Medtronic 7434A Patient Programmer User Manual manual
Medtronic, Inc. Patient Programmer manual
UserManual.wiki
>
Medtronic
>
7434A User Manual
manual
Navigation menu
Upload a User Manual
Namespaces
Wiki Guide
HTML
PDF
Info
Views
User Manual
Discussion / Help
Navigation


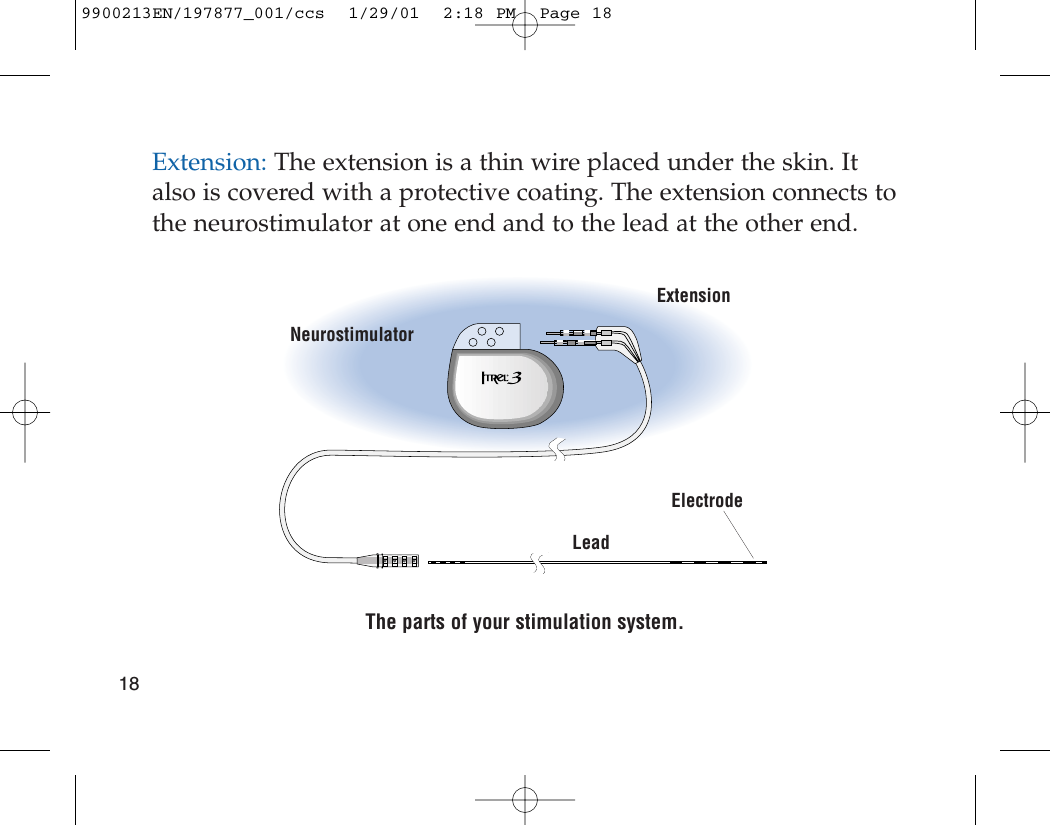


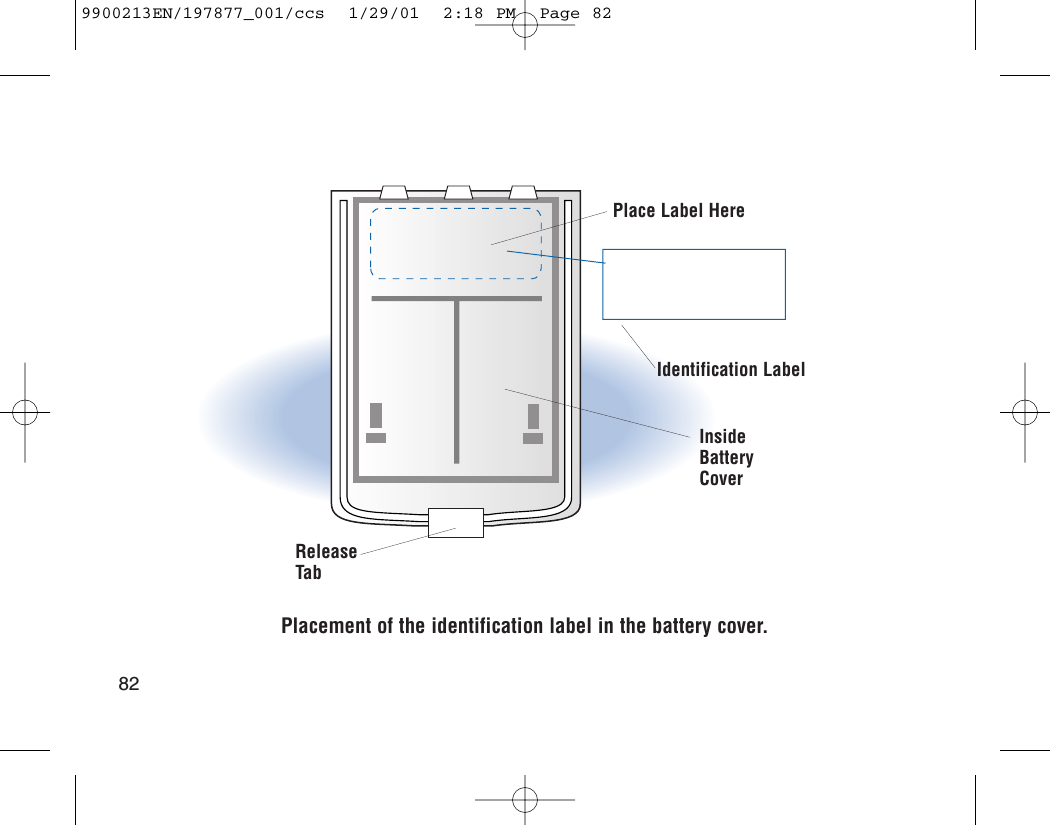

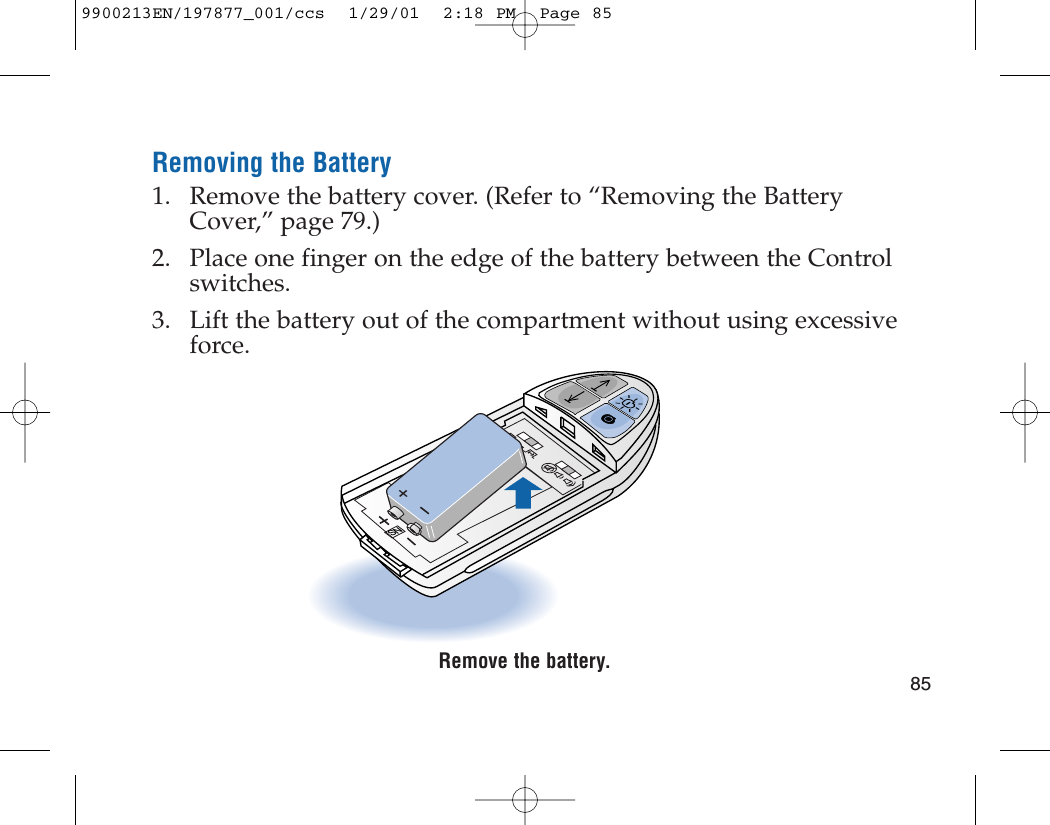
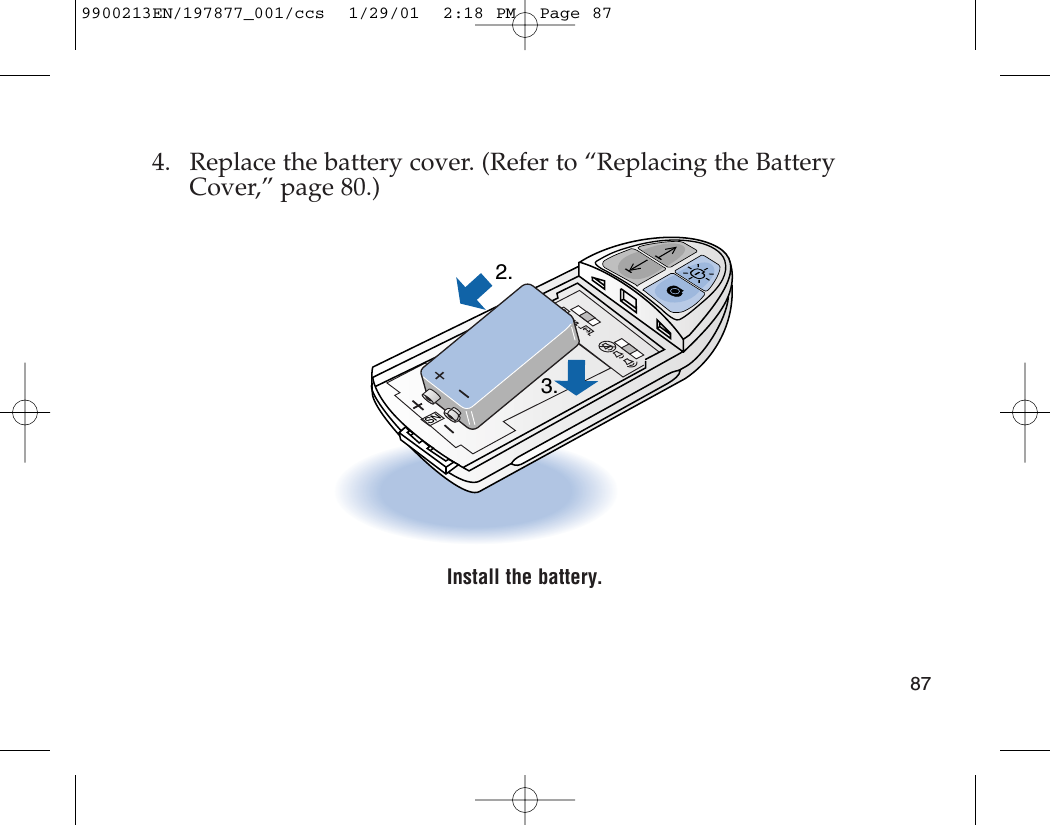
![Installing the BatteryAn alkaline battery is recommended for longer battery life.1. Remove the battery cover (refer to page 79) and the old battery(refer to page 85), if necessary.2. Check the battery label for positive [+] and negative [-]contacts. Match them with the [+] and [-] symbols in thebattery compartment.3. Press the battery down fully into the battery compartmentwithout using excessive force.Notes: • Do not press any of the programmer’s keys during batteryinsertion.• The programmer performs a self-test when the battery isinserted. A successful check is indicated by a single flash ofthe status lights followed by a short beep. If this does notoccur, the self-test has failed. Refer to “Troubleshooting,“page 96. 869900213EN/197877_001/ccs 1/29/01 2:18 PM Page 86](https://usermanual.wiki/Medtronic/7434A/User-Guide-152514-Page-98.png)