MEILOON SSC4TV51 Audio Entertainment Console User Manual part1
Meiloon Industrial Co., Ltd. Audio Entertainment Console part1
MEILOON >
Contents
- 1. user manual part1
- 2. user manual part2
- 3. user manual part3
- 4. user manual part4
- 5. user manual part5
- 6. user manual part 6
- 7. user manual part 7
- 8. user manual part 8
- 9. user manual-Part1
- 10. user manual-Part2
- 11. user manual-Part3
- 12. user manual-Part4
- 13. user manual-Part5
- 14. user manual-Part6
- 15. user manual-Part7
- 16. user manual-Part8
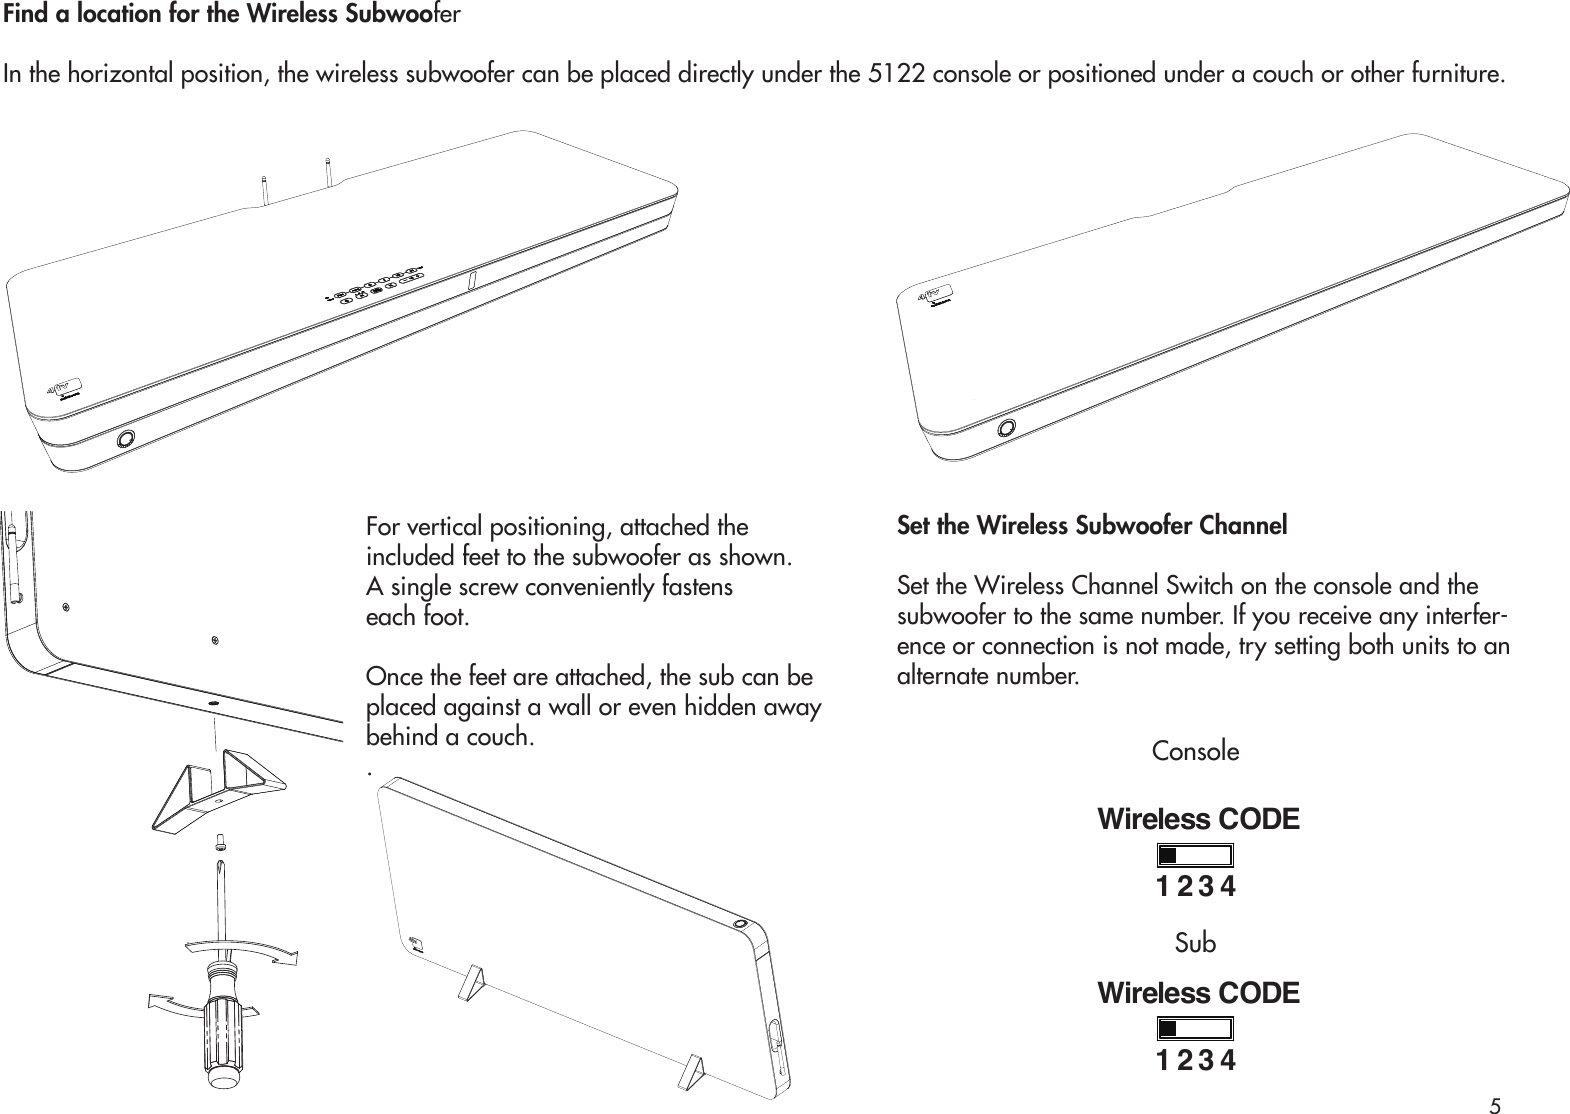
user manual part1