Micro Star MS6820 Wireless 11g MiniPCI Card User Manual 6823 TOC
Micro Star International Co Ltd Wireless 11g MiniPCI Card 6823 TOC
Contents
USERS MANUAL 3
11
Wireless 11g MiniPCI Card MP54G User’s Guide
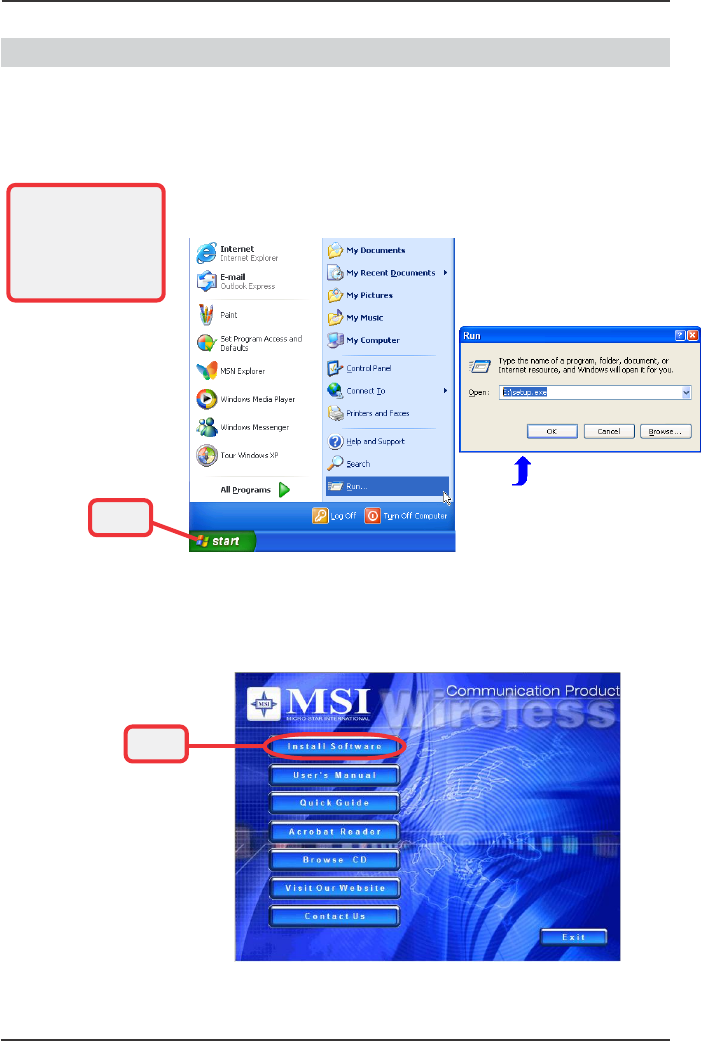
Click
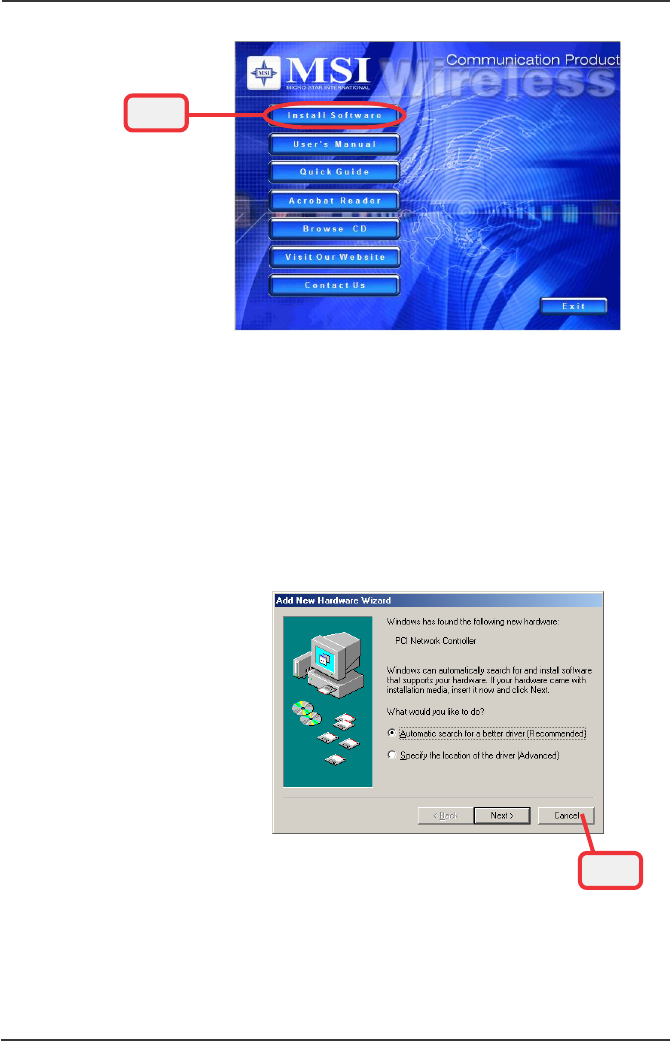
The installation screen of Setup program
Click the Install Software button.
Then, the system will detect a new device and start to
configure the new device. Click Restart when
prompted.
After rebooting, the system will search the new device
again, click Cancel to continue the installation from the
InstallShield Wizard.
Click
12
Wireless 11g MiniPCI Card MP54G User’s Guide
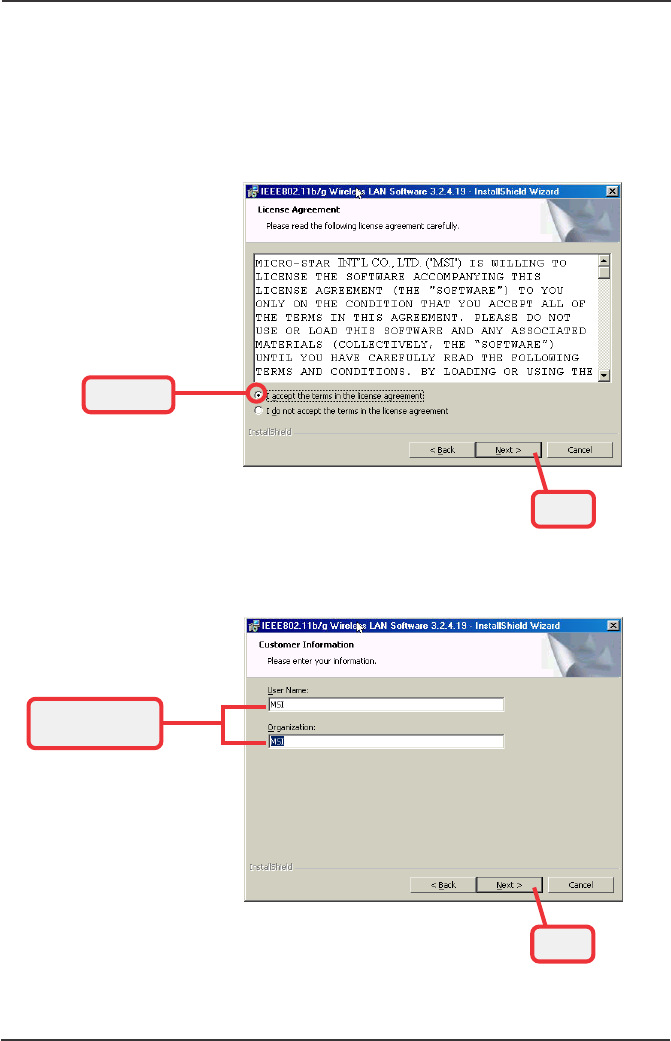
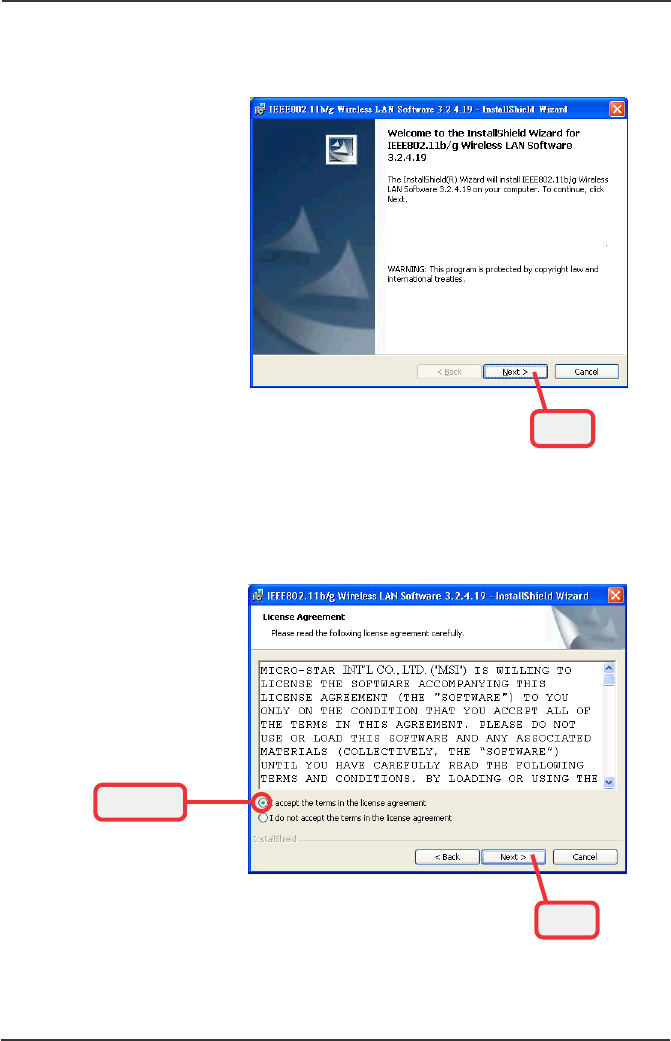
The welcome screen of InstallShield Wizard appears.
Click Next.
Read and accept the License Agreement; then, click
Next.
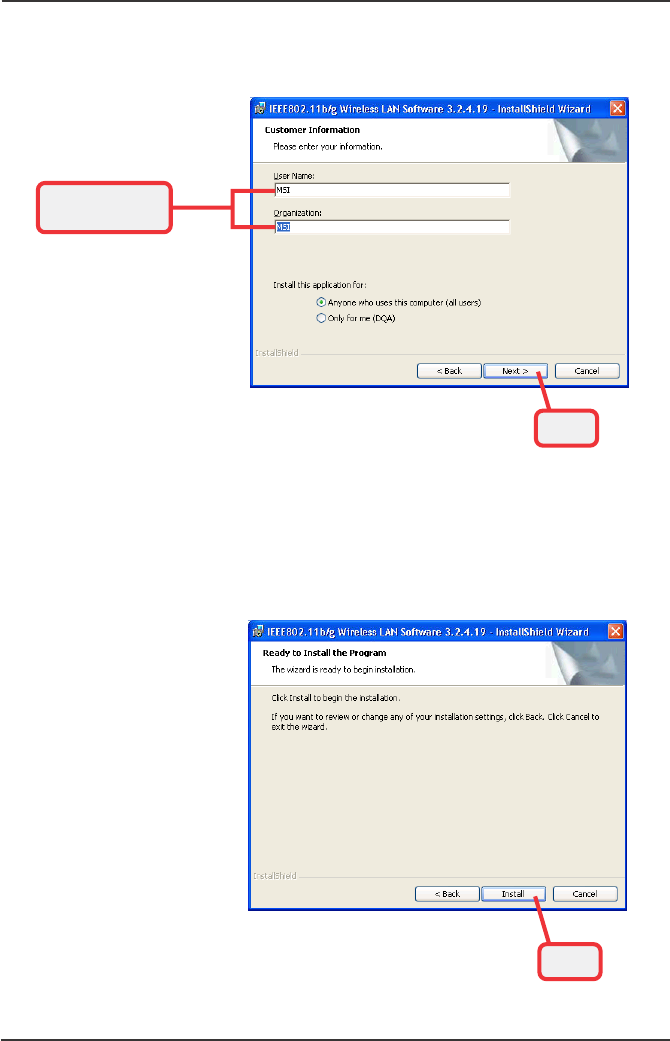
Enter the user’s information (User Name, Organization)
in the respective fields; then, click Next.
Step 2.
Click
Click
Check this
Enter the user’s
information
13
Wireless 11g MiniPCI Card MP54G User’s Guide
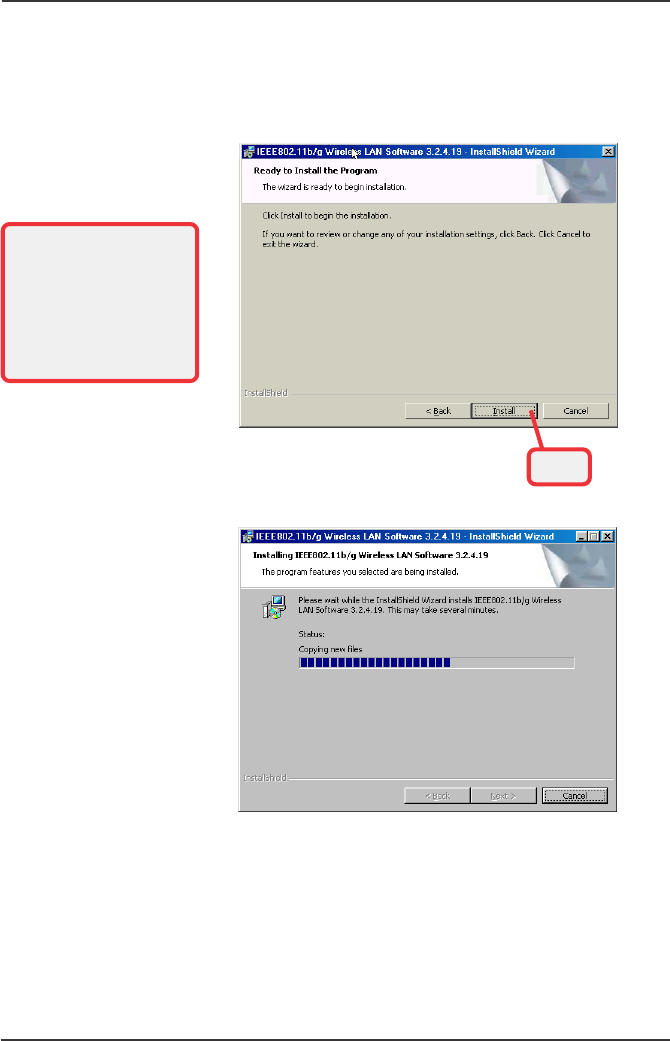
Click Install and the program will copy the necessary
files to the system. The progress indicator shows the
installing status.
Step 3.
Click
You may be asked to
insert the Windows Setup
CD during the installa-
tion. Please insert the
Setup CD by the on-
screen instruction to
continue the installation.
14
Wireless 11g MiniPCI Card MP54G User’s Guide
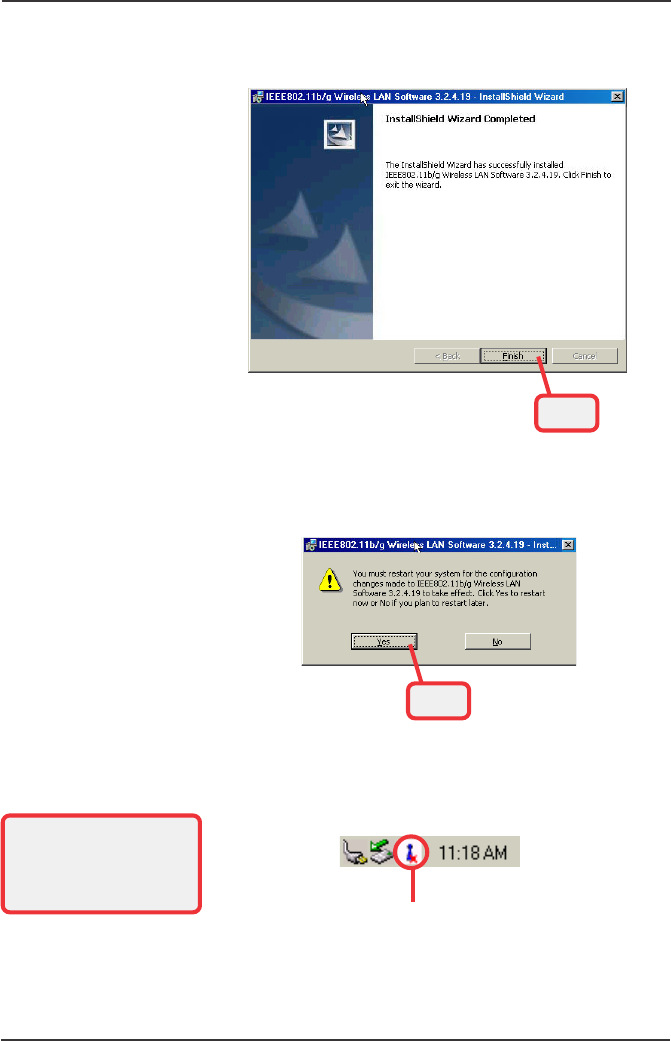
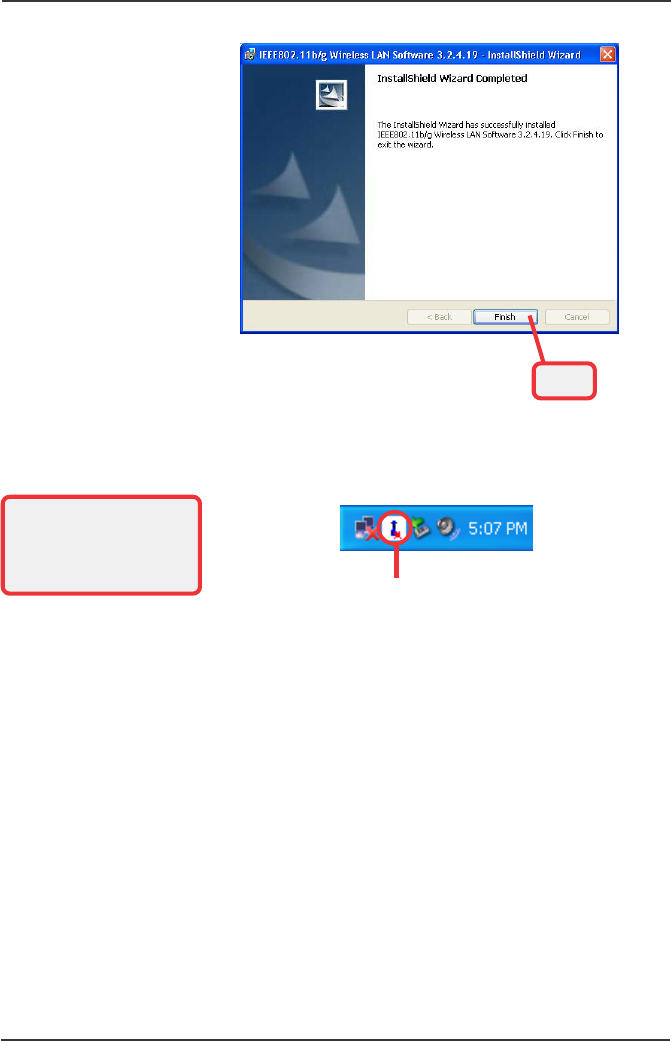
After rebooting, the MSI Wireless LAN icon* appears in
the status area.
MSI Wireless LAN icon
When the installation is completed, click Finish.
The system will restart. Click Yes when prompted to
reboot the system.
Click
Click
* For more information
of the MSI Wireless LAN
icon, please see section
4-1.
Step 4.
15
Wireless 11g MiniPCI Card MP54G User’s Guide
Installing on Windows®
2000/XP
Insert the driver CD into your CD-ROM drive, and the
Setup program should launch automatically.
If the Autorun program doesn’t launch, click Start at the
taskbar and select Run...; type E:\setup.exe in the Open
box and click OK, where E is your CD-drive.
>>> 3.2
Windows XP
Step 1.
The card should be
installed into your
computer before
installing the driver
and utility.
Click
Click the Install Software button.
The installation screen of Setup program
Click
16
Wireless 11g MiniPCI Card MP54G User’s Guide
The welcome screen of InstallShield Wizard appears.
Click Next.
Step 2.
Click
Read and accept the License Agreement; then, click
Next.
Click
Check this
17
Wireless 11g MiniPCI Card MP54G User’s Guide
Click Install. When the installation is completed, click
Finish.
Enter the user’s information (User Name, Organization)
in the respective fields; then, click Next.
Click
Enter the user’s
information
Click
Step 3.
18
Wireless 11g MiniPCI Card MP54G User’s Guide
The MSI Wireless LAN icon* appears in the status area.
MSI Wireless LAN icon
Click
* For more information
of the MSI Wireless LAN
icon, please see section
4-1.
19
Wireless 11g MiniPCI Card MP54G User’s Guide
>>> 4.1
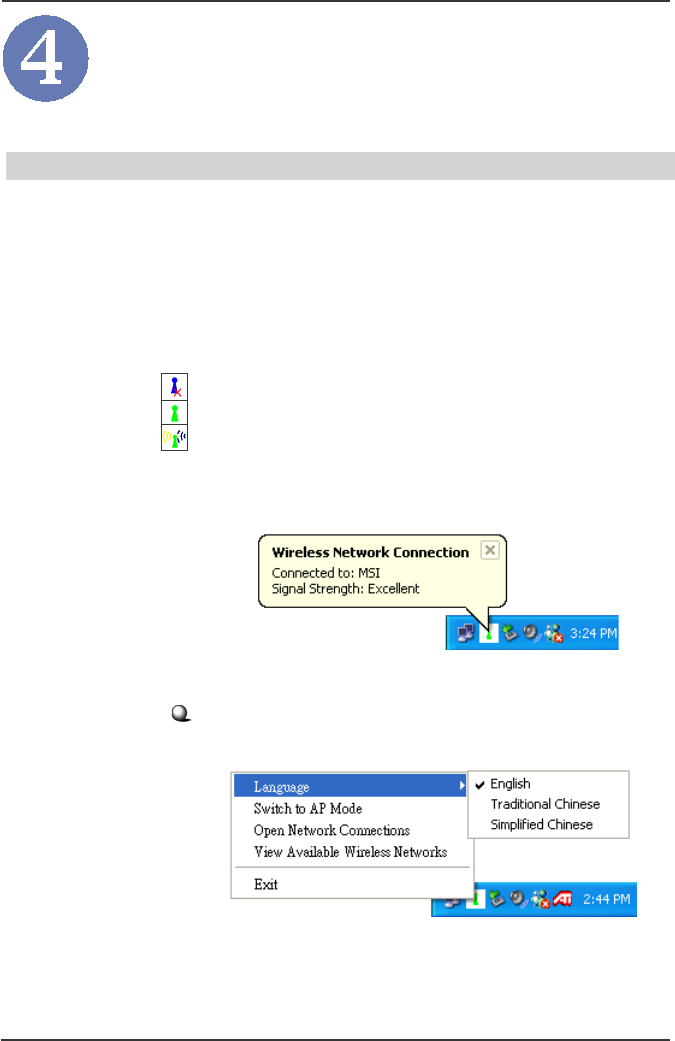
Right-click the icon will appear a sub-menu containing
more settings:
Introduction
After installing the driver, MSI MP54G provides a conven-
ient and powerful utility that allows you to set up,
configure, and know your networking status easily and
clearly.
The MSI Wireless LAN icon
Not connected to the network.
Connected to the network.
Receiving/transmitting data from/to the network.
When you move the mouse over the icon, it shows the
current connection information.
MSI Wireless Network Utility
20
Wireless 11g MiniPCI Card MP54G User’s Guide
Language
You can select language according to your operating
system.
Switch to AP Mode
This function allows you to use your MSI wireless adapter
as a virtual access point. For details, see Appendix, MSI
Software AP.
Open Network Connections
Select to open the Network Connections window.
View Available Wireless Networks
Launch the utility to configure your network settings.
Exit
Close the program.
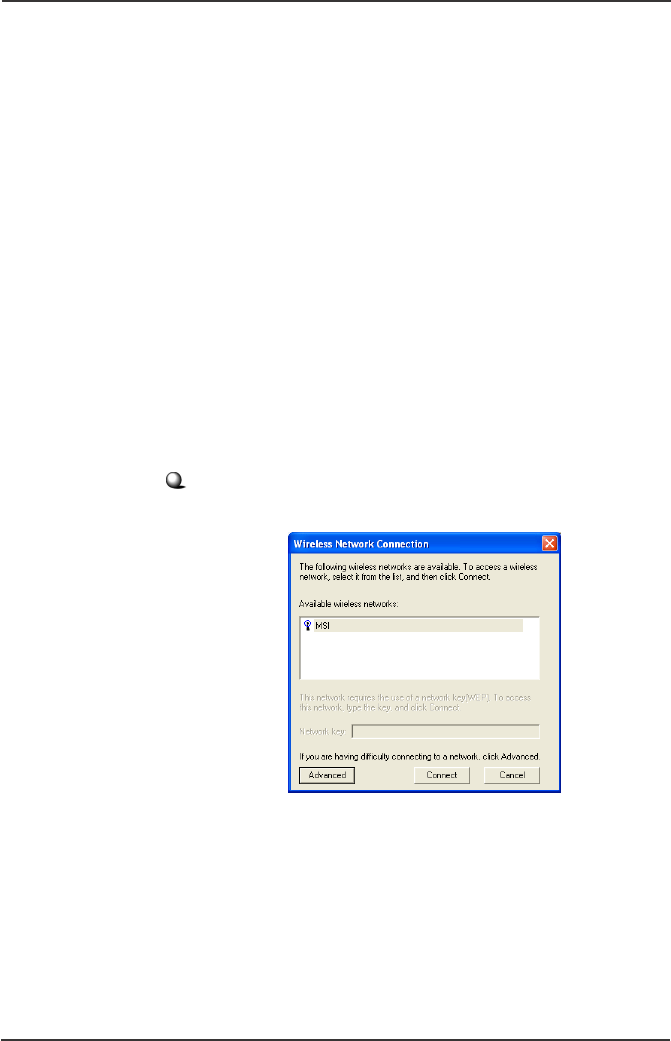
Click the icon will launch the utility as shown below to
configure your network settings.
21
Wireless 11g MiniPCI Card MP54G User’s Guide
Click
Click
4.2.1
>>> 4.2 Networking
Since the wireless NIC is installed in your computer, you
have to configure the settings for communication to start
working in your network environment.
Infrastructure Mode
Infrastructure mode allows your computer to communi-
cate with the other computers in the network through an
Access Point. The following tasks should be done before
you configure the settings:
- The Access Point must be turned on.
- Your computer with wireless NIC installed and
the Access Point must be located with the
communication range of the Access Point (see
the Access Point's manual for details).
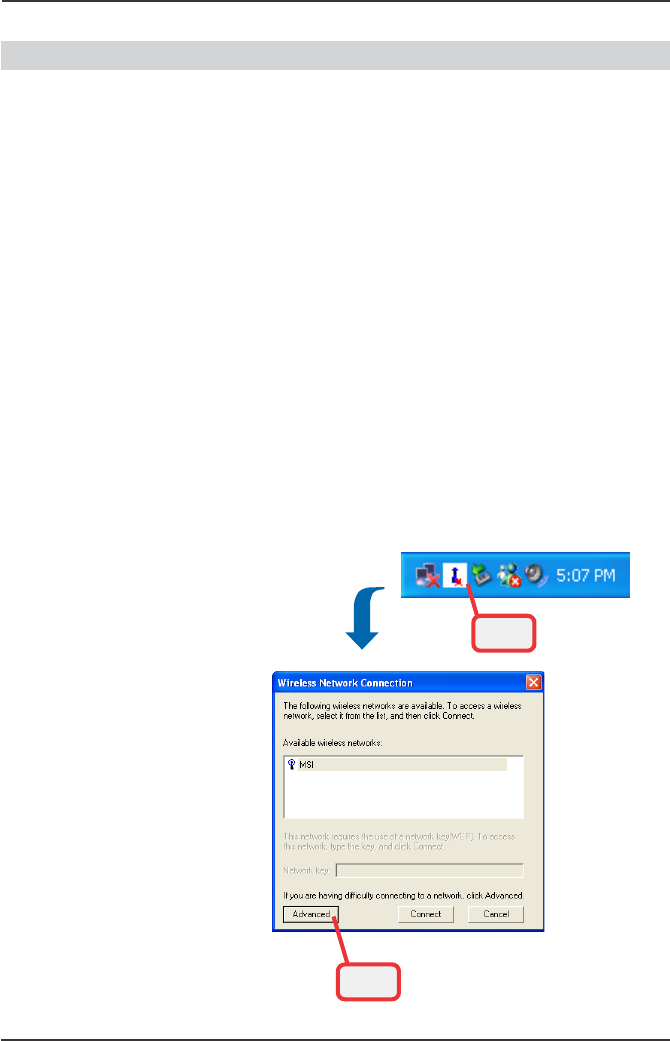
To configure the settings:
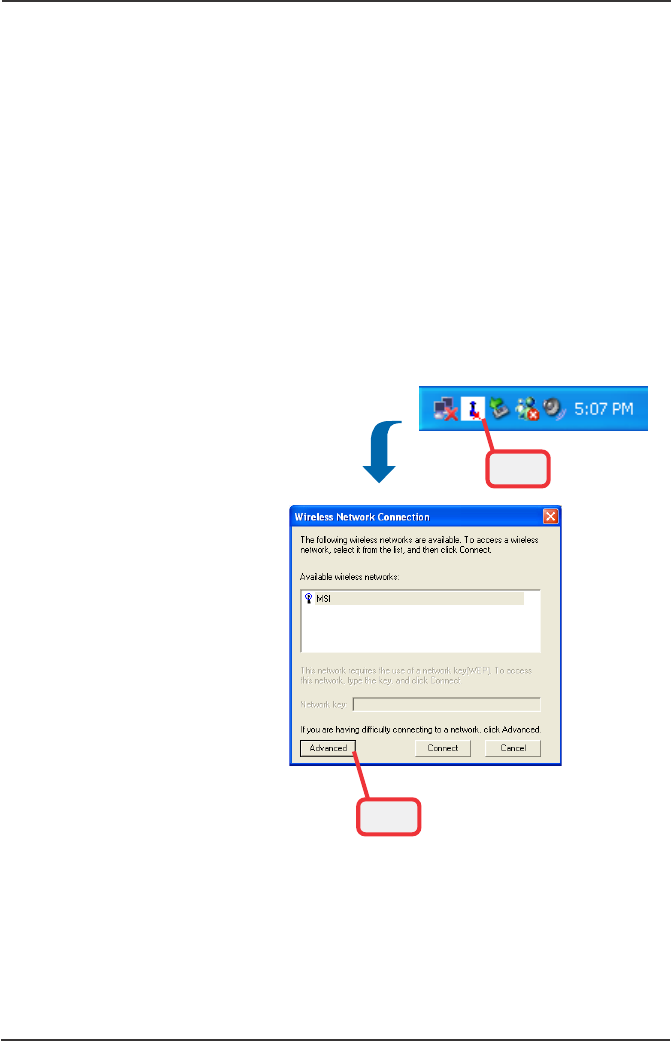
1. Click the MSI Wireless LAN icon to bring up the
Wireless Network Connection window. Then,
click Advanced.
22
Wireless 11g MiniPCI Card MP54G User’s Guide
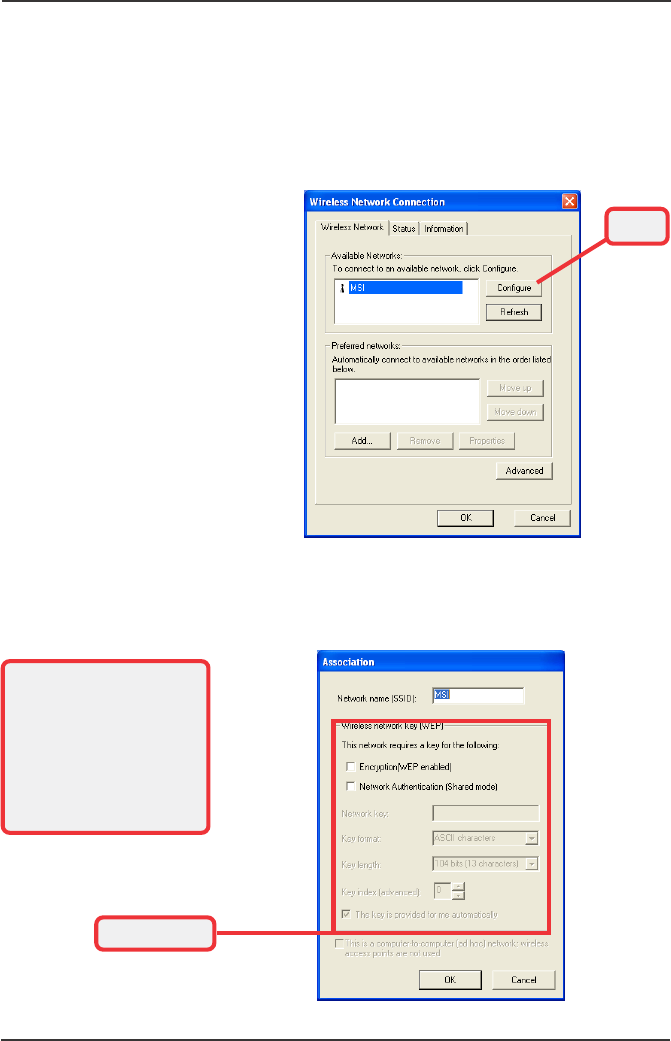
2. The Available Networks field contains a list of
available Access Points in your network.
Choose one network by highlighting it in the list,
and click Configure to set up the selected
network. You can click Refresh to search the
available Access Points in the network again.
Click
WEP settings
Only the network adminis-
trator can change the
SSID and WEP settings in
the Association window; if
you have problem of
accessing the network,
please ask the administra-
tor for help.
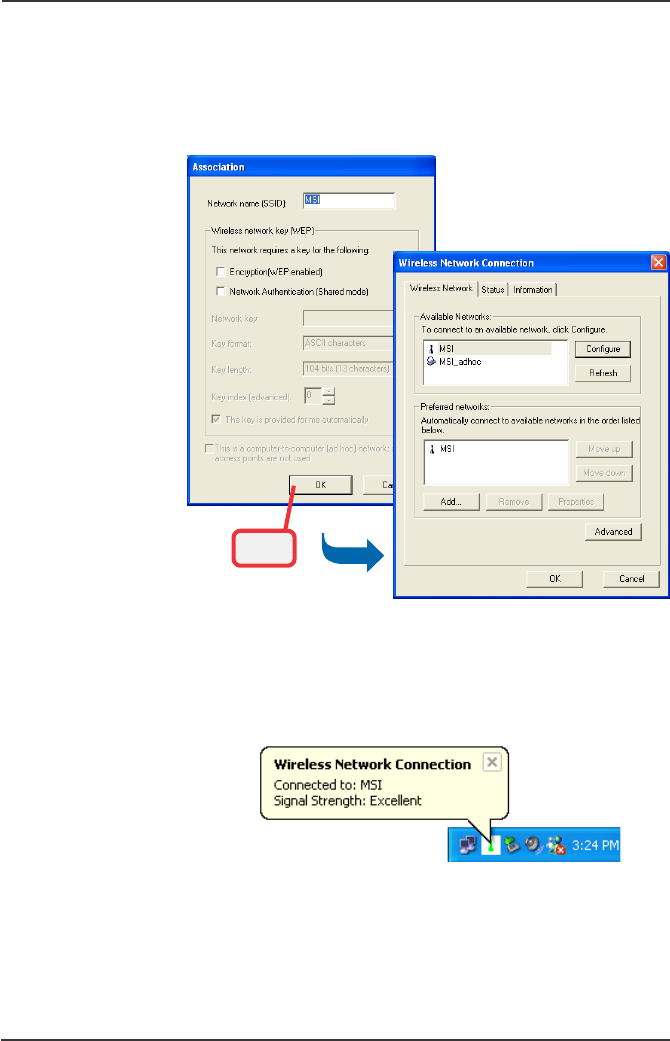
3. Setup the Network Key (if needed) in the Wire-
less Network Key (WEP) field according to the
network’s settings.
23
Wireless 11g MiniPCI Card MP54G User’s Guide
connected
Click
4. Click OK. The selected network will appear in
the Preferred Networks field. If it contains two
or more networks in the list, you can use Move
up/Move down to set the priority.
5. Click OK to complete the configuration, and an
icon indicating connected to the network will
appear in the status area.
24
Wireless 11g MiniPCI Card MP54G User’s Guide
Ad-hoc Mode
Ad-hoc mode allows your computer to communicate
directly with any computer installed with compatible
wireless NIC. If you want to use the network in Ad-Hoc
mode:
- All the computers connected should be set to
Ad-hoc mode.
- The computers have the same SSID (network
name) setting.
To configure the settings:
1. Click the MSI Wireless LAN icon to bring up the
Wireless Network Connection window. Then,
click Advanced.
Click
Click
4.2.2
25
Wireless 11g MiniPCI Card MP54G User’s Guide
Click
Click
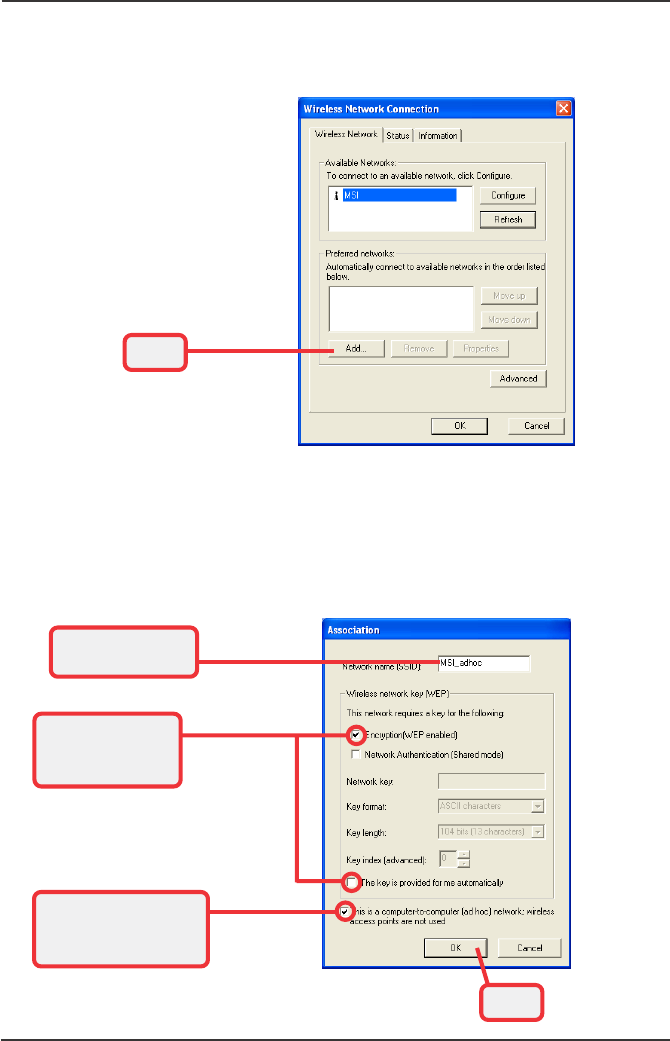
Enter a Network
Name (SSID)
IMPORTANT
Check this to enable
Ad-Hoc mode.
Check this option
and cancel the
bottom option
3. Set up the Network Name (SSID) and Network
Key (if needed) for the network. Then, check
the "This is a computer-to-computer [ad hoc]
network; wireless access points are not used"
option and click OK to enable the Ad-Hoc mode.
2. You can build up the Ad-Hoc network by clicking
Add... in the Preferred Networks field.
26
Wireless 11g MiniPCI Card MP54G User’s Guide
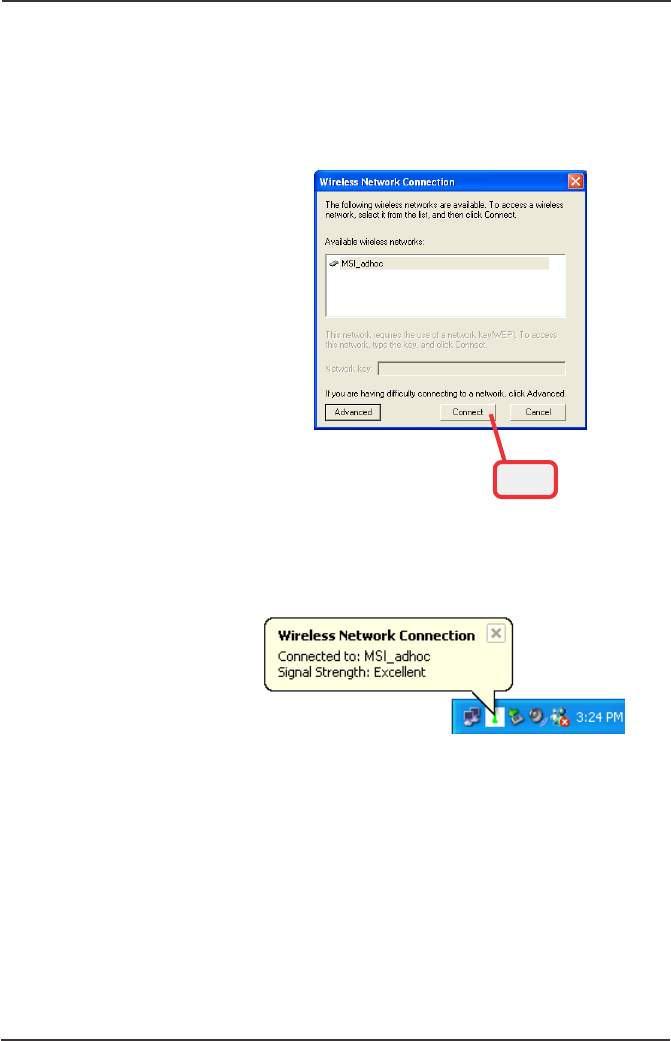
4. The computer set up with this Ad-Hoc network
in step 3 is the designated administrator of the
network. Any computer can access the network
by selecting Connect in the Wireless Network
Connection window.
connected
5. Click OK to complete the configuration, and an
icon indicating connected to the network appears
in the status area.
Click