Micro Star MS6820 Wireless 11g MiniPCI Card User Manual 6823 TOC
Micro Star International Co Ltd Wireless 11g MiniPCI Card 6823 TOC
UserManual.wiki
>
Micro Star
>
MS6820 User Manual
>
users manual 3
Contents
1.
users manual 1
2.
users manual 2
3.
users manual 3
4.
users manual 4
5.
USERS MANUAL 1
6.
USERS MANUAL 2
7.
USERS MANUAL 3
8.
USERS MANUAL 4
users manual 3
Navigation menu
Upload a User Manual
Namespaces
Wiki Guide
HTML
PDF
Info
Views
User Manual
Discussion / Help
Navigation
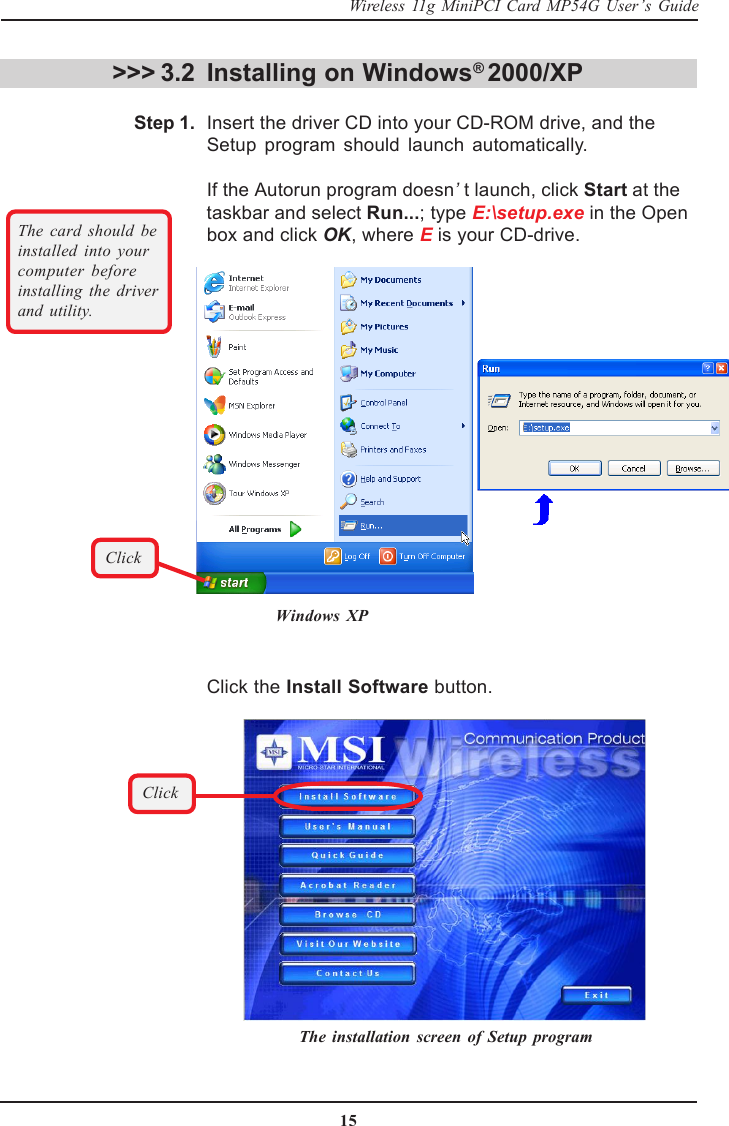
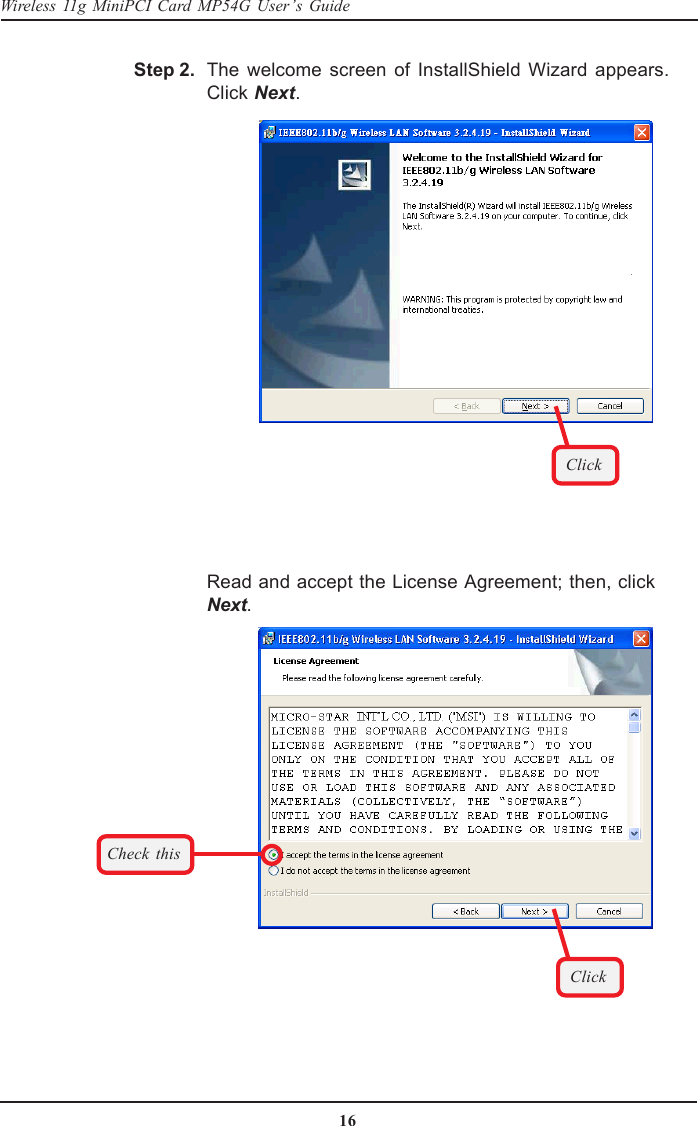
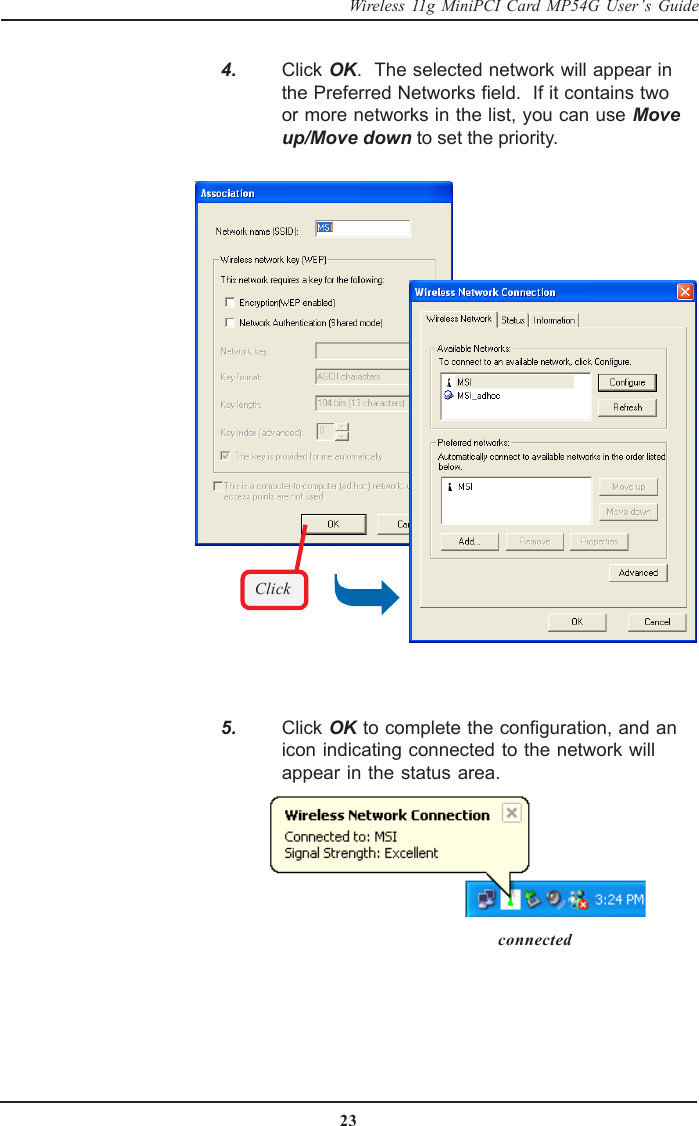
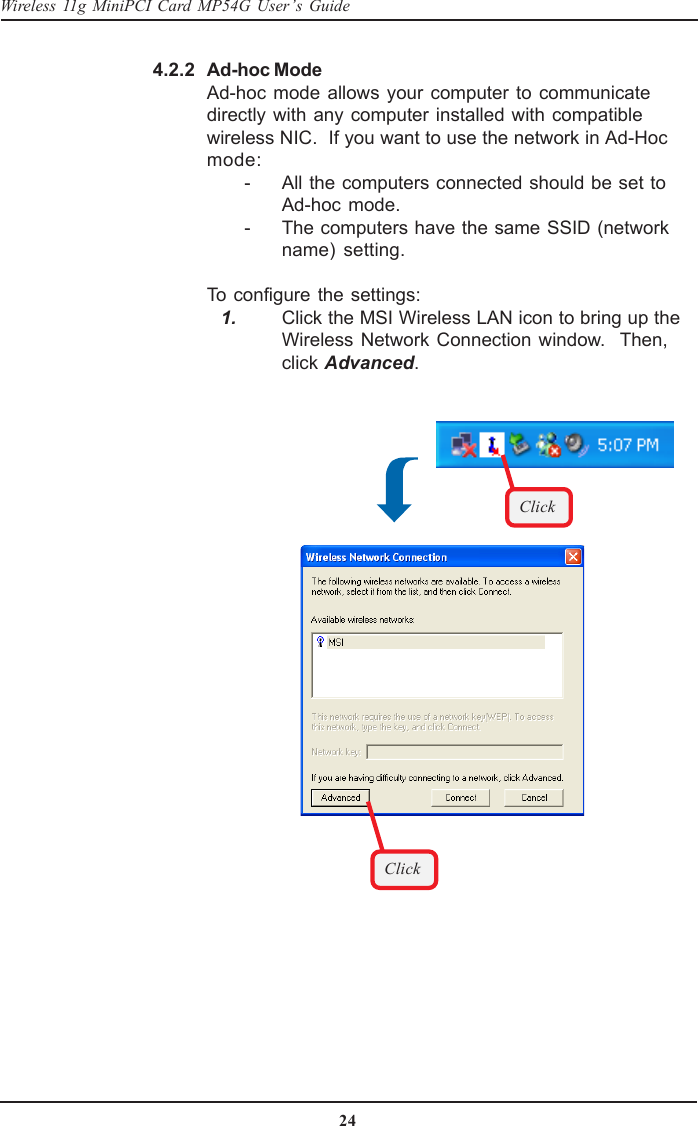
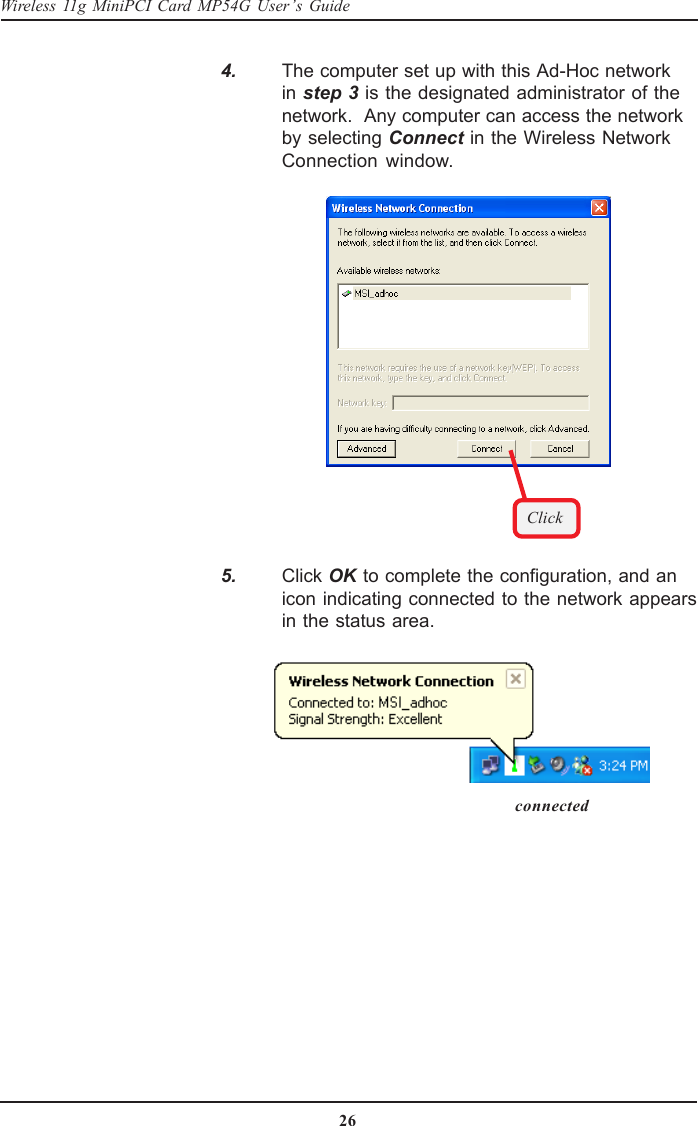
![25Wireless 11g MiniPCI Card MP54G User’s GuideClickClickEnter a NetworkName (SSID)IMPORTANTCheck this to enableAd-Hoc mode.Check this optionand cancel thebottom option 3. Set up the Network Name (SSID) and NetworkKey (if needed) for the network. Then, checkthe "This is a computer-to-computer [ad hoc]network; wireless access points are not used"option and click OK to enable the Ad-Hoc mode. 2. You can build up the Ad-Hoc network by clickingAdd... in the Preferred Networks field.](https://usermanual.wiki/Micro-Star/MS6820.users-manual-3/User-Guide-355182-Page-13.png)