Micro Star S260 MEGA BOOK User Manual Part 3
Micro Star International Co Ltd MEGA BOOK Part 3
Contents
- 1. User Manual Part 1
- 2. User Manual Part 2
- 3. User Manual Part 3
User Manual Part 3
65
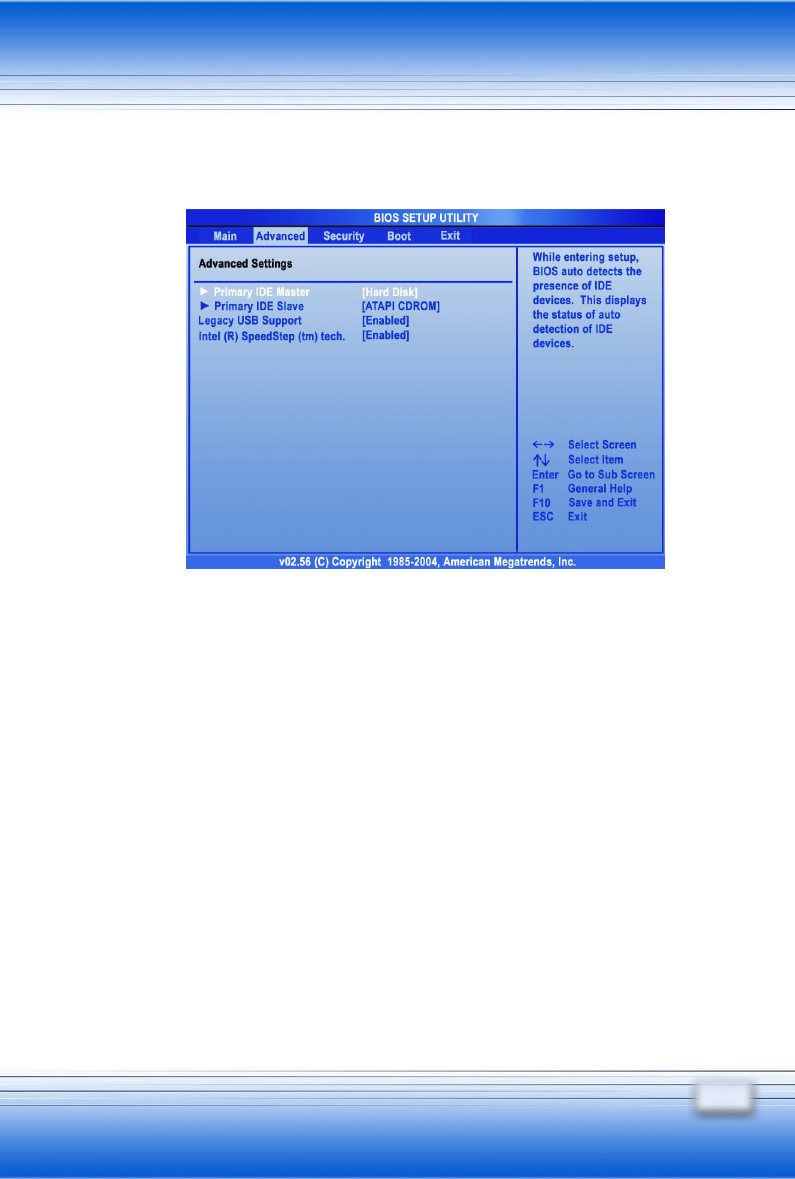
Advanced Settings
y Primary IDE Master/Slave
The two items display the types of the primary master/slave IDE
devices installed in the computer. Press [Enter] to bring up a
window showing the detailed information of the device, including the
device name, vendor, LBA mode, PIO mode and more.
y Legacy USB Support
If you want to use USB device, like mouse, keyboard, portable disk,
in DOS system or boot your system by USB device, you should
enable this function by select Enabled.

66
y Intel (R) SpeedStep (tm) tech.
This item allows you to enable or disable Intel SpeedStep
technology. When set to Disabled, the system always operates in
a conserve power mode (the processor works at FSB400-600MHz
or FSB533-800MHz). If you want optimize the processor, set this
item to Enabled, so that the processor’s speed will be controlled by
the use of your operating system and applications.
67
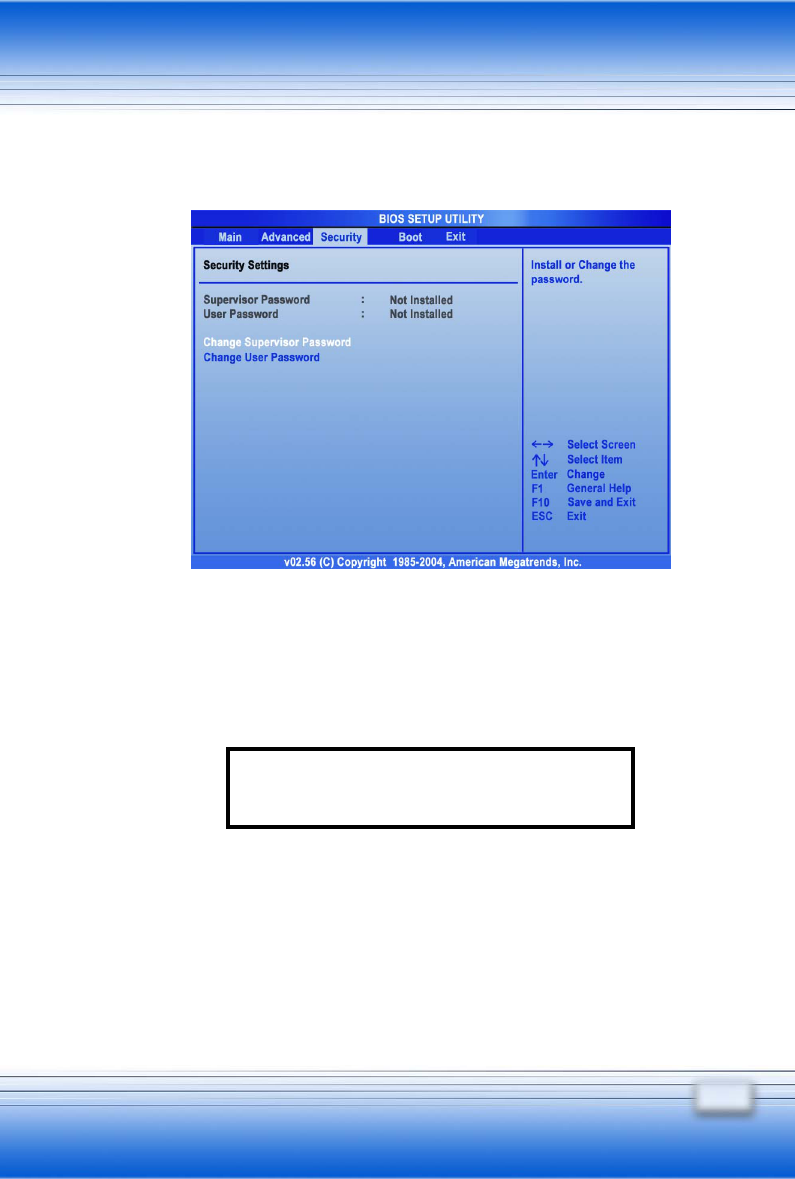
Security Settings
y Change Supervisor/User Password
When you select the function, a message box will appear on the
screen as below:
Type the password you want, up to six characters in length and
press [Enter]. The password typed now will replace any previously
set password from CMOS memory. You may also press [ESC] to
abort the selection and not enter a password.
Enter New Password

68
About Supervisor Password and User Password
Supervisor Password allows the user to enter and change
the settings of the setup menu; User Password only allows
the user to enter the setup menu, but do not have the right
to make changes.
Things to know…
When the Supervisor Password is set, the new item User Access
Level and Password Check will be added in the menu. You can
make further settings of access right in the User Access Level item.
Setting options: No Access, View Only, Limited and Full Access.
The Password Check item is used to specify the type of BIOS
password protection that is implemented. Settings are described
below:
Setup The password prompt appears only when end users try to
run Setup.
Always A password prompt appears every time when the computer
is powered on or when end users try to run Setup.
To clear a set password, just press [Enter] when you are prompted
to enter the password. A message box will show up confirming the
password will be disabled. Once the password is disabled, the
system will boot and you can enter Setup without entering any
password.
69
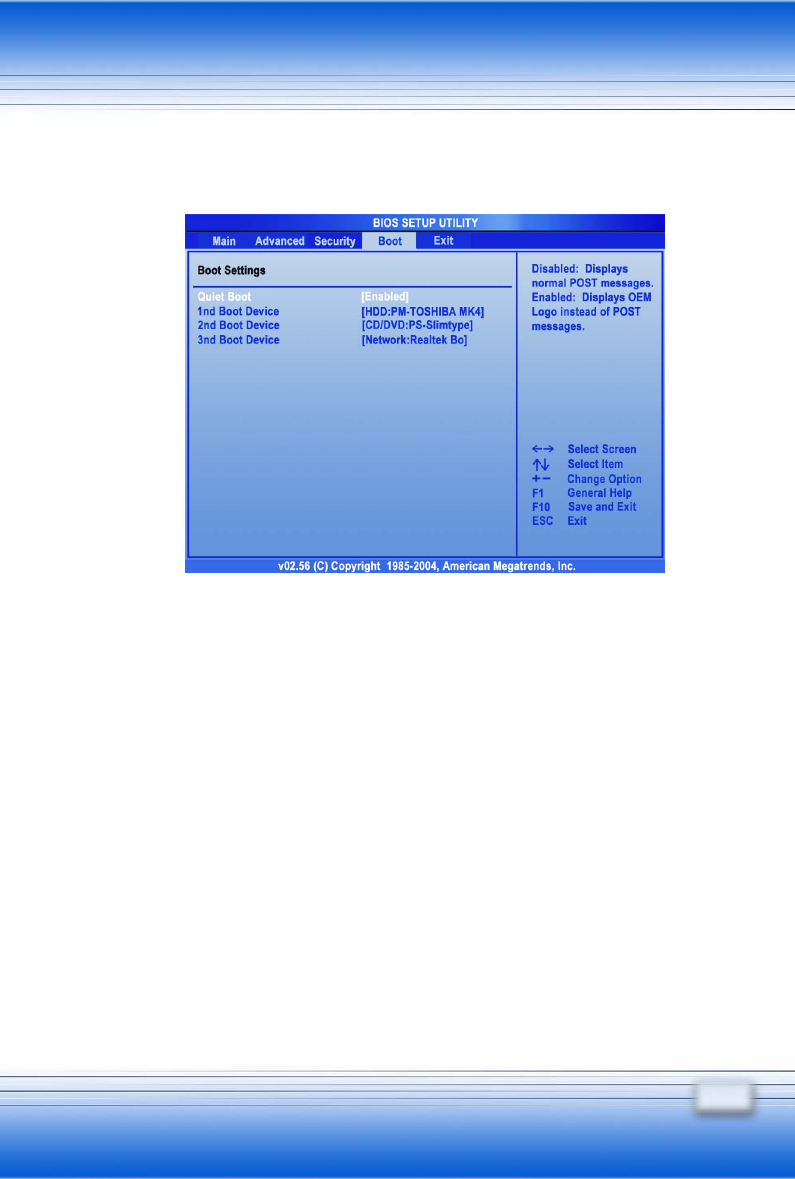
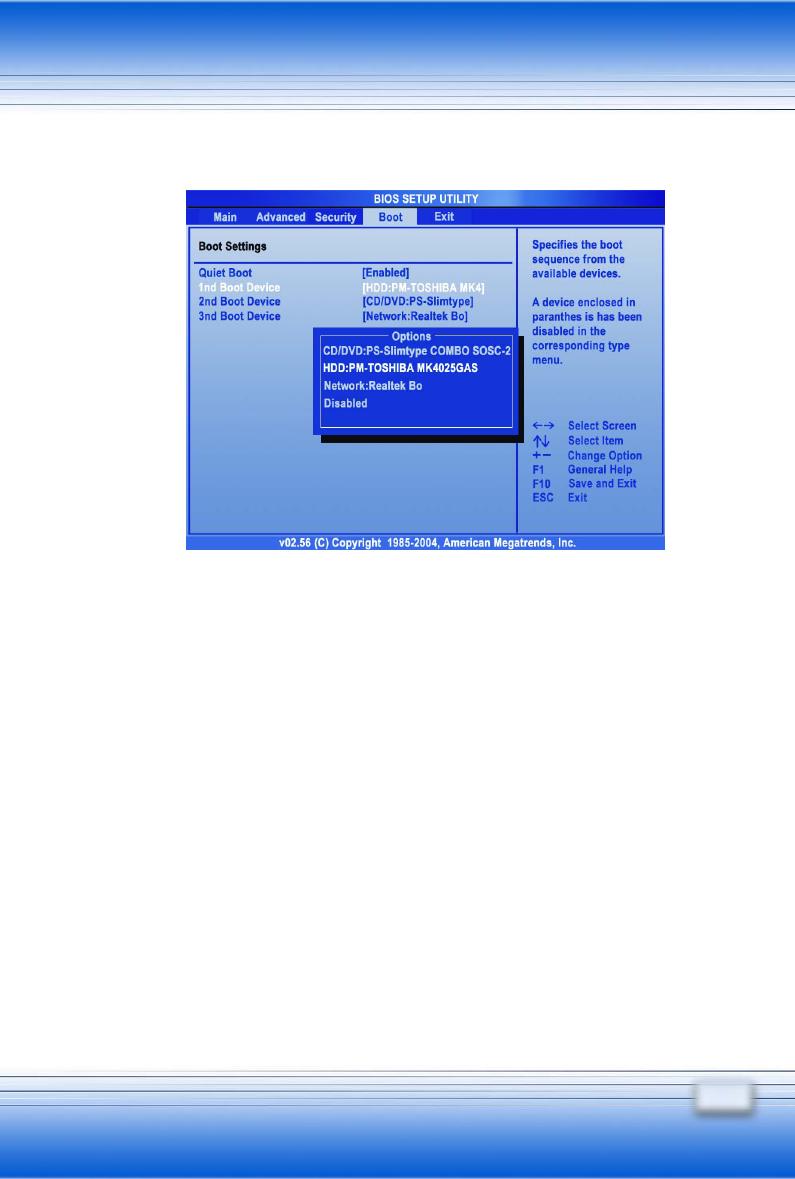
Boot Settings
y Quiet Boot
This item enables you to show the vendor logo on the boot-up
screen. Settings options: Disabled and Enabled. The default
setting is Enabled.
y 1st, 2nd and 3rd Boot Device Setting
The three items allow you to set the sequence of boot devices
where BIOS attempts to load the disk operating system.
70
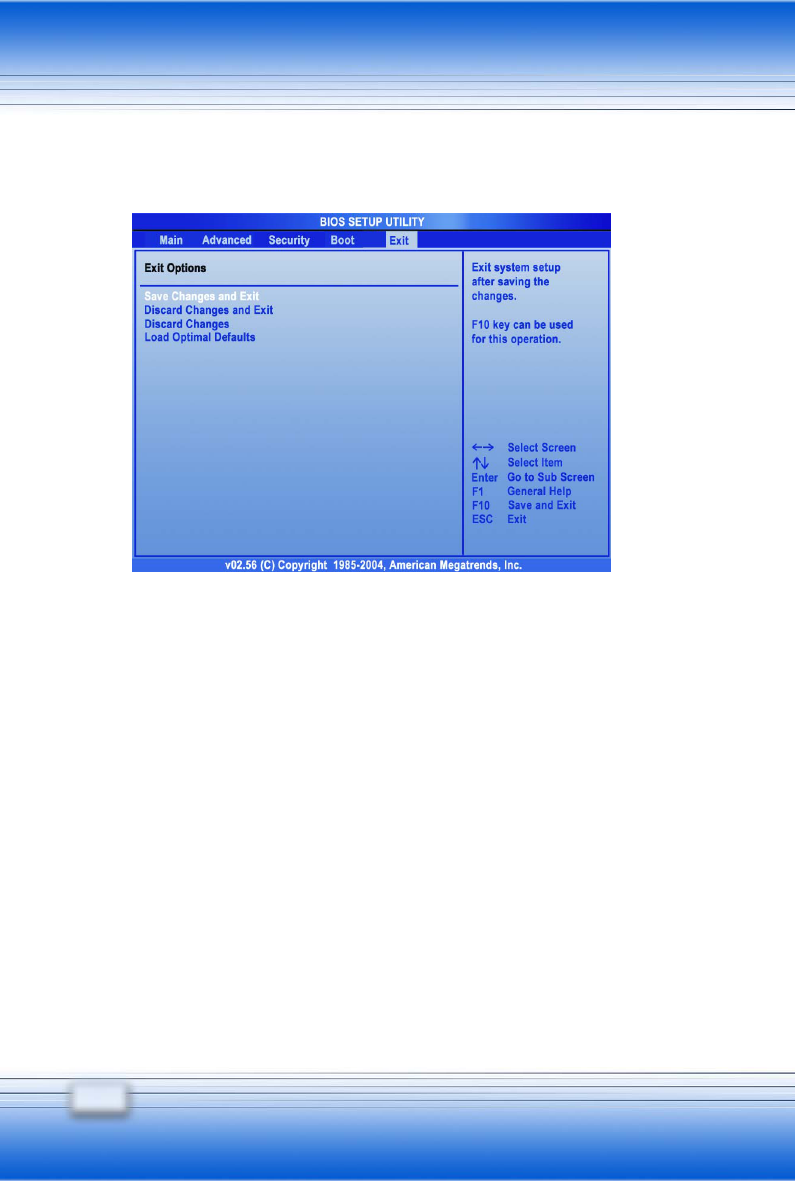
Exit Setting
Save Changes and Exit
Save the changes you have made and exit the utility.
Discard Changes and Exit
Exit the utility without saving the changes you have made.
Discard Changes
Abandon your changes and reload the previous configuration before
running the utility.
Load Optimal Defaults
Select this item to load the default settings for optimal system
performance.

1
Additional Information

72
Activating Your System
Before using your computer, you need to activate the Windows XP
operating system by the following steps.
1. Welcome to Microsoft Windows.
After the computer is ready for the pre-use configuration, the
screen will show the Welcome to Microsoft Windows message.
Click Next to continue.
2. What time zone are you in?
The computer will request for your time zone and set your
computer’s clock. In the Time Zone list, click the time zone
you are in. For example, select (GMT-05:00) Eastern time (US
& Canada) if you live in Boston. Mark the check box if you
want to automatically adjust clock for day light saving time. Click
Next.
3. The End User License Agreement.
The End User License Agreement (EULA) describes your legal
rights regarding your use of Windows. Please note that you
must accept this agreement to continue to use Windows.
Check the Yes, I accept item and click Next to proceed to the
next step.

73
4. What’s you computer’s name?
Choose a name for your PC that will help you identify it on your
home network, if you have one. In order for your computer to
appear on a network, its name cannot be longer than 15
characters or contain any spaces or characters aside from the
numbers 0-9, the letters A-Z and a-z, and hyphens. You can
also give your computer a friendly description which is optional.
Click Next to continue.
5. How will this computer connect to the Internet?
Choose one of the options to connect this computer to the
Internet, Click Next.
6. Do you want to set up Internet access now?
You’ve finished setting up Windows and your computer is now
ready to use. Click Yes to set up Internet connection of your
PC right away or click No to skip it. After setting up the
connection, click Finish to exit.
7. Thank you!
Congratulations, you’re ready to surf with your PC! Click Finish
to exit.
8. The Windows Login dialog box appears on the screen, click OK
to login.
9. That’s right. You can use your Notebook PC now

74
Using the Recovery CD
The Recovery CD is a compact disk that records the sources of
operating system and important data and can be used to restore the
hard disk to its original state. When the operating system of your
computer is damaged and can not work properly any more, you can
use the Recovery CD to resume the system in its original state.
Resuming the Operating System
To resume the operating system from the Recovery CD.
Insert the Recovery CD into the CD/DVD-ROM drive.
Press the [Del] key on the keyboard to enter the BIOS Setup
Utility when the system boots up.
In the BIOS Setup Utility, set the CD/DVDVD-ROM drive as
the first boot device (See Boot Menu in BIOS Setup for more
instruction).
Choose to restore the operating system from the Recovery
CD when prompted. Then, follow the on-screen instructions
to complete the procedures. The system will reboot
automatically when completed.
75
The system will resume the factory default settings after reboots.
After resuming the operating system, you should reactivate the
operating system as like the first time to use the computer.
76
Autorun – Driver Screen
Using the Utility CD
The Utility CD is a compact disk which provides the necessary
drivers and software applications for your Notebook PC.
When do I Need the Utility CD?
You want to install the operating system from your Windows
Setup CD, but not from the Recovery CD that included in the
package.
You want to install the drivers and software applications
manually.
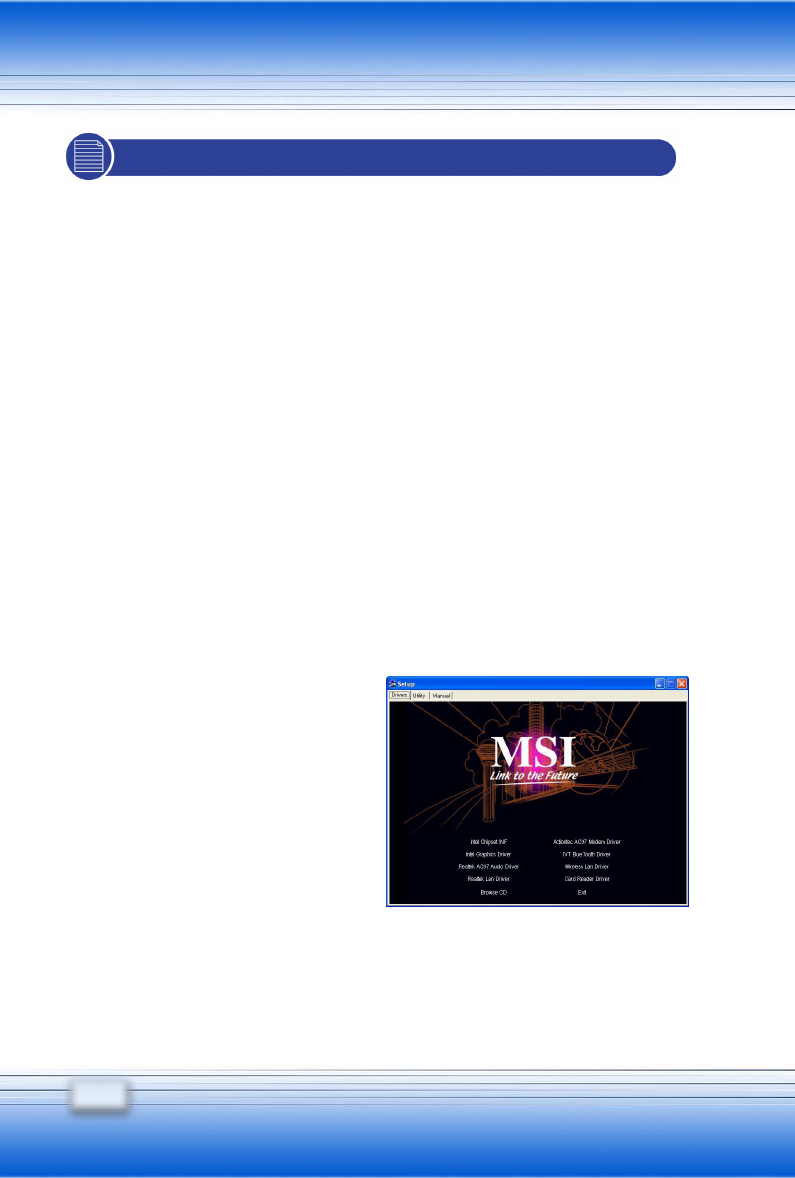
How to Use the Utility CD?
Insert the Utility CD into your
CD/DVD-ROM drive and the
Setup program should start
automatically as shown in the
right figure. Then, click the item
you want to install and follow the
on-screen instructions to
complete the installation.
77
1. If your computer is pre-installed with the Windows
operating system when purchased, the required drivers
should be installed in the system already. If not, you ma
y
need to install the drivers manually from the Software CD
included in the package.
2. Please contact you local dealer or visit our website fo
r
driver update information.
Things to know…
In Drivers tab:
Provides the required drivers, for example, the Intel Chipset INF,
Intel Graphics Driver, Realtek AC97 Audio Driver, Realtek Lan
Driver, Actiontec AC97 Modem Driver, IVE BlueTooth Driver,
Wireless Lan Driver, and Card Reader Driver for the system.
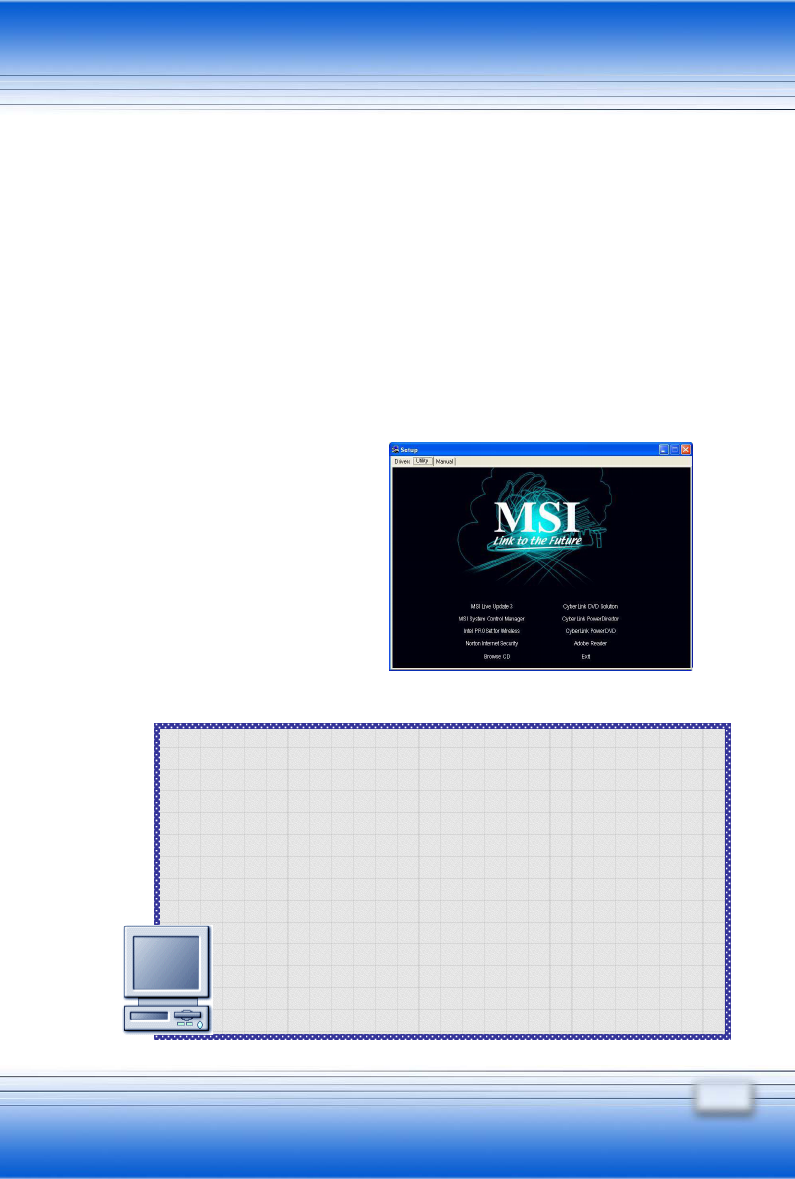
In Utility tab:
Contains the powerful utilities that can maximize your experience in
operating the computer. Utility CD includes Norton Internet
Security, Intel PROSet
for Wireless, CyberLink
DVD Solution, CyberLink
Power DVD, CyberLink
Power Director, MSI
System Control Manager,
MSI Live Update 3, and
Adobe Reader.
Autorun – Utility Screen

78
MSI Live Update™3
MSI Live Update™3 is a useful utility for enhancing the performance
of your Notebook PC. With its auto–search and scheduling
function, MSI Live Update™3 saves your efforts and time to find the
required BIOS or drivers on the Internet.
Moreover, MSI Live Update™3 supports multilingual interface. It
will detect the language of your operating system while installing this
program. Users will find out that once MSI Live Update™3 is
successfully installed, the interface’s language will be the same as
your operating system.
Using MSI Live Update™3
Double-click the MSI Live Update™3 icon ( ) on Windows
desktop. The setup screen containing three main items on the left
column of the page: Live BIOS™, Live Driver™, and Live Utility™.
Select the function by clicking the item and start to upgrade online.
Follow the on-screen instructions to complete it.

79
1. It is recommended to close all programs before updating
new BIOS.
2. Your computer should have connection to the Internet
before using the utility to update.
Things to know…
Updating BIOS
To update BIOS through Live Update™3
Click the Live BIOS item in the main window.
Click Yes to start updating or No to return to the main window with
nothing changed.
If you click Yes, it will check and list the information and BIOS
version of your system.
Click the MSI Live Update Series Server button. It will connect
to MSI’s database automatically to search the supported
BIOS and shows the results on the webpage.
If it has found one (or more) supported BIOS for you system,
click the InstallShield Wizard button on the right side of the
table to download and update the desired BIOS automatically.
Follow the on-screen instructions to complete the procedure.

80
Updating Driver
To update the drivers through Live Update™3:
Click the Live Driver item in the main window.
It will check and list the system information of your computer.
Click the MSI Live Update Series Server button.
It will connect to MSI’s database automatically to compare the
version of driver in the database. It may take several
minutes to detect the required drivers. Please wait for
proceeding detection.
If it has found one (or more) supported drivers for your system.
Click the InstallShield Wizard button on the right side of the
table to download and update the desired drivers
automatically.
Follow the on-screen instructions to complete the procedure.
Updating Utility
Live Utility is a tool that helps users to get the correct system
information and generates a list containing various compatible links
of MSI’s software applications in accordance with the detected
system information.
81
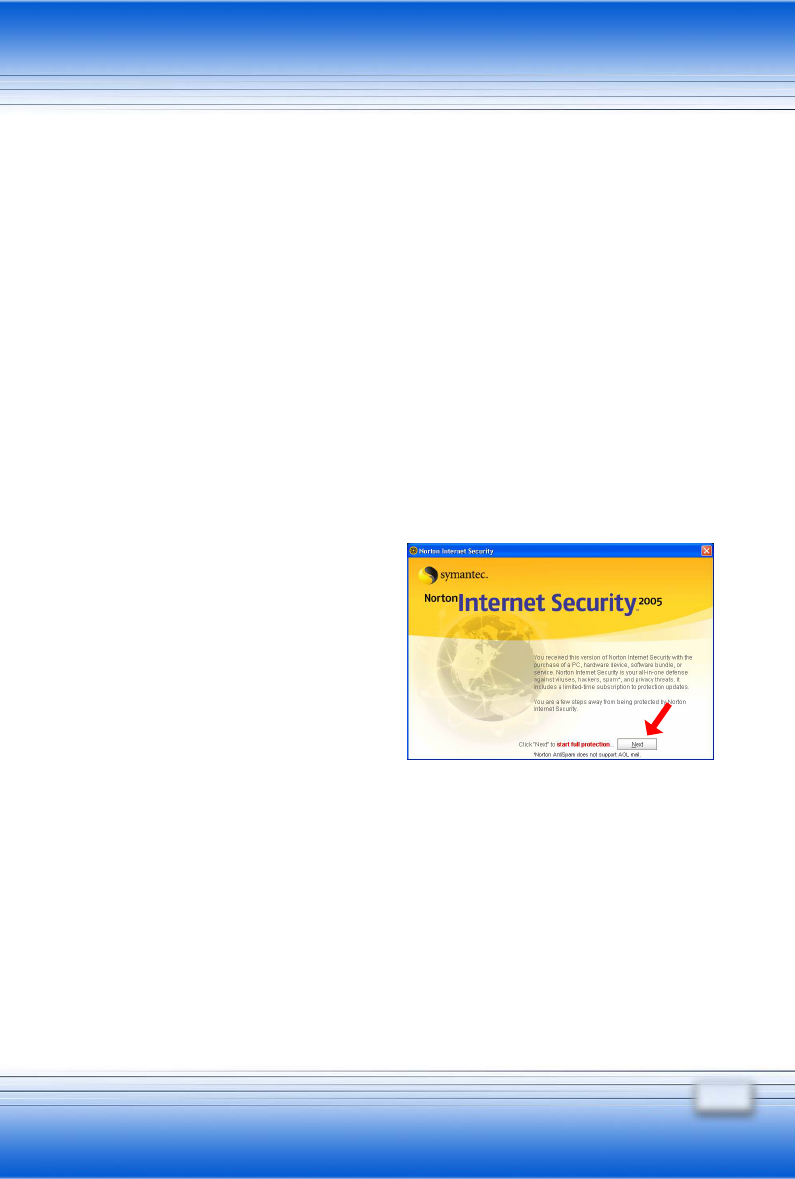
Norton Internet Security™2005
Norton Internet Security ™2005 provides you a friendly interface to
use anti-virus functions. You can use Norton Internet Security
™2005 to scan your e-mail, block unnecessary websites and protect
your PC from virus infected.
Registering Norton Internet Security ™2005
It is better to register your software before starting to use. After
registration, you can get the full functionality of the software,
real-time updates, technical support and product updates.
To register your software:
On the Norton Internet
Security ™2005 main
window, click “Next” to start
full protection Æ Tick “I
accept the License
Agreement” and click “Next”
in this License Agreement display Æ In the appropriate fields on the
Registration page, choose your country region (for example, Taiwan)
and type other required information, then click “Next”. Æ If you
agree to receive postal mail from Symantec, please tick the first
option and type your information into the respective space, and click
“Next” to continue; if not, please skip this step and click “Next” Æ
Registration information is transmitted using a secure connection

82
with a Symantec server, please make sure your computer is
connected to the Internet, then click “Next” to send registration. Æ
Then you can see Subscription: This copy of Norton Internet
Security includes a complimentary 90 days subscription to Norton
Internet Security Protection updates. When the complimentary
subscription expires, you can purchase a renewal good for one year
of Norton Internet Security Protection updates. Click “Next”. Æ In
this Post Install Tasks, choose the option you want to use and tick it,
then click “Next” Æ In this Summary list, it will show you the
Post-Install Tasks and Configuration Settings you use. If you would
like to change your configuration settings, click Option on the Norton
Internet Security main window. Then click “Finish” to complete the
registration process.

83
Advanced Software
MSI System Control Manager
It is a new generation and powerful tool of screen control with MSI
SearchKey, Email coming-alarm and colorful status displays for
Function Keys integrated. MSI System Control Manger makes
more interactive displays for you to notice what functions you are
using. Let’s go to find how much convenient and useful the MSI
System Control Manager will provide you.
MSI System Control Manager is pre-installed in the Notebook PC
when you buy it. You may re-install this program in the future by
the software CD bundled with the package of your Notebook PC.
When you turn on your Notebook PC, MSI System Control Manager
will automatically launch and display a status icon ( ) on the
taskbar. By click on the right button of your mouse, you will know
information about the version of MSI System Control Manager. It is
recommended to let MSI System Control Manager running as a
background program and it will help you a lot with your working.
The three major functions of MSI System Control Manager ---
Search Key Define, Mail Properties and OSD (On-Screen Display)
Function will be more described in the next sections.
84
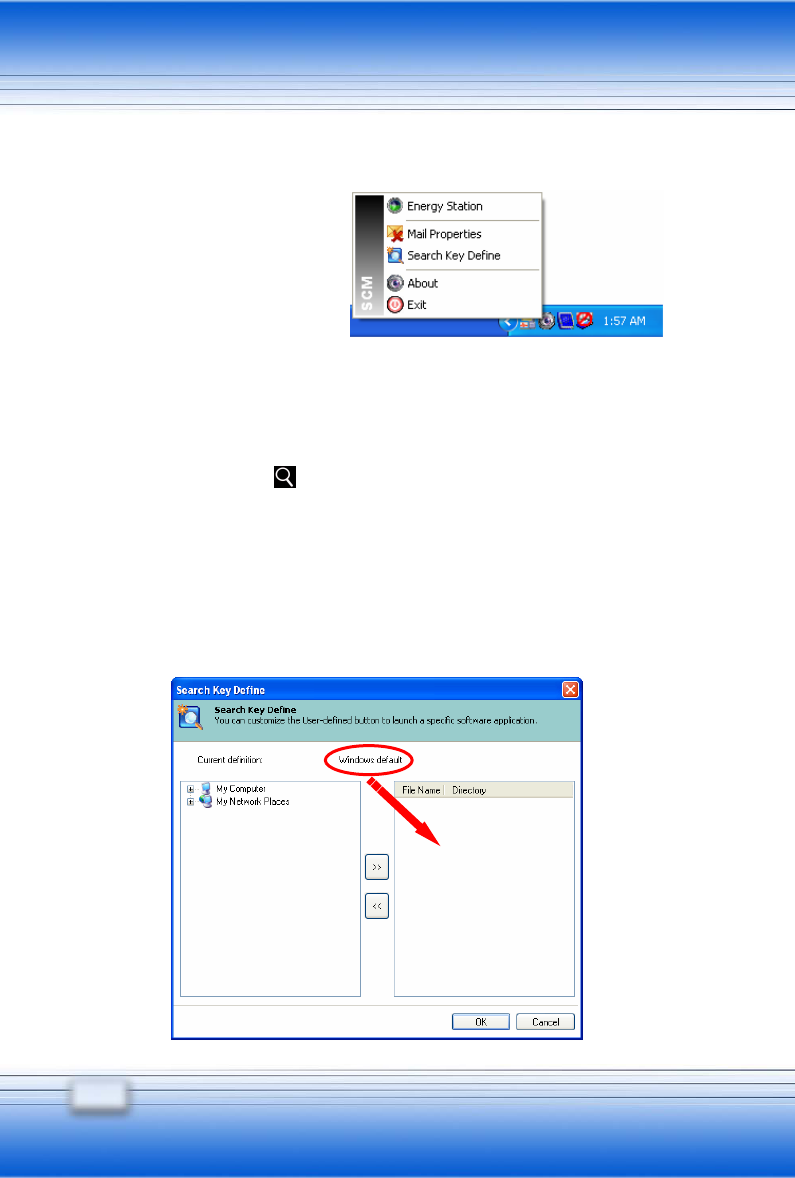
Search Key Define
It is a quick way to set up the
function of Search Key on
your keyboard panel. After
Search Key Defined installed,
you can give a right-click on
your mouse and see the function list showing like below.
If it is the first time to use Search Key Define, you can also click the
Search Key button ( ) on the keyboard panel to activate the
Search Key Define. Without any search key defined, the default
screen of clicking Search Key button will show the same as opening
the function of Search Key Define. At the beginning, there is no
item listed in the right field of the screen and a message “Windows
default” shows you the status of the current definition.
85
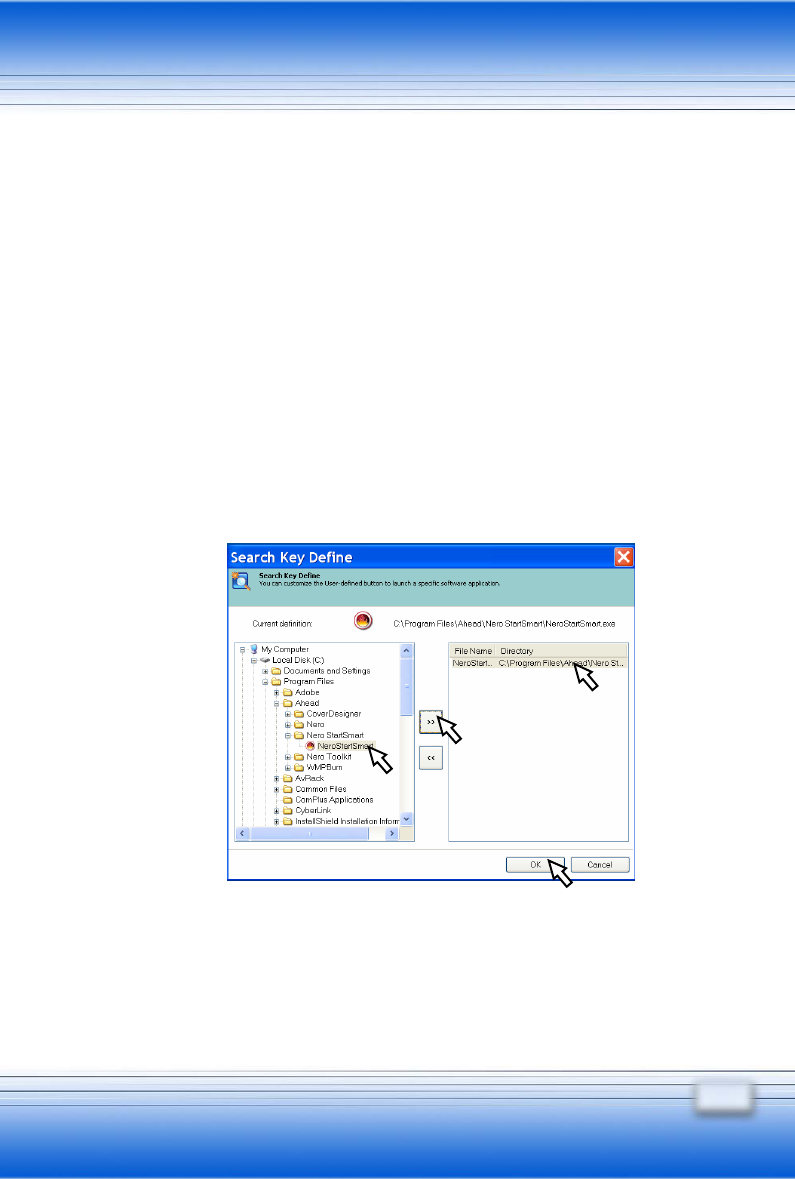
To add a Search Key in the list, just search and select an item from
the left field. An item can be a program, a media or a web page.
For example, point the Nero StartSmart () and press the “>>”
button (), the path where Nero StartSmart locates will be add in
the right field. Because there is only one path listed so far, all you
need to do is to click it and make it as the search key (). If you
have items more than one listed in the right field, you can select
ONLY ONE to be the search key. Click “OK” and exit the screen of
Search Key Define (). To remove item in the right field, just click
the “<<” button and the selected item will not be in the right field
unless you add it again.
Now, you may press on the Search Key button to test whether your
setup for Search Key button is available. If not, please open and
check your Search Key Define again and make sure you do the
setting process well.
86
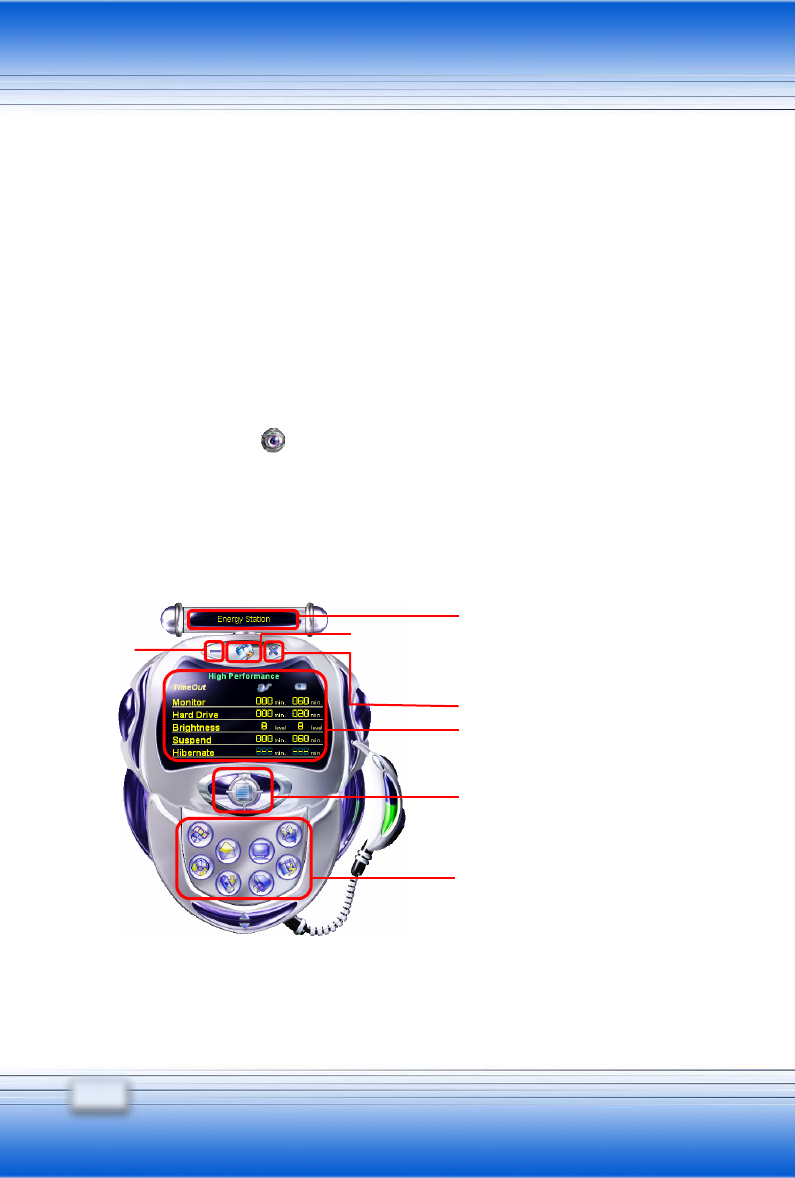
It will change the mode depends
on which power scheme in the
following display you select
It shows you the current PC status
Exit Energy Station mode
Click here to bring up configuration
menu and you can set each value
individually
8 different power schemes for your
selection
Energy Station
Energy Station provides 8 different power schemes to let users to
set the optimized power management configuration according
different operating modes. In addition, you can control the system
standby period to turn off monitor and HDD after using the notebook;
to enable the hibernation mode or not; to control CPU operating
performance and adjust LCD brightness. In the meanwhile, you also
can adjust each setting value in their configuration menu.
Right click the icon ( ) on the taskbar and select “Energy Station”.
It leads you to the setup screen of Energy Station showing as below.
Current Power
scheme you
select
Minimize
Energy
Station
display

87
Power schemes
Display Power Scheme
Full Performance
High Performance
Presentation (with LCD)
Presentation (with Projector)
Office/E-Mail
High Battery Performance
DVD Movie
CD Audio

88
How to adjust the individual setting value in the configuration
menu? (Take “Full Performance” for example)
Firstly, select Full Performance icon within the power
schemes display, then click Configuration button to bring up
the following configuration menu. You can adjust each setting option
in Full Performance depends on your request.
(1) Full Performance (2) Full Performance
configuration menu 1 configuration menu 2
89
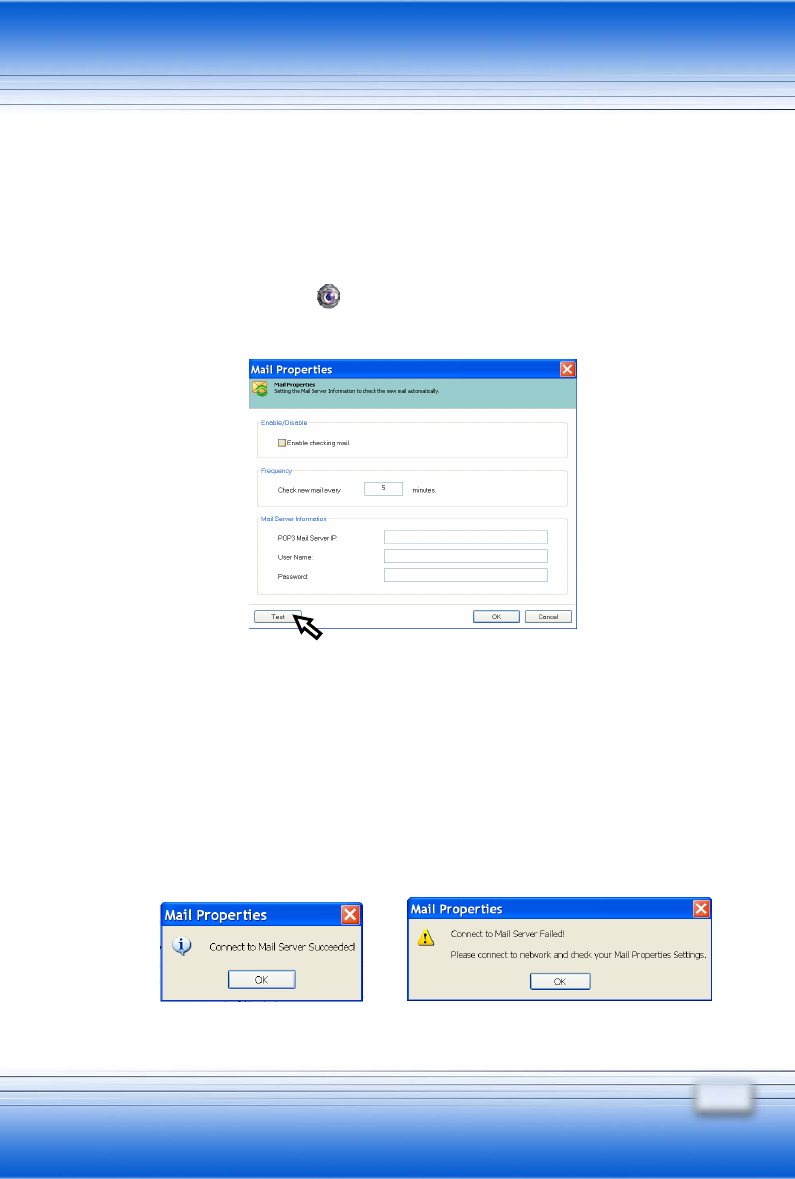
Mail Properties
Power schemes: you won’t need to turn on and off the mail box
many times to check out coming emails and know how many mails
you have got.
Right click the icon ( ) on the taskbar and select “Mail Properties”.
It leads you to the setup screen of Mail Properties showing as below.
You need to check the “Enable checking mail” box first, then you can
setup the duration of every checking and fill mail information in Mail
Sever Information. Before exiting the setup screen, you can click
Test button to see whether your e-mail properties is working or not.
If your setting is ok, it will show you a successful message; if not, it
will show you a fail message and you need to reset the information
of Mail Properties.
Successful Message Failed Message
90
About filling in Sever Information, please notice that your
mail IP should be POP3 protocol and no other protocol
can be applied to the checking system so far.
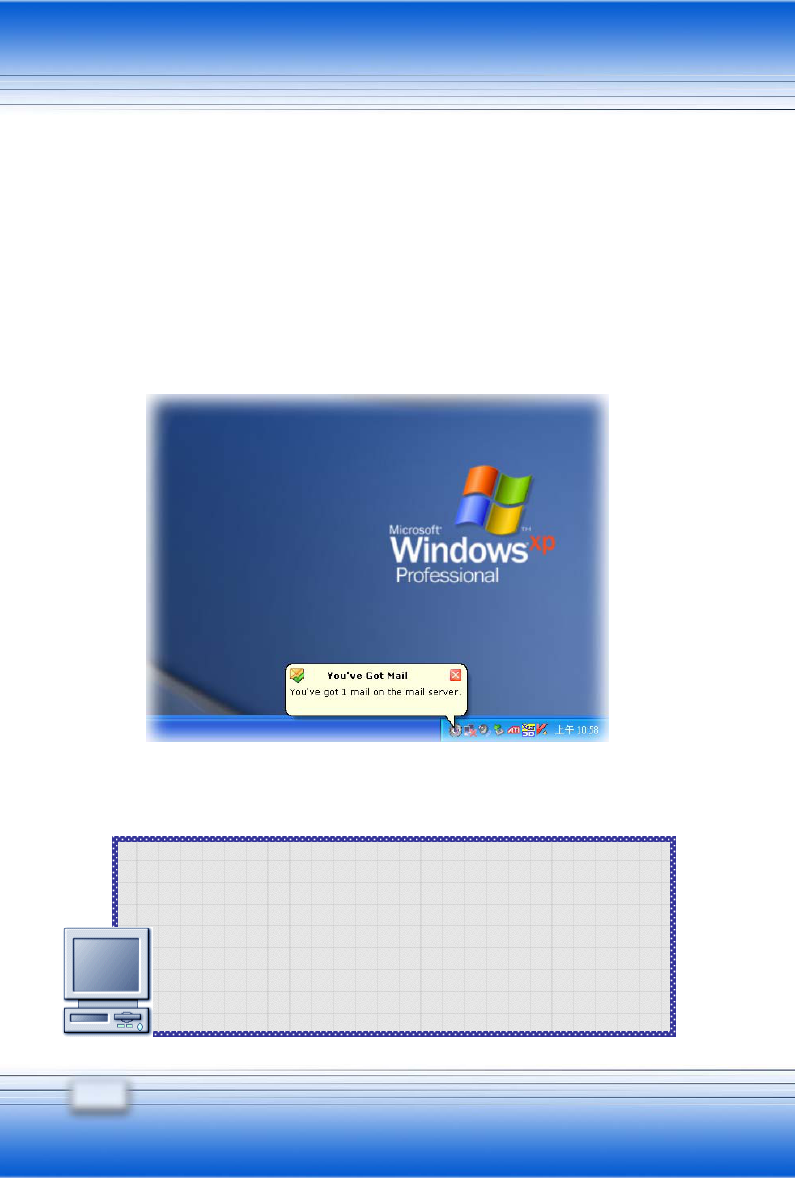
Things to know…
Take a look at this figure. If your mail settings are correct and your
network is connecting successfully. The mail-checking function of
Mail Properties will automatically do checking as the duration you
set. When you have mails, the SCM (System Control Manager)
icon will deliver a pop-up message with information about how many
mails you have got. See? Isn’t it a lovely and friendly reminder
for you?
91
OSD (On-Screen Display)
Your Notebook PC is already installed a special OSD interface. It
gives you vivid and friendly displays on your screen when you are
enabling Function Keys and Quick Launch Buttons. Take the
tables below as your reference and know every function with its
related keys and reminders.
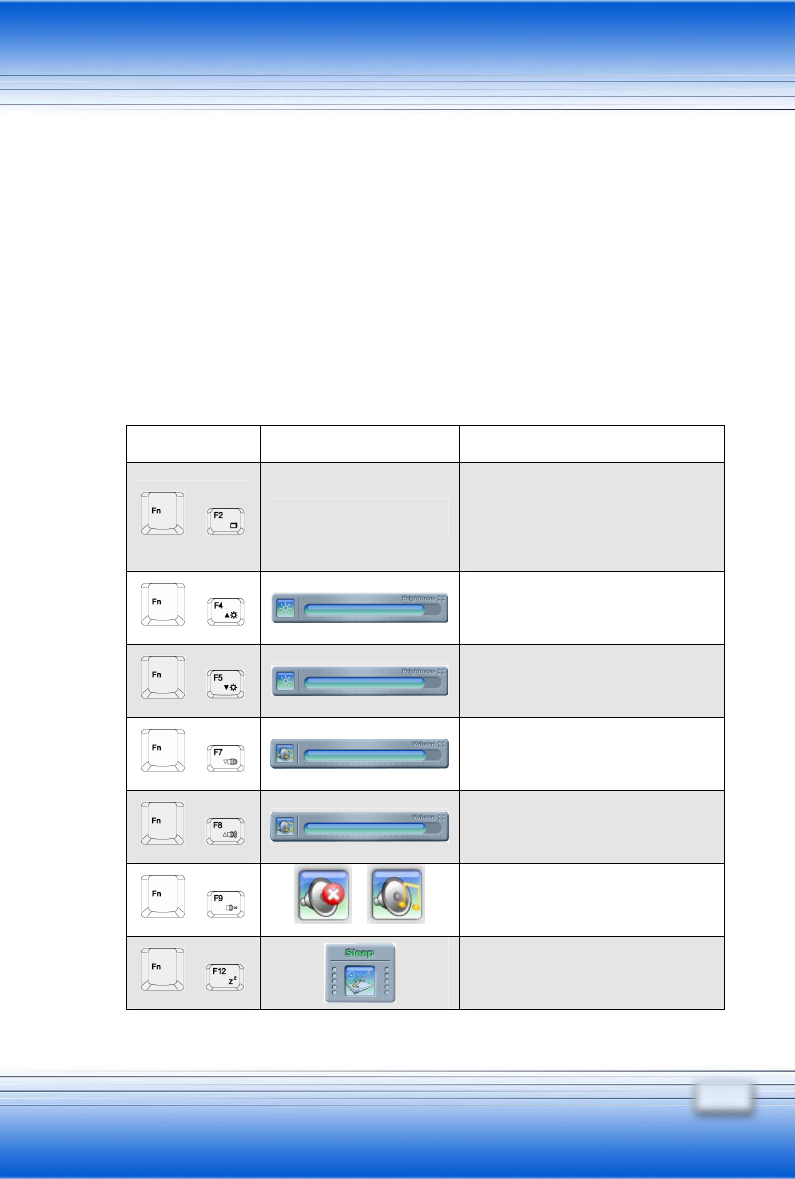
Function Keys
[Fn] + [Fx] Display Status
+NA
Toggle between internal and
external displays without any
status reminder.
+
Adjustable scroll bar to
increase brightness.
+
Adjustable scroll bar to
decrease brightness.
+
Adjustable scroll bar to
increase volume.
+
Adjustable scroll bar to
decrease volume.
+/
Toggle between mute and
sound effect modes.
+
Reminder before getting into
Hibernation.
92
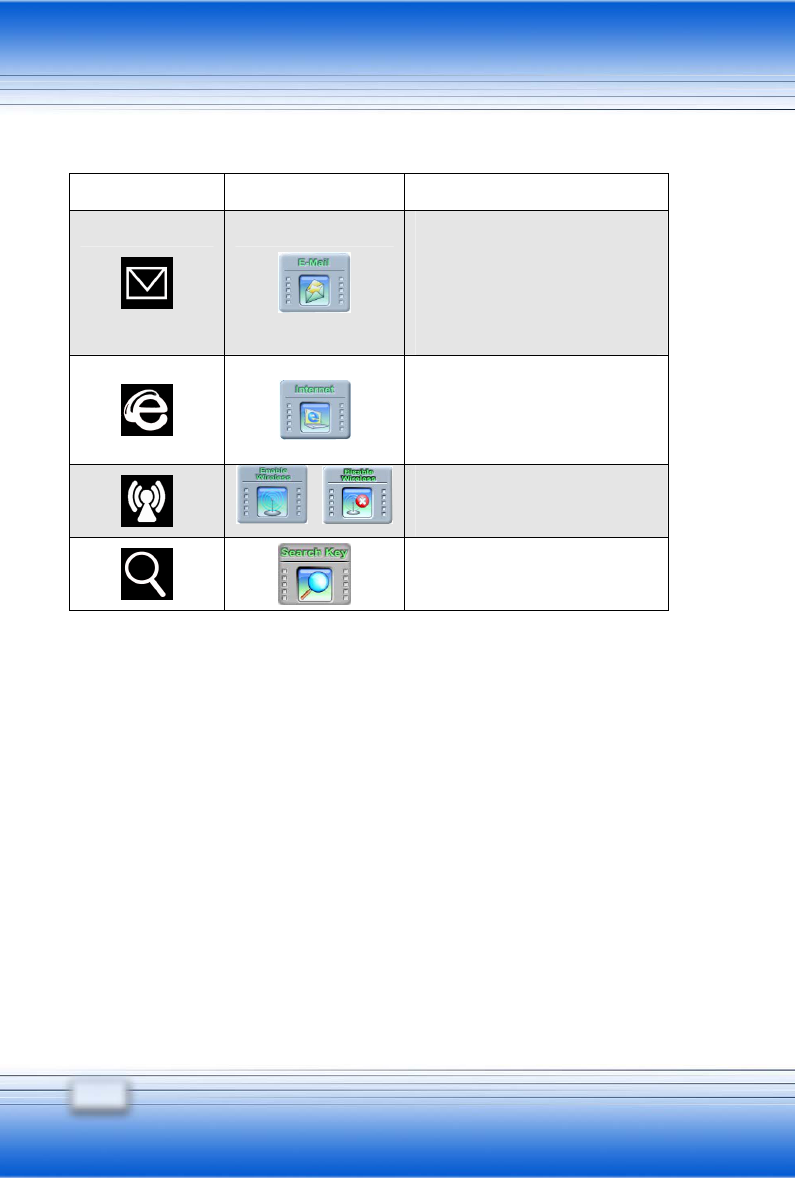
Quick Launch Display Status
Reminder between clicking
e-mail quick launch button
and starting Outlook Express
or Microsoft Outlook.
Reminder between clicking
Internet quick launch button
and Webpage opening.
/Toggle between enable and
disable wireless connection.
Reminder before opening the
Search Key function.
93
CyberLink Multimedia Launcher
To launch CyberLink Multimedia Launcher, double-click Cyberlink
Multimedia Launcher icon on Windows desktop. As you
ever operated this function before, the following CyberLink list will
appear on the desktop as you rebooting next time.
It includes: PowerDirector , PowerProducer , PowerDVD
, and Power2Go .
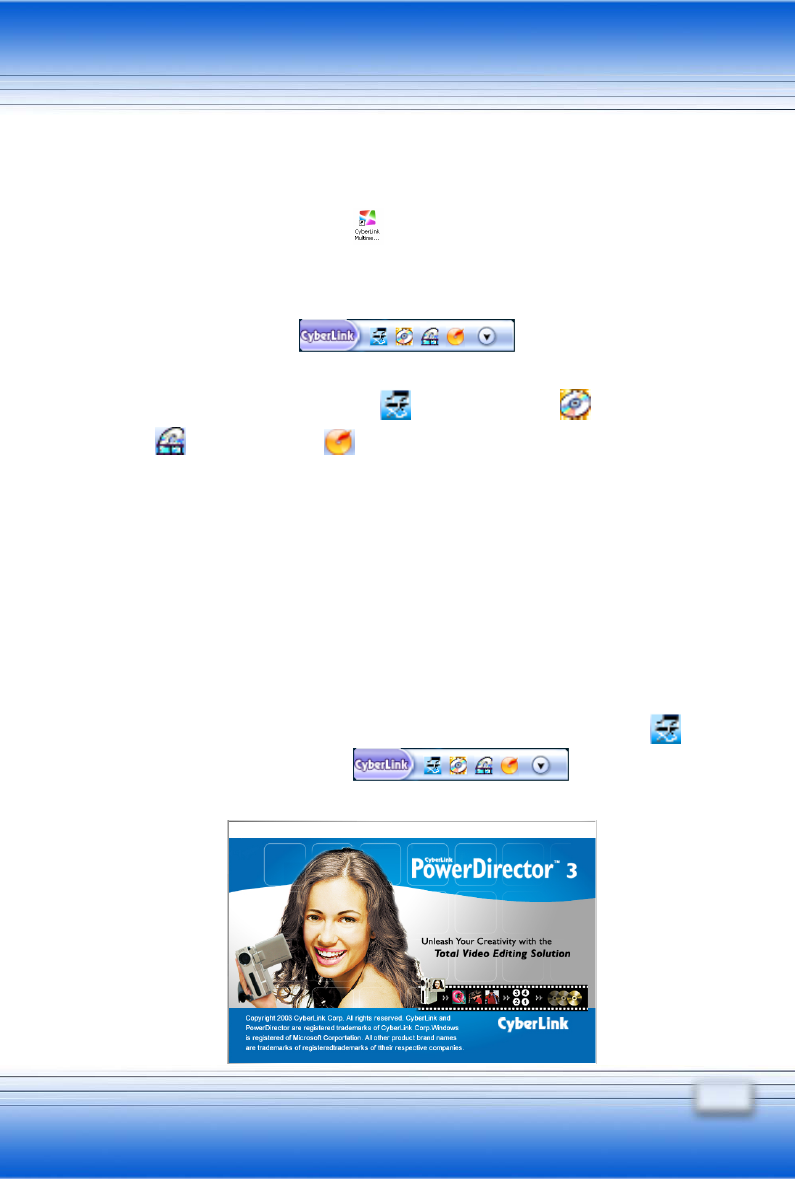
PowerDirector
PowerDirector provides many ways of the different kinds of
technology you will use in the digital movie-making process, as well
as system requirements for working smoothly with CyberLink
PowerDirector. It really offers a range of choices to set your video
production environment to better suit the way you work.
To launch PowerDirector, double-click PowerDirector icon ( )
on the Cyberlink list and
the following pop-up screen will appear as below:
94
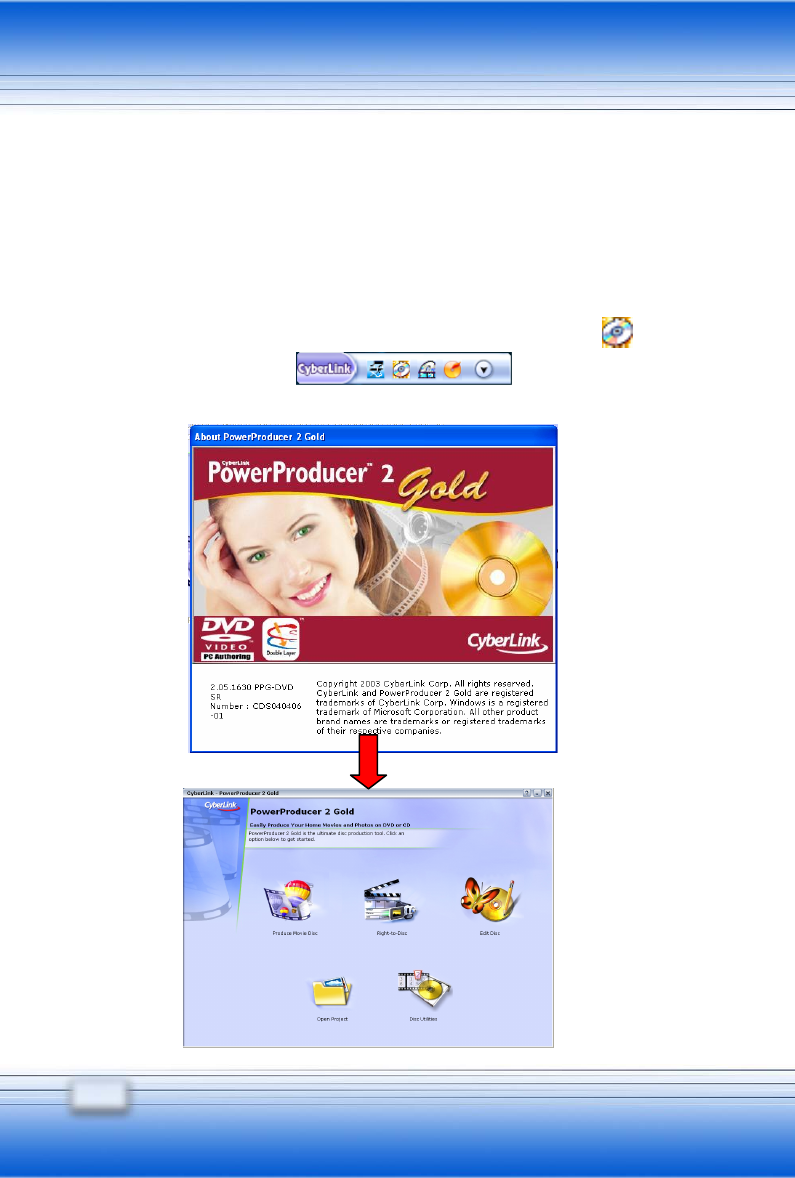
PowerProducer
PowerProducer allows you to finalize your digital video productions
and burn them to disc. You can use PowerProducer for light editing
tasks and to capture new media, and when it’s time to polish your
movie.
To launch PowerProducer, double-click PowerProducer icon ( )
on the Cyberlink list and
the following pop-up screen will appear as below:
95
Power2Go
CyberLink Power2Go is a disc-burning program, which is a handy
utility for burning discs containing movies made using CyberLink’s
movie-making software, or when you want to make music discs,
dara discs, and even bootable discs. The Cyberlink Power2Go
program can run in either of two modes: Power2Go mode or
Power2Go Express mode. Power2Go Express mode is the simpler
of the two modes, allowing you to burn discs in two steps;
Power2Go mode, on the other hand, offers you access to more
options and disc utilities.
(1) To launch Power2Go, double-click Power2Go icon ( ) on the
Cyberlink list and
the following pop-up screen will appear as below:
96
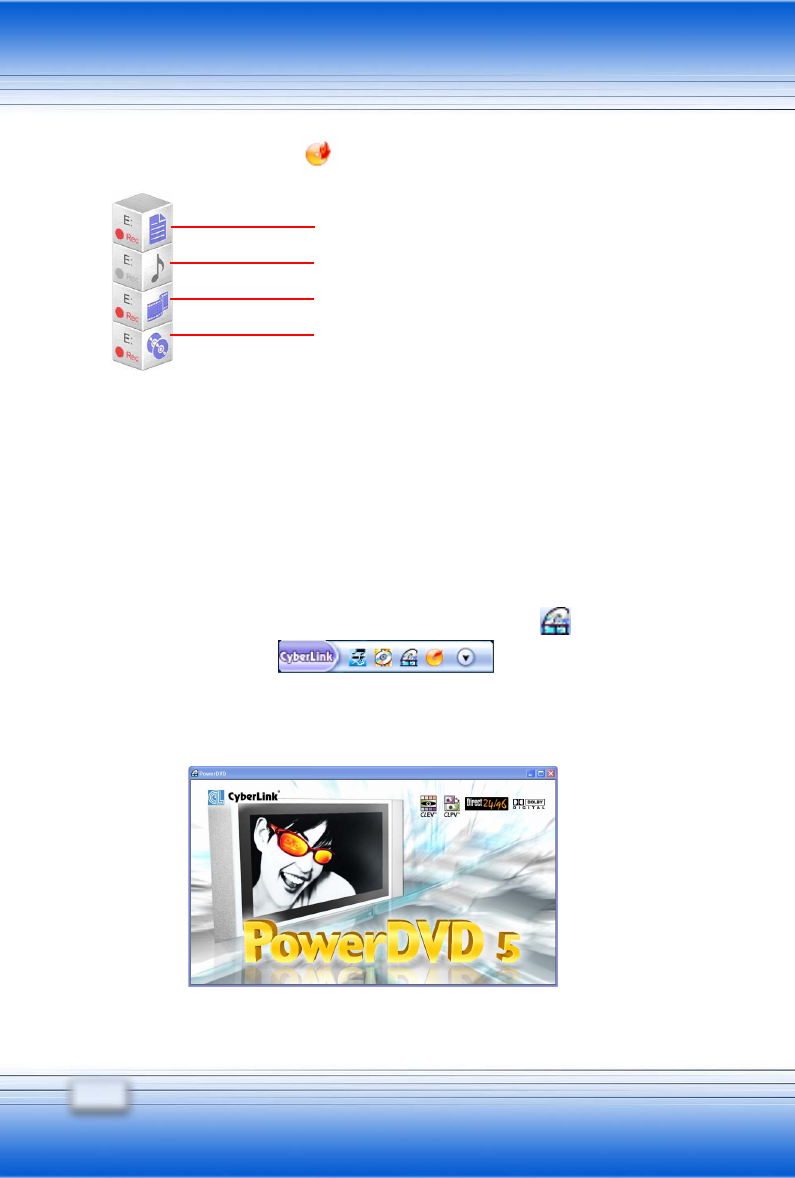
Drag any file here to make a data disc
Drag audio files here to make an Audio CD
Drag video files here to make a DVD/VCD
Copy disc content onto another disc
(2) Power2Go Express ( )
PowerDVD
Whether watching DVD movies on your Notebook PC as you travel,
using your computer as a second DVD player for your kids or
watching a movie on your desktop as you work, PowerDVD lets you
get the most out of any computer with a DVD drive.
To launch PowerDVD, double-click PowerDVD icon ( ) on the
Cyberlink list and
the following pop-up screen will appear as below:

97
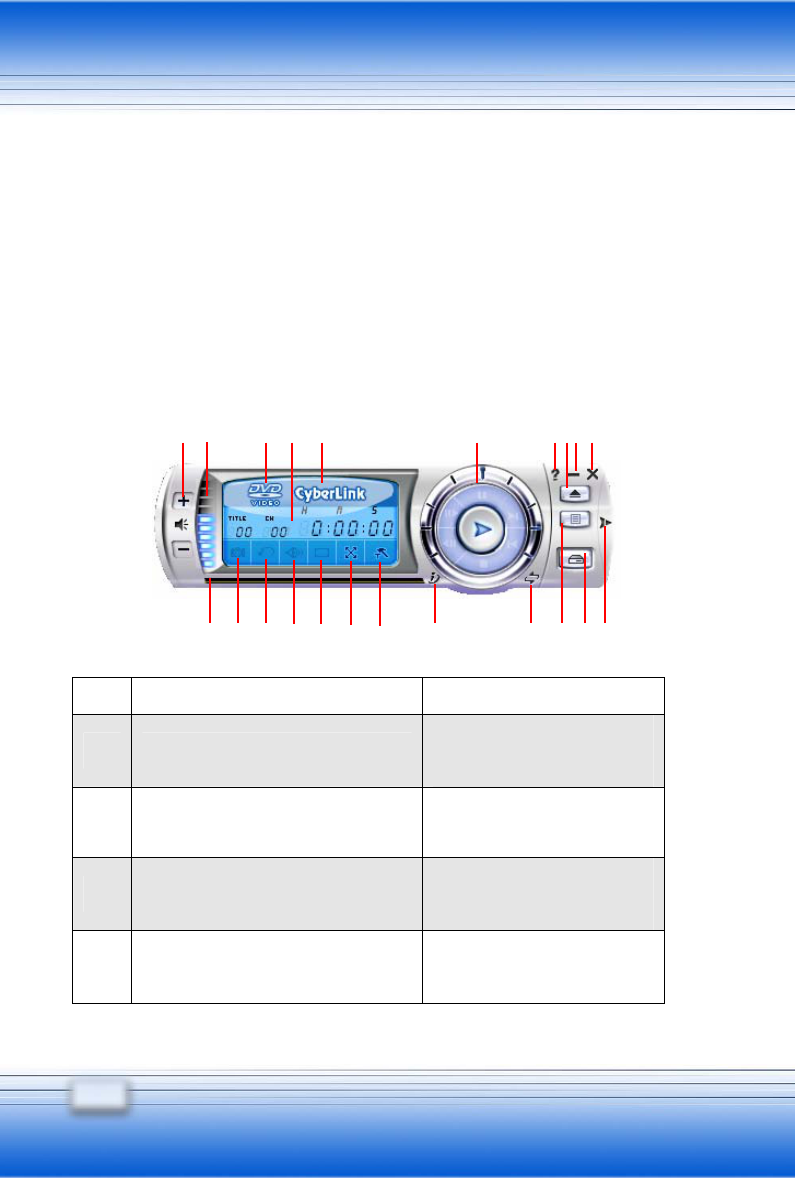
Display: Display DVD/VCD on the screen.
Control Panel: Contains lots of control functions of the
program.
98
Control Panel Functions
To enjoy a DVD movie is an easy task on PowerDVD. In most
cases, all you have to do is inserting the DVD disc. PowerDVD
starts automatically and determines the type of disc in the drive.
But sometimes there’s more to viewing a DVD title than letting a
movie start and play through to the end without stopping.
PowerDVD lets you control your DVD viewing through the Control
Panel.
Item Hotkey Status
A +/-
Increase volume
(+)/Decrease volume (-)
B Volume status (up/down)
C
It will show you the current
media type you play
D
It will show you the chapter
of the DVD you play and
A B CDEFGHI J
K L MNOP Q R S T U V
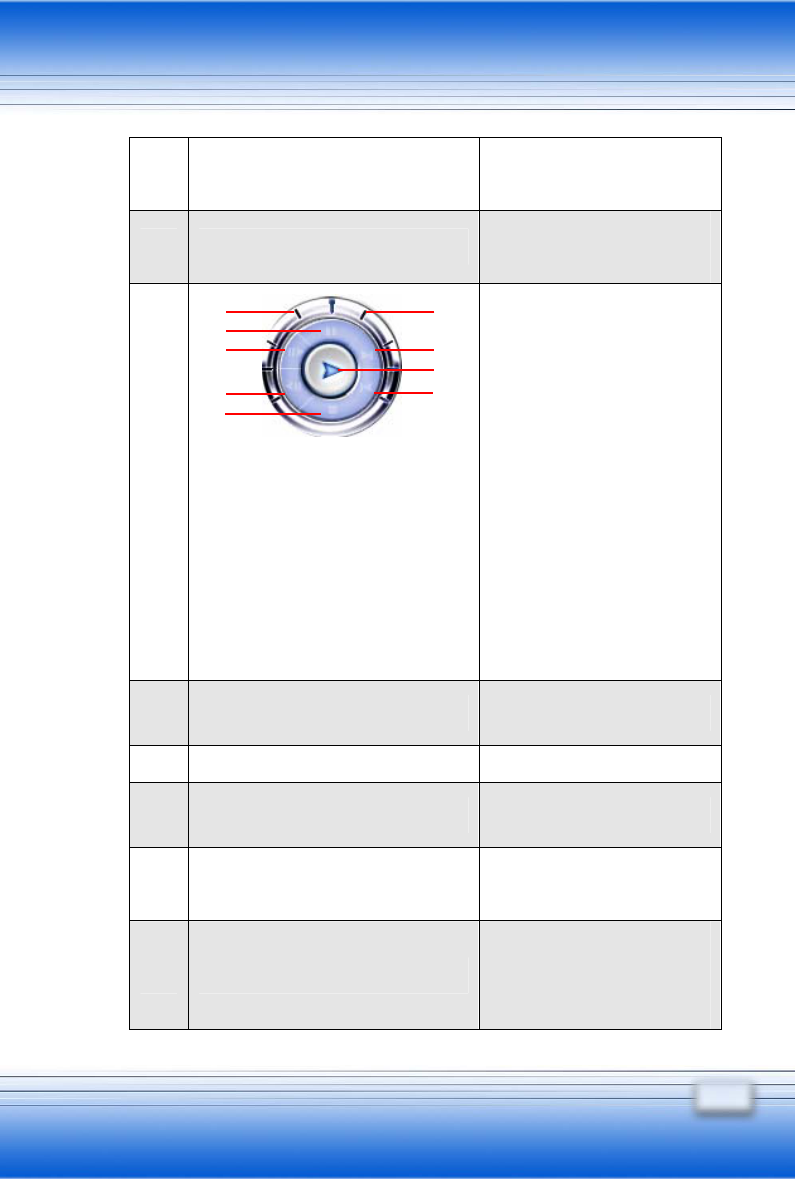
99
how many time it has
played
E Ctrl-A
PowerDVD version and
related inforamtion
F
(2) Hot key: Space key
(3) Hot key: T
(4) Hot key: Ctrl-B
(5) Hot key: S
(7) Hot key: N
(8) Hot key: Enter
(9) Hot key: P
(1) Fast Rewind
(2) Pause, stop playing
(3) Step forward
(4) Step backward
(5) Stop
(6) Fast Forward
(7) Next
(8) Play
(9) Previous
G F1 Open on-line help file
H Ctrl-E Eject disc
I Ctrl-N Minimize the control panel
J Ctrl-X
Power off PowerDVD
program
K
Navigational slider, click
anywhere of the slider and
you can skip to other
(2)
(3)
(1)
(4)
(5)
(6)
(7)
(8)
(9)

100
chapter of the DVD
L C
Capture frame, to snap
shot the screen
M R Shuttle
N H Next audio stream
O U Next subtitle
P Z Full screen
Q Ctrl-C Configuration
R F3
i-power (click here to
connect to CyberLink
homepage)
S Ctrl-T Skin toggle
T L
Menu (click here to open
PowerDVD edit playlist)
U Ctrl-O Select Source
V
Pad (DVD menu/Numberic
keyboard)