Microprogram Information MP180L RFID Reader User Manual MP180L 1 x
Microprogram Information Co., Ltd. RFID Reader MP180L 1 x
Users Manual

RFID Reader
MP180L

1
Contents
Block Diagram.................................................................................................................................. 2
System Update Guide ....................................................................................................................... 3
Test Method ...................................................................................................................................... 5
Warning............................................................................................................................................. 6
2
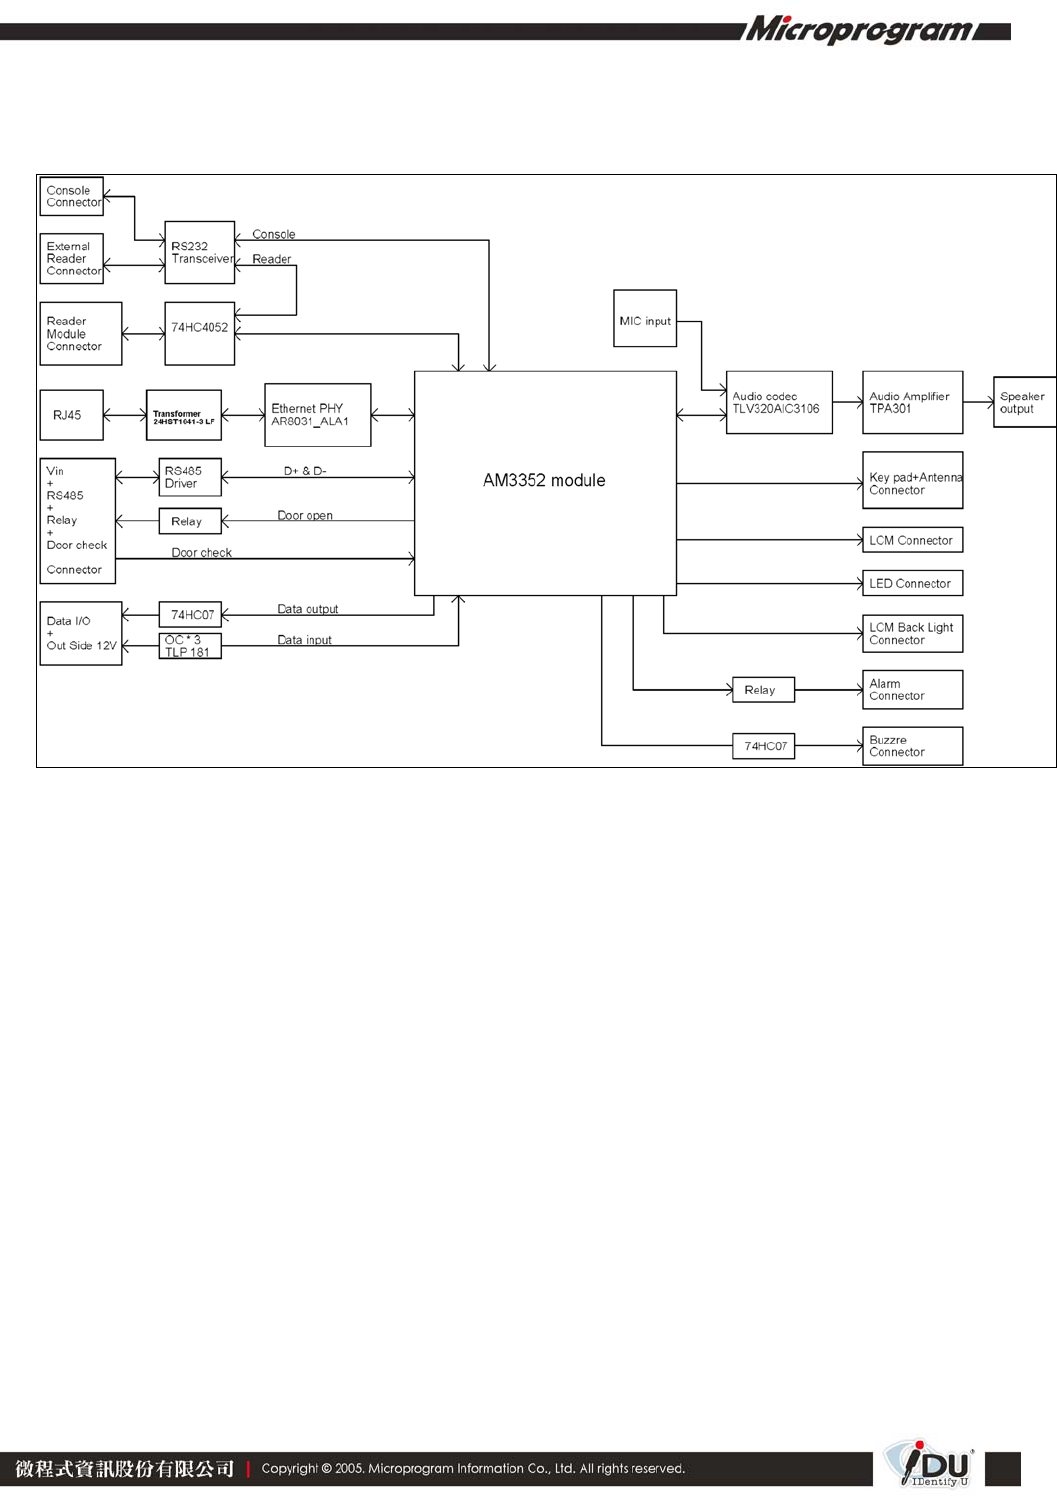
1. Block Diagram
Processor
• TI AM3325 CPU Clock Speed 1Ghz
Memory
• 256MB SDRAM
Display
• COG/FSTN LCD with white backlight
• 128 × 64 pixel resolution
Interface
• 18 hard keys
• LED indicators x 3
Card Reader
• Capacity of card: 40,960
• Supports reader types:
– EM, 125kHz
– HID, 125kHz
– Mifare, 13.56MHz
Operating System
• Linux 3.2
Data IO
• Ethernet 10/100M
• RS485
• Door Open
• Security Trigger
• Door Position Input
• Anti-Thief Input
• Relay x 2
I/O Expansion
• Drive RS232 x 1 (secondary reader)
• Audio Input/Output
• Digital inputs x 3
• Digital outputs x 3
• USB Host 1.1 X 1
• USB Device 1.1 X1
3
• Micro SD Card Slot X1
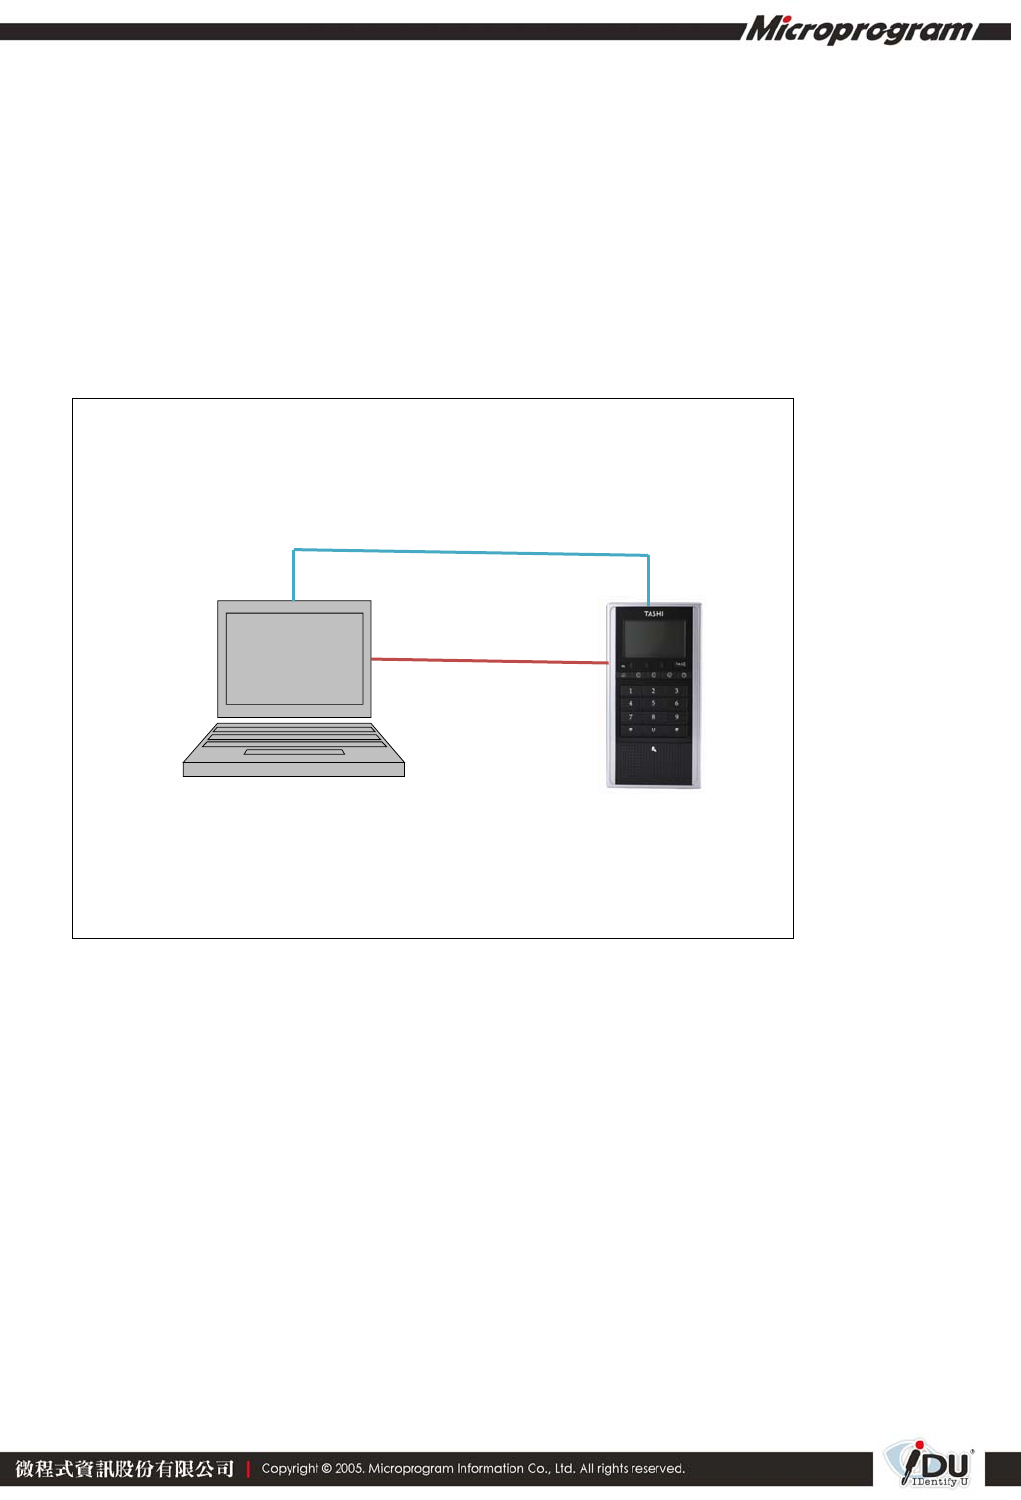
2. System Update Guide
1. Install USB driver on Windows XP (FriendlyARM USB Download Driver
Setup_20090421.exe).
2. Connect MP180L USB device port to USB host port on PC using an USB cable.
3. Connect MP180L J15 to Windows XP RS-232 port with console cable, and enable the hyper
terminal or putty (115200,N,8,1)
USB device
USBHost
USBCable
ConsoleCable
4
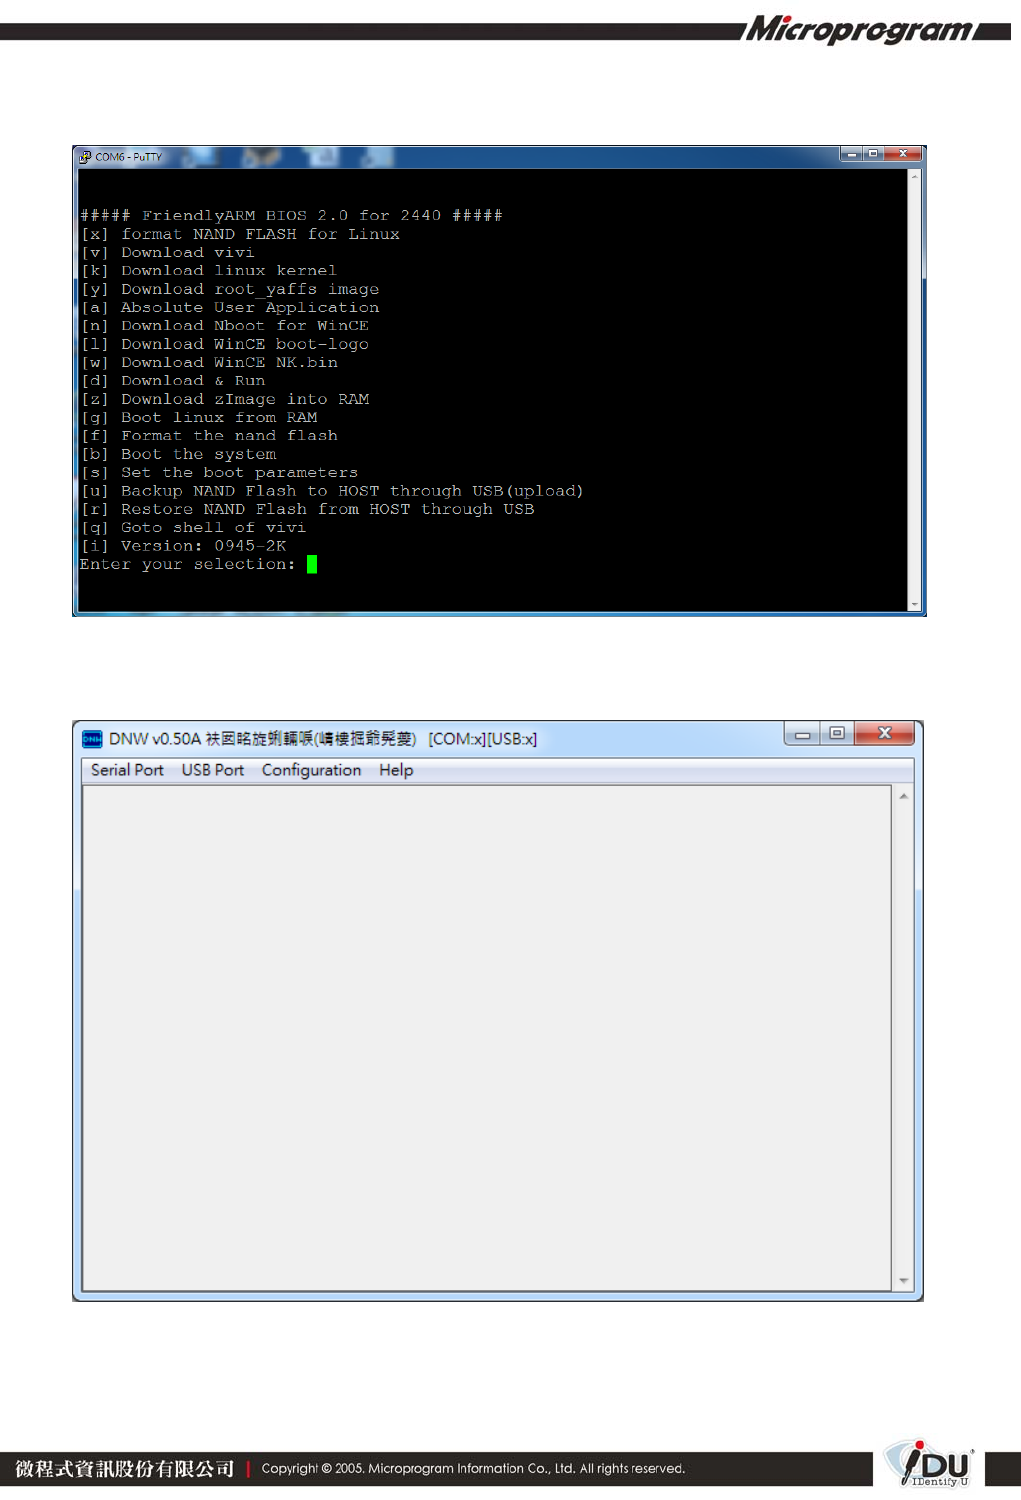
4. Remove J6 Jumper and turn on MP180L, it will then enter SOM BIOS setup menu.
5. Run download tool DNW.exe.
6. Select [ r ] Restore NAND Flash from HOST through USB in terminal or putty.
7. Access download tool DNW and select the latest system backup in USB Port ->
5
Transmit/Restore, plug-in J6 after transmit and restart to complete the system upgrade.
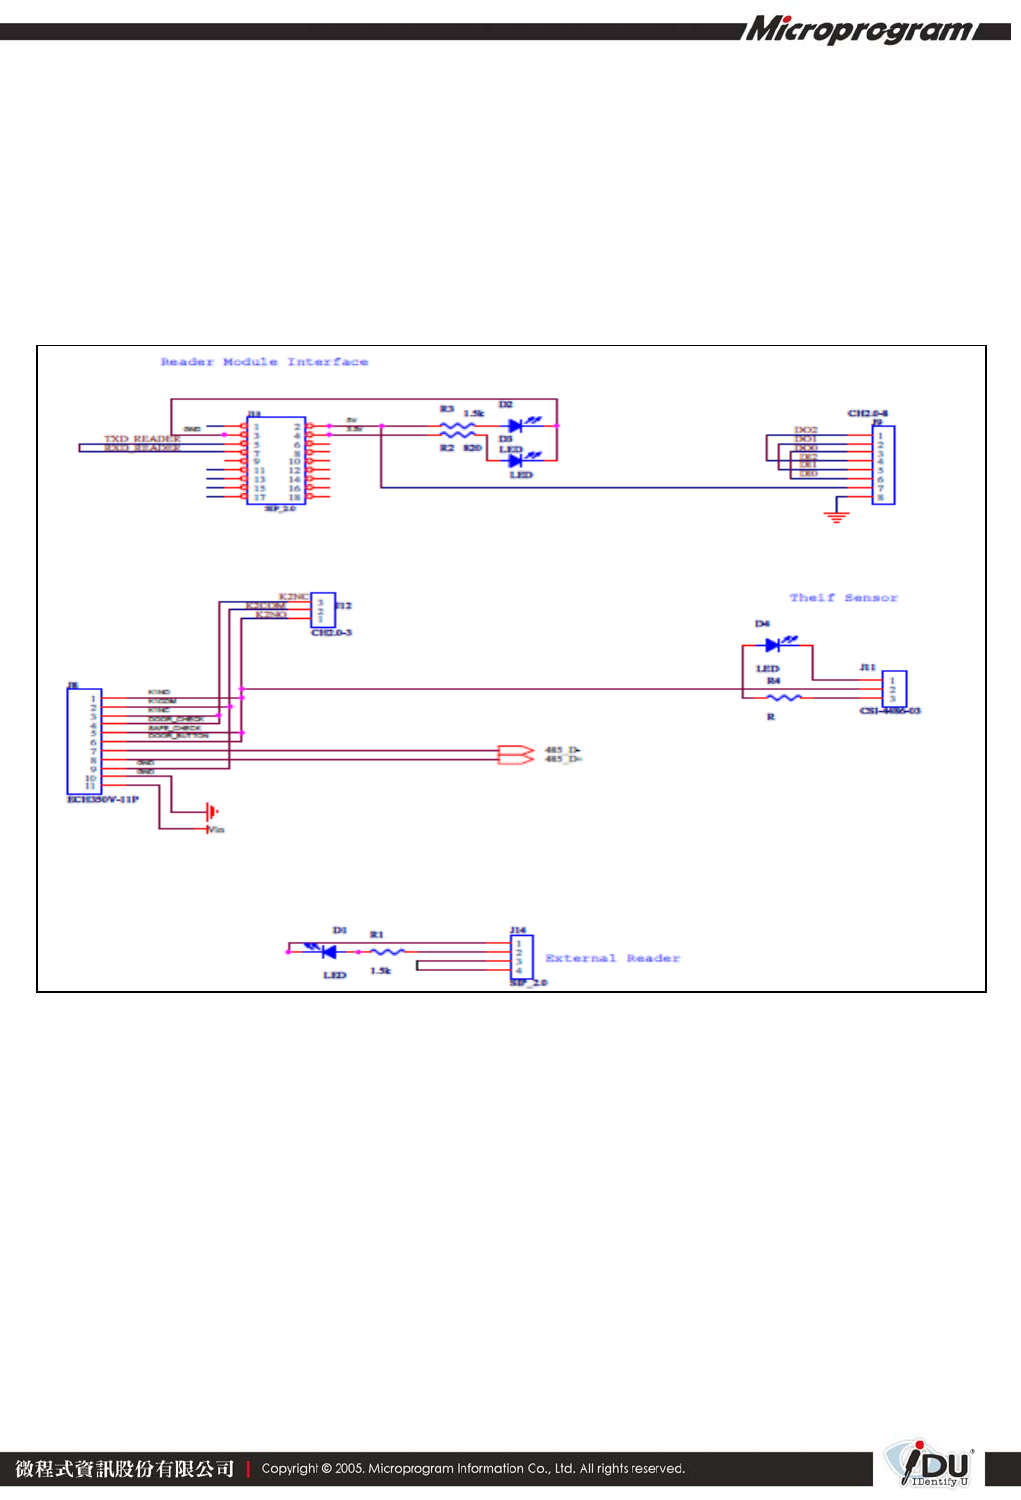
3. Test Method
1. There is no single-chip IC on MP180L main board, therefore testing must be done through SOM by
writing the testing program on SOM.
2. Manufacture jigs to connect all SOM PIN to MP180L in order, and create connectors like the
schematic shown below for plugging.
3. Connect Microphone, speaker, buzzer, micro SD Card, USB disk, Ethernet RJ-45.
4. SOM will run the testing program automatically after turn-on, main board can then be inspect
through console and LED.

6
4. Warning
Federal Communication Commission Interference Statement
This equipment has been tested and found to comply with the limits for a Class B
digital device, pursuant to Part 15 of the FCC Rules. These limits are designed to
provide reasonable protection against harmful interference in a residential installation.
This equipment generates, uses and can radiate radio frequency energy and, if not
installed and used in accordance with the instructions, may cause harmful interference
to radio communications. However, there is no guarantee that interference will not
occur in a particular installation. If this equipment does cause harmful interference to
radio or television reception, which can be determined by turning the equipment off
and on, the user is encouraged to try to correct the interference by one of the
following measures:
. Reorient or relocate the receiving antenna.
. Increase the separation between the equipment and receiver.
. Connect the equipment into an outlet on a circuit different from that to which the
receiver is connected.
. Consult the dealer or an experienced radio/TV technician for help.
FCC Caution: To assure continued compliance, any changes or modifications not
expressly approved by the party responsible for compliance could void the user's
authority to operate this equipment. (Example - use only shielded interface cables
when connecting to computer or peripheral devices).
This device complies with Part 15 of the FCC Rules. Operation is subject to the
following two conditions:
(1) This device may not cause harmful interference, and
(2) This device must acceptany interference received, including interference that may cause undesired
operation.