Microsoft 1573 Handheld Computing Device User Manual Surface 2 User Guide
Microsoft Corporation Handheld Computing Device Surface 2 User Guide
Contents
- 1. Manual
- 2. Manual Safety
- 3. Manual 1
- 4. manual 1
manual 1
Surface 2 User Guide
With Windows RT 8.1 Software
Published: January 2014
Version 2.0
2013 Microsoft. All rights reserved.
BlueTrack Technology, ClearType, Excel, Hotmail, Internet Explorer, Microsoft, OneNote, Outlook, PowerPoint, SkyDrive,
Windows, Xbox, and Xbox Live are registered trademarks of Microsoft Corporation.
Surface, Skype, and Wedge are trademarks of Microsoft Corporation.
Bluetooth is a registered trademark of Bluetooth SIG, Inc.
Dolby and the double-D symbol are registered trademarks of Dolby Laboratories.
LTE is a trademark of ETSI.
This document is provided “as-is.” Information in this document, including URL and other Internet Web site references, may
change without notice.
© 2014 Microsoft Page ii
MEET SURFACE 2 ..............................................................................................................................................................1
ABOUT THIS GUIDE ................................................................................................................................................................................................ 1
SURFACE 2 FEATURES ............................................................................................................................................................................................ 2
SET UP YOUR SURFACE ...................................................................................................................................................6
PLUG IN AND TURN ON ........................................................................................................................................................................................ 6
SETUP...................................................................................................................................................................................................................... 7
THE BASICS .......................................................................................................................................................................8
TOUCH, KEYBOARD, MOUSE, AND PEN ............................................................................................................................................................... 8
START SCREEN ....................................................................................................................................................................................................... 8
OPEN APPS ............................................................................................................................................................................................................. 8
TOUCH: SWIPE, TAP, AND BEYOND ..................................................................................................................................................................... 9
CHARMS ............................................................................................................................................................................................................... 11
LEARN MORE ABOUT WINDOWS ....................................................................................................................................................................... 12
LOCK SCREEN AND SIGNING IN .......................................................................................................................................................................... 12
GET STARTED ................................................................................................................................................................. 13
GET ONLINE ......................................................................................................................................................................................................... 13
SET UP YOUR EMAIL ............................................................................................................................................................................................. 13
PEOPLE: ADD CONTACTS .................................................................................................................................................................................... 14
SKYPE: ADD CONTACTS ...................................................................................................................................................................................... 15
SKYDRIVE: YOUR PERSONAL CLOUD ................................................................................................................................................................. 15
MAKE IT YOURS ................................................................................................................................................................................................... 15
GET TO KNOW SURFACE 2 .......................................................................................................................................... 16
POWER STATES: ON, OFF, STANDBY, AND RESTART ........................................................................................................................................ 16
CHARGING ........................................................................................................................................................................................................... 17
THE TOUCHSCREEN ............................................................................................................................................................................................. 18
ON-SCREEN KEYBOARD ...................................................................................................................................................................................... 20
THE KICKSTAND ................................................................................................................................................................................................... 21
TYPING COVERS (KEYBOARDS) ........................................................................................................................................................................... 22
TOUCHPAD ........................................................................................................................................................................................................... 26
SOUND FEATURES ................................................................................................................................................................................................ 27
THE DESKTOP ....................................................................................................................................................................................................... 29
USE APPS ........................................................................................................................................................................ 30
FIND AND OPEN APPS ......................................................................................................................................................................................... 30
SWITCH BETWEEN OPEN APPS ............................................................................................................................................................................ 31
USE APPS TOGETHER (SIDE BY SIDE) .................................................................................................................................................................. 31
CLOSE AN APP ..................................................................................................................................................................................................... 32
APP COMMANDS ................................................................................................................................................................................................. 33
APP SETTINGS AND HELP .................................................................................................................................................................................... 33
PROBLEMS WITH AN APP? .................................................................................................................................................................................. 33
SEARCH, SHARE, AND SETTINGS ............................................................................................................................... 34
HOW TO SEARCH ................................................................................................................................................................................................. 34
SHARE PHOTOS, LINKS, AND MORE ................................................................................................................................................................... 35
CHANGE YOUR SETTINGS .................................................................................................................................................................................... 36
© 2014 Microsoft Page iii
ACCOUNTS AND SIGN IN ............................................................................................................................................ 38
WHAT TYPE OF ACCOUNT DO I HAVE? .............................................................................................................................................................. 38
CREATE ANOTHER ACCOUNT .............................................................................................................................................................................. 38
MANAGE ACCOUNTS .......................................................................................................................................................................................... 39
UNLOCK AND SIGN IN ......................................................................................................................................................................................... 39
SIGN OUT OR LOCK ............................................................................................................................................................................................. 40
CHANGE YOUR PASSWORD ................................................................................................................................................................................ 40
ACCOUNT SECURITY ............................................................................................................................................................................................ 41
APPS AND GAMES FROM THE WINDOWS STORE .................................................................................................. 42
YOUR ACCOUNT .................................................................................................................................................................................................. 42
GET APPS .............................................................................................................................................................................................................. 42
DELETE AN APP .................................................................................................................................................................................................... 44
REINSTALL AN APP............................................................................................................................................................................................... 45
APP UPDATES ....................................................................................................................................................................................................... 45
PERSONALIZE YOUR SURFACE ................................................................................................................................... 46
ADD YOUR ACCOUNTS ........................................................................................................................................................................................ 46
PERSONALIZE THE START SCREEN ...................................................................................................................................................................... 46
CHANGE YOUR LOCK SCREEN ............................................................................................................................................................................. 47
NOTIFICATIONS ................................................................................................................................................................................................... 47
ADD A LANGUAGE ............................................................................................................................................................................................... 48
DESKTOP BACKGROUND, COLORS, AND SOUNDS ............................................................................................................................................ 48
CONNECT DEVICES ....................................................................................................................................................... 49
CONNECT A USB MOUSE, PRINTER, AND MORE .............................................................................................................................................. 49
USE A MOUSE ...................................................................................................................................................................................................... 49
USE A CAPACITIVE PEN ........................................................................................................................................................................................ 49
ADD A BLUETOOTH DEVICE ................................................................................................................................................................................ 49
ADD, REMOVE, AND MANAGE YOUR DEVICES AND PRINTERS ........................................................................................................................ 50
HOW DO I PRINT? ............................................................................................................................................................................................... 50
HOW DO I SCAN SOMETHING? .......................................................................................................................................................................... 51
CONNECT TO A TV, MONITOR, OR PROJECTOR ............................................................................................................................................... 51
STORAGE, FILES, AND BACKUP .................................................................................................................................. 54
HOW MUCH DISK SPACE DO I HAVE? ................................................................................................................................................................ 54
ADDITIONAL STORAGE OPTIONS........................................................................................................................................................................ 54
FILES AND FOLDERS ............................................................................................................................................................................................. 55
ADD FILES TO SURFACE ...................................................................................................................................................................................... 55
BACK UP YOUR FILES USING FILE HISTORY ....................................................................................................................................................... 56
NETWORKING ............................................................................................................................................................... 57
CONNECT TO A WI-FI NETWORK ...................................................................................................................................................................... 57
DISCONNECT FROM A WI-FI NETWORK ........................................................................................................................................................... 58
CONNECT TO A WIRED NETWORK ...................................................................................................................................................................... 58
JOIN A HOMEGROUP ........................................................................................................................................................................................... 58
JOIN A WORKGROUP ........................................................................................................................................................................................... 58
GET TO FILES ON OTHER COMPUTERS ............................................................................................................................................................... 59
CONNECT TO A VIRTUAL PRIVATE NETWORK (VPN) ..................................................................................................................................... 59
© 2014 Microsoft Page iv
WORKPLACE JOIN ................................................................................................................................................................................................ 59
AIRPLANE MODE .................................................................................................................................................................................................. 60
TETHERING: USE YOUR PHONE’S DATA CONNECTION ..................................................................................................................................... 60
REMOTE DESKTOP: CONNECT TO ANOTHER PC .............................................................................................................................................. 60
BUILT-IN APPS .............................................................................................................................................................. 61
OFFICE 2013 RT ................................................................................................................................................................................................. 61
ONENOTE ............................................................................................................................................................................................................ 62
INTERNET EXPLORER 11 ..................................................................................................................................................................................... 62
MAIL ..................................................................................................................................................................................................................... 65
PEOPLE ................................................................................................................................................................................................................. 67
CALENDAR AND REMINDERS .............................................................................................................................................................................. 68
CAMERA ............................................................................................................................................................................................................... 69
MUSIC .................................................................................................................................................................................................................. 73
PHOTOS ................................................................................................................................................................................................................ 75
VIDEO ................................................................................................................................................................................................................... 76
SKYPE .................................................................................................................................................................................................................... 77
SKYDRIVE ............................................................................................................................................................................................................. 78
XBOX GAMES ....................................................................................................................................................................................................... 80
MAPS .................................................................................................................................................................................................................... 80
MORE BUILT-IN APPS .......................................................................................................................................................................................... 81
ADDITIONAL INFO YOU SHOULD KNOW ................................................................................................................. 82
KEEP SURFACE UP TO DATE ................................................................................................................................................................................ 82
HOW CAN I HELP PROTECT MY SURFACE FROM VIRUSES? .............................................................................................................................. 83
KEYBOARD SHORTCUTS ...................................................................................................................................................................................... 83
ACCESSIBILITY ...................................................................................................................................................................................................... 83
SPEECH RECOGNITION ........................................................................................................................................................................................ 83
TAKE A SCREEN SHOT .......................................................................................................................................................................................... 83
BITLOCKER RECOVERY KEY .................................................................................................................................................................................. 84
REFRESH SURFACE ............................................................................................................................................................................................... 84
RESET SURFACE ................................................................................................................................................................................................... 84
ACCESSORIES ................................................................................................................................................................. 85
MOBILE NETWORKING ON SURFACE 2 (4G LTE) ..................................................................................................... 87
CONNECT TO A MOBILE BROADBAND NETWORK ............................................................................................................................................. 87
DISCONNECT OR TURN OFF MOBILE BROADBAND ........................................................................................................................................... 88
THE AT&T ALLACCESS APP............................................................................................................................................................................... 88
VIEW YOUR AT&T DATA USAGE ....................................................................................................................................................................... 89
SHARE YOUR INTERNET CONNECTION .............................................................................................................................................................. 89
MOBILE BROADBAND SETTINGS ......................................................................................................................................................................... 90
HOW TO USE LESS DATA ..................................................................................................................................................................................... 91
REPLACE THE MICRO-SIM CARD ....................................................................................................................................................................... 91
CARE AND CLEANING .................................................................................................................................................. 92
TOUCHSCREEN CARE ........................................................................................................................................................................................... 92
COVER CARE ......................................................................................................................................................................................................... 92
BATTERY CARE ...................................................................................................................................................................................................... 92
© 2014 Microsoft Page v
SAFETY AND WARRANTY ..................................................................................................................................................................................... 92
HELP, SERVICE, AND SUPPORT .................................................................................................................................. 93
SURFACE HELP ..................................................................................................................................................................................................... 93
WINDOWS HELP .................................................................................................................................................................................................. 93
AT&T HELP.......................................................................................................................................................................................................... 93
APP HELP AND TROUBLESHOOTING .................................................................................................................................................................. 93
THAT’S IT! ...................................................................................................................................................................... 93
© 2014 Microsoft Page vi
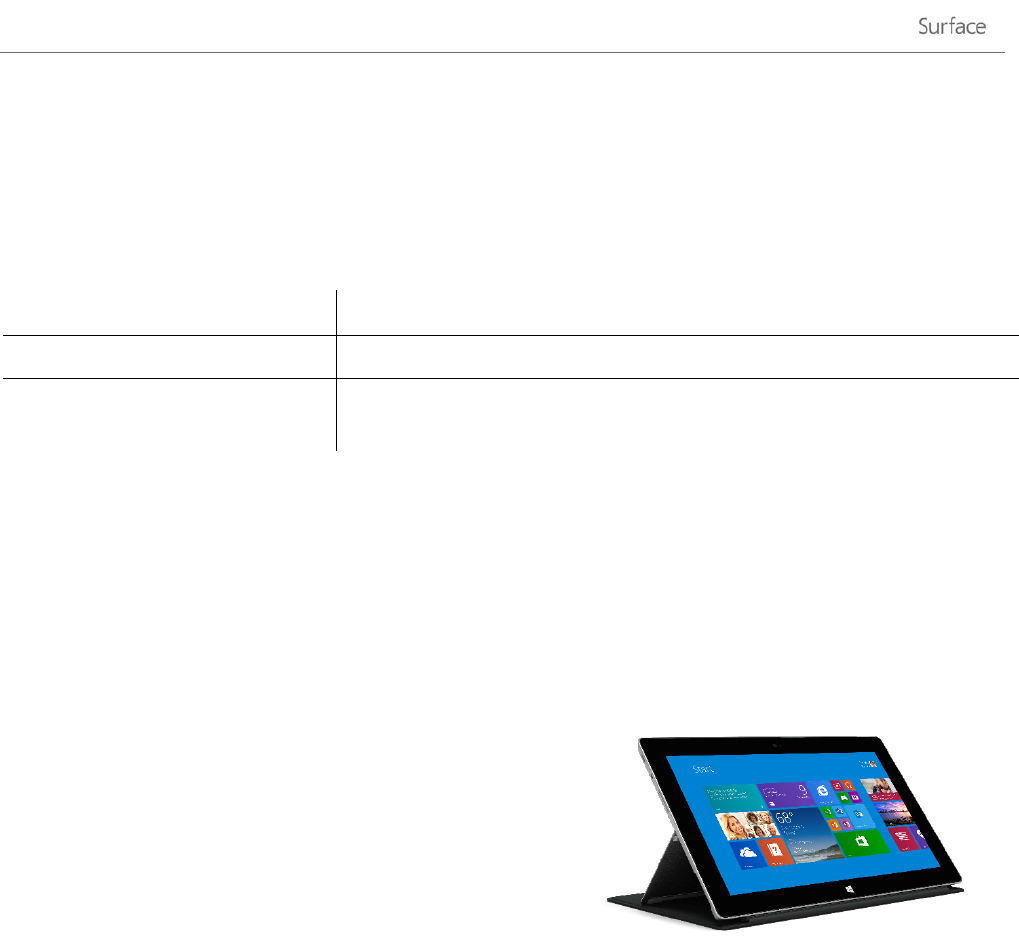
Meet Surface 2
Ultra-thin and light, Surface 2 is the on-the-go tablet.
With Xbox Music and Video, games, and Internet Explorer, you’ll never run out of ways to play.
And when it’s time to get work done, Surface 2 comes with Microsoft Office 2013 RT—Word, Excel, Outlook,
PowerPoint and OneNote apps.1
1There are some differences between Office RT and other versions of Office. For more info, see Office.com/OfficeRT.
About this guide
We hope this guide helps you get the most out of your Surface 2.
To jump to a topic (using the Reader app):
• Swipe down from the top edge of the screen, tap More ( ) > Bookmarks.
To search for a topic:
• Swipe down from the top edge of the screen, tap Find, type what you want to
find.
©2013 Microsoft Page 1
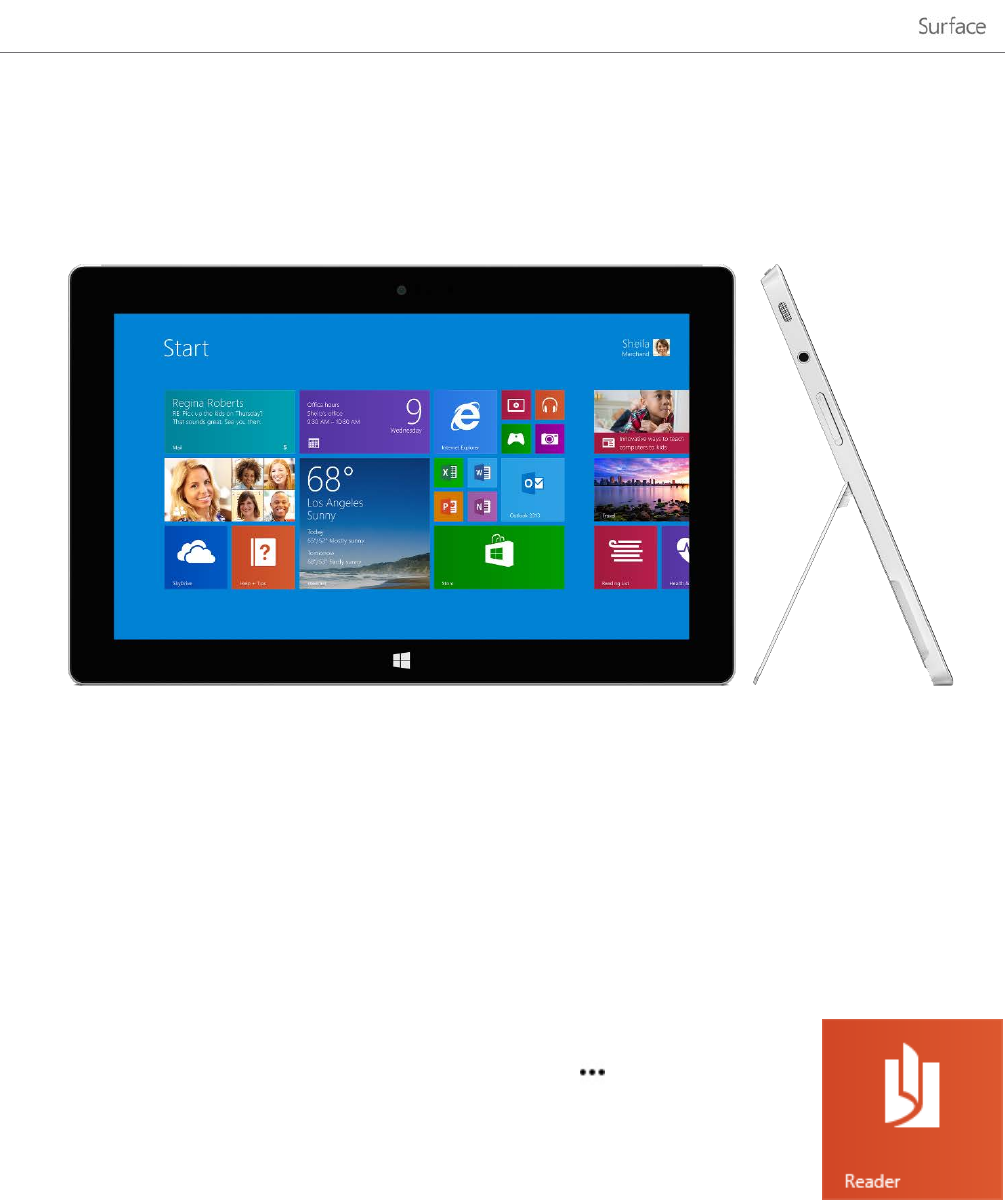
Surface 2 features
Touchscreen The 10.6” touchscreen, with its 16:9 aspect ratio and ClearType Full HD
display (1080p resolution, 1920x1080 pixels), is great for watching HD movies,
browsing the web, and using Office apps. Like a smartphone, you can browse
the web or your email using your fingers. See Touchscreen for more info.
Typing Covers Add a unique keyboard that doubles as a protective cover (Typing Covers
sold separately). This way you’ll always have a keyboard with you. See Typing
Covers for more info.
Two cameras—front and
back
The two cameras make it easy to make video calls, record videos, and take
pictures. The front-facing camera is 3.5 megapixels and the rear-facing
camera is 5.0 megapixels. The cameras record video in 1080p HD, with a 16:9
aspect ratio (widescreen). See Camera for more info.
Wi-Fi and Bluetooth Surface supports standard Wi-Fi protocols (802.11a/b/g/n) and Bluetooth®
4.0. This means you can connect to a wireless network and use Bluetooth
devices such as mice, printers, and headsets.
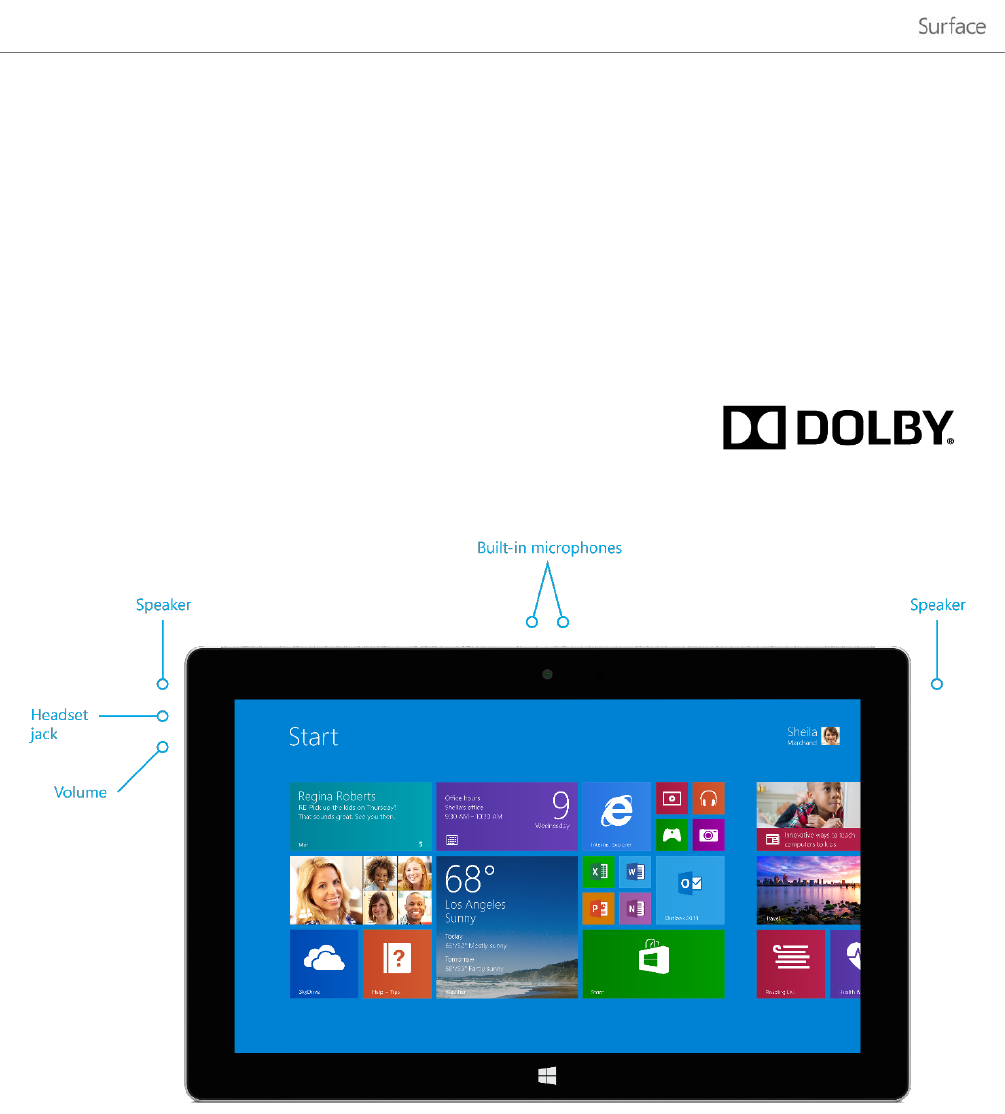
Two microphones Built-in microphones with noise cancellation come in handy when recording
videos and calling people. See Sound features for more info.
© 2014 Microsoft Page 2
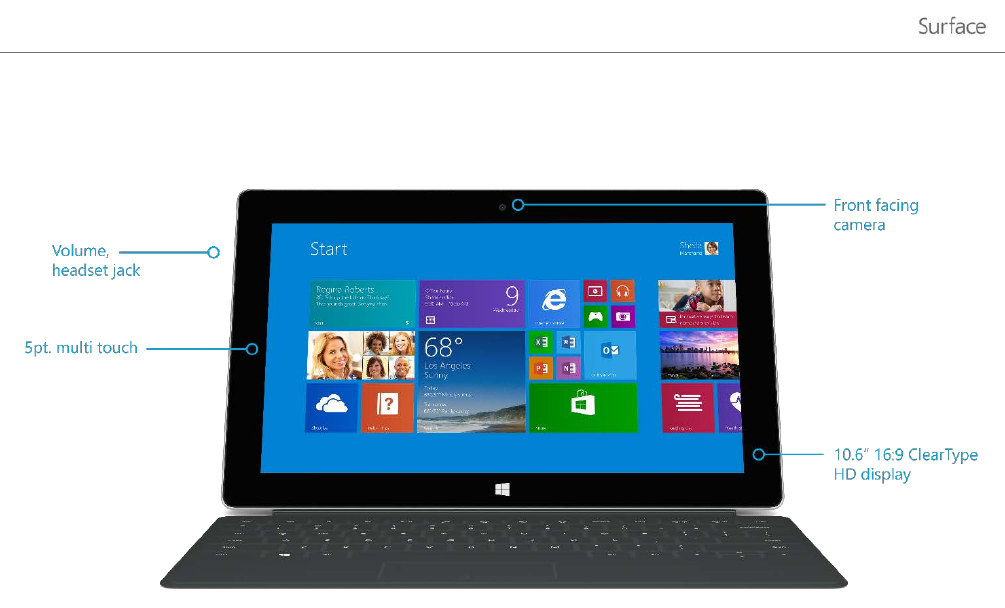
Kickstand Flip out the dual-position kickstand when you want to be productive, or when
you want to kick back and have some fun. One position is ideal for typing at a
desk, and another for typing on your lap.
Stereo speakers and headset
jack
With the two stereo speakers and headset jack, you can listen to music,
podcasts, and audio books. See Sound features for more info.
micro-SIM tray*
*Surface 2 (AT&T 4G LTE) only
Surface 2 (AT&T 4G LTE)2 has built-in mobile broadband that you can use to
connect to the Internet when a Wi-Fi network isn’t available. See Mobile
networking on Surface 2 (4G LTE) for more info.
2AT&T service activation on qualifying plan required; additional fees apply. Coverage
not available everywhere.
© 2014 Microsoft Page 3
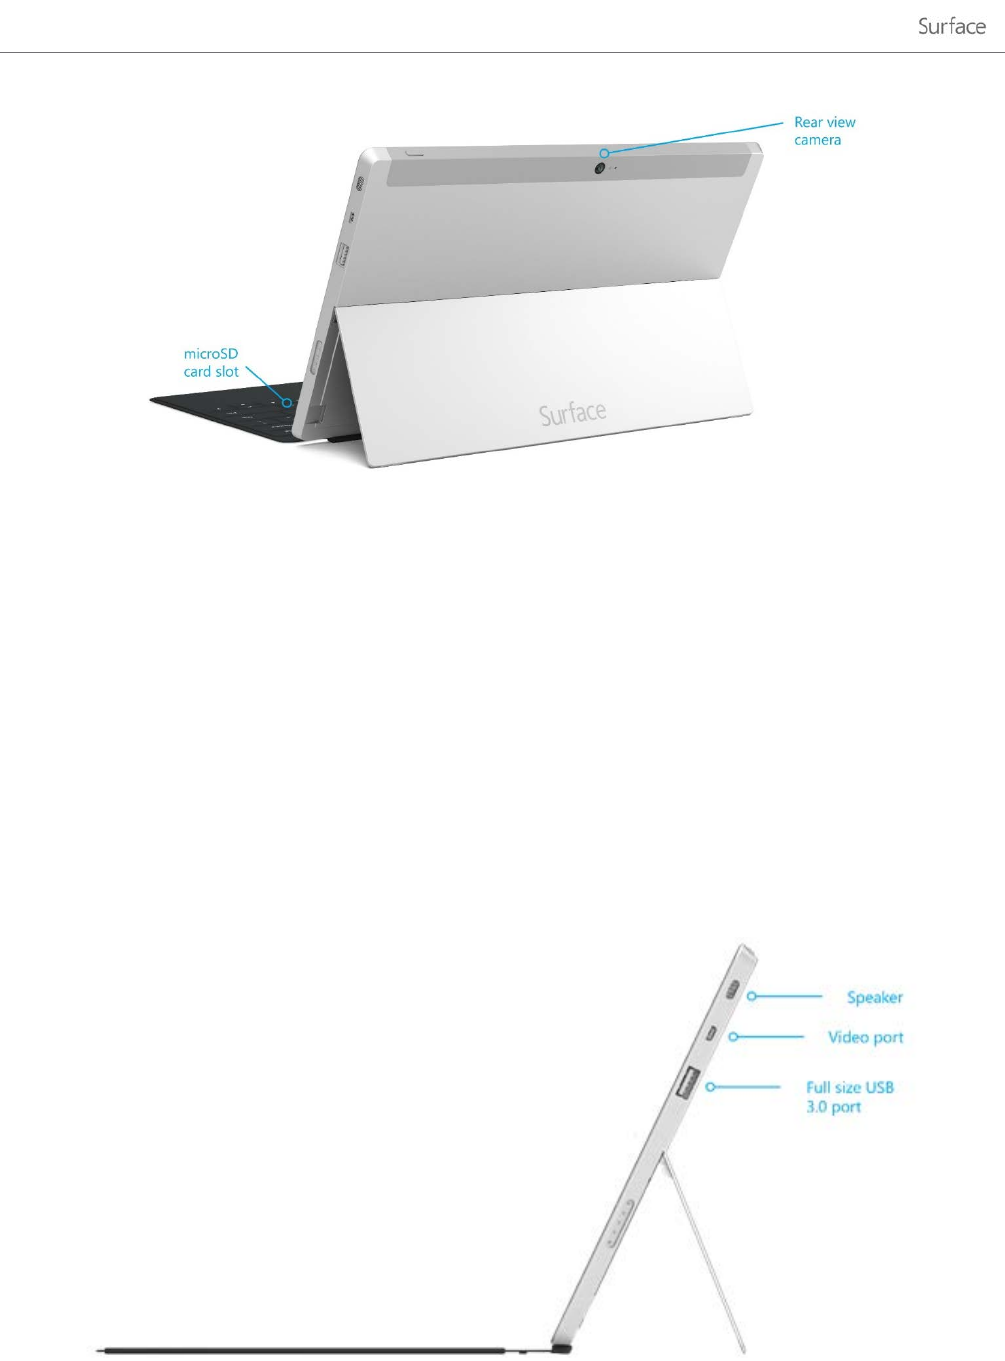
Ports
• HD video out port
Share videos, photos, or presentations by connecting Surface to an HDTV,
monitor, or projector (adapters and cables sold separately). See Connect
to a TV, monitor, or projector for more info.
• Full-size USB 3.0 port
Connect USB accessories—like a mouse, phone, or an Ethernet adapter.
See Connect devices for more info.
• microSDXC card reader
Use the microSDXC card reader (behind the kickstand) for extra storage or
transferring files. See Storage, files, and backup for more info.
• Charging port and 24-watt power supply
Connect the included power supply when your battery is low. See
Charging for more info.
© 2014 Microsoft Page 4

Software • Windows RT 8.1
Surface 2 comes pre-installed with Windows RT 8.1—a Windows-based
operating system that's optimized for thin and light PCs. Windows RT
runs built-in apps and apps from the Windows Store. To learn more, see
Windows RT 8.1: FAQ on Windows.com.
• Office 2013 RT
Word, Excel, Outlook, PowerPoint and OneNote apps are pre-installed.
See Office 2013 RT for more info.
• Apps
Surface 2 has many built-in apps—check out the tiles for them on your
Start screen. And you can install more apps from the Windows Store.
CPU and RAM Next generation NVIDIA Tegra 4 processor with 2GB RAM.
Sensors Surface has four sensors (an ambient light sensor, an accelerometer, gyroscope,
and compass) that apps can use to do cool things.
Accessories Surface accessories add to your Surface experience—check out the Accessories
section in this guide.
© 2014 Microsoft Page 5
Set up your Surface
Grab your Surface and let’s go!
Before you start… Make sure a wireless network is available and you have the network password (if the network
is secured).
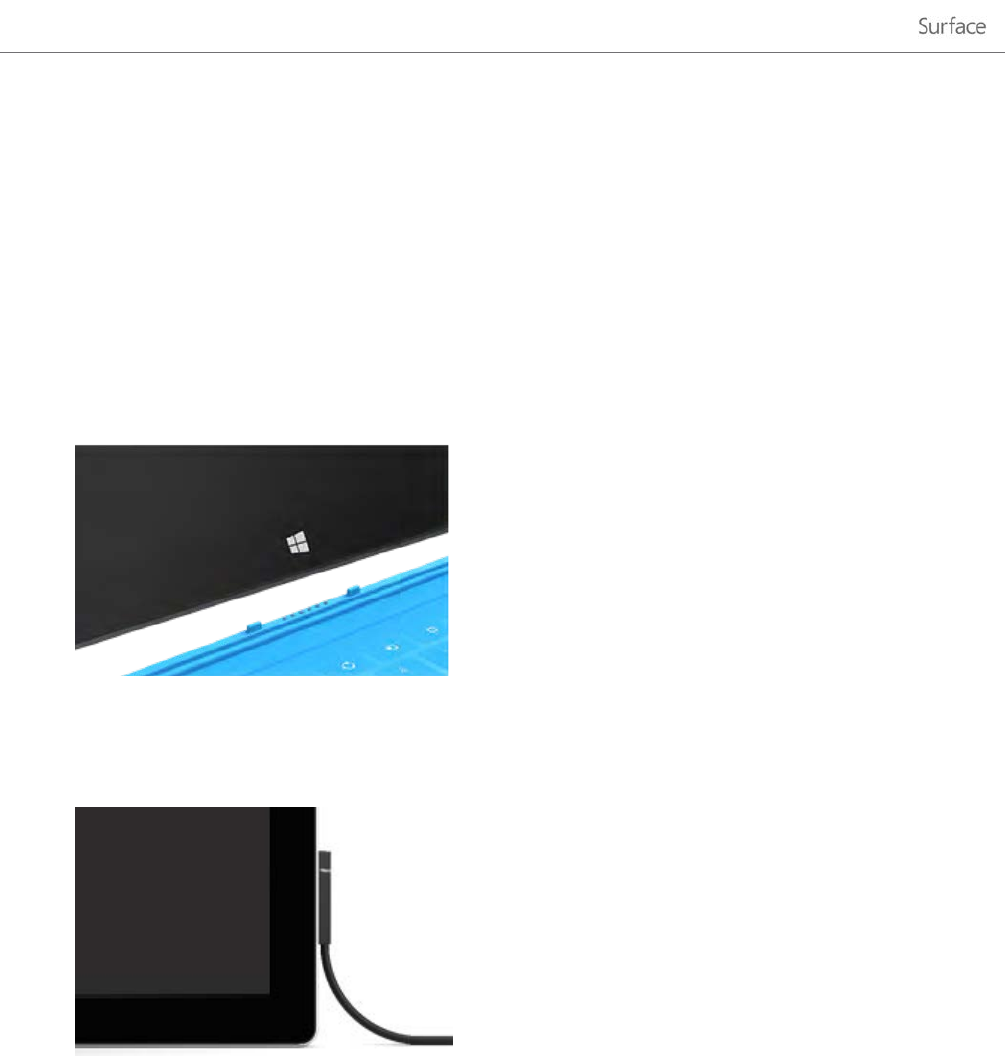
Plug in and turn on
1. If you have a Typing Cover, bring it close to your Surface, so that it clicks into place (see picture).
2. Flip out the built-in kickstand on the back of Surface (either position).
3. Plug the power cord into a wall outlet or power strip.
4. Connect the power connector to the charging port on Surface (either direction works).
The ring of light near the end of the connector means Surface is getting power.
5. Press and release the Power button (on the top right edge).
Surface turns on and setup begins.
© 2014 Microsoft Page 6

Setup
Setup runs the first time you turn on Surface. During setup you’ll choose a language, color scheme, and name for
your Surface. (You can change these things later.)
Two key things happen during setup:
• Surface connects to your Wi-Fi network. If you don’t know your wireless password, see How to find
your wireless network password on Surface.com.
Important Surface 2 (AT&T 4G LTE): Be sure to connect to a Wi-Fi network during setup (instead of
Mobile broadband). Once setup is complete, you can set up your mobile broadband connection using
the steps below.
• An account is created on Surface. For the best experience, we recommend using a Microsoft account.
You can use your existing Microsoft account or setup can create one for you.
o What is a Microsoft account? A Microsoft account is an email address and password that you’ll
use to sign in to Surface. If you’ve used Microsoft services in the past—like Xbox, Hotmail,
Outlook.com, SkyDrive, Messenger, Skype, or Windows Phone—you already have a Microsoft
account (it's the email address you use to sign in). If you don’t have a Microsoft account, setup
can create one for you using any email address. To learn about the benefits of using a Microsoft
account, see All about accounts on Surface.com.
o More than one Microsoft account? If you have more than one Microsoft account, you’ll need
to choose one for your Surface. To figure out which Microsoft account to use, see Choose a
Microsoft account on Microsoft.com (English only).
To learn more about accounts, see the Accounts and sign in section in this guide.
Got kids? Give each child their own account, so they can enjoy Surface without changing your settings or getting
into your email. For more info, see Family Safety on Windows.com.
Surface 2 (AT&T 4G LTE): Set up your mobile broadband connection
Once setup is complete, here’s how to set up your mobile broadband connection:
1. Open the Search charm (swipe in from the right edge of the screen, and then tap Settings).
2. Tap or click the network icon ( ).
3. Under Mobile broadband, choose AT&T and then Connect.
4. If prompted, choose Activate now and follow the on-screen instructions to set up your AT&T account
(you won’t be prompted if your SIM has already been activated).
For more info, see Mobile networking on Surface 2 (4G LTE) in this guide.
© 2014 Microsoft Page 7
The basics
There are a few things you need to know to get around your Surface.
Touch, keyboard, mouse, and pen
With Surface, you can easily switch between using touch, a keyboard, mouse, or pen.
• Touch. Like a smartphone, you can use your fingers on the touchscreen. For example, drag your finger
across the screen to scroll.
• Keyboard. Click in a Typing Cover or use a full-size USB or Bluetooth keyboard.
• Mouse. Use the Typing Cover touchpad, or connect a USB or Bluetooth mouse.
• Pen. Take notes, draw, and mark up documents using a capacitive pen (sold separately).
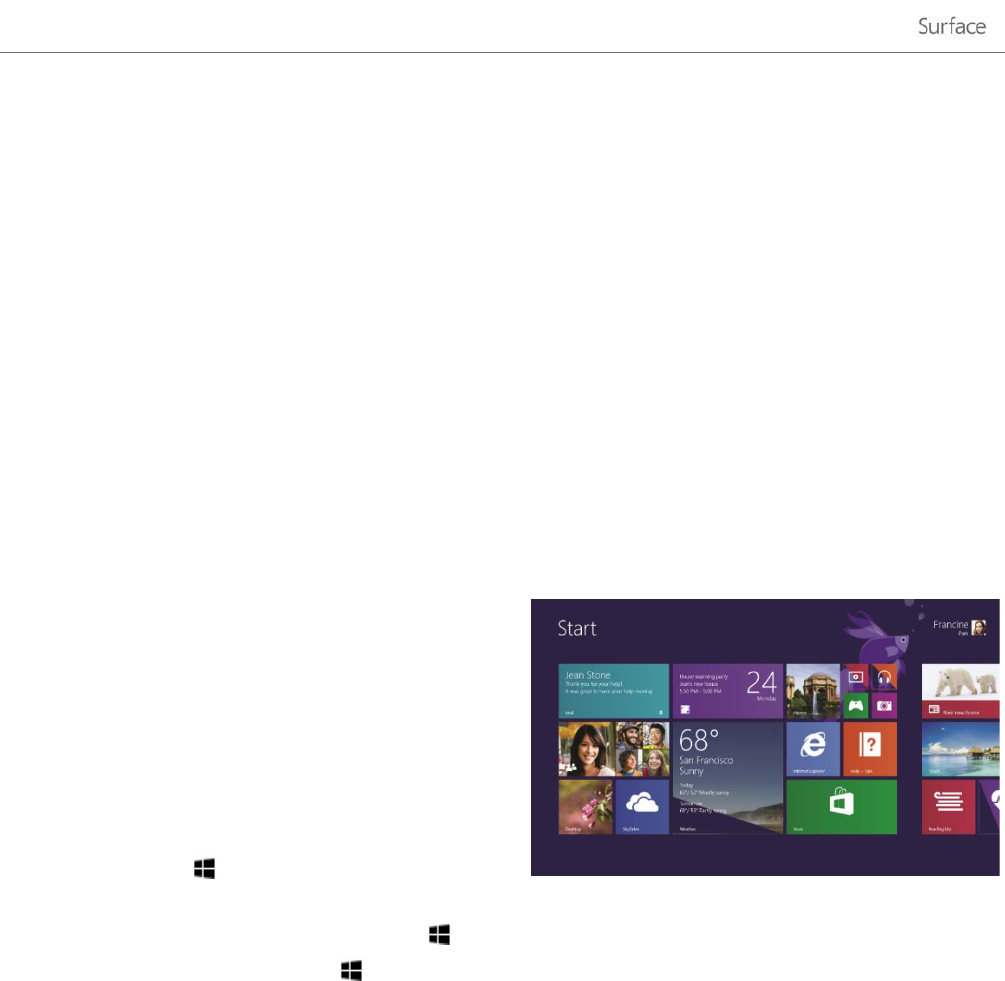
Start screen
Start is the heart of your Surface—it’s where you open
apps, see what your friends are doing, and get to your
favorite websites.
The tiles on Start show info, such as new email messages
and the next appointment on your calendar.
To go to Start:
• Touch. Press below the touchscreen, or swipe
in from the right edge of the screen and tap Start.
• Keyboard. Press the Windows logo key on your keyboard.
• Mouse. Click the Start button in the lower-left corner of the screen.
Open apps
• Touch or mouse. Tap or click an app tile on the Start screen.
• Keyboard. Go to Start and type an app name (such as Word or SkyDrive).
You can see all your apps by swiping up from the center of the Start screen.
© 2014 Microsoft Page 8
Switch between open apps
You can switch between open apps by swiping in from the left edge
of the screen. You can keep swiping, and each time you’ll switch to
another app.
More about this in the Use apps section.
App commands: Where are they?
Swipe up from the bottom edge of the screen, or down from the top
edge.
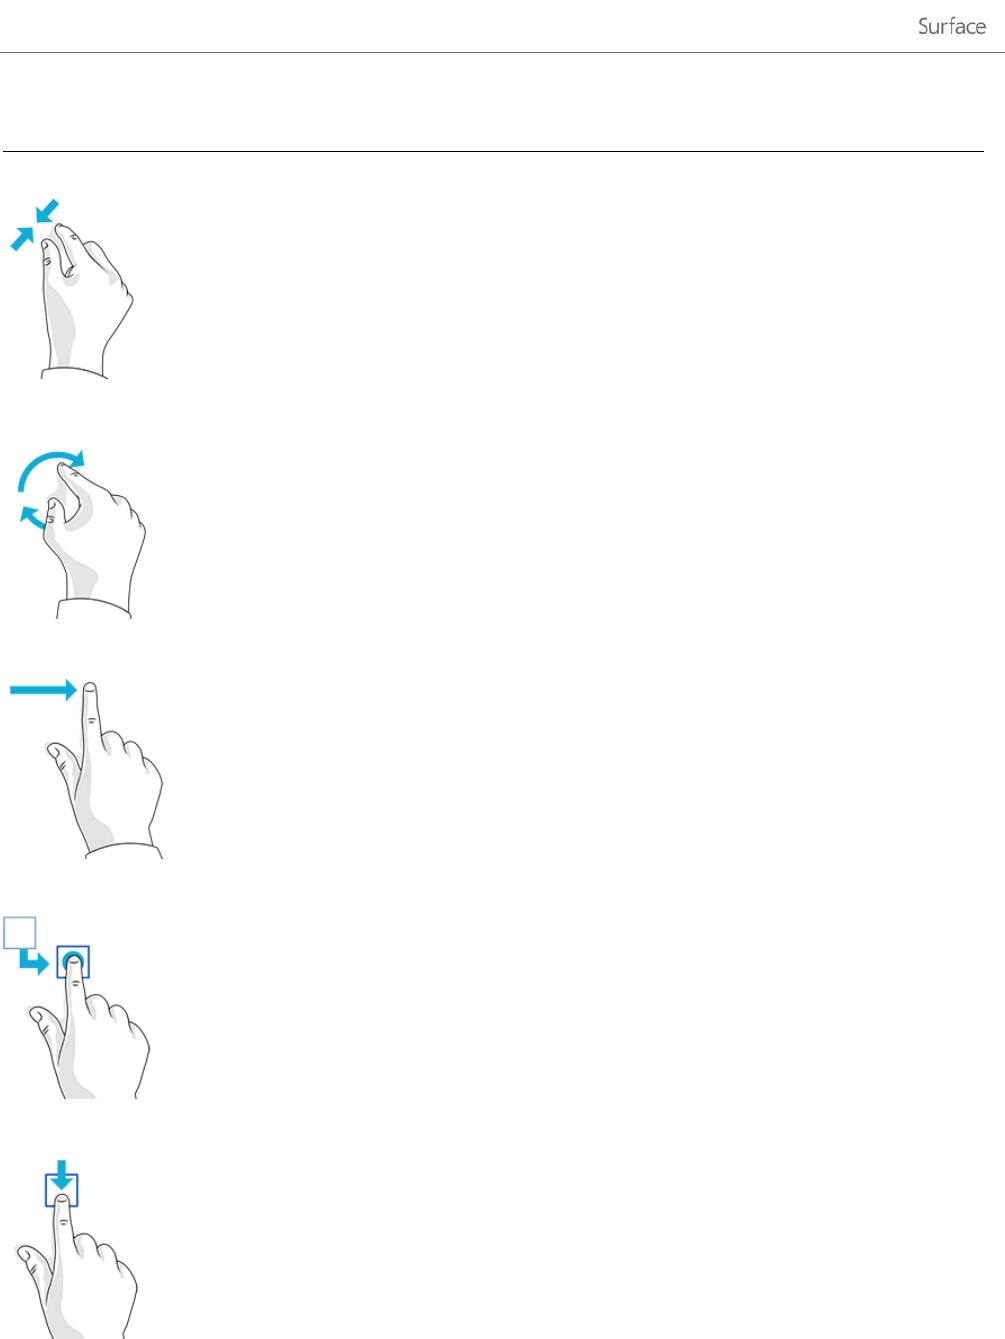
Touch: Swipe, tap, and beyond
Tap? Swipe? Here’s a glossary of touch gestures that you can use with Surface.
Gesture
How to do it
What it does
Tap
Tap
once on something.
Opens
, selects, or activates whatever you
tap.
Similar to clicking with a mouse.
Tap and hold
Press
your finger down and hold for about
a second.
Shows options related to what you’re
doing (
like right-clicking with a mouse).
© 2014 Microsoft Page 9
Gesture
How to do it
What it does
Pinch or stretch
Touch the screen or an item with two or
more fingers, and then move the fingers
toward each other (pinch) or
away from
each other (stretch).
Zooms in or out of a website, map, or
picture.
Rotate
Put two or more fingers on an item and
then turn your hand.
Rotates things that can be rotated.
Slide to scroll
Drag your finger on the screen.
Scrolls through what’s on the screen (like
scrolling with a mouse)
.
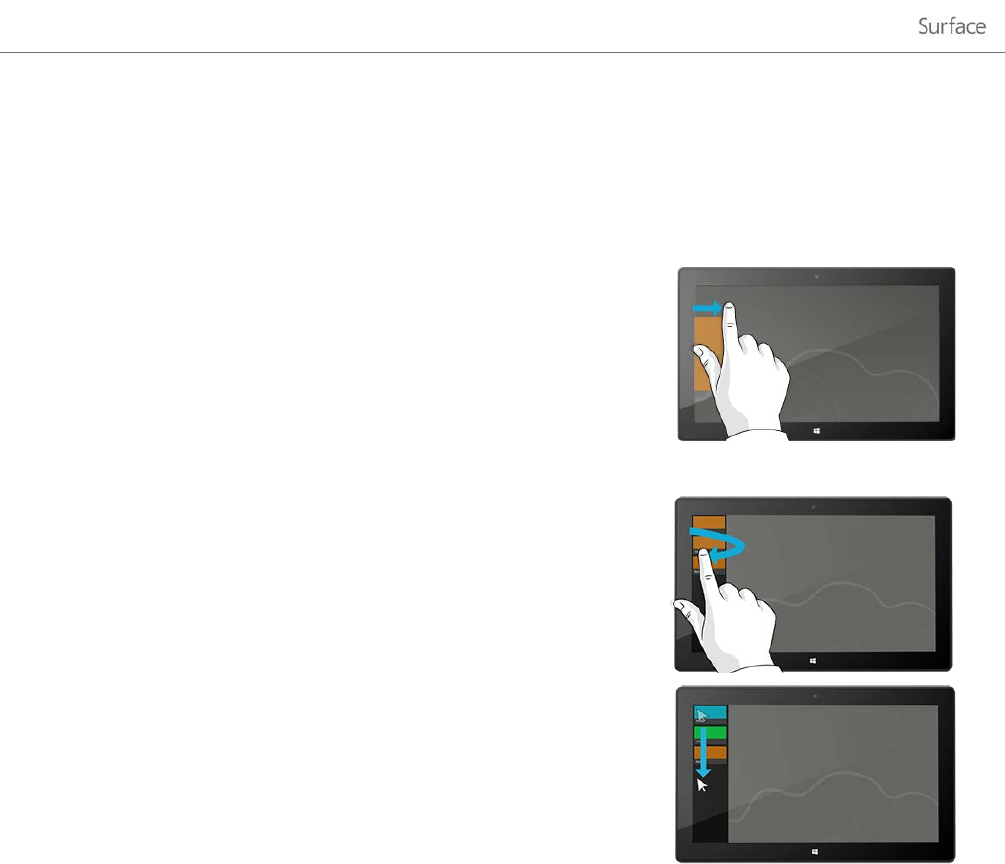
Slide to rearrange
Press and briefly drag an item in the
direction opposite
to the way the page
scrolls, then move it wherever you want.
(For example, if
the screen scrolls left or
right, drag the item
up or down.) When
you've moved the item to the new
location, let it go.
Moves an item
(like dragging with a
mouse)
.
Swipe to select
Swipe an item with a short, quick
movement in the direction opposite
to the
way the page scrolls.
(For example, if the
screen scrolls left
or right, swipe the item
up or down
to select it.)
Selects an item, like an app tile or photo.
This often brings up app commands
.
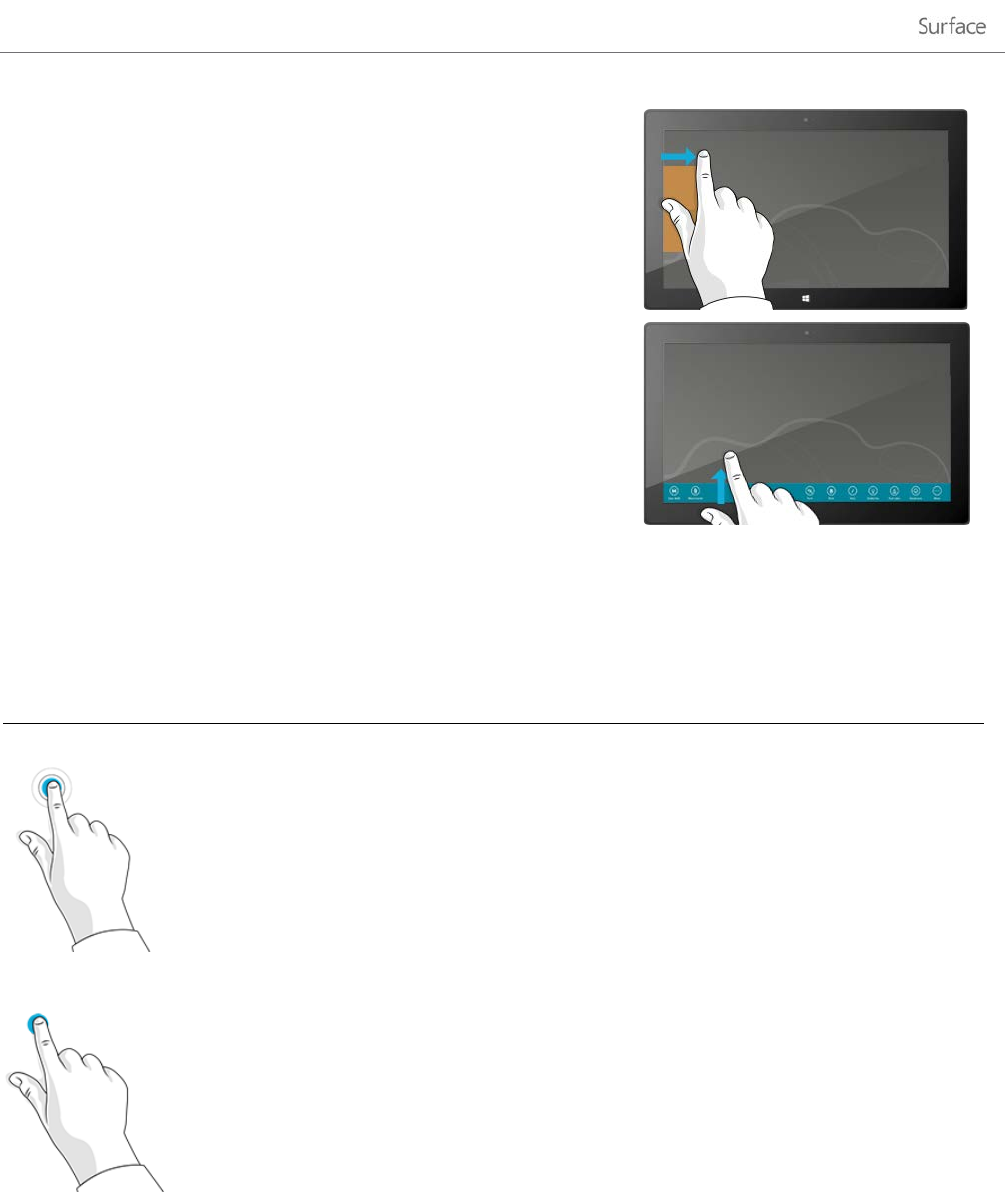
© 2014 Microsoft Page 10
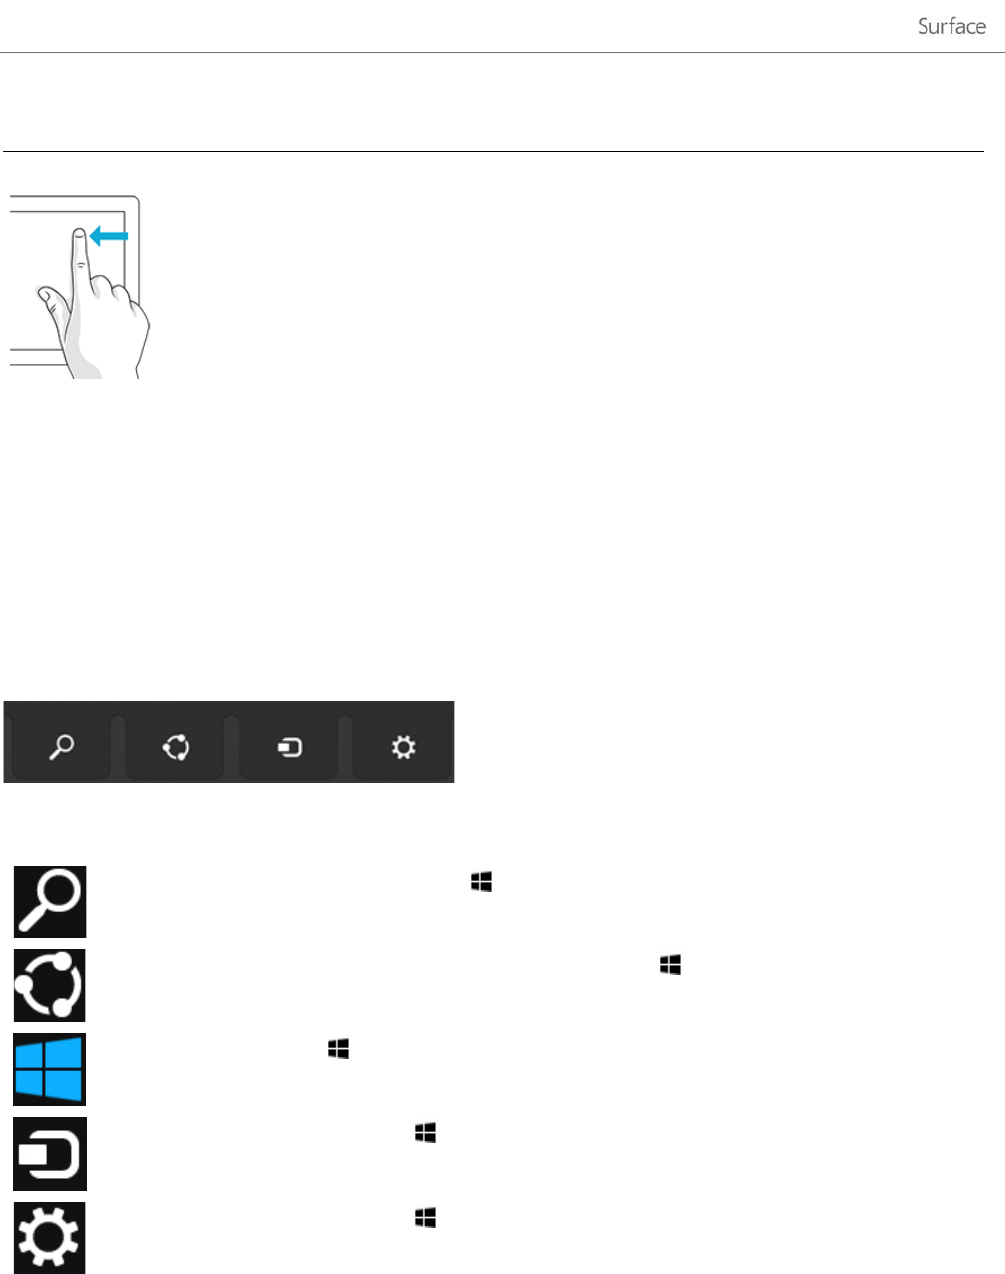
Gesture
How to do it
What it does
Swipe from edge
Starting on the edge, swipe in.
Right edge
: Opens the charms.
Left edge
: Brings in open apps, snaps
apps, shows your recently opened apps, or
closes apps.
See Use apps for more info.
Top or bottom edge
: Shows commands
or closes an app.
Charms
No matter where you are, the charms help you do the things you do most often—like search, share, print, and
change settings. Here’s how to open the charms:
• Touch. Swipe in from the right edge, and then tap the one you want.
• Mouse. Move your pointer into the upper-right or lower-right corner, and then move it up or down and
click the one you want.
• Typing Cover. Press a charm key from the top row.
Charm keys on Touch Cover
Here's what you can do with the charms:
Search. You can use the Search charm ( +S) to finds things on Surface, SkyDrive, in apps, and on
the web. For more info, see How to search in this guide.
Share. When you’re in an app, you can use the Share charm ( +H) to share files, photos, or
webpages. For more info, see Share photos, links, and more in this guide.
Start. The Start charm () takes you to the Start screen. Or if you're already on Start, it takes you
to the last app you were using.
Devices. Use the Devices charm ( +K) to play, project, and print to devices. For more info, see
Connect devices in this guide.
Settings. Use the Setting charm (+I) to change your Surface settings, or if you’re in an app, you
can get to settings for that app. For more info, see Change your settings in this guide.
© 2014 Microsoft Page 11
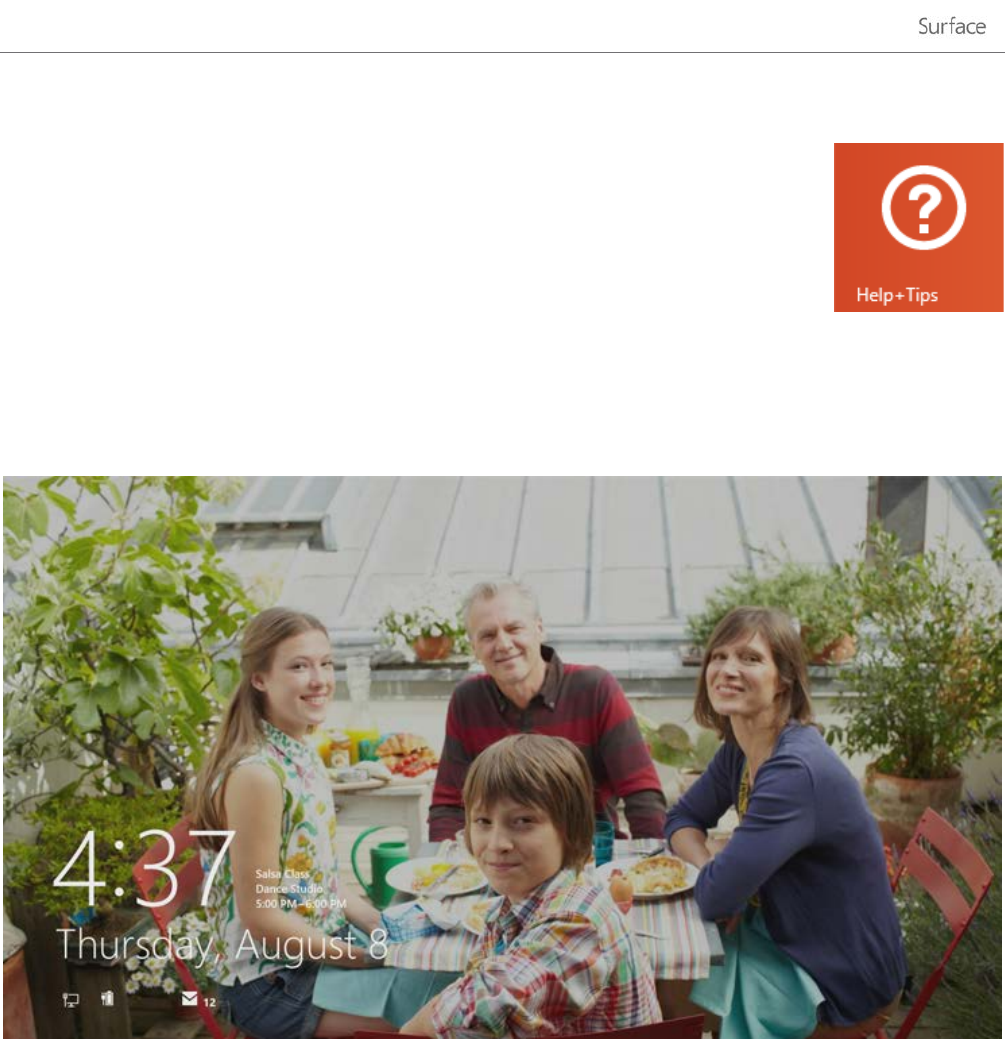
Learn more about Windows
To learn more about getting around Windows RT 8.1, check out these resources:
• Help and Tips: From the Start screen, tap or click Help+Tips. This app has info to
help you get up to speed on Windows.
• Windows Basics and Tips: See the Getting started tutorials on Windows.com.
Lock screen and signing in
With a Microsoft account, personal settings like your lock screen and Start screen can follow you to other
devices. Your favorite websites, browser history, and pinned sites on your Start screen move with you, as well.
If you don’t use Surface for a few minutes, the screen turns off and locks. When this happens, press a key (or
press and release the Power button), then swipe up on the touch screen.
Next, sign in to your account by typing your password.
Now, let’s set up your email and other accounts.
© 2014 Microsoft Page 12
Get started
Now that you know the basics, let’s get online and add your accounts.
Get online
Here’s how to get online:
1. Open the Settings charm (swipe in from the right edge of the screen, and then tap Settings).
2. Tap or click the wireless network icon ( ).
3. Under Wi-Fi, tap or click the network you want to connect to, and then tap or click Connect.
For more info about getting online, see Networking in this guide.
Surface 2 (AT&T 4G LTE): If a Wi-Fi network isn’t available, you can connect to the AT&T mobile network. For
info on how to do this the first time, see Set up your mobile broadband connection.
Set up your email
Now let’s set up your email. Outlook RT and Mail are both pre-installed, so you can add your email accounts to
either or both of these apps.
Outlook RT: Add your email accounts
You can add Outlook.com, Gmail, AOL, Yahoo!, and Exchange email accounts to Outlook (or any email account
that uses POP or IMAP). Here’s how:
1. Tap or click Outlook 2013 from the Start screen. Account setup starts the first time you start Outlook.
If the Auto Account Setup dialog doesn’t appear, tap or click File and then choose Add Account (just
above Account Settings).
2. Type your name, email address, and password, and then choose Next.
Outlook searches online to find your email server settings. If Outlook doesn’t find the settings, see Set up email
in Outlook on Office.com.
Mail: Add your email accounts
You can add Outlook.com, Gmail, AOL, Yahoo!, and Exchange email accounts to the Mail app.
Note The Mail app doesn’t support accounts that use POP (Post Office Protocol). If you have a POP
email account, you can use Outlook RT (see above) or see Using email accounts over POP on
Windows.com.
© 2014 Microsoft Page 13
Here’s how to add your email accounts:
1. Tap or click Mail from the Start screen.
2. Open the Settings charm, then tap or click Accounts > Add an account.
3. Choose the type of account you want to add, and then follow the on-screen instructions.
Most accounts can be added with only your user name and password. In some cases, you’ll be asked for
more details, which you can usually find on your email account provider’s website. (Repeat steps 1-3 for
each of your email accounts.)
After you add an email account…
• Your contacts from Outlook.com and Exchange accounts are automatically added to the People app, and
your appointments appear in the Calendar app. For other accounts, see People: Add contacts below.
• For info on how to sync Google email, contacts, and calendar, see How to sync Google services on
Windows.com.
Microsoft Exchange: To find out how to set up and troubleshoot a Microsoft Exchange account, see How to
configure an Exchange account.
People: Add contacts
The People app is your universal address book. See contacts from all of your address books in one
place, and get the latest updates from your friends. Also, sync contacts from the social networks you
care about, like Facebook, LinkedIn, and Twitter. Get in touch with someone by sending email, calling,
or posting to social media directly from the People app.
Here's how to add contacts from your accounts:
1. Tap or click People from the Start screen.
2. Open the Settings charm, tap or click Accounts > Add an account.
3. Choose the type of account you want to add and then follow the instructions.
For more info, see People in this guide.
© 2014 Microsoft Page 14
Skype: Add contacts
With Skype calls and chat, you can stay in touch with anyone, on almost any device, for free. Once
you’ve added your friends, you can make Skype calls and send instant messages.
Here's how to get started using Skype:
1. On the Start screen, tap or click Skype.
2. Sign in with your Microsoft account and your Messenger friends will be automatically added to your
existing list of contacts. If you already have a Skype account, you can merge it with your Microsoft
account by following the on-screen instructions.
3. Add your contacts. To find out how, see Skype on Surface on Surface.com.
Included with your Surface 2 purchase: One year of free voice calling to landlines in over 60 countries, and free
Skype WiFi at over 2 million hotspots worldwide. To activate your free Skype experience, use the code included in
your Surface 2 packaging. Offer details.
SkyDrive: Your personal cloud
SkyDrive is online storage that comes with your Microsoft account. It’s like an extra hard drive that’s
available from any of the devices you use. When you save your documents, photos, and other files on
SkyDrive, they're available from any web-connected device (for example, your phone or computer).
SkyDrive is also a great way to share files with other people.
Included with your Surface 2 purchase: 200GB of free SkyDrive storage, for two years. To activate your free
SkyDrive storage, just use the code included in your Surface 2 packaging. Offer details.
To learn more, see SkyDrive in this guide.
Make it yours
You can make Surface reflect who you are and what you care about. You can rearrange the Start screen however
you like, and choose the colors and pictures that reflect your personal style. For info about this, see the
Personalize Surface section in this guide.
© 2014 Microsoft Page 15
Get to know Surface 2
Now that you’ve added your accounts, let’s go a little deeper.
Power states: On, off, standby, and restart
Here’s a quick overview of the Surface power states:
State
What to do
On
Press and release the Power button (you’ll feel a vibration).
If nothing happens, Surface might need to be recharged. Connect the power supply
and then press the Power button again.
Wake
Do any of the following:
• Press and release the Power button.
• Open the Cover.
• Press a key or the Windows logo on Surface.
Off (Shut down)
Press and hold the Power button for 2 seconds, then swipe down on the screen. Or
open the Settings charm, tap or click Power > Shut down.
Standby
Close the Cover, press and release the Power button, or don’t use Surface for a few
minutes.
Restart
Open the Settings charm, tap or click Power > Restart.
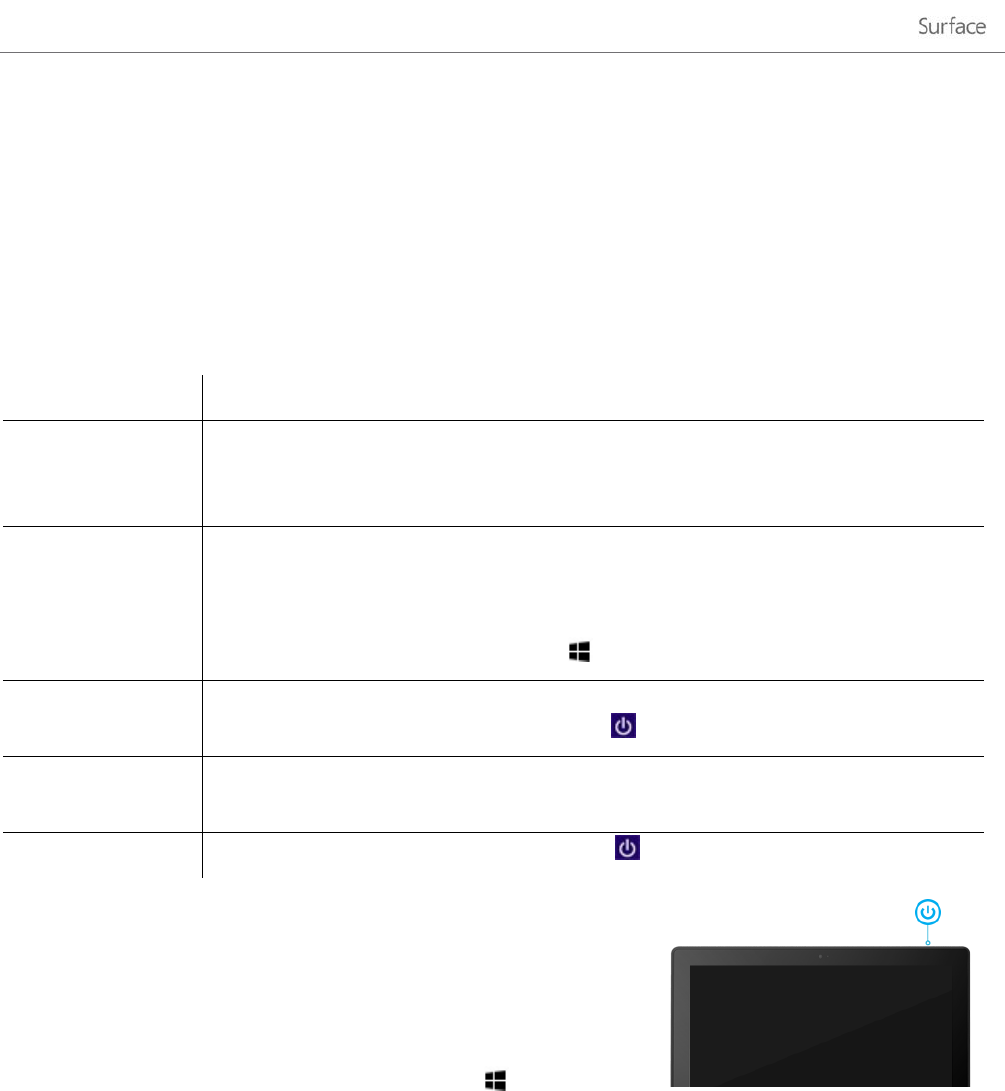
Turn on or wake
1. Do any of the following things:
• On/Wake: Press and release the Power button.
• Wake: Open the Cover.
• Wake: Press a key or the Windows logo on Surface.
The lock screen appears with app notifications. For more info, see Notifications in this guide.
2. To unlock Surface, swipe up from the bottom of the screen or press a key.
3. Sign in to Surface. Need help? See the Accounts and sign in section in this guide.
Tip
• You can set the amount of time before a password is needed to unlock your Surface. For more info, see
Choose when a password is required in this guide.
© 2014 Microsoft Page 16
Standby
If you don’t use Surface for a few minutes the screen turns off and locks, just like a smartphone. When this
happens, Surface goes into a standby mode called InstantGo. While Surface is in standby, it stays connected to
your wireless network. This way you can get app notifications (such as an incoming Skype call) and you can turn
on Surface in an instant.
Choose when the screen turns off
By default, the Surface screen turns off after a few minutes of inactivity. Here’s how to change this:
1. Open the Settings charm, then tap or click Change PC Settings > PC and devices > Power and sleep.
2. Under Sleep, choose when you want Surface to go to sleep (on battery and when plugged in).
Charging
Surface 2 has an internal lithium-ion battery with up to 10 hours of
active-use battery life on a single charge.
At the end of your day or when the battery is low, use the included 24-
watt power supply to charge your Surface. Here’s how:
1. Plug the power cord into an electrical outlet or power strip.
2. Connect the power connector to the charging port on Surface
(either direction is good).
A ring of light near the end of the connector means Surface is getting power.
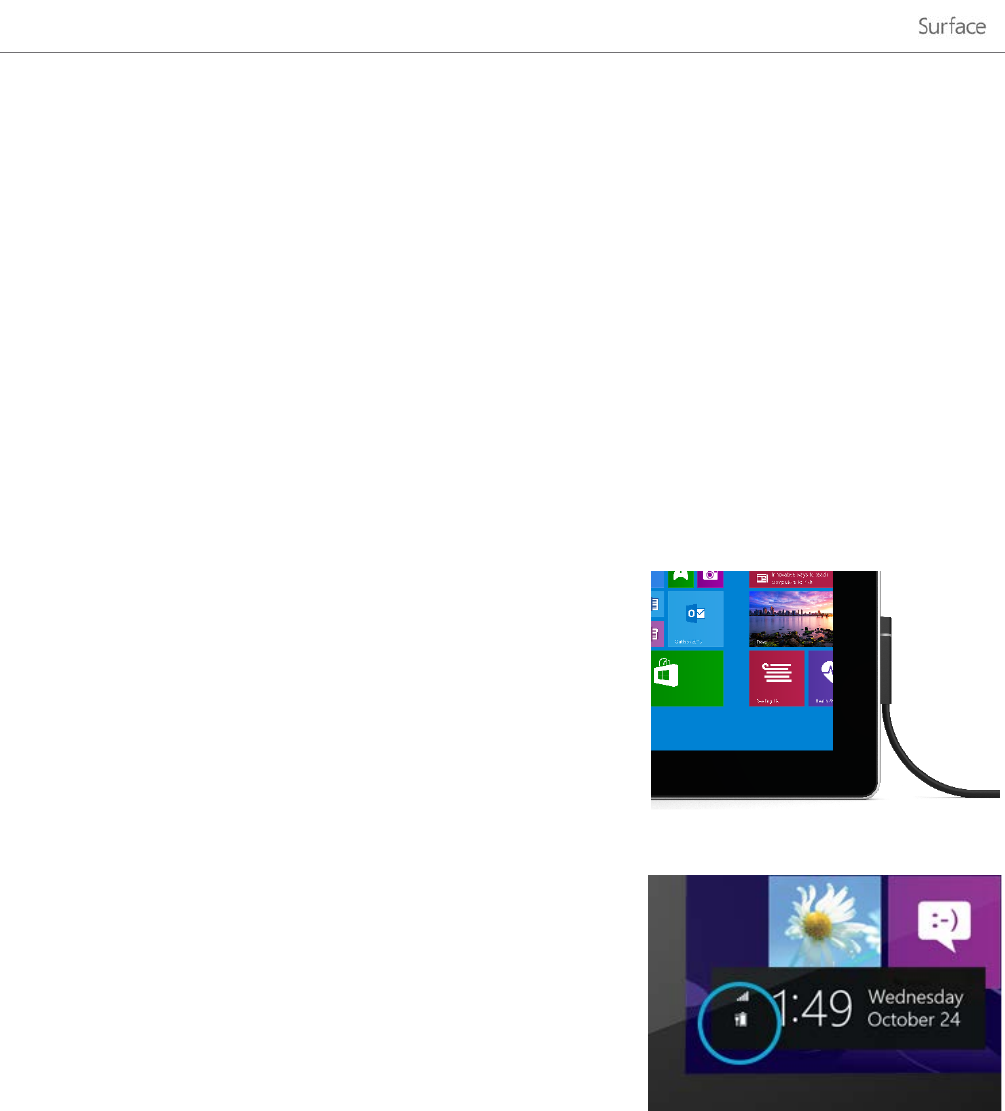
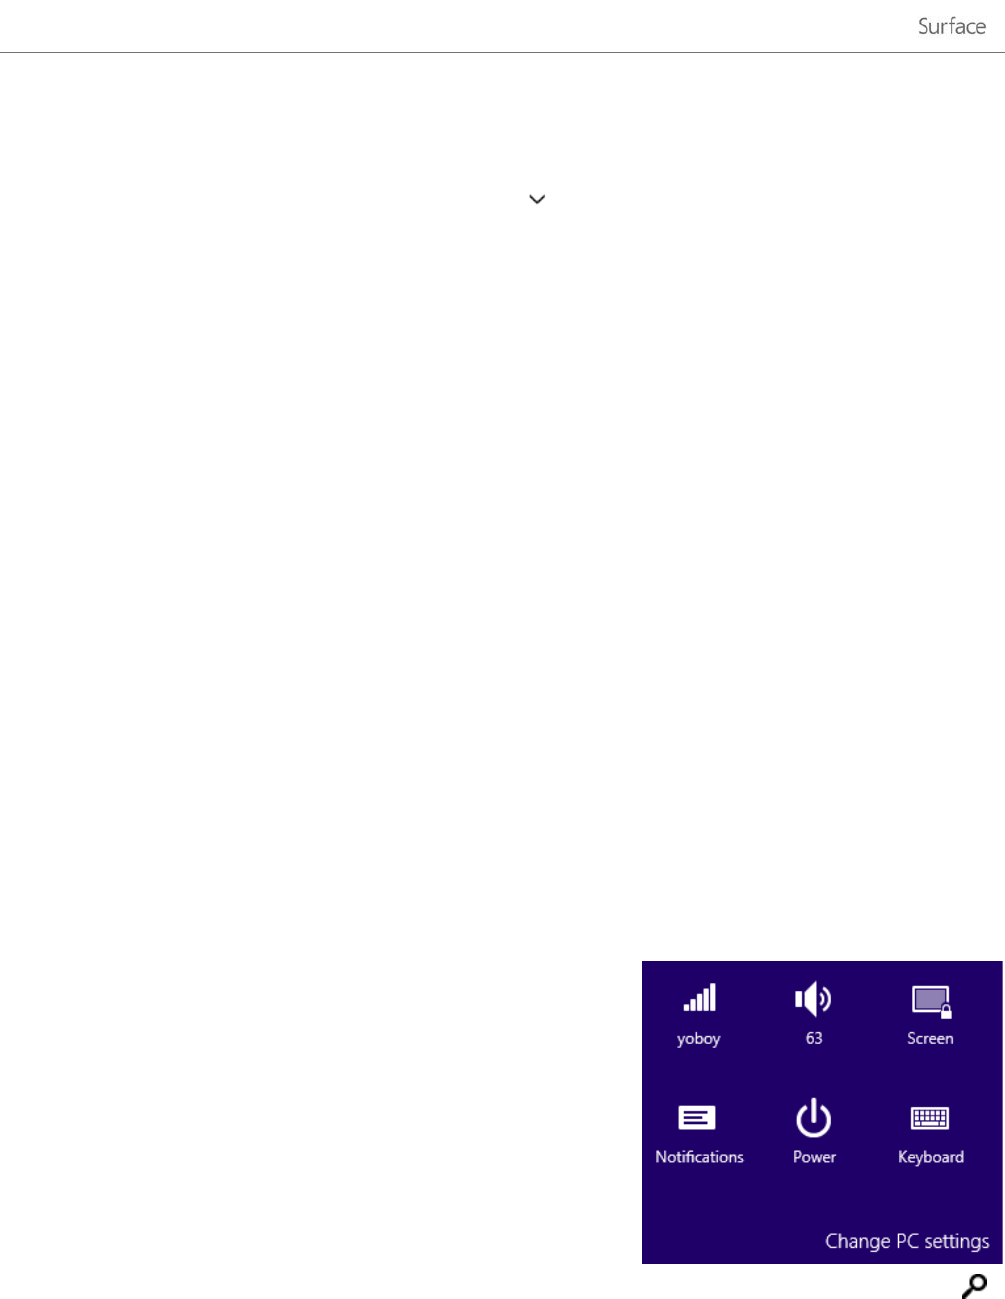
How much battery charge is remaining?
You can see the battery status in a few places:
• Charms. Lower-left corner after you open the charms (see
picture).
• Lock screen. Lower-left corner of the lock screen.
• Desktop taskbar. Battery status appears on the desktop
taskbar. Tap the battery icon to see the percentage remaining.
When you see a low battery warning, plug your Surface into an electrical outlet. If you don’t recharge the battery,
Surface will eventually save your work and shut down.
Notes
• It takes 2-3 hours to fully charge your Surface battery from an empty state.
• Surface can’t be charged through the USB port. Instead, you need to use the included power supply or
the Surface Car Charger.
© 2014 Microsoft Page 17
Advanced power settings
A power plan is a collection of settings that control how your Surface uses power. To find out how to customize
or create a power plan, see Power Plans: Frequently asked questions on Windows.com (Surface 2 supports
InstantGo).
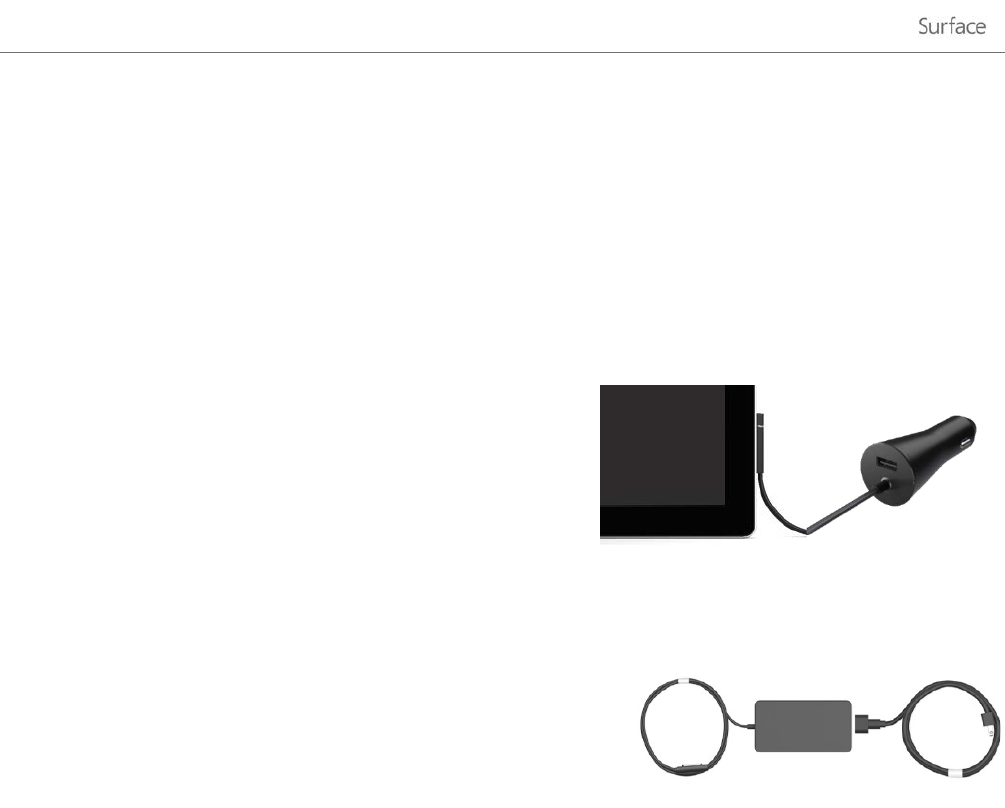
Charging accessories
There are a couple of additional charging options that you can purchase separately (see Power Supply on
Surface.com for purchase info).
Car Charger with USB charging port
You can use the Car Charger to charge Surface and another USB
device (such as your phone), while you’re traveling in your car.
To charge Surface using the Car Charger:
1. Plug the Car Charger into the vehicle power port or cigarette lighter in your car.
2. Connect the power connector to the charging port on Surface.
48W power supply with USB charging port
While this power supply doesn’t charge Surface 2 any faster than the
included 24-watt power supply, you can charge a cell phone or other
USB device while you’re charging Surface. (The 48-watt power supply
is not available in all regions.)
The touchscreen
The multi-touch screen has a 16:9 aspect ratio—perfect for watching 1080p HD videos and optimized for multi-
tasking with side-by-side apps.
Like a smartphone, you can interact with Surface by touching the screen. To learn about using touch, see Touch:
Swipe, tap, and beyond in this guide.
Manually adjust screen brightness
• Open the Settings charm, tap or click Screen, and then move the slider to adjust the brightness.
Automatically adjust screen brightness
• Open the Settings charm, tap or click Change PC Settings > PC and devices > Power and sleep >
Adjust my screen brightness automatically.
© 2014 Microsoft Page 18
Choose when the screen turns off
If you don’t use Surface for five minutes, the screen turns off. If you want to change this setting, see Choose
when the screen turns off in this guide.
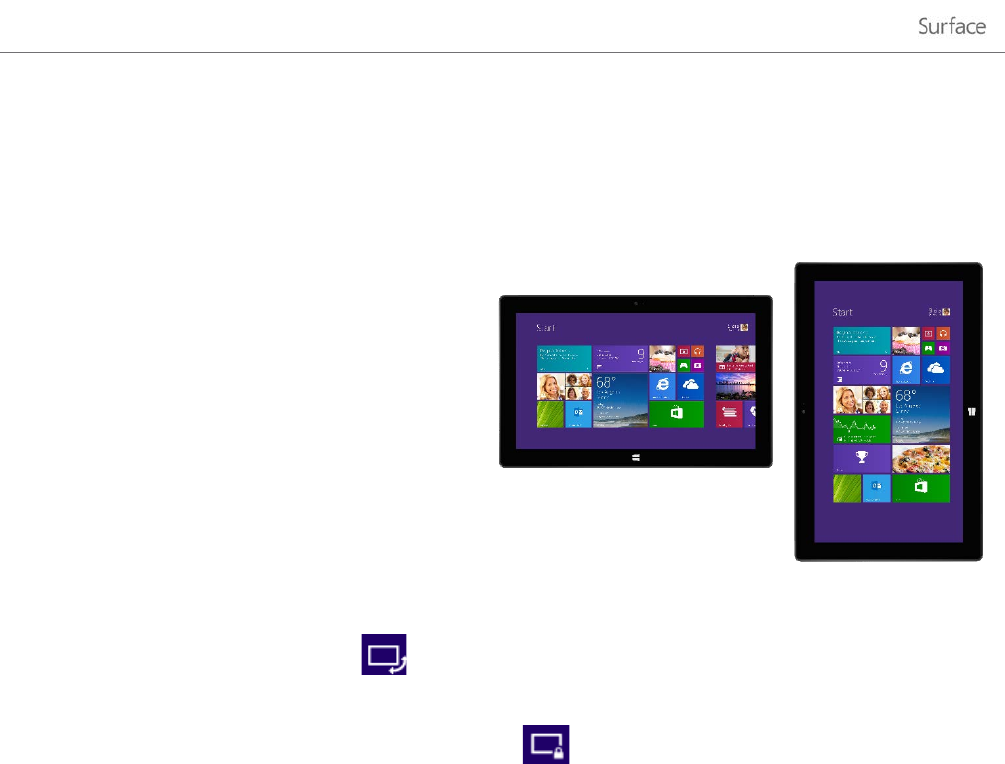
Landscape or portrait
When you rotate Surface, the screen content
changes to the new orientation. This way you can
use landscape for webpages and Office apps, and
portrait for reading a book.
Lock the screen orientation
If you don’t want the screen content to rotate, you
can lock the screen orientation. Here’s how:
1. Rotate Surface the way you want it.
2. Open the Settings charm, and then tap or click Screen.
3. Tap the Screen rotation icon.
(If this doesn’t work, remove or fold back the Typing Cover and try the steps again.)
A lock appears on the Screen icon when rotation is locked.
Find more display settings
• Open the Settings charm, tap or click Change PC Settings > PC and devices > Display.
You can also use search to find more display settings. For info about this, see Search for a setting in this guide.
Copy and paste using touch
Here’s how to copy and paste text using touch:
1. Select text. Tap a word, then drag either circle to extend the text selection.
2. Copy. Press and hold the selection for a couple seconds, and then let go and tap Copy.
3. Paste. Move to where you want to paste the text. Press and hold a couple seconds, then let go and tap
Paste.
© 2014 Microsoft Page 19
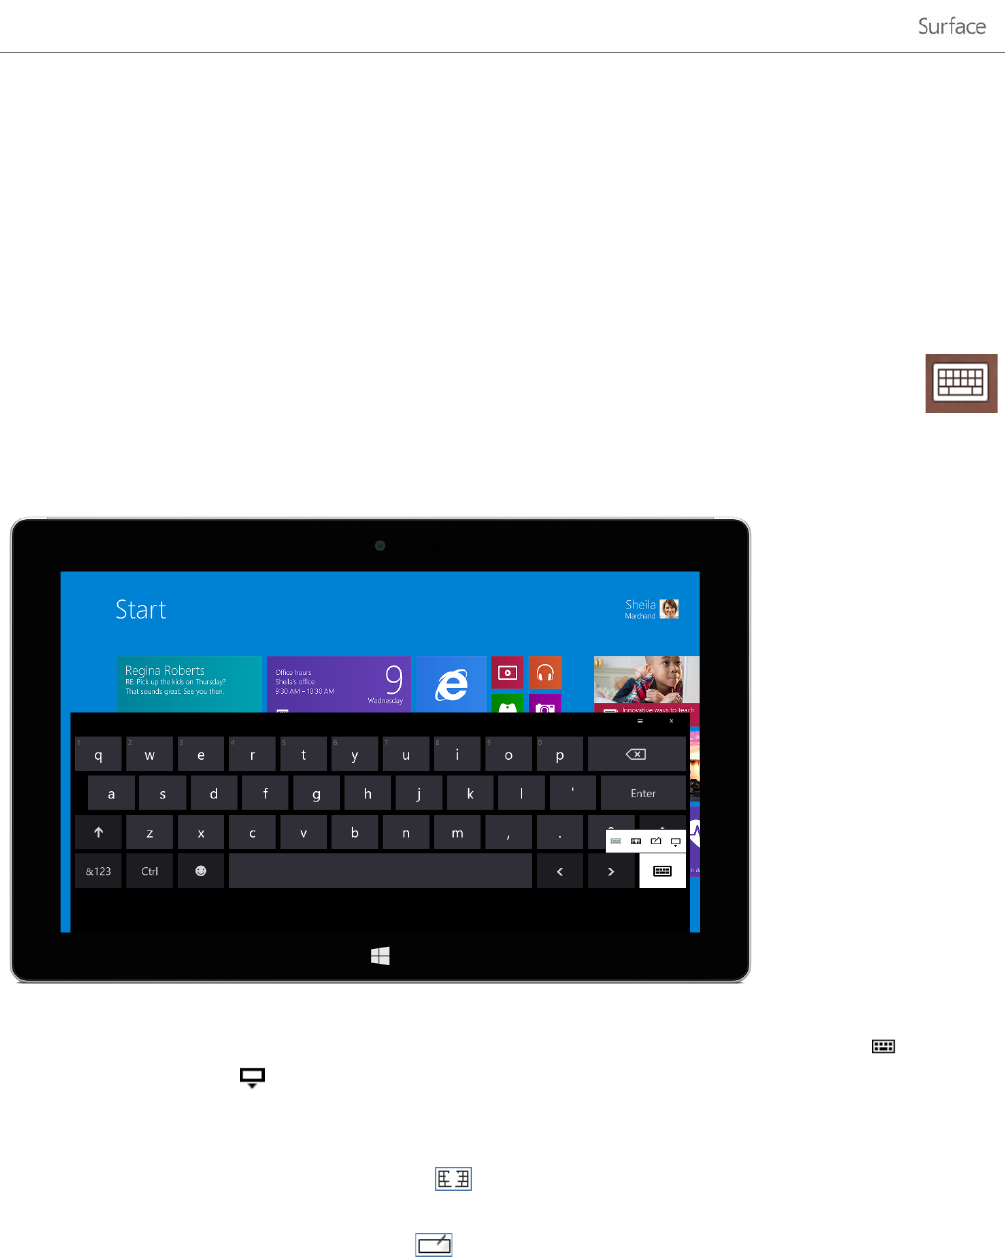
On-screen keyboard
Surface has an on-screen, touch keyboard that appears when you need it.
Show the on-screen keyboard
1. Fold back the Cover or remove it.
2. Tap the screen in a place where text can be entered and the on-screen keyboard should appear.
If you're in the desktop, tap the keyboard icon on the desktop taskbar (lower-right corner) to open the
on-screen keyboard.
To manually open the on-screen keyboard (without tapping an area where you can type):
• Open the Settings charm, tap or click Keyboard > Touch keyboard and handwriting panel.
On-screen keyboard on Surface
To close the on-screen keyboard: Tap an area where text can’t be typed or tap the keyboard button , and then
the close keyboard button .
Thumb keyboard and handwriting options
• Thumb keyboard. The thumb keyboard makes it easy to type with your thumbs while holding
Surface in both hands.
• Handwriting. The handwriting option lets you write with a capacitive pen or your finger.
© 2014 Microsoft Page 20

Suggestions and corrections
As you type on the on-screen keyboard, suggestions appear above the keyboard. For more info, see Suggestions
and corrections later in this guide.
Change on-screen keyboard settings
• Open the Settings charm, tap or click Change PC settings > PC and devices > Typing > Touch
keyboard.
Tips and tricks
How do I?
What to do
Type numbers
Tap the &123 key, or swipe up on a key in the first row. For example, swipe up
on the Q key to type the number 1.
Type diacritical marks
Press and hold a key such as O, then slide your finger to the accented character
that you want (for example, Ӧ).
Use keyboard shortcuts
Tap the Ctrl key and then another key (for example, Ctrl+C for Copy).
Turn Caps Lock on/off
Double-tap the Up Arrow key.
Change keyboard settings
Open the Settings charm, tap or click Change PC settings > PC and devices >
Typing.
Turn key sounds on/off
Open the Settings charm, tap or click Change PC settings > PC and devices >
Typing > Play key sounds as I type (under Touch Keyboard).
Add a language
See Add a language in this guide.
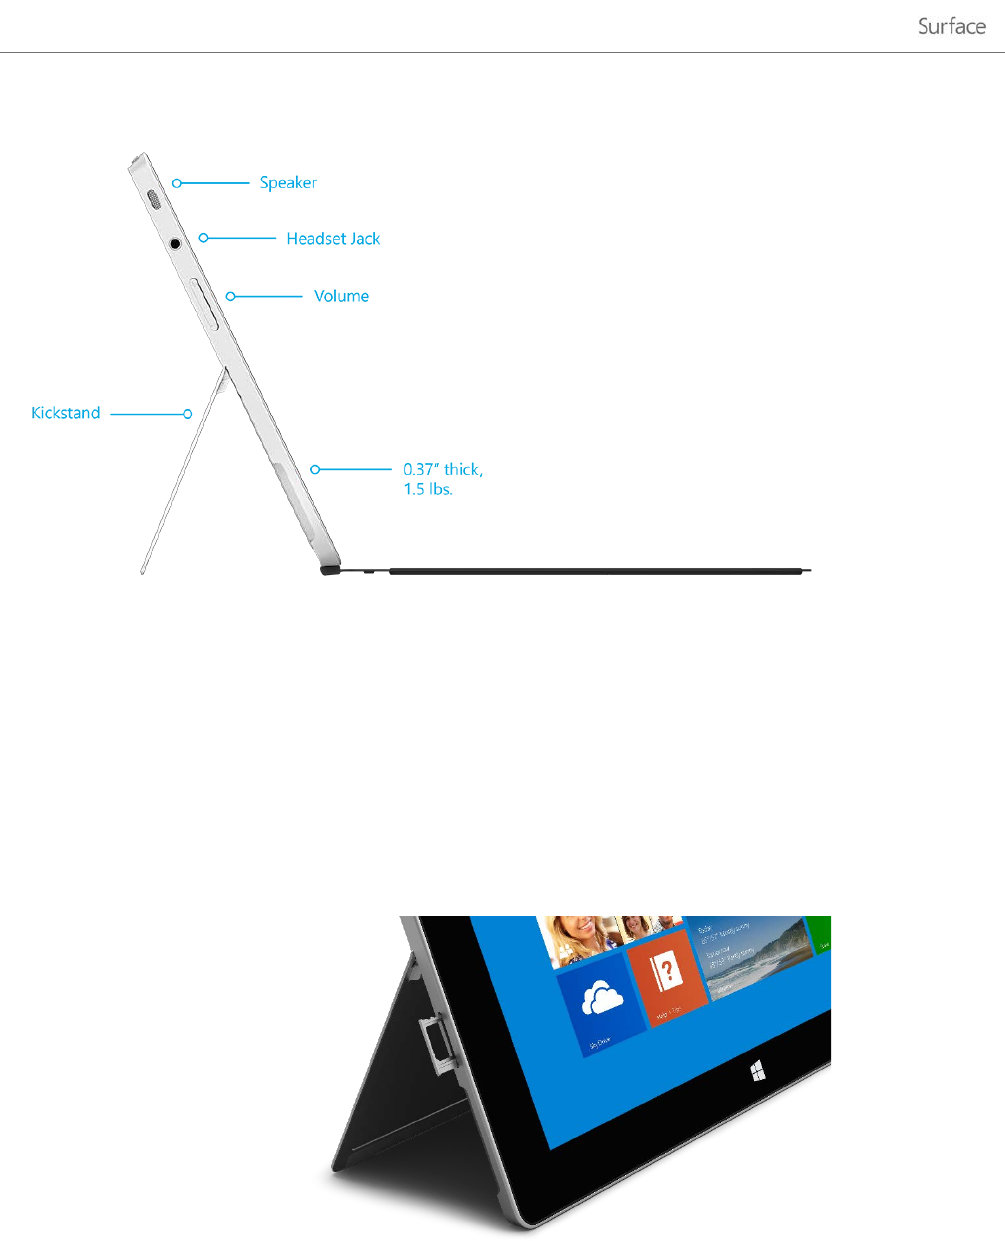
The Kickstand
Surface 2 has two built
-in kickstand positions (24° and 40°), so you
can easily see the screen when you’re working at a desk or
typing on
your lap. You can f
lip out the kickstand from either side. Gently flip
out once for the first position (upright), and
then again for the
second position (less upright).
Dual position kickstand
© 2014 Microsoft Page 21
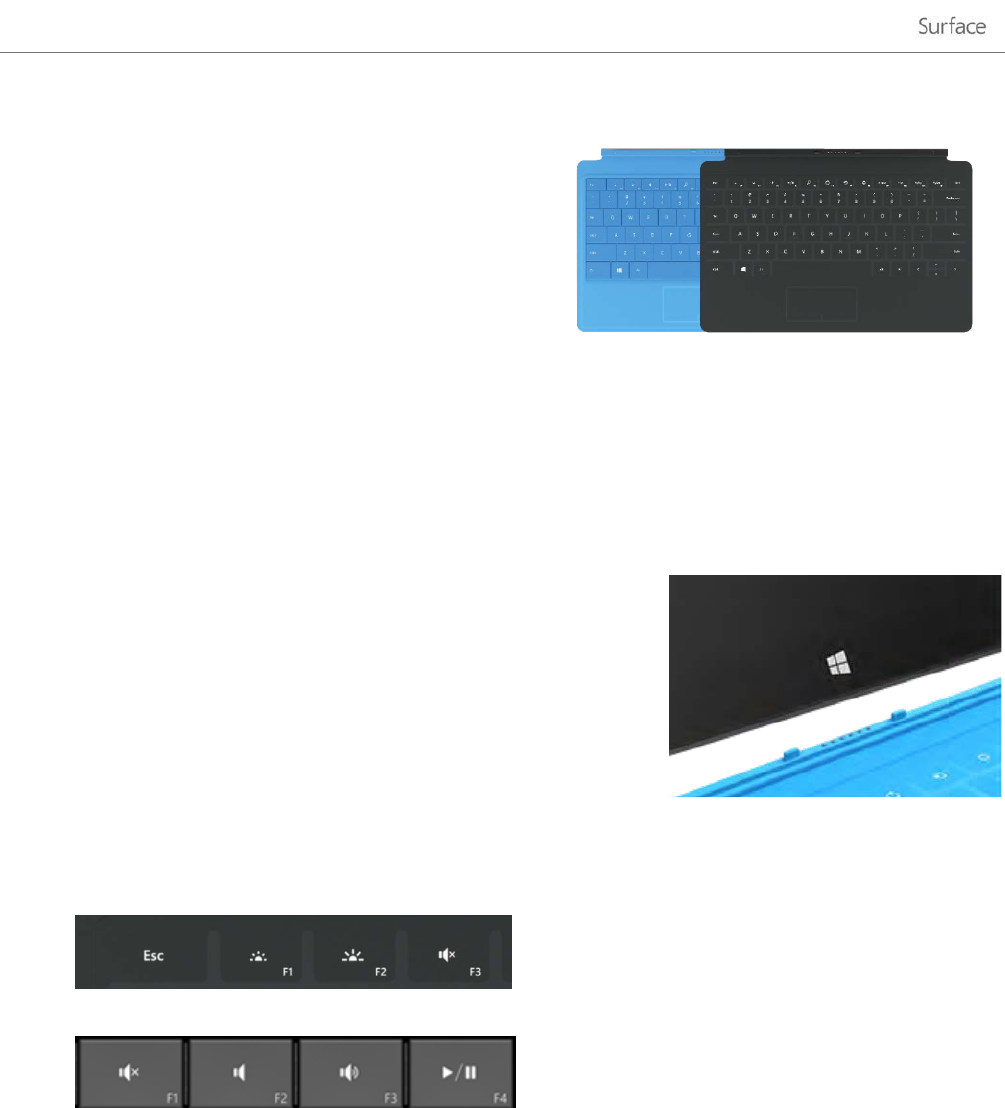
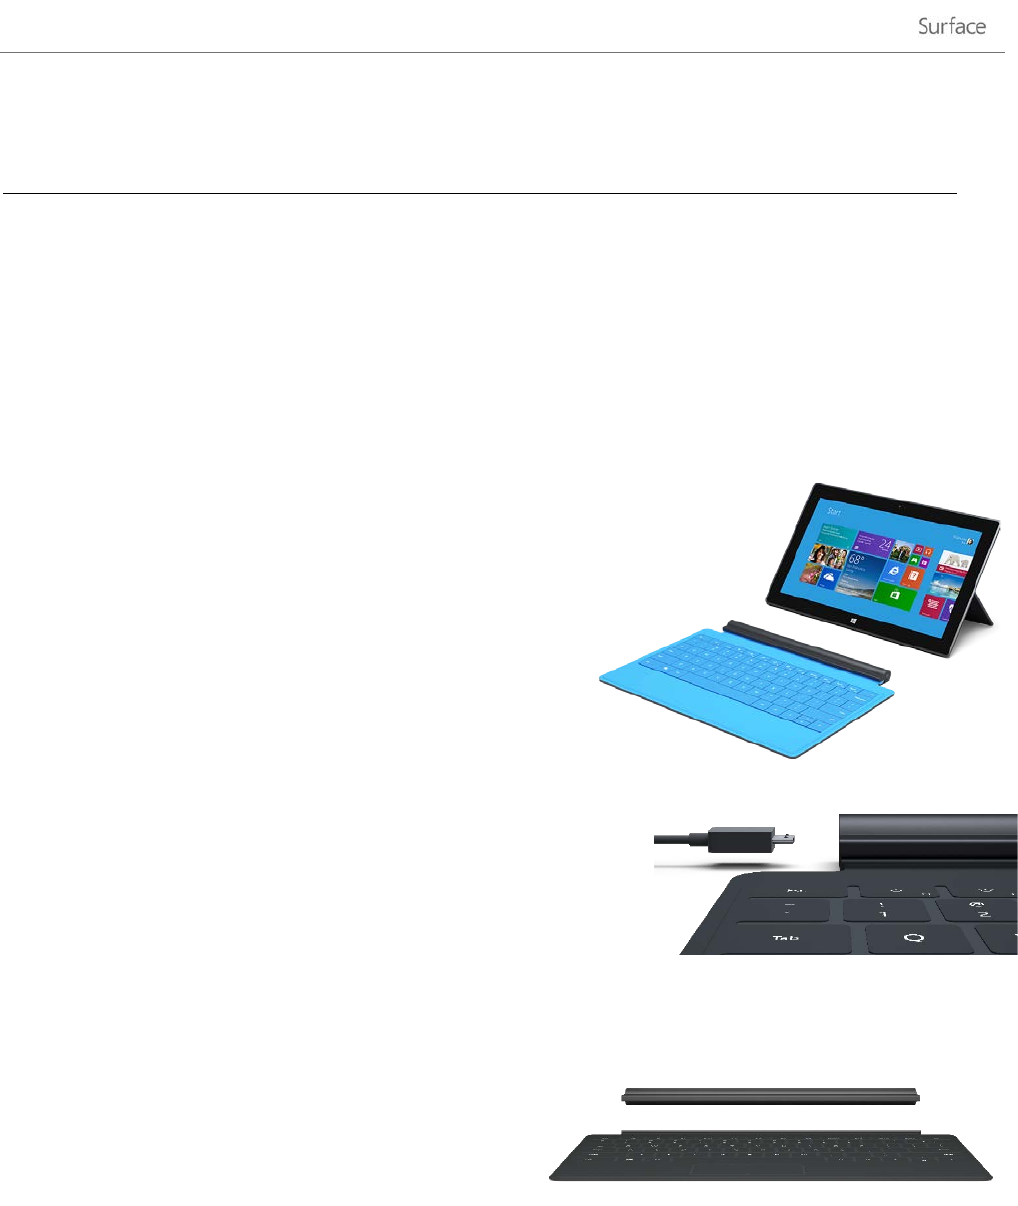
Typing Covers (keyboards)
Choose from the following Typing Covers:
• Touch Cover and Touch Cover 2
Super-thin, pressure-sensitive keyboards with a
touchpad.
• Type Cover and Type Cover 2
One of the thinnest mechanical keyboards available,
with moving keys.
Touch Cover 2 and Type Cover 2 are thinner and lighter, with keys that can illuminate when your hands are near.
You can see all of the Typing Covers in the Accessories area of Surface.com. To find out how to clean the Covers,
see Cover care in this guide.
Click in
The Typing Covers magnetically attach to the Surface touch screen.
Simply bring the two close together. When the Cover gets close, it aligns
and snaps into place. Once connected, the Cover stays put. You can
easily remove it by pulling it away.
When you fold a Cover back behind the touch screen, the keyboard is
disabled. This way you don’t accidently type anything.
Which version of Type Cover or Touch Cover do I have?
To figure out which version you have, look in the upper-left corner:
• Type Cover 2 and Touch Cover 2. The upper-left corner has brightness controls.
• Type Cover and Touch Cover. The upper-left corner has volume controls.
Type with Touch Cover
Touch Cover is more than a protective cover. It’s also a keyboard. Type on Touch Cover just as you would on any
other keyboard. You can even rest your hands on the keys. Touch Cover only detects key presses when you strike
a key.
By default, a sound plays when you strike a key on Touch Cover (or the on-screen keyboard), so you know when
you’ve pressed a key.
© 2014 Microsoft Page 22
To turn key sounds on or off: Open the Settings charm, tap or click Change PC settings > PC and devices >
Typing > Play key sounds as I type (under Touch keyboard).
Touch Cover 2 gestures
Here are a couple handy gestures you can use on the Touch Cover 2 keyboard:
To do this
Do this…
Move the insertion point
Slide two fingers horizontally across the letter keys.
Select and delete
text Slide two fingers horizontally across the number row keys, and when the
selection is complete, lift your hand to delete the selected text.
Suggestions and corrections
As you type on Touch Cover 2 or the on-screen keyboard, text suggestions appear to help you enter words
quickly or correct misspellings. To insert a suggestion, tap it or press Spacebar. To switch the highlighted word,
swipe right or left on the Spacebar.
To turn text suggestions on/off: Open the Settings charm, tap or click Change PC settings > PC and devices >
Typing > Show text suggestions as I type.
Fold back the Cover
You can fold back a Typing Cover to create a stand (see picture).
When the Cover is folded back, you can use the on-screen
keyboard to type text. Tap a place where you can type, such as a
text box, and the on-screen keyboard appears. For more info, see
On-screen keyboard in this guide.
Close the Cover
When you close the Cover, the screen turns off and Surface goes into standby mode. When you open the cover,
Surface wakes up. To learn more, see Power states: On, off, standby, and restart in this guide.
Adjust the backlighting
Touch Cover 2 and Type Cover 2 have keys that can illuminate. The backlighting turns on when your hands are
near the keys and turns off when they leave.
© 2014 Microsoft Page 23
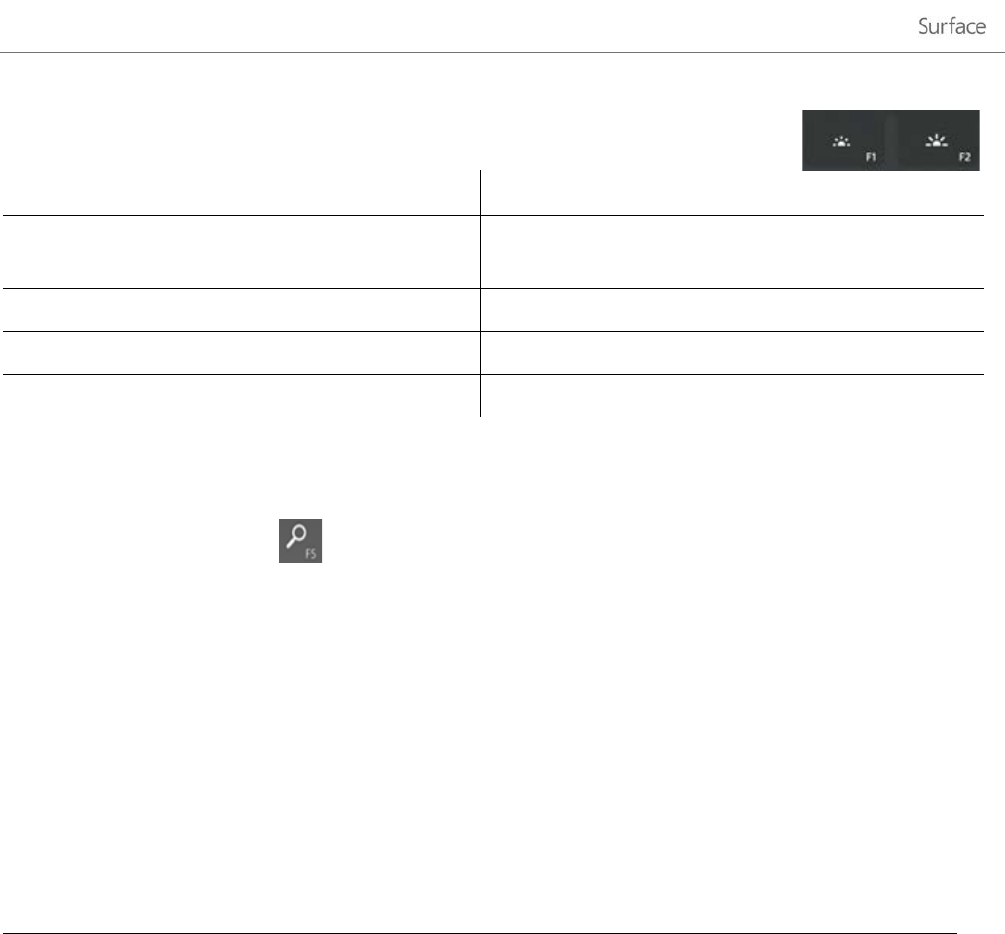
You can adjust the brightness of the keys and turn backlighting on/off.
To do this
Press this…
I
ncrease the brightness of the keys
Tap the F2 key repeatedly.
D
ecrease the brightness of the keys Tap the F1 key repeatedly.
Turn backlighting off
Press and hold the F1 key.
Turn backlighting on
Press and hold the F2 key.
Function keys
If you want to use a function key (F1-F12), use the Fn key in combination with a key from the top row.
For example, for F5, press Fn + .
Function lock/unlock (Fn+Caps)
If you frequently use function keys, you can lock the Fn key so that you don’t have to press it each time. Press
Fn+Caps to make the top row of keys be function keys (F1-F12). Once locked, press the Search key for F5. (Press
Fn+Caps again to unlock the Fn key.)
The function keys appear on the keys for Type Cover, Type Cover 2, and Touch Cover 2. If you have a Touch
Cover, here are the function keys:
Touch Cover function keys
For this key
Press this
For this key
Press this
F1
Fn + Mute
F7
Fn + Devices
F2
Fn + Volume Down
F8
Fn + Settings
F3
Fn + Volume Up
F9
Fn + Home
F4
Fn + Play/Pause
F10
Fn + End
F5
Fn + Search
F11
Fn + Page Up
F6
Fn + Connect
F12
Fn + Page Down
© 2014 Microsoft Page 24
More function keys for either Typing Cover
For this key
Press this
For this key
Press this
Page up
Fn + Up arrow
Page down
Fn + Down arrow
Home
Fn + Left arrow
End
Fn + Right arrow
Increase screen
brightness
Fn + Del
Decrease screen
brightness
Fn + Backspace
Can I use my desktop keyboard with Surface?
Yes. You can use a full-size USB or Bluetooth keyboard if you’d like. For more info, see Connect devices in this
guide.
Wireless Adapter for Typing Covers
The Wireless Adapter lets you type on a Typing Cover from
anywhere in the room (up to 30 feet away). This way you can
connect Surface to a TV or monitor, and type from another
location like your couch.
Note The Wireless Adapter doesn’t work with Surface Music Kit.
Charging the wireless adapter
Connect the included cable to the wireless adapter and plug the other
end of the cable into the USB port on Surface or another computer. It
takes about 4-5 hours to charge the wireless adapter from an empty
state (the light on top pulses while it’s charging). You can use the
wireless adapter while it’s charging, or charge the adapter when it’s not
attached to a Typing Cover.
Set up the wireless adapter
1. Before using the adapter for the first time, charge
it for 4-5 hours.
2. Connect the wireless adapter to your Typing
Cover.
3. On Surface, open the Settings charm, tap or click
Change PC settings > PC and devices > Bluetooth. (Make sure Bluetooth is turned on.)
4. Press and hold the Power button on the adapter until a white light flashes.
(This means the adapter is ready to pair.)
© 2014 Microsoft Page 25
5. Choose Wireless Adapter for Typing Covers, and then tap or click Pair. Once paired, you can start
typing.
Battery status
The battery status light is on the top middle of the adapter. When the battery gets low (less than 15% of battery
remaining), the light is red.
To conserve battery life, remove the wireless adapter from the Typing Cover or turn it off when you’re not using
it. The adapter turns off if you don’t use it for an hour.
Note If you have problems, see Troubleshoot the Wireless Adapter for Typing Covers on Surface.com.
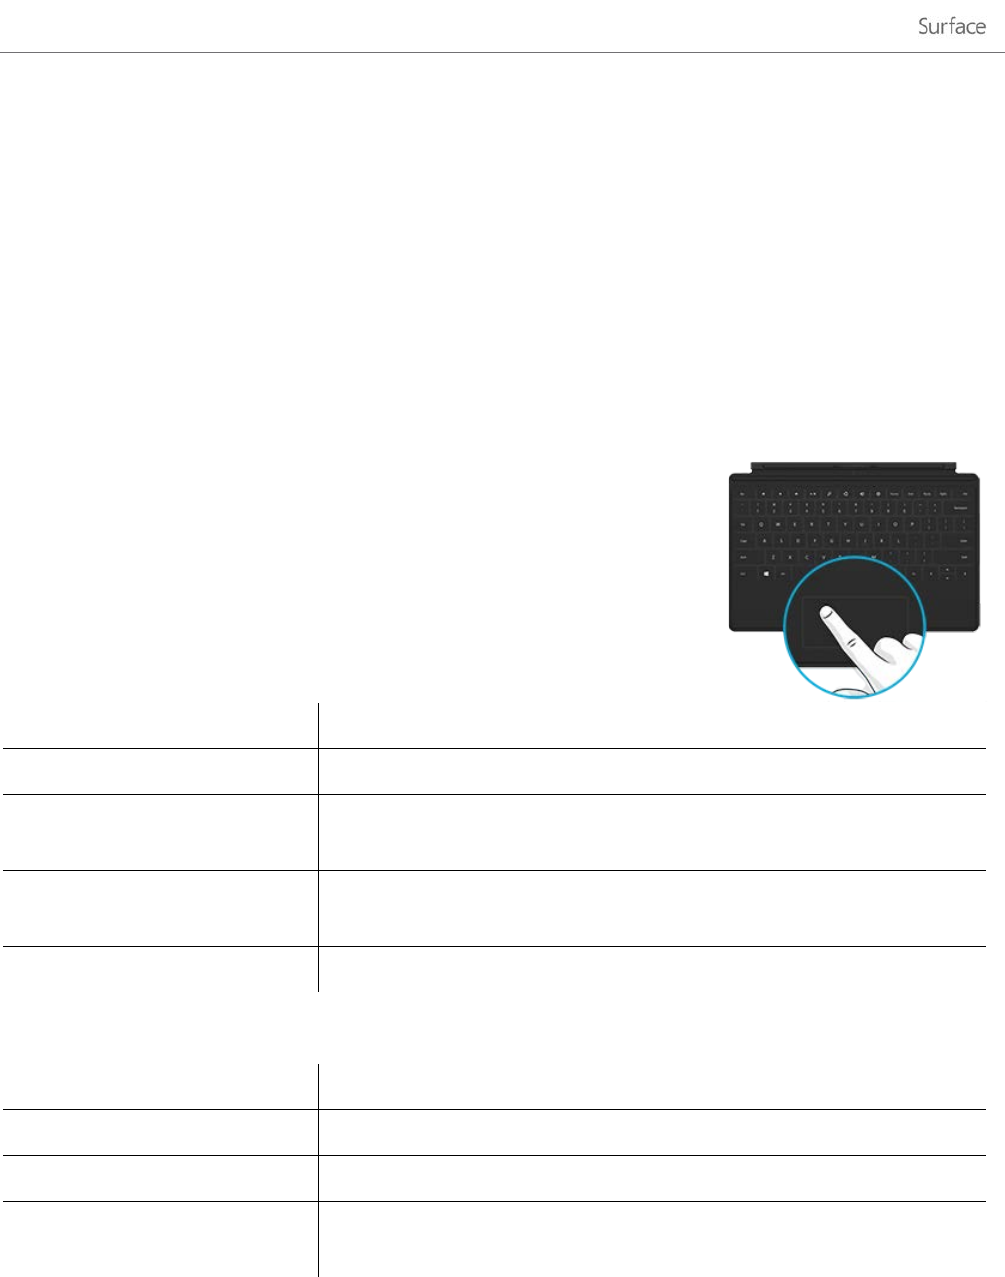
Touchpad
The Typing Covers have a touchpad that you can use like a mouse. Like a
laptop, you can drag your finger across the touchpad to move the on-screen
pointer. To click on something, tap once on the touchpad (left mouse click).
If you’d rather use a mouse with Surface, see Use a mouse in this guide.
Action
Touchpad gesture
Move the on
-screen pointer Drag your finger on the touchpad.
Left click
Tap one finger anywhere on the touchpad, or tap the left touchpad
button.
Right click
Tap two fingers anywhere on the touchpad, or tap the right touchpad
button.
Scroll
Slide two fingers across the touchpad (horizontally or vertically).
Touch Cover 2 and Type Cover 2: Additional touchpad gestures
Action
Touchpad gesture
Open the charms
Swipe in from the right edge of the touchpad.
See your open apps
Swipe in from the left edge of the touchpad.
Zoom in or out
Move two or more fingers together (pinching motion) or apart (stretching
motion) on the touchpad.
© 2014 Microsoft Page 26
How do I change the touchpad settings?
You can turn off the touchpad, turn off edge swiping, reverse the scrolling, and prevent the cursor from
accidently moving while you type. To change these settings:
• Open the Settings charm, tap or click Change PC settings > PC and devices > Mouse and touchpad.
Sound features
Surface has two stereo speakers and a headset jack for listening to music
or watching movies. The internal microphones—one in front and one in
back—come in handy when making calls or recording videos.
Surface 2 features Dolby® audio, so that you can enjoy the best possible
audio experience.
Adjust the volume
You can control the volume in a few places:
• Volume rocker. Use the volume rocker (on the left edge).
• Start screen. Open the Settings charm, then tap the sound icon and adjust the slider.
• Desktop. Tap the sound icon on the desktop taskbar (lower-right corner) and adjust the slider.
© 2014 Microsoft Page 27
• Audio accessories. Headphones, external speakers, and other accessories may have their own volume
control.
• Apps. Some apps have a volume control.
Tips
• To quickly pause audio in an app from the Windows Store, press the volume rocker and then tap the on-
screen pause button.
• To mute audio, press the mute key on Touch Cover or Type Cover.
Add audio accessories
The headset jack works for both audio output and microphone input. You can plug headphones or a headset
with a microphone into the headset jack or the USB port.
For bigger sound, connect external speakers to the headset jack or USB port, or wirelessly connect speakers using
Bluetooth technology. For more info, see Connect devices in this guide.
How do I set the default audio device?
You can switch between different audio devices, such as speakers and headphones. Here’s how:
1. Open the Search charm, type manage audio devices, and then choose Manage audio devices from the
search results.
2. Tap or click the device you want to use for playback, tap Set Default, and then choose OK.
How can I record audio?
You can use the Sound Recorder app to record audio. Snap this app alongside another app, so you can continue
working while you’re recording.
To open the Sound Recorder app: Swipe up from the center of the Start screen and then tap Sound Recorder.
Have questions? See Sound recorder: FAQ on Windows.com.
How do I change which sounds play?
You can choose which sounds play for notifications and system events (for example, the sound that plays when
you get a new message). Here's how:
1. Open the Search charm, tap the down arrow , and then tap Settings.
2. Tap the search box, type sound, and then choose Change system sounds from the search results.
© 2014 Microsoft Page 28
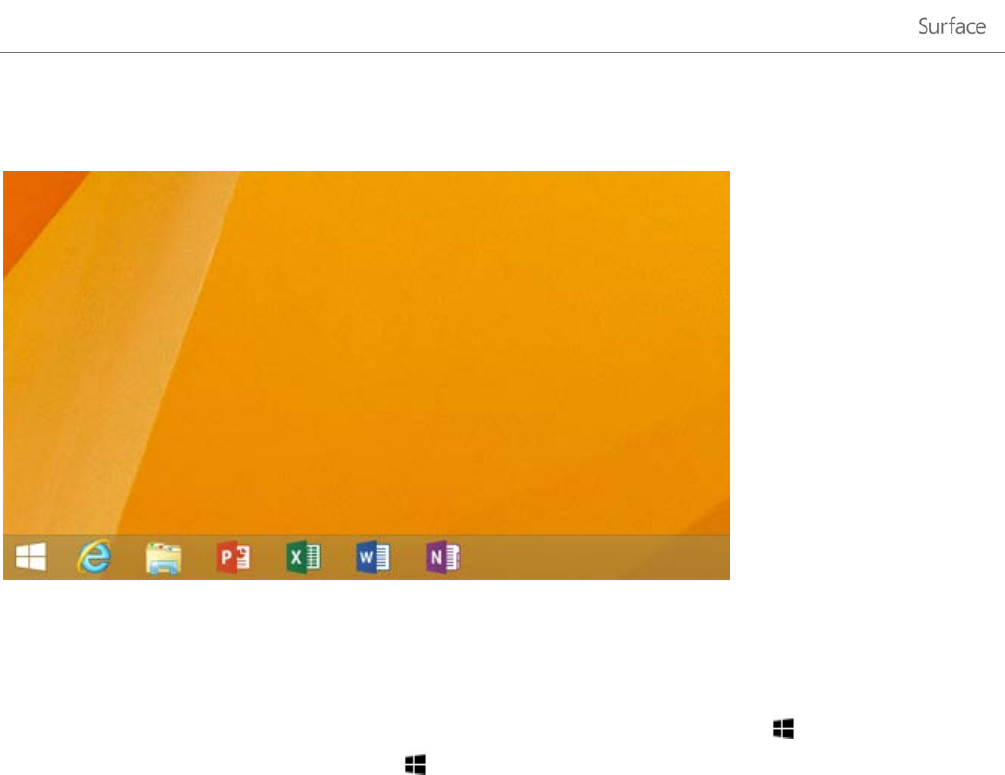
The desktop
The Windows desktop—with its taskbar, folders, and icons—is still available in Windows RT 8.1. To go to the
desktop:
• Touch. Open the charms and tap Start or add a Desktop tile to your Start screen.
• Mouse. From Start, move your pointer to the lower-left corner, and then click .
• Keyboard. Press Windows logo key +D.
When will I go to the desktop?
The pre-installed Office RT apps run in the desktop. You might also go to the desktop to use Control Panel, File
Explorer, or a Windows desktop app such as Paint or Notepad.
© 2014 Microsoft Page 29
Use apps
Surface comes with a great set of apps such as Mail, Skype, and Camera.
Learn more about these apps in the Built-in apps section of this guide.
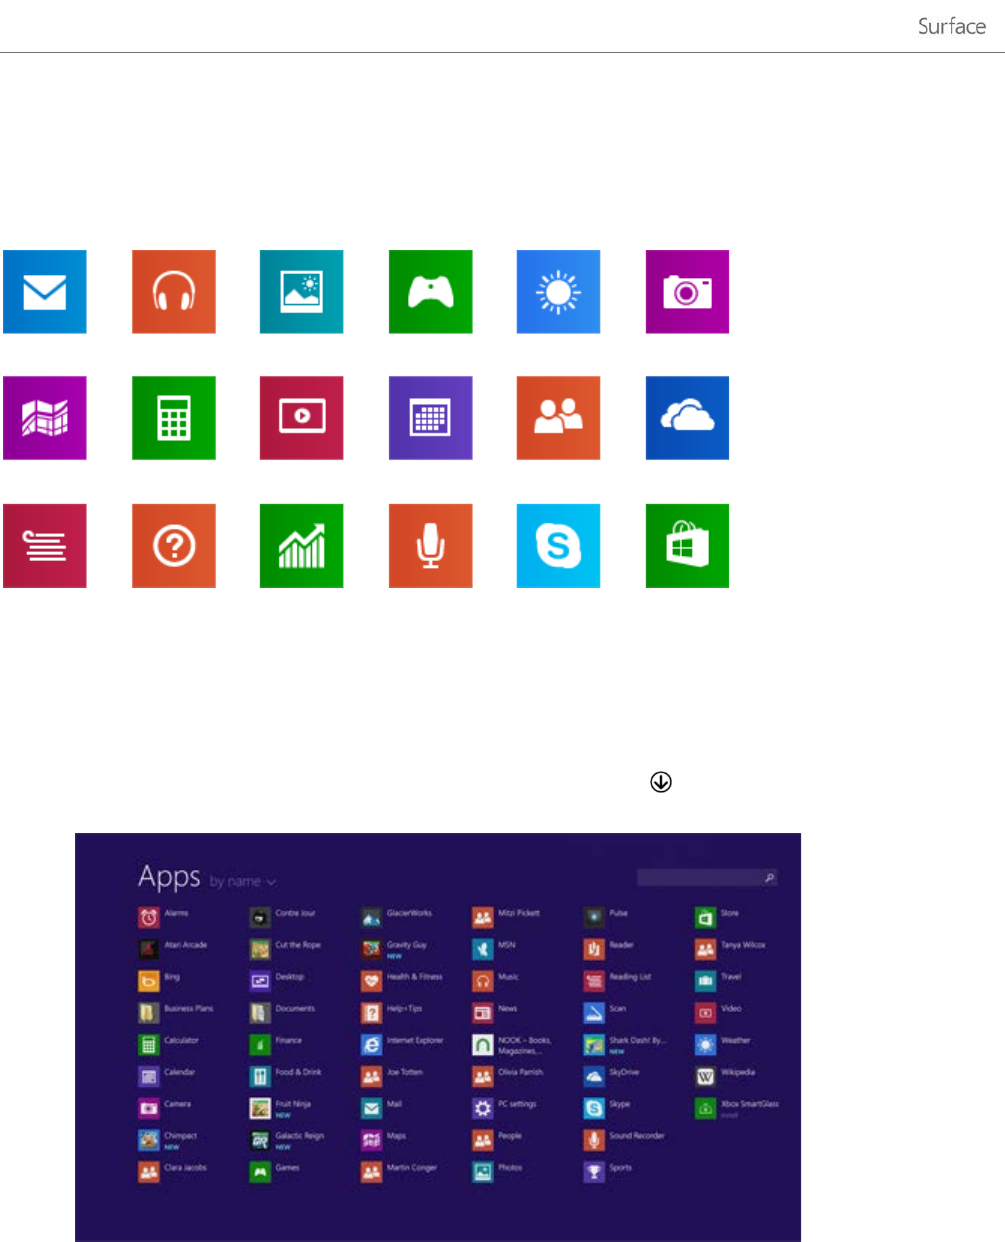
Find and open apps
To find an app on your Surface:
• Apps view. Swipe up from the center of the Start screen (or click on the lower-left of Start). A list of
apps appears. Type an app name or scroll to see all your apps.
• Use Search. Open the Search charm, and type an app name like Skype.
Tip
• If you don’t see the app you want, look in the Windows Store (see Get apps in this guide).
© 2014 Microsoft Page 30
Switch between open apps
If you want to keep your apps full screen, you can quickly switch between open apps. Here’s how:
Switch
back to a previous app
• Touch. Swipe in from the left edge of the screen.
• Mouse. Move the mouse pointer into the upper-left corner of
the screen, and then click.
• Keyboard. Press Alt+Tab.
S
witch to a specific app
• Touch. Swipe in from the left edge, and with your finger still on
the screen, move it back toward the left edge. Tap the app you
want.
• Mouse. Move the mouse pointer into the upper-left corner, and
then move it straight down. You’ll see the apps you recently
used. Click the app you want.
• Keyboard. Hold down the Alt key and press the Tab key
repeatedly to switch between apps. When you get to the app
you want, let go.
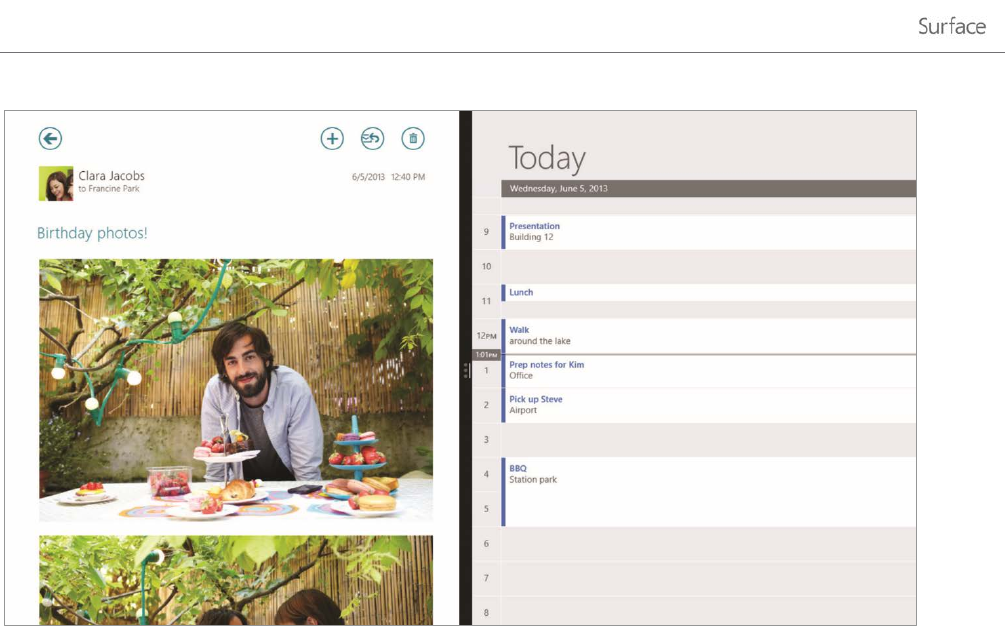
Use apps together (side by side)
You can use two apps at the same time by snapping them side by side. This way you can see two apps on the
screen at once (such as the Mail and Calendar apps).
© 2014 Microsoft Page 31
Here’s how to arrange two apps side-by-side:
1. Open each of the apps you want to use.
2. Open the recently used app list (swipe in from the left edge, and with your finger still on the screen,
move it back toward the left edge).
3. Drag an app from the app list until the current app changes size, then let go of the app.
4. To adjust the size of the apps, drag the bar between the apps.
If you want to change one of the apps, go to Start or the Apps view and tap or click an app. It’ll appear on top of
the first two apps. Tap or click the left of right side of the screen.
To learn more about using apps together, see Getting around your PC on Windows.com.
Close an app
You don’t need to close apps from the Windows Store. When you switch to another app, Windows leaves the
app running in the background and will close it eventually if you don’t use it.
If you really want to close a Windows Store app, here’s how:
• Touch. Swipe down from the top edge of the screen, and drag the app down and off the screen.
• Mouse. Move the pointer to the top of an app, and when the pointer changes to a hand, click and drag
the app down off the screen.
© 2014 Microsoft Page 32
To completely stop all processes associated with an app, drag the app to the bottom of the screen, and hold it
there until the app flips over. You can see all open apps and services in Task Manager (open the Search charm
and type Task Manager to find this app).
Close desktop apps
It’s still a good idea to close desktop apps, such as Office apps, when you're done using them or before you shut
down Surface. You can close an Office app by tapping or clicking the X in the upper-right corner of the app.
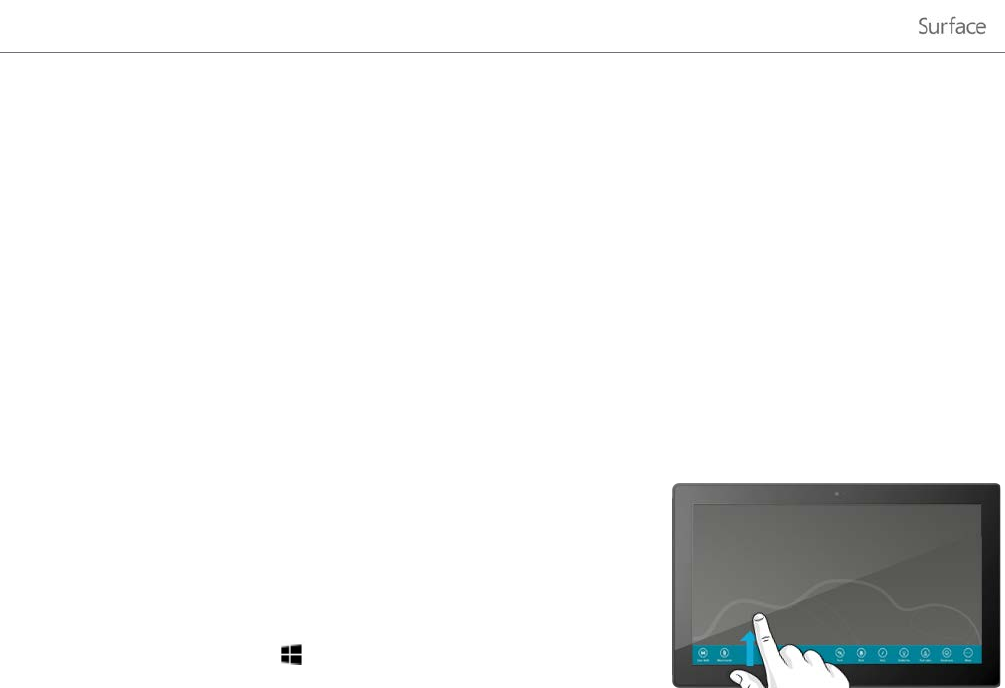
App commands
To see what you can do with an app, open app commands. Here’s how:
1. Open an app and then do any of the following:
• Touch. Swipe up from the bottom edge, or down from the
top edge of the screen.
• Mouse or touchpad. Right-click. You can also tap two
fingers anywhere on the touchpad.
• Keyboard. Press +Z.
2. Choose an item on the bar of commands.
App settings and help
• App settings. Open the Settings charm from an app. For example, open the Mail app and then open the
Settings charm—you’ll see settings for the Mail app.
• App help. Open the Settings charm from an app, and look for Help. (If you can't find help in the Settings
charm, check the company's website for help info.)
Problems with an app?
If you’re having problems running an app, try the suggestions on the following Windows.com page:
Troubleshoot problems with an app.
© 2014 Microsoft Page 33
Search, share, and settings
There are charms to help you find things, share stuff, and change your settings.
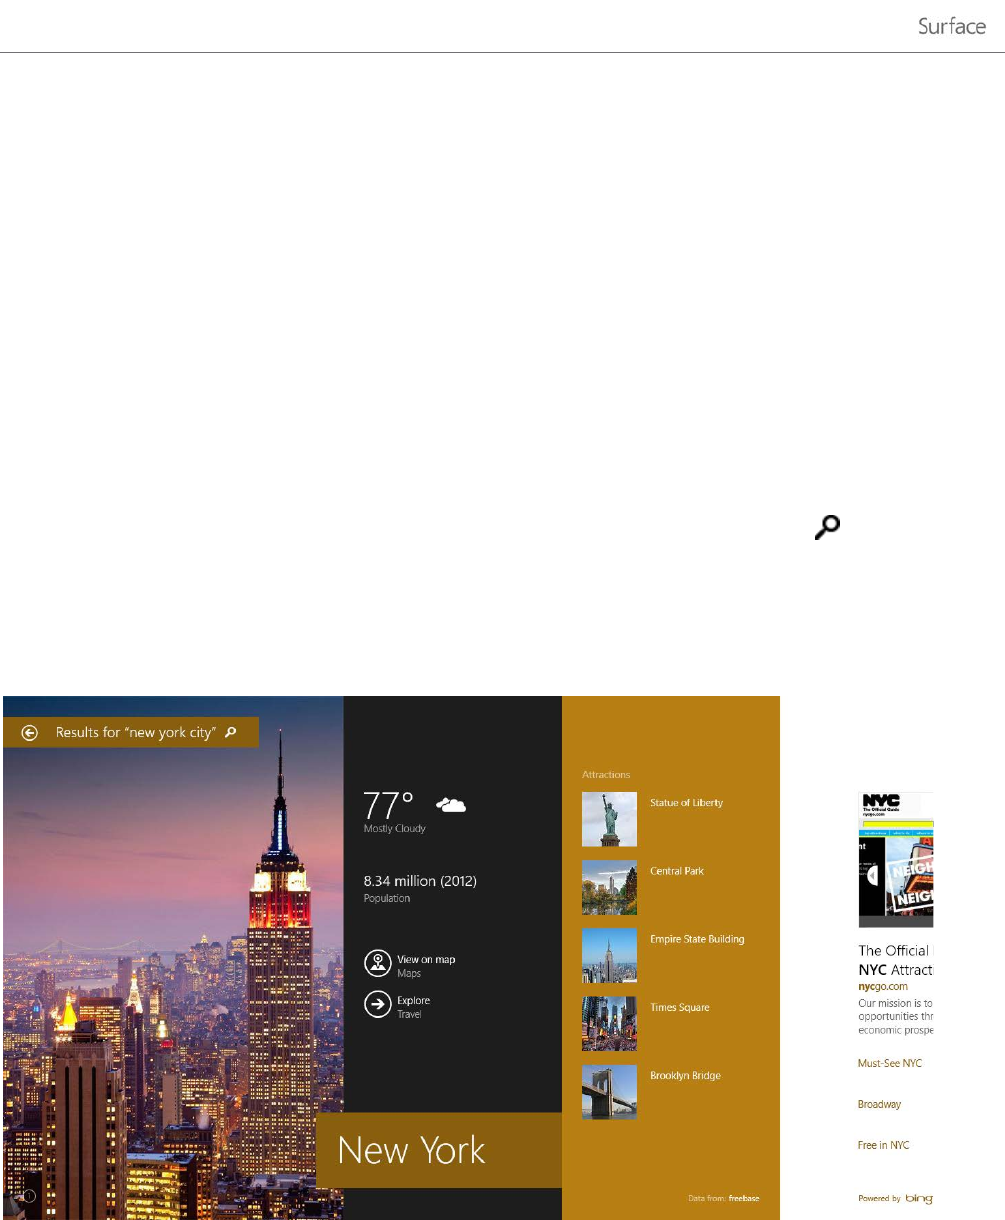
How to search
The Search charm uses Bing Smart Search to search your Surface, the web, SkyDrive, and some apps. Here’s how
to search for things:
1. Open the Search charm, and then type what you want to find. As you type, you’ll see search results and
suggestions.
2. If you see what you’re looking for, tap or click it to open it.
3. To see more results, including web results from Bing, tap or click the Search button .
4. On the search results page, tap or click a search result to open it. For example, tap a song to start playing
it or a webpage to open it.
Search includes items from the web (like webpages and videos), files from your Surface and SkyDrive, apps, and
Windows settings.
© 2014 Microsoft Page 34
Tips
• Keyboard shortcuts. Press +S to open Search. To search for a file (on Surface or SkyDrive), press
+F. And to search for a setting, press +W.
• You can just start typing while you’re on the Start screen (you don’t have to open the Search charm first).
• To find out how to search using File Explorer, see Search for files in File Explorer on Windows.com.
Narrow the scope of search
By default, the Search charm searches for apps, files, and settings, plus content on the web. You can also limit
your search to a single content type like Files or Settings. Here’s how:
1. Open the Search charm, tap or click the arrow above the search box, and choose what you want to
search for.
2. Type something in the search box. Results appear as you type.
3. To see more results, tap or click the Search button .
Search within an app
• Tap or click the Search button in the app. If you don’t see Search, swipe down from the top of the
screen to see more commands.
• In some apps you can use the Search charm. Here’s how:
1. Open the Search charm from an app, tap or click the arrow , then choose the app name.
2. Type what you want to find in the search box.
Change search settings
You can delete your search history, choose how much of your search info is shared with Bing, and filter adult
content out of your web search results.
To change your search settings: Open the Settings charm, tap or click Change PC settings > Search and apps.
Share photos, links, and more
When you come across something you want to share, use the Share charm. You can share with a few people,
your entire social network, or send info to another app.
Share a link
1. Find a webpage that you want to share (using Internet Explorer), and then open the Share charm.
2. A list of apps that can share and people that you share with most appears.
• To post on a social network, choose People.
• To email the link to someone, choose Mail.
© 2014 Microsoft Page 35
• To bookmark the page to read later, choose Reading List.
• To save the link in OneNote, choose OneNote.
To share a screenshot: Open the Share charm, tap the arrow and choose Screenshot.
To change your share settings: Open the Settings charm, tap or click Change PC settings > Search and apps >
Share.
Share photos
1. Open the Photos app and find a photo or photos that you want to share.
2. Swipe down or right-click a photo to select it.
3. Open the Share charm. You'll see a list of the people, apps, and devices you share with most often, plus a
list of apps that can share. For example, to share using email, tap Mail, type an email address, and tap or
click the Send icon.
To share a photo or group of photos to a social network, the photos need to be on your SkyDrive. For more info,
see Store photos on SkyDrive and Share and print photos on Windows.com.
Save pages to Reading List
When you come across an article or other content that you’d like to read later, just share it to Reading List
instead of emailing yourself a link. Reading List is your personal content library. Here’s how to save a page to
Reading List:
1. When you find a webpage that you want to read later, open the Share charm and tap or click Reading
List.
2. Tap or click Add. A link to the content is added to Reading List.
For more info about using Reading List, see Reading List app FAQ on Windows.com.
Change your settings
PC Settings
Most of the settings that you'll want to change can be found in PC
settings. To open PC settings:
1. Open the Settings charm. Some PC settings appear in the
lower-right corner (see picture).
2. For more settings, tap or click Change PC settings.
3. Tap or click a category. For example, tap PC and devices to
add a device, or Accounts to change account settings. If you can’t find a setting, you can use Search .
For more info, see Get help with PC settings on Windows.com.
© 2014 Microsoft Page 36
Search for a setting
You can use the Search charm to find a setting. Here’s how:
1. Open the Search charm, tap the arrow and choose Settings.
2. Tap the search box and type what you want to find. For example, type sound to find sound settings.
3. If you don’t see the setting you want, tap or click the Search button to see more results.
4. Tap or click a setting to open it.
Control Panel
Control Panel includes some additional settings that you might use less often, such as customizing the desktop.
To open Control Panel, do either of the following:
• Open the Search charm, type control panel, and then choose Control Panel from the search results.
-or-
• From the desktop, open the Settings charm and then tap or click Control Panel.
Sync your settings
When you sign in with a Microsoft account, your personal settings and preferences are stored on SkyDrive, and
are synced to any PC that you sign in to.
To choose which settings sync: Open the Settings charm, tap or click Change PC settings > SkyDrive > Sync
settings. For more info about this, see Sync settings between PCs with SkyDrive on Windows.com.
If you’re using a metered connection (such as a mobile network), you can choose whether or not you want to
sync settings over a metered connection. To access these settings, open the Settings charm then tap or click
Change PC settings > SkyDrive > Metered connections. For more info, see Metered Internet Connections: FAQ
on Windows.com.
© 2014 Microsoft Page 37

Accounts and sign in
A user account determines how you interact and personalize your Surface. When you want to use Surface, you
sign in with your user account.
What type of account do I have?
You can sign in to Surface using a local account or a Microsoft account. We recommend using a Microsoft
account. To see which type of account you're using:
• Open the Settings charm, tap or click Change PC settings > Accounts > Your account.
o If you see your name and email address, you’re using a Microsoft account.
o If you see Local account, this means your account is on Surface and you don’t have the
benefits of connecting to the cloud.
Questions? See User accounts: FAQ on Windows.com.
Surface 2 (AT&T 4G LTE): For information about your AT&T account, see Mobile networking on Surface 2 (4G
LTE).
What is a Microsoft account?
A Microsoft account is the email address and a password that you use to sign in to services like Outlook.com,
SkyDrive, Windows Phone, and Xbox. If you use an email address and password to sign in to these Microsoft
services, then you already have a Microsoft account. To learn more, see All about accounts on Surface.com.
To switch from a local account to a Microsoft account:
• Open the Settings charm, tap or click Change PC settings > Accounts > Switch to a Microsoft
account.
Create another account
If more than one person uses your Surface, each person can have their own account. This way they can sign in
and personalize everything.
To find out how to create another account on your Surface, see Create a user account on Windows.com.
Family Safety (child account)
Got kids? Family Safety is an integrated part of Windows, so it's easier than ever to keep track of when and how
your kids use Surface. You can set limits on exactly which websites, apps, and games they're allowed to use.
To find out how to turn on Family Safety, see Family Safety on Windows.com.
© 2014 Microsoft Page 38

Manage accounts
There are two places you can manage user accounts:
• PC Settings. Open the Settings charm, tap or click Change PC settings > Accounts > Other accounts.
• Control Panel. Open the Search charm, type user accounts, then choose User Accounts from the
search results.
Unlock and sign in
Here’s how to unlock and sign in to Surface:
1. Press a key, or press and release the Power button.
2. Dismiss the lock screen by swiping up from the bottom edge of the screen or pressing a key.
3. If prompted, type the password for your account. If you want to sign in with a different account, tap or
click the Back button.
• If you can’t remember your password, see I forgot my password on Surface.com.
• If you have a picture password or PIN, tap or click Sign-in options to choose another sign-in
method.
• If you're locked out and need your BitLocker recovery key, see BitLocker recovery key in this guide.
Choose when a password is required
You can choose when a password is required to sign in to Surface. Here’s how:
1. Open the Settings charm, then tap or click PC settings > Accounts > Sign-in options.
2. Under Password policy, choose an item from the list:
• Microsoft account. Choose a time frame or Always require a password.
• Local account. Choose a time frame, Always require a password, or Never require a
password.
The Password policy setting may not be available if you’ve added a work email account to the Mail app.
Other sign in options
Two more sign-in options are available to you: PIN and picture password. (These sign-in options may not be
available if you’ve added a work email account to Outlook RT or the Mail app.)
© 2014 Microsoft Page 39

Create a PIN
Instead of typing a password, you can sign in quickly with a four-digit PIN. Here’s how:
1. Open the Settings charm, tap or click Change PC settings > Accounts > Sign-in options.
2. Under PIN, tap or click Add.
3. Type your current password and choose OK.
4. Type 4 numbers for your PIN.
Now you can quickly sign in using your four-digit PIN.
Surface (AT&T 4G LTE): For info on how to set a PIN for your SIM card, see Mobile broadband settings.
Create a picture password
To find out how to create a picture password, see Personalize your PC on Windows.com.
Sign out or lock
Your account is automatically locked if you close the Cover or don’t use Surface for a while. Here’s how to
manually lock or sign out:
1. From the Start screen, tap or click your account picture (upper-right corner).
2. Choose Sign out or Lock.
Sign out or lock. What’s the difference?
• Sign out closes all the apps you were using.
• Locking protects your account from use, but lets someone else sign in with their account. The apps
you’re using are not closed.
Change your password
Here’s how to change your password:
1. Open the Settings charm, tap or click Change PC settings > Accounts > Sign-in options.
2. Under Password, tap or click Change and follow the on-screen instructions.
Notes
• Forgot your password? See I forgot my password on Surface.com.
• For other password-related questions, see Passwords in Windows: FAQ on Windows.com.
© 2014 Microsoft Page 40

Account security
It's an excellent idea to help protect your account by adding security info to it. If you ever forget your password
or your account is hacked, we can use your security info to verify your identity and help you get back into your
account.
It’s important to make sure you’ve added security info and check it for accuracy. For more info, see Microsoft
account security info: FAQ on Windows.com.
If you think your Microsoft account has been blocked or hacked, see Get back into your Microsoft account if it's
been blocked or hacked on Windows.com.
© 2014 Microsoft Page 41
Apps and games from the Windows Store
Discover a variety of great apps and games in the Windows Store.
You can browse for apps in a category, or in groups like “Picks for you” and "Popular
Now." And if you already know what you want, you can use Search .
Your account
You need to sign in with a Microsoft account before you can install apps from the Windows Store. To see your
account info or switch accounts:
• From the Store app, open the Settings charm and then tap or click Your account. Here you can switch to
another account, add a payment method, and see which PCs are associated with your account.
Get apps
When you want to get more apps (or games), the Windows Store is the place to go.
Note You need to be connected to the Internet and signed in with a Microsoft account to install apps.
Here’s how to get more apps:
1. On the Start screen, tap or click Store to open the Windows Store. If prompted, sign in with your
Microsoft account. If you can’t sign in to the Windows Store, see Why can’t I sign in to the Windows
Store? on Windows.com.
2. To find an app, do any of the following:
• Drag your finger across the screen to browse apps. Tap a category, like New Releases, to see
apps.
• Type an app name in the Search box.
• To see app categories like Games, swipe down from the top edge of the screen.
3. Tap an app to learn more about it and read reviews.
4. If an app is free, choose Install to download it. Otherwise:
• Choose Buy to pay for an app. Apps are charged to the payment option associated with your
Microsoft account (see Add or change a payment method below).
• Choose Try to download a free trial version (if available).
By default, new apps are not pinned to your Start screen. You can see all your apps by swiping up from the
center of the Start screen. To add an app to your Start screen, see Personalize the Start screen in this guide.
Important You can only install apps from the Windows Store, not from other sources. You can’t install Windows
7 apps on Surface 2.
© 2014 Microsoft Page 42
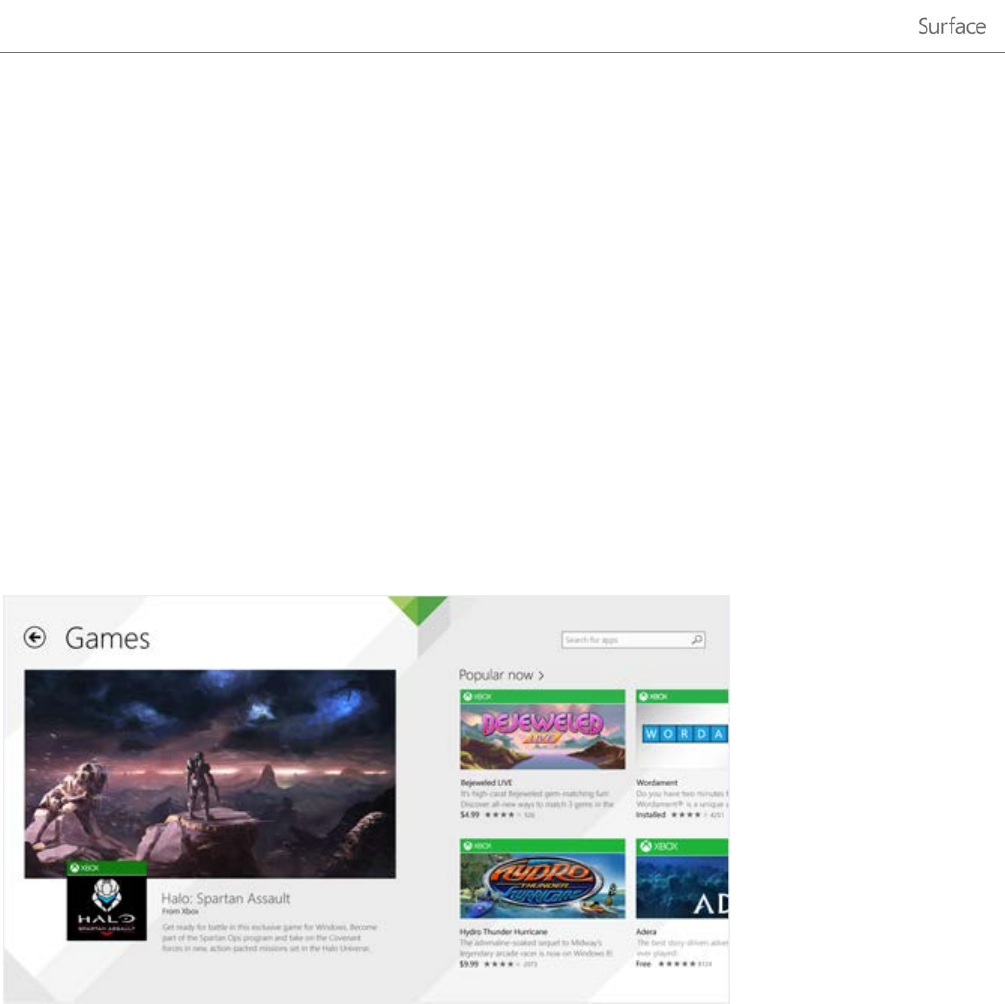
Notes
• Need help? Open the Settings charm from the Store app, and then tap or click Help.
• Can’t find or install an app? See Why can’t I find or install an app from the Windows Store? on
Windows.com.
• Install the same apps as another PC. If you’ve installed apps on another Windows 8 or Windows RT PC
and want to install similar apps on Surface, see Use your Microsoft account to install apps on multiple
PCs on Windows.com.
• Surface 2 (AT&T 4G LTE): When using a mobile broadband connection, apps and games won’t
download by default. To download apps over a metered connection, open the Settings charm, tap or
click Change PC settings > PC and devices > Devices, then set Download over metered connections
to On. For more info, see Mobile networking on Surface 2 (4G LTE).
Get games
There’s a game for everyone in the Windows Store.
Here’s how to get games:
1. On the Start screen, tap or click Store.
2. Swipe down from the top edge of the screen and then tap Games.
3. Tap an app to learn more about the game and install it.
Solitaire, Hearts, and Minesweeper are not installed by default, but you can download them for free from the
Windows Store. To install our version of Solitaire and Minesweeper, tap or click the following links:
• Microsoft Solitaire Collection
• Microsoft Minesweeper
To install Hearts, search the Store app for Hearts.
© 2014 Microsoft Page 43
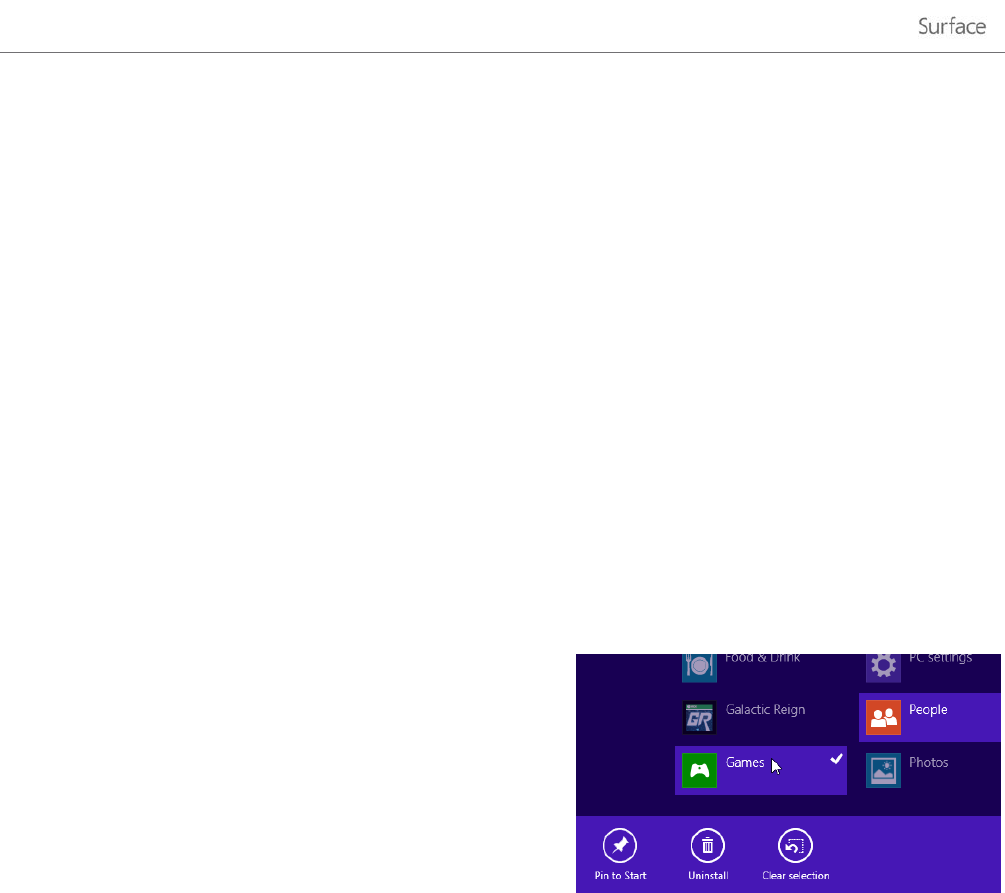
Family Safety with the Windows Store
You can use Family Safety to control which games and apps your child can see and install from the Windows
Store. You can also allow or block specific apps and games. For info about this, see Use Family Safety with the
Windows Store on Windows.com.
Add or change payment option and see billing history
Before you can buy an app, you'll need to add a payment method to your account. To add or change a payment
method:
1. From the Store app, swipe down from the top edge of the screen, and then tap Your account.
2. Choose Add payment method or Edit payment method, edit any necessary info, and then choose
Submit.
To remove a payment method or view your billing history, see Edit payment method for the Windows Store and
view billing history on Windows.com.
Delete an app
If you’re not using an app you can uninstall it. Here’s how:
1. Go to Start and swipe up from the center of the
screen.
2. Press and hold the app that you want to delete for a
couple seconds.
3. Tap or click Uninstall (along the bottom), and then
the Uninstall button.
Note Office apps can’t be uninstalled.
How much space is an app using?
To see how much space an app is using, you can do this:
• Open the Settings charm, then tap or click Change PC settings > Search and apps > App sizes.
© 2014 Microsoft Page 44

Reinstall an app
You can reinstall apps or games you’ve bought without paying for them again (as long as they're still available in
the Windows Store). To reinstall an app:
1. Open the Store app and make sure you’re signed in with your Microsoft account. (To see which account
you’re signed in to, open the Settings charm, then choose Your account.)
2. Swipe down from the top of the screen, and then tap Your apps.
3. Tap or click the apps that you want to install, and then choose Install.
For more info, see What happened to the apps on my PC? on Windows.com.
App updates
App publishers sometimes update their apps to add new features and fix problems. The Windows Store can
automatically install app updates when they become available. To make sure your apps get updated
automatically, do this:
1. From the Store app, open the Settings charm, then tap or click App updates.
2. Make sure Automatically update my apps is set to Yes.
You can also manually check for app updates at any time—tap or click Check for updates.
© 2014 Microsoft Page 45

Personalize your Surface
Add your accounts
If you haven’t already added your email and social networking accounts, see the Get started section in this guide.
Personalize the Start screen
Colors and background
You can change the Start screen colors and background.
Here’s how:
• From Start, open the Settings charm, and then tap
or click Personalize.
To watch a video about this, see Personalize your PC.
Create tiles for your favorites
You can pin websites, contacts, and apps to the Start screen. Here’s how:
• Pin a website. See Your web favorites in this guide.
• Pin a contact. Select a contact in the People app, swipe down from the top edge of the screen, and then
tap Pin to Start.
• Pin an app. Swipe up from the center of the Start screen to see all your apps. Press and hold an app for
a moment, then choose Pin to Start.
Tip Want more rows of tiles on your Start screen? From Start, open the Settings charm, tap or click Tiles, then
set Show more tiles to Yes.
Rearrange, resize, unpin, and group tiles
You can rearrange and resize the tiles, unpin the ones you don’t use, and create groups of tiles. Here’s how:
• From Start, swipe down from the top edge of the Start screen, and then tap Customize. Then do any of
the following:
o Move a tile. Tap a tile and then drag it where you want it.
o Resize a tile. Tap a tile, tap Resize along the bottom, and then choose a size.
o Turn off a live tile. Tap a tile, then tap Turn live tile off.
o Unpin from Start. Tap a tile, then tap Unpin from Start.
To find out how to create and name groups of tiles, see Start screen on Windows.com.
© 2014 Microsoft Page 46
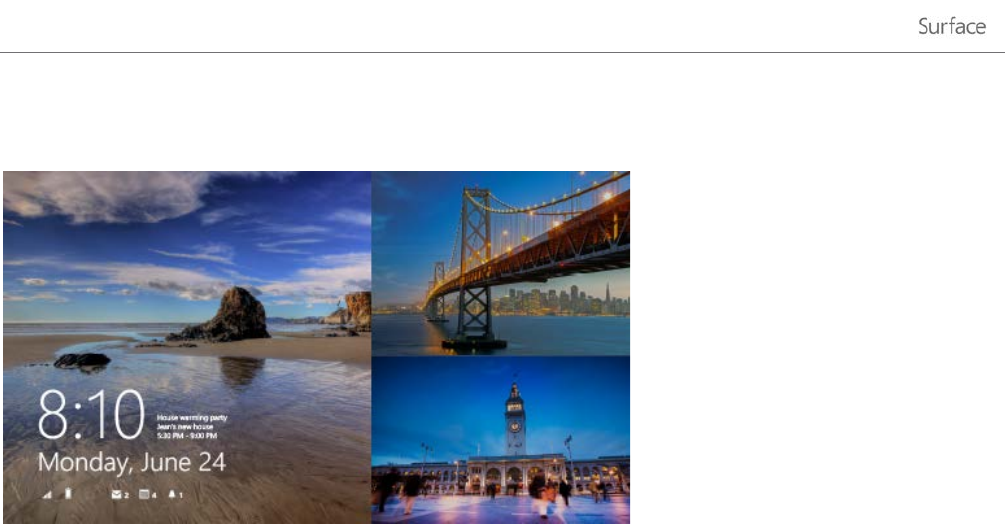
Change your lock screen
Your lock screen can include a picture, a slide show of pictures, and app notifications such as your next calendar
appointment. Here’s where you can change your lock screen settings:
• Open the Settings charm, tap or click Change PC settings > PC and devices > Lock screen.
For more info, see Personalize your PC on Windows.com.
Notifications
There are many ways to see when you have new email, messages, calendar events, status updates, and Tweets.
You have notifications in the upper-right corner and on the lock screen.
Hide notifications
To hide notifications for a while, open the Settings charm and then tap Notifications. Additional notification
settings are in PC settings:
• Open the Settings charm, tap or click Change PC settings > Search and apps > Notifications.
For more info about notifications, see the topic How to manage notifications for Mail, Calendar, and People on
Windows.com.
Lock screen app notifications
To choose which apps have notifications on the lock screen:
1. Open the Settings charm, tap or click Change PC settings > PC and devices > Lock screen.
2. Under Lock screen apps, choose the apps you want on your lock screen.
© 2014 Microsoft Page 47

Add a language
By adding a language, you can change the language that you use to read and write in Windows, apps, and the
web.
• To learn all about this, see Add a language or keyboard on Windows.com.
• If you want to use different languages in the Office apps, see Office 2013 language options on
Office.com.
Desktop background, colors, and sounds
To change the desktop background, colors, and sounds:
• From the desktop, open the Settings charm, then tap or click Personalization. Choose a theme or
change the desktop background, colors, and sounds separately. For more info, see Get started with
themes on Windows.com.
© 2014 Microsoft Page 48

Connect devices
Connect a USB mouse, printer, and
more
Surface 2 has a full-size USB 3.0 port that you can use to
connect accessories, such as a printer, camera, music player,
phone, a mouse, or even an external hard drive.
The first time you plug in a USB accessory, Windows installs the
necessary software for you (if needed).
Use a mouse
You can use the touchpad on your Typing Cover, or add a USB or
Bluetooth mouse.
• USB. Plug the mouse into the USB port on Surface.
• Bluetooth. See the Add a Bluetooth device section below.
Change your mouse settings
• Open the Search charm, tap or click Change PC settings > PC and devices > Mouse and touchpad.
Use a capacitive pen
You can use a capacitive pen or stylus (sold separately) on the Surface touchscreen. (Capacitive means a pen that
works like your finger.) You can use a pen to draw in apps like Fresh Paint, take notes in One Note, and mark up
Office docs.
Note The Surface Pro Pen can’t be used with Surface 2.
Add a Bluetooth device
Here’s how to add (also called pair) a Bluetooth device with your Surface:
1. Turn on the Bluetooth device and make it discoverable. To learn how to do this, check the info that came
with your Bluetooth device or the manufacturer’s website.
2. Open the Settings charm, tap or click Change PC Settings > PC and devices > Bluetooth.
3. Make sure Bluetooth is turned on, then wait while Windows searches for Bluetooth devices.
© 2014 Microsoft Page 49

4. Follow the onscreen instructions to finish pairing your device. If the accessory requires a passcode
(sometimes called a pairing code), you’ll be prompted for it. If you don’t know the passcode, check the
info that came with your device or the manufacturer’s website.
Notes
• When pairing a phone, make sure your phone is unlocked and showing the Bluetooth settings screen.
• If Windows doesn’t find your device, see Troubleshoot Bluetooth on Surface.com.
Add, remove, and manage your devices and printers
To remove and troubleshoot devices that aren't working properly, see Add, remove, and manage your devices
and printers on Windows.com.
What devices work with Surface 2?
Surface 2 is compatible with printers, mice, speakers, and other devices that have the Designed for Windows RT
8.1 logo. These devices work right out of the box—and you don't have to install drivers. Some older devices
might not work with Windows RT 8.1. To check what's compatible, see the Windows Compatibility Center.
How do I print?
To print from a Windows Store app (such as Internet Explorer or Mail):
1. Open the item you want to print.
2. Open the Devices charm, then tap or click Print.
3. Choose your printer from the list. (If your printer isn’t listed, choose Add a printer > Add a device.)
4. Choose your printing options and then tap or click Print.
To print from a desktop app (such as Office):
• Find the Print command in the app, or press Ctrl+P.
Printing topics
• Print and scan from Surface on Surface.com.
• Take a screen shot (print screen) in this guide.
• Share and print photos on Windows.com.
Can’t print?
If you have problems printing, see Troubleshoot printing on Surface.com.
© 2014 Microsoft Page 50
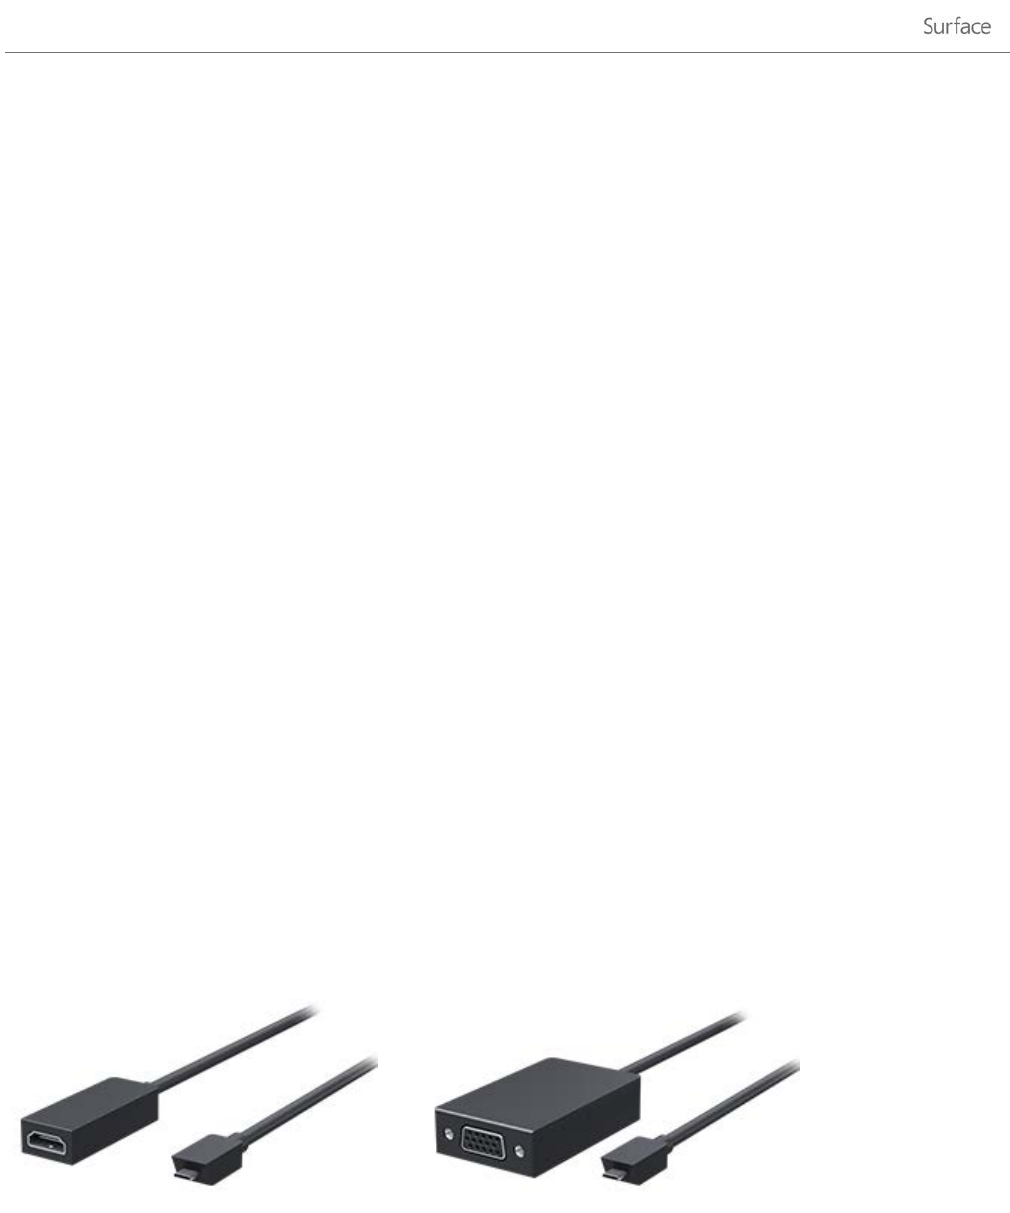
How do I scan something?
You can use the Scan app to scan pictures or documents to a variety of file formats (such as JPG and PNG). To
open the Scan app:
• Swipe up from the center of the Start screen and tap Scan.
Need help? In the Scan app, open the Settings charm and then choose Help.
Connect to a TV, monitor, or projector
You can connect your Surface 2 to a TV to watch movies on a big screen, a projector to share a presentation, or
another monitor so you can work with multiple apps.
Stream pictures, video, and music
Depending on what you already have set up, you might be ready to stream. For example, if you have an
Xbox 360 on a home network you might be ready to stream. In other cases, you might need to set up or change
your network and connect compatible devices.
For more info about this, see Stream pictures, video, and music to devices using Play on Windows.com.
Connect to a wireless display
1. Open the Devices charm and then tap or click Project.
2. Tap or click Add a wireless display.
3. Choose the wireless display in the list of devices found, and follow the on-screen instructions.
Connect with a cable
To connect Surface to another screen you’ll need an adapter and a compatible VGA or HDMI cable (cables and
adapters sold separately). Here are the adapters:
Surface HD Digital AV Adapter
Surface VGA Adapter
© 2014 Microsoft Page 51
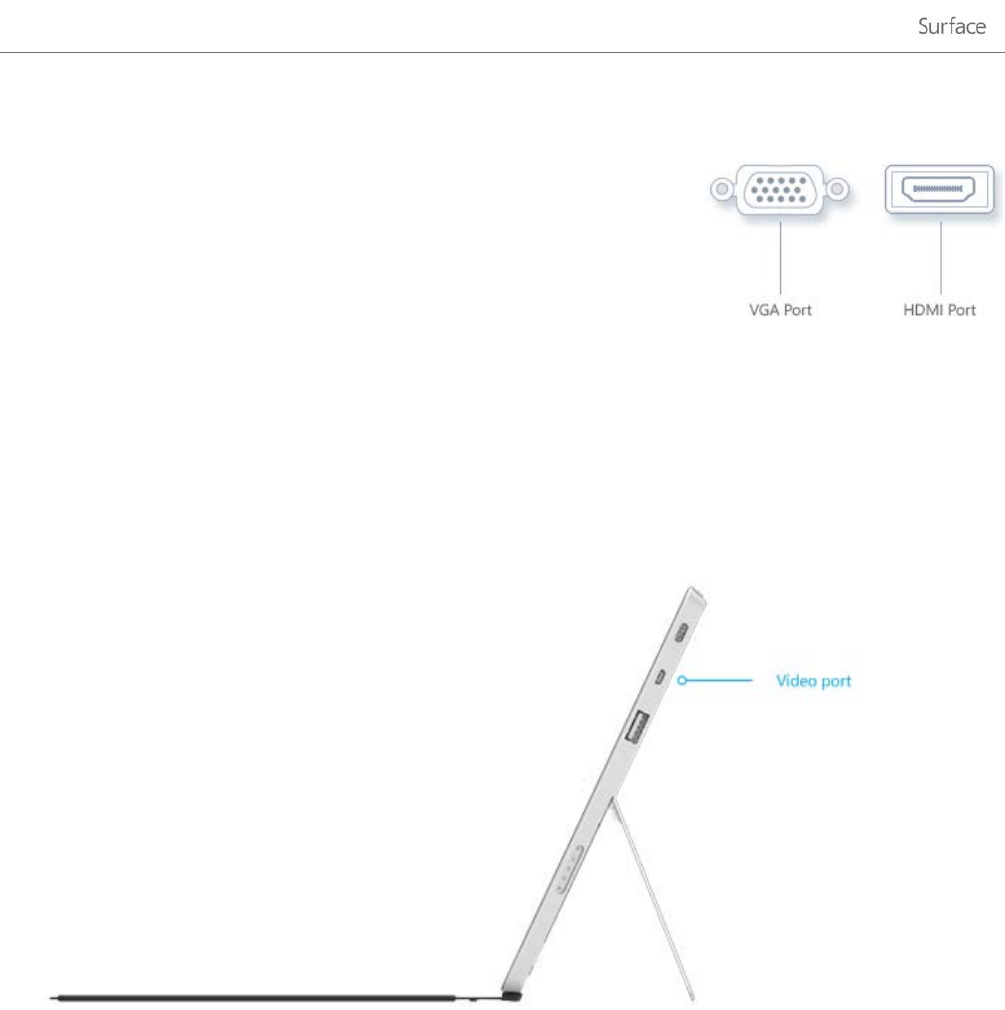
Which video adapter do I need?
To figure out which adapter you need, look at the ports on your TV, monitor,
or projector.
• HDMI port? Use the HD Digital AV Adapter.
• No HDMI port? Use the VGA Adapter (the VGA Adapter transfers
video only, not audio).
Surface video adapters are available online at Surface.com/accessories.
Connect Surface to a TV, monitor, or projector
1. Connect a VGA or HDMI cable to the HDMI or VGA port on your TV, monitor, or projector.
2. Connect the other end of the cable to the Surface adapter. (Be sure to remove the end cap from the
Surface adapter.)
3. Plug the adapter into the HD video out port on Surface (see picture).
Set up what’s on your screens
1. Open the Devices charm and then tap or click Project.
2. Choose one of these options:
• PC screen only. You’ll see everything on your Surface. (When you're connected to a wireless
projector, this option changes to Disconnect.)
• Duplicate. You’ll see the same thing on both screens.
• Extend. You'll see everything spread over both screens, and you can drag and move items
between the two.
© 2014 Microsoft Page 52

• Second screen only. You’ll see everything on the connected screen, and your Surface screen will
be blank.
Notes
• For more info about using taskbars and moving apps around, see Connect a second monitor or projector
on Windows.com.
• Problems or questions? See Trouble connecting to a second screen? on Surface.com.
© 2014 Microsoft Page 53
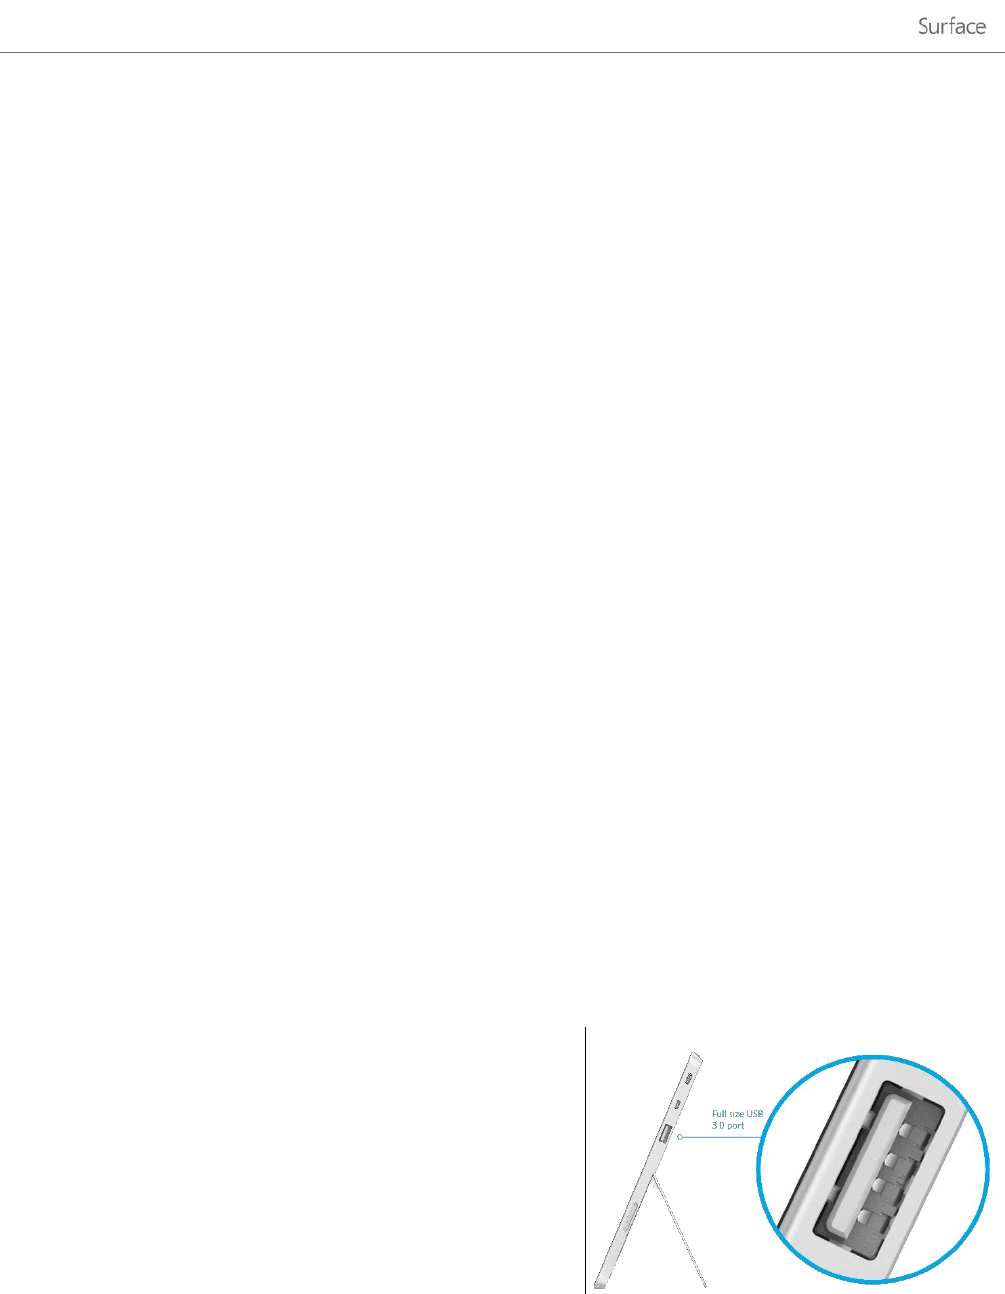
Storage, files, and backup
Here’s what you need to know about storage, files, and backup.
How much disk space do I have?
To see how much disk space you have on Surface:
• Open the Settings charm, then tap or click Change PC settings > Search and apps > App sizes. Here
you can see how much disk space is available and how much space each app is using.
Notes
• Pre-installed software and apps use a significant amount of disk space. See Surface.com/storage for
more details.
• Free disk space is also shown in File Explorer (choose This PC in the left pane of File Explorer).
Additional storage options
In addition to the internal storage, you can use the following storage options.
SkyDrive (online storage)
SkyDrive is cloud storage that comes with your Microsoft account. You can save files from your apps directly to
SkyDrive. When you open or save a file, just choose SkyDrive as the location. (It might already be selected.) Or
you can use the SkyDrive app—see the SkyDrive section to learn more about this.
To see how much space you have on SkyDrive:
• Open the Settings charm, then tap or click Change PC settings > SkyDrive > File storage.
Removable storage options
USB flash drive or hard dri
ve
Insert a USB flash drive
or hard drive into the USB port
on Surface
.
© 2014 Microsoft Page 54
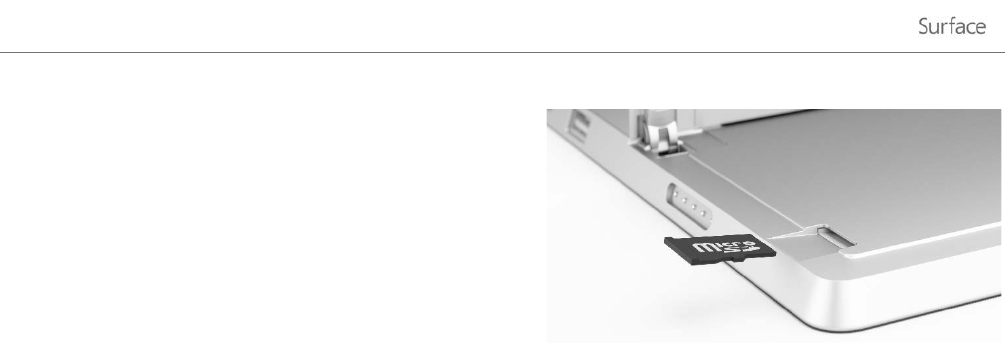
microSD memory card
You can
add additional storage to Surface by inserting
a
microSD, microSDHC, or microSDXC card.
F
lip out the Kickstand to access the memory card slot.
Save files on another computer on your network
You can open and save files to computers on your network. For more info, see Share files and folders on
Windows.com. (This way files don’t take up space on your Surface.)
Files and folders
When you need to delete, copy, move, or rename files, you can use the SkyDrive app or File Explorer:
• SkyDrive app. From the Start screen, tap SkyDrive. To learn more, see the SkyDrive section in this guide.
• File Explorer. To open File Explorer, do either of the following:
o Swipe up from the center of the Start screen and type File Explorer.
o From the desktop, tap or click the file folder icon on the taskbar.
For help using File Explorer, see the topic How to work with files and folders on Windows.com.
Add files to Surface
You can easily add music, pictures, videos, and documents to your Surface.
Use SkyDrive to add files
Add whatever files you like to your SkyDrive so that you can access them from your Surface. First add files to
your SkyDrive. Here’s how:
1. Go to the computer with the files that you want to copy to Surface.
2. Go to SkyDrive.com and upload your files. (To find out how, see Upload photos and files on
Windows.com.)
© 2014 Microsoft Page 55

Once files are on SkyDrive, use the SkyDrive app on Surface to access them. Here’s how:
1. From the Start screen, tap or click SkyDrive.
2. Navigate to the folder with the files that you want.
3. Do one of the following:
• Open: Tap or click a file.
• Download: Swipe down on a file (or right-click), and then tap Make offline.
Files that are available offline are stored locally on your Surface and can be opened without an Internet
connection. For more info, see Using SkyDrive on Surface on Surface.com.
If you’re using a metered connection (such as a mobile network), you can choose whether or not you want to
upload or download files over a metered connection. To access these settings, open the Settings charm then tap
or click Change PC settings > SkyDrive > Metered connections. For more info, see Metered Internet
Connections: FAQ on Windows.com.
Use removable media to add files
Music, pictures, and videos on removable media automatically appear in the Photos, Music, and Video apps. This
way you don’t have to add files to your Surface.
If you want to add files to Surface from a USB flash drive or microSD memory card. Here’s how:
1. Add files to a USB flash drive or memory card on another computer.
2. Insert the USB flash drive or microSD memory card into Surface.
3. If prompted, tap the notification in the upper-right corner and then choose Open folder to view files.
4. Select the files or folders you want to add to Surface.
5. Tap or click Copy to (on the Home tab).
6. Select a location. It’s a good idea to put your files in the appropriate folder: Documents, Music, Pictures,
and Videos. This way your files will show up in the appropriate app—for example, copy MP3 files to the
Music folder.
For help using File Explorer, see How to work with files and folders on Windows.com.
Copy files from another computer
You can access music, pictures, videos, and documents on computers that are part of your network. This way you
can copy files from one computer to Surface. For more info, see Get to files on other computers in this guide.
Back up your files using File History
File History backs up your personal files in the Documents, Music, Pictures, Videos, and Desktop folders on your
Surface. Over time, File History builds a complete history of your files.
© 2014 Microsoft Page 56
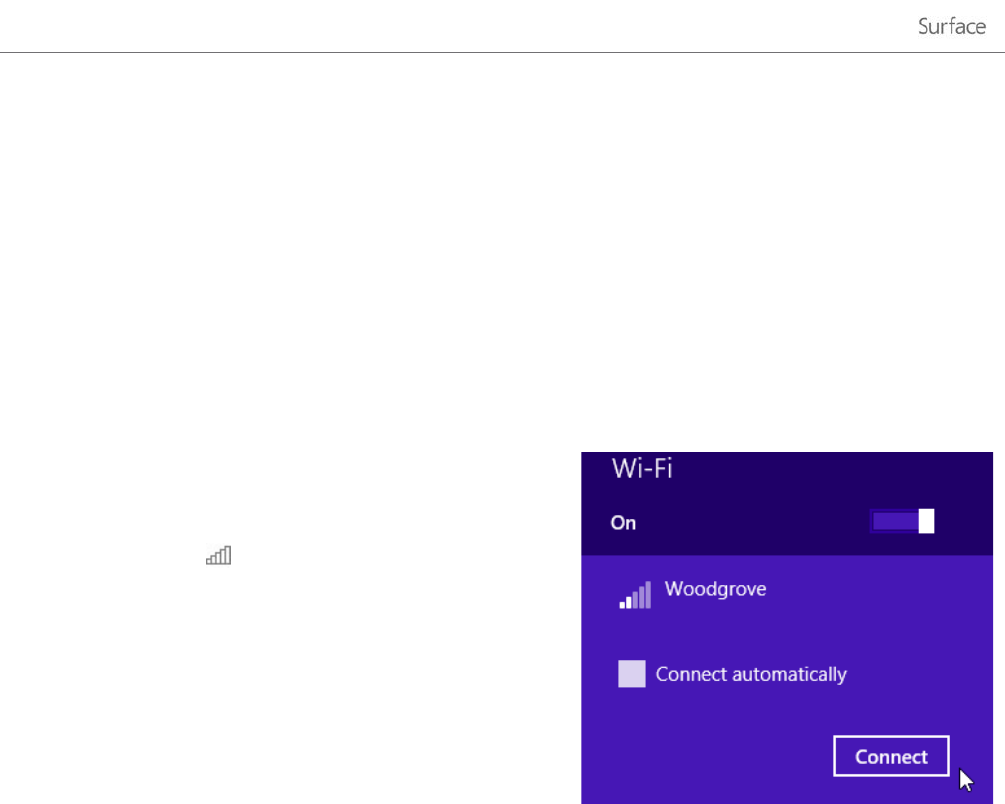
To start backing up and creating a history of your files, you'll first need to set up a File History drive and turn File
History on. We recommend backing up your files to an external drive or network.
To set up a drive or network location for your backup, see Set up a drive for File History on Windows.com.
Networking
Surface has built-in Wi-Fi that you can use to get online. Once you’re online, you can browse the Internet, get
apps, send email, and access other computers and devices on your network.
Connect to a Wi-Fi network
1. Open the Settings charm, then tap or click the wireless
network icon ( ).
2. Tap or click a network name and then choose Connect.
(If you want to connect to this network every time it's
in range, select Connect automatically).
3. If prompted, type your network security key (network
password), and then tap or click Next. If you need help
finding your wireless network password, see How to
find your wireless network password on Surface.com.
4. If prompted, choose whether or not you want to connect to other PCs and devices on the network.
Choose No if you’re connecting to a network in a public place like a café.
If you have problems connecting to a wireless network, see Can’t connect to a wireless network on Surface.com.
No Wi-Fi networks?
When a Wi-Fi network isn’t available, you can try one of the following options:
• Surface 2 (AT&T 4G LTE): You can use the built-in 4G/LTE connectivity. For info about this, see Mobile
networking on Surface 2 (4G LTE) in this guide.
• You might be able to use your phone’s Internet connection (see Tethering in this guide).
• Use the Skype WiFi app to find a WiFi hotspot. See Skype WiFi on Skype.com.
• Use a wired connection (see Connect to a wired network below).
• You might be able to use a portable wireless router or USB dongle with 3G, 4G, or LTE. To learn more,
see Mobile broadband from start to finish on Windows.com.
© 2014 Microsoft Page 57
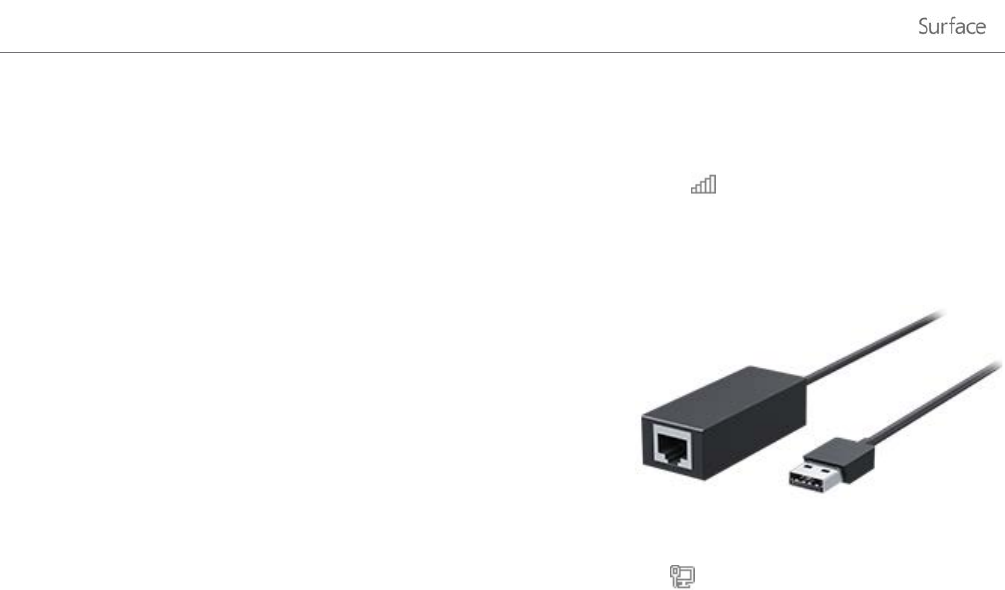
Disconnect from a Wi-Fi network
1. Open the Settings charm, then tap or click the wireless network icon ( ).
2. Tap or click the network with a Connected status, then choose Disconnect.
Connect to a wired network
You can connect Surface to a wired network using the Surface
Ethernet adapter (sold separately). Here’s how:
1. Plug the Surface Ethernet adapter into the USB port on
Surface (along the right edge).
2. Plug an Ethernet network cable into the adapter.
3. Plug the other end of the network cable into your router or an Ethernet network port.
4. Open the Settings charm, then tap or click the wired network icon ( ).
5. If prompted, type your username and password, and then tap Next. If you don't know this info, check
with your network admin.
6. To see if you’re online, go to the Start screen and start Internet Explorer.
If Surface doesn’t connect to the Internet, see Connect Surface to a wired network on Surface.com.
Join a homegroup
When you have several PCs on a network, homegroups make sharing printers and files a lot easier. A homegroup
is a group of PCs on a network that can share devices (such as printers) and files (such as your Documents,
Pictures, Music, and Videos).
If you’ve already created a homegroup, Surface can join it. Here’s how:
1. Open the Settings charm, then tap or click Change PC settings > Network > HomeGroup.
2. Tap or click Join. You can get the password from anyone else in the homegroup.
After you join a homegroup, you can access printers and files on PCs that are part of your homegroup. For more
info, see HomeGroup from start to finish on Windows.com.
Join a workgroup
Surface 2 can join an existing workgroup on a network. To learn more, see Join a domain, workgroup, or
homegroup on Windows.com.
© 2014 Microsoft Page 58

Get to files on other computers
To see shared files and folders on your network, open File Explorer and navigate to Homegroup or Network (or
you can use the SkyDrive app). Here’s how:
1. Open File Explorer. (Swipe up from the center of the Start screen and type File Explorer.)
2. In the left pane, choose Homegroup or Network.
3. To browse shared files and folders, tap or click the computer name under Network or someone’s name
under Homegroup.
For more info, see Find PCs, devices, and content on your network on Windows.com.
Note PCs that are turned off, hibernating, or asleep won't appear as part of the homegroup.
Connect to a Virtual Private Network (VPN)
Surface 2 can connect to your workplace network by using a Virtual Private Network (VPN) connection. VPNs
connect PCs to large networks (usually corporate) over the Internet.
Important Surface 2 with Windows RT 8.1 has built-in support for VPN. Third-party VPN software can also be
installed, if it's available in the Windows Store. For help with third-party VPN software, contact the third-party
VPN provider.
Set up a new VPN connection
1. Ask your network admin for your company’s virtual private network (VPN) server name. Example:
Contoso.com or 157.54.0.1 or 3ffe:1234::1111.
2. Make sure you’re connected to a network.
3. Open the Settings charm, then tap or click Change PC settings > Network > Connections.
4. Under VPN, tap or click + and enter the info for connecting to your VPN.
Can’t connect? See Connect to a Virtual Private Network (VPN) on Surface.com.
Connect or disconnect from a VPN
1. Open the Settings charm, and then tap or click the wired or wireless network icon.
2. Under Connections, tap or click your VPN connection, then choose Connect or Disconnect.
Workplace join
If your IT admin has set up the software to allow it, you can use your Surface for work and get to workplace
resources such as internal websites and business apps. For more info about this, see Use your personal PC at your
workplace on Windows.com.
© 2014 Microsoft Page 59
Airplane mode
Turn on Airplane mode when you’re traveling on an airplane or when you don’t need Wi-Fi or Bluetooth for a
while. Airplane mode extends the amount of time you have before your battery needs to be recharged.
To turn Airplane mode on or off: Open the Settings charm, tap or click the wireless network icon ( ) > Airplane
mode. When Airplane mode is on, both Wi-Fi and Bluetooth are turned off.
Tethering: Use your phone’s data connection
If a wireless network isn’t available, you might be able to connect your phone to Surface and share your phone’s
cellular data connection (sometimes called tethering). Tethering turns your phone into a mobile hotspot.
Notes
• To share your cellular data connection, tethering must be included with your current phone plan and
often costs extra.
• Tethering uses data from your cellular data plan. You should be aware of any data limits you have on
your plan, so you don't get charged extra.
• By default, tethered connections are metered. Apps and updates may not download over a metered
connection. To change this setting or to learn more about this, see Metered Internet connections:
Frequently asked questions on Windows.com.
Step 1: Share your phone’s Internet connection
• Check the materials that came with your phone or the manufacturer’s website.
Step 2: On Surface, select your phone as a network
1. Open the Settings charm, then tap or click the wireless network icon ( ).
2. Tap or click your phone’s name (the name you set up in Step 1), and then tap or click Connect.
3. If prompted, type the password that you set in Step 1.
Remote Desktop: Connect to another PC
With the Remote Desktop app from the Windows Store, Surface can connect to a PC in another location (the
remote PC). For example, you can connect to your work PC and get to all your apps, files, and network resources
from Surface. For info on how to do this, see Remote Desktop: Frequently asked questions on Windows.com.
© 2014 Microsoft Page 60
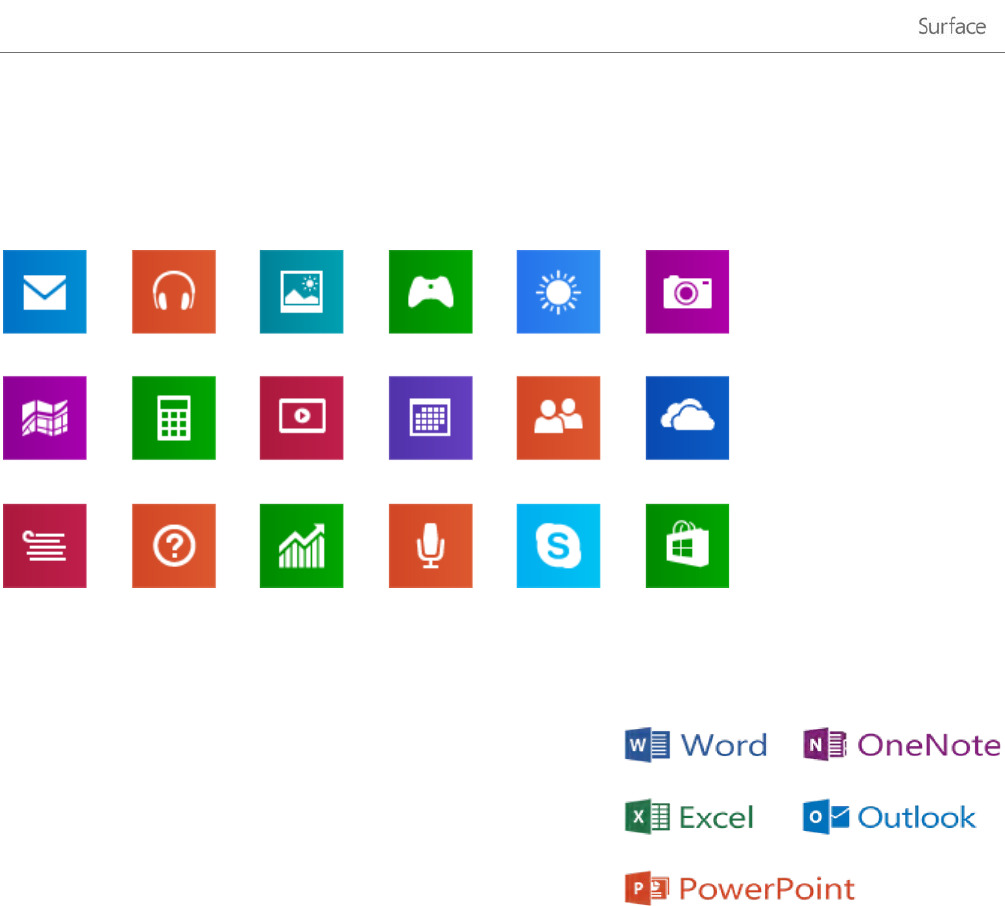
Built-in apps
Surface 2 comes with a great set of apps such as Skype, Camera, and Office 2013 RT.
Note Some features or apps may not be available in all regions.
Office 2013 RT
Surface 2 comes pre-installed with Office 2013 RT: Word, Excel,
PowerPoint, OneNote, and Outlook.
Office 2013 RT has almost the same features as Office 2013 on
Windows 7 or Windows 8. To learn about the differences, go to
Office.com/OfficeRT.
Start an Office app
• From the Start screen, tap an Office app tile (such as Word).
• From the desktop, tap an Office app on the taskbar.
Either way, Office apps run in the desktop.
Get started
If you’re new to Office 2013, download free Office 2013 Quick Start Guides. These printable guides have tips,
shortcuts, and screenshots to help you get started.
To find out how to add your email accounts to Outlook, see Outlook RT: Add your email accounts in this guide.
© 2014 Microsoft Page 61

SkyDrive and Office work together
When you sign in with a Microsoft account, your docs are saved on SkyDrive (by default) so that you can access
them from anywhere—your computer, phone, or the web. Saving Office docs on SkyDrive also makes it easy to
share and work with other people (If they don't have Office, they can use free Office Web Apps.) For more info,
see SkyDrive and Office work together on Windows.com.
A few more things
• File compatibility. Office 2013 apps can open files created with previous versions of Office. To check
compatibility between Office 2013 and previous versions of Office, see Check file compatibility with
earlier versions on Office.com.
• Touch. Check out the Office Touch Guide on Office.com.
• Pen. To find out how to use a capacitive pen (sold separately) in Office apps (called inking), see Use a
pen to draw, write, or highlight text on a Windows tablet on Office.com.
• Languages. If you want to work with different languages, see Office 2013 Language Options on
Office.com.
OneNote
OneNote is a digital notebook for all of your notes and information. You can create to-do lists, add pictures, and
format notes with tables, bullets, and colors. When you sign in with a Microsoft account, your notes are saved in
the cloud so that you can access them from your computer, phone, or the web.
You can use either of the following apps:
• OneNote 2013 RT. Pre-installed desktop app.
• OneNote app. Free app in the Windows Store.
You can add and edit notes using either OneNote app. You can also use OneNote on your phone, so that you
can view and edit your notes on the go. (OneNote apps are available for Windows Phone, Android, and the
iPhone.) To learn more about using OneNote on your Windows Phone, see Use OneNote Mobile on
WindowsPhone.com.
Internet Explorer 11
Surfing the web has never been better. Surface has two versions of Internet Explorer:
• a touch-friendly app
• a desktop app
This way you can easily surf the web from the Start screen or the desktop.
© 2014 Microsoft Page 62
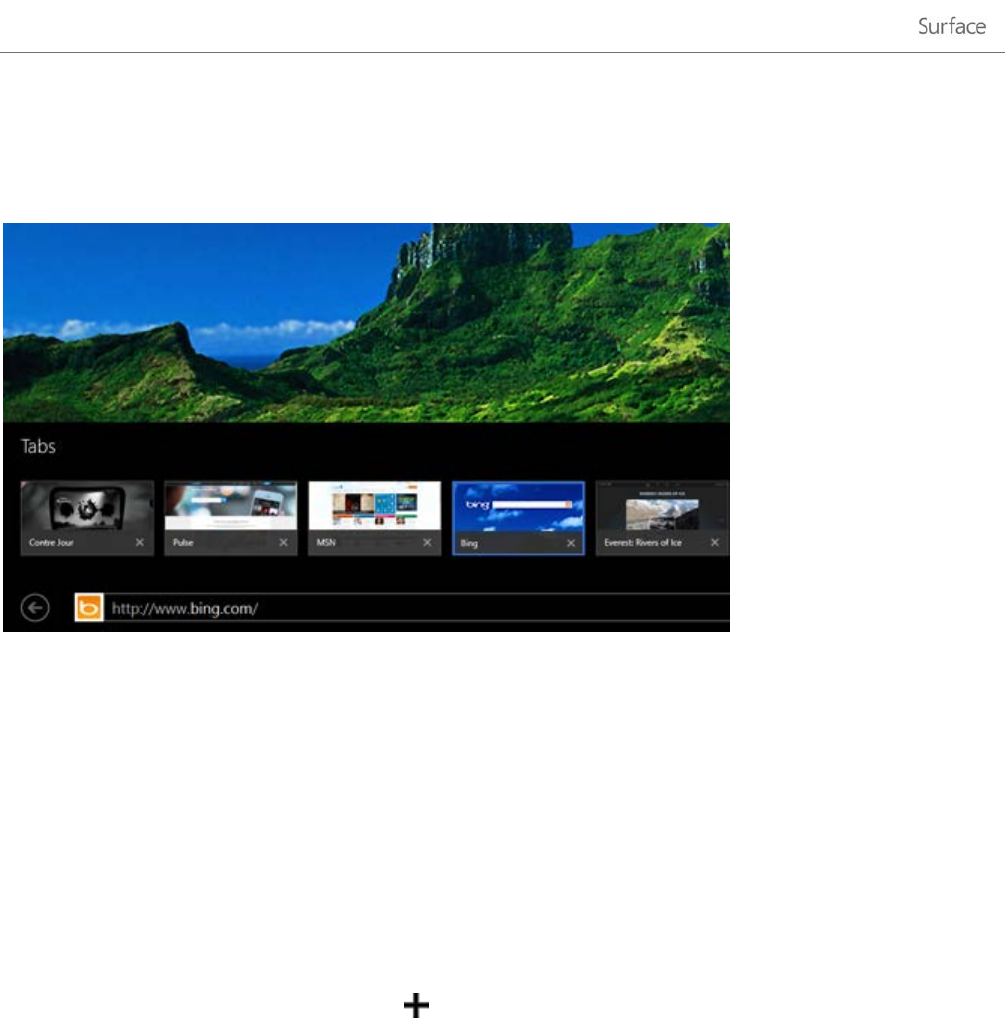
Touch-friendly Internet Explorer 11
Internet Explorer 11 is built for touch, with faster load times, and a full-screen experience that includes side-by-
side browsing of your sites.
• To open Internet Explorer, go to Start and tap or click Internet Explorer. For help getting started, check
out the Browsing the web on Windows.com.
Address bar, tabs, and favorites
To show the Address bar, swipe down from the top edge of the screen (or right-click). Tap or click the Address
bar and then type what you want to find.
To always show address bar: Open the Settings charm, tap or click Options > Always show address bar and
tabs.
• Change settings. Open the Settings charm, tap Options. Some settings can only be changed from the
desktop version of Internet Explorer (see below).
• Tabs. To open a new tab, tap or click . Then, type a URL or search term, or select one of your frequent
or favorite sites. For info on using tabs, see Open, close, and switch between tabs on Windows.com.
• Home page. To find out how to change your home page, see Change your home page.
• Need help? See Internet Explorer Top Solutions on Windows.com.
© 2014 Microsoft Page 63
Your web favorites
You can pin websites to your Start screen or add them to your browser favorites. Here’s how:
1. Go to a site that you want to pin or make a favorite.
2. Swipe down from the top edge of the screen (or right-click).
3. Tap the Favorites button () or the Pin button ( ).
Notes
• Favorites. See Add to, view, and organize favorites on Windows.com.
• Sync your settings. If you’re using a Microsoft account, your favorites, open tabs, home page, history
and settings can be synced across your Windows RT and Windows 8 PCs. For more info, see Sync your
settings in this guide.
Internet Explorer for the desktop
You can also surf the web from the desktop using Internet Explorer for the desktop. Here’s how:
• From the desktop, tap or click the Internet Explorer icon on the taskbar.
Change settings. Tap (upper-right corner) > Internet options. Pop-up Blocker is on the Privacy tab. Both
Internet Explorer apps use the same settings.
Browsing history. Tap (upper-right corner) > History tab.
Display problems? If a website you're visiting doesn't look right or videos won’t play, see Videos won't play or
webpages don't display correctly on Windows.com.
Flash and browser add-ons
Internet Explorer can play HTML5 and many Adobe Flash Player videos, however, browser add-ons, such as Java
and Silverlight, are not supported.
Streaming audio from a website
To stream audio from a website while using other apps, do the following:
• Use Internet Explorer and the other app side-by-side, or use Internet Explorer for the desktop. For more
info, see Use apps together (side by side) in this guide.
Music playing from the Music app continues playing when you switch apps, and when the screen turns off.
Questions about Internet Explorer? See Internet Explorer Help on Windows.com.
© 2014 Microsoft Page 64
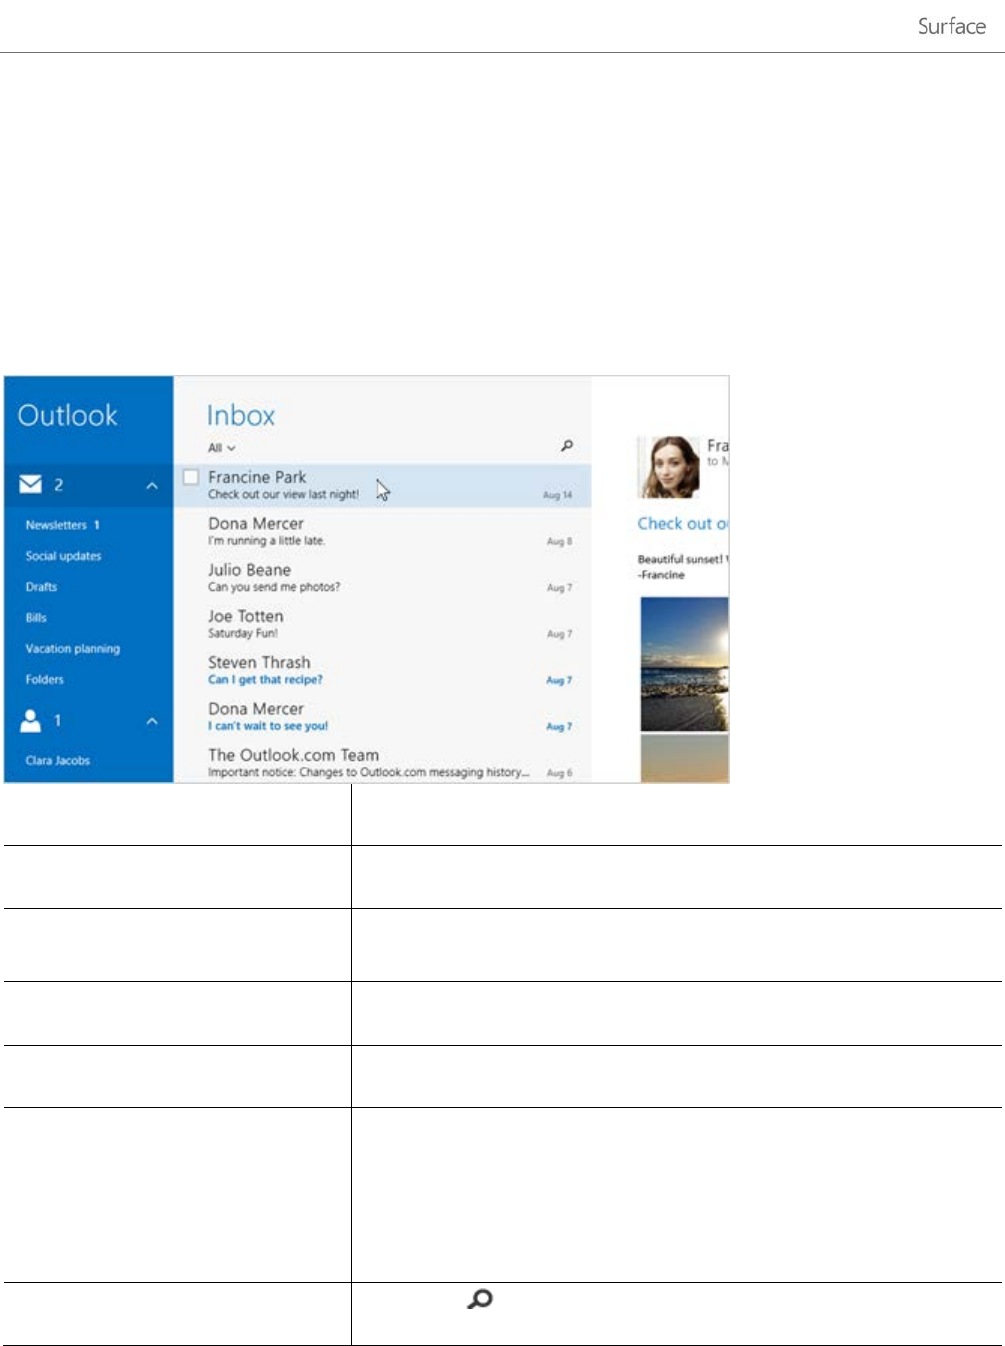
Mail
You can use the Mail app to read and respond to your email messages from all your email accounts.
Add email accounts
To find out how to add your email accounts to Mail or Outlook RT, see Set up your email in this guide.
Using Mail
Task
What to do
Change Mail app settings
Open the Settings charm, tap or click Options.
Change email
account settings Open the Settings charm, tap or click Accounts, then choose one of
your accounts.
Switch accounts
or folders Tap a folder or account to switch to it (lower-left corner).
See
commands Swipe down from the top edge of the screen or right-click.
Send or receive email
To manually sync your email, swipe down from the top edge of the
screen and then tap Sync (or press F5).
To change when and how much email is downloaded, open the
Settings charm, tap or click Accounts, select an account, and then
change your settings.
Find messages
Tap Search above your messages and type what you want to find.
© 2014 Microsoft Page 65

Task
What to do
Print messages
Open the Devices charm, tap Print, choose a printer, and then choose
Print.
Select multiple messages
Swipe across a message in the middle pane, or right-click each
message.
To select continuous messages, hold the Shift key and press the Up
arrow or Down arrow key.
Mark messages as unread, junk, or
flagged
Select one or more messages, then swipe down from the top of the
screen and choose Flag, Junk or Mark unread.
Format text
Select text in a new email message to see basic formatting options like
the font, emoticons, or a bulleted list.
Copy and paste
Tap a word then drag a circle to extend the selection. Tap and hold
the selected text for a moment, then tap Copy or Copy/Paste.
Add attachments
In a new message, tap the paper clip in the upper-right corner. Select
some files and choose Attach.
Create and manage folders
Swipe down from the top edge of the screen, then tap or click Folder
options.
Email notifications
New email notifications appear in the upper-right corner, on the lock
screen, and on the Mail tile. For more info, see How to manage
notifications for Mail, Calendar, and People on Windows.com.
Change your email signature
Open the Settings charm, tap Accounts, choose an account, then
change the email signature.
Add a contact
Add your contacts to the People app. To find out how, see People app
help on Windows.com.
Questions? Check out Mail app for Windows on Windows.com. If you’re having a problem, see Troubleshoot
Mail on Surface.com.
Other email apps?
• Outlook RT is pre-installed on Surface—see Outlook RT: Add your email accounts in this guide.
• Look for an email app in the Windows Store.
© 2014 Microsoft Page 66
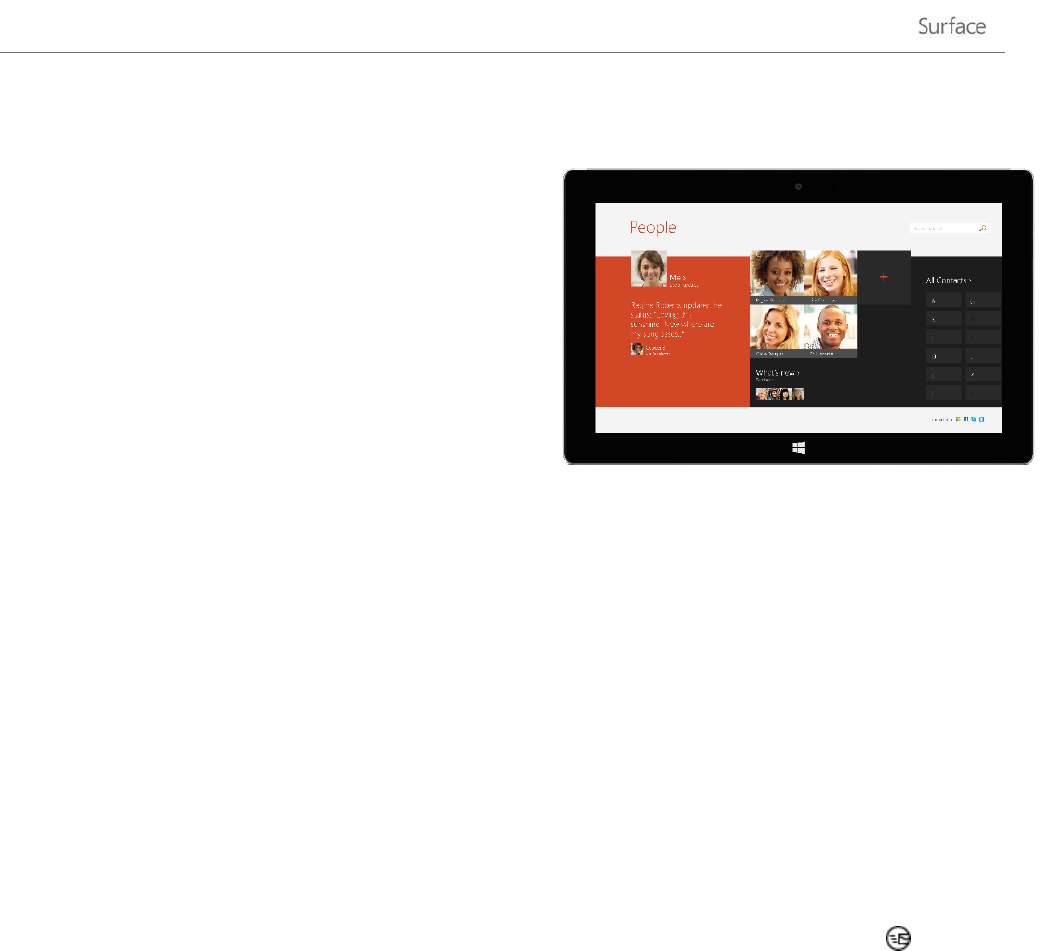
People
The People app is your address book and your social app
all in one. When you connect your accounts, such as
Facebook and Twitter, you’ll get all the latest updates,
Tweets, and pictures in one place. You can write on
someone's Facebook wall, comment on an update, or
retweet a Tweet without switching to another app.
To find out how to add your accounts, see People: Add
accounts in this guide.
For info on editing contacts and creating groups, see
Contact list management on Windows.com.
Connect with people
Once you've added some people, you can…
• Send them a message or email.
• Call, chat, video call them using Skype.
• Map their address so that you have directions ready to go.
• Write on their Facebook wall.
Pin a contact to Start: Tap a contact, then swipe down from the top of the screen, and tap Pin to Start. Now you
can tap the person’s tile on Start to see what’s new or contact them.
Post status updates and Tweets
1. Swipe down from the top edge of the screen, and then tap Me.
2. In the What's new section, choose a social network, write your message, and then tap send .
Tips
• You can use the Share charm to share links or photos with your social networks. See Share photos, links,
and more in this guide.
• Need help? See People app help on Windows.com.
© 2014 Microsoft Page 67
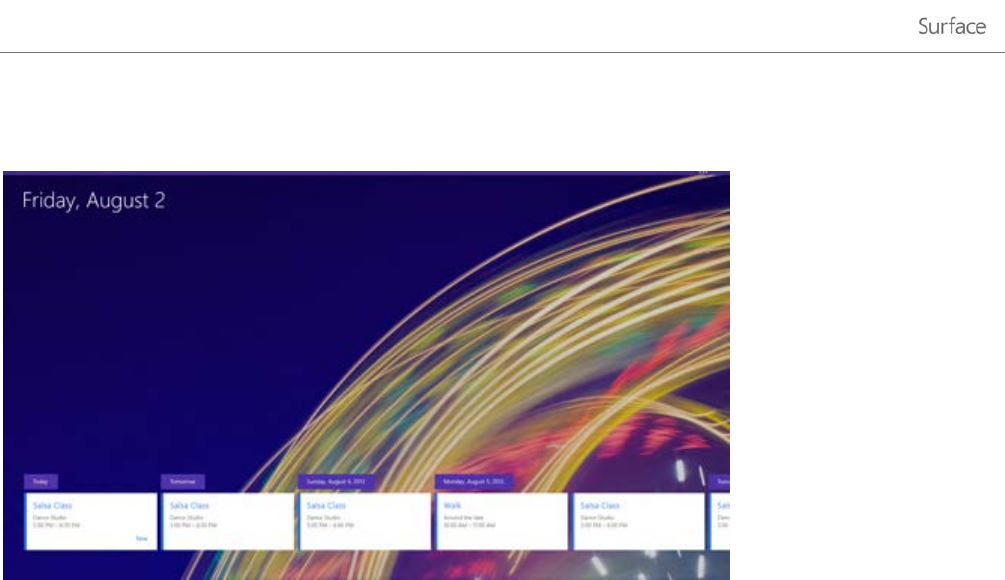
Calendar and reminders
The Calendar app brings all your calendars together in one place. Reminders and notifications remind you about
events and appointments, so that you don't miss a thing.
To add a calendar: Open the Settings charm, tap or click Accounts > Add an account.
Note Your Google calendar can’t be synced with the Calendar app. For a workaround, see How to see your
Google events on Windows.com.
To change your calendar options: Open the Settings charm, tap or click Options, select the calendars you want to
show and the colors that you want.
To switch calendar views: Swipe down from the top edge of the screen, then tap what you want to see.
Calendar help
• See Calendar app help on Windows.com or open the Settings charm and tap Help (from the Calendar
app).
• For info on how to get notified about upcoming events, see How to manage notifications for Mail,
Calendar, and People on Windows.com.
© 2014 Microsoft Page 68
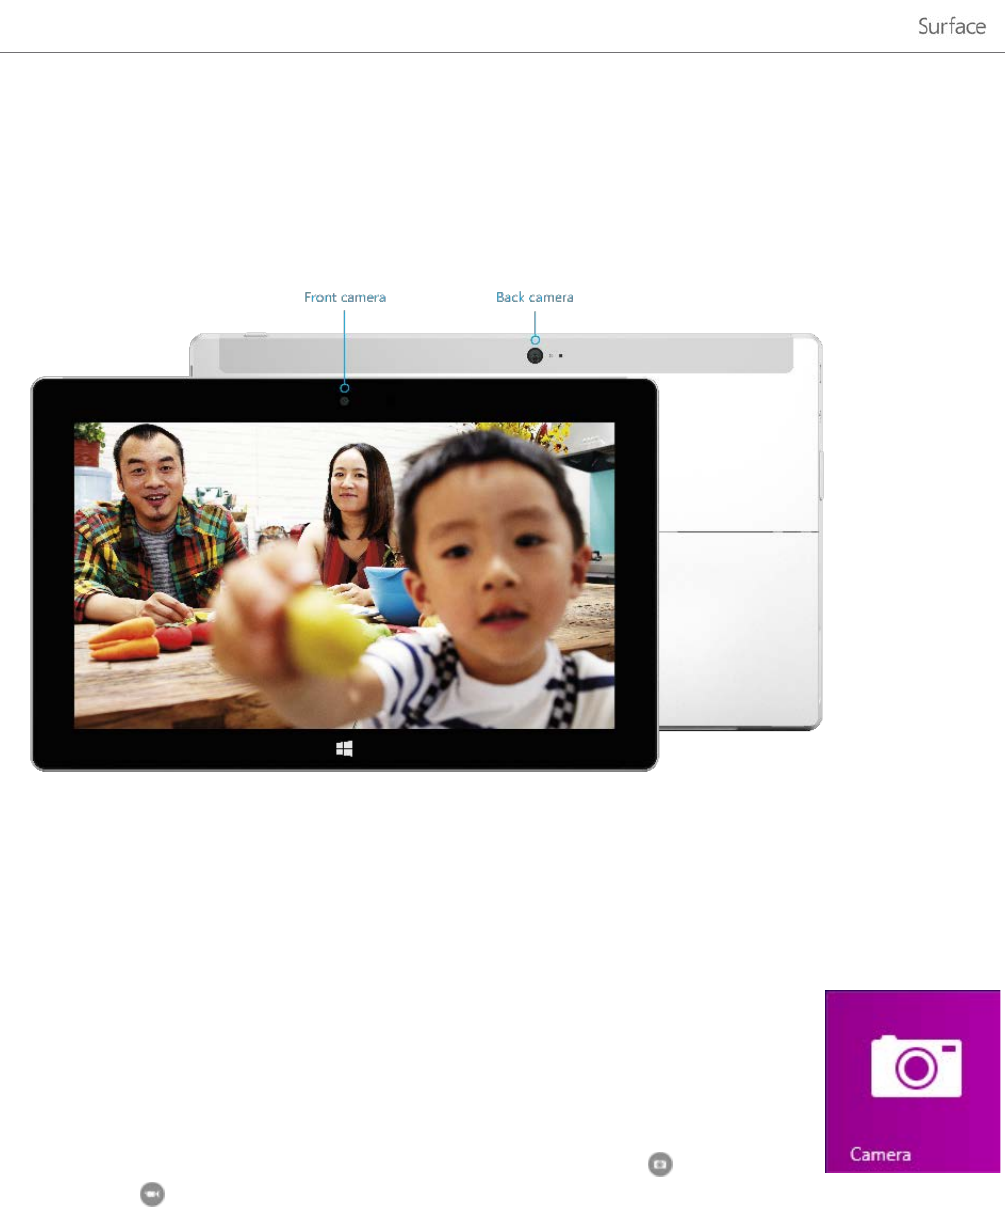
Camera
Surface has two cameras. You can use the front-facing camera for a Skype video chat with a friend, and the rear-
facing camera to record meetings and events. When Surface is positioned on a desk using the first kickstand
position (the more upright position), the rear-facing camera points straight ahead.
Record video in 1080p HD, with a 16:9 aspect ratio (widescreen) with either camera. Take photos with either
camera, too. The front-facing camera is 3.5 megapixels and the rear-facing camera is 5.0 megapixels.
Both cameras are fixed focus, so you don’t need to worry about focusing. A privacy light appears when either
camera is on, so there are no surprises.
Record videos and take photos
The Camera app is pre-installed on Surface or you can use another camera app from the
Windows Store (search for Camera in the Store app). The following info is for the Camera
app.
To take a photo or record a video:
• Open the Camera app, and then tap the on-screen Photo button or Video
button .
Tip When you’re recording video, you can tap anywhere on the screen to take a picture without stopping the
recording.
© 2014 Microsoft Page 69
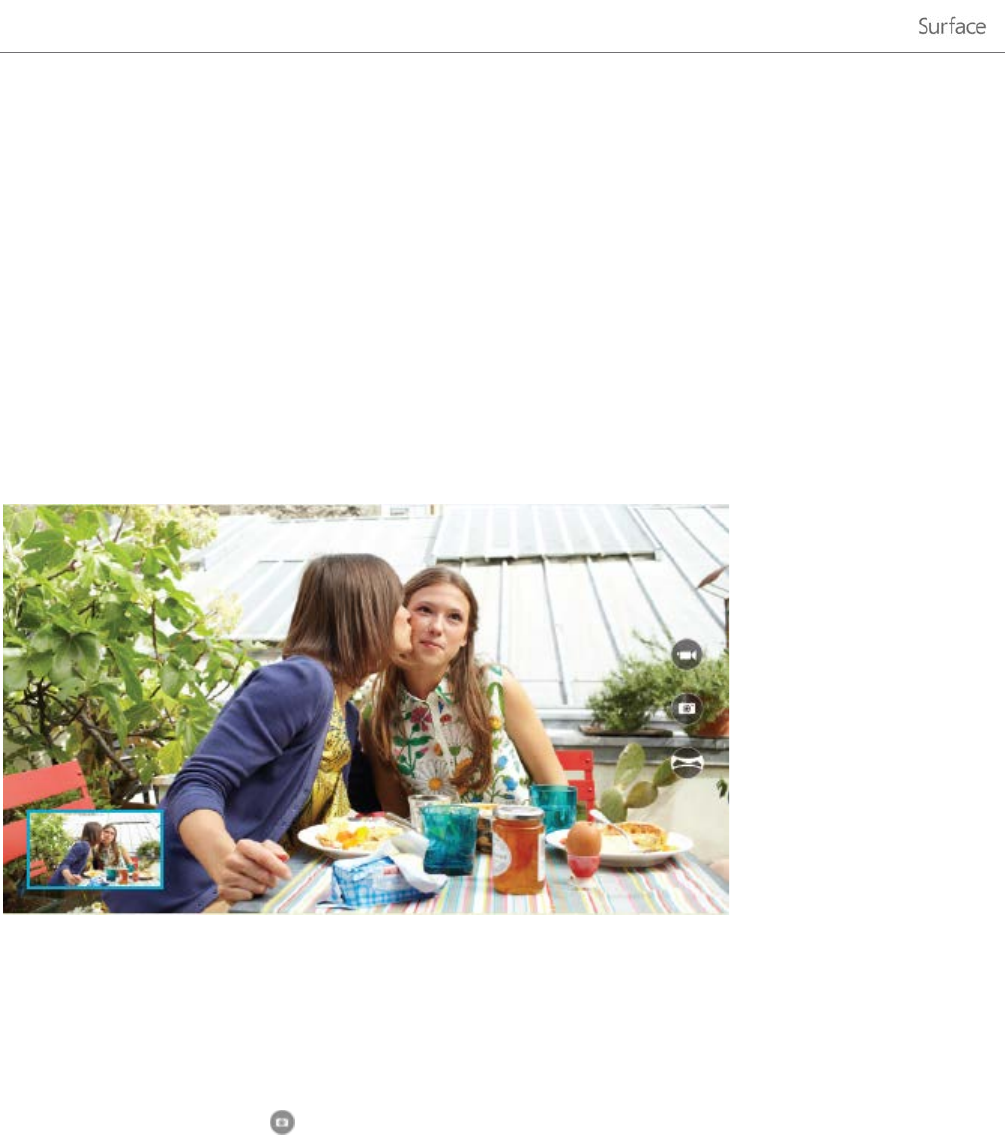
Camera options
Swipe down from the top edge of the screen to see camera options such as timer, exposure, and the option to
switch cameras. A few more camera options are available in Settings (open the Settings charm, and then choose
Options).
How to get the best shot
The Camera app automatically captures several images right before and after you take a photo. This way if you
miss a moment, you can look through the images to find the photo you want. Here’s how:
1. After you take a photo, tap the image in the lower-left corner (see picture).
2. Turn the dial to review the images.
3. When looking at the one you want to save, tap or click the Save button in the dial.
Take photos from the lock screen
You can quickly take a photo or video from the lock screen. Here’s how:
1. If the screen is off, tap a key or turn Surface on.
2. Swipe down from the top edge of the lock screen.
3. Tap the Photo button or anywhere on the screen.
4. To see your camera roll or change settings, tap or click the Unlock button, sign in to your Surface, and
open the Camera app.
To turn the lock screen camera on or off: Open the Settings charm, tap Change PC settings > PC and devices >
Lock screen > Swipe down on the lock screen to use the camera (under Camera at the bottom of the screen).
© 2014 Microsoft Page 70
Take a panorama
You can capture unique immersive panoramas using the Camera app. Here’s how:
1. Open the Camera app and point the camera at your starting point for the panorama.
2. Tap the Panorama button .
3. Slowly tilt or rotate the camera in any direction. When you align the new image with the existing images,
the camera automatically takes the next image.
4. When you’ve taken all the pictures you want in your panorama, tap the check mark.
The Camera app stitches together the images and saves the panorama in your camera roll (panorama files in the
Camera Roll folder have a .Pano file extension).
For best results, keep the camera in the same place as you tilt and rotate it, as if it’s on a tripod. Move slowly
and steadily when lining up the image, and then pause to capture it. If your body blocks the viewfinder, keep the
camera in the same place and step around it until you’re out of the way. See Camera app and webcams: FAQ to
watch a video showing best practices for taking a panorama.
Use the Camera, Photos, or SkyDrive apps to view your panoramas. You can share links to your panoramas on
SkyDrive—see Share and print photos on Windows.com.
View photos and videos (Camera Roll)
There are lots of ways to see the photos and videos you’ve taken with the Camera app:
• Camera app: Swipe to the right to look through your recent photos and videos. You can also swipe
down from the top edge of the screen, and then tap Camera roll.
• Photos, File Explorer, or the SkyDrive app: Go to the Pictures folder, and then to the Camera roll folder.
You can choose to have the photos and videos that you take with Surface automatically uploaded to SkyDrive. To
find out how, see Store photos on SkyDrive on Windows.com.
© 2014 Microsoft Page 71
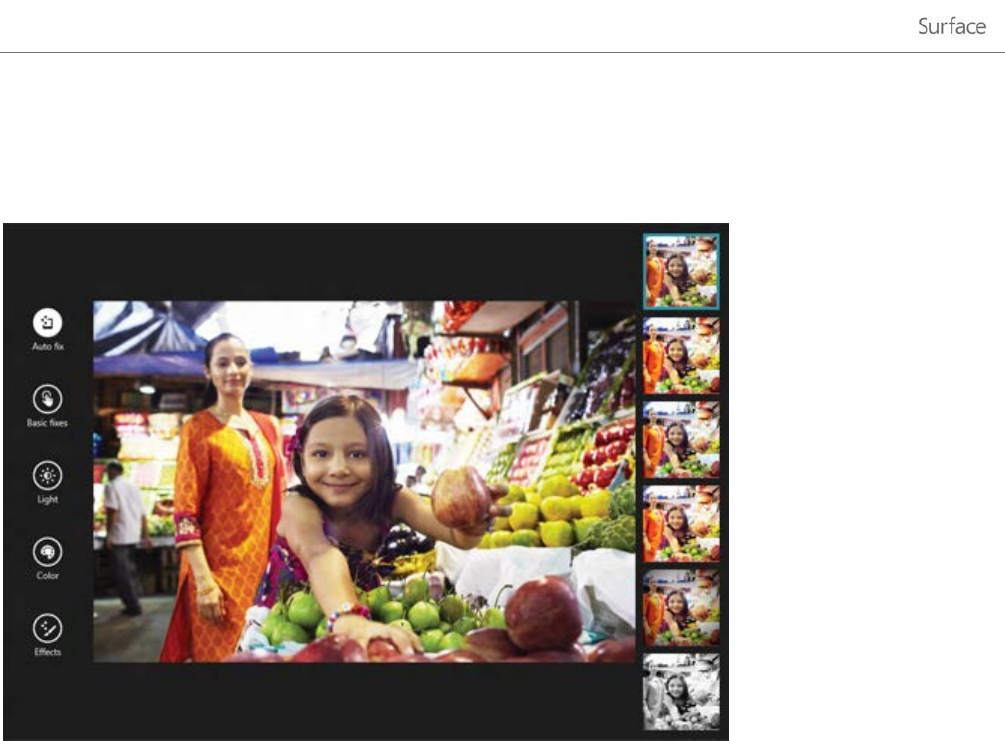
Edit photos
The Photos app can make automatic corrections for you, or you can experiment with lighting and color
adjustments, effects, plus cropping and rotating.
1. Open a photo in the Camera, Photos, or the SkyDrive app.
2. Swipe down from the top edge of the screen.
3. Tap or click Edit.
4. Choose from auto and basic fixes, light and color adjustments, and effects.
5. Once the picture is how you like it, swipe down from the top edge to save your changes.
Share and print photos
For info about sharing and printing your photos, see Share and print photos on Windows.com.
Edit videos
To delete or trim videos:
1. Open the video using the Camera, Photos, or the SkyDrive app.
2. Swipe down from the top edge of the screen.
© 2014 Microsoft Page 72

3. Do one of the following:
• Tap or click Delete to delete the video.
• Tap or click Trim to make the video shorter. Move the handles at the left and right ends of
the time line to the new start and stop points you want.
Other video editing apps
You can use the Movie Moments app to edit your videos into short movies that are 60 seconds or less. You can
trim scenes, highlight key moments with captions, and add music. For more info see How to use Movie Moments
on Windows.com.
If you want to make more advanced edits or work with longer videos, search the Windows Store for other video
editing apps.
Music
With the Music app, you can play music in your collection, stream music from one of the largest
digital music catalogs, and buy new music from the Xbox Music Store2. You can also discover new
music by creating a Radio station based on your favorite artists.
2Free streaming limited to 10 hours/month after 6 months; unlimited with paid Xbox Music Pass subscription. Free music
streaming, Xbox Music Pass, and Xbox Music aren’t available in all countries or regions. See Xbox Music for more info.
© 2014 Microsoft Page 73

Play music
1. From the Start screen, tap or click Music.
2. On the left, tap or click Collection.
3. Choose to see your collection arranged by Albums, Artists, or Songs. Or use Search to find what you
want to play.
4. Select a song or album, and then tap or click the Play button.
No music? If your Collection is empty, add songs to your Music folder and they'll appear in the Music app. If
your music is on another computer that’s part of your home network (homegroup), you can join the homegroup
and listen to music without copying files to your Surface. For help copying music to your Music folder, see Add
files to Surface in this guide.
Playlists. For help creating playlists, see Music app on Windows.com.
Want bigger sound? Connect external speakers to the headset jack or USB port on Surface, or wirelessly
connect speakers with Bluetooth wireless technology. See Connect devices in this guide for more info.
Stream music
When you’re signed in with your Microsoft account, you can stream millions of songs for free*. You’ll hear some
ads when you’re listening to songs you don’t own, and there’s some fine print you should read about streaming
limits.
To stream music: Tap or click Explore, choose a new album, or use Search to find an artist, album, or song
that you want to play.
*Internet required; ISP fees apply. Free music streaming, Xbox Music Pass, and Xbox Music aren’t available in all countries or
regions. See Xbox Music for more info.
Xbox Music Pass
If you want to stream music without hearing ads and be able to download songs to your Surface, Windows
Phone or Xbox, try a subscription for Xbox Music Pass.
Create a radio station
Radio creates a dynamic playlist of songs from similar artists.
To create a new station: Tap or click Radio, tap Create new station and type an artist’s name.
Buy songs and albums
You can buy music using the payment option associated with your Microsoft account. Here's how:
• Find a song or album that you want. You can use Search to quickly find something. If you don’t see a
buy option, swipe down from the top edge of the screen to see more commands.
© 2014 Microsoft Page 74
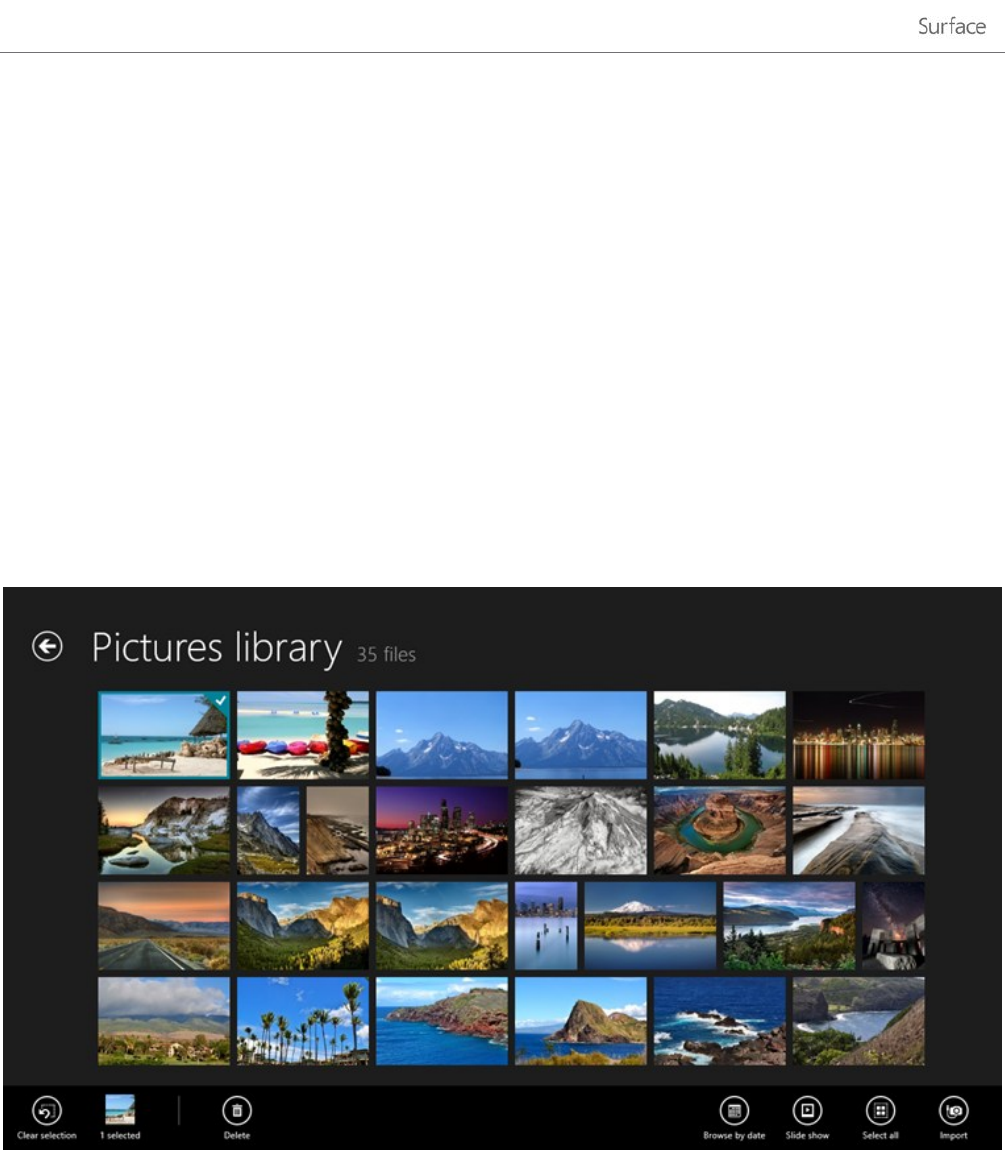
To see your billing history and payment options: Open the Settings charm, then tap or click Account.
Get more music apps
You can browse or search the Windows Store for music apps.
Need help?
If you need help, see Xbox Music on support.xbox.com.
Photos
You can use this app to view photos on Surface and on your SkyDrive. If you have photos on your camera or
phone, you can import them using this app.
To see your photos, go to the Start screen and open the Photos app. Photos from your Pictures folder appear in
the Photos app. To see commands like Slide show and Select all, swipe down from the top edge of the screen.
Notes
• For help with the Photos app, see Photos app for Windows: FAQ on Windows.com.
• To see the file formats supported by the Photos app, see Which file types are supported? on
Surface.com.
© 2014 Microsoft Page 75
Import photos or videos
You can import photos from your camera, phone, or removable storage (USB flash drive or microSD memory
card). To find out how, see View and import photos and home videos on Surface.com.
Edit photos
For info on how to edit photos, see Edit photos in this guide.
Tips
• If you have lots of photos or videos, you can store them on SkyDrive and access them from any web-
connected device (including Surface). For more info, see Store photos on SkyDrive on Windows.com.
• Want to take photos or videos with Surface? See the Camera topic in this guide.
• To find out how to share and print photos, see Share and print photos on Windows.com.
Video
You can use the Video app to watch home videos on your Surface, and rent
or buy TV shows and movies from the Xbox Video Store.
The Video app uses the Xbox Video* service for movies and TV shows. And,
it features Instant-on streaming in HD, so you don't have to wait for
anything to download—just start watching.
*The Xbox Video service isn't available everywhere. Read this info to see where it’s
available.
Play videos
1. From the Start screen, tap or click Video.
2. Slide to the left to see your videos.
3. Tap or click a video to play it.
No videos? If you don’t see any videos, add videos to your Videos folder or join a homegroup. For help copying
videos to your Videos folder, see Add files to Surface in this guide.
More video apps? Browse the Windows Store for more video and entertainment apps.
Notes
• You can stream videos from Surface to your TV. See Connect to a TV, monitor, or projector in this guide.
• For help using the Video app, see Xbox Video on support.xbox.com.
© 2014 Microsoft Page 76

Skype
Skype is the always-on app that makes staying in touch easier than ever. Connect with friends, family, and
colleagues by using Skype calls and chat.
Included with your Surface 2 purchase: One year of free voice calling to landlines in over 60 countries, and free
Skype WiFi at over 2 million hotspots worldwide. To activate your free Skype experience, use the code included in
your Surface 2 packaging. Offer details.
Set up Skype
• See the Skype (IM and calls): Add contacts topic in this guide.
Call and chat
To find out how to add contacts, send instant messages, and make calls, see Skype on Surface on Surface.com.
Tips
• To change settings or see help topics: Open the Settings charm from the Skype app.
• To switch between the front and rear-facing cameras while in a video call: Tap the webcam image.
• For more help with Skype, go to Skype support.
© 2014 Microsoft Page 77
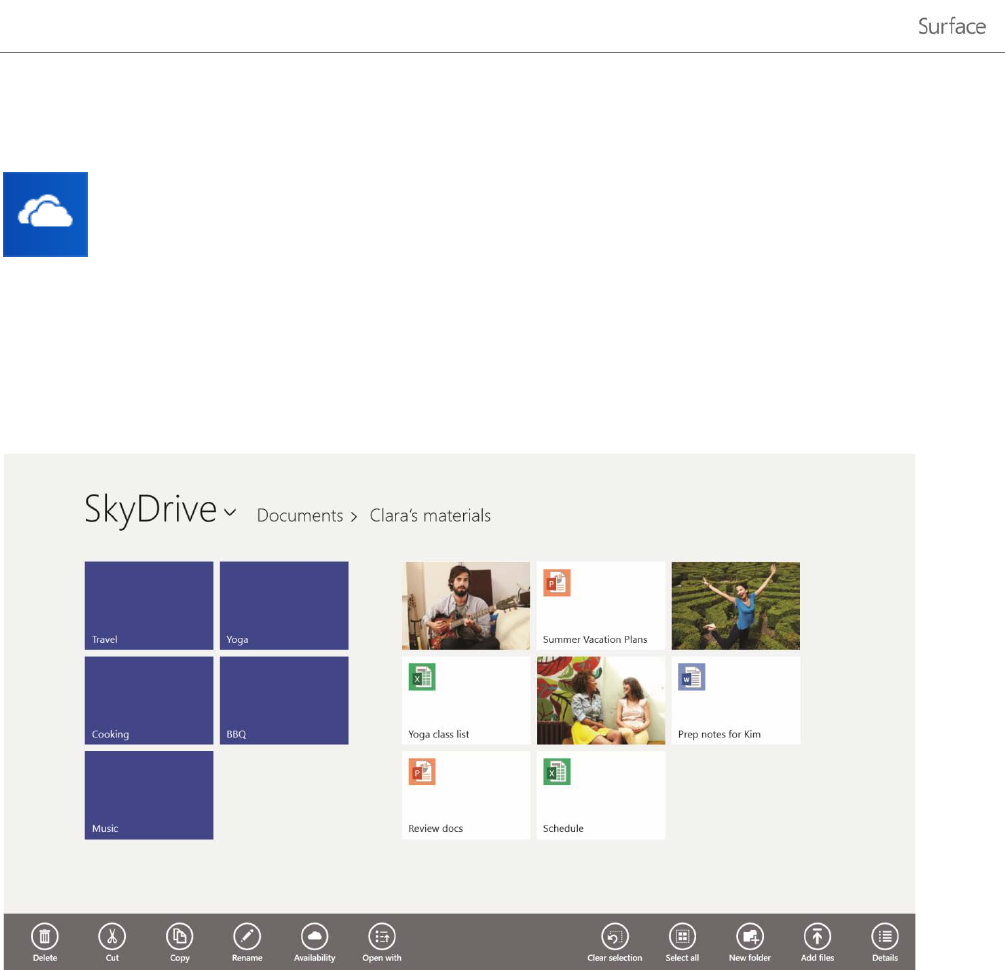
SkyDrive
With SkyDrive, you'll never be without the documents, photos, and videos that matter to you. Your
Microsoft account includes cloud storage that’s accessible from any of your devices—your computer,
tablet, and phone.
• To see what’s on your SkyDrive, go to Start and tap or click SkyDrive.
All of the files that you’ve saved on SkyDrive appear (you can also open files saved on Surface or your network).
Tap or click a folder name to see the contents. Tap or click a file to open it. Office files open in Office apps and
music files open in Xbox Music.
Swipe down from the top edge of the screen to see commands.
Included with your Surface 2 purchase: 200GB of free SkyDrive storage, for two years. To activate your free
SkyDrive storage, just use the code included in your Surface 2 packaging. Offer details.
To learn more about using SkyDrive, see SkyDrive on Surface or Getting started with SkyDrive on Windows.com.
Tips
• Pictures that you take with the Camera app are saved to SkyDrive by default. See the Camera topic for
more info about this.
• Need help with SkyDrive? From the SkyDrive app, open the Settings charm and then tap or click Help.
Get to your files from anywhere
When your files are on SkyDrive, you can get to them from any device. You can go to SkyDrive.com or one of the
SkyDrive mobile apps.
© 2014 Microsoft Page 78

Save and open files
You can work with SkyDrive files from the apps you use. When you choose to open or save files from an app, you
can choose SkyDrive as the location (if it isn’t already selected). If you don’t want to save to SkyDrive, tap the
arrow to switch to This PC.
Use SkyDrive to share files
With SkyDrive, it’s easy to share files securely and easily with your friends or coworkers. They won’t need to install
any special programs or sign up for a new account, and they can use any web browser to get to the files you
share with them.
You can use SkyDrive to share photos, Office docs, and other files with people. Here's how:
1. Open the SkyDrive app and select the files that you want to share. (Swipe down on a file or folder to
select it.)
2. Open the Share charm, and then decide how you want to share:
• By email. Choose Mail.
• On a social network. Choose People, then choose a social network.
To learn more about sharing files, see Share files and photos on Windows.com.
© 2014 Microsoft Page 79
Xbox Games
With the Xbox Games app, you can discover all of the latest Xbox games made for
Windows 8.1 and get extras for the game you last played. You can also view all the
games you've played across your Xbox 360, Windows PC, and Windows Phone.
With the Xbox Games app, you can see which friends are online and what they’re
playing. See who’s on top in the leaderboard of your favorite game. You can also view
all the achievements you've earned over time.
For more info, see Windows 8.1 and Xbox: Better together on Windows.com.
SmartGlass
Be sure to check out the Xbox SmartGlass app too—it’s available for free in the Windows Store, and turns Surface
into a great second screen companion. For more info, see the Xbox SmartGlass website.
To check the availability of the SmartGlass app in your region, see the Xbox on Windows feature list.
Maps
Maps can show you where you are, where you want to go, and provide directions to get you there.
Maps also shows you traffic conditions to help you find the fastest route.
Note You need to be connected to the Internet to use Maps.
• Move around the map. Slide your finger across the screen in any direction.
• Zoom in and out. Pinch your fingers together or apart on the map.
• Go to your current location. Swipe down from the top edge of the screen, then tap My location.
• Get directions. Swipe down from the top edge of the screen, then tap Directions.
© 2014 Microsoft Page 80
More built-in apps
Here are some additional apps pre-installed on your Surface 2:
News
Keep up to date with what’s happening
in the world using this photo-rich app.
Finance
Stay on top of financial news and market
data from global sources.
Alarms
Manage and keep track of time by using
alarms, timers, or a stopwatch. For more
info, see Alarms app on Windows.com.
Reading List
Keep track of content that you want to
read later. For more info, see Reading List
app on Windows.com.
Travel
Plan your trip via travel guides, booking
tools, real-time currency conversion, and
weather forecasts.
Sports
Keep up with all the sports and teams
you care about with Live Tile updates on
your favorite teams.
Weather
Prepare for the latest conditions with hourly, daily, and
10-day forecasts. Compare weather from multiple
providers, check radar maps, and view historical
weather.
Movie Moments
Turn your videos into short movies (60 seconds or
less). You can add captions, trim scenes, and add
music. For more info, see Movie Moments app on
Windows.com.
Food & Drink
This app features a hands-free cooking mode, a recipe
and wine catalog, as well as tips and techniques from
celebrity chefs.
Health & Fitness
This app has over 1,000 exercise videos, a nutritional
and medical reference, and exercise and diet trackers.
Reader
Read files in PDF and XPS formats. For more info, see Reader app on Windows.com.
Additional built-in apps:
• Scan—use this app to scan pictures or documents.
• Sound Recorder—use this app to record audio such as a lecture or meeting.
• Calculator—use this app for basic calculations, advanced math (Scientific mode) and converting units of
measure.
© 2014 Microsoft Page 81

Additional info you should know
This section includes a few more things that would be helpful for you to know.
Keep Surface up to date
Two types of updates keep Surface performing its best: Windows software updates and Surface hardware
updates (also known as firmware). Both types install automatically as they become available.
If a restart is needed, you’ll see a message like this:
Windows Update
Your PC will restart in 2 days to finish installing important updates.
When you see this message, do any of the following:
• Open the Settings charm, tap or click Power > Update and restart.
• From the lock screen, tap the Power icon and then Update and restart.
• Do nothing and Windows will install the updates and restart Surface in 2 days.
Surface 2 (AT&T 4G LTE): When you’re using a mobile broadband connection, Windows Update will only
download priority updates. To learn more about this, see Mobile broadband settings in this guide.
Manually check for Windows updates
1. Open the Settings charm, tap or click Change PC Settings > Update and recovery > Windows Update
> Check now.
2. If updates are available, tap or click View details.
3. Choose the updates you want to install, and then tap or click Install.
See your update history
• Open the Settings charm, tap or click Change PC Settings > Update and recovery > Windows Update
> View your update history.
If you have questions or problems with Windows Update, see Windows Update: Frequently Asked Questions on
Windows.com.
Firmware updates
Firmware is software that controls how the Surface hardware functions. You’ll see a notification on Surface when
a firmware update is available. When this happens, follow the on-screen instructions to update Surface.
Important Plug Surface into an electrical outlet before updating your firmware.
© 2014 Microsoft Page 82
How can I help protect my Surface from viruses?
Windows RT includes up-to-date virus and malware protection called Windows Defender. This software helps
identify and remove viruses, spyware, and other malicious software. Windows Defender is always on and can't be
turned off.
To manually scan Surface by using Windows Defender, see How do I find and remove a virus? on Windows.com.
Keyboard shortcuts
Keyboard shortcuts are key combinations that you can use to perform a task, such as switching between open
apps. For a list of shortcuts, see Keyboard shortcuts on Windows.com.
Accessibility
Ease of Access features let you use your Surface the way you want. To see what settings are available:
• Open the Settings charm, tap or click Change PC settings > Ease of Access.
For info about these features, see Ease of Access features on Windows.com.
Speech recognition
Windows Speech Recognition makes using a keyboard and mouse optional. You can control your Surface with
your voice and dictate text instead.
For more info, see How to use Speech Recognition on Windows.com.
Take a screen shot
To take a snapshot of your screen, press and hold the below the touchscreen, and then press the volume
rocker down (along the left edge). The screen dims briefly when the screen is captured. A picture of the screen is
saved in the Screenshots folder, which is in the Pictures folder. You can use File Explorer, Photos, or the SkyDrive
app to see your screenshots.
You can also use the Share charm to share a screen shot with someone. For more info, see Share a link in this
guide.
To capture part of the screen, see Use Snipping Tool to capture screen shots on Windows.com.
© 2014 Microsoft Page 83

BitLocker recovery key
Data on your Surface hard drive is automatically encrypted to help keep it secure. This way, if your Surface is lost
or stolen, someone else can’t access your data.
If a security event or hardware failure locks your Surface, you’ll need a BitLocker recovery key to sign in. If you
sign in to your Surface with a Microsoft account, a copy of your BitLocker recovery key is automatically backed
up to that account. To get your recovery key, go online to BitLocker Recovery Keys.
For more info, see BitLocker recovery keys: Frequently asked questions on Windows.com.
Refresh Surface
If your Surface isn't performing as well as it once did, you can refresh it. Refreshing your Surface reinstalls
Windows while keeping your personal files, settings, and apps intact. To refresh your Surface:
1. Open the Settings charm, then tap or click Change PC settings > Update and recovery > Recovery.
2. Under Refresh your PC without affecting your files, tap or click Get started.
Reset Surface
If you're having problems with Surface or you want to start over with it, you can remove everything and reinstall
Windows. For info on how to reset Surface, see Refresh or reset your Surface 2 on Surface.com.
© 2014 Microsoft Page 84
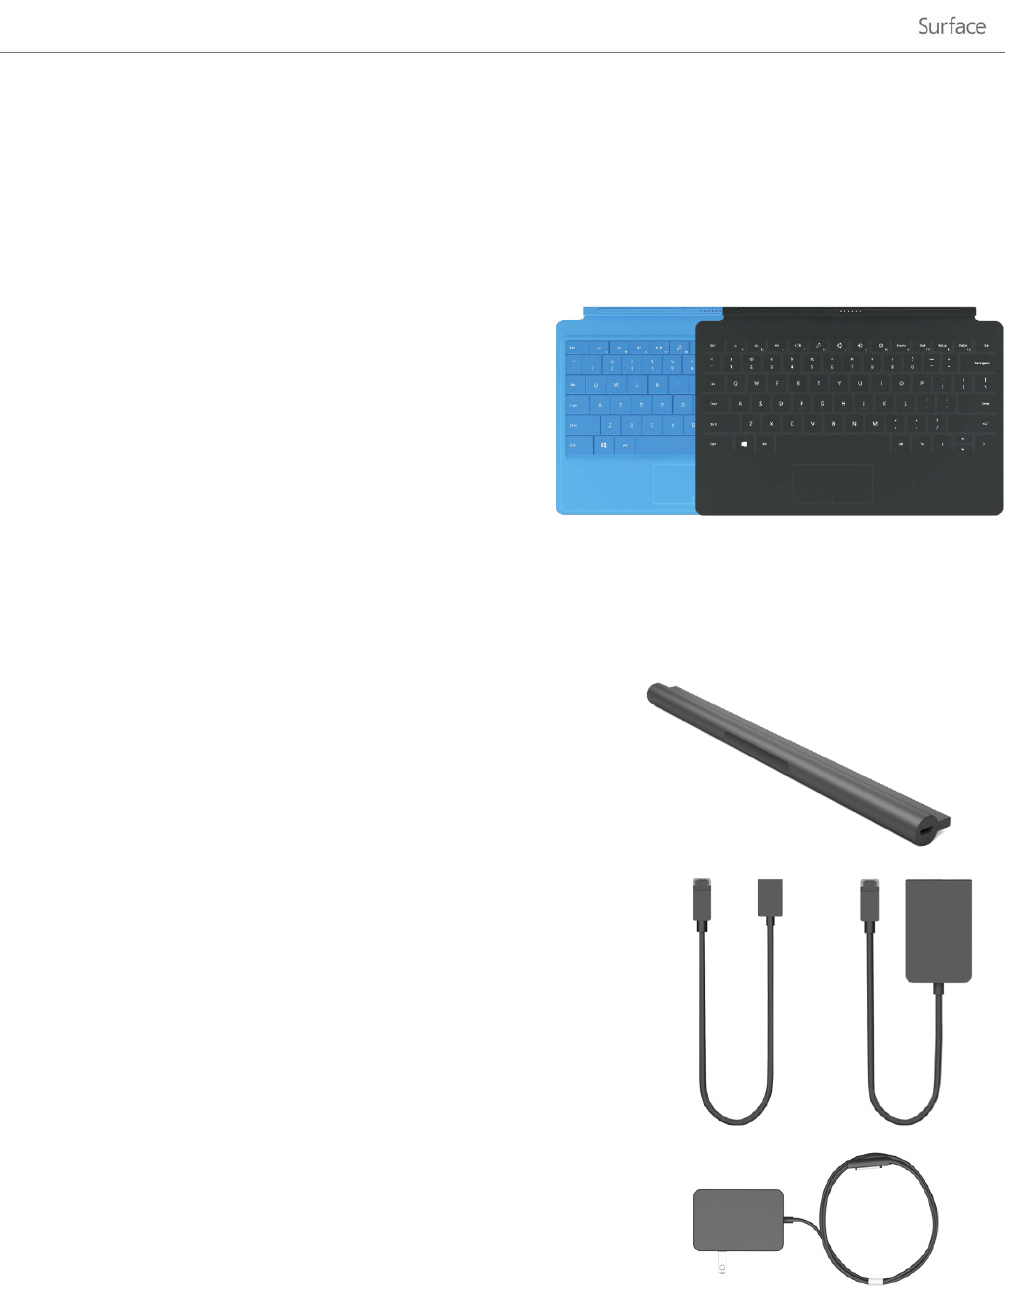
Accessories
Accessories add to your Surface experience.
Typing Covers
Click in a unique keyboard that doubles as a cover. Choose
from the following Typing Covers:
• Touch Cover is a super-thin, pressure-sensitive
keyboard and touchpad.
• Type Cover is a slim version of a traditional laptop
keyboard with moving keys and a touchpad.
Some Typing Covers are available in different colors or designs3. To see what’s available, go to Covers on
Surface.com. All Typing Covers can be used with Surface 2.
3 Colors and designs vary by region.
Wireless Adapter for Typing Covers
The Wireless Adapter lets you wirelessly connect a Typing Cover to
your Surface. This way you can connect Surface to a monitor or TV,
and type from another location like your couch. For more info, see
Wireless Adapter for Typing Covers in this guide.
Video Adapters
Surface video adapters let you connect your Surface to an HDTV,
monitor, or projector (adapters and cables sold separately).
See Connect to a TV, monitor, or projector in this guide for more
info.
24W Power Supply (included with Surface)
Surface comes with a 24-watt power supply for charging your
battery. For more info, see the Charging section of this guide.
© 2014 Microsoft Page 85
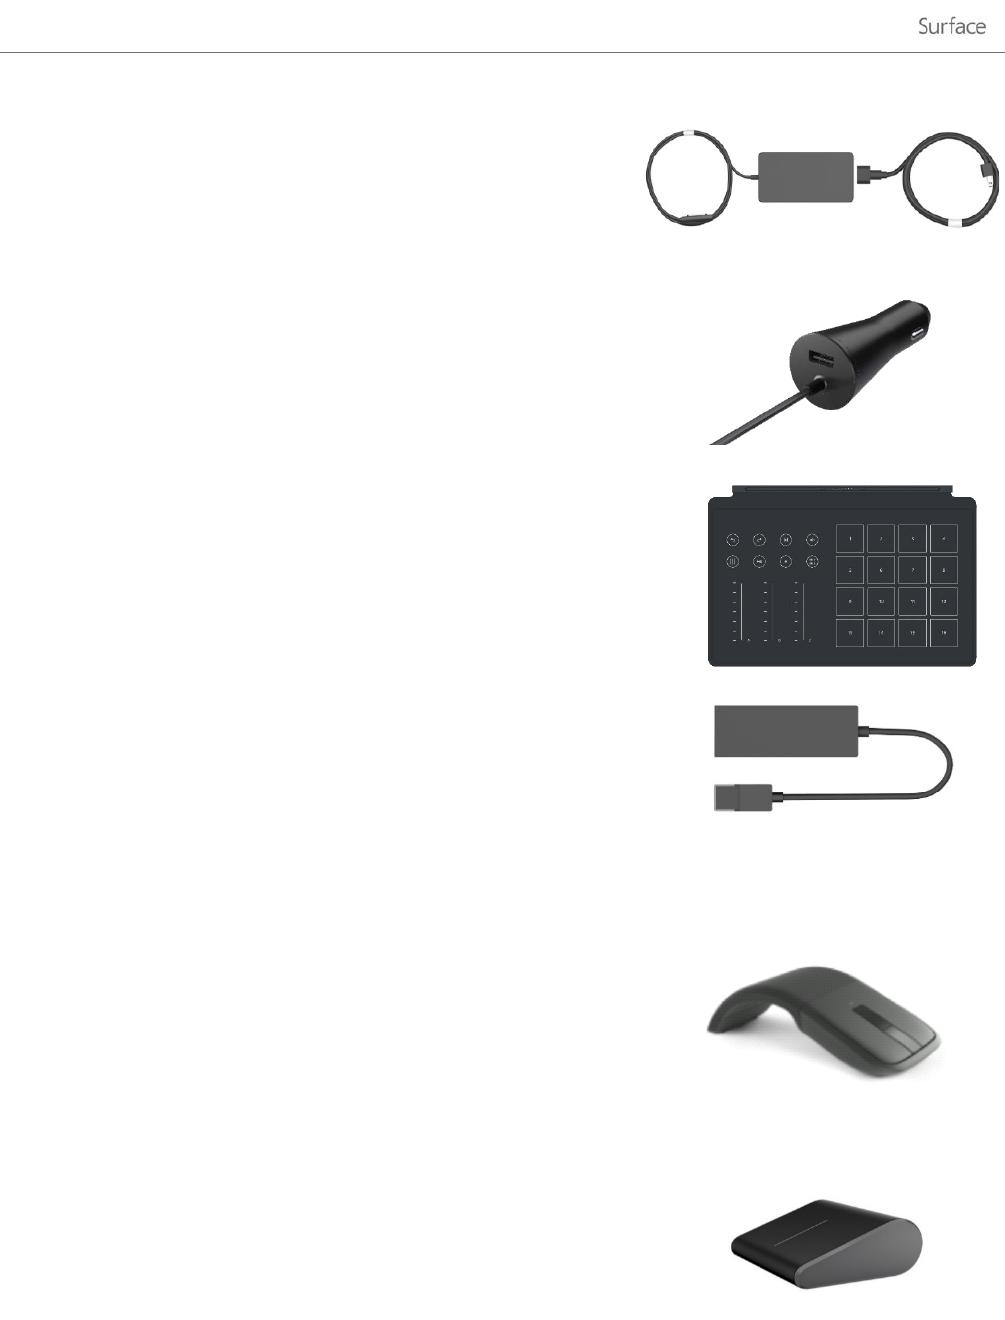
48W Power Supply with USB Charging Port
Use this charger to charge your Surface and a USB accessory, such as
your phone, at the same time. For more info, see 48-watt power supply
with USB charging port in this guide.
Car Charger with USB
Use the Car Charger to charge your Surface and a USB accessory (such
as your phone) while you’re traveling in your car. For more info, see Car
Charger in this guide.
Surface Music Kit
Ever wanted to play DJ? This Cover is a compact version of a traditional
audio mixing board, with buttons, pads, and slider controls that you
can use to create and remix music. For more info, see Surface Music Kit
features on Surface.com.
Ethernet adapter
You can use the Surface Ethernet adapter to connect Surface to a wired
network. For more info about this, see Connect to a wired network in
this guide.
Arc Touch Mouse Surface Edition
This special edition Arc Touch Mouse is designed for comfort and
flattens for portability—no wires or cables, just Bluetooth.
For setup info, see Arc Touch Mouse for Surface on Surface.com.
Wedge Touch Mouse Surface Edition
This special edition Wedge Touch Mouse is small enough to fit in
your pocket, and wirelessly connects to Surface using Bluetooth.
For setup info, see Wedge Touch Mouse for Surface on Surface.com.
Check out all of the Surface accessories at Surface.com/Accessories.
© 2014 Microsoft Page 86
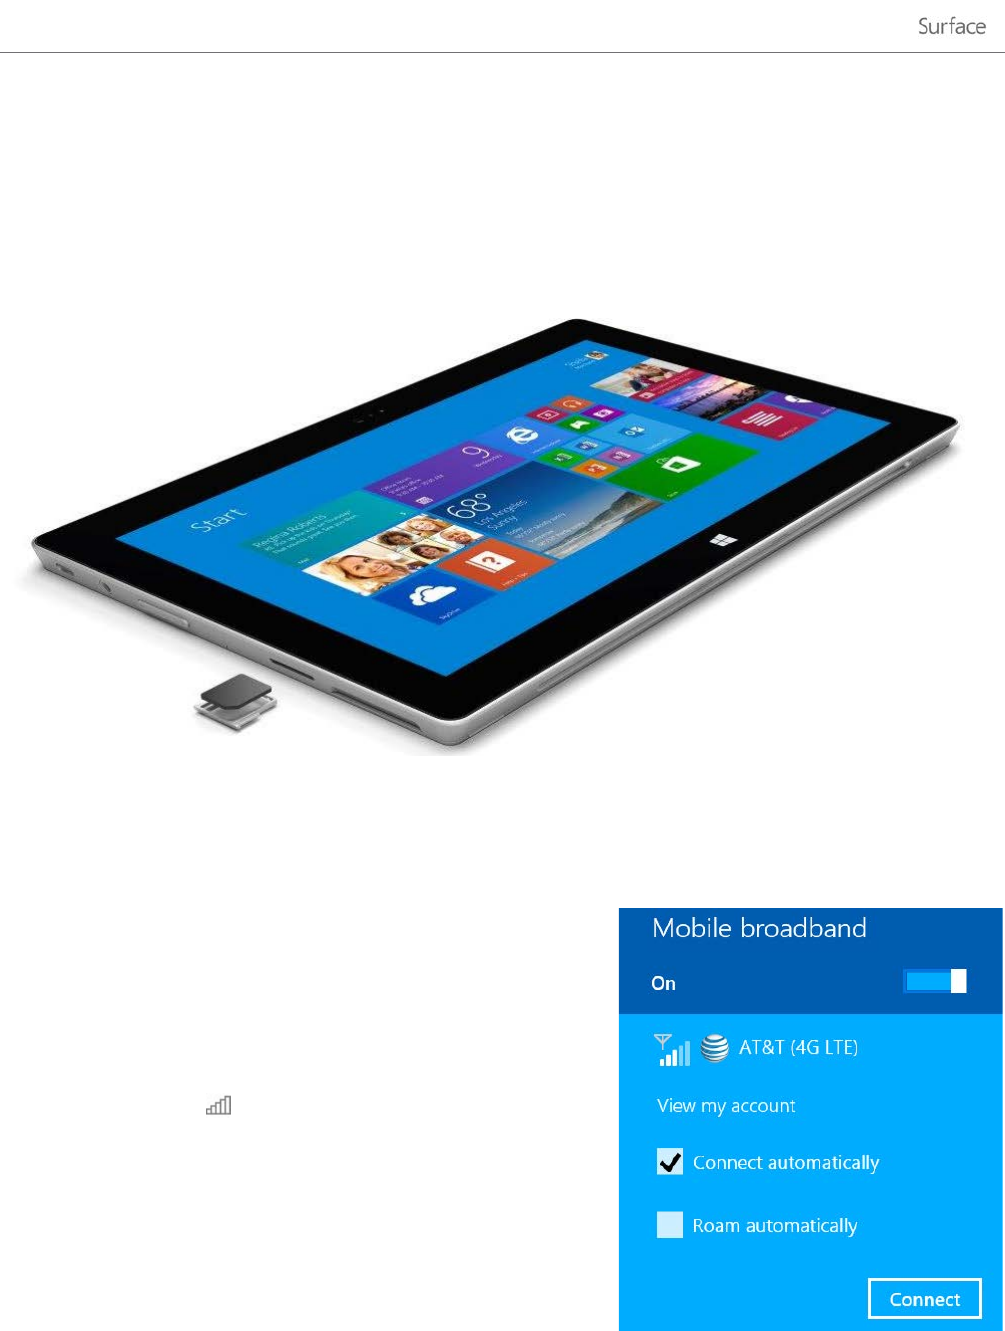
Mobile networking on Surface 2 (4G LTE)
Surface 2 (AT&T 4G LTE) has built-in mobile broadband connectivity (cellular service) that you can use to connect
to the Internet when a Wi-Fi network isn’t available. For more info, see Mobile broadband (4G): FAQ on
Surface.com.
Surface 2 (4G LTE) has a SIM tray along the left edge, with a preinstalled micro-SIM card for the AT&T cellular
network. AT&T service activation on qualifying plan required; additional fees apply. Coverage not available
everywhere.
Connect to a mobile broadband network
Here’s how to connect to a mobile network:
1. First time connecting? See Set up your mobile broadband
connection in this guide.
2. Open the Settings charm, then tap or click the wireless
network icon ( ).
3. Under Mobile broadband, choose AT&T (4G LTE)*.
If you want to connect to this network every time it's in
range, choose Connect automatically (Windows will
automatically switch from Wi-Fi to mobile broadband as
needed). You might incur extra charges if you allow
roaming.
4. Choose Connect.
© 2014 Microsoft Page 87
If you have trouble connecting or staying connected, see Troubleshoot your mobile broadband connection on
Surface.com.
Service availability and performance is subject to service provider's network.
Disconnect or turn off mobile broadband
To disconnect from a mobile broadband network:
1. Open the Settings charm, then tap or click the wireless network icon ( ).
2. Under Mobile broadband, choose AT&T (4G LTE) and then choose Disconnect.
To turn off mobile broadband:
1. Open the Settings charm, then tap or click the wireless network icon ( ).
2. Set Mobile broadband to Off.
The AT&T AllAccess app
You can use the AT&T AllAccess app to do the following things:
• View your AT&T account and data usage.
• Receive free account notifications from AT&T.
• Share your Internet connection with other devices.
• Find nearby AT&T Wi-Fi Hot Spots.
To open the AT&T AllAccess app:
• Open the Search charm, type AT&T, and then press Enter.
–or–
• Swipe up from the middle of the Start screen to see all your apps. Tap or click AT&T AllAccess
Notes
• If the AT&T AllAccess app isn’t installed, you can install it from the Windows Store.
• You may want to pin the AT&T AllAccess app to your Start screen for easy access (the AT&T AllAccess tile
shows info like data usage). To find out how to pin an app to Start, see Personalize the Start screen in
this guide.
© 2014 Microsoft Page 88
View your AT&T data usage
Use the AT&T AllAccess app to see your data usage. Here’s how:
• Open the AT&T AllAccess app (see the info above) and look under My Account. Here you can set a data
alert so that you don’t unknowingly exceed your data plan.
–or–
• Open the Settings charm, tap or click the wireless network icon ( ) > AT&T (4G LTE) > View my
account. The AT&T AllAccess app opens (look under My Account for data usage info).
View or change your AT&T account info
1. Open the AT&T AllAccess app and then tap or click My Account (this opens the AT&T website).
2. Log in with your AT&T username and password.
Read account notifications from AT&T
You can read your free account notifications from AT&T by using the AT&T AllAccess app. Here’s how:
• Open the AT&T AllAccess app, then tap or click Notifications.
Share your Internet connection
Depending on your AT&T data plan, you might be able to share your mobile broadband connection with other
devices. To share your Internet connection:
1. Open the Settings charm, tap or click Change PC settings > Network > Connections.
2. Under Mobile broadband, tap or click AT&T.
3. Set Share this connection to On.
Note Not all AT&T data plans support shared Internet connections. If you have questions about your
account, contact AT&T.
4. Write down the network name and password. If you want to change these items, tap or click Edit.
5. To use your connection on another device: Open the Wi-Fi networks list on your device, select the
network name from step 4, and then enter the network password when prompted.
You can also share your Internet connection by using the AT&T AllAccess app:
• Open the AT&T AllAccess app, tap or click Mobile Hotspot, move the slider to On, and then follow the
on-screen instructions.
© 2014 Microsoft Page 89
Mobile broadband settings
To see your mobile broadband connection settings:
1. Open the Settings charm, tap or click Change PC settings > Network > Connections.
2. Under Mobile broadband, tap or click AT&T.
Share this connection
See the previous section for info about this.
Data usage
• Show estimated data use: You can choose to show estimated data usage in the Networks list, however,
it’s best to view your data usage using the AT&T AllAccess app (see View your AT&T data usage
above).
• Set as a metered connection: Mobile broadband connections are metered by default. A metered
connection helps you reduce the amount of data you use. You might notice these and other effects when
using your AT&T mobile broadband connection:
o Low priority Windows updates and apps from the Windows Store will not download (downloads
are paused until a Wi-Fi connection is available). To allow app downloads and Windows updates
over a metered connection, open the Settings charm, tap or click Change PC settings > PC and
devices > Devices > and set Download over metered connections to On. If your mobile
broadband service is unlimited, you could consider leaving this option on.
o Start screen tiles might stop updating.
o Offline files might not sync automatically. You can change how SkyDrive uses metered
connections, To do this open the Settings charm, tap or click Change PC settings > SkyDrive >
Metered connections.
For more info about metered connections, see Metered Internet connections: FAQ on Windows.com.
Access point
Your access point name (APN), user name, and type of sign-in info.
Properties
A variety of info is shown including the mobile number for your SIM card.
Security
You can set a PIN to help protect your SIM. You’ll need to enter the PIN to use the SIM card with another device.
Contact AT&T to find out the default PIN.
Note For more info about mobile broadband, see Mobile broadband from start to finish on Windows.com.
© 2014 Microsoft Page 90
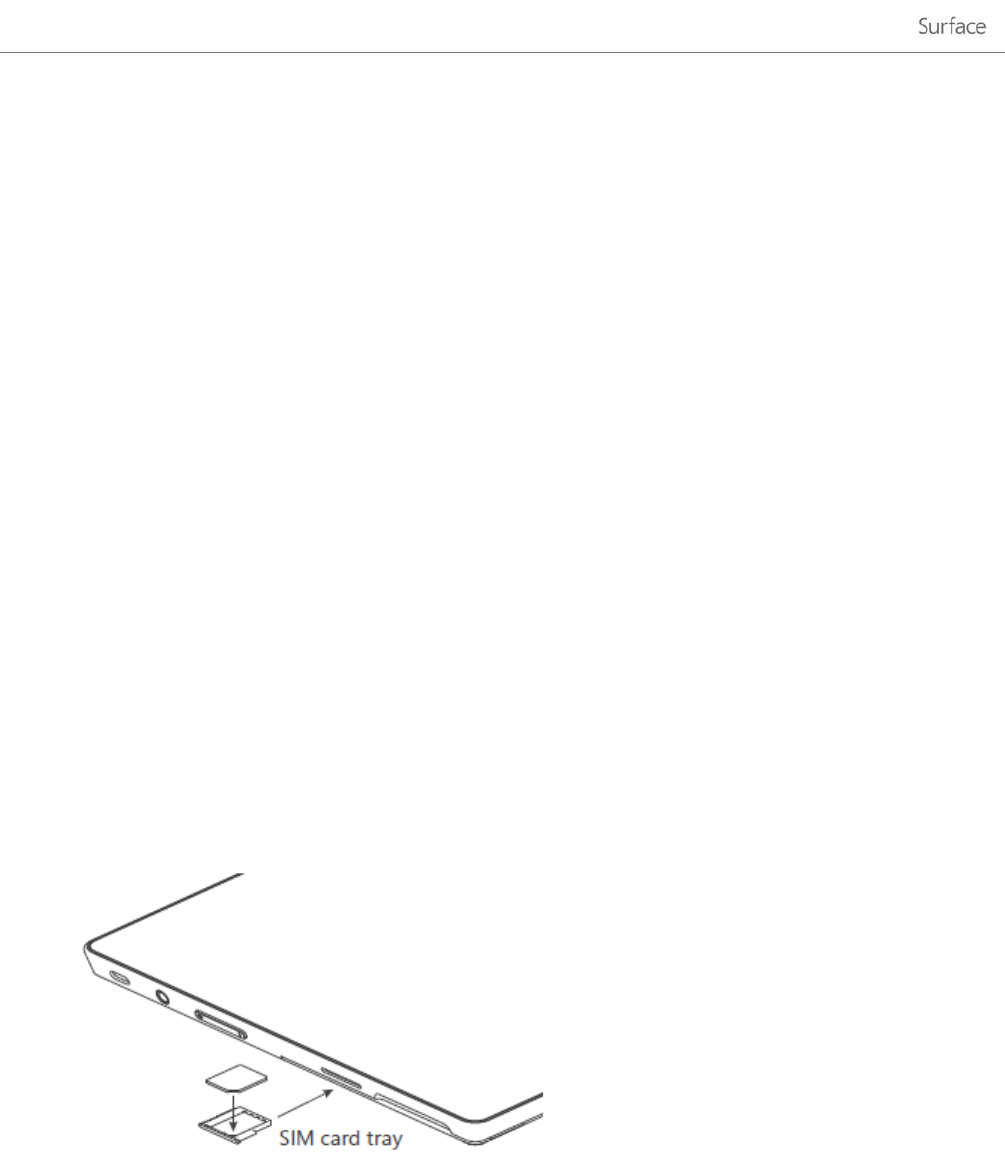
How to use less data
• Connect to a Wi-Fi network whenever available. Wi-Fi is typically faster and less expensive than using a
mobile broadband connection. If you’re connected to both Wi-Fi and mobile broadband, Surface will use
the Wi-Fi connection.
• Change your mail download settings to manual. To do this, open the Mail app, then open the Settings
charm > Accounts > choose an account, and then set Download new email to Manual. Now when you
want to download new email, open the Mail app, swipe down from the top of the screen, tap or click
More > Sync.
• Make sure your mobile broadband connection is metered – see the Data usage section above for info
about this.
• Consider changing your sync settings (by default, files and settings are synced over metered
connections). To change your sync settings, open the Settings charm then tap or click Change PC
settings > SkyDrive > Metered connections.
For more info, see Manage your mobile broadband data use on Surface.com.
Replace the micro-SIM card
Surface (AT&T 4G LTE) comes with a micro-SIM card preinstalled. If you need to replace the SIM card:
1. Turn off your Surface (open the Settings charm, tap or click Power > Shut down).
2. Along the left side of Surface, press and release the SIM card tray with your fingernail to eject it.
3. Remove the existing SIM card and put the new SIM card in the tray. Align the notch on your SIM card
with the notch in the SIM tray.
4. Push the tray back into place using your fingernail. Don’t force the SIM tray into place, it should slide in
easily.
5. Turn on your Surface (press and release the Power button).
© 2014 Microsoft Page 91

Care and cleaning
Here’s how to keep your Surface looking and working great.
Touchscreen care
Scratches, finger grease, dust, chemicals, and ultraviolet light can affect the performance of the touchscreen.
Here are a few things you can do to help protect the screen:
• Clean frequently. Wipe the touchscreen with a soft, lint-free cloth to clean it. You can dampen the cloth
with water or an eyeglass cleaner, but don’t apply liquids directly to the touchscreen. Also don’t use
window cleaner or other chemical cleaners.
• Keep it covered. Close the Cover when you’re in transit or not using Surface. If you don’t have a Cover,
you can use a sleeve to protect the touchscreen (sleeves are available at Surface.com/Accessories).
• Keep it out of the sun. Don’t leave Surface in direct sunlight for an extended amount of time. Ultraviolet
light and excessive heat can damage the touchscreen.
Cover care
You can clean the Cover with a lint-free cloth, dampened with mild soap and water. If the spine or the magnetic
connections get dirty, you can clean them with isopropyl alcohol (also called rubbing alcohol).
Battery care
• Operating temperature. Surface is designed to work between 32°F and 95°F (or 0°C to 35°C). Lithium-
ion batteries are sensitive to high temperatures, so keep your Surface out of the sun and don’t leave it in
a hot car.
• Recharge anytime. The battery doesn’t need to be empty or low before you recharge. You can recharge
the battery whenever you’d like. However, it’s best to let the battery run down to 10% at least once per
month before you recharge it.
Safety and warranty
• Read the Safety and regulatory information for important safety info and the terms of the Surface
Limited Warranty.
© 2014 Microsoft Page 92
Help, Service, and Support
Surface help
Support. For help and support info, go to Surface.com/Support. Find answers and share ideas with other Surface
enthusiasts online in the Surface Community forum (Answers.Microsoft.com).
Registration. If you haven't registered your Surface, go to Register your Surface product on Surface.com.
Warranty and service. For warranty info, see Surface warranty on Surface.com. If your Surface needs service, see
How to get service for Surface on Surface.com.
Windows help
• Swipe up from the center of the Start screen and then type Help and Support.
• From Start, tap or click Help+Tips. This app has info to help you get up to speed on using Windows.
• Go online to Windows.com.
AT&T help
If you have questions about the AT&T service or your AT&T account, contact AT&T Support at ATT.com/Support.
App help and troubleshooting
App Help. When you're in an app, open the Settings charm and look for Help. (If you can't find Help content,
check the company's website for help info.)
App problems? See Troubleshoot problems with an app on Windows.com.
That’s it!
You’ve come to the end of this guide. We hope you’ve found it helpful.
Check out Surface.com/Accessories for the latest info on Surface accessories.
For the latest news about Surface, check out our Surface Blog.
For the latest buzz about Surface, follow us:
• Surface on Twitter
• Surface on Facebook
• Surface on Pinterest
© 2014 Microsoft Page 93