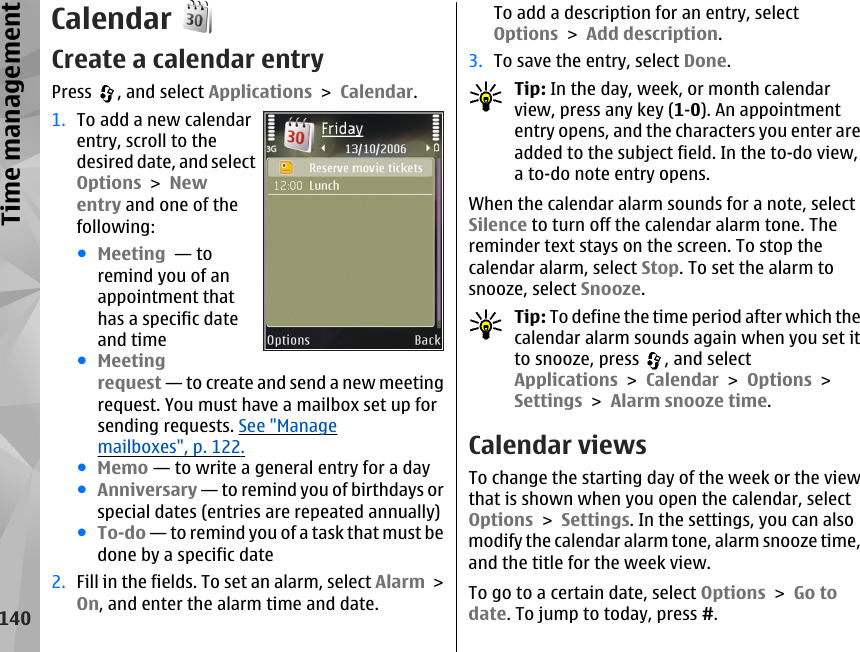
Microsoft RM-235 GSM/WCDMA Cellular Phone w/BT, WLAN and FMTx User Manual User Guide
Microsoft Mobile Oy GSM/WCDMA Cellular Phone w/BT, WLAN and FMTx User Guide
UserManual.wiki
>
Microsoft
>
RM-235 User Manual
>
User Guide
Contents
1.
User Guide
2.
Manual 1
3.
Manual 2
User Guide
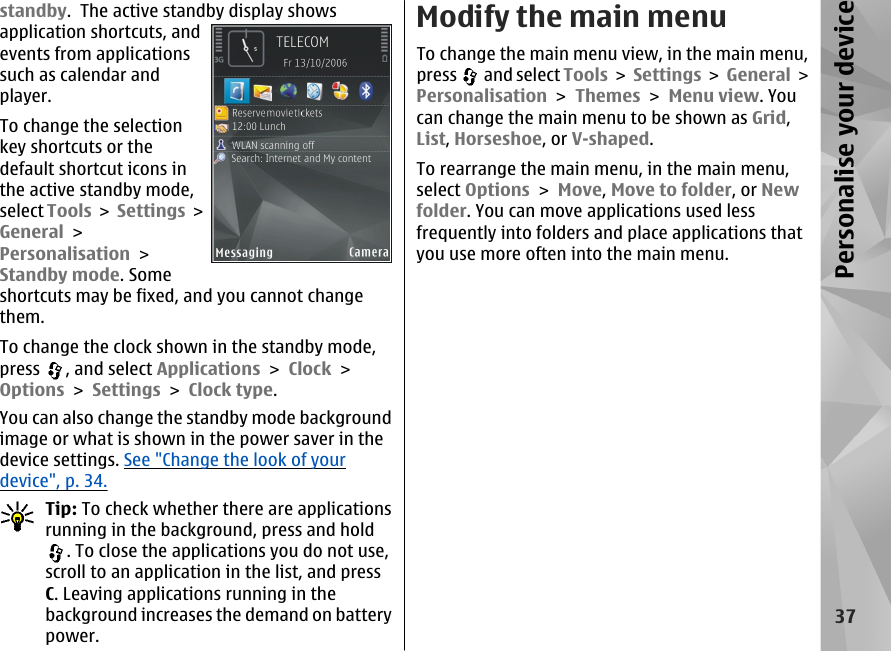
Navigation menu
Upload a User Manual
Namespaces
Wiki Guide
HTML
PDF
Info
Views
User Manual
Discussion / Help
Navigation


![Browse mapsThe map coverage varies by country.When you open the Maps application, Maps zoomsin to the location that was saved from your lastsession. If no position was saved from the lastsession, the Maps application zooms in to thecapital city of the country you are in based on theinformation the device receives from the cellularnetwork. At the same time, the map of the locationis downloaded, if it has not been downloadedduring previous sessions.To establish a GPS connection and zoom in to yourcurrent location, select Options > Find place >GPS position [0], or press 0If the power saver turns on while the device isattempting to establish a GPS connection, theattempt is interrupted.A GPS indicator is shown on the display whenyou browse maps. When the device tries toestablish a GPS connection, the circles are yellow.When the device receives enough data from thesatellites to calculate the coordinates of yourcurrent location, the circles turn green.To view information about satellites when you areusing Maps, select Options > Map options >Satellite info.Move on the mapYour current location is indicated on the map with. To move on the map, scroll up, down, left, orright. When you browsethe map on the display, anew map is automaticallydownloaded if you scroll toan area which is notcovered by maps alreadydownloaded. These mapsare free of charge, butdownloading may involvethe transmission of largeamounts of data throughyour service provider'snetwork. For moreinformation on data transmission charges, contactyour service provider. The maps are automaticallysaved in the device memory or on a compatiblememory card (if inserted).Edit the map viewTo zoom in or out, press * or #.To switch between the 2D and 3D views, selectOptions > Map options > 2D/3D.To define what kinds of points of interest are shownon the map, select Options > Map options >Categories and the desired categories.45Maps](https://usermanual.wiki/Microsoft/RM-235.User-Guide/User-Guide-898737-Page-45.png)