Microsoft SU-18 Internet Tablet w/ WLAN/BT User Manual
Microsoft Mobile Oy Internet Tablet w/ WLAN/BT
UserManual.wiki
>
Microsoft
>
SU 18 User Manual
Manual rev
Navigation menu
Upload a User Manual
Namespaces
Wiki Guide
HTML
PDF
Info
Views
User Manual
Discussion / Help
Navigation

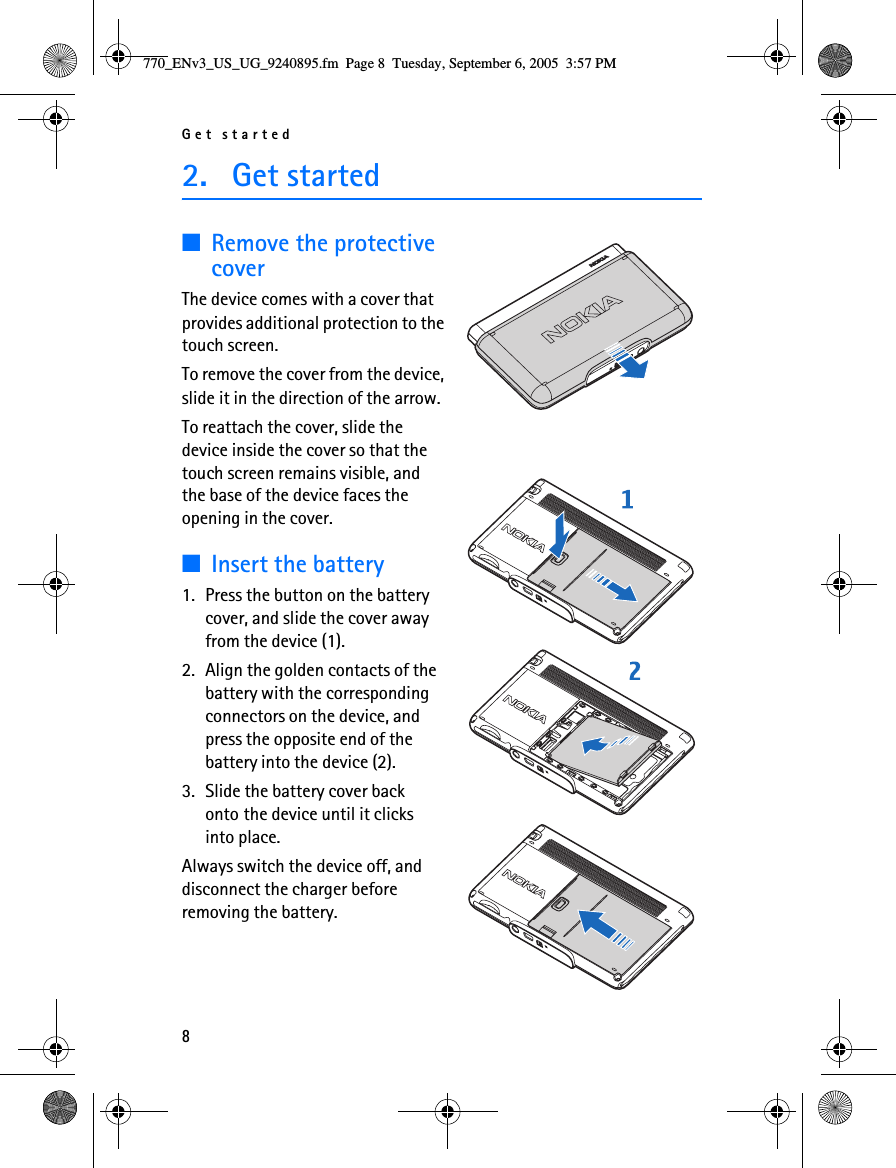

![Your device19On-screen keyboard• Tabulator key (1) — Add a tabulator space, or move the cursor to the next available text input field.•[ABC] (2) — Lock down the uppercase characters of the keyboard. In handwriting recognition, switches between the normal and special character recognition modes.• Shift key (3) — Enter an uppercase character in the on-screen keyboard mode, when you write in lowercase. When you press this key in the handwriting recognition mode, the last input lowercase character switches to uppercase, and vice versa.• Input menu key (4) — Open the text input menu. • On-screen keyboard (5) — Input text.• Space bar (6) — Insert a space.• Numeric keyboard (7)• Backspace key (8) — Delete the character to the left of the cursor.• Enter key (9) — Move the cursor to the next row or text input field. It has additional functions based on the current context (for example, in the Web address field of the Web browser, it acts as a go button).• Special character key (10) — Open the special characters view, where you can select from commonly used special characters, symbols, and language characters.• Close (11) — Close the on-screen keyboard and handwriting recognition input area, and save changes. 770_ENv3_US_UG_9240895.fm Page 19 Tuesday, September 6, 2005 3:57 PM](https://usermanual.wiki/Microsoft/SU-18/User-Guide-578758-Page-19.png)
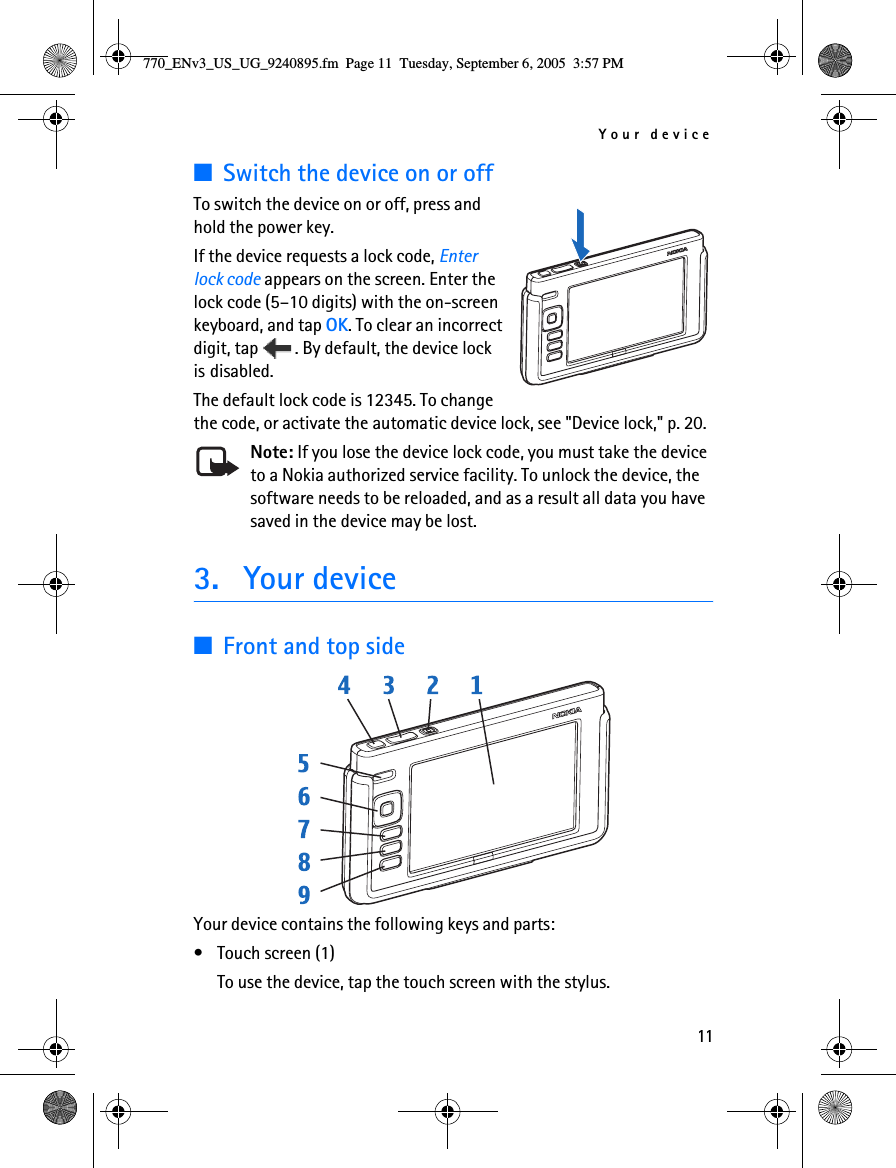
![Your device20Handwriting recognitionYou can use the stylus as a pen to write text. Write legible, upright characters, and leave a small horizontal gap between each character. Do not use cursive writing. To write common characters and numbers (default mode), write words as you normally write them.To write special characters, tap [Abc1] in the left pane of the input area, and write the characters as you normally write them.To use handwriting gestures, see the figure. Draw gesture 1 for a backspace; gesture 2 for a space; gesture 3 for a line change; or gesture 4 for a tabulator.To delete characters, draw the backspace gesture from right to left over the chosen character. To insert new characters in and after words, draw them in the intended positions.■Volume controlTo adjust the master volume, tap to access the sound settings. To decrease or increase the volume, drag the volume slider to the desired position.Warning: Listen to music at a moderate level. Continuous exposure to high volume may damage your hearing. ■Device lockTo avoid unauthorized use of your device, change the lock code, and set the device to automatically lock after a certain timeout period.To edit the security settings, tap , and select Control panel > Device lock. The Security dialog opens.To turn the automatic device lock on, select Use device lock, enter the lock code, and tap OK.To set the timeout period, tap the Autolock period list, and select the desired time.770_ENv3_US_UG_9240895.fm Page 20 Tuesday, September 6, 2005 3:57 PM](https://usermanual.wiki/Microsoft/SU-18/User-Guide-578758-Page-20.png)