Midea Kitchen Appliances EAC032CYY Microwave Oven User Manual User Manual
Guangdong Midea Kitchen Appliances Manufacturing Co.,Ltd. Microwave Oven User Manual
UserManual.wiki
>
Midea Kitchen Appliances
>
EAC032CYY User Manual
User Manual
Navigation menu
Upload a User Manual
Namespaces
Wiki Guide
HTML
PDF
Info
Views
User Manual
Discussion / Help
Navigation

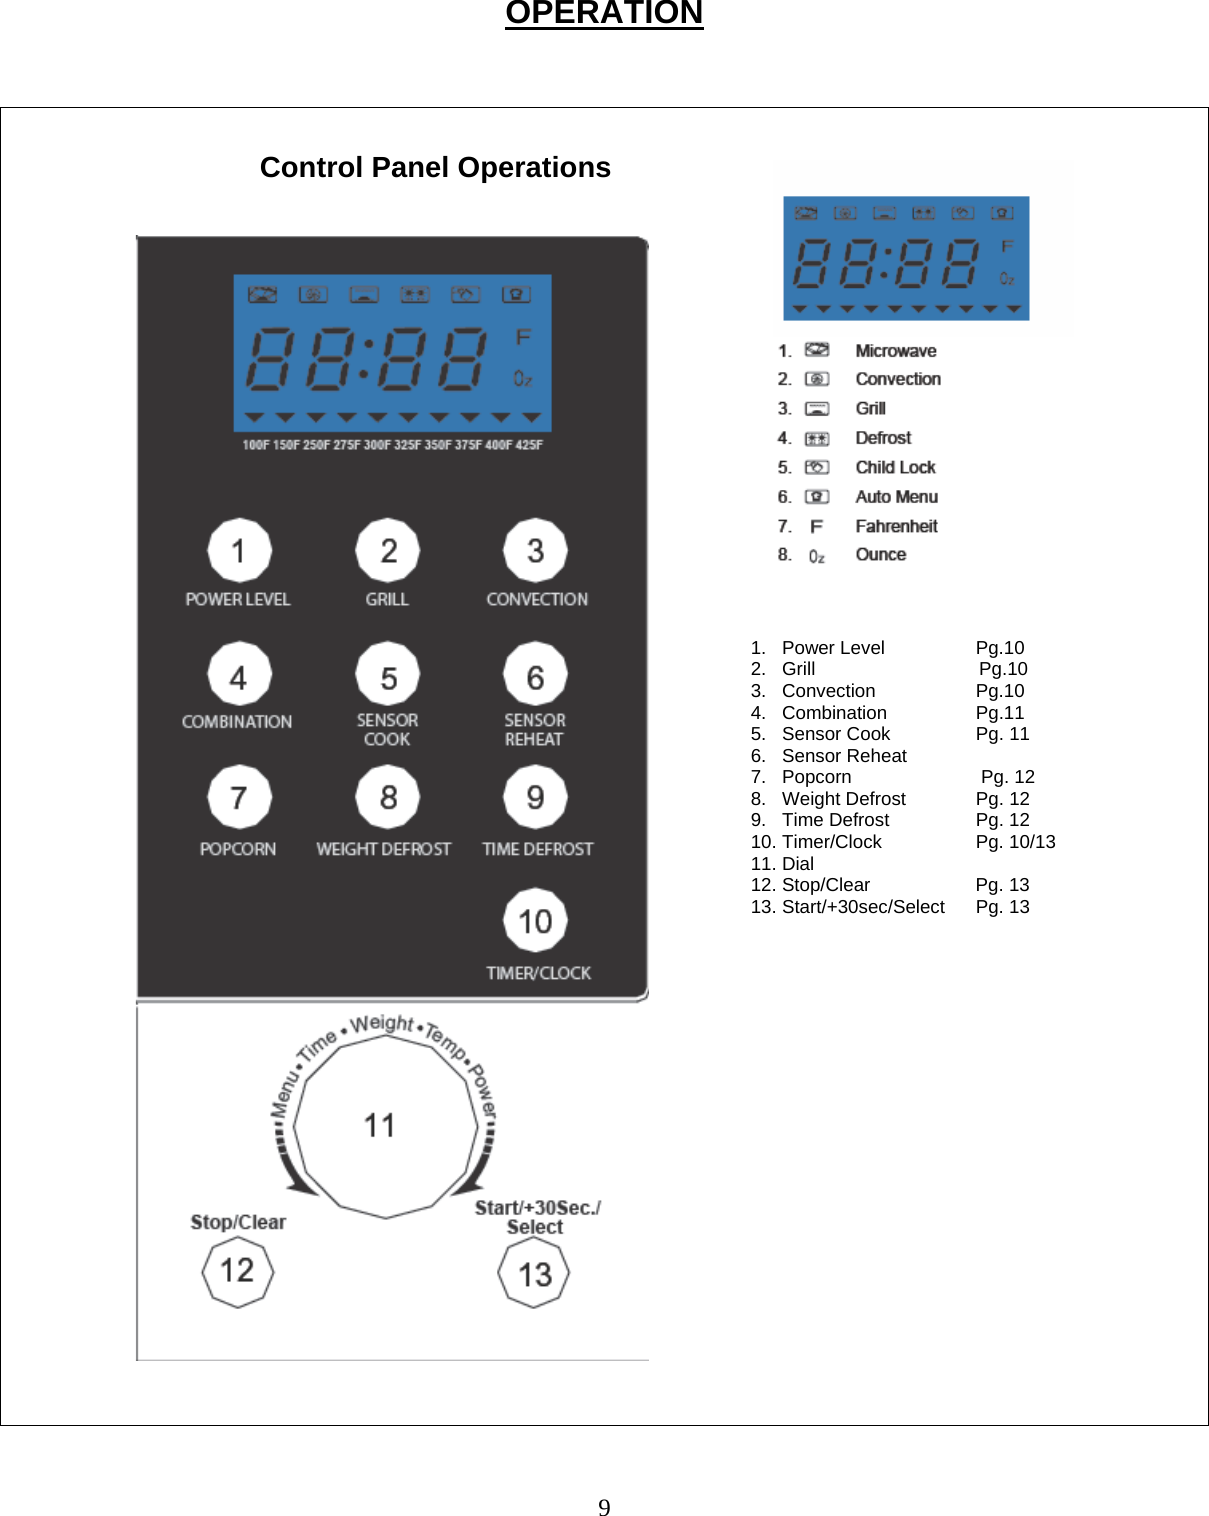

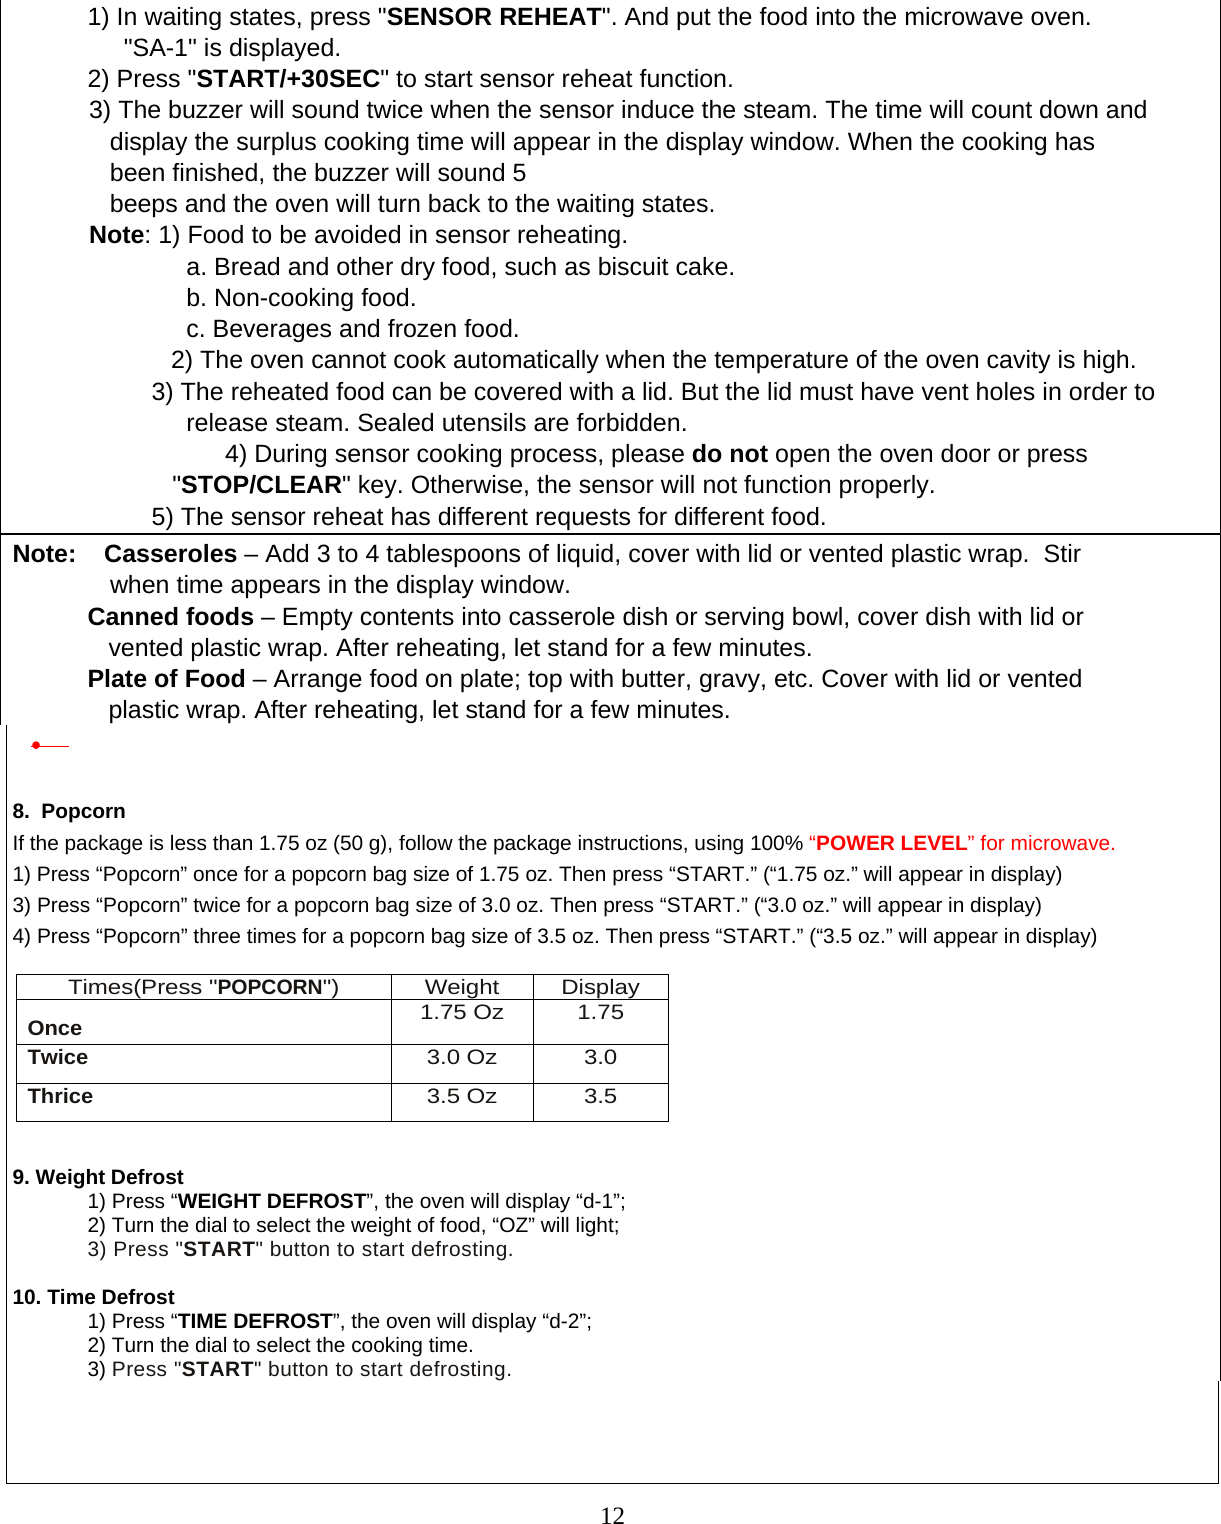
![13 Defrosting Tips and Tricks 11. Multi-Stage Cooking Two or three cooking stages can be set. If one stage is defrosting, it should be put in the first stage. It will beep once when one stage finished and the next stage will begin. Note: Sensor menu and weight defrost cannot be set as one of the multi-stage; if convection is used as one of the multi-stage, you can only adjust the cooking time, temperature can Not be adjusted. Two stages cooking setting example: If you want to defrost the food for 5 minutes, then to cook with 80% microwave power for 7 minutes. The steps are as following: 1) Press "TIME DEFROST ", the screen will display "d-2"; 2) Turn the dial to adjust the defrost time of 5 minutes; 3) Press "POWER LEVEL" and turn the dial to choose 80% microwave power, and "P80" displays. 4) Press “SELECT” to input your selected power level. 5) Turn the dial to adjust the cooking time of 7 minutes; 6) Press "START" to start cooking. Three stages cooking setting example: If you want to defrost the food for 5 minutes, and cook with 100% microwave power for 7 minutes, then cook with Grill 3 minutes. The steps are as following: 1) Press "TIME DEFROST ", the screen will display "d-2"; 2) Turn the dial to adjust the defrost time of 5 minutes; After Defrosting Food Manual Defrost Time at P3 (min/kg) (min/lb) During Defrost Stand Time Rinse Fish and Seafood (up to 1.4 kg [3lbs]) Crabmeat 12 6 Break apart/Rearrange Fish Steaks 8 to 12 4 to 6 Turn Over Fish Fillets 8 to 12 4 to 6 Turn Over/Rearrange/Shield Ends Sea Scallops 8 to 12 4 to 6 Break apart/Remove defrosted Pieces Whole Fish 8 to 12 4 to 6 Turn Over 5 min. YES Meat Ground Meat 8 to 10 4 to 5 Turn over/Remove defroster portion/Shield Edges 10 min. Roasts (1.1-1.8 kg [2½-4 lbs.]) 8 to 16 4 to 8 Turn over/ Shield ends and defrosted Surface 30 min. in fridge Chops/Steak 12 to 16 6 to 8 Turn over/ Rearrange/ Shield ends and defrosted surface Ribs/T-bone 12 to16 6 to 8 Turn over/ Rearrange/ Shield ends and defrosted surface Stew Meat 8 to 16 4 to 8 Break apart/ Rearrange/ Remove defrosted pieces Liver (Thinly Sliced) 8 to 12 4 to 6 Drain liquid/ Turn over/ Separate pieces 5 min. Bacon (Sliced) 8 4 Turn over ---- NO Poultry Chicken, Whole (up to 1.4 kg [3 lbs]) 8 to 12 4 to 6 Turn over/ Shield 20 min/ in fridge Cutlets 8 to 12 4 to 6 Break apart/ Turn over/ Remove defrosted pieces 5 min. Cornish hens 12 to 16 6 to 8 Turn over/ Shield 10 min. Turkey Breast (2.3-2.7 kg [5-6 lbs]) 12 6 Turn over/ Shield 20 min. in fridge YES](https://usermanual.wiki/Midea-Kitchen-Appliances/EAC032CYY/User-Guide-818676-Page-13.png)