Midea Kitchen Appliances XM245AYYPV4BBY Microwave Oven User Manual
Guangdong Midea Kitchen Appliances Manufacturing Co.,Ltd Microwave Oven
UserManual.wiki
>
Midea Kitchen Appliances
>
XM245AYYPV4BBY User Manual
User Manual
Navigation menu
Upload a User Manual
Namespaces
Wiki Guide
HTML
PDF
Info
Views
User Manual
Discussion / Help
Navigation

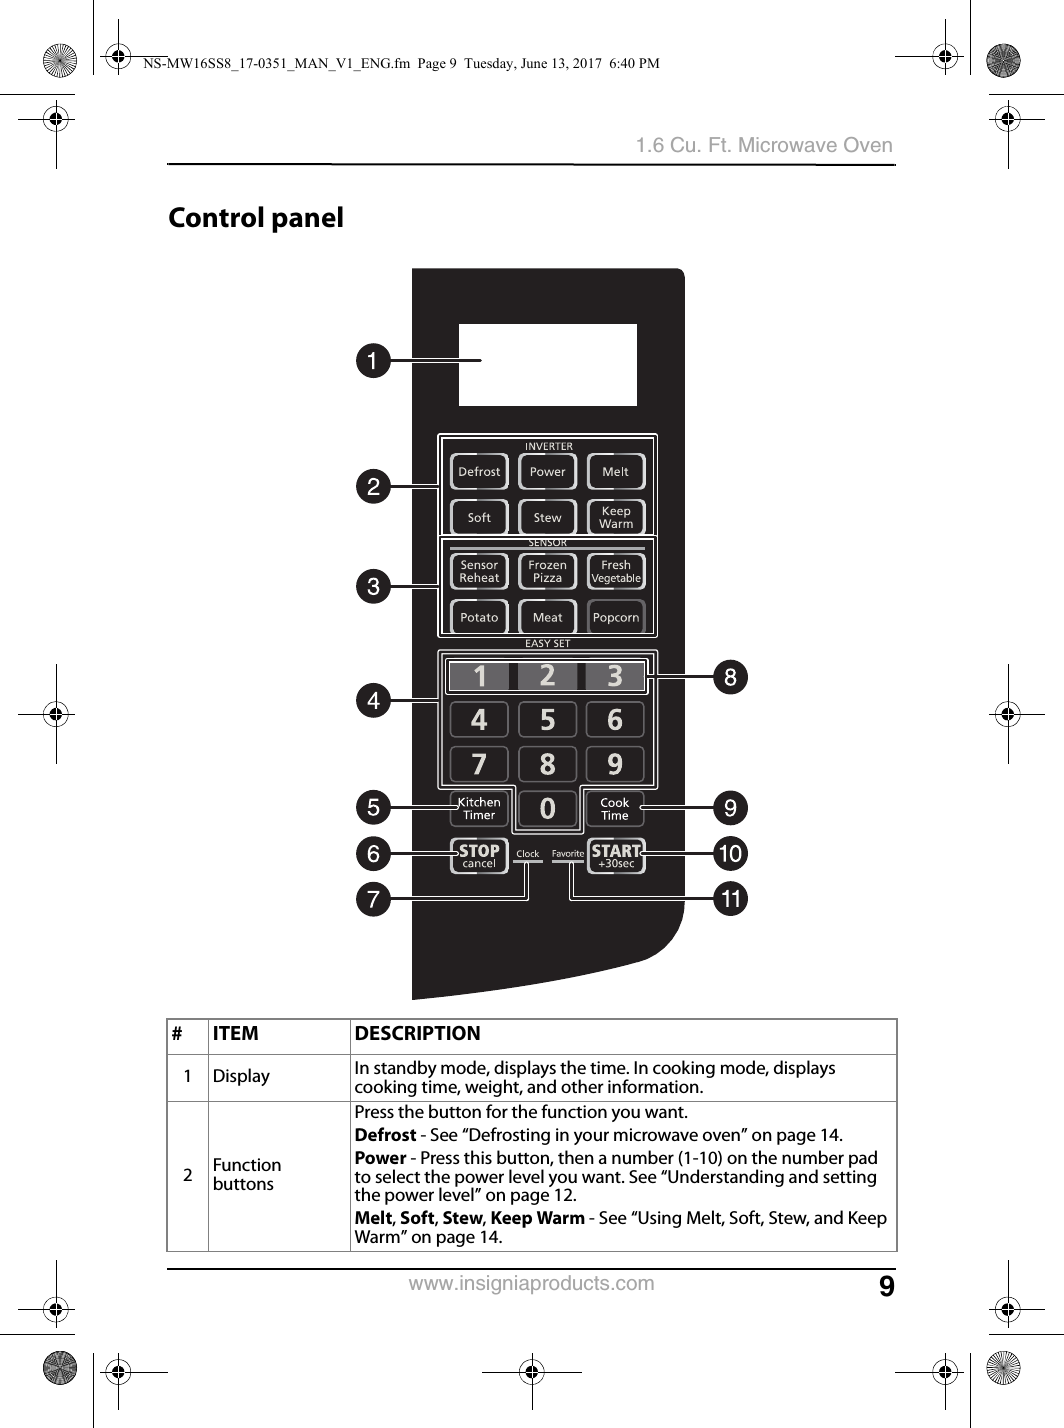
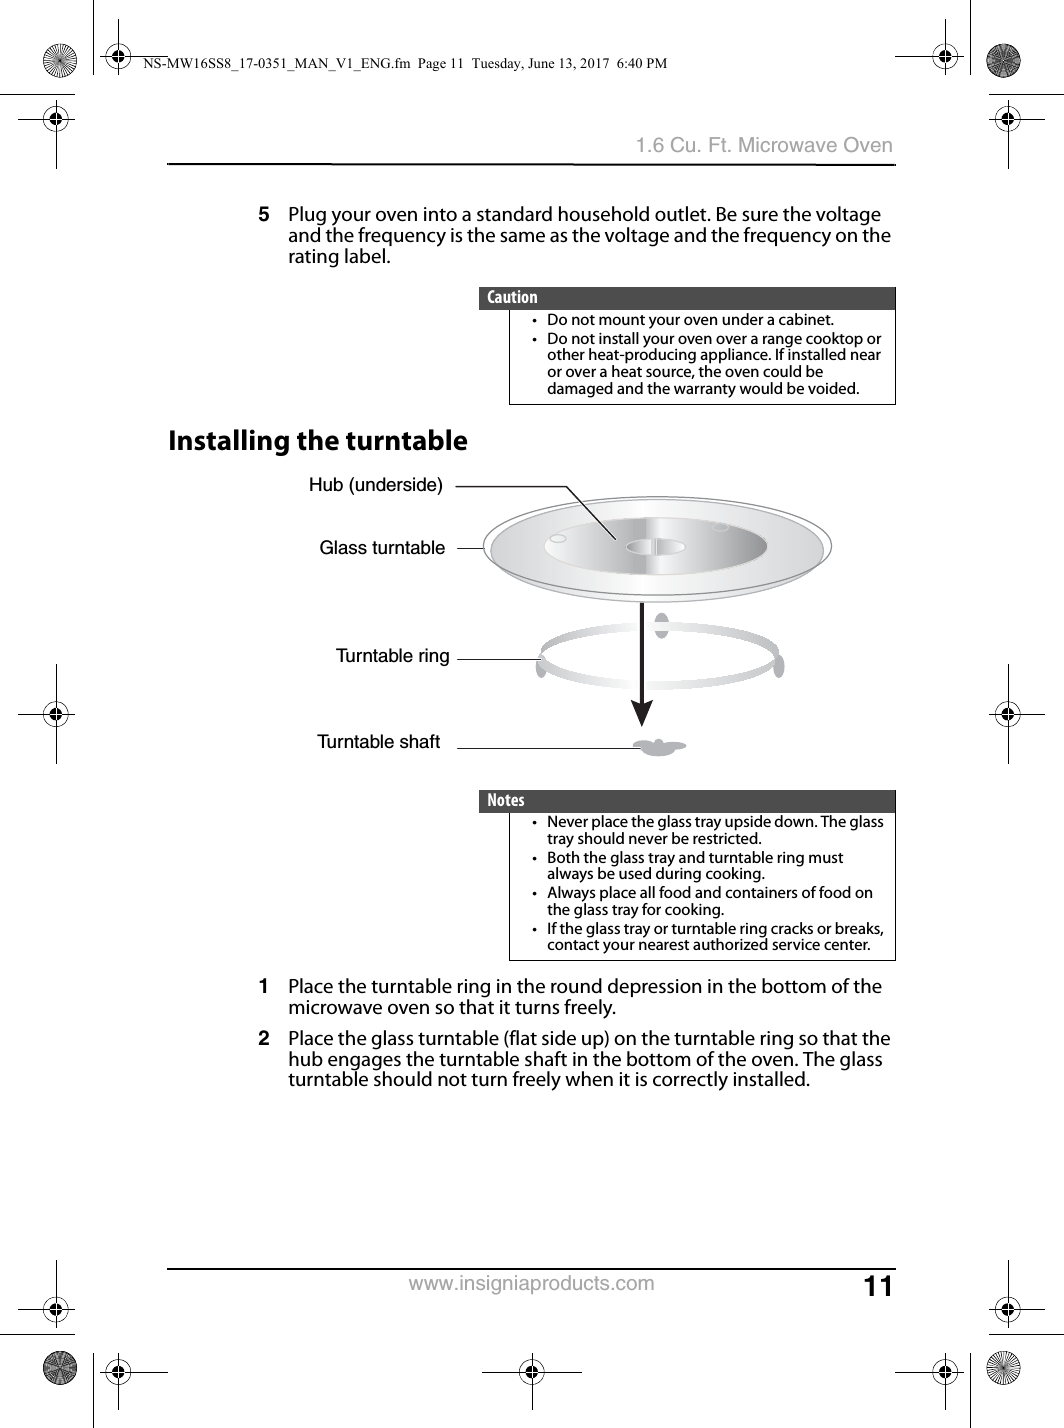
![8NS-MW16SS8www.insigniaproducts.comFeatures•1250 Watts of power•Sensor cooking•LED display•Easy to clean•Child lockPackage contents:• 1.6 Cu. Ft. compact microwave oven• Glass tray (13.6 in. [345 mm])• Turntable ring•User GuideMicrowave oven (Please verify the accuracy of this graphic)#ITEM DESCRIPTION1 Observation window Use to view the item being cooked.2 Safety interlock system Prevents the oven from operating when the door is open.3 Door assembly Protects you from exposure to excessive microwave energy.4 Control panel Use to set cooking times and enter other information as needed.5 Glass turntable Allows food to cook evenly.6 Turntable ring assembly Allows the turntable to rotate to cook food evenly.7 Turntable shaft Rotates the turntable assembly.NS-MW16SS8_17-0351_MAN_V1_ENG.fm Page 8 Tuesday, June 13, 2017 6:40 PM](https://usermanual.wiki/Midea-Kitchen-Appliances/XM245AYYPV4BBY/User-Guide-3446959-Page-8.png)