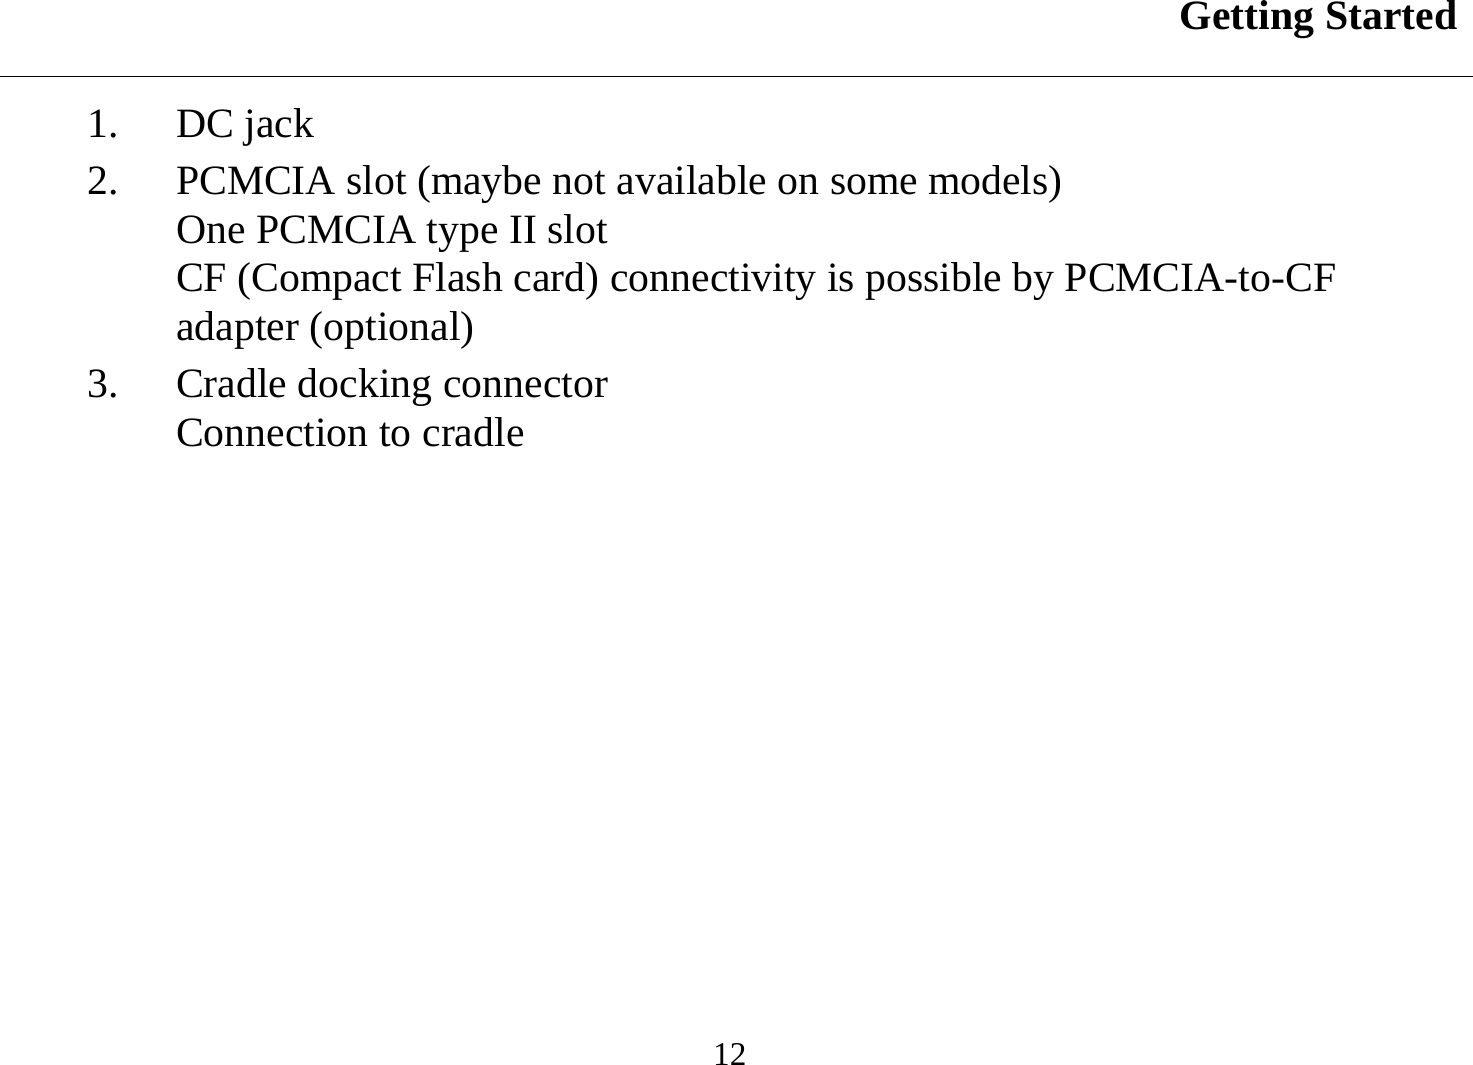
MilDef Crete DA04IM PDA WITH GS, WLAN, AND BLUETOOTH User Manual manual
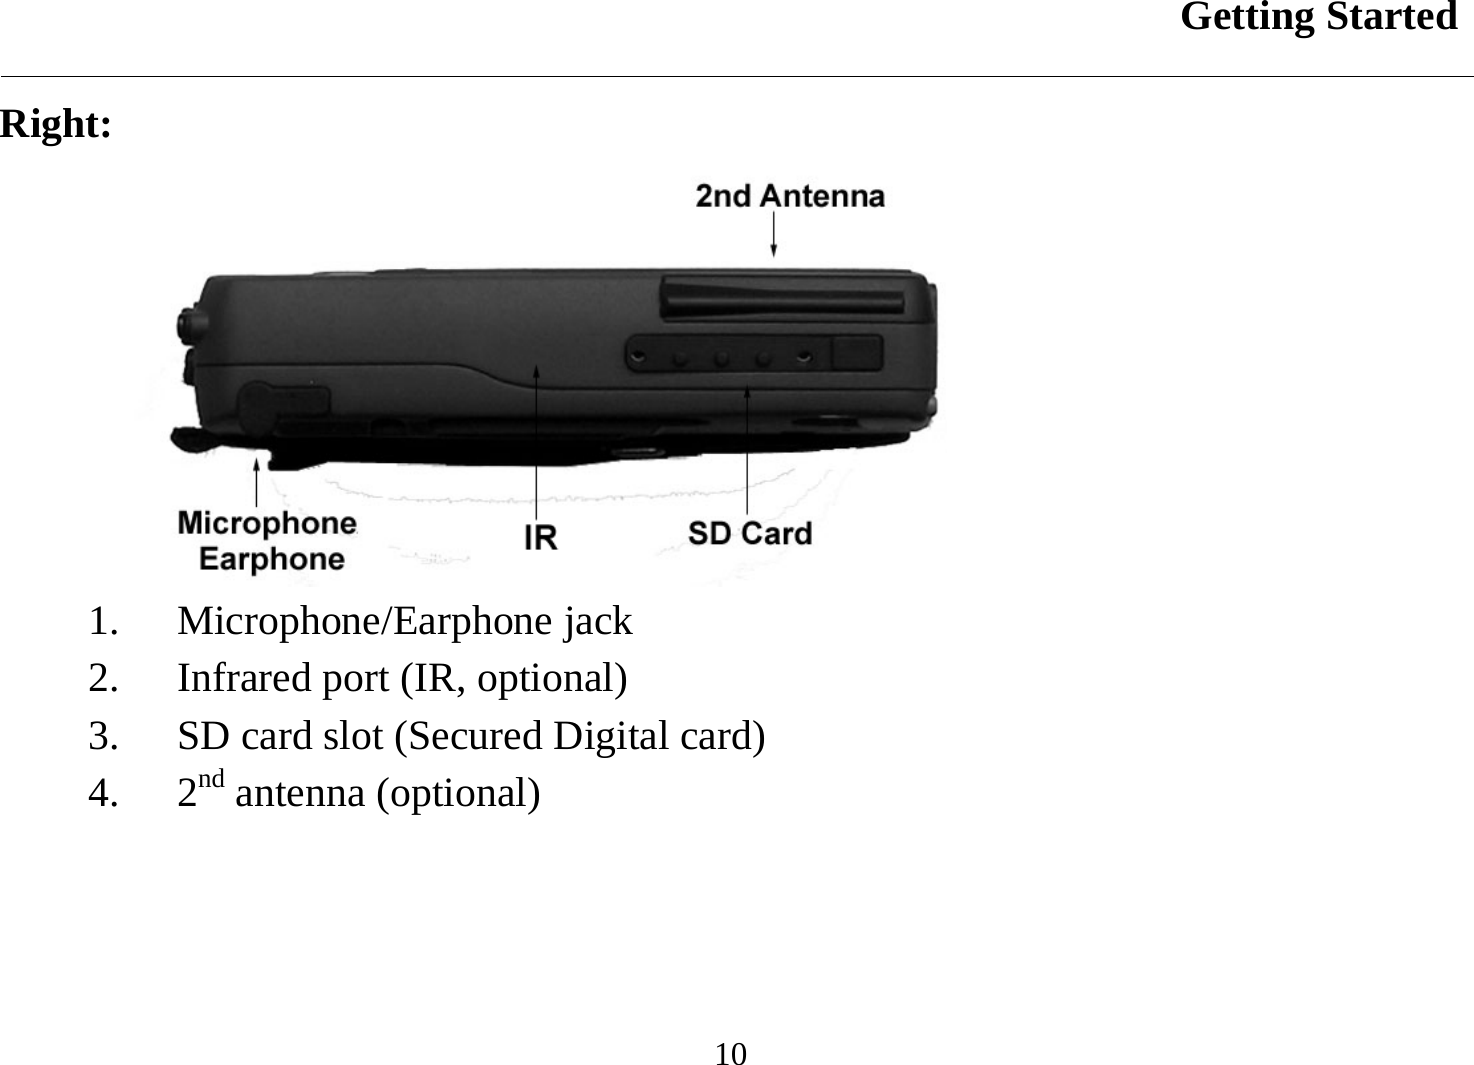
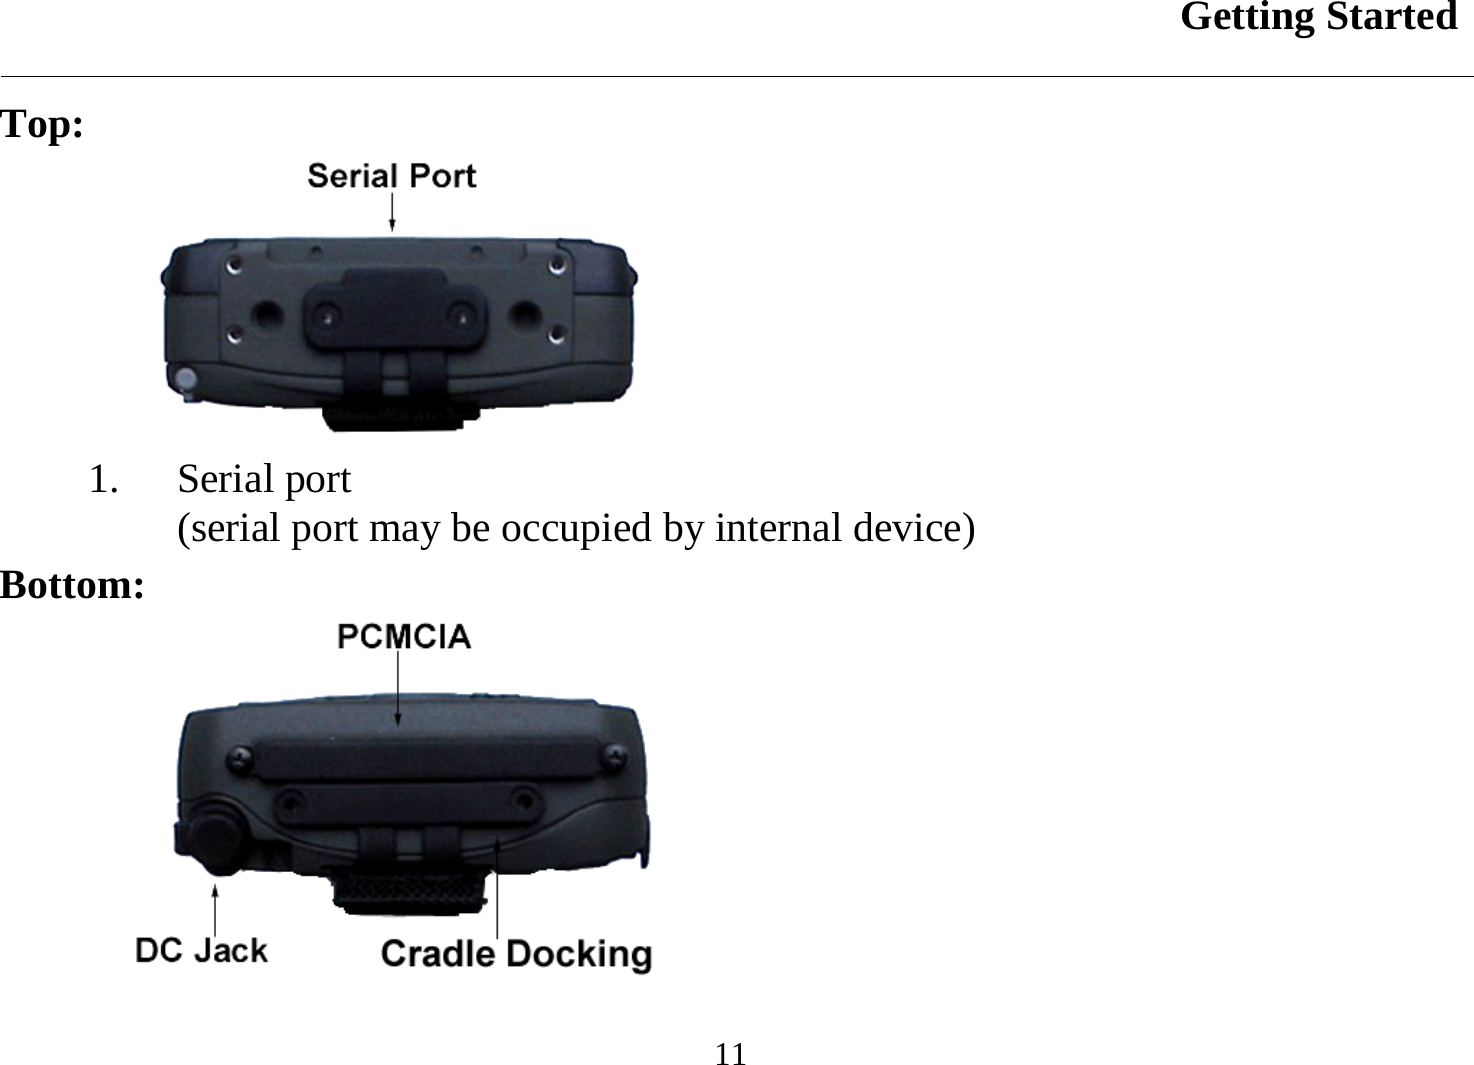
MilDef Crete Inc. PDA WITH GS, WLAN, AND BLUETOOTH manual
UserManual.wiki
>
MilDef Crete
>
DA04IM User Manual
USERS MANUAL
Navigation menu
Upload a User Manual
Namespaces
Wiki Guide
HTML
PDF
Info
Views
User Manual
Discussion / Help
Navigation


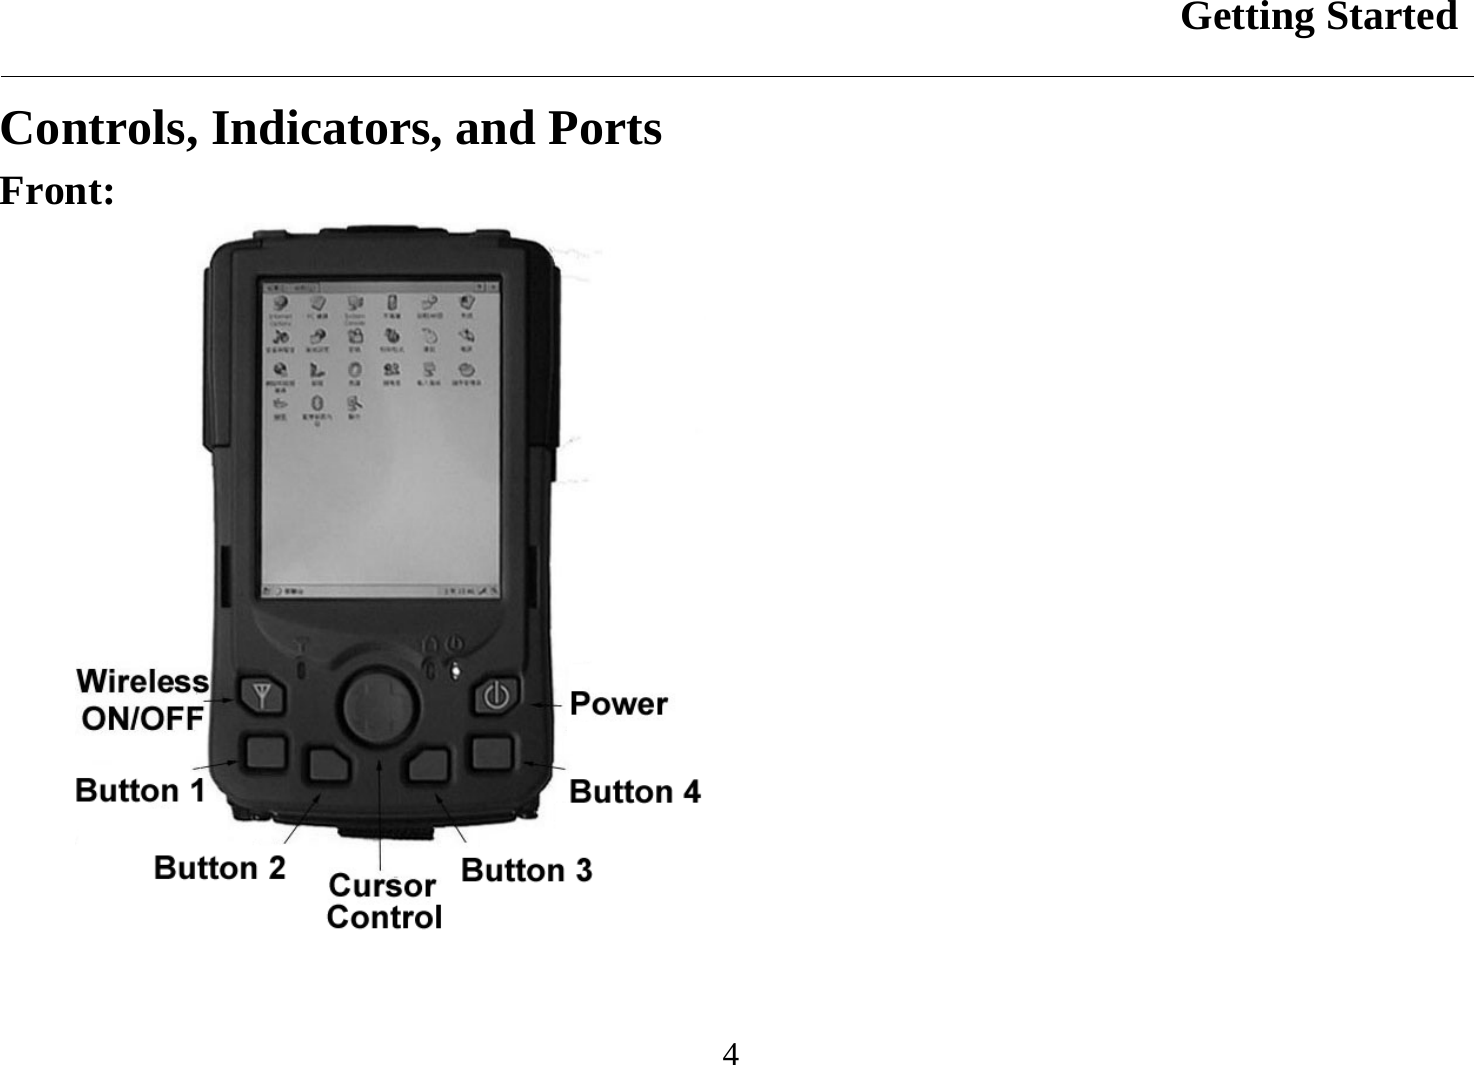
![Getting Started 5 1. Wireless ON/OFF (Flight button) Turn ON/OFF the wireless device (Wireless device WLAN, GPRS, Bluetooth, etc. are optional) Please turn it OFF at locations with wireless control (hospital, onboard airplane, etc.) 2. Button 1 (User programmable) 3. Button 2 (User programmable) 4. Cursor Control [Left], [Right], [Up], [Down] 4 directions [Enter] at the center 5. Button 3 (User programmable) 6. Button 4 (User programmable) 7. Power Button Press momentarily turns the power ON or OFF. Press > 1 second turns LCD backlight ON or OFF (actually power OFF is “suspend” only, the battery is still backing up memory data) 8. Power indicator](https://usermanual.wiki/MilDef-Crete/DA04IM/User-Guide-516113-Page-18.png)