Mitek 2635986 Overhead Audio Unit User Manual
Mitek Corp Overhead Audio Unit Users Manual
UserManual.wiki
>
Mitek
>
2635986 User Manual
Users Manual
Navigation menu
Upload a User Manual
Namespaces
Wiki Guide
HTML
PDF
Info
Views
User Manual
Discussion / Help
Navigation

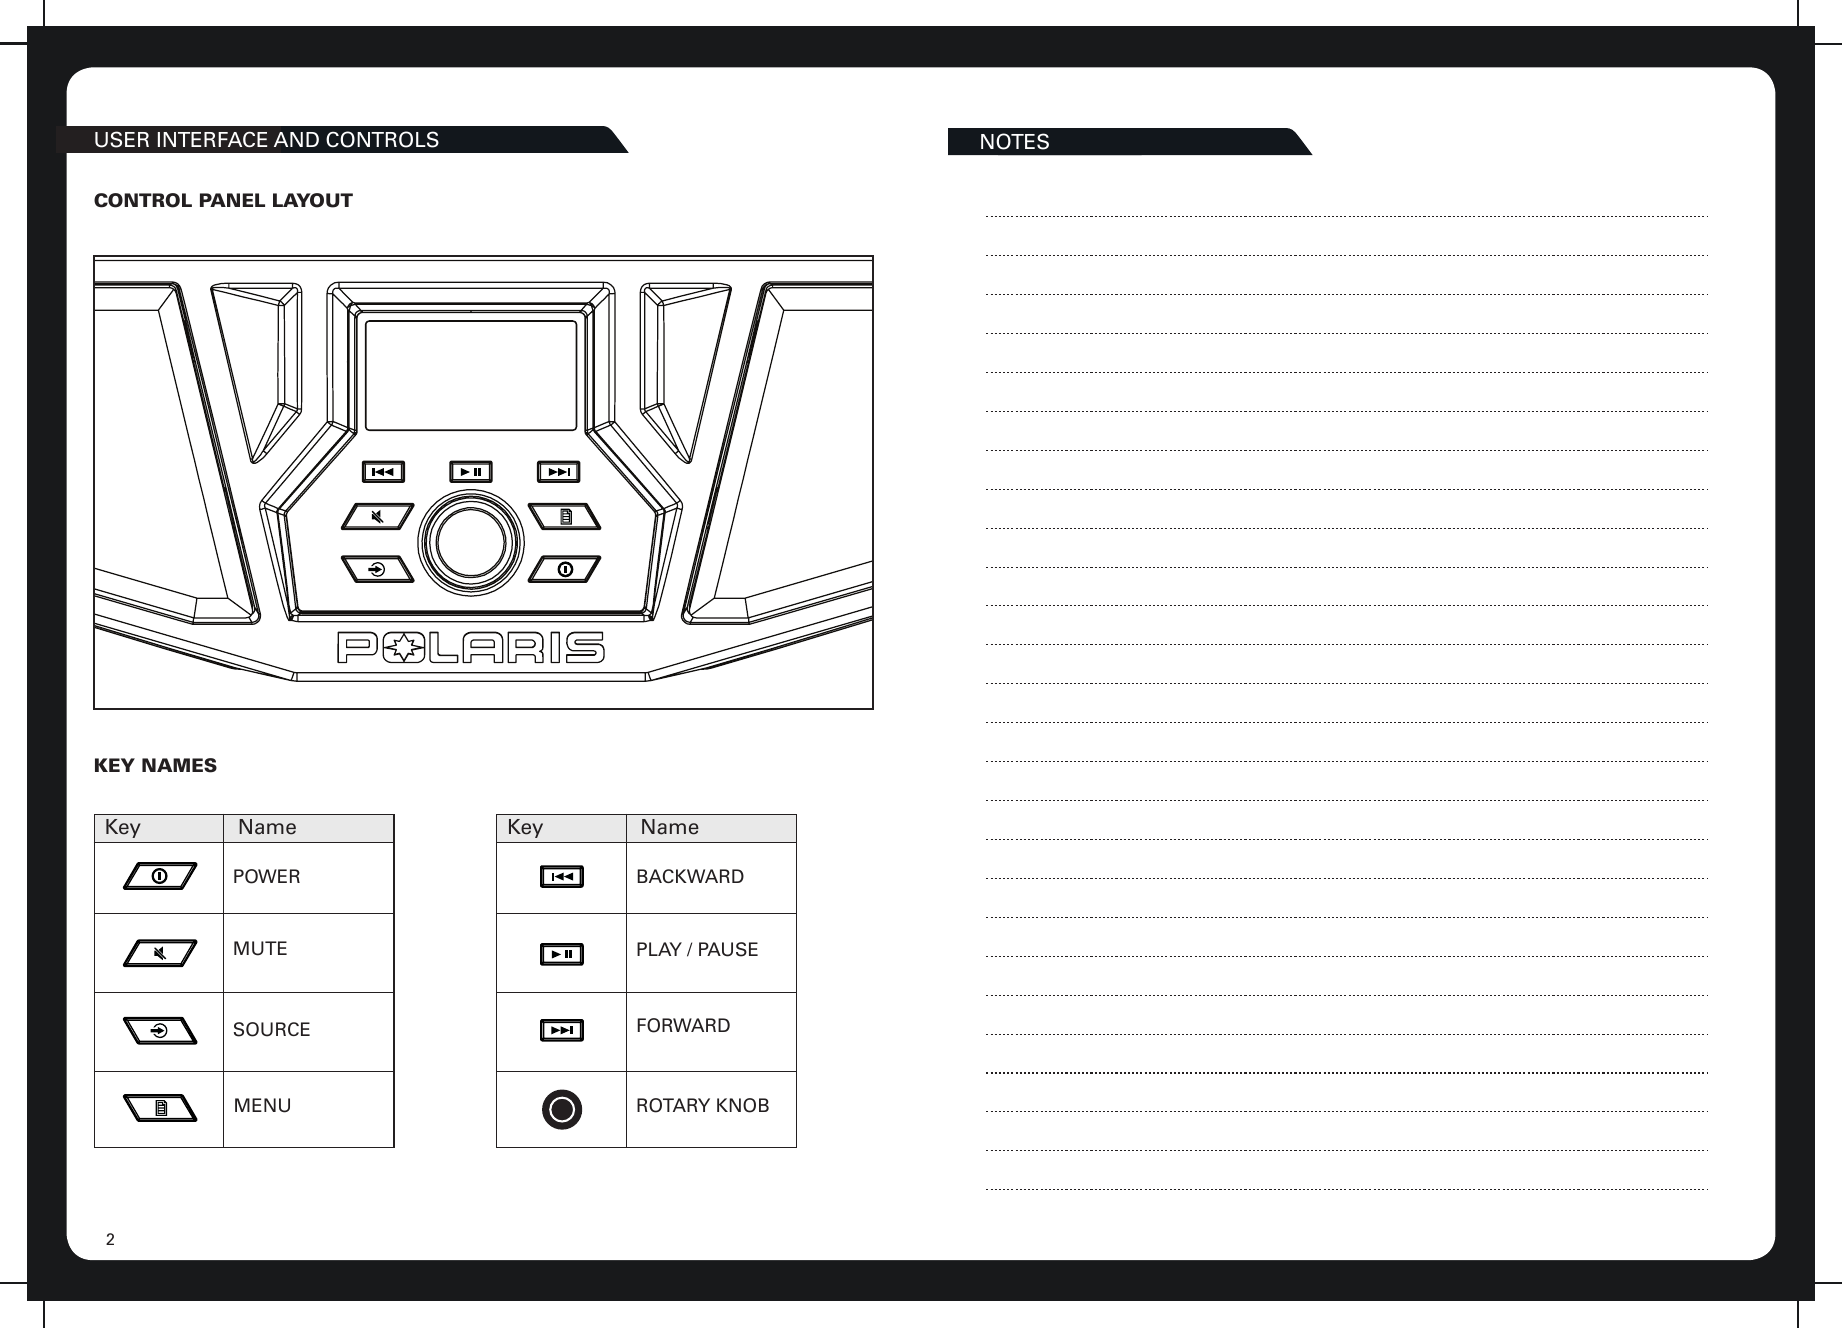
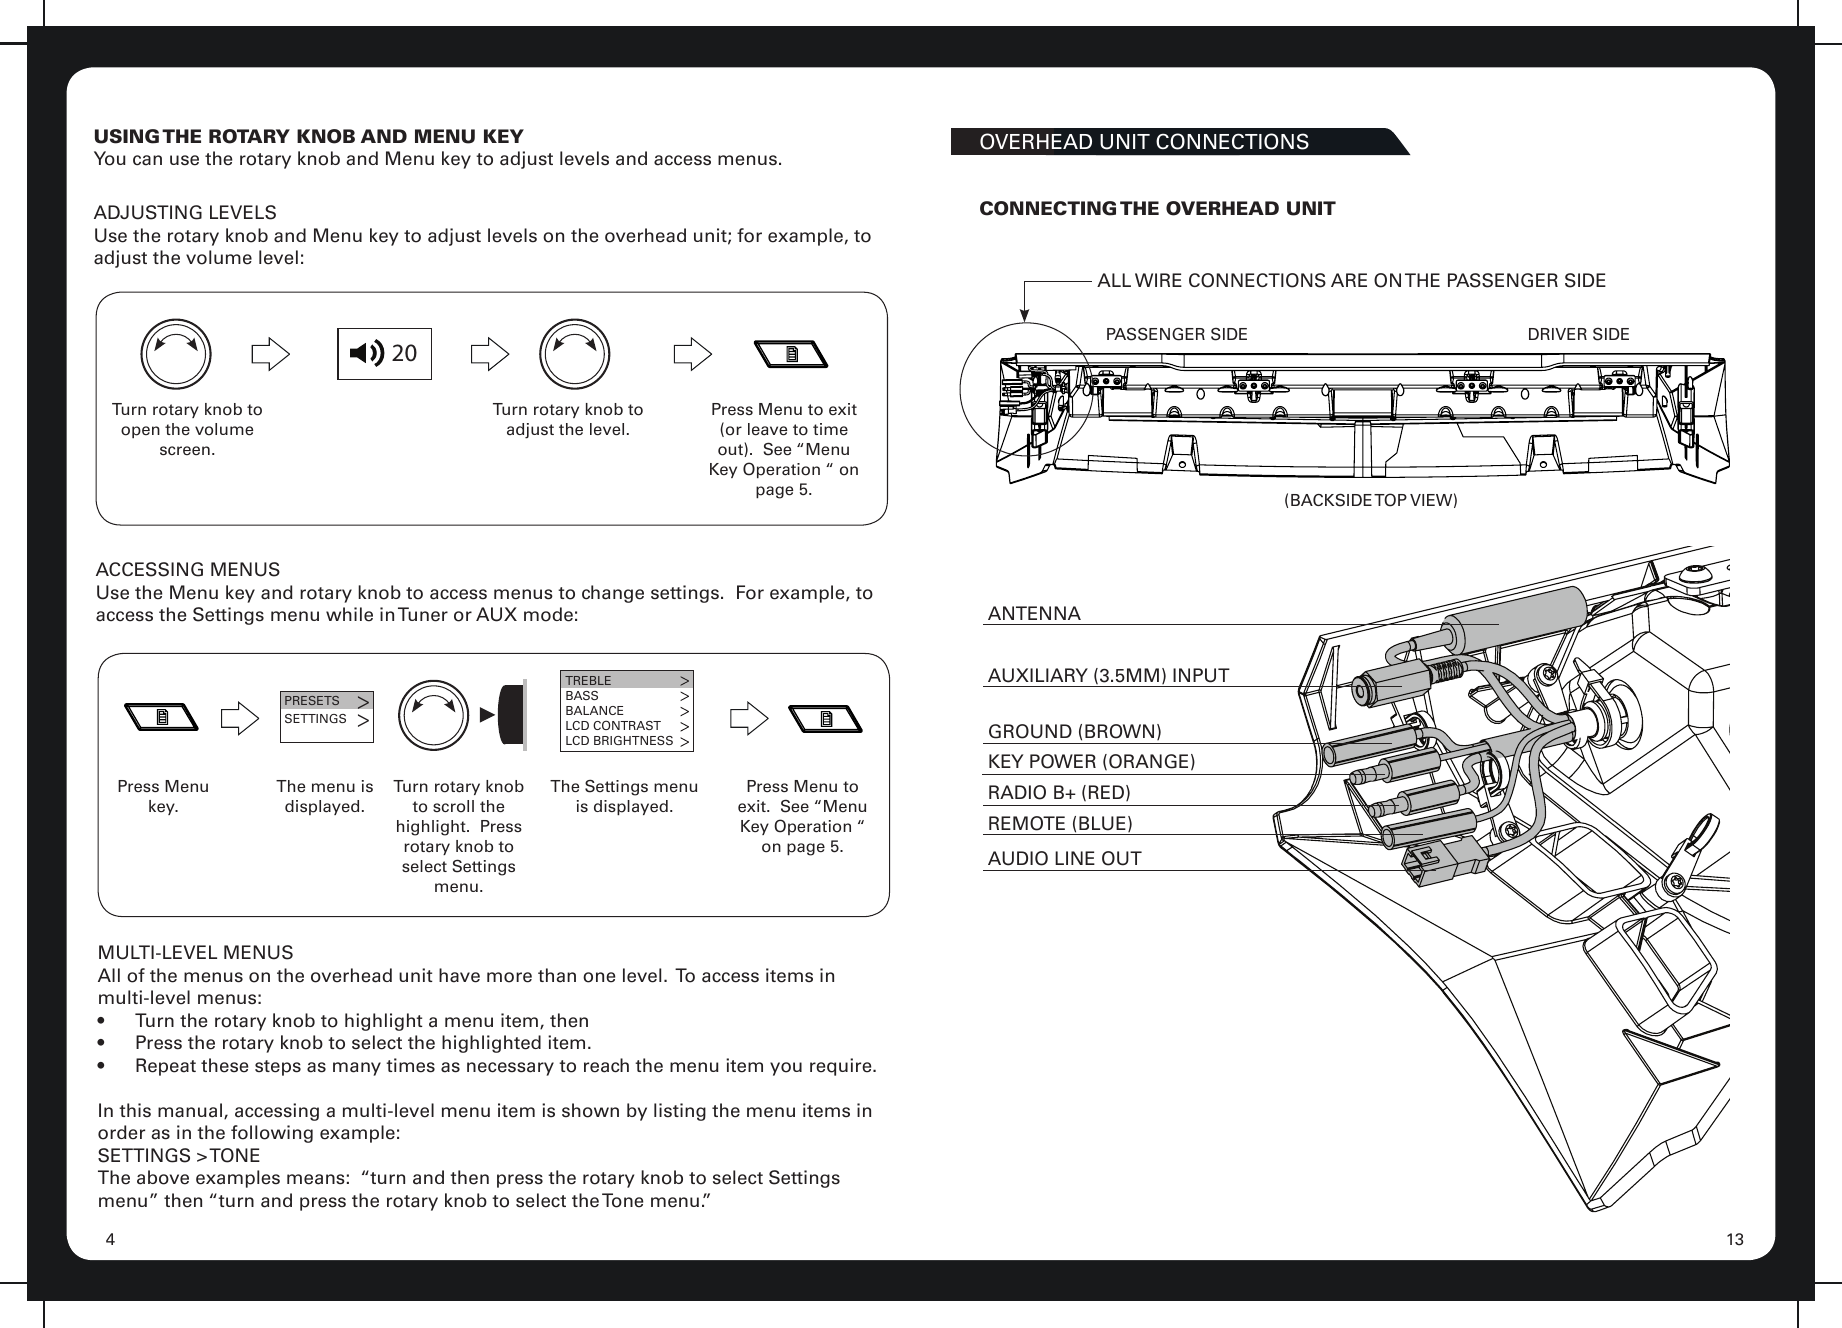
![512BLUETOOTH GETTING STARTEDPLAYING CONTENTThe overhead unit can accept audio from devices with Bluetooth.To listen to input from a Bluetooth device:Press the Input source key [ ] until the Bluetooth input source sceen is displayed.Continuing to press the key will display the input source screens for AM, FM and AUX as described in the section “Input Source Screens.”BLUETOOTH SOURCE SCREENThe input source screen displayed when you select Bluetooth input is shown in the gure below.BTDISCONNECTEDExample of Bluetooth source screen.The source screen will show disconnected until a device is paired.To pair a device:• Make sure source screen says disconnected.• Search for “MTX AUDIO” on your Bluetooth enabled device.• Once you have connected the source screen will say connected and you will also hear a connection beep.CONTROLLING BLUETOOTH PLAYBACKYou can control your device from the overhead unit using the Back, Forward and Play/Pause keys as shown on page 2.POWERING THE UNIT ON OR OFFWhen you power on the overhead unit it will automatically start playing music from the most recently selected input source.TO POWER THE UNIT ON OR OFFPOWER• Momentarily press the Power key on the unit. As the unit starts up, a splash screen is displayed for several seconds, followed by the input source screen for the current input source.• When the unit is on, momentarily press the Power key to power off the unit.INPUT SOURCE SCREENSThe overhead unit supports inputs from several different sources:• AM/FM radio• Bluetooth• Auxiliary InputPress the Input source key [ ] to step through the input source types in the following order:AM FM Bluetooth AuxWhen you select one of these sources, the overhead unit displays a source screen, similar to the AM source screen shown in Figure 1 below. The title bar always shows the source name. Additional information varies depending on the source type you have selected.SOURCE NAMESELECTEDFREQUENCYTUNING MODEFigure 1 - Example source screen (AM input selected)](https://usermanual.wiki/Mitek/2635986/User-Guide-2842436-Page-7.png)
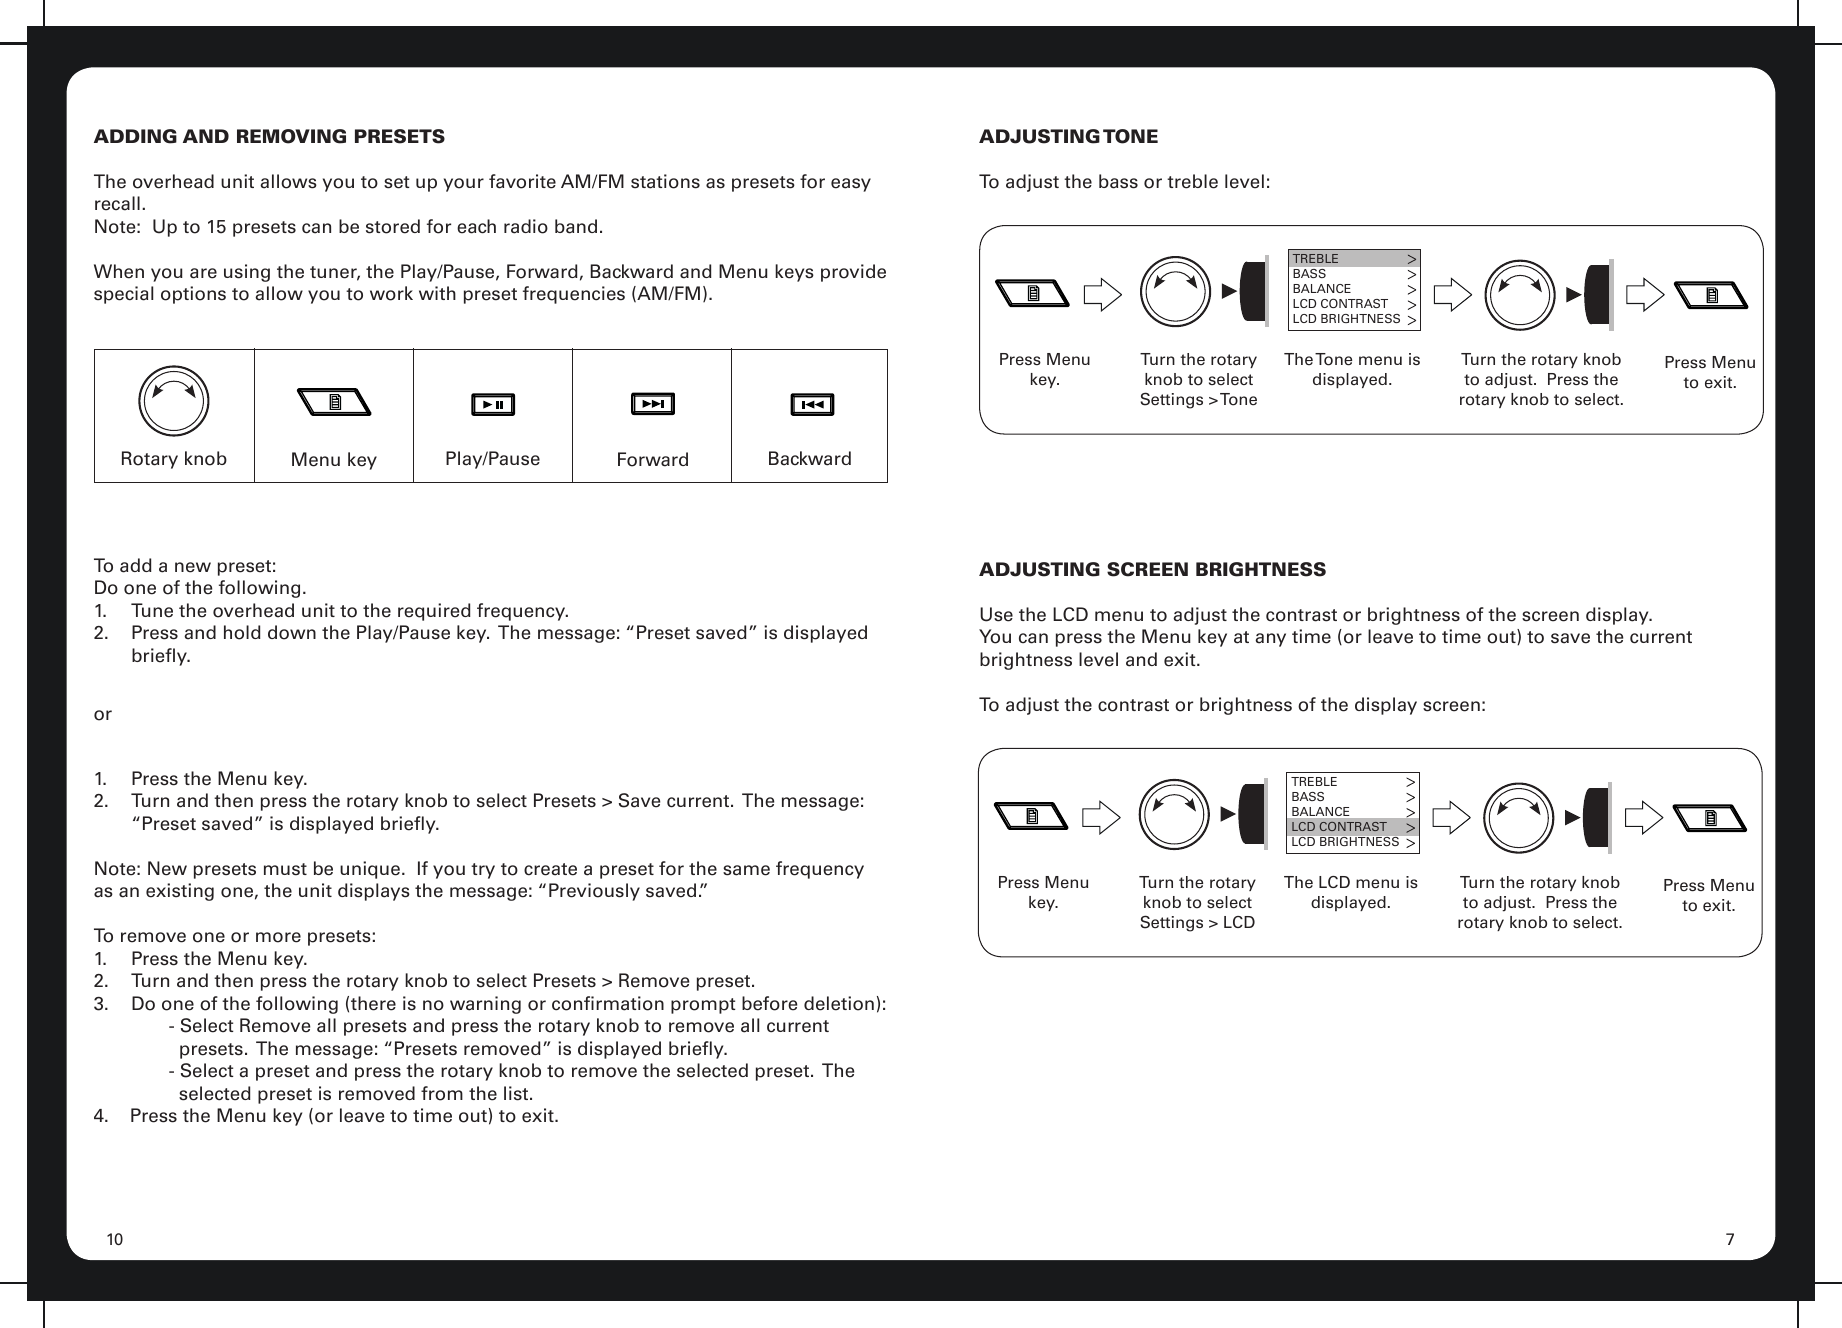
![116ADJUSTING VOLUME LEVELTo adjust the volume level:20Turn rotary knob. The Volume screen is displayed.Press Menu to exit or leave to time out.Turn rotary knob to adjust.MUTING OUTPUTTo mute and unmute the volume:MUTE• Press the Mute key to mute the audio output. The Mute icon is dis-played over the top of the current input source screen.• Press the Mute key again to unmute the audio output. The volume continues at the previously set level.AUXILIARY INPUTLISTENING TO AUXILIARY INPUTThe overhead unit can accept audio from devices with an audio output.To listen to input from an auxiliary device:Press the Input source key [ ] until the AUX input source screen is displayed.Continuing to press the key will display the input source screens for AM, FM and Bluetooth as described in the section “Input Source Screens.”Figure 4 - Example auxiliary input source screen.AUXILIARY SOURCE SCREENThe input source screen is displayed when you select auxiliary input, shown in Figure 4 below.](https://usermanual.wiki/Mitek/2635986/User-Guide-2842436-Page-8.png)
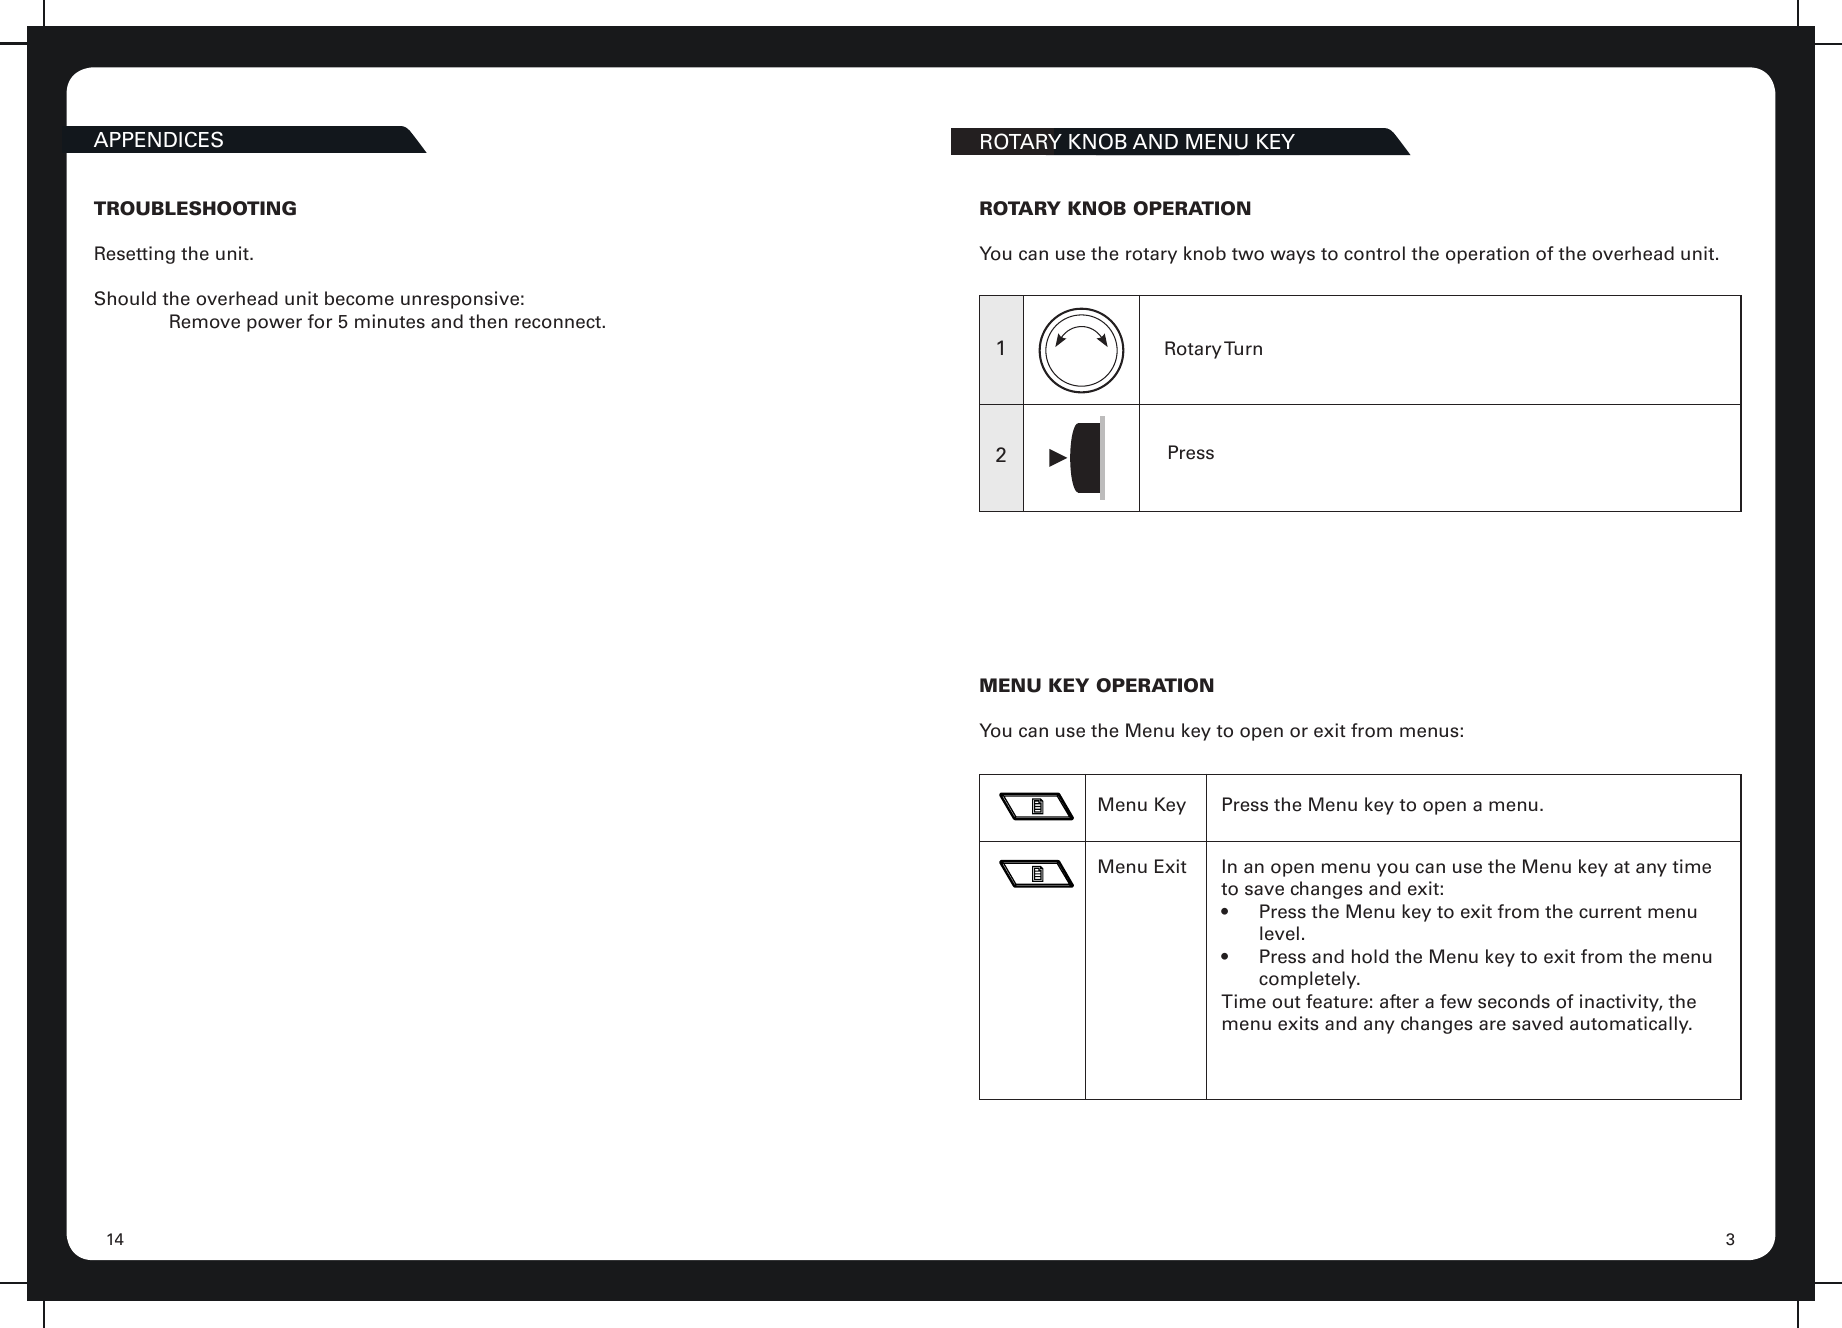
![98TUNERLISTENING TO THE TUNERTo select one of the available tuner bands:Press the Input source key [ ] to select input from each of the following in turn:• AM• FMThe applicable input source screen is displayed for each band.Continuing to press the key will display the input source screens for Bluetooth and Auxil-iary as described in the section “Input Source Screens” on page 5.TUNER SOURCE SCREENSAM/FMAn example of a typical tuner input source screen is shown in Figure 2 below.SOURCE NAMESELECTEDFREQUENCYTUNING MODEFigure 2 - Example source screen (AM input selected)TUNING METHODSYou can use three methods to tune the overhead unit: automatic, manual and preset.Rotary knob Menu key Play/Pause Forward BackwardTo tune to a required frequency, channel or preset:Press the Play/Pause key to step through the available tuning methods for each band.Tuning Method When tuning with this method...AutoManualPreset• Press the Forward or Backward key to start searching for available stations. Note: The search stops when a station is found or when the unit has scanned all available frequencies once.• Press the Forward or Backward key to step through the range of frequencies one at a time.• Press the Forward or Backward key to step through available presets (only available if there are two or more presets)• To tune to a specic preset: a. Press the Menu key. b. Press the rotary knob to select Presets. c. Turn the rotary knob to hightlight the required preset. d. Press the rotary knob to tune to the highlighted preset. e. Menu exit. See “Menu Key Operation”For further details, see “Adding and Removing Presets.”](https://usermanual.wiki/Mitek/2635986/User-Guide-2842436-Page-10.png)