Mitsumi Electric Co DWMW024 Wireless LAN Module User Manual NZB MANUALx
Mitsumi Electric Co Ltd Wireless LAN Module NZB MANUALx
Contents
User Manual for Host equipment

(1)
Nintendo Zone Box (NOA P/N and Description: Automates the connection between a consumer’s Nintendo DS
System and a local WiFi network, enabling the System to retrieve and/or receive WiFi content)
[NZB-001]
User’s Manual
Please read this manual before using this product. Store this manual in a safe place.
(2)
Please contact Support for the following.
• When Nintendo Zone Box is not working properly
• When parts are lost or the device is damaged
• When discontinuing use
Assembled in Japan All rights reserved.
Nintendo of America Inc.
12521 128 Lane NE Suite B, Kirkland, WA. 98034
(3)
1. Kit Contents
Nintendo Zone Box (NZB-001) x1 (NOA P/N and Description: Automates the connection between a
consumer’s Nintendo DS System and a local WiFi network, enabling the System to retrieve and/or receive WiFi
content)
(1) Status Window
Open the window to check status of current communication.
(2) Power LED (Blue)
The light turns on when power is on.
(3) Wireless Communication LED (Yellow)
Light is steady when power is on; light blinks during wireless communications.
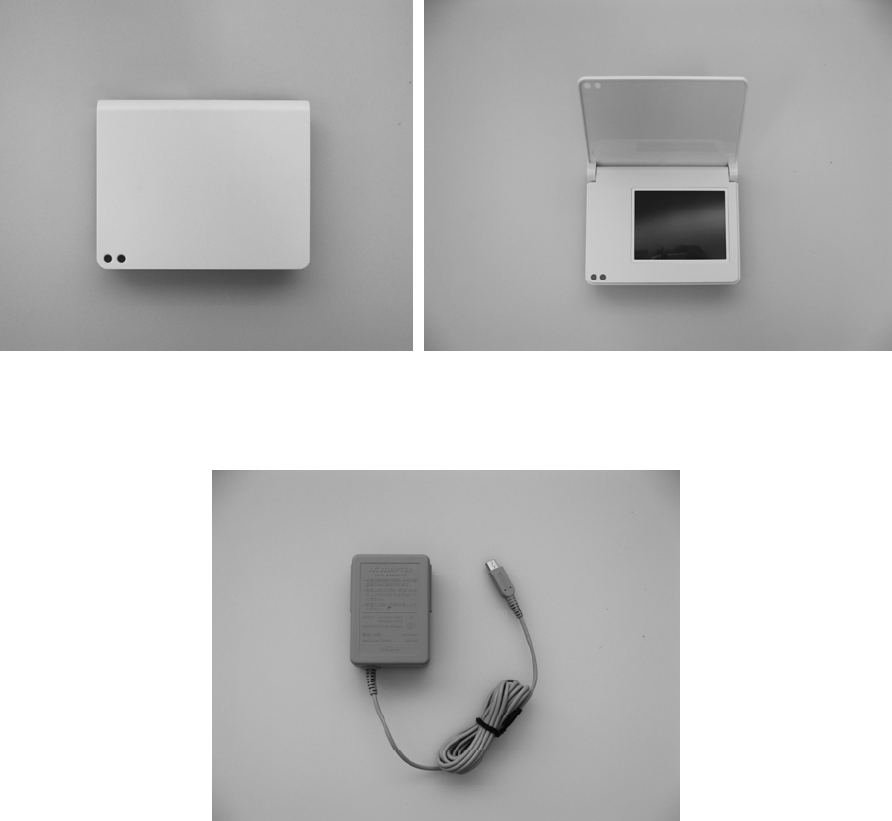
AC Adapter (NOA P/N and Description)
[WAP-002(JPN)]
x1
Wall mounting resin plate (NOA P/N and Description)
x1
When mounting this device to a wall, this part is attached to the device with screws.
(-> “5. Installation)
Note: Use the included “Pan head screws (M4x6).” (NOA P/N and Description)
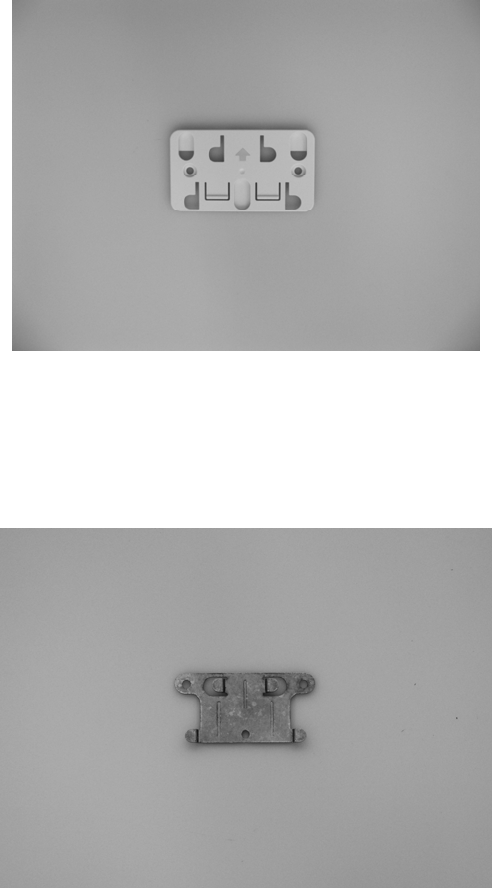
Wall mounting bracket (NOA P/N and Description)
x1
When mounting this device to a wall, this part is attached to the wall with screws. (-> “5.
Installation)
Note: Use the included “Wall mounting screws.”
Cord stickers (NOA P/N and Description)
x2
These are used to secure the AC adapter cord to the wall.
(-> “6. Connecting the AC Adapter and Setting up Download Services that use the Internet”)
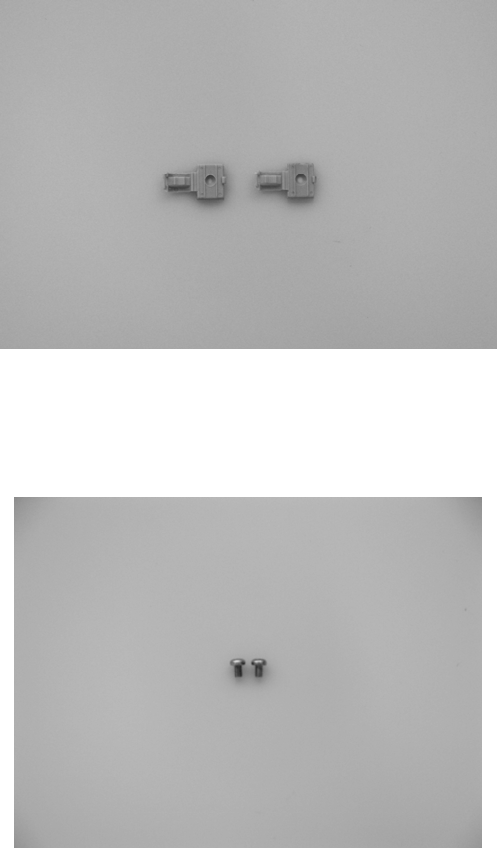
Pan head screws (M4x6) (NOA P/N and Description)
x2
These are used when mounting the Wall mounting resin plate to the main device.
(-> “5. Installation)
Wall mounting screws (NOA P/N and Description)
x3
These are used when mounting the Wall mounting bracket.
(-> “5. Installation)
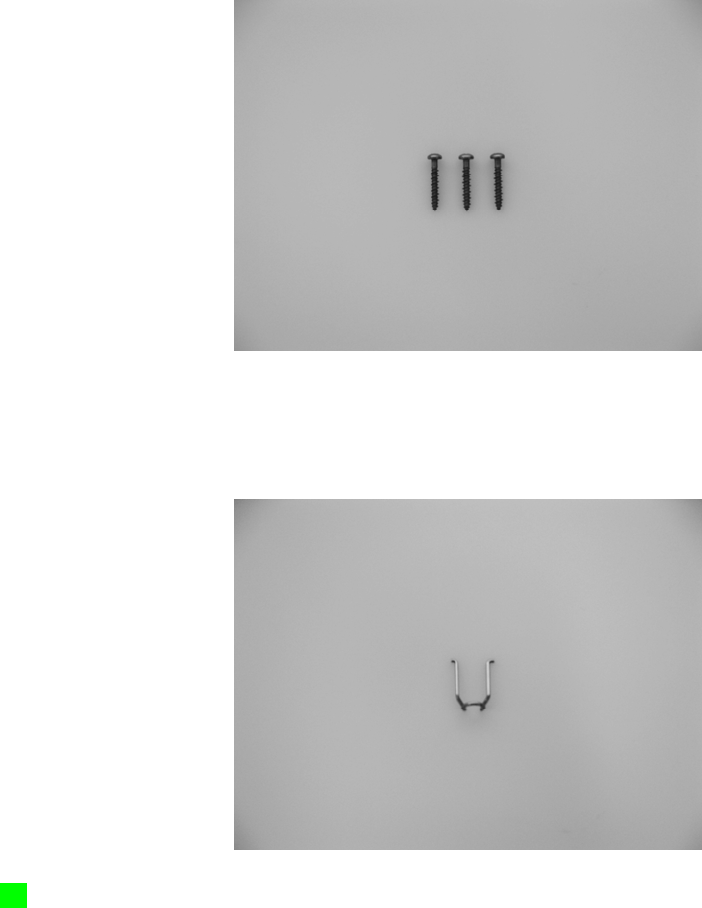
DC Plug lock (NOA P/N and Description)
x1
This fitting is to prevent the DC plug of the AC adapter from being unplugged from the device.
(-> “5. Installation)
(4)
2. WARNING – FIRE OR ELECTRICAL SHOCK
Failure to install or use this product as directed may result in fire or electrical shock.
Please observe the following precautions for safe use:
■ Observe Safety Precautions
Please read this User’s Manual before use.
■ Periodic Inspections
Periodically inspect the AC adapter cord and AC plug for damage and check for dust between
the outlet and AC plug.
■ If there is a problem
Note: Exercise caution, as it is dangerous to make excessive contact.
1. Unplug the AC adapter AC plug from the outlet to turn power OFF.

2. Immediately contact Nintendo Zone Support. Note: Do not have repairs
performed by the supplier.
(5)
■ Ceases to function properly
If normal functions cease, immediately contact Nintendo Zone Support.
■ Warning Icons
The following warning icons should be understood before reading this manual.
DANGER: Strong possibility of death or serious injury
WARNING: Possibility of an accident resulting in serious injury or death
CAUTION: Possibility of injury or damage to personal property
Request for use: Possibility of damaging this device or damaging personal property
(6)
3. Cautions during Use
WARNING
• Do not install this device in the following locations. If it fails, it may result in injury, fire, or
damage.
• Places exposed to weather, such as the outdoors
• Unstable locations; walls not sufficiently strong to mount this device
• Places exposed to direct sunlight; near sources of heat, such as heaters and
stoves
• Places were electromagnetic waves or power line noise is generated, such as
near microwave ovens or motors
• Places exposed to humidity, dust, oily smoke, or tobacco smoke
• Places where children can reach
• Places subject to condensation due to sudden changes in temperature, such as
near air conditioner vents
• Places subject to strong static electricity; places near open flames
• Do not use any AC Adapter other than the proprietary AC adapter [WAP-002 (JPN)].
Using another adapter may result in fire, electric shock, or malfunction.
• Do not alter, disassemble, or try to repair this product as it may result in fire, electric
shock, or malfunction.
• Always use the included parts for wall mounting when mounting this device on a wall
and firmly affix the device on the wall in the proper direction.
• If you detect odd sounds, smoke, or odd smells, immediately unplug the AC plug from
the outlet. After confirming there is no smoke, contact Nintendo Zone Support.
Continuing use may cause fire or malfunctions.
• Exercise caution, as it is dangerous to make excessive contact.
• Do not attempt repairs by yourself.
• Do not touch the connector or terminals with your fingers or metal objects and do not
insert foreign objects.

• Please use in a location that is appropriate for the use conditions. Not doing so may
cause a malfunction.
• Temperature use conditions: 10°C - 40°C
(7)
CAUTIONS
• Use the stylus to operate the touch screen. Do not use ball point pens or other hard
metal objects, operate by scratching the surface, strongly rub across the surface, press,
or poke.
(8)
Request for use
• Do not install or use this device in locations were wireless communications are
prohibited. The operation of the device may be affected by electromagnetic waves.
• If the device becomes dirty, please clean it with a soft cloth such as one used for
eyeglasses. Do not wipe with solvents, such as thinner, benzene, or alcohol as it may
damage the surface.
• Do not incinerate this product. Contact your local authorizes for instructions on disposal.
(9)
4. Cautions Regarding Handling the AC Adapter
Please be aware of the following safety precautions when handling the AC adapter. Failing to do
so may cause fire, electric shock, or a malfunction.
WARNING
• This product is specifically designed to be used with household current (TBD) in the
United States. Do not use with different voltages, such as in foreign countries.
• If you detect something odd, such as odd sounds, smoke, or odd smells, immediately
unplug the AC plug from the outlet, and after confirming there is no smoke, contact
Nintendo Zone Support.
• Do not use an AC adapter that has liquid on it or has a foreign object inserted. If the
adapter gets wet or has a foreign object inserted, do not use it and contact Nintendo
Zone Support.
• Do not touch the wireless distribution box or AC adapter in the event of lightning. Fire or
electric shock can be caused by lightning.
• Do not use AC adapters with damaged plugs or cords.
• Do not touch the AC adapter plug with your finger or metal objects. Also be sure that no
metal objects are touching the AC plug when it is plugged into an outlet.
• Do not step on, pull, or bend the AC adapter or cord.
• Do not exceed the rated value for the outlets or wiring devices (e.g., overloading a circuit
with multiple cords).
• When unplugging the AC adapter from the outlet, grasp the AC adapter and pull straight
out. (Pulling on the cord may result in damaging the cord and causing a fire or electric
shock.)

• Do not place the AC adapter or cord near stoves or heaters.
• Do not use so that the cord (especially near the base of the cord) is subjected to
excessive force.
• For safety, always unplug the AC adapter from the outlet if it will not be used for a long
period of time. Store the AC adapter out of the reach of children.
• Do not modify or damage the AC adapter or cord.
• If the AC adapter seems loose in the outlet, a short may be caused in the plug if a metal
object (such as a clip) accidently falls. When plugging in the AC adapter, plug it firmly
into the outlet with the cord on the bottom. If it is plugged in with the cord on top, it is
susceptible to coming loose.
• Do not alter, disassemble, or try to repair.
• Periodically clean any dust that accumulates on the AC adapter plug using a soft cloth.
(10)
5. Installation
This product is used for information services that use wireless communication, such as
“Nintendo Zone”. The following are also required in order to use these services.
Devices other than this product required to use the “Nintendo Zone” service
• Broadband Internet environment
• Wireless LAN access point
• Nintendo DS Series Game System
After verifying the following, install in an appropriate location.
Note: When mounting on a wall, see “5. Installation” -> “Mounting on a Wall.”
Locations appropriate for Installation
• Locations that are unobstructed
• Locations that avoid inadvertent contact (such as under counters)
• Near wireless LAN access points
• Locations that can be easily monitored by store employees or installation managers
(11)
Mounting on a Wall
Perform the procedures below when mounting this device on a wall.
Note: Please firmly mount this device to a wall strong enough so that it will not fall.
Note: Mount this device where there is a nearby outlet to plug the AC adapter in directly.
Note: If you must use an extension cord because there is no outlet nearby, firmly fix the AC
adapter so that it will not easily come unplugged and ensure the cord remains flat.
1. Check the direction of the “Wall mounting resin plate” so that the arrow points in the direction
of the device and then secure the device to the plate with the screws. Use the two included Pan
head screws (M4x6) and attach the device firmly so that it does not come loose. (See Image 1.)
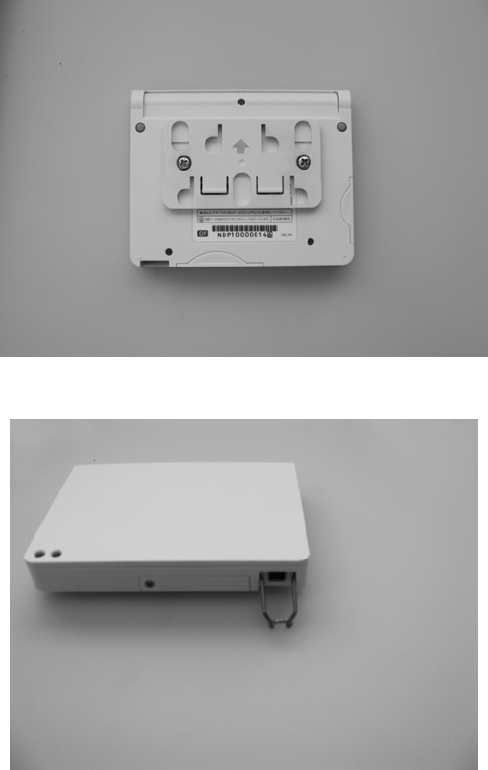
Note: Check to be sure the “Wall mounting resin plate” is firmly attached to the device.
2. Attach the DC Plug lock to the device in the proper direction. (See Image 2.)
3. Secure the “Wall mounting bracket” to the wall using the screws. Use the three included Wall
mounting screws to attach the bracket firmly to the wall so that it will not come loose. (See
Image 3.)
Note: Check to be sure the “Wall mounting bracket” is firmly attached to the wall.
4. Insert the “Wall mounting resin plate” attached to the device into the “Wall mounting bracket”
tabs and then slide the device down so that it is firmly seated. (See Image 4.)
Note: Check to be sure the “Wall mounting resin plate” is firmly attached to the “Wall mounting
bracket.”
Image 1.
Image 2
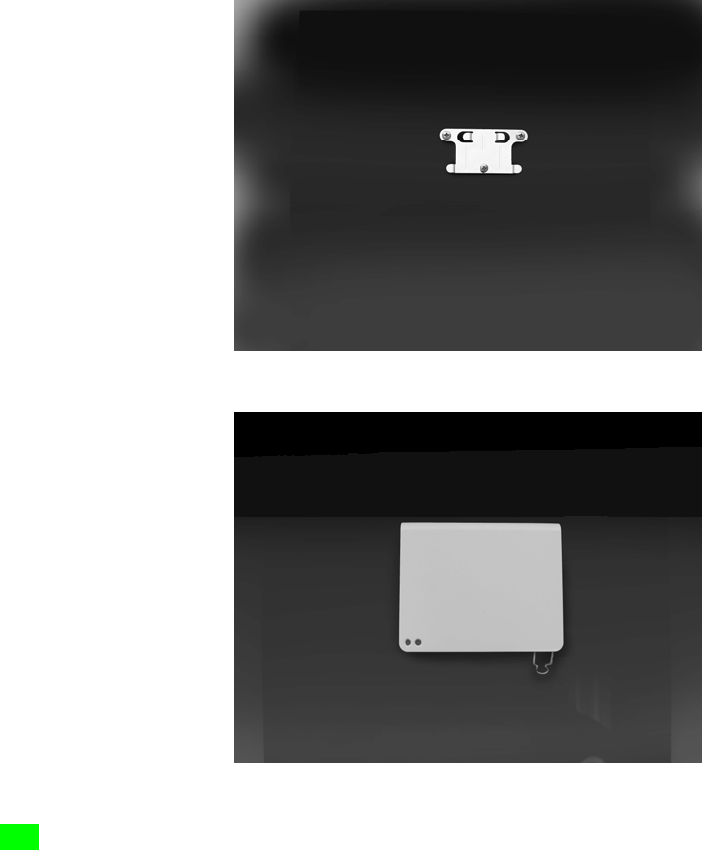
Image 3
Image 4
(12)
6. Connecting the AC Adapter and Setting up Download Services that use the Internet
1. Install this device in a safe location.
Note: See “5. Installation” regarding installation locations.
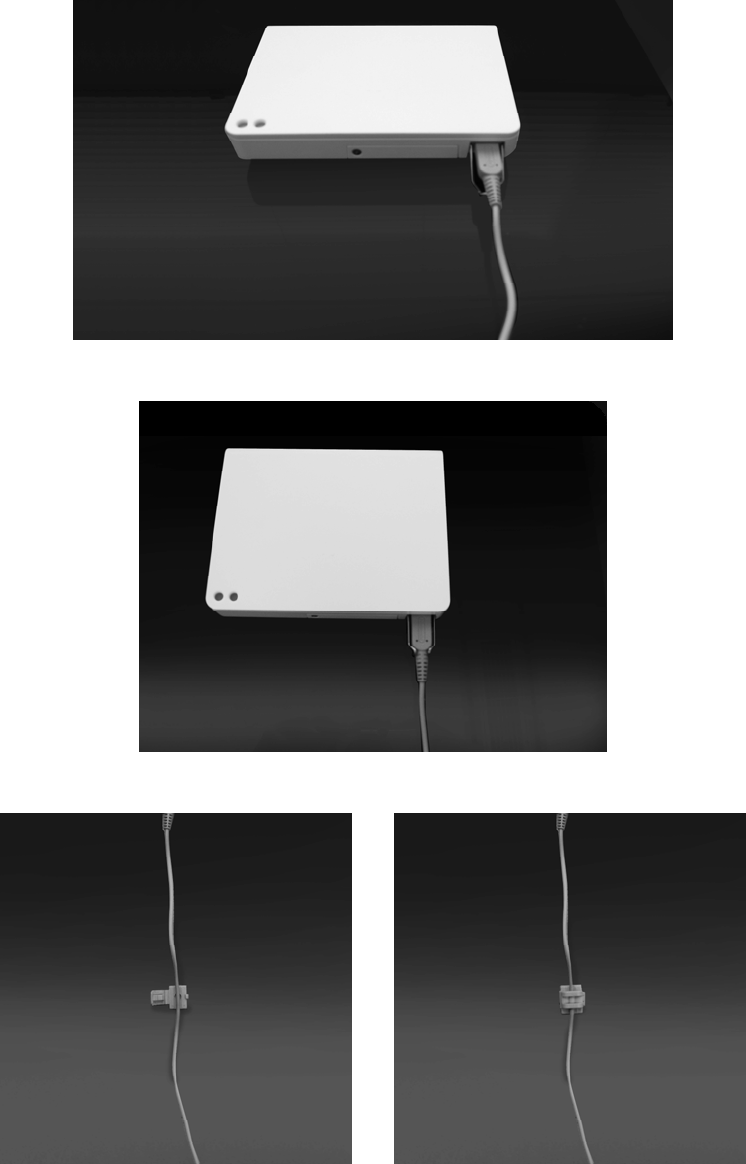
2. Plug the DC plug of the AC adapter into the AC adapter connector on the bottom of the
device. (See Image 5.)
3. Close the DC Plug lock until it clicks so the DC plug will not become unplugged. (See Image
6.)
4. If necessary, use the Cord stickers to secure the cord. (See Image 7.)
5. When the AC adapter is plugged into an outlet, the power is turned ON.
To turn power on: Plug the AC adapter into an outlet
6. The Status Window will open. Verify that you can connect to the internet. (See Image 8.)
7. To turn power OFF, unplug the AC adapter from the outlet.
Image 5
Image 6

Image 7
(13)
Distributing Contents
Status: Normal
Waiting for connection with DS
2007/12/25 13:21
Continuous Activation Time Number of Downloads
00h 00m 33s 0
(14)
Verifying Operation on Nintendo DS Series Game Systems (requires a Nintendo DS or
Nintendo DS Lite)
After verifying that the device screen is normal (See Step 6 in “6. Connecting the AC Adapter
and Setting up Download Services that use the Internet”), follow the procedure below to verify
that downloading from the internet can be performed normally using a Nintendo DS Series
Game System.
Note: Steps 1 – 5 are required when using Download Services with the Nintendo DS or
Nintendo DS Lite.
Note: The content of the information service or design of the screen may vary by location.
1. Turn on power to the Nintendo DS Series Game System.
2. The DS Menu is displayed on the lower screen. Select “DS Download Play.”
3. Select “Nintendo Zone Viewer” on the lower screen.
4. Data is downloaded from the wireless distribution box.
5. After about one minute, the Service Menu screen is displayed.
(15)
2
(Lower screen of the customer’s Nintendo DS Series Game System)
3
(Lower screen of the customer’s Nintendo DS Series Game System)
4
(Lower screen of the customer’s Nintendo DS Series Game System)
5
(Lower screen of the customer’s Nintendo DS Series Game System)
(16)
Troubleshooting Communication Errors
Check the following on the Nintendo Zone Box if there is a problem with downloading.
1. Check if the power LED is lit. If it is not lit, check the following.
• The DC plug of the AC adapter is properly plugged in
• The AC adapter is firmly plugged into the outlet

2. Check the Status Window to verify that there is a connection to the internet. If an error such
as that shown to the right (see Image 9) is displayed, unplug the AC adapter from the outlet to
turn power OFF.
3. After waiting about one minute, plug the AC adapter into the outlet to turn power ON.
4. The Status Window will open. Check if there is a connection to the internet. (See Image 10.)
5. If the problem persists after repeating Steps 1-4, contact Nintendo Zone Support.
(17)
9
Distribution Stopped
Status: Error 5-51099
Cannot connect to wireless LAN
2007/12/25 13:23
Continuous Activation Time Number of Downloads
00h 00m 05s 0
10
Distributing Contents
Status: Normal
Waiting for connection with DS
2007/12/25 13:21
Continuous Activation Time Number of Downloads
00h 00m 33s 0
(18)
7. Using SD Cards (Please confirm the service you are using uses SD cards)
When using an SD card, follow the procedure below to insert the SD card.
WARNING: When the Nintendo Zone Box is mounted on a wall, remove it from the wall before
performing the following operation.
1. Unplug the AC plug of the AC adapter from the outlet to turn power to the device OFF.
Note: Do not perform this operation with the power ON.
2. Use a Phillips head screwdriver to loosen the screw on the SD card slot cover and then
remove the SD card slot cover. (See Image 11.)
Note: Please use an appropriate screwdriver for the screw. Not doing so may damage the screw
hole and the SD card slot cover may not be removable.
3. Firmly insert the SD card in the proper direction until a click is heard.
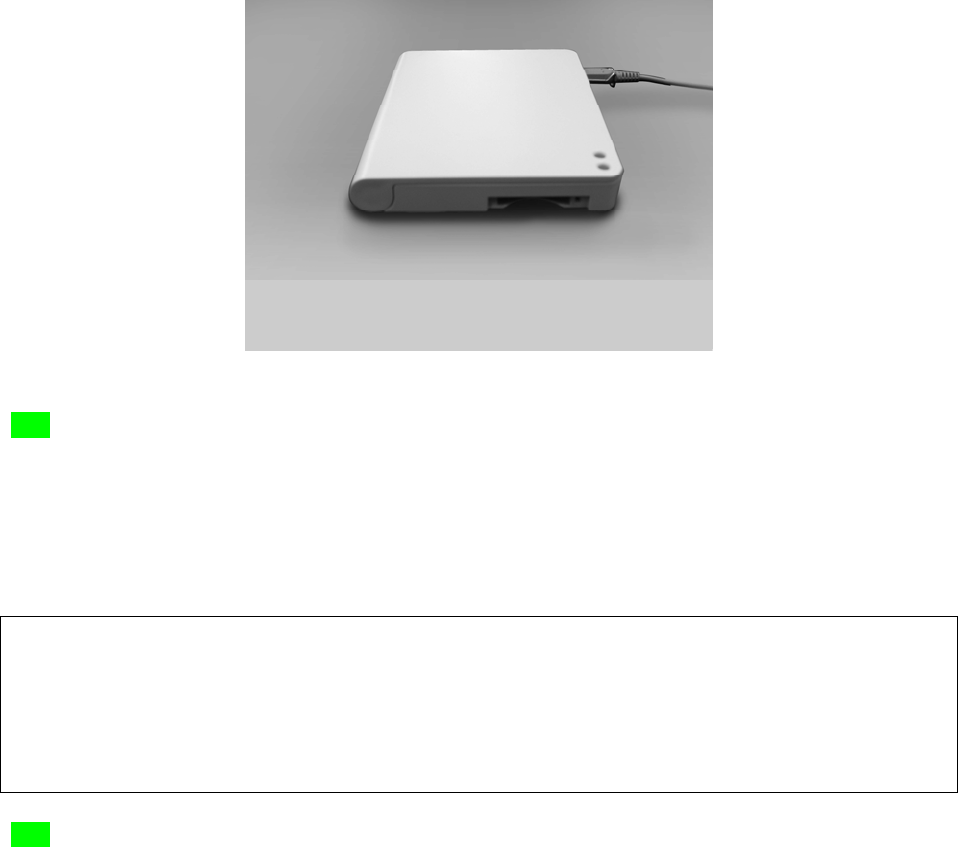
4. Replace the SD card slot cover and then tighten the screw.
Image 11
(19)
8. Requesting Repairs
Nintendo of America Inc. (Nintendo) provides after-sales service according to the following.
Please read and agree to “9. Repair Service Regulations” and “10. Warranty Regulations”
before requesting after-sales service.
Please contact Nintendo Zone Support for repair requests.
Nintendo Zone Support
• When not working properly
• When parts are lost or the device is damaged
• When discontinuing use
(20)
9. Repair Service Regulations
Precautions when Sending Products to be Repaired
• When sending a product in for repair, please pack in the Nintendo Zone Box box so as
not to scratch or damage the device or accessories.
• Repairs will be refused if parts are lost or damaged during transport due to poor packing.
• If malfunction symptoms occurred when using specific software or accessories, please
send that software or accessories with the device.
• Please remove any products attached to the device after purchase (straps, protection
sheets, seals, and other decorations). Even within the warranty period, the product may
not be returned in the same condition due to repairs and inspection.
• Nintendo is not liable for any accidents that occur during transport.
• The Customer is responsible for delivery costs to Nintendo after the warranty period
expires.

(21)
Repairs
• Parts that are replaced during repair are not returned.
• When repair is requested, Nintendo will make the minimum repairs regardless of the
specific repair request.
(22)
• If Nintendo deems it necessary, the system software will be updated.
• Recycled or refurbished parts may be used during repair if required.
• Parts may be replaced or serial numbers may be changed if required for repair.
• We may not be able to accommodate requests that exceed Nintendo’s quality standards.
• Repairs may not be cancelled once they have begun.
• Repaired products are returned by transport companies specified by Nintendo.
(23)
Replacement or Repair May be Refused If:
• Malfunction or damage is caused by disassembly, modification (including software), or
improper repair.
• The rubber plugs (*) or screws on the device are missing or there is evidence they have
been removed.
• Recovering or maintaining functionality is excessively difficult due to severe damage.
• Requested to recover corrupted data on memory media (system save memory or SD
cards).
• Data is not created by methods described in the User’s Manual or software not approved
by Nintendo is saved on the system save memory or there is evidence that such data or
software was saved.
• Nintendo determines that the situation fits one of the categories above.
(24)
(*) Rubber Plug Location
(25)
Repair Fees
• Repairs performed after the warranty period has expired will be charged.
• If repair fees are due, the product will be sent cash-on-delivery.
• Because repair services are performed individually, repair fees for relatively inexpensive
items such as peripheral devices may exceed the retail cost.
(26)
Data in Memory Media
• Please be aware that depending on the repair, data stored in the system save memory
may be deleted.

• Nintendo is not liable for data in memory media.
(27)
Other Precautions
• Parts for repair are not for sale.
• Repair parts are kept for a period of six years after terminating the manufacture of the
product. After this period, repairs may not be possible. Also, please understand that
even during the time that repair parts are available, repair may not be possible due to
regulations.
• Nintendo is not liable for any derivative losses caused by malfunctions in or repairs to
this product.
(28)
10. Warranty Regulations
For products under warranty, the following regulations are applied in addition to “9. Repair
Service Regulations.” Please read these regulations and “9. Repair Service Regulations.”
• Repairs are free of charge for products under warranty that malfunction under normal
use as described in the User’s Manual.
• The warranty period is one year from the date of purchase, regardless of the date when
use was started.
• There is no change in the warranty period after repairs.
• Repairs will be charged during the warranty period in each of the following cases:
(1) The product serial number cannot be determined.
(2) Malfunctions or damage have occurred due to treatment differing from the
usage described in the User’s Manual.
(3) Malfunctions or damage have occurred due to inadequate care in managing or
storing, such as dropping during transportation or transference after purchase.
(4) Malfunctions or damage have occurred due to broken liquid crystals, water
exposure (corrosion), dropping, shock, application of pressure, or insertion of
foreign objects.
(5) Malfunctions or damage have occurred due to natural disasters or calamities
including fire, earthquake, wind and flood damage, lightning, salt corrosion, gas
damage, and abnormal voltage.
(6) Malfunctions or damage caused by other connected devices.
(7) Malfunctions or damage have occurred due to use of non-proprietary products.
(8) When replacing or replenishing consumable products.
(9) When replacement is requested by the customer for units that are not damaged.
(10) When Nintendo determines (1) – (11) above applies to the corresponding case.
The Customer is responsible for delivery costs to Nintendo after the warranty period
expires.
These warranty regulations may change without notice.
REGULATIONS FOR EQUIPMENT USE IN U.S.A. AND CANADA
FCC and Industry Canada Information
In order to comply with FCC radio-frequency radiation exposure guidelines for an uncontrolled
exposure, this device and its antenna must not be co-located or operating in conjunction with any
other antenna or transmitter.
This device complies with Part 15 of the FCC Rules and RSS-210 of Industry Canada. Operation is
subject to the following two conditions: (1) This device may not cause harmful interference, and (2)
this device must accept interference received, including interference that may cause undesired
operation.
Changes or modifications not expressly approved by the manufacturer could void the user's
authority to operate this device.
This equipment has been tested and found to comply with the limits of a Class B digital device,
pursuant to part 15 of the FCC Rules. These limits are designed to provide reasonable protection
against harmful interference in a residential installation. This equipment generates uses and can
radiate radio frequency energy and, if not installed and used in accordance with the instructions,
may cause harmful interference to radio communications. However, there is no guarantee that
interference will not occur in a particular installation. If this equipment does cause harmful
interference to radio or television reception, which can be determined by turning the equipment off
and on, the user is encouraged to try to correct the interference by one or more of the following
measures:
• Reorient or relocate the receiving antenna.
• Increase the separation between the equipment and receiver.
• Connect the equipment into an outlet on a circuit different from that to which the receiver is
connected.
• Consult the dealer or an experienced radio/TV technician.
WARNING - Radio Frequency Interference
The Nintendo DS can emit radio waves that can affect the operation of nearby electronics, including
cardiac pacemakers.
• Do not operate the Nintendo DS within 9 inches of a pacemaker while using the wireless feature.
• If you have a pacemaker or other implanted medical device, do not use the wireless feature of the
Nintendo DS without first consulting your doctor or the manufacturer of your medical device.
• Observe and follow all regulations and rules regarding use of wireless devices in locations such as
hospitals, airports, and on board aircraft. Operation in those locations may interfere with or cause
malfunctions of equipment, with resulting injuries to persons or damage to property.