Motorola Mobility P6KU1 CDMA 800 TRANSCEIVER W/BLUETOOTH CLASS 2 User Manual
Motorola Mobility LLC CDMA 800 TRANSCEIVER W/BLUETOOTH CLASS 2
Users Manual

APPLICANT MOTORLA INC. FCC ID: 1HDP6KU1
INSTRUCTION MANUAL
A preliminary draft of the User’s Manual follows this page.
The text on the following 163 pages will be added to the user manual.
p.2 L
Welcome
Thank you for purchasing Motorola mobile phone with world leading mobile communication technology. Motorola’s mobile communication equipment are designed and
produced in
compliance with its strict in-house standards and the international standards.
They are subject to the strict quality tests including temperature, humidity, shock, dust, vibration and drop tests. We are confident that you will be highly satisfied with
the Motorola products that have been manufactured after such processes.
Thank you again for choosing Motorola, and we hope that you would succeed
in your business with your V13.
※ Some of the contents and the functions in this manual subject to change without prior notice according to situation.
※ We suggest that you set your phone on vibration at a public place.
p.3 R
Prohibition of Illegal Modification of ESN
Removal or change of ESN(electronic serial number) installed in the mobile phone manufactured and supplied by Motorola, or and attempt to reproduce and enter another ESN in
the mobile phone is strictly prohibited and subject to maximum 10-year of imprisonment or a fine up to 20 million won in pursuant of article 347 of the criminal act.
In addition, such an illegal act may damage the software installed in the phone.
Therefore, customers should care so that you do not damage your phone due to such an illegal act.
The product which is illegally modified is excluded from any free or paid service warranted by Motorola.

p.4 L
Safety Information
Read this ‘Safety Information’ carefully for your own safety and to prevent possible property damage.
CAUTION
● Do not lend your phone to other person.
● Follow appropriate cell phone etiquette in public places.
● If any problem occurs with your phone, contact designated service center.
● If your phone is lost or stolen, report your mobile service provider immediately.
● Do not use unauthorized devices with your phone.
- Unauthorized battery charger, stereo earphone, USB data cable, batteries or any other unauthorized devices may decrease your product’s performance and may result in product
malfunction.
● Do not use your earphone for extended hours.
- If you are exposed to loud sound for extended period of time, it may damage your hearing.
● Make sure to record important data separately.
- Saved phone numbers or other data can get lost due to user’s carelessness or other unexpected problems.
● Make sure to keep your phone in dry places (with relatively low humidity) at all time.
- If either mobile phone or battery is immersed in ‘liquid’, the color of immersion-checking label attached on your mobile phone or battery will be changed. In this case, you will loose
the privilege of receiving free service by Motorola.
■ This product should not be added with any separate equipment that may cause an alteration to its original performance as described on type registration.
p.5 R
To use the mobile phone safely for a long time
Use authentic products only.
Using unauthorized products (battery, charger etc.) may shorten product’s life or decrease its performance.
Be careful not to damages your mobile phone.
Some parts of your mobile device may be made of glass. This glass could break if the product is dropped on a hard surface or receives a substantial impact. If glass breaks, do not
touch or attempt to remove. Stop using your mobile device until the glass is replaced by a qualified service center.
Do not dry your mobile phone with a heating apparatus.
If you dry a wet mobile phone or battery with a heating apparatus may cause explosion or damage to your phone. In this case, do not turn on the power, separate a batter from the
phone and contact a service center designated by Motorola.

p.6 L
Safety Information (Cont’d)
To use the mobile phone safely for a long time
Use and keep the phone at room temperature.
If a mobile phone or battery is placed in a hot or cold place, it may shorten product’s life or decrease its performance.
Keep the mobile phone clean at all time.
· If there are foreign substances on a metal part of a charger or battery, the phone may not be charged properly.
· Use smooth cloth to clean the mobile phone and do not use flammable chemicals such as alcohol, benzene, thinner, etc. for cleaning.
Do not give strong impact to the mobile phone, disassemble or modify it.
Giving a strong impact or dropping the mobile phone or battery may cause malfunction or explosion. If you disassemble or modify the mobile phone on your own discretion, you will
lose privilege to receive free service.
p.7 R
Do not use the phone while charging.
If you use the mobile phone while charging it with a charger or USB data cable, there is a risk of electric shock or fire. Make sure that you use the phone after disconnecting it from USB data cable or charger.
Be cautious when you use an USB data cable.
If you connect the phone with PC via USB data cable, there is a risk of electric shock depending on the grounding state of the PC power.
Do not place items containing magnetic components.
Placing the phone near magnetic components may cause product malfunction or cause battery discharge which can lead to performance decrease.
p.8 L
To use the mobile phone safely for a long time
Make sure to back-up all the data stored in your mobile phone.
· Saved data (such as phone number or pictures etc.) can be deleted unexpectedly due to user’s carelessness, software upgrade or product repair etc.
· Manufacturer shall not be responsible for such data loss.
Use the phone in proper position.
It may also consume higher power which can shorten the talk and standby time.
p.9 R
Keep the phone out of animal or children’s reach.
If children or animals suck or bite the mobile phone or battery, there is risk of electric shock or exposure to electromagnetic wave.
Be careful when you use a necklace or cord for the mobile phone.
Be careful that using a necklace or cord for the mobile phone may cause you to run into dangerous accidents like being caught in train, electric railway or car doors.
Do not paint or put sticker on your mobile phone.
· Such action may damage your phone’s joints and your phone may not open or close properly.
· Paint or metallic content on the phone may cause an allergic reaction, eczema, itching, swell, and etc.
p.10 L
Safety Information (Cont’d)
Precautions on location
Do not use the mobile phone in a place with risk of explosion.
In a construction sites and military areas, explosives can be controlled with RF devices. When you are in those places, turn off your phone and follow the proper instructions and signals.
Do not use the mobile phone in near inflammable materials.
Do not install or use accessories onto your phone in a potentially explosive atmosphere including gas station, gas leak areas, and deck on boats.
Do not use the mobile phone in a prohibited area such as air plane and hospitals.
Radio frequency emitted from your phone may affect some of the devices used in an air plane or hospitals and cause accidents.
Do not use the mobile phone near pacemakers.
· Electromagnetic waves from your mobile phone may affect pacemaker when it is used within 15cm (6 inches) from it.
· If it is necessary, person with pacemaker should always use the phone in the opposite side of the pacemaker and keep the distance over 15cm .
p.11 R
Using the mobile phone while driving
Do not use the mobile phone while driving.
· Using the mobile phone while driving a car is dangerous and such action can cause car accidents.
· Check the local laws and regulations on using the mobile phones while driving.
Do not install a hands-free device near air bag.
An air bag inflates with great force in a moment. Do not leave your phone or set up the hands-free kit near to the air bag. You may be seriously injured when the air bag is activated.
p.12 L
Safety Information (Cont’d)
Using the battery and the charger
A chargeable battery is consumable.
The repetition of charging/discharging will shorten its operation time gradually.
When the phone is not being charged properly, lamp on the charger will flicker.
Check the charger to avoid the trouble that may occur to each device.
If the temperature of the battery rises over 45˚C while charging, stop charging the phone for your own safety.
Mobile phone and battery cover need to be combined at all time.
If not, it may cause malfunction.
In case of separating a battery from the mobile phone, make sure to turn off the power.
If not, it may cause malfunction.
p.13 R
Safety Information (Cont’d)
Make sure to charge the battery with the battery charger authorized by TTA.
Using unauthorized charger may cause damage to your phone.
Keep your phone at room temperature of 0℃~40℃, avoid direct sunlight or place with high temperature and humidity.
If not, it may damage the phone and cause the phone to explode.
Do not place the phone in areas that may get very hot, such as microwave or near heating apparatus.
It may damage the phone and cause the phone to explode.
Ensure that charging terminal of the battery does not make contact with other metallic objects such as necklace, coins and keys.
There is a risk of explosion or fire.

Safety Information
Safety and General Information
Safet y In formati on
This section contains important information on the safe and
efficient operation of your mobile device. Read this
information before using your mobile device.
Exposure to Radio Frequency (RF)
Energy
Your mobile device contains a transmitter and receiver. When it is
ON, it receives and transmits RF energy. When you communicate
with your mobile device, the system handling your call controls the
power level at which your mobile device transmits.
Your Motorola mobile device is designed to comply with local
regulatory requirements in your country concerning exposure of
human beings to RF energy.
Operational Precautions
For optimal mobile device performance, and to be sure that human
exposure to RF energy does not exceed the guidelines set forth in
the relevant standards, always follow these instructions and
precautions.
Product Operation
When placing or receiving a phone call, hold your mobile device
just like you would a landline phone.
If you wear the mobile device on your body, always place the
mobile device in a Motorola-supplied or approved clip, holder,
holster, case, or body harness. If you do not use a body-worn
accessory supplied or approved by Motorola, keep the mobile
device and its antenna at least 2.5 centimeters (1 inch) from your
body when transmitting.
Using accessories not supplied or approved by Motorola may
cause your mobile device to exceed RF energy exposure
guidelines. For a list of Motorola-supplied or approved
accessories, visit our Web site at:
www.motorola.com
.
RF Energy Interference/Compatibility
Nearly every electronic device is subject to RF energy interference
from external sources if inadequately shielded, designed, or
otherwise configured for RF energy compatibility. In some
circumstances your mobile device may cause interference with
other devices.

FCC Notice to Users
FCC Notice
The following statement applies to all products that have
received FCC approval. Applicable products bear the FCC
logo, and/or an FCC ID in the format FCC-ID:xxxxxx on the
product label.
Motorola has not approved any changes or modifications to this
device by the user. Any changes or modifications could void the
user’s authority to operate the equipment. See 47 CFR Sec. 15.21.
This device complies with part 15 of the FCC Rules. Operation is
subject to the following two conditions: (1) This device may not
cause harmful interference, and (2) this device must accept any
interference received, including interference that may cause
undesired operation. See 47 CFR Sec. 15.19(3).
This equipment has been tested and found to comply with the
limits for a Class B digital device, pursuant to part 15 of the FCC
Rules. These limits are designed to provide reasonable protection
against harmful interference in a residential installation. This
equipment generates, uses and can radiate radio frequency energy
and, if not installed and used in accordance with the instructions,
may cause harmful interference to radio communications.
However, there is no guarantee that interference will not occur in a
particular installation. If this equipment does cause harmful
interference to radio or television reception, which can be
determined by turning the equipment off and on, the user is
encouraged to try to correct the interference by one or more of the
following measures:
•
Reorient or relocate the receiving antenna.
•
Increase the separation between the equipment and the
receiver.
•
Connect the equipment to an outlet on a circuit different
from that to which the receiver is connected.
•
Consult the dealer or an experienced radio/TV technician
for help.
p.14 L
Menu Table
T service Display Contents
Roaming………………
M Service Center………….
T Service……………
NATE…………..
W ……………
T map……………
Sounds
1. T service ………………….
2. Sounds
3. Display
4. Contents
5. My Moto
6. Organizer
7. Message
8. Phonebook
9. Settings
Ringtone Style……………
Download Ringtone………….
Vibrate Style……………
Call Alert Style………..
Volume……………
Operation Effects…….
Etiquette Style…………..
Main Display……..
Download Wallpaper
External Display
Menu Style
Screen Design
Font Style
Dialing Font
Backlight Control
Ringtone Box
Wallpaper Box
Photo/Movie Album
MMS Contents Box
Playonⓜ
june Contents Box
Memory Manager

p.15 R
My Moto Message Phonebook Settings
Camera
Bluetooth
Subway Map
Dictionary
File Viewer
E-book
Wine/Health
USB Mass Storage
Organizer
Alarms
Calendar
Schedule
Memo
Calculator
Unit Converter
Message Box
New Message
Report Spam/Service
Contents Box
Settings
Search Number
Add New Contact
Call History/Time
Management Phonebook
Automatic Backup
Phone Settings
Call Settings
Data Network Settings
Moto Customer Service
My Device Info

p.16~20
Table of Contents
Basic Operation
Prohibition of illegal ESN Modification
Safety Information
Menu Table
Before Use
Power On/Off
Power On
Power Off
Basic Icons
Touch display
Using Buttons on Menu
Multi-Access
Entering Text
Phone
Components
Parts of the Phone
Keypad
Battery
Call
Before making a call
Making a call
Receiving a call
Using Menu from Call History
Missed Calls
Setting My Menu
Using Menu after Entering a Number
p.21 R
Before Use
Components ..................... 22
Parts of the Phone ........... 23
Keypad………………………25
Touch button………………….26
Battery .............................. 28
p.22 L
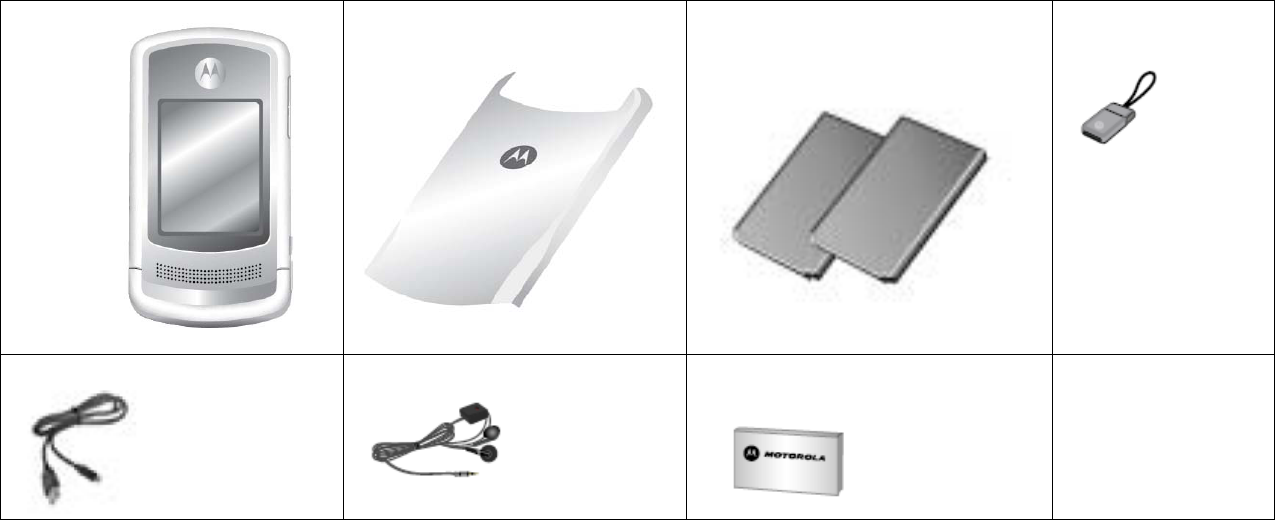
Components
Before using your phone, make sure you have all the components included in your package.
Mobile Phone
Battery Cover
Standard Battery Multi Adapter
USB Data cable
Stereo earphone
User guide
· Above illustration may look slightly different and the supplied items may change without notice.
· If you attach the multi adapter to the ‘accessory connector’, be careful not to loose the body of the multi adapter.
· If you contact 5PIN terminal of the basic components such as Stereo earphone, Multi adapter, USB Data cable (5PIN travel charger will be sold separately) to the PC’s USB port, be aware that your PC
may malfunction (Power off, Reset).

p.23 R
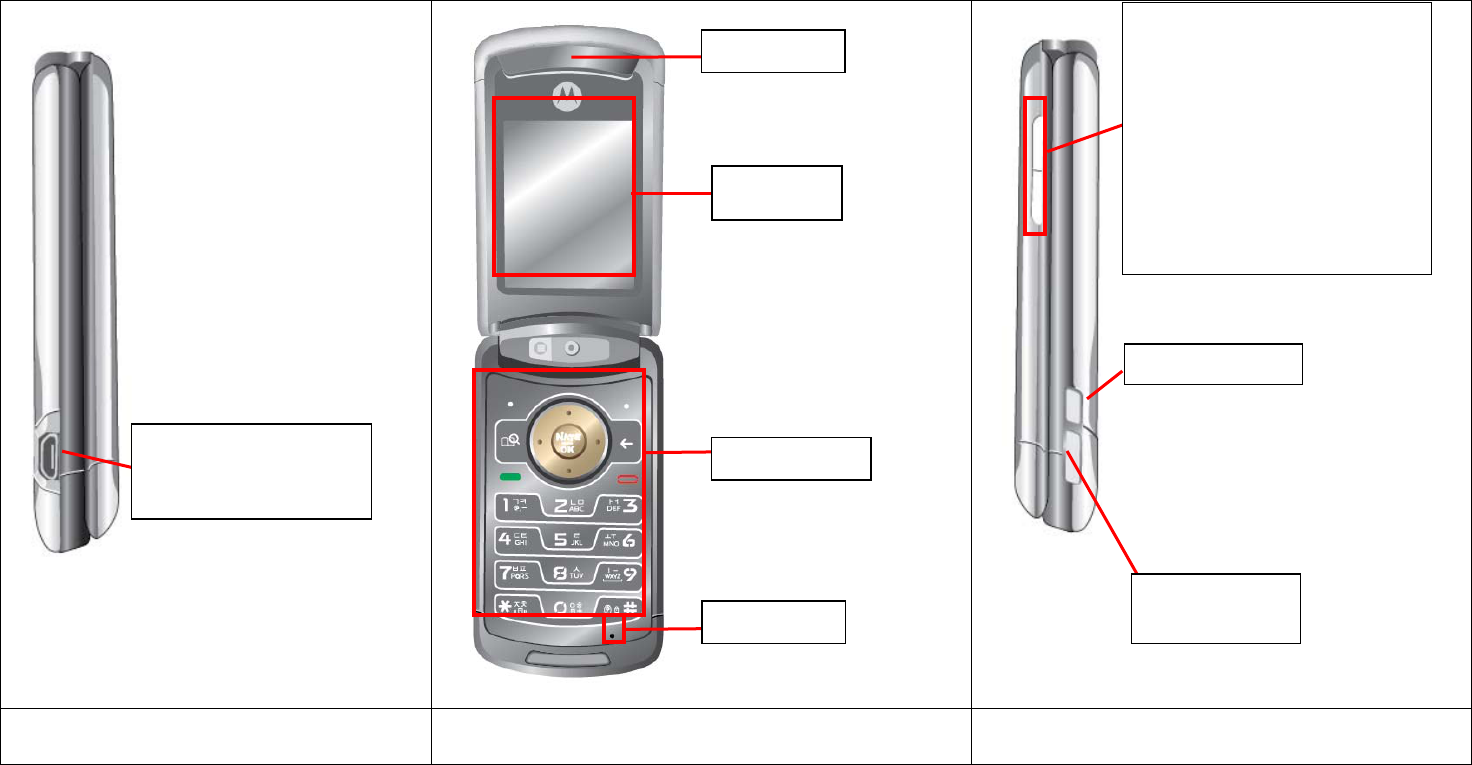
Parts of the Phone
Front View Rear View
External touchscreen
Speaker
Camera
Battery cover
Battery removal button
Accessory connector
Flash
p.24 L
Parts of the Phone (Cont’d)
Left side view Open view 우측면
Internal LCD
Keypad
Microphone
External connection port
-Connect Multi adapter, USB
data cable
Volume button
-Adjust volume (Operation Effects,
Wallpaper, Reminder Alerts, Alarms,
Voice in Call, Ringtone) in standby
screen.
잠금 스위치
Camera button
Earpiece
p. 25 R
Keypad
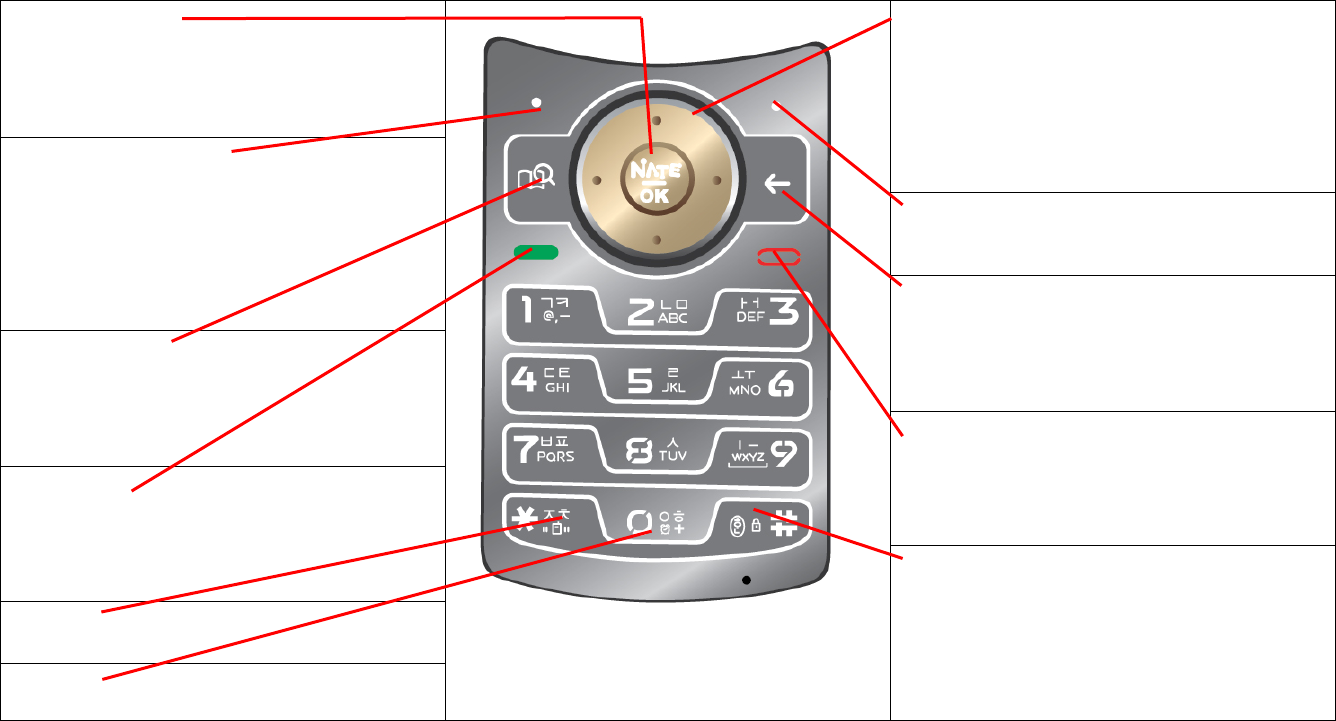
NATE/OK button
· In menu: Select list or function
· In standby screen : Press to access NATE menu
Press and hold to access NATE home
Navigation button
Up : Move to ‘W’ menu (See p.59 )
Down : Move to ‘T map’ (See p.61)
Left : Move to ‘Message’ menu
Right : Move to ‘My menu’
In menu : Move up/down/left/right
Phonebook button
· In standby screen : Move to Phonebook
· In menu : Go back to previous screen
Menu button
· In standby screen : Move to menu
· In menu : Set My Menu · Set menu type
Cancel button
·Go back to previous screen
·In message: Delete a character
Dictionary button
·Short cut for the dictionary. (See p.00)
End button
·Power On/Off
·End or reject a call
·Move to standby screen
Send button
· Dial/Answer a call
· Shows recent call history
· Press and hold to dial recent voice call number
* button
· Press and hold to set/cancel ‘Etiquette mode’
0 button
Input + for international calls
# button
·Press and hold to set ‘Phone Lock’

26L
Touch button
Before using touch button
·Do not use excessive force to press the button.
- The touch button works with a light skin touch. Applying excessive force can damage the sensor.
·Press the touch button correctly to use the desired function.
-Other function may be selected with a light touch.
·Be careful of damp. Be sure that your hand is dry.
-Avoid using the phone in a damp condition. If your hands or touch button is wet, dry it first.
·Remove any cover on the touch button and take off the glove when using the touch button.
-The touch may not be recognized properly.
·Keep any conductive material away from the touch button.
-The touch button may malfunction due to electric stimulation or impact from a conductive material or static electricity. Be careful
that the touch button should not be touched by these materials.

27R
Using the touch button
As the folder is closed, press and hold [HOLD] button to unlock the touch
button.
With the touch button, even when the folder is closed, you can use some functions such as
checking total call history, Bluetooth, and music content playing.
Note
·In order to prevent recognition of excessive operation, the touch button is not
recognized unless it is unlocked.
·The touch button is automatically locked if the folder is opened/closed after the function
is unlocked, or if a certain period of time is passed without any menu function.
·If the touch button is touched by a part of body or a conductive material, the phone may
malfunction.
·You can lock or unlock the touch button by pressing and holding [HOLD] button while the
phone is playing contents. When the touch button is locked, the lock icon is displayed on
the sub LCD.
·If you close the folder while the phone is playing music contents, you can still use the
function. You can use the touch button after unlocking the touch button. (See p.148 june
setting)
p. 28 L
Battery
Battery in the package is not fully charged, make sure to fully charge the battery.
Installing the battery 배터리 분리하기
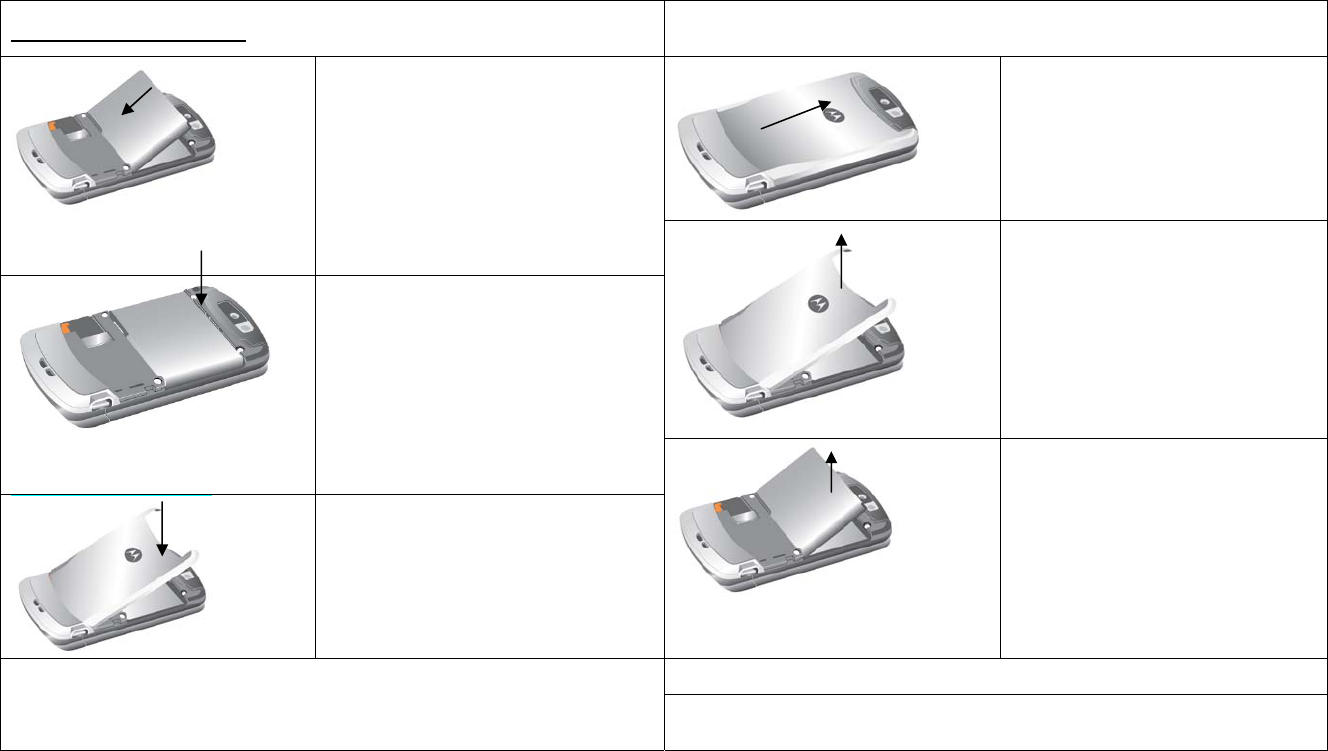
① Push the battery removal button on
the top of the battery cover and lift up
to release it from the battery groove.
① Battery charge terminal and the
phone charge terminal should be
engaged as shown in the figure.
② Lift up the battery as shown in the
figure.
② Push down the battery until it
clicks.
③ Place the battery cover to the battery
cover groove. And then push and slide it
until it is properly fitted.
③ Remove the battery from the
phone.
Caution
Make sure the power is off when you remove the battery.
If you remove the battery while the phone is on, it may damage your phone.

p. 29 R
Charging the battery
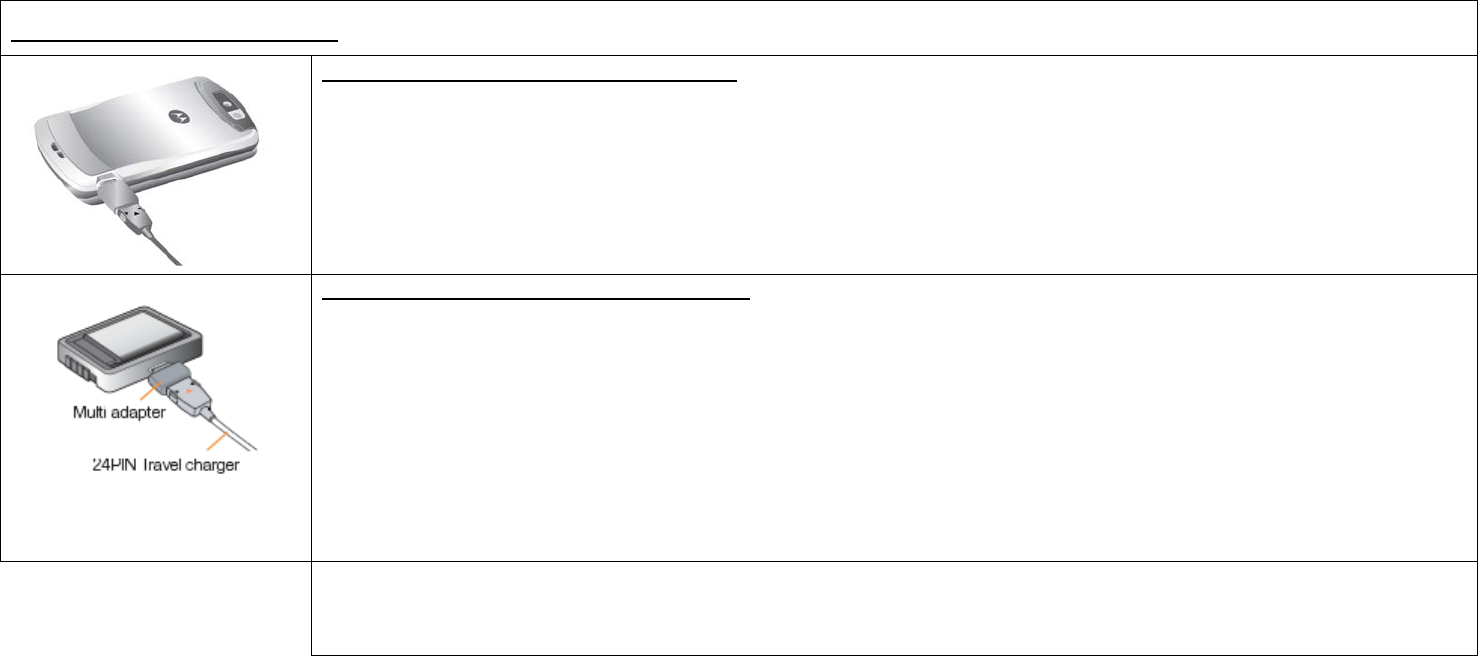
Charging the battery with a USB data cable
1) Open the external connection port cover and connect the multi adapter.
2) Connect the USB cable to the external connection port.
· To charge your phone by using the USB data cable, you should have the SKT integrated USB driver installed in your PC.
· If you connect your phone to your PC by using the USB data cable, both charging and communication function is available. You can
charge your phone and transfer data from it.
3) Connect the USB data cable to the USB port on your PC.
Note
·Only use the multi adapter in the package. Other multi adapters may not be compatible.
· You can only charge the fully exhausted battery by travel/car charger only.
· Charging and communication is possible using the micro USB data cable (inbox item). However the other data cables (ex. 24, 20 pin) are
not compatible with the mobile phone.
· If you use travel charger, check the charging status by checking the lamp. (It turns red to green.)
p.30 L
Battery (Cont’d)
Charging the battery(Cont’d)
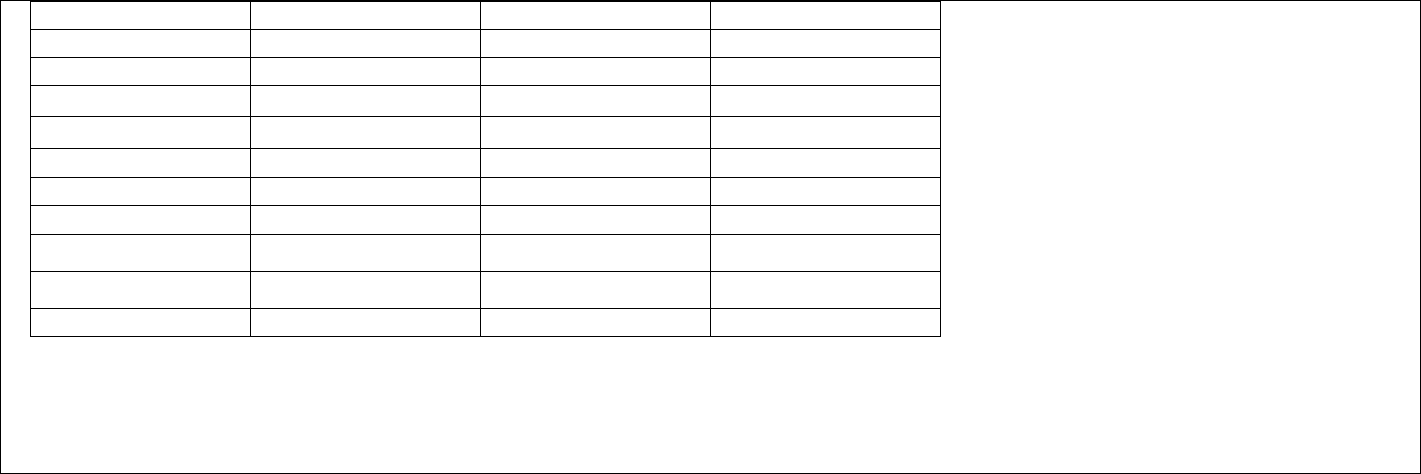
Charging the battery with the travel charger
1) Open the external connection port cover and connect the multi adapter.
2) Connect the travel charger to the multi adapter.
3) Connect the power cord of the travel charger to an electrical outlet.
· Red : Charging, Green : Charge complete
Charging the battery with the battery charger
1) Insert the battery on the battery charger.
· Check and make sure that the battery is in proper position.
2) Connect the travel charger to the battery charger.
3) Connect the power cord of the travel charger to an electrical outlet.
· Red : Charging, Green : Charge complete
Optional travel charger
Travel chargers are not included in the package for conservation of resources. You can purchase them separately from the retail shop or a
service center.
31R
■ Compatible travel chargers
Vendor Charger Vendor Charger
HIDIA HIK-600TC KUMHO ELEC. KT-2000R
INJI Telecom COK-1500 TIANJIN H&T ACH-C100
MCS Electronics CTC-100 MORNING TELECOM SK-2
AIR Power PR-370A KEUMBEE ELEC. AAPN4082A
WAVE Tech S400 KEUMBEE ELEC. KTC-4000A
KOREA Technology T500 SK ELEC. TC - 5000
E-OH Telecom EO42750A POWER CONVERSIONS DC POWER SUPPLY
YAMU Solution YMC-1000 E -TEK ETEK - TC01
E-OH Telecom EO47750A NEW WORLD TDK - 010K
SAY Electronics SC-0407W FOREVER SB -07- JOO1
*Above vendors and chargers are compatible with the phone.
*The phone cannot be charged if you connect a travel charger which is not compatible with TTA.
*Some travel chargers including the FSTC-100 model of DIGI TECH are not compatible with your mobile phone.

p. 32 L
Battery charging status Battery operating time
Type Charging in progress Charging completed Type Standby time Call time
Travel charger Red Red Standard
battery(940mAh)
Approx. 200 hours Approx. 230 minutes
Lamp blinks in red
· Status of the charging terminal is poor. Check if the battery is clean.
· Battery or the other accessories may be damaged. Contact service center.
Lamp blinks in orange
· Battery is being charged in a place too hot or cold. When the temperature returns to
normal, the lamp turns red and begins charging again.
Battery charging time
Based on a new battery/Bluetooth mode off/no external memory※
· Above battery operating time is measured according to ‘Measuring and indicating
operation time of mobile phone battery’ set by Korea Consumer Protection Board.
· Using bluetooth function will increase battery consumption.
· If you have large amount of calling, it will be more convenient to charge a battery
everyday.
· Calling or using NATE, Playon, WINC, MP3 consumes more battery than when the ⓜ
phone is in standby. If the calling time becomes longer, standby time will get shorter.
· Receiving call will consume as much battery as making a call.
· Standby time may get shorter in out-of-service area.
· Operating time may vary depending on the charge status, temperature(high/low),
wave status in the surrounding and the lighting.
Type Standard battery(940mAh)
Time Approx. 150 minutes
· Charging time can be different depending on the status of battery and the charger.
· Charging time may increase if the rated voltage of the charger is low.
Low battery
· When the battery is low, ‘ ’ will blink.
· When the ‘ ’ blinks, light of the display or the button will not turn on.
· When the battery is low, functions may not be able to operate. Charge the phone
immediately.

P.33 R
Basic Operation
Power On/Off…………………… 34
Basic icons ………………..35
Using buttons on Menu………………36
Entering text…………………..38
P 34 L
Power On/Off
Power on screen
Power On
Press and hold the for 3 seconds while the phone is off.
• The graphic set by the user will be displayed, and then the phone switches into the standby screen.
Power Off
Press and hold the for 3 seconds while the phone is on.
• A graphic disappears and the power will be turned off.
Note
You can change the graphic from
Menu Display Main Display.(Main Display. See p.69)
▶▶
p. 35R
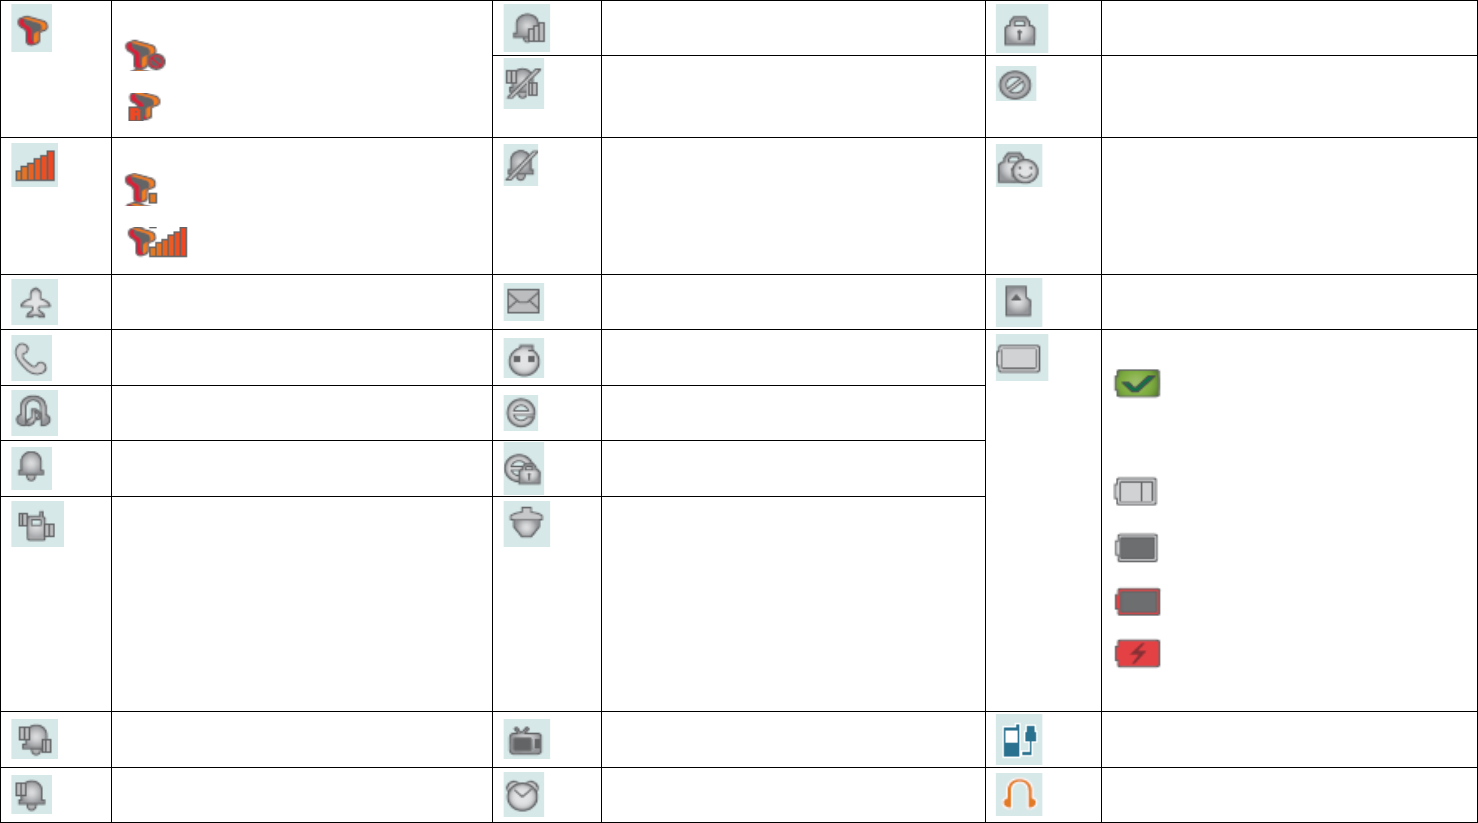
Basic icons
Ring louder
Phone lock
Network System
Out of service
Roaming
Silent
External LCD lock
Signal strength
Low signal
Full signal
Etiquette mode On
Privacy/Service lock
Airplane mode On
New SMS/MMS message
External memory card inserted
Connected to voice/data call
New mobile messenger message
Music contents playing
New e-mail
Ringtone On
New company e-mail
Vibrate On
New Cyworld message
Battery Status
Full with charger connected
(N/A when TTA charger is being
used)
Full with charger disconnected
Battery low(Charging needed)
Battery empty(blinks)
Charging (N/A when TTA
charger is being used)
Ring & Vibrate
New Nate Air message
USB data cable connected
Vibrate then bell
Alarm/Timer On
Earphone connected
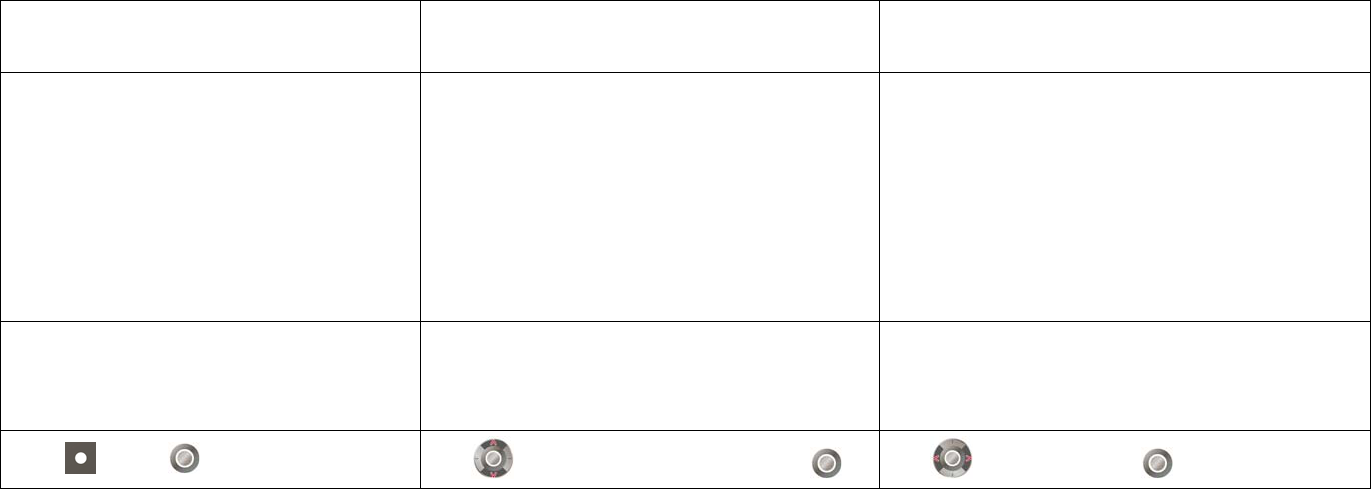
p.36 L
Using Buttons on Menu
Check the different menus and check how to use the buttons depending on the different menu.
Selecting menu displayed on the bottom of the
screen. Moving the > (cursor) and select a menu. When < > is displayed on the screen.
(Screen capture to be inserted) (Screen capture to be inserted) (Screen capture to be inserted)
Press (Left) or . Use or volume button to move and press . Use to select and press .
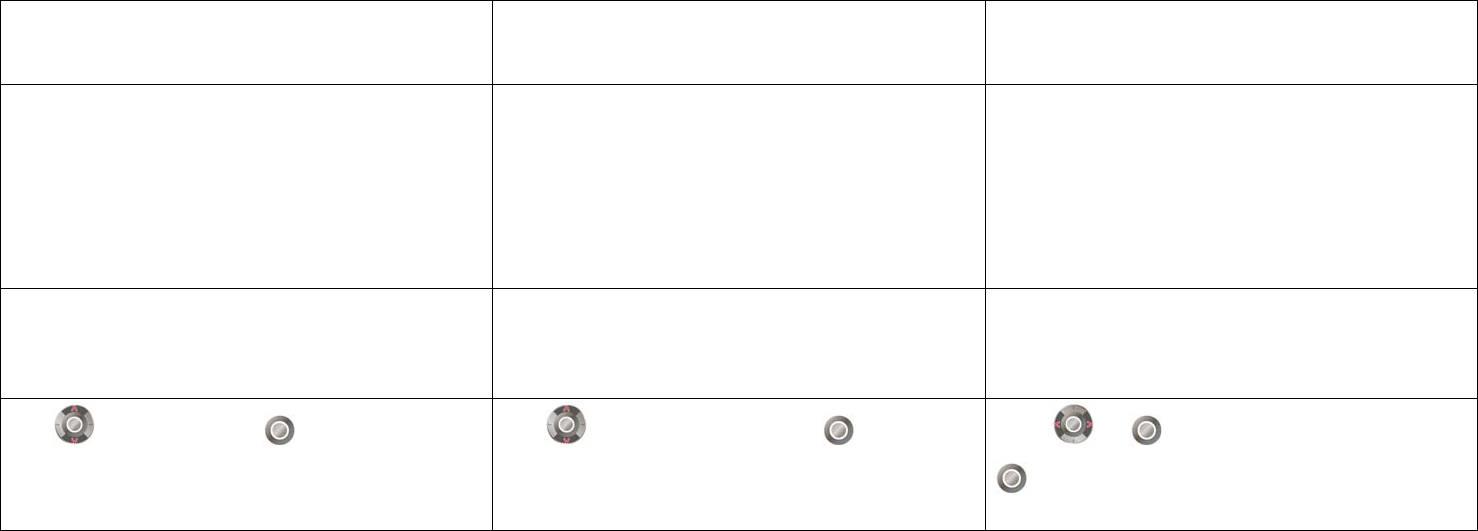
P37 R
When a scroll bar is displayed on the side of the screen. When is displayed on the screen.⊙ When there is sub menu, > will be displayed.
(Screen capture to be inserted) (Screen capture to be inserted)
Use to select and press . Use or volume button and press . Press or to check the sub menu and press
or the number of an item.
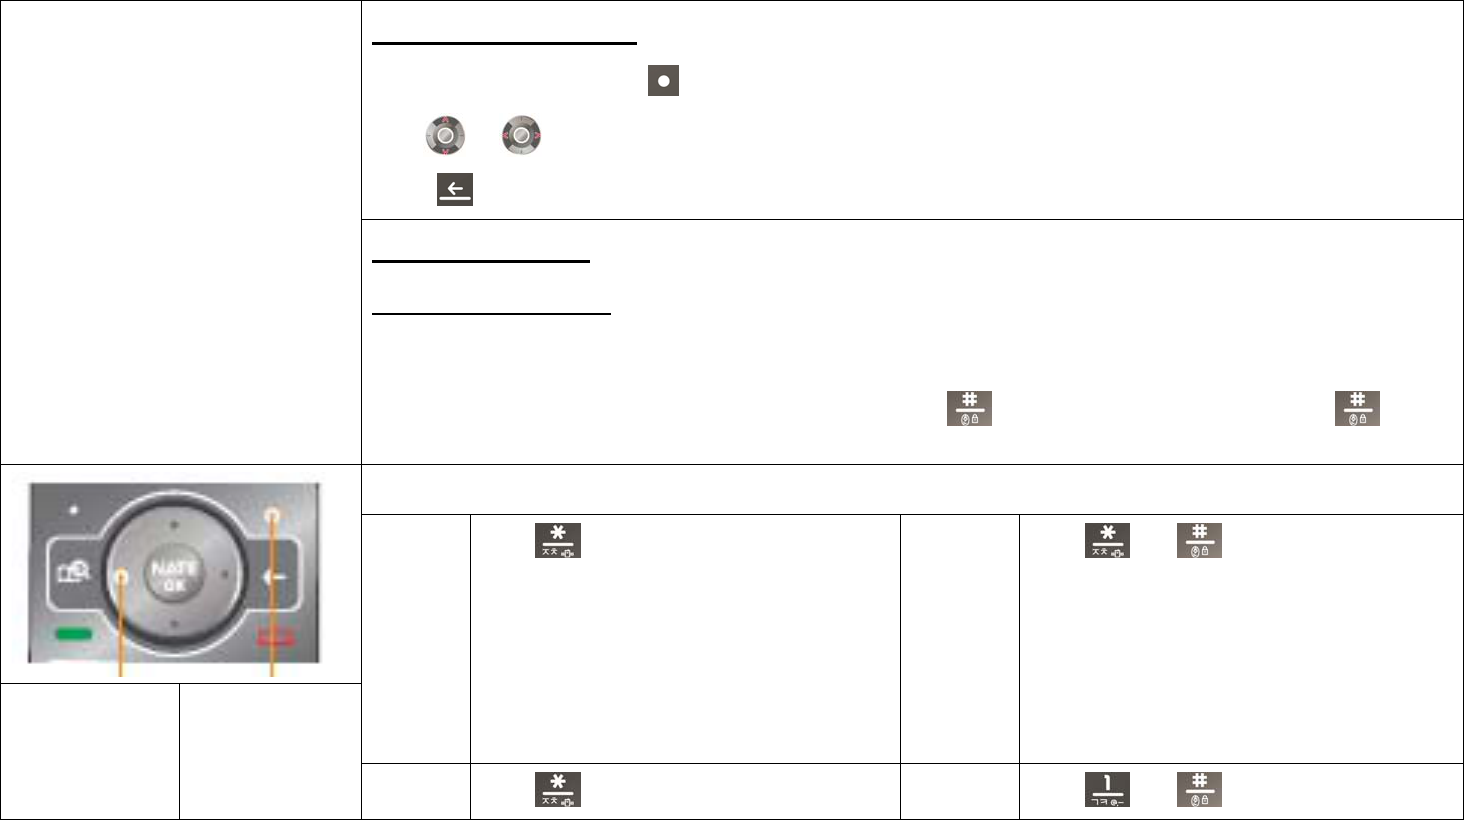
p.38 L
Entering Text
Before entering text
· Select a entry mode by pressing (Right) in the text entry mode.
· Use or to move the cursor and enter letters.
· Press to delete a last character and press and hold to delete all.
(Screen capture to be inserted) Entering Korean
Entering consonants
Press a button once to write the first consonant marked on the key and price twice to enter the hard sound of the
consonant.
· You can enter the second consonant marked on the key by pressing after entering the letter, and if you press again, it
will change to the first consonant.
Example
ㅈ
Press once
ㅊ
Press and
Enter the text and
move the cursor
Change text mode
ㅉ
Press twice
ㅋ
Press and
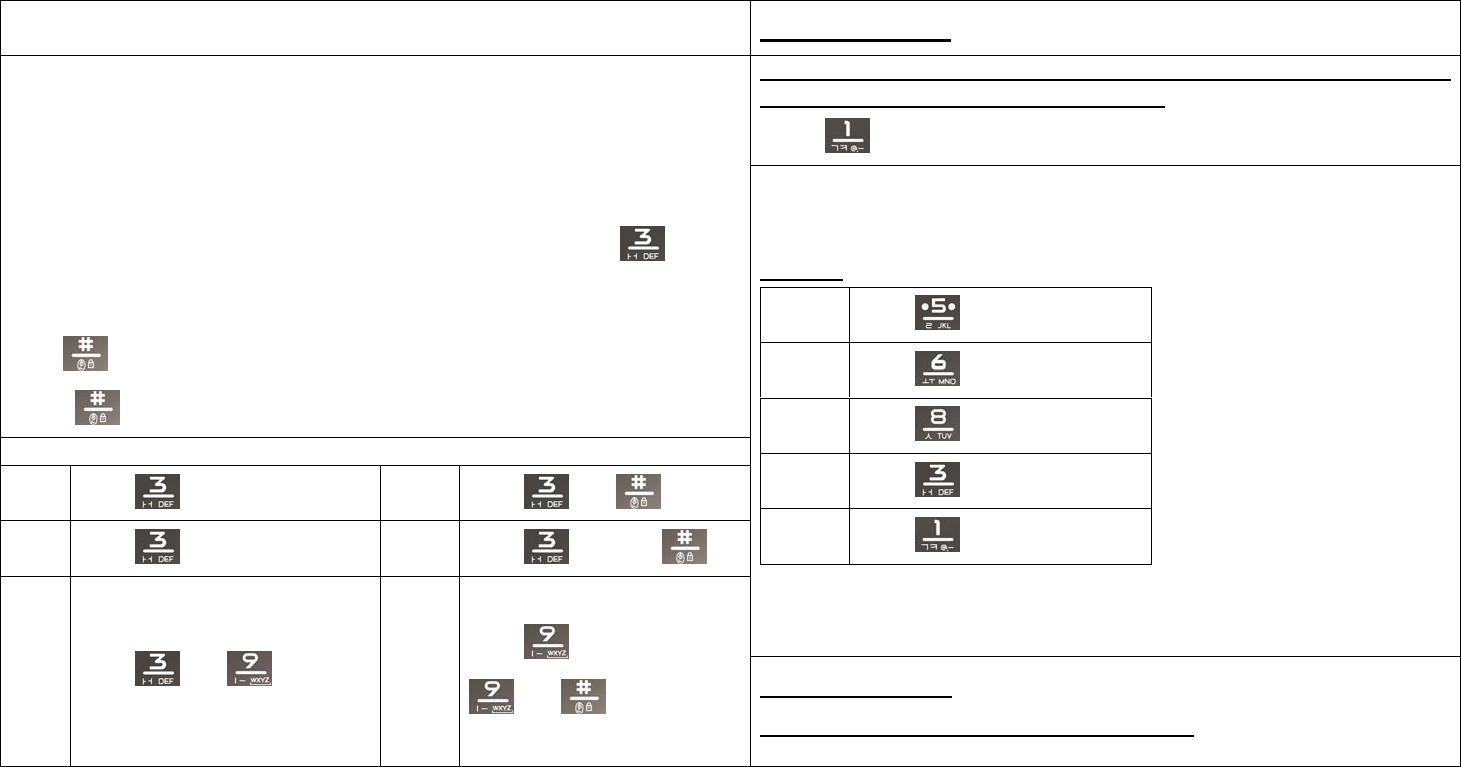
p.39 R
Entering vowels Entering English
Press the key once, twice or three times in order to write the first
second or the third English letter on a key.
· Press once to enter ‘@’, and twice to enter ‘.’.
· Enter an initial consonant, a medial vowel and a final consonant in accordance with
Korean orthography. If the final consonant does not meet Korean orthography, it moved to
the initial consonant of the next character.
- Initial consonant: ‘ㅎ’ is initial consonant in ‘홍’
- Medial vowel: ‘ㅗ’ is medial vowel in ‘홍’
- Final consonant: ‘ㅇ’ is final consonant in ‘홍’
· To enter the second vowel on the key, press the button twice. (if it’s ‘ ’, ‘ㅓ’is a
second vowel.)
· To enter a diphthong, press the key in order of the stroke or enter the basic vowel and
press .
· Press again to change to basic from diphthong.
Example
ㅏ Press once ㅑ Press and
ㅓ Press twice ㅕ Press twice and
Example
L
Press three times
O
Press three times
V
Press three times
E
Press twice
.
Press twice
ㅐ Press and ㅢ
Press three times or Press
and
Entering number
Press the number button in the number mode
· Press and hold the number button in any other mode.
40 L
↘Entering Text (Cont’d)
Entering special characters
Press the number of the character from special character
· You can use to see the different sets of characters.
Entering the text in memo
Entering emoticons
Press (Left) and select emoticon
· You can select and enter generally used symbols.
You can select from ^-^, E-mail, Normal, Figure1, Figure2, Line, Unit, Circle, Brace, Japan1, Japan2,
· Press to more emoticons, and then press , to different types of symbol set.
· Press the number of the emoticon and to enter.
Select the emoticon mode
Note
· You can use richer menu (Set text color, picture/text emoticons, and used word) and symbols when writing in the message mode than
in text mode.
p.41 R
Phone
Voice Call ......................................................... 42
Missed Calls ................................................... 47
Using Menu from Call History ............. 48
Setting My Menu .......................................... 49
Using Menu after Entering a Number …….. 49
p. 42 L
Voice Call
Before making a voice call
· Press in the standby screen to call the most recent number you have called.
· If your phone is set to ‘Phone Lock’, you need to enter PIN number before making a phone call. However, you can make a emergency
call(111, 112, 113, 119, 125, 127) or speed dial number 1 without entering a PIN.
Making a Call
First, enter the number
Press
Making a voice call
Making a call by entering a phone number
Enter a phone number on the standby screen and press
· When you enter a number, easy calling function runs to find the matching number from the recent call list. You can select a number with
and make a call by pressing .
· You can change the number style pressing the Camera button. (Dialing Font, see p.74)
*Easy Calling: Easy calling service finds the matching recent call number when entering the phone number.
P43. R
Making a call with electronic dialing
Enter a number Enter ‘P’ or ‘T’ with ▶, and enter a number to be
dialed electronically ▶
Making a call to a number stored in the phonebook
Press (Right) Select a number ▶▶
· You can search the numbers in the phonebook to place a call.
· If you press after selecting a person, the ‘Primary #’ of the contact will be dialed.
First Enter a number
Enter ‘P’ or ‘T’ with
Making a call with speed dial
Press and hold the last digit of the speed dial number
Example
Speed dial number 17
Press and then press and hold
Speed dial number 173
Press and and then press and hold
· You can easily place a call with the speed dial number stored in the phonebook.
· You can have the phone to memorize several numbers according to the voice
announcement when you use ARS.
· You can cancel the electronic dialing by pressing at any time during a call.
Buttons for electronic dialing
P The numbers entered after ‘P’ are transmitted only when you
press or (Left).
T The numbers entered after ‘T’ are transmitted automatically.

P44. L
Receiving a Call
Receiving a Call
Open the folder or press when the call is incoming
· When the phone rings/vibrates you can press and hold the volume button down to set the ring or vibration to silent.
· You can reject a call by pressing .
· If you have subscribed to ‘Call display’, caller’s number will be displayed on the screen.
Press or open the folder to
receive a call
Note
· You can download graphics from NATE, and change the setting in ‘Main Display’ of the ‘Display’ menu.
· Depending on the size of the downloaded graphic, it may take some time to loading up.
p.45 R
Menu in Voice Call
You can use various functions during a call.
Press (Left) during a call
Keypad
(Screen capture to be inserted) Press during a call
Receiving a call with a stereo earphone
Press the stereo earphone key to receive a call
· After the call is finished, press or press and hold the stereo earphone key to hang
up the call.
· When the call is incoming while stereo earphone is connected, ringtone will sound
through stereo earphone even when the phone is set to vibrate. Once a call is connected,
you can still talk with the folder close.
Answer options
Press (Left) ▶9 ▶2 ▶1
· For incoming calls, you can answer the call depending on the mode you have selected.
Menu description
Folder Open Open the folder to receive calls.
Any Key
Press any key except to receive calls.
[Send] Key Only
You can receive calls only by pressing .
After 3 Seconds The call is connected automatically in 3 seconds after the ring.
New Message
Press (Left) during a call 1▶
·You can send a text message.
·You can send short messages (SMS) only. ‘Connect’, ‘Save number’ and ‘To In Box’
menus are disabled.
· You cannot use ‘To in box’ function when you read SPAM messages.
· You cannot use ‘Save Number’ and ‘To Sent box’ menu when you read the sent
message.
P. 46 L
Voice Call (Cont’d)
↘Menu in Call (Cont’d)
Phonebook
Press (Left) during a call 2▶
· You can use the phonebook menu during a call.
· You cannot edit the number or use some of the function such as ‘call me free’.
* Call me free: Receiver pays for the call charges instead of the caller.
Mute/Unmute
Press (Left) during a call 3▶
· You can mute your voice over the phone during a call.
· Select ‘Unmute’ to deactivate the function.
· When you use mute function will be displayed.
· This function will be deactivated automatically when the call is done.
DTMF Off
Press (Left) during a call 4▶
· You can block the key tone during a call.
· Select ‘DTMF On’ to deactivate the function.
· When you use this function, will be displayed.
· This function will be deactivated automatically when the call is done.
Send My Number
Press (Left) during a call 5▶
· You can send your number to other person’s hone during a call.
Adjusting volume during a call
Press volume button during a call
· You can adjust the earpiece volume during a call.
Taking phone number
Enter a phone number during a call Press ▶
· The phone number you have taken during a call is saved in Outgoing call list.
· If you press and hold after finishing the call, a new call is placed to the saved
number.
p.47 R
Missed Calls
If you fail to receive a call, following image is displayed on the screen.
(Screen capture to be inserted)
Using Speaker
Press during a call
· When the speaker is on, will be displayed. To deactivate the speaker, press .
· When you use the speaker, the microphone must face the user at a distance not farther
than 30cm.
· Speaker will be deactivated automatically when the call is finished.
Making a second call from phonebook
· Press (Left) during a call Select phonebook Select a number ▶▶▶
· If you press when ‘Missed Call’ message box is displayed, you can check the list of
incoming calls.
· You can check the missed calls from Menu Phonebook Call History/Time ▶▶ ▶
Received Calls.
· To check from the call history list, press .
· If you press from the missed calls screen, you can directly connect the missed call
number.
P.,48 L
Using Menu from Call History
Search the number from the Call History Press ▶ (Left)
· You can only use Time Info, Repeated Calls On, and Delete functions on restricted numbers,
· e-mail is only available if user have set the e-mail account.
(Screen capture to be inserted)
(Screen capture to be inserted)
Menu Description
New Message Send a message.
Cyworld Real-time messenger service.
Send/Connect Connect to the mobile cyworld.
Time Info · e-mail: Send e-mail to the entered number.
· Voice Message Call: Send a voice message to the entered number.
(The receiver will be notified by the text message.)
· Video Message Call: Send a video message to the entered number.
· Call Me Free: The receiver pays the call charge instead of the caller.
· Number via Message: Send a selected number via text message.
New Contact Save the selected number if it is not saved in the phone.
Repeated Calls On Manage all repeated calls.
Block Number Block the selected number.
Delete Delete all or delete the selected number.
Select Select all or select a number.

P. 49R
Using Menu after Entering a Number
You can use the following simple function after entering a number.
Enter a phone number on the standby screen Press ▶ (Left)
In-Call menu
Press after entering a number from the
standby screen
Setting My Menu
You can register up to 12 favorite menus in My Menu.
Select Menu to be added Press ▶ (Left) Select ‘Yes’ Select icon ▶▶
with
(Screen capture to be
inserted)
(Screen capture to be
inserted)
(Screen capture to be
inserted)
· Press on the standby screen to check, add new or delete My Menu.
· The menu will not be deleted from its former list even if you copy to My Menu.
Menu Description
New Message Send a message.
Cyworld Connect to the mobile cyworld.
Send/Contact · Voice Message Call: Send a voice message to the
entered number.
(The receiver will be notified by the text message.)
· Call Me Free: The receiver pays the call charge instead of
the caller.
Search Number Search the entered number from a phonebook.
Hide My Number Hide my phone number to the receiver.
Go to Calendar Move to the date on the schedule calendar corresponding
to the number entered.
50L 간지
51R
T Service
Roaming .......................................................... 52
M Service Center ..................................... 53
T Service .........................................................54
NATE ..................................................................55
W ........................................................................... 59
T map………………………………………………….61
52L
Roaming
You can use your own phone abroad without subscribing for any service.
Global roaming screen Select system
Press (Left) 1 1 1 Select OK ▶▶▶▶
1) Check the caution message and press .
2) Select the system.
3) Press when the selection is done.
Korea(SKTelecom): Default setting. Provides the service when you use the phone in Korea.
Auto Select: You can use this function to check if you can use the phone in any country other than those in Area A or B.
A-Band(China,etc): Selected when you travel China, Thailand, Hong Kong, New Zealand, Guam, Saipan, Taiwan, Israel or some parts in
USA.
B-Band(USA,etc): Selected when you travel the major parts of USA, Australia or Canada
Caution
·If you wish to change the settings for the Global Roaming service, please contact the service center. (Changing the settings at your own
discretion may disable the phone.)
· Select the other wireless service provider from the system when a call does not function properly.
53R
M Service Center
You can contact SKT Customer Center to receive various customer support services.
Roaming auto dial
Press (Left) 112▶▶▶
Press (Left) 1▶▶2
(Screen capture to be inserted) (Screen capture to be inserted) (Screen capture to be inserted)
· When placing a call from abroad, you don’t have to enter the international call access
number and national code. You can place a call from the number in the phonebook or the
call history list.
· The roaming auto dial screen is displayed on the standby screen when you set the
roaming auto dial function.
· You can press **114 and on the standby screen to connect to NATE directly.
· You can query bill, view information on supplementary services, service rate and
membership, and use the real time service.
· You can select 별별맵 on the top right side of the M Service Center screen to get area
information, location and phone number.
Contact SKT Customer Center (1566※-0011, 1599-0011(charged)) for details.
54L
T Service
You can subscribe, cancel subscription or use various services from SK Telecom.
Press (Left) 1 3▶▶
Menu Description
Join T Service You can join in various T services.
Terminate T Service You can terminate T service subscription.
Set T Service You can set up the T service .
Traffic News You can receive traffic information on expressways, highways, railroads, air traffic and Seoul local traffic.
Number Plus You can receive a separate receive-only number other than the SKT number.
(Screen capture to be inserted)
Note
· Depending on the type of T service, you need to subscribe to service from SKT in order to receive service.
For more information, contact SKT customer center or visit www.tworld.co.kr
55R
NATE
You can access NATE to search information or download various content such as games and ringtones.
(Screen capture to be inserted)
Favorite
·Press in the standby screen to move to favorite screen directly.
·After selecting the menu you want, press to set detailed items.
Menu Description
Note
· Data call rate and information service fee are charged when you use NATE. Visit M Service Center or contact SKT customer center.
Changing order You can change the order of favorite
icons.
Add favorite You can add the web site you want by
entering the name of site and its URL.
Delete all You can delete all the favorites.
View list/icon You can view the favorites by list or icon.
First cursor setting You can set the initial website when you
connect to the wireless internet.
56L
↘NATE (Cont’d)
↘Favorite(Cont’d)
NATE
Menu 1 4 Select ▶▶▶ [NATE]
· You can use various services such as ringtone, movie and pictures provided by web site
and search information.
Open Net
Menu 1 4 Select ▶▶▶ [Open Net]
·Open net is a mobile internet portal site that combines variable internet sites. You can
download free contents and search the website you want.
Button description
(Left)
Move to NATE browser menu
Navigate
Press: Select/Run
Press and hold: NATE start up page
/ (Right)
Move to previous page
End NATE
57R
Program T map
Menu 1 4 Select ▶▶▶ [Program] tab Select ▶[T map]
·You can use various services related to the traffic using GPS(Global Positioning
System).
(Screen capture to be inserted)
NATE Air
Press (Left) 1 4 Select [Program▶▶▶ ] tab Select [NATE ▶
Air]
·The NATE broadcasting message service provides news, stock price, play-by-play
broadcasting and moving images.
Playonⓜ
Press (Left) 1 4 Select [Program] tab Select [ Playon]▶▶▶ ▶ ⓜ
·You can download and install various service programs such as games, messenger, e-book,
trade stock from Playon site. After downloading and installing, you can execute those ⓜ
programs without connecting to the NATE.
W-Intro
Press (Left) 1 4 Select [Program] tab Select [W▶▶▶ ▶ -
Intro]
· You can use various services such as web surfing, june video, tossi and june
contents box.
58L
↘NATE (Cont’d)
Playonⓜ
(Screen capture to be inserted)
T map Navigation
Press (Left) ▶ 1 ▶ 4 ▶Select [ Playon] tab ⓜ▶ Select [T map
Navigation]
·You can get driving directions service by using T map.
Phone Theme
Press (Left) ▶ 1 ▶ 4 ▶Select [ Playon] tab ⓜ▶ Select [Phone
Theme]
·You can manage and set the wallpapers which downloaded from mobile internet site.
Web Surfing
Press (Left) ▶ 1 ▶ 4 ▶Select [ Playoⓜn] tab ▶ Select [Web
Surfing]
·You can surf the net by using web surfing function.

59 R
w
You can enjoy various content such as web surfing , june video, tossi and june contents box.
(Screen capture to be inserted)
Web Surfing
Press (Left) ▶ 1 ▶ 5 ▶Select [Web surfing]
·You can surf the net by using web surfing function
Note
· You can download any contents while using internet until the memory gets full.
· W service screen and content are subject to change depending on the circumstances of the service providers.
· If you connect W while etiquette mode is on, You can set/cancel the etiquette mode.
60L
W (Cont’d)↘
june Video
Press (Left) ▶ 1 ▶ 5 ▶Select [june video]
· You can enjoy various types of content including TV, movie, music, game, sports and
ringtone or download them to your phone as multimedia content using the premium
service.
· june service screen and contents may change without prior notice.
· Default june contents in your phone cannot be restored once it is deleted by user.
· You can check the downloaded contents from june contents box and you can save any
contents regardless of their type within available memory space.
· You can resume downloading unfinished june contents from june contents box.
· You can receive calls while using june player and when the call ends, you can resume
where you left off.
· TSM(Memory manager)is a program which notifies you when your phone’s memory
space is full.
· TSM will notify you if there are insufficient memory space when you try to download
contents from wireless internet
(such as NATE, june, Playon etc.). You may delete existing contents befⓜore
downloading new contents.
(Protected june contents, livebel, livescreen can not be deleted.)
· Downloading content will be charged separately.
tossi
Press (Left) ▶ 1 ▶ 5 ▶Select [tossi]
· Tossi is essentially a microblogging service that you can send and share your emotions
in a simple form.
· A call rate and an additional information service fee are charged. For more information
and rate guide, see tossi homepage (http://www.tossi.com).
june Contents
Press (Left) ▶ 1 ▶ 5 ▶Select [june Contents]
· You can manage, save, and play downloaded music contents or MP3 files. (see p.81)
· Contents will be playing with the folder closed.

61R
T map
This is a navigation service which provides you traffic information and position finder through the map stored by GPS method using an artificial satellite.
Press (Left) ▶ 1 ▶ 6
·You can check electric map when using T map service.
·You may not get exact locate information if you are in the area where GPS reception is
impossible such as underground and tunnel.
Note
·When starting first finding directions, your phone exchange information with server.
·Using the phone while you are driving is dangerous. Check the information before you
drive.
· When using T map service, the actual road conditions may be different. Please drive
depending on the actual road conditions and regulations.
·If you delete T map, you can use the memory as the deleted memory.
·Additional fee will be charged and for more details, refer to the T map
homepage.(http://tmap.tworld.co.kr).
T map menu description
Finding directions Provides you the finding directions service by using
various methods.
Recently check way You can check the recently checked finding directions
service.
Safe driving Inform you about the dangerous area and additional
information for safe driving.
Finding friend You can check the current location of your friend or
family by using the phone.
T map Life Provides you the information about restaurant, travel
information.
Traffic information You can check traffic information of highways/national
road /Metropolitan.
Safety You can get the location information of your child or
restaurant You can get information about nice restaurants around
you.
Star map
62 L 간지
63 R
Sounds
Ringtone Style………………………..64
Download Ringtone………………………64
Vibrate Style………………………65
Call Alert Style…………………65
Volume………………………66
Operation Effects……………………..67
Reminder Alerts……….67
Etiquette Style………….68
64L
Ringtone Style
You can set a ringtone for incoming calls.
Download Ringtone
You can download a ringtone from NATE.
Press (Left) ▶ 2 ▶ 1 Press (Left) ▶ 2 ▶ 2
(Screen capture to be inserted)
1) Press to check the list of ringtones.
2) Press to check the ringtone.
· If you press (Right) in ‘Live Bell’ or ‘My
Bell’, to download ringtones from NATE.
· When the etiquette mode is released, you can
press Volume button to adjust the volume.
· You can manage live ringtones in ‘Ringtone
Box’. (Ringtone Box, see p.77)
(Screen capture to be inserted)
1) Download ringtone when connected to NATE.
· Depending on the type of the downloaded
ringtone, it will be saved under ‘My ringtone’ or
‘Live ringtone’.
· You can also find the downloaded ringtones in the
‘Ringtone Box’ menu of ‘Contents’.(Ringtone Box,
see p.77)
· You can release the etiquette mode when
pressing and holding in NATE (except My
Etiquette Mode.)
Note
· In addition to the default ringtones stored in your phone, you can download various
ringtones from the ringtone download service of your service provider.
Downloading ringtones from 700 service
Enter 700 service number ▶ Press
1) Select a ringtone according to the voice service.
2) Open the message received from 700 service and press .

65R
Vibrate Style
You can set different sound effects.
Call Alert Style
You can set the ring/vibrate for incoming calls, alarms or alerts.
Press (Left) ▶ 2 ▶ 3 Press (Left) ▶ 2 ▶ 4
(Screen capture to be inserted)
1) Set the vibration style.
· You can set the vibration with different
duration and rhythm.
2) Press to save.
(Screen capture to be inserted)
1) Select Call Alert Style
Ring Vibrate
Ring &
Vibrate
Vibrate
then Ring
Ring Louder Silent
2) Press to save.
· If the Etiquette mode is on, the phone
vibrates for receiving calls even if you change
the setting in ‘Call Alert Style’. When the
Etiquette mode is released, the phone returns
to the latest setting.
· The message alert tone is depending on the
message alert setting.
66 L
Call Alert Style(Cont’d)↘
Volume
You can control volume for each function.
Press (Left) ▶ 2 ▶ 5
(Screen capture to be inserted)
1) Select menu
· Voice : Control the earpiece volume.
· Ringtone : Control incoming call volume.
· Effects Sounds : Control phone operating
effect tone.
· Reminder Alerts: Control volumes of
various information alerts.
· System Alerts: Control volumes of various
alert tones.
· Alarm/Sche. sound: Control volumes for
alarm and schedule.
· Standby: Control volumes of movie and
downloaded contents.
· Playon: Control volume for Playon ⓜⓜ
menu.
2) Adjust the volume.
3) Press to save.
Setting Etiquette Mode
Press and hold on the standby screen
(Press %%% and hold again to release the mode)
· will be displayed in the standby screen.
· Etiquette mode can be used in a public place. You can still hear ring through the stereo
earphone if it is connected to the phone.
· The etiquette mode is maintained when you switch off/on the phone as the etiquette
mode is on.
Vibration: Power on, ring, alarm (except morning call), message alert (except when
‘Message alert’ is off).
Mute: Call connect tone, power off, dialog box tone, out of SVC coverage alert (out
of phone service area), menu tone, key tone, low battery alert, shuttle tone, 1min
time alert tone.
Emergency alarm: Emergency message is transmitted when there’s emergency
situation in a specific area so that the users can take the appropriate action.
Sound: Photo/Video tone, morning call.
Note
· If the live screen is selected, the effect tone is depending on june preference. If the
livescreen tone is off, no sound will be heard.
67R
Operation Effects
You can select the effect tones for operation of the phone.
Press (Left) ▶ 2 ▶ 6
Reminder Alerts
You can set alert tones for various information of the phone.
Press (Left) ▶ 2 ▶ 7
(Screen capture to be inserted)
1) Select the menu.
· Missed Call: Effect tone for missed call.
·Keypad Sound: Effect tone for key action.
·Power On/Off: Effect tone for power on/off.
·Phone Folder: Effect tone for folder
open/close.
2) Select Effects.
3) Press & to save.
(Screen capture to be inserted)
1) Select the menu.
· Reminder Alerts : Select the theme
package or custom theme.
· Missed Call : Set the missed call alert
tone.
· Repeat : Set the repeat count of the
missed call alert tone.
· Schedule : Select the schedule alarm
tone.
· Anniversary : Select the anniversary
alarm tone.
· D-day : D-day alert tone.
2) Select Alerts.
3) Press to save.
Note
You can set the effect tone with the volume button. If the volume is less than step 1 or the
Etiquette mode or My Etiquette mode is on, no effect tone will heard.

68L
Etiquette Style
You can set silent or vibration for the etiquette mode.
Press (Left) ▶ 2 ▶ 7
(Screen capture to be inserted)
1) Select Silent or vibration.
· Silent : No ring and vibrate
· Vibration: Vibrate only
2) Press to save.
69R
Display
Main Display ................................................. 70
Download Wallpaper ............................. 71
External Display ......................................... 72
Menu Style………………………. 73
Screen Design ………………………74
Font Style……………………. 75
Dialing Font…………………….. 75
Backlight Control…………………….. 76
70L
Main Display
You can change and set the graphics on main screen.
(Screen capture to be inserted) (Screen capture to be inserted)
Incoming Call
Press (Left) ▶ 3 ▶ 1 ▶ 3
· You can set the graphic that will be displayed for incoming calls.
Standby
Press (Left) ▶ 3 ▶ 1 ▶ 1
· You can set the graphic displayed on standby screen. Outgoing Call
Press (Left) ▶ 3 ▶ 1 ▶ 4
· You can set the graphic that will be displayed for outgoing calls.
Set Standby
Press (Left) ▶ 3 ▶ 1 ▶ 2
· You can set Clock Type, Date/Time Color, Navigation Key, and Greeting Banner.
Power On
Press (Left) ▶ 3 ▶ 1 ▶ 5
· You can set the graphic that will be displayed when the power turns on.
71R
Download Wallpaper
You can download various graphics from NATE.
Press (Left) ▶ 3 ▶ 2
Power Off
Press (Left) ▶ 3 ▶ 1 ▶ 6
· You can set the graphic that will be displayed when the power turns off.
(Screen capture to be inserted) (Screen capture to be inserted)
NATE
Press (Left) ▶ 3 ▶ 1 ▶ 7
· You can set the graphic that will be displayed when you connect to the NATE. · You can download graphics from NATE.
· Downloaded graphics will be saved on ‘Wallpaper Box’ in ‘Contents’.
Note
· You can select the graphic from default, flash, color, my gallery, photo, movie, live
screen and downloads.
· You can manage the live screen from Menu Contents Wallpaper Box Live ▶▶ ▶
screen.
Note
· You can download the graphic from NATE within allowable memory space.
· It may take some time to load the graphic depending on its size.
72L
External Display
You can change and set the graphics on external screen.
(Screen capture to be inserted) (Screen capture to be inserted)
Incoming Call
Press (Left) ▶ 3 ▶ 3 ▶ 3
· You can set the graphic that will be displayed for incoming calls.
Wallpaper
Press (Left) ▶ 3 ▶ 3 ▶ 1
· You can set the graphic displayed on external standby screen.
Set Ext. Standby
Press (Left) ▶ 3 ▶ 3 ▶ 2
· You can set Clock Type, Greeting Banner on the external display.
Outgoing Call
Press (Left) ▶ 3 ▶ 3 ▶ 4
· You can set the graphic that will be displayed for outgoing calls.
73R
Menu Style
You can set the style of menu displayed on the screen.
Press (Left) ▶ 3 ▶ 4
Power On
Press (Left) ▶ 3 ▶ 3 ▶ 5
· You can set the graphic that will be displayed when the power turns on.
(Screen capture to be inserted) (Screen capture to be inserted)
Power Off
Press (Left) ▶ 3 ▶ 3 ▶ 6
· You can set the graphic that will be displayed when the power turns off.
Note
· You cannot set the download contents on external display.
1) Select the menu.
· You can select from Icon, List and Multi Level..
· You can press (Right) to see the preview.
2) Press to save.
· Before you save the menu style you can press (Right) to see the preview.
· From standby screen, you can press (Left) and then press (Left) again to set the
menu style.
74L
Screen Design
You can set ‘Style’, ‘Screen Background’, ‘BG Transparency’, and ‘Ctrl Transparency’ of
the phone screen.
Press (Left) ▶ 3 ▶ 5
(Screen capture to be inserted) (Screen capture to be inserted)
How to download Menu Type(Flash Menu) or My Moto Font(Vector Font)
1) Download the PC sync program from Motorola website (www.mymotorola.co.kr), and
install the program in the PC.
2) Run the PC sync program, select Personalize, and click Flash Menu or Vector Font.
3) Select a Flash Menu or Vector Font and click [Send To Phone]. The selected data is
stored in the phone.
1) Select the menu.
· You can select from Style, Screen Background, BG Transparency and Ctrl
Transparency.
· When setting the style, press (Left) to check the list of the sub menu.
2) Press to save.
Note
· When setting up the font size, it applies to start-up screen. Even if you set up the font
size big, its maximum font size is normal.
· Visit Motorola’s website (www.mymotorola.co.kr) and you can download various Flash
Menu and Vector Font.
75R
Font Style
You can set the type, size and color of the font used in your phone.
Dialing Font
When you enter numbers on the standby screen, you can set their style on the screen.
Press (Left) ▶ 3 ▶ 6 Press (Left) ▶ 3 ▶ 7
(Screen capture to be inserted) (Screen capture to be inserted) (Screen capture to be inserted) (Screen capture to be inserted)
1) Select the menu.
· You can select from the type, size and color of the font.
· When setting the style, press (Left) to check the list of the sub menu.
2) Press to save.
1) Select the dialing font style.
· You can press (Right) to see the preview.
2) Press to save.
76L
Backlight Control
You can set the lighting for the main display, main LCD brightness, keypad, keypad brightness and backlight in call,,
Press (Left) ▶ 3 ▶ 8
(Screen capture to be inserted) (Screen capture to be inserted)
1) Select the menu.
· You can select from Main Display, Main LCD Brightness, Keypad, Keypad Brightness
and Backlight in Call.
2) Set the backlight control option.
· If you do not use the phone with in the configured lighting time after opening folder, the
screen goes to the screen saver mode and the light turns off.
3) Press to save.
· If the Backlight in Call is set to ’On’, the screen dims during the call. If you set it ‘off’, the
backlight turns off in 10 seconds after the call is connected.
77R
Contents
Ringtone Box 78
Wallpaper Box 78
Photo/Movie Album …………… 79
MMS Contents …………… 80
Playon ………….. 80ⓜ
june Contents Box 82
Memory Manager…………….. 85
78L
Ringtone Box
You can save the ringtones downloaded from NATE and check the default ringtone
settings.
Press (Left) ▶ 4 ▶ 1
Wallpaper Box
You can check the downloaded Wallpaper from NATE.
Press (Left) ▶ 4 ▶ 2
(Screen capture to be inserted) (Screen capture to be inserted) (Screen capture to be inserted) (Screen capture to be inserted)
· If you press (Right) in Live Bell or My Bell, you can download ringtones from NATE.
· You can press (Left) to set the contents as ringtone or view information on selected
ringtones.
· You can manage live ringtones and live screens.
· If you press (Right) in Downloads, you can download wallpaper from NATE.
· You can press (Left) to set as display or view information on selected wallpaper.
· If you select My Gallery, you can edit the saved pictures into the folder and set as
wallpaper.
· The flash pictures downloaded from NATE can be checked in the Theme folder in
Playon menu.ⓜ
· You can manage Live Screen.
79R
Photo/Movie Album
Photo Album
Press (Left) ▶ 4 ▶ 3 1 ▶
Movie Album
Press (Left) ▶ 4 ▶ 3 2▶
(Screen capture to be inserted) (Screen capture to be inserted) (Screen capture to be inserted) (Screen capture to be inserted)
1) Select Photo1~2 or External Photo folder.
· After selecting Photo 1~2 or External Photo folder, press (Left) to use use Album
manager function.
2) Select photo.
· Press (Left) to use Send to Message, Send/Register, Delete, Set as Display, Edit
Photo, Move/Copy, and File Info/Manager.
· You can check the photos downloaded with PC Sync.
1) Select Movie1~2 or External Movie folder.
· After selecting Movie 1~2, External Movie folder, press (Left) to use Album
manager function.
2) Select movie.
· Press (Left) to use Send to Message, Send via Bluetooth, Delete, Set as Standby,
Set as Ringtone, Move/Copy, File Info/Manager, File view, File sort or Select all function.
· If a movie file is lower than 950kbyte or set as movie mail, you can send as a MMS
message. In this case, data fee will be charged.
80L
MMS Contents
You can manage contents that can be attached on a message.
Press (Left) ▶ 4 ▶ 4
Playonⓜ
You can use the downloaded content without reconnecting NATE.
Press (Left) ▶ 4 ▶ 5
(Screen capture to be inserted) (Screen capture to be inserted) (Screen capture to be inserted) (Screen capture to be inserted)
· You can check photo, image, music/voice and movie in the attachment file box or
download new content from NATE shop.
· If the phone is set to mute in preferences of Playon, the phone makes no sound when ⓜ
you move between the Playon folder menu.ⓜ
· If your phone has insufficient memory, delete existing contents before trying to download
new contents.
· You can answer a call while you use the content, and return to the content after the call.
Menu description
Phone Theme Wallpapers are stored in the folder.
T map Navigation Provides driving directions service.
Web Surfing Surf the internet.

81R
Using Downloaded Content Menu
(Screen capture to be inserted) (Screen capture to be inserted)
Add folder You can create a folder to manage the content.
Delete all You can delete all the downloaded content.
(If you select Delete all, be aware that the contents in
Game Box will be deleted.)
View by icon/list You can view the menu list by icon or by list.
Memory info. You can check the memory status.
Restore default setting You can restore the default setting.
Note
· If you download contents when you have insufficient memory, TSM(memory manger) will
be activated. When this happens, you can download the content by deleting existing
contents (excluding protected june contents, live bell and live screen content).
* TSM (Memory Manager) function manages the memory and asks you if you wish to
delete the existing content.
· If you delete all content from Playon, the content stored in Game box will be deleted.ⓜ
· If you download content from Playon information service fee will be charged.ⓜ
82L
june Contents Box
You can save, manage and play the music content which is downloaded or received through the internet.
(Screen capture to be inserted)
Press (Left) ▶ 4 ▶ 6
· You can select the content you want to play by pressing .
· You can download the music content as long as the memory capacity allows.
· You cannot play the content which is not completely downloaded. You can resume downloading by pressing .
· You can receive a call while playing the content. The phone returns to the content play mode after the call.
· You can control volume with the volume button while content is being played. The phone continues playing music even if you close the slide.
· You can select a section to be repeated by pressing . If you press again, the selected section will be repeated. (for vertical play)
· If you press (Left), you can set the playing mode.
· You can change the settings for the music content stored in the june contents box with NATE player preferences menu.
(Screen capture to be inserted)
Note
· If you download content from wireless internet (NATE, june, Playon, etc.)when you have insufficient memory, the ‘lack of memory’ message ⓜ
will be displayed. You can download the content by executing the memory manager and deleting the content stored in the phone.
· You can listen to music content with bluetooth.

83R
NATE PLAYER
(Screen capture to be inserted)
Menu description
Delete You can delete the selected content.
Add to my album You can save the selected content in My
album.
Sort You can change the order of playlist.
Manage content/lyrics You can rename title, set/cancel
protection, view content information and
update lyrics.
Sort content You can change the order of content by
type or by date.
Delete all You can delete all the content.
Screen description
① Content playing icon
② Most recently played list
③
Press
④
Press
⑤ My album
⑥ List of all the contents stored in the phone
⑦ Content playing time
⑧ Content file size
⑨
Press
84L
Keys while playing music content
For vertical play
Select content in NATE player ▶ Press (Right)
For horizontal play
In the vertical view Press @@@▶
(Screen capture to be inserted) (Screen capture to be inserted) (Screen capture to be inserted)
Menu
Pause/Play
Vertical view
Press: Next/Press &
Hold: Fast Forward
Press: Previous/Press &
hold: Rewind
키패드그림
View list
Stop(Upper menu)
Set repeat
Menu
Press: Previous
Press & Hold: Rewind
Pause/Play
Horizontal view(full
screen)
Set repeat
키패드그림
View list
Stop(Upper menu)
Press: Next
Press & Hold: Fast
Forward
· You can adjust volume during vertical/horizontal play by pressing the volume button.

85R
Memory Manager
You can manage the internal/external memory of the phone and USIM card.
Press (Left) 4 7▶▶
(Screen capture to be inserted)
(Screen capture to be inserted)
1) Select the memory.
2) Press .
· Select one of the memory information, and press to display the menu for the selected item.
However, june and ETC are not included.
86 L 간지
87R
My Moto
Camera……………………. 88
Bluetooth ……………………. 101
Subway Map ……………………. 108
Dictionary ………………… 110
File Viewer ………………… 112
E-book ………………….. 113
Enjoy Wine …………………… 114
Health ………………… 115
USB Mass Storage ……………….. 116
88L
Camera
Before using camera
· Have the object stand still when you take a photo.
· Hold the phone with both hands to prevent shaking.
· Clean the camera lens only with the soft cloth. Otherwise, camera lens can be damaged
· Battery consumption increases when using the camera.
· It is recommended to take a photo outdoor or inside the room with light. If you take a
photo at night or in a dark place, set the brightness to maximum.
Caution
· Do not take a photo or video when you are not permitted or which may intrude other
person’s privacy. You may have to compensate for violation of portrait or intrusion of
privacy.
· Taking and distribution of a candid photo via internet is a criminal act and is subject to
civil/criminal punishment.
· Do not take a photo or video where it is forbidden.
· In order to prevent the misuse of camera phones, this product is designed to sound the
camera tone in accordance with the relative regulations.
· Observe the camera etiquette, and do not modify the camera tone at your own
discretion.
· Place and use the phone in the safe place. Keep the phone away from the magnetic
components.
· Be careful that dust or sand should not infiltrate into the phone.
· The camera lens is fragile. Do not drop the phone or give strong impact.
· Do not face the lens to the sun or strong light. Camera lens can be damaged.
· Avoid the place where there is sudden fluctuation of temperature and humidity.
In this case, turn off the power and dry the phone.
89R
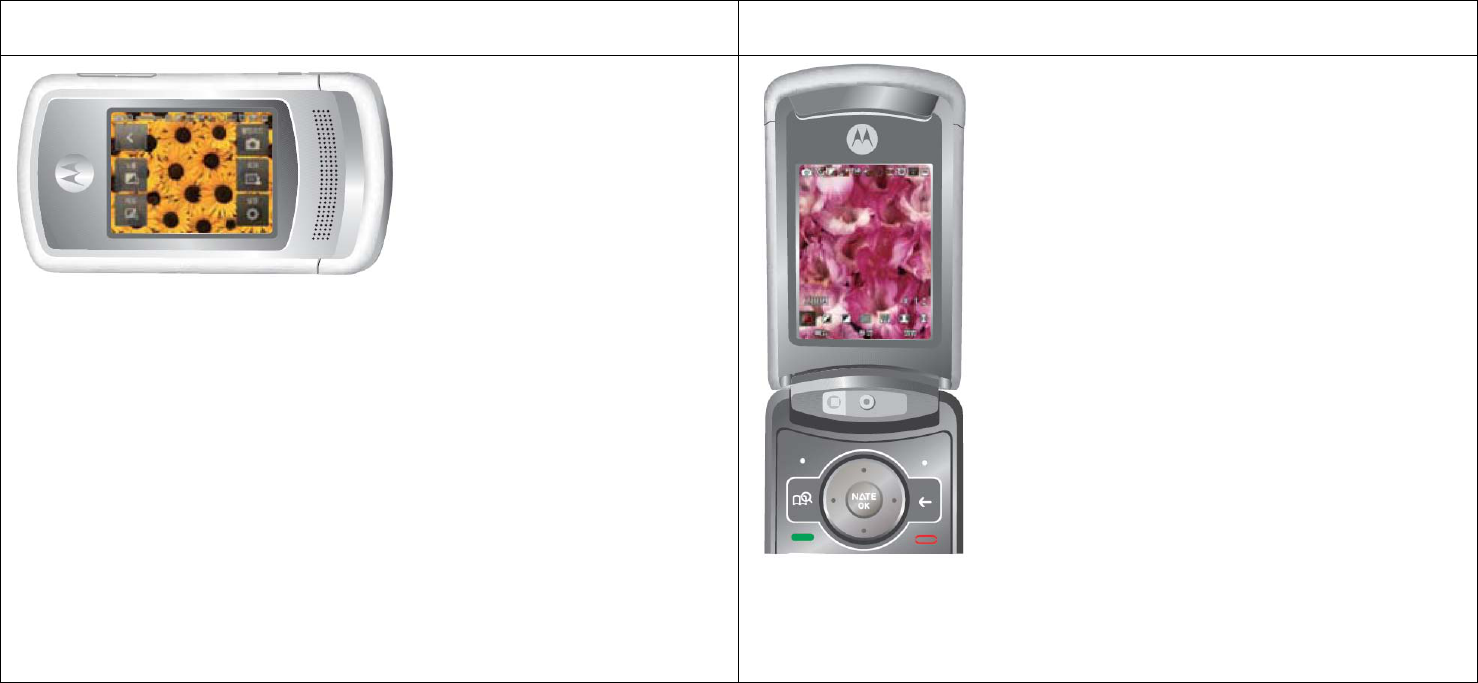
Recording with the folder closed Recording with the folder opened
90L
Camera(Cont’d)↘
(Screen capture to be inserted)
Photo
Press (Left) ▶ ▶ ▶ ▶
You can press and hold the camera button with the folder closed or from the standby screen to take a photo.
1) Press or the camera button to take a photo.
2) Press to save.
· Enter a file name before you save the file by pressing .
· When saving the photo, press (Left) to send to message.
(You can use this function only when the Autosave function is disabled.)
· Press (Right) to enter the file name and you can send it through MMS, When you rename the file, press (Right) to change the
text mode.
· You can receive a call during capturing the photo. It automatically switch to incoming call screen. However, you cannot go back to camera
mode after the call.
(Screen capture to be inserted)
Note
· You can use the volume button to select record/capture functions.
91R
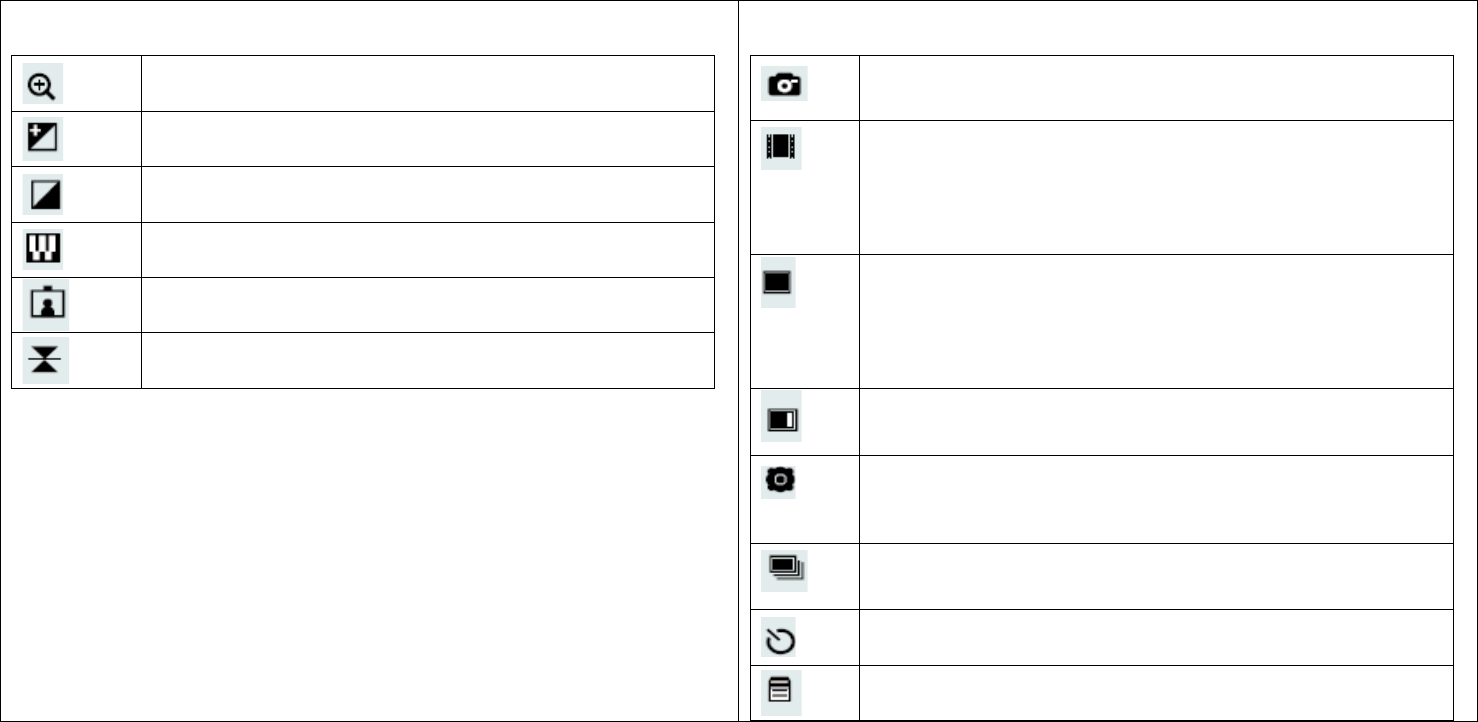
■ Icons description
ZOOM : Enlarge an object captured at a long distance.
(Only available with the photo smaller than 480x640)
Bright : You can adjust brightness of the photo.
Contrast : You can adjust sharpness of the photo.
Effect : You can use various colors and filtering effects.
Frame : You can put the photo in various photo frames.
(Only available with the photo smaller than 240x320)
Flip : You can reverse the photo up/down or left/right.
■ Setting camera menu
Mode: Select one Photo, Movie, and Movie Mail to move to preview
mode of the selected item.
Size: You can set the size of the photo.
Front camera: 640x480, 400x300, 320x240, 176x144
Back camera: 1024x1280, 960x1280, 480x640, 300x400, 240x320,
144x176
Quality: You can set the resolution of the photo.
-Best: for printing.
-Good: for downloading to PC or for E-mail.
-Normal: for saving in the phone.
Setting: You can set day/night mode.
Serial: Automatic serial shooting. (Cannot use in following photo size
1024x1280, 960x1280.)
Timer: Cancel, 10 Sec, 5 Sec, 3 Sec.
Select Memory: Select external/internal memory to save a file.
Memory: Shows the total/used memory status.

92L
Camera(Cont’d)↘
Self Capture
Press (Left) ▶ ▶ ▶ ▶
Photo Album
Press (Left) ▶ ▶ ▶ ▶
(Screen capture to be inserted) (Screen capture to be inserted) (Screen capture to be inserted) (Screen capture to be inserted)
1) Press the camera button to take a photo.
· Close the folder. You cannot take a self capture with the folder open.
· The photo will be saved automatically regardless of the autosave setting.
1) Select Photo1~2 or External Photo folder.
· You can check and manage the captured photos.
· If you press (Right) from camera preview screen, you can move to the photo album
directly.
2) Select a photo and press .
· Some functions (Set as Display, Move/Copy files, Sort files, and Select all) are restricted
in the external memory folder.
93R

■Using the Photo Album Menu
Send to Message: Attach the photo and transfer through MMS message.
Send/Register: Attach the photo and send or register it by using bluetooth.
- Send via Bluetooth : Send the photo using wireless bluetooth.
- Bluetooth Print : Connect and set the bluetooth between the phone and computer then print the photo.
Delete: Delete all, or the selected photos in the folder excluding protected photos.
Set as Display: Set the photo as a default display.
Edit Photo: Edit photos (photo with the size smaller than 640x480.)
Create Slide: You can edit captured photos together to create a slide.
Move/Copy: Move/Copy the photos in the current folder to other folder.
File Info/Manager: Manage the photo file and the folder.
File view: View the photos stored in the selected folder.
- List: View by photo list
- Preview: View by preview photo
File sort: Sort the photos in the selected folder.
Select All: Select all the photos stored in the selected folder and use various menu.
Be aware that when you send the photo through MMS, or e※-mail, there will be an extra data service fees.
94L

Camera(Cont’d)↘
Movie
Press (Left) ▶ ▶ ▶ ▶
(Screen capture to be inserted)
1) Press or the camera button to record a movie.
· Press (Left) to pause while recording a movie. To restart recording, press (Left) again.
2) Press to save.
· When saving the movie, you can send it as a MMS message by pressing (Left). After entering the file name, you can save the movie
by pressing .
· You can use above function only when the Autosave is disabled.
(Screen capture to be inserted) Note
· Recording time can be different depending on the sufficient memory in the phone.
· If you record a movie, closing the folder will automatically end the recording and recorded movie will not be saved.
· You can use the volume button to select record/capture functions.
· If a call is incoming while capturing movie, press to connect the call. Captured movie will be automatically saved in the movie album.
· After the call, the screen will be switched to the movie preview status.
· To send a movie message, press (Left) button and select movie mail in capture mode. The recording is optimized for sending a MMS
message. Be aware that additional data service fee will be charged.
95R
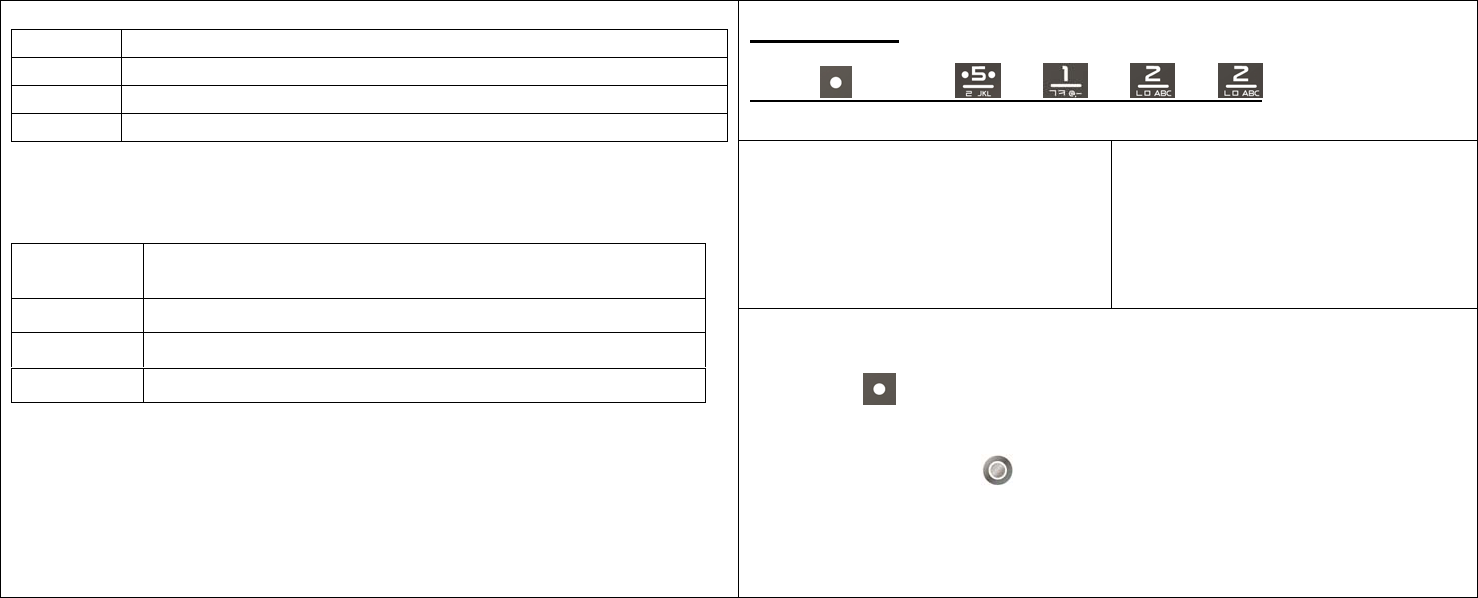
Movie Album
Press (Left) ▶ ▶ ▶ ▶
(Screen capture to be inserted) (Screen capture to be inserted)
■ Icon descriptions
ZOOM: Enlarge an object captured at a long distance.
Bright: You can adjust the brightness of the movie.
Contrast: You can adjust the sharpness of the movie.
Effect: Apply various colors and filtering effects.
■ Setting Camera Menu
Mode: Select one Photo, Movie, and Movie Mail move to preview
mode of the selected item.
Size: Select the size of movie. (176x144, 320x240)
Select Memory: Select external/internal memory to save a file.
Memory: Shows the total/used memory status.
1) Select Movie1~2 or External movie folder.
· You can check and manage the recorded movies.
· If you press (Right) from camera preview screen, you can move to the movie album
directly.
2) Select a movie and press .
· Some functions (Set as Display, Set as Ringtone, Move/Copy files, Sort files, and Select
all) are restricted in the external memory folder.
96L

C↘amera(Cont’d)
↘Movie Album(Cont’d)
■ Icons used for playing movie
동영상 재생 그림 : Pause/Play
: Set Repeat
: Stop
(Move to the previous page)
: Rewind
: Fast Forward
Volume button: Adjust Volume
(Left) : Move to previous movie
(Right): Move to next movie
■ Using the Movie Album Menu
Send to Message: Attach the movie and transfer through MMS message.
Send/Register: Send the movie using bluetooth.
· Send via Bluetooth: Send the movie using wireless bluetooth.
Delete: Delete all or the selected movies in the folder excluding protected movies.
Set as Standby: Set the movie as a default display.
Set as Ringtone: Set the selected movie as a ringtone.
Move/Copy: Move/Copy the movies in the current folder to other folder.
File Info/Manager: Manage the movie file and the folder.
File view: Select to view the saved movie file as a list or 9 at a page.
Downloaded or captured movie file would display as .
File sort: Sort the movies in the selected order.
Select All : Select all the movies stored in the selected folder and use various menu.
· If your phone is in etiquette mode, using volume button will not affect any changes in
volume.
· When the phone is in etiquette mode and if you deactivate the etiquette mode play
movie, your phone will still be in etiquette mode after the movie is ended.
· If a call is received during playing, the mobile phone returns to the receive screen and
the play screen is automatically recovered after the call is completed.
97R
■ Menu while using photo frames
Photo Frame
Frame Capture
Press (Left) ▶ ▶ ▶ ▶
(Screen capture to be inserted) (Screen capture to be inserted)
(Screen capture to be inserted) (Screen capture to be inserted)
1) To take a photo, press or the camera button.
· The photo frames are updated monthly without charge.
You can download the new frame from NATE.
· Press to select a photo frame.
· Press (Right) and adjust distance with and brightness with .
2) Press to save.
· After entering a file name you can press to save.
If you use the updated frames without purchasing them, an additional data servic※e fee will be
charged every time you save the photo with the frames.
Menu description
Frame box You can store and manage the frames downloaded from
NATE.
Frame photo album You can store and manage the photos.
Save frame You can save the selected frame.
Up/Down reversion Reverse the photo upside down.
Download frame You can download frames from NATE.
Help You can view guidelines on the photo frame service
Receiving agreement You can agree or block the updating frame service.
98L

↘Camera(Cont’d)
NATE Photo Print
Press (Left) ▶ ▶ ▶
Frame Album
Press (Left) ▶ ▶ ▶ ▶
(Screen capture to be inserted) (Screen capture to be inserted)
(Screen capture to be inserted) (Screen capture to be inserted)
1) Select a photo
· Press (Left) to use Delete, Delete all, Rename photo file, Send photo or Set
Standby Screen.
2) Press to save.
· You can request printing of the photos selected from ‘Photo album’ and receive the
printed photos from the service provider.
Contact the service provider or visit NATE Photo website (http://photo.※nate.com) for
further information.
99R

Settings
Press (Left) ▶ ▶ ▶
(Screen capture to be inserted) (Screen capture to be inserted)
1) Use to select the item.
2) Use to change the settings.
3) Press to save.
Autosave: Set a method of saving the captured photos or movies. (manual/auto)
Call in Recording : Set a method of answering a call while capturing the video (select to
answer manually or automatically).

100L
↘Camera(Cont’d)
Memory Manager
You can check and manage the information on total memory size, used memory size, and
free memory of your phone.
Press (Left) ▶ ▶ ▶
Help
Help shows instructions for using various keypad buttons assigned to the functions of
phone camera.
Press (Left) ▶ ▶ ▶
(Screen capture to be inserted) (Screen capture to be inserted) (Screen capture to be inserted) (Screen capture to be inserted)
1) Select the memory.
2) Press .
· Select an item you want and press to move to the selected item. (Excluding june
and ETC)
101R

Bluetooth
Before using the bluetooth
Bluetooth is a short-distance wireless communications technology which use 2.45GHz frequency to establish connection between various devices within a certain distance. You can
transfer data between the devices that supports bluetooth technology, without connecting any cables.
· Please use only Motorola-designated products or authorized goods.
- Motorola’s bluetooth function is best suitable for Motorola’s bluetooth headsets or
accessories.
· Bluetooth devices from other manufacturers may not be compatible with Motorola’s
mobile phone.
- Please see the user manuals of each manufacturer and contact a manufacturer when
troubles occur.
· Bluetooth related products (such as bluetooth headset and handsfree) should be
purchased separately.
- You can buy it at your agency or nearest Motorola service center.
· For an accurate use of bluetooth, see the user manual of the bluetooth device.
· When registering a bluetooth device to the phone, please do it within near distances.
· When making a call with bluetooth device, farther distance may result is lower call
quality. If the device is further than a certain distance away from the phone, a call may get
disconnected.
· When making a call in a noisy indoor or outdoor, surrounding noises may interrupt the
call.
· If you make a call in interrupted areas or a part of the body like hands touches the
receiving/sending part of the phone, the phone may work abnormally or generate some
noise.
· Out of Motorola phone’s bluetooth functions, the communication with mobile handsets is
optimized for motorola’s mobile phones, so it cannot be compatible with those of other
manufacturers.
· Bluetooth may generate some different performances according to applicable rules. This
device may be low in transmission output, but it is designed to minimize the battery
consumption. Therefore, general rules are applied to this unit for long-term use.

102L
Bluetooth(Cont’d)↘
Bluetooth Mode You can set the connection between the phone and other devices via bluetooth.
Press (Left) ▶ ▶ ▶
(Screen
capture to be
inserted)
(Screen capture to be
inserted)
(Screen
capture to be
inserted)
(Screen capture to be inserted)
· You can search for new bluetooth devices in 3 minutes and add them to your phone’s list of paired devices. (Once
the device is paired up with the phone, you can search them from the list)
· If you run the bluetooth menu such as connection to bluetooth or allow access when the bluetooth mode is not
enabled, a mode selection guide popup window will be displayed. Select ‘Yes’ and press .
· If the phone is set to bluetooth mode, battery consumption will be larger than general use. If bluetooth function is not
in use, please turn off the bluetooth mode.
Icon description
Bluetooth mode setting
Hide internal device
Handsfree connected
Stereo handsfree connected
Headset connect
Stereo headset connect
Stereo connected
Dial-up network and FTP connection status
103R
Connect Device You can use bluetooth function by connecting the bluetooth device to the phone.
Press (Left) ▶ ▶ ▶
(Screen capture to be
inserted) (Screen capture to be inserted) (Screen capture to be inserted) (Screen capture to be inserted)
· If the phone is connected to bluetooth device, an icon of connected device will be displayed on the standby screen.
· After selecting a connected device from a list, press (Left) to check a Name/Device Info, and perform the functions such as Delete and Delete all.
· Only one bluetooth device can be connected at a time. To connect other device, select a current paired up device, and press to disconnect.
104L
Bluetooth(Cont’d)↘
How to pair non-registered devices
1) Check if a target device is ready for pairing.
- See the user manual of the device to find out how to set the device ready for pairing.
2) Press (Left) ▶ ▶ ▶ and set bluetooth mode.
3) If there is no registered bluetooth from bluetooth device connection, press (Right)
to select search device options such as (All, Audio Devices, Mobile Phones, Computers,
Printers.
4) After selecting an search option, press to search the bluetooth devices
automatically.
- If there is no registered device, the list of connectable devices will be displayed.
5) If the bluetooth device is searched, the information on searched devices will be
displayed on the screen.
6) Select a device and press . Enter the PIN CODE, and the device will be
automatically registered to the phone.
- To find out the PIN code for a bluetooth device, refer to the product’s user manual.
7) After selecting a registered device service, press to connect the phone with
bluetooth device.
- Upon connection, an icon of the connected device will be displayed on the standby
screen.
How to connect a registered device
1) Press (Left) ▶ ▶ ▶ and set bluetooth mode.
2. Press (Left) ▶ ▶ ▶ and select device to connect. Press
to connect the phone with bluetooth device automatically.
- If you want to connect other device, select currently connected device first and press
to disconnect.
(When the device is connected, an icon will be displayed on the standby screen.)
Sending phone number via Bluetooth
1) Sending phone number from the phonebook.
· After selecting a number from the phonebook, press (Left) ▶ ▶ ▶
to send the number to the defined device.
2) Sending a phone number from bluetooth menu.
①Press (Left) ▶ ▶ ▶ Select the device.
Press ② to pair with the device and select phonebook with .
Press to choose the saved number in the phonebook and send the selec③ted number by
pressing .
105R
Using bluetooth printer
· Bluetooth printer must be connected to the phone.
· You can select the photos and print out wirelessly.
· Refer to the user manual of the printer for the detail instruction.
Using bluetooth headset/handsfree kit/stereo headset
· To place a call on the headset, dial the phone number and then press the Call button on the
headset.
· You can switch the call to the phone from headset/handsfree kit to the phone by pressing and hold
. In order to switch the call back to headset/handsfree from the phone, press and hold
again.
· To receive a call or end a call on the headset press the Call button on the headset.
· If you press and hold the Call button on the headset, the call will be made to the last number called.
Note
· Bluetooth headset/handsfree kit/stereo headset must be connected to the phone.
Using bluetooth PC
· By connecting the phone with the bluetooth PC, you can use the phone as a wireless
communication modem or you can easily send files from the phone to PC.
· You can copy the photos in the phone to PC using PC Sync program for bluetooth communication
between PC and the phone.
· Because the computer and the phone communicate with each other via OPP (Object Push Profile),
there is a case that the function is not supported depending on the PC manufacturer.
· Use the PC Sync program for bluetooth communication between PC and the phone.
· Since the function works differently depending on the software installed in the PC, read the
bluetooth manual of each manufacturer.
1) Using the phones as a wireless communication modem for a PC.
· Run the bluetooth control program(P e PC.
· If you select Dial-up Networking in Access setting in bluetooth preferences, you can use the
bluetooth device as a wireless communication modem. However, if you connect the USB data cable,
wireless modem will be disconnected.
2) Sending files to PC.
· You can search files in the phone and send them to PC.
· Run the bluetooth control program (PC sync) on the PC.
· Set the bluetooth communication (Send file) on the phone. After setting the communication function,
you can select and send files to PC.
Note
· While connecting the phone to the bluetooth device, you can still make a call via headset or
handsfree or play various contents.
· To use the connected device, device must within 10m from the phone.
· When using bluetooth FTP(File Transfer Profile) or OPP(Object Push Profile), the receiving device
must be in the standby mode.
· Description of bluetooth device functions and the method of using them described in this user
manual may vary depending on bluetooth device.
· For more information, please see the user manual of the device.
106L
Bluetooth(Cont’d)↘
Settings
Press (Left) ▶ ▶ ▶
(Screen capture to be inserted)
(Screen capture to be inserted)
Set a reception mode from other devices.
Audio Devices Make a connection from a registered bluetooth audio device to the phone.
Dial Up Networking Search the phone from bluetooth PC, and use it for PC wireless modem.
Receive Data You can exchange data with a near by bluetooth device.
File Transfer You can send files from the phone to other devices.
Service
Selection
PC-Sync Use the PC-Sync program for bluetooth between the phone and PC.
When saving data received from bluetooth-supporting devices to the phone,
you can designated a folder.
Receiving Folder You can save groups by pressing and designating a folder (others, workplaces,
friends, families).
Photo Album You can save albums by pressing and designating a folder (photo1, photo2).
Receiving
Folder
Movie Album You can save albums by pressing and designated a folder (movie1, movie2).
Bluetooth Alert The phone alerts when the bluetooth successfully attempts connection or found
abnormal, interrupted connection.
Auto call transfer When the user place a call using the phone, auto call transfer automatically
connects to the bluetooth headset.
Set Pin Code When you connect the bluetooth device, press to set the PIN Code automatically
inserted.
107R
My Device Info
Press (Left) ▶ ▶ ▶
1) Press o edit.
· You can check Device Name, Device Address, Device Type.
2) Edit Device Name and press .
· You can change the text mode by pressing (Right).
· You cannot edit Device Address and Device Type.
108L
Subway Map
The phone provides the nationwide subway route map. The information is subject to change depending on the circumstances.
View Route Map
Press (Left) ▶ ▶ ▶
Search Route
Press (Left) ▶ ▶ ▶
(Screen capture to be
inserted)
(Screen capture to be
inserted)
(Screen capture to be
inserted)
(Screen capture to
be inserted) (Screen capture to be inserted) (Screen capture to be
inserted)
1) Select the city and press .
2) Select line/search.
· Press (Left) to select a line and view the map in a specific area you have selected.
· Press (Right) to search a route. (See Search Route for details.)
1) Select the city and press .
2) Select Depature/Arrival
· You can find the number of transfers required and the estimated travel time. [The
estimated travel time includes the distance between stations and the transfer time
(approx. 5min).
It is an estimation, and can be different from the actual time.]
· Press (Left) to save the route in ‘My Route’.
Press (Right) to check the route with minimum number of transfers or with the
shortest distance.
109R
Station Info
Press (Left) ▶ ▶ ▶
• Select a subway station and press to find first/last train timetable, exit info and transfer
info.
My Route
Press (Left) ▶ ▶ ▶
Lost Property Office
Press (Left) ▶ ▶ ▶
• Telephone numbers of the lost property offices are displayed.
(Screen capture to be
inserted)
(Screen capture to be
inserted) (Screen capture to be inserted)
Settings
Press (Left) ▶ ▶ ▶
• You can set the frequently searched area.
· Press (Left) to save the route searched with ‘View Route Map’ or ‘Search Route’. Help
Press (Left) ▶ ▶ ▶
• You can check how to use the buttons when the subway map is displayed.
110L
Dictionary
You can search words by using English-Korean/Korean-English dictionaries.
English-Korean
Press (Left) ▶ ▶▶
(Screen capture to be inserted) (Screen capture to be inserted)
Before using the dictionary
Downloading via PC Sync Program
1) Go to Motorola website (www.mymotorola.co.kr), download PC Sync and install it to
PC.
2) Run PC Sync program and click [E-Document > Dictionary]
3) If you select [Put E-Dictionary into Cell Phone] after clicking [E-Dictionary] from [E-
Document > Dictionary] program, the e-dictionary database are saved in the phone.
Downloading via USB Mass Storage
1) Go to Motorola website (www.mymotorola.co.kr), download e-dictionary database.
2) If you copy a downloaded file to DIC folder of a USB Mass Storage after connecting the
mobile phone to PC, e-dictionary database are saved in the phone.
· You can use an e-dictionary menu if there are e-dictionary database.
Note
You can move to the dictionary directly by pressing .
· If you enter a English word in the box, the related words will be displayed.
· After selecting a desired word, you can check the word by pressing .
· Upon checking the word, you can perform Tap Move/Tap Clear by pressing
(Right). When moving the tap, you can select desired word by using or .
If you press , you can move to selected a word.
You can check the previous words by pressing .
111R
Korean-English
Press (Left) ▶ ▶▶
· If you enter Korean word in the box, the related words will be displayed.
· After selecting a desired word, you can check the word by pressing .
· Upon checking the word, you can perform Tap Move/Tap Clear by pressing (Right).
When moving the tap, you can select desired word by using or . If you press
, you can move to selected word.
· You can check the previous words by pressing .
My Vocabulary
Press (Left) ▶ ▶▶
· You can save the words searched from dictionary.
· When searching words via dictionary, you can save them into My Word List in order by
pressing (Left) and selecting Add to Word List.
· You can save up to 1,000 words per folder.
· Press (Left) to use various functions including Set/Clear Study, Delete, Move
Words, Sort (in English/Korean spelling order, by date), Manage Folder(rename folder,
lock folder), Delete All in Folder, and Select All in Folder.
· Press (Right) to select the words and press (Left) to use the functions such as
Set/Clear Study, Delete, Move and Clear All.
My History
Press (Left) ▶ ▶▶
· You can save, check and manage up to 100 searched words for each Korean-
English/English-Korean dictionary.
· If a capacity is exceeded its space, older words will be deleted first.
Settings
Press (Left) ▶ ▶▶
· You can set automatic word save setting/released and font (type) and size.
112L
File Viewer
You can view files stored in internal/external memory.
Press (Left) ▶ ▶
(Screen capture to be inserted) (Screen capture to be inserted)
Note
· The image displayed on the phone can be different from that shown on PC, and some of
figures may be omitted.
· You can view image files (JPG, BMP, PNG, GIF, WMF, EMF) and document files (PDF,
Text, HTML, Word, Excel, Power Point).
· To use the file viewer, you should save files in the internal memory with PC Sync
program.
· For external memory, the external memory card (Micro-SD) must be mounted on the
phone. (USB Mass Storage, see p.115). You can download PC Sync program from the
Motorola website (www.mymotorola.co.kr).
· Select a file in the list and press (Left). You can use Delete, File name/Information,
Sort by time, Sort by name, Sort by type, Sort by size, Delete all, and bluetooth.
Button description
Help
Press: Previous page
Press & Hold: Start page
Rotate screen
Fit to screen
Volume
Button
Zoom
Press: Next page
Press & Hold: End page
Hide/Show menu
Previous file
Previous screen
Next file
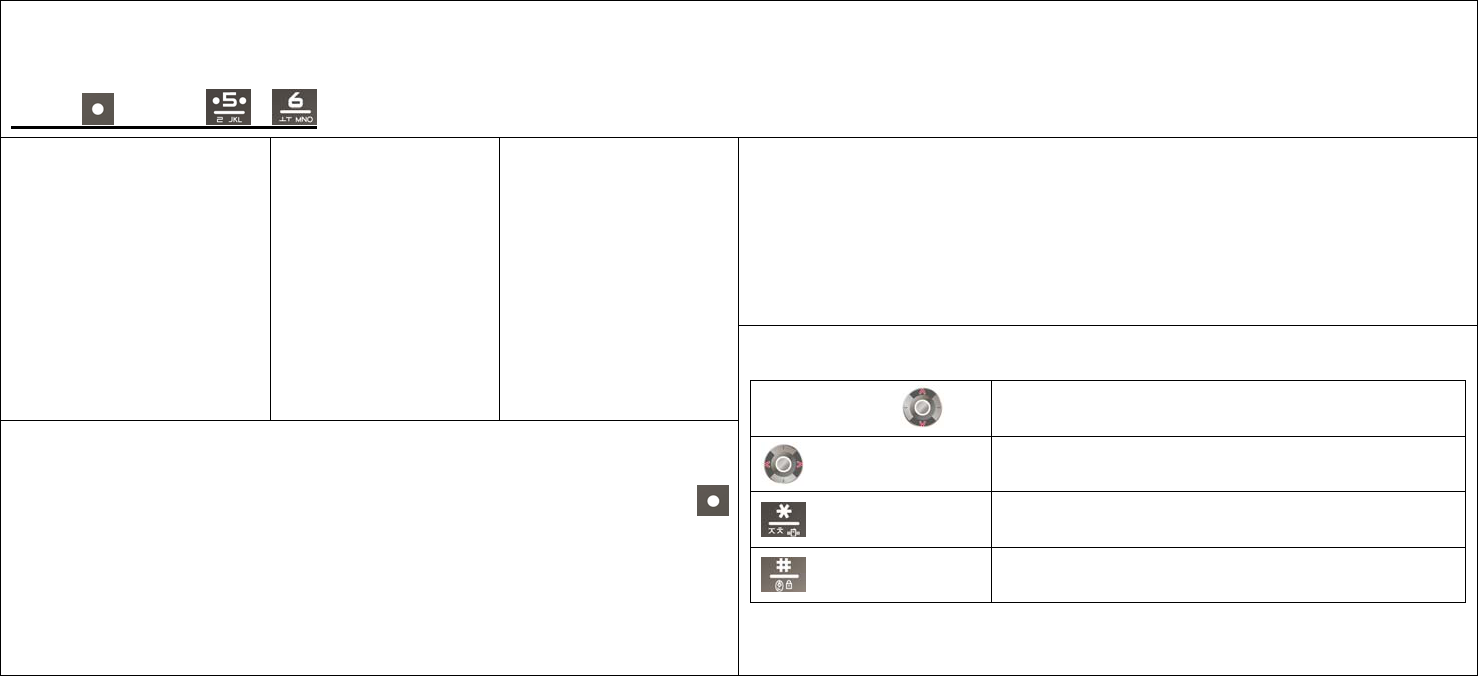
113R
E-book
You can read the text file on the phone. See ‘Help’ for further information.
Press (Left) ▶ ▶
Note
· The E-dictionary program must installed in the phone or external memory.For more
information see Dictionary Guide. (Dictionary, see p.109)
(Screen capture to be
inserted)
(Screen capture to be
inserted)
· The phone provides the space of up to 200 E-books, with maximum 1024K per an E-
book file. The number of files to be stored in the phone varies depending on the file size.
· You can use Go To, Search word, Search dictionary, Display and Help by pressing
(Left).
Button description
Volume button,
Move page
Move line
Start page
End page
114L
Enjoy Wine
You can search for recommended wines, check tips for wine, cheese story and tasting note provided by your phone.
(Screen capture to be inserted)
(Screen capture to be inserted)
Press (Left) ▶ ▶▶
1) Search
• You can search wine by name, type, purpose and taste.
2) Recommendation
• You can search recommended wine as a gift by relations, age and gender.
3) Tips for Wine
• You can check and learn tips for wine.
4) Cheese Story
• You can find out type and taste of the cheese.
5) Tasting Note
• You can record the taste of the wine and save it to the phone.
- It is able to save up to 50 tasting note. You can transfer saved tasting note via bluetooth.

115R
Health
You can check your types, food recommendation, and combination of food to maintain your health.
(Screen capture to be inserted)
(Screen capture to be inserted)
Press (Left) ▶ ▶▶
1) Classification
• You can view 4 types of classification and check your type by Facial Features/Appearance, Personality, and Health.
2) Test for Types
• You can find out your body types answering 12 different questions.
• Touch the answer following the question, and touch next to move to the next question.
• Touch save to save the text while you are answering.
3) Recommended Food
• You can find out the recommended food according to the symptoms on your body.
4) Effect/Direction
• You can find out effects and direction of traditional oriental medicine.
5) Combination of Food
• You can find out combination of food to maintain your health.

116L
USB Mass Storage
You can transmit various contents and MP3 files between the phone and PC with the
USB data cable.
Press (Left) ▶ ▶
Check USB Mass Storage
· Check if an external memory card (Micro-SD) is inserted in the phone.
· Visit Motorola website (www.mymotorola.co.kr) and download the USB driver program.
· Connect the USB data cable to the USB port on the PC and connect the other end to the
external connection port on the phone.
· Do not forcefully remove the USB data cable when the USB Mass Storage is connected.
Mobile phone can be switched off.
Note
· The MP3 files downloaded to the USB mass storage in the mobile phone cannot be
played in other mobile phone.
· You can find the MP3 files stored in the USB mass storage in
“june Contents Box”.
· You cannot play the MP3 files or contents if you rename or delete the default folder
name of the USB mass storage.

117R
Mounting external memory card (Micro-SD)
①Slide and open the external memory cover
as shown in the figure.
Insert the external memory (Micro②-SD) as
shown in the figure.
· Be sure that the external memory is inserted
to the correct direction, or the slot can be
damaged.
· Icon is displayed on the standby screen when
the external memory is mounted properly.
③ Close the external memory cover and slide it
as shown in the figure.
· Do not turn off the phone while using the data stored in the external memory card.
- The data in the card can be erased.
· Insert the external memory card and restart it, if you first use
the card or if there is an error on the card.
· Keep the external memory card in the safe place.
- Do not give impact or bend the card.
- Keep the card away from hot and humid place, the place with corrosive material or the
place with magnetic wave or static electricity.
Note
· When using the external memory card, you can only use some certain functions and other
functions are restricted.
· End the USB mass storage before you remove the external memory card.
- A critical system error or defect may occur.
· Motorola takes no responsibility on loss or damage of data caused due to negligence or
mishandling of the user.
· This product supports up to 4GB capacity of Micro-SD.
118L
119R
Organizer
Alarms ………………..120
Stopwatch ………………… 122
World Time…………….. 123
Calendar……………….. 124
Scheduler……………. 125
Memo…………….. 126
Calculator………………. 127
Unit Converter…………….. 127
120L
Alarms
The phone provides bell or vibrates at the designated time.
Easy Alarm
Press (Left) ▶ ▶ ▶
(Screen capture to be
inserted)
(Screen capture to be
inserted)
(Screen capture to be
inserted)
Before use
· If an alarm is on, ‘시계그림’ is displayed on the screen an when it is off, icon is no longer
displayed on the screen.
· If the phone is set to ‘Vibrate’ or ‘Etiquette mode’, the phone vibrates instead of rings.
(The phone rings for morning call.)
· When alarms set to the same time, operate in the following priority order : (Easy Alarm
→ Morning Call → My Alarm 15)
· You can turn off the alarm by opening/closing the folder when alarm rings.
- You can also turn off the alarm by pressing the volume button, camera button, ,
and (Right)
· If you set the morning call to repeat more than once, you must press (Right) to turn
off the morning call.
· If the designated timer for easy alarm expires, the alarm rings once. After alarm rings
once, it automatically turns off.
· You can set time by 1~999min.
· You can press (Left) to set the ringtone.
121R
Alarms
Press (Left) ▶ ▶ ▶ ▶(Right)
Timer
Press (Left) ▶ ▶ ▶
(Screen capture to be inserted) (Screen capture to be inserted) (Screen capture to be inserted) (Screen capture to be inserted)
1) Select the item.
· You can set an alarm to be sounded at a desired time by setting a time and interval.
· You can enter maximum 20 Korean characters and 40 English character for memo, a
message content will be displayed when an alarm is sounded.
2) Press to save.
· Alarm rings after designated time.
· You can set the time from 00:00~24:00.
·Press (Right) to select the ringtone for timer.
122L
Stopwatch
You can use the phone as a stopwatch.
Press (Left) ▶ ▶ ▶
(Screen capture to be inserted) (Screen capture to be inserted)
· You can record up to 20 lap times with the lap time function.
· The stop watch continues even if you close the folder.
Button description
Start/Pause/Resume
(Right)
Reset (Previous screen)
(Left)
During counting: Lap time
123R
World Time
You can check a current time of world main cities (50 countries) and city information, and
set various functions
Press (Left) ▶ ▶ ▶
(Screen capture to
be inserted) (Screen capture to be inserted) (Screen capture to be inserted)
· Press to display the country, country code, area code and emergency
number/information of the selected city.
Menu description
Summer Time(DST) You can set summer time periods by
cities.
Dual World Clock · The local time of your area and the
selected city will be displayed on the
standby screen.
· You can change the clock type on the
standby screen and you can see the
preview by pressing (Right).
(However you cannot use this function if a
phone theme or flash is selected.)
City info You can check desired city information.
.
124L
Calendar
If you set and save a schedule, alarm rings on a corresponding date and displays the stored content.
(Screen capture to be inserted)
Press (Left) ▶ ▶ ▶
· You can select new Schedule, To-do, Anniversary and D-Day by pressing (Right) at a desired date. (You can add 180 items for
schedule, to do and anniversary, 30 items for d-day.)
· If you select ‘Calendar top/bottom’ or ‘3 Months top/bottom’ in ‘Set Standby’, the current month will be displayed with the scheduled dates
in different color.
· When schedules set to the same time, alarm operate in the following priority order:
- D-Day → Anniversary → Schedule
· Schedule start up page is the monthly calendar.
- Press (Left) to find the schedules by Day/Month/Year.
· When checking the schedule, you can press (Left) to use Month, Week, Go to a date, Delete,
Delete by day or month, and Delete all.
- When setting View by week, select a day of a week and press to check the daily schedule.
(Screen capture to be inserted)
Menu description
Schedule : The phone provides the alarm and displays memo in accordance with the alarm cycle until the cycle is expired.
To-do : The to-do item is displayed as a block from the start date to the end date.
Anniversary : The phone provides the alarm and displays memo at the designated anniversary.
D-Day : Days remaining to or passed from a specific day is displayed on the standby screen. The alarm rings on the designated date.
125R
Scheduler
You can view or add schedule you have entered in.
Schedule
Press (Left) ▶ ▶ ▶
To-do
Press (Left) ▶ ▶ ▶
· Press (Right) to create a new to-do.
· Press (Left) to use monthly search, delete or delete all.
(Screen capture to be inserted) (Screen capture to be inserted)
· Press (Right) to create a new schedule.
· Press (Left) to use monthly search, delete or delete all.
Anniversary
Press (Left) ▶ ▶ ▶
· Press (Right) to create a new anniversary.
· Press (Left) to use monthly search, delete or delete all.
126L
Scheduler↘ Memo
You can store up to 50 memos in the phone.
Press (Left) ▶ ▶
(Screen capture to be inserted) (Screen capture to be inserted)
D-day
Press (Left) ▶ ▶ ▶
· Press (Right) to create a new D-day.
· Press (Left) to use monthly search, delete or delete all.
· If you select the calculation by General D-day, D-day will be indicated from a current
date based on the date entered. If you select the calculation by a specific D-day,
remaining dates or passing dates based on the date entered will indicate D-day.
1) Press (Right) to add a new meeting plan.
· You can enter a memo of up to 48 Korean letters or 96 English letters.
· When checking the written memo, you can edit it by pressing .
2) Press to save.
· Press (Left) on the list to delete, delete all or protect/lock.
127R
Calculator
You can make simple calculation with the phone.
Press (Left) ▶ ▶
Unit Converter
You can convert various units easily using the unit converter.
Press (Left) ▶ ▶
(Screen capture to be inserted) (Screen capture to be inserted) (Screen capture to be inserted) (Screen capture to be inserted)
· Press (Right) to make the calculation again.
· When entering numbers or symbols, press to delete a character and press and
hold to delete all.
· You can use the operators multiple times in a calculation.
Operators
+
X
-
⁄
(
)
(Left)
.
=
1) Select a unit you want to convert.
2) Input the value.
3) Press and you can check the converted value.
128L
129R
Message
Message Box …………….. 130
New Message ……………. 133
Report Spam/Service ……………. 137
Contents Box ………………. 138
Settings………………. 139
130L
Message Box
You can view and manage the received messages.
(Screen capture to be inserted)
Press (Left) ▶ ▶
· When you receive the message, the icon will be displayed on the standby screen.
· When you receive the message with the phone number shown on the screen, press to make a call to the person who sent the
message.
· If you press when receiving a voice message, you will be connected to the voice mailbox,
and you can listen to the recorded voice message.
· When checking the message, press to move to the previous or the next message.
When checking the message, press to move to the other message box.
When checking the text message, press the volume button to zoom in/out of the screen.
(Screen capture to be inserted)
Note
· If the capacity for received message is exceeded, the oldest message will be deleted.
· You can check the received message in the standby screen using the Message Alarm and Preview. (Settings, see p.138)
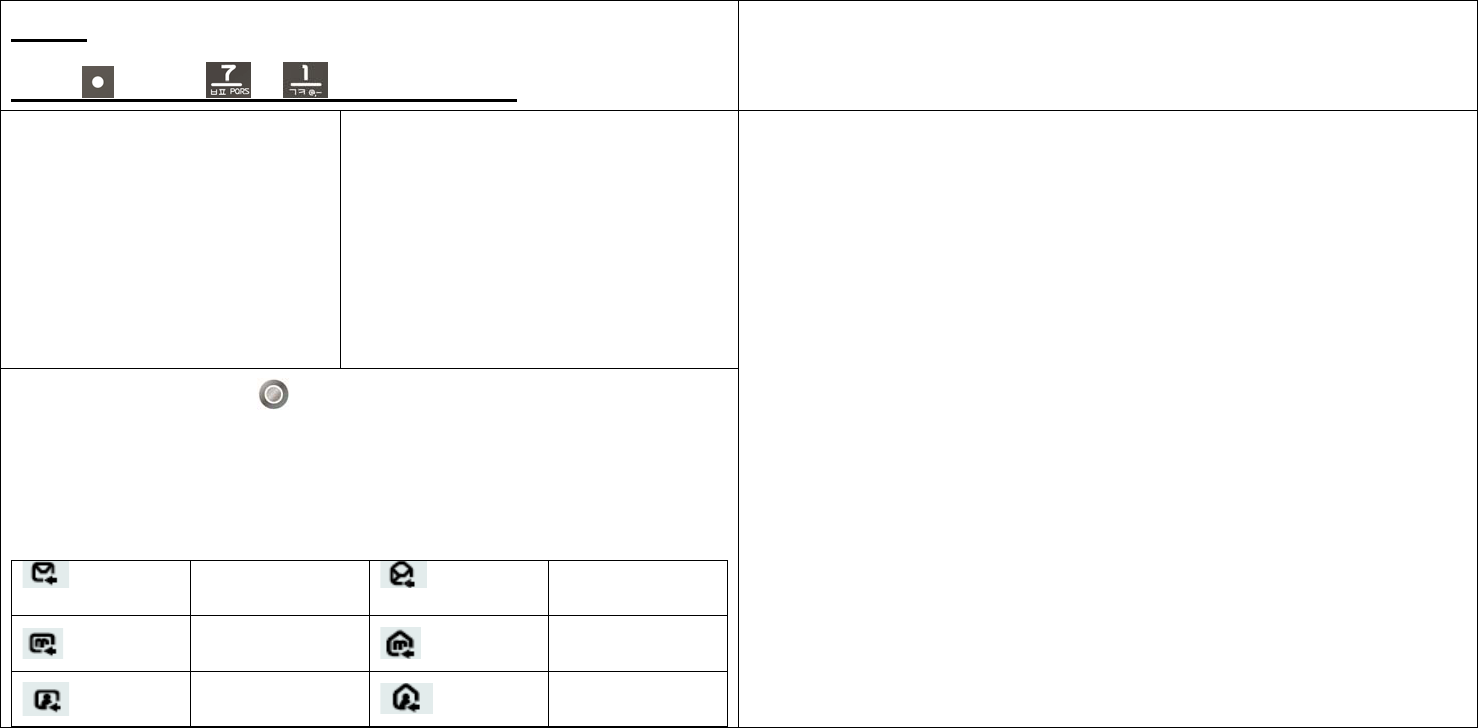
131R
INBOX
Press (Left) ▶ ▶ Select INBOX ▶
(Screen capture to be inserted) (Screen capture to be inserted)
· Select a message and press to read the message.
· The content attached to the message will be played automatically.
Icon description
Unconfirmed SMS
Message
Confirmed SMS
Unconfirmed MMS
Message
Confirmed MMS
Message
Unconfirmed Movie
Message
Confirmed Movie
Message
Menu description
Reply : You can reply the message to the sender.
Delete : You can delete the selected message.
Forward : You can forward the received message to other person.
Save Number : You can save the phone number indicated in the message.
Save Message: You can save the selected message in SAVED box.
Add to Spam List : Register a selected message as a spam number to block the
message.
Sort Message : You can sort the message by name/time/size.
Message Search : You can search and find the message by name/number/string.
Delete All : You can delete all the saved message in the inbox.
132L
Message Box(Cont’d)↘
OUTBOX
Press (Left) ▶ ▶ Select OUTBOX▶
Icon description
Temporarily saved message
SMS sent message
MMS sent message
(Screen capture to be inserted)
· You can manage sent message, draft message and failed message.
· Select the message and press to check the content of the message.
· While writing the message, press (Left) to save the message. You can press
to continue and rewrite the message.
Menu description
Delete : You can delete the selected message.
Forward : You can forward the received message to other person.
Save Number: You can save the phone number indicated in the message.
Save Message : You can save the selected message in SAVED box.
Delete All : You can delete all saved message in the inbox.
133R
SAVED
Press (Left) ▶ ▶ Select SAVED▶
New Message
The integrated MMS function enables you to attach content to the long text message and
send to the mobile phone or e-mail address.
Press (Left) ▶ ▶
(Screen capture to be inserted) (Screen capture to be inserted) (Screen capture to be inserted)
· You can move the selected messages from the inbox or outbox to the saved box.
· For outbox message, press (left) to delete, forward, save address, save to outbox
and delete all.
· For inbox message, press (left) to reply, delete, forward, move to inbox, save
address, voice call, spam number set and delete all.
· A message can be sent up to 20 people at a time.
· You can answer a call while you write a message and return to the message screen
after the call.
· You can send 3 image files (photo or picture) and 1 music and movie file.
· After writing a message, you can preview the message with (Right).
MMS is an SKT’s new multimedia transmission service integrating the text message ※
function and the color mail function.

134L
New Message (Cont’d)↘
Selecting BG
Select %%%%%% ▶
· You can select the various background.
Note
Cautions in writing messages
· Messages are sent as SMS in default. However In the following cases, they will be
changed to MMS and additional data service fee will be charged: message exceeding 40
Korean letters/80 English letters, font color changed, emoticon added, avatar added,
paper set, content attached (photo, movie, background music, etc.).
· If a message is changed to MMS, a message ‘Converted to MMS’ will be displayed on
the message window.
MMS fee
· The same date service fee will be charged for long text message, changed font color,
paper set, avatar set, and emoticon added between MMS and SMS. Additional service
fee is charged. No data call fee is charged for sending and receiving MMS. Visit SKT T-
World website (http://www.tworld.co.kr) or contact SKT Customer Center for further
information.
Image Background: You can select a image stored in the phone and set the image as a
background. (Press to select.)
Photo Background: You can select a photo stored in the photo album and set the photo
as a background. (Press to select.)
Color Background: You can select the background color of the letter paper. (Note that
the content might not be identified if the letters are written on the paper of the same
color.)
No Background: You can set the background as a white paper.
NATE Download: You can connect to NATE content shop and download the latest
contents.
135R
Selecting Avatar
Select %%%%%% ▶
Using menu in the message writing field
Press (Right) to change the writing mode (Korean, Symbol,
Number, English upper/lower case).
· The character or the photo of the sender is displayed on the message receiver’s phone.
Character Avatar: You can set a character in the photo album as a avatar. (Press
to select.)
Photo Avatar: You can set the photo in the photo album as a avatar.(Press to
select.)
No Avatar: No avatar will be displayed on the receiver’s phone.
An Avatar?: You can check the description on avatar.
NATE Download: You can connect to NATE content shop and download the latest
contents.
Menu description
Set Text Color Use or to set the color of the text.
Picture Emoticon Press to move page, and press the number button to
select the emoticon.
Text Emoticon Press to move page, and press the number button to
select the emoticon.
Add Number Select the phone number in the phonebook and press
to input the phone number automatically.
Used word You can store and use the frequently used word. You
can edit the word in settings.
Save to Draft box You can save the draft message in outbox.
136L
New Message (Cont’d)↘
Using menu in the attachment field
Press (Left) from
· If you select and press , you can connect to NATE content
shop and download the most latest contents.
· You can check and manage contents in Attachment box.
Using menu in the receiver field
Press (Left) from the receiver field
You can use the various functions such as search by name, recent addresses, search by
group, enter e-mail, read-reply, send receiver’s list by pressing (Left).
Menu description
Attach Photo You can attach the photo stored in the
attachment box.
Attach Video You can attach the video stored in the
attachment box.
Attach Music/Voice You can attach the music or voice stored in the
attachment box.
Attach Image You can attach the image downloaded from
NATE.
Take Photo You can take a photo and attach in the
message.
Record Video You can take a video and attach in the
message.
Record Voice You can record a voice and attach in the
message.
Menu description
Search by Name You can search a phone number by name.
Recent Address You can select a phone number from the recent call
history.
Search by Group You can search a phone number by group.
Enter E-mail You can enter e-mail address.
Read-Reply You can get reply message when the receiver check
your message.
Send Receivers’ list You can send the receivers’ list.
137R
Report Spam/Service
To promote convenience of the user and to prevent damage caused by illegal spam, you
can report the received spam messages to the spam handling center of Korea Information
Security Agency.
Press (Left) ▶ ▶
(Screen capture to be inserted) (Screen capture to be inserted)
Menu description
Spam Messages You can check received spam messages.
Report Msg. Spam You can report spam by selecting the
spam message and press (Right).
Report Voice Spam You can report spam by selecting the
spam number and press (Right).
Spam Settings You can block the number or message to
set as a spam.
Help You can check the guide for spam report.
Note
· Visit the spam handling center of Korea Information Security Agency
(www.spamcop.or.kr) for further information.
138L
Contents Box
You can manage and check attachment of the received MMS.
Press (Left) ▶ ▶
(Screen capture to be inserted) (Screen capture to be inserted)
· If you select and press , you can connect to NATE
content shop and download the latest contents.
· Press (Left) to use Send MMS, Set as Wallpaper, Rename, Delete, and Delete All
functions.
Menu description
Photo You can view and manage the attachable
photos.
Image You can store and manage the images
downloaded from NATE.
Music/Voice You can view and manage the attachable
music and voice files.
Movie You can view and manage the attachable
movie files.
NATE Shop You can connect to NATE content shop
and download the latest contents.
139R
Settings
You can set preferences for the message functions.
Press (Left) ▶ ▶
MMS Settings You can select and set various contents when writing messages.
· Background Settings: You can select the background of the message.
· Avatar Settings: You can send the character or photo with the message.
· Font Color Settings: You can select the font color.
· Photo Size Settings: You can set the size of photos transmitted from the phone via wireless Web (Internet).
· MMS mode change : You can set alarm when switching SMS to MMS message.
Signature Settings You can attach the designated sentence at the end of the message.
· Edit Signature: You can change font color or enter emoticon by pressing (Left), and change text input mode by pressing
(Right).
· Signature Setting: You can set the designated sentence at the end of the message.
MSG Noti. Setting You can set the alert cycle, alert volume, alert type, and alert in calls.
Msg. Notification You can set to display the message on the standby screen when a message is received.
Sent Msg. Auto Save You can set the autosave option for sent messages.
Spam Settings You can block the message from the designated phone number and string.
· Block Spam Number: You can check the number and use direct input, add number or delete all by pressing (Left).
· Block Spam Words: You can check the blocked string and use direct input and delete all by pressing (Left).
· Spam Msg. Setup: You can setup or release spam block.
Phrase Settings You can set the frequently used phrase.
140L
141R
Phonebook
Search Number………………. 142
Add New Contact ………………. 143
Call History/Time………………. 143
Management Phonebook……………… 144
Automatic Backup…………….. 145
142L
Search Number
You can search the saved phone number list.
Press (Left) ▶ ▶
(Screen capture to be inserted) (Screen capture to be inserted)
· You can check or edit phone numbers.
· If you press (Right) on the standby screen, ‘Speed Dial, ‘Search all’, ‘Group’ and
‘Consonant’’ will be displayed.
· You can change the category by pressing
· Select a phone number and press to make a call to the number.
Menu description
New Message Send message to selected number.
Cyworld Connect to the mobile cyworld.
Send/Connect Use Voice Message Call, Call Me Free, Number Via Message
and via Bluetooth functions for selected number. (Bluetooth,
see p.100)
Add New Contact Save the phone number in the phonebook.
Add Speed Dial Assign selected number as a speed dial.
Set as Primary # Assign a specific number as a primary number.
Delete Delete all or delete the selected number.
Select Select all or select a number.
Only available options will be displayed.※

143R
Add New Contact
You can save the phone numbers in the phone.
Press (Left) ▶ ▶
Call History/Time
You can view the call history and time.
Press (Left) ▶ ▶
(Screen capture to be inserted)
· You can save up to 2000 numbers.
· If you select ‘Add to Contact’ when saving
phone number on the standby screen, you
can add or modify the existing contact.
· Press (Left) to set the primary number,
and (Right) to assign a speed dial
number.
(Screen capture to be inserted) (Screen capture to be inserted)
Icon description
Note
· You can visit Motorola website (www.mymotorola.co.kr), download PC Sync
program, and save, edit, and send phone number to PC.
Name Group Mobile Home
Office Other Ringtone Image
e-mail, URL Anniversary
type
Anniversary
date
Memo
Fax
· The call time is counted from the point the ringer is generated, and charging begins after
the call is actually connected.
· If you are not subscribed to call display or the number is restricted, it will be displayed as
“No Number”.
144L
Management Phonebook
You can register a phone number you want to block and check the memory status of the
phonebook.
Block Calls
Press (Left) ▶ ▶ ▶
Memory Usage
Press (Left) ▶ ▶ ▶
(Screen capture to be inserted) (Screen capture to be inserted) (Screen capture to be inserted) (Screen capture to be inserted)
· Press (Right) to add a phone number to the block phone number list.
· Press to set/release and edit block calls.
Menu description
All Calls : You can block all incoming calls.
Hidden Numbers : You can block all restricted calls.
060* : You can block calls starting with 060 numbers.
· Press (Left) to reset memory.
Be aware that all the phone numbers will be deleted.

145R
Automatic Backup
Your phone updates the phonebook once a week to the server.
Press (Left) ▶ ▶
Menu description
(Screen capture to be inserted) (Screen capture to be inserted)
Upload Phonebook: Changed address will be uploaded on the server.
Download Phonebook: You can download saved address in the server. (Data service
fee will be charged when downloading.)
Phonebook Info: You can check the information of the most recent saved address book
to the server.
Move to NATE: You can preview or synchronize the recently updated phone book in the
phone or NATE. Also you can upload/download the phonebook from/to the phone.
Settings: You can set various preferences such as setting the
password, automatic phonebook automatic day, time,
restore deleted phonebook and update.
Help: You can view guidelines on the phone automatic backup services.
Note
· In order to use automatic backup service, you have to register first and additional service
fee will be charged. Contact SKT Customer Center
146L
147R
Settings
Phone Settings …………… 148
Call Settings ………………… 149
Data Network Settings……………… 150
Moto Customer Service……………. 150
My Device Info……………….. 151
148L
Phone Settings
Integrated menu for phone setting for further information.
언어선택/Language
Press (Left) ▶ ▶ ▶
·You can select the language to be used in the phone.
(Language : Korean/English)
Airplane Mode
Press (Left) ▶ ▶ ▶ Enter password▶
· In airplane mode, you can use all the mobile phone functions (MP3, game, organizer).
Except the communication services (sending/receiving call/message, network
communication including internet).
Date/Time Settings
Press (Left) ▶ ▶ ▶
· You can set current time in the phone.
· If you set to manual, you have to input the time or select city info and summer
time(DST).
Auto : Set the time automatically from service provider.
Manual : The user inputs the information manually.
Lock
Press (Left) ▶ ▶ ▶
·You can set the password of the phone to prevent unapproved use.(The default
password is ‘0000’)
Change Password
Press (Left) ▶ ▶ ▶
· You can change the password.
· Be sure to remember your password.
If you lose your password, you have to visit the service center in person with the personal
identification.
· Motorola takes no responsibility for any damage caused by exposed password.
Powersave
Press (Left) ▶ ▶ ▶
· When the folder is opened without using it, backlight turns off and change to powersave
mode.

149R
Call Settings
Integrated menu for call setting.
june setting
Press (Left) ▶ ▶ ▶
· You can set the june contents box functions in the june contents box menu.
Auto Area Code
Press (Left) ▶ ▶ ▶
· You can set an area code that you use frequently.
· If you enter a number starting with ‘0’ on the standby screen after setting an auto area
code, the area code will not displayed and only the number you entered will be displayed.
(Ex: Mobile phone number, international call number and other area codes)
· If you select ‘Off’ in area code list, the area code display will be cleared.
· You can enter up to 5 numbers for auto area code.
Reset
Press (Left) ▶ ▶ ▶
· You can reset the phone to factory default.
· To reset the phone, you need to input the password.
· The phone will be automatically turned off and rebooted. If the phone fails to reboot,
press to turn on the power.
· You can view function description of the item you wish to reset by pressing (Left).
Answer options
Press (Left) ▶ ▶ ▶
· You can set the call answer mode.
Folder Open : Receive a call when opening the folder.
Any Key : Receive a call when pressing any buttons except .
[Send] Key Only : Press to receive calls.
After 3 Seconds : The call is connected automatically in 3 seconds after the ringtone.
Abroad Calls restrict
·You can restrict abroad outgoing calls.
700/600 Calls restrict
·You can restrict 700/600 outgoing calls.

150L
Data Network Settings
Integrated menu for data network setting.
Press (Left) ▶ ▶ Enter password▶
Moto Customer Service
You can receive the service guide about the phone.
Call Center
Press (Left) ▶ ▶ ▶
(Screen capture to be inserted) (Screen capture to be inserted)
Settings You can allow/disallow call while using NATE or modem and
set the modem mode.
NATE Setting You can change NATE preferences.
Home URL : You can set the initial access address for
wireless internet.
Proxy : If the service provider extends the proxy, and adds or
deletes address, you can set the proxy at your own
discretion.
Note
· Proxy is the server located between the user and the service
server to speed up date transmission. When the users
request a specific data, the data in the proxy, rather than the
concerned server, are sent to the user.
1xEV-DO Mode You can select 1x only or EV-DO.
· Representative number and business hours of Motorola
Customer Call Center will be displayed.
· Press to place a call to the customer center.
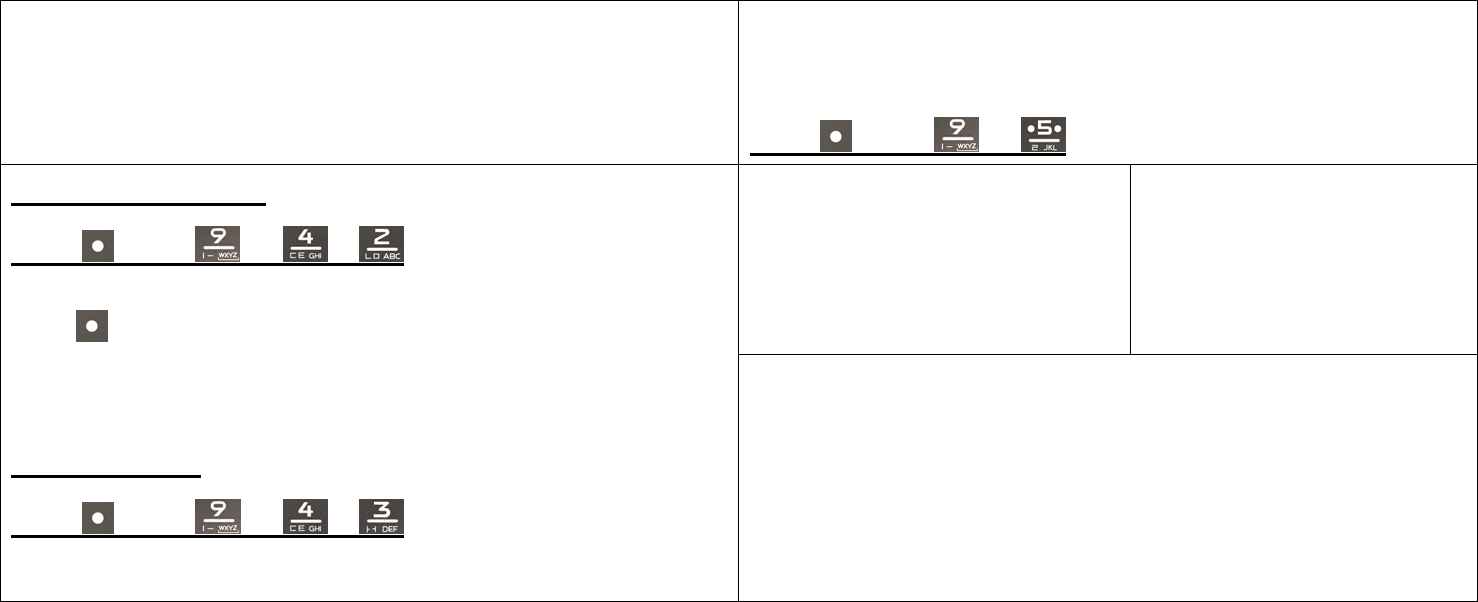
151R
My Device Info
You can check your device information such as model name, SW version, serial number
and phone number.
Press (Left) ▶ ▶
(Screen capture to be inserted) (Screen capture to be inserted)
Search Service Center
Press (Left) ▶ ▶ ▶
· Select a Service Center and press to make a call.
· Press (Left) to save the local customer center number.
Troubleshooting
Press (Left) ▶ ▶ ▶
· You can check the solution against phone failure.
·You can register your information such as name, home number, office number, photo, e-
mail address, home address and memo..
152L
153R
Appendix
Accessories …………….. 154
Troubleshooting …………….. 154
Spec and Feature…………… 155
Authentic Label……….. 155
Specific Absorption Rate Data……………… 156
Collecting wasted-mobile phones…………. 157
FCC Notice to User ……………… 158
European Union Directives Conformance Statement……………. 159

154L
Accessories Troubleshooting
Standard-type battery
Stereo earphone
Multi adapter
USB data cable
Car charger
Travel charger
Bluetooth headset
You can purchase optional items at the nearest Motorola service center or accessory
shop. Contact the service provider or visit Motorola website (www.mymotorola.co.kr) for
details.
Nothing is displayed on the screen
· Check the battery.
No antenna bar is displayed on the screen
· Move to other place and then attempt a call again.
It sounds ‘Toot-Toot’ when a call is placed
· There is no communication channel available or your phone has failed in communicating
with a base station. Press to clear the call and press to redial the number.
The charging lamp of the charger blinks in red
· Check the battery position or clean the terminals before reattempting charging. If the
lamp keeps blinking, contact the nearest service center.
Battery operating time does not comply with the User Manual
· The battery operating time reduces slowly as the battery repeats charging and
discharging. The operating time reduces rapidly if the battery is left in a cold or hot place
for a long time.
Malfunction or failure to power On
· Remove the battery and reinstall it, and then turn the power on.

155R
Spec and Feature Authentic Label
Wireless communications
service
Bluetooth
Transmit frequency 824.64~848.37MHz 2402~2480MHz
Receive frequency 869.64~893.37MHz 2402~2480MHz
TX power 250mW 0.1mW
Number of channel 20CH 79CH
Type of emission G7W F1D
Modulation system QPSK/OQPSK GFSK
Communication mode Duplex operation
system
Semi-duplex
operation system
Oscillation PLL
Power DC 3.7V
Exterior, weight 95(H)mm x 50(W)mm x 14.5(T)mm, 105g
Relative humidity -20℃~+50℃, 0%~95%
1. Name of the model : Wireless communications service device (V13)
2. Authentication number : MOT-C-V13-0909
3. Authentication Trade name : Motorola Korea Inc.
4. The date of manufacture : 2009.10
5. Manufacturer/country : Motorola Korea Inc. / China
Notice to Users
The manufacturer and the installer are not allowed to provide the service that affects ※
people’s lives since there can be an interference of in this equipment.

156L
Specific Absorption Rate Data
This model wireless phone meets the government’s requirements for exposure to radio waves.
Your wireless phone is a radio transmitter and receiver. It is designed and manufactured not to exceed limits for exposure to radio frequency (RF) energy set by the Federal Communications
Commission (FCC) of the U.S. Government and by the Canadian regulatory authorities. These limits are part of comprehensive guidelines and establish permitted levels of RF energy for the
general population. The guidelines are based on standards that were developed by independent scientific organizations through periodic and thorough evaluation of scientific studies. The
standards include a substantial safety margin designed to assure the safety of all persons, regardless of age or health. The exposure standard for wireless mobile phones employs a unit of
measurement known as the Specific Absorption Rate, or SAR. The SAR limit set by the FCC and by the Canadian regulatory authorities is 1.6 W/kg.1 Tests for SAR are conducted using
standard operating positions accepted by the FCC and by Industry Canada with the phone transmitting at its highest certified power level in all tested frequency bands. Although the SAR is
determined at the highest certified power level, the actual SAR level of the phone while operating can be well below the maximum value. This is because the phone is designed to operate at
multiple power levels so as to use only the power required to reach the network. In general, the closer you are to a wireless base station, the lower the power output. Before a phone model is
available for sale to the public in the U.S. and Canada, it must be tested and certified to the FCC and Industry Canada that it does not exceed the limit established by each government for safe
exposure. The tests are performed in positions and locations (e.g., at the ear and worn on the body) reported to the FCC and available for review by Industry Canada. The highest SAR value for
this model phone when tested for use at the ear is 0.75 W/kg, and when worn on the body, as described in this user guide, is 1.36 W/kg. (Body-worn measurements differ among phone models,
depending upon available accessories and regulatory requirements). While there may be differences between the SAR levels of various phones and at various positions, they all meet the
governmental requirements for safe exposure. Please note that improvements to this product model could cause differences in the SAR value for later products; in all cases, products are
designed to be within the guidelines.
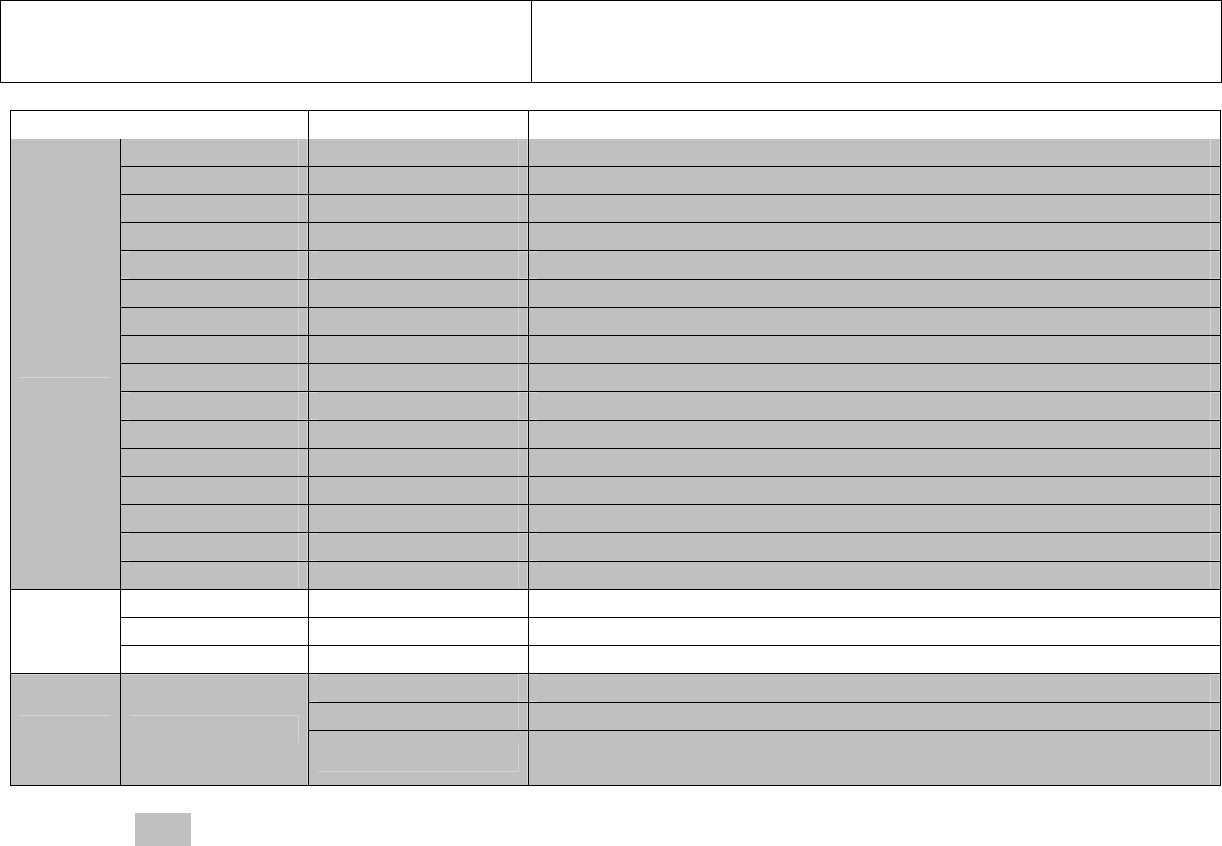
157R
Motorola service Center
☎
Motorola mobile phone consultant and A/S inquiry Nation wide 1588-6633
Please tell us your product model, error status and your contact number. We will try our
best to solve your questions and provide quick service.
Region Service Center Location
Gangnamgu Samseong station 1 Floor Ildong Building 968-5 Daechi-dong Gangnam-gu Seoul
Gangbukgu Gangbuk 202ho 2 Floor Gadeuntower Building 446-13 Beon1-dong Gangbuk-gu Seoul
Gangnamgu Seolleung 703ho Hwasin Building 705-22 Yeoksam-dong Gangnam-gu Seoul
Gangdonggu Gangdong 2 Floor Yangseong Building 77-37 Seongnae-dong Gangdong-gu Seoul
Eunpyunggu Eunpyung 187-38ho Daejo-dong Eunpyeong-gu Seoul
Jungnanggu Jungnang 2 Floor 115-13 Sangbong-dong Jungnang-gu Seoul
Gangseogu Gangseo 401ho Daeseong Building 1065-14 Hwagok3-dong Gangseo-gu Seoul
Gwanakgu Gwanak 5 Floor Jeongdobilding 1422-6 Sillim-dong Gwanak-gu Seoul
Gwangjingu Technomart 6 Floor Samudong Technomart Guui-dong Gwangjin-gu Seoul
Dongdaemungu Dongdaemun 1 Floor Dongeun Building 89-53ho Sinseol-dong Dongdaemun-gu Seoul
Dongjakgu Dongjak 2 Floor Osong Building 86-1 Sadang-dong Dongjak-gu Seoul
Seochogu Gangnam 6 Floor Eundo Building 737-19beonji Banpo-dong Seocho-gu Seoul
Seodaemungu Sinchon 5 Floor Daewon building 72-25,26 Changcheon-dong Seodaemun-gu Seoul
Jongno Jongno 4 Floor Tongil Building 12beonji Jongno2-ga Jongno-gu Seoul
Yeongdeugpogu Yoeongdeungpo 9 Floor Annam Building 47-3 7ga Yeongdeungpo-dong Yeongdeungpo-gu Seoul
Seoul
Yongsangu Yongsan I park mall 3ho 8 Floor Jeonjajeonmunjeom I Park mall 40-999 Hangangno3-ga Yongsan-gu Seoul
Namdonggu Incheon namdong 3 Floor 6-dong Nammun Building 1131beonji 1-dong Guwol Namdong-gu Incheon
Bupyeonggu Bupyung 1 Floor Motorola service center 374-1 Bupyeong4-dong Bupyeong-gu Incheon
Incheon
Namgu Juan 5 Floor Daedong Building 133-3 Juan-dong Nam-gu Incheon
Dongsuwon 401ho Jowon Building 1046-2 Ingye-dong Paldal-gu Suwon-si Gyeonggi-do
Suwon station 3 Floor Sammyeong Building 90-17 2ga Maesallo Gwonseon-gu Suwon-si Gyeonggi-do
Gyeonggi Suwon
Buksuwon 203ho Dongyangparagon 2 Floor 499-3 Songjuk-dong Jangan-gu Suwon-si Gyeonggi-
do
Background with - - color is designated motorola wasted mobile phone collecting center. They may change without prior notice.
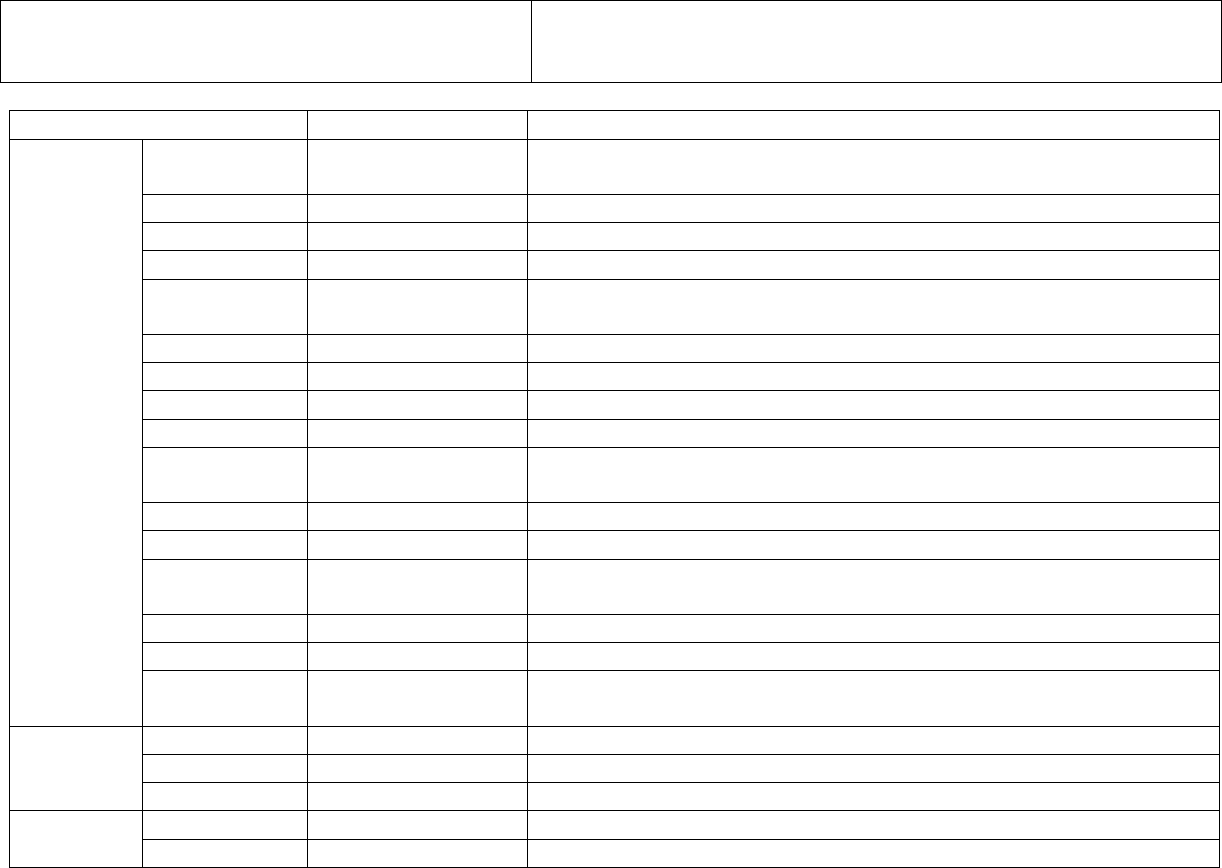
158 L
Motorola service Center
☎
Motorola mobile phone consultant and A/S inquiry Nation wide 1588-6633
Please tell us your product model, error status and your contact number. We will try our
best to solve your questions and provide quick service.
Region Service Center Location
Ahnyang Ahnyang 2 Floor Shopping mall building 1beonga 674-26 Anyang1-dong Manan-gu Anyang-si
Gyeonggi-do
Seongnam Seongnam 4761beonji Sujin2-dong Sujeong-gu Seongnam-si Gyeonggi-do
Bucheon Bucheon 207ho 2 Floor 1058-3 Jung3-dong Wonmi-gu Bucheon-si Gyeonggi-do
Goyang Ilsan 211ho 110-2beonji Juyeop-dong Ilsan-gu Goyang-si Gyeonggi-do
Goyang Hwajeong 403ho Hyeonchang Building 978 Hwajeong-dong Deogyeong-gu Goyang-si Gyeonggi-
do
Uijeongbu Uijeongbu 2 Floor Gwanju building 567-2 Uijeongbu2-dong Uijeongbu-si Gyeonggi-do
Guri Guri 406ho 4 Floor Dongwon play station building Inchangdong 676-6 Guri-si Gyeonggi-do
Ansan Ansan 2 Floor Namyang Building 541-2 Gojan-dong Danwon-gu Ansan-si Gyeonggi-do
Gunpo Sanbon 201ho 2 Floor Sinmyeongsan Building 1142-6 Sanbon-dong Gunpo-si Gyeonggi-do
Gwangmyung Gwangmyeong 306ho 3 Floor Leaders Building 158-195ho Gwangmyeong-dong Gwangmyeong-si
Gyeonggi-do
Pyeongtaek Pyeongtaek 2 Floor 62-17beonji Pyeongtaek-dong Pyeongtaek-si Gyeonggi-do
Icheon Icheon 2 Floor 148-11beonji Changjeon-dong Icheon-si Gyeonggi-do
Yongin Yongin 302ho 3 Floor Sincheon Building 241-5beonji Samga-dong Cheoin-gu Yongin-si
Gyeonggi-do
Gimpo Gimpo 2 Floor Geonjae Building 858beonji Bukbyeon-dong Gimpo-si Gyeonggi-do
Osan Osan 402ho Osan-green Plaza 925-6 Osan-dong Gyeonggi-do
Gyeonggi
Bundang Bundang 6 Floor Aubi Building Seohyeon 272-1 Seohyeon-dong Bundang-gu Seongnam-si
Gyeonggi-do
Donggu Daejeon donggu 2 Floor Yongjeon Building 172-4 Yongjeon-dong Dong-gu Daejeon
Junggu Daejeon junggu Motorola 2 Floor Socheong1beonga Building 5-2 Seonhwa-dong Jung-gu Daejeon
Daejeon
Seogu Daejeon seogu 2 Floor Hanyang Plaza 835beonji Tanbang-dong Seogu Daejeon
Cheonan Cheonan 1 Floor Wonhong Building 135-19 Wonseong-dong Cheonan-si Chungcheongnam-do
Chungnam
Nonsan Nonsan 605-6ho Chwiam-dong Nonsan-si Chungcheongnam-do
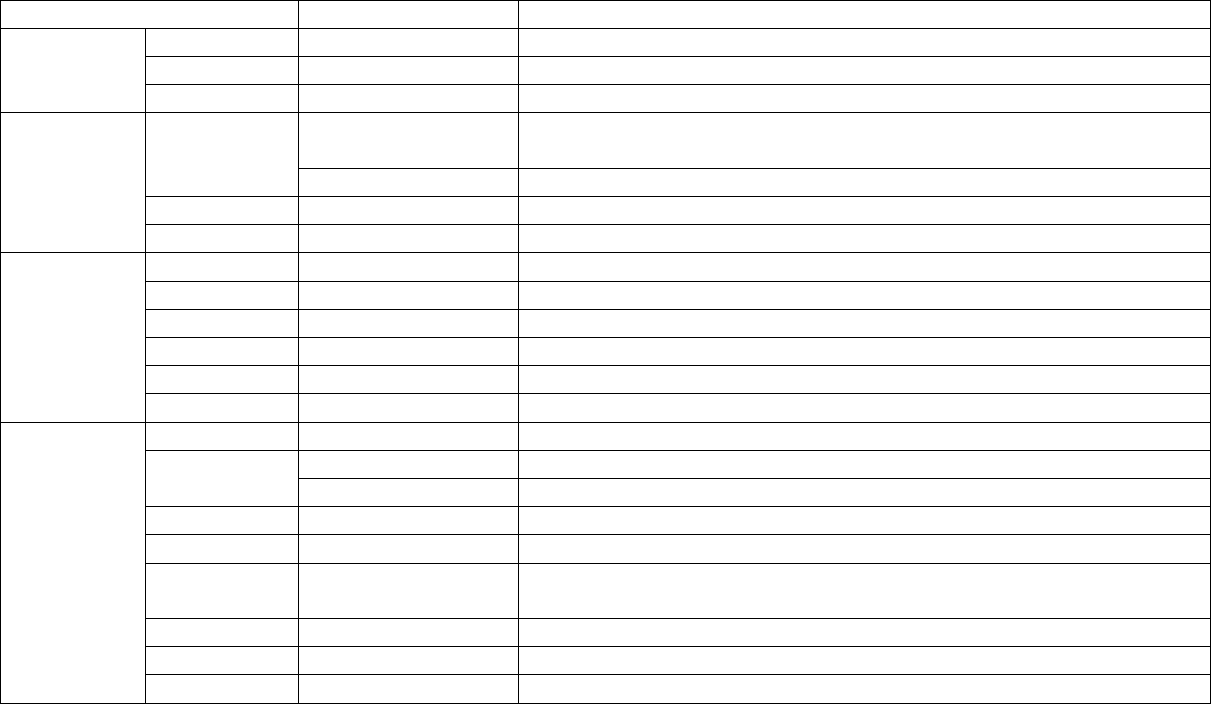
159 R
Region Service Center Location
Gongju Gongju 2 Floor 228beonji Jung-dong Gongju-si Chungcheongnam-do
Seosan Seosan 2 Floor 126-18 Eupnae-dong Seosan-si Chungcheongnam-do
Chungnam
Asan Asan 111-3ho Bangchuk-dong Asan-si Chungcheongnam-do
Cheongju heungdukgu 2 Floor 1053beonji Bongmyeong1-dong Heungdeok-gu Cheongju-si Chungcheongbuk-
do
Cheongju
Cheongju sangdanggu 112-7 Munhwa-dong Sangdang-gu Cheongju-si Chungcheongbuk-do
Chungju Chungju 1042 Munhwa-dong Chungju-si Chungcheongbuk-do
Chungbuk
Jecheon Jecheon 69-9 2ga Jungangno Jecheon-si Chungcheongbuk-do
Namgu Busan namgu 2 Floor 73-4ho Daeyeon-dong Nam-gu Busan
Dongraegu Busan dongraegu 1436-5beonji Oncheon2-dong Dongnaegu Busan
Sasanggu Busan sasanggu 502ho Cheongho Building 547-1 Gwaebeop-dong Sasanggu Busan
Jingu Busan jingu 2 Floor Myeongseong Building 870-12beonji Beomcheon1-dong Jingu Busan
Junggu Busan junggu 3 Floor Dongnam Building 15-5 4ga Nampo-dong Junggu Busan
Busan
Haeundaegu Busan haeundaegu 2 Floor 586-23beonji U-dong Haeundaegu Busan
Masan Masan 2 Floor SK telecom 151-25 Yangdeok2-dong Masan-si Gyeongsangnam-do
Ulsan junggu 2 Floor 226-43 Seongnam-dong Junggu Ulsan
Ulsan
Ulsan 2 Floor Jungang Building 568-11 Sinjeong3-dong Namgu Ulsan
Gimhae Gimhae 613-12 Buwon-dong Gimhae-si Gyeongsangnam-do
Jinju Jinju 1 Floor 60-11beonji Jangdae-dong Jinju-si Gyeongsangnam-do
Changwon Changwon 105-1ho 1 Floor Newolympia-sangga 95-2 Jungang-dong Changwon-si
Gyeongsangnam-do
Yangsan Yangsan 462-10 Bukbu-dong Yangsan-si Gyeongsangnam-do
Tongyeong Tongyeong 5-26beonji Buksin-dong Tongyeong-si Gyeongsangnam-do
Gyeongnam
Jinhae Jinhae 761-288 Yeojwa-dong Jinhae-si Gyeongsangnam-do
160L
Motorola service Center
☎
Motorola mobile phone consultant and A/S inquiry Nation wide 1588-6633
Please tell us your product model, error status and your contact number. We will try our
best to solve your questions and provide quick service.
Region Service Center Location
Junggu Jungdaegu 2 Floor Gyeongilgaebal Building 2118-2 Namsan3-dong Junggu Daegu
Donggu Dongdaegu 502ho Silla Building 19-4beonji Sincheon3-dong Donggu Daegu
Bukgu Bukdaegu 2 Floor 281-2 Nowon2ga Bukgu Daegu
Daegu
Seogu Seodaegu 5 Floor Dongsan Building 458-48beonji Naedang4-dong Seogu Daegu
Gyeongsan Gyeongsan 2 Floor 247-6beonji Siji-dong Suseong-gu Daegu-si Gyeongsangbuk-do
Gumi Gumi 1 Floor 189-22 Wonpyeong2-dong Gumi-si Gyeongsangbuk-do
Andong Andong 333-102 Dangbuk-dong Andong-si Gyeongsangbuk-do
Kyungju Kyungju 121-21 Noseo-dong Kyungju-si Gyeongsangbuk-do
Youngchun Youngchun 1 Floor 183-18beonji Yasa-dong Youngchun-si Gyeongsangbuk-do
Gyeongbuk
Pohang Pohang 732-15beonji Daeheung-dong Buk-gu Pohang-si Gyeongsangbuk-do
Gwangsangu Gwangju gwangsangu 1 Floor 906-6beonji Singa-dong Gwangsangu Gwangju Jeollanam-do
Namgu Gwangju namgu 395-16beonji Bangnim-dong Namgu Gwangju Jeollanam-do
Gwangsangu Gwangju cheomdan 209ho Central building 867-1 Wolgyedong Gwangsangu Gwangju
Bukgu Gwangju bukgu 480-14beonji Sinan-dong Bukgu Gwangju Jeollanam-do
Gwangju
Seogu Gwangju seogu 647-14 Nongseong-dong Seogu Gwangju Jeollanam-do
Mokpo Hadang 880beonji Sang-dong Mokpo-si Jeollanam-do
Suncheon Suncheon 1 Floor Bonghwa Building 1686-9beonji Jorye-dong Suncheon-si Jeollanam-do
Yeosu Yeosu 576-7beonji Mipyeong-dong Yeosu-si Jeollanam-do
Jeonnam
Haenam Haenam 438-3ho Hae-ri Haenam-eup Haenam-gun Jeollanam-do
Jeonju kyungwon 2 Floor 33-10 3ga Gyeongwon-dong Wansan-gu Jeonju-si Jeollabuk-do
Jeonbuk Jeonju
Jeonju keumam 711-1 Geumam-dong Deokjingu Jeonju Jeollabuk-do
161R
Region Service Center Location
Iksan Iksan 3ga 53-1 Jungang-dong Iksan-si Jeollabuk-do
Gunsan Gunsan 2 Floor 845-11 Naun-dong Gunsan-si Jeollabuk-do
Jeongeup Jeongeup 44-59beonji Yeonji-dong Jeongeup-si Jeollabuk-do
Namwon Namwon 1048-2beonji Hyanggyo-dong Namwon-si Jeollabuk-do
Jeonbuk
Gimjae Gimjae 178-13 Yochon-dong Gimje-si Jeollabuk-do
Chuncheon Chuncheon 661-21 Hyoja2-dong Chuncheon-si Gangwon-do
Gangneung Gangneung 134-9 Gyo2-dong Gangneung-si Gangwon-do
Wonjoo Wonjoo 7 Floor Jiam Building 193-6 Ilsan-dong Wonju-si Gangwon-do
Sokcho Sokcho Hannam Building1 Floor 932-4beonji Gyo-dong Sokcho-si Gangwon-do
Kangwon
Donghae Donghae 3 Floor Saemsil Building Saemsil 851beonji Cheongok-dong Donghae-si Gangwon-do
Jeju Jeju Jeju 4 Floor Jeongju Building 1060-14beonji Ido2-dong Jeju-si
Location and address of the service center may change without notice. For detail A/S information please visit our website (http://www.motorola.com/kr/consumer).
Customer Support Center
Mobile Phone Customer Support Center SK Telecom Customer Center
· Mon ~ Fri 9:00 ~ 18:00 / Sat 9:00 ~ 13:00
(Business Hours 9:00 ~ 18:00(Weekdays))
· Toll-free (Telephone) 1588-6633
Motorola Website
· http://www.motorola.com/kr/consumer
· Customer Center 1599-0011(Paid service) / From your
mobile phone 114(Free of charge)
· MCustomer Center From your mobile phone 11
4 + NATE button(Free of charge)
· Internet www.tworld.co.kr
· Global Roaming 1599-2011(Paid service)
· T MAP Navigation 1588-4011(Paid service) / From your mobile phone 1522(Free of charge)
· Billing Management center 1599-0500(Paid service)

162L
Collecting wasted-mobile phones
The collected wasted-mobile phones are utilized as resources and resides are treated ecologically. Motorola is willing to do its best to protect environment not only today but in the future also. We kindly invite you to participate in this movement
for the protection of environment.
Motorola phone collecting centers
Wasted-mobile phones
collecting centers
▶
Recycling Plant
▶
Recycling
Recycling of wasted-mobile phone
- Return the old one to the distributor when you purchase a new phone.
- Return your mobile phone to a representative of mobile service provider.
- Visit a near-by representative of the manufacturer or A/S center.
- Utilize a collecting bag with no charger (arranged in provincial office, distributor, representative)
Guidelines for collecting discarded Motorola mobile phones
Please think of environment when you discard your phones and accessories. Do not discard old mobile phones or accessories such as battery pack, battery charger, etc. together
with household waste. In some countries and areas, they have established a system to treat useless electronic and electrical products and batteries. Please contact your area for
more information. If there is no appropriate system available, please send useless mobile phone and accessories to a near-by Motorola service center.
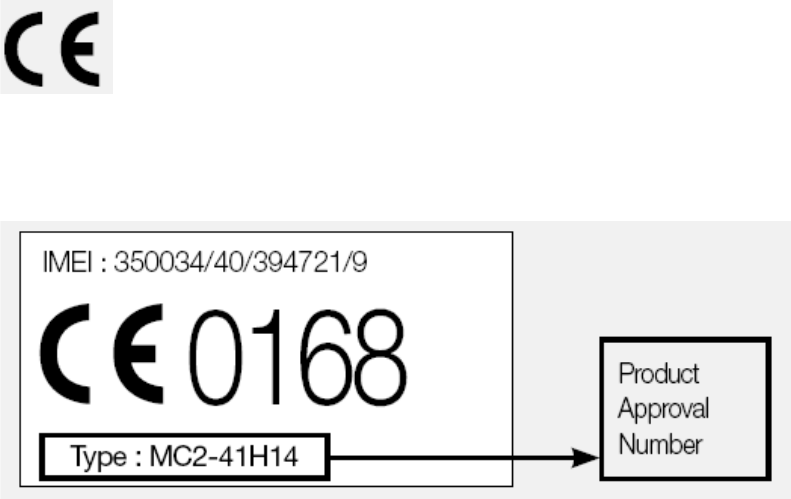
163R
European Union Directives Conformance Statement
Hereby, Motorola declares that this product is in compliance with:
The essential requirements and other relevant provisions of Directive 1999/5/EC.
All other relevant EU Directives
The above gives an example of a typical Product Approval Number.
You can view your product’s Declaration of Conformity (DoC) to Directive 1999/5/EC (to R&TTE Directive) at www.motorola.com/rtte. To find your DoC, enter the product Approval Number from your product’s label in
the “Search” bar on the web site.