Motorola Mobility T5EL1 Portable Cellular Transceiver (AMPS/TDMA) User Manual UG C330 GSM
Motorola Mobility LLC Portable Cellular Transceiver (AMPS/TDMA) UG C330 GSM
UserManual.wiki
>
Motorola Mobility
>
T5EL1 User Manual
Exhibit 8 Users Manual
Navigation menu
Upload a User Manual
Namespaces
Wiki Guide
HTML
PDF
Info
Views
User Manual
Discussion / Help
Navigation


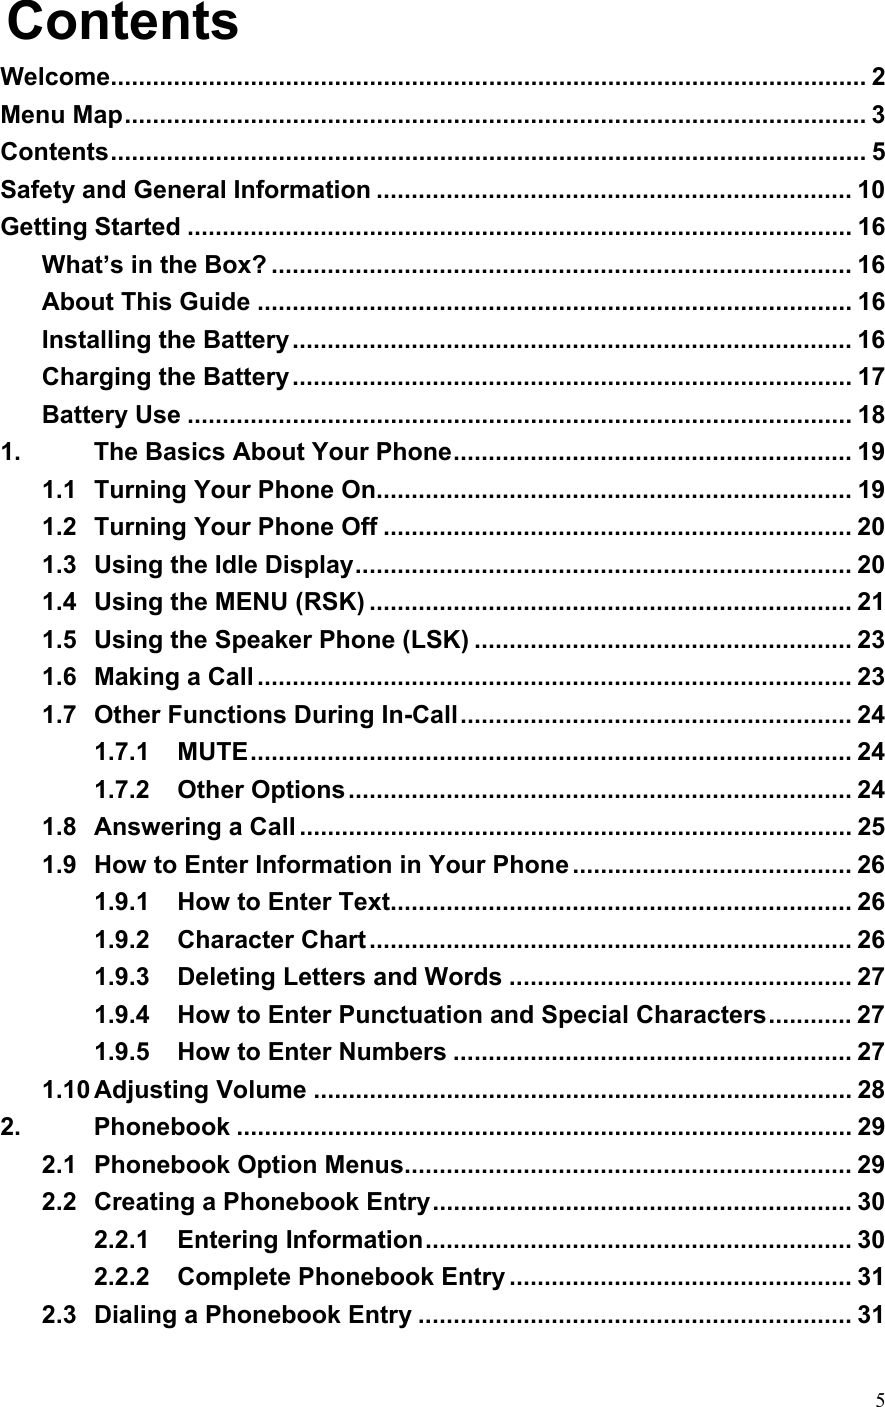


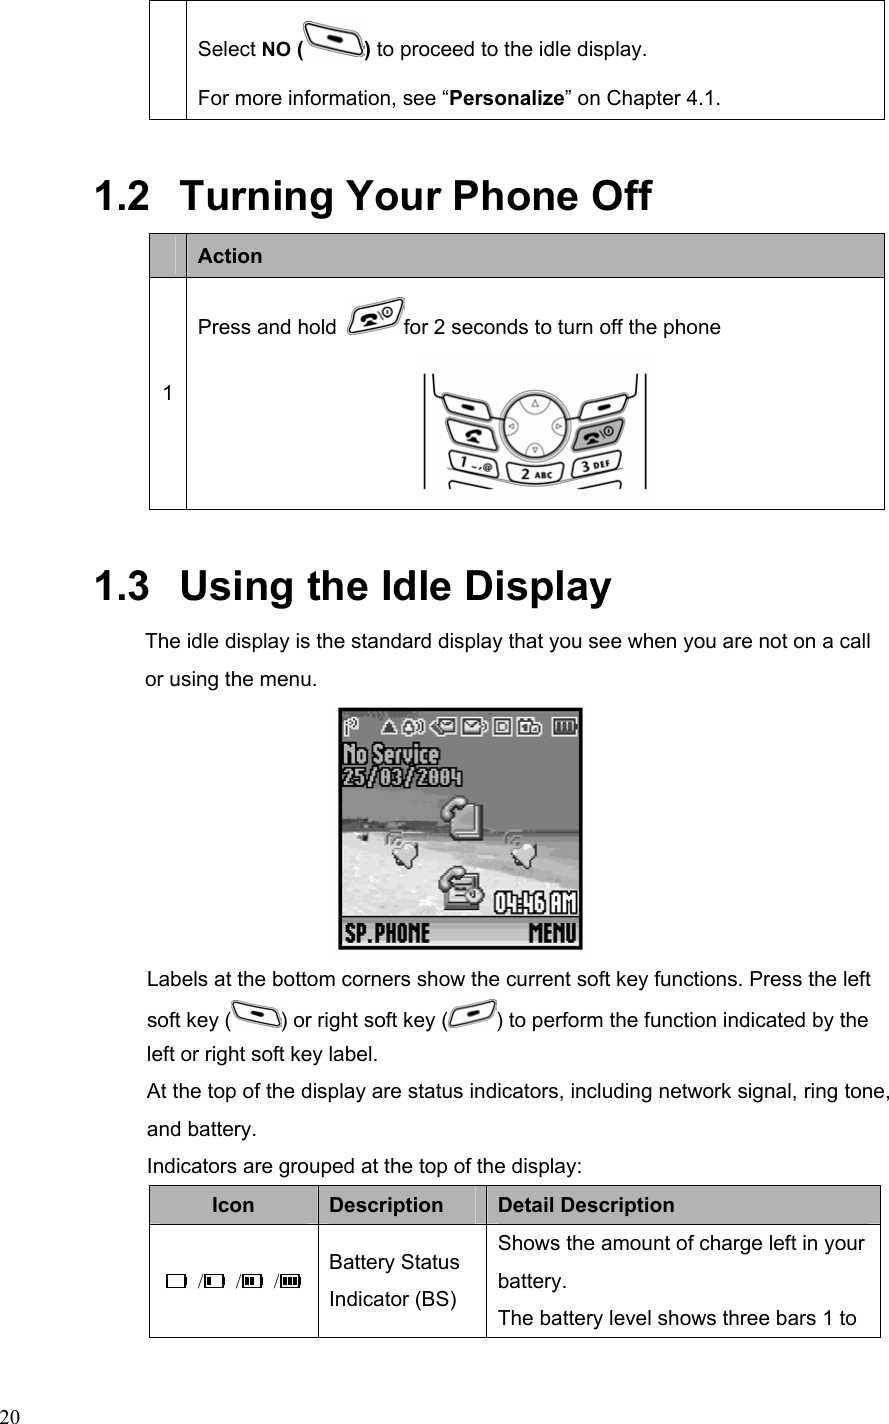


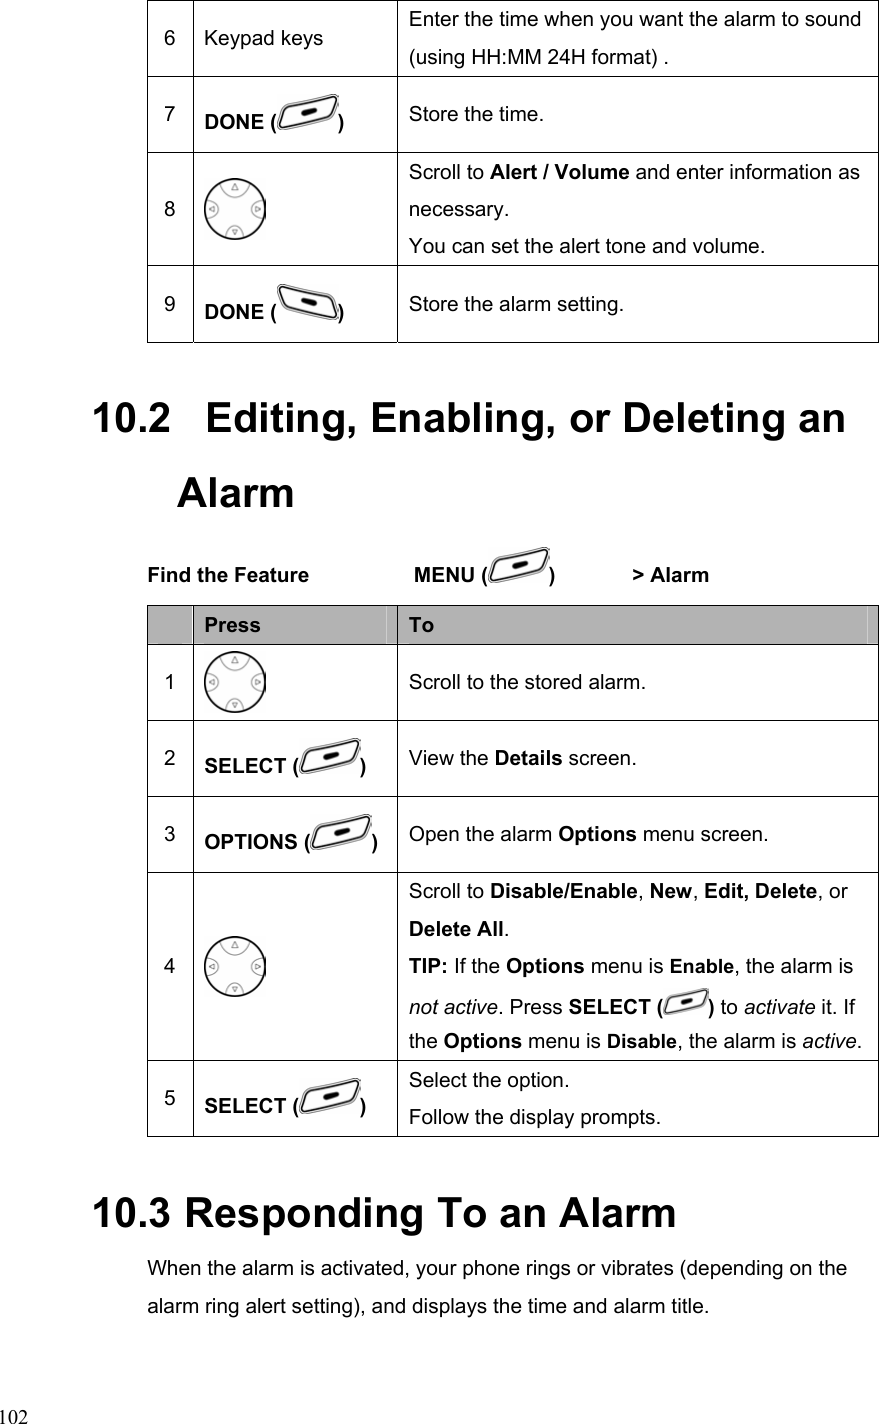
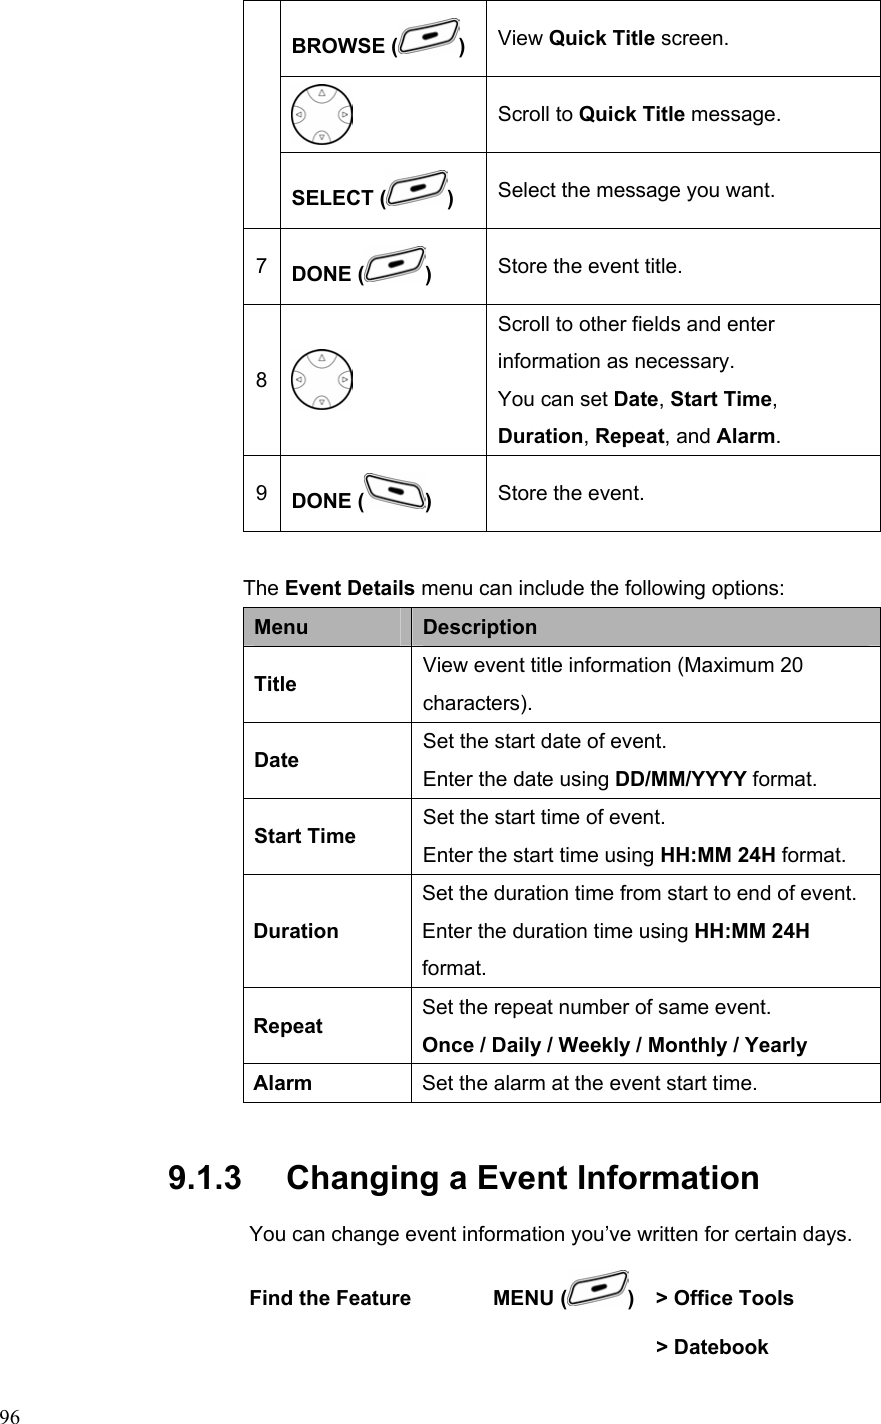
![303 Delete Delete single entry. 4 Delete Name Delete the complete entry of the selected name. 5 Send Msg Send a SMS message. 6 Ph Book Capacity Show the memory meter which fills up as entries are made. 7 Delete All Delete all phone book entries. 8 Sort By Sort entries by name or speed dial number. 2.2 Creating a Phonebook Entry 2.2.1 Entering Information To create a phonebook entry: Find the Feature MENU ( ) > Phonebook Action If you have no existing phonebook entry, press SELECT on [New Entry]. or If your phonebook already includes entries: 1. Use the 4 steps in chapter 2.1. 2. Scroll to New. 3. Press SELECT ( ). You can enter the following information for a phonebook entry. Item Description Name Entry’s name (Maximum 32 characters). Email Entry’s e-mail address (Maximum 48 characters). No. Entry’s phone number (Maximum 40 characters). Type Work / Home / Main / Mobile / Fax / Pager Speed No Entry’s default speed dial number. Ringer ID Select to set a distinctive ringer alert for the phone number. Your phone uses the alert to notify you when you](https://usermanual.wiki/Motorola-Mobility/T5EL1/User-Guide-429113-Page-31.png)

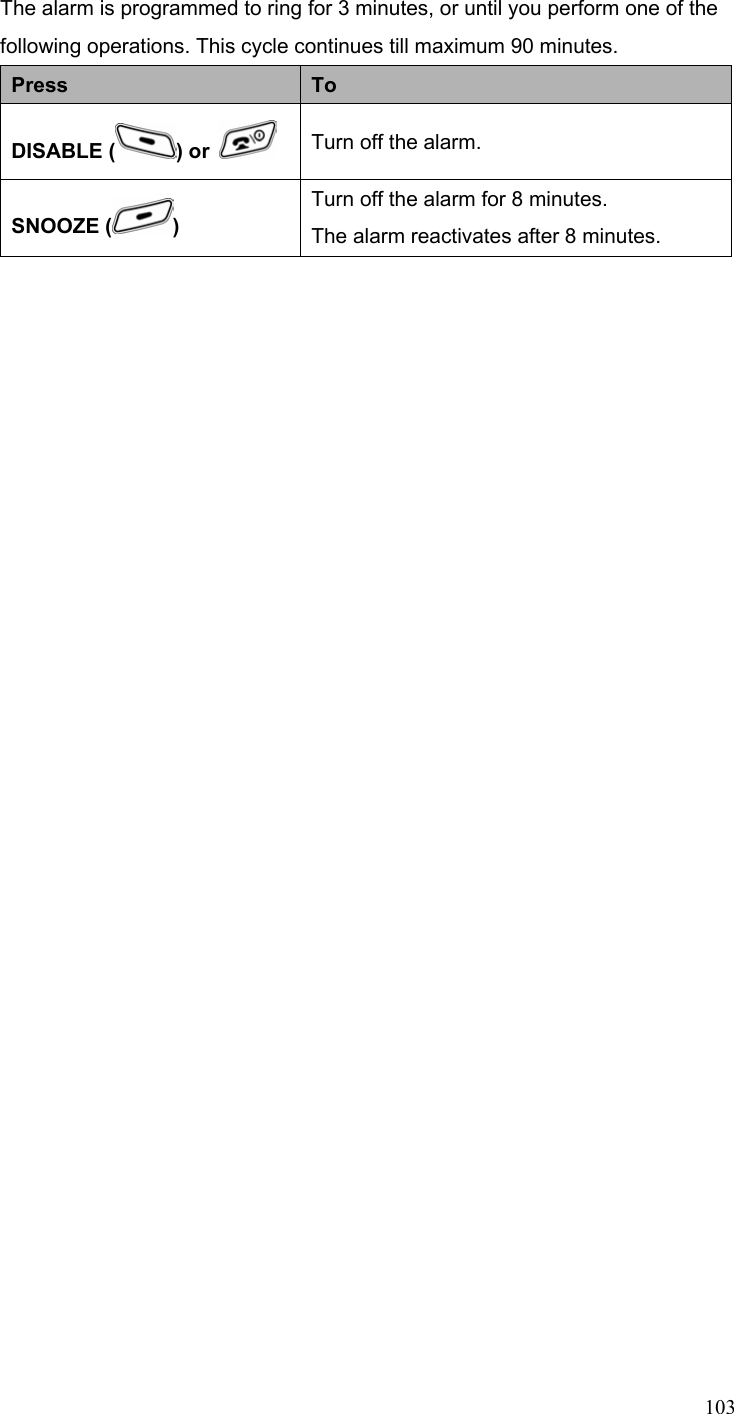
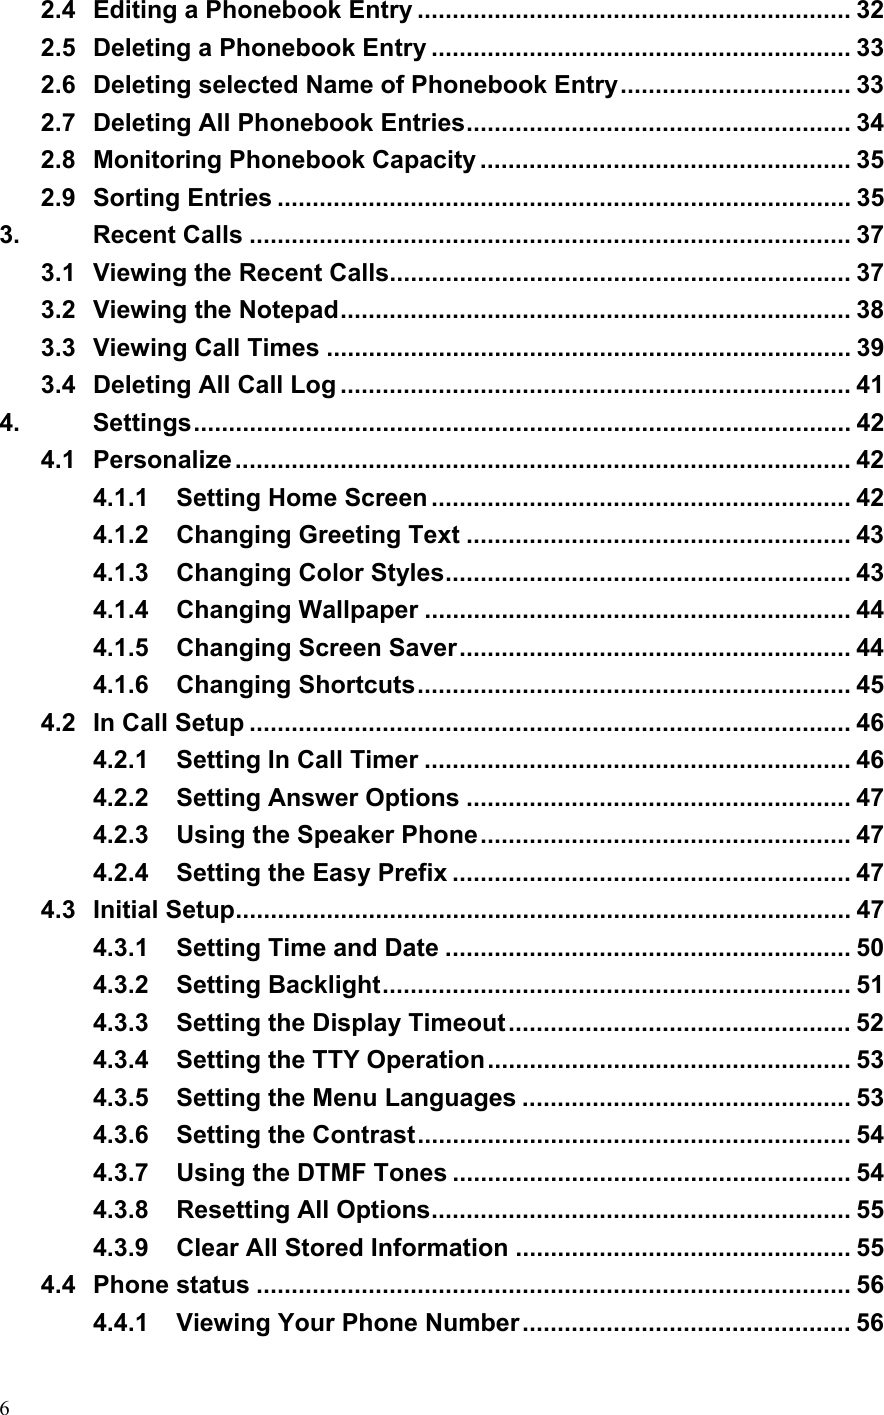
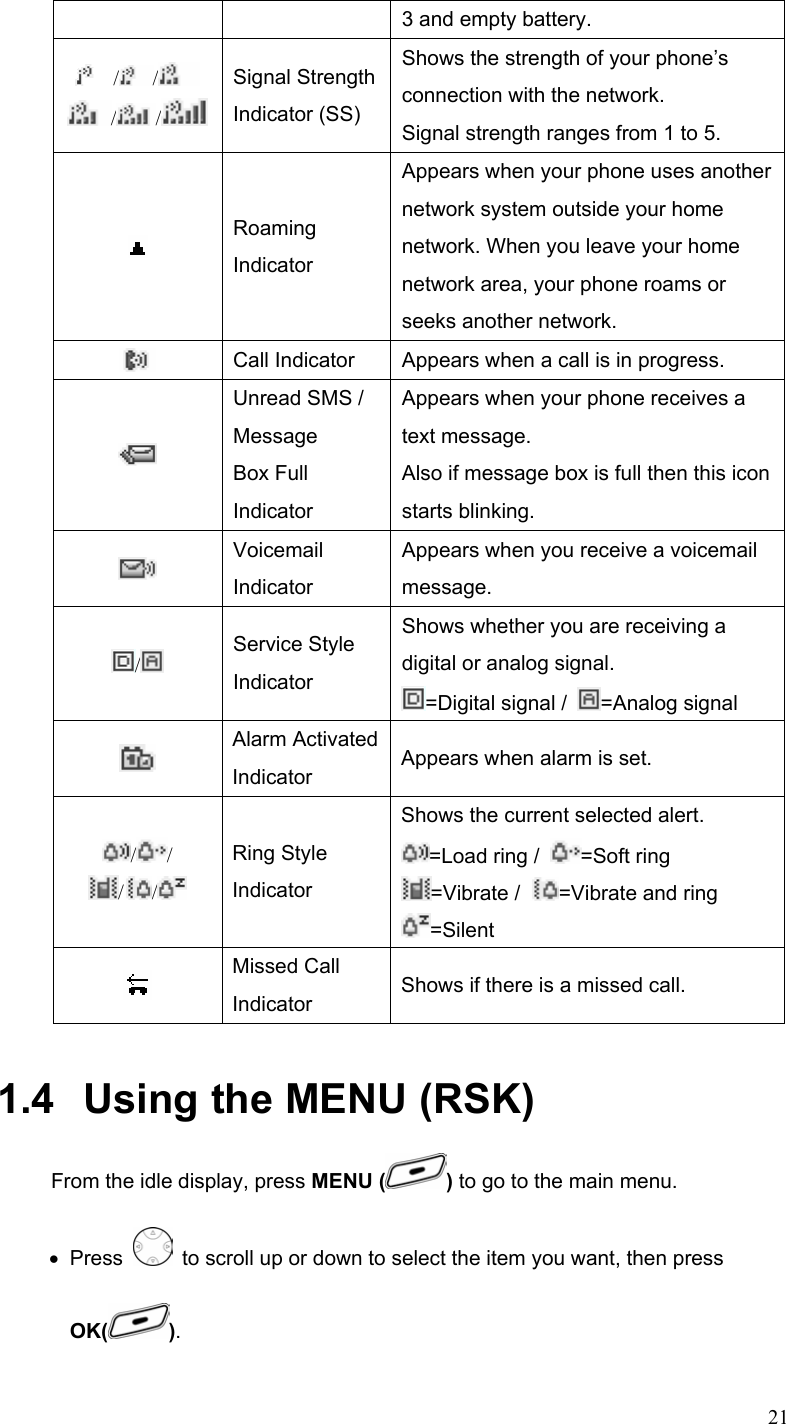
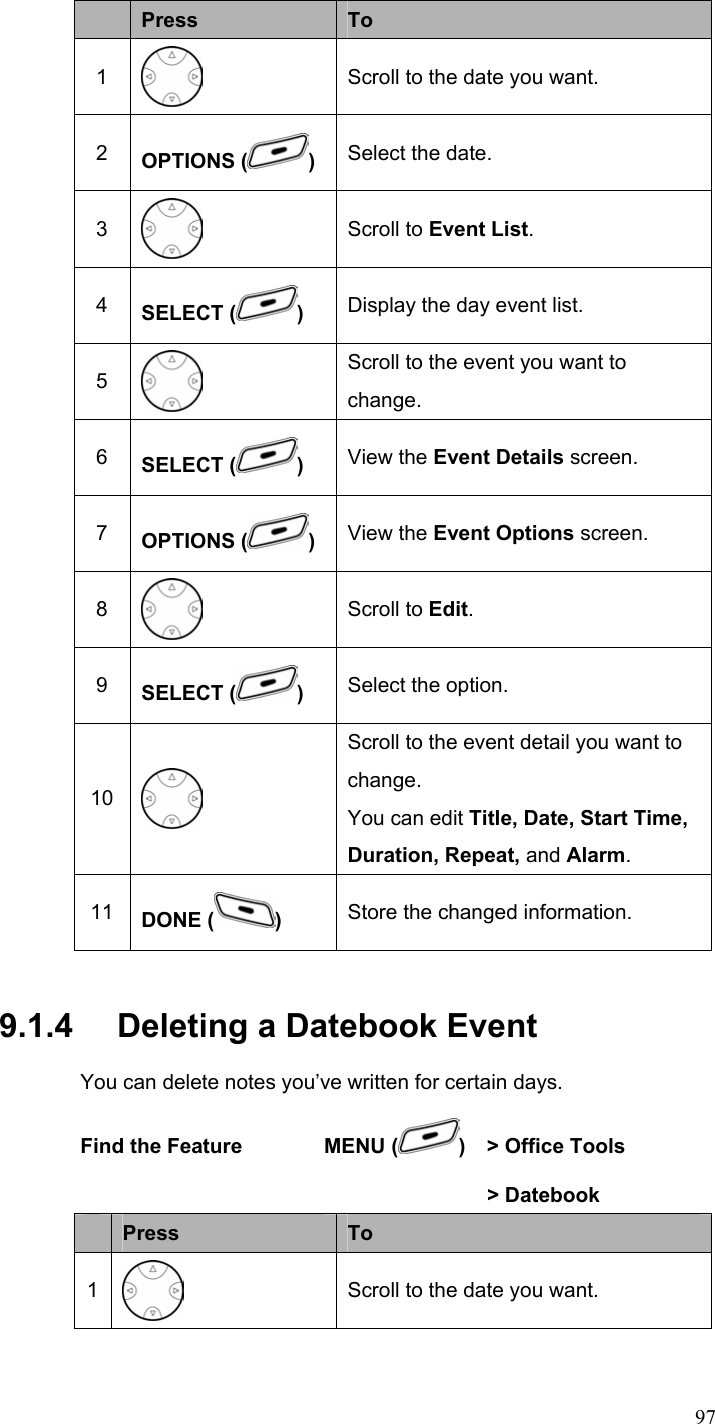
![342 SELECT ( ) View the type of number (i.e. Work, Home etc.). 3 SELECT ( ) View the e-mail, phone number and speed dial. 4 OPTIONS ( ) View the phonebook Options menu screen. 5 Scroll to Delete Name. 6 SELECT ( ) View the confirmation message “Delete <Name>?” 7 YES ( ) Erase the name and associated fields. 2.7 Deleting All Phonebook Entries You can erase the contents of your phonebook. Note that this action cannot be reversed! Once you have performed this procedure, all the stored information in your phonebook is erased. Warning: This feature will erase your entire phonebook, which can’t be undone! Find the Feature MENU ( ) > Phonebook Press To Scroll to [Delete All]. or Scroll to the name you want. SELECT ( ) View the type of number (i.e. Work, Home etc.).SELECT ( ) View the e-mail, phone number and speed dial. OPTIONS ( ) View the phonebook Options menu screen. 1 Scroll to Delete All.](https://usermanual.wiki/Motorola-Mobility/T5EL1/User-Guide-429113-Page-35.png)


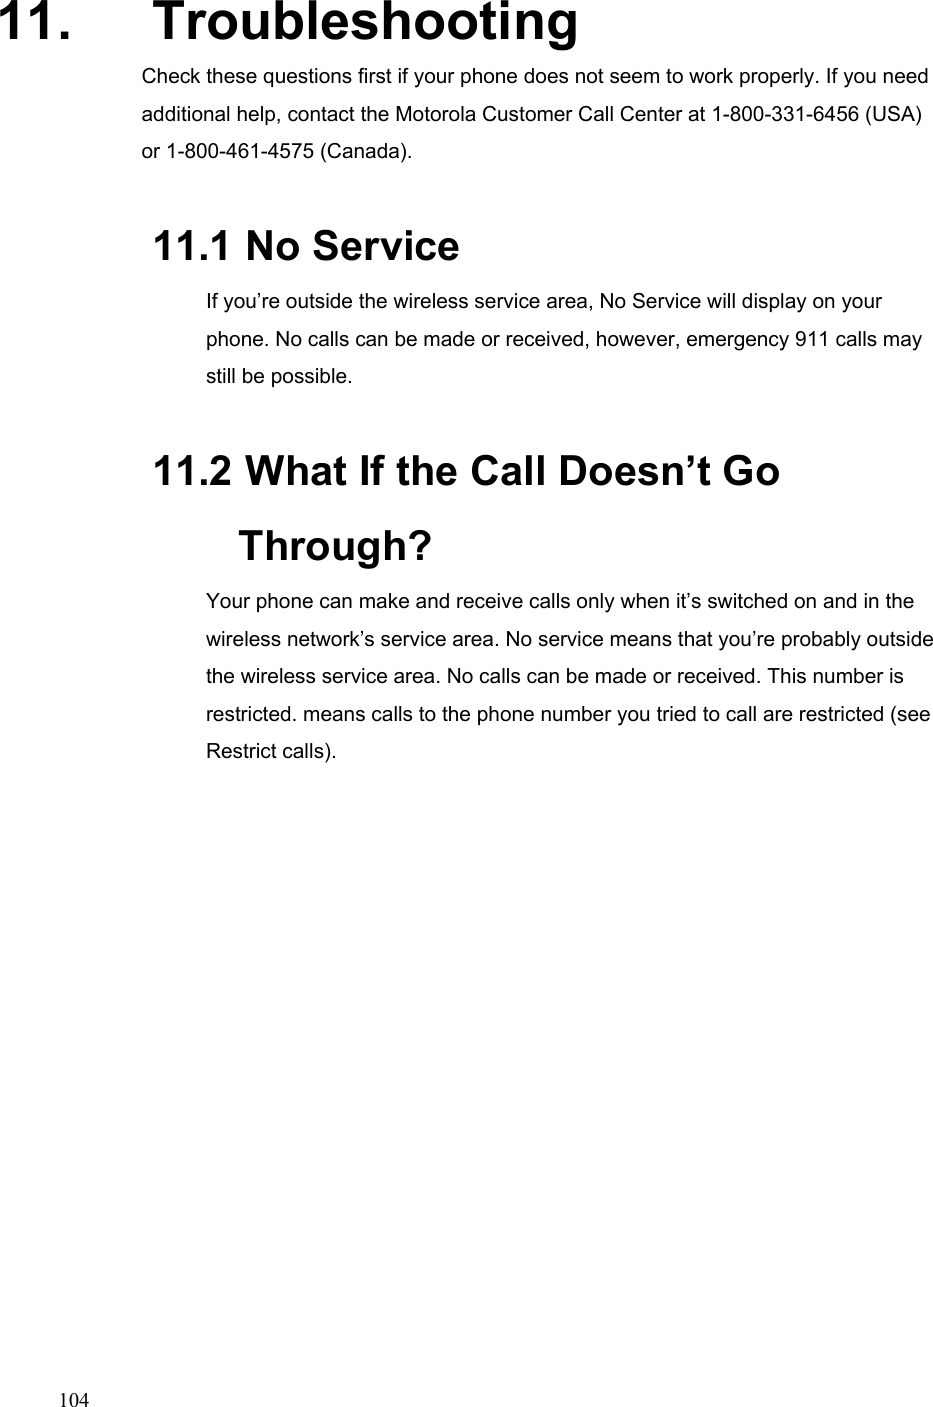
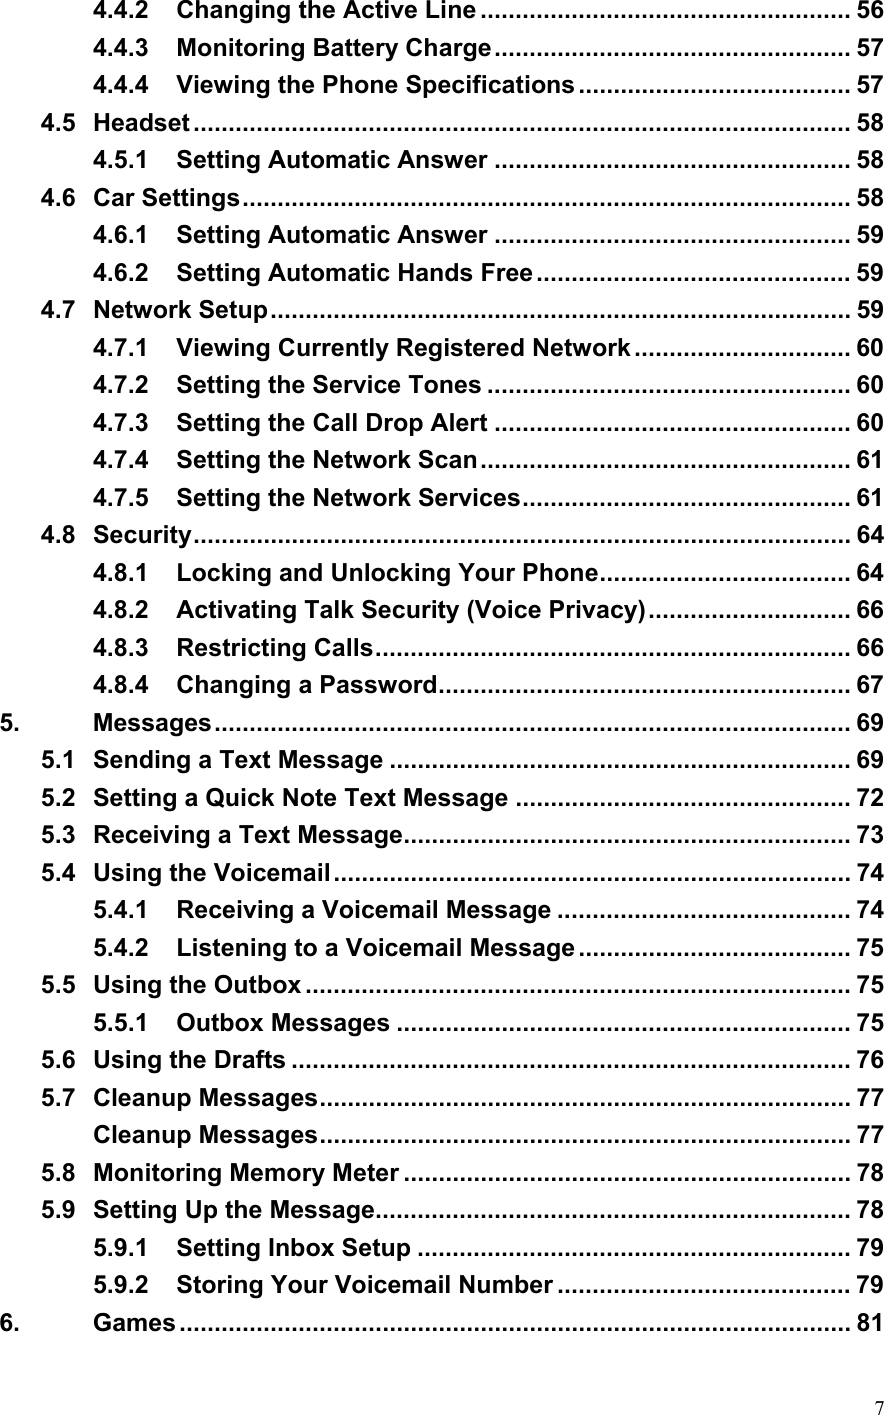
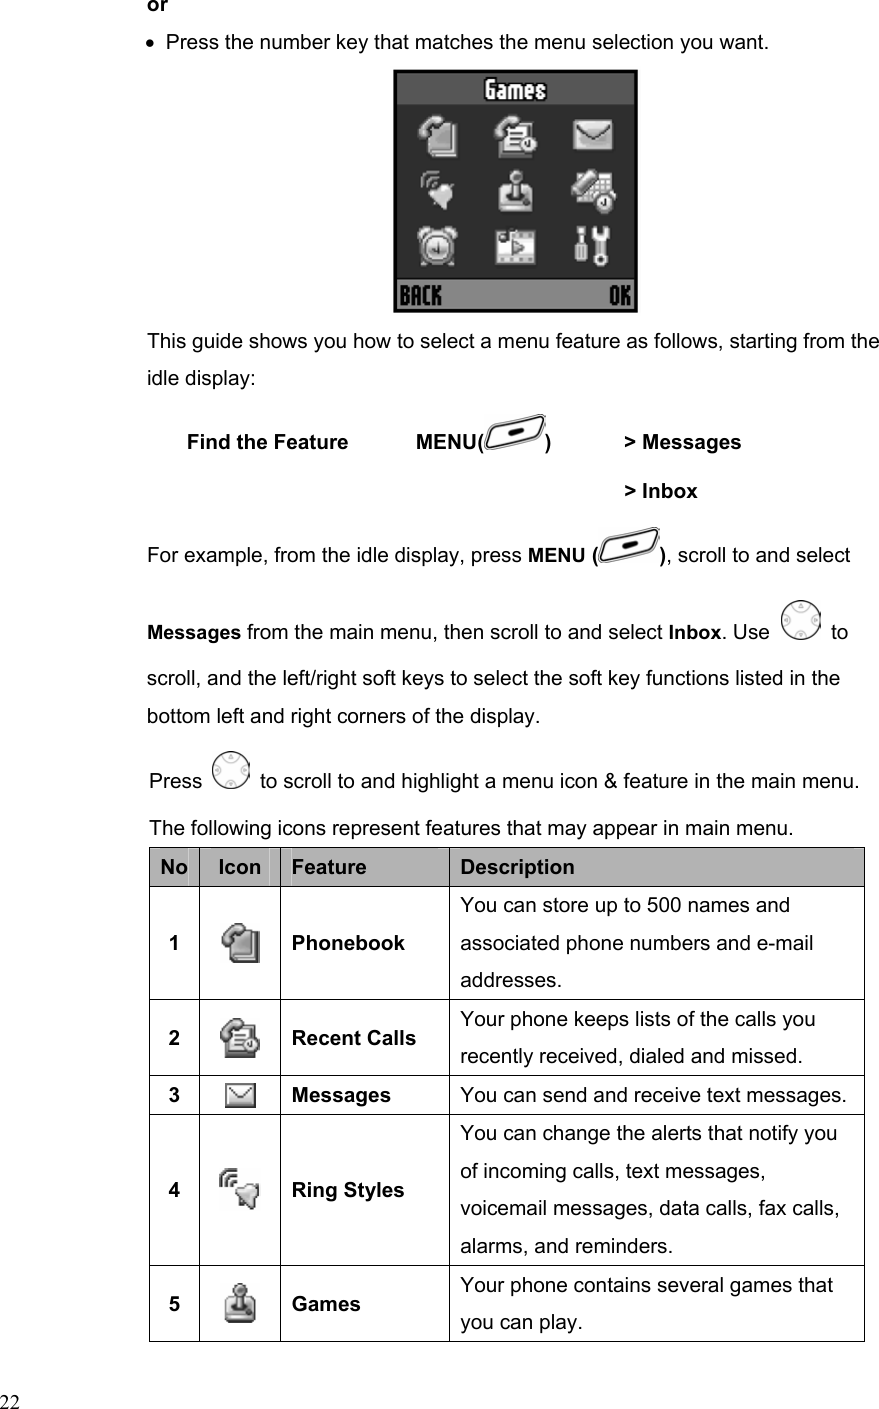
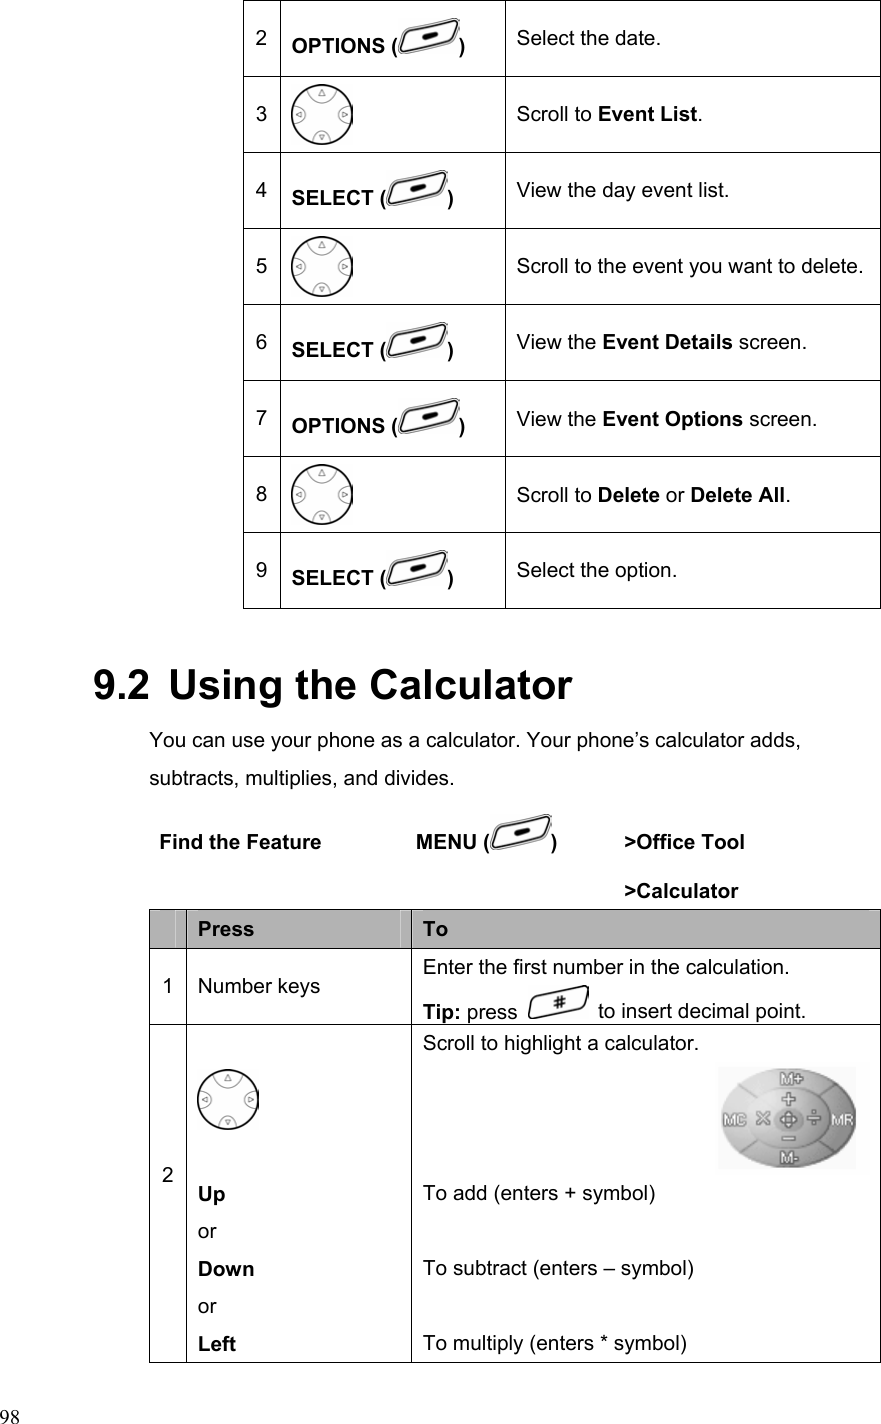
![95You can look into saved data list, edit, delete and save new data. This function can support alarm and schedule managing etc. You can set alarm with same way as setting’s alarm set. Find the Feature MENU ( ) > Office Tools > Datebook Action 1 When today’s day and date appear, press OPTIONS ( ). Note: Use to scroll up to an earlier date or down to a later date. 2 Select Event List to view the notes of the day currently on display. or Select All Events to view the notes of the entire datebook. 9.1.2 Adding a Datebook Event You can add a datebook event. Find the Feature MENU ( ) > Office Tools > Datebook Press To 1 Scroll to the date you want. 2 OPTIONS ( ) Select the date. 3 Scroll to [New Event] . 4 SELECT ( ) View the Event Details screen.. 5 CHANGE ( ) Edit the information. Keypad keys Enter a title for the event. 6 or](https://usermanual.wiki/Motorola-Mobility/T5EL1/User-Guide-429113-Page-96.png)
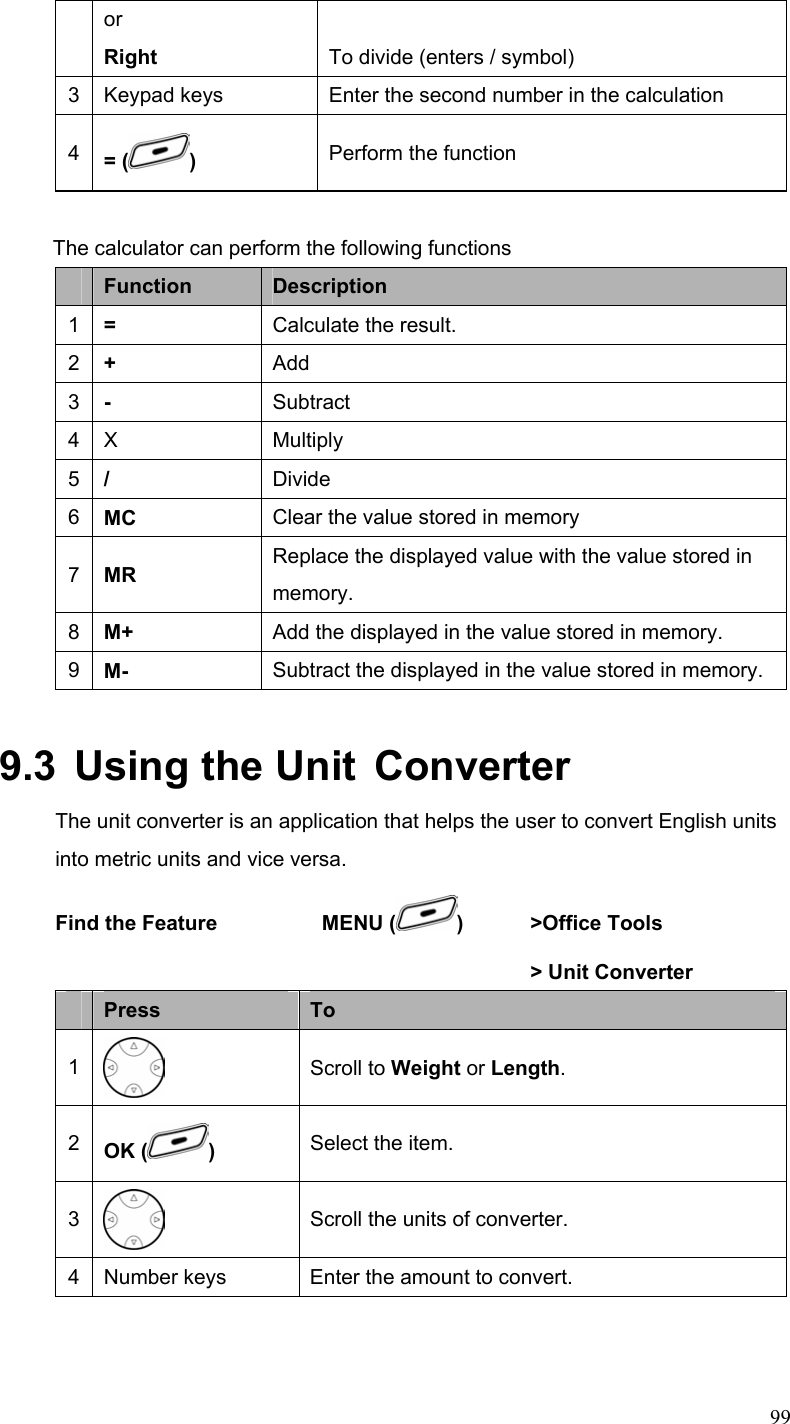
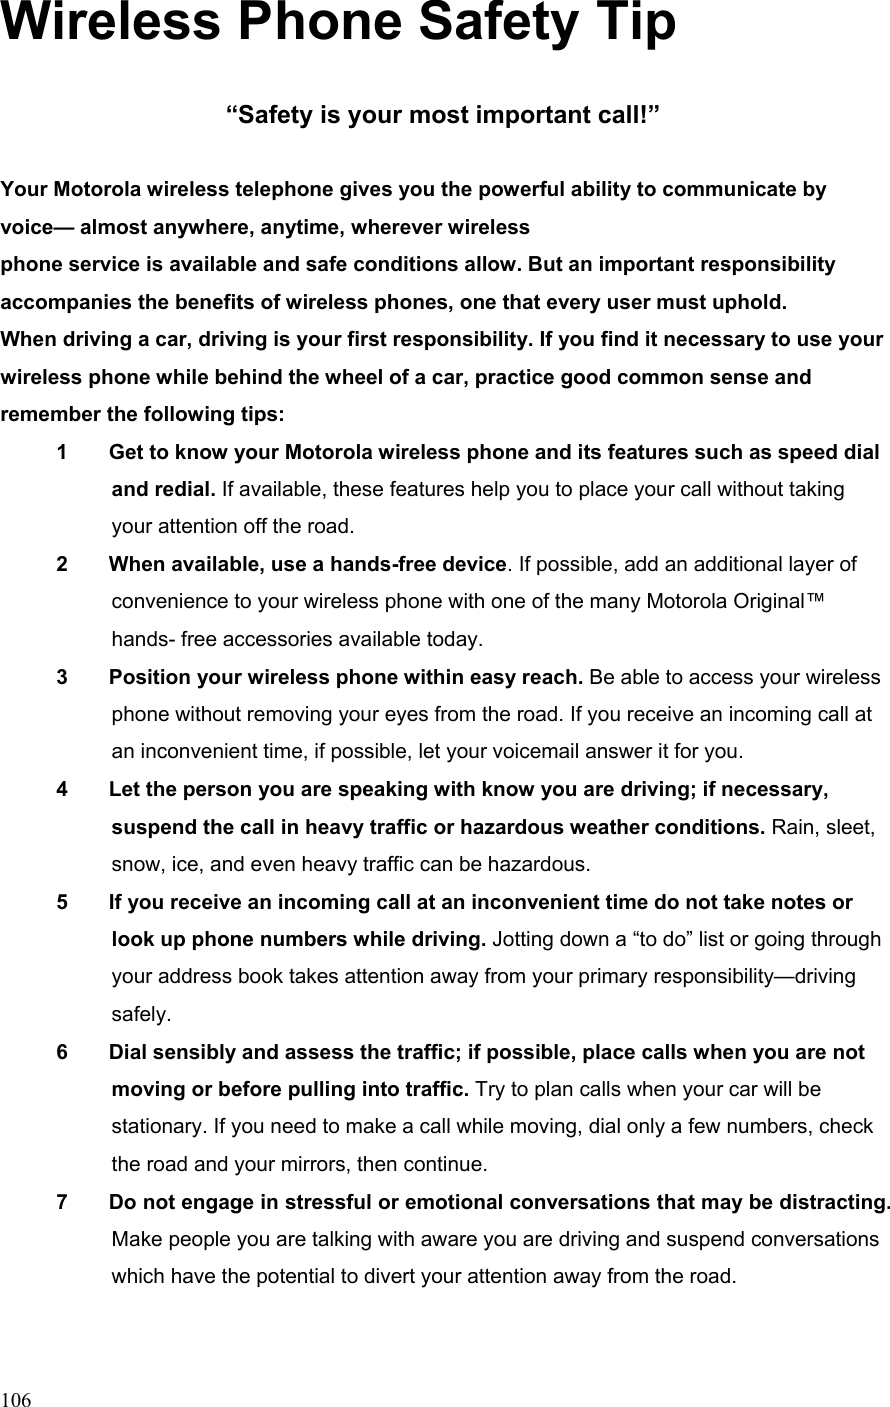
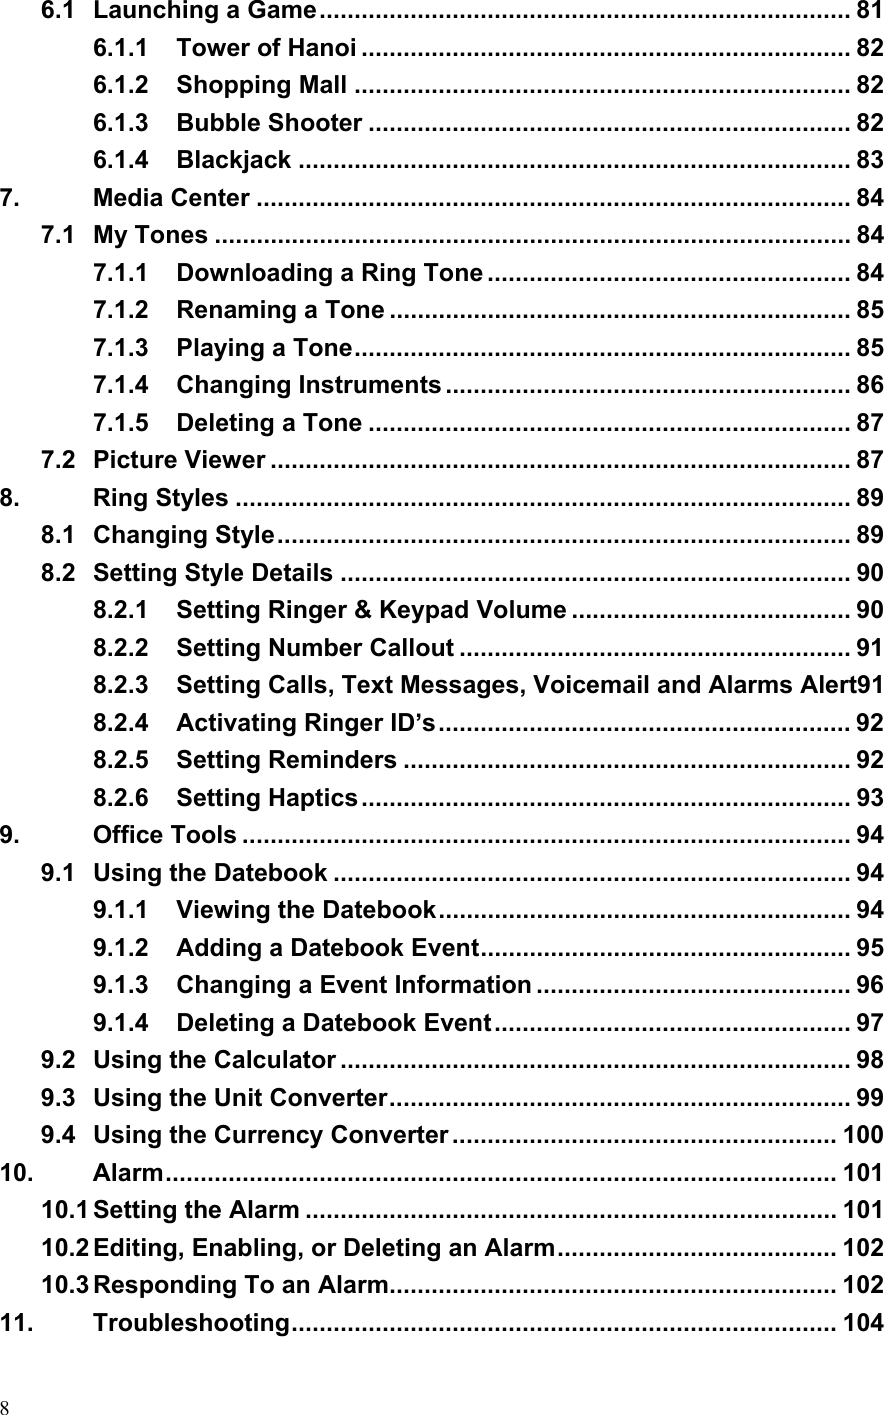
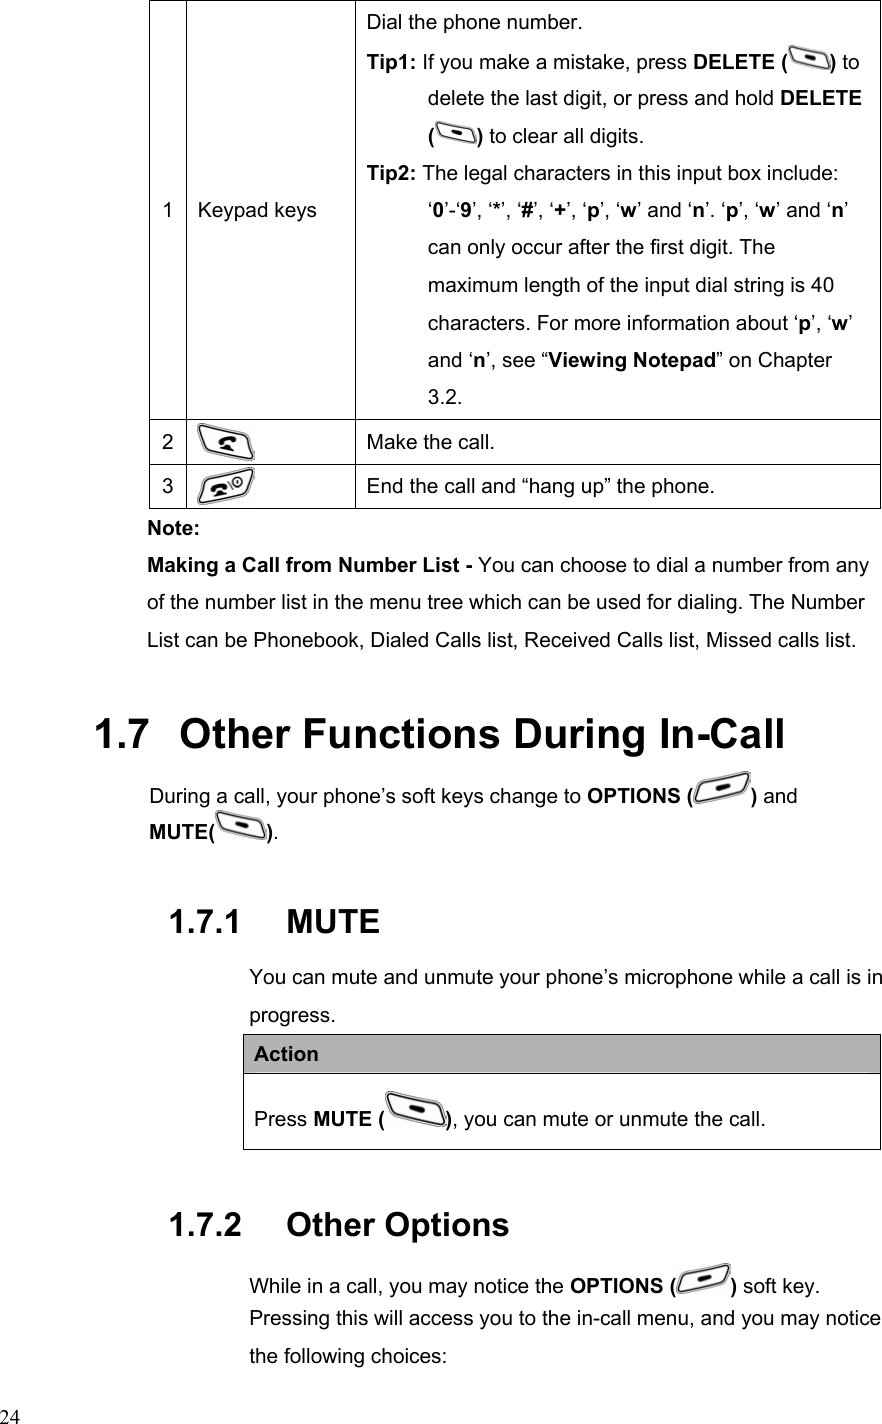
![10110. Alarm Your phone includes an alarm clock, which you can set up according your own need. Your phone can store up to 5 alarms. Notes: y The alarm clock setting does not display in the datebook day view, and is not synchronized with datebook settings. y Your phone must be turned on to use the alarm. Form the idle display, press MENU ( ) to enter the main menu. Press to scroll to and highlight Alarm icon in the main menu. 10.1 Setting the Alarm The Alarm clock icon will appear on the idle display to indicate that an alarm is set. Find the Feature MENU ( ) > Alarm > [New Alarm] Press To 1 CHANGE ( ) Select Name. 2 Keypad keys Enter the alarm name. 3 DONE ( ) Store the name. 4 Scroll to Time. 5 CHANGE ( ) Select Time.](https://usermanual.wiki/Motorola-Mobility/T5EL1/User-Guide-429113-Page-102.png)