Motorola Mobility T6FM1 Portable PCS GSM Transceiver with Bluetooth User Manual Scorpius E
Motorola Mobility LLC Portable PCS GSM Transceiver with Bluetooth Scorpius E
Contents
Exhibit 8C Users Manual
119
Security Settings
Passwords
Passwords .........................................................................................................120
Changing Passwords<New Passwords> ........................................................121
Setting UIM PIN<UIM PIN> ...............................................................................122
Unlocking a Blocked UIM .................................................................................122
Restricting the Handset Operations
Locking Function..............................................................................................123
Locking the Handset to Prevent Use by Others<Phone Lock> ....................123
Disabling Making/Receiving Calls/Messages<Self Mode> ...........................124
Disabling Phonebook or Datebook Viewing<Lock Application> .................124
Restricting Dialing<Dialing Restriction> ........................................................125
Preventing Sidekey Operations<Sidekey Lock>............................................126
Restricting a Call/Mail/Data Transfer
Viewing Information with Secret Set<Secret Data>.......................................126
Rejecting Calls from a Specified Number.......................................................126
Rejecting a Call without Caller ID<Reject Call> .............................................127
Muting the Ringtone of a Call Made from a Caller Not Saved in Contacts
<Ring Delay> .....................................................................................................127
Rejecting Calls from a Caller Not Saved in the Phonebook
<Not in Phonebook>.........................................................................................128
Other "Security Settings"
Other Security Settings....................................................................................129
120
Security Settings XXXXX
Passwords
Some functions of the FOMA handset require a password. In addition to the Security
Code, there are the Network Security Code and the i-mode Password. These passwords
help you utilize your handset.
Security Code
The Security Code is a 6-digit number that is required when:
- Selecting "Security" - Viewing all data in "My Personal Information"
- Performing "Master Reset" - Performing "Master Clear"
- Performing "Software Update" - Deleting all stored items
The Security Code is set to "000000" by default, however, you can change the code
yourself. →P121
• If you forget the Security Code, you need to bring the handset, the UIM and an ID (driver's license, etc.) to a
DoCoMo shop.
*: If you cannot prove you are the registered subscriber, DoCoMo may not be able to accept your request to
reset the handset.
Unlock Code
The Unlock Code is a 4-digit number that is required when:
- Setting/canceling "Phone Lock" - Setting/canceling "Lock Application"
The Unlock Code is set to "0000" by default, however, you can change the code yourself.
→P121
Network Security Code
The Network Security Code is a 4-digit number that is required to use network services
and is set to the number you selected at subscription. You can change the code yourself.
If you have "My DoCoMo ID/Password" for "My DoCoMo", the comprehensive support site
for PCs, you can change the Network Security Code by visiting the site from your PC. You
can change the Network Security Code yourself by accessing "各種手続き (Procedures)"
on the DoCoMo e-site using i-mode.
• For information on accessing "My DoCoMo" and the "DoCoMo e-Site", see the back of this manual.
Warning about Passwords
• Avoid setting a password using your birthday, a part of your phone number, your address or room number,
1111 or 1234, that can be easily guessed by others. Be sure to write down the set passwords and store
them in a separate location.
• Do not reveal your passwords to others. DoCoMo is not responsible for damage caused by misuse of your
security codes by others.
• DoCoMo will never ask you for your passwords.
• If you forget your passwords, you need to bring an ID (driver's license, etc.), the handset and the UIM to a
DoCoMo shop. For details, contact a "DoCoMo Information Center" on the back of this manual.
121
Security Settings XXXXX
i-mode Password
The 4-digit i-mode Password is required to assign or delete function to/from MyMenu,
subscribe to or cancel Message Services or fee-based i-mode services.
(Some other information service providers may set passwords for their sites.)
The i-mode Password is set to "0000" by default, however, you can change it yourself.
Access "iMenu" → "オプション設定 (Function)" → "iモードパスワード変更 (Change
i-mode Password)" if you use i-mode.
• If you forget your i-mode Password, you need to bring the handset, the UIM and an ID (driver's license, etc.)
to a DoCoMo shop.
UIM PIN/UIM PIN2
You can assign 2 PIN numbers to the UIM, UIM PIN and UIM PIN2. These codes are set to
"0000" by default, however, you can change them yourself. →P122
The UIM PIN is a 4-8 digit number (code) required to identify the user every time the UIM is
inserted into the handset or the handset power is turned on in order to prevent
unauthorized use. The UIM PIN entry is required to make or receive calls, and operate the
handset.
The UIM PIN2 is a 4-8 digit number used to reset outgoing call charges, incoming call
charges (if any) and the total of both, to reset total call charges, to set the maximum limit
for call charges, to set the currency, or to use or apply for User certificates.
• Use the UIM PIN and UIM PIN2 you set previously if you purchase a new handset but keep the same UIM.
PIN Unblock Code
The PIN Unblock Code is a 8-digit number to unlock the UIM PIN or UIM PIN2. →P122
You are not able to change it.
• The UIM will be locked if an incorrect PIN Unblock Code is entered 10 times in a row.
New Passwords
Changing Passwords
You can change the Unlock Code or Security Code yourself.
ac y $★$ (Settings) y "Security" y Enter the Security Code y
"New Passwords"
b"Unlock Code"/"Security Code" y Enter the current Unlock
Code/Security Code
The New Unlock Code entry screen / new Security Code entry screen opens.
cEnter a new Unlock Code (4-digit)/Security Code (6-digit)
The New Unlock Code re-entry screen / new Security Code re-entry screen opens.
dEnter the Unlock Code/Security Code entered in Step 3
Default Unlock Code: 0000 Security Code: 000000

122
Security Settings XXXXX
UIM PIN
Setting UIM PIN
You can set to require the UIM PIN each time the handset power is turned on.
ac y $★$ (Settings) y "Security" y Enter the Security Code y
"UIM PIN" y "On"/"Off" y Enter UIM PIN
Changing UIM PIN/UIM PIN2
Changing UIM PIN
(Checking the specifications)
Changing UIM PIN2
ac y $★$ (Settings) y "Security" y Enter the Security Code y
"New Passwords"
b"UIM PIN2" y Enter the current UIM PIN2
The new UIM PIN2 entry screen opens.
cEnter the new UIM PIN2 (4-8 digit)
The new UIM PIN2 re-entry screen opens.
dEnter the UIM PIN2 entered in Step 3
Unlocking a Blocked UIM
• The PIN Unblock code is written on the FOMA subscription application form (customer's copy).
• You need to set new UIM PIN/UIM PIN2 codes after unlocking UIM PIN.
ah [Unlock] y Enter the PIN Unblock code (8-digit)
The new UIM PIN/UIM PIN2 code entry screen opens.
bEnter the new UIM PIN/UIM PIN2 code (4-8 digit)
The re-entry screen for confirmation opens.
cEnter the UIM PIN/UIM PIN2 entered in Step 2
Default Off
Default 0000
Default 0000

123
Security Settings XXXXX
■PIN Unblock Code
The PIN Unblock Code is required when an incorrect UIM PIN/UIM PIN2 is entered 3 times in a row. The UIM will be locked
if an incorrect PIN Unblock Code is entered 10 times in a row.
• If you forget the PIN Unblock Code or the card is locked, you need to bring the FOMA handset, the UIM, and an ID (driver's
license, etc.) to a DoCoMo shop.
Locking Function
Phone Lock
Locking the Handset to Prevent Use by Others
You can lock your handset and disable its use unless the Unlock Code is entered. There
are 2 function for Phone Lock: the handset is locked immediately and the handset is
automatically locked when the power is turned on.
(Checking the specifications)
Locking the Phone Immediately
ac y $★$ (Settings) y "Security" y Enter the
Security Code y "Phone Lock"
b"Lock Now" y Enter the unlock code
The Phone Lock screen opens and Phone Lock is set.
• When Phone Lock is set, the unlock code entry screen is displayed.
Lock Option Description Reference
Phone Lock Lock the handset to prevent unauthorized use.
You can set to lock the handset automatically.
P123
Self Mode You can disable all communication functions including calls, Email, or i-mode.
You can set to display a confirmation whether to set Self Mode when the
handset power is turned on.
P124
Lock Application You can specify and lock function. P124
Dialing Restriction You can disable the key buttons to not allow others to make or send
unauthorized calls or Email.
P125
Default Automatic Lock: Off
Enter UIM PIN
If a code is entered
incorrectly 3 times in a row
Enter PIN Unblock
Code
Authentication OK Set new UIM PIN/UIM
PIN2
Enter UIM PIN
If a code is entered
incorrectly 3 times in a row
If the PIN Unblock code is entered
incorrectly 10 times in a row
UIM blocked
Phone Lock screen
124
Security Settings XXXXX
Activating Phone Lock at Power Up
aThe Phone Lock screen (P123) y "Automatic Lock" y "On"/"Off"
y Enter the unlock code
Automatic Lock is set.
• The Automatic Lock setting completes if you select "Off".
■To cancel Phone Lock
Enter the unlock code.
• If an incorrect unlock code is entered 5 times in a row, the FOMA handset is automatically turned off. If you turn the power
on and enter the correct unlock code, Phone Lock will be canceled.
Self Mode
Disabling Making/Receiving Calls/Messages
You can stop sending/receiving signals and disable all communication function such as
calls, Email, i-mode, packet communication, 64K data communication, Bluetooth
communication, and Infrared communication.
ac y $★$ (Settings) y "Self Mode" y Perform the following
operations
Self Mode
Set/Cancel Self Mode.
y "On"/"Off"
Prompt At Power Up
You can set to display a confirmation whether to set Self Mode when the handset power is turned on.
y "On"/"Off"
•$★$ appears at the top of the screen when Self Mode is set.
• You can also set/release Self Mode by pressing C (for 1+ seconds) on the wallpaper screen.
• Self Mode cannot be set while using some other functions such as during a call.
• Email or Message R/F arriving when Self Mode is set is stored at the i-mode center.
Lock Application
Disabling Phonebook or Datebook Viewing
You can lock function specified in "Lock Application Setup" and disable use unless the
Unlock Code is entered.
ac y $★$ (Settings) y "Security" y Enter the Security Code y
"Lock Application" y Enter the Unlock Code y "On"/"Off"
Default Self Mode: Off Prompt At Power Up: Off
Default Off
125
Security Settings XXXXX
•$★$ appears at the top of the screen when Lock Application is set.
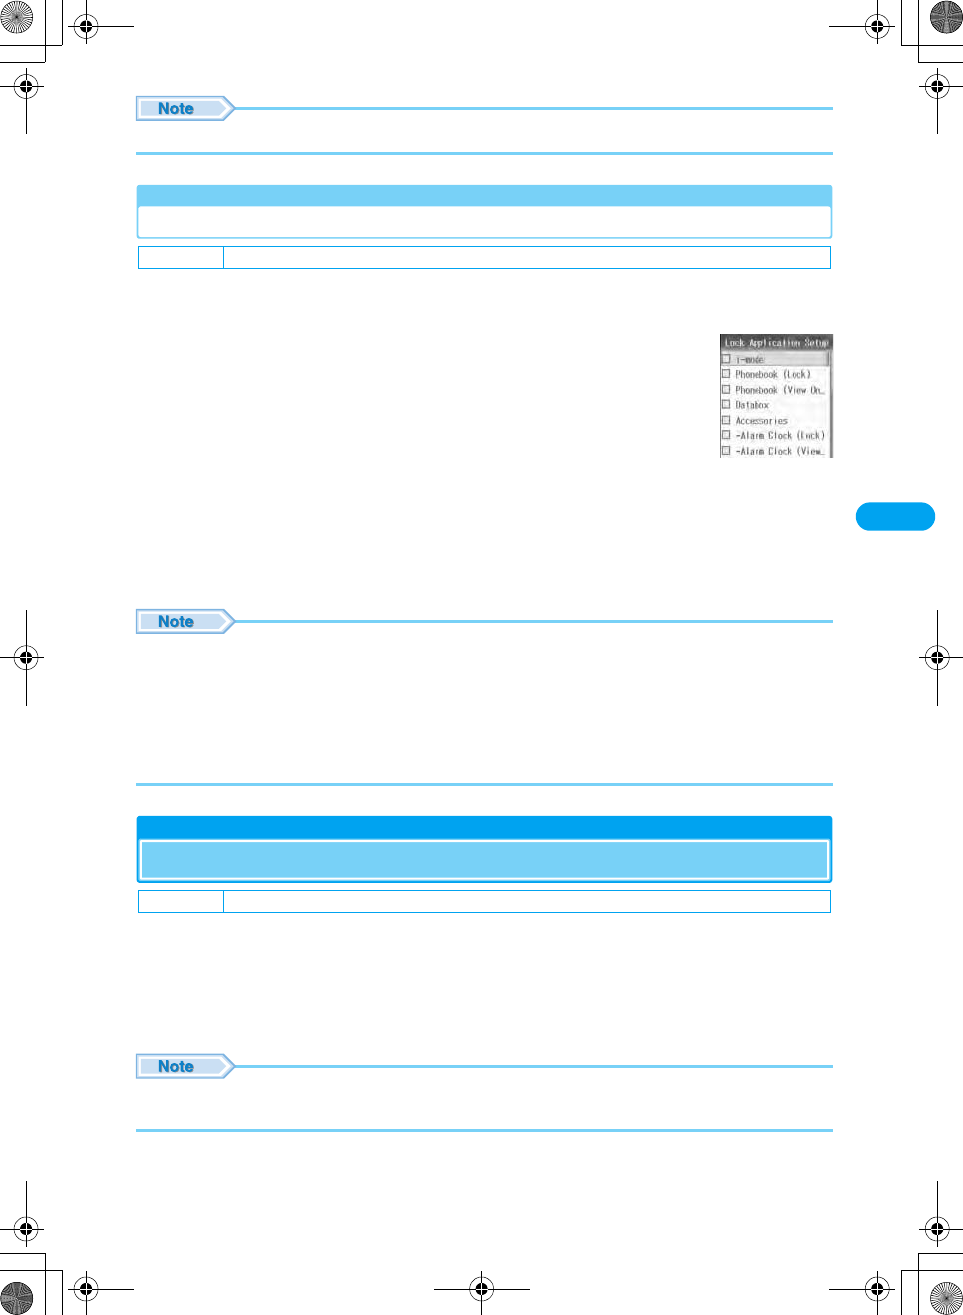
Lock Application Setup
Selecting Functions to be Disabled with Lock Application
You can specify which function that become unavailable using "Lock Application" unless
the Unlock Code is entered.
ac y $★$ (Settings) y "Security" y Enter the
Security Code y "Lock Application Setup" y Enter
the Unlock Code
bSelect an option y c
• Repeat Step 2 to specify another option.
ci [Complete]
• Sub items are indicated with a leading "-". For example, "Calculator" is a sub item of "Tools" and is preceded with "-". When
specifying an option to lock, selecting an item that has sub items, such as "Accessories", automatically selects its sub items.
• Where 2 function are available for the same functions, i.e., "Phonebook (Lock)" and "Phonebook (View Only)", you can select
only one of them.
• The following operations are available by pressing h [Function] on the Lock Application Setup screen:
- Select "Search" to find a Contact. →P97
- Select "Select All"/"Unselect All" to select or deselect all function.
- Select "Cancel" to cancel the operation.
Dialing Restriction
Restricting Dialing
You can restrict from making calls by pressing dial keys and only allow calls made from
Contacts and Dialed Calls. (Checking the specifications)
ac y $★$ (Settings) y "Security" y Enter the Security Code y
"Dialing Restriction" y "On"/"Off"
•$★$ appears at the top of the screen when Dialing Restriction is set.
• You cannot even send Email by entering an address using the dial keys. (Checking the specifications)
Default No applications are selected
Default Off
Lock Application
Setup screen

126
Security Settings XXXXX
Sidekey Lock
Preventing Sidekey Operations
You can set to lock the sidekeys (N, M, J and H) of the handset when your handset is
closed.
ac y $★$ (Settings) y "Security" y Enter the Security Code y
"Sidekey Lock" y "On"/"Off"
• Pressing J (for 1+ seconds) when the FOMA handset is folded cancels the Sidekey Lock.
Checking the Shortcut Operation of the Sidekey Lock
You can view the Shortcut operation to unlock the Sidekey Lock.
ac y $★$ (Settings) y "Security" y Enter the Security Code y
"Sidekey Shortcut"
The shortcut explanation screen opens.
Secret Data
Viewing Information with Secret Set
You can view a hidden Contact saved as Secret by setting Secret Data.
ac y $★$ (Settings) y "Security" y Enter the Security Code y
"Secret Data" y "Show"/"Hide" y h [OK]
•$★$ appears at the top of the screen when Secret Data is set to "Show".
Rejecting Calls from a Specified Number
You can set to reject calls from the specific callers stored in Contacts. You can set this
option when storing or editing a Contact.
aCreate Contact screen (P91)/Edit Contacts screen y "Reject" y
"Yes" y i [Complete]
Storing/editing a Contact completes.
Default Off
Default Hide
127
Security Settings XXXXX
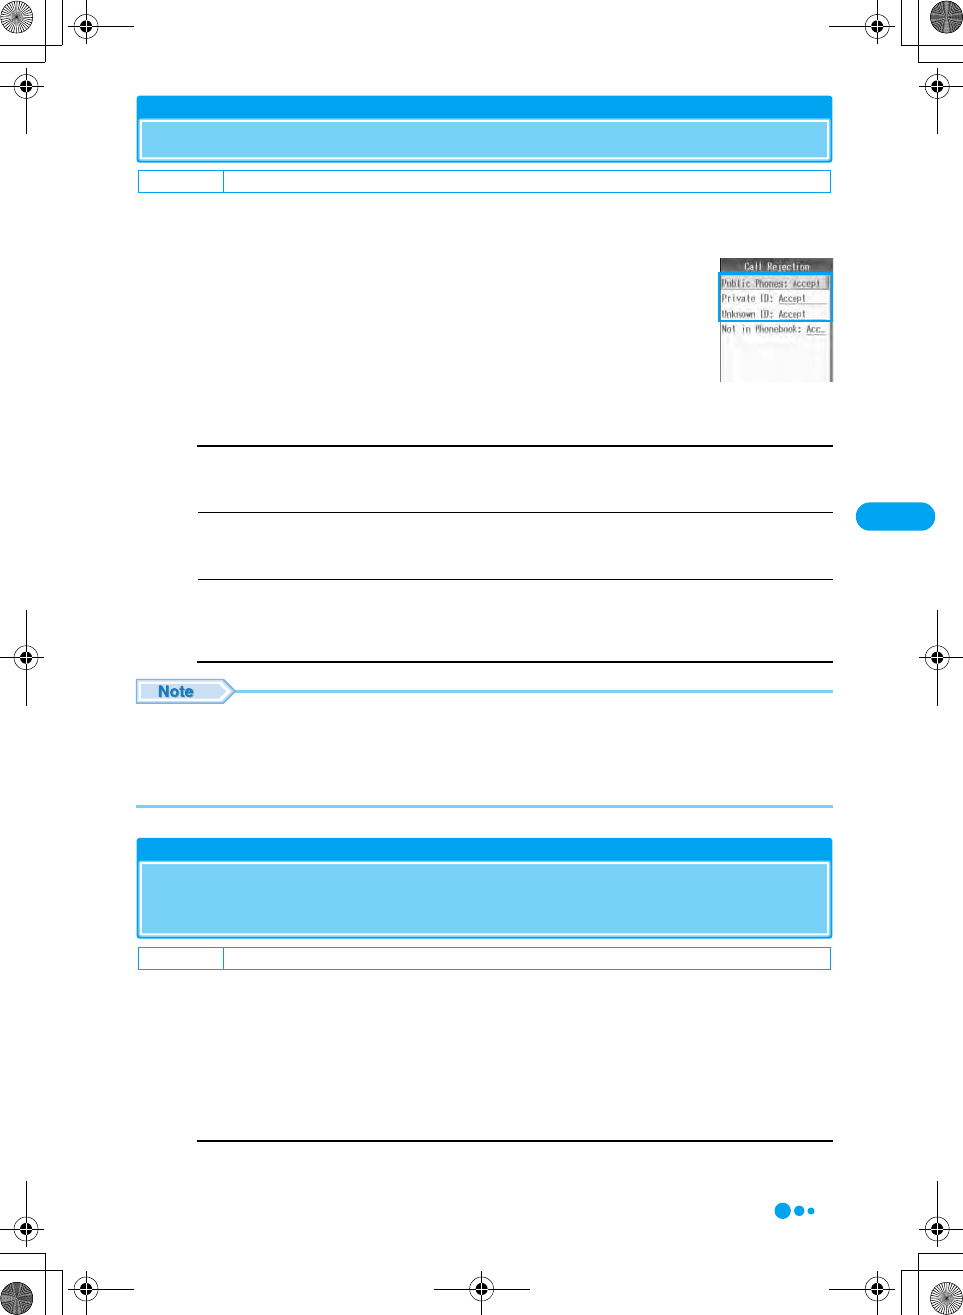
Reject Call
Rejecting a Call without Caller ID
You can set whether to accept or reject calls without Caller ID depending on the reason
for no Caller ID.
ac y $★$ (Settings) y "In-Call Setup" y "Call
Rejection"
bPerform the following operations
Public Phones
Set an option for calls made from public phones.
y "Accept"/"Reject"
Private ID
Set an option for calls made without the Caller ID because the caller chose not to send Caller ID.
y "Accept"/"Reject"
Unknown ID
Set an option for calls made from overseas or from a general phone via forwarding services, from which Caller ID cannot
be sent. (Caller ID may be sent depending on the carrier.)
y "Accept"/"Reject"
• The handset does not start incoming call actions for a rejected incoming call, and the call is recorded in Missed Calls. The
caller hears a busy signal. (Checking the specifications)
• Calls are rejected even when the Voicemail or Call Forwarding service is activated. However, if Ringing Time is set to 0
seconds, each service launches. (Checking the specifications)
• i-mode mail or SMS are received regardless of rejection settings. (Checking the specifications)
Ring Delay
Muting the Ringtone of a Call Made from a Caller Not
Saved in Contacts
You can set to not start ring action such as sounding a ringtone when a call arrives from a
caller not saved in Contacts or without Caller ID. This option is convenient to prevent
nuisance calls such as "One ring calls" that disconnect after a short ringing time.
(Checking the specifications)
ac y $★$ (Settings) y "In-Call Setup" y"Ring Delay" y Perform
the following operations
Ring Delay
Set an interval from when a call arrives until the ring action starts.
Use j to enter the time y h [OK]
Default Public Phones: Accept Private ID: Accept Unknown ID: Accept
Default Ring Delay: 0 seconds Show in Call Logs: Yes
Call Rejection screen
Continued on the next page
128
Security Settings XXXXX
Show in Call Logs
Set whether to show the call that was terminated within the Ring Delay time in Missed Calls.
y "Yes"/"No"
• If the Ring Delay is set longer than the ring time for the Voicemail or Call Forwarding service, each service launches before
the ring action starts. (Checking the specifications)
• If the Ring Delay is set longer than the response time of "Answering Machine", the Answering Machine starts without the ring
action.
• The time also can be entered using dial keys.
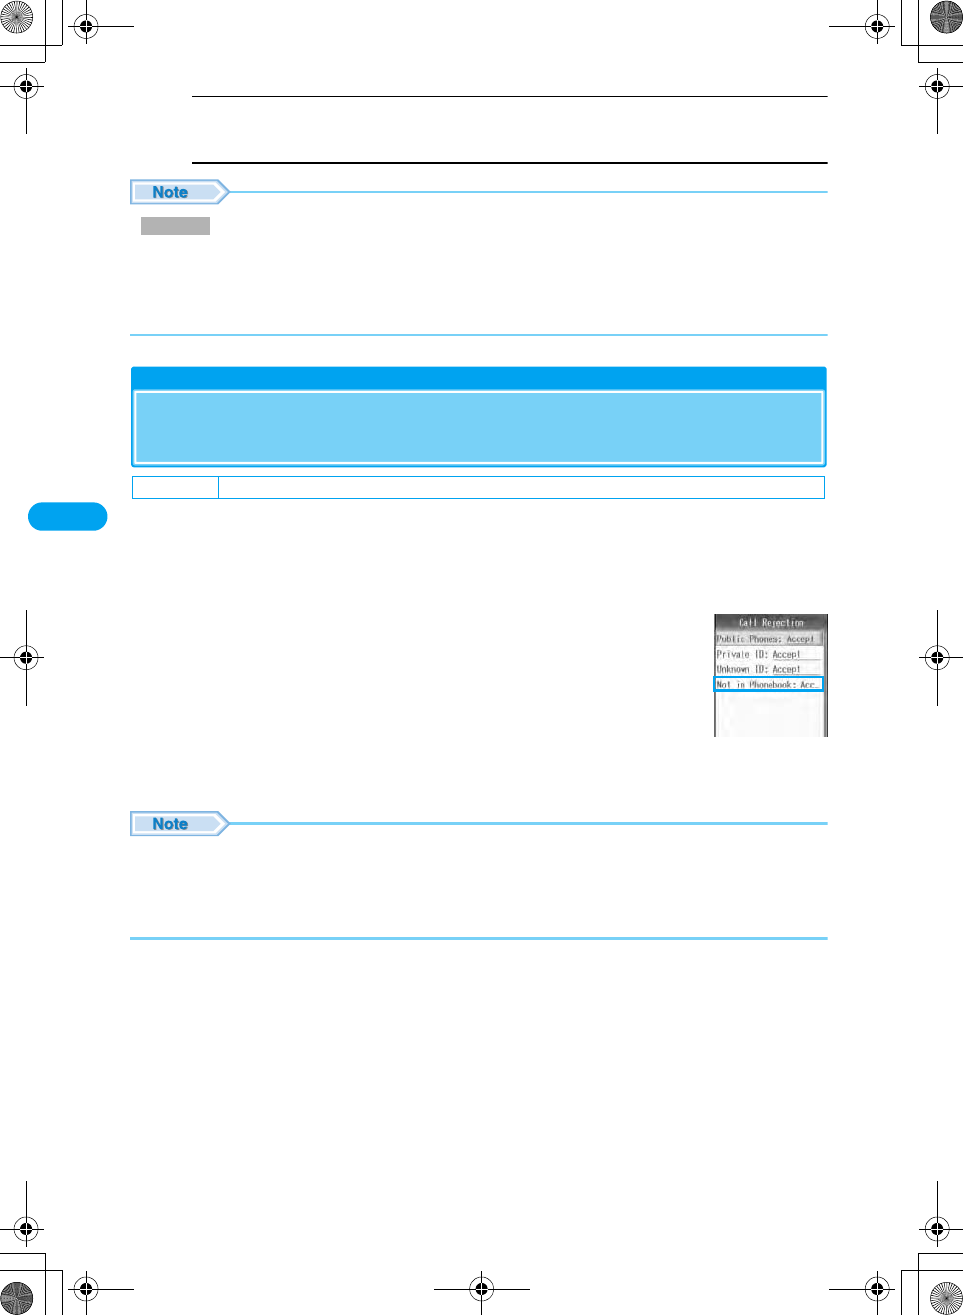
Not in Phonebook
Rejecting Calls from a Caller Not Saved in the
Phonebook
You can set to reject calls from a caller not saved in Contacts or without Caller ID.
(Checking the specifications)
• This function is available only when the caller sends Caller ID.
• It is recommended that you set the Caller ID Display Request service and "Reject Call" concurrently.
ac y $★$ (Settings) y "In-Call Setup" y "Call
Rejection"
b"Not in Phonebook" y "Accept"/"Reject"
• The handset does not start incoming call actions for a rejected incoming call, and the call is recorded in Missed Calls. The
caller hears a busy signal. (Checking the specifications)
• Calls are rejected even when Voicemail or Call Forwarding service is activated. However, if Ringing Time is set to 0 seconds,
each service launches. (Checking the specifications)
• i-mode mail or SMS is received regardless of rejection settings. (Checking the specifications)
Ring Delay
Default Accept
Call Rejection screen
129
Security Settings XXXXX
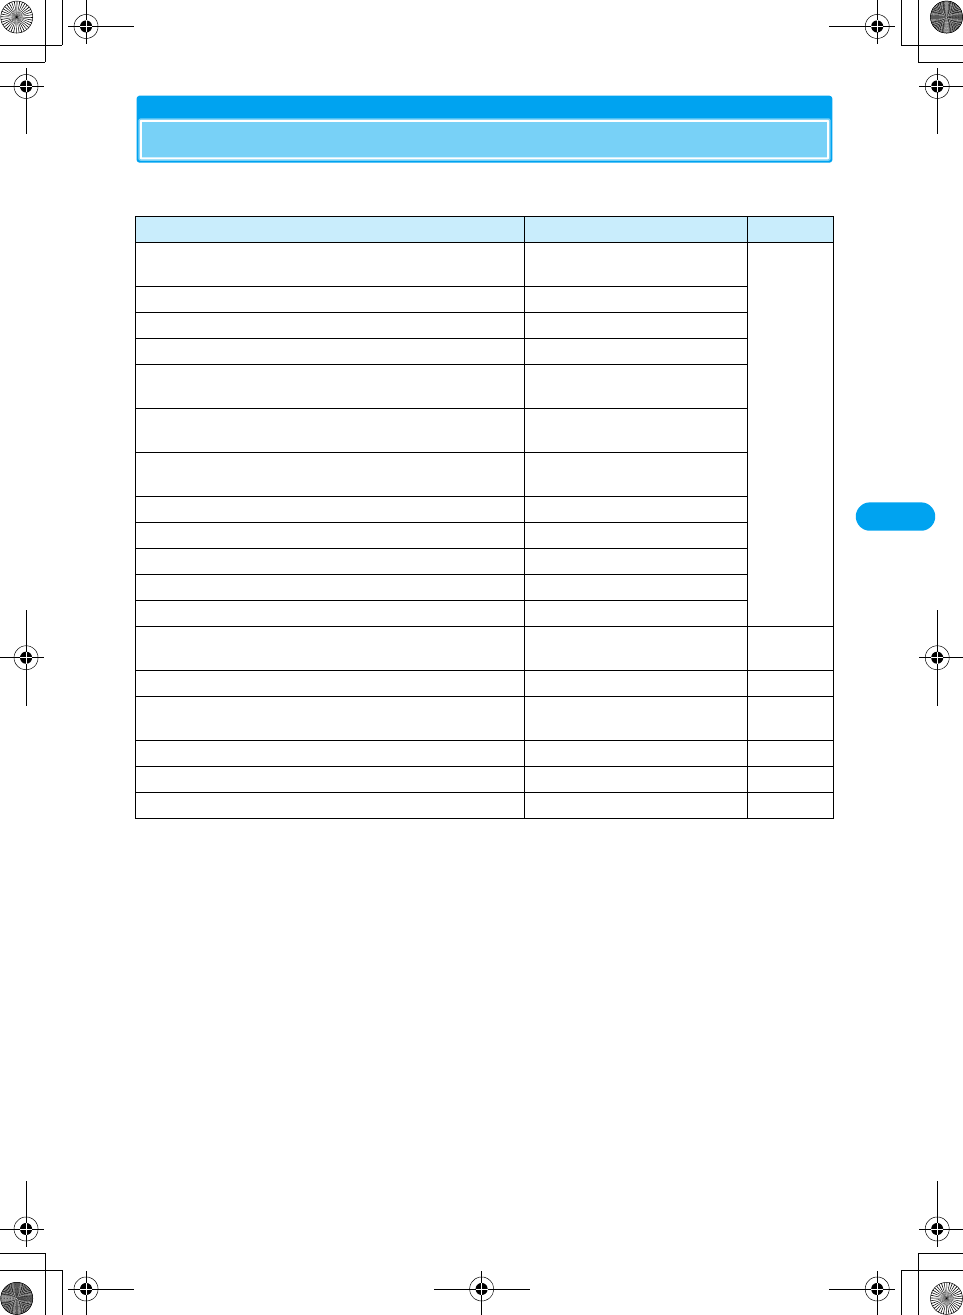
Other Security Settings
In addition to the security functions described in this chapter, the following functions and
services are available.
Purpose Function/Service Reference
To upload or check safety messages using i-mode in case of
disaster.
"i-mode BBS for disaster" service For details,
refer to the
"i-mode
Operation
Guide".
To change Email address Change Mail Address
View an Email address if you forget it Confirm Mail Address
To receive Email only from a specified domain Domain ID Receive
To receive/reject Email from a specified address. Address ID Receive/Address ID
Reject
To receive/reject Email via i-mode only Receive only i-mode Mail/Reject
only i-mode Mail
To reject incoming i-mode mail in excess of 200 a day from an
i-mode phone
Restrict i-mode Spam
To reject unsolicited mail Reject Unsolicited Ad Mail
To reject SMS Set/view Reject SMS
To check the Email setting status Confirm Settings
To restrict incoming Email size Limit Mail Size
To temporarily disable Email functions Suspend Mail
To use an Electronic authentication service to perform safe
and reliable data communication (for FirstPass sites only)
FirstPass P161
To select and download Email Receive option P176
To register the phone number of a nuisance caller to reject
calls from that number
Nuisance Call Barring Service P249
To ask a caller to show Caller ID Caller ID Request Service P249
To update software on the handset when necessary Software Update P318
To protect the handset from harmful data Scanning Function P323


131
Camera
Before Using the Camera .........................................................................................132
Capturing Still Images<Still Image Capture> .........................................................135
Capturing Videos<Record Video>...........................................................................136
Changing the Capturing Settings............................................................................136
Changing the Camera Settings<Camera Setup> ...................................................138
Using the Barcode Reader<Barcode Reader> .......................................................139
132
Camera
* You need to obtain a microSD memory card separately to use the functions related to the microSD memory card. →P221
Before Using the Camera
Notes for Capturing Images
• The camera employs high precision technology, but some pixels or lines may seem brighter or darker than
others. Also, when capturing in places with insufficient lighting, noise, seen as white lines, increases. This is
normal.
• Clean the lens with a soft cloth before capturing. If the lens is stained with fingerprints or oil, the captured
image may appear out of focus or blurred.
• Do not leave the handset in a warm place or under a direct sunlight for a long period. The captured image
or video may deteriorate.
• If you capture under a fluorescent light, mercury lamp or sodium lamp flickering at high speed, flickering such
as stripes may appear. The color tone of still images or videos may vary depending on the shutter speed.
• Do not expose the lens to direct sunlight for a long period and do not capture at the sun or bright lamp directly.
The image may become discolored or the camera may fail.
• Do not cover the lens with your fingers, hair or the handset strap when capturing.
• Capturing a fast moving object may result in an image slightly distorted from the image displayed on the
screen at the time of capturing, or the image may be blurred.
• When the battery level is low, you may not be able to save captured still images or videos.
• Captured still images or videos may differ from the actual subjects in brightness or color tone.
• Even in Manner Mode, the shutter tone sounds at a fixed volume. The shutter tone sounds from the speaker
even when a headset is connected to the handset (Checking the specifications).
Copyrights and Portrait Rights
You have no right to copy, modify, or distribute any contents to which a third party holds
a copyright such as text, images, music, or software downloaded from Web sites on the
Internet, or recorded using this product, without permission from the copyright holder
except when the copy or quote is for personal use allowed under Copyright Law. Note that
capturing and recording live performances or exhibitions even for personal use may be
prohibited. Refrain from taking portraits or other persons and distributing such portraits
over the Internet without their consent, as this may violate their portrait rights.
■Notice
The stored content may be lost due to the handset failure or repair. DoCoMo is not responsible for lost
data. It is recommended that you keep saved content from the handset on a microSD memory card. You
can connect the handset to a PC using data link software and a FOMA USB cable (optional) and save
data to the PC.
Please respect the privacy of individuals around you when capturing and sending photos using a
camera-equipped mobile phone.
XXXXX

133
Camera
Save Format of Still Images/Videos (Checking the Specifications)
Number of Pictures Which Can Be Saved on the Handset or a MicroSD Memory Card
The following tables show the approximate number of pictures which can be saved:
■Still Images (External Camera)
*: Using the included XX Mbyte microSD memory card (free sample).
■Still Image (Internal Camera)
*: Using the included XX Mbyte microSD memory card (free sample).
Still Image File Video File
File Format JPEG MP4 (Mobile MP4)
Resolution External Camera Wallpaper (240×320)
VGA (480×640)
1.3M (1024×1280)
2.0M (1200×1600)
QCIF (176×144)
CIF (352×288)
Internal Camera QCIF (176×144)
Sub-QCIF (128×96)
Encoding −Graphics:
(Checking the Specifications)
Audio:
(Checking the Specifications)
File Extension .jpg .3gp
File Name (Checking the specifications) (Checking the specifications)
Maximum File Size XX Kbytes 500 Kbytes
Resolution Quality Number of Pictures
M702iG (Handset) microSD Memory Card*
Standby (240×320) Good Approx. XX Approx. XX
Better Approx. XX Approx. XX
Best Approx. XX Approx. XX
VGA (480×640) Good Approx. XX Approx. XX
Better Approx. XX Approx. XX
Best Approx. XX Approx. XX
1.3M (1024×1280) Good Approx. XX Approx. XX
Better Approx. XX Approx. XX
Best Approx. XX Approx. XX
2.0M (1200×1600) Good Approx. XX Approx. XX
Better Approx. XX Approx. XX
Best Approx. XX Approx. XX
Resolution Quality Number of Pictures
M702iG (Handset) microSD Memory Card*
QCIF (176×144) Good Approx. XX Approx. XX
Better Approx. XX Approx. XX
Best Approx. XX Approx. XX
Sub-QCIF (128×96) Good Approx. XX Approx. XX
Better Approx. XX Approx. XX
Best Approx. XX Approx. XX
XXXXX
Continued on the next page
134
Camera
* You need to obtain a microSD memory card separately to use the functions related to the microSD memory card. →P221
■Video (Checking the Specifications)
*: Using the included XX Mbyte microSD memory card (free sample).
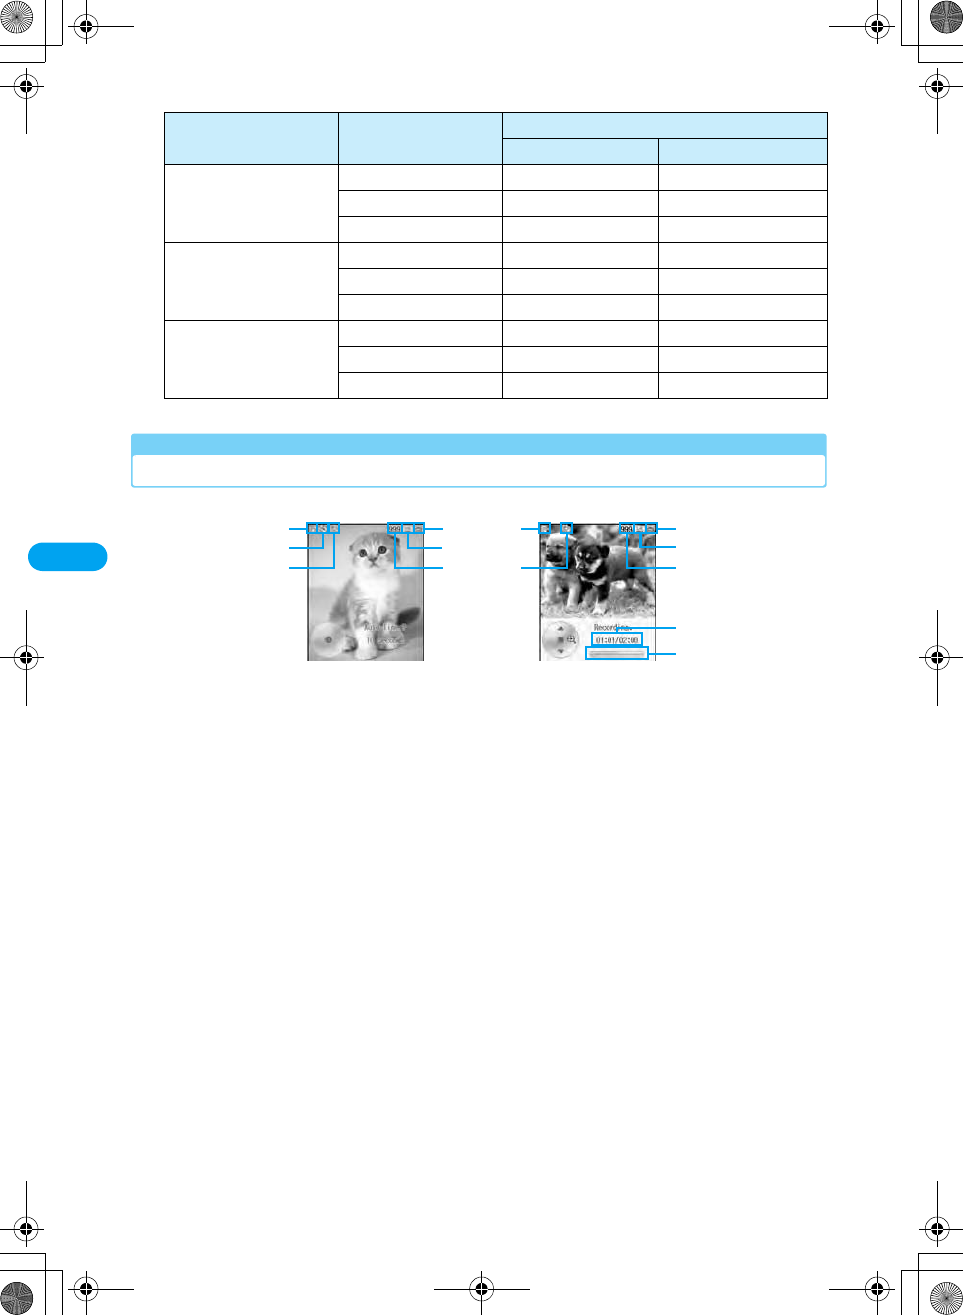
Capturing Screen Components
The meanings of icons appearing on the Photo/Video capture screen are as follows:
*: Number of remaining images depends on the setting
conditions for capturing.
Quality Video Length Number of Pictures
M702iG microSD Memory Card*
Good i-mode (small) Approx. XX Approx. XX
i-mode (large) Approx. XX Approx. XX
Maximum Approx. XX Approx. XX
Better i-mode (small) Approx. XX Approx. XX
i-mode (large) Approx. XX Approx. XX
Maximum Approx. XX Approx. XX
Best i-mode (small) Approx. XX Approx. XX
i-mode (large) Approx. XX Approx. XX
Maximum Approx. XX Approx. XX
Video capturing
screen
Camera capture
screen
a
b
c
d
e
f
a
c
d
e
f
g
h
aCamera mode →P135, P136
$★$ Camera
$★$ Video camera
bAuto-Timed Capture →P138
$★$ Auto Timer ON
cLight →P135, P136
$★$ Light On
$★$ Light Off
dSwitch Storage Device →P139
$★$ Phone
$★$microSD
eResolution →P138 (Still images), P138 (Videos)
$★$ Standby (240x320)
$★$ VGA (480x640)
$★$ 1.3M (1024x1280)
$★$ 2.0M (1200x1600)
$★$ QCIF (176x144)
$★$ Sub-QCIF (128x96)
fNumber of remaining images
gElapsed Capturing time/Maximum capturing time
$★$ Displays the Elapsed Capturing time/
Maximum capturing time
hCapturing progress bar
$★$ Displays the elapsed capturing time
in bar
XXXXX
135
Camera
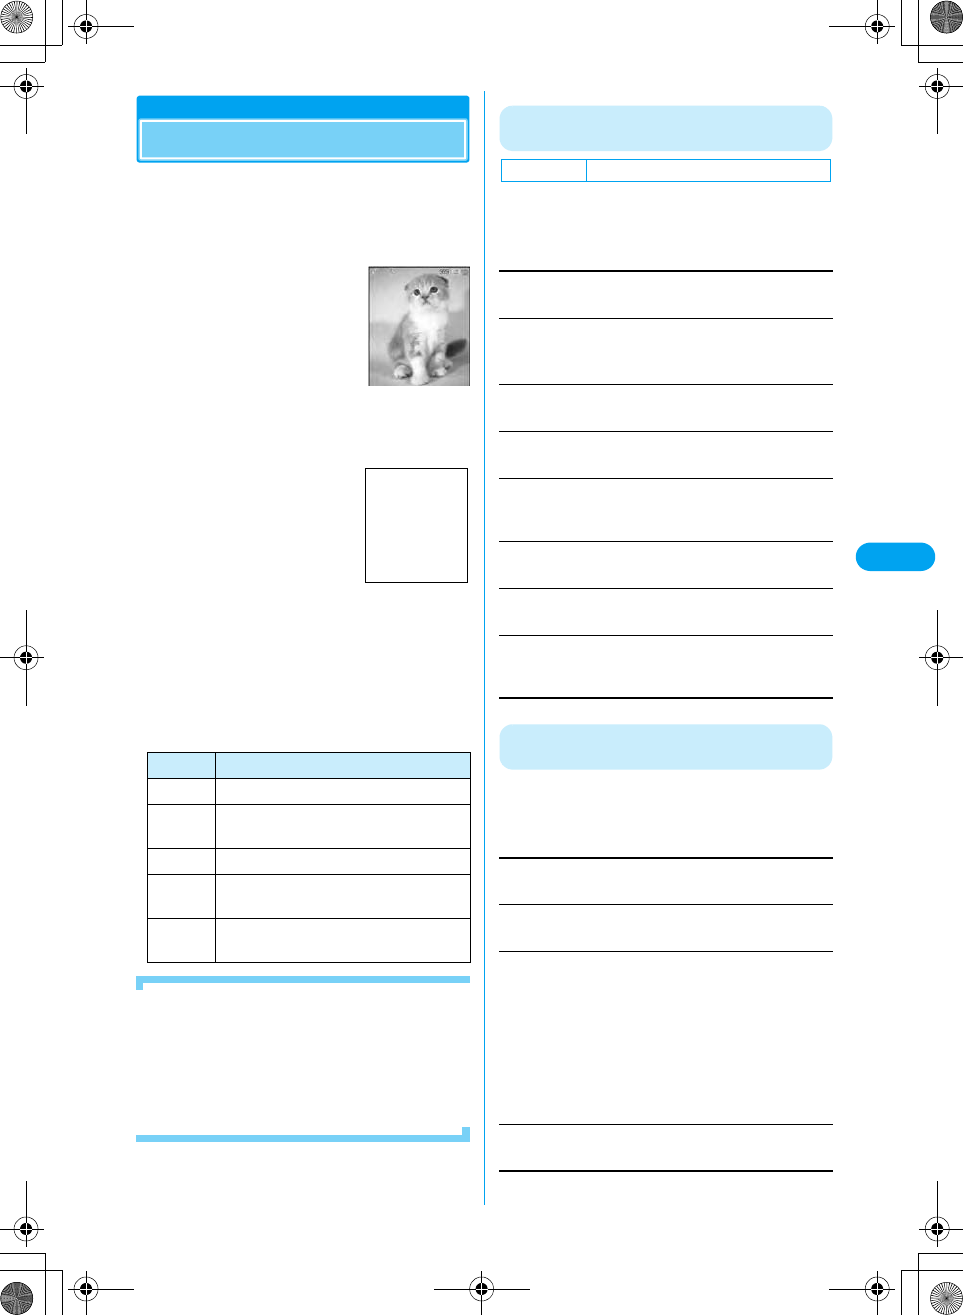
Still Image Capture
Capturing Still Images
• Captured still images are stored in the "Camera" folder
under "My Pictures" in "Databox" on the handset by
default. To change the saving destination to the microSD
memory card, access "Location" (P139).
acy $★$ (Accessories) y "Camera"
bFrame the shot yc/J
•i [Send]: Send a captured
still image using Email, Infrared,
communication or Bluetooth.
→P172, P223, P238
cAfter capturing yc/J
Captured images are saved and the Capturing
screen returns.
•C : A captured image will not be saved and returns
to the Shooting screen.
■Key operation while ready for capturing
■To capture with the handset folded
(Checking the specifications)
If the handset is folded while ready for capturing, the
capture screen opens on the sub-display. Captured
images are saved automatically.
•N/M:Set the image zoom ratio. (Checking the
specifications)
•J:Start shooting.
The Function Menu on the Still image
Capture Screen
aStill image capture screen (P135) yh
[Function] y Perform the following
operations
Go to Pictures
View images saved in "Databox". (Checking the specifications)
Switch
Switches to Video Mode or Barcode Reader.
y"Go to Movie Mode"/"Barcode Reader"
Internal View/External View
You can switch the camera between internal and external views.
Light On/Light Off
You can turn the flash on/off.
Auto-Timed Capture
Set the number of seconds from the time the shutter is pressed
until the capturing time. →P138
Camera Setup
Sets the camera. "Setting the Camera". →P138
Switch Storage Device
Set the saving destination of the image. →P139
Free Space
Check the free space on the handset or the microSD memory
card.
The Function Menu on the Still Image
Capture Completion Screen
aStill image Capture completion screen
(P135) yh [Function] y Perform the
following operations
Store Only
Saves a captured still image.
Discard
Deletes a captured still image.
Apply As
Sets the captured still image for the Wallpaper or a Contact.
Edit
Edits a captured still image. →P207
Key Description
c/JStart Capturing
*Light On/Off (Only when shooting with
the External camera)
#Internal/External View
jDisplay keys for Zoom, Lighting Control
and Brightness
sSelect values for Zoom, Lighting
Conditions, and Brightness
Still image
capture screen
Still image capture
completion screen
Screen to be
inserted
Default Light: Light Off
Wallpaper
Screen Saver
Contact
Camera Off Image
: Sets as Wallpaper.
: Sets as Screen Saver.
: Sets to a Contact. Go to Step 2 in "Saving
Contacts to the Phonebook from
Received Calls or Dialed Calls" (P94).
: Sets to an alternative image of a video
phone.
XXXXX

136
Camera
* You need to obtain a microSD memory card separately to use the functions related to the microSD memory card. →P221
Record Video
Capturing Videos
• Captured videos are stored in the "Camera" folder under
"i-motion" in "Databox" on the handset by default. To
change the saving destination to the microSD memory
card, access "Switch Storage Device" (P139).
acy $★$ (Databox) y "Video Camera"
bFrame the shot yc/J
•h [Stop]: Terminates
capturing.
•i [Cancel]: Stops capturing
without saving the captured
video.
cExit capturing
•i [Send]: Sends a captured video using Email,
Infrared communication, or Bluetooth. →P172, P223,
P238
dc/J
Captured videos are saved and returns to the
Capturing screen.
■Key operation while ready for capturing or
while capturing
The Function Menu on the Video Capture Screen
aVideo capture screen (P136) yh
[Function] y Perform the following
operations
Go to Videos
View images saved in "Databox". (Checking the specifications)
Switch
Switches to Photo Mode or Barcode Reader.
y"Go to Photo Mode"/"Barcode Reader"
Internal View/External View
You can switch the camera between internal and external views.
Light On/Light Off
You can turn the flash on or off.
Video Camera Setup
Sets the Video camera. "Setting the Camera". →P138
Switch Storage Device
Set the saving destination of the image. →P139
Free Space
Check the free space on the handset or the microSD memory
card.
Function Menu on the Video Capturing
Completion Screen
aVideo capturing completion screen
(P136) yh [Function] y Perform the
following operations
Store Only
Saves a captured video.
Discard
Deletes a captured video.
Preview
Plays a captured video.
Edit
Edits a captured video. →P210
Changing the Capturing Settings
Set the Camera matching with the ambient
conditions.
Key Description
c/JStart/Pause Capturing
*Light On/Off (Only when shooting with
the external camera)
#Internal/External View (Only in shooting
standby mode)
jDisplay keys for Zoom, Lighting Control
and Brightness
sSelect values for Zoom, Lighting
Conditions, and Brightness
Video capture
screen
Video capturing
screen
Default Light: Light Off
XXXXX
137
Camera
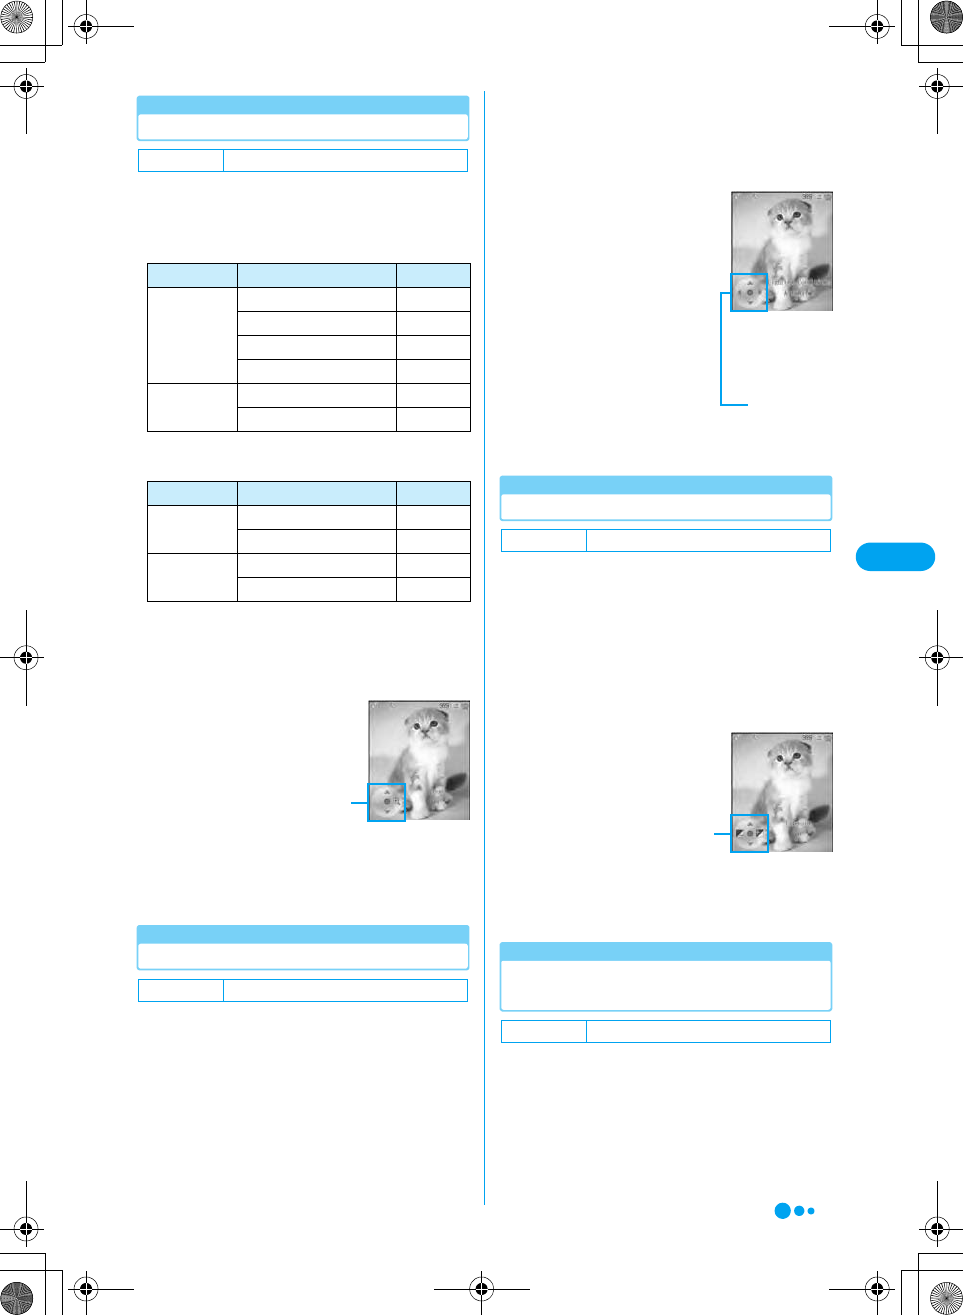
Using Zoom
Use the control key displayed on the capture
screen to set Zoom.
■Maximum zoom ratios for resolutions
(External camera)
■Maximum zoom ratios for resolutions (Internal
camera)
aStill image capture screen (P135)/Video
capture screen (P136) y Use j to
adjust Zoom y Use s to select a zoom
ratio
Setting Lighting Conditions
You can adjust the coloring of the image to a
natural color tone with light source in captured
places. Use the operation key displayed on the
capture screen to set Lighting Conditions.
aStill image capture screen (P135)/Video
capture screen (P136) y Use j to
adjust Lighting Conditions y Use s to
select the following the items
Automatic
: The camera automatically
adjusts the natural color tones to
match with the lighting
conditions.
Sunny
: Suitable for shooting outdoor in
sunny weather.
Indoor (Home)
: Suitable for shooting under
incandescent lighting.
Indoor (Office)
: Suitable for shooting under
florescent lighting.
Night
: Suitable for shooting night views.
Adjusting Brightness
Adjust the brightness (exposure) of the image.
The Brightness can be set from -2∼0∼+2. Use
the operation key displayed on the capture
screen to set Brightness.
aStill image capture screen (P135)/Video
capture screen (P136) y Use j to
adjust Exposure y Use s to select a
brightness correction value
Switching between the Internal and
External cameras
You can switch between the In and Out cameras
according to the subject.
aStill image capture screen (P135) yh
[Function] y "Internal View"/"External
View"
Default Still Image/Video: 1x
Camera Mode Resolution Max. Ratio
Still image Wallpaper (240×320) Approx. XX
VGA (480×640) Approx. XX
1.3M (1024×1280) Approx. XX
2.0M (1200×1600) Approx. XX
Video QCIF (176×144) Approx. XX
CIF (352×288) Approx. XX
Camera Mode Resolution Max. Ratio
Still image QCIF (176×144) Approx. XX
Sub-QCIF (128×96) Approx. XX
Video QCIF (176×144) Approx. XX
CIF (352×288) Approx. XX
Default Still Image/Video: Automatic
Zoom setting
screen
(Example: Still
image capture
screen)
Control key
Default Still Image/Video:0
Default Still Image/Video: External View
Lighting
Conditions
(Example: Still
image capture
screen)
Control key
Exposure setting
(Example: Still
image capture
screen)
Control key
XXXXX
Continued on the next page
138
Camera
* You need to obtain a microSD memory card separately to use the functions related to the microSD memory card. →P221
Capturing Close-up
Press the macro mode switch to $★$ when
capturing close to an object or using the
Barcode Reader.
• You can capture a subject from a distance of about 10 cm
away using (Macro).
• When switching lenses, slide the switch all the way. If
you stop the switch in the middle, the lens will not be
switched.
Setting the Auto Timer
Set the number of seconds from the time the
shutter is pressed until the capturing time.
• The Auto Timer is not available for video capturing.
aStill image capture screen (P135) y h
[Function] y "Auto-Timed Capture"
b"5 seconds"/"10 seconds"
The set duration ($★$) is
displayed on the capture
screen.
•i [Cancel]: Cancels the Auto
Timer.
ch [Start]
The auto timer starts and shoots after the set
number of seconds elapses.
•h [Capture]: Starts capturing.
•i [Cancel]: Cancels the timer.
Camera Setup
Changing the Camera Settings
You can specify the saving destination of
captured images, the shutter sound, the
resolution, image quality, etc.
Setting the Camera
aStill image capture screen (P135) yh
[Function] y "Camera Setup" y Select
from the following items yh [Change]
Resolution
Sets the resolution.
• For resolutions, see "Number of Pictures which can be Saved
on the Phone or a microSD Memory Card" (P133).
ySelect a resolution yh [Select]
Quality
Sets the image quality.
y"Good"/"Better"/"Best"
Shutter Tone
Select the tone to sound when the shutter is pressed.
ySelect a Shutter Tone yh [Select]
Mirror
The image displayed on the finder will be reversed when you are
using the internal camera.
y "Off"/"On"
Location of External View
Internal
Camera External
Camera
Press this key on the Still image capture screen
(P135) to switch to Internal Camera/External Camera.
Macro Switch
Default
Resolution (External/Internal View):
Standby (240 x 320)/QCIF (176 x 144)
Quality: Better
Shutter Tone: Click
Mirror: Off
Auto-Timed
capture screen
XXXXX

139
Camera
Setting Video Capturing
aVideo capture screen (P136) yh
[Function] y "Video Camera Setup" y
Select from among the following items
yh [Change]
Auto Repeat
(Checking the specifications)
y "On"/"Off"
Full Screen
(Checking the specifications)
y "Left (90 CCW)"/"Right (90 CW)"
Video Quality
Sets the image quality.
y "Good"/"Better"/"Best"
Video Length
Set a duration of video capturing. (Checking the specifications)
y "MMS"/"Maximum"
Resolution
Sets the resolution.
• For resolutions, see "Number of Pictures which can be Saved
on the Phone or a microSD Memory Card" (P133).
y Select a resolution yh [Select]
Recording Sound
• Set whether to record sound when capturing videos.
y "Off"/"On"
Mirror
The image displayed on the finder will be reversed when you are
using the Internal camera.
y "Off"/"On"
Set the Saving Destination of the
Image/Video.
Set the saving destination of the captured image
either to the handset or the microSD memory
card.
aStill image capture screen (P135)/Video
capture screen (P136) yh [Function]
y "Switch Storage Device"
b"MicroSD"/"Phone"
h [Details] : Display the storage location as "microSD"
or "Phone".
Barcode Reader
Using the Barcode Reader
You can scan information embedded in a JAN
code or QR code using the handset camera. You
can create i-mode mail or connect to the Internet
using the scanned information. You can also
save or play the scanned information, image or
melody.
• Up to XX split QR codes can be scanned.
• UP to 5 pieces of scanned information can be saved.
■JAN codes
The JAN code is a barcode representing numbers
using vertical bars in different thickness and
spaces. 8-digits (JAN8) or 13-digit (JAN13)
barcode can be scanned.
• The scanned information is saved on the Barcode
reader screen as "XXXXX.jan" data.
• The scanned result of the following JAN code is
"4942857113276".
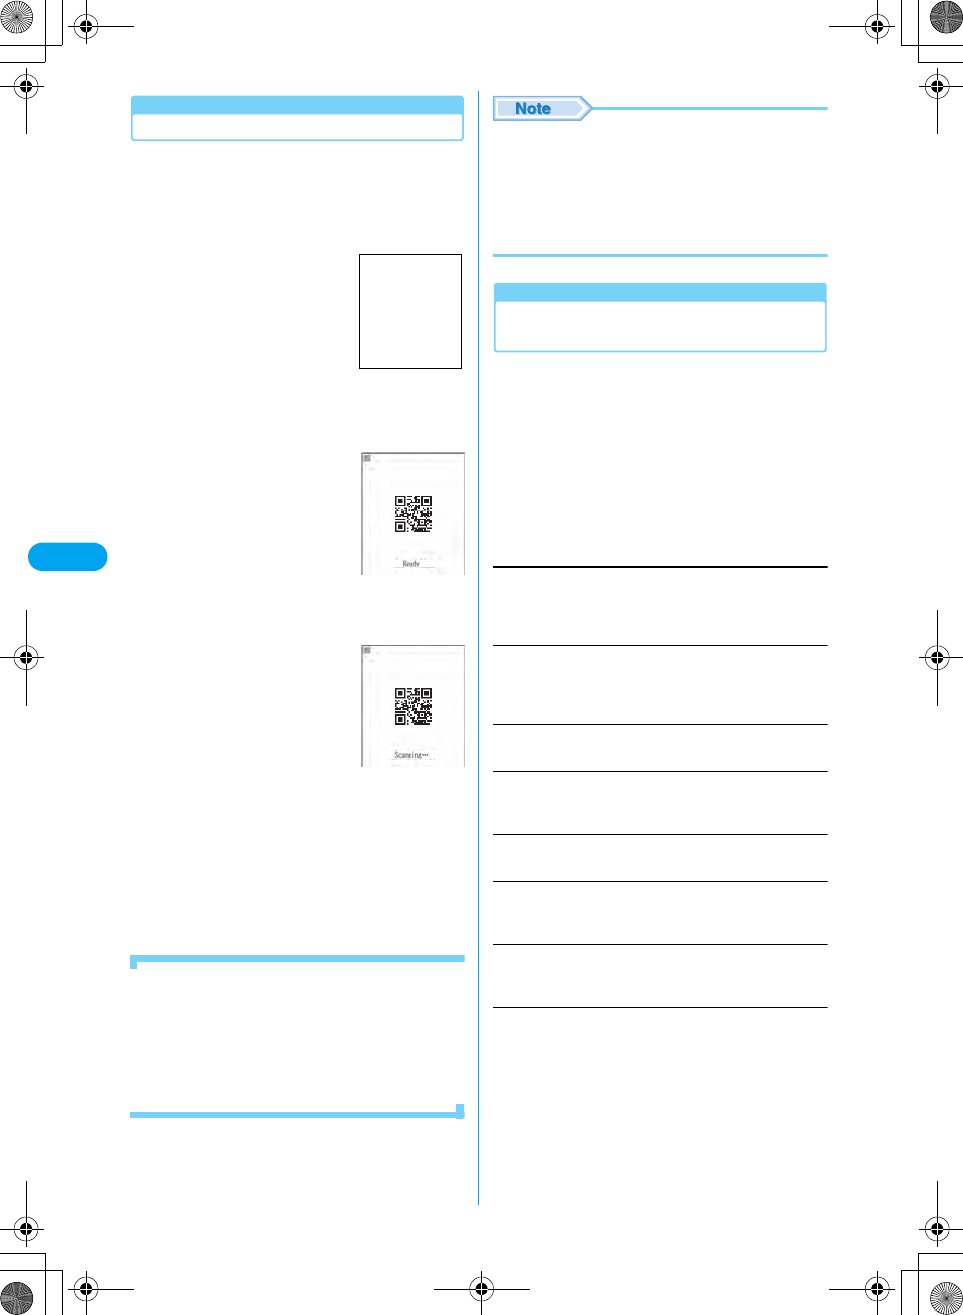
■QR codes
The QR code is one of the 2 dimensional codes
that expresses text including Kanji, Kana or
pictographs in the vertical and horizontal patterns.
Some QR codes have an image or melody
embedded, and there are split QR codes where
several images contain one larger piece of
information.
• The scanned information is saved on the Barcode
reader screen as "XXXXX.qr" data.
• The scanned result of the following JAN code is "株式
会社NTTドコモ".
Default
Auto Repeat:Off
Full Screen:Left (90 CCW)
Video Quality:Better
Video Length:i-mode (Large)
Resolution (External/Internal View):QCIF
(176x144)
Recording Sound:Off
Mirror:Off
Default Still Image/Video: Phone
XXXXX
140
Camera
Scanning Codes
• Set the close-up button of the camera to $★$ before using
the Barcode Reader. →P138
• Scan a code from a distance of about 10 cm away.
acy $★$ (Accessories) y "Barcode
Reader"
bStart Scan
•h [Light On]: Turn On/Off the
light.
cc
Scan the code. When
scanning completes, a tone
sounds and the Scanned
result screen opens.
•i [Cancel]: Cancels the
scanning.
• If the code cannot be scanned
within 30 seconds, the FOMA
handset returns to the Scanning
start screen after a message
appears.
dSelect data to scan y c
The screen to display/play/save the scanned data
appears. Go to Step 3 in "Using Saved Data"
(P140).
■To scan split QR codes
aPerforms Steps 1 to 3 of "Scanning Codes" (P140)
bAfter the message "Scan Next Barcode" appears,
scans the next code
cRepeats Steps b and c
• If a split code could not be scanned, a confirmation
whether to end the Barcode Reader appears. Press
h [No] to return to the Scanning code screen.
• Barcodes other than JAN Codes and QR Codes and 2
dimensional codes cannot be scanned.
• Barcodes may not be correctly scanned because of
scar, smudge, damage, printing quality or reflection of
lights.
• Some codes may not be scanned depending on the type
or size.
Using Saved Data (Checking the
specifications)
aBarcode Reader screen (P140) y Select
data y c
bSelect "View" y c
The Scanned result screen (P140) opens.
Delete: Deletes the selected data. Press h [Yes].
cSelect data y cy Perform the
following operations
• Displayed items vary depending on the type of data.
View
Displays an image.
• If the data is not saved, the image is displayed after the data
is saved. Press h [Yes].
Play
Plays a melody.
• If the data is not saved, the melody is played after the data is
saved. Press h [Yes].
Store as Bookmark
Saves the URL in Bookmarks. c yh [Yes].
URL
Saves the underlined URL to a bookmark or Contact, or make a
call using the Web To function.
Internet
Connects to the Internet. Press h [Yes].
Phone Number
Saves the underlined phone number to a Contact or create
i-mode mail using the Mail To function.
Email
Saves the underlined mail address to a Contact or create i-mode
mail using the Mail To function.
Create Message
The Compose message screen opens. Press h [Yes].
Barcode Reader
screen
Screen to be
inserted
Scanning start
screen
Scanned result
screen (Example:
An image was
scanned.)
XXXXX
141
Camera
Create Contact
Saves the name, phone number etc. to a Phonebook. Press
h [Yes].
Voice Call
Makes a voice call to the selected phone number.
Video Call
Makes a video call to the selected phone number.
Run i-appli
Starts an i-appli. Press h [Yes].
Delete*
Deletes scanned images or melodies.
Copy
Copies selected URL, phone number or address. →P265
Copy All
Copies all items on the Scanned result screen. →P265
Save
Saves the scanned data.
• If the address has invalid characters, nothing is entered
in the address.
• Valid characters are numbers and symbols (#, *, +, and
-). If the phone number contains characters other than
these, the call cannot be made.
• To launch an i-appli from scanned data, set "Start from
Barcode" to "Yes". →P195
• No more scanned data can be saved if 5 have already
been saved. Press h [OK] y Select scanned data
yc if a message whether to delete the oldest data
appears.
Create New
Add to Contact
: Save to a Phonebook selecting "Phone" or
"UIM".
: Add items to an existing Contact.
Create Email
Making a Voice Call/Video Call
Run i-appli
Save
XXXXX

142
i-mode/i-motion
i-mode ........................................................................................................................144
Displaying the i-mode Menu<i-mode Menu>..........................................................147
Accessing Sites
Accessing Sites ................................................................................................148
Navigating and Performing Operations on Web Sites ..................................149
Opening Web Site<Internet Connection>.......................................................150
Saving Entries in MyMenu<MyMenu>.............................................................151
Changing i-mode Password<Change i-mode Password>.............................151
Saving Web Site Addresses or Sites for Quick Access<Bookmarks> ........151
Saving the Contents of a Web Site<Screen Memo>......................................153
Downloading Images or Melodies from Sites
Saving Images from a Site or Message<Save Image> ..................................155
Downloading Melodies from a Site<Melody>.................................................155
Downloading Templates from a Site (checking the specifications)
<Download Templates>....................................................................................156
Downloading Dictionaries from a Site (checking the specifications)
<Download Dictionaries>.................................................................................156
Downloading Chara-den from a Site (checking the specifications)
<Download Chara-den>....................................................................................156
Useful Functions of i-mode
Using Phone To/Mail To/Web To/i-appli To Functions
<Phone To/Mail To/Web To/i-appli To Function>............................................157
Configuring i-mode Settings
Configuring i-mode Settings<i-mode Setting> ..............................................157

143
Using Message Service
When Receiving Messages<Receiving Messages> ......................................159
Displaying Messages in the Message Box<Message R/Message F>...........160
Using Certificates
Operating SSL Certificates<SSL Certificate> ................................................161
Configuring FirstPass Settings<User Certificate Operation> ......................161
Changing the Certificate Center Host
<Connect to Certificate Center Host>.............................................................162
Using i-motion
i-motion..............................................................................................................162
Downloading i-motion Movies from Sites
<Download i-motion movies> ..........................................................................163

144
i-mode/i-motion XXXXX
i-mode
i-mode is a service that makes use of the display
of the i-mode FOMA handset (i-mode handset) to
enable you to use online services such as site
(program) access, Internet access and i-mode
mail.
■Site (Program) access
You can use various types of online services
offered by information providers (IP), such as
weather forecasts and news by selecting i Menu
from the i-mode menu. You can also download
games or wallpaper.
■Internet
Directly entering a URL to an i-mode handset
allows you to view various i-mode Web sites.
■i-mode mail
You can exchange messages of up to 5,000 full-
pitch characters with i-mode handsets or with
anyone who has an Email address on the
Internet. Deco mail, still images or videos can
also be exchanged.
How the Service Works
• i-mode is a fee-based service requiring a separate
subscription. For details on subscription, contact the
"DoCoMo Information Center" on the back of this
manual.
• Once you subscribe to the FOMA service, you can use
all services from that day.
• If you switch the subscription from the mova service
(with i-mode subscription) to the FOMA service, the
MyMenu contents will be transferred. All of the
"MyMenu" contents may not be transferred to FOMA
depending on the sites. You may need to register again.
For sites that allow transferring "MyMenu", check "News
& Help" under the i-menu.
• i-mode fees are based on the amount of exchanged data
(number of packets). This manual does not include
information on fees. For information on fees, refer to the
"i-mode Operation Guide" that was provided when you
subscribed to i-mode.
• The i-mode service contents are subject to change. For
details, refer to the latest "i-mode Operation Guide".
Site (Program) Access
You can access sites with simple key operations
to use various online services offered by
information providers (IP). These online services
include inquiring on bank account balances,
transferring money, purchasing tickets, viewing
news, looking up in dictionaries, and
downloading ring melodies.
Opening Sites
After you connect to the i-mode Center, the
i Menu opens. From this menu, you can access
sites (programs) or the "Weekly i Guide".
• Accessing Sites →P150
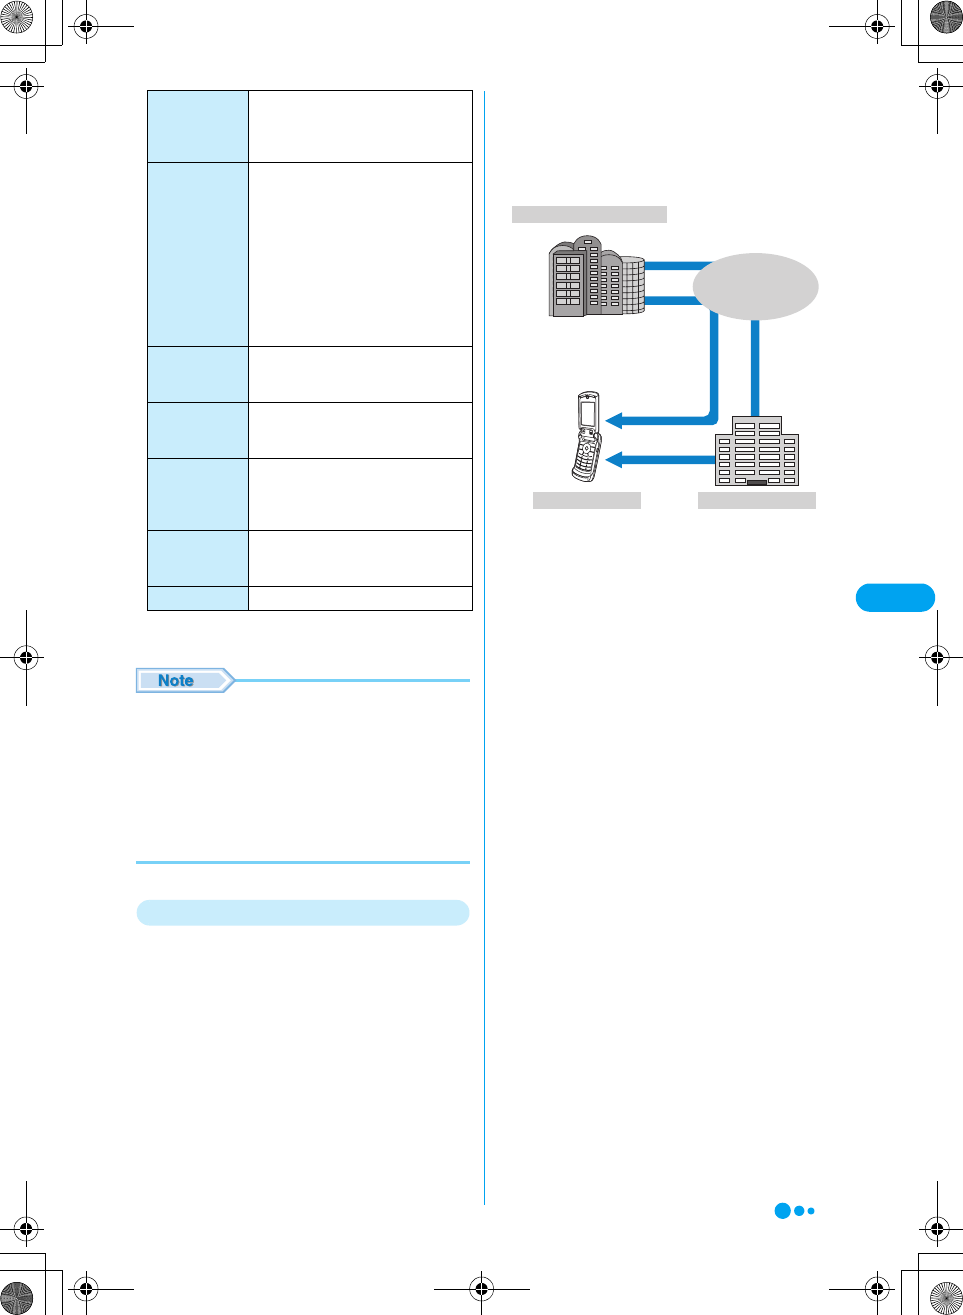
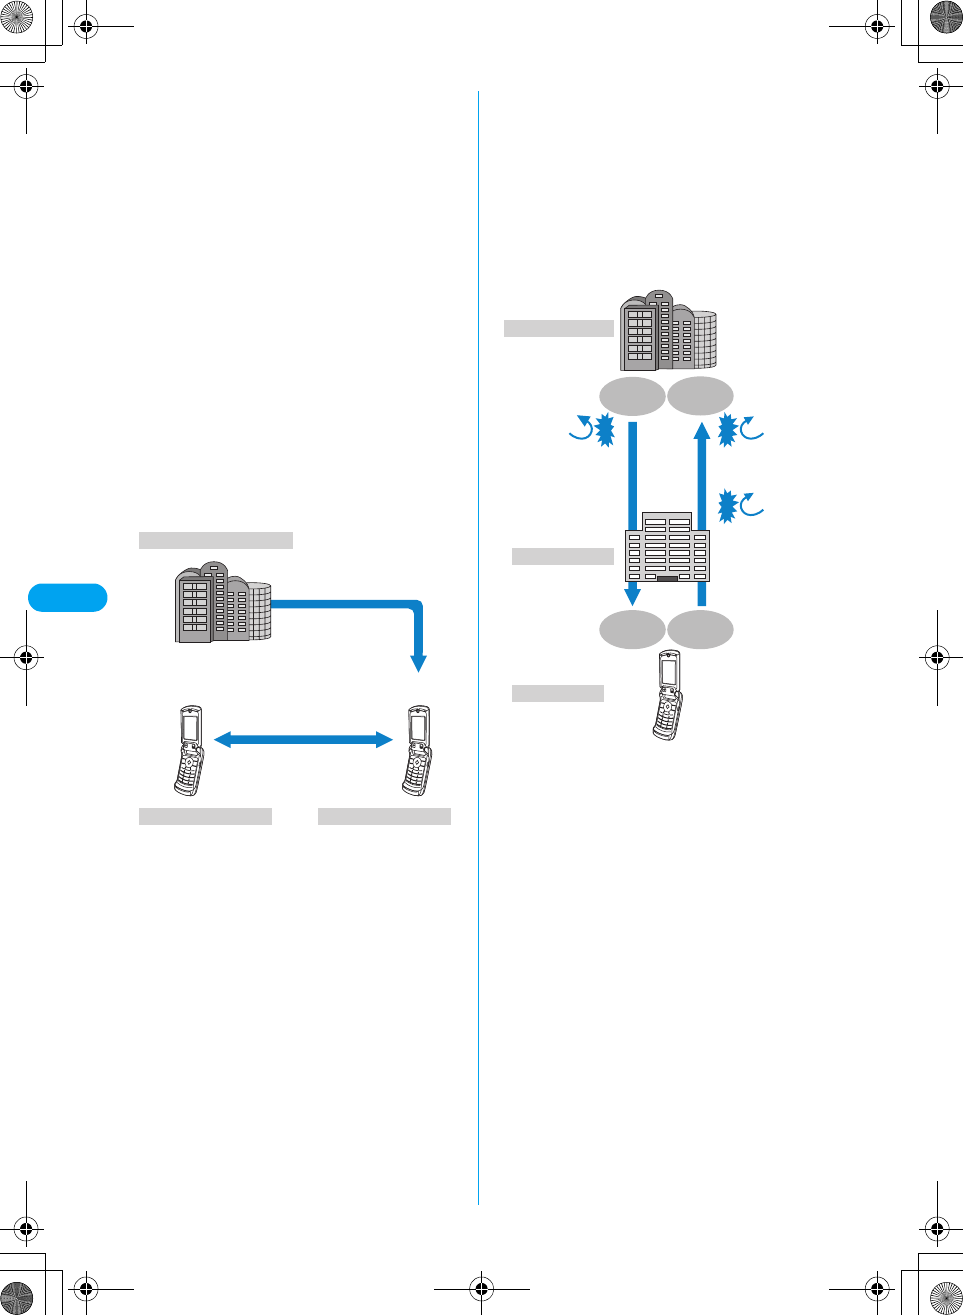
IP (Information Provider)
i-mode Center
i-mode handset i-mode handset
PC, etc
The i-mode Center
connects
Information
Providers and
i-mode handsets. It
also holds mail and
messages.
Provides sites
(programs).
FOMA service area
The i-mode service area is
the same as the FOMA
service areas (area in
which calls can be made).
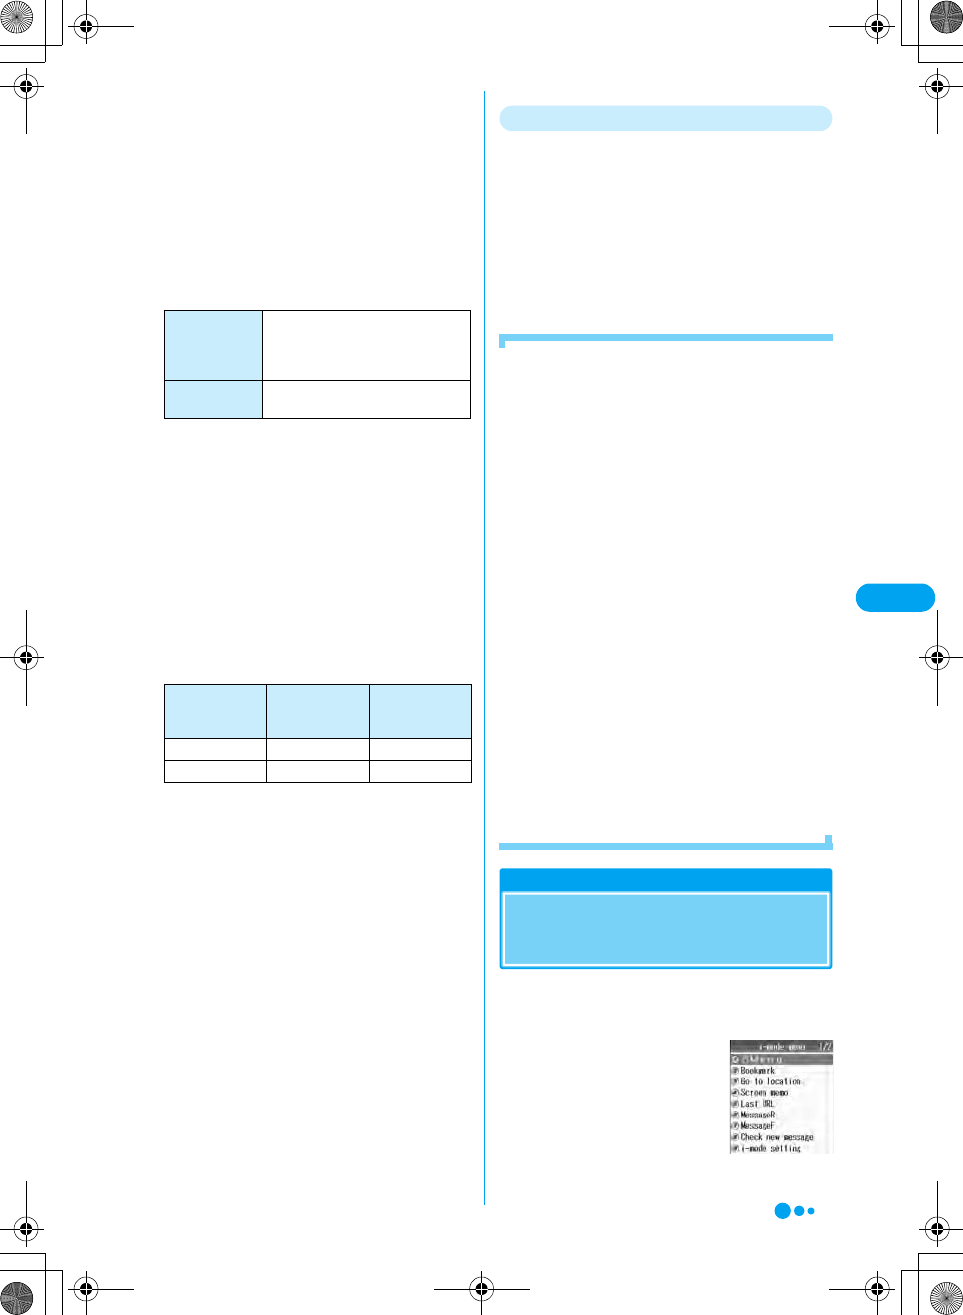
Internet
aマイメニュー
(MyMenu)
Frequently accessed sites can be saved
for quick connection. →P151
Fee based sites in i Menu will be saved
automatically. Up to 45 sites can be
saved.
b週間iガイド
(Weekly
i Guide)
The latest information about new or
recommended sites is provided every
day from Monday to Friday.
c
メニューリスト
(Menu List)
All sites by genre and region are listed.
Select and connect to a site from this list.
dとくする
メニュー
(Tokusuru
Menu)
Weekly updates on interesting PR
campaigns, premiums and discount
coupons, etc. are provided. (Sponsored
by D2 Communications)
i Menu
Screen to be
inserted
145
i-mode/i-motion XXXXX
• Setting screens only provide examples. Some screens
may appear differently depending on the settings.
• Some sites require fees to use their information (i-mode
pay sites).
• Some services offered by information providers (IP) may
require a separate subscription.
• Packet communication is not charged except during
communication with the i-mode center even if $★$ is
flashing.
• If you subscribe to the Dual Network service, the i Menu
screen appears differently.
Other Convenient Services
■i-Channel
i-Channel is a service that DoCoMo or
information providers (IP) use to distribute
graphical information such as news or weather
forecasts to i-mode handsets. Information is
periodically received and tickers flow on the
wallpaper screen for the latest information. You
can press h to show a Channel List. In
addition, you can obtain more detailed
information by selecting a channel you want to
see from the Channel List.
• Compatible devices - Available on the i-Channel
compatible handset.
For details, refer to the "i-mode Operation Guide".
■i-motion
You can download images or sounds from i-mode
sites to play or use as Wallpaper.
• Downloading i-motion Files →P163
• Playing back i-motion Sounds →P208
• Automatically Playing i-motion Files →P164
■Chaku-motion/Chaku-Uta
You can download an i-motion file from an i-mode
site to your i-mode handset to use it as a ringtone
or Picture ID. In addition to melodies, you can use
the singing voice of your favorite singer as a
ringtone. However, you cannot set some
incompatible i-motion files as Chaku-motion.
Setting Chaku-motion →P108
• "Chaku-Uta" is a registered trademark of Sony Music
Entertainment Inc.
■i-appli
i-appli downloaded from various sites allow you to
use your i-mode handset in many new,
convenient ways. For example, you can
download various games to your i-mode handset,
or a stock market i-appli for automatically
checking stock prices periodically. You can scroll
a map smoothly because only the data you need
is downloaded with a map i-appli.
• Downloading an i-appli →P193
• Launching an i-appli →P195
• Launching an i-appli Automatically →P195
■i-appli Standby screen
On the i-appli Standby screen, you can use an
i-appli as the Standby display, or to receive mails,
or make calls. You can set the stand-by display to
display the latest news or weather forecast, or
have your favorite character notify you of new
mails or alarms.
• Setting the i-appli Standby Screen →P192
eエリア
(i Area)
Easy-to-use information on the area you
are currently located, such as weather
forecast, maps and town information is
provided.
fかんたん検索
(Easy
Search)
Sites can be quickly searched using a
keyword from a category such as
"games" or "wallpaper".
i-appli Search:
Menu for introducing i-appli by subject
categories, such as free i-appli or
games.
Convenient-site Search:
A Menu that introduces sites picked from
the menu list that is convenient for daily
use, by usage category.
gマイボックス
(MyBox)
MyBox is a membership service that
allows you quickly access the saved
sites or shops.
hオプション
設定
(Function)
i-mode mail settings or the i-mode
password can be changed.
iお知らせ&
ヘルプ
(News &
Help)
Information from DoCoMo and
instructions and rules for using i-mode
are provides.
■料金&お申込
(Billing &
Subscriptions)
You can check or pay your bill, change
your subscription items, or subscribe to
additional services.
ENGLISH You can switch the i Menu to English.
IP (Information Provider)
i-mode handset i-mode Center
i-motion
Movies of news,
music, and so on
Continued on the next page
146
i-mode/i-motion XXXXX
■i-appli DX
You can make even greater use of an i-appli. For
example, you can link the i-mode handset data
(mail and call logs, Contacts, etc.) to i-appli DX to
create mail messages with your favorite
animation character, to have the animation
announce the names of callers, or to update real-
time information such as stock prices or sport
events.
•i-appli DX →P192
■Chara-den
During a video call, you can send an animation
character to the other party's video call handset
instead of your own image, and make the
character move using key operations. You can
download an animation character and set it as
Wallpaper or attach it to Email. However, you
cannot send a still image or video file which has
been restricted from being attached to Email or
output from the handset.
• Downloading Chara-den →P156
• Viewing Chara-den →P213
• Setting Chara-den →P85
• Operating Chara-den →P213
■Infrared communications
You can exchange Contacts, Email, and
bookmarks with another mobile phone or PC with
infrared capability.*
An i-appli enables you to connect to another
device with infrared capability and provides for a
wider variety of usage. For example, you can use
the handset with an i-appli as a TV remote
controller or as a membership card.
*: You may not be able to exchange data with some
devices even when they have the infrared capability.
• Switching to Infrared Mode →P223
■SSL communication
SSL employs authentication and encryption
technology to protect privacy and make data
communication more secure. SSL pages use
data encryption to prevent eavesdropping or
identity theft, and file overwriting to make
exchange of personal data including your credit
card numbers or addresses more secure. There
are 2 types of SSL communication: One displays
an SSL site (SSL page) using the CA certificates
on the handset without any special operations
and the other one displays an SSL site using the
user certificate downloaded from the FirstPass
center. Depending on the site, different
certificates are used.
• Using the SSL Certificate Stored in the i-mode Handset
→P161
• Using the User Certificate of the FirstPass Center
→P161
■UIM restrictions
Some melodies, still images, and i-motion movies
may be restricted from use when a UIM other
than the one used for obtaining these files is used
in the handset.
If a different UIM is inserted or a UIM is not
inserted, obtained files cannot be played or
displayed.
• The restrictions do not apply for still images or videos
captured with the Camera or files transferred from a PC
to the handset.
• Ringtones or Wallpaper settings assigned to handset
functions will revert to defaults.
■i-melody
You can download the latest melodies into the
i-mode handset to use them as ringtones.
→P155
■i-animation
You can download your favorite animation to the
i-mode handset and display it as Wallpaper or
Picture ID. →P155
■Flash®
Flash is an animation technology using images
and sounds. With Flash movies, you can use
various kinds of animations and enhanced sites.
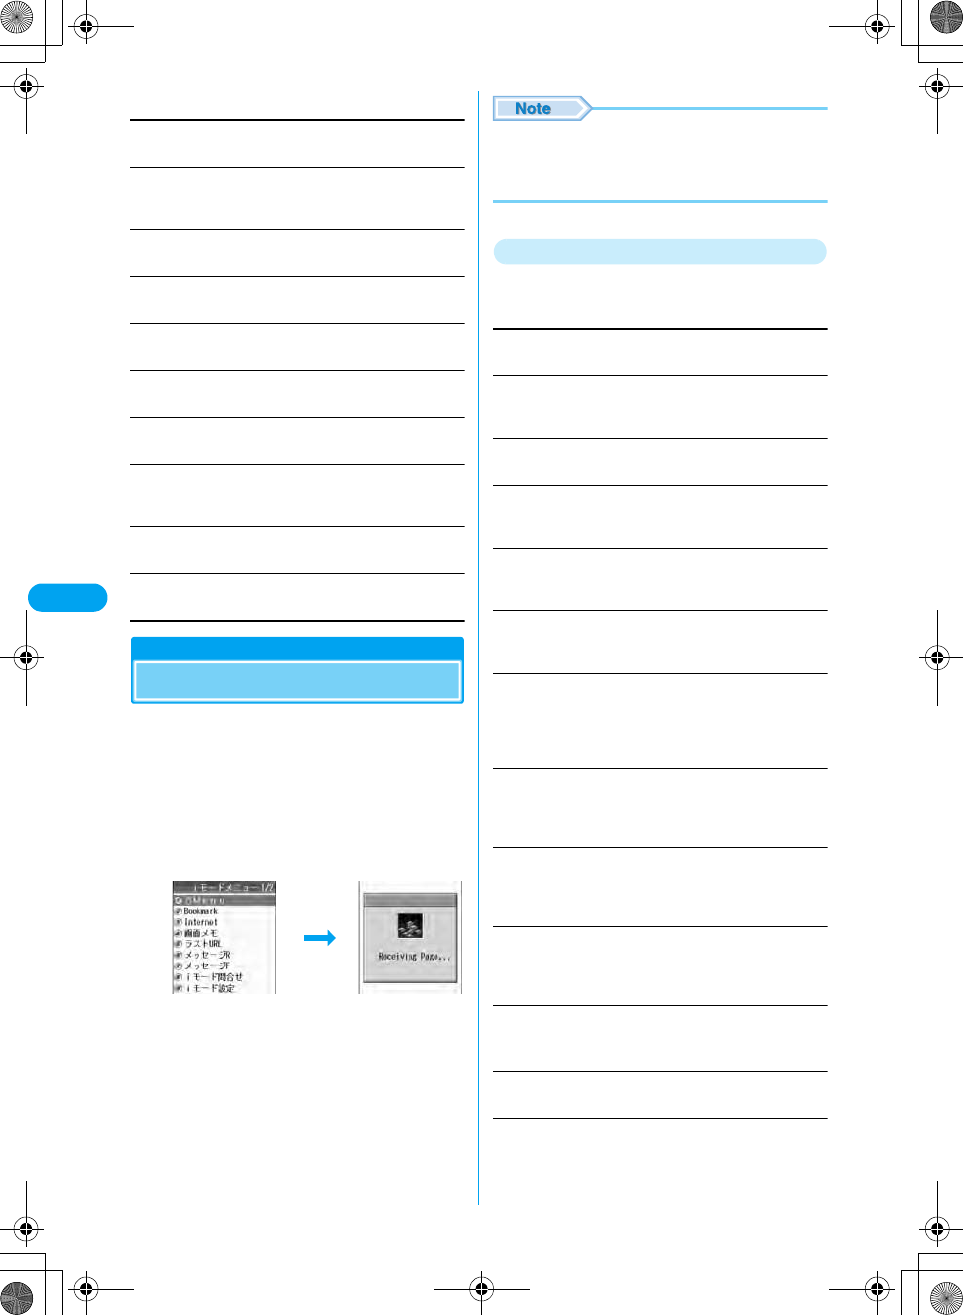
IP (Information Provider)
Video-phone
Chara-den image
Movies of news, music,
and so on
Key operationψ
Image through
camera
Chara-den contents
Download
Video-phone
IP (Information Provider)
i-mode Center
i-mode handset
Impersonation
Flasification
Encryption Decryption
EncryptionDecryption
Eavesdropping
Someone who
pretends to be a
site for the
purpose of illicitly
acquiring
information about
people.
147
i-mode/i-motion XXXXX
You can also download images of Flash movies
to the i-mode handset and use them as
Wallpaper. Some Flash movies can browse the
handset data including:
• Battery level, Signal strength, Date and Time, Ring
Volume, Language, and Handset model information.
■Message service
The Message Service delivers required
information (messages) automatically to your
i-mode handset. There are 2 types of Message
Service: Message R (Message Request) and
Message F (Message Free).
• Receiving messages via the Message Service
→P159
• The default setting for Message F (Free) is "Receive" if
you subscribed to i-mode at the same time as you
newly registered the FOMA handset on October 1,
2004 or later. You need to change the setting to "Not
Receive" to stop receiving Messages F.
- If the above case does not fit to you, you need to set
the option to receive before receiving Messages F.
The option is set to "Not Receive" as default.
• Messages R/F are stored at the i-mode center while
your handset is turned off or out of the service area.
• Messages R/F are stored at the i-mode center as
follows: If there are too many messages or messages
that are held too long , the oldest messages will be
overwritten first.
• You can download Messages R/F from the i-mode
center using "Check new message". →P159
■News delivery service
DoCoMo distributes information such as news
and weather forecasts to i-mode handsets using
the Message R (Request) function. The News
Delivery Service is a fee-based service requiring
a separate subscription. After your new
subscription has been processed, this service is
automatically saved to MyMenu, enabling you to
access the same information from MyMenu.
• Message R Screen Components →P160
■i-mode password
The i-mode password is required to save/cancel
MyMenu items, to subscribe to i-mode fee-based
sites, or to configure i-mode mail settings. The
password is set to "0000" by default. Change it to
a 4-digit number of your own choice.
Do not reveal your i-mode password to others.
• Changing the i-mode password →P151
Internet
You can access Web sites that support i-mode
by entering the Internet Web site address (URL).
• Viewing Web sites →P150
• Web sites that do not support i-mode may not be displayed
correctly. Web sites that support i-mode are sites created
using tags designed for i-mode.
• Web sites may appear differently from the way they appear
on a PC.
• It may not be possible to open a Web site that has a URL
of more than 256 half-pitch characters.
■Before using i-mode
• Contents of sites (programs) and Web sites are
generally protected by copyright law. Data, such as
text and images you download to the i-mode handset
from sites or Web sites, can be used for personal
entertainment but cannot be used, in whole or in part,
as is or after modification, for sale or redistribution,
without the consent of the copyright holders.
• The contents saved on the i-mode handset (mail,
Message R/F, Screen Memos, i-appli, and i-motion
movies) and saved Bookmarks, etc. may be lost due
to handset failure, repair or other mishandling. It is
recommended that you make a copy of important
data and keep it in a separate place. DoCoMo is not
responsible for lost data.
• When an i-mode handset is repaired or replaced,
DoCoMo does not restore all information downloaded
via i-mode, i-appli or i-motion due to copyright law
protections. If you insert another UIM or turn the
handset power on without the UIM, depending on the
model of the handset, still images, videos, melodies,
Email attachments (still images, videos or melodies),
screen memos or Messages R/F cannot be viewed or
played.
• When the data with UIM restrictions is set as
Wallpaper or a ringtone, the setting will revert to its
default if a different UIM is inserted or the handset
power is turned on without a UIM. Inserting the UIM
used when the data was originally downloaded, will
restore the settings.
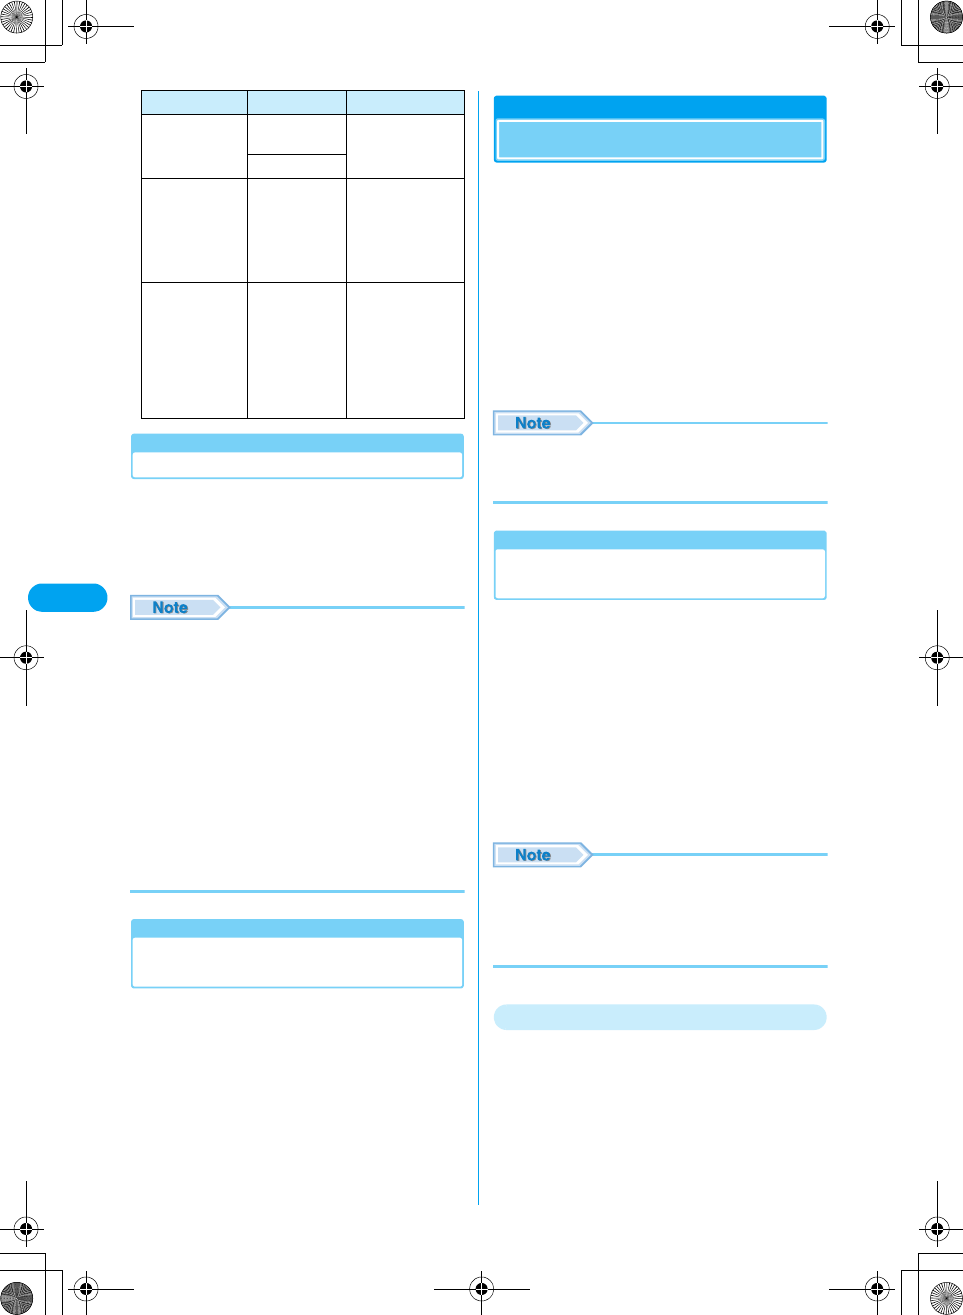
i-mode Menu
Displaying the i-mode
Menu
You can use i-mode functions from the i-mode
Menu.
ai
Message R
(Request)
Subscribe to sites that provide
Message Service to have information
automatically delivered to your
handset.
Message F
(Free)
Messages are delivered without
charges for packet communication.
Message Type Maximum
Messages to be
Stored
Maximum
Storing
Duration
Message R 300 72 hours
Message F 300 72 hours
i-mode menu
screen
Continued on the next page
148
i-mode/i-motion XXXXX
bSelect from the following items
iMenu
Connects to the i-mode center. →P148
Bookmark
Press h [Cancel] to cancel visiting a site while downloading
a page. →P151
Go to location
Enter a URL to connect to the Internet. →P150
Screen Memo
Open the Screen Memo folder list. →P153
Last URL
Opens the last accessed i-mode site or Web site. →P150
MessageR
Opens a list of Message R. →P160
MessageF
Opens a list of Message F. →P160
Check new message
Checks whether i-mode mail or MessagesR/F are stored at the
i-mode center. →P159
i-mode setting
Configure the handset function regarding i-mode. →P157
SWAP
Access another application from the i-mode menu. →P226
Accessing Sites
You can use a variety of services offered by
information providers (IP).
• Services vary depending on the information provider.
Some sites require a separate subscription.
ai-mode menu screen (P147) y "iMenu"
•$★$ flashes during i-mode communication.
• Press h [Cancel] to cancel visiting a site while
downloading a page.
bSelect an item (linked page) y c
•h [Return]: Returns to the previous screen.
•p: Terminates i-mode.
• When a number appears in front of a linked item, press
the corresponding dial number to visit the site. However,
some sites may not be connected. (Checking the
specifications)
Function Menu on the Site Display Screen
aOn the open page y h [Function] y
Perform the following operations
iMenu
Opens iMenu.
Register bookmark
Save the URL of the open page as a Bookmark. Go to Step 2 in
"Saving Bookmarks" (P151).
Bookmark list
Opens the Bookmark folder list. →P152
Screen memo
Save the displayed page to the Screen Memo. Go to Step 2 in
"Saving Screen Memos" (P153).
Save image
Save images contained in the displayed page. Go to Step 3 in
"Saving Images from a Site or Message" (P155).
Go to location
Enter a URL or select one from the Bookmark Log to access a
Web site. →P150
View/Copy URL
Displays the URL of the open page.
•h [OK]: Returns to the i-mode menu screen.
•i [Copy]: Copies the URL. Up to 256 half-pitch characters
can be copied.
Compose message
Creates i-mode mail with the URL of the open page pasted in
the message text. (Checking the specifications) Go to Step 3 in
"Creating and Sending i-mode Mail" (P172).
Compose SMS
Creates SMS (short message) with the URL of the open page
pasted in the message text. Go to Step 2 in "Creating and
Sending SMS" (P187).
Save in Phonebook
Save the phone number or mail address highlighted on the open
page to a Contact. Go to Step 2 in "Saving in Phone Contacts"
(P94).
Image display
Set whether to display images contained on the open page.
y "Display"/"Not display"
Reload
If the open page is updated, the contents of site are updated.
View certificate
If the opened page supports SSL, the contents of the SSL
Certificate is displayed.
h [Select]

149
i-mode/i-motion XXXXX
Retry
Play an animation or a Flash movie contained in the displayed
page from the beginning.
Sound effect
Set whether to play sound effects for a Flash movie. →P158
Convert char. code
If characters do not display correctly, try changing to another
character encoding. (Checking the specifications)
SWAP
Starts another function. (Checking the specifications)
• When this option is set to "Display", images contained
on the page are displayed, however, the setting will not
be retained. If you wish to view images on every page,
set "Image Display" on the i-mode menu screen (P147)
y "i-mode setting" y "Image display".
■To acquire an SSL page
The following screen opens when you access an SSL
site. After acquisition is completed, the SSL page opens
and $★$ is displayed.
■To return to a normal site
The SSL communication
complete conformation screen
opens when you return to a non-
SSL site. Select "Yes" to return
to a normal site, and $★$
disappears.
• If the SSL Certificate has already expired, or a site does
not support SSL, a message "This site is not certified. Do
you connect?" may appear. If you select "Yes (Checking
the specifications)", the page opens. However, your
personal information (credit card number or contact
address) may not be sent safely.
Changing to iMenu in English
The iMenu can be displayed in English.
ai-mode menu y iMenu y English
iMenu is English will be displayed.
• To change back to the Japanese display, select "日本語
(Japanese)" and press c [Select].
(Checking the specifications)
Navigating and Performing
Operations on Web Sites
This section describes basic operations on Web
sites.
Going Back to the Previous Page/
Going to the Next Page
aPress l to open the previous page /
press r to open the next page
■Moving through pages
Pressing l consecutively goes back to pages
previously opened. However, if you open the previous
page by pressing l (going back to Page "B" from
Page "C") and open another page (Page "D"), pressing
l twice on the current page (Page "D") does not open
Page "C". Pages open in order of Page "D" → Page "B"
→ Page "A".
• Example: Pages are displayed in the order of Screen
"A" → "B" → "C" → "B" → "D"
Selecting Links or Items
You may need to perform operations using the
following items while connected to i-mode. For
details, refer to the "i-mode Operation Guide".
Image display
SSL establishing
screen
Screen to be
inserted
Item Sample Icon Description
Radio button $★$: (Not
selected)
You can select only
one choice.
$★$: (Selected)
Page before the
last
Currently opened
page
s
Screen to
be inserted
…The order of the page to open
…The order when the previous page from
the display "D" has been opened
Continued on the next page
150
i-mode/i-motion XXXXX
Flash Movies
The FOMA handset supports Flash, an animation
technology using images and sounds. You can
access sites that provide various kind of
animations using the handset. You can also
download a Flash movie and set it as Wallpaper.
• Some Flash movies can use data saved on your
handset. To allow Flash movies to use the data, set "Use
registrated data" to "Use".
• Some Flash movies play sound effects. To not sound,
set "Sound effect" to "Not play".
• If you play a Flash movie with vibration set, the handset
vibrates regardless of the "Vibrate" setting on the
handset.
• Flash movies are not displayed if "Image display" is set
to "Not display".
• The sound effects of the Flash movie set as Wallpaper
do not sound.
• You may not be able to save an entire image even if you
perform a save operation or save as Screen Memo
depending on the Flash movie.
Last URL
Open the Most Recently Accessed
Web Site
Each time you open a Web site, the URL of the
page is stored in "Last URL". You can re-
connect to the most recently accessed page
using "Last URL".
ai-mode menu screen (P147) y "Last
URL"
•h [Function]: "Copy"/"Delete" the Last URL.
bc
Internet Connection
Opening Web Site
You can access a Web site by entering its URL.
A URL consists of half-pitch alphanumeric
characters and symbols.
• On the open page, select h [Function] y "Go to
location", then go to Step 2.
ai-mode menu screen (P147) y "Go to
location"
The Web site opens.
b"<New entry>" y Enter a URL y c
• Up to 256 half-pitch characters can be entered.
• Web sites that do not support i-mode may not be
displayed correctly.
• Some Web sites may not be displayed correctly.
Accessing a Web Site Using the
Bookmark Log
Up to 8 previously entered URLs are stored in
the Bookmark Log (Checking the specifications).
You can access a Web site by using Bookmark
Log.
• To use the Bookmark Log to access a Web site, select
h [Function] y "Go to location", then go to Step 2.
ai-mode menu screen (P147) y "Go to
location"
The Web site opens.
bSelect a URL y c
• If more than 8 URLs are entered, the oldest URLs will be
overwritten. (Checking the specifications)
• A directly entered URL is recorded as another URL even
if the same URL has already been recorded. (Checking
the specifications)
The Function Menu on the Internet Screen
aInternet screen (P150) y Select a
Bookmark Log entry y h [Function]
y Perform the following operations
Check box $★$: (Not
selected)
You can select
more than one
choice.
$★$: (Selected)
Text box $★$ Enter text. Select a
text box and press
c to open the text
entry screen.
(Checking the
specifications)
Pull down menu $★$ Select an item from
a list of choices.
Select a pull down
menu item and
press c to open
the list of choices.
(Checking the
specifications)
Item Sample Icon Description
151
i-mode/i-motion XXXXX
View/Copy URL
Connect to the selected URL.
•h [Connect]: Connects to the Displayed URL.
•i [Copy]: Copies a URL. Up to 256 half-pitch characters
can be copied.
Register bookmark
Save the URL as a Bookmark. Go to Step 2 in "Saving
Bookmarks" (P151).
Save in Phonebook
Save the selected URL in a Contact.Go to Step 2 in "Saving
Contacts to the Phonebook from Received Calls or Dialed Calls"
(P94).
Delete
y Select from the following items y $★$
• Press h [Detail] on the Delete selected screen to
view the URL to delete.
MyMenu
Saving Entries in MyMenu
Frequently accessed sites can be saved in
MyMenu for quick connection.
• Up to 45 entries can be saved in MyMenu.
• Some sites cannot be saved in MyMenu.
• Save Web sites in Bookmarks. →P151
aVisit the site y "MyMenu"
bSelect the i-mode password y c y
Enter the i-mode password y c y
"Confirm"
• The entered i-mode password is masked by asterisks
"*".
• i-mode Password →P147
• When you subscribe to a fee-based site on the menu list,
the site is automatically saved in MyMenu.
Accessing a Site from MyMenu
ai-mode menu screen (P147) y "MyMenu"
y c y Select a site
Change i-mode Password
Changing i-mode Password
"i-mode Password" (4-digit) is required to
subscribe to and unsubscribe from Message
Services or fee-based i-mode sites, or configure
Email settings. The password is set to "0000" by
default. Change it to a number of your own
choice. Do not reveal your i-mode password to
others.
ai-mode menu screen (P147) y "iMenu" y
"English" y "Function" y "Change
i-mode Password"
bSelect the "Current Password" box y c
y Enter the i-mode password (4-digit)
cSelect the "New Password" box y c y
Enter the new i-mode password (4-digit)
d"Select"
• If you forget the i-mode password, you need to bring an
ID such as your driver's license to a DoCoMo shop to
have the i-mode password reset to "0000".
Bookmarks
Saving Web Site
Addresses or Sites for
Quick Access
Save frequently accessed sites or Web sites in
Bookmarks to display the page quickly.
• Saved Bookmarks can be renamed or managed by sorting
them into folders. →P152
Saving Bookmarks
• Up to 100 page URLs can be saved in Bookmarks for all
folders.
• Up to 256 half-pitch characters can be saved for each URL
Bookmark.
aOn a page y h [Function] y "Register
bookmark"
• If there are no user-defined folders, the page is saved in
the "Main folder".
bSelect a folder y h [Select]
• If there is already the same URL saved, a confirmation
to overwrite appears. Select $★$ [Yes].
Delete
Delete multiple
Delete all
: Deletes the selected URL. Select $★$ [Yes].
: Select and delete more than one URL.
Select a URL y c y i [Execute] y
Select $★$ [Yes].
: Deletes all saved URLs. Enter the Security
Code y Select $★$ [Yes].
Delete multiple
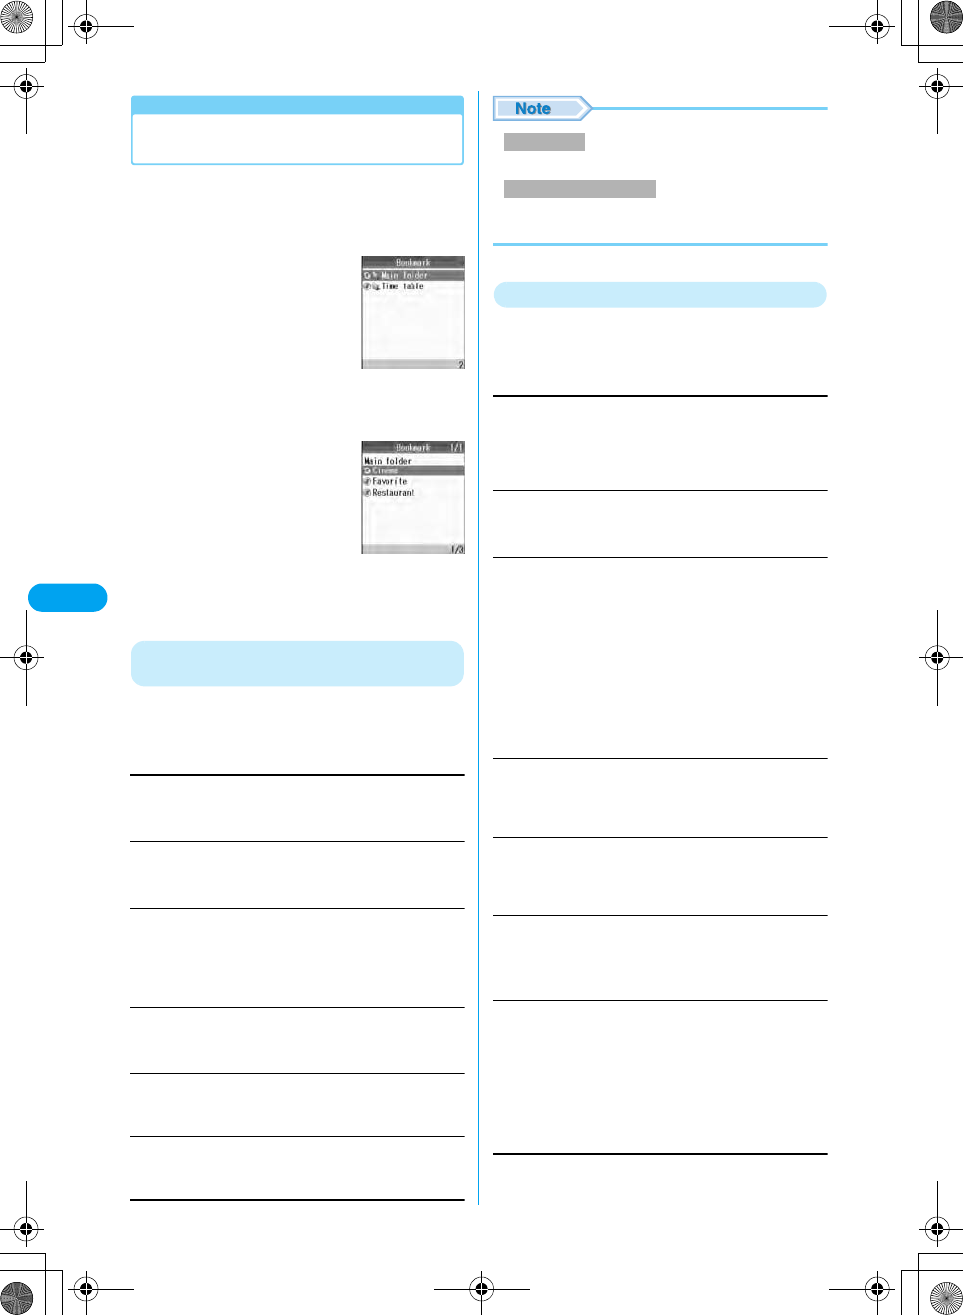
152
i-mode/i-motion XXXXX
Accessing Web Sites or Sites from
Bookmarks
• On a page, select h [Function] y "Bookmark list", then
go to Step 2.
ai-mode menu screen (P147) y
"Bookmark"
bSelect a folder y c
cSelect a Bookmark to view y c
The Function Menu on the Bookmark Folder
List
aBookmark folder list (P152) y h
[Function] y Perform the following
operations
Create folder
Creates a new folder. Up to 8 new folders can be created.
y Enter a folder name
Edit folder name
Edit the selected folder name.
y Edit a folder name
Sort folders
Reorder folders.
y Select a folder y h [Select] y Select a destination
folder y h [Define]
•i [Return]: Go back to the previous operation.
Delete folder
Deletes the selected folder.
Enter the Security Code y Select $★$ [Yes].
Bookmark log
Lists Bookmarks saved in the selected folders. (Checking the
specifications)
Send all entries
Sends all Bookmarks saved in a folder via Infrared
communication. Go to Step 2 in "Sending All Data" (P224).
• A new folder with no name entered cannot be created.
• The pre-installed "Main folder" cannot be sorted or
deleted.
Function Menu on the Bookmark List
aBookmark list (P152) y Select a
Bookmark yh [Function] y Perform
the following operations
View/Copy URL
Connect to the selected URL.
•h [Connect]: Connect to the Displayed URL.
•i [Copy]: Copy the URL. Up to 256 half-pitch characters
can be copied.
Edit title
Edit the name of the Bookmark title.
y Edit a Bookmark name
Move to folder
Move the selected Bookmark to another folder.
Compose message
Create i-mode mail with the URL of the selected Bookmark in
the message text. Go to Step 2 in "Creating and Sending i-mode
Mail" (P172).
Save in Phonebook
Save the URL of the selected Bookmark with a Contact. Go to
Step 2 in "Saving in Phone Contacts" (P94).
(checking the specifications)
Send data
Delete
Bookmark folder
list
Bookmark list
Create folder
Sort folders/Delete folder
Move
Move multiple
Move all
: Move the selected URL. Select a destination
folder y Press h [Select] y $★$ [Yes].
: Select and move more than one Bookmark.
Select a bookmark y c y i [Execute] y
Select a destination folder y Press h
[Select].
: Move all Bookmarks in the folder. Select a
destination folder y Press h [Select] y
$★$ [Yes].
Infrared
Bluetooth
: Send 1 file using Infrared communication.
: Send via Bluetooth. Go to Step 2 in "Registering
and Connecting a Bluetooth Device" (P239).
Delete
Delete multiple
Delete all
: Delete the selected Bookmark. Press $★$
[Yes].
: Select and delete more than one Bookmark.
Select Bookmarks y Press c y i
[Execute] y $★$ [Yes].
: Delete all Bookmarks in the folder. Enter the
Security Code y Select $★$ [Yes].
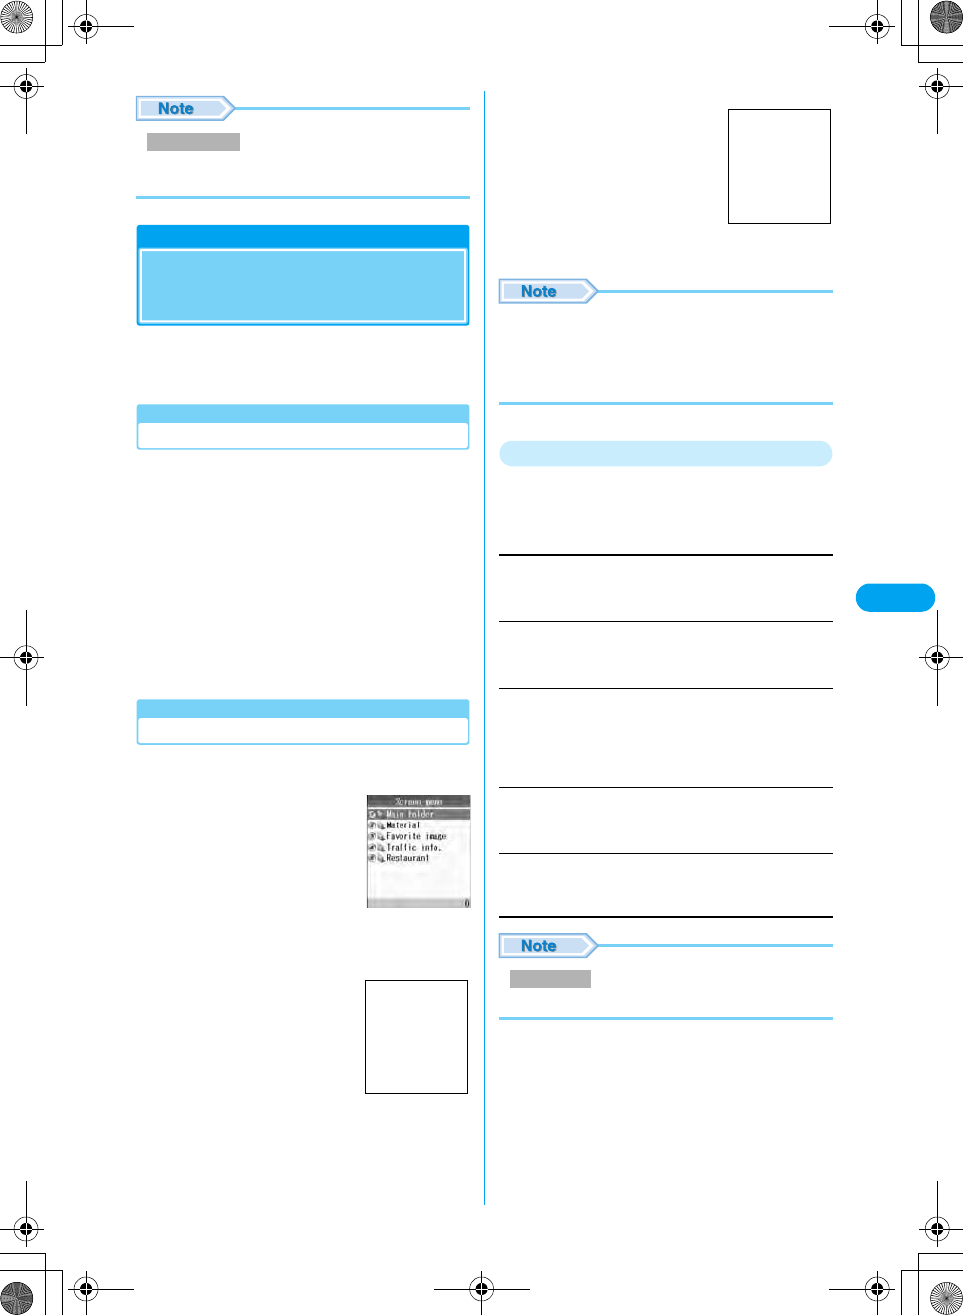
153
i-mode/i-motion XXXXX
• Press h [Detail] on the Delete selected screen to
view the URL of the Bookmark to delete.
Screen Memo
Saving the Contents of a
Web Site
You can save an opened page as a Screen
Memo. Saved Screen Memos can be opened
without connecting to i-mode.
Saving Screen Memos
• Up to 100 Screen Memos can be saved. However, the
number of savable Screen Memos may be fewer if the
pages are large.
• Up to about 1000 Kbytes per memo can be saved.
aOn a page y h [Function] y "Screen
memo"
bSelect a folder y h [Select]
• If the maximum number of Screen Memos has already
been saved, delete unnecessary data then save. Select
a Screen Memo y Press c y i [Execute] y $★$
[Yes].
Viewing Screen Memos
ai-mode menu screen (P147) y "Screen
memo"
bSelect a folder y c
cSelect a Screen y c
• The information saved in Screen Memo is as of the time
it was saved. The memo may not contain the latest
information.
• If the saved page does not have a title, it is displayed as
"No title" in the Screen Memo list.
Function Menu on the Screen Memo Folder List
aScreen Memo folder list (P153) y h
[Function] y Perform the following
operations
Create folder
Create a new folder. Up to 8 new folders can be created.
y Enter a folder name
Edit folder name
Edit the selected folder name.
y Edit a folder name
Sort folders
Reorder folders.
y Select a folder y h [Select] y Select a destination
location y h [Define]
•i [Return]: Go back to the previous operation.
Delete folder
Delete a folder.
Enter the Security Code y $★$ [Yes]
Screen memo log
List Screen memos in the selected folder. (checking the
specifications)
• A new folder with no name entered cannot be created.
Delete multiple
Screen Memo
folder list
Screen Memo List
Screen to be
inserted
Create folder
Screen Memo
detail screen
Screen to be
inserted
154
i-mode/i-motion XXXXX
* You need to obtain a microSD memory card separately to use the functions related to the microSD memory card. →P221
Function Menu on the Screen Memo List Screen
aScreen Memo list (P153) y Select a
Screen Memo y h [Function] y
Perform the following operations
Edit title
Edit the name of the Screen Memo.
y Edit a Screen Memo name
Protect/release
Protect or release the selected Screen memo.
Move to folder
Move the selected Screen Memo to another folder.
Sort
Sort Screen Memos.
View/Copy URL
Display the URL of the Screen memo.
•h [OK]: The Screen Memo list returns.
•i [Copy]: Copy the URL. Up to 256 half-pitch characters
can be copied.
File property
Display the title, stored date and time, size and URL of the
Screen Memo.
Delete
• Up to 50 Screen Memos can be protected. The number
of Screen Memos that can be protected may vary
depending on the data.
• Protected Screen Memos cannot be deleted. Unprotect
Screen Memo(s) before deleting them.
• Press h [Detail] on the Delete selected screen to
view the properties of the Screen memo.
Function Menu on the Screen Memo Detail
Screen
aScreen Memo detail screen (P153) y
h [Function] y Perform the following
operations
Edit title
Edit the name of the displayed Screen Memo.
y Edit a Screen Memo name
Protect/Release
Protect or release the displayed Screen memo.
File property
Display the title, stored date and time, size and URL of the
Screen Memo.
Delete
Delete Screen Memos. Press $★$ [Yes].
Register bookmark
Save the URL of the Screen Memo in Bookmarks. Go to Step 2
"Saving Bookmark" (P151).
Bookmark list
Open the Bookmark list. →P152
Save image
Save images contained in the Screen Memo. Go to Step 3 in
"Saving Images from a Site or Message" (P155).
View/Copy URL
Display the URL of the Screen memo.
•h [OK]: The Screen Memo detail screen returns.
•i [Copy]: Copy the URL. Up to 256 half-pitch characters
can be copied.
Release
Release all
: Release the selected Screen memo.
: Release all Screen memos.
Move
Move multiple
Delete all
: Move the selected Screen Memo. Select a
destination folder y Press h [Select] y $
★$ [Yes].
: Select and move more than one Screen
Memo. Select a Screen Memo y c y i
[Execute] y Select a destination folder y
Press h [Select].
: Move all Screen Memos in the folder. Select a
destination folder y Press h [Select] y $
★$ [Yes].
Svg date (new→O)
: Screen Memos are rearranged with newest
ones at the top.
Svg date (old→n)
: Screen Memos are rearranged with the oldest
one at the top.
Title (asc.)
Title (des.)
: Screen Memos are rearranged by title.
(checking the specifications)
: Screen Memos are rearranged by title.
(checking the specifications)
Prot/unprot order
: Screen Memos are rearranged by protected
→ unprotected. (Checking the specifications)
Unprot/prot order
: Screen Memos are rearranged by unprotected
→ protected. (Checking the specifications)
Delete
Delete multiple
Delete all
: Delete the selected Screen Memo. Press $
★$ [Yes].
: Select and delete more than one Screen
Memo. Select a Screen Memo y Press c
y i [Execute] y $★$ [Yes].
: Delete all Screen Memos in the folder.
Enter the Security Code y Press $★$ [Yes].
Protect/Release
Delete/Delete multiple/Delete all
Delete Several
155
i-mode/i-motion XXXXX
Compose message
Create i-mode mail with an Email address on the Screen Memo
as the destination. Go to Step 2 in "Creating and Sending
i-mode Mail" (P172).
Save in Phonebook
Save a mail address in the Screen Memo to the Phonebook. Go
to Step 2 in "Saving Contacts to the Phonebook from Received
Calls or Dialed Calls" (P94).
View certificate
Display the SSL Certificate of the Screen Memo.
Retry
Play an animation or a Flash movie contained in the Screen
Memo from the beginning.
Sound effect
Set whether to play sound effects of the Flash movie contained
in the Screen Memo. →P158
Convert char. code
If characters do not display correctly, try changing to another
character encoding.
• Up to 50 Screen Memos can be protected. The number
of Screen Memos that can be protected may vary
depending on the data.
• Protected Screen Memos cannot be deleted. Release
Screen Memo(s) before deleting.
Save Image
Saving Images from a Site
or Message
You can save images contained in the site,
Messages R/F or Screen Memo to the handset.
• Images will be saved in "i-mode/Other" folder in "My
Pictures" of the "Databox". (checking the specifications)
• While the Screen memo detail screen (P153) or Messages
R/F detail screen (P160) is open, select an image and go
to Step 2.
aWhile accessing a site/displaying mail,
message image y h [Function] y
Save image
bh [Save] y $★$ [Yes]
• Images cannot be saved if "Image display" is set to "Not
display.
• Some images saved on the handset may not be
displayed even if they can be displayed at the site.
Melody
Downloading Melodies
from a Site
• Melodies will be saved in "i-mode/Other" folder in "Melody"
of the "Databox". (checking the specifications)
aWhile accessing a site y Select a melody
y c
bPerform the following operations
Play
Play a melody.
Operations during melody playback →P214
Save
Save a melody. Press $★$ [Yes].
Setup
Configure the melody after saving it. (Checking the
specifications)
File Details
Display information about the melody.
Return
Return to the previous screen. (Checking the specifications)
• Download may not possible depending on the site.
• Some downloaded melodies may not play correctly.
• Some downloaded melodies may have a section to be
played already specified. These melodies will be played
in their entirety under playback, however, as a melody
set for a Ringer ID only the specified part is played.
Protect/Release
Delete
■Notice
The stored content may be lost due to the
handset failure or repair. DoCoMo is not
responsible for lost data. It is recommended that
you keep saved content from the handset on a
microSD memory card. You can connect the
handset to a PC using data link software and a
FOMA USB cable (optional) and save the data to
the PC.
Downloading
Data screen
Screen to be
inserted
Continued on the next page
156
i-mode/i-motion XXXXX
Download Templates
Downloading Templates
from a Site (checking the
specifications)
• Templates will be saved in "i-mode/Other" folder in "My
Pictures" of the "Databox". (Checking the specifications)
aWhile accessing a site y Select a
template y c
bPerform the following operations
Play
Play a melody.
Operations during melody playback
Save
Save a melody. Press $★$ [Yes].
Setup
Configure the melody after saving it. (Checking the
specifications)
File Details
Display information about the melody.
Return
Return to the previous screen. (Checking the specifications)
Download Dictionaries
Downloading Dictionaries
from a Site (checking the
specifications)
• Up to 10 dictionaries can be saved. However, only 5 can
be used, concurrently.
aWhile accessing a site y Select a
dictionary y c
bPerform the following operations
Play
Display the dictionary data.
Save
Save the dictionary data. Press $★$ [Yes].
Setup
Configure the dictionary data after saving it. (Checking the
specifications)
File Details
Display information about the dictionary data.
Return
Return to the previous screen. (Checking the specifications)
Download Chara-den
Downloading Chara-den
from a Site (checking the
specifications)
aWhile accessing a site y Select a Chara-
den y c
bPerform the following operations
Play
Play Chara-den.
Save
Save Chara-den. Press $★$ [Yes].
Apply as Camera Off image
Set the Chara-den as the alternate image for video calls after
saving it.
File Details
Display information about the Chara-den.
■Notice
The stored content may be lost due to the
handset failure or repair. DoCoMo is not
responsible for lost data. It is recommended that
you keep saved content from the handset on a
microSD memory card. You can connect the
handset to a PC using data link software and a
FOMA USB cable (optional) and save the data to
the PC.
Downloading
data screen
Screen to be
inserted
Downloading
Data screen
Screen to be
inserted
Downloading
Data screen
Screen to be
inserted
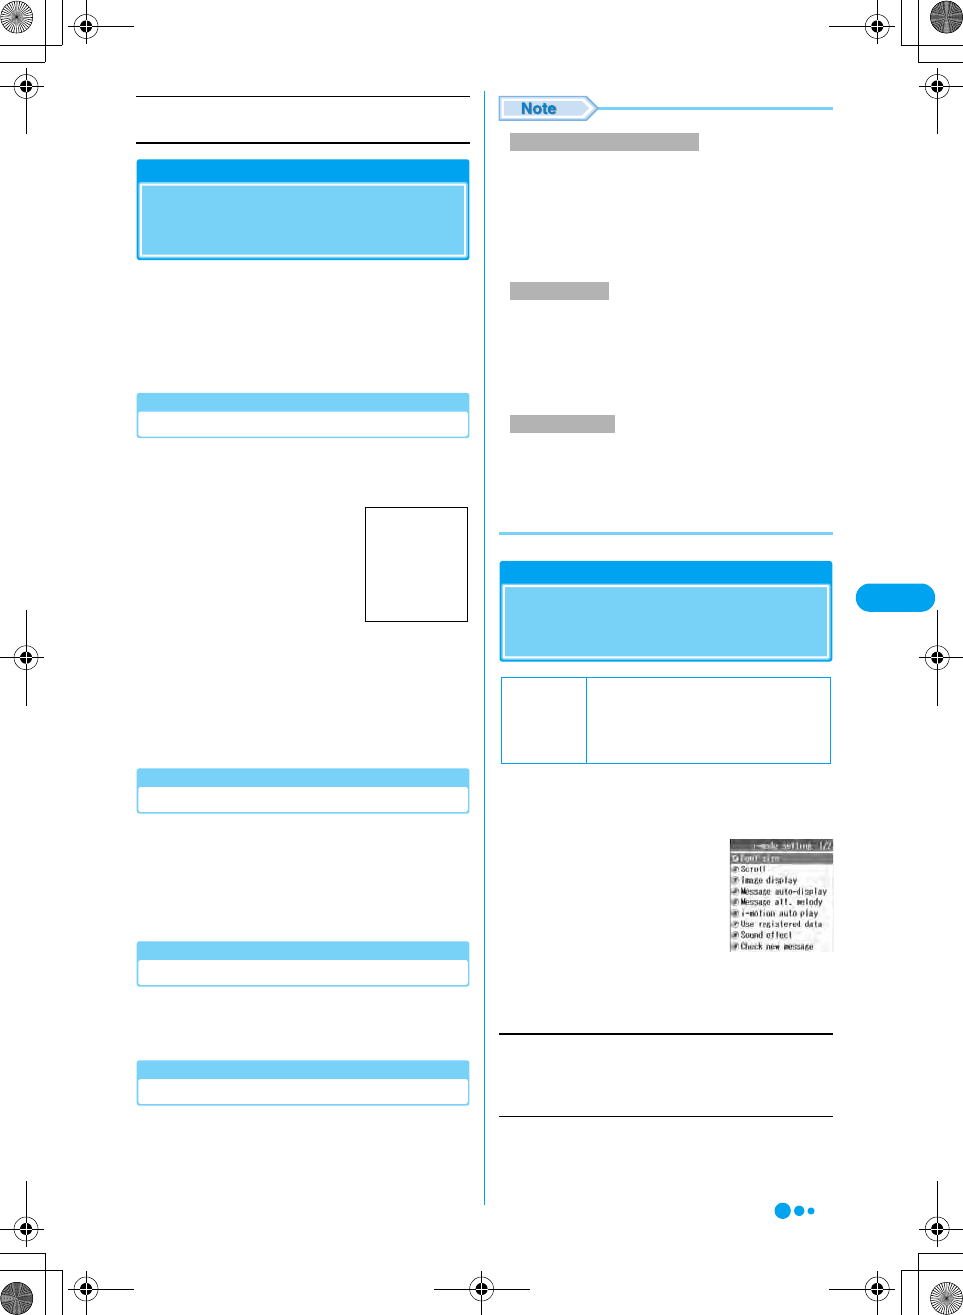
157
i-mode/i-motion XXXXX
Return
Return to the previous screen. (Checking the specifications)
Phone To/Mail To/Web To/i-appli To Function
Using Phone To/Mail To/
Web To/i-appli To Functions
If a site page or mail has a highlighted phone
number, Email address, URL, you can use these
to open a Web site, to make a call, or send Email
with a simple operation.
• Phone To, AV Phone To, Mail To, or Web To in mail sent
from a PC may not work.
Phone To/AV Phone To Function
• The Phone To function for video calls is called the AV
Phone To function.
aSelect a phone number y c
b"Voice Call"/"Video Call"/"Chara-den
image" y c
• When selecting "Chara-den image", select an image to
be sent to the other party during the video call.
Mail To Function
You can send mail to an Email address
highlighted on a site page or mail.
aSelect an Email address y c
• Go to Step 3 in "Creating and sending i-mode Mail"
(P172).
Web To Function
Access a URL highlighted on a site page or mail.
aSelect a URL y c
i-appli To function
You can start i-appli from a URL highlighted on a
site or in i-mode mail.
aSelect i-appli information y c
(Checking the specifications)
• The Phone to/AV Phone to function may not be available
depending on the site.
• The Phone to/AV Phone to function can be used when
the sender or destination of mail is a phone number.
• The Phone to function may be available using an item
with a phone number saved even if the number is other
than the numeric string that expresses a phone number.
• The Mail to function may not be available depending on
the site.
• Correct the Email address before sending Email if
necessary.
• The Mail to function may be available using a highlighted
item other than an Email address.
• The Web to function may not be available depending on
the site.
• Display of a URL varies depending on a site.
• The Web to function is available using a highlighted item
other than a URL.
i-mode Setting
Configuring i-mode
Settings
Set i-mode or Message R/F function.
ai-mode menu screen (P147) y "i-mode
setting"
bPerform the following operations
Font size
Set the font size in the message text on a site, Screen Memo or
Messages R/F.
y "i-mode"/"Message" y "Large"/"Standard"/"Small"
Scroll
• Set the number of lines when scrolling in the message text on
a site, Screen Memo or Messages R/F.
y "1 line" / "3 line" / "5 line" / "1/2 page" / "1 page"
Calling Method
Selection screen
Screen to be
inserted
Phone to/AV Phone to Function
Mail to Function
Web To Function
Default
Font size: Standard
Scroll: 1 line
Image display: Display
Use registered data: Use
Sound effect: Play
i-mode setting
screen
Continued on the next page
158
i-mode/i-motion XXXXX
Image display
Set whether to display images or Flash movies contained on the
site page or Screen Memo.
y "Display"/"Not display"
Message auto-display
Set to automatically display Messages R/F. →P159
Message att. melody
Set whether automatically play a melody when Messages R/F
are opened. →P159
i-motion auto play
Set whether to automatically play an i-motion movie when the
i-motion movie is downloaded from a site or Email. →P164
Use registered data
When a Flash movie is displayed while a site or Screen Memo
is displayed, information saved on the handset may be used.
Set this option whether to use the information on the phone is
used.
y "Use"/"Not use"
Sound effect
Set whether to use sound effects when a Flash movie is played
while a site or Screen Memo is displayed.
y "Play"/"Not play"
Check new message
Select items to check (Email and/or Messages R/F) when
checking new message at the i-mode center. →P184
Connection timeout
Set the time until the connection is automatically terminated if no
response was returned due to network traffic. →P158
Host setting
Set an APN (Access Point Name) when you use services other
than i-mode (DoCoMo). i-mode becomes unavailable when you
connect to an APN other than DoCoMo. →P158
Certificate Center host
Set the address to download a User Certificate. →P162
Certificate
View the content of the SSL Certificate or set valid or invalid.
→P161
Client certificate
Perform steps from applying for the issuance of User Certificate
to downloading it. →P161
Check i-mode setting
View the i-mode setting configuration.
Reset i-mode
Restore all settings to their defaults.
y Enter the Security Code
• Images may not be displayed correctly even this option
is set to "Display". In that case, $★$ appears.
• When this option is set to "Use", the battery level, signal
strength, Date & Time, Ring Volume, Language, and
handset model information may be sent to information
providers (IP) via the Internet, and a third party may
intercept the information.
• Even if "Play" is set, Sound Effects may not used
depending on the Flash movie.
• The access point set in "Host setting" will not be
changed by resetting.
Connection timeout
Setting the Connection Timeout
Set the time until the connection is automatically
terminated if no response was returned due to
network traffic.
ai-mode setting screen (P157) y
"Connection timeout"
b"60 seconds" / "90 seconds" / "Unlimited
(no setting)
• If "Unlimited use(no setting)" is selected, the connection
will not be automatically cancelled.
• Even if this option is set to "Unlimited use(no setting)",
the connection attempt may be terminated because of
the signal strength.
• "Connection timeout" cannot be set during i-mode
communication.
Host setting
Changing the Access Point from
i-mode
If you use the i-mode service of DoCoMo, do not
change the access point.
Set an APN (Access Point Name) when you use
services other than i-mode (DoCoMo). i-mode
and i-mode mail become unavailable when you
connect to an APN other than DoCoMo.
Storing Access Points
ai-mode setting screen (P157) y "Host
setting"
Image display
Use registered data
Sound effect
Reset i-mode
Default 60 seconds
Default i-mode
159
i-mode/i-motion XXXXX
bSelect "<Unregistered>" y h [Edit] y
Enter the Security Code y Select from
the following items y h [Change]
Host name
Enter an access point name.
Host number
Enter the number of the access point.
Host address1
Enter the access point address.
Host address2
Enter the access point address2.
ci [Complete]
Changing/Deleting a Host
ai-mode setting screen (P157) y "Host
setting"
■To delete an access point
Select an access point to delete y Press i
[Delete] y $★$.
■To edit an access point
Select an access point to change. Press c.
• "Host setting" cannot be set during i-mode
communication.
• Pake-Hodai is not applied to packet communication with
an APN other than "i-mode".
• When an access point is changed, the ticker of the
i-Channel does not appear. When the information is
updated or you download the latest information by
pressing h, the Ticker will be turned on automatically.
Receiving Messages
When Receiving Messages
When the handset is in the service area,
Messages R and F are sent automatically from
the i-mode center. When Messages R/F arrive,
the display, ringtone or vibration notifies you of
new messages.
• Up to XXX Messages R and F can be saved to the
handset. However, the number of savable messages
varies depending on the message size.
Viewing New Messages
Among the arrived Messages R/F, the newest
message is displayed automatically.
• When "Message auto-display" is set to "Not auto display",
received Messages R/F are not displayed.
• You can change the message types to be displayed
automatically or set priorities in "Message auto-display".
→P159
aWhen Messages R/F arrive, they are
received automatically
•$★$ (Yellow) flashes for Message R and $★$ (Yellow)
for Message F.
• After messages are received, the reception result of
Messages R/F is displayed.
• If no operation is performed for about 15 seconds, the
previous screen returns.
Message auto-display
Displaying Messages Automatically
Set how to automatically display Messages R or
Messages F.
ai-mode setting screen (P157) y
"Message auto-display" y Perform the
following operations
MessageR preferred : When Message R and F are
received at the same time,
Message R are displayed
automatically.
MessagesR only : Only Message R are
automatically displayed.
MessageF preferred : When Message R and F are
received at the same time,
Message F are displayed
automatically.
MessageF only : Only Message F are
automatically displayed.
Not auto display : Messages are not displayed
automatically.
Playing a Melody When a Message is
Opened
Set whether to automatically play melodies when
Messages R/F are opened.
ai-mode setting screen (P157) y
"Message attached melody" y "Auto
play"/"Not auto play"
Check new message
Checking Whether Messages have
Arrived
Messages that were not received because the
handset was out of the service area are stored at
the i-mode center. Checking new messages
downloads the stored messages.
Default Message R Preferred
Default Auto play
Continued on the next page

160
i-mode/i-motion XXXXX
• You cannot check new messages when the handset is out
of the service area.
• Set what to check (mail and Messages R/F) in "Check New
Message Setting" (P184).
am y "Check new message"
The number of received i-mode mail and
Messages R/F is displayed.
bSelect "MessageR"/"MessageF"
• The number of Messages R/F that can be saved at the
i-mode center and how long they will be retained if not
delivered. →P147
Message R/Message F
Displaying Messages in the
Message Box
When Messages R/F arrive from the i-mode
center, $★$ or $★$ appears at the top of the
screen.
ai-mode menu screen (P147) y "Message
R"/"MessageF"
•i [Sort]: Sort the message list
by "Reception date (New to
Old)"/"Reception date (Old to
New)"/"Subject (ascending)"/
"Subject (descending)".
bSelect a message yc
■Screen components of the Message list /
Display screen
The following icons appear on the Messages
R/F screen.
Function Menu on the Messages R/F List Screen
aMessage R/F list screen (P160) yh
[Function] y Perform the following
operations
Protect/Release
Protect or release the selected MessageR/F.
Search (usual)/Search (search state)
Set search key to find a message.
Delete
Delete all/Delete all searched message items
Delete all messages on the message list, or delete all found
messages using "Search". Enter the Security Code y Press $★
$ [Yes].
• Up to 75 messages can be locked.
• Locked messages cannot be deleted.
• Press h [Detail] on the Delete selected screen to
view the message.
Function Menu on the View Messages R/F
Screen
aView Messages R/F screen (P160) y h
[Function] y Perform the following
operations
Protect/Release
Protect or release the displayed Message R/F.
Icons Description
$★$/$★$ Unread Messages R/F
$★$/$★$ Read Messages R/F
$★$ Messages R/F with a file attached or
pasted
$★$ Messages R/F with an image attached
$★$ Messages R/F with a melody pasted or
attached
$★$ Protected Messages R/F
Message R List
Screen to be
inserted
Message R
Display screen
Screen to be
inserted
Release
Release all
: Release the selected Messages R/F.
: Release all Messages R/F.
Search Unread
Search Read
Search Protected
Search Attached
Re-Search
Release search
: Search only for unread messages and
open a list.
: Search only for read messages and open
a list.
: Search only for protected messages and
open a list.
: Search only for messages with
attachments and open a list.
: Search again.
: Cancel search.
Delete
Delete multiple
: Delete the selected message.
Press $★$ [Yes].
: Select and delete more than 1 message.
Select messages y Press c y i
[Execute] y $★$ [Yes].
Protect
Delete/Delete multiple/Delete All/Delete all searched message items
Delete multiple
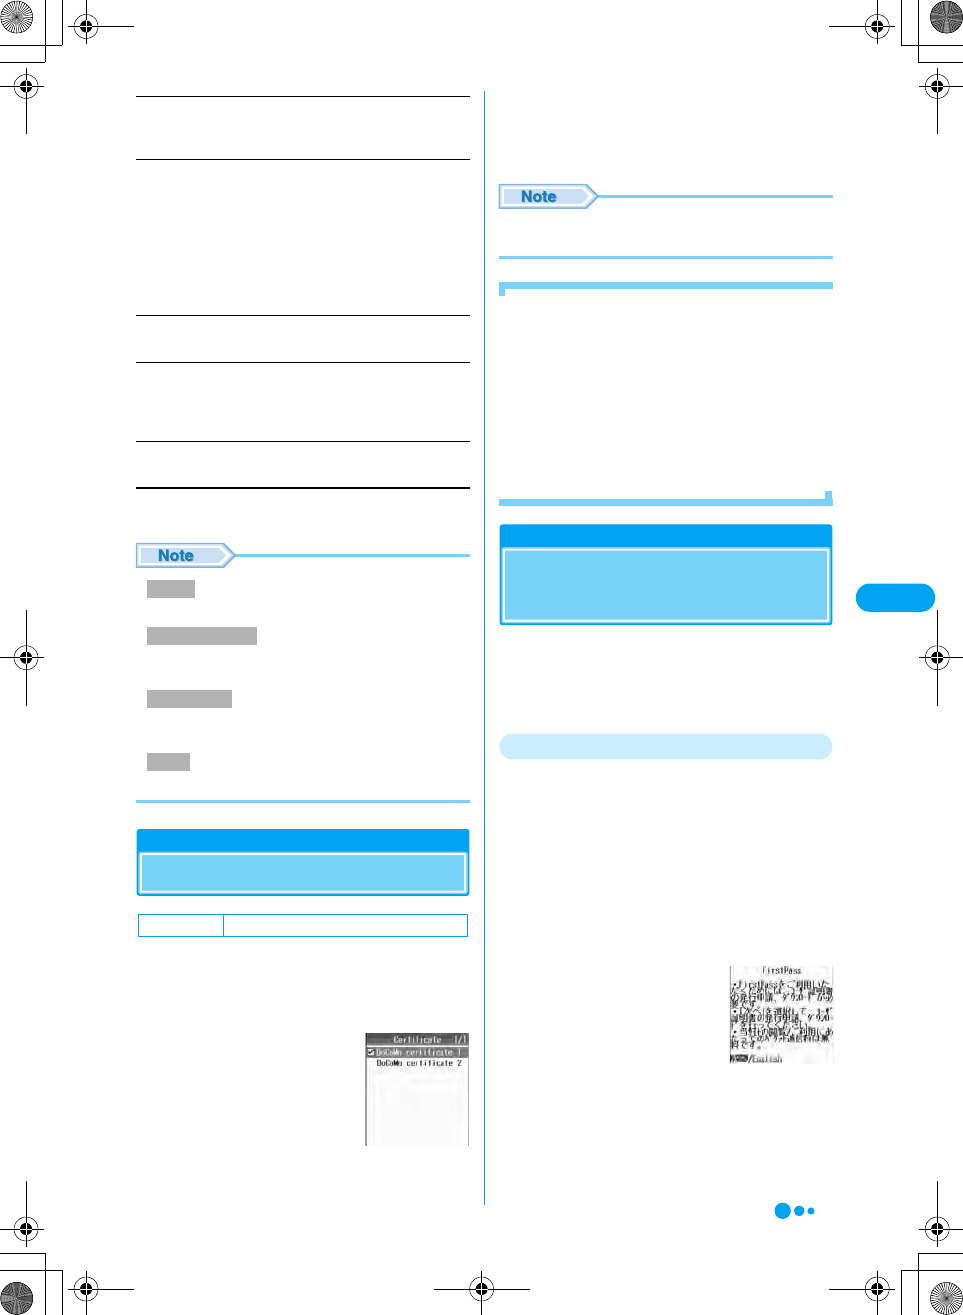
161
i-mode/i-motion XXXXX
Save image
Save images contained in the message. Go to Step 2 in "Saving
Images from a Site or Message" (P155).
Check attachment
List files attached to the message.
•i [Save]: Save a selected file.
y h [Function] y Perform the following operations
Reload image
Re-download a file that failed to be acquired.
Save Phonebook
Save a highlighted mail address from the message to the
Phonebook. Go to Step 2 in "Saving Contacts to the Phonebook
from Received Calls or Dialed Calls" (P94).
Delete
Delete the message. Press $★$ [Yes].
• Items displayed on the function menu vary depending on the
displayed message.
• Up to 75 messages can be locked.
• Select an image or melody on the View attachment
screen to display or play it.
• Images may not be displayed even after re-
downloading.
• Locked messages cannot be deleted.
SSL Certificate
Operating SSL Certificates
View the content of the SSL Certificate or set
valid or invalid.
ai-mode setting screen (P157) y
"Certificate"
bSelect a certificate to enable y c
•h [Detail]: Check the selected certificate.
ch [Complete]
• If an SSL certificate is set to "Invalid", the associated
SSL will no longer open.
■Certificates used for SSL communication
certificate
Issued by an authentication company and saved on the
handset by default.
DoCoMo Certificate
Required to connect to the FirstPass center or
FirstPass sites and saved on the UIM (green).
User Certificate
Downloaded from the FirstPass center by selecting
"Client certificate" under "i-mode setting" in i-mode
Menu. Saved in the UIM (green).
User Certificate Operation
Configuring FirstPass
Settings
The user certificate proves that you have
subscribed the FOMA service. The downloaded
User Certificate is saved on the UIM and is used
at sites that require a Client Certificate.
Connecting to the FirstPass Center
Perform steps from applying for the issuance of
User Certificate to downloading it.
• You can request the FirstPass center to issue a User
Certificate and then download the certificate.
• The UIM (blue) does not work.
• You need to set the date and time before connecting to the
FirstPass Center. → P50
• Screens or steps at the FirstPass Center may be changed.
ai-mode setting screen (P157) y "Client
Certificate"
b(Checking the specifications)
c(Checking the specifications)
Set
File property
Delete
: Save the selected file, then configure the file.
(checking the specifications)
: Display the file information.
: Delete the selected file.
Protect
Check attachment
Reload image
Delete
Default Validate All
Certificate screen
Client Certificate
screen
Continued on the next page
162
i-mode/i-motion XXXXX
* You need to obtain a microSD memory card separately to use the functions related to the microSD memory card. →P221
■Before using FirstPass for the first time
(Checking the specifications)
■To invalidate the certificate
(Checking the specifications)
d(Checking the specifications)
e(Checking the specifications)
(Checking the specifications)
Function Menu on the Client Certificate
Screen
aClient Certificate screen (P161) y h
[Function] y Perform the following
operations
View certificate
Display the certificate obtained via SSL communication.
Convert char. code
If characters do not display correctly, try changing to another
character encoding.
• Packet communication charges do not apply for the
connection to the FirstPass Center.
• Be sure to download the Client Certificate after
requesting the issuance of new Client Certificate or
Renewed Certificate. A Client Certificate you have not
requested for issuance cannot be downloaded.
• After a Client Certificate is invalidated, the FirstPass site
that requires the Client Certificate can no longer be
accessed.
Connect to Certificate Center Host
Changing the Certificate
Center Host
Set the address to download a Client Certificate.
ai-mode setting screen (P157) y
"Certificate Center host"
•i [Delete]: Delete the selected center host address.
The security code entry is required to delete.
bPerform the following operations
DoCoMo
Set DoCoMo as the access point.
Unregistered
Save a new center, or edit a configured center.
y h [Edit] y Enter the Security Code
ci [Complete]
■Using FirstPass
• FirstPass is DoCoMo's electronic authentication
service. By using FirstPass, client authentication is
enabled, whereby the site and the FOMA handset
exchange certificates, check the other party's
certificate and perform mutual authentication.
• When requesting issuance of a User Certificate,
carefully read "the FirstPass Rules on Use" on the
screen, agree to this, and make the request.
• UIM PIN2 is required to use the User Certificate.
Once the UIM PIN2 is entered, all subsequent
operations will be deemed to be complete by you. Be
careful not to let others use your UIM PIN or UIM
PIN2.
• If the UIM is lost or stolen, the "DoCoMo Information
Center" on the back of this manual can revoke your
User Certificate.
• DoCoMo bears no obligation or responsibility
regarding to the sites and information provided by
FirstPass sites. Solve any problems you may have
directly with the FirstPass site.
• DoCoMo and authentication companies do not
guarantee security when you use FirstPass and SLL.
You should use them at your own discretion.
• FirstPass can be used over the Internet using the
handset or the handset connected with a PC. You
need to install the FirstPass PC Software from the
included CD-ROM on the PC.
i-motion
i-motion is composed of video and sound files or
music files. You can obtain them for use on the
FOMA handset from i-motion compatible sites.
You can set an i-motion as a ringer ID. → P107
i-motion Types
Default DoCoMo
You usually do not need to change the
settings.
Center name
Center address
: Enter a Center name.
: Enter the Center address.
163
i-mode/i-motion XXXXX
There are 2 types of i-motion movies. This FOMA
handset handles only the standard type
i-motion movie. However, streaming type
i-motion movies cannot be downloaded.
■Standard
Up to 500 Kbytes of i-motion can be saved on the
handset.
• There are 2 forms standard type.
aPlayback is possible after downloading
bPlayback is possible while downloading
*: Some standard type i-motion movies cannot be saved.
■Streaming type (this FOMA handset does not
support this type.)
This type of i-motion movie cannot be saved on
the handset. Play back while downloading an
i-motion movie. Up to 2 Mbytes of i-motion can be
played. The data is deleted after playback. The
data will be downloaded for each playback.
• i-motion movies that can be downloaded and played are
in MP4 (Mobile MP4) format. i-motion movies in ASF
format cannot be downloaded or played.
Download i-motion movies
Downloading i-motion
Movies from Sites
aWhile a site is displayed y Select an
i-motion movie y c
After the i-motion movie is
downloaded, the i-motion
movie player appears.
When an i-motion movie has
been obtained, the i-motion
player is displayed.
• Operation during playback
→P209
• If "i-motion auto play" is set to
"Auto play", the i-motion movie is
automatically played back after
downloaded.
bc
Play the i-motion movie.
The Function Menu after an i-motion Movie
Download Completes
aAfter an i-motion movie is downloaded y
h [Function] y Perform the following
operations
Play
Play the downloaded i-motion movie.
Save
Save the downloaded i-motion movie. Press h [Yes].
Properties
Display the title, file size and playback restrictions, etc. of the
downloaded i-motion movie.
Exit
Terminate the i-motion movie playback and save the data.
y After a message to end the i-motion movie player
appears y h [Yes]
• Depending on the connected site or i-motion movie, the
i-motion movie may not be downloaded, or played during
the download.
• Some i-motion movies have playback restrictions. If an
i-motion movie has restrictions for the number of
playbacks, playback period or playback expiration, $★$
is displayed. An i-motion movie with playback period
restrictions cannot be played back prior to or after the
restriction period.
• Some downloaded i-motion movies may not play
correctly.
• If there is not enough free space on the handset, a
confirmation to delete files appears. h [Yes] y Select
an i-motion movie y Press h [Delete].
When a Link is Set in a Ticker
When a ticker is set in an i-motion movie, the
ticker is displayed during playback. You can use
the PhoneTo, AV Phone To, Mail To or Web To
function by selecting a phone number, mail
address or URL in the ticker.
aSelect a phone number, mail address or
URL in the ticker
i-motion Movie
Player
Screen to be
inserted
Next Page
Restrict File
: Display the next page of the file information.
: Set a file with "No File Restrictions" to "With File
Restrictions".
■Notice
Stored content may be lost due to the handset
failure or repair. DoCoMo is not responsible for
lost data. It is recommended that you keep
saved content from the handset on a microSD
memory card. You can connect the handset to a
PC using data link software and a FOMA USB
cable (optional) and save the data to the PC.
Ticker display
screen
Screen to be
inserted
Continued on the next page
164
i-mode/i-motion XXXXX
bc
A confirmation whether to end the i-motion movie
player appears.
ch [Yes]
i Motion Auto Play
Setting Whether to Play an i-Motion
Movie Automatically
Set whether to automatically play an i-motion
movie when the i-motion movie is downloaded
from a site or Email.
ai-mode setting screen (P157) y
"i-motion auto play " y "Auto play"/"Not
auto play"
Default Auto play