Motorola Solutions Germany MR1145 RADIOTELEPHONE MR1145 User Manual OPERATING MANUAL
Motorola Solutions Germany GmbH RADIOTELEPHONE MR1145 OPERATING MANUAL
Contents
- 1. OPERATING MANUAL
- 2. SERVICE MANUAL PART 1
- 3. SERVICE MANUAL PART 2
OPERATING MANUAL
Kraftfahrzeugsprechfunkgerät
Mobile Radiotelephone
Radiotéléphone pour véhicule
MR 11 S-C · MR 11 SD-R
mit / with / avec
ML 11 · HBT 11 · HA 11 · BTM-XB
Bedienungsanleitung · Operating Manual · Mode d’emploi
923991 19.10.1999 10:27 Uhr Seite 1
2
923991 19.10.1999 10:27 Uhr Seite 2
3
Kurzbedienungsanleitung / Operating instructions in brief /
Mode d’emploi sommaire
MR 11 SD-R mit / with / avec HBT 11
923991 19.10.1999 10:27 Uhr Seite 3
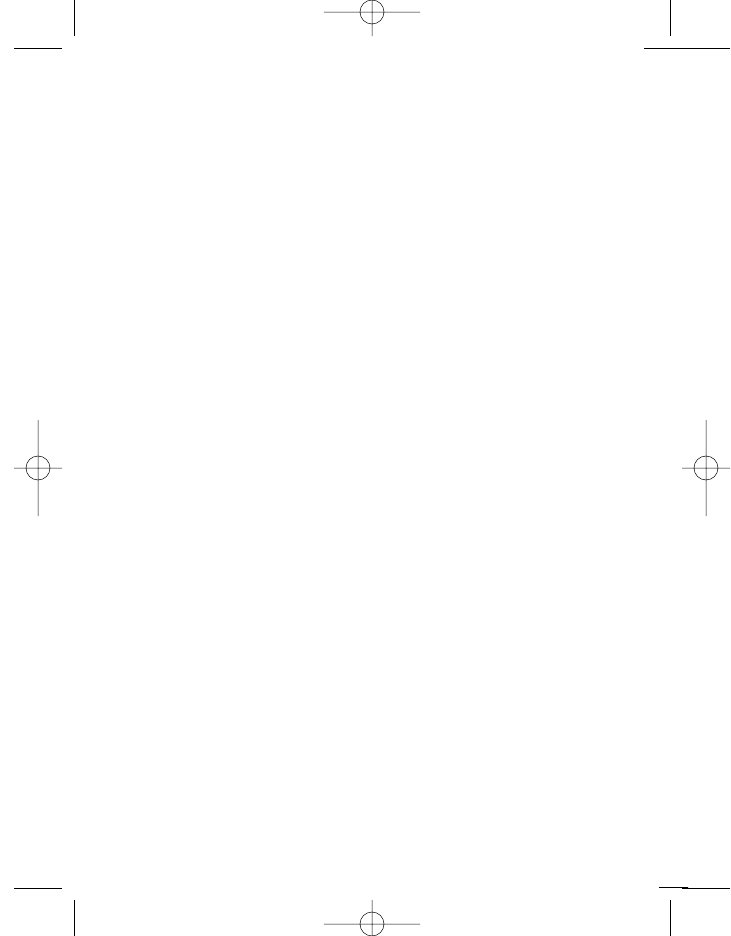
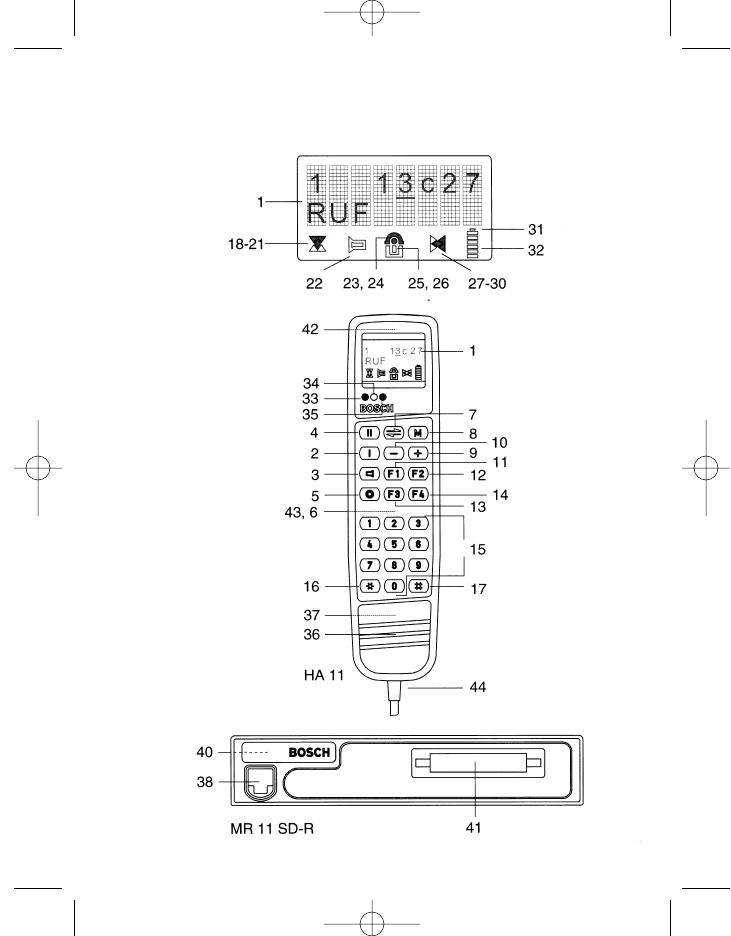
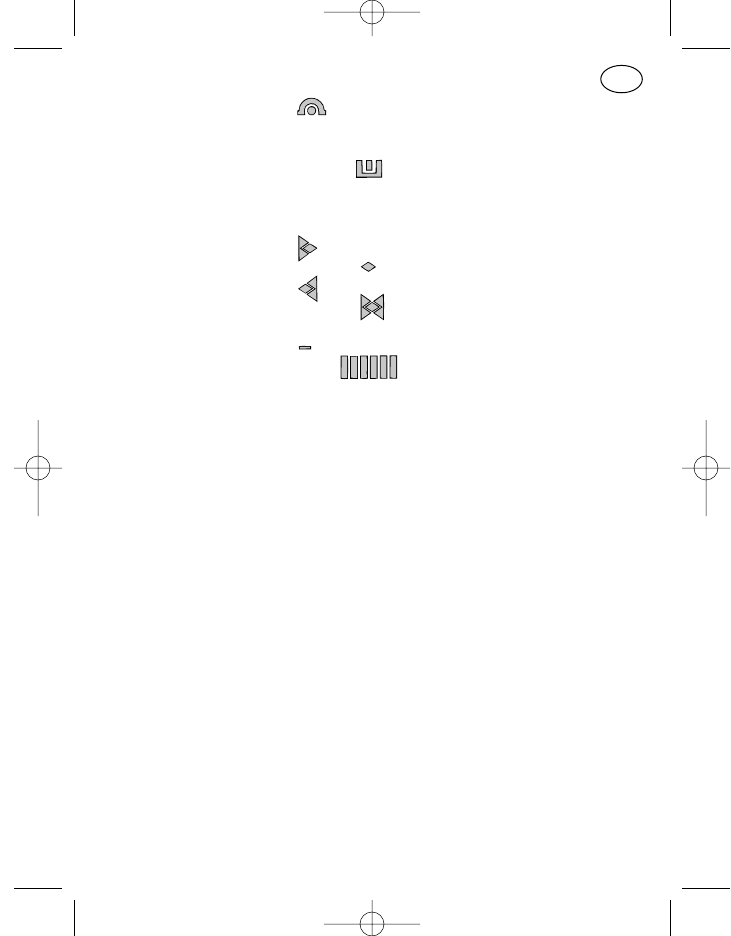
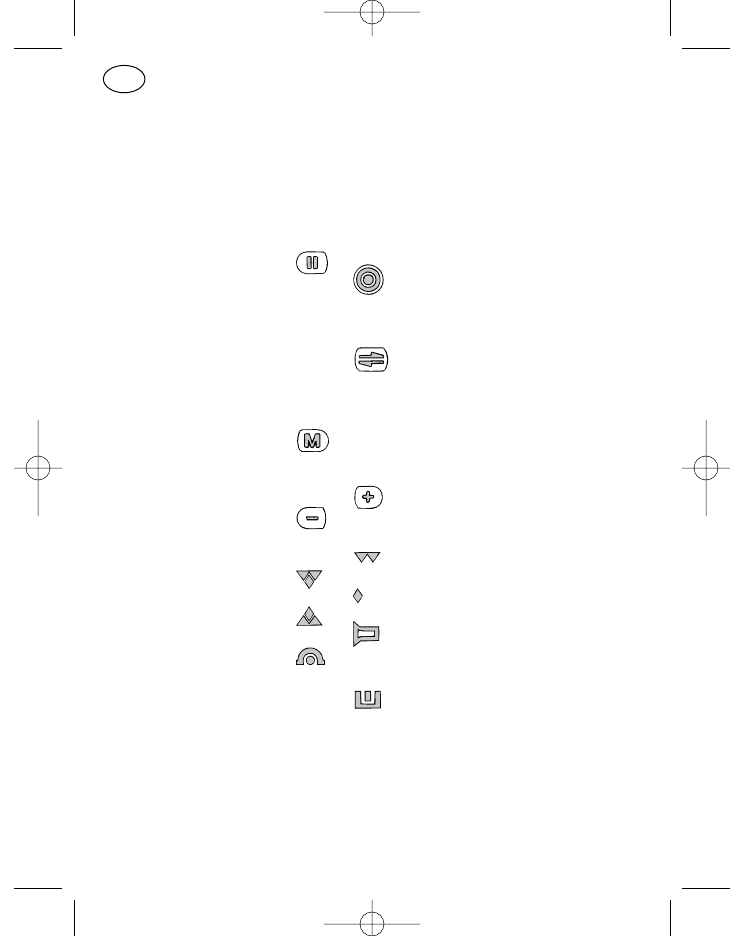
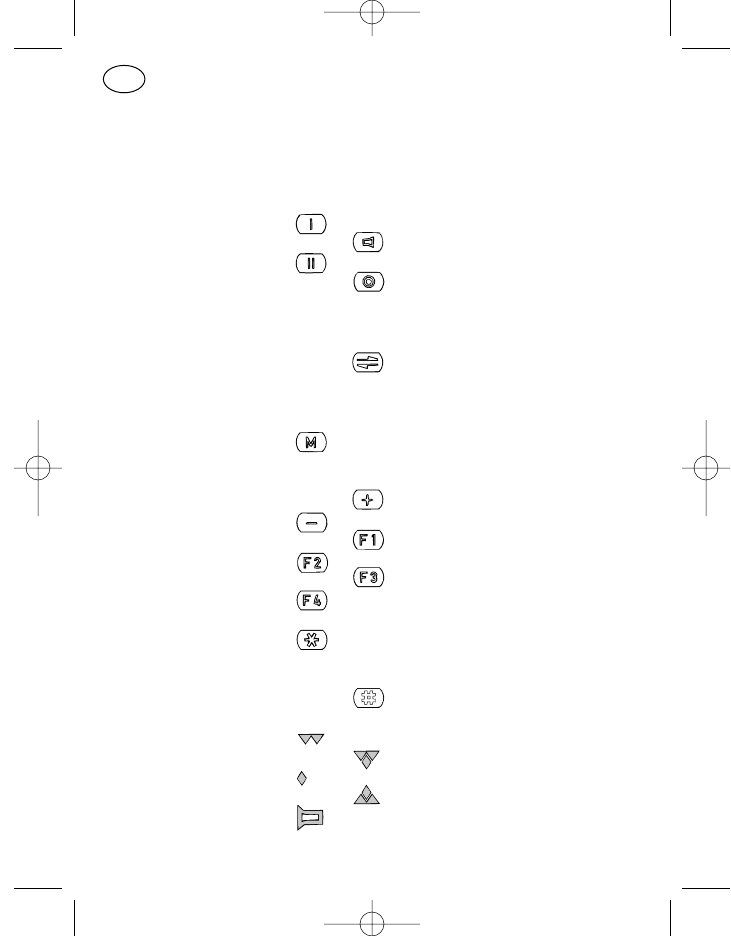
Bedienelemente
Pos. Benennung Tastensymbol, Standardfunktion
Displaysymbol
1 Display
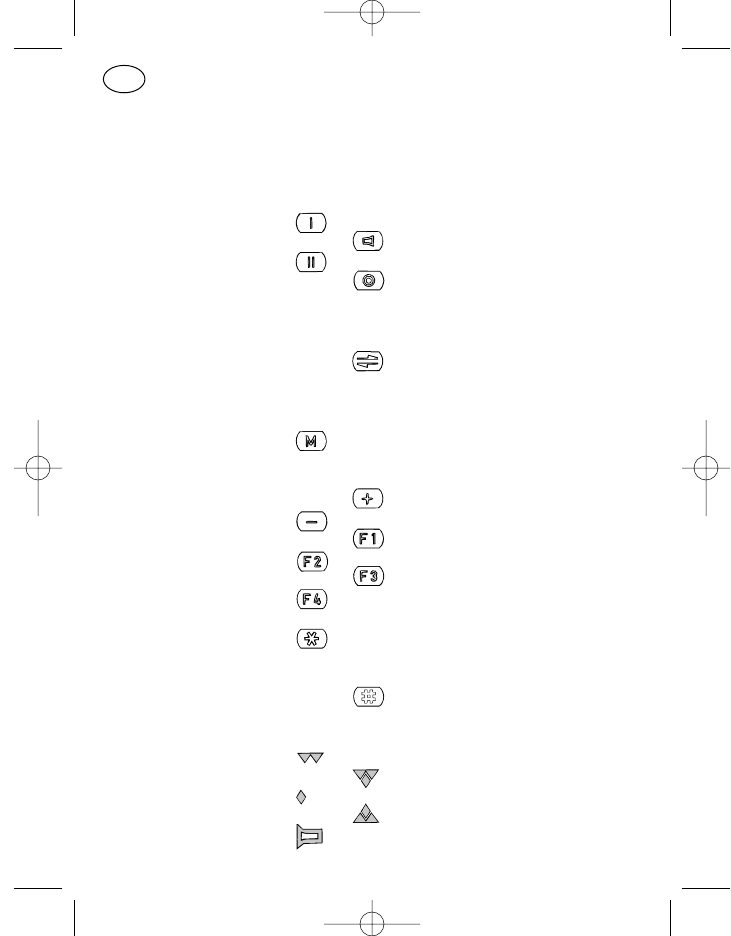
2* Ruftaste 1 I Festruf
3* Lautsprechertaste o Lautsprecher ein/aus, mithören
4* Ruftaste 2 Displayruf
5* Ein/Aus-Taste Gerät ein/aus
Kurz: ein
Lang: aus
6* Sendetaste : : : Sprechtaste
7 Cursortaste Verschieben der Eingabestelle
im Display
Kurz: rechts
Lang: links
8 Menütaste Aufruf eines Menüs
Kurz: nächster Menüpunkt
Lang: Menü 1
9 Plus-Taste Eingabestelle aufwärts
10 Minus-Taste Eingabestelle abwärts
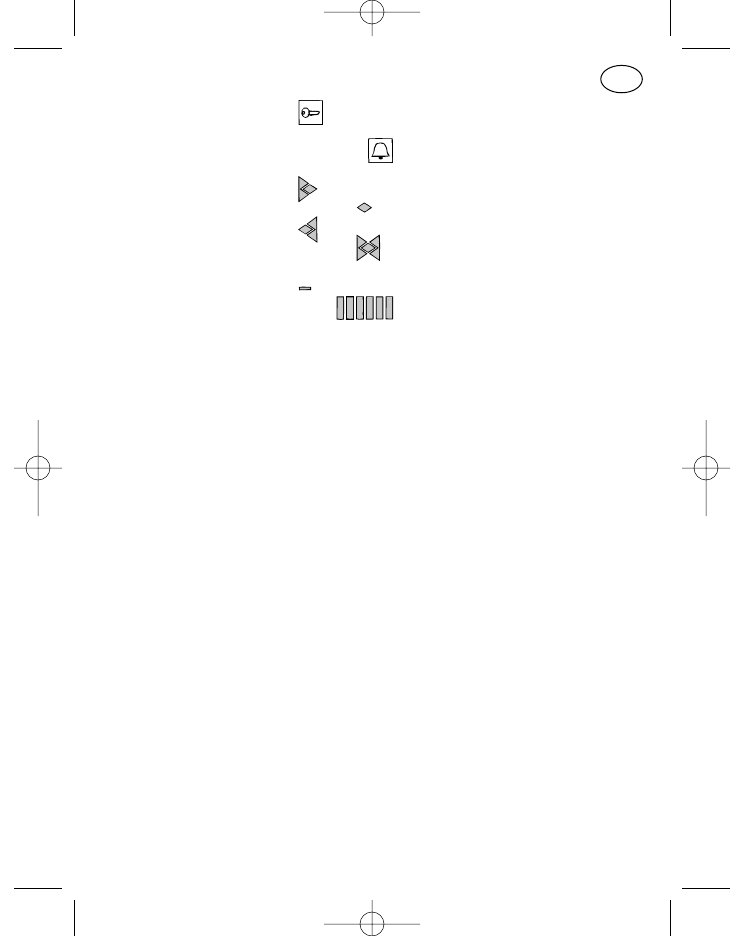
18 Sende-/
Empfangssymbol Nicht in Verwendung
19 Kanal belegt
20 Nicht in Verwendung
21 Senden
22 Lautsprechersymbol Lautsprecher ein
23 Rufumleitungs- Rufumleitung geschaltet
symbol
24 Mit 23 zusammen
25 Kennungssymbol Nummer des Rufenden
empfangen
26 Mit 25 zusammen
4
D
923991 19.10.1999 10:27 Uhr Seite 4
27 Anzeige-
Überlaufsymbol Rechts weitere Zeichen
28 Nicht in Verwendung
29 Links weitere Zeichen
30 Rechts und links weitere
Zeichen
31 Batteriesymbol Bei MR-Geräten ohne Funktion
32 Balkenanzeige Bei MR-Geräten ohne Funktion
33 Leuchtdiode rot Senden
34 Leuchtdiode gelb Funkkanal belegt
35 Leuchtdiode grün Lautsprecher ein
Dauer: durch Tastendruck
Blinkt: durch Anruf
36 Lautsprecher
37 Mikrofon
38 10-polige
FCC-Buchse Für Bedienteilanschluß
40 +, –, externe Hupe
oder Notrufanschluß
41 Datenbuchse
* Pos. 2–6 können auf Kundenwunsch mit anderen Funktionen belegt
werden. Bitte überzeugen Sie sich in dem Programmierausdruck, den Ihr
Funkhändler der Bedienungsanleitung beigelegt hat, von der aktuellen
Funktion dieser Tasten.
5
D
923991 19.10.1999 10:27 Uhr Seite 5

6
923991 19.10.1999 10:27 Uhr Seite 6
Kurzbedienungsanleitung / Operating instructions in brief /
Mode d’emploi sommaire
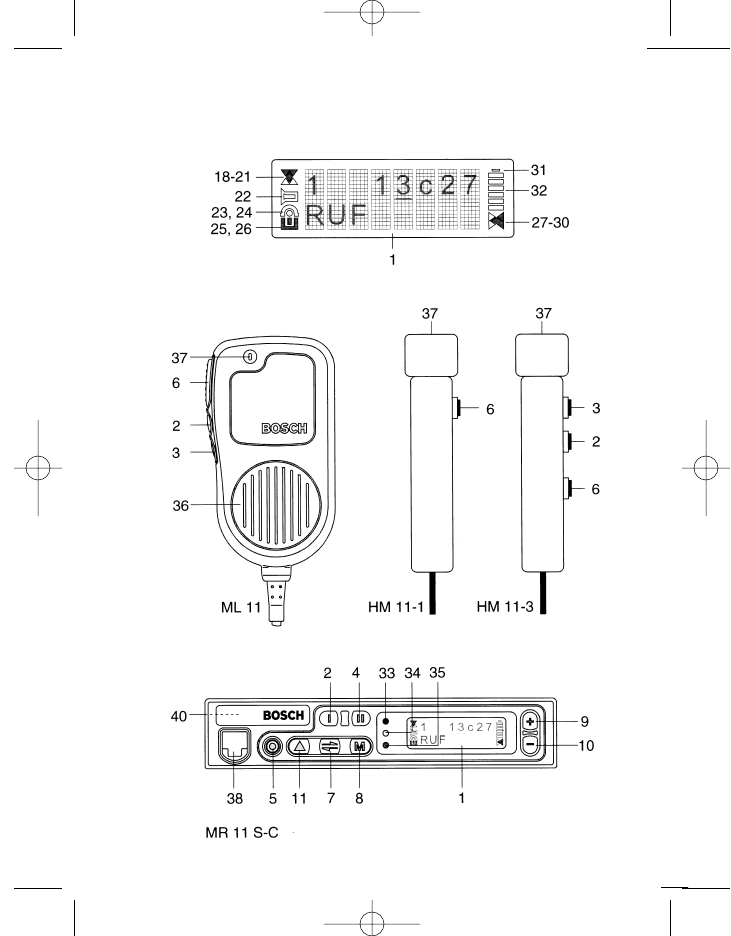
MR 11 S-C mit / with / avec ML 11 oder / or / ou HM 11-1/3
7
923991 19.10.1999 10:27 Uhr Seite 7
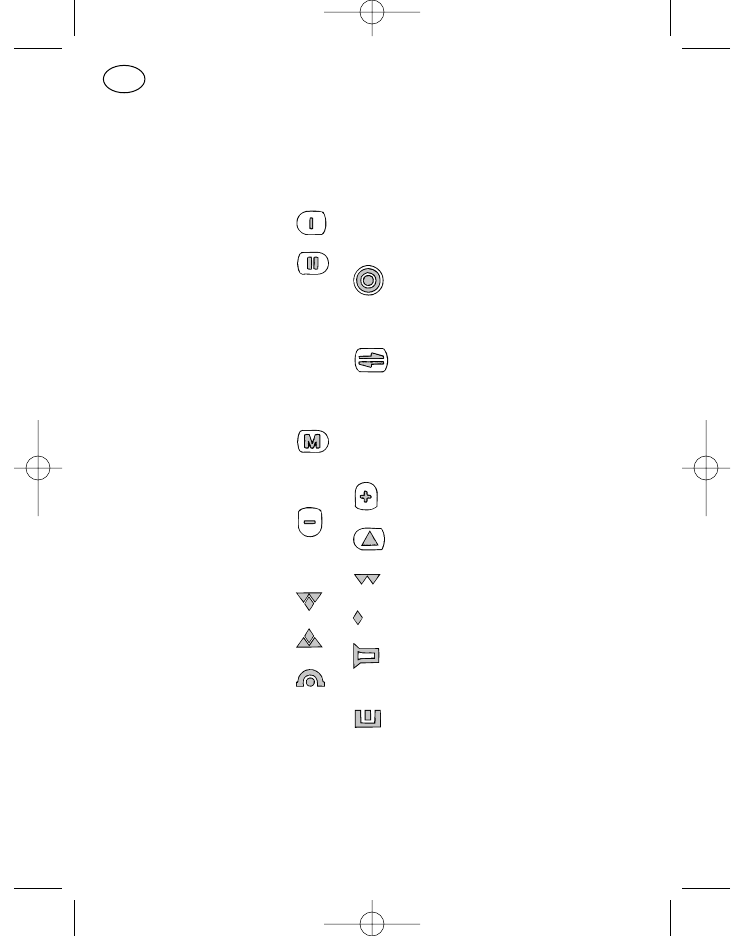
Bedienelemente
Pos. Benennung Tastensymbol, Standardfunktion
Displaysymbol
1 Display
2* Ruftaste 1 Festruf
3* Lautsprechertaste o Lautsprecher ein/aus, mithören
4* Ruftaste 2 Displayruf
5* Ein/Aus-Taste Gerät ein/aus
Kurz: ein
Lang: aus
6* Sendetaste : : : Sprechtaste
7 Cursortaste Verschieben der Eingabestelle
im Display
Kurz: rechts
Lang: links
8 Menütaste Aufruf eines Menüs
Kurz: nächster Menüpunkt
Lang: Menü 1
9 Plus-Taste Eingabestelle aufwärts
10 Minus-Taste Eingabestelle abwärts
11* Dreieckstaste (F1) Programmierbare Taste
18 Sende-/
Empfangssymbol Nicht in Verwendung
19 Kanal belegt
20 Nicht in Verwendung
21 Senden
22 Lautsprechersymbol Lautsprecher ein
23 Rufumleitungs- Rufumleitung geschaltet
symbol
24 Mit 23 zusammen
25 Kennungssymbol Nummer des Rufenden
empfangen
26 Mit 25 zusammen
8
D
923991 19.10.1999 10:27 Uhr Seite 8

27 Anzeige-
Überlaufsymbol Rechts weitere Zeichen
28 Nicht in Verwendung
29 Links weitere Zeichen
30 Rechts und links weitere
Zeichen
31 Batteriesymbol Bei MR-Geräten ohne Funktion
32 Balkenanzeige Bei MR-Geräten ohne Funktion
33 Leuchtdiode rot Senden
34 Leuchtdiode gelb Funkkanal belegt
35 Leuchtdiode grün Lautsprecher ein
Dauer: durch Tastendruck
Blinkt: durch Anruf
36 Lautsprecher
37 Mikrofon
38 10-polige
FCC-Buchse Für Bedienteilanschluß
40 +, –, externe Hupe
oder Notrufanschluß
* Pos. 2–6 und 11 können auf Kundenwunsch mit anderen Funktionen
belegt werden. Bitte überzeugen Sie sich in dem Programmierausdruck,
den Ihr Funkhändler der Bedienungsanleitung beigelegt hat, von der ak-
tuellen Funktion dieser Tasten.
9
D
923991 19.10.1999 10:27 Uhr Seite 9

10
923991 19.10.1999 10:27 Uhr Seite 10
11
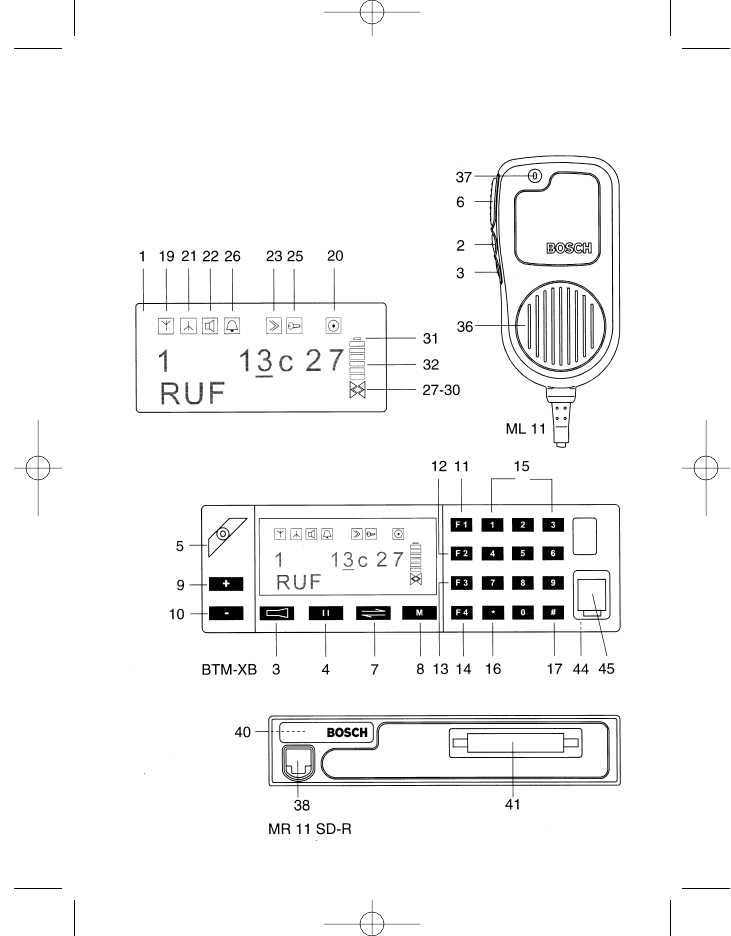
Kurzbedienungsanleitung / Operating instructions in brief /
Mode d’emploi sommaire MR 11 SD-R mit / with / avec
BTM-XB und / and / et ML 11 oder / or / ou HM 11-1/3
923991 19.10.1999 10:27 Uhr Seite 11

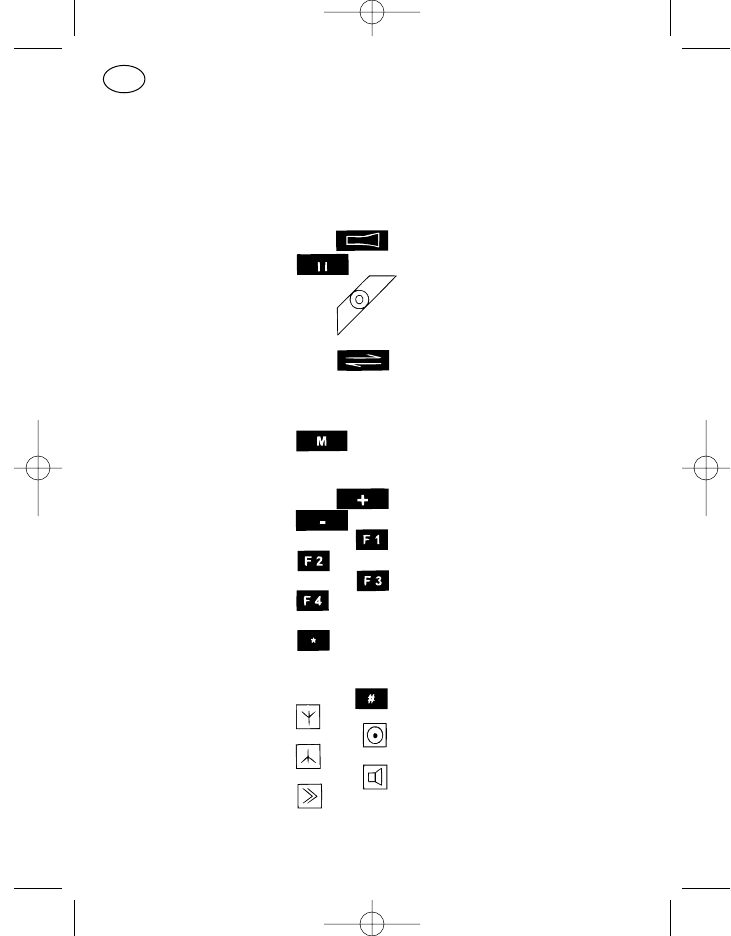
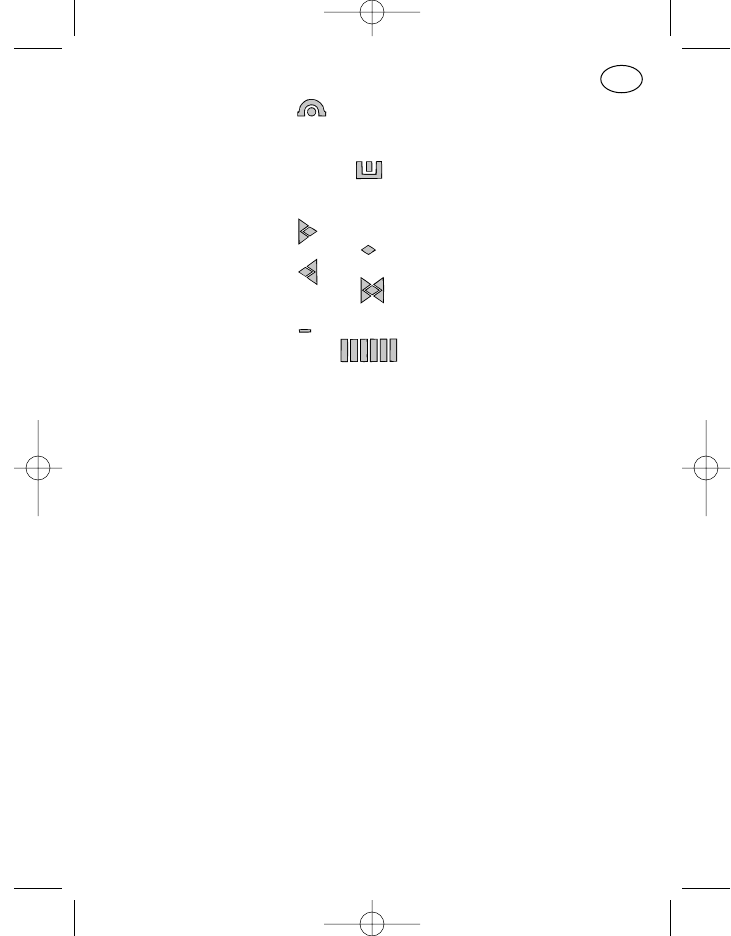
Bedienelemente
Pos. Benennung Tastensymbol, Standardfunktion
Displaysymbol
1 Display
2* Ruftaste 1 I Festruf
3* Lautsprechertaste Lautsprecher ein/aus, mithören
4* Ruftaste 2 Displayruf
5* Ein/Aus-Taste Gerät ein/aus
Kurz: ein
Lang: aus
6* Sendetaste : : : Sprechtaste
7 Cursortaste Verschieben der Eingabestelle
im Display
Kurz: rechts
Lang: links
8 Menütaste Aufruf eines Menüs
Kurz: nächster Menüpunkt
Lang: Menü 1
9 Plus-Taste Eingabestelle aufwärts
10 Minus-Taste Eingabestelle abwärts
11* Funktionstaste 1 Programmierbare Taste
12* Funktionstaste 2 Programmierbare Taste
13* Funktionstaste 3 Programmierbare Taste
14* Funktionstaste 4 Programmierbare Taste
15 Ziffernblock 0–9 Zifferneingabe
16* Sterntaste Displayinhalt löschen
Kurz: markierte Stelle
Lang: alle Eingabestellen
17* Rautentaste Eingabe des Gruppen-
ruftones „G“
19 Empfangssymbol Kanal belegt
20 Nicht in Verwendung
21 Sendesymbol Senden
22 Lautsprechersymbol Lautsprecher ein
23 Rufumleitungs- Rufumleitung geschaltet
symbol
12
D
923991 19.10.1999 10:27 Uhr Seite 12
25 Kennungssymbol Nummer des Rufenden
empfangen
26 Mit 25 zusammen
27 Anzeige-
Überlaufsymbol Rechts weitere Zeichen
28 Nicht in Verwendung
29 Links weitere Zeichen
30 Rechts und links weitere
Zeichen
31 Batteriesymbol Bei MR-Geräten ohne Funktion
32 Balkenanzeige Bei MR-Geräten ohne Funktion
36 Lautsprecher
37 Mikrofon
38 10-polige
FCC-Buchse Für Bedienteilanschluß
40 +, –, externe Hupe
oder Notrufanschluß
41 Datenbuchse
44 Funkgeräteanschluß Verbindung zum Funkgerät
45 10-polige
FCC-Buchse Für den Anschluß der
Besprechungs-Einrichtungen
ML 11, HM 11-1 und HM 11-3
* Pos. 2–6, 11–14 und 16, 17 können auf Kundenwunsch mit anderen Funk-
tionen belegt werden. Bitte überzeugen Sie sich in dem Programmieraus-
druck, den Ihr Funkhändler der Bedienungsanleitung beigelegt hat, von
der aktuellen Funktion dieser Tasten.
13
D
923991 19.10.1999 10:27 Uhr Seite 13
14
923991 19.10.1999 10:27 Uhr Seite 14
15
Kurzbedienungsanleitung / Operating instructions in brief /
Mode d’emploi sommaire
MR 11 SD-R mit / with / avec HA 11
923991 19.10.1999 10:27 Uhr Seite 15
Bedienelemente
Pos. Benennung Tastensymbol, Standardfunktion
Displaysymbol
1 Display
2* Ruftaste 1 Festruf
3* Lautsprechertaste Lautsprecher ein/aus, mithören
4* Ruftaste 2 Displayruf
5* Ein/Aus-Taste Gerät ein/aus
Kurz: ein
Lang: aus
6* Sendetaste : : : Sprechtaste
7 Cursortaste Verschieben der Eingabestelle
im Display
Kurz: rechts
Lang: links
8 Menütaste Aufruf eines Menüs
Kurz: nächster Menüpunkt
Lang: Menü 1
9 Plus-Taste Eingabestelle aufwärts
10 Minus-Taste Eingabestelle abwärts
11* Funktionstaste 1 Programmierbare Taste
12* Funktionstaste 2 Programmierbare Taste
13* Funktionstaste 3 Programmierbare Taste
14* Funktionstaste 4 Programmierbare Taste
15 Ziffernblock 0–9 Zifferneingabe
16* Sterntaste Displayinhalt löschen
Kurz: markierte Stelle
Lang: alle Eingabestellen
17* Rautentaste Eingabe des Gruppen-
ruftones „G“
18 Sende/Empfangs-
symbol Nicht in Verwendung
19 Kanal belegt
20 Nicht in Verwendung
21 Senden
22 Lautsprechersymbol Lautsprecher ein
16
D
923991 19.10.1999 10:27 Uhr Seite 16
23 Rufumleitungs- Rufumleitung geschaltet
symbol
24 Mit 23 zusammen
25 Kennungssymbol Nummer des Rufenden
empfangen
26 Mit 25 zusammen
27 Anzeige-
Überlaufsymbol Rechts weitere Zeichen
28 Nicht in Verwendung
29 Links weitere Zeichen
30 Rechts und links weitere
Zeichen
31 Batteriesymbol Bei MR-Geräten ohne Funktion
32 Balkenanzeige Bei MR-Geräten ohne Funktion
33 Leuchtdiode rot Senden
34 Leuchtdiode gelb Funkkanal belegt
35 Leuchtdiode grün Lautsprecher ein
Dauer: durch Tastendruck
Blinkt: durch Anruf
36 Lautsprecher
37 Mikrofon
38 10-polige FCC-Buchse Für Bedienteilanschluß
39 Antennenanschluß
40 +, –, externe Hupe
oder Notrufanschluß
41 Datenbuchse
42 Hörer
43 Hang-up-Kontakt
44 Funkgeräteanschluß Verbindung zum Funkgerät
* Pos. 2–6, 11–14 und 16, 17 können auf Kundenwunsch mit anderen Funk-
tionen belegt werden. Bitte überzeugen Sie sich in dem Programmieraus-
druck, den Ihr Funkhändler der Bedienungsanleitung beigelegt hat, von
der aktuellen Funktion dieser Tasten.
17
D
923991 19.10.1999 10:27 Uhr Seite 17

Inhaltsverzeichnis
Kurzbedienungsanleitung MR 11 SD-R mit HBT 11 3
Kurzbedienungsanleitung MR 11 S-C mit ML 11 oder HM 11-1/3 7
Kurzbedienungsanleitung MR 11 SD-R mit BTM-XB und
ML 11 oder HM 11-1/3 11
Kurzbedienungsanleitung MR 11 SD-R mit HA 11 15
Sicherheitshinweise 21
Allgemeines 22
Reinigen des Gerätes 22
Optische Meldungen 23
Betriebsbereitschaft 23
Kanal „frei“ 23
Kanal „belegt“ 23
Lautsprecher „ein“ 23
Senden 24
Anzeige-Überlauf 24
Akustische Meldungen 24
Verwendete Tonsignale 24
Tastenklick 25
Bestätigungston 25
Fehlbedienungston 25
Notrufvorwarnung 26
Optisch-akustische Meldungen 26
Einschalttest 26
Anrufmeldung 26
Kurzzeitiger Spannungsabfall der Stromversorgung 26
Systemfehler 27
Standardprogrammierung der Tasten 27
Ein-/Ausschalten (Pos. 5) 28
Sendetaste (Pos. 6) 28
Ruftaste I, Festruf (Pos. 2) 28
18
D
923991 19.10.1999 10:27 Uhr Seite 18

19
D
Ruftaste II, Displayruf (Pos. 4) 28
Lautsprechertaste (Pos. 3) 28
Sterntaste (Pos. 16) 29
Rautetaste (Pos. 17) 29
Standardprogrammierung der Tasten zur Menübedienung 29
Menütaste (Pos. 8) 29
Cursortaste (Pos. 7) 30
Plus- und Minustaste (Pos. 9, 10) 30
Ziffernblock 0 bis 9 (Pos. 15) 31
Das Menüsystem 31
Anwendermenü 31
Menüpunkt 31
Menüanzeige 31
Anzeigeformat 32
Menüreihenfolge 32
Basisanzeige 32
Servicemenü 33
Kennungsanzeige 33
Verfügbare Standardmenüpunkte 33
Lautstärke-Einstellung 33
Kompakteingabe mit Textanzeige und Kanalscrollen 34
Verfügbare Sondermenüpunkte 34
Sicherungsabfrage beim Einschalten 34
Paßwortänderung 35
Kompakteingabe 35
Kompakteingabe mit Kanalscrollen 36
Kompakteingabe mit Textanzeige 36
Kanaleingabe 37
Kanalscrollen 37
Rufnummerneingabe 38
Kurzwahleingabe 38
Kurzwahlscrollen 39
Kurzwahleingabe mit Textanzeige 39
Kurzwahlscrollen mit Textanzeige 39
Statuseingabe 39
923991 19.10.1999 10:27 Uhr Seite 19

Statuseingabe mit Textanzeige 40
Tastatursperre 40
DTMF-Betrieb 40
Kanalscanning 41
Folgekontakt-Aktivierung 41
Hupe (Folgekontakt schalten) 42
Rufumleitung 42
QRE-Betrieb 42
Notizen 43
Sendeleistung 43
Auswerter-Rufnummer 43
Servicebetrieb 44
Rückrufspeicher 44
Sonderfunktionen 44
Notruf auslösen 44
Tastenkombinationen 45
Abschalten akustischer Signaltöne und Lautsprecherstummschaltung 45
Umschalten der Sendeleistung 45
Umschalten der Sendeleistung und Abschalten akustischer Signaltöne 46
20
D
923991 19.10.1999 10:27 Uhr Seite 20

Sicherheitshinweise
– Das Funkgerät mit sämtlichem Zubehör darf nicht in schlagwetter- oder
explosionsgefährdeten Bereichen betrieben werden.
– Halten Sie beim Betätigen der Sendetaste einen Abstand von minde-
stens 30 cm zwischen Funkantenne und Körper bei Geräten mit 7-15 W
Sendeleistung und einen Abstand von mindestens 60 cm bei Geräten
mit 16-50 W Sendeleistung.
– Halten Sie nie bei eingeschaltetem Funkgerät das Handbedienteil mit
dem Lautsprecher direkt an das Ohr, testen Sie vorher einen verträg-
lichen Abstand bei gewählter Lautstärkestufe durch Öffnen der Rausch-
sperre. Andernfalls könnten Sie bei extrem großer Lautstärke Ihr Gehör
schädigen.
– Führen Sie während der Fahrt im Auto als Fahrer keinen Funkbetrieb, der
Sie vom Straßenverkehr ablenkt.
– Wenn Sie Träger eines Herzschrittmachers sind, informieren Sie sich vor
Betrieb des Funkgerätes bei dem Hersteller Ihres Herzschrittmachers
über eventuelle Beeinträchtigungen durch Hochfrequenz. Vermeiden Sie
es, die Sendetaste außerhalb des Fahrzeuges in Antennennähe zu
betätigen, bleiben Sie dabei im Fahrzeug.
– Halten Sie Funkgeräte fern aus dem Bereich von Kindern oder nicht mit
der Bedienung vertrauten Personen.
21
D
923991 19.10.1999 10:27 Uhr Seite 21

Allgemeines
Das Bedienkonzept für die Kraftfahrzeugfunkgeräte der 11er-Generation in
Ausführung PMR (private mobile radio/Betriebsfunk) ist, unabhängig von der
Bedienteilausstattung, für alle Geräte einheitlich. Selbstverständlich ist die
Art der Anzeige und die Anzahl der verfügbaren Tasten von der jeweiligen
Geräte-Bedienteilkombination und von der entsprechenden Programmie-
rung abhängig.
Wählen Sie deshalb bitte von den Seiten 3, 7, 11 und 15 die für Ihre Geräte-
kombination passende Abbildung und nehmen den von Ihrem Funk-
fachhändler beigefügten Programmierausdruck mit zu Hilfe, wenn Sie sich
mit der Bedienung Ihres Funkgerätes vertraut machen möchten.
Bis auf vier Tasten (Menü-, Cursor-, Plus- und Minus-Taste) und die Ziffern-
tastatur 0 bis 9 sind alle weiteren Tasten durch Ihren Funkfachhändler pro-
grammierbar und können unter Umständen mit einer vom Standard abwei-
chenden Funktion programmiert sein. Dadurch sind, je nach Ausführung
Ihres Funkgerätes, für Sie nur einige der in dieser Anleitung aufgeführten
Bedienprozeduren von Interesse.
Reinigen des Gerätes
Zum Reinigen des äußeren Gehäuses Ihres Funkgerätes und der Bedientei-
le verwenden Sie bitte nur Wasser mit etwas Spülmittel und einen weichen
Lappen. Wischen Sie das Funkgerät mit dem angefeuchteten Lappen ab
(keinesfalls das Funkgerät bzw. das Zubehör in das Wasser tauchen) und
trocknen anschließend mit einem trockenen Tuch nach. Achten Sie darauf,
daß keine Feuchtigkeit im Bereich des Bedienteilsteckers und des Anten-
nenkontaktes zurückbleibt.
Verwenden Sie keinesfalls Lösungsmittel!
22
D
923991 19.10.1999 10:27 Uhr Seite 22
Optische Meldungen
Optische Meldungen werden über die Displaysymbole (Pos. 18–30) und über
die drei Leuchtdioden (Pos. 33, 34 und 35) ausgegeben. Die Anzeige der
Leuchtdioden kann dauernd oder blinkend signalisieren. Das Blinken erfolgt
im ca. 1 Sekunden-Takt.
Betriebsbereitschaft
Die Betriebsbereitschaft des eingeschalteten Funkgerätes ist an der sicht-
baren Displayanzeige zu erkennen.
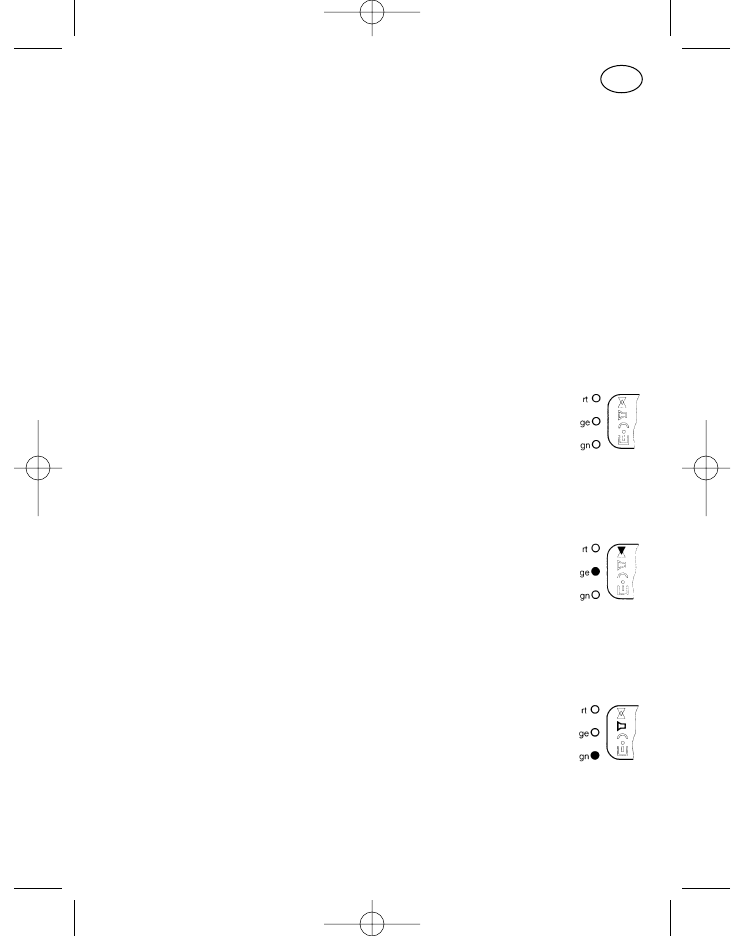
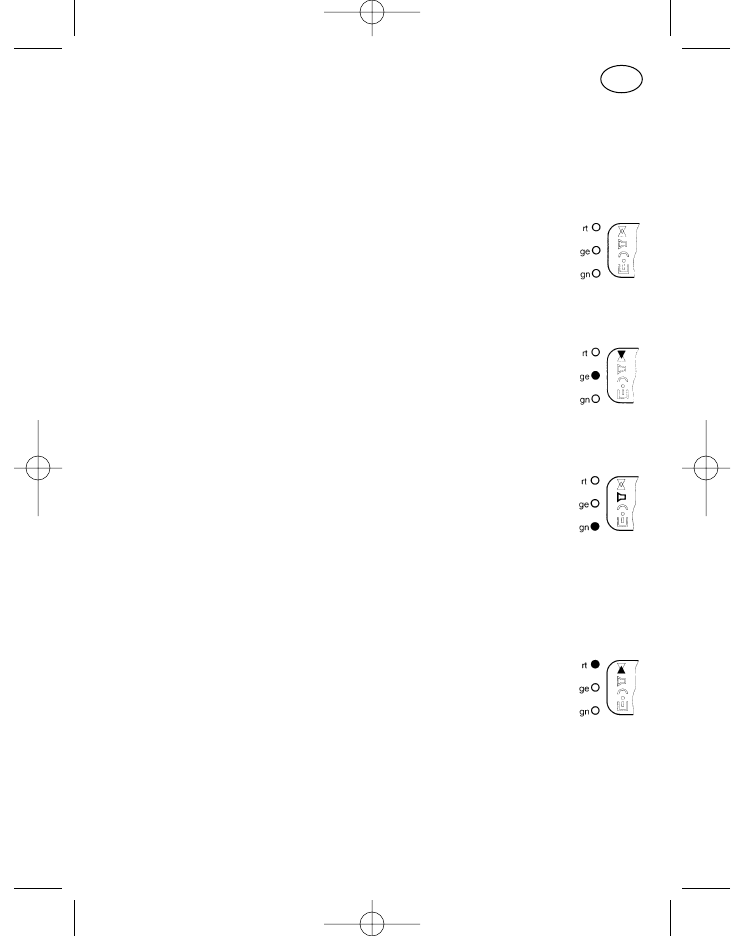
Kanal „frei“
Bei freiem Kanal sind der Empfangspfeil (Pos. 19, Pfeil nach
unten) und die gelbe Leuchtdiode (Pos. 34) abgeschaltet, und
zwar unabhängig davon, ob für diesen Kanal ein Ruf- oder Sub-
audio-Auswerter programmiert ist oder nicht.
Kanal „belegt“
Bei belegtem Kanal sind der Empfangspfeil (Pos. 19) und die
gelbe Leuchtdiode (Pos. 34) angeschaltet, und zwar unabhängig
davon, ob für diesen Kanal ein Ruf- oder Subaudio-Auswerter
programmiert ist oder nicht.
Lautsprecher „ein“
Zur Anzeige des empfangsbereiten Gerätes (Lautsprecher „ein“)
werden das Lautsprechersymbol (Pos. 22) und die grüne Leucht-
diode (Pos. 35) angeschaltet.
Der Lautsprecher wird im Normalfall eingeschaltet durch:
Betätigen der Lautsprechertaste,
Betätigen der Sende- bzw. Ruftaste
einen Anruf (grüne Leuchtdiode blinkt)
23
D
923991 19.10.1999 10:27 Uhr Seite 23
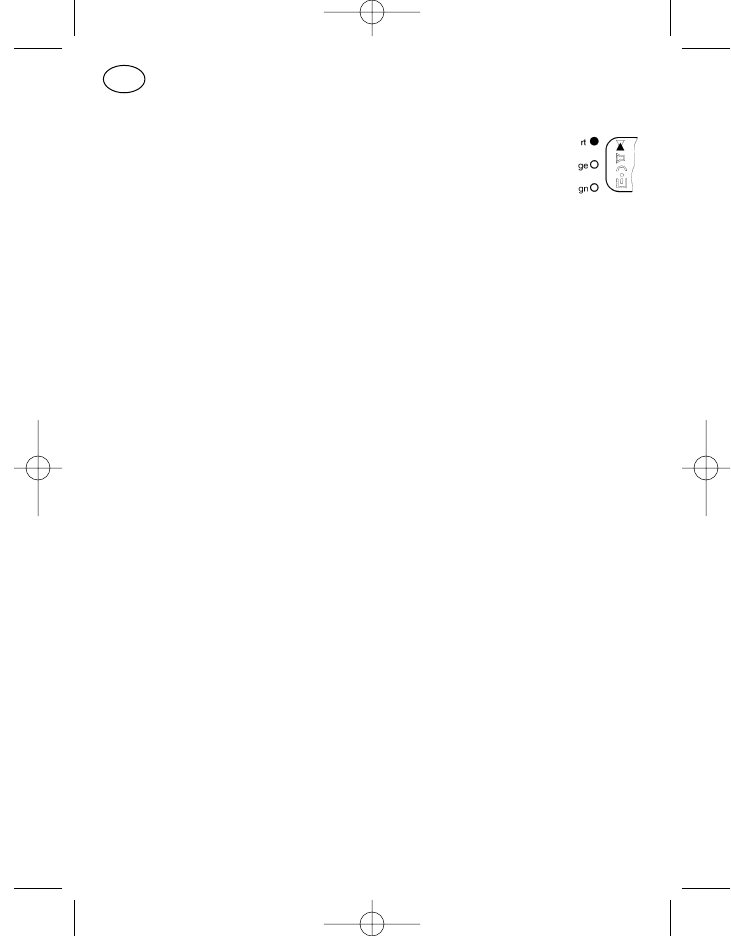
Senden
Bei Sendebetrieb werden der Sendepfeil (Pos. 21, Pfeil nach
oben) und die rote Leuchtdiode (Pos. 33) angeschaltet. Das
geschieht auch kurzzeitig bei automatischer Sendertastung wie
z. B. bei Quittungsabgabe oder Statusabfrage.
Anzeige-Überlauf
Die aus den Displaysymbolen (Pos. 27–30) gebildeten Richtungspfeile (links,
rechts, links und rechts) dienen als Hinweis dafür, daß noch weitere nicht
angezeigte Stellen vorhanden sind (bei Eingabe von mehr als 8 Stellen).
Dieser Überlauf kann z. B. im Menü „Notizen“ auftreten. Zum Zurückholen
der rechts „übergelaufenen“ Eingabestellen ist der Cursor gegen den rech-
ten Displayrand zu steuern. Mit jedem Cursortastendruck kommt dann eine
Stelle zurück in den Anzeigebereich. Bei Überlauf nach links springt der Cur-
sor bei langem Tastendruck auf die erste Eingabestelle.
Akustische Meldungen
Neben den nur optisch signalisierten Betriebszuständen gibt es auch rein
akustische Signale.
Verwendete Tonsignale
Zur Unterscheidung der einzelnen Meldungen werden zwei Tonhöhen
benutzt. Für positive Meldungen hohe Töne (Frequenz ca. 1200 Hz), für
negative Meldungen tiefe Töne (Frequenz ca. 400 Hz).
Bei den Tonlängen können je nach Programmierung vier Tonlängen auftre-
ten:
lang ca. 1 Sekunde
mittel ca. 0,35 Sekunden
kurz ca. 0,1 Sekunden
sehr kurz (Klick) ca. 20 Millisekunden
24
D
923991 19.10.1999 10:27 Uhr Seite 24
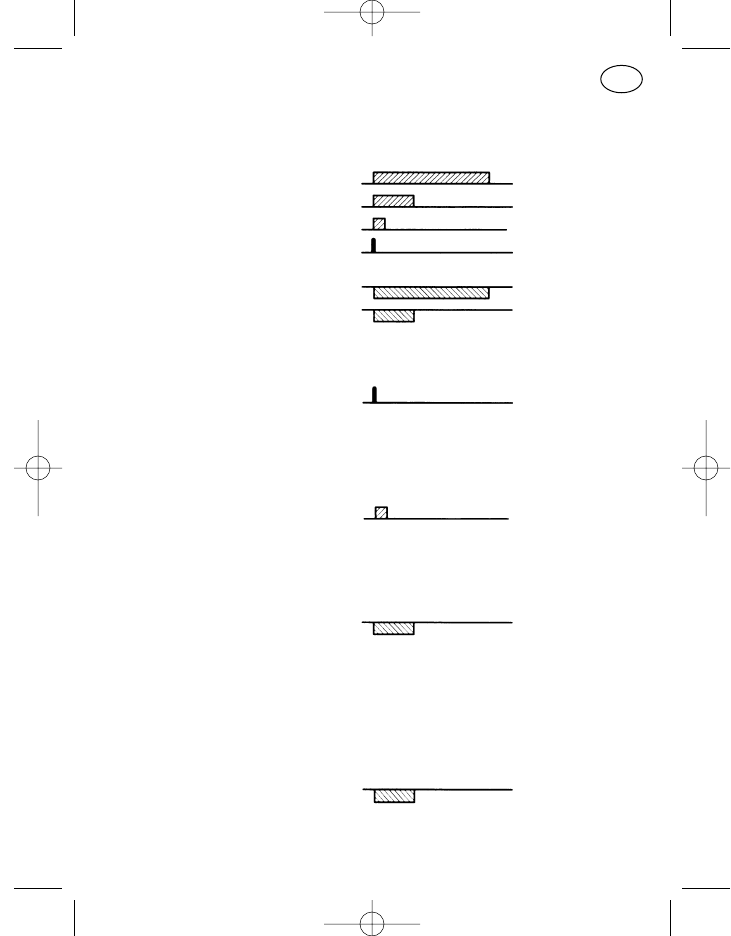
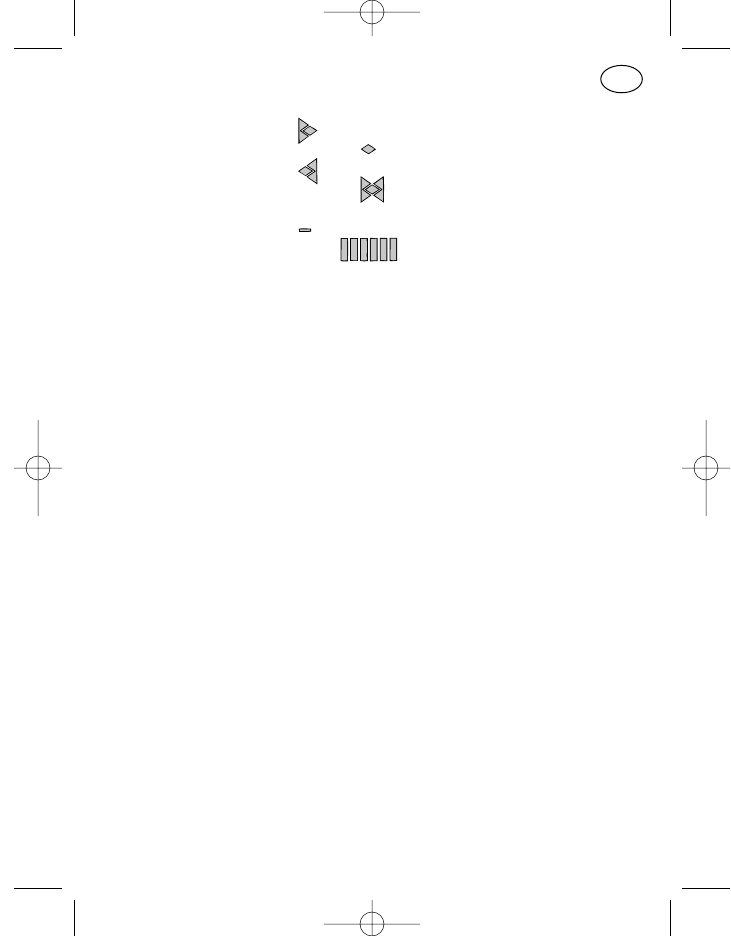
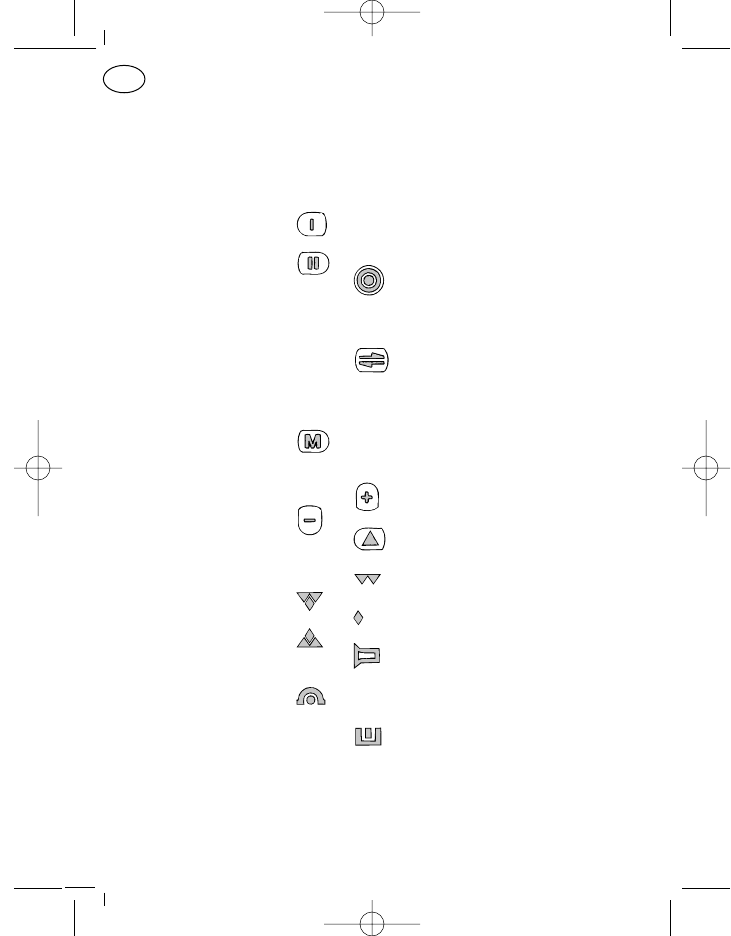
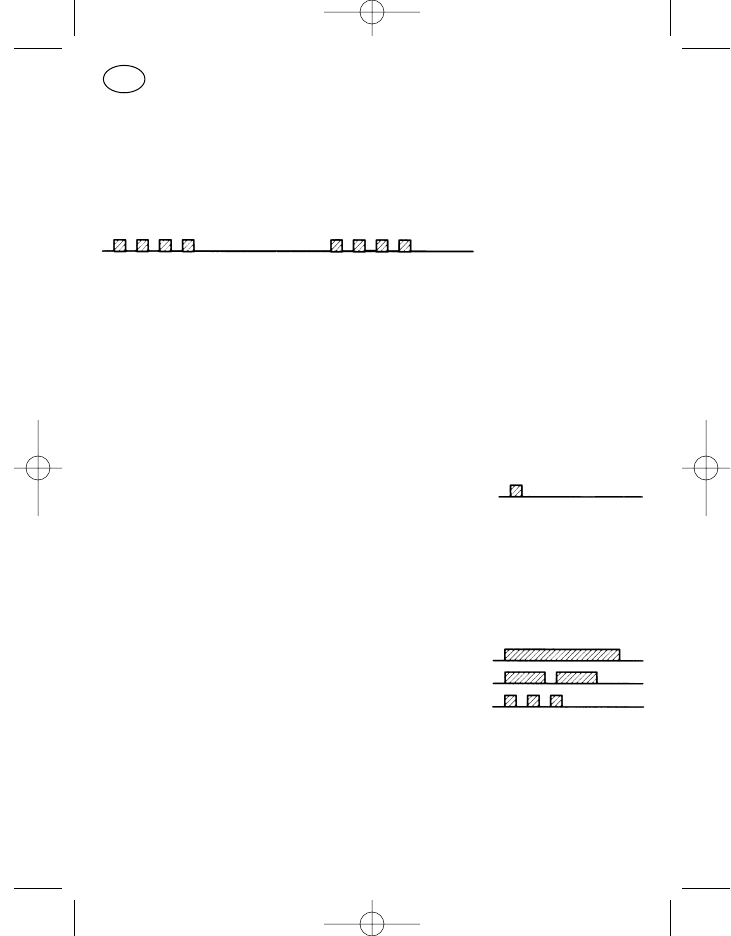
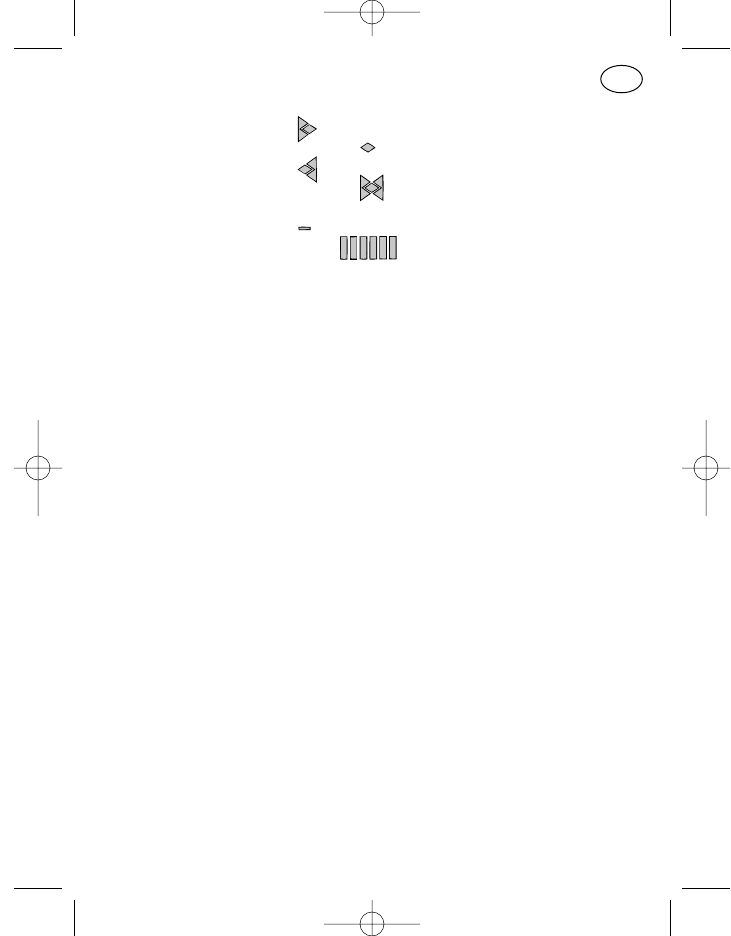
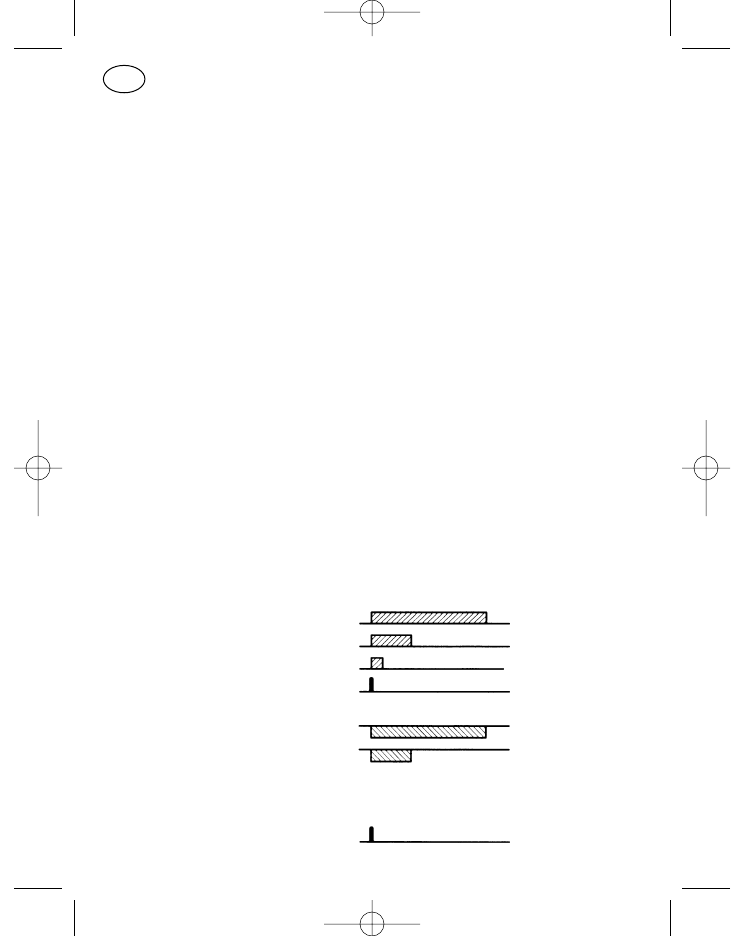
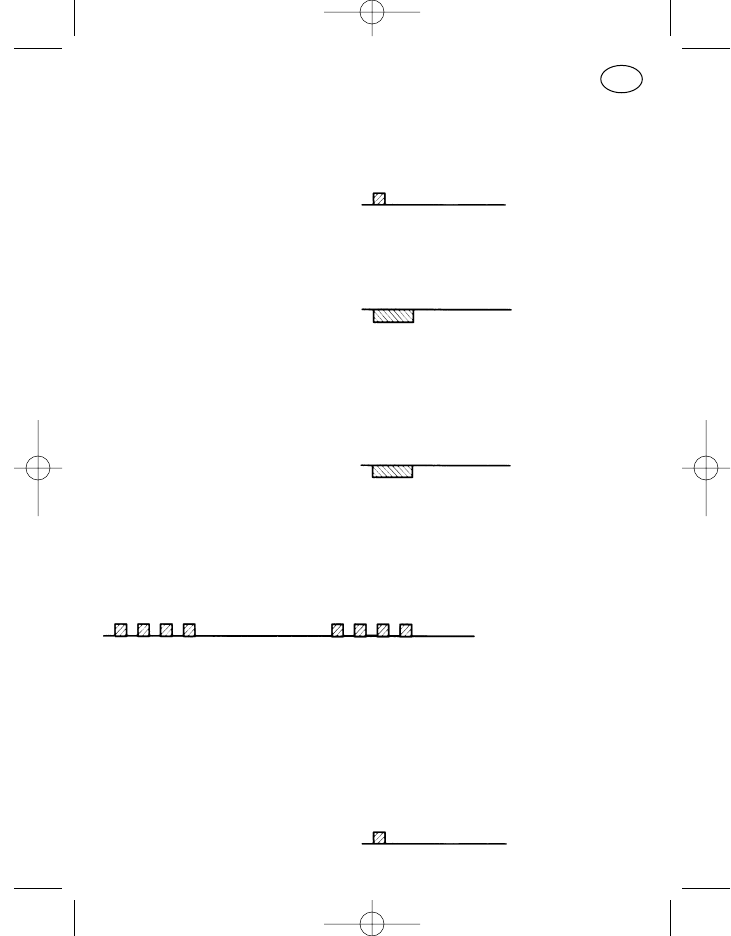
Hohe Töne werden nachfolgend auf einer Linie als Block nach oben, tiefe
Töne entsprechend als Block nach unten dargestellt. Mit den vier Tonlängen
ergeben sich folgende Bilder:
hoch, lang
hoch, mittel
hoch, kurz
hoch, Klick
tief, lang
tief, mittel
Tastenklick
Ein hoher, sehr kurzer Ton.
Ertönt als Erkennung einer erfolgreichen Tastenbetätigung. Das bedeutet,
daß die Eingabetaste mechanisch richtig gedrückt wurde.
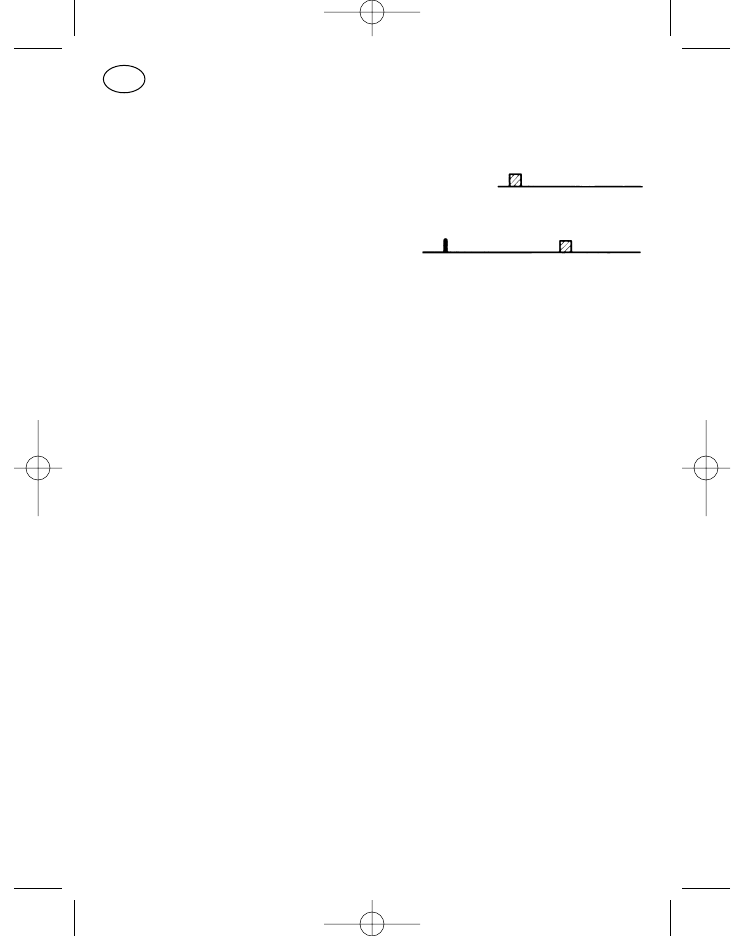
Bestätigungston
Ein hoher, kurzer Ton.
Er ertönt nach abgeschlossenem Verbindungsaufbau (Quittung erhalten).
Fehlbedienungston
Ein tiefer Ton mittlerer Dauer,
bzw. tiefer Dauerton, bis die Fehlerursache behoben ist.
Da Fehlbedienungen sehr stark von der Programmierung abhängig sind, hier
zum Verständnis zwei mögliche Beispiele:
a) Ist die Lautstärke auf ihre höchste oder niedrigste Stufe gestellt und wird
dann versucht, die Lautstärke noch höher oder noch niedriger zu stellen,
so ertönt als Fehlerton ein tiefer Ton mittlerer Dauer.
b) Programmiert ist, daß bei belegtem Kanal nicht gesendet werden kann.
Wird jetzt bei belegtem Kanal trotzdem die Sendetaste gedrückt, so
25
D
923991 19.10.1999 10:27 Uhr Seite 25
ertönt als Fehlerton ein tiefer Dauerton solange, bis die Sendetaste los-
gelassen wird.
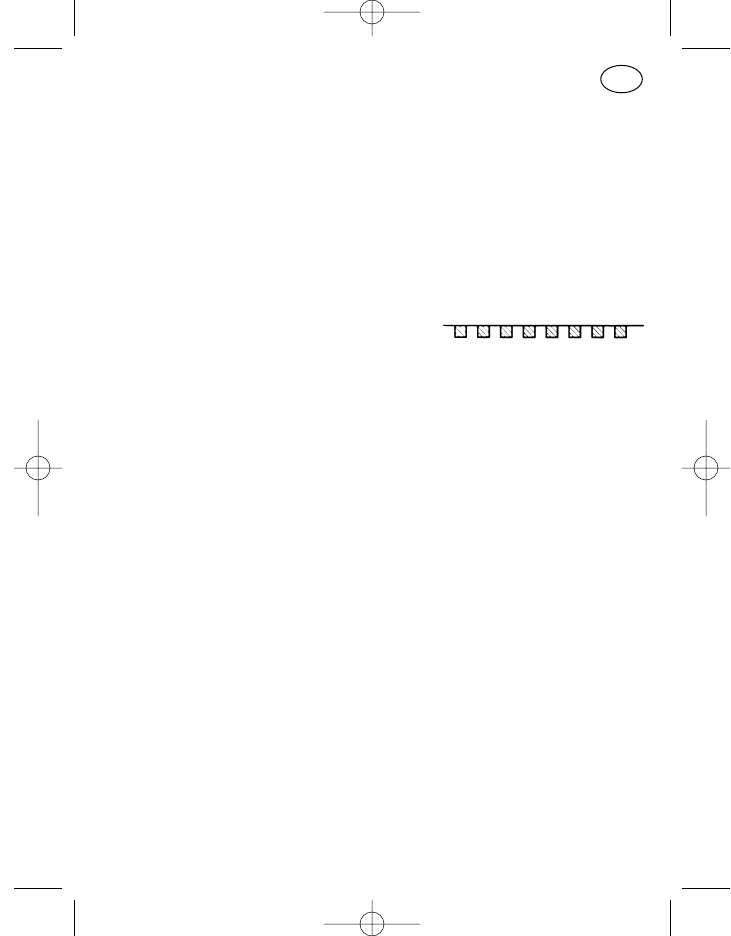
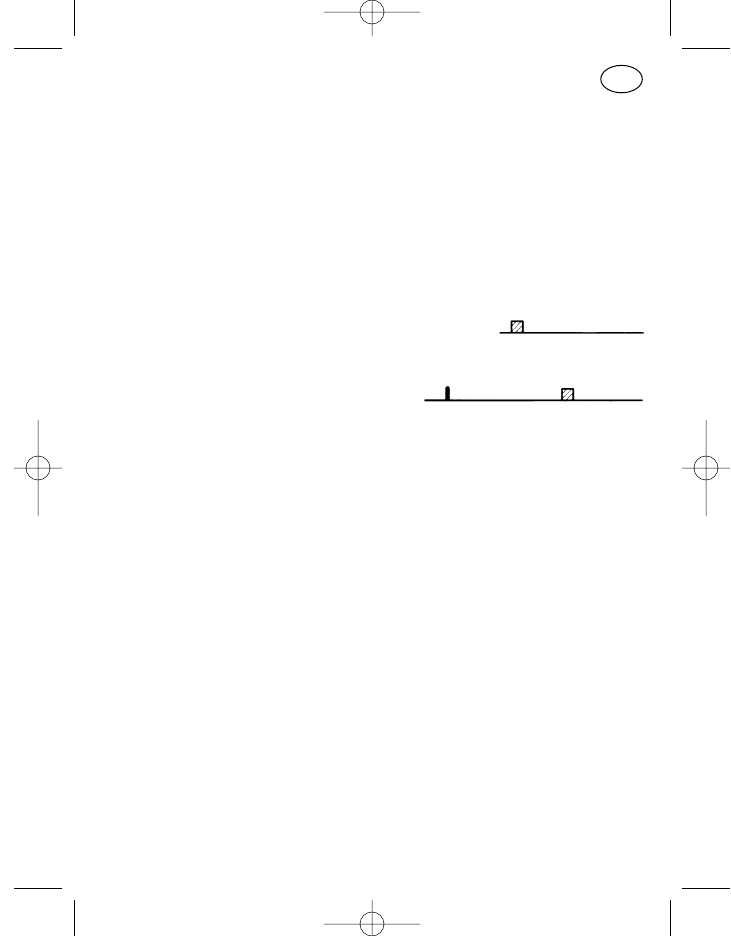
Notrufvorwarnung
Folge von vier kurzen, hohen Tönen, alle 2 s Wiederholung
Die Notrufprozedur unterliegt in ihrem Ablauf sehr stark der Programmie-
rung!
Optisch-akustische Meldungen
Einschalttest
Nach dem Einschalten werden alle drei Leuchtdioden und alle LCD-Symbo-
le für ca. 1 s eingeschaltet, die Displaybeleuchtung wird angeschaltet und
abschließend ertönt ein kurzer hoher Ton; danach erscheint normalerweise
die Anzeige, daß das Gerät betriebsbereit ist.
Anrufmeldung
Bei einem Anruf blinkt die grüne Leuchtdiode (Pos. 35) und das Lautspre-
chersymbol (Pos. 22) wird angeschaltet. Akustisch wird der Anruf durch fol-
gende Signale gemeldet:
Selektivruf ein hoher Ton, lang
Gruppenruf zwei hohe Töne, mittel
Sammelruf drei hohe Töne, kurz
Kurzzeitiger Spannungsabfall der Stromversorgung
Im Kraftfahrzeug treten beim Anlassen des Motors zum Teil kräftige Span-
nungseinbrüche auf. Bei Spannungsabfall der Stromversorgung auf einen
Wert von ca. 5 V schaltet sich das Funkgerät aus. Spannungseinbrüche von
26
D
923991 19.10.1999 10:27 Uhr Seite 26
bis zu ca. 4 Sekunden überbrückt das Funkgerät insofern, als es sich danach
selbsttätig wieder einschaltet. Bei längeren Spannungseinbrüchen ist das
Gerät von Hand erneut einzustellen.
Das Einschalten erfolgt in jedem Fall wie ein Neu-Einschalten, zwischenzeit-
liche Betriebszustände (bis auf Kanal und Lautstärke) werden nicht gespei-
chert.
Systemfehler
Im Display blinkt der Text „SERVICE“,
akustisch melden kurze, tiefe Töne den Fehler.
Gerät aus- und wieder einschalten bzw. von der Stromversorgung trennen
und nach erneutem Anschluß das Gerät wieder einschalten. Ist der System-
fehler dann immer noch vorhanden, bitte den Kundendienst aufsuchen.
Standardprogrammierung der Tasten
Von den nachfolgend beschriebenen Tasten sind Pos. 2–6, 11–14 und 16, 17
nach ihrer Standardprogrammierung benannt, können aber auf Kunden-
wunsch mit anderen programmierbaren Funktionen belegt werden; die für
die jeweilige Taste zur Verfügung stehenden Funktionen sind auf eine sinn-
volle Bedienung abgestimmt und auf Anfrage bei Ihrem Kundendienst bzw.
Händler zu erfahren.
Bei der Lautsprechertaste, Ein/Aus-Taste, Cursortaste, Sterntaste und der
Menütaste (Pos. 3, 5, 7, 16, 8) wird zwischen langem und kurzem Tasten-
druck unterschieden:
kurzer Tastendruck: ca. 0,5 Sekunden
langer Tastendruck: ca. 2 Sekunden
Die Unterscheidungsgrenze zwischen langem und kurzem Tastendruck liegt
bei ca. 1 Sekunde. 27
D
923991 19.10.1999 10:27 Uhr Seite 27
Ein-/Ausschalten (Pos. 5)
Zum Einschalten des Funkgerätes die Ein/Aus-Taste (Pos. 5) kurz drücken.
Der Einschalttest wird durchgeführt (ca. 1 Sekunde), nach Ertönen des
Bestätigungstones ist das Gerät betriebsbereit.
Zum Ausschalten ist die Ein/Aus-Taste (Pos. 5) lang zu drücken, bis der
Bestätigungston ertönt. Mit dem Loslassen der Taste wird das Funkgerät
abgeschaltet.
Beim Abschalten werden die letzten Einstellungen von Kanal und Lautstärke
gespeichert und bei erneutem Einschalten wieder übernommen.
Sendetaste (Pos. 6)
Zum Senden ist die Sendetaste (Pos. 6) gedrückt zu halten, das Mikrofon ist
angeschaltet und es kann gesprochen werden. Für die Dauer des Sendens
sind die rote Leuchtdiode (Pos. 33) und das Sendesymbol (Pos. 21, Pfeil
nach oben) angeschaltet. Zum Hören ist die Sendetaste wieder loszulassen.
Ruftaste I, Festruf (Pos. 2)
Bei programmiertem Festruf (keine im Display veränderbaren Rufwahlstellen)
die Ruftaste 1 (Pos. 2) drücken, der Ruf wird ausgesendet. Für die Dauer der
Sendertastung sind die Sendesymbole aktiv.
Ruftaste II, Displayruf (Pos. 4)
Bei programmiertem Displayruf (mit der Zifferntastatur bzw. Cursor-, Plus-
und Minustaste kann die im Display erscheinende Rufnummer verändert
werden) die Ruftaste 2 (Pos. 4) drücken, der Ruf wird ausgesendet. Für die
Dauer der Sendertastung sind die Sendesymbole aktiv.
Lautsprechertaste (Pos. 3)
In der Standardprogrammierung besitzt die Lautsprechertaste (Pos. 3) eine
Kombination aus Lösch-, Monitor- und Mithörfunktion. Hierbei erhält die
Taste nur für die Monitorfunktion eine kurz–lang-Unterscheidung, d. h. die
Monitorfunktion wird nur bei einem kurzen Tastendruck ausgeführt.
28
D
923991 19.10.1999 10:27 Uhr Seite 28

Gerät mit Rufauswerter:
Mithören
Während die Taste gedrückt gehalten wird, kann man in den Funkkanal
hineinhören. Ist Funkbetrieb auf dem Kanal, so hört man diesen mit, ist
der Kanal frei, so hört man ein Rauschen. Für die Dauer des Tasten-
drucks wird das Lautsprechersymbol (Pos. 22) und die grüne Leucht-
diode (Pos. 35) angeschaltet. [Ruf-, Subaudioauswerter und Rausch-
sperre werden umgangen]
Monitor
Mit jedem Loslassen der Taste wird der Lautsprecher gleichzeitig in den
jeweils anderen Zustand geschaltet, d. h. Lautsprecher „ein“ (grüne
Diode auf Dauerlicht, Lautsprechersymbol an) oder Lautsprecher „aus“
(grüne Diode aus und Lautsprechersymbol aus). [Nur Rufauswerter wird
umgangen]
Löschen
Darüber hinaus wird mit jedem Tastendruck ein eventuell vorhandenes
Anrufsignal zurückgesetzt.
Sterntaste (Pos. 16)
Die Sterntaste ist standardmäßig mit der Funktion „Displayinhalt löschen“
(kurz = markierte Eingabestelle, lang = alle Eingabestellen) belegt. Sie steht
nicht bei allen Bedienteilen zur Verfügung.
Rautetaste (Pos. 17)
Die Rautetaste dient in der Standardprogrammierung der Eingabe des Grup-
penruftones „G“. Sie steht nicht bei allen Bedienteilen zur Verfügung.
Standardprogrammierung
der Tasten zur Menübedienung
Menütaste (Pos. 8)
Im Ruhezustand (Standby-Betrieb) des Funkgerätes ist auf dem Display die
Basisanzeige sichtbar (siehe „Das Menüsystem“ ). Wollen Sie Eingaben vor-
29
D
923991 19.10.1999 10:27 Uhr Seite 29

nehmen, also z. B. den Kanal oder die Rufnummer wechseln, so betätigen
Sie einmal kurz die Menütaste „M“ (Pos. 8), es erscheint der Menüpunkt 1 im
Display. Jeder weitere kurze Tastendruck der Menütaste bringt den nächst-
folgenden Menüpunkt in das Display. Nach Aufruf des letzten Menüpunktes
erscheint durch kurzen Tastendruck wieder der Menüpunkt 1. Ein langer
Tastendruck der Menütaste schaltet von jeder beliebigen Menüanzeige zum
Menüpunkt 1, sichtbar ist die Basisanzeige.
Wird nach Aufruf eines Menüs keine weitere Taste betätigt, so schaltet das
Gerät bei vielen Menüs wieder zurück in die Basisanzeige. Das geschieht, je
nach Menüanzeige, nach ca. 2 Sekunden beim Menüpunk 1 (standardmäßig
das Lautstärke-Menü) bzw. nach ca. 10 Sekunden (von anderen Menüs) .
Cursortaste (Pos. 7)
Sind im Display Eingaben möglich, so ist die aktuell zu verändernde Stelle
durch einen Unterstrich markiert. Befinden sich links bzw. rechts neben der
markierten Position noch weitere zu verändernde Stellen, so verschiebt ein
kurzer Tastendruck der Cursortaste (Pos. 7) die Schreibmarke eine Stelle
weiter nach rechts, ein langer Tastendruck eine Stelle nach links.
Sind im Display mehr als eine Stelle durch Unterstriche markiert, so ist eine
Veränderung nur durch Scrollen (kontinuierliches Durchschalten angebote-
ner, bereits vorhandener Eingaben) mit den +/–Tasten möglich. Die Cursor-
taste ist in solchen Fällen wirkungslos, es sei denn, man befindet sich in einer
Menüanzeige wie z. B. „Kompakteingabe“ (s. S. 35). Das Menü „Kompakt-
eingabe“ hat mehrere Eingabeblöcke, ein Druck auf die Cursortaste schaltet
dann von einem Eingabeblock auf den nächsten, z. B. von „Rufeingabe“ auf
„Kanal“.
Plus- und Minustaste (Pos. 9, 10)
Mit der Plus- und Minustaste können im Display markierte Eingabestellen
aufwärts- bzw. abwärtsgezählt werden. Nach Erreichen des gewünschten
Inhalts ist mit dem Cursor auf die nächste einzugebende Stelle zu wechseln.
30
D
923991 19.10.1999 10:27 Uhr Seite 30

Ziffernblock 0 bis 9 (Pos. 15)
Über die Zifferntastatur kann an den in der Menüanzeige vorgesehenen Stel-
len der Inhalt direkt eingegeben werden. Mit jeder eingegebenen Ziffer bzw.
jedem Buchstaben schaltet der Cursor automatisch auf die nächste Einga-
bestelle. Die Zifferntastatur ist nicht an jedem Bedienteil vorhanden.
Das Menüsystem
Die Funkgeräte der 11er-Generation sind menügeführt zu bedienen. Darun-
ter ist zu verstehen, daß die Anzeige- bzw. Eingabestellen im Display jeweils
individuell auf den Bedienvorgang abgestimmt sind. Dazu gehört unter ande-
rem auch, daß im Display angezeigt wird, welcher Bedienungsablauf gerade
aktiviert ist.
Anwendermenü
Das Anwendermenü ist über die Menütaste aufrufbar und ermöglicht dem
Benutzer des Gerätes eine optimal auf seine Bedürfnisse zugeschnittene
Bedienung. So wie hier in dieser Bedienungsanleitung alle Menüpunkte und
Bediendetails erwähnt werden müssen, sind sie in ihrer Vielfalt sicher ver-
wirrend. Deshalb wird der Benutzer durch fachgerechte Auswahl und Pro-
grammierung nur mit dem konfrontiert, was er auch wirklich für seine spezi-
ellen Anwendungen braucht.
Menüpunkt
Unter einem Menüpunkt ist innerhalb des über die Menütaste aufgerufenen
Menüs eine Displayanzeige mit ihren zugehörigen Eingabe- und Anzei-
gemöglichkeiten zu verstehen.
Als Menüpunkte stehen zur Zeit ca. 30 verschiedene zur Verfügung, von
denen je nach Kundenwunsch eine individuelle Auswahl von bis zu 23 Menü-
punkten programmiert werden kann.
Menüanzeige
Jedem Menüpunkt ist eine Menüanzeige mit fest definierten Anzeige- und
Eingabemöglichkeiten zugeordnet. 31
D
923991 19.10.1999 10:27 Uhr Seite 31
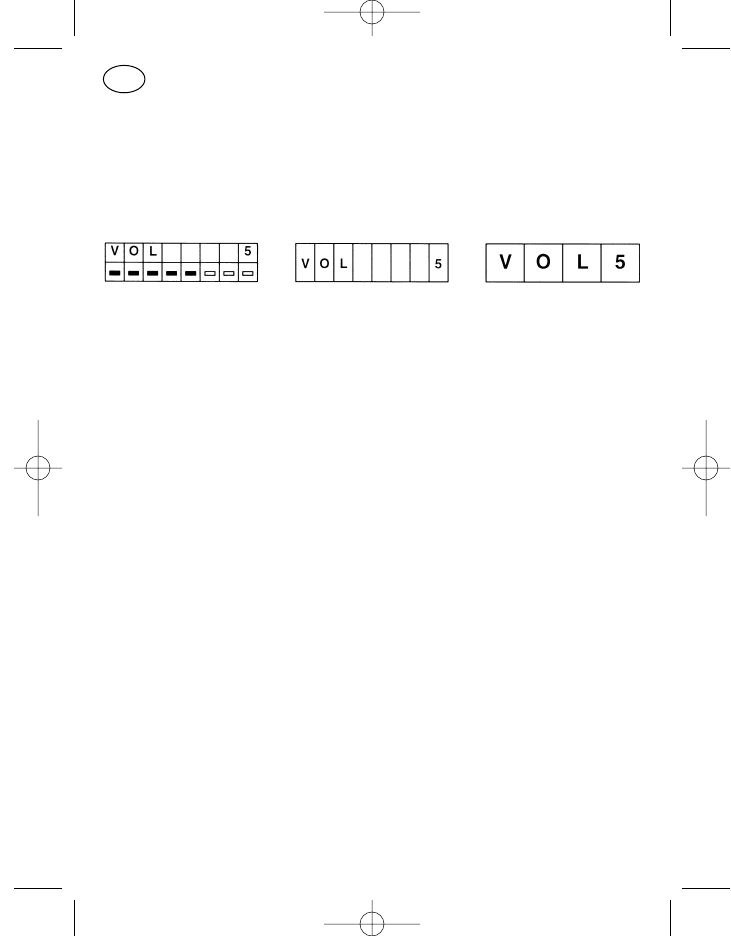
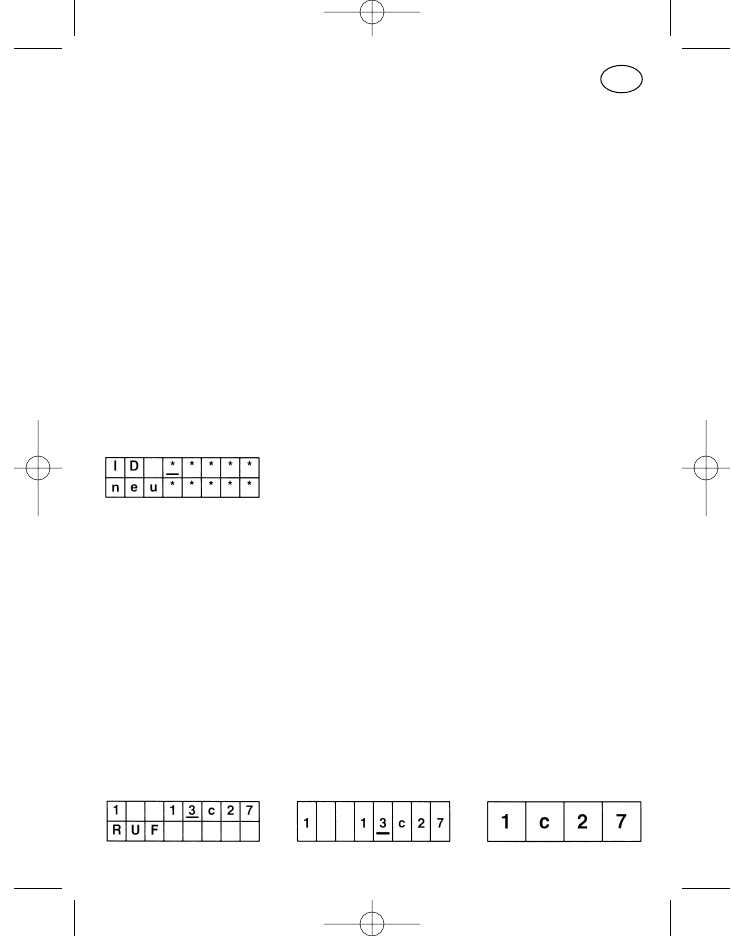
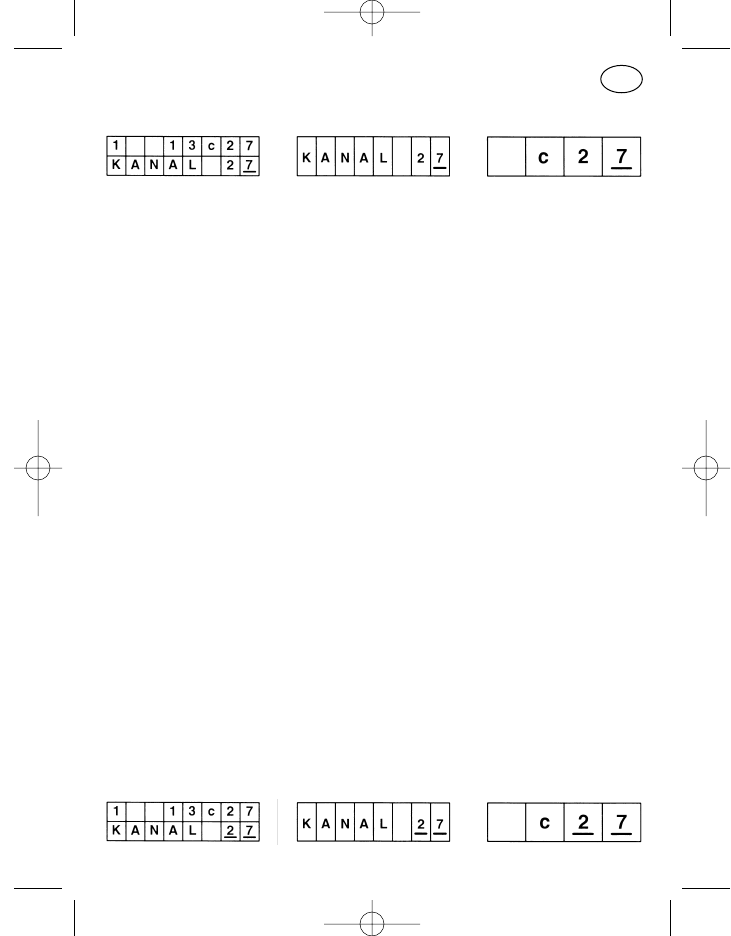
Anzeigeformat
Bei der kundenspezifischen Programmierung besteht für viele Menüpunkte
des Anwendermenüs die Wahlmöglichkeit zwischen drei unterschiedlichen
Anzeigeformaten im Display, einem zweizeiligen mit zweimal acht Stellen
(Format C), einem einzeiligen mit acht Stellen (Format B) und einem einzeili-
gen mit vier Stellen (Format A).
Format C Format B Format A
Bei der Programmierung im Kundendienst ist für jeden Menüpunkt zu über-
prüfen, ob das gewünschte Format für den jeweiligen Anwendungsfall geeig-
net ist (Stellenzahl).
Menüreihenfolge
Die Reihenfolge der einzelnen Menüpunkte beim Durchblättern des Menüs
mit der Menütaste ist kundenspezifisch programmierbar.
Basisanzeige
Die für den Anwender wichtigste (informativste) Menüanzeige kann als
Basisanzeige programmiert werden. Die Standard-Basisanzeige ist die
Menüanzeige des Menüpunktes „Kompakteingabe mit Textanzeige“ (siehe
S. 36). Durch diese Basisanzeige werden wichtige Betriebszustände (z. B.
Kanal, Ruf und Status) signalisiert, ohne daß irgend eine Bedienung auszu-
führen ist. Das Anzeigeformat der Basisanzeige kann von dem des entspre-
chenden Menüpunktes abweichen. Eingaben in die Basisanzeige sind nicht
möglich (keine Eingabestellen markiert).
Achtung! Die Basisanzeige erscheint immer nach Verlassen des Menüs,
trotzdem ist im Hintergrund weiterhin der Menüpunkt 1 aktiv.
Das bedeutet bei Standardprogrammierung mit dem Menüpunkt
1 „Lautstärke“, daß trotz sichtbarer Basisanzeige ein Betätigen
der Plustaste die Lautstärke erhöht. Nach erfolgter Eingabe wird
aber sofort der Menüpunkt 1 mit Anzeige der Änderung sichtbar!
Diese Tatsache ist zu berücksichtigen, wenn beim Menüpunkt 1
von der Standardprogrammierung abgewichen werden soll.
32
D
923991 19.10.1999 10:27 Uhr Seite 32
Servicemenü
Das Servicemenü ist nur für den Kundendienst bestimmt. Es kann über den
Menüpunkt „Servicefunktionen“ durch Paßworteingabe aufgerufen werden.
Erscheint der Menüpunkt im Ablauf der normalen Bedienung, so ist durch
kurzes Drücken der Menütaste weiterzuschalten.
Hinweis: Wurde versehentlich eine Eingabetaste gedrückt, so kann das
Menü über Abschalten des Gerätes oder durch Sterncheneinga-
be verlassen werden (ohne Zifferntastatur mit +/– erreichbar).
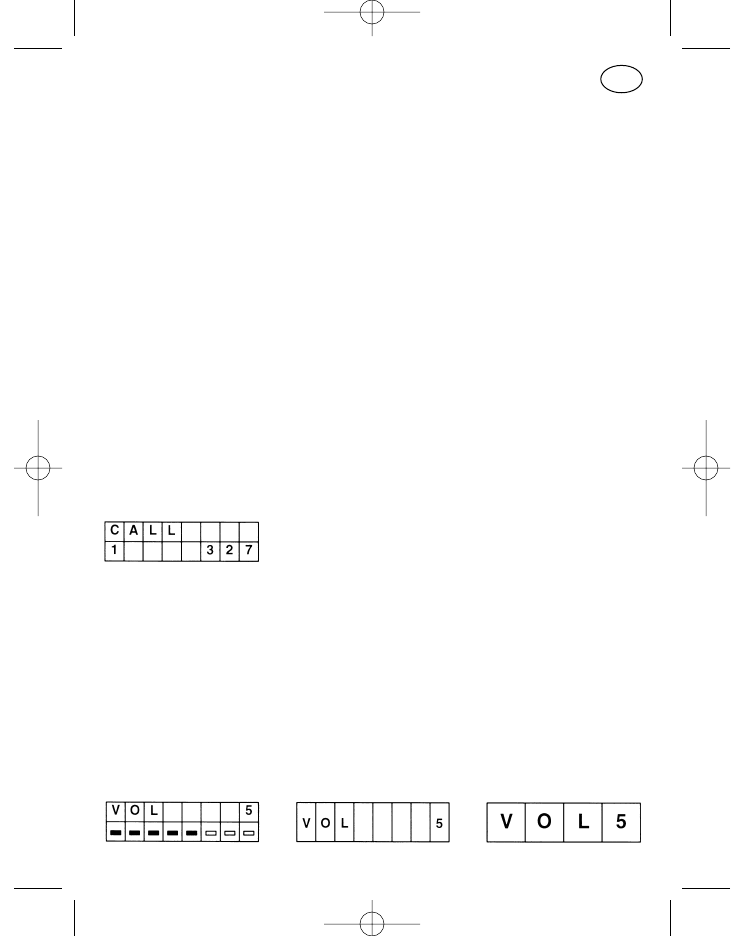
Kennungsanzeige
Unter Kennungsanzeige versteht man die Anzeige der Rufnummer des Anru-
fers. Mit der Kennung kann zusätzlich auch noch ein Status (Mitteilung des
Rufenden in Form einer verabredeten Ziffer) übertragen werden.
Wird ein Anruf empfangen, so wird das durch die blinkende grüne Leucht-
diode und das eingeschaltete Lautsprechersymbol signalisiert. Ist das Funk-
gerät für Kennungsanzeige programmiert und wird eine Kennung oder eine
Kennung mit Status übertragen, so wird beides im Display angezeigt und
auch das Kennungssymbol (Pos. 25, 26) angeschaltet. Linksbündig im Dis-
play steht der Status, rechts die Nummer des Rufenden.
Verfügbare Standardmenüpunkte
Als Standardprogrammierung werden zwei Menüpunkte angeboten. Das
Menü „Lautstärke-Einstellung“ als Menüpunkt 1 und das Menü „Kompakt-
eingabe mit Textanzeige und Kanalscrollen“ als Menüpunkt 2. Für viele
Anwendungen ist damit eine komfortable Bedienung möglich.
Lautstärke-Einstellung
33
D
923991 19.10.1999 10:27 Uhr Seite 33
Bedienung:
Mit der Plustaste (Pos. 9) und Minustaste (Pos. 10) kann innerhalb der
vorhandenen acht Lautstärkestufen die Lautstärke höher bzw. niedriger
eingestellt werden. Nach jeder Veränderung ertönt der Tastenklick in der
eingestellten Lautstärke.
Eine lang- kurz-Unterscheidung ist bei diesen Tasten nicht zu beachten,
jeder Tastendruck verändert die Lautstärke um eine Stufe entsprechend
der gewählten Richtung. Bei längerem Tastendruck wird kontinuierlich
durchgeschaltet (Scrollen).
Wird in den beiden Endstellungen der Lautstärke (Stufe 1 bzw. Stufe 8)
in Stufe 1 die Minustaste oder in Stufe 8 die Plustaste betätigt, so ertönt
der Fehlerton.
Die Direkteingabe über die Zifferntastatur (1-8) ist auch möglich.
Kompakteingabe mit Textanzeige und Kanalscrollen
Die Anzeige in der oberen Zeile entspricht dem Menü „Kompakteingabe“.
In der unteren Zeile erscheint zusätzlich ein für Status und Kanal im Kun-
dendienst einprogrammierter, individueller Text. Die Standardtexte der „nor-
malen“ Kompaktmenüs sind „STATUS“, „RUF“ und „KANAL“. Ob Kanal-
oder Statustext angezeigt wird, bestimmt die Stellung des Cursors in der
oberen Zeile.
Verfügbare Sondermenüpunkte
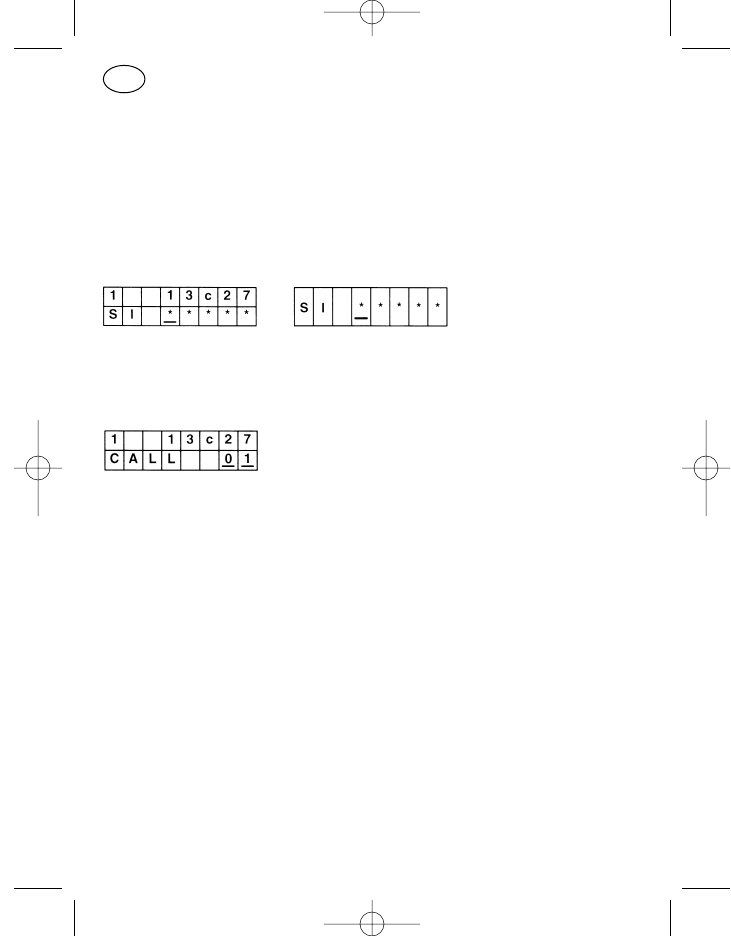
Sicherungsabfrage beim Einschalten
34
D
923991 19.10.1999 10:27 Uhr Seite 34
Die Paßworteingabe verhindert eine Gerätebedienung durch Unbefugte.
Nach dem Einschalten erscheint, wenn programmiert, direkt der Menüpunkt
Paßwort mit Sternchen als Leerzeichen für die Paßworteingabe. Die Eingabe
kann mit Zifferntastatur oder mit Cursor und Plus-/Minustasten erfolgen.
Nach abgeschlossener Eingabe ist die Menütaste zu betätigen, das Gerät
schaltet zur Basisanzeige, wenn das Paßwort richtig war.
Vor Drücken der Menütaste kann ein falsches Paßwort korrigiert werden,
danach ist es neu einzugeben. Nach drei fehlerhaften Versuchen wird eine
weitere Eingabe für 15 Minuten unterbunden. Zum Ablauf der 15-Minuten-
Sperre muß das Gerät eingeschaltet bleiben.
Der Menüpunkt „Sicherungsabfrage beim Einschalten“ steht logischerweise
außerhalb des normalen Bediener-Menüs immer an erster Stelle und wird nur
durch Einschalten des Gerätes aktiviert.
Paßwortänderung
Dieses Menü ist nur in Verbindung mit der Sicherungsabfrage zu verwenden.
Es kann damit ein einmal vom Kundendienst einprogrammiertes Paßwort am
Gerät geändert werden.
Nach Eingabe des alten Paßwortes in die obere Zeile kann in die untere Zei-
le das neue Paßwort eingegeben werden; anschließend ist die Menütaste zu
drücken.
Achtung! Das Menü „Paßwortänderung“ darf nicht an die erste Stelle der
Menüfolge programmiert werden, da es sonst leicht zur Fehlbe-
dienung kommen kann (auch bei Ansicht der Basisanzeige im
Display ist im Hintergrund immer der Menüpunkt 1 aktiv).
Kompakteingabe
35
D
923991 19.10.1999 10:27 Uhr Seite 35
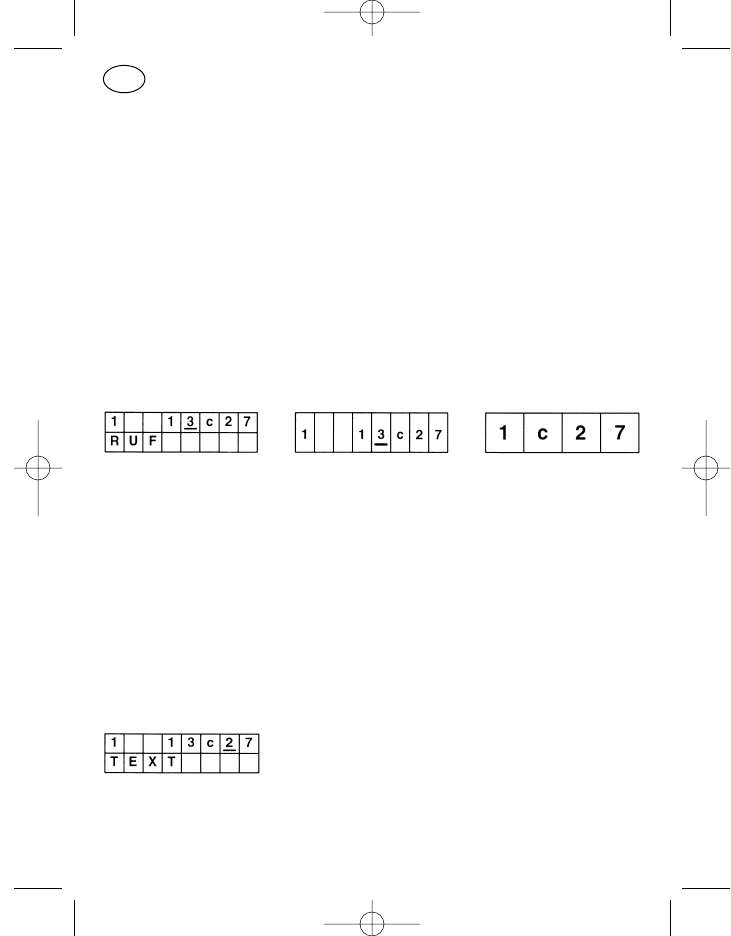
Mit dem Menüpunkt „Kompakteingabe“ lassen sich Status, Ruf und Kanal
innerhalb eines Menüpunktes verändern. In der oberen Zeile der Anzeige
(Format C) steht linksbündig der Status, rechtsbündig die Kanalziffer mit vor-
angestelltem „c“ für „Kanal“. In der Mitte, links vom Kanal, steht die aktuelle
Rufziffer. Die Eingabe kann mit Cursortaste, Plus-/Minustaste und Ziffernta-
statur erfolgen.
Beim zweizeiligen Anzeigeformat erscheint in der unteren Zeile die Benen-
nung des gerade aktivierten Teils der oberen Zeile (Cursorstelle).
Für die Eingabe der Ruf- und Kanalziffern gelten die Angaben der Menü-
punkte „Rufnummerneingabe“ und „Kanaleingabe“.
Kompakteingabe mit Kanalscrollen
Der Menüpunkt entspricht dem Menü „Kompakteingabe“. Der Unterschied
besteht in der Art der Kanaleingabe. Die Kanäle sind nur mit den Plus-/
Minustasten durchzuschalten, die Zifferntasten sind bei der Kanaleingabe
ohne Funktion.
Ein kurzer Tastendruck schaltet auf den nächsten Kanal, mit langem Tasten-
druck rollen die Kanäle durch.
Für die Eingabe der Rufziffern gelten die Angaben des Menüpunktes „Ruf-
nummerneingabe“.
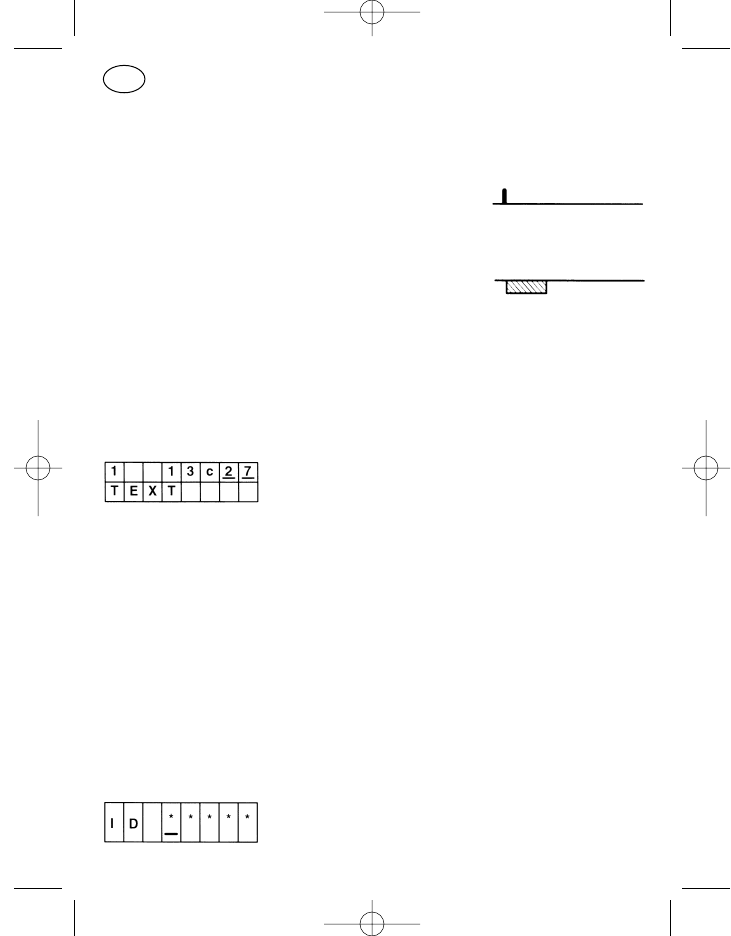
Kompakteingabe mit Textanzeige
Der Menüpunkt entspricht dem Menü „Kompakteingabe“ mit der Anzeige
des Standardmenüpunktes „Kompakteingabe mit Textanzeige und Kanal-
scrollen“.
36
D
923991 19.10.1999 10:27 Uhr Seite 36
Kanaleingabe
Bedienung:
Bei dem zweizeiligen Anzeigeformat werden in der oberen Zeile zusätz-
lich linksbündig der Status und rechts davon, vor dem „c“ für Kanal, die
Rufziffern angezeigt. Zu verändern ist jedoch über diesen Menüpunkt
nur der Kanal.
Die Kanaleingabe erfolgt stellenweise, d. h. bei einer dreistelligen Kanal-
ziffer wird der Cursor zuerst z. B. auf die Hunderter-Stelle geschoben
und mit der Plus- oder Minustaste die richtige Ziffer eingestellt. Danach
werden in gleicher Art die beiden anderen Stellen bearbeitet.
Wird die Eingabe unterbrochen und ergibt zu diesem Zeitpunkt die ein-
gegebene Ziffer zusammen mit den anderen angezeigten Kanalstellen
eine nicht existierende Kanalbezeichnung, so wird nach Ablauf einer
bestimmten Verweilzeit (ca. 2 Sekunden) der letzte gültige Kanal einge-
stellt. Das muß dabei nicht der letzte Betriebskanal sein, sondern es
kann auch ein zwischen dem letzten Betriebskanal und dem ungültigen
Kanal eingegebener, anderer Kanal sein.
Der Vorteil des zweizeiligen Anzeigeformats ist, daß jede in der unteren
Zeile eingestellte gültige Kanalziffer sofort in die Anzeige der oberen
Zeile übernommen wird. Man erkennt also gleich, ob ein gültiger oder
ungültiger Kanal eingegeben ist.
Achtung! Steht ein ungültiger Kanal im Display und wird vor Ablauf der
Verweilzeit von ca. 2 Sekunden die Menü-, Ruf- oder Sendetaste ge-
drückt, so ertönt der Fehlerton und es wird auch nicht gesendet. Sende-
taste loslassen, Kanal korrigieren und erneut Sendetaste betätigen,
wenn gewünscht.
Kanalscrollen
37
D
923991 19.10.1999 10:27 Uhr Seite 37
Der Menüpunkt entspricht dem Menüpunkt „Kanaleingabe“, die Eingabe ist
aber nur mit Hilfe der Plus-/Minustasten möglich. Die Kanäle sind nicht stel-
lenweise zu editieren, sondern sie schalten fortlaufend von einem program-
mierten Kanal zum nächsthöheren (+) bzw. zum nächstniedrigeren (–). Die
Eingabe ungültiger Kanäle ist dadurch unterbunden.
Rufnummerneingabe
Bedienung:
Zur Eingabe der Rufnummern dienen die Cursortaste, die Plus-/Minus-
tasten und, wenn am Bedienteil vorhanden, die Zifferntastatur mit Stern
und Raute. Die Cursortaste kurz bzw. lang verschiebt die Eingabeposi-
tion um eine Stelle nach rechts bzw. links, die Plus-/Minustasten rollen
die Eingabestelle von „0“ bis „9“ über „G“ und „–“ durch und bei der
12er-Tastatur gibt die Sterntaste den Mittelstrich und die Rautetaste das
„G“ ein.
Im Display erscheinen so viele Eingabestellen, wie im Gerät maximal als
frei wählbar programmiert sind. Hat man einen Kanal oder eine Ruftaste
gewählt, wo weniger freie Stellen eingebbar sind, so sind an den über-
zähligen Eingabestellen im Display von links her Mittelstriche einzuge-
ben. Als Gruppenrufzeichen ist „G“ einzugeben.
Die im Display sichtbaren Rufziffern müssen bei Rufaussendung mit der
freien Stellenzahl des entsprechenden Rufes übereinstimmen, andern-
falls ertönt bei Ruftastenbetätigung ein Fehlerton und der Ruf wird nicht
ausgesendet.
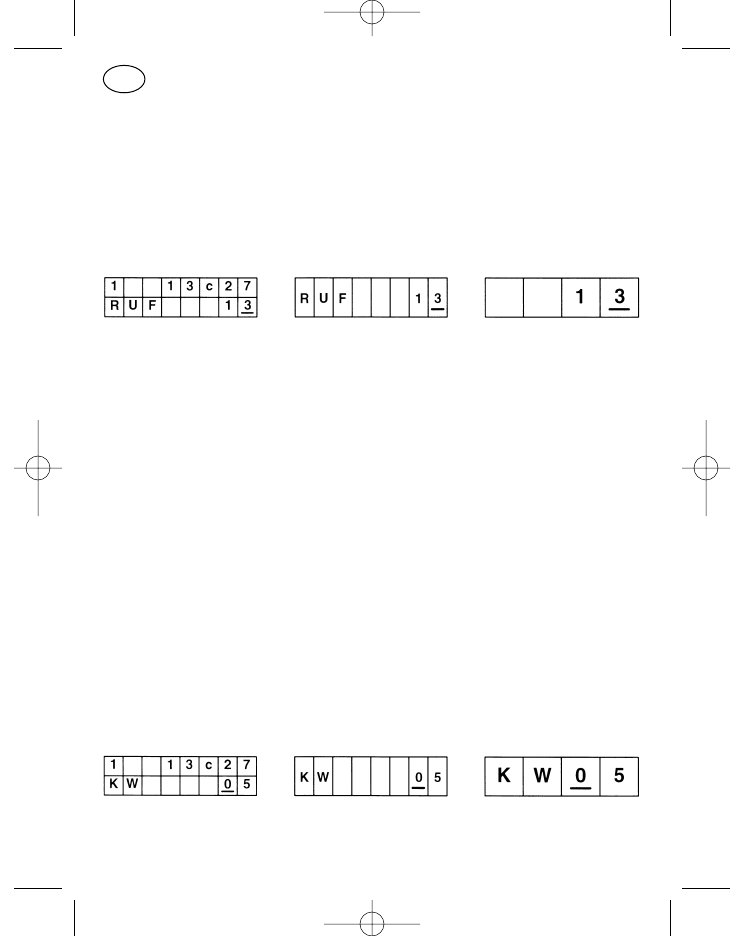
Kurzwahleingabe
Der Menüpunkt „Kurzwahleingabe“ ist zum Aufruf von im Gerät program-
mierten Rufnummern. Jeder Kurzwahlziffer ist eine Rufnummer zugeordnet.
38
D
923991 19.10.1999 10:27 Uhr Seite 38
Die Eingabe erfolgt mit Cursor-, Plus- oder Minustaste bzw. mit der Ziffern-
tastatur.
Achtung! Bei dem zweizeiligen Format gibt die obere Zeile nicht den zu
der Kurzwahlziffer gehörenden Ruf an.
Kurzwahlscrollen
Wie „Kurzwahleingabe“, nur Durchschalten mit ausschließlich den Plus-/
Minustasten in programmierter Reihenfolge auf- (+) bzw. abwärts (–).
Kurzwahleingabe mit Textanzeige
Wie „Kurzwahleingabe“, zusätzlich erscheint in der oberen Zeile ein im Kun-
dendienst zu der jeweiligen Kurzwahlziffer programmierter Text.
Kurzwahlscrollen mit Textanzeige
Wie „Kurzwahlscrollen“, nur zusätzlich erscheint in der oberen Zeile ein im
Kundendienst zu der jeweiligen Kurzwahlziffer programmierter Text.
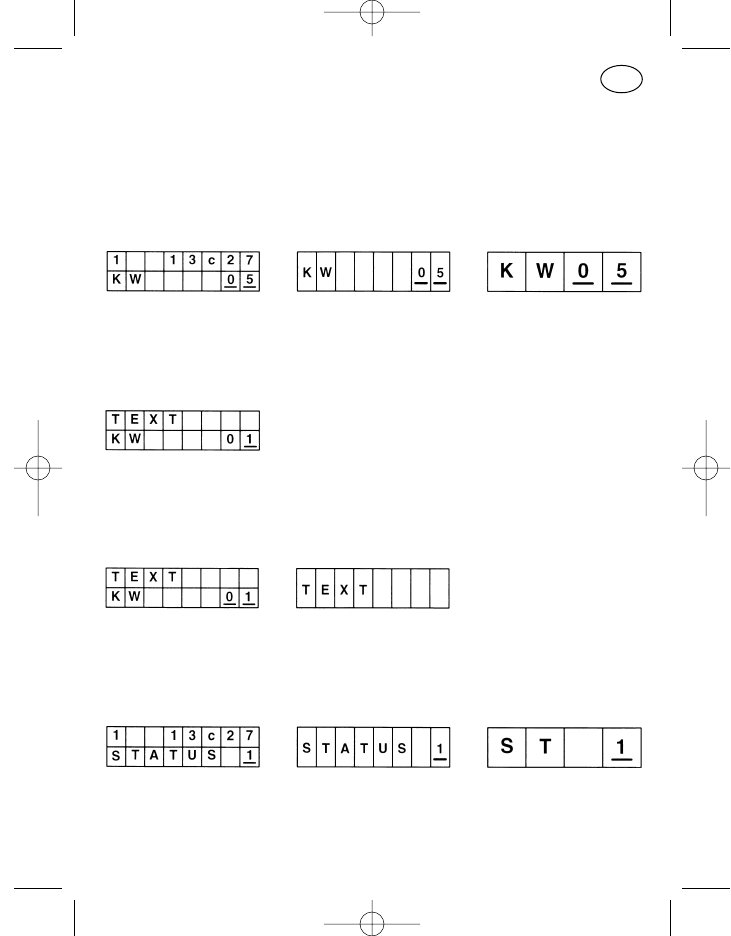
Statuseingabe
Bedienung:
Es erscheint im Display bei den beiden achtstelligen Anzeigeformaten
das Wort „STATUS“ mit der Statusziffer rechts daneben. Die Statusziffer
39
D
923991 19.10.1999 10:27 Uhr Seite 39
kann mit den Plus-/Minustasten durchgeschaltet, bzw. über eine Ziffern-
tastatur direkt eingegeben werden.
Statuseingabe mit Textanzeige
Wie „Statuseingabe“, nur zusätzlich erscheint in der oberen Zeile ein im Kun-
dendienst zu dem jeweiligen Status programmierter Text.
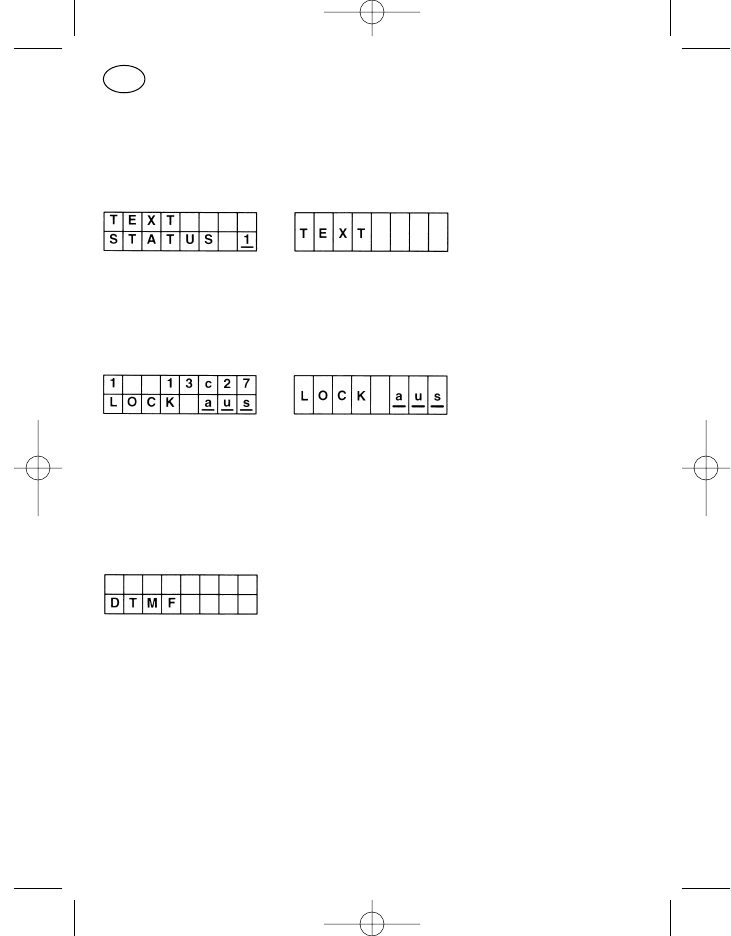
Tastatursperre
Mit der Tastatursperre können die Tasten des Zifferntastenfeldes (0 bis 9, *,
#), die Cursortaste und die Ein/Aus-Taste gesperrt werden. Das An- oder
Abschalten der Tastatursperre im Display erfolgt mit den Plus- oder Minus-
tasten, die Sperre wird sofort aktiviert.
DTMF-Betrieb
Der Menüpunkt „DTMF-Betrieb“ gestattet die Eingabe von bis zu 23 DTMF-
Rufziffern. Ist das Display mit eingegebenen Stellen gefüllt, so erscheinen die
weiteren eingegebenen Stellen rechts, links wandert die Rufnummer aus
dem sichtbaren Bereich.
Für die Eingabe können die Cursor-, die Plus-/Minus- und die Zifferntasten
verwendet werden. Die Löschtaste löscht mit kurzem Tastendruck die letzte
eingegebene Stelle, mit langem Druck die gesamte Zeile.
Beim Betätigen der Ruf- oder Sendetaste wird der Menüpunkt nicht verlas-
sen, es wird nur der Ruf abgeschickt oder gesendet. Erst mit dem Betätigen
der Menütaste wird der DTMF-Betrieb abgeschaltet.
40
D
923991 19.10.1999 10:27 Uhr Seite 40
Zur Zeit ist nur „Touchtone“ realisiert, d. h. bei jedem Betätigen einer Ziffern-
taste wird ein Doppelton ausgesendet.
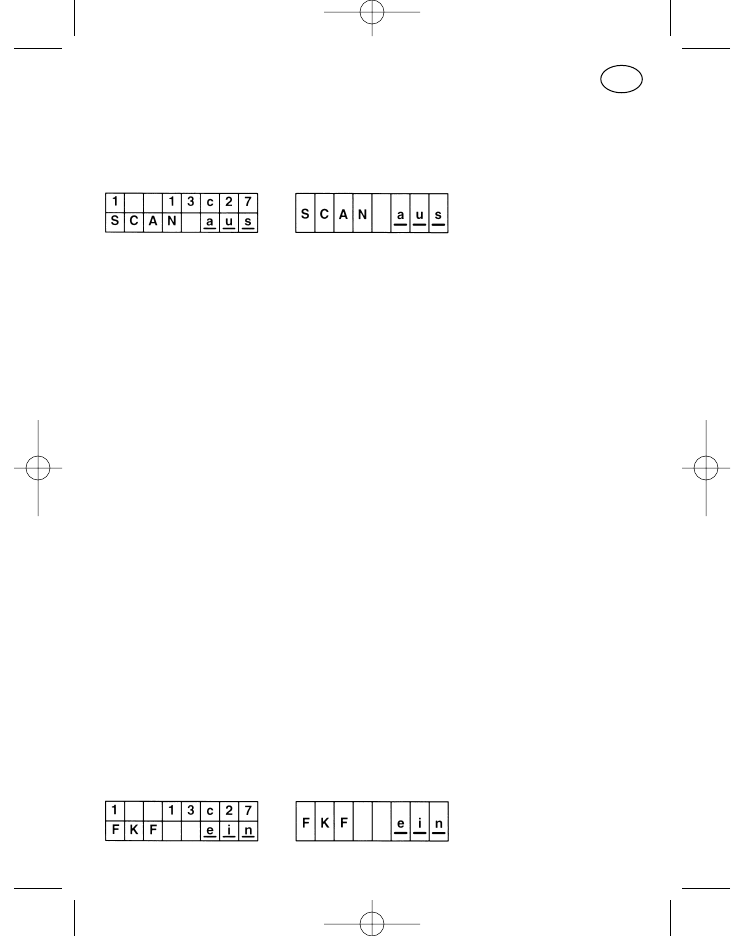
Kanalscanning
Der Scanbetrieb dient der Überwachung von mehreren Kanälen, die nach-
einander zyklisch angeschaltet werden. Wird auf einem Kanal empfangen,
so unterbricht das Funkgerät den Scanbetrieb. Die Bedingungen, die das
Gerät zur Unterbrechung des Scanbetriebes veranlassen, werden Scan-
stopkriterien genannt. Folgende Scanstopkriterien sind einzeln bzw. in Kom-
bination kanalabhängig programmierbar, der HF-Träger-Empfang muß in
jedem Fall vorliegen:
HF-Träger
Subaudioton
Scanstopton
Rufauswertung
Ebenfalls programmierbar ist ein eventuell gewünschter Prioritätskanal, auf
den das Funkgerät im Scanbetrieb schaltet, wenn die Sende-, Ruf- oder
Lautsprechertaste gedrückt wird. Ist kein Prioritätskanal programmiert, so
schaltet das Funkgerät unter diesen Bedingungen auf den Kanal, der vor
Aufnahme des Scanbetriebes geschaltet war.
Hält das Funkgerät auf einem der gescannten Kanäle an, weil die Scanstop-
kriterien erfüllt sind, so wird das durch die Leuchtdiode, das Displaysymbol
und den Displaytext „SCANSTOP“ sichtbar. Das Gespräch kann geführt
werden.
Der Scanbetrieb wird mit der Plus- bzw. Minustaste gestartet.
Der Stopzustand wird durch Schließen des Lautsprechers (z. B. Drücken der
Lautsprechertaste) beendet, das Gerät setzt den Suchlauf fort.
Folgekontakt-Aktivierung
41
D
923991 19.10.1999 10:27 Uhr Seite 41
Menüpunkt mit Schaltfunktion. Nach Aufruf mit der Menütaste kann der Dis-
playinhalt mit der Plus- bzw. Minustaste von „ein“ auf „aus“ oder umgekehrt
eingestellt werden. Damit wird der Folgekontakt (rückwärtiger Kontakt an der
Funkgeräte-Stromversorgung) aktiviert, d. h. er schließt z. B. bei Auswertung
eines eingehenden Rufes. Damit kann z. B. eine Hupe über ein Hupenrelais
angesteuert werden.
Hupe (Folgekontakt schalten)
Menüpunkt mit Schaltfunktion. Nach Aufruf mit der Menütaste kann der Dis-
playinhalt mit der Plus- bzw. Minustaste von „ein“ auf „aus“ oder umgekehrt
eingestellt werden. Damit wird der Folgekontakt direkt gesteuert, d. h. eine
z. B. über ein Hupenrelais angeschlossene Hupe kann direkt ein- oder aus-
geschaltet werden.
Rufumleitung
Bei Aufruf des Menüpunktes „Rufumleitung“ mit der Menütaste wird die Ruf-
umleitung sofort wirksam. Die Umleitungsadresse kann mit der Cursor-,
Plus- oder Minustaste bzw. mit der Zifferntastatur editiert werden. Die Ruf-
umleitung wird durch Drücken der Menütaste aufgehoben und der Menü-
punkt verlassen.
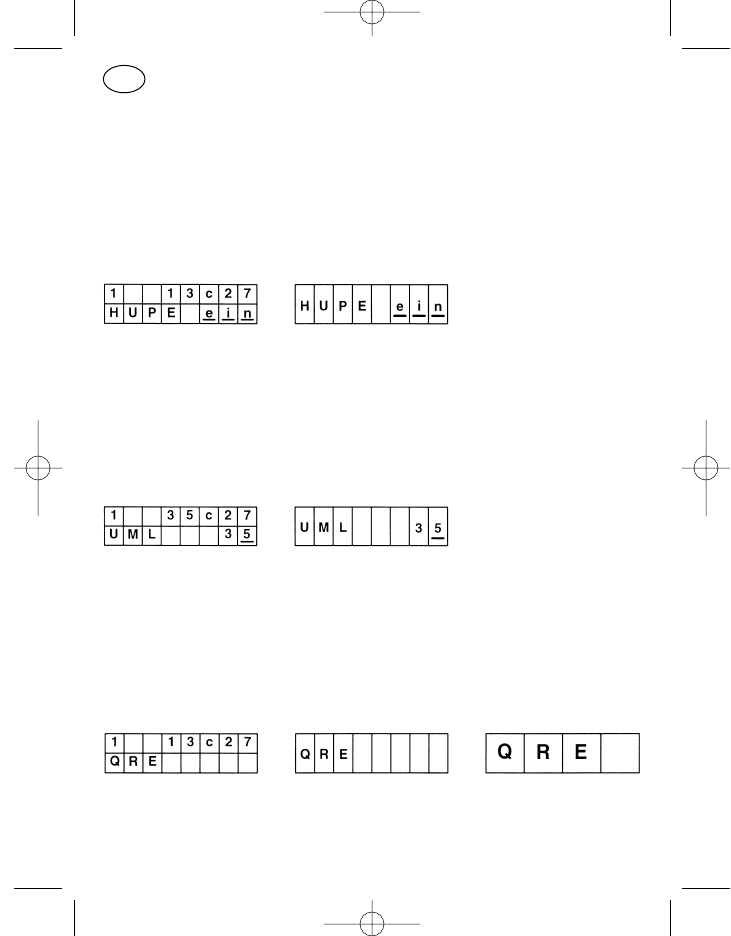
QRE-Betrieb
QRE-Betrieb bedeutet Betrieb mit Quittungsruf-Empfänger. Verläßt der
Funkgerätebetreiber sein Funkgerät, so erhält er im Falle eines Anrufes über
den QRE die Information, daß er gerufen wurde.
42
D
923991 19.10.1999 10:27 Uhr Seite 42
Bei dem zweizeiligen Anzeigeformat ist die obere Zeile die Anzeige des vor-
herigen Status, Rufes und Kanals und hat nichts mit dem aktivierten QRE-
Betrieb zu tun. Dessen Eigenschaften sind im Kundendienst programmier-
bar.
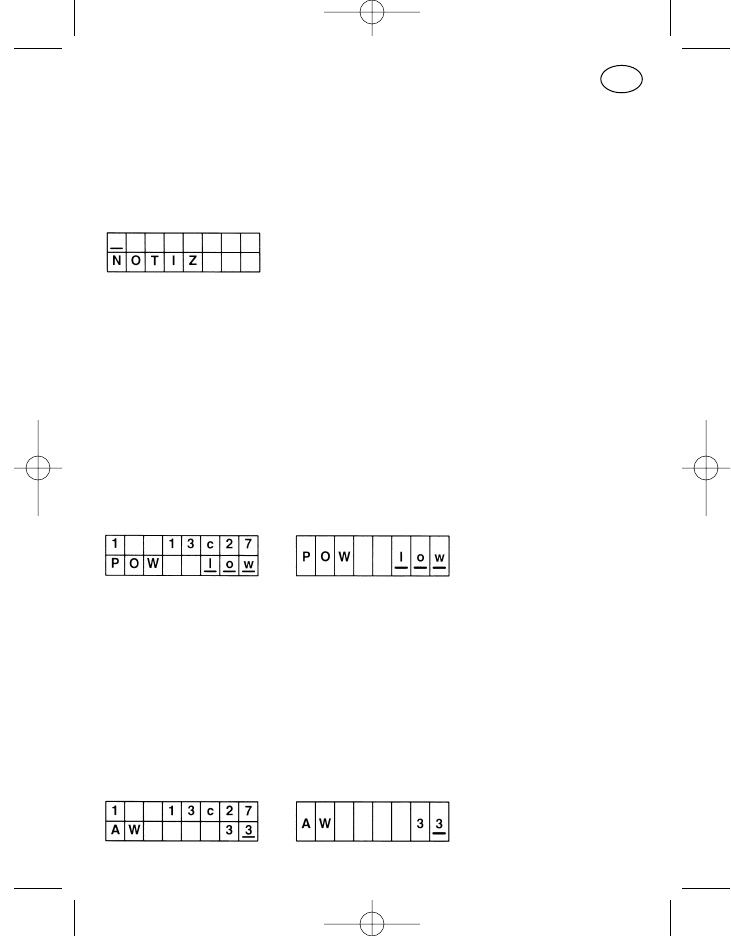
Notizen
Der Menüpunkt „Notizen“ gestattet die Eingabe von bis zu 16 Ziffern. Ist das
Display mit eingegebenen Stellen gefüllt, so erscheinen die weiteren einge-
gebenen Stellen rechts, links wandert die Notiz aus dem sichtbaren Bereich.
Für die Eingabe können die Cursor-, die Plus-/Minus- und die Zifferntasten
verwendet werden. Die Löschtaste löscht mit kurzem Tastendruck die letzte
eingegebene Stelle, mit langem Druck die gesamte Zeile.
Beim Betätigen der Menütaste wird der Menüpunkt verlassen und auf den
nächsten Menüpunkt geschaltet; beim Ausschalten des Gerätes wird der
Speicher gelöscht.
Sendeleistung
Menüpunkt mit Schaltfunktion. Nach Aufruf mit der Menütaste kann der Dis-
playinhalt mit der Plus- bzw. Minustaste von „low“ auf „high“ oder umge-
kehrt eingestellt werden. Der neue Zustand wird sofort wirksam.
Die mit dem Menüpunkt auf „low“ geschaltete Sendeleistung wird beim Aus-
schalten des Gerätes wieder auf „high“ gesetzt.
Weiteres zu diesem Punkt siehe: „Umschalten der Sendeleistung“ unter
„Sonderfunktionen“.
Auswerter-Rufnummer
43
D
923991 19.10.1999 10:27 Uhr Seite 43
Über den Menüpunkt „Auswerter-Rufnummer“ kann am Gerät der Auswer-
ter umprogrammiert werden.
Für die Eingabe können die Cursor-, die Plus-/Minus- und die Zifferntasten
verwendet werden.
Beim Betätigen der Menütaste wird der Menüpunkt verlassen.
Servicebetrieb
Das Service-Menü ist nur für den Kundendienst bestimmt.
Rückrufspeicher
Im Rückrufspeicher können bis zu 20 Anrufe gespeichert werden. Das Aus-
lesen erfolgt durch Aufruf des Menüs, jeder Anrufnummer in der oberen Zei-
le ist ein Rückrufspeicherplatz in der unteren Zeile zugeordnet.
Die Speicherplätze können mit den Plus-/Minustasten durchgescrollt wer-
den, Rückruf erfolgt durch Drücken der Displayruftaste. Nicht benötigte Rufe
können mit der Display-Löschtaste gelöscht werden, beim Ausschalten des
Gerätes werden alle Speicherplätze gelöscht.
Sonderfunktionen
Als kundenspezifisch zu programmierende Sonderfunktionen stehen zur Zeit
die nachfolgend aufgeführten Funktionen zur Verfügung.
Notruf auslösen
Der Notruf kann mit jeder programmierbaren Taste manuell ausgelöst wer-
den. Dazu muß im Normalfall das Gerät eingeschaltet sein!
44
D
923991 19.10.1999 10:27 Uhr Seite 44

Bei ausgeschaltetem Gerät kann nach entsprechender Programmierung der
Notruf nur mit dem externen Notrufkontakt (Pos. 40) ausgelöst werden.
Dabei wird bei der Betätigung das Gerät eingeschaltet und anschließend
automatisch die Notrufprozedur eingeleitet.
Tastenkombinationen
Generell gilt für alle Tastenkombinationen, daß sie nicht zum Umfang der
Standardprogrammierung gehören und nur auf Kundenwunsch aktiviert
werden.
Tastenkombinationen sind ein bis zwei Tasten, die gedrückt zu halten sind,
während die Ein/Aus-Taste (Pos. 5) betätigt wird. Die nachfolgend beschrie-
benen Tasten sind Beispiele, das Gerät kann auch abweichend davon pro-
grammiert werden.
Abschalten akustischer Signaltöne, Anzeigen und Lautsprecherstumm-
schaltung
Um vorübergehend die akustische Signalisierung abzuschalten, ist bei aus-
geschaltetem Gerät die Ruftaste 1 (Pos. 2) gedrückt zu halten und dann das
Gerät einzuschalten. Welche Signalisierungstöne vorübergehend abgeschal-
tet werden, ist durch die Programmierung des Gerätes festgelegt. Es kann
keine, eine einzelne oder eine beliebig kombinierte Gruppe aus folgenden
Positionen sein:
Tastenklick und Bestätigungston
akustische Anruf- und Quittungssignalisierung
Fehlbedienungston
Notrufvorwarnung
Fehlerton und Akkuwarnton
Lautsprecher komplett stummgeschaltet
Tastatur- und Displaybeleuchtung
Um die vorübergehende Abschaltung aufzuheben, ist das Gerät aus- und
wieder einzuschalten.
Umschalten der Sendeleistung
Es besteht die Möglichkeit, unterschiedlich hohe Sendeleistungen des Funk-
gerätes kanalabhängig oder auf allen Kanälen gleich zu programmieren. Pro
45
D
923991 19.10.1999 10:27 Uhr Seite 45

Kanal können zwei von vier Abgleichwerten als „Hohe Sendeleistung“ und
„Niedrige Sendeleistung“ hinterlegt werden. Ebenfalls ist es möglich, auf
einem oder mehreren Kanälen für beide Leistungen den gleichen Wert zu
programmieren, damit kann eine Leistungsumschaltung auf nur einem Kanal
realisiert werden.
Beim normalen Einschalten des Funkgerätes arbeitet der Sender mit den
Werten „Hohe Sendeleistung“. Um auf die Werte „Niedrige Sendeleistung“
zu gelangen, sind bei ausgeschaltetem Funkgerät die Ruftaste 1 (Pos. 2) und
die Plustaste (Pos. 9) gemeinsam zu drücken und dann die Ein/Aus-Taste
(Pos. 5) zu betätigen. Diese Tastenkombinationen werden eigentlich nur bei
dem Handsprechfunkgerät PR 11 S-E (ohne Display) benötigt, funktionieren
aber auch an allen anderen Geräten.
Um von der Stufe „Niedrige Sendeleistung“ wieder zur Stufe „Hohe Sende-
leistung“ zurückzugelangen, ist das Gerät aus- und wieder einzuschalten.
Bei Bedarf kann auch ein niedriger Leistungswert dem Programmierpunkt
„Hohe Sendeleistung“ und ein hoher Leistungswert dem Programmierpunkt
„Niedrige Sendeleistung“ einprogrammiert werden. Damit arbeitet das Gerät
dann nach dem normalen Einschalten mit der niedrigen Sendeleistung und
nach dem Einschalten mit gedrückten Tasten mit der hohen Sendeleistung.
Umschalten der Sendeleistung und Abschalten akustischer Signaltöne
Hierbei handelt es sich um eine Kombination aus den beiden zuletzt
beschriebenen Um- bzw. Abschaltungen. Um sie gemeinsam zu aktivieren,
ist das Gerät ebenfalls auszuschalten und bei Drücken der Ruftaste 1
(Pos. 2) das Gerät mit der Ein/Aus-Taste (Pos. 5) einzuschalten.
Durch Aus- und wieder Einschalten des Gerätes gelangt man zurück in den
normalen Betrieb.
46
D
923991 19.10.1999 10:27 Uhr Seite 46

47
Notizen:
923991 19.10.1999 10:27 Uhr Seite 47
Controls (see page 3)
Item Name Key symbol, Standard function
Display symbol
1 Display
2* Call key 1 I Fixed call
3* Loudspeaker key o Loudspeaker on/off, monitor
4* Call key 2 Display call
5* On/off key Radio on/off
short: on
long: off
6* PTT key : : : Press-to-talk key
7 Cursor key Move the input position
in the display
short: right
long: left
8 Menu key Call a menu
short: next menu item
long: menu 1
9 Plus key Input position up
10 Minus key Input position down
18 Transmit/
receive symbol Not in use
19 Channel busy
20 Not in use
21 Transmit
22 Loudspeaker symbol Loudspeaker on
23 Call diversion symbol Call diversion switched
24 Together with 23
25 Identification symbol Number of caller received
26 Together with 25
48
GB
923991 19.10.1999 10:27 Uhr Seite 48

27 Display overflow
symbol Right other characters
28 Not in use
29 Left other characters
30 Right and left other
characters
31 Battery symbol No function in MR radios
32 Bargraph display No function in MR radios
33 LED red Transmit
34 LED yellow Radio channel busy
35 LED green Loudspeaker on
steady: by pressing key
flashing: by call
36 Loudspeaker
37 Microphone
38 10-pin
FCC socket For control unit connection
40 +, –, Lsp.,
external horn
or emergency call
connection
41 Data socket
* Items 2–6 can be assigned other functions at the customer’s request.
Please consult the programming the programming printout which your
dealer has enclosed with the operating instructions for the current func-
tions of these keys.
49
GB
923991 19.10.1999 10:27 Uhr Seite 49
Controls (see page 7)
Item Name Key symbol, Standard function
Display symbol
1 Display
2* Call key 1 Fixed call
3* Loudspeaker key o Loudspeaker on/off, monitor
4* Call key 2 Display call
5* On/off key Radio on/off
short: on
long: off
6* PTT key : : : Press-to-talk key
7 Cursor key Move the input position
in the display
short: right
long: left
8 Menu key Call a menu
short: next menu item
long: menu 1
9 Plus key Input position up
10 Minus key Input position down
11* Funktions key (F1) Programmable key
18 Transmit/
receive symbol Not in use
19 Channel busy
20 Not in use
21 Transmit
22 Loudspeaker symbol Loudspeaker on
23 Call diversion symbol Call diversion switched
24 Together with 23
25 Identification symbol Number of caller received
26 Together with 25
50
GB
923991 19.10.1999 10:27 Uhr Seite 50
27 Display overflow
symbol Right other characters
28 Not in use
29 Left other characters
30 Right and left other
characters
31 Battery symbol No function in MR radios
32 Bargraph display No function in MR radios
33 LED red Transmit
34 LED yellow Radio channel busy
35 LED green Loudspeaker on
steady: by pressing key
flashing: by call
36 Loudspeaker
37 Microphone
38 10-pin
FCC socket For control unit connection
40 +, –, Lsp.,
external horn
or emergency call
connection
* Items 2–6 and 11 can be assigned other functions on request. Please
consult the programming the programming printout which your dealer has
enclosed with the operating instructions for the current functions of these
keys.
51
GB
923991 19.10.1999 10:27 Uhr Seite 51
52
GB
Controls (see page 11)
Item Name Key symbol, Standard function
Display symbol
1 Display
2* Call key 1 I Fixed call
3* Loudspeaker key Loudspeaker on/off, Monitor
4* Call key 2 Display call
5* On/off key Radio on/off
short: on
long: off
6* PTT key : : : Press-to-talk key
7 Cursor key Move the input position
in the display
short: right
long: left
8 Menu key Call a menu
short: next menu item
long: menu 1
9 Plus key Input position up
10 Minus key Input position down
11* Function key 1 Programmable key
12* Function key 2 Programmable key
13* Function key 3 Programmable key
14* Function key 4 Programmable key
15 Numeric block 0–9 Digit input
16* Star key Delete contents of display
short: marked position
long: all input positions
17* Hash key Input group call tone „G“
19 Transmit symbol Channel busy
20 Not in use
21 PTT symbol Transmit
22 Loudspeaker symbol Loudspeaker on
23 Call diversion Call diversion switched
symbol
923991 19.10.1999 10:27 Uhr Seite 52

53
GB
25 Identification symbol Number of caller
received
26 Together with 25
27 Display
overflow symbol Right other characters
28 Not in use
29 Left other characters
30 Right and left other
characters
31 Battery symbol No function in MR radios
32 Bargraph display No function in MR radios
36 Loudspeaker
37 Microphone
38 10-pin
FCC socket For control unit connection
40 +, –,
Lsp., external horn
or emergency call
connection
41 Data socket
44 Radio connection Connection to radio
45 10-pin
FCC socket For connection of the speach
equipment ML 11, HM 11-1
and HM 11-3
* Items 2–6, 11–14 and 16, 17 can be assigned other functions on request.
Please consult the programming the programming printout which your
dealer has enclosed with the operating instructions for the current func-
tions of these keys.
923991 19.10.1999 10:27 Uhr Seite 53
54
GB
Controls (see page 15)
Item Name Key symbol, Standard function
Display symbol
1 Display
2* Call key 1 I Fixed call
3* Loudspeaker key Loudspeaker on/off, Monitor
4* Call key 2 Display call
5* On/off key Radio on/off
short: on
long: off
6* PTT key : : : Press-to-talk key
7 Cursor key Move the input position
in the display
short: right
long: left
8 Menu key Call a menu
short: next menu item
long: menu 1
9 Plus key Input position up
10 Minus key Input position down
11* Function key 1 Programmable key
12* Function key 2 Programmable key
13* Function key 3 Programmable key
14* Function key 4 Programmable key
15 Numeric block 0–9 Digit input
16* Star key Delete contents of display
short: marked position
long: all input positions
17* Hash key Input group call tone „G“
18 Transmit/receive
symbol Not in use
19 Channel busy
20 Not in use
21 Transmit
22 Loudspeaker symbol Loudspeaker on
923991 19.10.1999 10:27 Uhr Seite 54
55
GB
23 Call diversion Call diversion switched
symbol
24 Together with 23
25 Identification symbol Number of caller received
26 Together with 25
27 Display overflow
symbol Right other characters
28 Not in use
29 Left other characters
30 Right and left other
characters
31 Battery symbol No function in MR radios
32 Bargraph display No function in MR radios
33 LED red Transmit
34 LED yellow Radio channel busy
35 LED green Loudspeaker on
steady: by pressing key
flashing: by call
36 Loudspeaker
37 Microphone
38 10-pin FCC socket For control unit connection
39 Antenna connection
40 +, –,
Lsp., external horn
or emergency call
connection
41 Data socket
42 Headset
43 Hang-up contact
44 Radio connection Connection to radio
* Items 2–6, 11–14 and 16, 17 can be assigned other functions on request.
Please consult the programming the programming printout which your
dealer has enclosed with the operating instructions for the current func-
tions of these keys.
923991 19.10.1999 10:27 Uhr Seite 55

Contents
Operating instructions in brief MR 11 SD-R with HBT 11 3
Operating instructions in brief MR 11 S-C with ML 11 or HM 11-1/3 7
Operating instructions in brief MR 11 SD-R with BTM-XB
and ML 11 or HM 11-1/3 11
Operating instructions in brief MR 11 SD-R with HA 11 15
Safety notes 59
General information 60
Cleaning the unit 60
Optical messages 60
Standby 61
Channel “free” 61
Channel “busy” 61
Loudspeaker “on” 61
Transmission 61
Display overrun 61
Acoustic messages 62
Tone signals used 62
Key click 62
Confirmation tone 63
Error tone 63
Emergency call warning 63
Optical-acoustic messages 63
Power-on test 63
Call message 64
Temporary power failure 64
System error 64
Standard programming of keys 64
Switching on/off (item 5) 65
PTT key (item 6) 65
Call key I, fixed call (item 2) 65
56
GB
923991 19.10.1999 10:27 Uhr Seite 56

Call key II, display call (item 4) 65
Loudspeaker key (item 3) 66
Star key (item 16) 66
Hash key (item 17) 66
Standard programming of keys for menu operation 67
Menu key (item 8) 67
Cursor key (item 7) 67
Plus and minus key (items 9, 10) 67
Numeric block 0 to 9 (item 15) 68
Menu system 68
User menu 68
Menu item 68
Menu display 68
Display format 69
Menu order 69
Basic display 69
Service menu 70
Identification display 70
Available standard menu items 70
Volume control 70
Compact input with channel text display and channel scrolling 71
Available special menu items 71
Security prompt when switching on 71
Change password 72
Compact input 72
Compact input with channel scrolling 73
Compact input with text display 73
Channel input 73
Channel scrolling 74
Call number input 74
Short dial input 75
Short dial scrolling 75
Short dial input with text display 76
Short dial scrolling with text display 76
Status input 76
57
GB
923991 19.10.1999 10:27 Uhr Seite 57

Status input with text display 76
Keyboard lock 76
DTMF mode 77
Channel scanning 77
Follower contact activation 78
Horn (follower contact open) 78
Call diversion 79
Paging mode 79
Notes 79
Transmitter power 80
Decoder call number 80
Service mode 80
Callback memory 80
Special functions 81
Activate emergency call 81
Key combinations 81
Switch off acoustic signal tones, display and loudspeaker muting 81
Switch over transmitter power 82
Switch over transmitter power and switch off acoustic signal tones 83
58
GB
923991 19.10.1999 10:27 Uhr Seite 58

59
GB
Safety Notes
– The radiotelephone and all its accessories may not be used in areas
where there is fire damp or risk of explosion.
– Keep the radio antenna at least 30 cm away from your body for units with
7-15 W transmitter power and at least 60 cm for units with 16-50 W
when you press the PTT key.
– Never hold the hand control unit with the loudspeaker directly to your ear
when it is switched on, test a bearable distance first at the selected
volume by opening the squelch. Otherwise extremely high volumes
could damage your hearing.
– Do not use the radio when driving in such a way as might distract your
attention from the traffic.
– If you wear a heart pacemaker, contact the manufacturer of the pace-
maker before using the radio. He will tell you whether this could be
affected by high frequencies. Avoid pressing the PTT key outside the
vehicle close to the antenna, stay in the vehicle.
– Keep the radio away from children or persons not familiar with its use.
923991 19.10.1999 10:27 Uhr Seite 59

General Information
The operating concept for mobile radio telephones of the 11th generation
in the PMR (Private Mobile Radio) version is identical for all units irrespective
of the control unit equipment. Of course the type of display and number of
keys available depends on the respective radio-control unit combination and
the corresponding programming.
Therefore choose the combination from pages 3, 7, 11 and 15 which most
suits you requirements and use the programming printout provided by your
dealer as a help to familiarise yourself with operation of your radio.
Apart from four keys (Menu, Cursor, Plus and Minus) and the numeric key
block 0 to 9, all other keys can be programmed by your dealer and may be
programmed with a function which deviates from the standard programming.
Therefore, not all of the operating procedures in this manual apply necessa-
rily to your radio model.
Cleaning the Unit
To clean the outside of your radio housing and the control units, please use
only water with a little washing up liquid and a soft cloth. Wipe the radio with
the damp cloth (do not immerse the radio or the accessories in water) and
then dry with a dry cloth. Make sure there is no moisture left in the vicinity of
the control unit plug and the antenna contact.
Do not use solvents!
Optical Messages
Optical messages are indicated by the display symbols (items 18–30) and
the three LEDs (items 33, 34 and 35). The LEDs may light steadily or flash.
They flash in a rhythm of about 1 second.
60
GB
923991 19.10.1999 10:27 Uhr Seite 60
Standby
The standby state of the switched-on radio is indicated by the activated dis-
play.
Channel “Free”
When the channel is free, the reception arrow (item 19, arrow
down) and the yellow LED (item 34) are switched off irrespeciti-
vely of whether a call decoder or subaudio decoder is program-
med for this channel or not.
Channel “Busy”
When the channel is busy, the reception arrow (item 19) and the
yellow LED (item 34) are switched on irrespectively of whether a
call decoder or subaudio decoder is programmed for this chan-
nel or not.
Loudspeaker “On”
The loudspeaker symbol (item 22) and the green LED (item 35)
are switched on to indicate that the radio is ready to receive.
The loudspeaker is normally switched on by:
pressing the loudspeaker key,
pressing the PTT key or call key
a call (green LED flashes)
Transmission
In transmission mode, the transmission arrow (item 21, arrow up)
and the red LED (item 33) are switched on. This also happens
briefly in the case of automatic transmitter keying as for example
in the event of acknowldegement transmission or status request.
Display Overrun
The directional arrows (left, right, left and right) formed by the display sym-
bols (item 27–30) serve as an indication that other characters which do not
fit in the display exist (when more than 8 characters are entered).
61
GB
923991 19.10.1999 10:28 Uhr Seite 61
This overrun may occur for example in the “Notes” menu. Move the cursor
towards the right hand side of the display to recover characters which have
“overrun” to the right. You can then move back one character at a time in the
display by pressing the cursor key. In the case of an overrun to the left, the
cursor jumps back to the first input position when the button is kept pressed.
Acoustic Messages
Some signals are indicated only acoustically in addition to the only optically
signalled operating states.
Tone Signals Used
Two tone frequencies are used to distinguish between the individual mes-
sages. High tones (frequency approx. 1200 Hz for positive messages) and
low tones (frequency approx. 400 Hz) for negative messages.
Four different tone lengths are possible depending on the programming:
long approx. 1 second
medium approx. 0.35 seconds
short approx. 0.1 seconds
very short (click) approx. 20 milliseconds
High tones are represented hereinafter as a block above the line, low tones
as a block below the line. The four tone lengths give the following images:
high, long
high, medium
high, short
high, click
low, long
low, medium
Key Click
A high, very short tone.
62
GB
923991 19.10.1999 10:28 Uhr Seite 62
Is emitted as identification of a successful key press. This means that the
input key has been pressed correctly.
Confirmation Tone
A high, short tone.
This sounds after a connection has been established (acknowledgement
received).
Error Tone
A low, medium duration tone,
or low permanent tone until the error has been eliminated.
Since operating errors depend to a large degree on the programming, here
are two possible examples:
a) If the volume is set to maximum or minimum and an attempt is made to
set the volume higher or lower, the error tone sounds as a low, medium
duration tone.
b) The radio has been programmed so that transmission is blocked when
the channel is busy. If you press the PTT key despite this, the error tone
sounds as a low, permanent tone until you release the PTT key.
Emergency Call Warning
Sequence of four short, high tones repeated every 2 s
The emergency call procedure is greatly dependent on the programming!
Optical-Acoustic Messages
Power-on Test
All three LEDs and all LCD symbols are switched on for approx. 1 s after
switching on the radio and then a short, high tone is emitted; then the dis-
play that the radio is ready to operate normally appears.
63
GB
923991 19.10.1999 10:28 Uhr Seite 63

Call Message
When a call is received, the green LED (item 35) flashes and the loudspeaker
symbol (item 22) is activated. The call is signalled acoustically by the follow-
ing signals:
Selective call one high tone, long
Group call two high tones, medium
Collective call three high tones, short
Temporary Power Failure
Strong power interruptions often occur when the vehicle’s engine is started.
The radio switches off when the power supply voltage drops below approx.
5 V. The radio can bridge voltage interruptions up to approx. 4 seconds inas-
much as it switches itself back on automatically. The radio must be switched
back on manually if the power failure lasts longer.
Switching on is as if the radio were switched on for the first time, previous
operating states (apart from channel and volume) are not stored.
System Error
The text “SERVICE” in the display flashes,
the error is signalled by short, low tones.
Switch the radio off and on or disconnect it from the power supply and then
switch it back on after reconnecting. If the system error persists, please
contact the after-sales service.
Standard Programming of the Keys
Of the keys described below, items 2–6, 11–14, and 16, 17 are named after
their standard programming but can be assigned other programmable func-
tions at the customer’s request; the functions available for the respective key
are adapted to a reasonable operation and can be inquired from your after-
sales service representative or dealer.
64
GB
923991 19.10.1999 10:28 Uhr Seite 64
The loudspeaker key, on/off key, cursor key, star key and menu key (items 3,
5, 7, 16, 8) distinguish between long and short key presses:
short key press: approx. 0.5 seconds
long key press: approx. 2 seconds
The limit between long and short key presses is about 1 second.
Switching On/Off (Item 5)
Press the On/Off key (item 5) to switch on the radio. The power-on test is car-
ried out (approx. 1 second), the radio is ready to receive after the con-
firmation tone is sounded.
Press the On/off key (item 5) long until the confirmation tone sounds to
switch off the radio. The radio is switched
off when you release the key.
The last settings of the channel and volume are saved when you switch off
the radio and are set automatically when you switch it back on.
PTT Key (Item 6)
Keep the PTT key (item 6) pressed to transmit, the microphone is switched
on and you can talk. The red LED (item 33) and the transmit symbol (item 21,
arrow up) are activated for the duration of the transmission. Release the PTT
key again to listen.
Call Key I, Fixed Call (Item 2)
If a fixed call is programmed (the call number digits cannot be changed in the
display), press the call key I (item 2), the call is transmitted. The transmit sym-
bols are active for the whole time the PTT key is pressed.
Call Key II, Display Call (Item 4)
If display call is programmed (the call number which appears in the display
can be changed with the numeric key block or with cursor and the plus and
minus key), press call key II (item 4), the call is transmitted. The transmit sym-
bols are active for the whole time the PTT key is pressed.
65
GB
923991 19.10.1999 10:28 Uhr Seite 65
66
GB
Loudspeaker Key (Item 3)
In its standard programming, the loudspeaker key (item 3) has a combinati-
on of Clear, Listen In and Monitor functions. The key only distinguishes
between short and long presses in its Monitor function, i.e. the monitor func-
tion is only executed when the key is pressed short.
Radio with call decoder:
Listen in
You can listen into the radio channel when you keep the key pressed. If
there is radio traffic on the channel, you can listen in, if the channel is
free, you will hear noise. The loudspeaker symbol (item 22) and the green
LED (item 35) are active for the whole time the key is pressed. [Call deco-
der, subaudio decoder and squelch are bypassed]
Monitor
Every time the key is released the loudspeaker is switched to the
respective other state, i.e. loudspeaker “on” (green LED lights steadily,
loudspeaker symbol active) or loudspeaker “off” (green LED off and
loudspeaker symbol off). [Only the call decoder is bypassed]
Clear
Any calling signal is reset in addition every time the key is pressed.
Star Key (Item 16)
The standard assignment of the star key is “Clear Display Content” (short =
marked input position, long = all input positions). It is not available in all con-
trol units.
Hash Key (Item 17)
The hash key is used in its standard programming for entering the group call
tone “G”. It is not available in all control units.
923991 19.10.1999 10:28 Uhr Seite 66

Standard Programming of the Keys for Menu Operation
Menu Key (Item 8)
The basic display is visible in the standby mode of the radio (see “Menu
System”). If you want to make entries, for example change the channel or call
number, press the menu key “M” (item 8) once short, menu item 1 appears
in the display. Each time you press the menu key again, you move to the next
item in the display. Menu item 1 then reappears after the last item after a
short key press. A long key press switches from any menu item to the first
menu item, the basic display is visible.
If you do not press any other keys after calling a menu, the radio switches
back to the basic display from many of the menus. This takes place, depend-
ing on the menu display, after approx. 2 seconds in menu item 1 (the Volume
menu in the standard program) or after approx. 10 seconds (from other
menus).
Cursor Key (Item 7)
If entries can be made in the display, the position which can now be chang-
ed is marked by an underscore ( _ ). If other positions to be changed are loca-
ted to the right and left of the marked position, you can move the cursor to
the right by pressing the cursor key (item 7) short or to the left by pressing it
long.
If more than one position is marked by an underscore in the display, you can
only change them by scrolling (continuous switching of all existing entries)
with the +/– keys. The cursor key is inactive in this case unless you are in a
menu such as “Compact Input” (see page 72). The “Compact Input” menu
has several input blocks, one press of the cursor key then switches from one
input block to the next, e.g. from “Call Input” to “CHANNEL”.
Plus and Minus Keys (Items 9, 10)
Marked input positions can be counted up and down with the plus and minus
keys in the display. On reaching the desired entry, you can change to the next
position to be entered with the cursor.
67
GB
923991 19.10.1999 10:28 Uhr Seite 67

Numeric Block 0 to 9 (Item 15)
The content can be entered directly at the positions provided in the menu
display with the numeric key block. The cursor switches to the next input
position automatically with every entered digit or letter. Not every control unit
has a numeric key block.
Menu System
The radios of the 11th generation are operated with menus. This means that
the display or input positions in the display are adapted individually to the
operating procedure. This includes the operating process which is currently
activated being displayed among other things.
User Menu
The user menu can be called with the menu key and enables the radio user
to adapt the operation optimally to his requirements. All the menu items and
operating details which need to be mentioned in this operating manual may
seem confusing in their variety. Therefore the user, by proper selection and
programming, is only confronted with what he really needs for his own spe-
cial applications.
Menu Item
A menu item is a display and the corresponding input and display possibili-
ties in a menu called with the menu key.
At the moment, about 30 different menu items are available of which an indi-
vidual selection of up to 23 menu items can be programmed depending on
the customer’s wishes.
Menu Display
Every menu item is assigned a menu display with fixed display and input
possibilities.
68
GB
923991 19.10.1999 10:28 Uhr Seite 68

Display Format
In the customised programming, it is possible to select between three dif-
ferent display formats for many of the user menu’s menu items, a two-line
display with two times 8 characters (format C), a one-line display with 8
characters (format B) and a one-line display with four characters (format A).
Format C Format B Format A
When programming in the after-sales service, each menu item must be
checked to make sure the desired format is suitable for the respective appli-
cation (number of positions).
Menu Order
The order of the individual menu items when scrolling through the menu with
the menu key is customer-specifically programmable.
Basic Display
The most important (informative) display for the user can be programmed as
a basic display. The standard basic display is the menu display of the “Com-
pact Input with Text Display” menu item (see page 73). This basic display
indicates important operating states (e.g. channel, call and status) without
having to perform any action. The display format of the basic display may
deviate from the corresponding menu item. Entries in the basic display are
not possible (no input positions marked).
Attention! The basic display always appears when you exit the menu but
the menu item 1 is still active in the background. This means in
the standard program with menu item 1 “Volume” that pressing
the plus key still increases the volume even though the basic dis-
play is visible. However, menu item 1 appears immediately to
display the change as soon as you make the input!
This fact should be taken into account if menu item 1 is to de-
viate from the standard programming.
69
GB
923991 19.10.1999 10:28 Uhr Seite 69
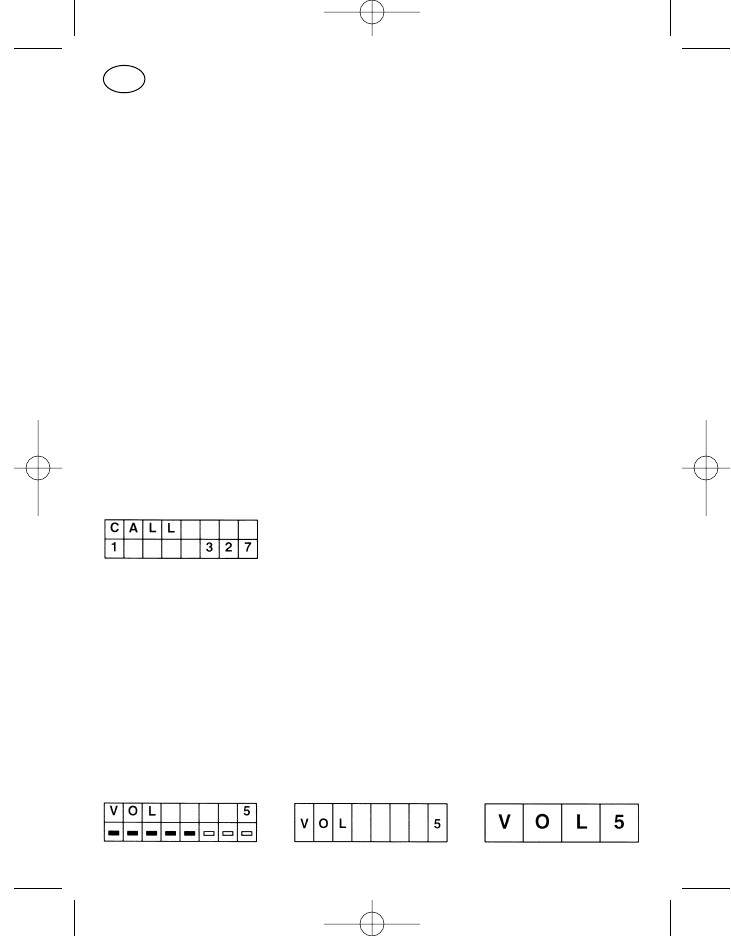
Service Menu
The service menu is for the after-sales service only. It can be called under the
“Service Functions” menu item by entering a password. If the menu item
appears in the course of normal operation, continue by pressing the menu
key short.
Note: If you accidentally press an input key, you can exit the menu by
switching off the radio or by entering a star ( with+/– without nume-
ric key block).
Identification Display
Identification display is the display of the caller’s number. A status can also
be transmitted with the identification (indication of the caller in the form of an
agreed digit).
If a call is received, this is signalled by the flashing green LED and the activat-
ed loudspeaker symbol. If the radio is programmed for identification display
and an identification with status is transmitted, both of these are displayed
and the identification symbol (item 25, 26) is also activated. The status is at
the left of the display, the caller’s number on the right.
Available Standard Menu Items
Two menu items are offered in the standard program. The “Volume Control”
menu as menu item 1 and the “Compact Input with Text Display and Chan-
nel Scrolling” as menu item 2. This offers comfortable operation for many
applications.
Volume Control
70
GB
923991 19.10.1999 10:28 Uhr Seite 70
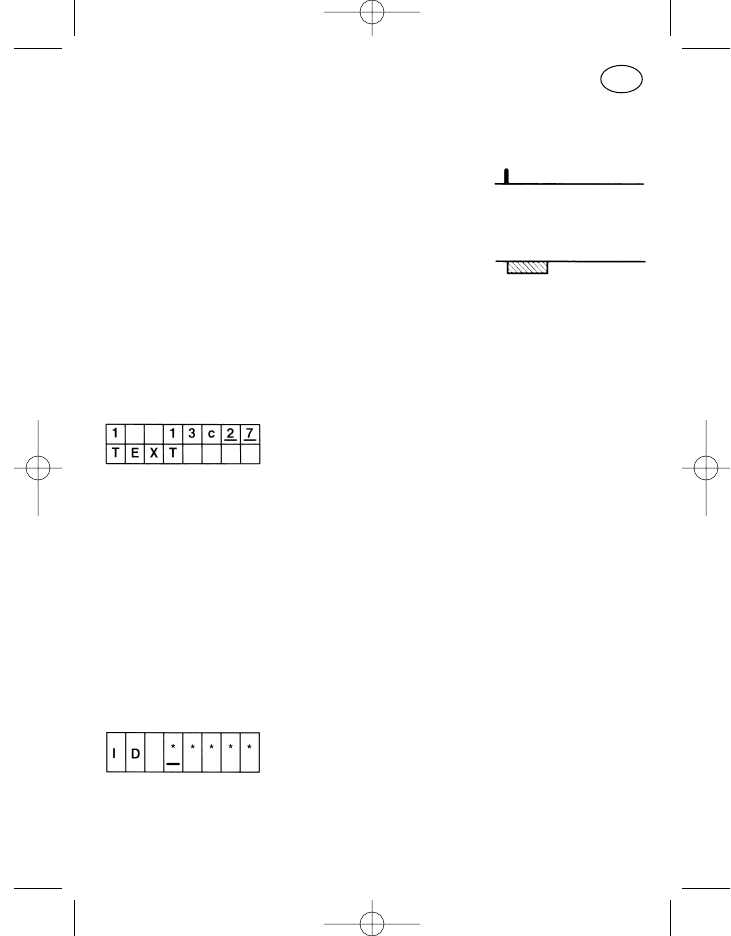
Operation:
The volume can be set louder or quieter within the eight available volume
steps with the plus key (item 9) and the minus key (item 10). A key click
sounds every time the volume is changed.
These keys do not distinguish between long and short presses, every
key press changes the volume one step according to the selected
direction. If the key is pressed for longer, the
volume is scrolled.
The error tone sounds if the minus key is pressed at step 1 and the plus
key at step 8 of the volume (volume end positions).
Direct input with the numeric key block (1–8) is also possible.
Compact Input with Text Display and Channel Scrolling
The display in the top line corresponds to the “Compact Input” menu.
An individual text for status and channel programmed in the after-sales ser-
vice appears additionally in the bottom line. The standard texts of the “nor-
mal” compact menu are “STATUS”, “CALL” and “CHANNEL”. The position
of the cursor on the top line determines whether a channel or status text is
displayed.
Available Special Menu Items
Security Prompt when Switching On
The password input prevents the radio being operated by unauthorised per-
sons. Immediately after switching on the radio, the Password menu item
appears with stars as blanks for the password entry if this is programmed.
71
GB
923991 19.10.1999 10:28 Uhr Seite 71
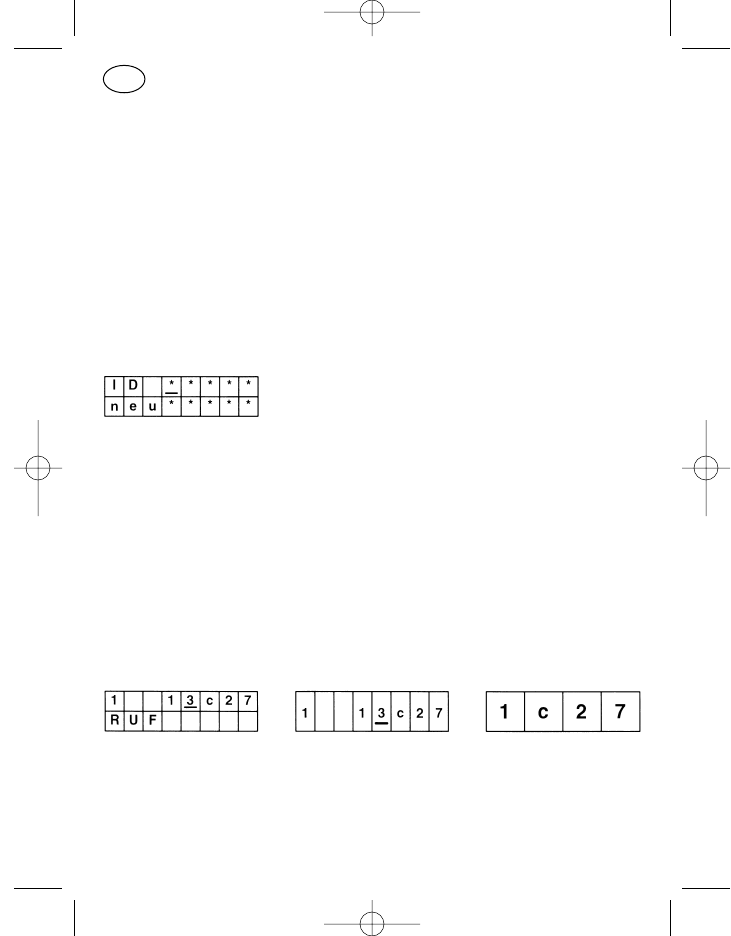
The password can be entered with the numeric key block or with the cursor
and plus and minus keys. The entry must be confirmed with the menu key,
the radio switches to the basic display if the password was correct.
A false password can be corrected before you press the menu key then it
should be re-entered. After three wrong attempts, all further inputs are
barred for 15 minutes. The radio must be left on during the 15 minute bar.
The “Security Prompt when Switching On” menu item is logically outside the
normal operator menu always in first place and is only activated when the
radio is switched on.
Change the Password
This menu can only be used in connection with the security prompt. A pass-
word programmed in the after-sales service can be changed here.
After entering the old password in the top line, the new password can be
written in the bottom line; then press the menu key.
Attention! The “Change Password” menu may not be programmed in the
first position of the menu sequence otherwise operating errors
may easily occur (menu item 1 is always active in the backgro-
und even when the basic display is visible).
Compact Input
The status, call and channel can be changed with the “Compact Input” menu
item. The top line of the display (format C) contains the status on the left and
the channel number with a prefixed “c” for channel on the right. The current
call number is in the middle to the left of the channel. The input can be made
with the cursor key, plus and minus keys and the numeric key block.
72
GB
923991 19.10.1999 10:28 Uhr Seite 72
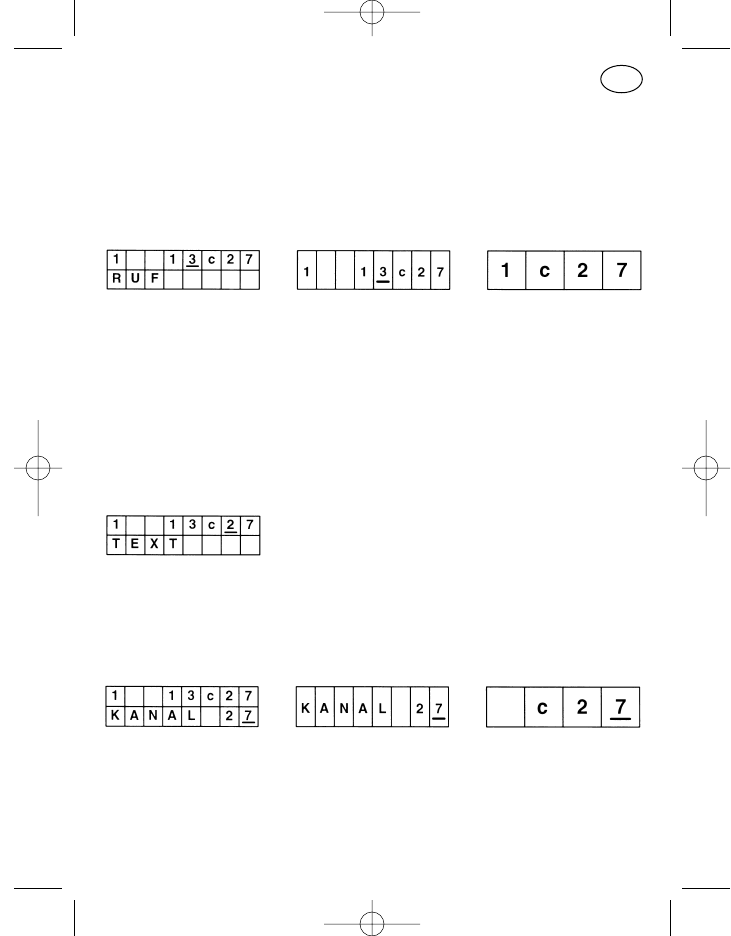
In the two-line display format, the name of the currently active part of the top
line (cursor position) appears in the bottom line.
The specifications in the menu items “Call Number Input” and “Channel
Input” apply for input of the call and channel numbers.
Compact Input with Channel Scrolling
The menu item corresponds to the “Compact Input” menu. The difference
being in the type of channel input. The channels can only be scrolled with the
plus and minus keys, the numeric keys have no function in the channel input.
A short key press switches to the next channel, the channels are scrolled
with a long key press.
The specifications in the “Call Number Input” menu item apply for inputting
call numbers.
Compact Input with Text Display
The menu item corresponds to the “Compact Input” menu with display of
the standard menu item “Compact Input with Text Display and Channel
Scrolling”.
Channel Input
Operation:
In the two-line display format, the status is displayed additionally on the
left of the top line and to the right of it, with a prefixed “c” for channel,
the call numbers. However, only the channel is changed in this menu
item.
73
GB
923991 19.10.1999 10:28 Uhr Seite 73
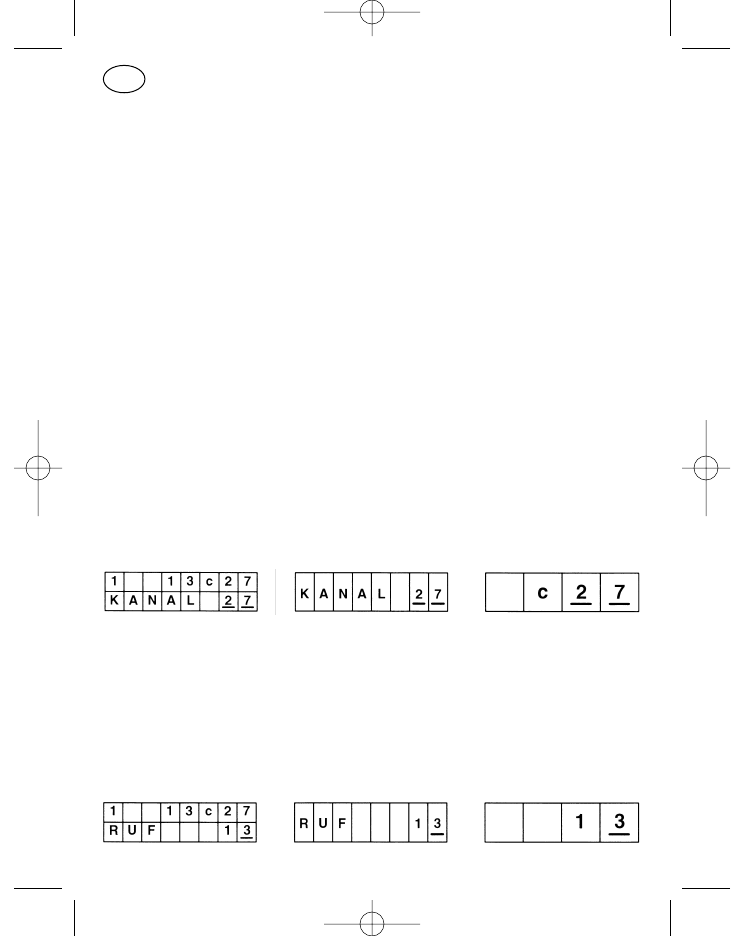
The channel is entered position by position, i.e. for a three-digit channel
number the cursor is first moved to the hundreds position and the cor-
rect digit set with the plus and minus keys. Then the other two positions
are set in the same way.
If the input is interrupted and the digits entered up to now give a non-
existent channel designation together with the other displayed channel
positions, the last valid channel is set after a certain delay (approx. 2
seconds). This need not necessarily be the last operating channel but
may also be another channel which was entered between the last
operating channel and the invalid channel.
The advantage of the two-line display format is that every valid channel
set in the bottom line is immediately transferred to the top line. You
therefore recognise immediately whether a valid or invalid channel has
been set.
Attention! If there is an invalid channel in the display and you press the
menu key, call key or PTT key before the delay of 2 seconds has expired,
the error tone sounds and no transmission takes place. Release the PTT
key, correct the channel and press the PTT key again if you want to.
Channel Scrolling
The menu item corresponds to the “Channel Input” menu, the input is only
possible with the plus and minus keys however. The channels are not edited
position by position but are scrolled continuously from one programmed
channel to the next highest (+) or next lowest (–). This prevents invalid
channels from being input.
Call Number Input
74
GB
923991 19.10.1999 10:28 Uhr Seite 74
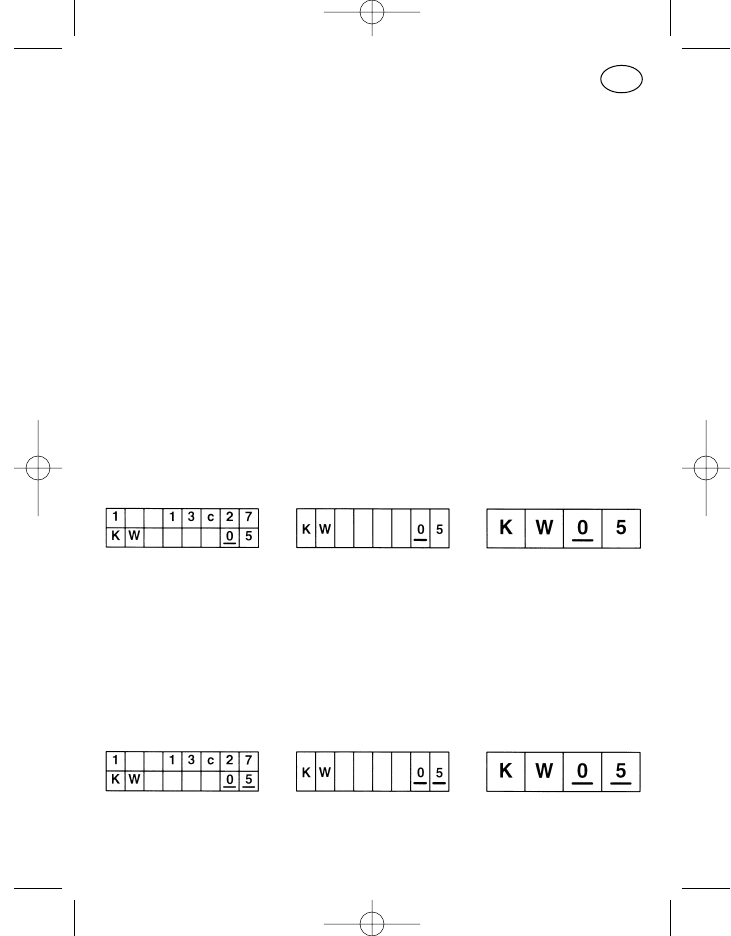
Operation:
The cursor key, the plus and minus keys and the numeric key block with
star and hash keys, if the control unit has one, are used to input the call
numbers. Short or long pressing of the cursor key moves the input po-
sition one to the right or left, the plus and minus keys roll the input po-
sition from “0” to “9” via “G” and “–” and on the 12-key numeric block,
the star enters the hyphen and the hash key the “G”.
As many input positions as can be freely programmed in the radio ap-
pear in the display. If you have selected a channel or a call key where
less free positions can be entered, the rest of the input positions in the
display must be filled up with hyphens from the left. “G” must be entered
as a group call character.
The call digits visible in the display must match the free number of posi-
tions of the appropriate call when transmitting otherwise an error tone
sounds when the call key is pressed and no call will be transmitted.
Short Dial Input
The “Short Dial Input” menu item is designed for calling numbers program-
med in the radio. Every short dialling digit is assigned a call number. These
are input with the cursor key, plus or minus key or with the numeric keys.
Attention! In the two-line display format, the top line does not indicate the
number belonging to the short dialling digit.
Short Dial Scrolling
Like “Short Dial Input” except scrolling only with the plus and minus keys in
programmed order up (+) and down (–).
75
GB
923991 19.10.1999 10:28 Uhr Seite 75
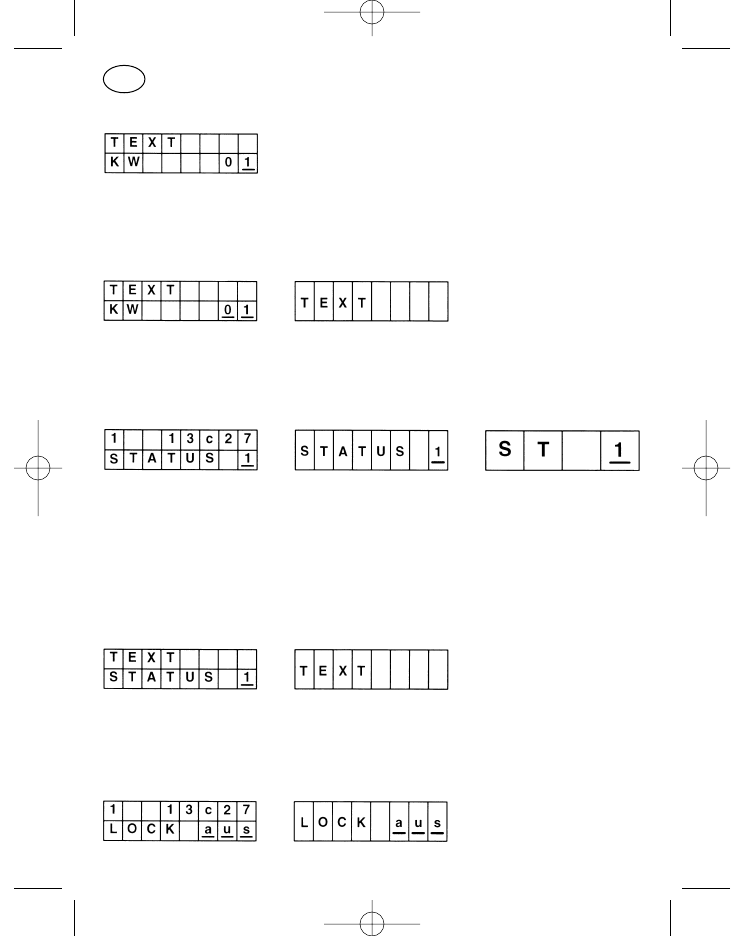
Short Dial Input with Text Display
Like “Short Dial Input” but a text for the respective short dialling digit pro-
grammed in the after-sales service appears additionally in the top line.
Short Dial Scrolling with Text Display
Like “Short Dial Scrolling” but a text for the respective short dialling digit pro-
grammed in the after-sales service appears additionally in the top line.
Status Input
Operation:
The word “STATUS” with the status digit to the right of it appears in the
display in the two eight-digit display formats. The status digit can be
scrolled with the plus and minus keys or entered directly with the nu-
meric keys.
Status Input with Text Display
Like “Status Input” but a text for the respective status programmed in the
after-sales service appears additionally in the top line.
Keyboard Lock
76
GB
923991 19.10.1999 10:28 Uhr Seite 76
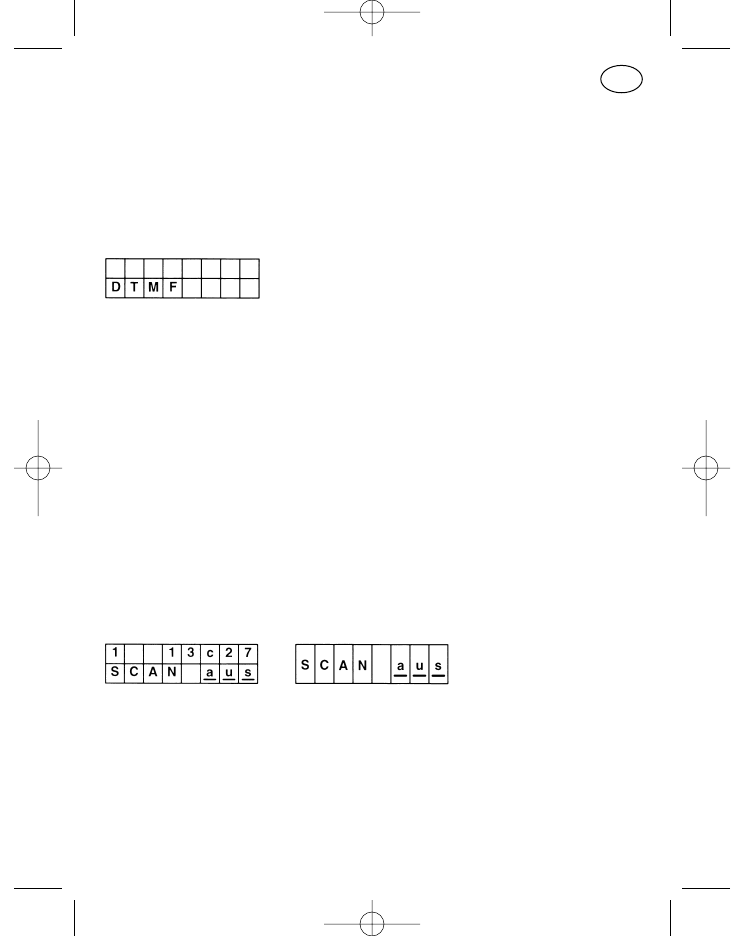
The keys of the numeric block (0 to 9, *, #), the cursor key and the ON/Off
key can be locked with the keyboard lock. The keyboard lock is switched on
and off in the display with the plus and minus keys, the lock is activated
immediately.
DTMF Mode
The “DTMF Mode” menu item allows input of up to 23 DTMF call digits. If the
display is filled with entered digits, the other digits entered appear on the
right, the call number moves to the left out of sight.
The cursor key, plus and minus keys and the numeric keys can be used for
the input. The Clear key clears the last entered position with a short press
and the whole line with a long press.
The menu is not exited when the call key or PTT key is pressed, the call is
merely sent or transmitted. The DTMF mode is not switched off until the
menu key is pressed.
Only “Touchtone” is available at present, i.e. a double tone is emitted every
time a numeric key is pressed.
Channel Scanning
Scan mode is used to monitor several channels which are switched on in a
cycle. The radio interrupts scan mode when a channel is receiving. The con-
ditions which lead to the radio interrupting scan mode are known as the scan
stop criteria.
The following scan stop criteria are channel-dependently programmable
singly or in combination, the RF carrier reception must be available in any
case:
77
GB
923991 19.10.1999 10:28 Uhr Seite 77
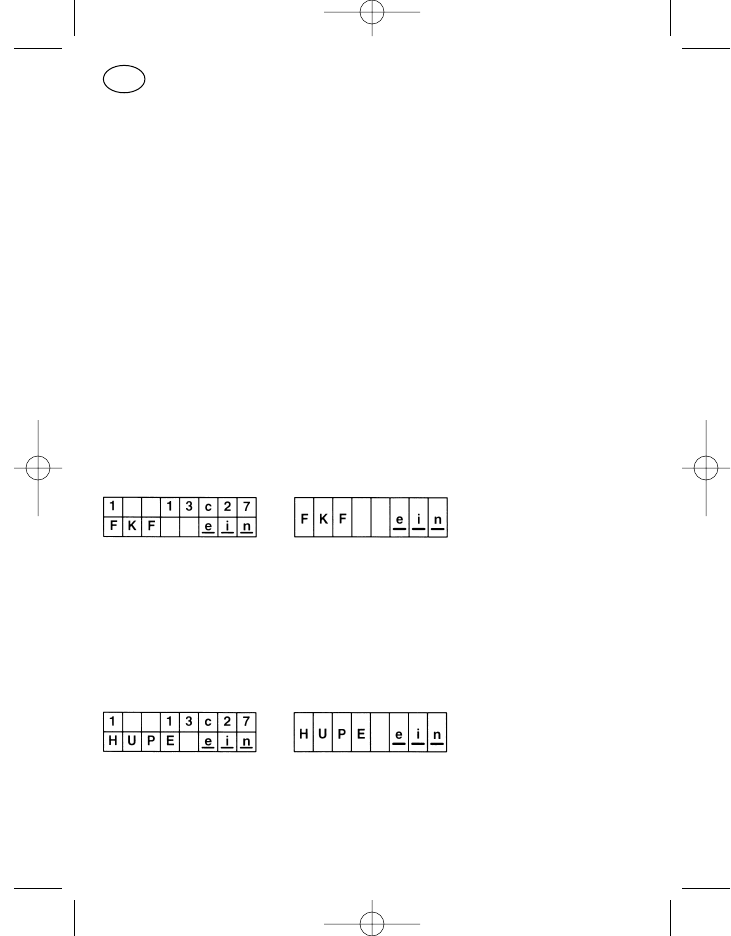
RF carrier
Subaudio tone
Scan stop tone
Call decoding
A desired priority channel can also be programmed to which the radio
switches in scan mode when the PTT key, the call key or the loudspeaker key
is pressed. If no priority channel is programmed, the radio switches to the
channel which was switched before starting scan mode under these
conditions.
If the radio stops on one of the scanned channels because the scan stop
criteria are fulfilled, this is indicated by the LED, the display symbol and the
display text “SCANSTOP”. The call can be made.
The scan mode is started with the plus or minus key.
The stop state is ended by closing the loudspeaker (e.g. pressing the loud-
speaker key), the radio continues the search.
Follower Contact Activation
Menu item with switching function. After calling with the menu key, the dis-
play content can be set from “on” to “off” or vice versa with the plus or minus
keys. This activates the follower contact (reverse contact on the radio’s
power supply), i.e. it closes, for example when an incoming call is decoded.
This can be used for example to activate a horn via a horn relay.
Horn ( switch follower contact)
Menu item with switching function. After calling with the menu key, the dis-
play content can be set from “on” to “off” or vice versa with the plus or minus
keys. This triggers the follower contact directly, i.e. a horn connected via a
horn relay for example can be switched on or off directly.
78
GB
923991 19.10.1999 10:28 Uhr Seite 78
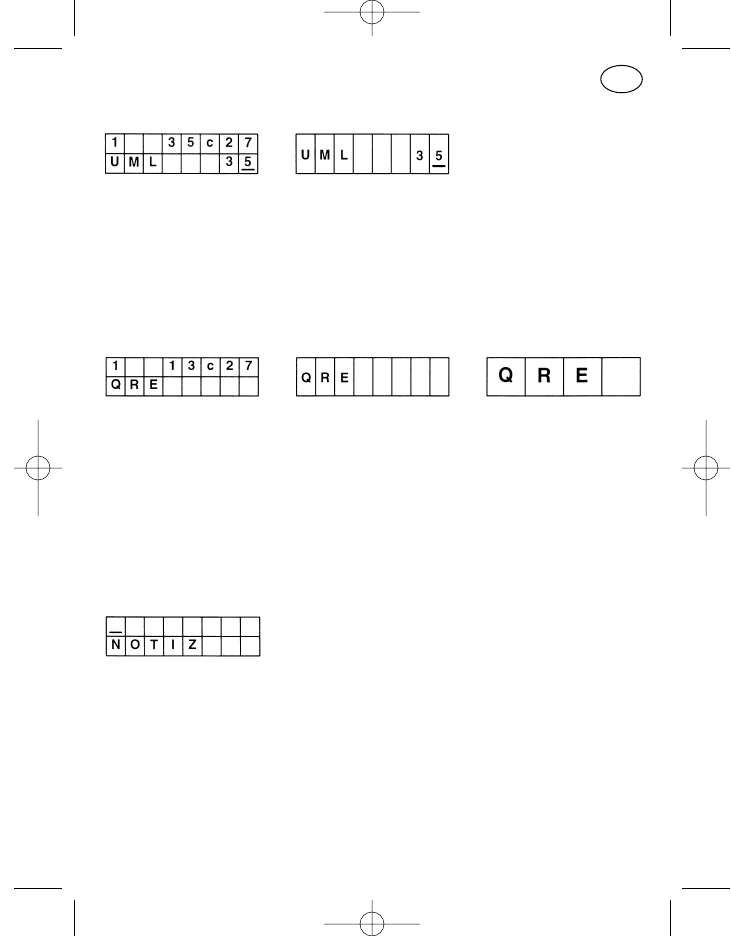
Call Diversion
The call diversion is immediately active on calling the “Call Diversion” menu
item with the menu key. The diversion address can be edited with the cursor
key, the plus and minus keys or the numeric keys. The call diversion is can-
celled by pressing the menu key and exiting the menu item.
Paging Mode
Paging mode means operating with a secondary pager. If the radio operator
leaves his vehicle, he receives a signal on his pager when he is called.
In the two-line display format, the top line displays the previous status, call
and channel and has nothing to do with the activated pager mode. Its pro-
perties are programmable in the after-sales service.
Notes
The “Notes” menu item allows input of up to 16 digits. If the display is filled
with entered digits, the other entered digits appear on the right, the note
moves out of sight to the left.
The cursor key, plus and minus keys and the numeric keys can be used for
the input. The Clear key clears the last entered position with a short press
and the whole line with a long press.
Pressing the menu key exits the menu item and switches to the next menu
item; the memory is erased when the radio is switched off.
79
GB
923991 19.10.1999 10:28 Uhr Seite 79

Transmitter Power
Menu item with switching function. The display contents can be set from
“low” to “high” or vice versa with the plus and minus keys after calling with
the menu key. The new status is immediately effective.
The transmitter power set to “low” with the menu item is reset to “high” when
the radio is switched off.
For further information see: “Switching Over the Transmitter Power” under
“Special Functions”.
Decoder Call Number
The decoder can be reprogrammed on the radio with the “Decoder Call
Number” menu item.
The cursor key, plus and minus keys and the numeric keys can be used for
the input.
The menu item is exited on pressing the menu key.
Service Mode
The service menu is for use by the after-sales service only.
Callback Memory
80
GB
923991 19.10.1999 10:28 Uhr Seite 80
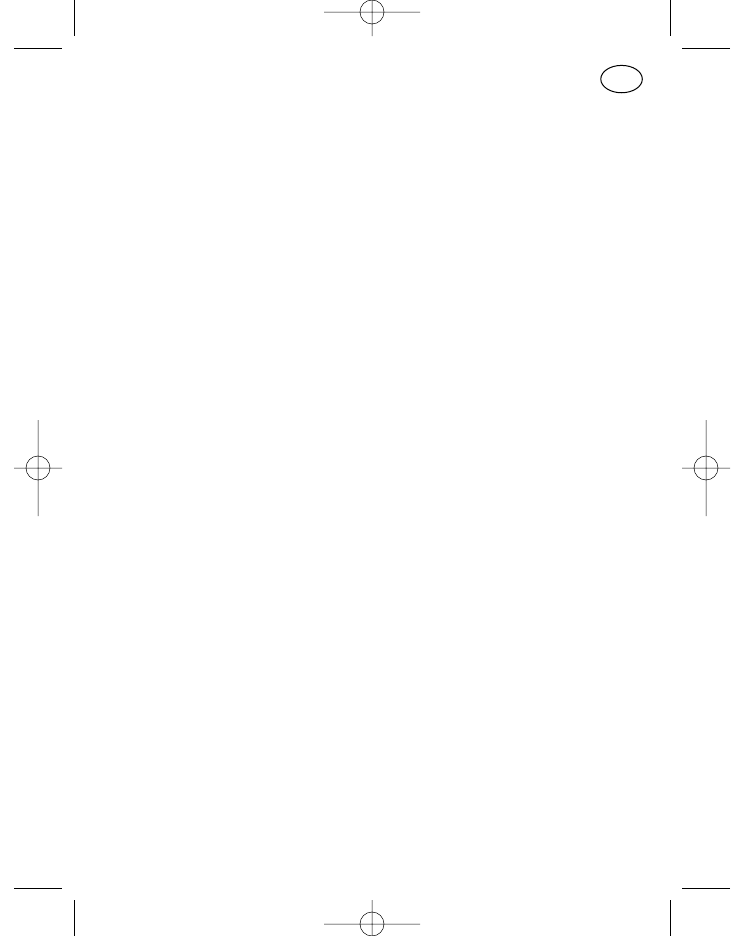
Up to 20 calls can be stored in the callback memory. It is read out by calling
the menu, every call number in the top line is assigned a callback memory
address in the bottom line.
The memory addresses can be scrolled with the plus and minus keys, call-
back is activated by pressing the display call key. Calls which are not needed
can be erased with the display clear key, all memory addresses are erased
when the radio is switched off.
Special Functions
The following functions are available at present as customised special func-
tions.
Activate Emergency Call
The emergency call can be activated manually with every programmable key.
The radio must usually be switched on for this!
If the radio is switched off, the emergency call can be activated with the
external emergency call contact (item 40) if programmed accordingly. When
this contact is triggered, the radio is switched on and emergency call proce-
dure is activated automatically.
Key Combinations
It generally applies for all key combinations that they are not part of the
standard programming and are only activated at the customer’s request.
Key combinations are one to two keys which are kept pressed whilst press-
ing the On/Off key (item 5). The keys described below are examples, the
radio may be programmed differently.
Switch Off Acoustic Signal Tones, Displays and Loudspeaker Muting
To switch off the acoustic signalling temporarily, press the call key I (item 2)
with the radio switched off and then switch the radio on. Which signalling
81
GB
923991 19.10.1999 10:28 Uhr Seite 81

tones are switched off temporarily is determined by the radio’s programming.
This may be none, one or any group of the following items:
Keyclick and confirmation tone
Acoustic calling and acknowledge tone
Error tone
Emergency call warning signal
Error tone and battery warning tone
Loudspeaker completely muted
Keyboard and display lighting
To cancel the temporary deactivation, switch the radio off and then back on.
Switch Over the Transmitter Power
It is possible to program different transmitter powers of the radio channel-
dependently or on all channels. Two of four adjustment values can be stored
per channel as “high transmitter power” and “low transmitter power”. It is
also possible to program the same value for both powers on one or more
channels, a power switching on just one channel is then possible.
When the radio is switched on normally, the transmitter operates with the
values “high transmitter power”.
To switch to the “low transmitter power” values, press the call key I (item 2)
and the plus key (item 9) together, with the radio switched off and then press
the On/Off key (item 5). These key combinations are only really necessary in
the hand-held radio PR 11 S-E (without display) but also work in all other
radios.
Switch the radio off and back on to switch from “low transmitter power” to
“high transmitter power”.
If required, a low power value can also be programmed for the “high trans-
mitter power” programming item and a high power value for the “low trans-
mitter power” programming item. The radio then operates after normal
switching on with the low transmitter power and after switching on with
pressed keys with the high transmitter power.
82
GB
923991 19.10.1999 10:28 Uhr Seite 82

Switch Over the Transmitter Power and Switch Off Acoustic Signal
Tones
This is a combination of the two switchover and switch-off procedures
described above. To activate them together, switch off the radio and then
switch on the radio with the On/Off key (item 5) with call key I (item 2) pres-
sed.
Normal operation is reinstated by switching the radio off and back on.
83
GB
923991 19.10.1999 10:28 Uhr Seite 83
Organes de commande (voir page 3)
Pos. Désignation Symbole Fonction standard
des touches,
Symbole
affichage
1 Ecran d’affichage
2* Touche d’appel 1 I Appel fixe
3* Touche haut-parleur o HP marche/arrêt, écoute
permanente
4* Touche d’appel 2 Appel affichage
5* Touche marche/arrêt Appareil marche/arrêt
Court: marche
Long: arrêt
6* Touche d’émission : : : Touche de conversation
7 Touche curseur Déplacement de la position
d’entrée sur l’affichage
Court: à droite
Long: à gauche
8 Touche de menu Appel d’un menu
Court: option suivante
Long: menu 1
9 Touche plus Position de l’entrée
incrementée
10 Touche moins Position de l’entrée
décrémentée
18 Symbole émission/
réception Non utilisé
19 Canal occupé
20 Non utilisé
21 Emission
22 Symbole HP HP »marche«
23 Symbole renvoi Renvoi d’appel activé
d’appel
24 Combiné avec 23
84
F
923991 19.10.1999 10:28 Uhr Seite 84

25 Symbole Réception du nodu demandeur
identification
26 Combiné avec 25
27 Symbole
débordement de
l’affichage Autres caractères à droite
28 Non utilisé
29 Autres caractères à gauche
30 Autres caractères à droite et
à gauche
31 Symbole batterie Sans fonction dans les
appareils MR
32 Symbole barre Sans fonction dans les
appareils MR
33 LED rouge Emission
34 LED jaune Radiocanal occupé
35 LED verte HP »marche«
En continu: avec frappe de
touche
Clignotante: avec appel
36 Haut-parleur
37 Microphone
38 Douille FCC Pour raccordement boîtier de
à 10 pôles commande
40 +, –, HP, avertisseur
externe ou raccor-
dement appel de
détresse
41 Douille données
* A la demande du client d’autres fonctions peuvent être attribuées aux pos.
2–6. Assurez-vous de la fonction affectée à ces touches au moyen de la
liste imprimée de programmation fournie avec le mode d’emploi par votre
revendeur.
85
français
923991 19.10.1999 10:28 Uhr Seite 85
Organes de commande (voir page 7)
Pos. Désignation Symbole Fonction standard
des touches,
Symbole
affichage
1 Ecran d’affichage
2* Touche d’appel 1 Appel fixe
3* Touche haut-parleur o HP marche/arrêt, écoute
permanente
4* Touche d’appel 2 Appel affichage
5* Touche marche/arrêt Appareil marche/arrêt
Court: marche
Long: arrêt
6* Touche d’émission : : : Touche de conversation
7 Touche curseur Déplacement de la position
d’entrée sur l’affichage
Court: à droite
Long: à gauche
8 Touche de menu Appel d’un menu
Court: option suivante
Long: menu 1
9 Touche plus Position de l’entrée
incrementée
10 Touche moins Position de l’entrée
décrémentée
11* Touche de
fonctions (F1) Touche programmable
18 Symbole émission/
réception Non utilisé
19 Canal occupé
20 Non utilisé
21 Emission
22 Symbole HP HP »marche«
23 Symbole renvoi Renvoi d’appel activé
d’appel
24 Combiné avec 23
86
F
923991 19.10.1999 10:28 Uhr Seite 86

25 Symbole Réception du nodu demandeur
identification
26 Combiné avec 25
27 Symbole
débordement de
l’affichage Autres caractères à droite
28 Non utilisé
29 Autres caractères à gauche
30 Autres caractères à droite et
à gauche
31 Symbole batterie Sans fonction dans les
appareils MR
32 Symbole barre Sans fonction dans les
appareils MR
33 LED rouge Emission
34 LED jaune Radiocanal occupé
35 LED verte HP »marche«
En continu: avec frappe de
touche
Clignotante: avec appel
36 Haut-parleur
37 Microphone
38 Douille FCC Pour raccordement boîtier de
à 10 pôles commande
40 +, –, HP, avertisseur
externe ou raccor-
dement appel de
détresse
* A la demande du client d’autres fonctions peuvent être attribuées aux pos.
2–6 et 11. Assurez-vous de la fonction affectée à ces touches au moyen
de la liste imprimée de programmation fournie avec le mode d’emploi par
votre revendeur.
87
F
923991 19.10.1999 10:28 Uhr Seite 87
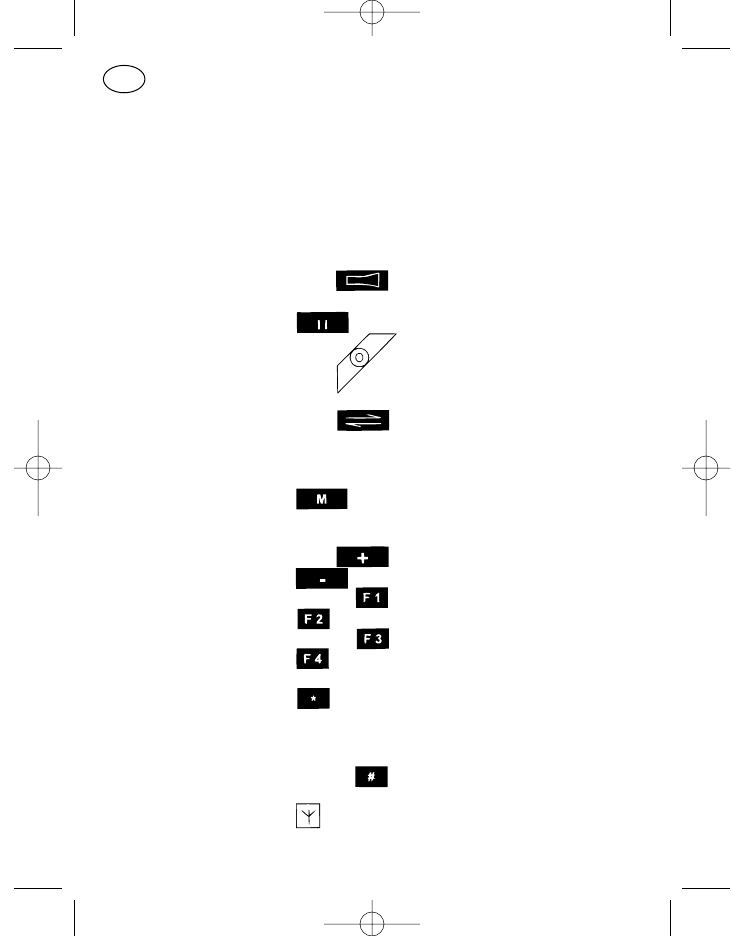
88
F
Organes de commande (voir page 11)
Pos. Désignation Symbole Fonction standard
des touches,
Symbole
affichage
1 Ecran d’affichage
2* Touche d’appel 1 I Appel fixe
3* Touche haut-parleur HP marche/arrêt, écoute
permanente
4* Touche d’appel 2 Appel affichage
5* Touche marche/arrêt Appareil marche/arrêt
Court: marche
Long: arrêt
6* Touche d’émission : : : Touche de conversation
7 Touche curseur Déplacement de la position
d’entrée sur l’affichage
Court: à droite
Long: à gauche
8 Touche de menu Appel d’un menu
Court: option suivante
Long: menu 1
9 Touche plus Pos. de l’entrée incrementée
10 Touche moins Pos. de l’entrée décrémentée
11* Touche de fonction 1 Touche programmable
12* Touche de fonction 2 Touche programmable
13* Touche de fonction 3 Touche programmable
14* Touche de fonction 4 Touche programmable
15 Pavé numérique 0–9 Saisie des chiffres
16* Touche astérisque Effacem. du contenu de l’écran
Court: position marquée
Long: toutes les positions
d’entrée
17* Touche dièse Saisie de la tonalité d’appel de
groupe »G«
19 Symbole réception Canal occupé
923991 19.10.1999 10:28 Uhr Seite 88
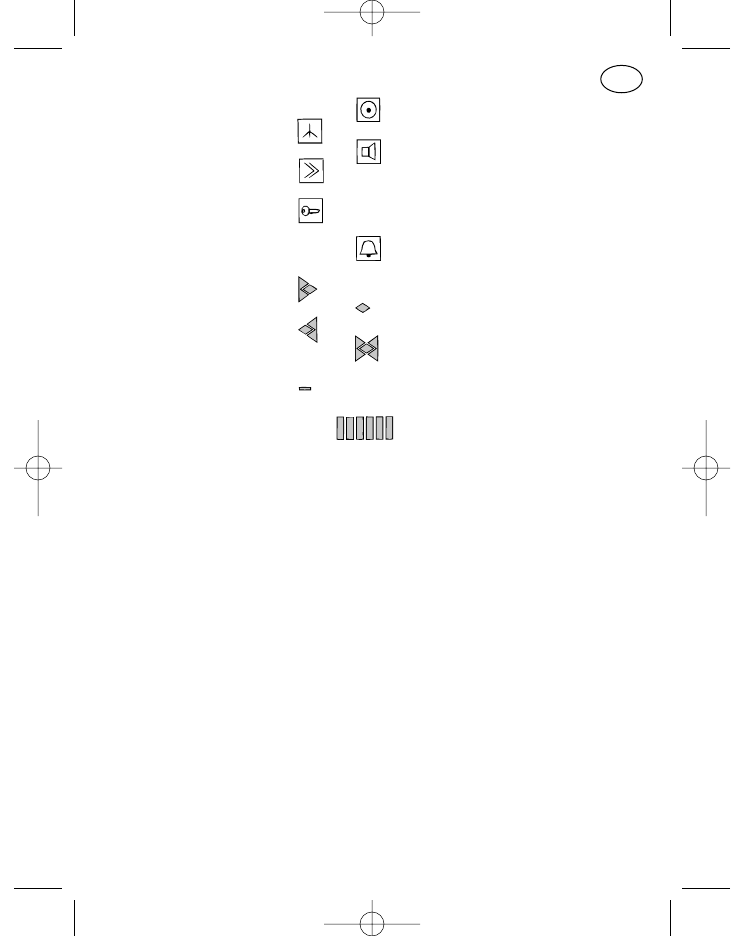
89
F
20 Non utilisé
21 Symbole émission Emission
22 Symbole HP HP »marche«
23 Symbole renvoi Renvoi d’appel activé
d’appel
25 Symbole Réception du nodu demandeur
identification
26 Combiné avec 25
27 Symbole déborde-
ment de l’affichage Autres caractères à droite
28 Non utilisé
29 Autres caractères à gauche
30 Autres caractères à droite et
à gauche
31 Symbole batterie Sans fonction dans les
appareils MR
32 Symbole barre Sans fonction dans les
appareils MR
36 Haut-parleur
37 Microphone
38 Douille FCC Pour raccordement boîtier de
à 10 pôles commande
40 +, –, HP, avertisseur
externe ou raccor-
dement appel de détresse
41 Douille données
44 Raccordement Connexion
radiotéléphone avec radiotéléphone
45 Douille FCC à 10 pôles Pour le carrordement des
dispositifs de conversation
ML 11, HM 11-1, et HM 11-3
* A la demande du client d’autres fonctions peuvent être attribuées aux pos.
2–6, 11–14 et 16, 17. Assurez-vous de la fonction affectée à ces touches
au moyen de la liste imprimée de programmation fournie avec le mode
d’emploi par votre revendeur.
923991 19.10.1999 10:28 Uhr Seite 89
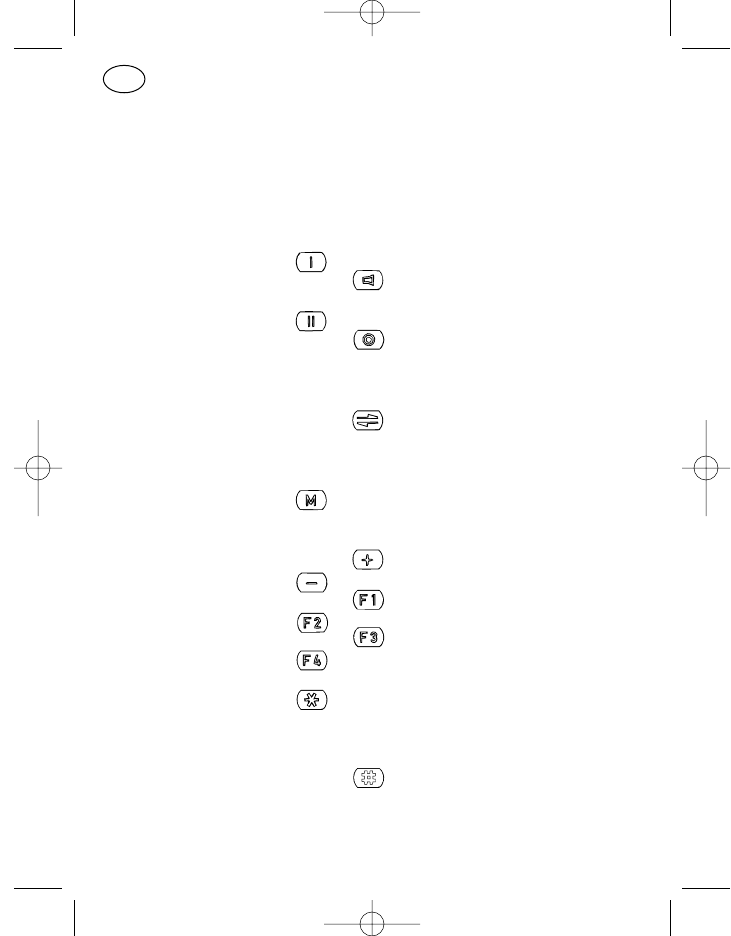
90
F
Organes de commande (voir page 15)
Pos. Désignation Symbole Fonction standard
des touches,
Symbole
affichage
1 Ecran d’affichage
2* Touche d’appel 1 Appel fixe
3* Touche haut-parleur HP marche/arrêt, écoute
permanente
4* Touche d’appel 2 Appel affichage
5* Touche marche/arrêt Appareil marche/arrêt
Court: marche
Long: arrêt
6* Touche d’émission : : : Touche de conversation
7 Touche curseur Déplacement de la position
d’entrée sur l’affichage
Court: à droite
Long: à gauche
8 Touche de menu Appel d’un menu
Court: option suivante
Long: menu 1
9 Touche plus Pos. de l’entrée incrementée
10 Touche moins Pos. de l’entrée décrémentée
11* Touche de fonction 1 Touche programmable
12* Touche de fonction 2 Touche programmable
13* Touche de fonction 3 Touche programmable
14* Touche de fonction 4 Touche programmable
15 Pavé numérique 0–9 Saisie des chiffres
16* Touche astérisque Effacem. du contenu de l’écran
Court: position marquée
Long: toutes les positions
d’entrée
17* Touche dièse Saisie de la tonalité d’appel de
groupe »G«
923991 19.10.1999 10:28 Uhr Seite 90
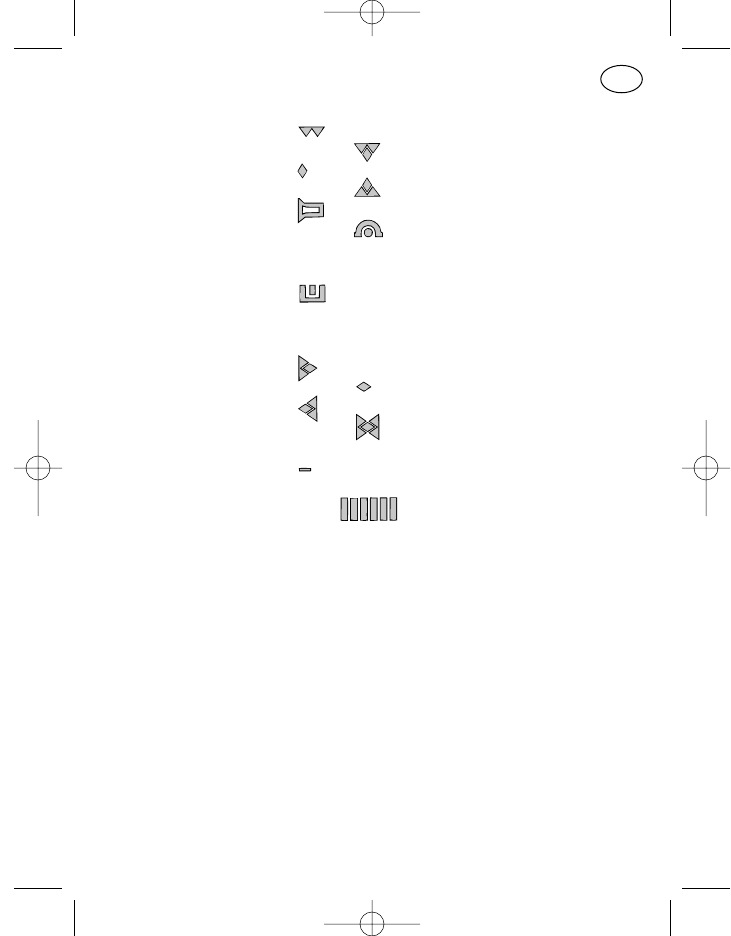
91
F
18 Symbole émission/
réception Non utilisé
19 Canal occupé
20 Non utilisé
21 Emission
22 Symbole HP HP »marche«
23 Symbole renvoi Renvoi d’appel activé
d’appel
24 Combiné avec 23
25 Symbole Réception du nodu demandeur
identification
26 Combiné avec 25
27 Symbole déborde-
ment de l’affichage Autres caractères à droite
28 Non utilisé
29 Autres caractères à gauche
30 Autres caractères à droite et
à gauche
31 Symbole batterie Sans fonction dans les
appareils MR
32 Symbole barre Sans fonction dans les
appareils MR
33 LED rouge Emission
34 LED jaune Radiocanal occupé
35 LED verte HP »marche«
En continu: avec frappe de
touche
Clignotante: avec appel
36 Haut-parleur
37 Microphone
38 Douille FCC Pour raccordement boîtier de
à 10 pôles commande
40 +, –, HP, avertisseur
externe ou raccor-
dement appel de détresse
41 Douille données
42 Ecouteur
923991 19.10.1999 10:28 Uhr Seite 91

43 Contact Hang-up
44 Raccordement Connexion
radiotéléphone avec radiotéléphone
* A la demande du client d’autres fonctions peuvent être attribuées aux pos.
2–6, 11–14 et 16, 17. Assurez-vous de la fonction affectée à ces touches
au moyen de la liste imprimée de programmation fournie avec le mode
d’emploi par votre revendeur.
92
F
923991 19.10.1999 10:28 Uhr Seite 92
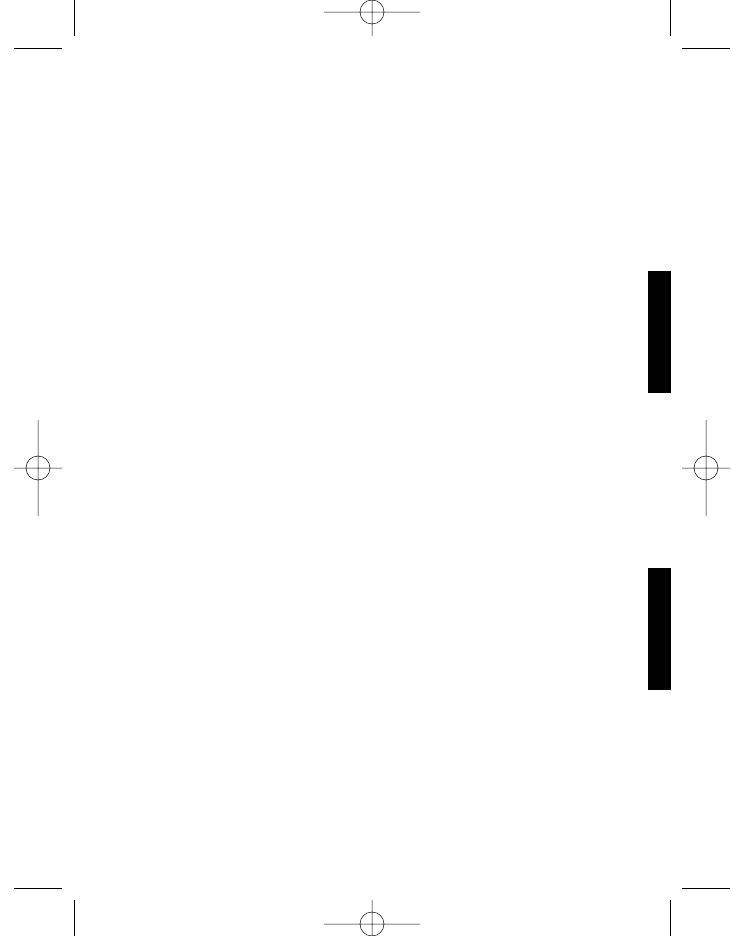
Mode d’emploi sommaire
Mode d’emploi sommaire MR 11 SD-R avec HBT 11 3
Mode d’emploi sommaire MR 11 S-C avec ML 11 ou HM 11-1/3 7
Mode d’emploi sommaire MR 11 SD-R avec BTM-XB et ML 11
ou HM 11-1/3 11
Mode d’emploi sommaire MR 11 SD-R avec HA 11 15
Règles de sécurité 96
Généralités 97
Entretien de l’appareil 97
Signalisations optiques 98
Etat prêt à l’emploi 98
Canal »libre« 98
Canal »occupé« 98
Haut-parleur »marche« 98
Emission 99
Débordement de l’affichage 99
Signalisations sonores 99
Signaux sonores utilisés 99
Enclenchement bref de la touche (clic) 100
Tonalité de validation 100
Tonalité d’erreur de manipulation 100
Avertissement appel de détresse 101
Messages optiques et sonores 101
Test de mise sous tension 101
Signal d’appel 101
Chute de tension brève de l’alimentation 101
Erreur système 102
Programmation standard des touches 102
Mise sous tension et hors tension (pos. 5) 103
Touche d’émission (pos. 6) 103
Touche d’appel I, appel fixe (pos. 2) 103
93
français français
923991 19.10.1999 10:28 Uhr Seite 93

Touche d’appel II, appel sur écran d’affichage (pos. 4) 103
Touche haut-parleur (pos. 3) 103
Touche astérisque (pos. 16) 104
Touche dièse (pos. 17) 104
Programmation standard des touches pour la commande
des menus 105
Touche de menu (pos. 8) 105
Touche du curseur (pos. 7) 105
Touche plus et moins (pos. 9, 10) 105
Pavé numérique 0 à 9 (pos. 15) 106
Le système de menu 106
Menu utilisateur 106
Option 106
Affichage de menu 107
Format de visualisation 107
Classement des menus 107
Affichage de base 107
Menu de service 108
Affichage de l’identification 108
Options standard disponibles 109
Réglage du volume 109
Saisie compactée avec affichage de texte et défilement du canal 109
Options spéciales disponibles 110
Demande de confirmation lors de la mise sous tension 110
Modification du mot de passe 110
Saisie compactée 111
Saisie compactée avec défilement du canal 111
Saisie compactée avec affichage de texte 112
Saisie de canal 112
Défilement du canal 113
Saisie du numéro d’appel 113
Saisie sélection abrégée 113
Défilement sélection abrégée 114
Saisie sélection abrégée avec affichage de texte 114
Défilement sélection abrégée avec affichage de texte 114
94
F
923991 19.10.1999 10:28 Uhr Seite 94

Saisie d’état 114
Saisie d’état avec affichage de texte 115
Blocage du clavier 115
Exploitation-DTMF 115
Recherche automatique de canal 116
Activation contact de retour d’appel 117
Avertisseur (contact de retour d’appel sous tension) 117
Renvoi d’appel 117
Exploitation-QRE 117
Notices 118
Puissance d’émission 118
Décodeur-numéro d’appel 119
Exploitation service après-vente 119
Mémoire de rétroappels 119
Fonctions spéciales 120
Déclenchement appel de détresse 120
Combinaison de touches 120
Coupure des tonalités de signalisation sonores, de l’affichage
et de la fonction »secret« du haut-parleur 120
Commutation de la puissance d’émission 121
Commutation de la puissance d’émission et coupure des tonalités
de signalisations sonores 121
95
F
923991 19.10.1999 10:28 Uhr Seite 95

Règles de sécurité
– Le radiotéléphone avec tous ses accessoires ne doit pas être utilisé
dans des lieux exposés à des risques de coups de grisou ou d’explosi-
on.
– En activant la touche d’émission, maintenez une distance de 30 cm au
moins entre vous et le radiotéléphone avec des appareils ayant une
puissance d’émission de 7-15 W au max. et une distance de 60 cm au
moins avec des appareils ayant une puissance d’émission de 16-50 W
au maximum.
– Le radiotéléphone étant en service, ne jamais maintenir le combiné
manuel avec le haut-parleur directement appliqué sur l’oreille, aupara-
vant testez une distance acceptable avec le volume sonore choisi en
ouvrant le silencieux. Des volumes trop forts peuvent provoquer des
lésions de l’ouïe.
– Ne pas utiliser le radiotéléphone en conduisant, cela peut détourner vot-
re attention de la circulation routière.
– Si vous portez un stimulateur cardiaque, avant d’utiliser le radiotélé-
phone informez-vous auprès du fabricant sur les préjudices éventuelles
occasionnés par les hautes fréquences. Evitez d’actionner la touche
d’émission hors du véhicule à proximité de l’antenne, restez dans le
véhicule.
– Ne pas mettre les batteries et les radiotéléphones à la portée des
enfants ou de personnes non habilitées.
96
F
923991 19.10.1999 10:28 Uhr Seite 96

Généralités
Indépendamment de l’équipement en organes de commande, le procédé
d’exploitation des radiotéléphones pour véhicule de la 11ème génération de
la version PMR (private mobile radio/réseau radio des entreprises) est com-
mun à tous les appareils. Naturellement le mode d’affichage et le nombre
des touches disponibles dépend de chacune des combinaisons des organes
de commande des appareils et de la programmation correspondante.
C’est pourquoi il vous est recommandé de sélectionner la figure correspon-
dant à votre combinaison d’appareils et de consulter la liste imprimée de
programmation fournie par votre revendeur afin de vous familiariser avec la
commande de votre radiotéléphone.
A part quatre touches (la touche de menu, la touche du curseur, la touche +
et la touche –) et le pavé numérique de 0 à 9 toutes les autres touches peu-
vent être programmées par votre revendeur et le cas échéant peuvent être
programmées avec une fonction personnalisée. Selon la version choisie,
seule une partie des procédés de commande mentionnés dans les instruc-
tions suivantes vous concerne.
Entretien de l’appareil
Pour nettoyer le boîtier de votre radiotéléphone et des organes de comman-
de n’utiliser que de l’eau avec un peu de produit détergent et un chiffon
doux. Essuyez le radiotéléphone à l’aide du chiffon humide (ne jamais plon-
ger le radiotéléphone resp. les accessoires dans l’eau) et ensuite séchez
avec un chiffon sec. Prenez soin à ce qu’aucune trace d’humidité ne reste au
niveau de la fiche de l’organe de commande et du contact d’antenne.
Ne jamais utiliser de dissolvant!
97
F
923991 19.10.1999 10:28 Uhr Seite 97
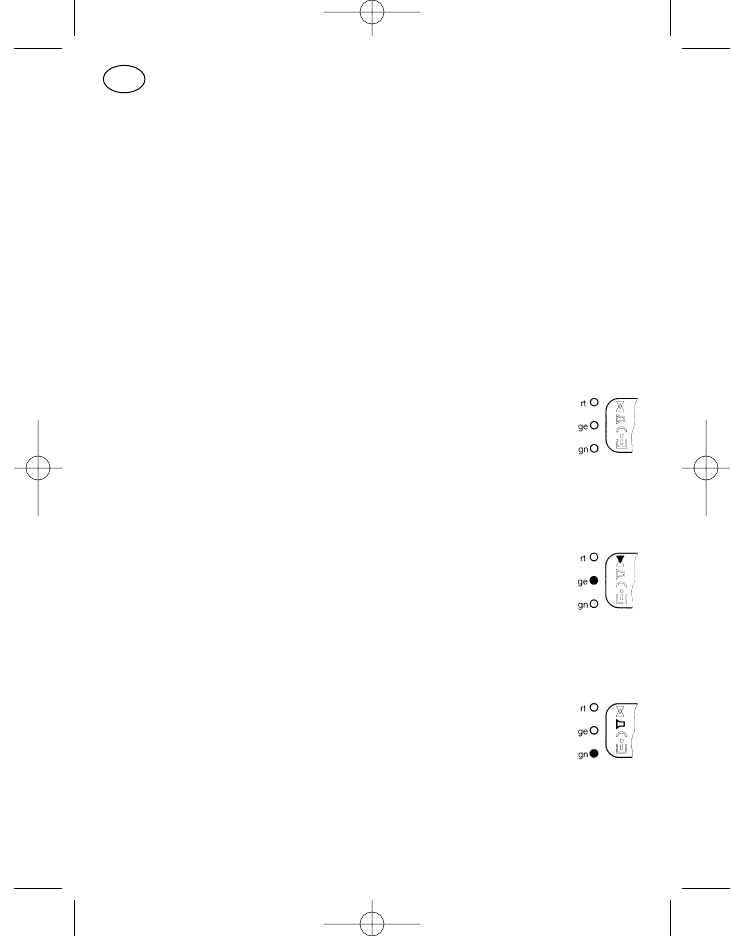
Signalisations optiques
Les signalisations optiques sont transmises au moyen des symboles de
l’écran d’affichage (pos. 18–30) et des trois diodes LED (pos. 33, 34 et 35).
Les diodes transmettent les signalisations en continu ou par clignotement.
Le clignotement a un rythme de 1 seconde environ.
Etat prêt à l’emploi
L’affichage indique que le radiotéléphone sous tension est prêt à l’emploi.
Canal »libre«
Lorsque le canal est libre la flèche de réception (pos. 19, flèche
vers le bas) et la diode LED jaune (pos. 34) sont éteintes, et ceci
indépendamment de la programmation ou non d’un décodeur
d’appel ou d’un décodeur subaudio pour ce canal.
Canal »occupé«
Lorsque le canal est occupé la flèche de réception (pos. 19) et la
diode LED jaune (pos. 34) sont allumées, et ceci indépendam-
ment de la programmation ou non d’un décodeur d’appel ou d’un
décodeur subaudio pour ce canal.
Haut-parleur »marche«
Le symbole haut-parleur (pos. 22) et la diode LED verte (pos. 35)
sont activés lorsque l’appareil est prêt à recevoir (haut-parleur
»marche«).
Normalement le haut-parleur est ouvert avec:
l’enclenchement de la touche du haut-parleur,
l’enclenchement de la touche d’émission resp. de la touche d’appel
un appel (diode LED verte clignote).
98
F
923991 19.10.1999 10:28 Uhr Seite 98
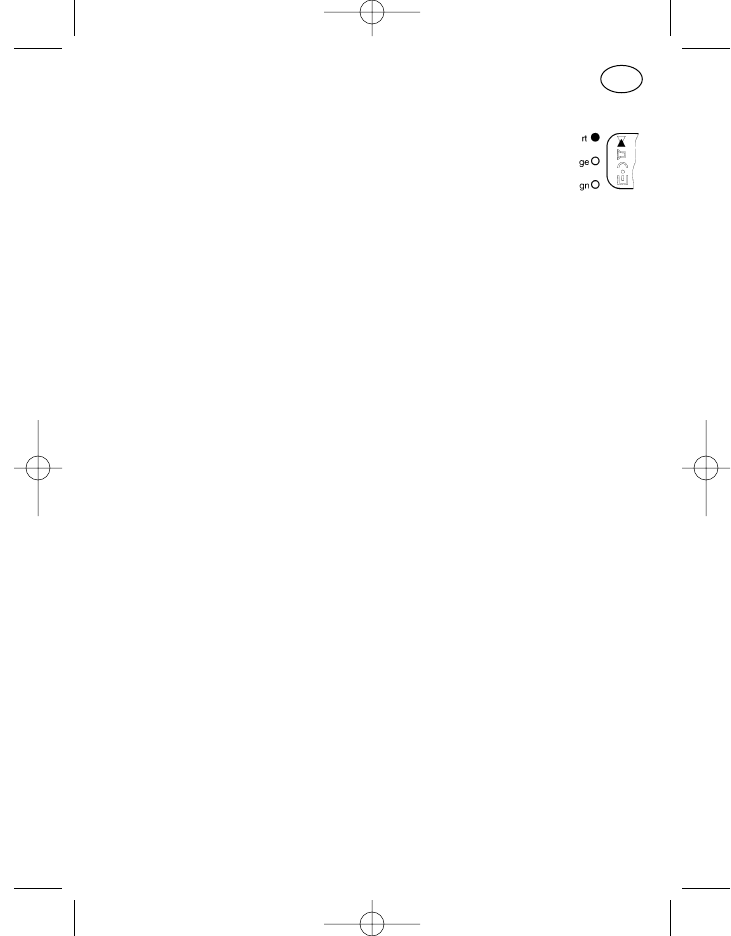
Emission
En émission, la flèche d’émission (pos. 21, flèche vers le haut) et
la diode LED rouge (pos. 33) sont activées. C’est aussi le cas,
temporairement, avec l’enclenchement automatique de l’émet-
teur par ex. avec l’envoi d’une quittance ou l’interrogation d’état.
Débordement de l’affichage
Les flèches de direction figurant sur l’écran d’affichage (pos. 27–30) (à
gauche, à droite, à gauche et à droite) indiquent la présence de positions non
affichées (avec une saisie de plus de 8 positions).
Ce débordement peut survenir par ex. dans le menu »Notices«. Afin de
visualiser les positions de la saisie débordées à droite il faut déplacer le cur-
seur vers le côté droit de l’écran d’affichage. Avec chaque pression de la tou-
che du curseur réapparaît alors une position dans la zone de visualisation.
Une pression prolongée de la touche fait sauter le curseur sur la première
position de la saisie lors d’un débordement vers la gauche.
Signalisations sonores
En plus de la signalisation optique des états de fonctionnement il existe aus-
si une signalisation essentiellement sonore.
Signaux sonores utilisés
Deux fréquences sonores sont utilisées pour différencier chacun des mes-
sages. Tonalités aiguës (fréquence env. 1200 Hz) pour messages positifs,
tonalités basses (fréquence env. 400 Hz) pour messages négatifs.
Selon la programmation, quatre durées de tonalité sont disponibles:
long env. 1 sec.
moyen env. 0,35 sec.
court env. 0,1 sec.
trés court (clic) env. 20 millisec. 99
F
923991 19.10.1999 10:28 Uhr Seite 99
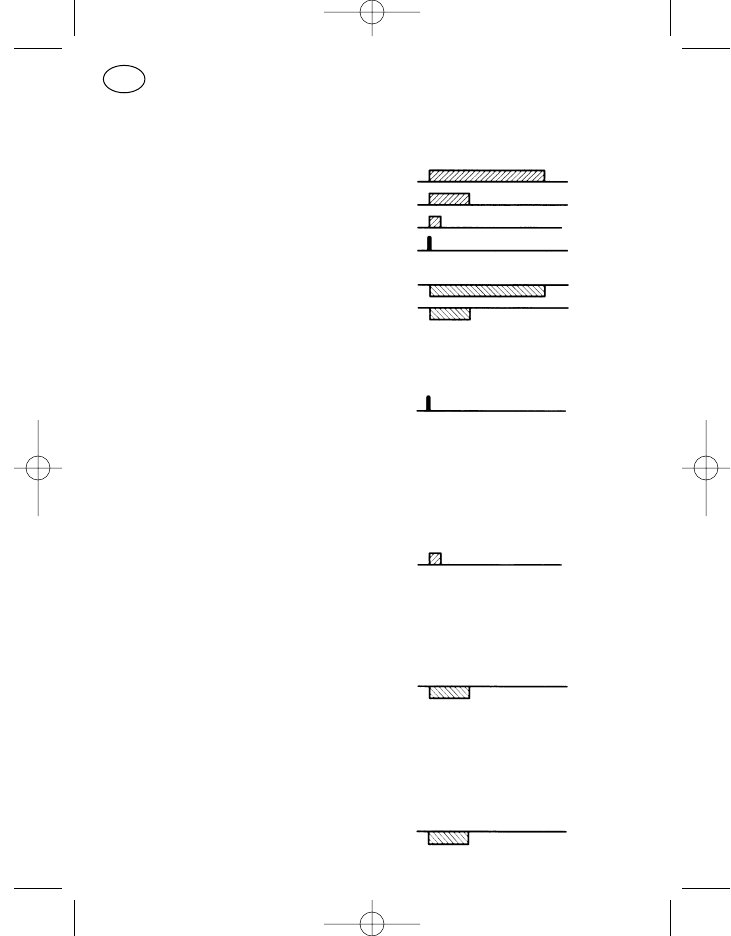
Les tonalités aiguës sont représentées ci-dessous en un bloc au-dessus
d’une ligne, les tonalités basses en un bloc au-dessous d’une ligne. Il
s’ensuit la représentation suivante:
aiguë, longue
aiguë, moyenne
aiguë, courte
aiguë, clic
basse, longue
basse, moyenne
Enclenchement bref de la touche (clic)
Une tonalité aiguë, trés brève.
Cette tonalité sonore retentit après l’identification d’un enclenchement de
touche réussi. Cela signifie que la touche d’entrée a été mécaniquement
convenablement activée.
Tonalité de validation
Une tonalité aiguë, courte.
Elle retentit après la validation de l’établissement de la liaison (quittance
reçue).
Tonalité d’erreur de manipulation
Une tonalité basse de durée moyenne,
resp. tonalité continue basse, jusqu’à élimination de la cause de l’erreur.
Comme les erreurs de manipulation dépendent beaucoup de la programma-
tion, voici deux exemples possibles pour plus de compréhension:
a) Lorsque le volume est réglé sur le palier le plus haut ou le plus bas et
qu’on cherche à l’augmenter ou à le diminuer, retentit alors une tonalité
basse de durée moyenne.
100
F
923991 19.10.1999 10:28 Uhr Seite 100
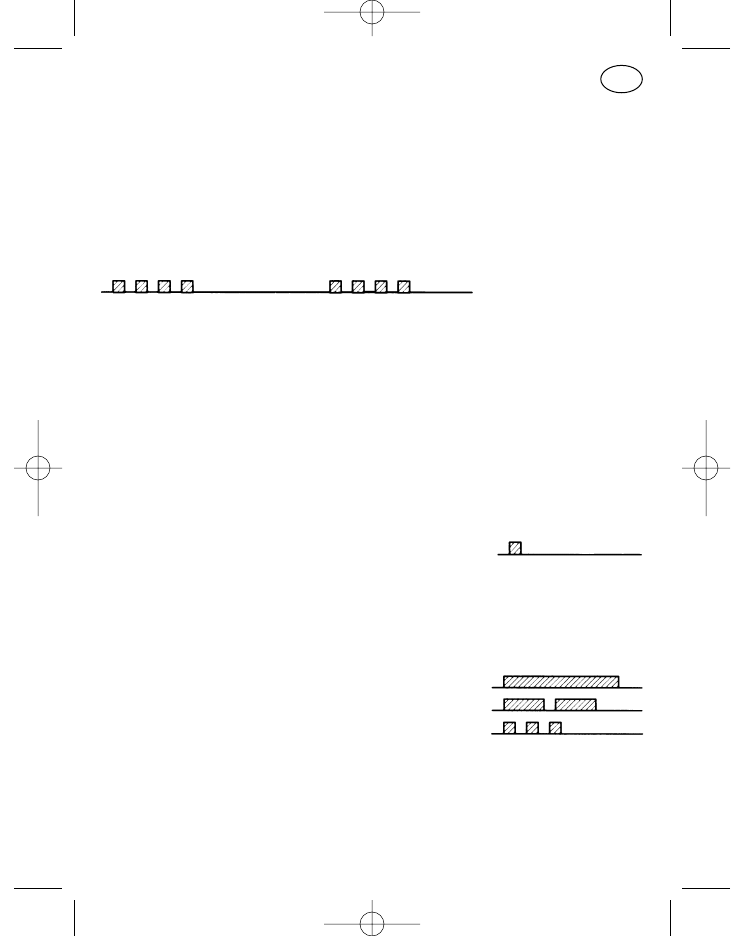
b) Programmation: pas de possibilité d’émission sur un canal occupé. Si la
touche d’émission est enclenchée alors que le canal est occupé, une
tonalité basse continue retentit jusqu’à ce que la touche d’émission soit
relâchée.
Avertissement appel de détresse
Série de quatre tonalités courtes et aiguës, répétées toutes les deux secon-
des
La procédure de l’appel de détresse dépend beaucoup, dans son déroule-
ment, de la programmation!
Messages optiques et sonores
Test de mise sous tension
Après la mise sous tension, les trois diodes LED et tous les symboles LCD
sont allumés pendant environ 1 seconde, l’éclairage de l’écran d’affichage
est activé puis une tonalité aiguë brève retentit; normalement l’affichage in-
dique ensuite que l’appareil est prêt à l’emploi.
Signal d’appel
Avec un appel, la diode LED verte (pos. 35) clignote et le symbole du haut-
parleur (pos. 22) est activé. L’appel est reçu acoustiquement de la façon sui-
vante:
appel sélectif tonalité aiguë, longue
appel de groupe deux tonalités aiguës, moyennes
appel collectif trois tonalités aiguës, courtes
Chute de tension brève de l’alimentation
Dans le véhicule, de fortes pertes de tension se produisent en partie lors du
démarrage du moteur. Avec une chute de tension de l’alimentation d’une
valeur de 5 V environ le radiotéléphone se déconnecte. 101
F
923991 19.10.1999 10:28 Uhr Seite 101

Avec des pertes de tension de jusqu’à environ 4 secondes le radiotéléphone
est toujours prêt à l’emploi. Avec des pertes de tension plus longues
l’appareil doit être de nouveau mis sous tension manuellement.
Cette mise sous tension de l’appareil est dans tous les cas une remise sous
tension, des états de fonctionnement provisoires (à part le canal et le vo-
lume) ne sont pas mémorisés.
Erreur système
Le texte »SERVICE« clignote sur l’écran d’affichage,
des tonalités courtes et basses signalent
l’erreur.
Couper et remettre l’appareil sous tension resp. le couper de l’alimentation
et après l’avoir rebranché mettre de nouveau l’appareil sous tension. Con-
sulter le service après-vente dans le cas où l’erreur système persiste.
Programmation standard des touches
L’appellation des positions 2–6, 11–14 et 16, 17 dépend de leur program-
mation standard, d’autres fonctions programmables peuvent être attribuées
à ces touches à la demande du client; les fonctions disponibles pour cha-
cune des touches s’appliquent à une utilisation bien définie, S.V.P consultez
le service après-vente.
Une distinction est faite entre une frappe de touche longue et une frappe de
touche brève sur la touche du haut-parleur, la touche marche/arrêt, la touche
du curseur, la touche astérique et la touche de menu (pos. 3, 5, 7, 16, 8):
frappe de touche brève: env. 0,5 sec.
frappe de touche longue: env. 2 sec.
La limite de différenciation entre la frappe de touche brève et la frappe de
touche longue est d’environ 1 seconde.
102
F
923991 19.10.1999 10:28 Uhr Seite 102
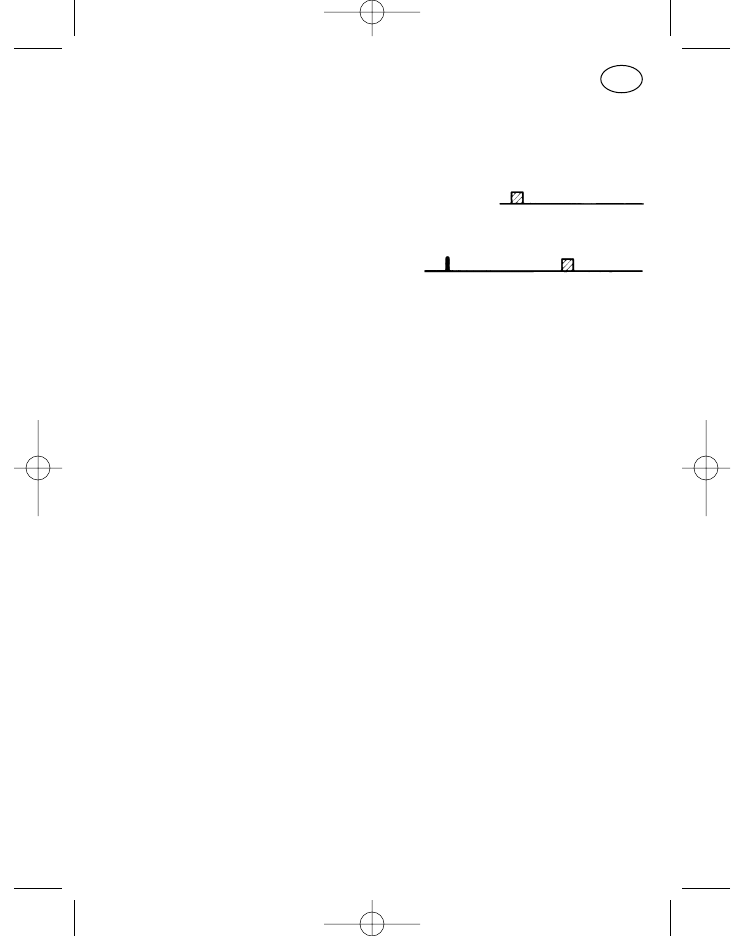
Mise sous tension et hors tension (pos. 5)
L’appareil est sous tension en appuyant brièvement sur la touche
marche/arrêt (pos. 5). Le test d’enclenchement se déroule (env. 1 seconde),
l’appareil est prêt à fonctionner après la tonalité de validation.
Pour couper l’appareil appuyer longuement sur la touche marche/arrêt
(pos. 5), jusqu’à ce que la tonalité de validation retentisse. L’appareil est hors
tension en relâchant la touche.
Avec la mise hors tension de l’appareil, les derniers réglages du canal et du
volume sont mémorisés et se retrouvent lorsque l’appareil est remis sous
tension.
Touche d’émission (pos. 6)
Pour émettre, maintenir la pression sur la touche d’émission (pos. 6), le
microphone est ouvert et il est possible de parler. La diode LED rouge
(pos. 33) et le symbole de l’émission (pos. 21, flèche vers le haut) sont
allumés pendant l’émission. Relâcher la touche d’émission pour pouvoir
écouter.
Touche d’appel I, appel fixe (pos. 2)
Avec un appel fixe programmé (les positions à codage libre ne peuvent être
modifiées sur l’écran d’affichage) appuyer sur la touche d’appel 1 (pos. 2),
l’appel est transmis. Les symboles de l’émission sont activés pendant la
durée d’enclenchement de l’émetteur.
Touche d’appel II, appel sur écran d’affichage (pos. 4)
Avec un appel sur écran d’affichage programmé (le numéro d’appel figurant
sur l’écran d’affichage peut être modifié à l’aide du pavé numérique resp. de
la touche du curseur, de la touche plus et de la touche moins) appuyer sur la
touche d’appel 2 (pos. 4), l’appel est transmis. Les symboles de l’émission
sont activés pendant la durée d’enclenchement de l’émetteur.
Touche haut-parleur (pos. 3)
Dans la programmation standard la touche du haut-parleur (pos. 3) possède
une fonction multiple (fonction écoute permanente, moniteur et reverrouilla-
103
F
923991 19.10.1999 10:28 Uhr Seite 103

ge). La touche est affectée d’une différenciation entre frappe brève et frappe
longue seulement pour la fonction moniteur, c’est à dire que seule une pres-
sion brève de la touche active la fonction moniteur.
Appareil avec décodeur d’appel:
Fonction écoute permanente
Pendant que la pression est maintenue sur la touche, il est possible
d’écouter dans le canal radio. Si le canal est occupé, on écoute alors le
trafic radio, si le canal est libre, on entend un bruit de fond. Pendant la
durée de l’enclenchement de touche, le symbole haut-parleur (pos. 22)
et la diode LED verte (pos. 35) sont allumés. [le décodeur d’appel, le
décodeur subaudio et le silencieux sont contournés]
Moniteur
A chaque relâchement de touche, le haut-parleur est branché soit sur
l’état »marche« (diode verte sur lumière continue, symbole haut-parleur
activé) ou sur l’état »arrêt« (diode verte éteinte et symbole haut-parleur
désactivé ). [seul le décodeur d’appel est contourné]
Reverrouillage
De plus, chaque enclenchement de touche entraîne le reverrouillage
d’un signal d’appel éventuel.
Touche astérisque (pos. 16)
La fonction »effacement du contenu de l’écran d’affichage« (pression
brève=position de la saisie marquée, pression prolongée=toutes les posi-
tions de la saisie) est, dans la version standard, affectée à la touche asté-
risque. Elle n’est pas disponible sur tous les organes de commande.
Touche dièse (pos. 17)
La touche dièse sert à la saisie de la tonalité d’appel de groupe »G« dans la
programmation standard. Elle n’est pas disponible sur tous les organes de
commande.
104
F
923991 19.10.1999 10:28 Uhr Seite 104

Programmation standard des touches pour la
commande des menus
Touche de menu (pos. 8)
Lorsque le radiotéléphone est en état de repos (exploitation standby) l’affi-
chage de base est visible sur l’écran (voir »le système menu«). Dans le cas
d’une saisie, c’est à dire par exemple pour changer de canal ou de numéro
d’appel, appuyez une fois brièvement sur la touche de menu »M« (pos. 8),
l’option 1 apparaît sur l’écran d’affichage. Avec chaque nouvelle pression
brève de la touche apparaît sur l’écran d’affichage l’option suivante. Après
l’appel de la dernière option, l’option 1 réapparaît en appuyant brièvement
sur la touche. Une pression prolongée sur la touche de menu entraîne le pas-
sage d’un affichage de menu quelconque sur l’option 1, l’affichage de base
est visible.
Sans pression de touche après l’appel d’un menu, l’appareil revient dans la
plupart des menus sur l’affichage de base. C’est le cas, selon l’affichage de
menu, après environ 2 secondes avec l’option 1 (menu haut-parleur dans la
programmation standard) resp. après 10 secondes (avec les autres menus).
Touche du curseur (pos. 7)
Lors d’une saisie sur l’écran d’affichage, la position effective à modifier est
soulignée. Si d’autres positions à modifier se trouvent à gauche resp. à droite
de la position marquée, une pression brève sur la touche du curseur (pos. 7)
déplace alors le curseur d’une position vers la droite et une pression prolon-
gée d’une position vers la gauche.
Lorsque plusieurs positions sont soulignées sur l’écran d’affichage, alors
seules les touches +/– permettent une modification par défilement (passage
continu de saisies déjà introduites). Dans ce cas la touche du curseur n’a pas
de fonction, sauf si l’on se trouve dans un affichage de menu comme par ex.
»saisie compactée« (voir page 111). Le menu »saisie compactée« possède
plusieurs blocs d’entrée, une pression sur la touche du curseur entraîne le
passage d’un bloc sur le suivant, par ex. de »saisie d’appel« sur »canal«.
Touche plus et moins (pos. 9, 10)
Les positions de saisie marquées sur l’écran d’affichage peuvent être décré-
mentées et incrémentées à l’aide de la touche plus et de la touche moins.
105
F
923991 19.10.1999 10:28 Uhr Seite 105

Une fois le contenu souhaité introduit, utiliser le curseur pour passer sur la
position suivante.
Pavé numérique 0 à 9 (pos. 15)
Le contenu peut être directement introduit sur les positions prévues dans
l’affichage de menu à l’aide du pavé numérique. Avec chaque chiffre resp.
chaque lettre introduite le curseur se déplace automatiquement sur la posi-
tion de saisie suivante. Le pavé numérique n’est pas disponible sur tous les
organes de commande.
Le système de menu
Les radiotéléphones de la 11ème génération sont commandés par menu.
C’est à dire que chacune des positions de visualisation et de saisie sur
l’écran d’affichage dépend du procédé d’exploitation. Il est à remarqué que
la manipulation en cours est affichée sur l’écran.
Menu utilisateur
Le menu utilisateur est appelé au moyen de la touche de menu et permet à
l’utilisateur de l’appareil une exploitation optimale adaptée à ses besoins.
Toutes les options et les détails d’exploitation qui doivent être mentionnés
dans ce mode d’emploi sont trés certainement déroutants, c’est pourquoi
grâce à une sélection et une programmation appropriées l’utilisateur n’est
confronté qu’à ce dont il a vraiment besoin pour ses applications personnel-
les.
Option
Sous ce terme il faut comprendre un affichage sur écran avec ses possibi-
lités de saisie et de visualisation, appelé au moyen de la touche de menu.
Actuellement environ 30 options différentes sont disponibles; une sélection
personnalisée de jusqu’à 23 options peut être programmée à la demande du
client.
106
F
923991 19.10.1999 10:28 Uhr Seite 106
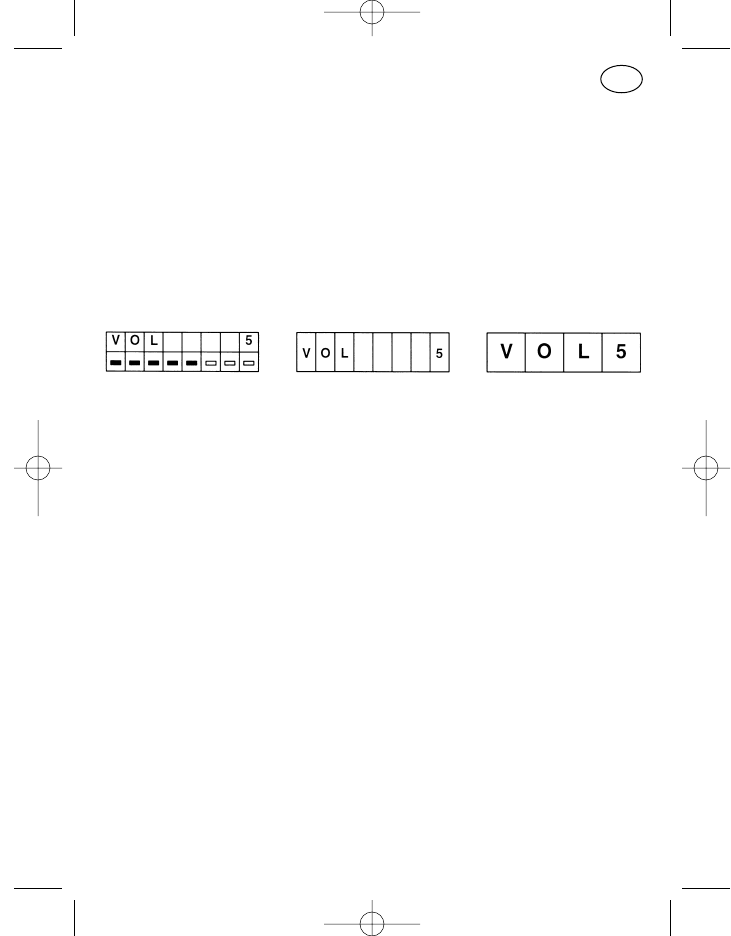
Affichage de menu
Un affichage de menu avec possibilités de visualisation et de saisie déter-
minées est attribué à chaque option.
Format de visualisation
Dans la programmation personnalisée, trois formats de visualisation sur
l’écran d’affichage sont disponibles pour plusieurs options du menu utilisa-
teur, un format à double ligne avec deux fois huit positions (format C), un for-
mat à ligne simple avec huit positions (format B) et un format à ligne simple
avec quatre positions (format A).
Format C Format B Format A
Lors de la programmation par le service après-vente il est recommandé de
contrôler pour chaque option si le format souhaité est approprié à chacun
des cas d’application (nombre de positions).
Le classement des menus
Le classement de chacune des options, en feuilletant le menu au moyen de
la touche de menu, est programmable à la demande du client.
Affichage de base
L’affichage de menu le plus important (le plus informatif) pour l’utilisateur
peut être programmé comme affichage de base. L’affichage de base stan-
dard est l’affichage de menu de l’option »saisie compactée avec affichage
de texte« (voir page 112). Des états de fonctionnement importants (par ex.
canal, appel et état) sont signalés par cet affichage de base sans la moindre
manipulation. Le format de visualisation de l’affichage de base peut se dif-
férencier de celui de l’option correspondante. Des saisies dans l’affichage de
base ne sont pas possibles (aucune position de saisie n’est marquée).
Attention! L’affichage de base apparaît toujours après la désélection du
menu, cependant l’option 1 est encore active à l’arrière-plan.
107
F
923991 19.10.1999 10:28 Uhr Seite 107
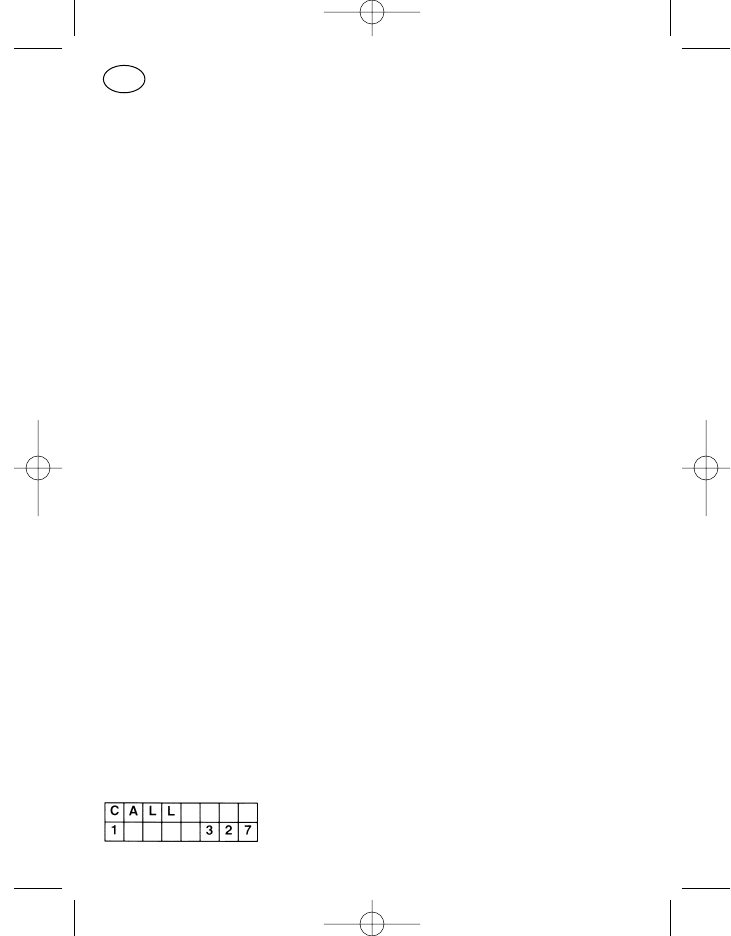
Dans la programmation standard avec l’option 1 »volume« cela
signifie que l’enclenchement de la touche plus entraîne une aug-
mentation du volume bien que l’affichage de base soit visible.
Après une saisie, l’option 1 est aussitôt visible avec l’affichage
de la modification!
Il faut en tenir compte lors d’une variation de la programmation
standard dans l’option 1.
Menu de service
Le menu de service est destiné seulement au service après-vente. Il peut
être appelé à l’aide d’un mot de passe via l’option »fonctions de service«.
Dans le cas où l’option apparaît dans le déroulement normal d’une opérati-
on, poursuivre l’opération en cours avec une pression brève de la touche de
menu.
Remarque: Dans le cas où une touche d’entrée a été enclenchée par mégar-
de, la désélection du menu se fait en coupant l’appareil ou en
introduisant l’astérisque (sans pavé numérique possible avec
+/–).
Affichage de l’identification
Il faut comprendre sous ce terme l’affichage du numéro d’appel de l’appe-
lant. Avec l’identification il est aussi possible de transmettre en plus un état
(message de l’appelant sous forme d’un chiffre convenu).
Un appel reçu est signalé par le clignotement de la diode LED verte et
l’activation du symbole du haut-parleur. Lorsque l’appareil est programmé
pour l’affichage de l’identification et qu’une identification ou une identificati-
on avec état est transmise, alors elles sont toutes deux affichées sur l’écran
et le symbole de l’identification (pos. 25, 26) est actif. Sur l’écran l’état est
cadré à gauche, le numéro de l’appelant est cadré à droite.
108
F
923991 19.10.1999 10:28 Uhr Seite 108
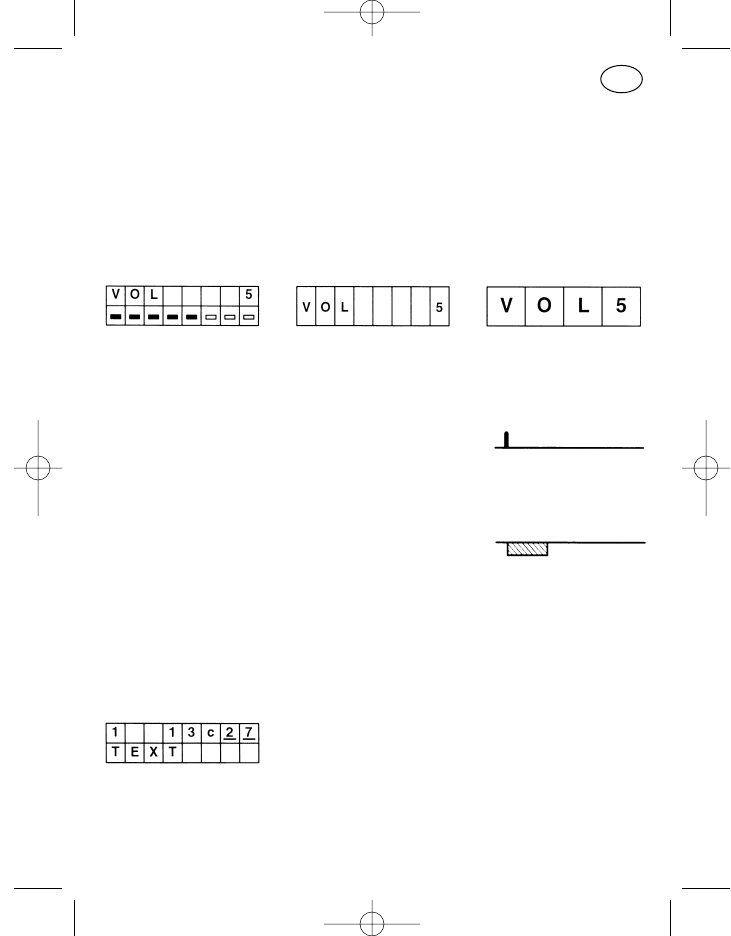
Options standard disponibles
Deux options sont proposées comme programmation standard. Le menu
»réglage du volume« comme option 1 et le menu »saisie compactée avec
affichage de texte et défilement du canal« comme option 2. La commande
est ainsi facilitée dans un grand nombre d’application.
Réglage du volume
Commande:
A l’aide de la touches + (pos. 9) et de la touche – (pos. 10) huit plages de
volume permettent de régler l’intensité sonore. Un clic est audible avec
chaque changement de position du volume réglé.
Avec ces touches, il n’y a pas de différenciation de manipulation longue
ou brève, chaque pression de la touche modifie le volume d’un palier
selon la direction choisie. Une pression prolongée sur la touche provo-
que une augmentation continue du volume (scrollen).
La tonalité d’erreur retentit lorsque la touche – est activée avec le volume
réglé sur le palier 1 ou que la touche + est activée avec le volume réglé
sur le palier 8.
Une saisie directe est possible en utilisant le pavé numérique (1-8).
Saisie compactée avec affichage de texte et défilement du canal
L’affichage dans la ligne supérieure correspond au menu »saisie compactée«
Dans la ligne inférieure apparaît en plus un texte individuel pour l’état et le
canal programmé par le service après-vente. Les textes standard des menus
109
F
923991 19.10.1999 10:28 Uhr Seite 109
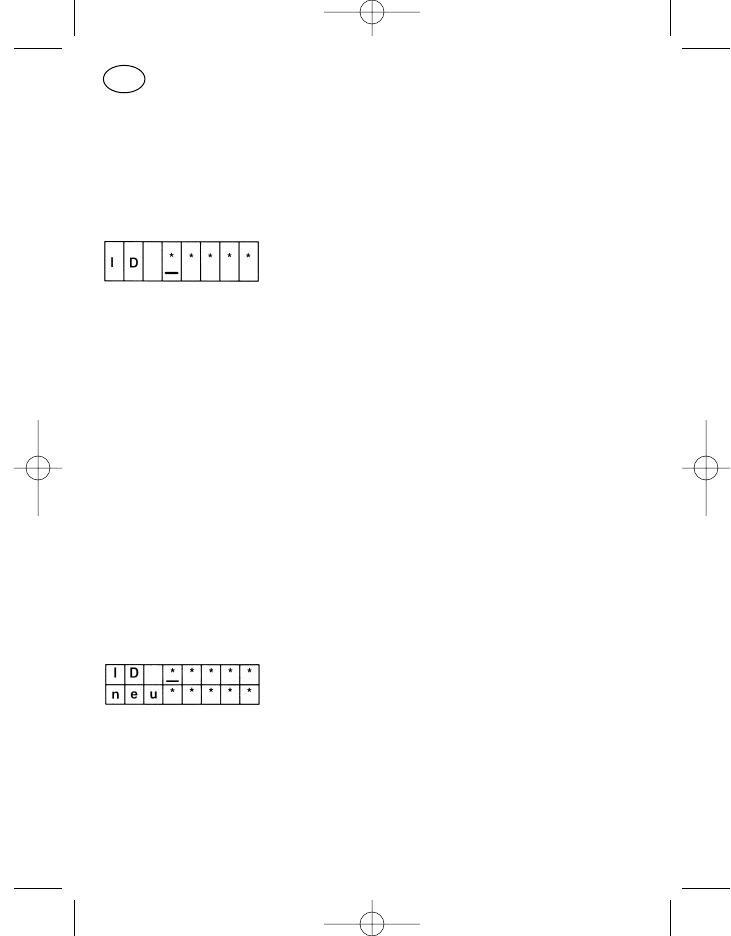
compactés »normaux« sont »ETAT«, »APPEL« et »CANAL«. C’est la position
du curseur sur la ligne supérieure qui détermine l’affichage du texte du canal
ou de l’état.
Options spéciales disponibles
Demande de confirmation lors de la mise sous tension
La saisie du mot de passe évite une utilisation non autorisée de l’appareil.
Dans le cas de sa programmation, l’option mot de passe indiquée avec des
astérisques comme espaces pour la saisie du mot de passe apparaît direc-
tement après la mise sous tension. La saisie se fait à l’aide du pavé numéri-
que ou du curseur avec les touches plus et moins. Une fois la saisie validée
enclencher la touche de menu, l’appareil commute sur l’affichage de base
lorsque le mot de passe est correct.
Avant d’appuyer sur la touche de menu il est toujours possible de corriger
un mot de passe incorrecte, réintroduire alors le mot de passe. Après trois
essais incorrects toute autre saisie est bloquée pendant 15 minutes.
L’appareil doit rester branché afin de permettre le déroulement du blocage
de 15 minutes.
L’option »demande de confirmation lors de la mise sous tension« se trouve
logiquement toujours sur la première position et est activée seulement lors
de la mise sous tension de l’appareil.
Modification du mot de passe
Ce menu ne peut être utilisé que conjointement avec la demande de confir-
mation. Un mot de passe programmé par le service après-vente peut de cet-
te façon être modifié sur l’appareil.
Après la saisie de l’ancien mot de passe sur la ligne supérieure il est possible
d’introduire le nouveau mot de passe sur la ligne inférieure; appuyer ensuite
sur la touche de menu.
110
F
923991 19.10.1999 10:28 Uhr Seite 110
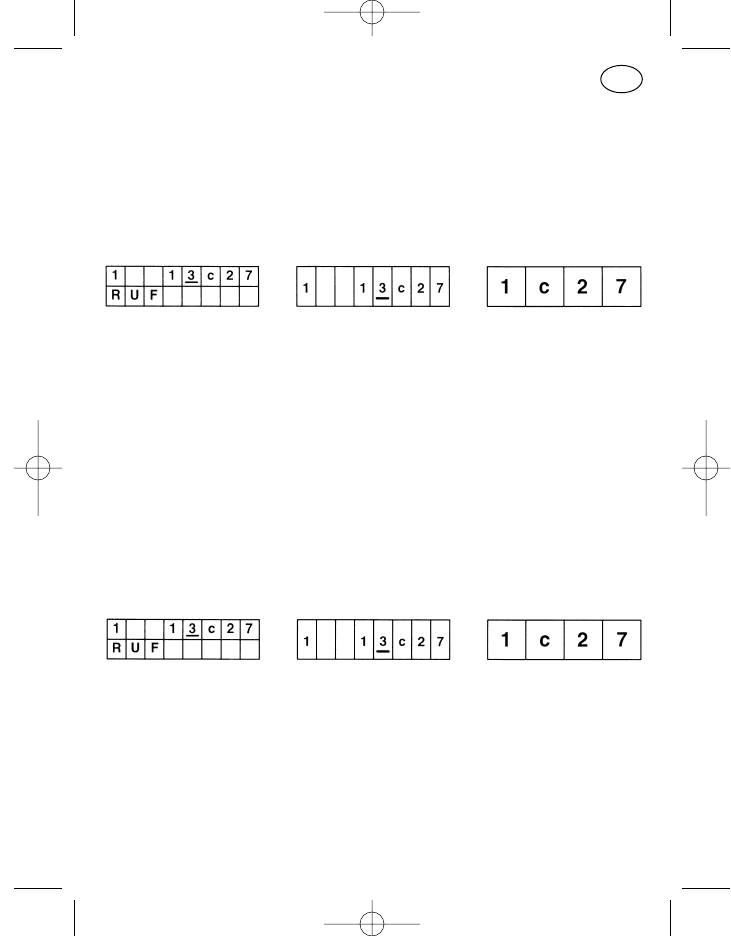
Attention: Le menu »modification du mot de passe« ne doit pas être pro-
grammé sur la première position de la série de menu, il peut
s’ensuivre une erreur de manipulation (à l’arrière-plan l’option 1
est toujours active même si sur l’écran l’affichage de base est
visible).
Saisie compactée
Avec l’option »saisie compactée« l’état, l’appel et le canal peuvent être
modifiés au sein d’une option. Sur la ligne supérieure de l’affichage (format
C) l’état est cadré à gauche, le numéro de canal est cadré à droite précédé
de »c« pour »canal«. Au milieu, à gauche du canal, se trouve le numéro
d’appel en cours. La saisie se fait à l’aide de la touche du curseur, des tou-
ches plus et moins et du pavé numérique.
Dans le format d’affichage à double ligne apparaît sur la ligne inférieure la
désignation de la partie qui vient d’être activée sur la ligne supérieure (posi-
tion du curseur).
Les données des options »saisie numéros d’appel« et »saisie du canal«
s’appliquent aux saisies des numéros d’appel et de canal.
Saisie compactée avec défilement du canal
L’option correspond au menu »saisie compactée«. La distinction tient dans
le mode d’introduction du canal. Les canaux ne peuvent être commutés qu’à
l’aide des touches plus et moins, les touches de chiffre sont sans fonction
pour la saisie de canal.
En appuyant brièvement sur la touche l’appareil commute sur le canal sui-
vant, avec une pression prolongée de la touche les canaux défilent.
Les données de l’option »saisie numéros d’appel« s’appliquent à la saisie
des chiffres d’appel. 111
F
923991 19.10.1999 10:28 Uhr Seite 111
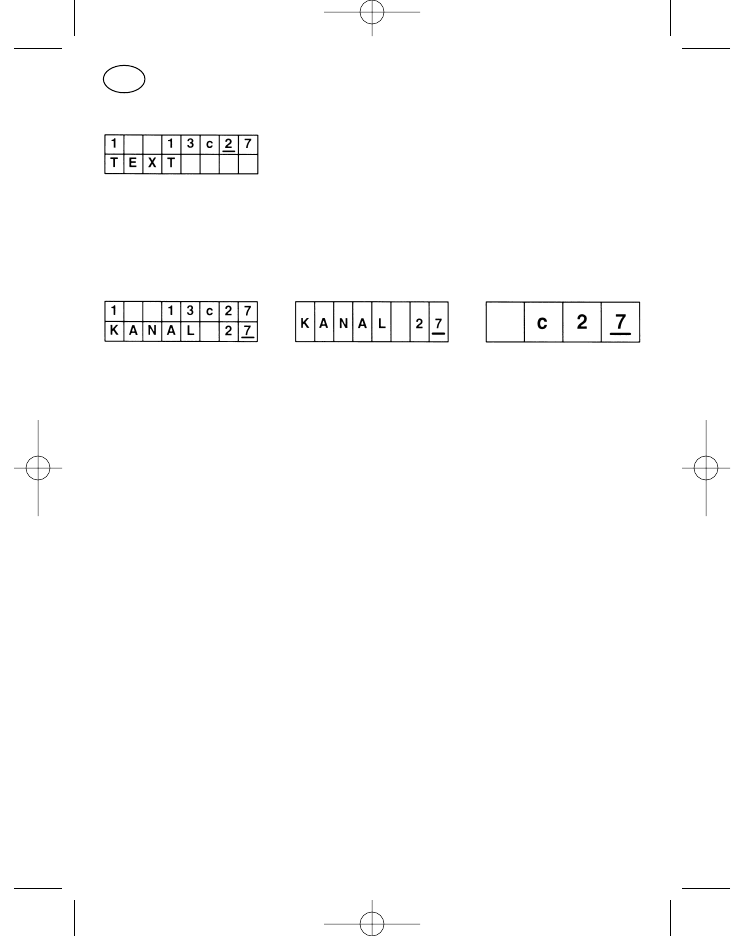
Saisie compactée avec affichage de texte
L’option correspond au menu »saisie compactée« avec l’affichage de
l’option standard »saisie compactée avec affichage de texte et défilement
des canaux«.
Saisie de canal
Commande:
Dans le format d’affichage à double ligne, sur la ligne supérieure sont
affichés en plus à gauche l’état et à sa droite, devant le »c« pour canal,
les chiffres d’appel. Dans cette option seul le canal peut être modifié.
La saisie de canal se fait pas à pas, c’est à dire avec un numéro de canal
à trois chiffres le curseur est par ex. déplacé tout d’abord sur la position
des centaines et à l’aide des touches plus et moins le chiffre souhaité est
introduit. Les deux autres positions sont introduites de la même façon.
Lorsque la saisie est interrompue et que le chiffre introduit donne avec
les autres positions de canal affichées un numéro inexistant, alors c’est
le dernier canal validé qui est réglé après la fin d’une temporisation
d’environ 2 secondes. Ce n’est pas obligatoirement le dernier canal
d’exploitation, mais ce peut être un canal introduit entre le dernier canal
d’exploitation et le canal invalide.
L’avantage du format à double ligne tient dans le fait que chaque chiffre
de canal valide introduit dans la ligne inférieure est automatiquement
pris en charge dans l’affichage de la ligne supérieure. Ainsi il est possible
de reconnaître aussitôt si le canal introduit est valide ou non.
Attention! Si un canal invalide est affiché et que la touche de menu,
d’appel ou d’émission est activée avant la fin de la temporisation d’envi-
ron 2 secondes, alors retentit la tonalité d’erreur et il n’est plus possible
d’émettre. Relâcher la touche d’émission, corriger le canal et enclencher
de nouveau la touche d’émission, si nécessaire.
112
F
923991 19.10.1999 10:28 Uhr Seite 112
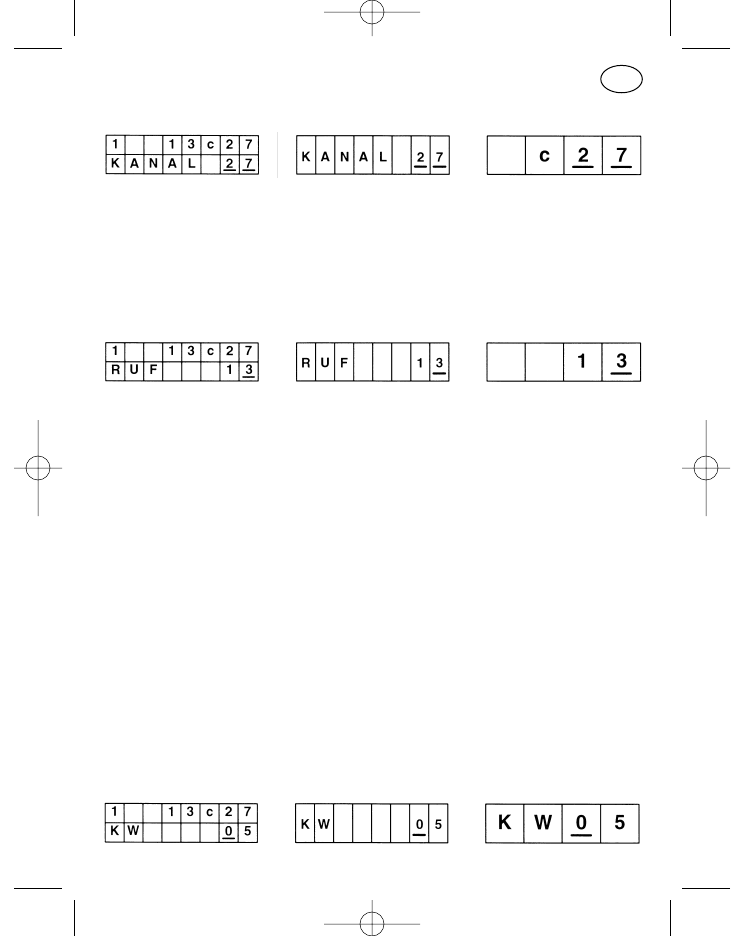
Défilement du canal
Cette option correspond à l’option »saisie de canal«, la saisie n’est possible
qu’à l’aide des touches plus et moins. Les canaux ne sont pas édités pas à
pas, mais défilent d’un canal programmé vers le canal de rang immédiate-
ment supérieure (+) resp. vers le canal de rang immédiatement inférieur (–).
Une introduction de canaux invalides est ainsi évitée.
Saisie du numéro d’appel
Commande:
Les numéros d’appel sont introduits à l’aide de la touche du curseur, des
touches plus et moins et, s’il est disponible sur l’organe de commande,
du pavé numérique avec touche astérisque et touche dièse. Une
pression brève resp. prolongée de la touche du curseur décale la posi-
tion d’entrée d’une position vers la droite resp. d’une position vers la
gauche, les touches plus et moins laissent défiler les positions d’entrée
de »0« à »9« via »G« et »–« et avec un pavé de 12 touches la touche
astérisque permet d’introduire »–« et la touche dièse d’introduire »G«.
Sur l’écran apparaissent autant de positions d’entrée qu’il en a été
programmées en codage libre dans l’appareil. Lorsqu’un canal ou une
touche d’appel a été sélectionné avec moins de positions, il faut alors
introduire des tirets »–« à partir de la gauche dans les positions d’entrée
libres sur l’écran. Il faut introduire »G« pour le groupe d’appel.
Lorsque le numéro d’appel qui a été introduit est incomplet alors une
tonalité d’erreur retentit lors de l’enclenchement de la touche d’appel.
L’appel n’est pas transmis.
Saisie sélection abrégée
113
F
923991 19.10.1999 10:28 Uhr Seite 113
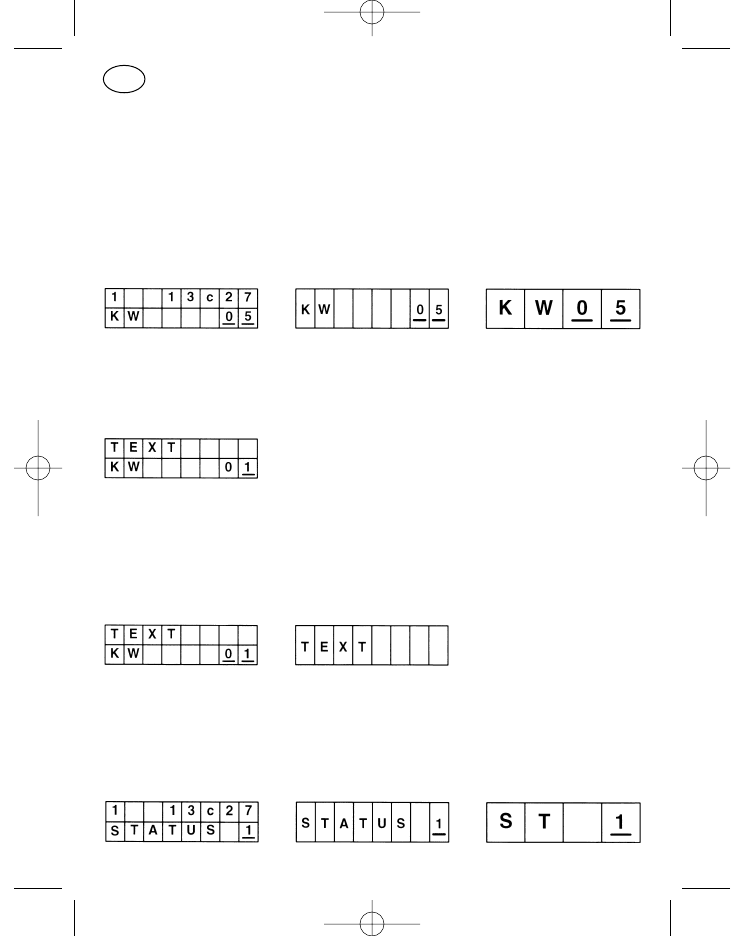
L’option »saisie abrégée« sert à l’appel de numéros d’appel programmés
dans l’appareil. Un numéro d’appel est attribué à chaque chiffre de sélection
abrégée. La saisie se fait au moyen de la touche du curseur, des touches
plus et moins resp. avec le pavé numérique.
Attention! Dans le format à double ligne, la ligne supérieure n’indique pas
l’appel correspondant au chiffre de sélection abrégée
Défilement sélection abrégée
Voir »saisie sélection abrégée«, faire défiler selon le classement programmé
avec les touches plus et moins .
Saisie sélection abrégée avec affichage de texte
Voir »saisie sélection abrégée«, dans la ligne supérieure apparaît en plus un
texte programmé par le service après-vente à chacun des chiffres de sélec-
tion abrégée.
Défilement sélection abrégée avec affichage de texte
Voir »défilement sélection abrégée«, dans la ligne supérieure apparaît seule-
ment en plus un texte programmé par le service après-vente à chacun des
chiffres de sélection abrégée.
Saisie d’état
114
F
923991 19.10.1999 10:28 Uhr Seite 114

Commande:
Sur l’écran apparaît dans les deux formats d’affichage à huit positions
le mot »ETAT« avec le chiffre d’état à droite. Le chiffre d’état peut être
introduit au moyen des touches plus et moins, resp. être directement
introduit à l’aide du pavé numérique.
Saisie d’état avec affichage de texte
Voir »saisie d’état«, dans la ligne supérieure apparaît seulement en plus un
texte programmé par le service après-vente à chacun des états.
Blocage du clavier
Les touches du pavé numérique (0 à 9, *, #), la touche du curseur et la touche
marche/arrêt peuvent être bloquées à l’aide du blocage de clavier. L’enclen-
chement ou la coupure du blocage de clavier sur l’écran se fait à l’aide des
touches plus ou moins, le blocage est aussitôt activé.
Exploitation-DTMF
L’option »exploitation-DTMF« permet la saisie de jusqu’à 23 chiffres d’appel
DTMF. Dans le cas où les positions de saisie sont remplies sur l’écran, alors
les positions introduites ultérieurement apparaissent à droite, le numéro
d’appel se déplace à gauche hors du champ de vision.
Pour la saisie il est possible d’utiliser la touche du curseur, les touches plus
et moins et le pavé numérique. Une pression brève sur la touche d’efface-
ment efface la dernière position introduite, une pression prolongée toute la
ligne.
115
F
923991 19.10.1999 10:28 Uhr Seite 115
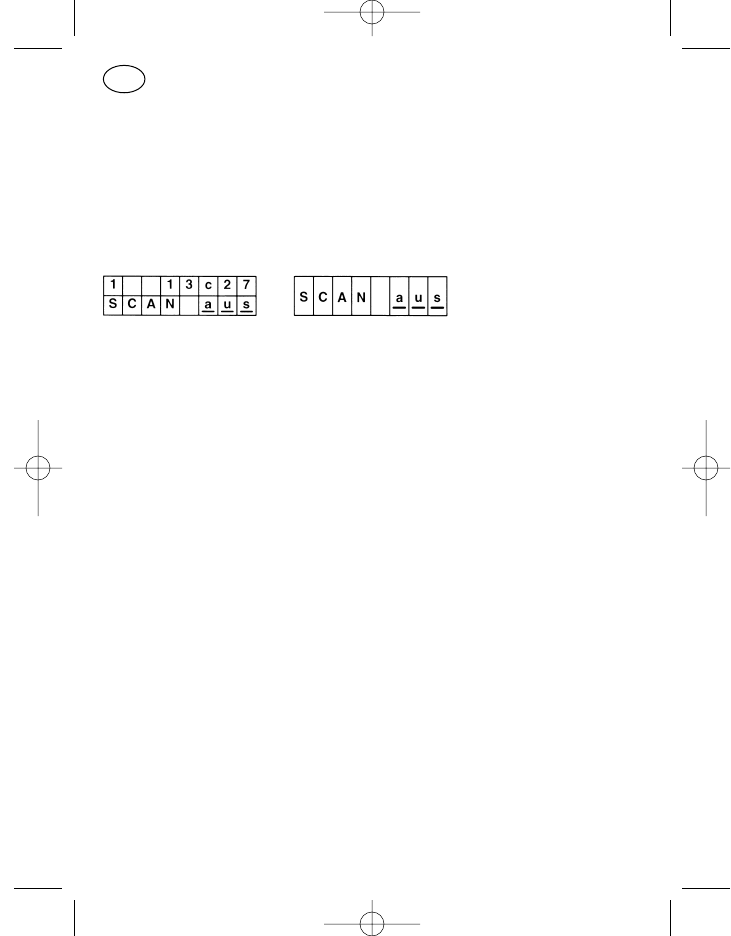
L’option n’est pas désélectionnée en enclenchant la touche d’appel ou la
touche d’émission, seul l’appel est émis. L’exploitation-DTMF est coupée en
enclenchant la touche de menu.
Actuellement seul »Touchtone« est disponible, c’est à dire qu’une tonalité
double est transmise à chaque enclenchement de touche de chiffre.
Recherche automatique de canal
La recherche automatique sert au contrôle de plusieurs canaux, qui sont
connectés en série cyclique. Le radiotéléphone interrompt la recherche
automatique lorsqu’il y a réception sur un canal. Les conditions menant à
l’interruption de la recherche automatique portent le nom de critères d’arrêt
de recherche automatique. Les critères d’arrêt de recherche automatique
suivants sont programmables en fonction du canal, séparément resp. en
combinaison, la réception de porteuse HF doit être présente:
Porteuse HF
Tonalité subaudio
Tonalité d’arrêt de recherche automatique
Décodage d’appel
De même, il est possible de programmer un canal prioritaire sur lequel le
radiotéléphone commute en mode de recherche automatique lorsque la
touche d’émission, d’appel ou du haut-parleur est enclenchée. Sans canal
prioritaire programmé, le radiotéléphone commute dans ces conditions sur
le canal connecté avant la mise en service de la recherche automatique.
Les critères d’arrêt de recherche automatique étant satisfaits, la commuta-
tion du radiotéléphone sur un des canaux à recherche automatique est
indiqué par la diode LED, le symbole d’affichage et le texte d’affichage
»SCANSTOP«. La conversation peut se faire.
La recherche automatique démarre en enclenchant la touche plus resp. la
touche moins.
L’état d’arrêt est coupé en fermant le haut-parleur (par ex. en appuyant sur
la touche du haut-parleur), l’appareil poursuit la recherche automatique.
116
F
923991 19.10.1999 10:28 Uhr Seite 116
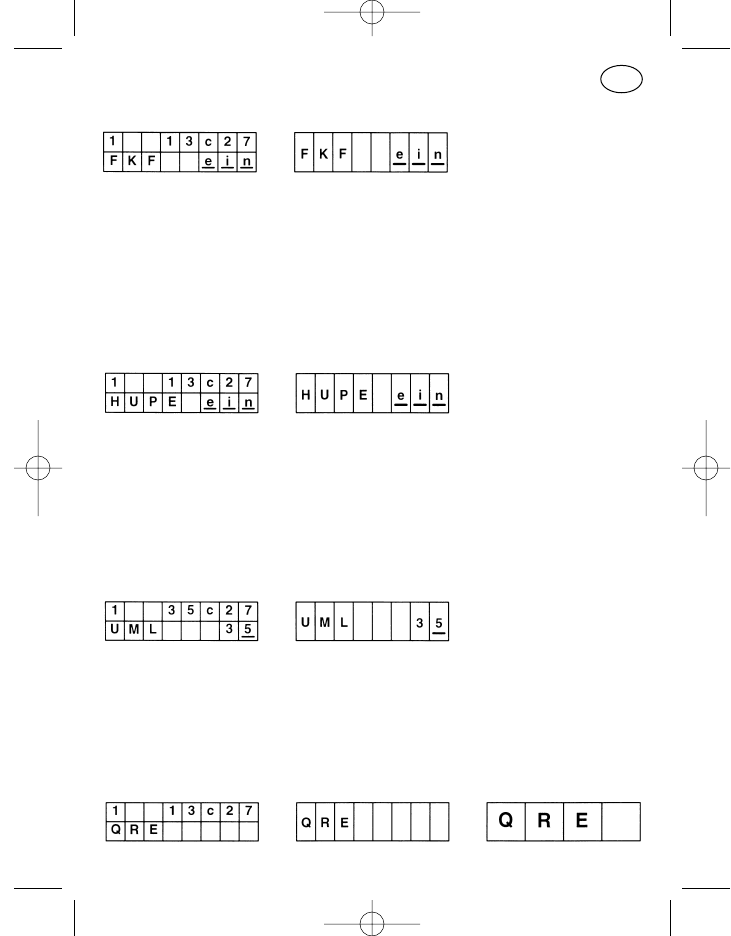
Activation contact de retour d’appel
Option avec fonction logique. Après l’appel au moyen de la touche de menu
le contenu de l’écran peut être réglé de »marche« sur »arrêt« et inversement
à l’aide de la touche plus resp. de la touche moins. Le contact de retour
d’appel (contact se trouvant au niveau de l’alimentation à l’arrière du radi-
otéléphone) est ainsi activé, c’est à dire qu’il ferme par ex. avec le décoda-
ge d’un appel entrant. De cette façon un avertisseur peut être commandé
par relais.
Avertisseur (contact de retour d’appel sous tension)
Option avec fonction logique. Après l’appel au moyen de la touche de menu
le contenu de l’écran peut être réglé de »marche« sur »arrêt« et inversement
à l’aide de la touche plus resp. de la touche moins. Le contact de retour
d’appel est ainsi directement commandé, c’est à dire qu’un avertisseur
raccordé par l’intermédiaire d’un relais peut être directement mis sous ten-
sion ou être coupé.
Renvoi d’appel
En appelant l’option »renvoi d’appel« à l’aide de la touche de menu le renvoi
d’appel est aussitôt actif. L’adresse de renvoi peut être éditée à l’aide de la
touche du curseur, de la touche plus, de la touche moins resp. du pavé
numérique. Le renvoi d’appel est désactivé en appuyant sur la touche de
menu et l’option est désélectionnée.
Exploitation-QRE
117
F
923991 19.10.1999 10:28 Uhr Seite 117
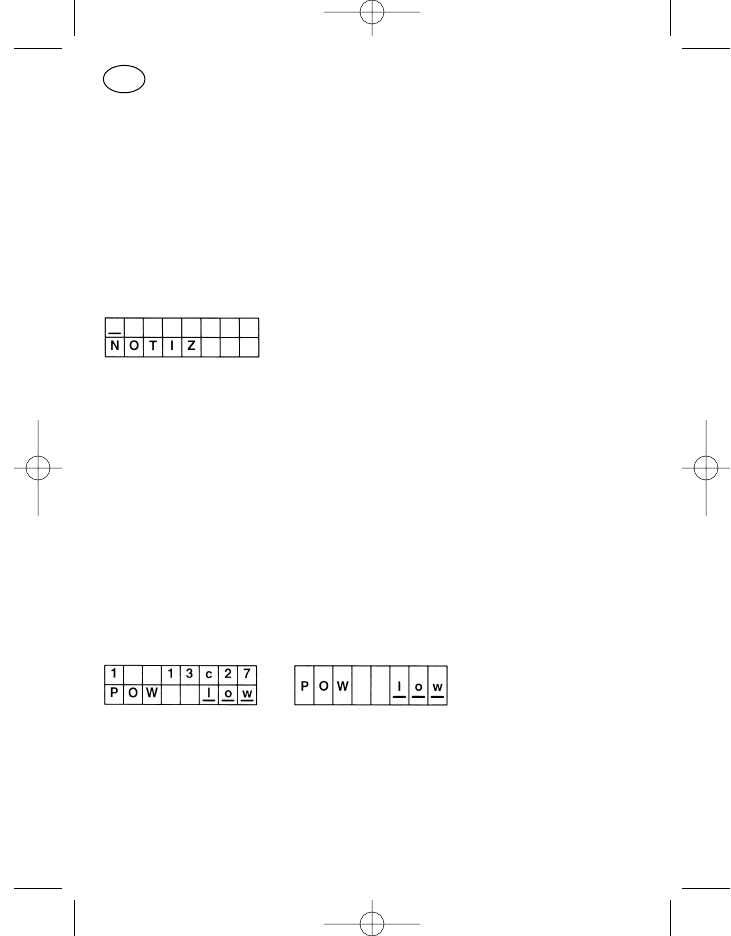
L’exploitation-QRE signifie une exploitation avec un récepteur d’appel de
quittance. Lorsque l’opérateur abandonne son radiotéléphone, dans le cas
d’un appel, QRE l’informe de cet appel.
Dans le format d’affichage à double ligne l’état, l’appel et le canal précédents
sont affichés sur la ligne supérieure et elle n’a aucun rapport avec l’exploita-
tion-QRE activée. Les particularités de l’exploitation QRE sont programma-
bles par le service après-vente.
Notices
L’option »notices« permet la saisie de jusqu’à 16 chiffres. Dans le cas où les
positions de saisie sont remplies sur l’écran, alors les positions introduites
ultérieurement apparaissent à droite, la notice se déplace à gauche hors du
champ de vision.
Pour la saisie il est possible d’utiliser la touche du curseur, les touches plus
et moins et le pavé numérique. Une pression brève sur la touche d’efface-
ment efface la dernière position introduite, une pression prolongée toute la
ligne.
L’option est désélectionnée en enclenchant la touche de menu et l’option
suivante est commutée; Lorsque l’appareil est coupé la mémoire est effacée.
Puissance d’émission
Option avec fonction logique. Après l’appel au moyen de la touche de menu
le contenu de l’écran peut être réglé de »low« sur »high« et inversement à
l’aide de la touche plus resp. de la touche moins. Le nouvel état est aussitôt
actif.
La puissance d’émission commutée sur »low« avec l’option revient sur
»high« avec la coupure de l’appareil.
118
F
923991 19.10.1999 10:28 Uhr Seite 118

Pour plus d’informations voir: »commutation de la puissance d’émission«
chapitre »fonctions spéciales«.
Décodeur-numéro d’appel
Dans l’appareil le décodeur peut être reprogrammé au moyen de l’option
»décodeur-numéro d’appel«.
Le touche du curseur, la touche plus, la touche moins et le pavé numérique
peuvent être utilisées pour la saisie.
L’option est désélectionnée en enclenchant la touche de menu.
Exploitation service après-vente
Ce menu est réservé au service après-vente.
Mémoire de rétroappels
20 appels peuvent être mémorisés dans la mémoire de rétroappels. La lec-
ture se fait en appelant le menu, un emplacement de mémoire rétroappel de
la ligne inférieure est attribué à chaque numéro d’appel de la ligne supé-
rieure.
Le défilement des espaces mémoires se fait à l’aide des touches plus et
moins, Le rétroappel est effectué en activant la touche d’appel de l’écran
d’affichage. Les appels de moindre importance peuvent être effacés à l’aide
de la touche d’effacement, tous les espaces mémoires sont effacés lors de
la coupure de l’appareil.
119
F
923991 19.10.1999 10:28 Uhr Seite 119

Fonctions spéciales
Les fonctions spéciales décrites ci-dessous peuvent être programmées et
adaptées aux besoins du client.
Déclenchement appel de détresse
L’appel de détresse peut être déclenché manuellement avec chaque touche
programmable. L’appareil doit alors être sous tension!
Lorsque l’appareil est coupé, l’appel de détresse peut être déclenché, grâce
à une programmation appropriée, seulement avec le contact extérieur
d’appel de détresse (pos. 40). En enclenchant la touche, l’appareil est mis
sous tension et la procédure de l’appel de détresse est ensuite automa-
tiquement déclenchée.
Combinaison de touches
Toutes les combinaisons de touches ne font pas partie de la programmation
standard et ne sont activées que sur la demande du client.
Une combinaison de touches signifie que la pression doit être maintenue sur
une à deux touches pendant l’enclenchement de la touche marche/arrêt
(pos. 5). Les touches décrites ci-dessous vous fournissent quelques exem-
ples, l’appareil peut cependant être programmé différemment.
Coupure des tonalités de signalisations sonores, de l’affichage et de la
fonction »secret« du haut-parleur
Pour pouvoir couper temporairement la signalisation sonore, l’appareil étant
hors tension, maintenir la pression sur la touche d’appel 1 (pos. 2) puis mett-
re l’appareil en marche. C’est la programmation de l’apparail qui détermine
laquelle des tonalités sonores est temporairement coupée. Ce peut être
aucune, une seule ou bien un groupe combiné quelconque:
Clic de touche et tonalité de validation
Signalisation d’appel et de quittance sonore
Tonalité de fausse manipulation
Avertissement appel de détresse
120
F
923991 19.10.1999 10:28 Uhr Seite 120

Tonalité d’erreur et tonalité d’avertissement de l’accu
Haut-parleur sur fonction »secret«
Eclairage du clavier et de l’écran d’affichage
Couper et remettre sous tension l’appareil pour désactiver la coupure tem-
poraire.
Commutation de la puissance d’émission
Il est possible de programmer différentes puissances d’émission du radio-
téléphone en fonction d’un canal ou de programmer les mêmes puissances
sur l’ensemble des canaux. Deux valeurs »puissance d’émission haute« et
»puissance d’émission basse« entre quatre peuvent être attribuées à chacun
des canaux. De même il est possible de programmer la même valeur pour
les deux puissances sur un ou plusieurs canaux, la commutation de puis-
sance ne peut alors se faire que sur un canal.
Avec une mise sous tension normale du radiotéléphone, l’émetteur fonc-
tionne sur les valeurs »puissance d’émission haute«. Pour parvenir à la valeur
»puissance basse«, enclencher simultanément la touche d’appel 1 (pos. 2)
et la touche + (pos. 9) l’appareil étant coupé puis activer la touche mar-
che/arrêt (pos. 5). Cette combinaison de touches n’est nécessaire que dans
le radiotéléphone PR11S-E (sans écran), elle fonctionne cependant sur tous
les autres appareils.
Pour passer de la plage »puissance d’émission basse« à la plage »puissance
d’émission haute«, couper puis remettre l’appareil sous tension.
Au besoin il est possible de programmer une valeur de puissance plus bas-
se dans le point de programmation »puissance d’émission haute« et une
valeur de puissance plus haute dans le point de programmation »puissance
d’émission basse«. Avec une mise sous tension normale l’appareil fonc-
tionne alors sur la puissance d’émission basse et avec une mise sous tensi-
on avec pression des touches sur la puissance d’émission haute.
Commutation de la puissance d’émission et coupure des tonalités de
signalisations sonores
Il s’agit ici d’une combinaison des deux derniers points décrits ci-dessus.
Afin d’activer conjointement la commutation et la coupure, l’appareil doit
121
F
923991 19.10.1999 10:28 Uhr Seite 121

également être coupé et en enclenchant la touche 1 (pos. 2) mettre l’appareil
sous tension avec la touche marche/arrêt (pos. 5).
En coupant et en remettant sous tension l’appareil on revient sur le mode de
fonctionnement normal.
122
F
923991 19.10.1999 10:28 Uhr Seite 122
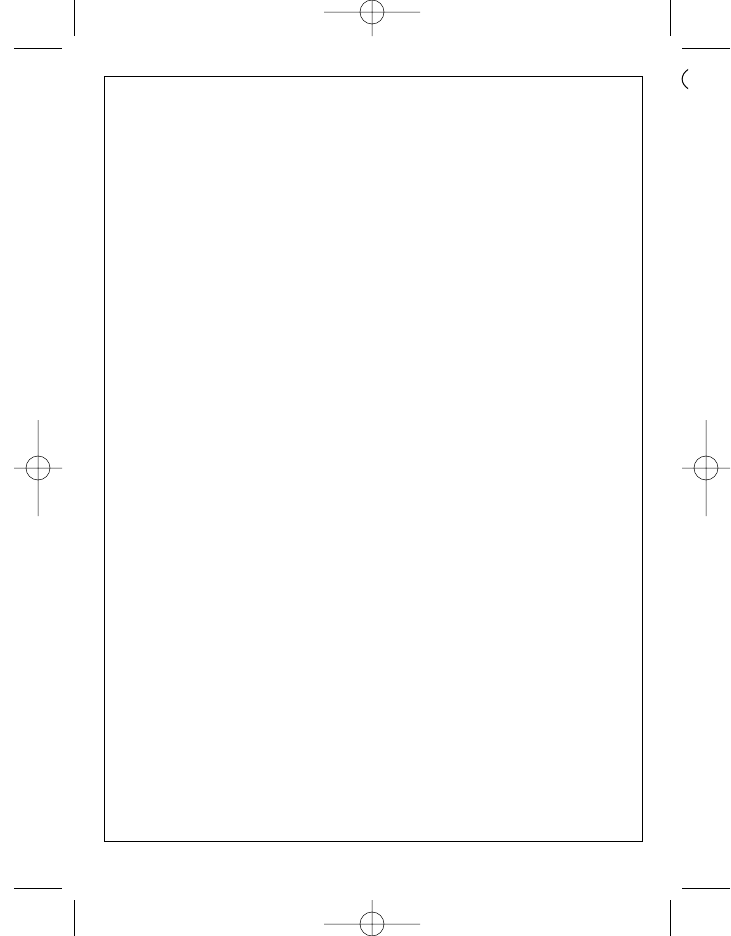
123
Notices:
923991 19.10.1999 10:28 Uhr Seite 123

Funksysteme
Motorola GmbH
Geschäftsbereich Funksysteme
Postfach 200459
D -13514 Berlin
Telefon (030) 33 88 – 02
Telefax (030) 33 88 – 18 09
Gedruckt in der Bundesrepublik Deutschland Änderungen vorbehalten
Printed in the Federal Republic of Germany Subjects to modification
Imprimé en R. F. A. par Austermeier, Berlin Sous réserve de modifications
GM 8 699 923 991/0003 (0593) A
923991 19.10.1999 10:28 Uhr Seite 124