Motorola Solutions 89FT5799 iDEN i3000 Portable Transmitter User Manual Amended Users Manual
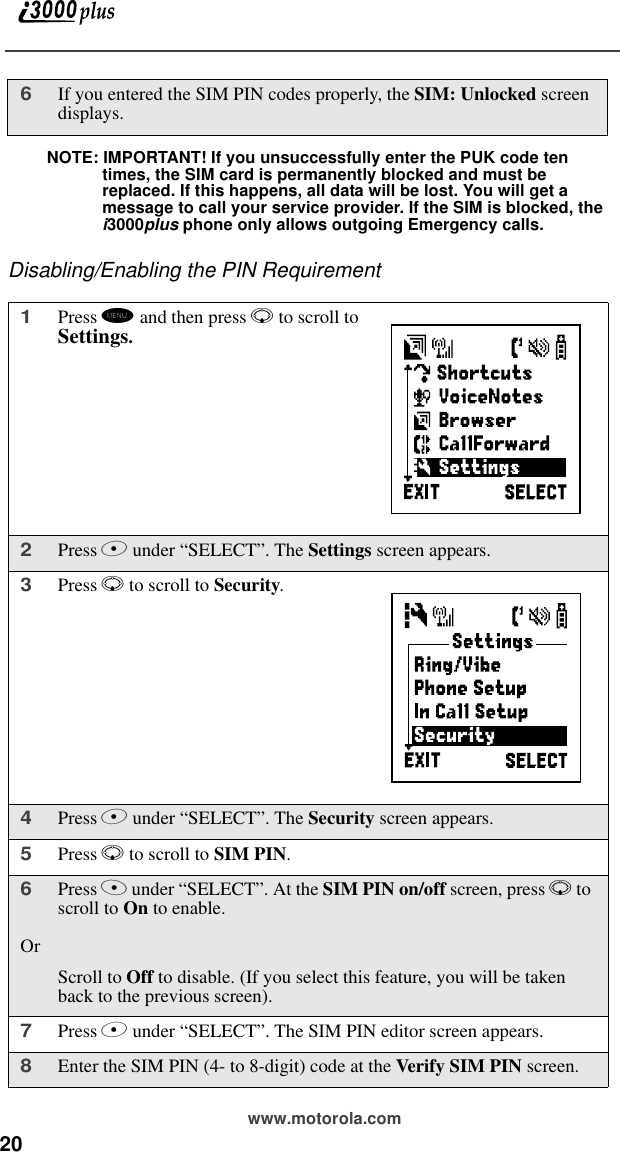
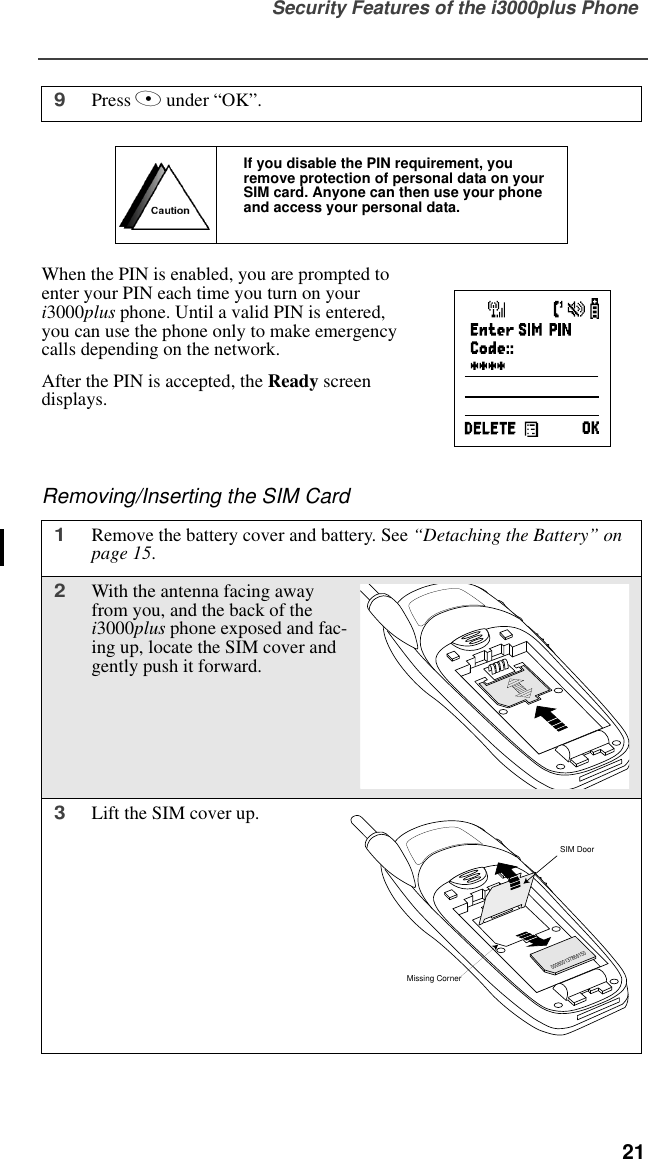
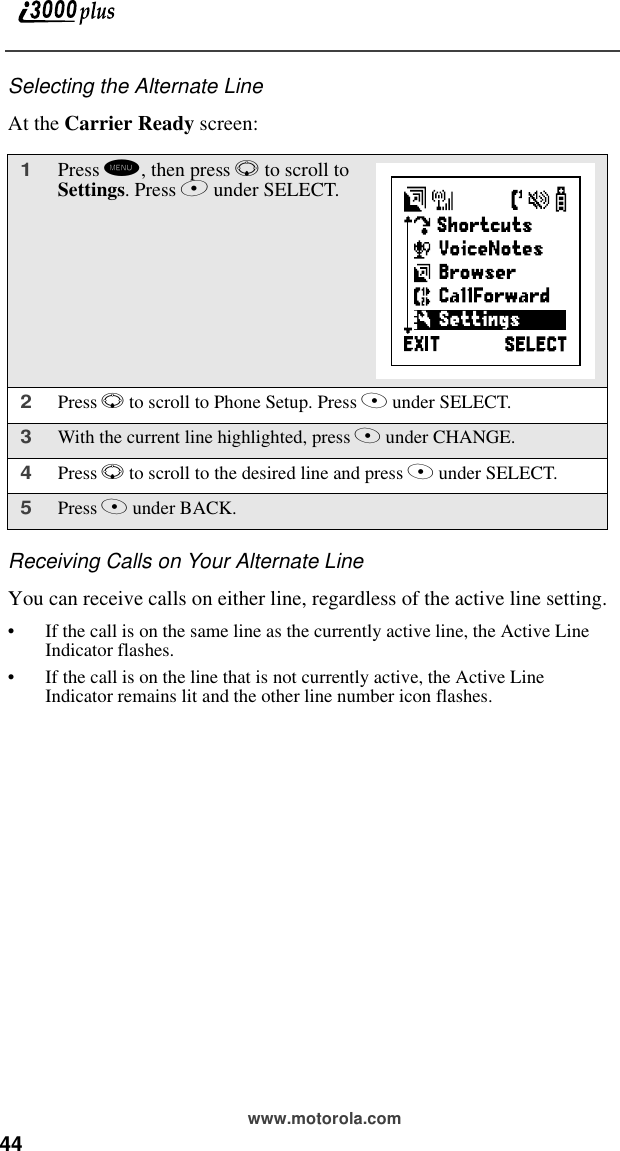
Motorola Solutions, Inc. iDEN i3000 Portable Transmitter Amended Users Manual
UserManual.wiki
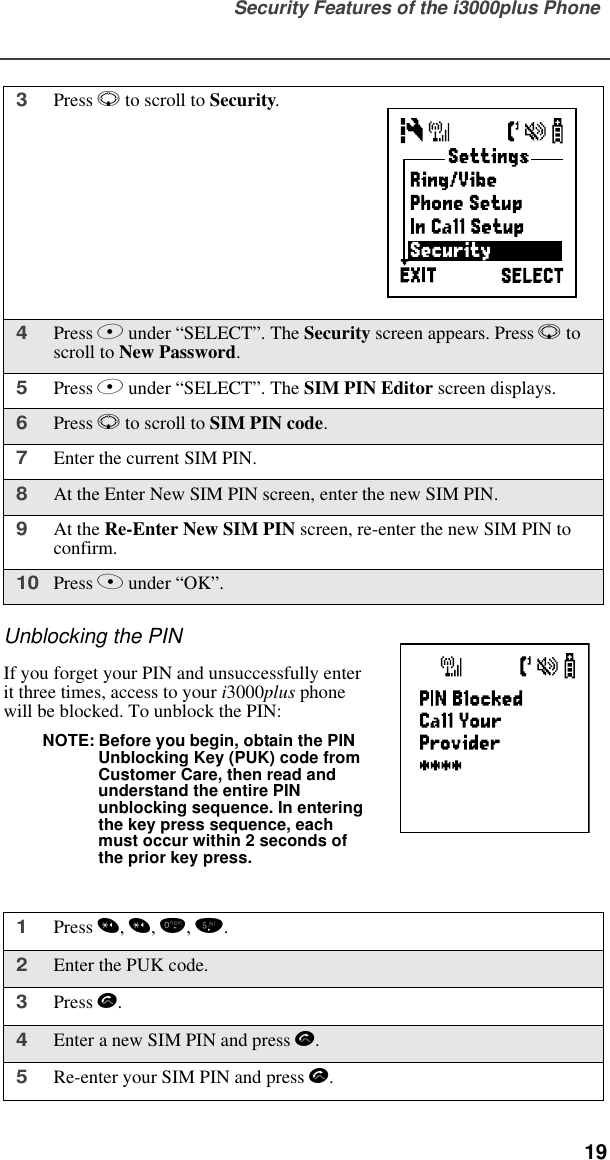
>
Motorola Solutions
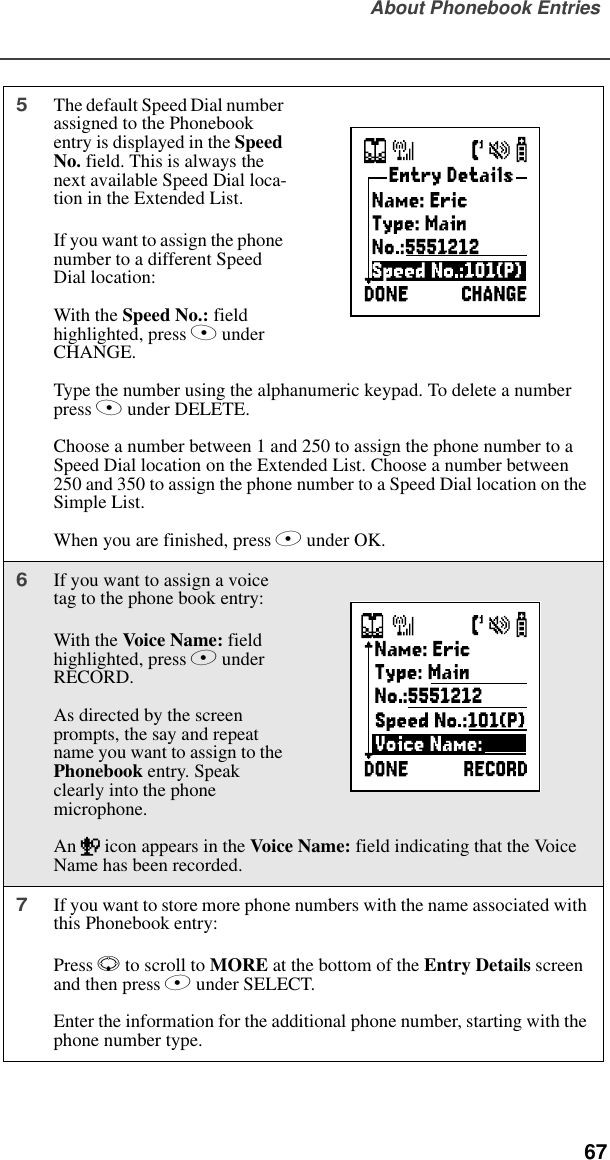
>
89FT5799 User Manual
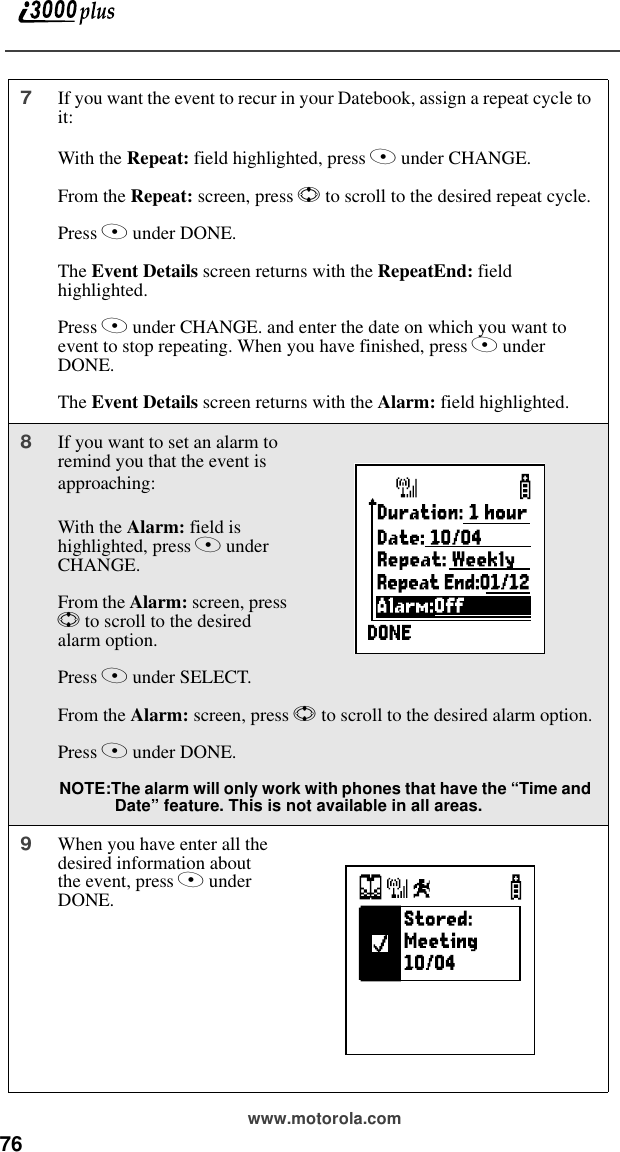
Amended Users Manual
Navigation menu
Upload a User Manual
Namespaces
Wiki Guide
HTML
PDF
Info
Views
User Manual
Discussion / Help
Navigation

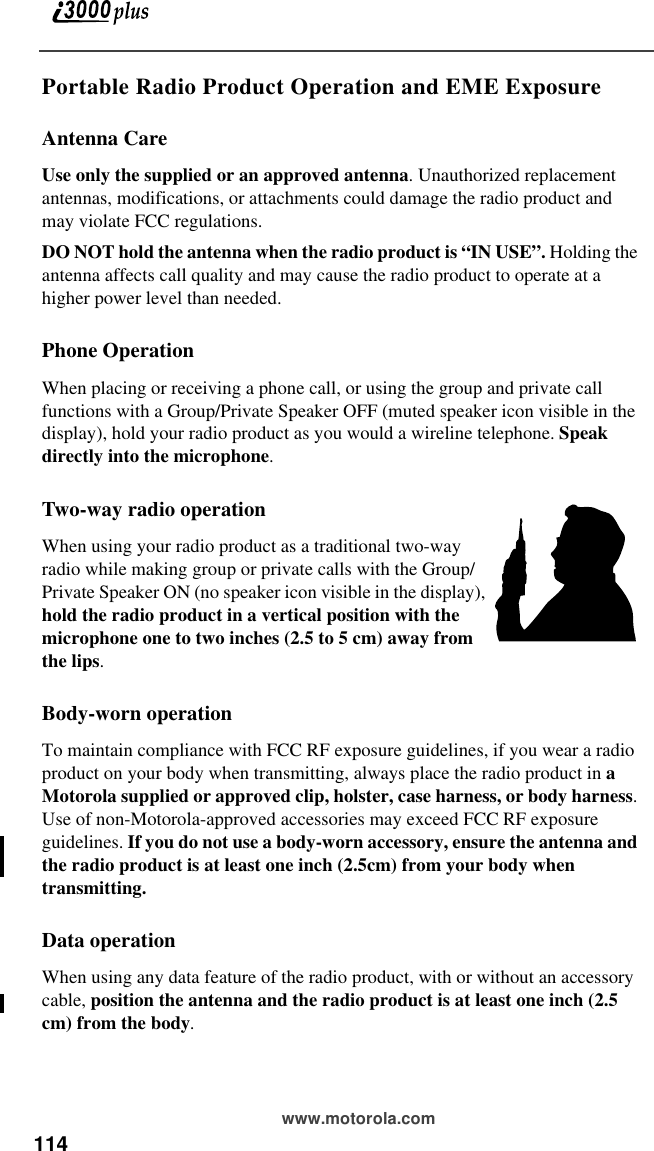
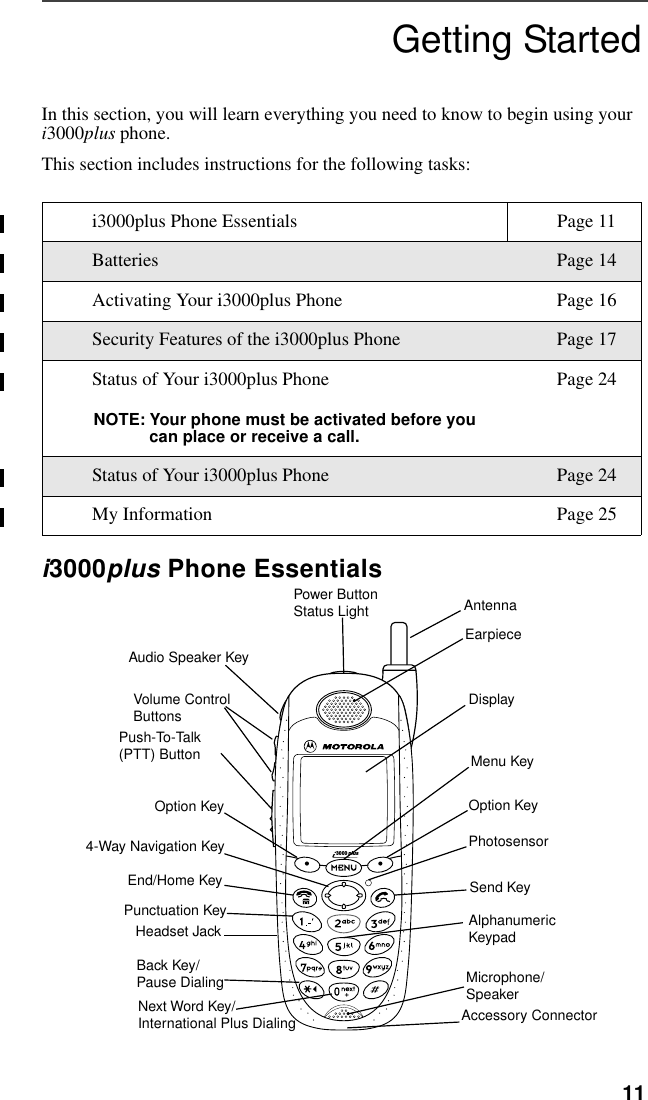
![10 www.motorola.comDriving Safety TipsSafe driving is far more important than anything else. So please follow these tips for using your wireless phone when you’re behind the wheel.1Give driving your full attention. Don’t let anything interfere with your concentration.2Assess road conditions before making or taking a call.3Let Voice Mail pick up when you’re in heavy traffic or hazardous road conditions.4Program your most frequently dialed numbers into your phone for Speed Dialing. When dialing manually without the Turbo Dial™ (one-touch dialing) feature, dial only when your vehicle is stopped—or have a passenger dial for you.5Position your phone where it is easy to see and reach.6Keep your eyes on the road. Never take notes while driving.7Consider using a hands-free speakerphone, which allows you to keep both hands on the wheel when speaking. .8Be a Good Samaritan. Dial 9-1-1 in emergen-cies to report accidents, impaired or aggressive drivers, crimes or fires. It’s a free call. NOTE: You can set your phone to display text in three size: Standard view, Compress view, and Zoom view. Zoom view is the best view to use while driving. See [xxxxx] for information on setting your view.](https://usermanual.wiki/Motorola-Solutions/89FT5799/User-Guide-123169-Page-10.png)
![My Information 25My InformationYou can select My Information from the main menu to display or edit the following:•Name — enter your name in this field.•Private ID — enter your private ID is this field. Your private ID is the number that others use to contact you using the Private feature.•Phone Numbers of Lines 1 and 2 — your i3000plus phone’s numbers are displayed in these fields. You can edit the phone number displayed in My Information, but this does not change your i3000plus phone’s numbers.•IP Addresses — these fields display the IP address you use to access the internet with your i3000plus phone.•Circuit Data Number — [user-editable???]Viewing/Editing My InformationSolid Green In use.1From the Ready screen, press m.2Press R to scroll to MY INFO. Press A under “SELECT”. The My Information screen displays. 3Use S to scroll through the fields.4To edit the displayed information, press A under “CHANGE”. Edit information as desired.To return to the Ready screen, press A under “EXIT”.](https://usermanual.wiki/Motorola-Solutions/89FT5799/User-Guide-123169-Page-25.png)


![36 www.motorola.comIf the phone number of the recent call is stored in your Phonebook, the name associated with the phone number appears on the Recent Call list. A letter appears to the right of the name or number indicating the type of recent call: the letter i indicates an incoming call; the letter o indicates; the letter m indicates a missed call. Missed calls appear on your Recent Calls list only if you have Caller ID.Getting Detailed Information About Recent CallsTo get more information about a recent call:The screen that appears displays information such as the name oscillated with the phone number of the recent call and the date, time, and duration of the call.Storing a Number From the Recent Call ListTo store a number from the Recent Call list to the Phonebook:Calling From the Recent Call ListSee “Making Calls from the Recent Calls List” on page 33.Deleting Recent Calls[?????????]2Press S to scroll the list of recent calls.1With the call you want more information about highlighted, press m to access the Calls Menu.2Press A under VIEW.1From the screen showing detailed information about the recent call whose number you want to store, press m to access the Calls Menu.2Press A under STORE.](https://usermanual.wiki/Motorola-Solutions/89FT5799/User-Guide-123169-Page-36.png)


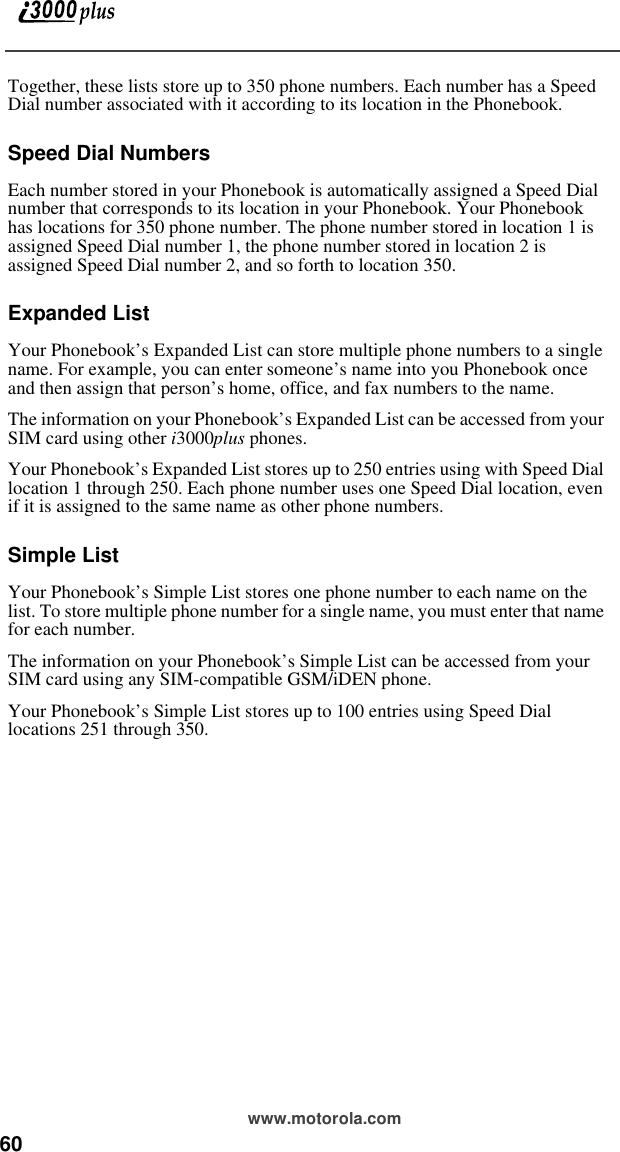
![About Phonebook Entries 63•A voice tag audio recording. This field is optional.Viewing Phonebook EntriesNames with more than one number assigned to them appear with f to the right of the icon or ef surrounding the icon to the right of the name. For example, the entry for Joe Smith’s home phone number would look like this: Joe Smith eLfWhen the name is highlighted, pressing T (the left or right side of the four-way navigation key) displays the icons representing each of the numbers assigned to that name.To view any of the phone numbers assign to a name:Sorting Phonebook EntriesYou can sort your Phonebook entries by:•Name — the name you entered for the entry.•Speed No. — the Speed Dial location of the entry.•Voice Name — [????????????] 1From the Phonebook screen, press S to scroll through the Phone-book entries. 2To view the highlighted number, press A under VIEW.1From the Phonebook screen, press S to scroll to the name associated with the phone number you want to see.2Press T view the icons representing the phone numbers assigned to that name. 3When the icon representing the number you want to view is displayed, press A under VIEW.](https://usermanual.wiki/Motorola-Solutions/89FT5799/User-Guide-123169-Page-61.png)
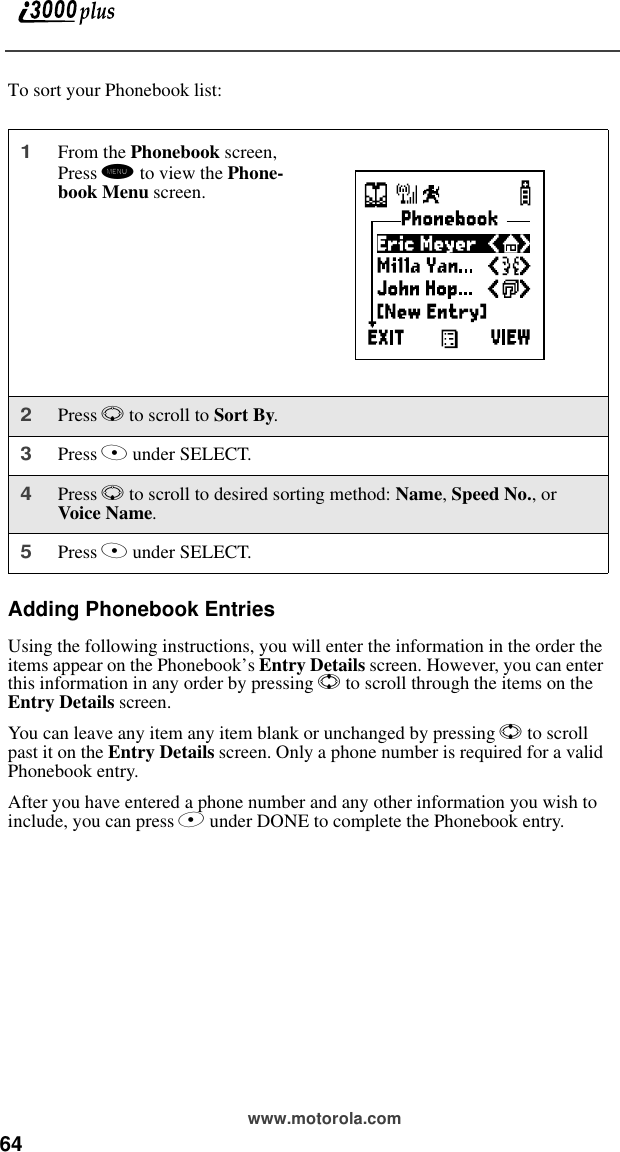
![About Phonebook Entries 65To add a Phonebook entry:1Access the Entry Details screen:.From the Phonebook screen, press R to scroll to [New Entry] and press B under SELECTOr,From the Phonebook screen, press m. Then press R to scroll to NEW and press B under SELECT.2If you want to assign a name to your Phonebook entry:. With the Name: field highlighted, press B under CHANGEFrom the Name: screen, enter the name using the alphanumeric keypad.As you type, you can delete a letter by pressing A under DELETE. To create a space, press R once.When you are finished, press B under OK.The Entry Details screen returns with the Type: field highlighted.](https://usermanual.wiki/Motorola-Solutions/89FT5799/User-Guide-123169-Page-63.png)
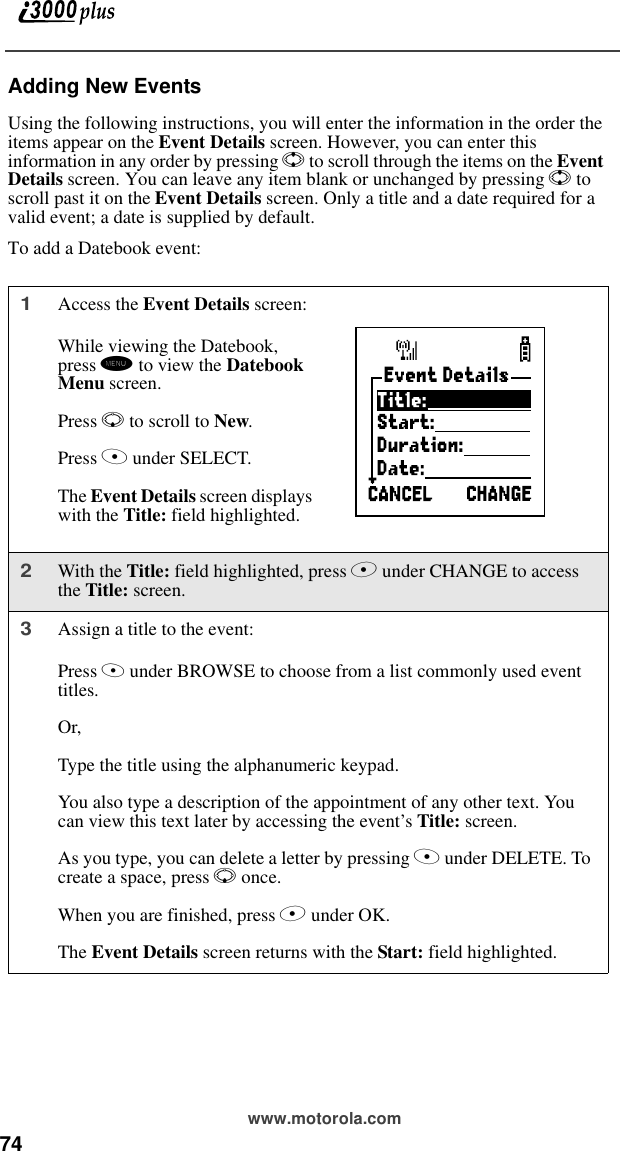
![Datebook 73The day and date appear at the top of the text display area. Titles of the events for the day selected are listed by time. Events without times are displayed at the top of the list with a bullet to the left of them.Viewing Event DetailsTo view the details of an event:This displays event details such as day of week, time, title, duration, alarm time, and repeat cycle. For more information about events, see xxxxx.Viewing TodayYou can easily go to the current day when viewing your Datebook:If you were previously viewing a day or event, the screen displays the current day. If you were previously viewing a week, the screen displays the current week with today highlighted.About Datebook EventsEach Datebook event may contain the following information:•The title you assign to the event. You can enter a title using the phone’s alphanumeric keypad or choose from a list of commonly used titles. A title is required for every event.•Addition text of any kind following the event’s title.•The start time and duration of the event.•An option to repeat the event in your Datebook.•An alarm to notify you of the event before it begins.•[Style???????]1Select and view the day containing the event you want to view.2Press N to scroll to the event.3Press A under VIEW.1While viewing any week, day, or event, press m. This displays the Datebook Menu with Go to Today highlighted.2Press A under VIEW.](https://usermanual.wiki/Motorola-Solutions/89FT5799/User-Guide-123169-Page-71.png)
![80 www.motorola.comRecording a New VoiceNotePlaying a VoiceNoteDeleting a VoiceNoteLocking/Unlocking a VoiceNoteSynchronizingYour phone can synchronize with certain software applications to ensure that you always stay on top of your appointments. Synchronizing refers to your 1From the VoiceNotes screen, press R to scroll to [New VoiceNote].2Press A under RECORD and speak the message you want to record into the microphone.3When you are finished recording your Voice Note, press A under STOP.1From the VoiceNotes screen, press R to scroll to VoiceNote you want to play.2Press A under PLAY. 1From the VoiceNotes screen, press R to scroll to VoiceNote you want to delete.2Press m to view the VoiceNotes Menu.3Press R to scroll to Delete and press A under SELECT. 4A confirmation screen appears. Press A under YES to confirm.1From the VoiceNotes screen, press R to scroll to VoiceNote you want to lock or unlock.2Press m to view the VoiceNotes Menu.3Press R to scroll to Lock or Unlock. 4Press A to SELECT. A confirmation screen displays.](https://usermanual.wiki/Motorola-Solutions/89FT5799/User-Guide-123169-Page-78.png)