Motorola Solutions 89FT5818 iDEN i30sx User Manual i30sx
Motorola Solutions, Inc. iDEN i30sx i30sx
UserManual.wiki
>
Motorola Solutions
>
89FT5818 User Manual
Users Manual
Navigation menu
Upload a User Manual
Namespaces
Wiki Guide
HTML
PDF
Info
Views
User Manual
Discussion / Help
Navigation


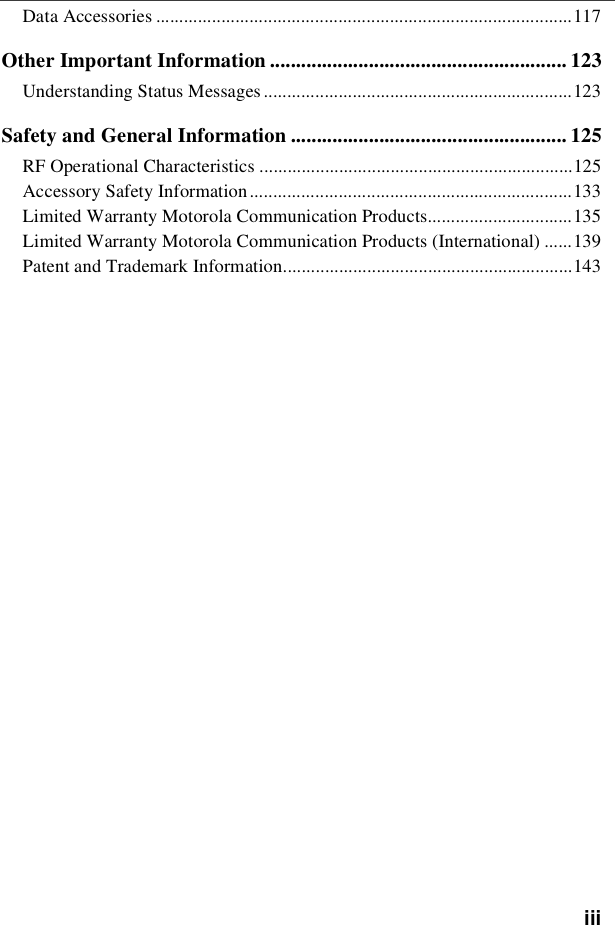

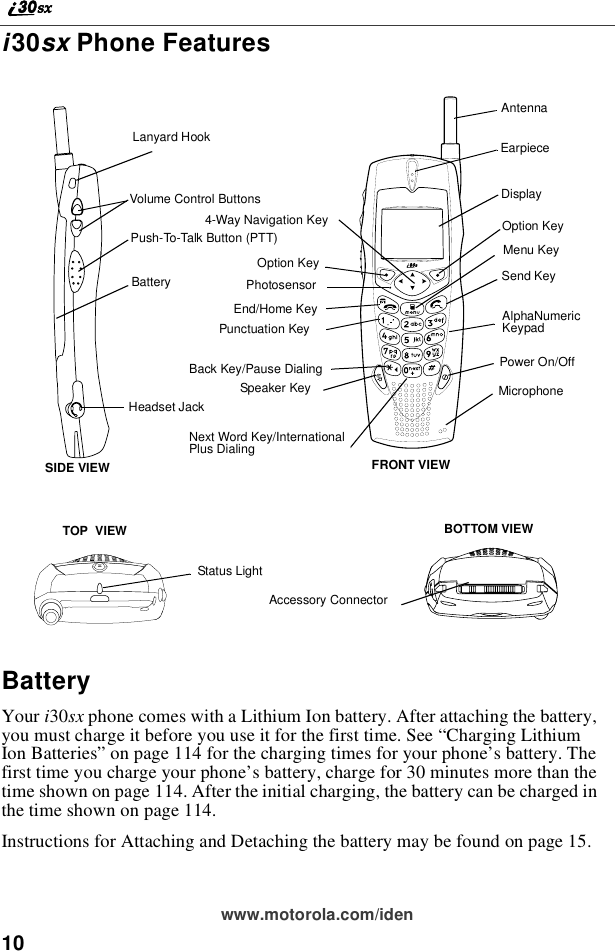


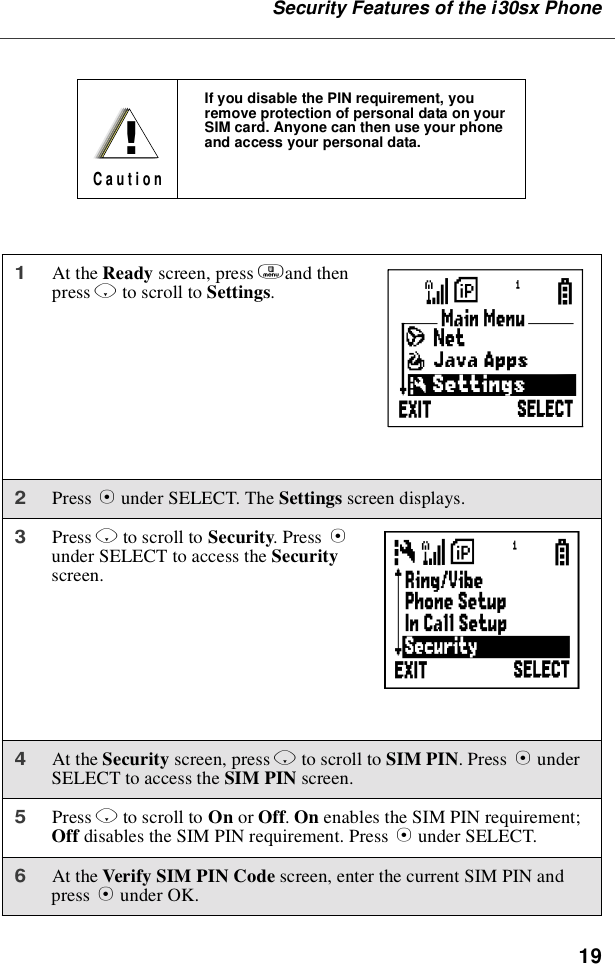
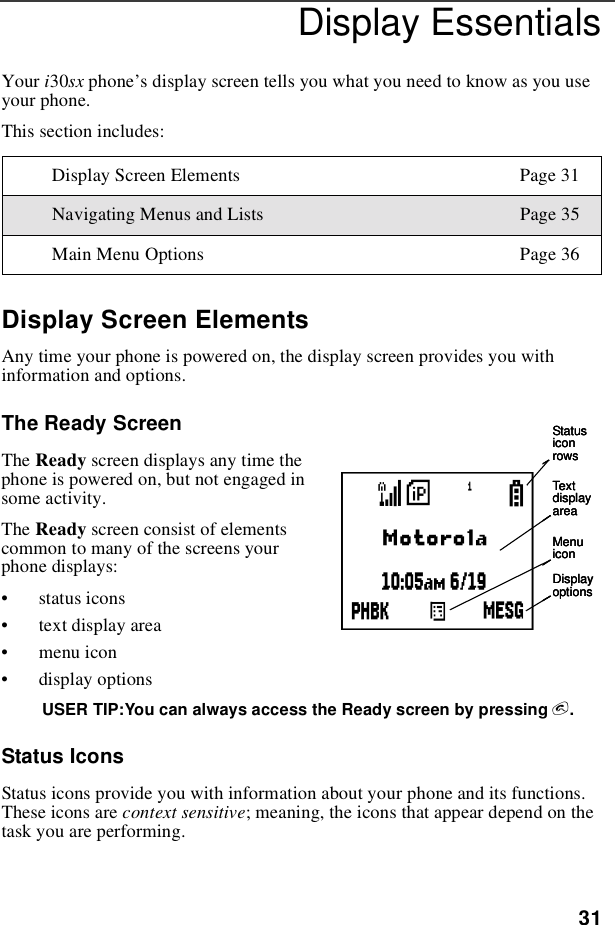
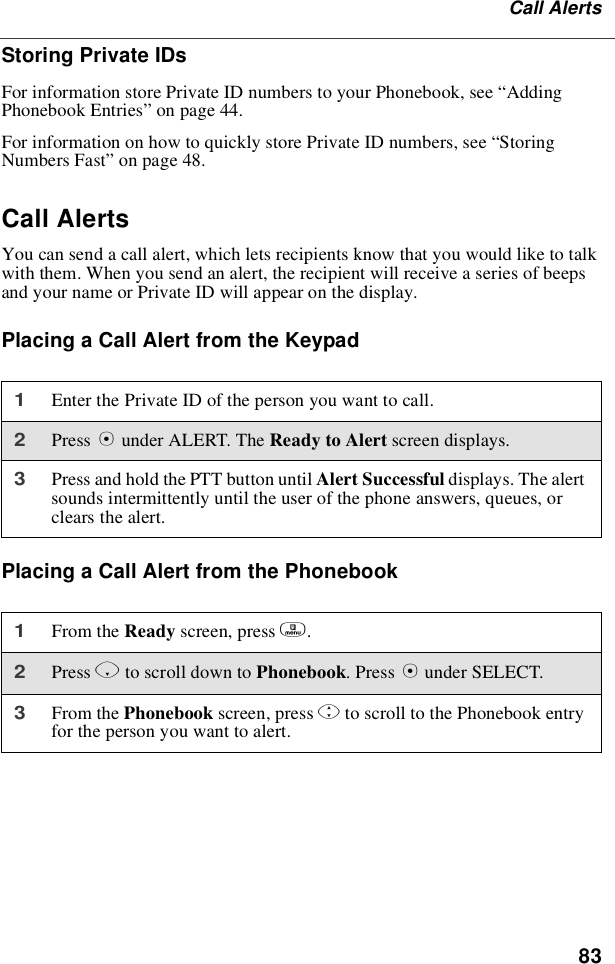
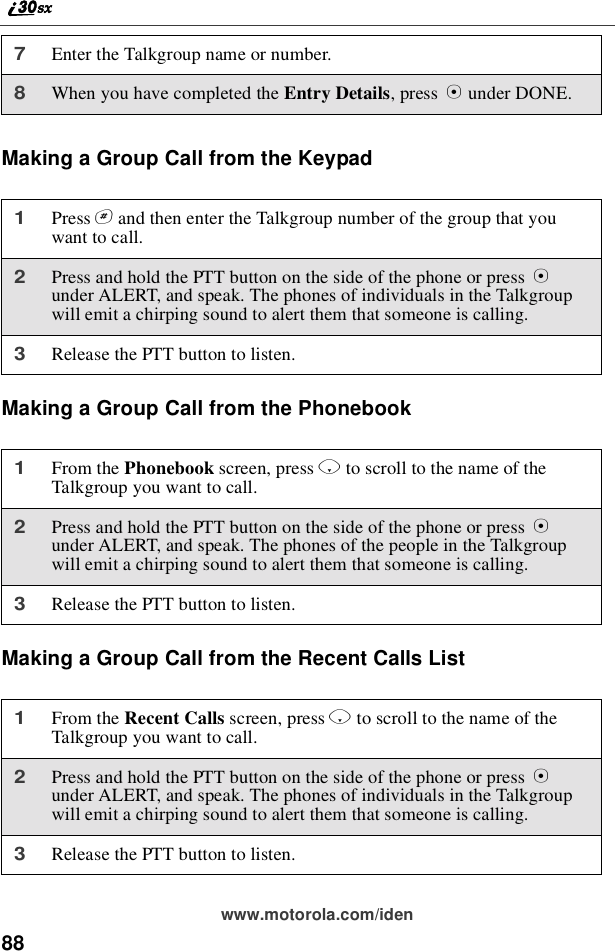
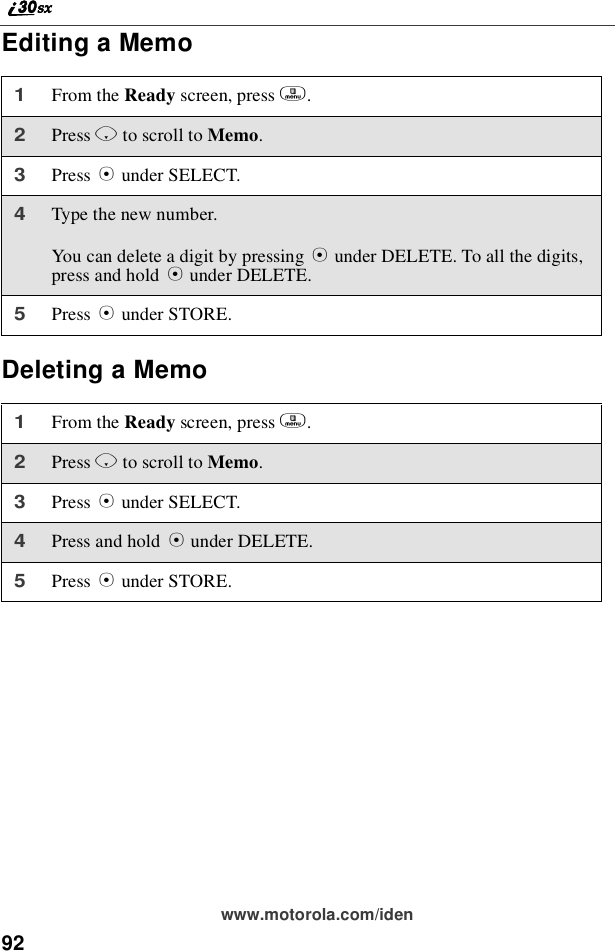
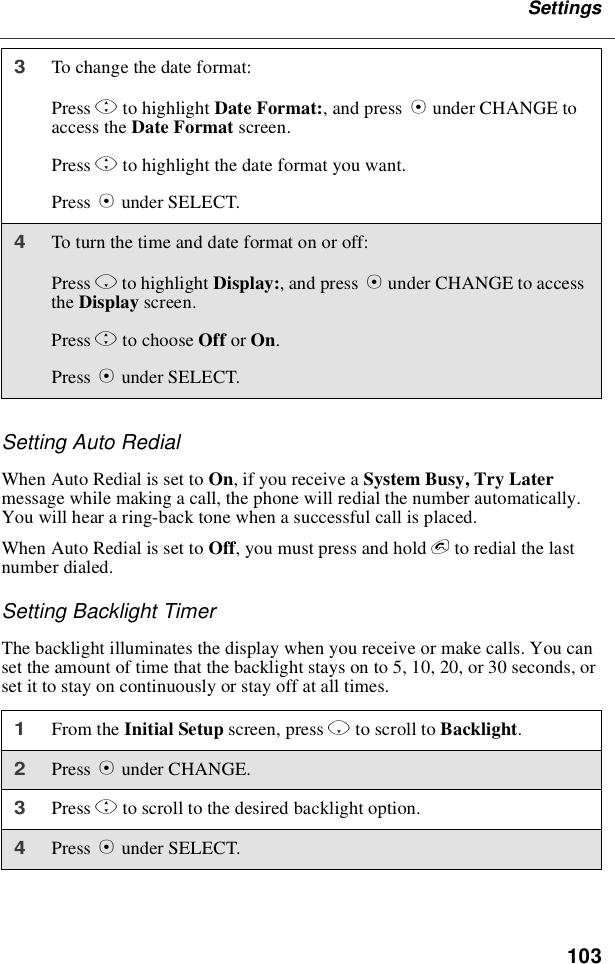
![32www.motorola.com/idenStatus icons appear in the two rows at the top of the display screen. Some appearat all times. Others appear only when your phone is engaged in certain activitiesor when you have activated certain features.Icon Indicates...abcdefgdBattery Strength icons —remainingbattery charge. More bars on the batteryindicate a greater charge. See the table onpage 13 for detailed information about themeaning of each battery strength icon.opqrsSignal Strength icons —strength of thenetwork signal. More bars next to theantenna indicate a stronger signal.01 Active Line icons —currently activephone line; 0indicates Line 1 is active; 1indicates Line 2 is active.GHIJKL Call Forward icons —phone is set toforward calls. See “Call Forwarding”onpage 68 for more information.cPhone In Use —phone is connected on anactive call.hPrivate In Use —number being called is aPrivate ID.%Talkgroup In Use —phone is active on atalkgroup call.YPacket Data Ready —phone is ready toreceive data through a data cable.ZPacket Data Activity —phone istransmitting data.]Mobile IP —phone is ready to access theInternet.](https://usermanual.wiki/Motorola-Solutions/89FT5818/User-Guide-186703-Page-34.png)


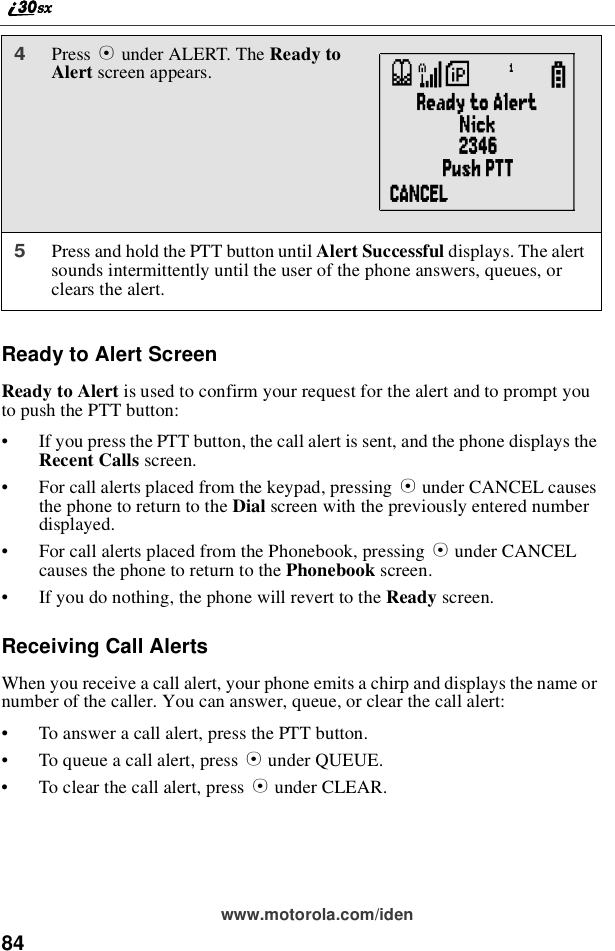
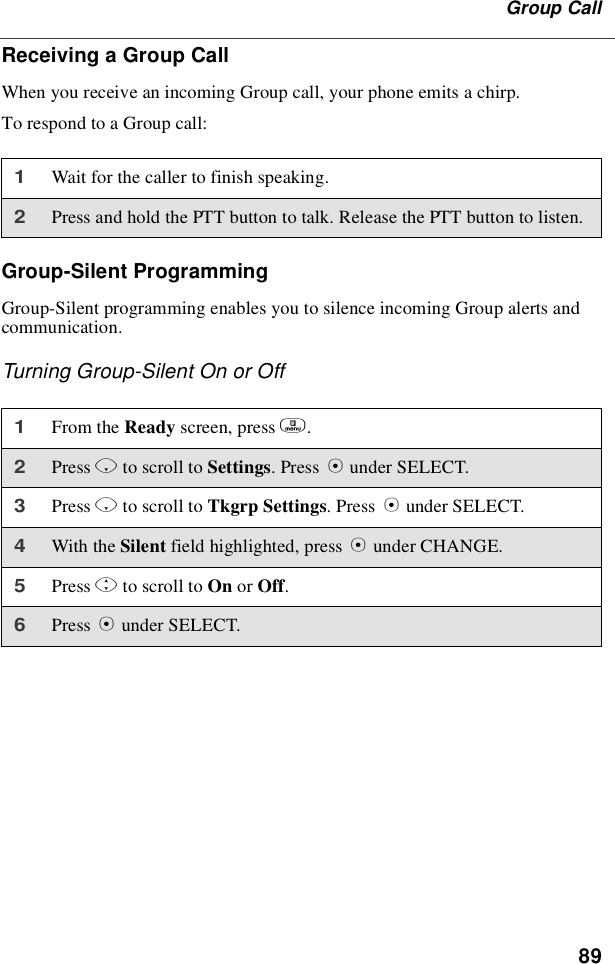
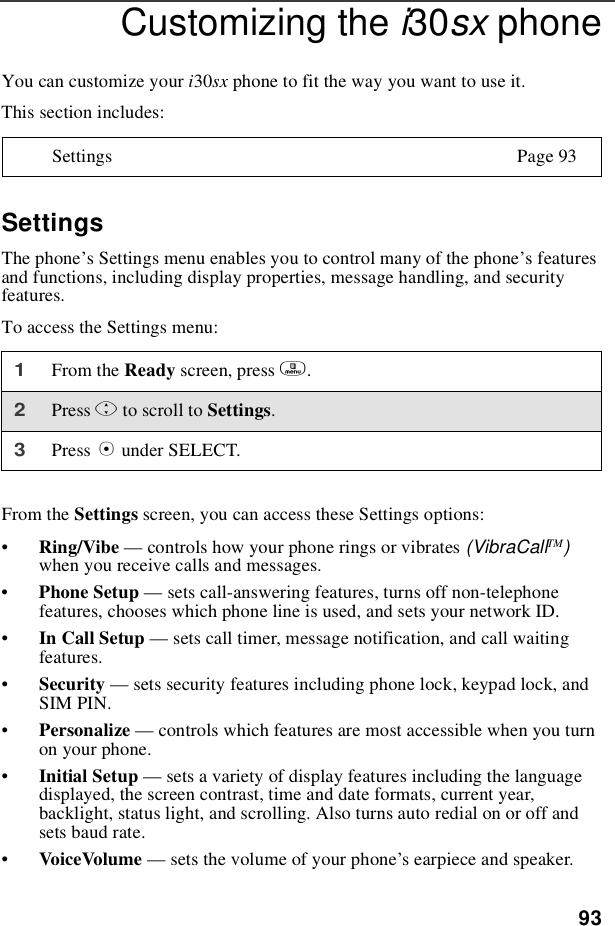
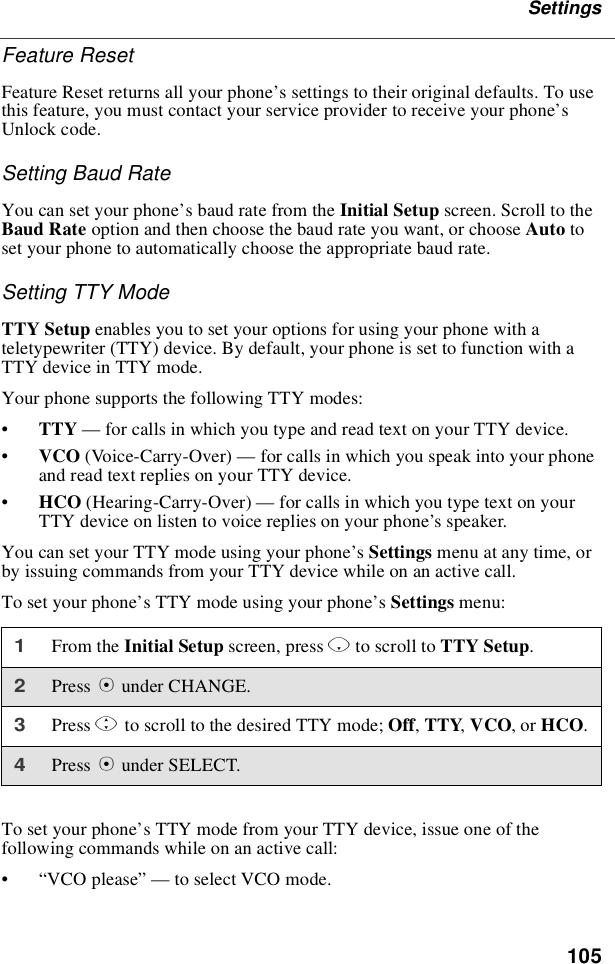
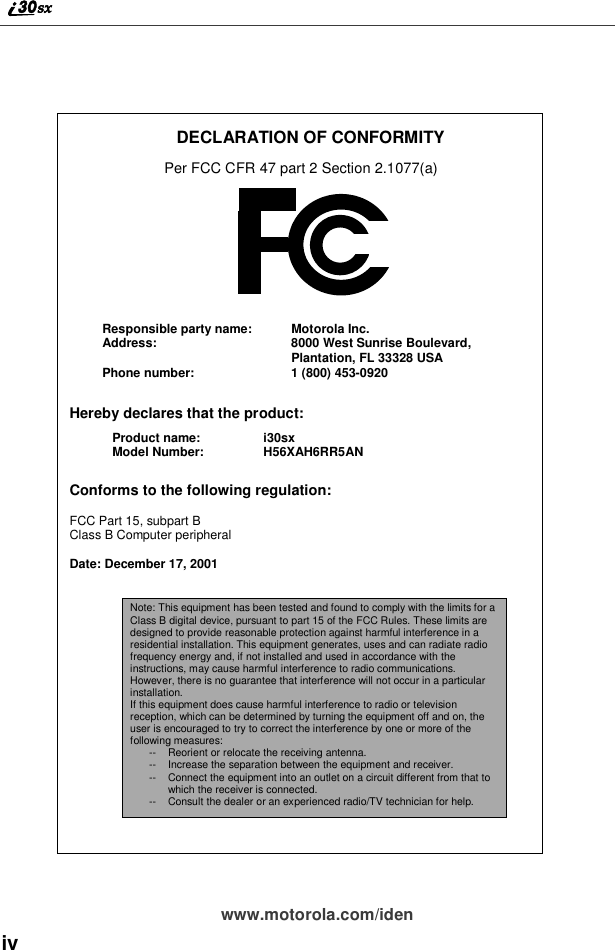
![45About Phonebook EntriesTo cancel a Phonebook entry at any time, press sto return to the Readyscreen.To add a Phonebook entry:1Access the Entry Details screen:From the Main Screen screen, press m.Then press Rto scroll to Phonebook.Press Bunder SELECTTo add a [New Entry],pressBunderSELECT.2If you want to assign a name to yourPhonebook entry:With the Name: field highlighted, pressBunder CHANGE.From the Name: screen, enter the nameusing the alphanumeric keypad.See “Using T9®Text Input”on page 26for information about entering text intothis field.When you are finished, press Bunder OK.The Entry Details screen returns with the Type: field highlighted.3If you want to assign a number type otherthan Mobile to your Phonebook entry:With the Type: field highlighted, press Bunder CHANGE.From the Type Editor screen, press Rtoscroll to the type of number you want toassign to the Phonebook entry.Press Bunder SELECT.The Entry Details screen returns with the No.: field highlighted.HIJ](https://usermanual.wiki/Motorola-Solutions/89FT5818/User-Guide-186703-Page-47.png)