Motorola Solutions 89FT5856 r765, r765is, WiDEN, MOTOtlk, BT User Manual r765 Armadillo
Motorola Solutions, Inc. r765, r765is, WiDEN, MOTOtlk, BT r765 Armadillo
UserManual.wiki
>
Motorola Solutions
>
89FT5856 User Manual
Users Manual
Navigation menu
Upload a User Manual
Namespaces
Wiki Guide
HTML
PDF
Info
Views
User Manual
Discussion / Help
Navigation
![2menu mapmenu mapmain menu1NetLJava Apps•[Buy More]• Location Assist• Java SystemuSettings• (see next page)0VoiceRecord• [New VoiceRec]AContacts• [New Contact]• [New SDG List]EMessages•[Create Mesg]•Voice Mail• Inbox•Drafts• Sent Items• Net Alert•SMSPCall ForwardDDatebooklMemoMCall Timers•Last Call• Phone Reset• Phone Lifetime•Prvt/Grp Reset•Prvt/Grp Life• Circuit Reset•Circuit Lifetime• Kbytes ResetBRecent CallsKShortcuts• [New Shortcurt]• 1)Shortcuts• 2)Cntcs[New Contact]• 3)Recent Calls• 4)Contacts• 5)Datebook• 6)Messages• 7)VoiceRecord•8)Net• 9)Call ForwardJMy Info•My Name• Line 1• Line 2• Private ID• Group ID• Carrier IP• IP1 Address• IP2 Address• Circuit DataoProfilespCall AlertcGPS• Position• Privacy• Interfacer765_Armadillo.book Page 2 Wednesday, August 27, 2008 7:01 PM](https://usermanual.wiki/Motorola-Solutions/89FT5856/User-Guide-1017038-Page-8.png)
![3menu mapmain menu (cont.)tRing Tones•[Buy More]• Vibrate All• Ringer 1-12• Vibrate• SilentPMOTOtalk•Go To MOTOTalk• Setup•HelpOMy PicturesLQuick PTT• PTT: ContactsNPT Manager•Quick PTT• Send Message• Send Picture• Send Event• Send My Info• Send Contact• Configure•TBD Location Assist• Send Alert• AlertReceptionListener• ConfigurationCBluetooth• Hands Free• Link to Devices• Device History•Setup•Find MeThis is the standard Main Menu layout. Your handset’s menu may be a little different.r765_Armadillo.book Page 3 Wednesday, August 27, 2008 7:01 PM](https://usermanual.wiki/Motorola-Solutions/89FT5856/User-Guide-1017038-Page-9.png)
![17handset basicsBy default, the first letter of an entry is capitalized and the following letters are lowercased. After a character is entered, the cursor automatically advances to the next space after two seconds or when you enter a character on a different key.Characters scroll in the following order: navigation keyPress the navigation key up, down, left, or right to scroll to items in the display. When you scroll to highlight the desired item, press .volumeTurn the volume knob to set the volume of the high audio (in conjunction with the output audio through the side connector). Set Line 1, Line 2, Messages, Keypad, and Data volume levels via > u > Volume.characters1. ? ! , @ & : ; “ - ( ) ‘ ¿ ¡ % £ $ ¥2A B C 2 Á Ã Â À Ç3D E F 3 É Ê È4G H I 4 Í Ì5J K L 56M N ñ O 6 Ó Õ Ô Ò7P Q R S 7 ß8T U V 8 Ú Ü Û Ù9W X Y Z 90+ - 0 * / \ [ ] = > < # §#Space*BackcharactersOKOKr765_Armadillo.book Page 17 Wednesday, August 27, 2008 7:01 PM](https://usermanual.wiki/Motorola-Solutions/89FT5856/User-Guide-1017038-Page-23.png)


![38callsor2Queue the call alert by pressing - under Queue.or3Clear the call alert by pressing - under Clear.store a phone number or private IDYou can store a phone number or Private ID in Contacts.Find it: > L > [New Contact].1Enter a name for the new entry. Each entry’s name can contain 20 characters. 2Select a specific Ringer.3Select a type for the entry (Mobile, Private, Work1, Work2, Home, Email, Fax, Pager, Talkgroup, Hub, SDG, IP or Other). To store a Private ID choose Private.4Enter the number for the entry and press - under Done.Tip: Before saving the entry, you can save more information. You can store an Email address, IP addresses, and more. You can choose a special ringer, create Contact entries that are groups of Private IDs called Group IDs and/or SDG lists.After you have saved the number, the new Contacts entry is displayed.call a stored phone number or private IDShortcut: From the home screen press - under Contcs.orr765_Armadillo.book Page 38 Wednesday, August 27, 2008 7:01 PM](https://usermanual.wiki/Motorola-Solutions/89FT5856/User-Guide-1017038-Page-44.png)
![42callsvoice namesYou can place calls by speaking commands to your phone if you have previously assigned a voice name to your Contacts.assign voice names to contacts1Press - under Contcs and select [New Contact].2Assign a name, phone number and select [Options].3Select Voice Name and follow the prompt to record the voice name.4Press - under Back and - under Done.place a call using voice name1Press the speaker key until you are prompted to say the voice name.The phone will automatically place the call.emergency callsYour service provider programs one or more emergency phone numbers that you can call under any circumstances, even when your handset is locked or the SIM card is not inserted.Note: Emergency numbers vary by country. Your handset’s preprogrammed emergency number(s) may not work in all locations, and sometimes an emergency call cannot be placed due to network, environmental, or interference issues.Your handset supports emergency calling. Emergency phone calls can be made even when your SIM card is blocked or not in your handset.Dial 911 or your local emergency number to be connected to an emergency response center. If you are on an active call, you must end it before making an emergency call. r765_Armadillo.book Page 42 Wednesday, August 27, 2008 7:01 PM](https://usermanual.wiki/Motorola-Solutions/89FT5856/User-Guide-1017038-Page-48.png)
![45callsselective dynamic group (SDG) callsA SDG call is similar to a Private call, but is made to all members of a SDG list at once. A SDG list is a group of Private IDs that you create using your handset. A SDG list must contain at least 2 members and can contain up to 20 members.You can create a SDG list for one call only or store it to Contacts so you can call it any time.Note: In order to store SDG lists to your handset, you must use a SDG-capable SIM card. For more information about SDG-capable SIM cards, contact your service provider. SDG lists created with your handset are not readable by an older iDEN SIM-based handset.You can use Send via PTT to send SDG lists to other handsets that have this capability.create SDG lists in contactsShortcut: From the home screen press - under Contcs. 1Select [New SDG List].Tip: You can also create a SDG list by selecting [New Contact] and assigning the SDG Contact type. See “store a phone number or private ID” on page 38.2If you want to assign a name to the SDG list, enter the name.Note: If you do not assign a name, the SDG list is named “SDG” followed by the number of members in the SDG list. For example, “SDG (8)” for a SDG list with 8 members.r765_Armadillo.book Page 45 Wednesday, August 27, 2008 7:01 PM](https://usermanual.wiki/Motorola-Solutions/89FT5856/User-Guide-1017038-Page-51.png)
![46calls3Add Private IDs. See “Adding Private Numbers” below.4If you want to create a voice name for the SDG list, select [Options] > Voice Name. As directed by the screen prompts, say and repeat the voice name you want to assign to the SDG list. Speak clearly into the microphone. 5Press - under Save.add private numbersYou can add Private IDs to a SDG list by selecting them from Contacts, the recent calls list, or memo. You can add all members in an existing SDG list by selecting the list. You can select more than one member from Contacts and the recent calls list. A checkmark appears next to each selected item.Tip: To deselect a selected item, highlight it and press . You can also enter Private IDs from the keypad. add members from contacts, the recent calls list, or memo1While creating a SDG list, select [Add Member] or select [Add Number] and press - under Browse.Tip: To move between Contacts, the recent calls list, and Memo, scroll left or right. 2Scroll to the members you want from Contacts, the recent calls list, or Memo, and press . A checkmark appears next to each selected member. Tip: To deselect a selected member, highlight it and press .OKOKOKOKr765_Armadillo.book Page 46 Wednesday, August 27, 2008 7:01 PM](https://usermanual.wiki/Motorola-Solutions/89FT5856/User-Guide-1017038-Page-52.png)
![47calls3Press - under Done.add members manually from the keypad1While creating a SDG list, select [Add Number].2Enter the Private number using the keypad.remove members or SDG listsremove a member from a SDG list1From Contacts, scroll to the SDG list you want to delete the member from.2Press - under Edit.3Scroll to the member you want to remove. 4Press > Remove Member.5Press - under Save.remove all members from a SDG list1From Contacts, scroll to the SDG list you want to delete the member from.2Press - under Edit.3Press > Remove All.4Press - under Yes to confirm.delete a SDG list from Contacts1Scroll to the SDG list you want to delete.2Press > Delete SDG List.make SDG Calls1From Contacts or the recent calls list, scroll to or select the SDG list you want. orPress and hold until a prompt appears telling you to say the voice name. Say the voice name assigned to the SDG list you want. r765_Armadillo.book Page 47 Wednesday, August 27, 2008 7:01 PM](https://usermanual.wiki/Motorola-Solutions/89FT5856/User-Guide-1017038-Page-53.png)
![52MOSMS messagesPress - under Done to save the information you entered.receive a text message1To view the message press - under Read.2To dismiss the message notification press - under Back.Note: If your handset is powered off when you receive a text message, your handset notifies you the next time you power it on. If you are out of your coverage area, your handset alerts you when you return to your coverage area.Tip: While reading a text and numeric message that contains a phone number, you can press to call that number.read from the Message center1From the home screen press - under Msgs > Inbox > Text Msg Inbox.2Select the message you want to read or press the number of the message you Cleanup: Set this option to On if you want your handset to delete sent messages.If you select Cleanup, select Clean Up After to set the number of days after which sent messages are deleted or the number of messages to be kept.Quick Notes: Are short, pre-written text messages that you can create, edit, and send in your text messages. You can store up to 20 quick notes. A quick note may be up to 30 characters long.Select Quick Notes to create a [New Note] or press - under Edit to change the pre-written quick notes.optionr765_Armadillo.book Page 52 Wednesday, August 27, 2008 7:01 PM](https://usermanual.wiki/Motorola-Solutions/89FT5856/User-Guide-1017038-Page-58.png)
![53MOSMS messageswant to read. If the message fills more than one screen, scroll to read it.Tip: Scrolling through one message lets you view the next message.3To reply to the message, press - under Reply or to see all other choices, including forwarding and deleting the message, calling the sender, or storing the sender’s number in Contacts, press .create and send text messages1From the home screen press - under Msgs > [Create Message] > [Create Text Msg].orYou can also create a text message from the Inbox, Outbox, or Drafts.2To address the message use the keypad to enter the phone number of the person you want to send the message to and press or press - under Contcs, or press > Recent Calls. Select the number you want.3Select Msg: and enter the text of the message or to use a quick note press - under Browse and scroll to the quick note you want.4Press > Set Send Method and select Text, Fax, x400, Paging, Email, ERMES, or Voice.5If you want to send the message, press - under Send or to delete the message without sending it, press - under Cancel.Note: If you want to request confirmation of delivery press > Delivery Report > On.use draftsWhen you save a message as a draft, it is saved in the drafts folder.Shortcut: From the home screen press - under Msgs > Drafts > Text Msg Drafts.OKr765_Armadillo.book Page 53 Wednesday, August 27, 2008 7:01 PM](https://usermanual.wiki/Motorola-Solutions/89FT5856/User-Guide-1017038-Page-59.png)

![66advanced featuresMMSMultimedia Messaging Service (MMS) lets you send and receive messages that may include text, pictures and audio recordings. Depending on your service provider, your handset may support MOSMS as well as MMS. You should see no significant differences between the two; some names of menu items and the steps you take to access features may differ.create a message Shortcut: From the home screen press - under Msgs > [Create Message] > [Create MMS Msg].orFind it: > Messages > [Create Message] > [Create MMS Msg].Note: You can also create a message from Contacts, Recent Calls, or the home screen.To address the message: 1Select To to bring up a list of address slots.2Highlight a slot and press .3Enter the phone number or email address using the keypad.orPress Browse to select from Contacts or Recent Calls.4Press when done.5Add additional phone numbers or email addresses as necessary.Tip: To remove a phone number or email address from the list of message recipients, scroll to the phone number or email address and press - under Remove.6When you are finished addressing the message, press - under Back.To enter or edit the body of the message: OKOKr765_Armadillo.book Page 66 Wednesday, August 27, 2008 7:01 PM](https://usermanual.wiki/Motorola-Solutions/89FT5856/User-Guide-1017038-Page-72.png)
![67advanced features1Select Mesg.2Enter text using the keypad or press - under QNotes to select a quick note of your choice (see “quick notes” on page 68) and press .more message options To view more message fields in a message you are creating, select ...More...The following options become available:reply to a message You can reply to a message while you are viewing it, or while a previously viewed message is highlighted in the message center. You cannot reply to unread messages. To reply to a message: 1View the message you want to reply to.2To reply to the sender only, press Reply or Reply All. 3A list of short phrases appears. Select any of these phrases to add it to your messages or select [Create Reply].optionSubject: Create or edit the Subject line.Attach: Attach a picture, audio file, video or voice record.Cc: Send a copy of this message to someone else.Auto Replies: Allows you to create a list of possible short answers for the recipient to choose when replying to your message.OKPriority: Set priority Normal or High.Report: Set receipt confirmation On Delivery.Valid Until: Set a date after which attempts to deliver the message end, or press - under No Date.optionr765_Armadillo.book Page 67 Wednesday, August 27, 2008 7:01 PM](https://usermanual.wiki/Motorola-Solutions/89FT5856/User-Guide-1017038-Page-73.png)
![68advanced features4Edit any message fields you want to change. 5Press - under Send.quick notesWhen you are filling in the Message and Subject fields, you can add ready-made words or short phrases called quick notes. After you add these words or phrases, you can edit them as you would any other text. 1While you are creating a message, scroll to or select Message or Subject. 2Press - under QNotes.3Select the quick note you want to insert into the message. attach a picture and audio recording or a ring toneYou can attach one or more pictures audio recordings or ring tones from your handset into the body of the message. You can include text in the body of your message in addition to these items. insert items While you are filling in the Attach field, press [New] > My Pictures, VoiceRecord or Ring Tones.A list of available pictures, audio recordings and ring tones appears. Select the picture, voice record or ring tone you want to attach. Tip: To view or listen to the item before attaching it, highlight it and press View or Play.Note: You can only attach audio files and pictures if they are not forward locked and if r765_Armadillo.book Page 68 Wednesday, August 27, 2008 7:01 PM](https://usermanual.wiki/Motorola-Solutions/89FT5856/User-Guide-1017038-Page-74.png)
![69advanced featurestheir DRM settings do not prevent you from sending.Forward locked items are usually copyright protected, and you cannot share them with anyone, such as in Private calls or by uploading them from your handset.create a new voice recordYou can create a new voice record to send with a message:1Press or select Attach > [New].2Select VoiceRecord > [New VoiceRec].3Say the message you want to record into the microphone. 4When you are finished recording, press .5When you are finished, press - under Back and - under Done.6The voice record is attached to the message and saved to the media center and the list of voice records. remove an attachmentTo remove an attachment in a message you are creating: 1Select Attach.2Scroll to the attachment you want to remove. 3Press > Unattach.draftsWhile composing a message you can save it in the MSS drafts folder by pressing > Save.You can continue to create the message. The version you saved in the MMS drafts folder will not change.OKr765_Armadillo.book Page 69 Wednesday, August 27, 2008 7:01 PM](https://usermanual.wiki/Motorola-Solutions/89FT5856/User-Guide-1017038-Page-75.png)
![74advanced featuresaddress in the From field, the To field, the Cc field, the Subject field, or the body of the message, you can store this information to Contacts. 1View the message. 2Highlight the number or email address you want to save. 3Press > Save Number or Save Email. 4To store the number or email address as a new entry, select [New Contact].To store the number or email address to an existing entry, select the entry. 5With the Contacts type field highlighted, press left or right to display the Contacts type you want to assign the number or email address. 6Press - under Save. go to a website If a message contains one or more website URLs, you can go to that website. 1View the message. 2Highlight the website URL you want to go to. 3Press > Go To Website. Note: The entire URL must appear in the message to allow you to open the website. save an embedded picture or audio recording To save a picture or audio recording that is part of the body of a message you receive: 1View the message. 2Highlight the picture or audio recording you want to save. OKr765_Armadillo.book Page 74 Wednesday, August 27, 2008 7:01 PM](https://usermanual.wiki/Motorola-Solutions/89FT5856/User-Guide-1017038-Page-80.png)
![77advanced featuresnew quick notes and reply phrases Note: These Quick Notes are not the same as the quick notes used with MOSMS messages. Each messaging service has its own quick notes feature. create quick notes1From the MMS Setup menu, select Quick Notes or Replies. 2Select [New QuickNote] or [New Reply]. 3Enter text from the keypad and press .edit quick notes You can edit only Quick Notes and reply phrases you have created. 1From the MMS Setup menu, select Quick Notes or Replies. 2Select the quick note or reply phrase you want to edit. Cleanup: Controls how long messages remain in the Inbox and Outbox before they are deleted. Downloads: Controls whether your handset automatically downloads new messages when they arrive, or only after you respond to a prompt or read the message from the Inbox. Set this option to Automatic if you want your handset to download new messages automatically; set the option to Manual if you want your handset to prompt you before downloading new messages. Memory Size: Shows the total amount of Used, Free:, and total Capacity of the handset’s memory.optionOKr765_Armadillo.book Page 77 Wednesday, August 27, 2008 7:01 PM](https://usermanual.wiki/Motorola-Solutions/89FT5856/User-Guide-1017038-Page-83.png)
![80advanced features4Press - under Yes to confirm.Bluetooth® Your handset supports the use of wireless Bluetooth headsets. Find it: > Bluetooth.The Bluetooth connection menu contains an option to search for audio devices.turn Bluetooth On or OffYou can turn your handset’s Bluetooth feature on or off. While Bluetooth power is on, your handset can communicate with other devices.Find it: > Bluetooth > Setup > Power.1Select On to power Bluetooth On.2Select Name if you wish to assign a name to your handset.3Select Find Me Time to determine the amount of time in which your handset can be found by other Bluetooth devices.Tip: You can turn off Bluetooth if you want to prolong battery life or if you enter an area where Bluetooth is prohibited.make a Bluetooth connectionconnect your handset with a Bluetooth headsetFind it: > Bluetooth > Hands Free > [Find Devices].1Follow the instructions on your Bluetooth headset to set it up to be found.2Once your Bluetooth headset is set to be found press on your handset. Your handset will scan the Bluetooth headset until it finds it. Press when you see the name of the Bluetooth headset on your screen.OKOKr765_Armadillo.book Page 80 Wednesday, August 27, 2008 7:01 PM](https://usermanual.wiki/Motorola-Solutions/89FT5856/User-Guide-1017038-Page-86.png)
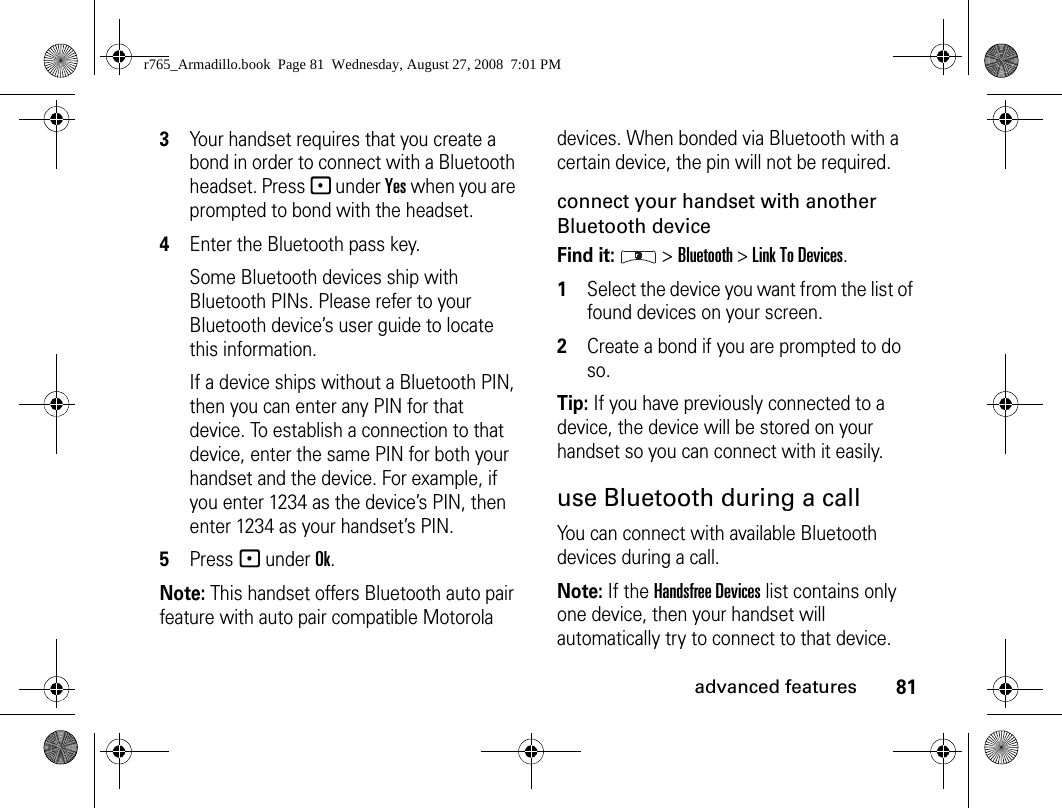
![82advanced features1While in a call, press > Use Bluetooth.2Press - under Yes to power On Bluetooth.3Select the audio device you want to connect to from the list of Handsfree Devices.send information via BluetoothYou can use your handset to send contacts entries, or datebook events to another Bluetooth device.The receiving device must be within 32 feet (10 meters) of your handset in order to connect with yours.Note: Files sent or received may be up to 200 kB, depending on your service provider.send ContactsShortcut: From the home screen press - under Contcs.1Select the contact you want to send.2Press > Send Via... > Bluetooth.3Press - under Yes to power On Bluetooth.4Select the device you want to transfer the contact information to.orSearch for the device by selecting [Find Devices].5If prompted, bond with the device.Your handset connects with the devices and transfers the contact.send a Datebook eventFind it: > Datebook1Select the datebook event you want to send.2Press > Send Via... > Bluetooth.r765_Armadillo.book Page 82 Wednesday, August 27, 2008 7:01 PM](https://usermanual.wiki/Motorola-Solutions/89FT5856/User-Guide-1017038-Page-88.png)
![83advanced featuresIf the event you select repeats, then you will be prompted to choose whether to send the selected instance of the event or all instances of the event.To send only the selected instance of the event, select This Event Only.orTo send all instances of the event, select Repeat Events.3Press - under Yes to power On Bluetooth.4Select the device you want to transfer the contact information to.orSearch for the device by selecting [Find Devices].5If prompted, bond with the device.Your handset connects with the device and sends the datebook event.MOTOtalkTMMOTOtalk allows direct two-way handset-to-handset communications between two or more handsets equipped for MOTOtalk. You can make and receive MOTOtalk calls even when network service is not available. You can talk to anyone on your code and channel within your range.Note: Range will vary based on terrain, man-made structures and atmospheric conditions.MOTOtalk allows you to:• Use code or Private mode operation• Use up to 10 channels• Communicate with standalone MOTOtalk radiosr765_Armadillo.book Page 83 Wednesday, August 27, 2008 7:01 PM](https://usermanual.wiki/Motorola-Solutions/89FT5856/User-Guide-1017038-Page-89.png)

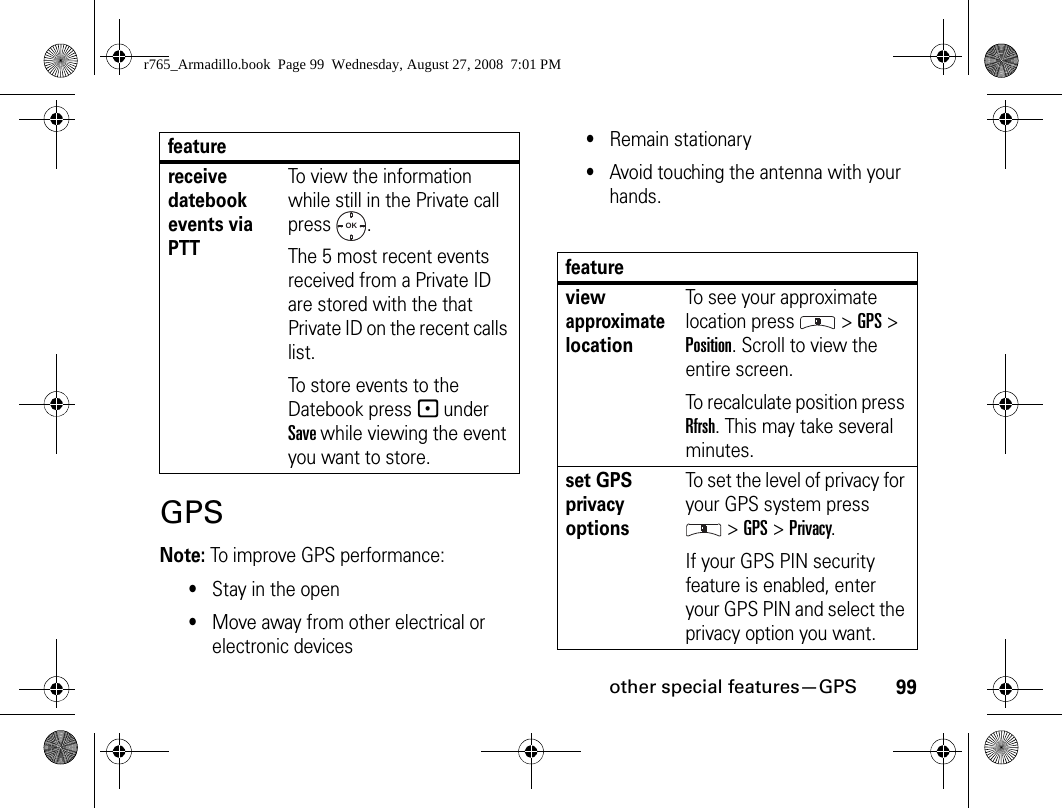
![98other special features—contactscontactsdatebookany key answerTo answer phone calls by pressing any key on the keypad press > u > Phone Calls > Any Key Ans > On.featureedit/delete contact entryPress - under Contcs. Select a contact and press > Edit. Change the desired content and press - under Done.set ringer IDPress - under Contcs. Select a contact and press > Edit > Ringer.Select desired ringer and press - under Back > - under Done.featurefeaturecreate datebook eventsTo create a new Datebook event press > Datebook > [New Event].see datebook eventTo see a calendar event press > Datebook. Press left or right to see the day and up or down to see the events.event reminderWhen an event reminder occurs press - under View.Press - under Back to close the reminder.OKOKr765_Armadillo.book Page 98 Wednesday, August 27, 2008 7:01 PM](https://usermanual.wiki/Motorola-Solutions/89FT5856/User-Guide-1017038-Page-104.png)