Motorola Solutions 89FT5868 2 Way Portable Radio User Manual Manual
Motorola Solutions, Inc. 2 Way Portable Radio Manual
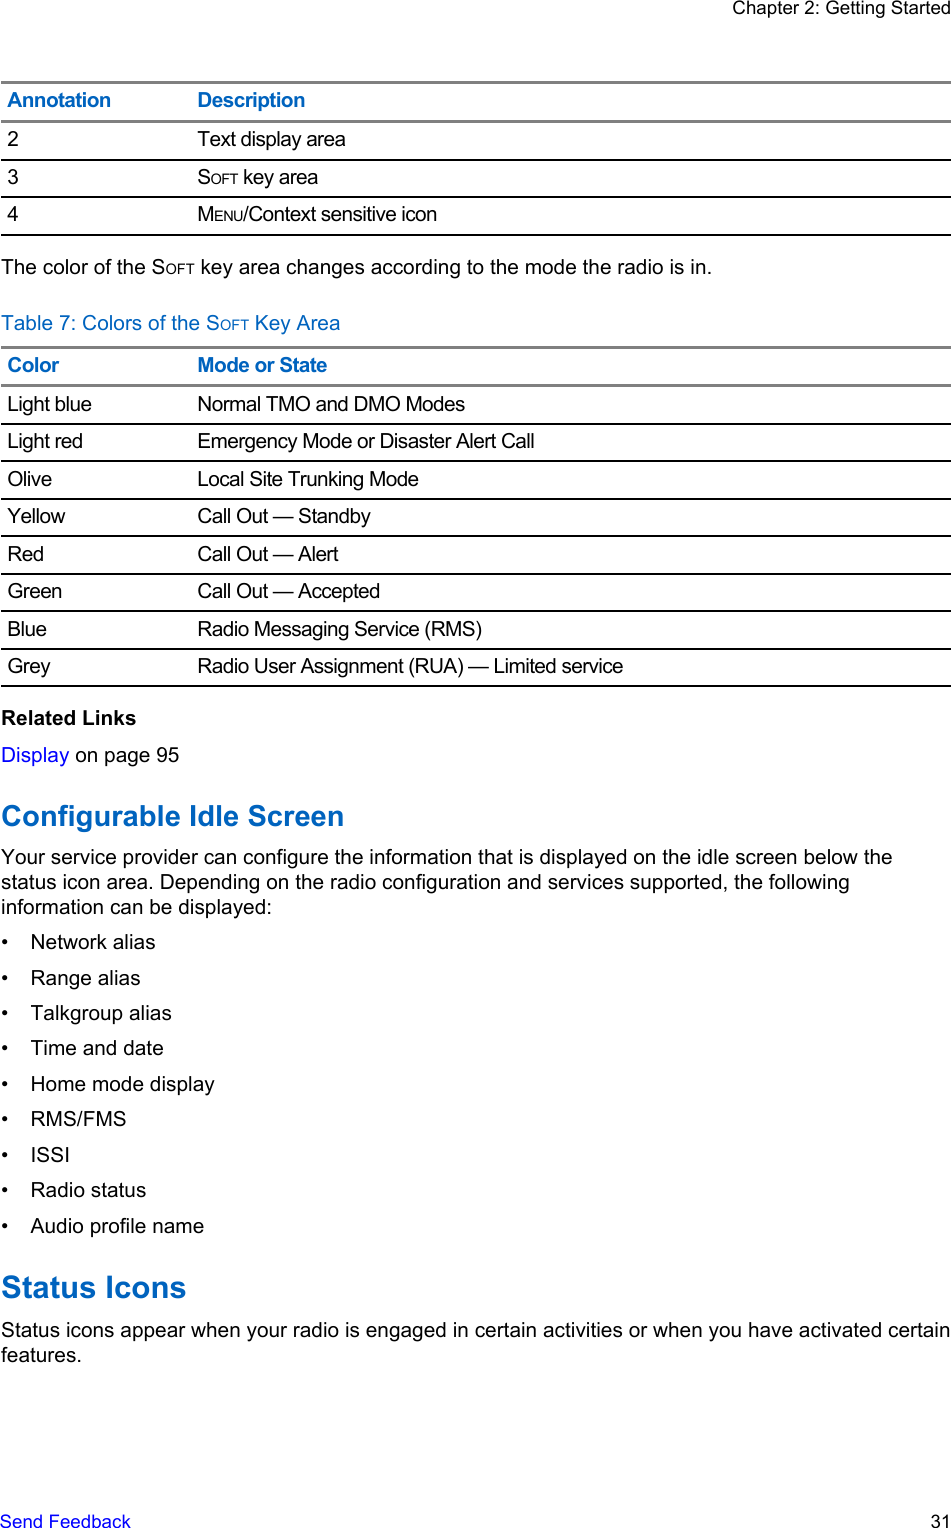
UserManual.wiki
>
Motorola Solutions
>
89FT5868 User Manual
>
Manual
Contents
1.
RF Safety Manual
2.
Manual
Manual
Navigation menu
Upload a User Manual
Namespaces
Wiki Guide
HTML
PDF
Info
Views
User Manual
Discussion / Help
Navigation
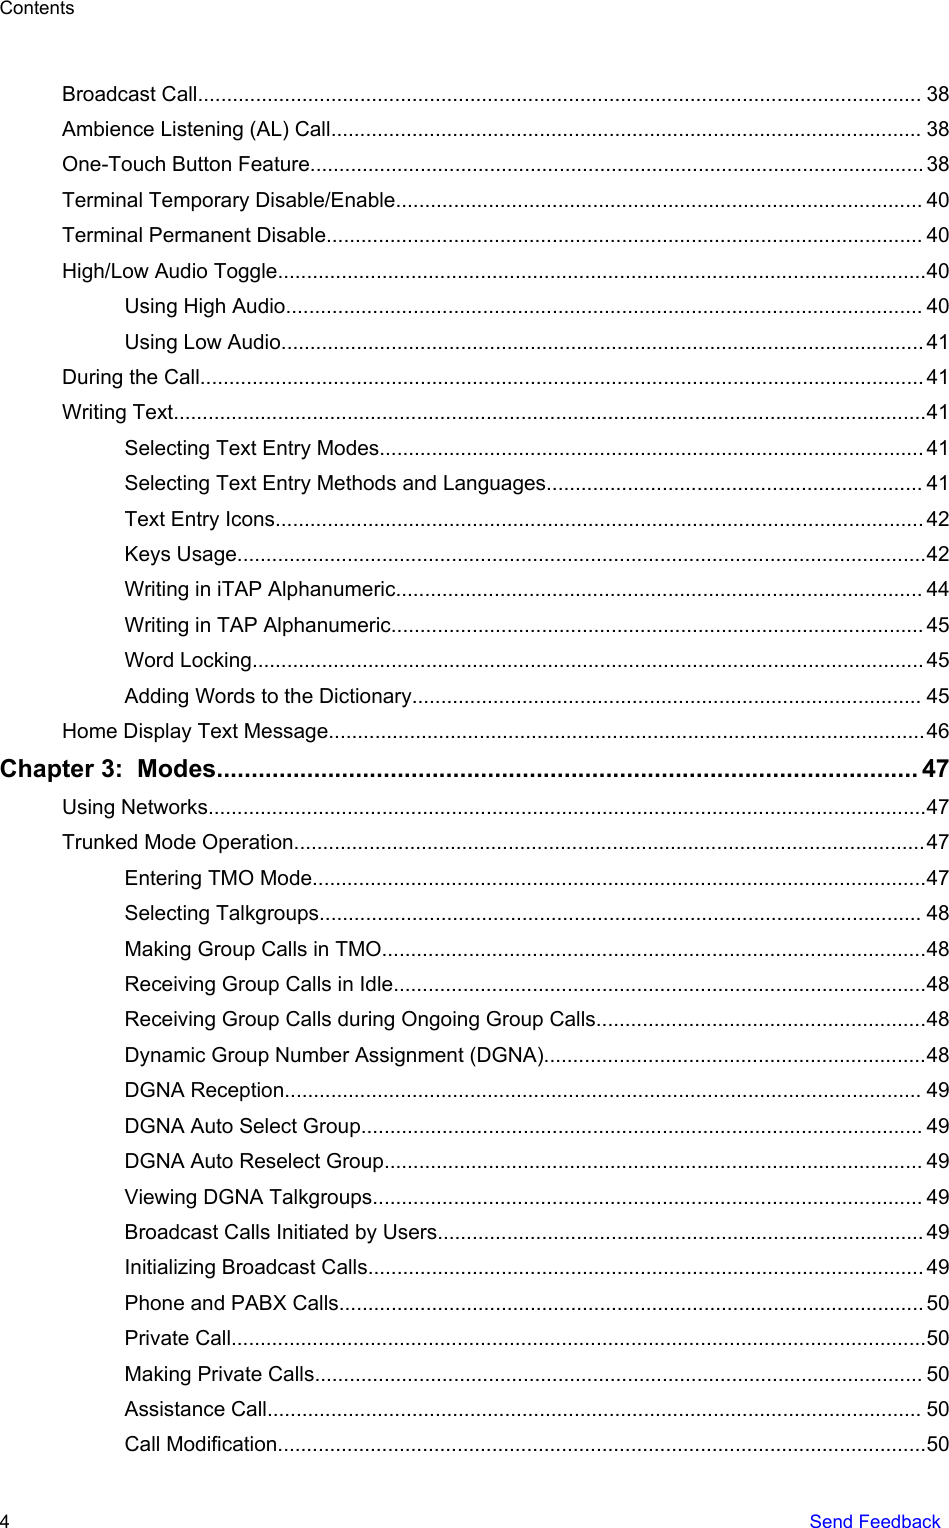
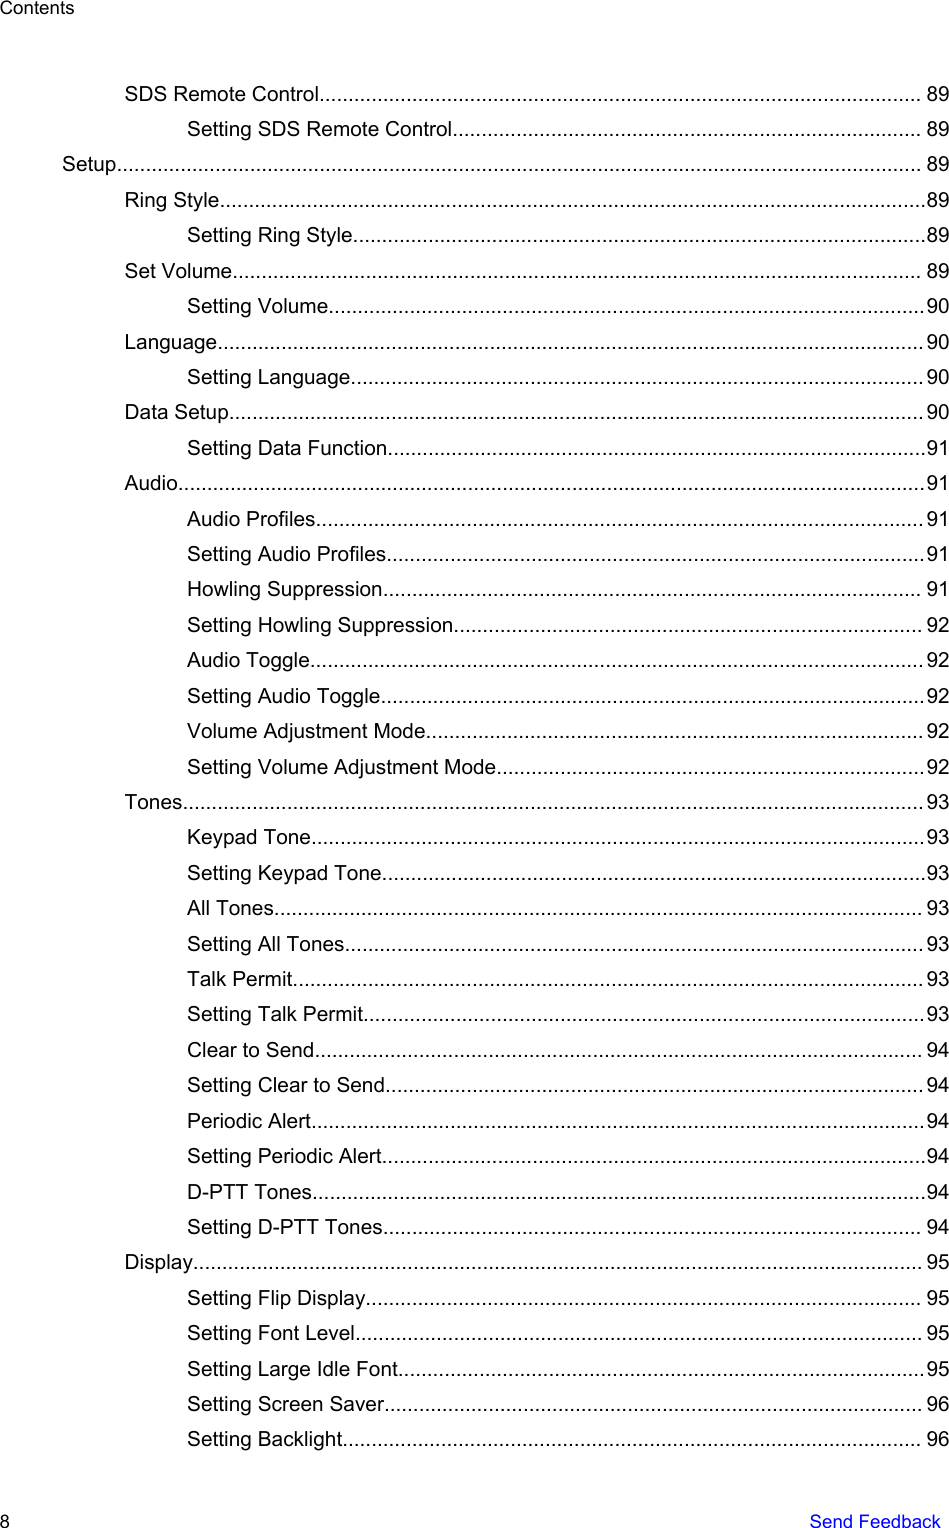
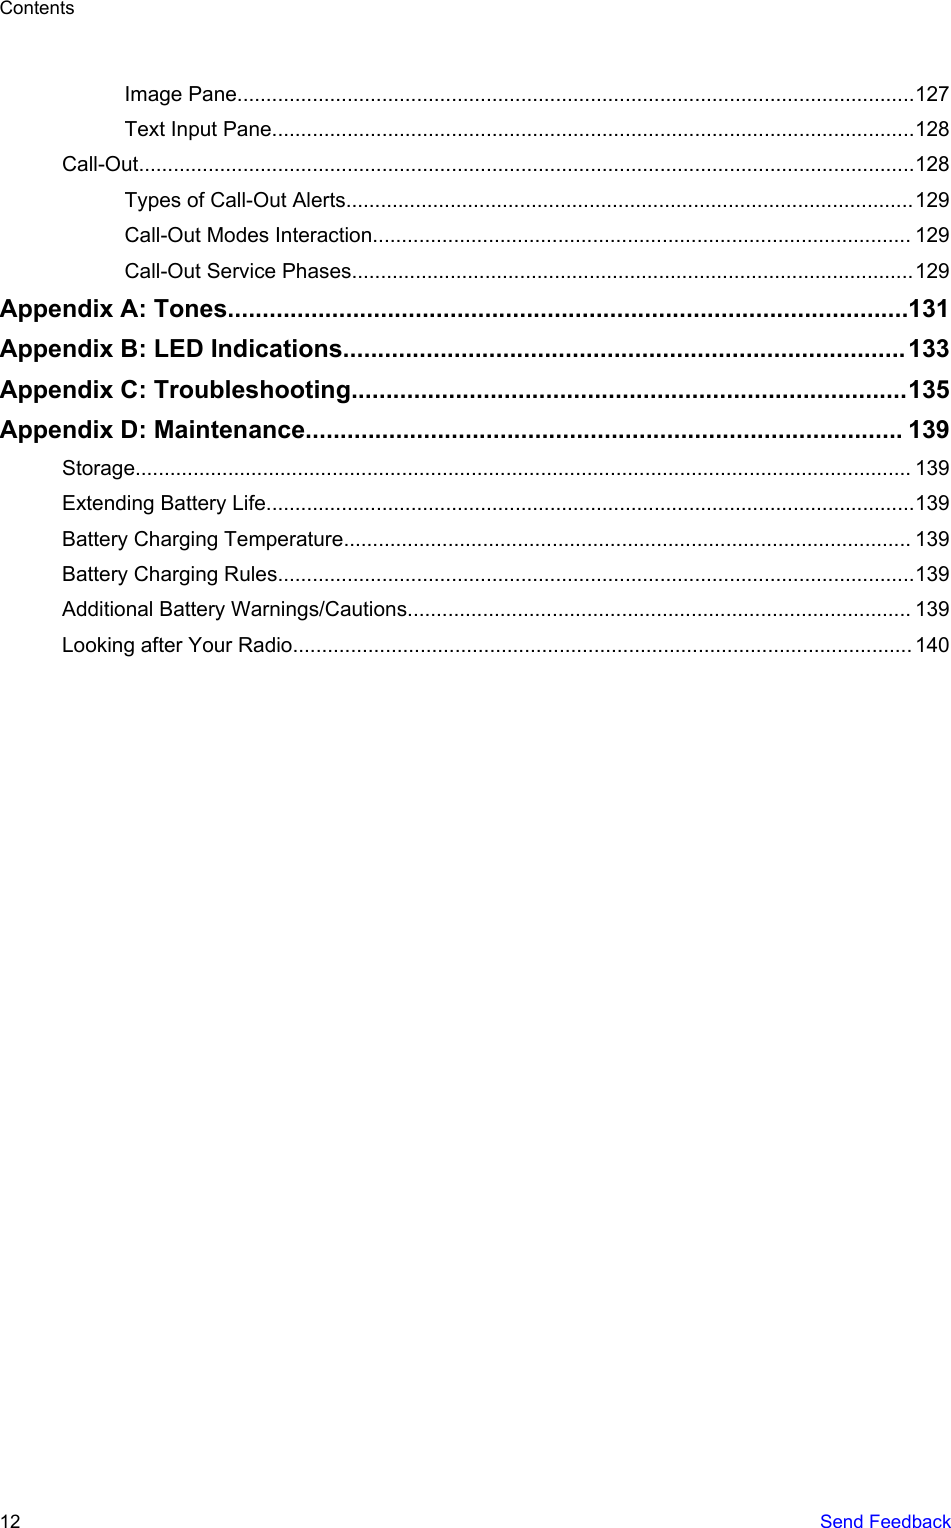


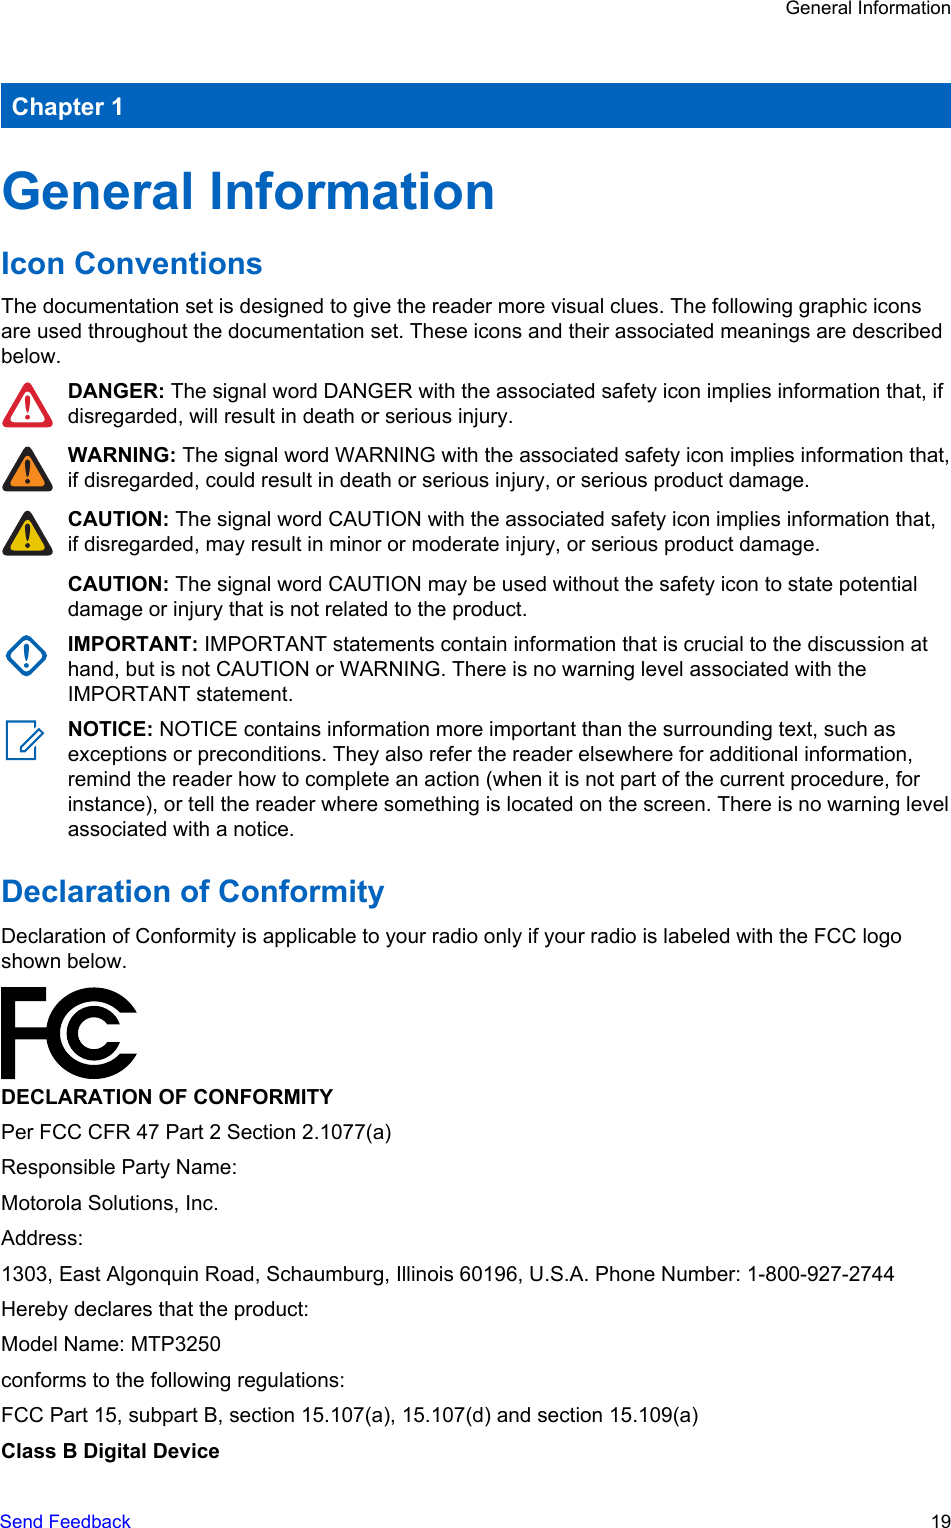
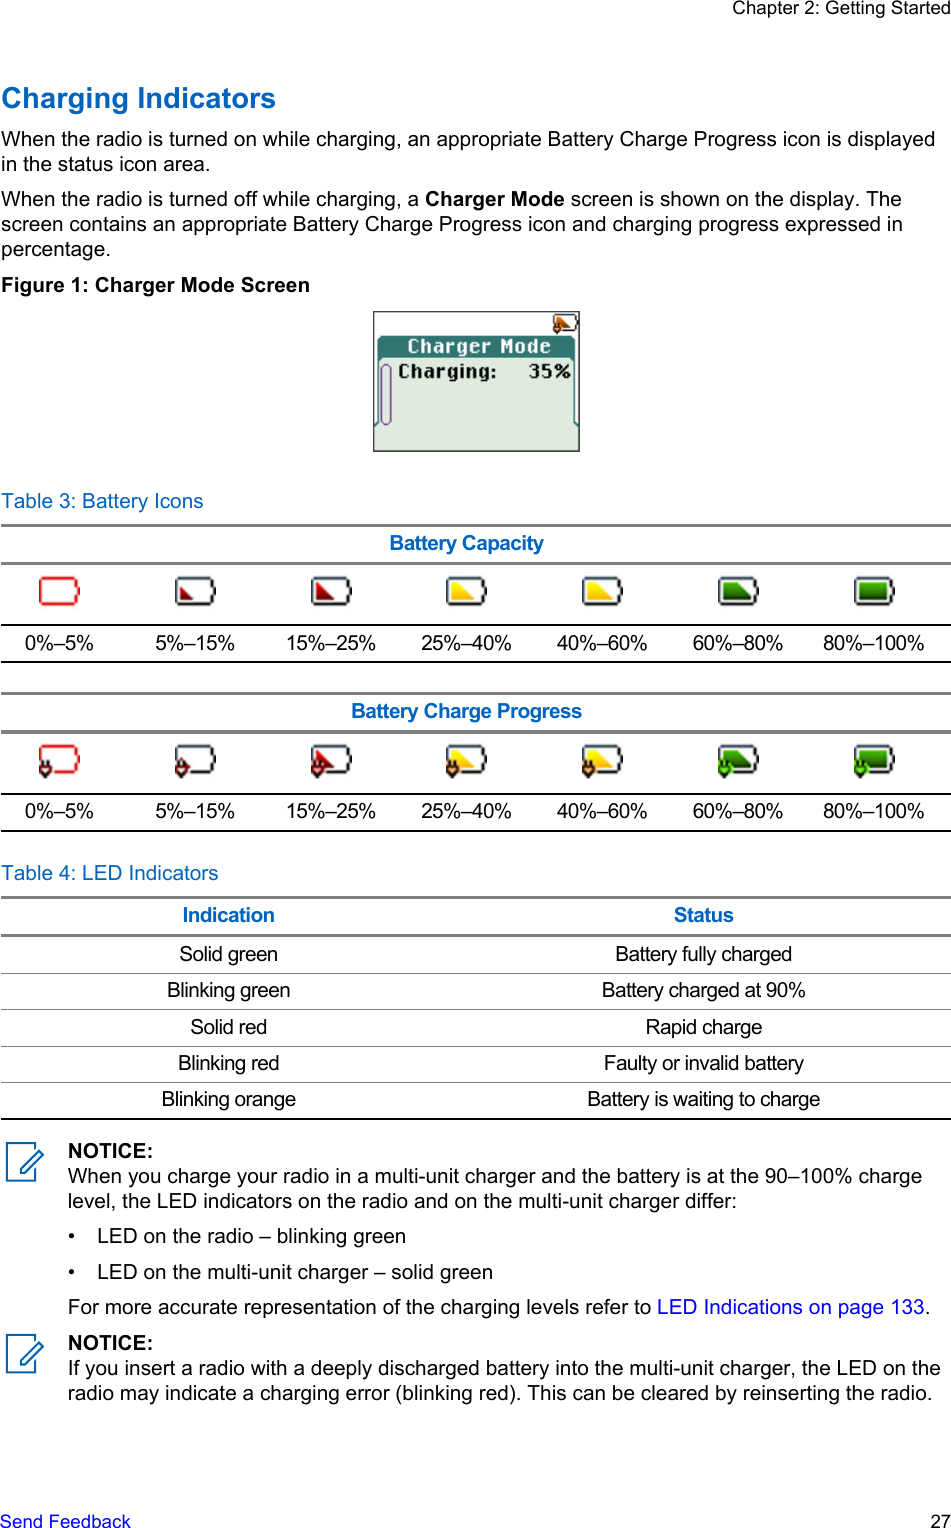
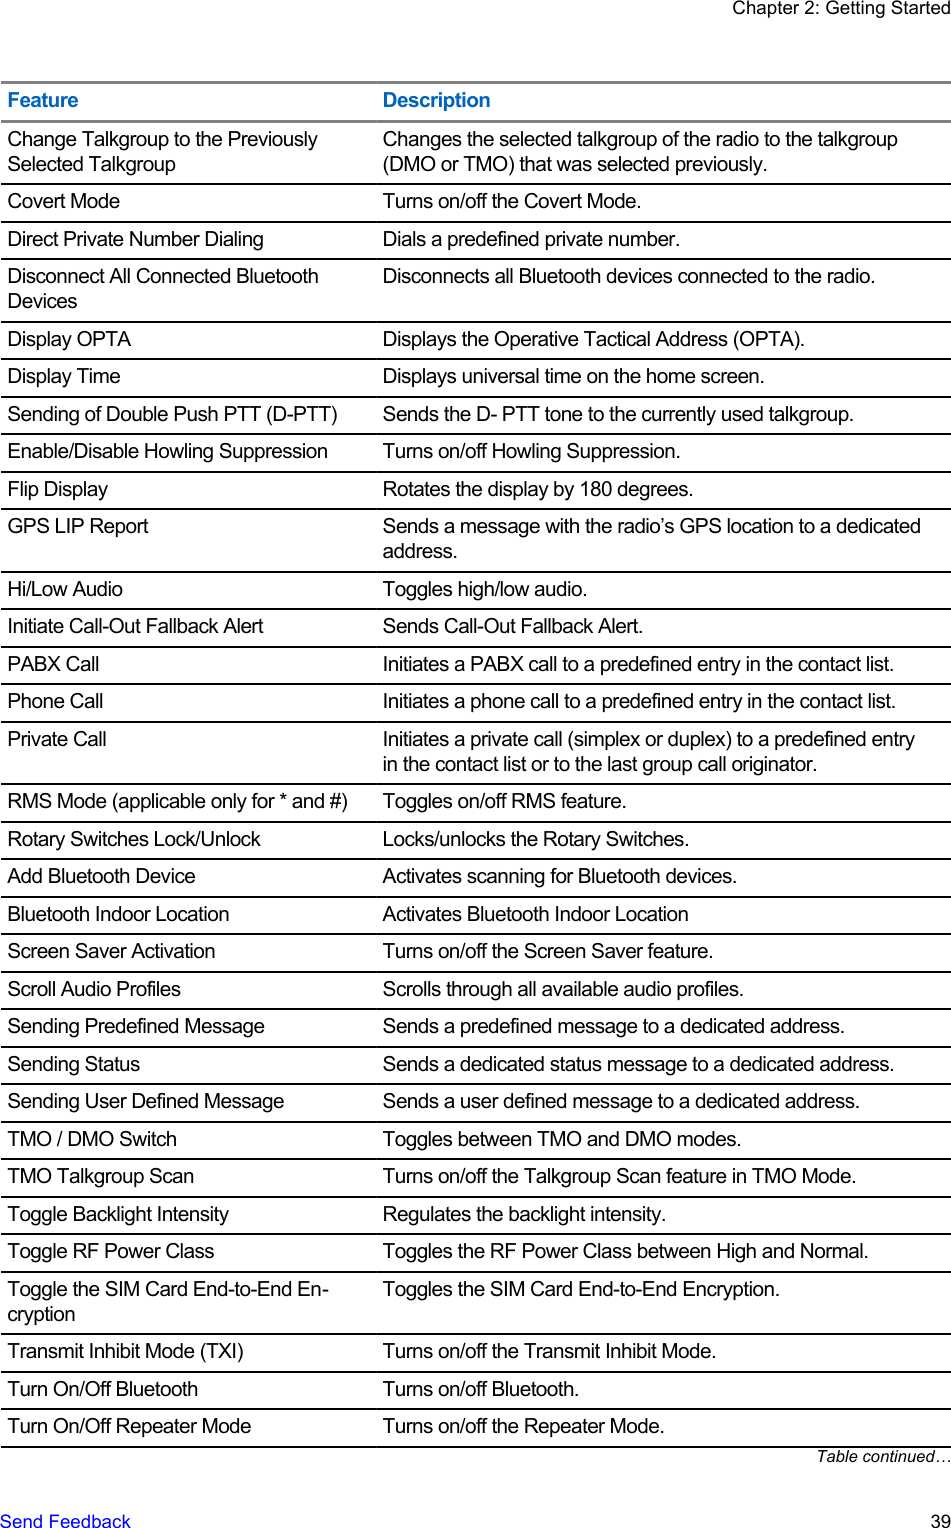
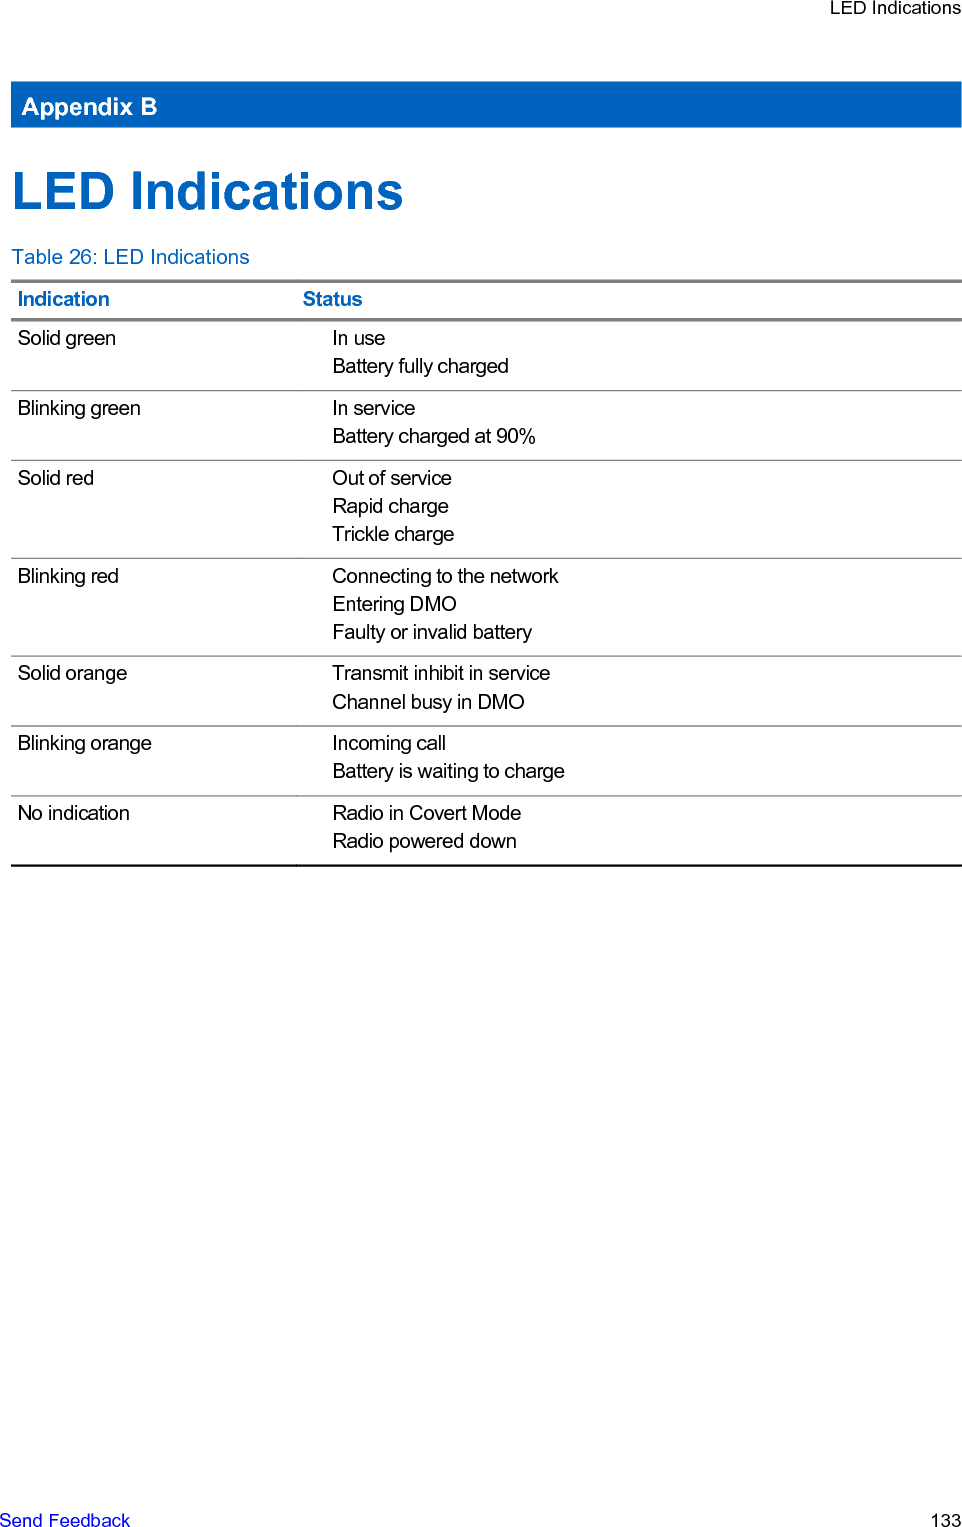
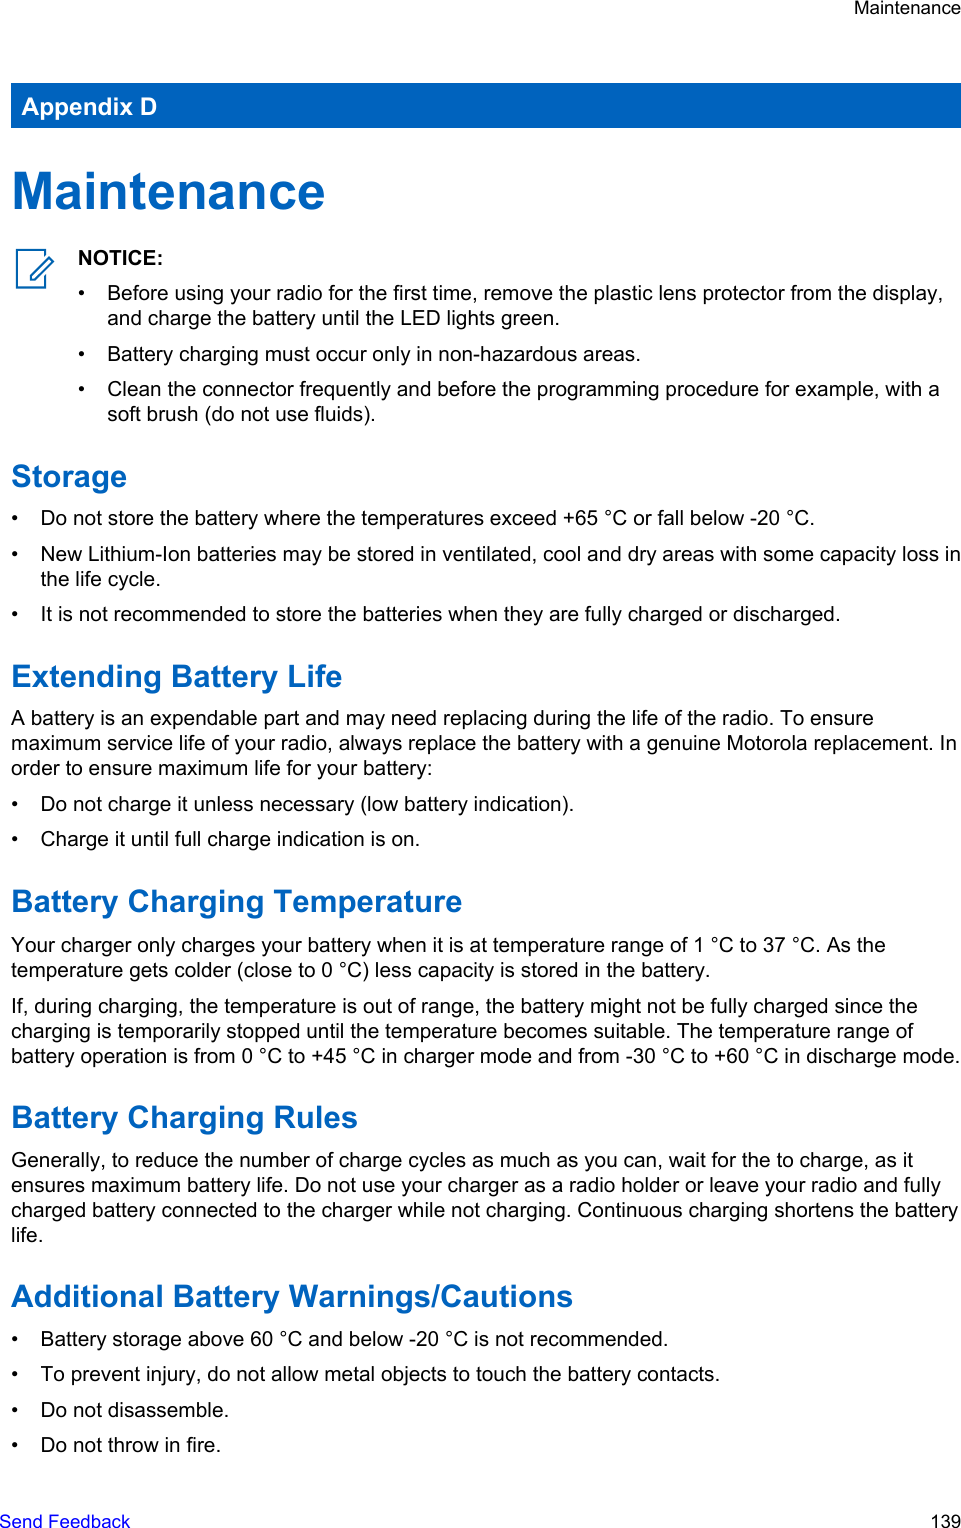
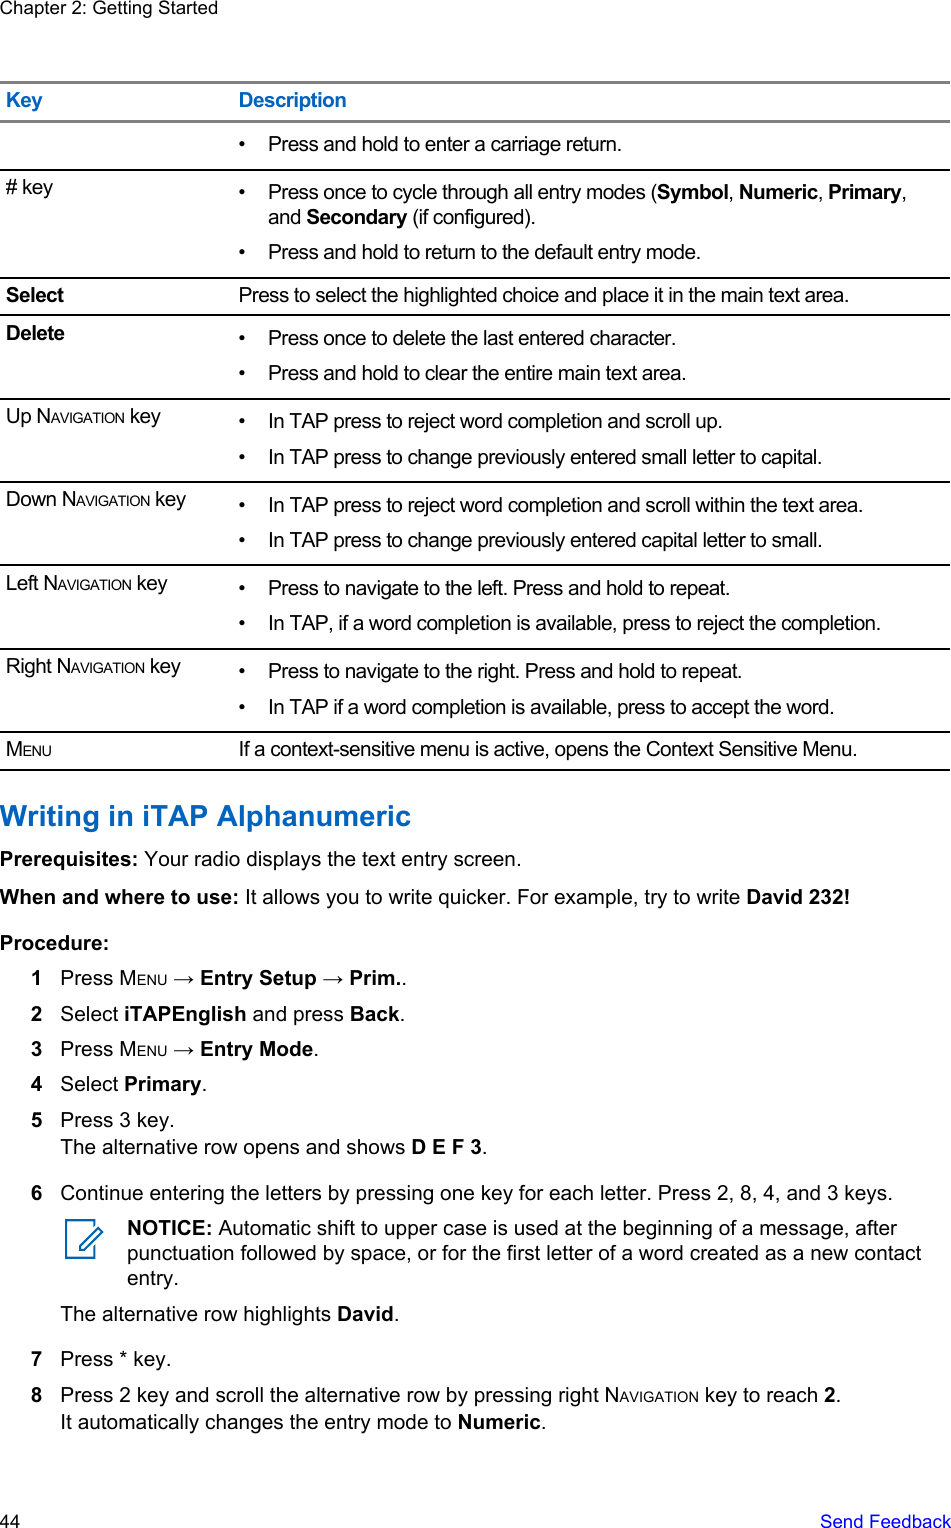
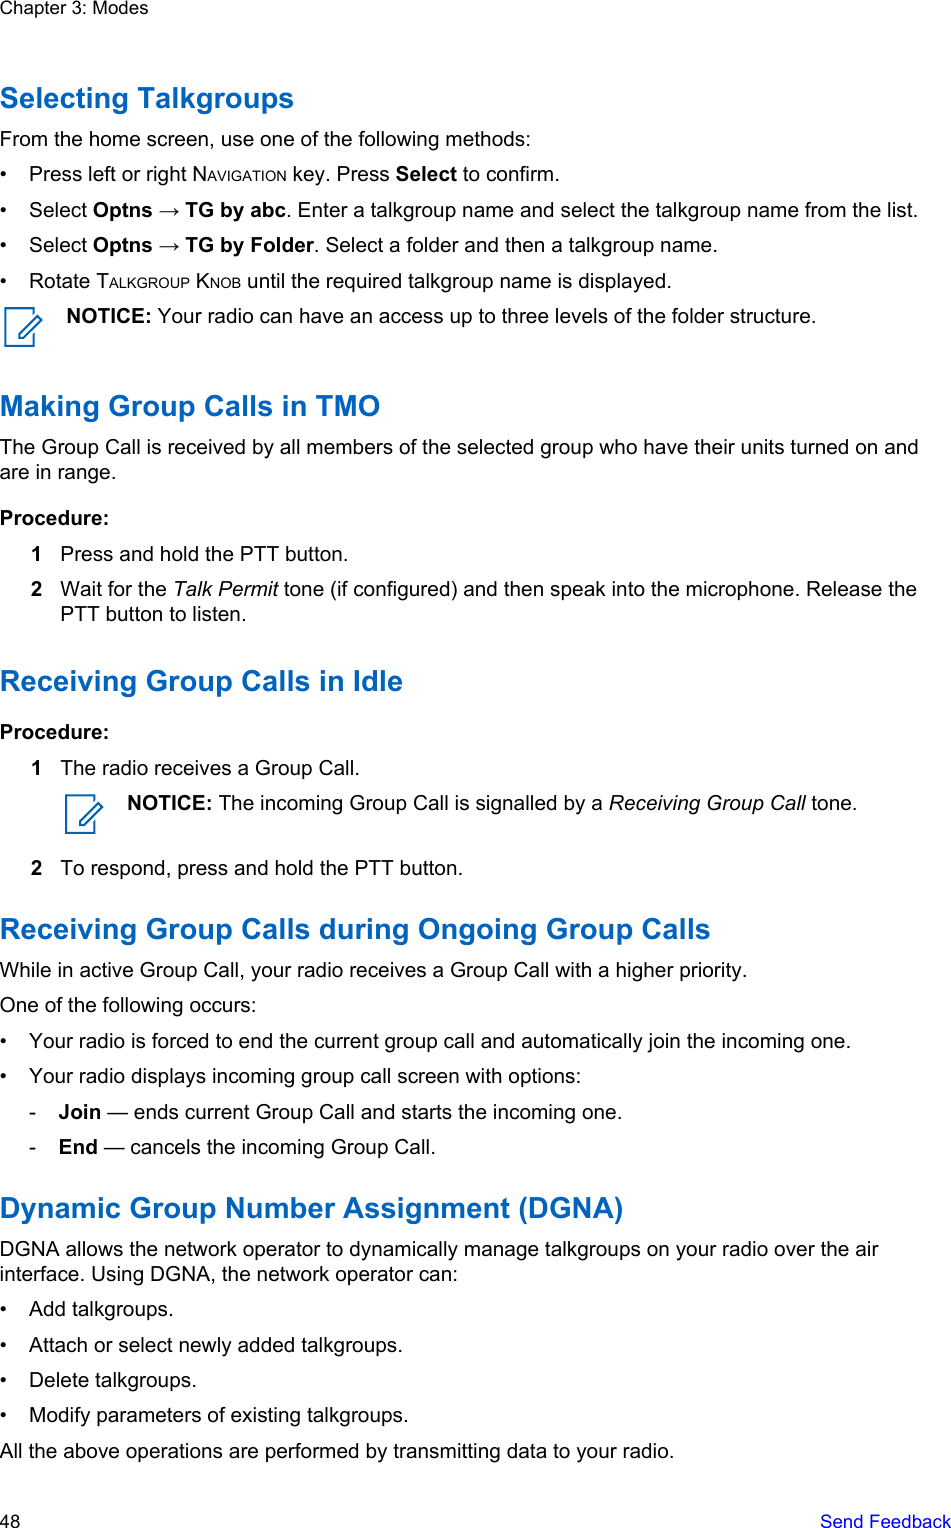
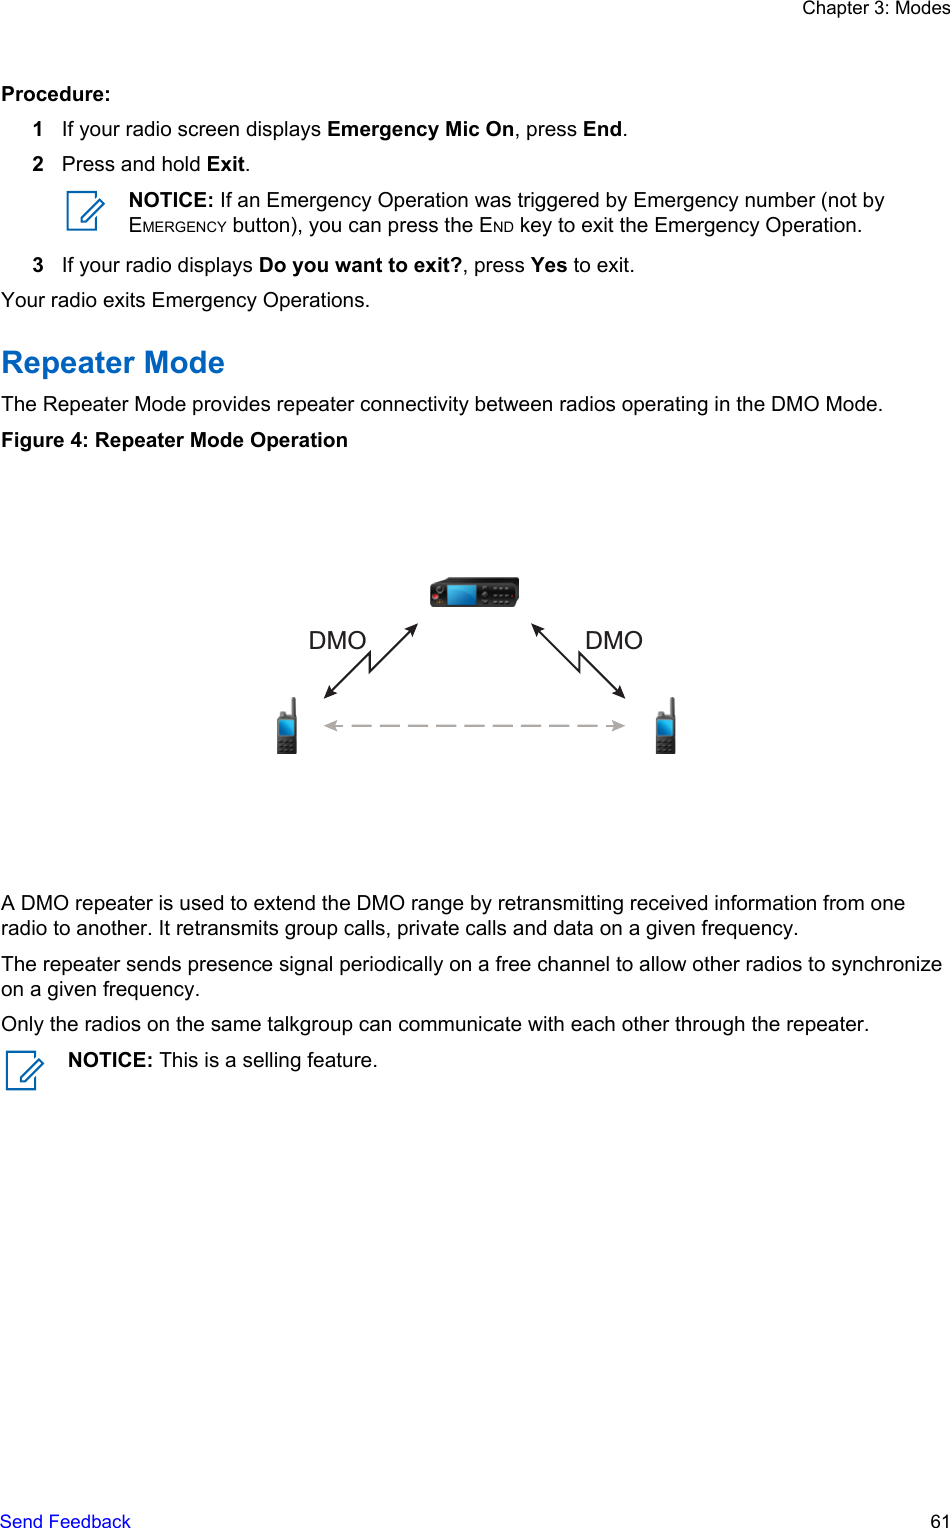
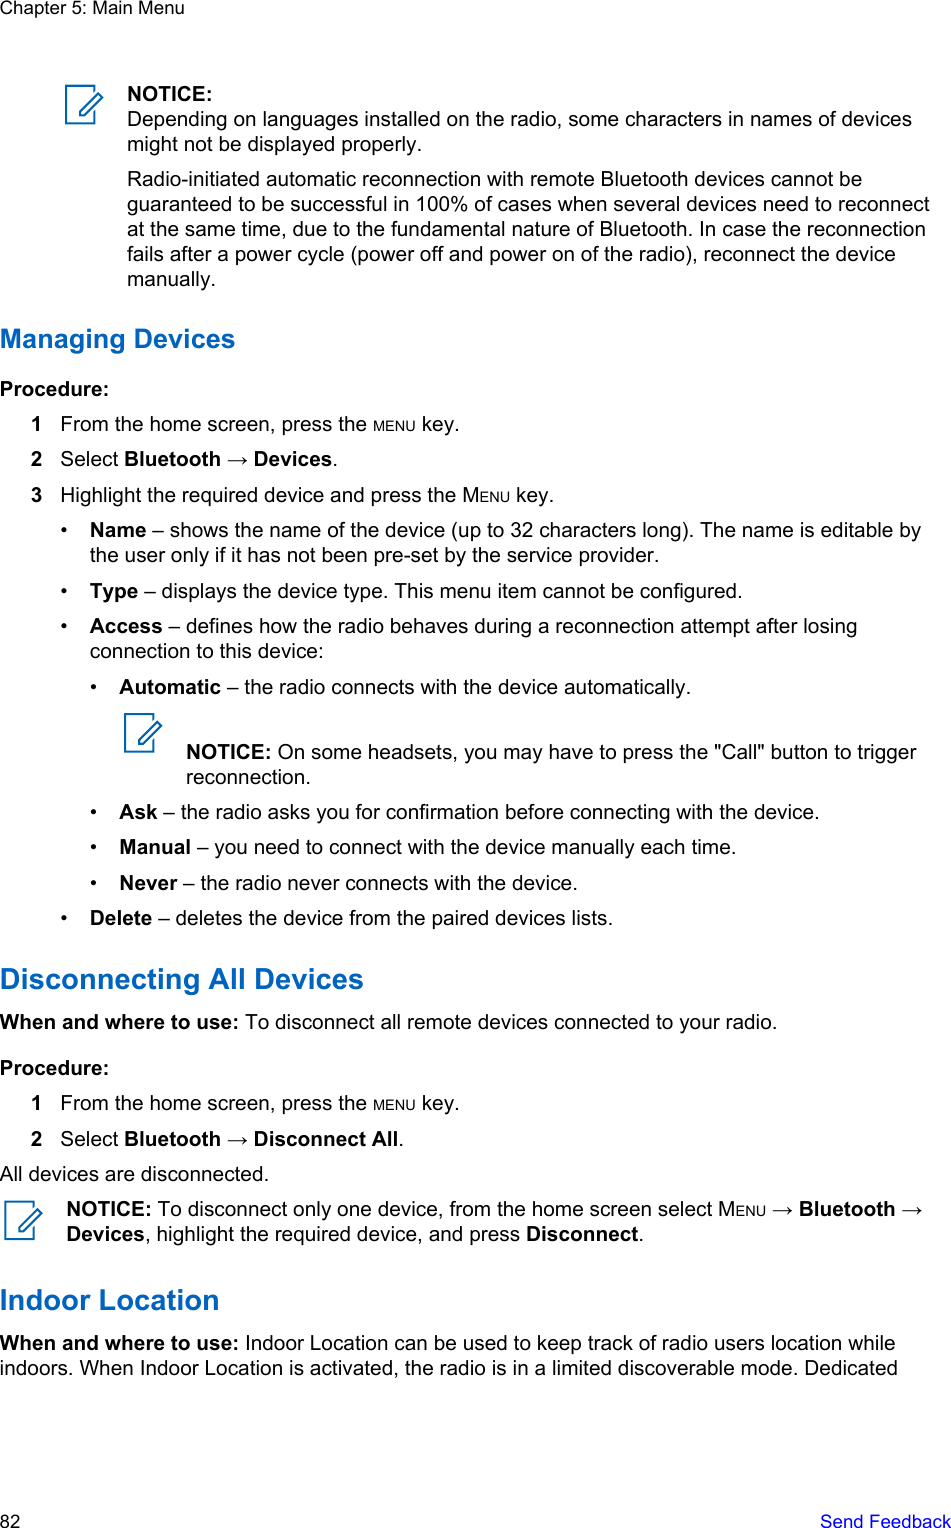
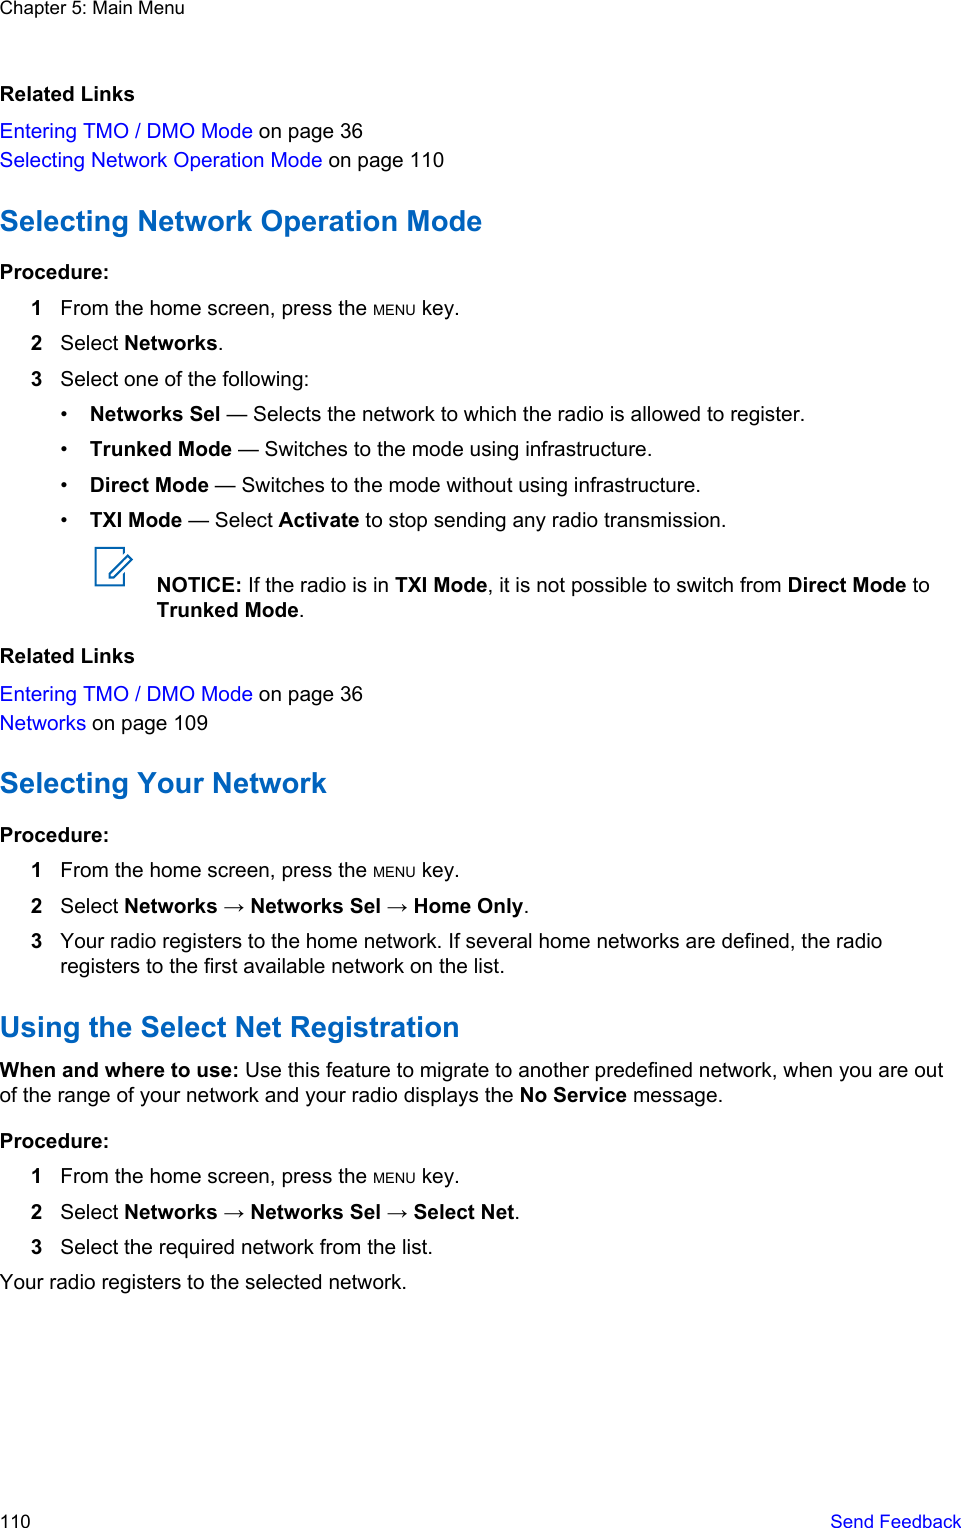
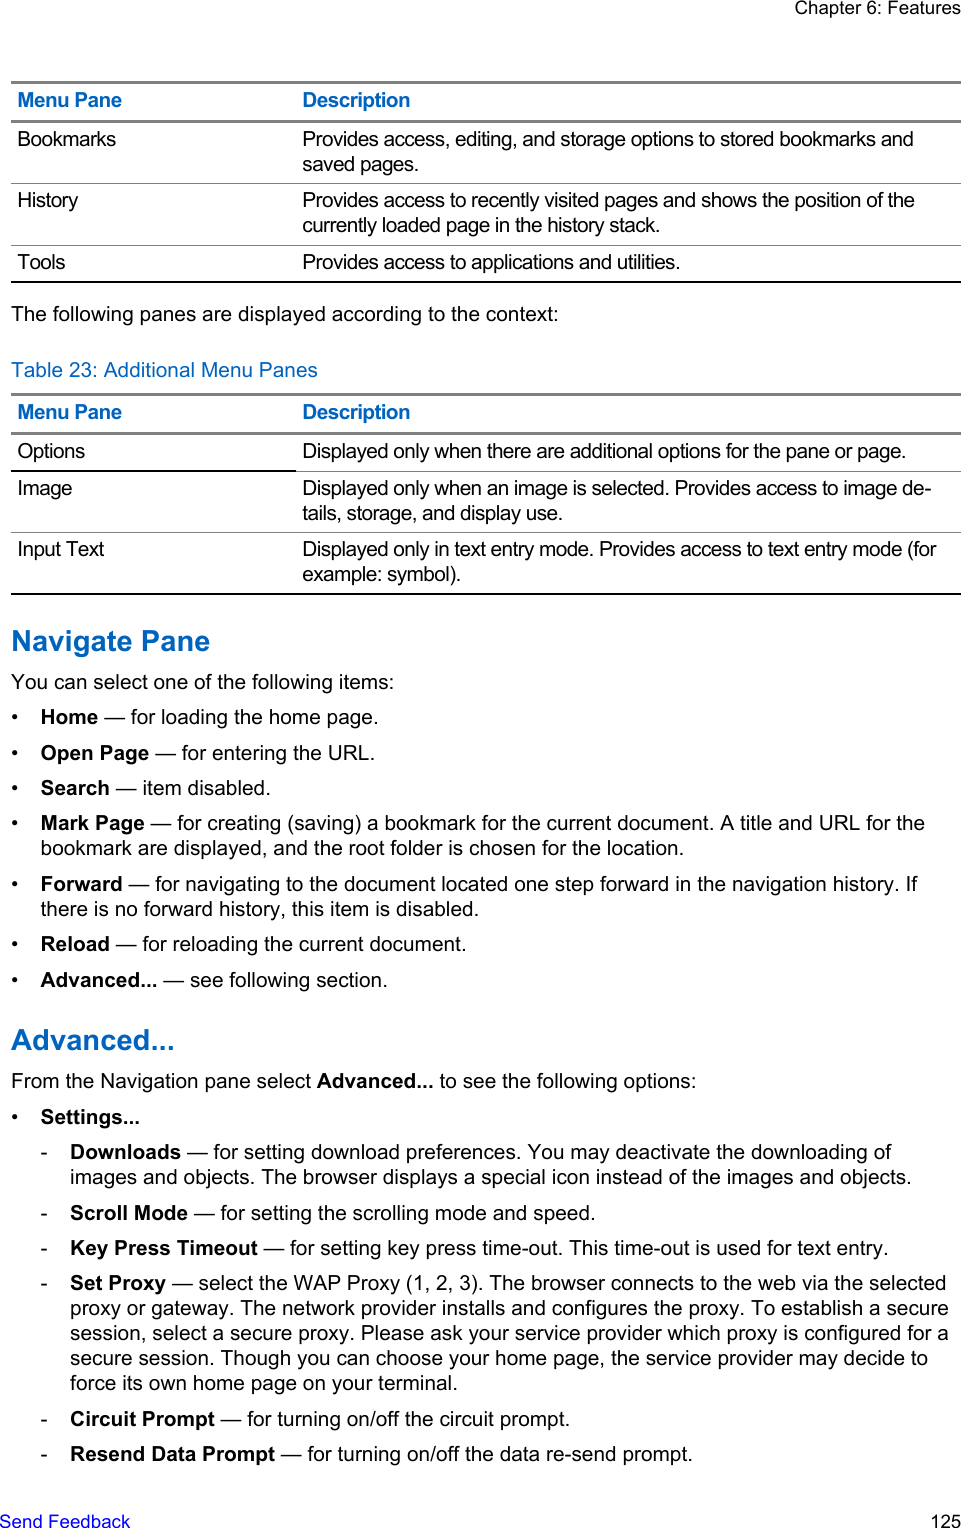
![Table 13: Keys UsageKey Alphanumeric Mode (TAP/iTAP) Symbol Mode0 to 9 keys Numeric Mode:• Press to enter digit at insertion point.• Press and hold any numeric key to enterTAP alphanumeric mode.• To exit TAP alphanumeric mode, press andhold any numeric key.0 key Press to cycle through single shift, caps lock,and lower case.+ - × * / \ [ ] = < > § #1 key . , ? ! 0 1 @ ’ ” - ( ) / : _ ; + & % × * = < > € £ $ ¥ ¤ [ ] { } \ ~ ^ ¿ ¡ § #2 key A B C 2a b c 2@ _ \3 key D E F 3d e f 3/ , ;4 key G H I 4g h i 4” & ’5 key J K L 5j k l 5( ) [ ] { }6 key M N O 6m n o 6¿ ¡ ~7 key P Q R S 7p q r s 7= < >8 key T U V 8t u v 8€ £ $ ¥ ¤9 key W X Y Z 9w x y z 9# % *Table 14: Other KeysKey DescriptionAny numeric key • In TAP press any key to reject word completion and continue with text entryA new completion will be displayed, if available, after the time-out for TAPexpires.• Press and hold to enter Numeric mode from TAP or iTAP alphanumeric.* key • Press to insert a space.• In TAP press to dismiss a word completion and insert a space.• Enter a newly created word into the user dictionary.Table continued…Chapter 2: Getting StartedSend Feedback 43](https://usermanual.wiki/Motorola-Solutions/89FT5868.Manual/User-Guide-2590389-Page-43.png)
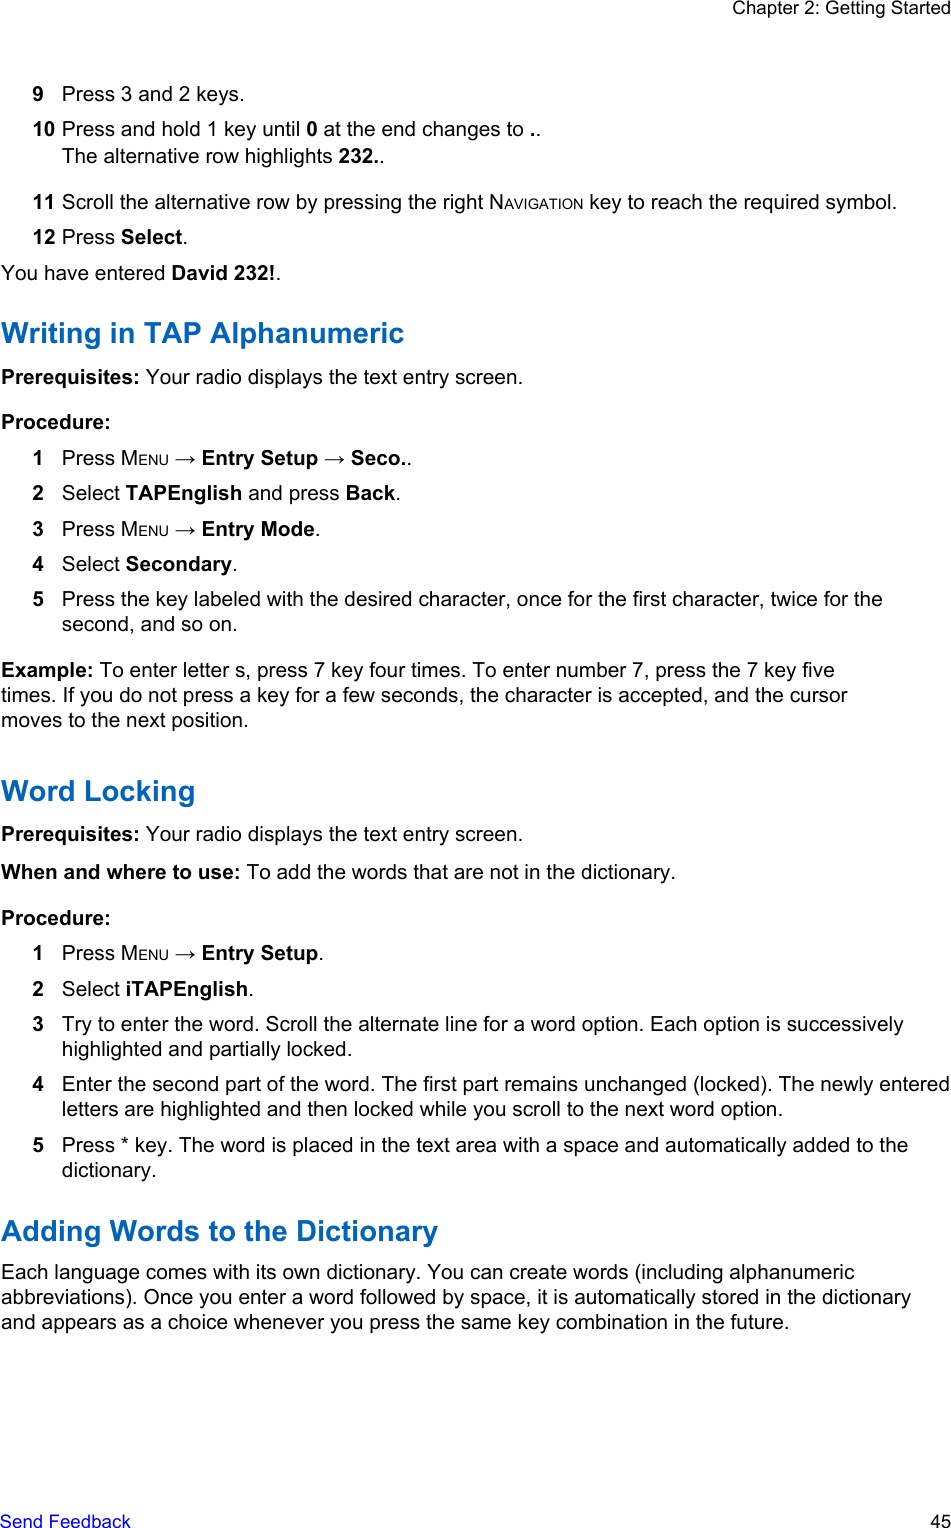
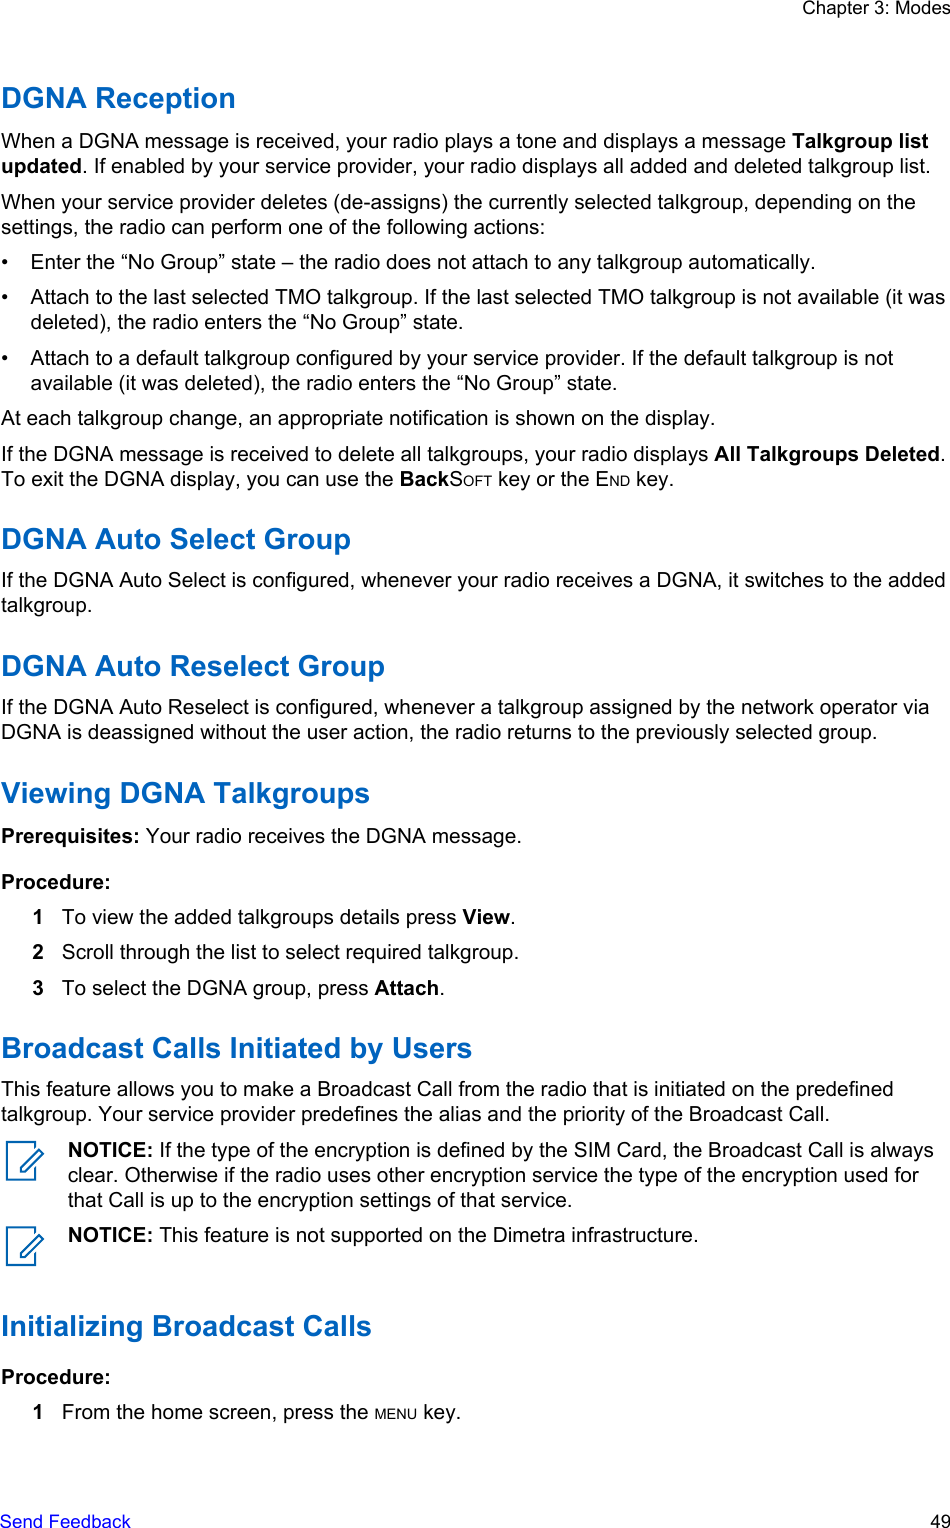

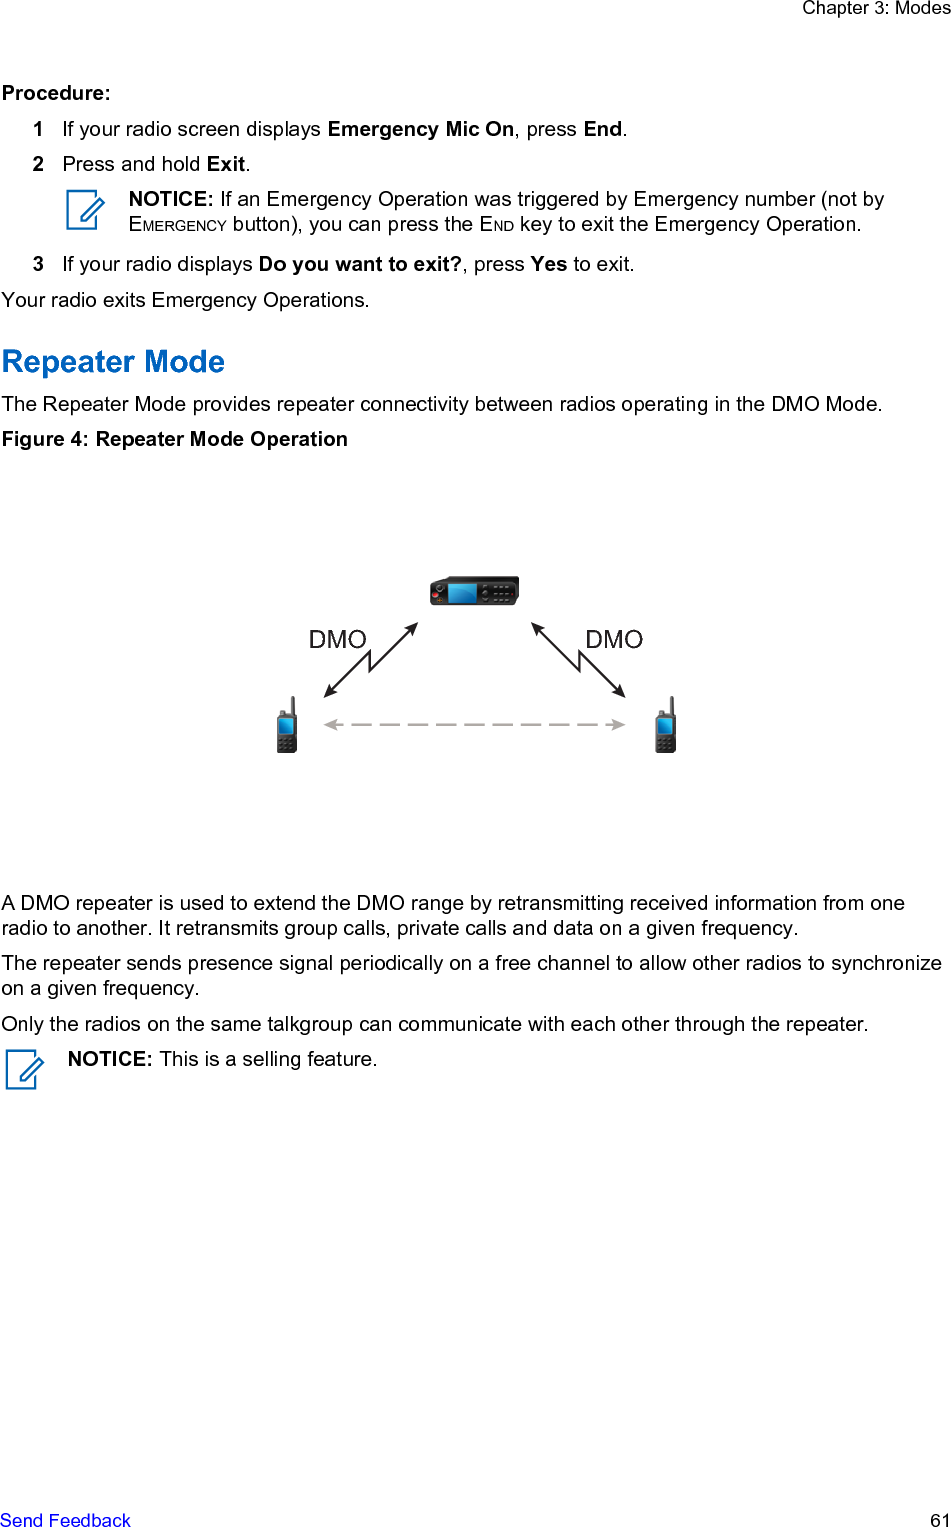

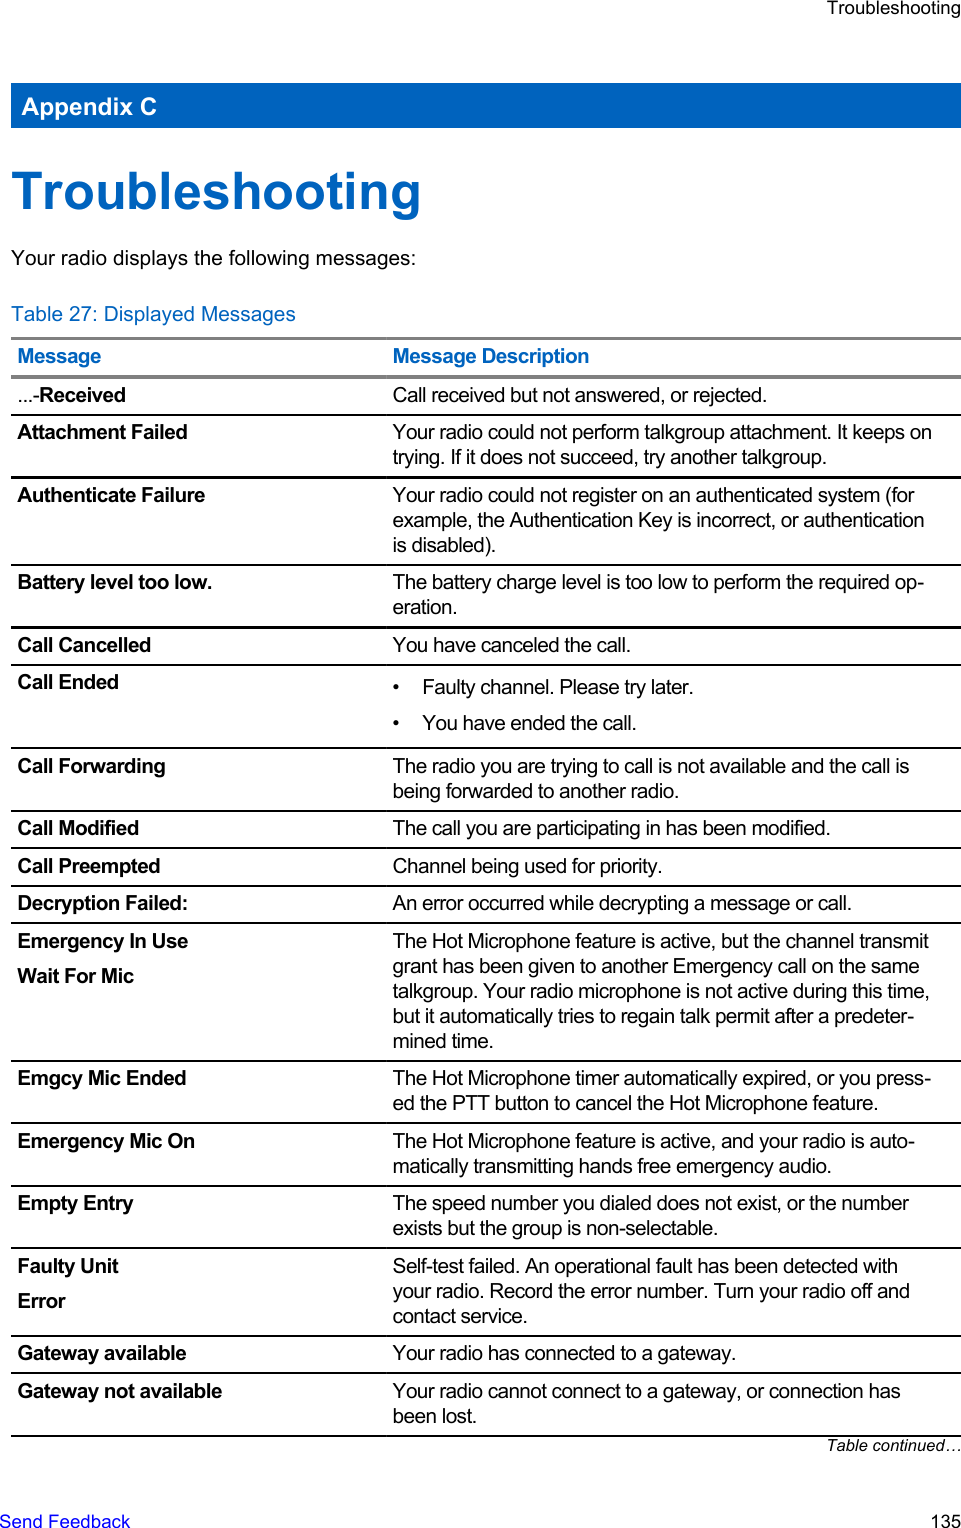
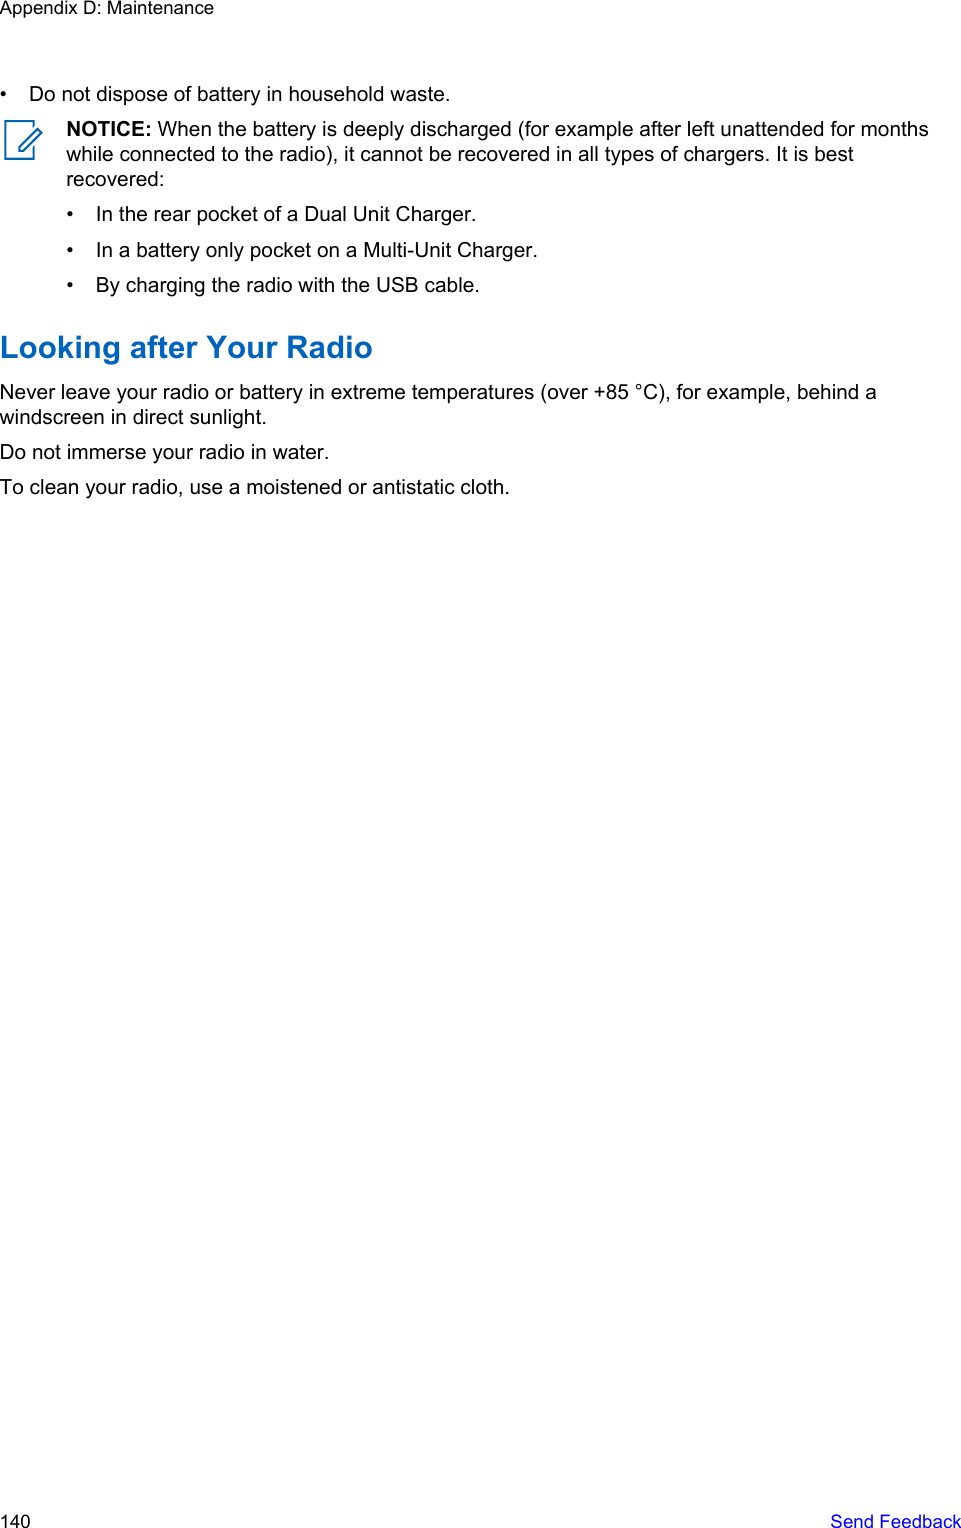
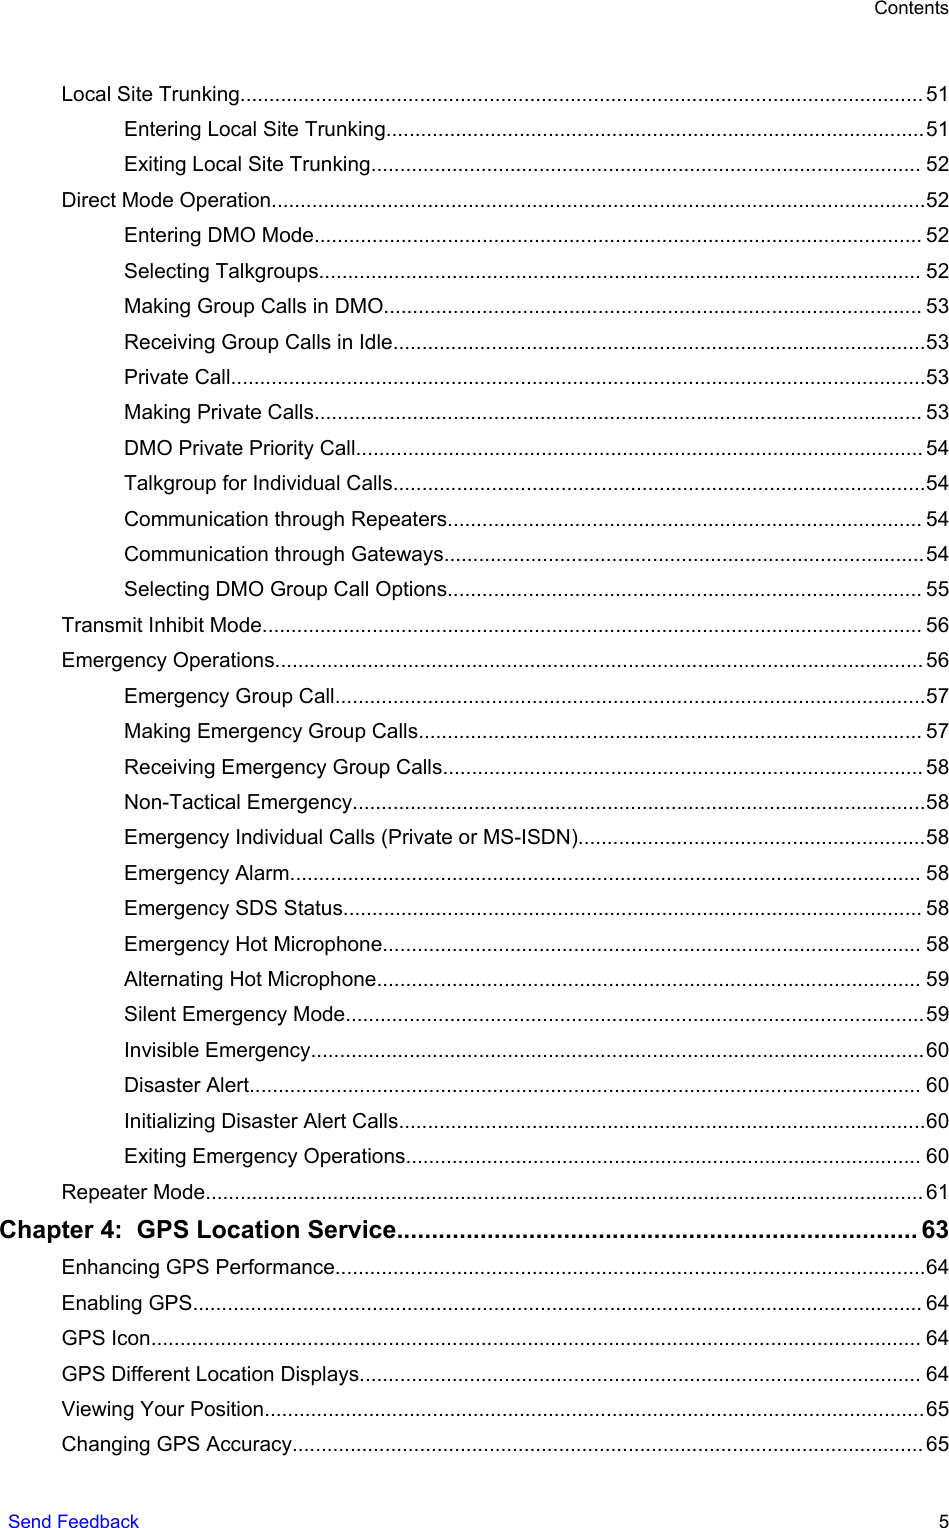
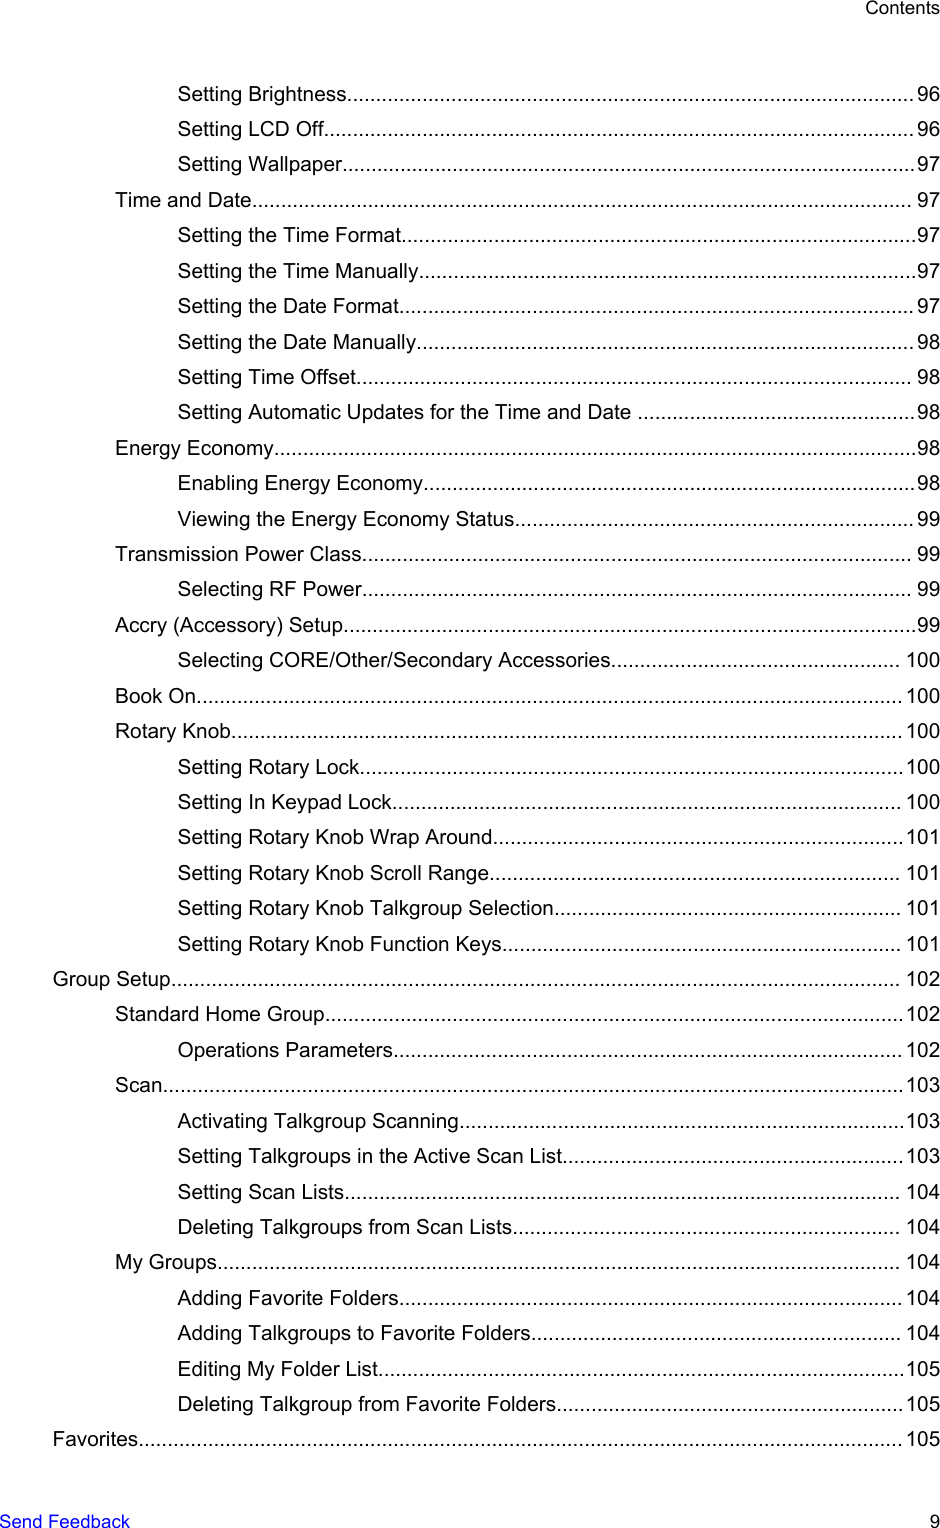
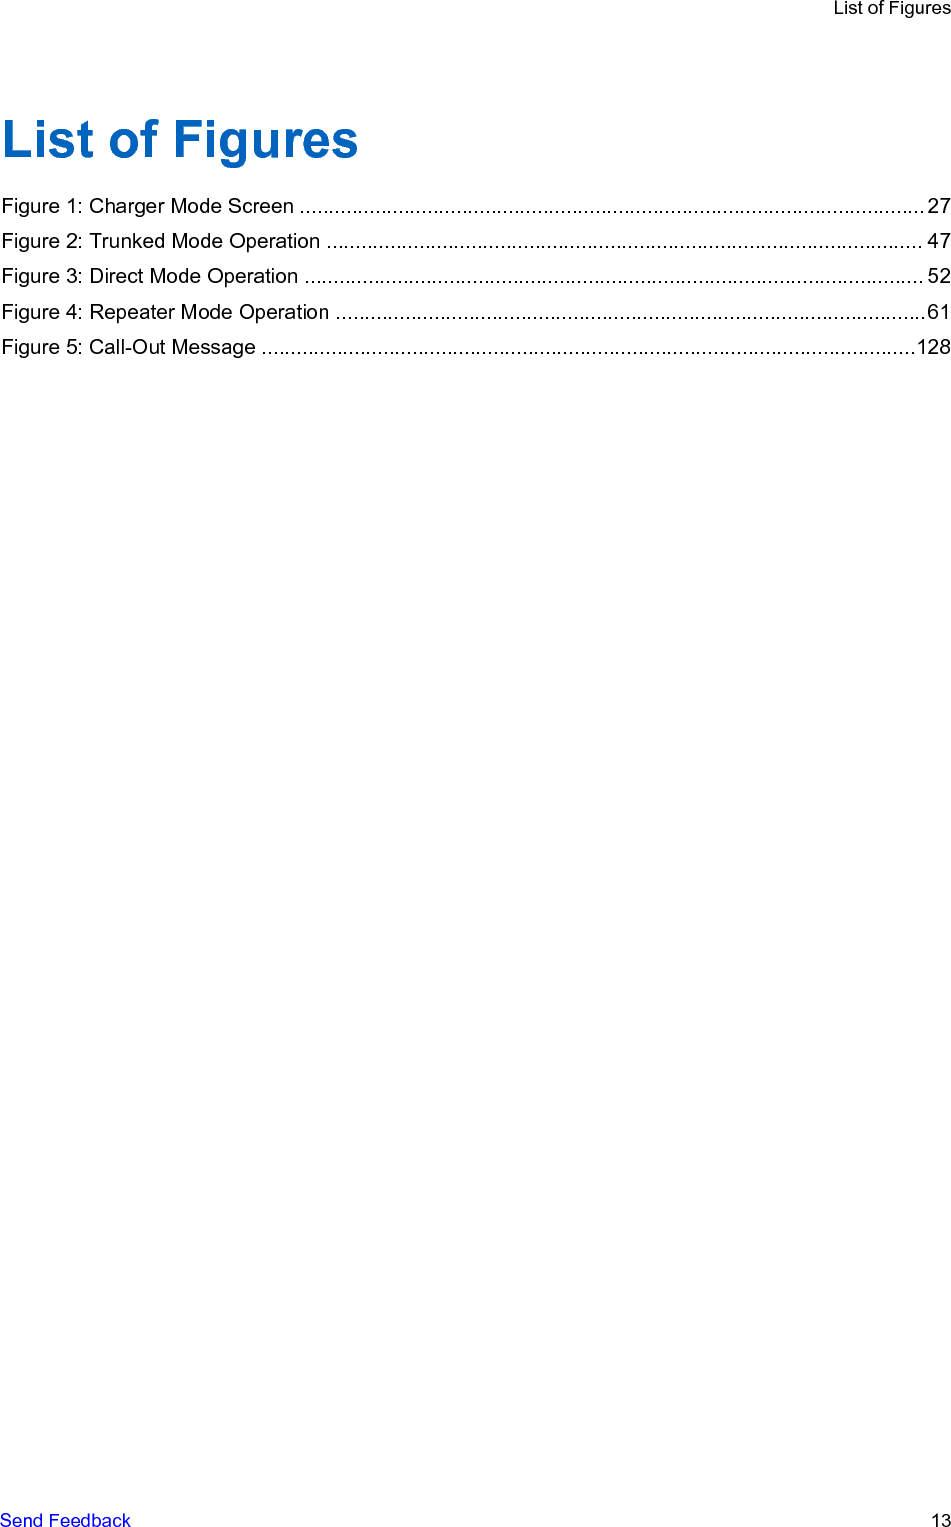
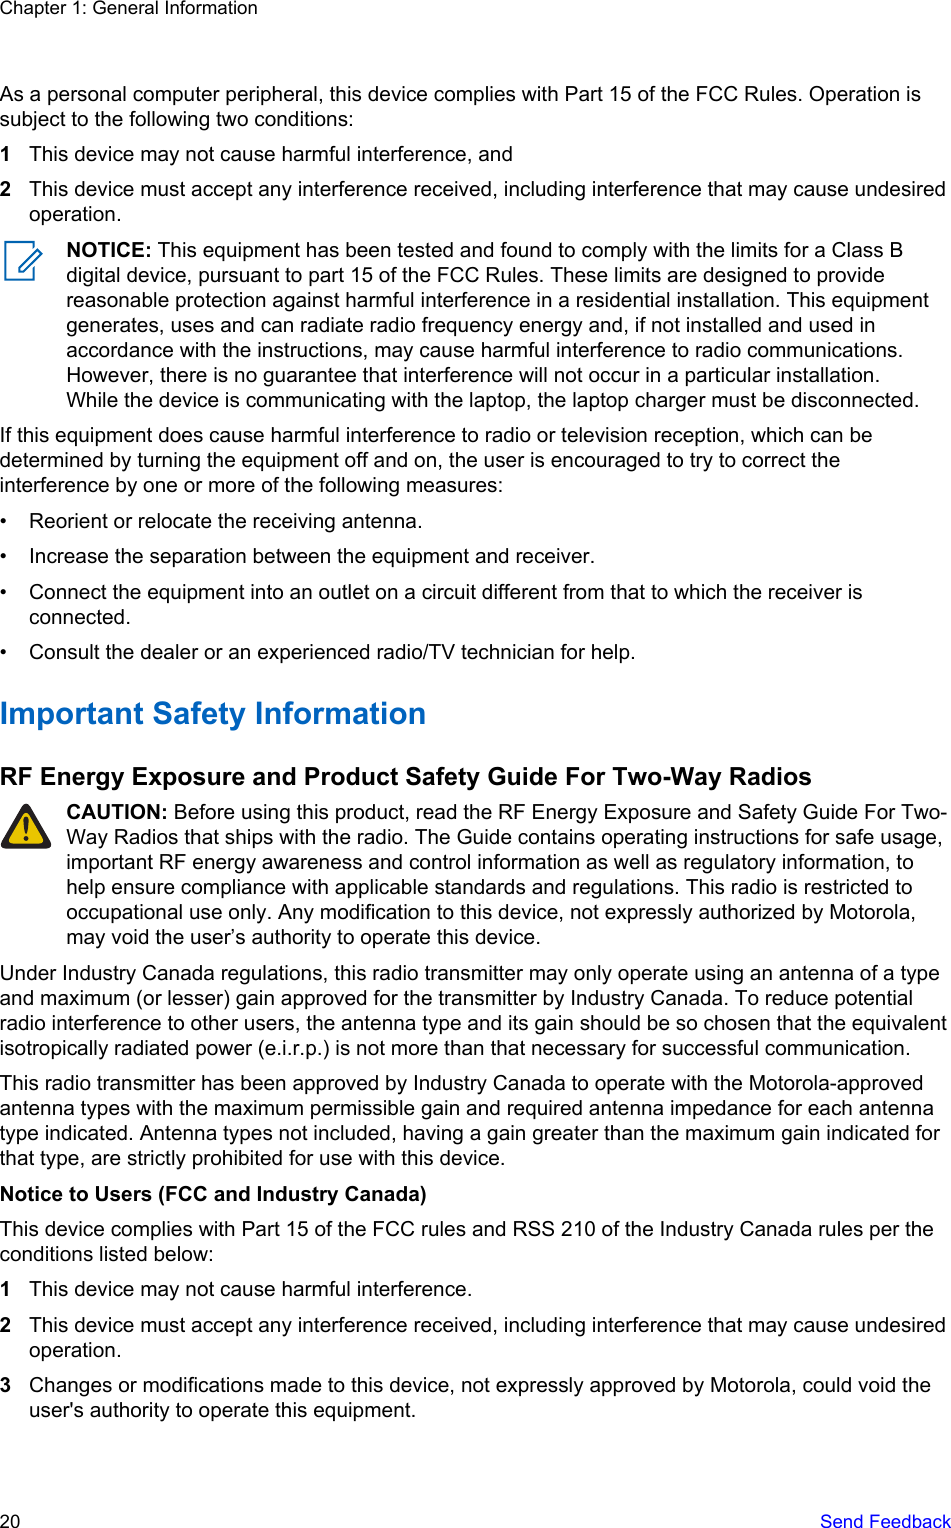
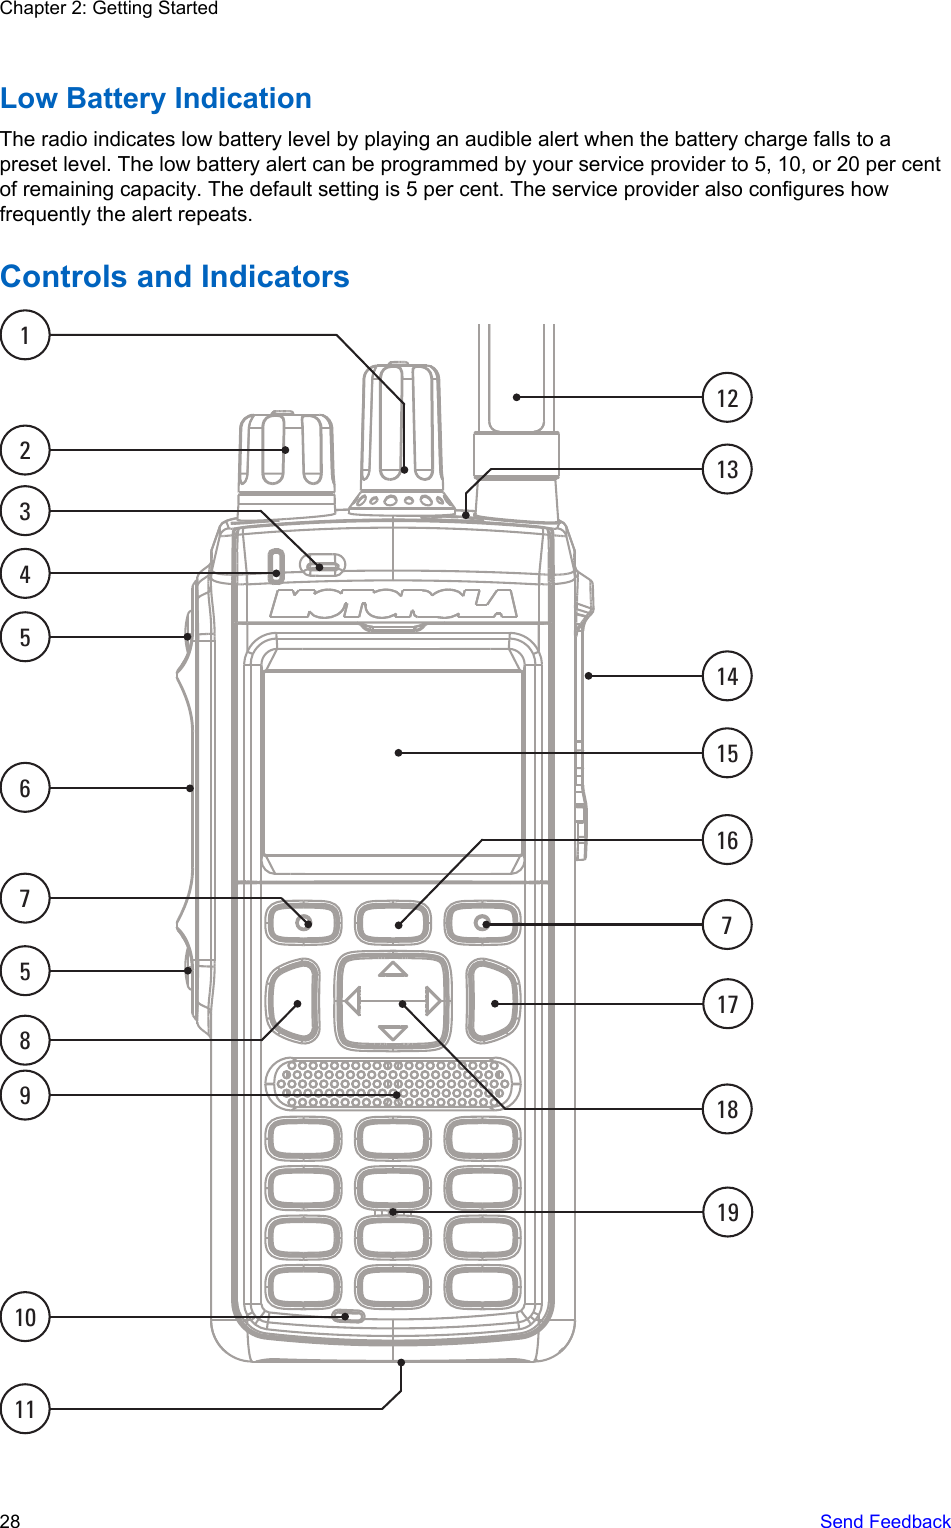
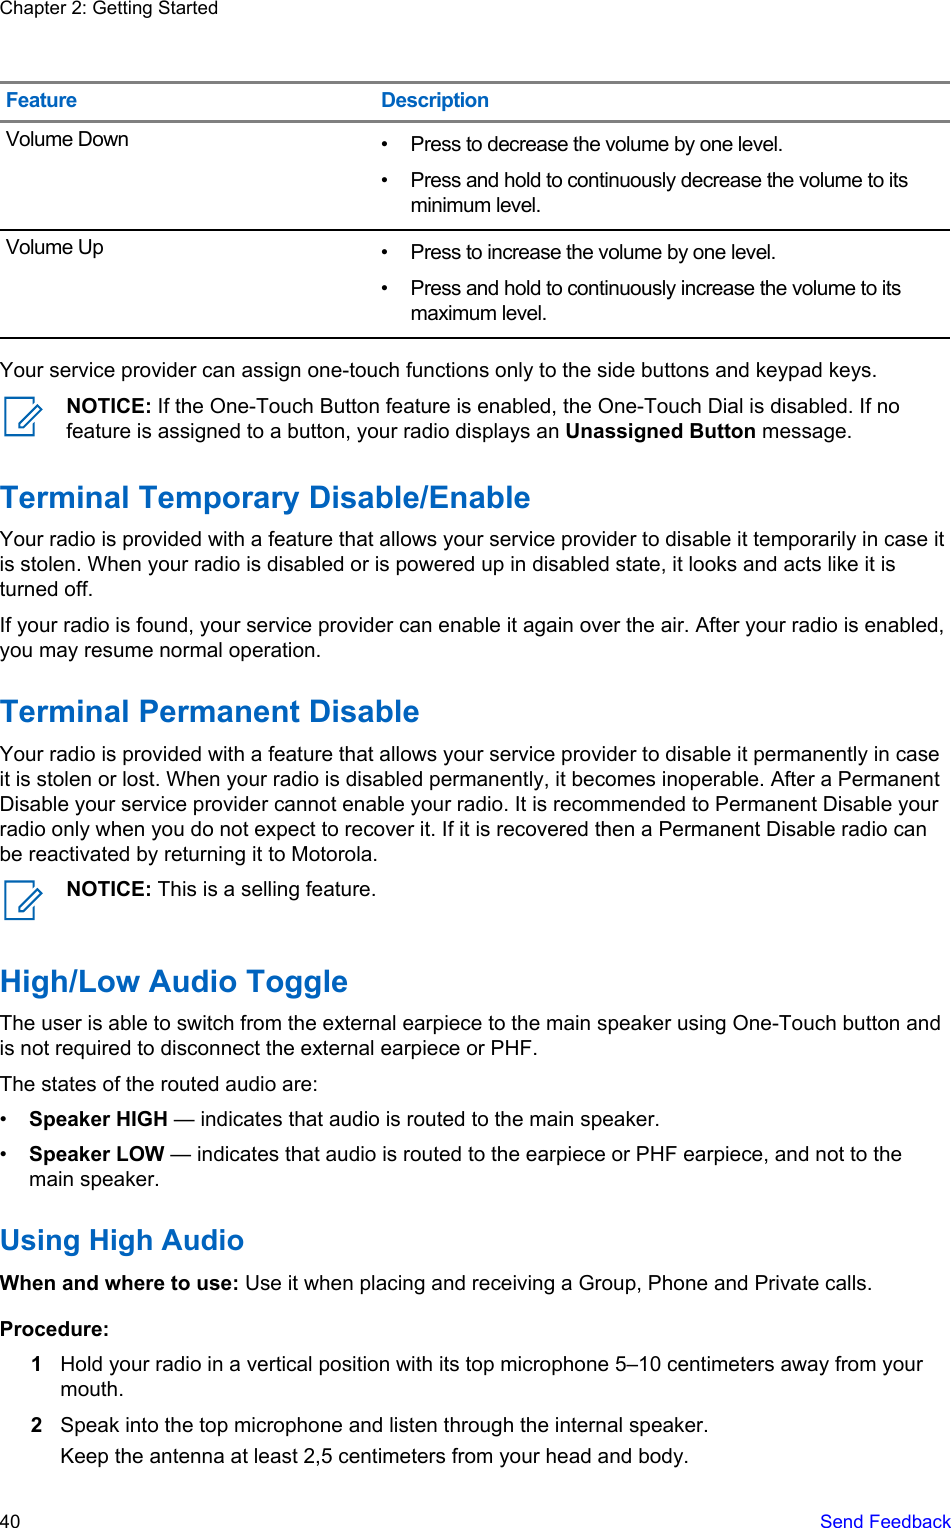
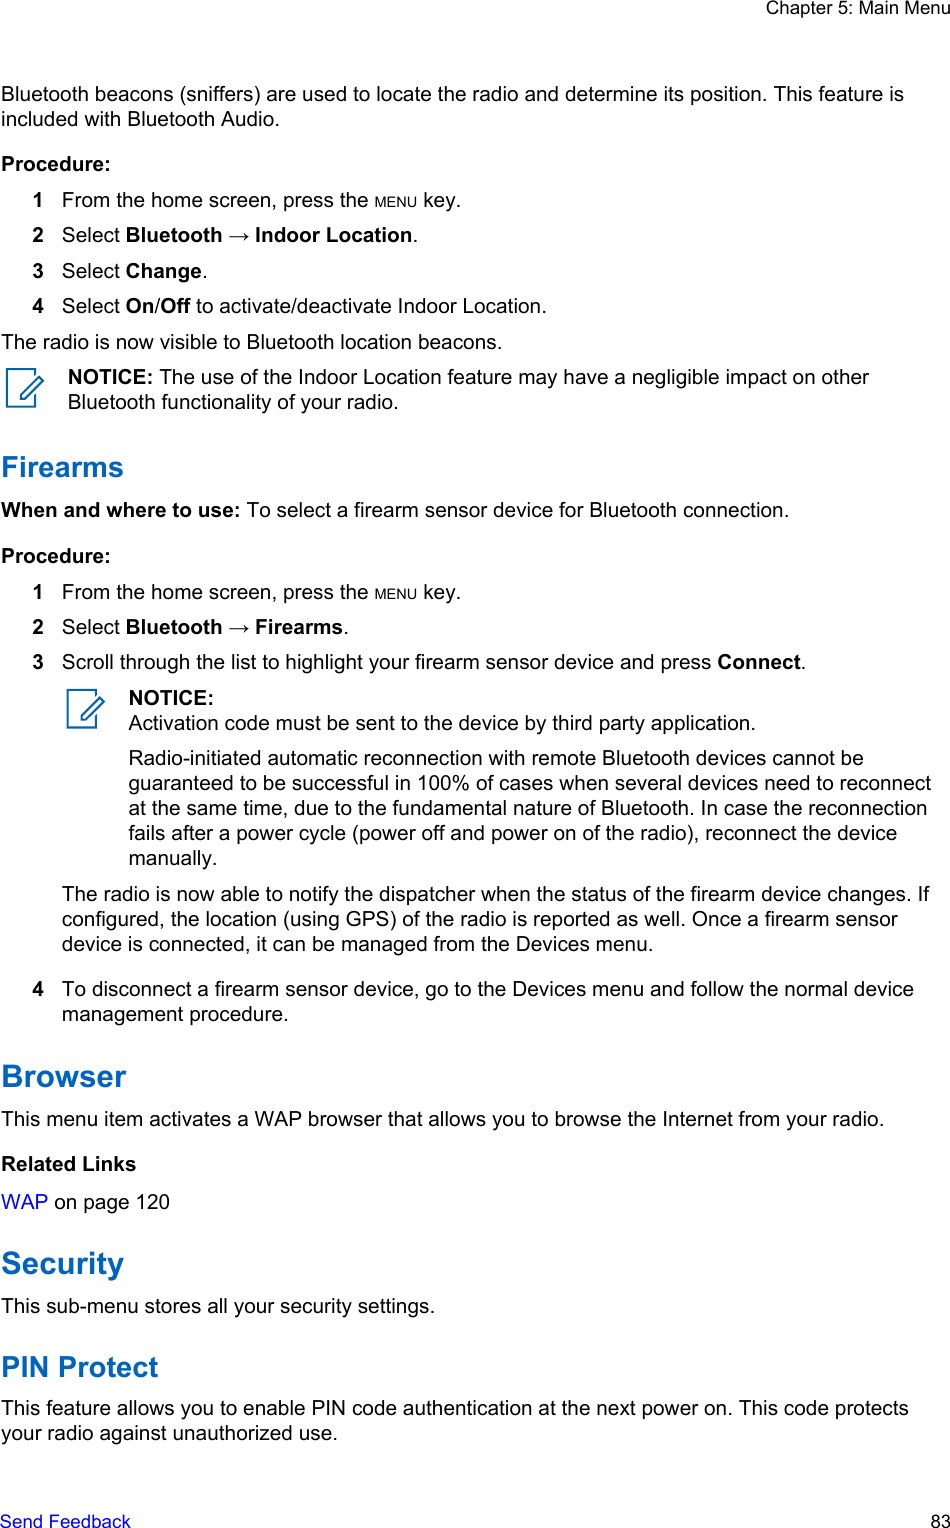
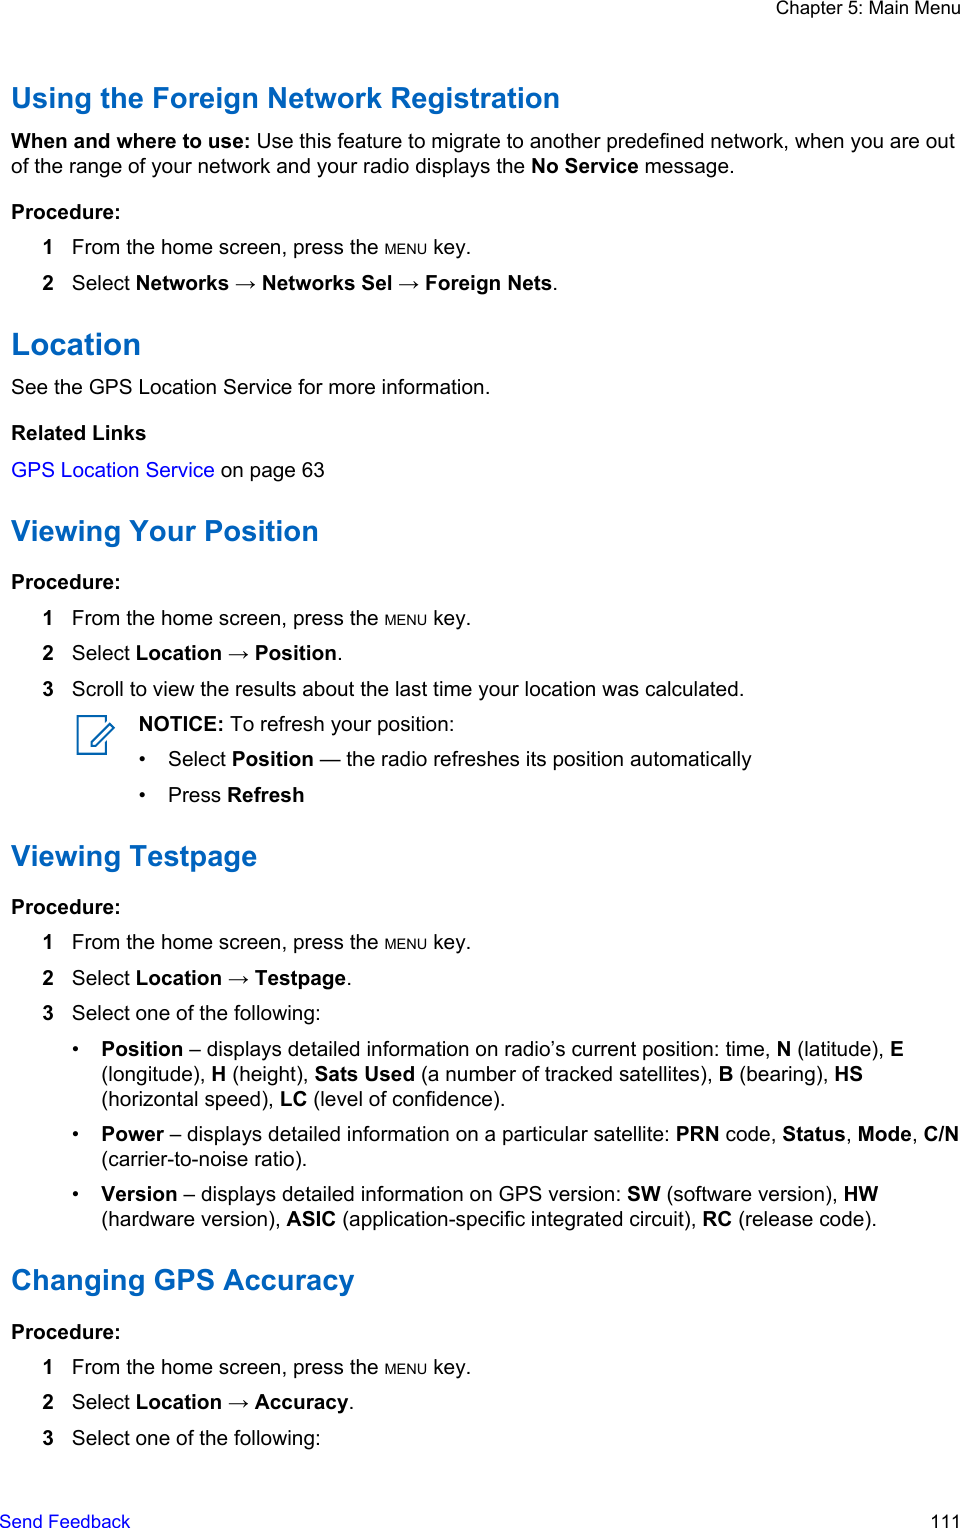
![•Back — dismisses the message. You can access the message later from the Inbox.Using Submenus in the Inbox and the OutboxProcedure:1From the home screen, press the MENU key.2Select Messages → Inbox or Outbox.3Highlight the required message and press MENU key.4Select one of the following:•Store — Saves a message as a template. Change the default template name and press Ok.•Delete — Deletes the selected message. Press Yes to confirm.•Delete All — Deletes all the messages in the Inbox/Outbox. Press Yes to confirm.•Reply (only for Inbox) — Invokes the edit screen with the old message as default text andthe message originator as a recipient. After editing, press Send, the PTT button, or the SENDkey to send.•Resend (only for Outbox) — Invokes the edit screen with previously entered text with thesame recipient. After editing, press Send, the PTT button, or the SEND key to send.•Forward — Invokes the edit screen with the old message to send it to a different participant.After editing, press Send, the PTT button, or SEND key to send.•Refresh — Re-orders the message list and displays the new messages.•Delivery Status (only for Outbox) — Shows the date and time of the message when it sent,delivered, read, and expired was not delivered, expired was not read, failed unknown.Embedded NumberThis feature allows you to call a number from a message or to start a group call with the messagesender talkgroup.Storing Numbers from MessagesPrerequisites: Embedded Number feature is enabled by your service provider.When and where to use: You can save the sender's or embedded number from the message to anew or existing contact.Procedure:1From the home screen, press the MENU key.2Select Messages → Inbox.3Highlight the required message and select Read.4Press the PTT button.5Radio displays a list of the numbers (including the senders number).6Highlight the required number and press Store.7Highlight required contact and press View.NOTICE: To store a number for a new contact, select [New Contact] and fill out therequired fields. Press Done to save it..8Select Edit.Chapter 5: Main Menu72 Send Feedback](https://usermanual.wiki/Motorola-Solutions/89FT5868.Manual/User-Guide-2590389-Page-72.png)

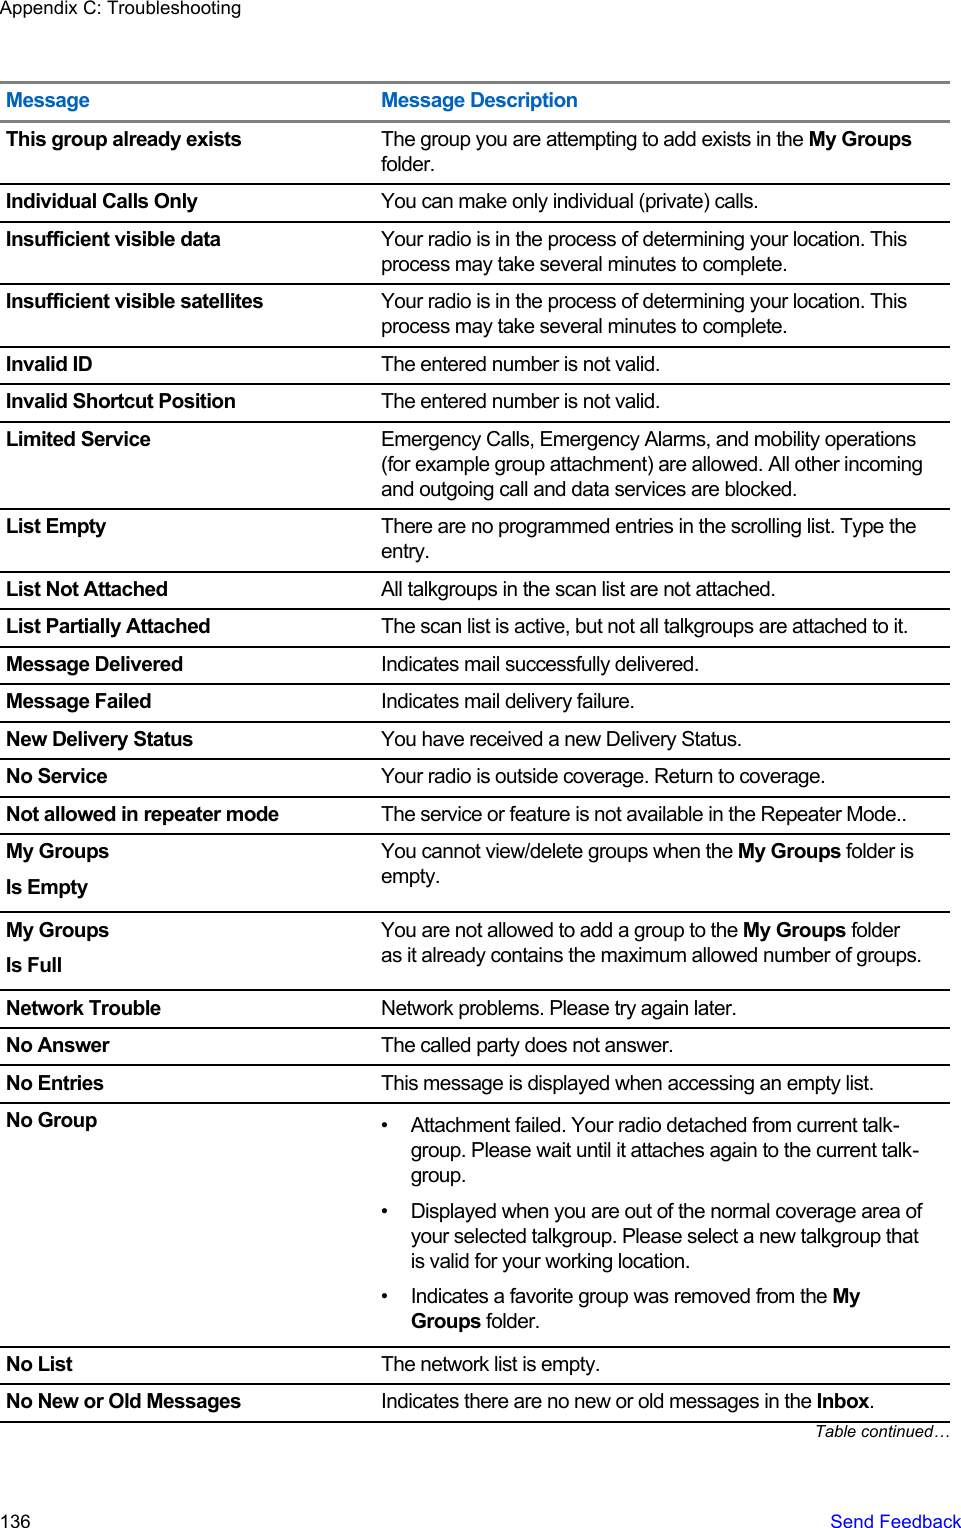
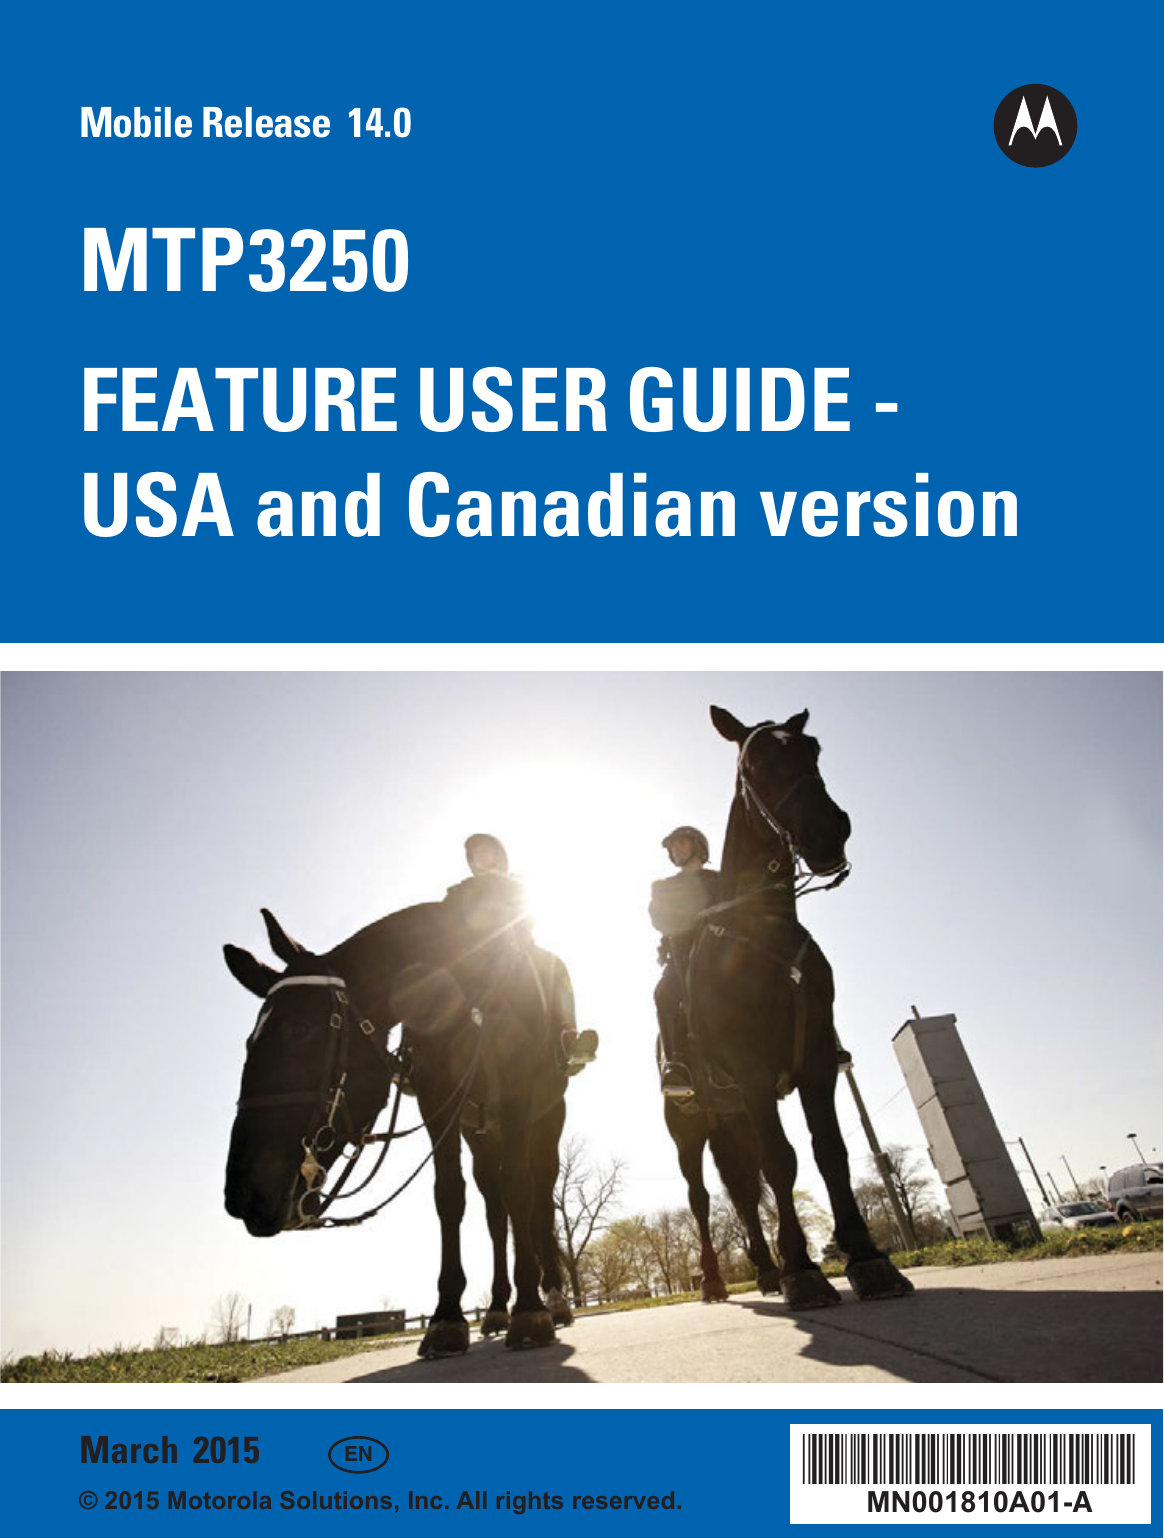
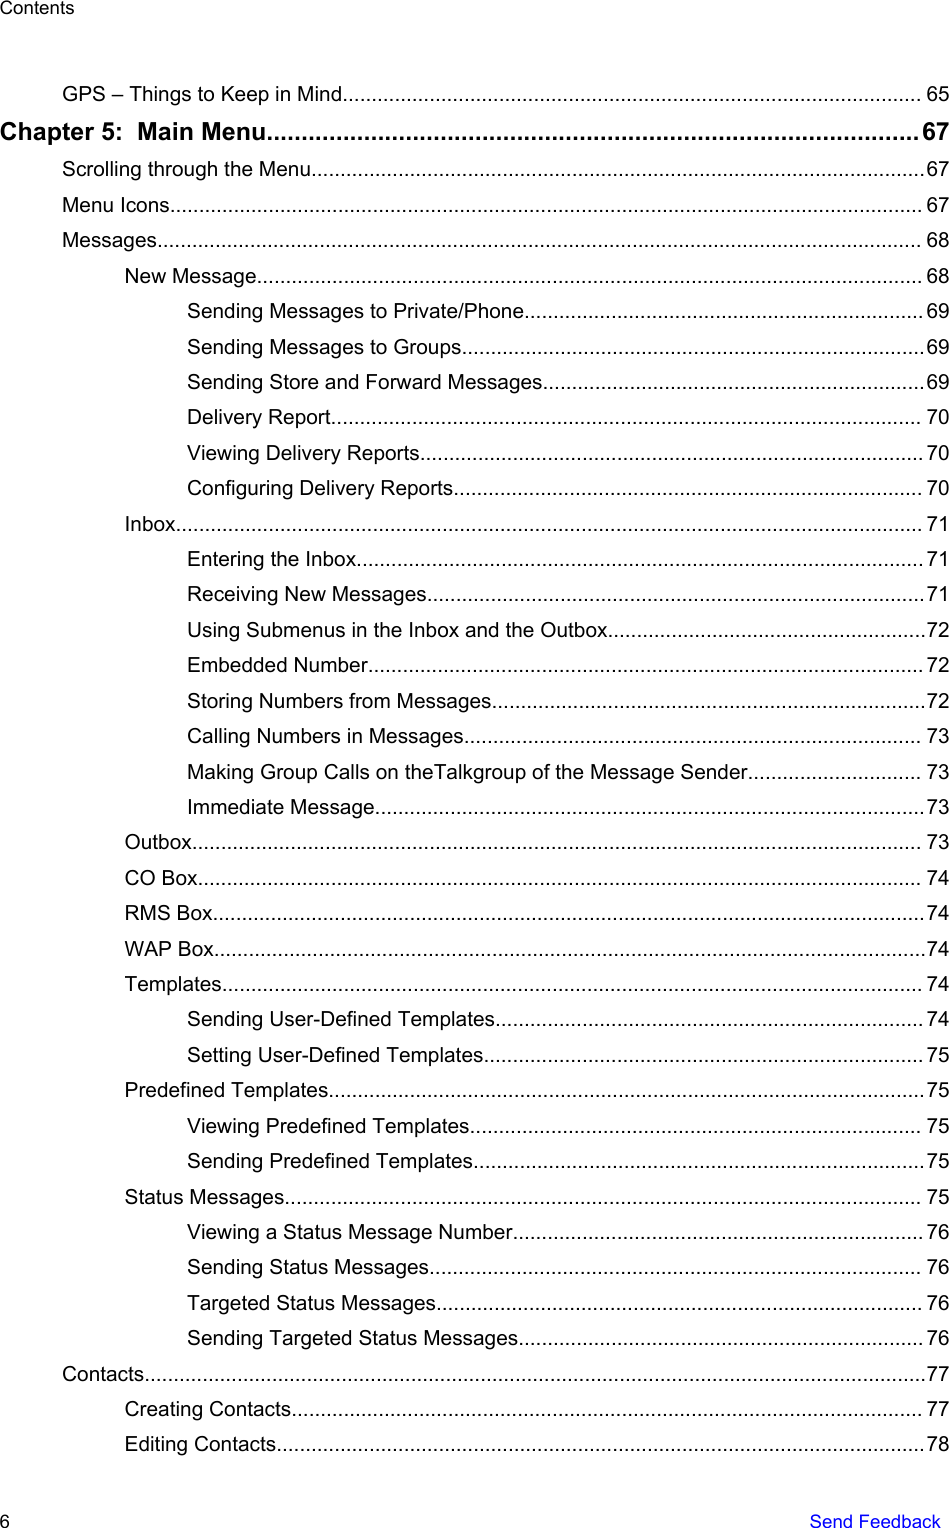
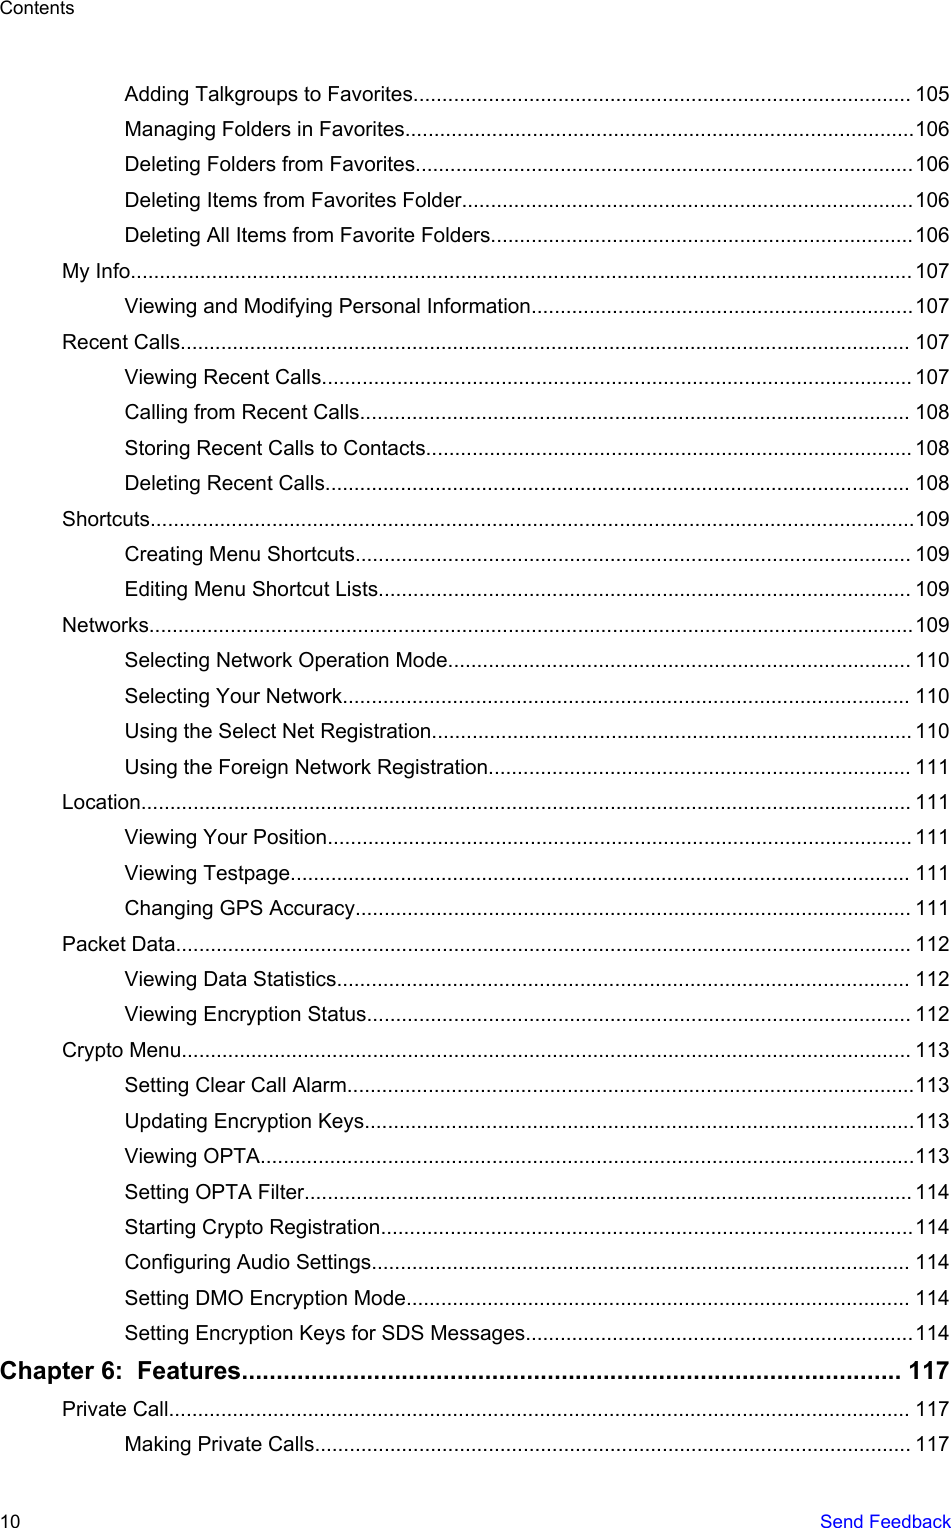
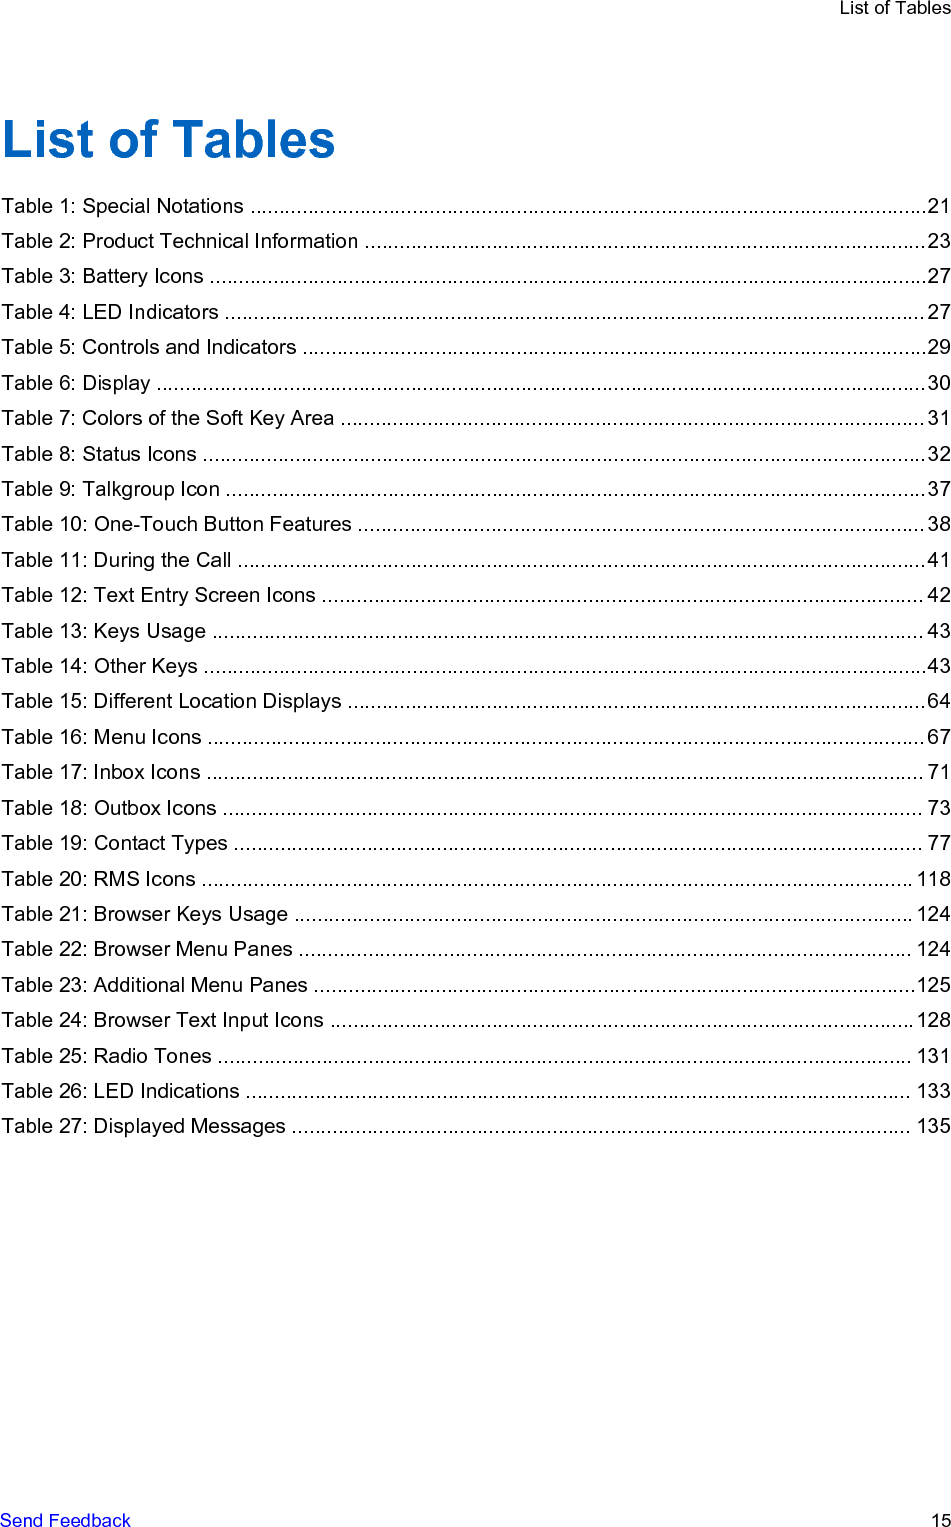
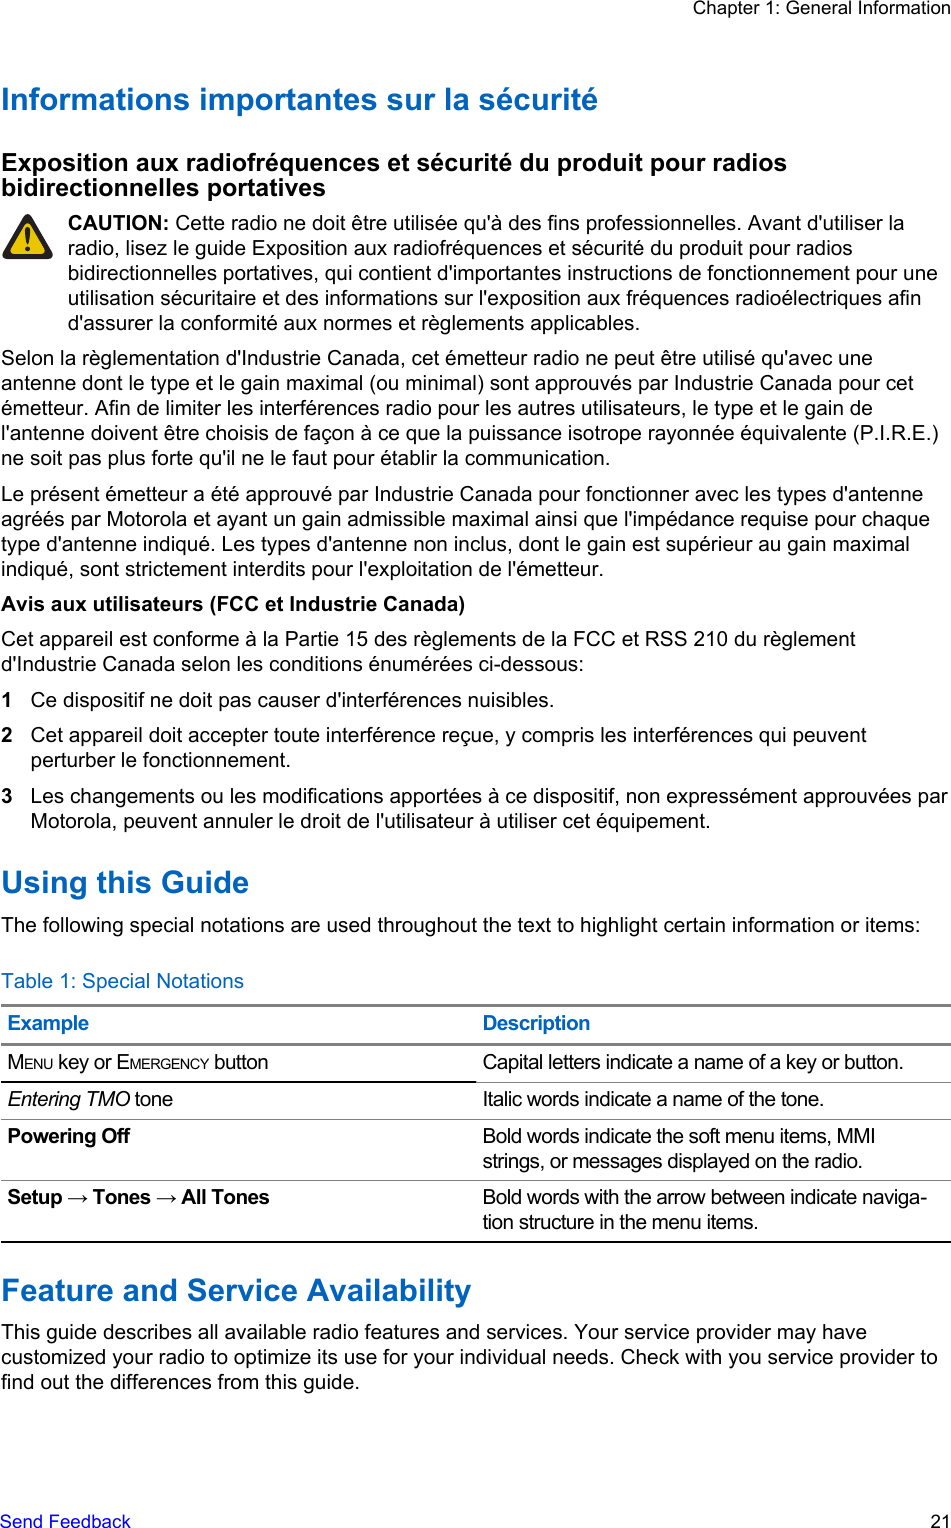
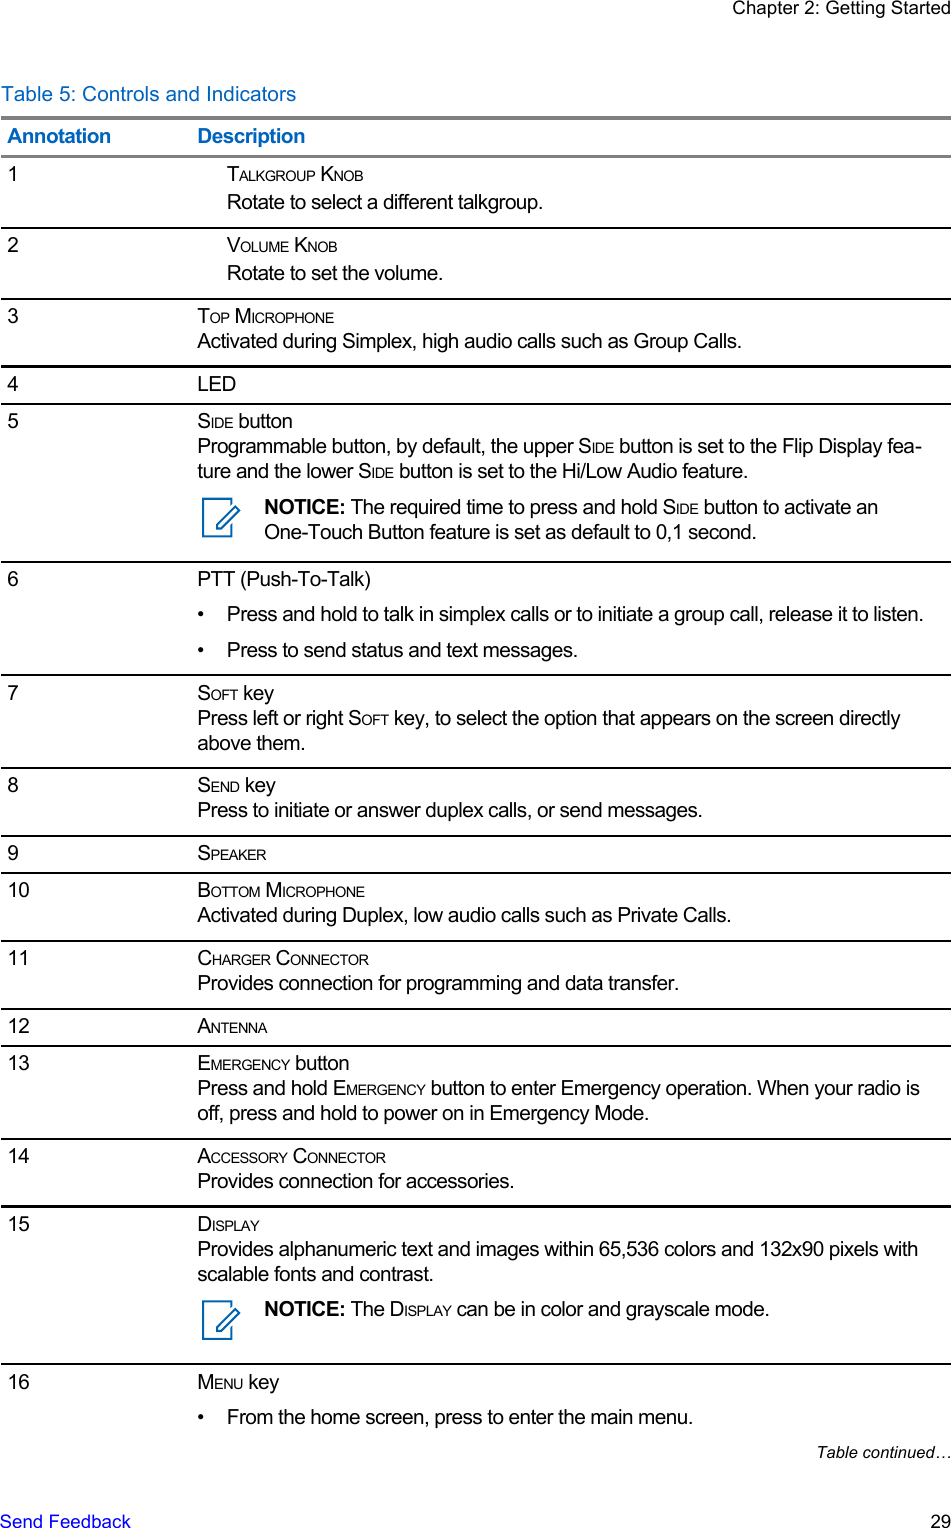
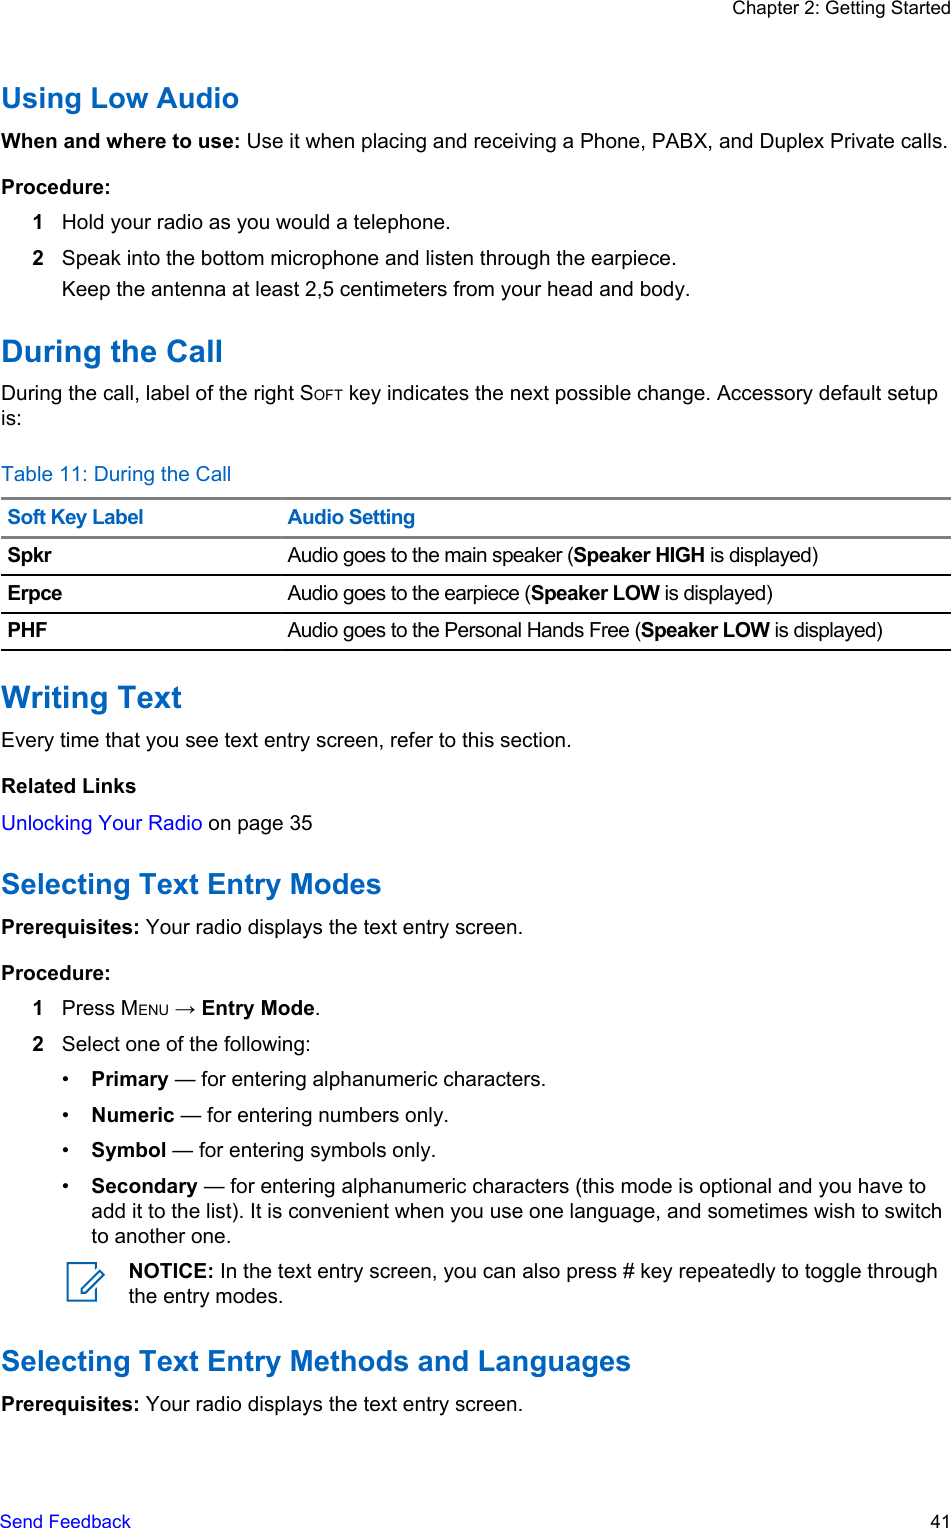
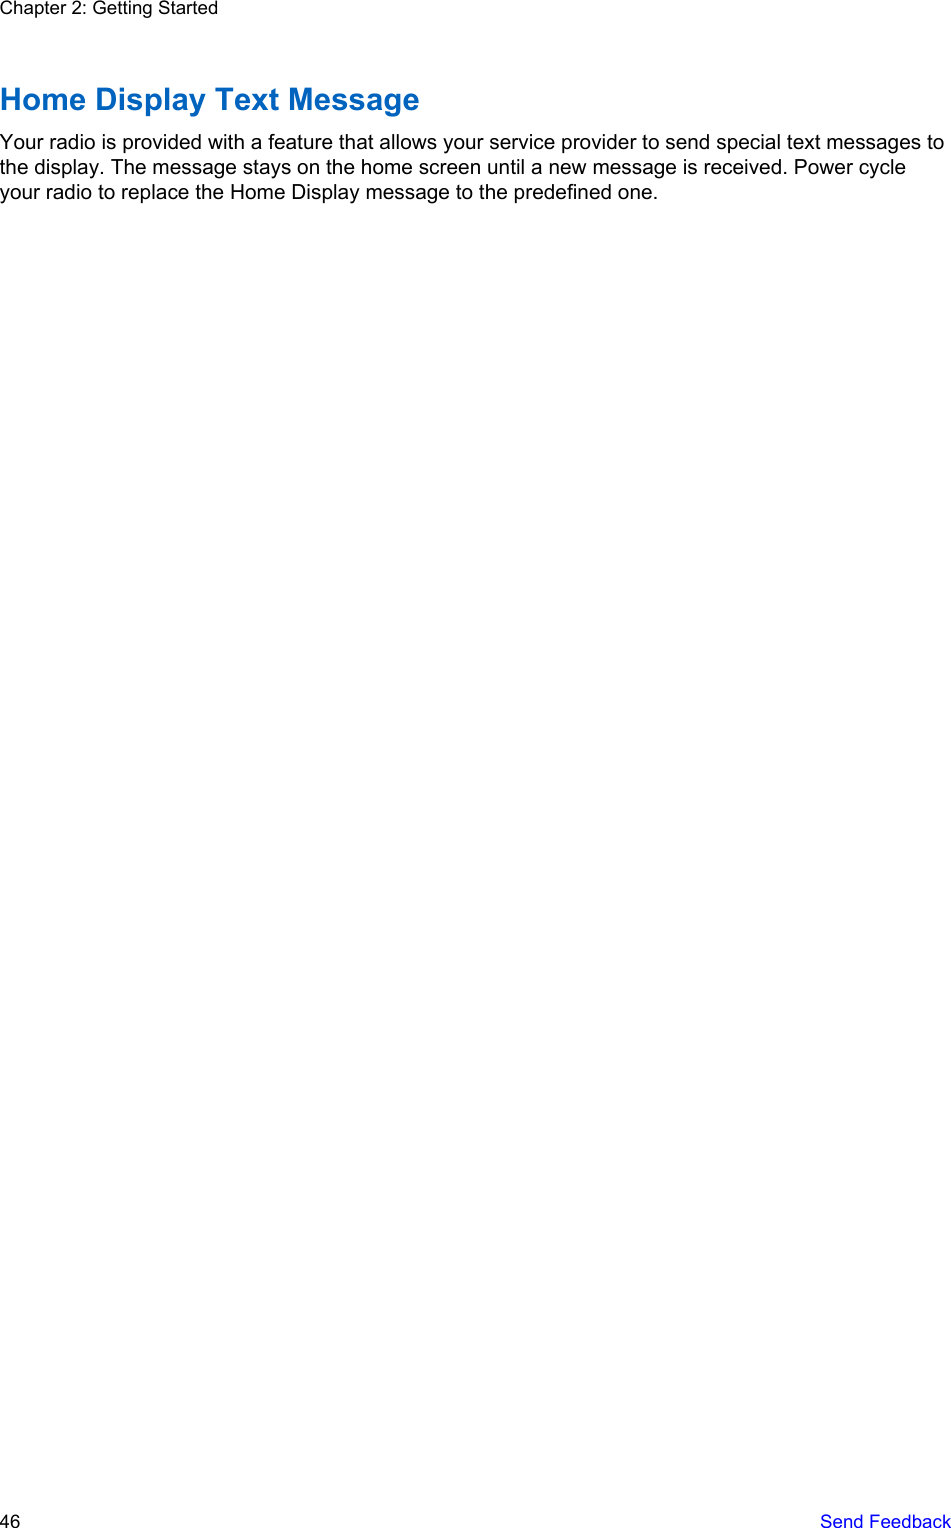
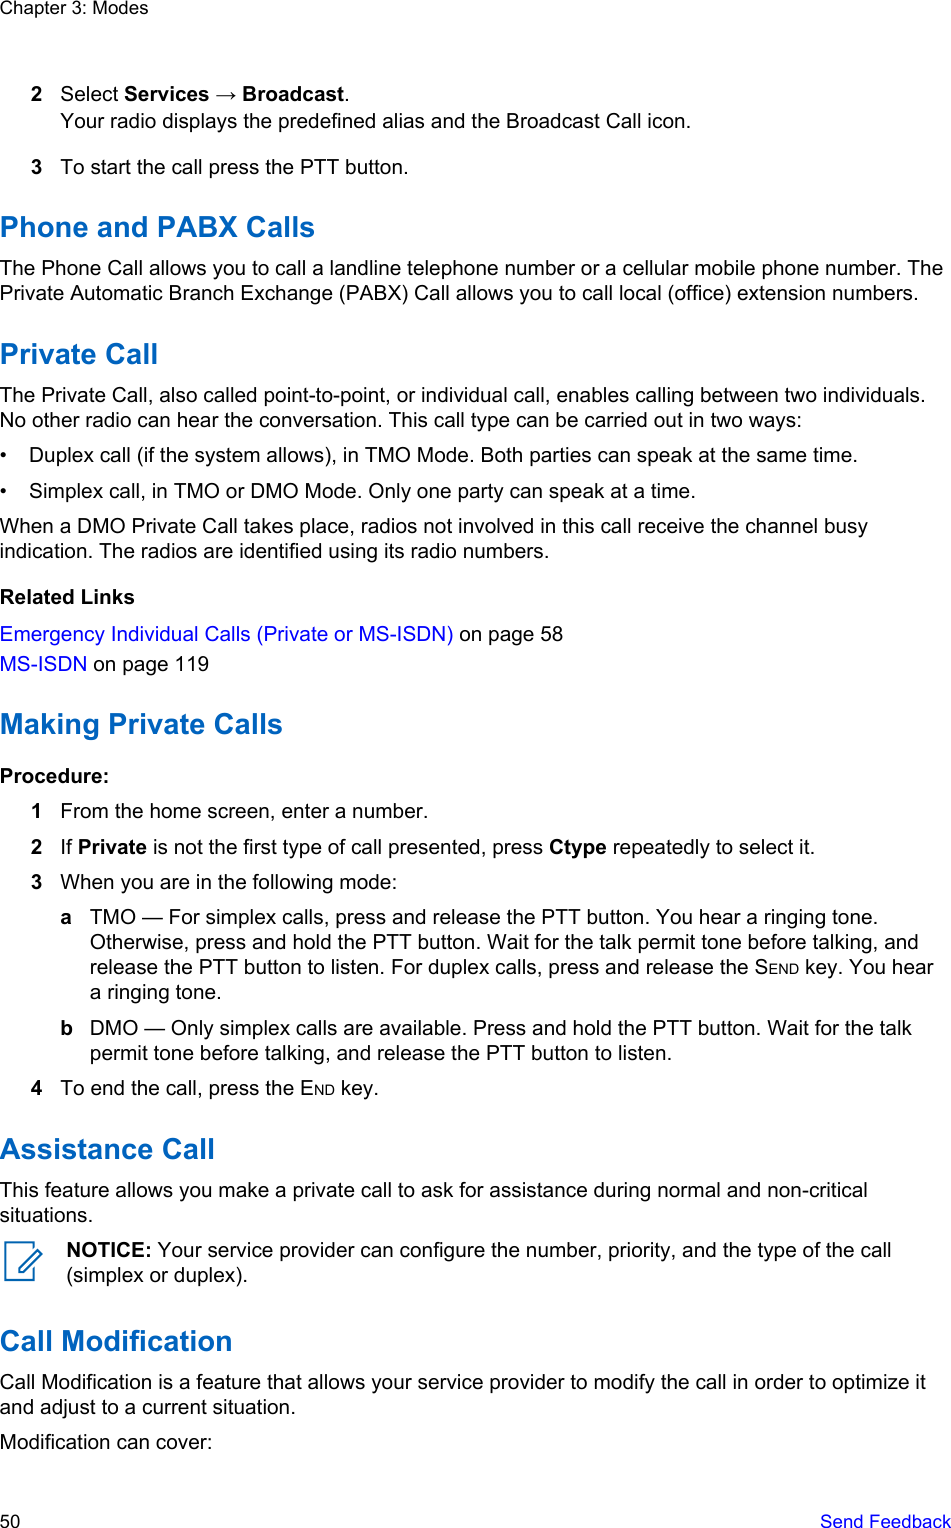
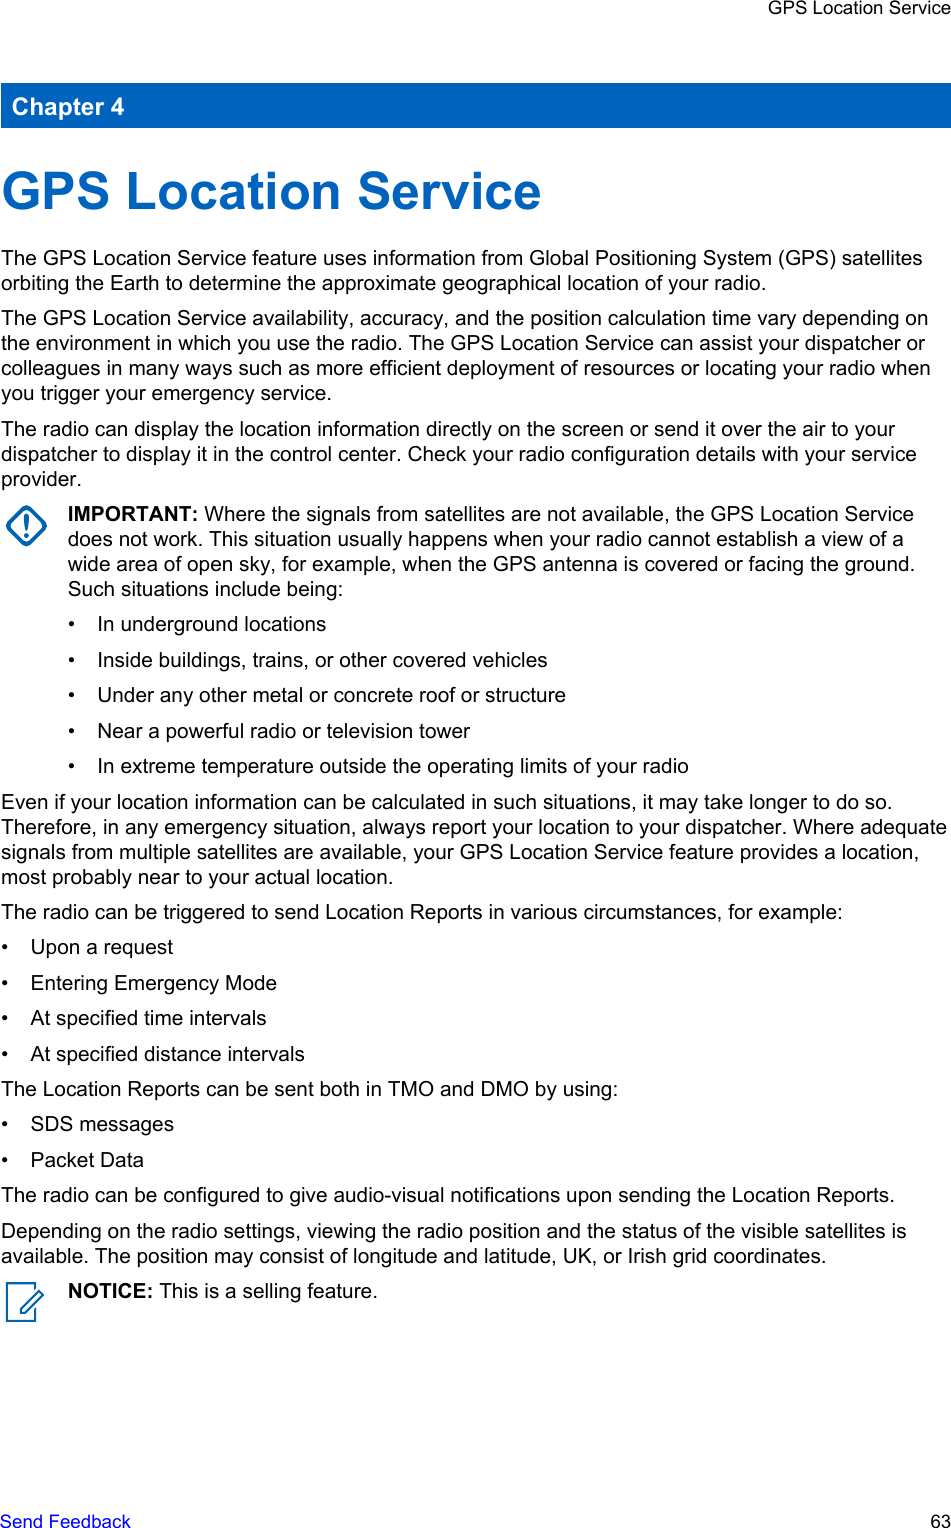
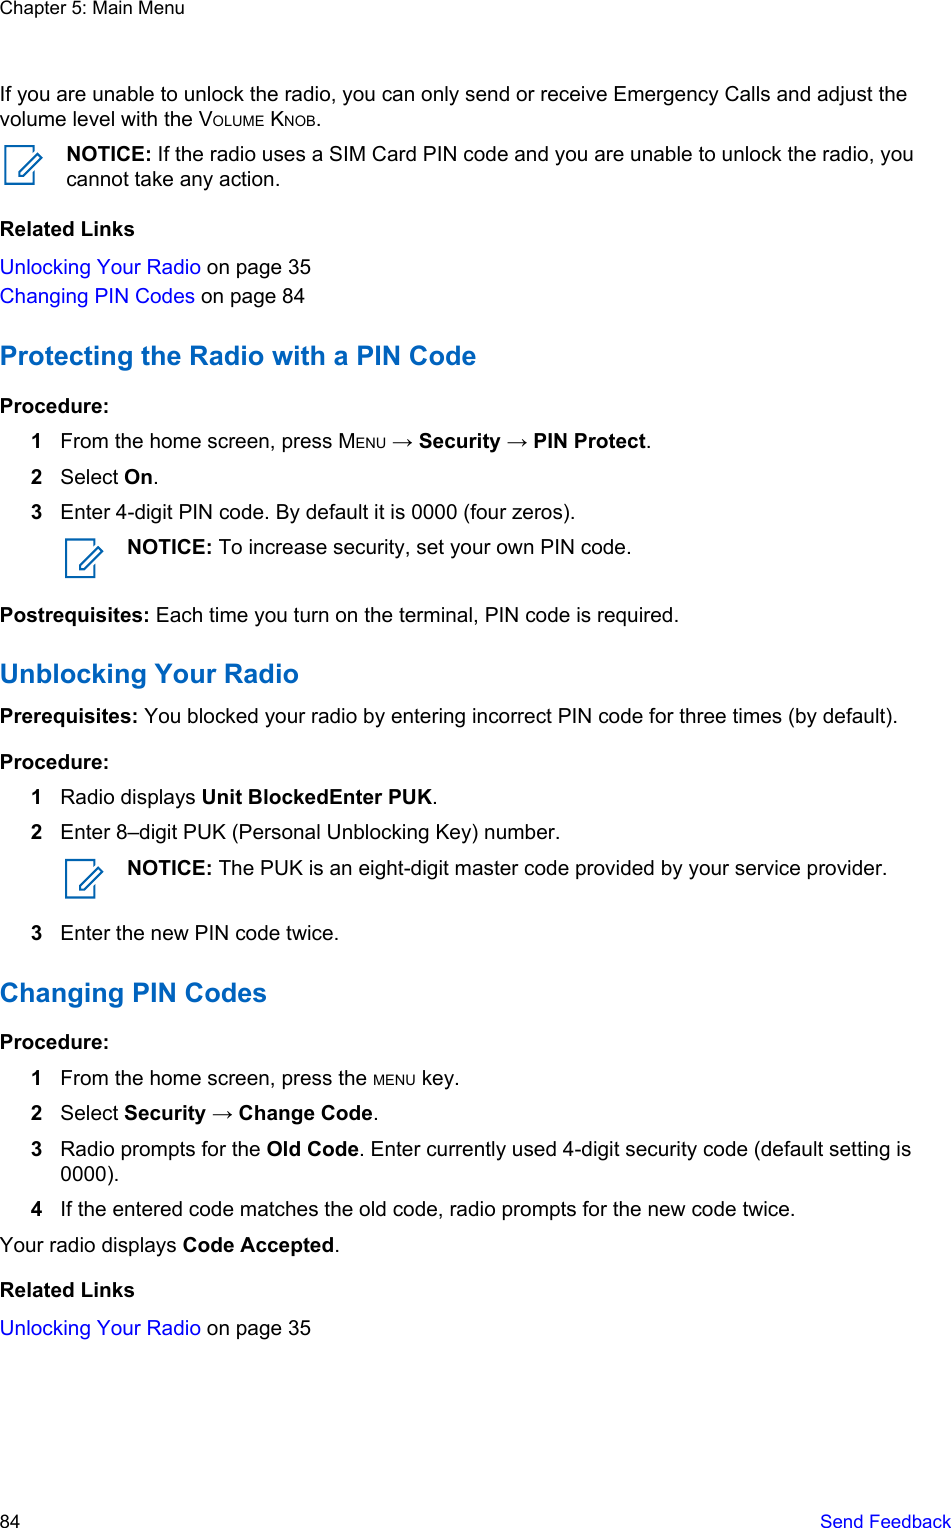
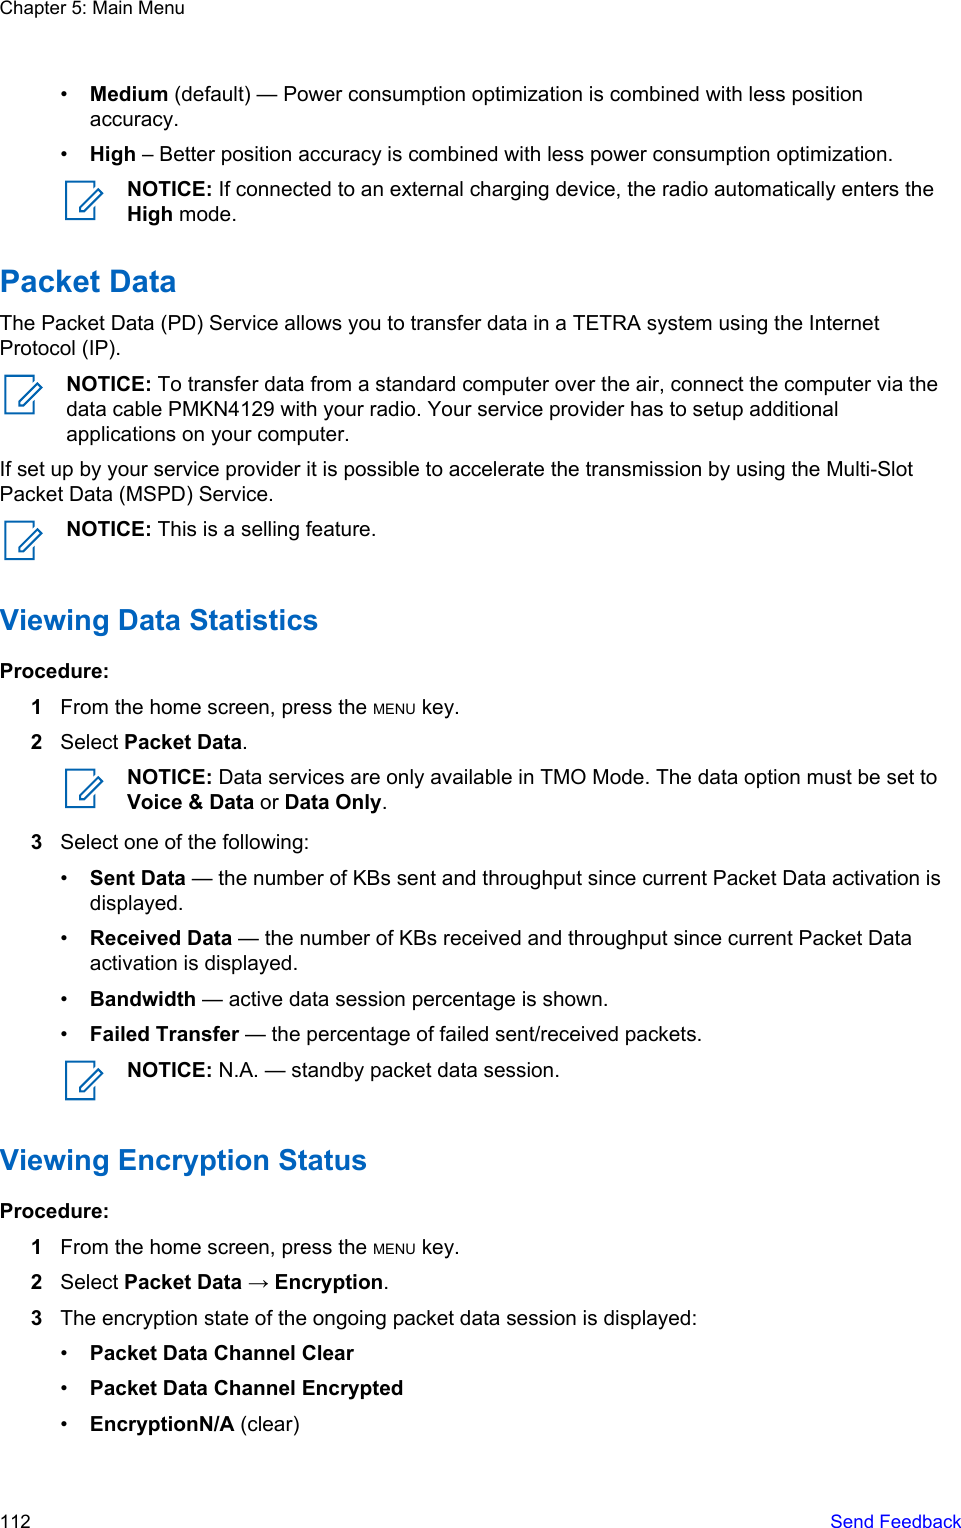
![ContactsThis sub-menu stores all your contact numbers. Each entry requires the following information:•Name — if you store more than one number to one contact, this entry is required.•Type — each contact must be assigned to one of the following types:Table 19: Contact TypesContact Icon DescriptionPrivateCannot have a speed dial number.MobileHomeWorkPABXOtherPickersIndicate more than one number in a contact.•# (number) — each contacts entry must contain a number.•Speed # — accept the default Speed Dial number or change it.Creating ContactsProcedure:1From the home screen, select Contcs.2Select [New Contact].3Highlight Name and press Change. Enter the name of your contact and press Ok.4Highlight Type and press Change. Select the required type of your contact.NOTICE: You can use the left and right NAVIGATION keys to select the type of your contactfrom the Contact Details screen.5Highlight # (number) and press Change. Enter the number of your contact and press Ok.6If needed, highlight Speed # and press Change. Enter the speed dial number (1– 1000) of yourcontact and press Ok.NOTICE: If the entered number exist, the radio displays Overwrite? message. PressYes to confirm, or No to enter the speed dial number again.7Press Done.You have create a contact with one number. To add additional number repeat steps 4–6.Chapter 5: Main MenuSend Feedback 77](https://usermanual.wiki/Motorola-Solutions/89FT5868.Manual/User-Guide-2590389-Page-77.png)


![Setting Scan ListsWhen and where to use: If you want to set up any scan list.Procedure:1From the home screen, press the MENU key.2Select Group Setup → Scan → Scan Lists.3Highlight required scan list and press MENU to see additional settings:•Rename — Enters new name for that scan list.•Capacity — Displays the number of assigned and unassigned talkgroups for the scan list.•Clear — Deletes all the talkgroup assigned to that scan list.•Add Group — Adds a talkgroup to the scan list. Select one talkgroup from your talkgroupfolders and assign appropriate priority.•Edit — Changes the priority of the required talkgroup or deletes it.Deleting Talkgroups from Scan ListsProcedure:1From the home screen, press the MENU key.2Select Group Setup → Scan → Scan Lists.3Highlight the required scan list and press MENU → Edit.4Highlight the required talkgroup and press MENU → Delete.My GroupsThis sub-menu allows you to select/edit your favorite group list.Adding Favorite FoldersProcedure:1From the home screen, press the MENU key.2Select Group Setup → My Groups.3Select [New Folder].4Enter the name and select Ok.Adding Talkgroups to Favorite FoldersProcedure:1From the home screen, press the MENU key.2Select Group Setup → My Groups.3Select <FolderName>.4Select [New Group].5Select the required talkgroup by Folder or by alphabetic search.Chapter 5: Main Menu104 Send Feedback](https://usermanual.wiki/Motorola-Solutions/89FT5868.Manual/User-Guide-2590389-Page-104.png)
![6Select View.NOTICE: Press down NAVIGATION key to bypass first two steps.NOTICE: Call time information is only available if the time and date are set in the radio.Call duration is not available in the missed calls list.Calling from Recent CallsProcedure:1From the home screen, press the MENU key.2Select Recent Calls.3Select one of the following:•Dialed (from the home screen press SEND key to access Dialed Calls list)•Received•MissedNOTICE: From the home screen press down NAVIGATION key, to access Recent Callsmenu item.4Highlight the required call and press the PTT button for private calls or press theSEND key tomake a phone call.NOTICE: Phone calls are only available in TMO Mode.Storing Recent Calls to ContactsProcedure:1From the home screen, press the MENU key.2Select Recent Calls.3Select Dialed, Received or Missed.4Press Store.NOTICE: If Store is not assigned to the left SOFT key, the number is already stored inyour contact list.5To store the number as a new entry, select [New Contact]. Or, to store the number to anexisting entry, select the entry, and press View then select Edit.6With the contact type field highlighted, scroll left or right to display the contact type you want toassign the number.7Select Done.Deleting Recent CallsProcedure:1From the home screen, press the MENU key.2Select Recent Calls.3Select Dialed, Received or Missed.Chapter 5: Main Menu108 Send Feedback](https://usermanual.wiki/Motorola-Solutions/89FT5868.Manual/User-Guide-2590389-Page-108.png)
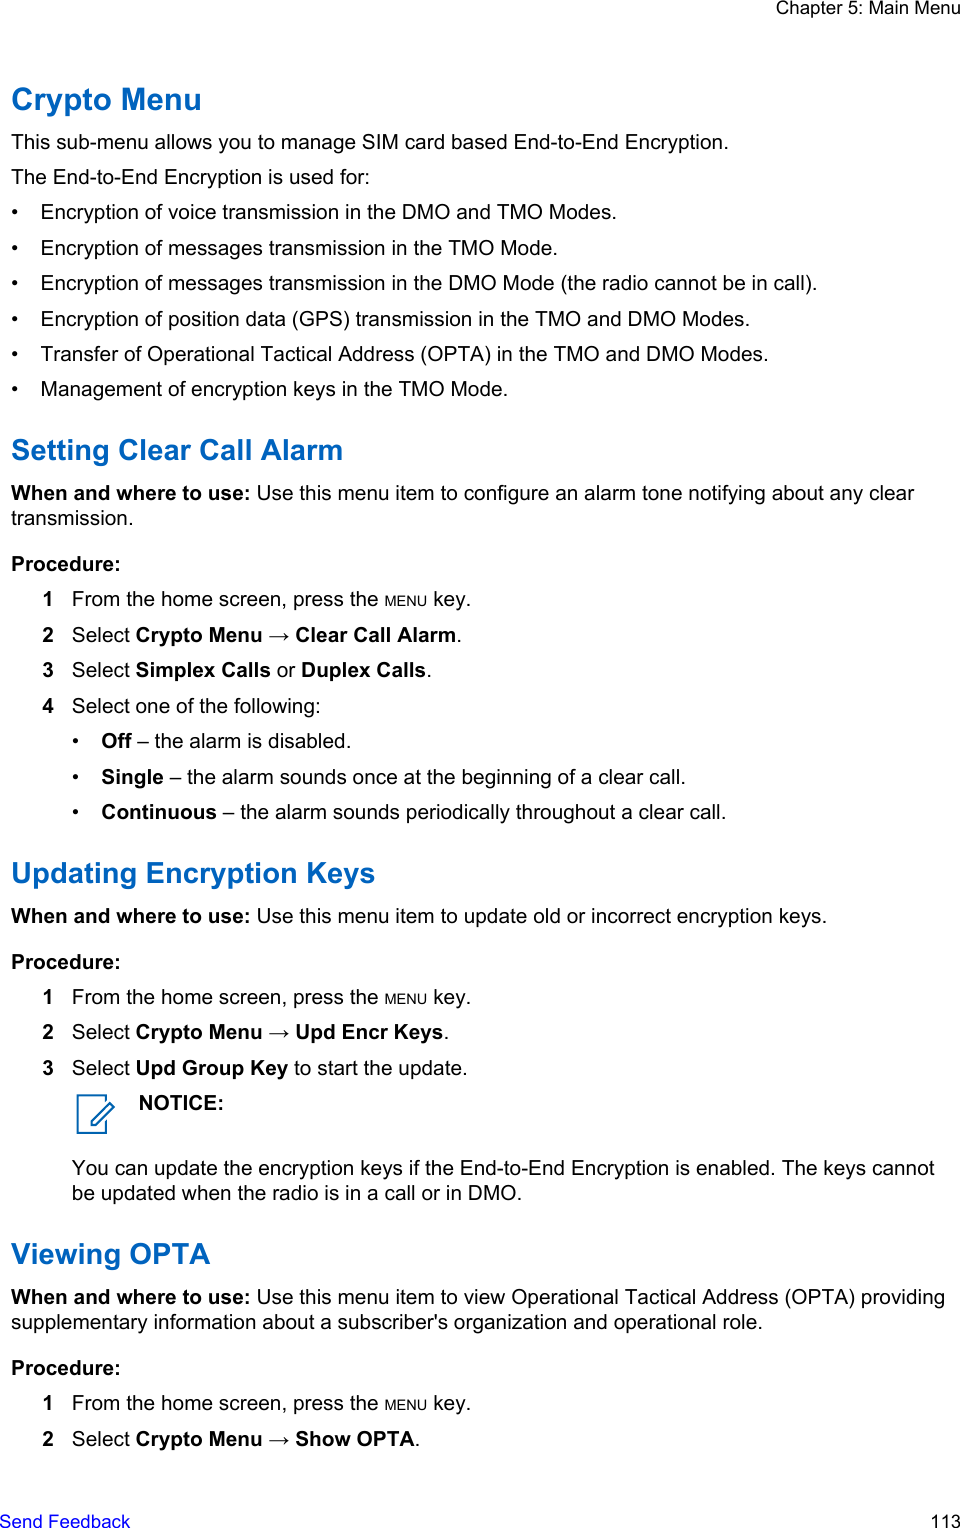


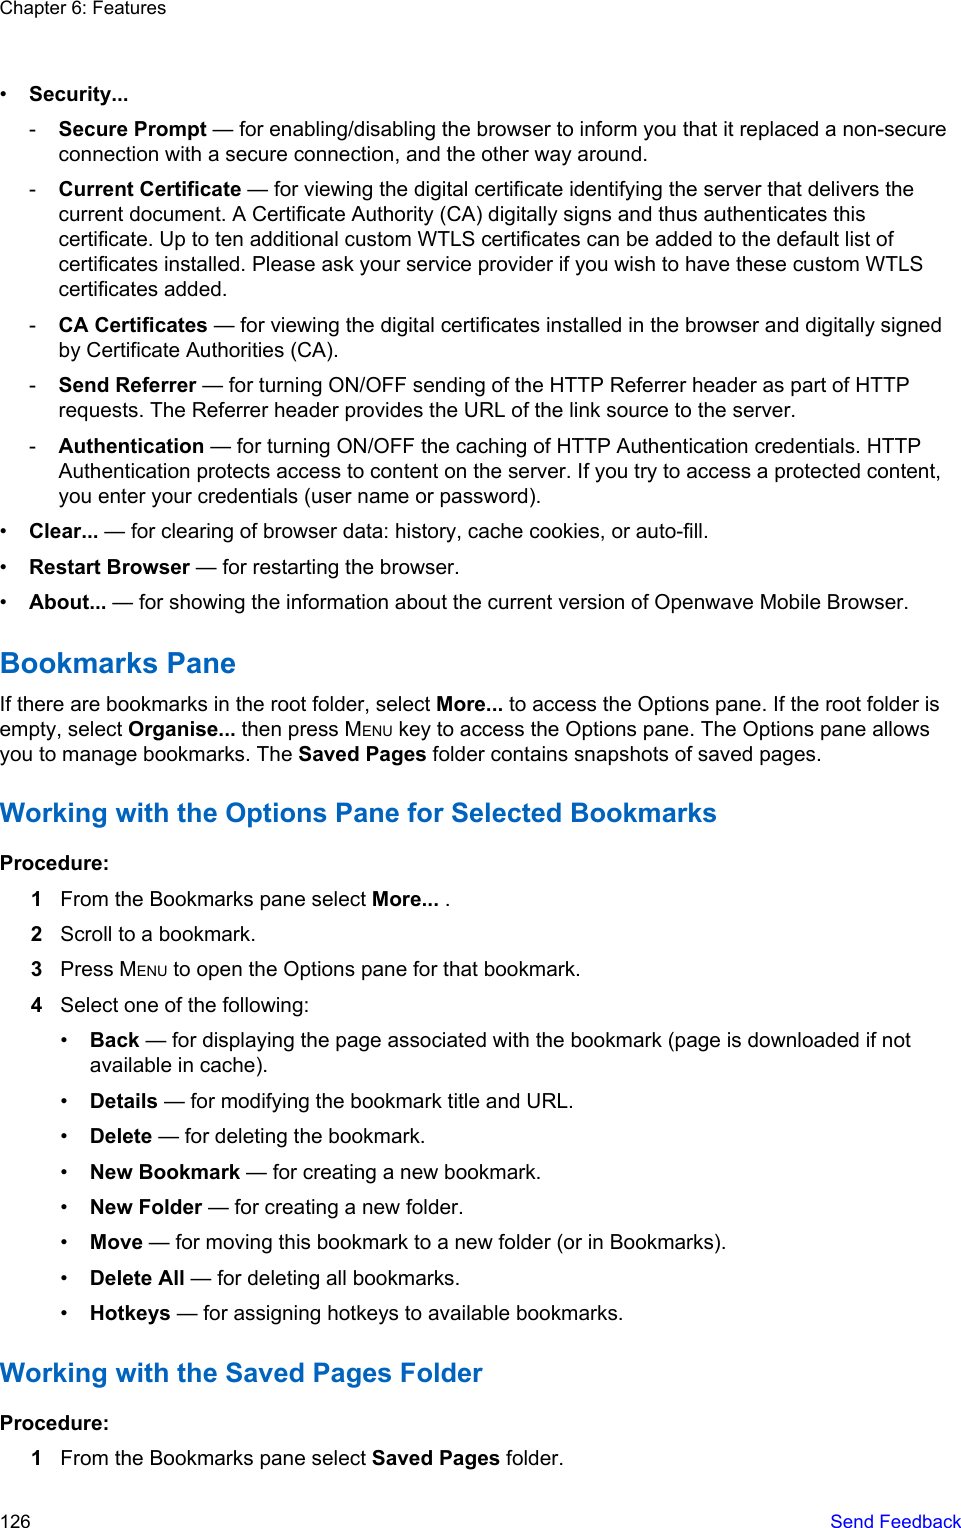

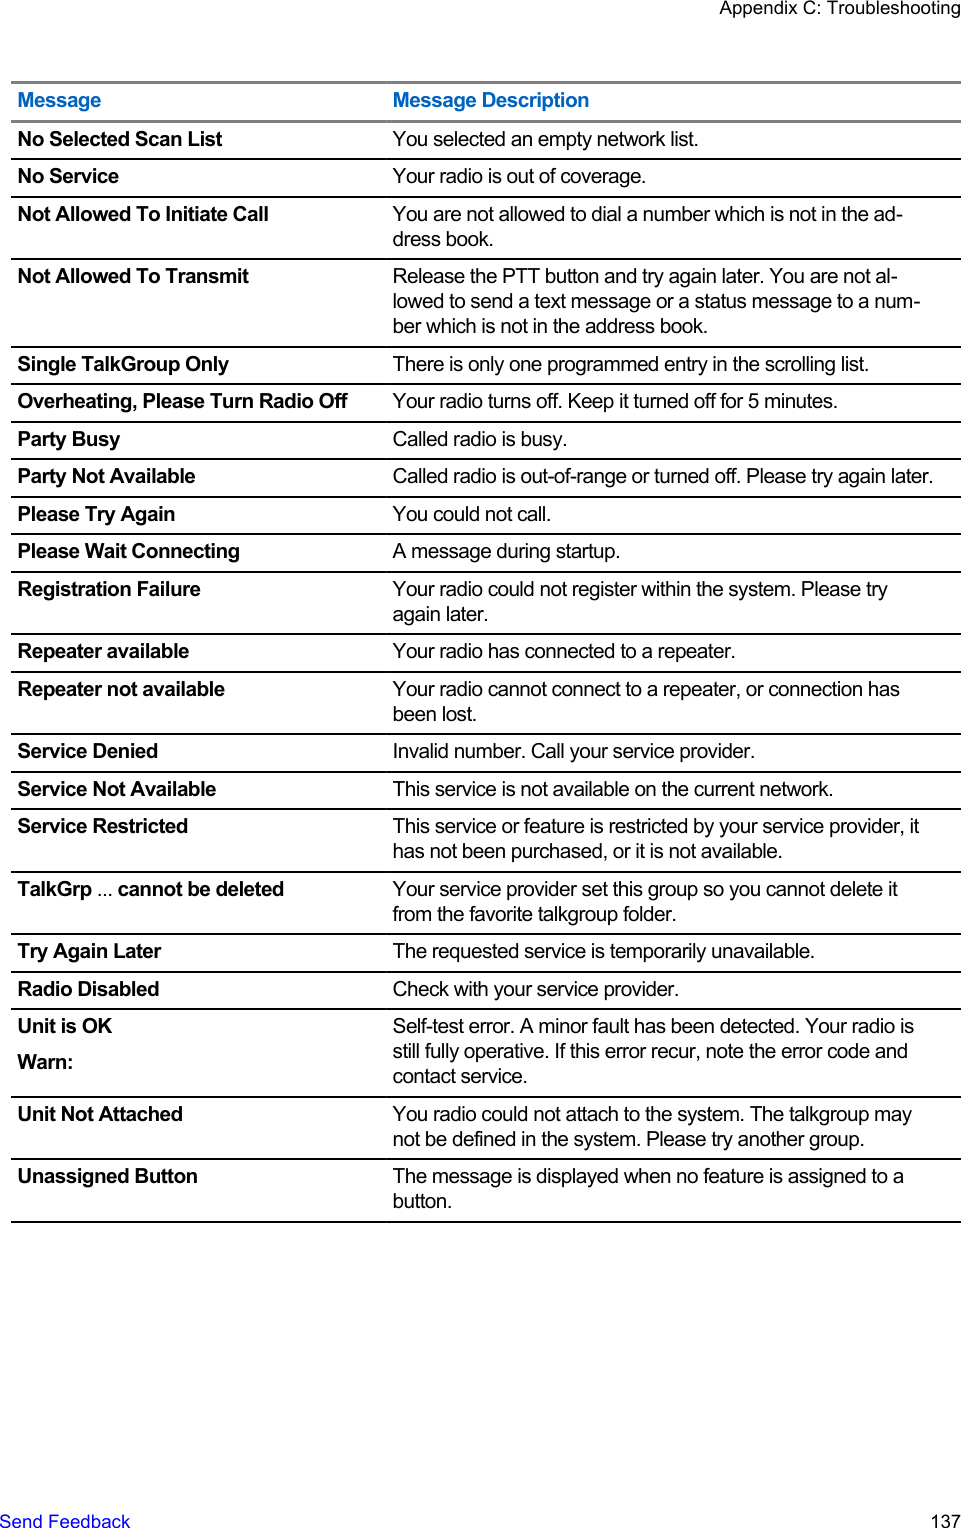
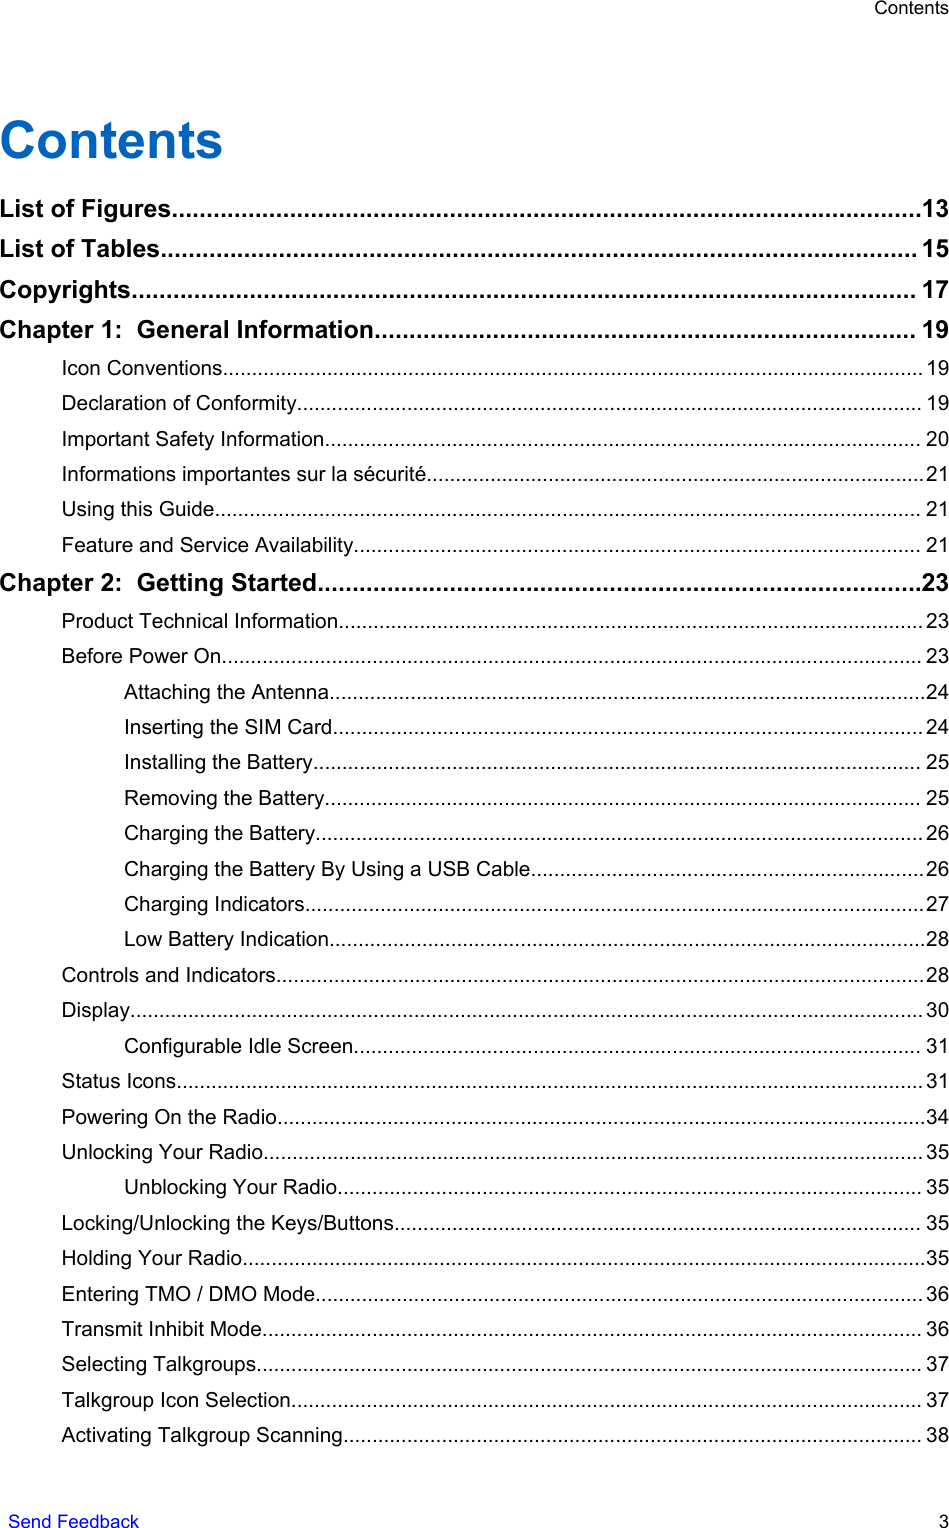
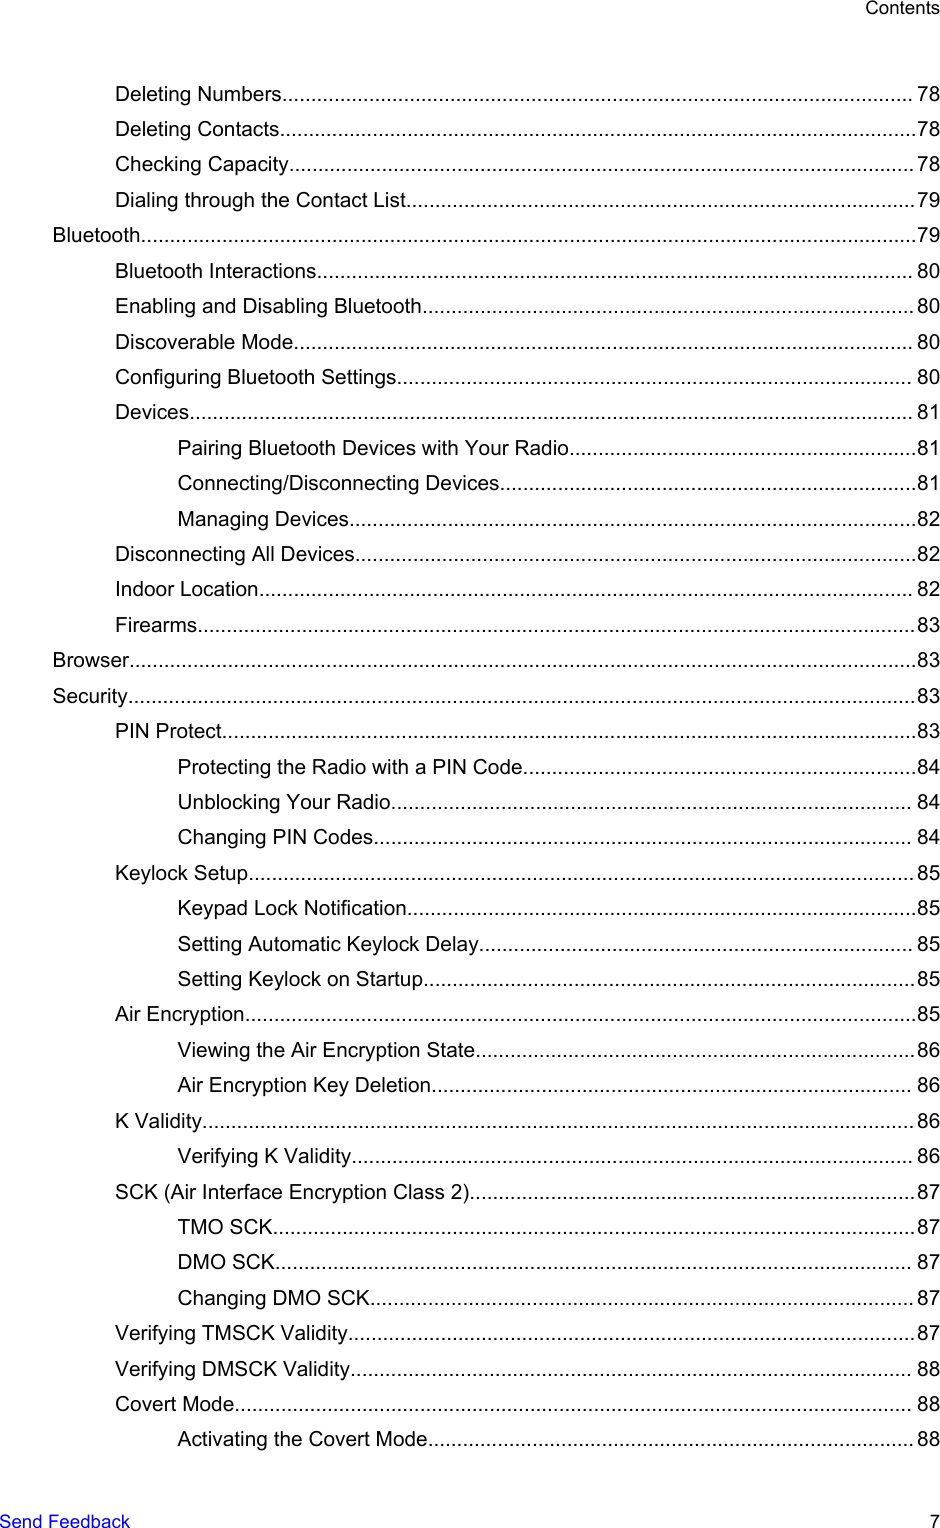
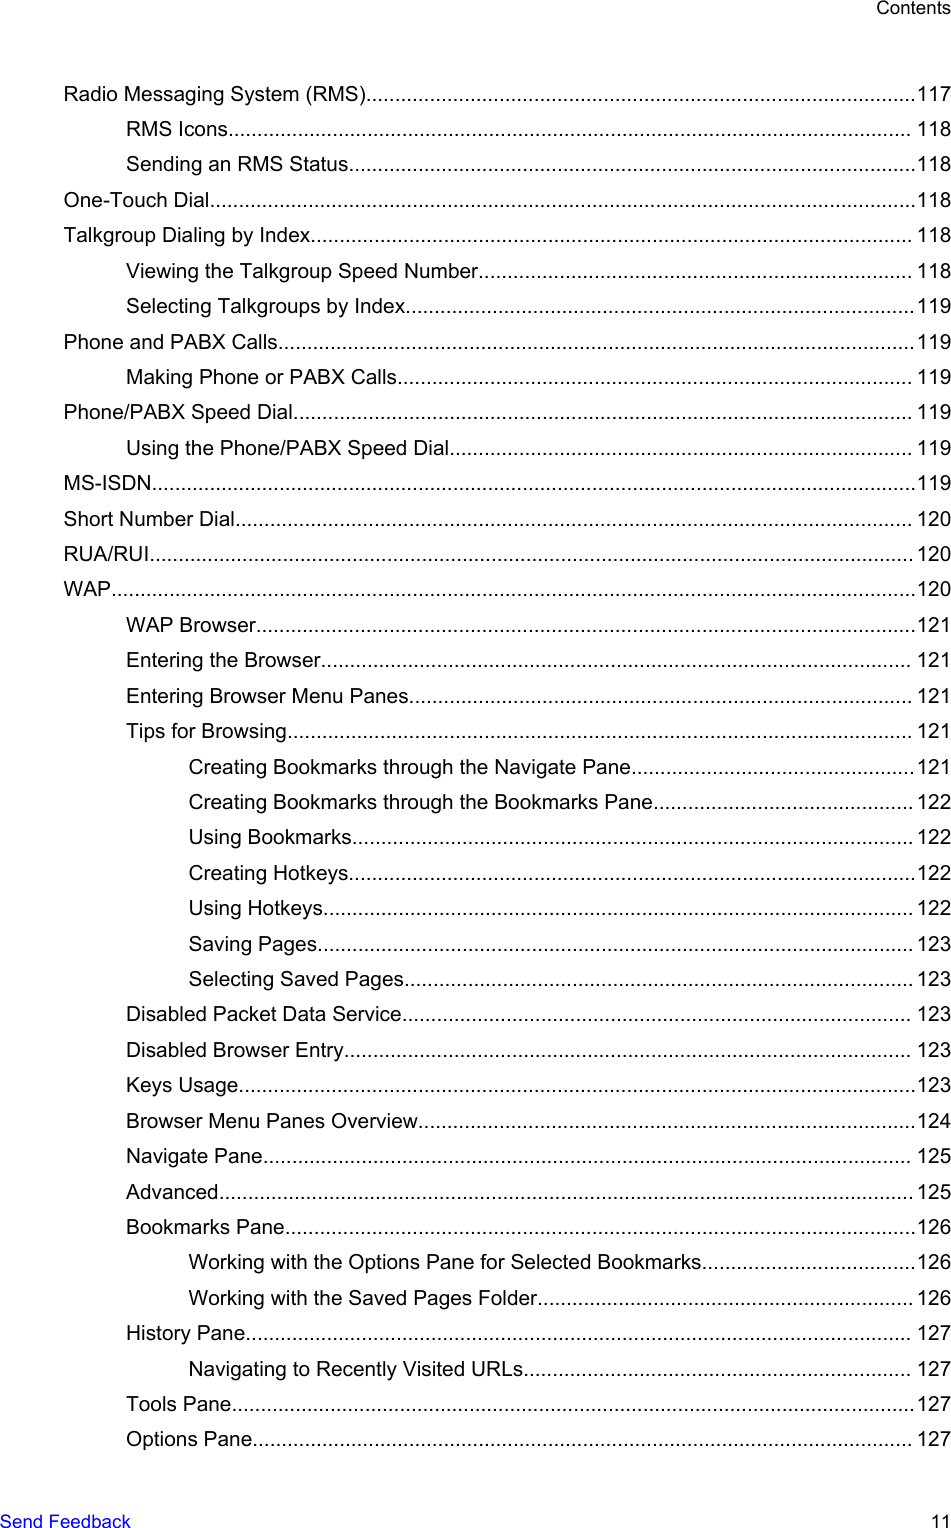
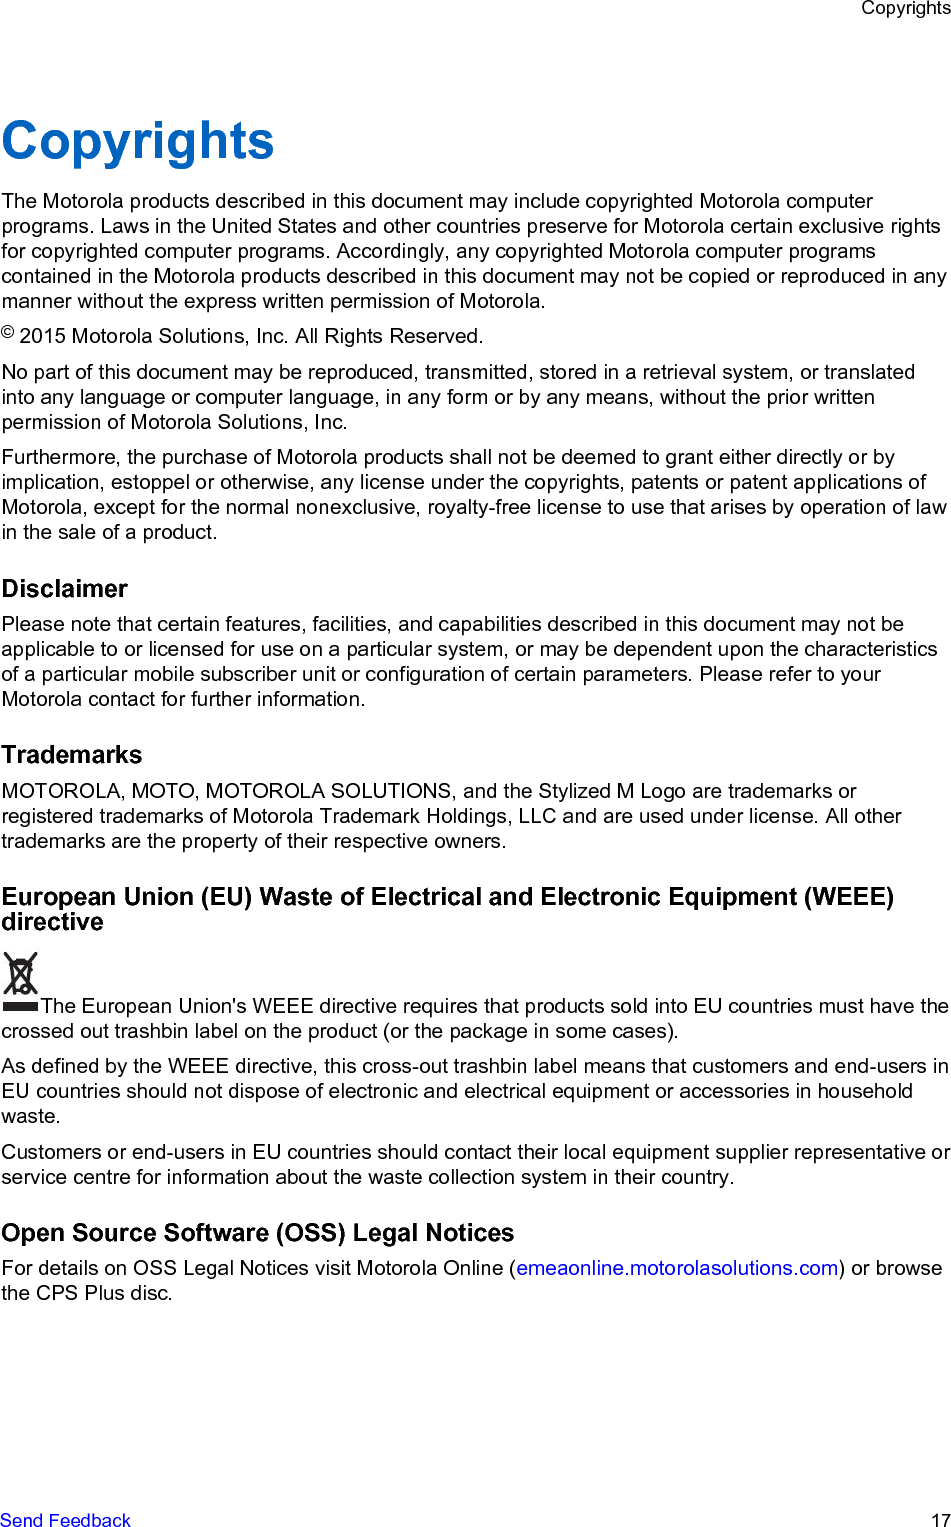
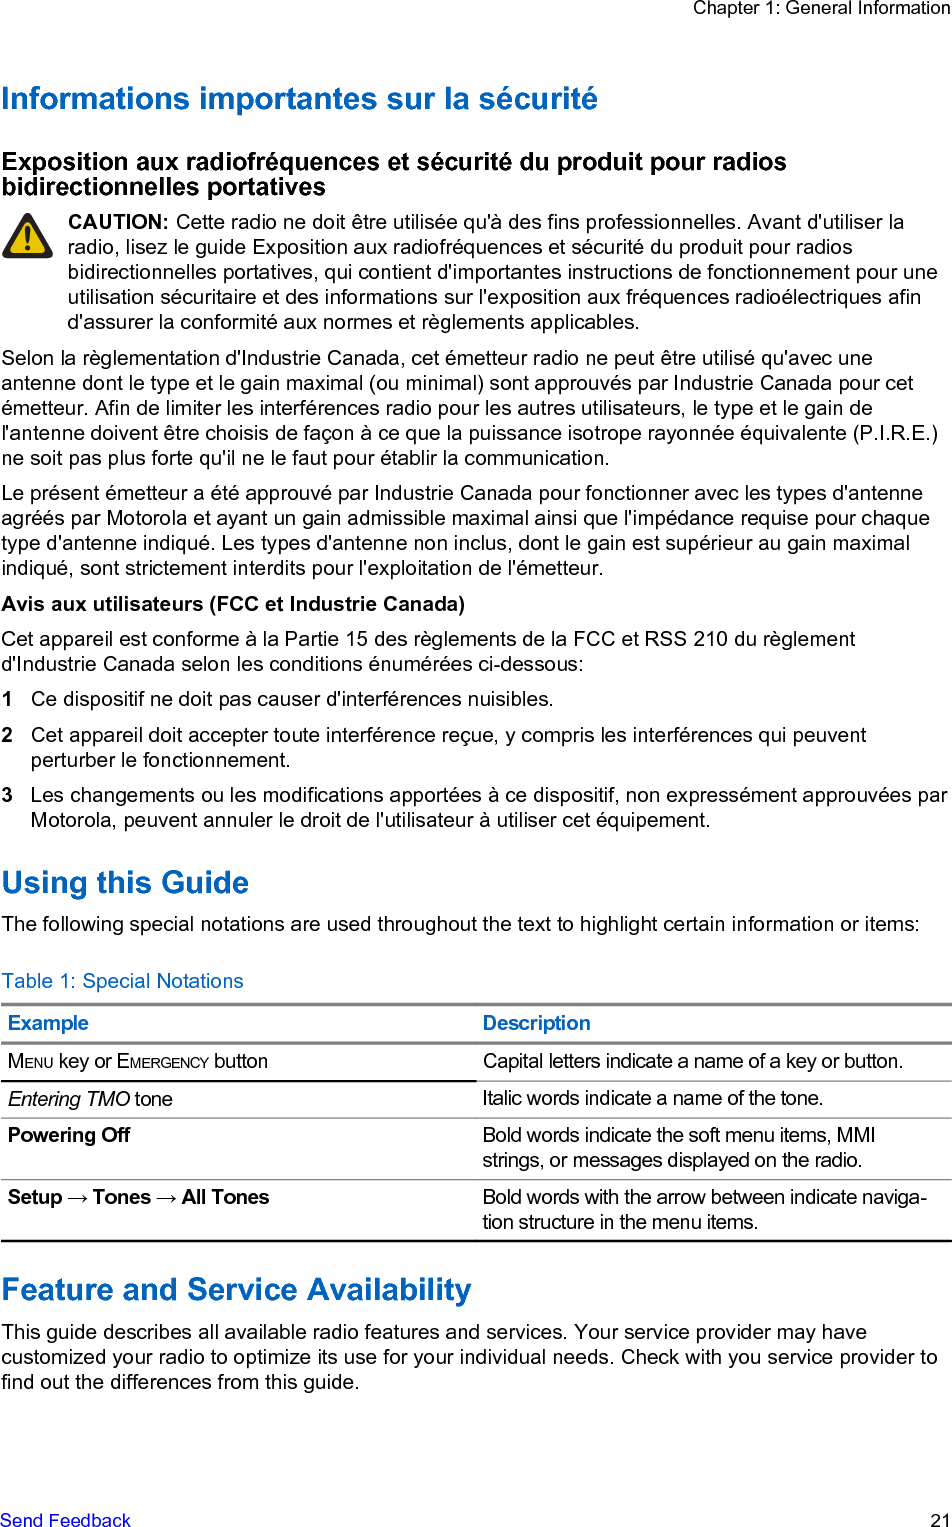
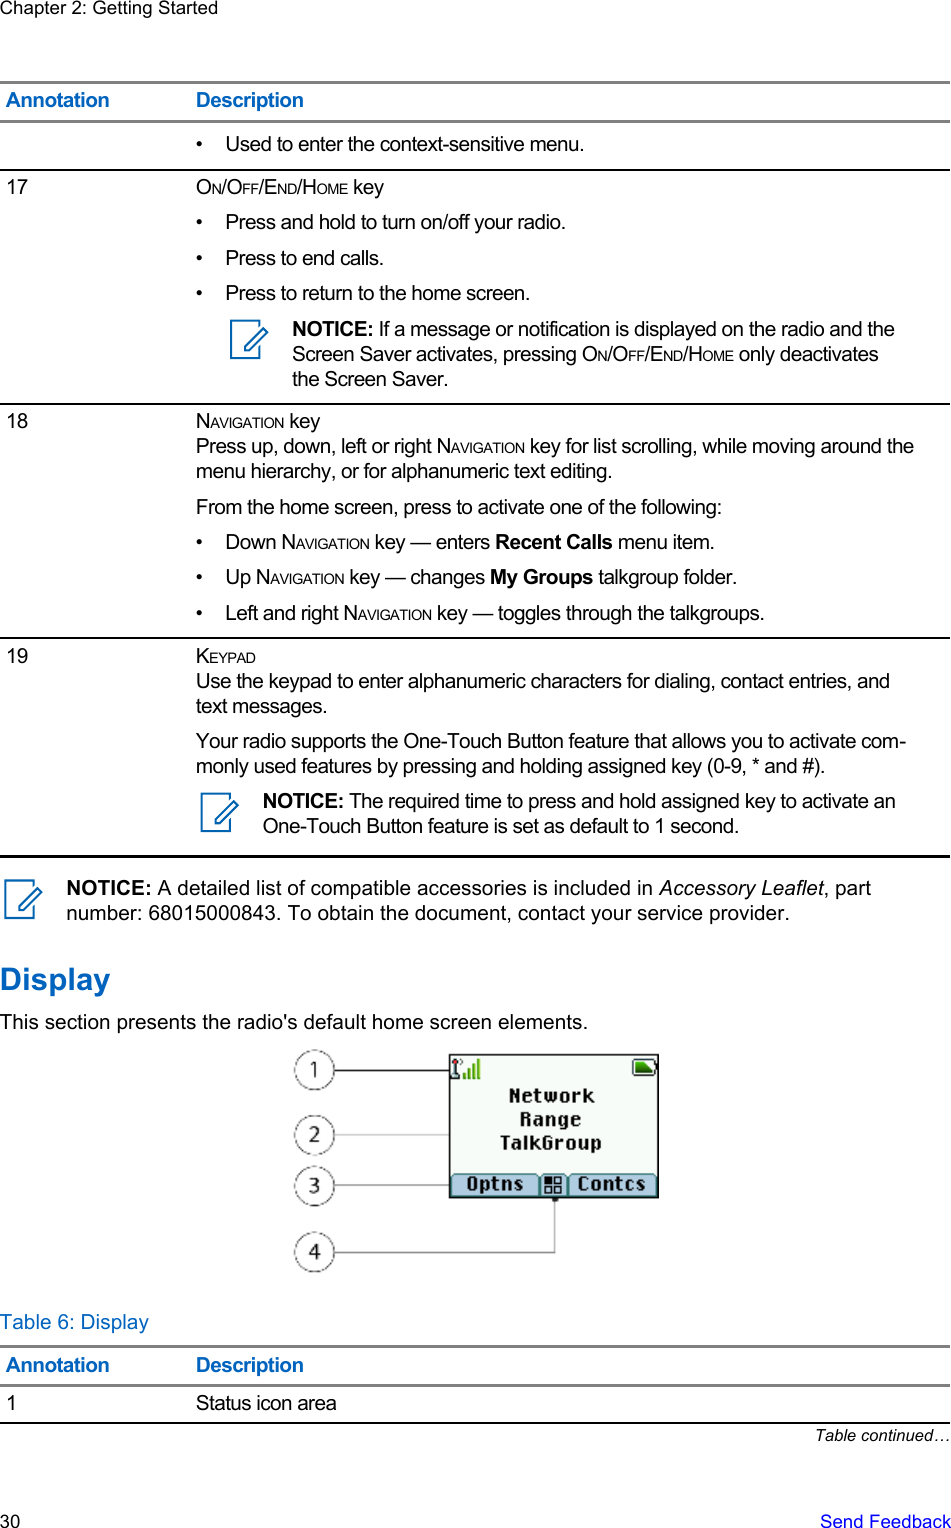
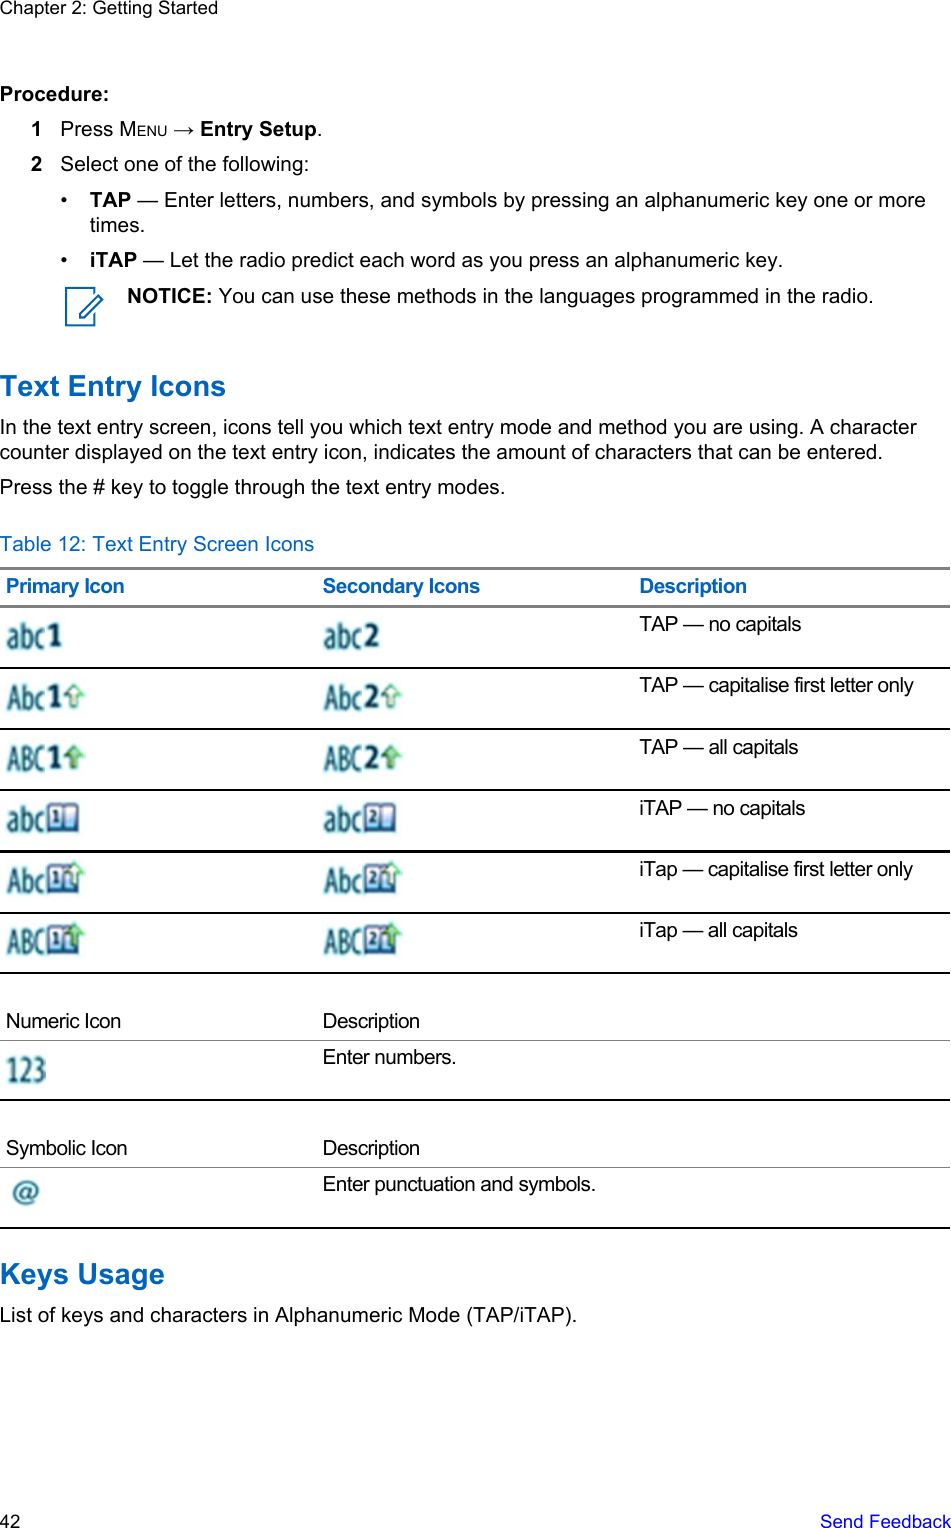
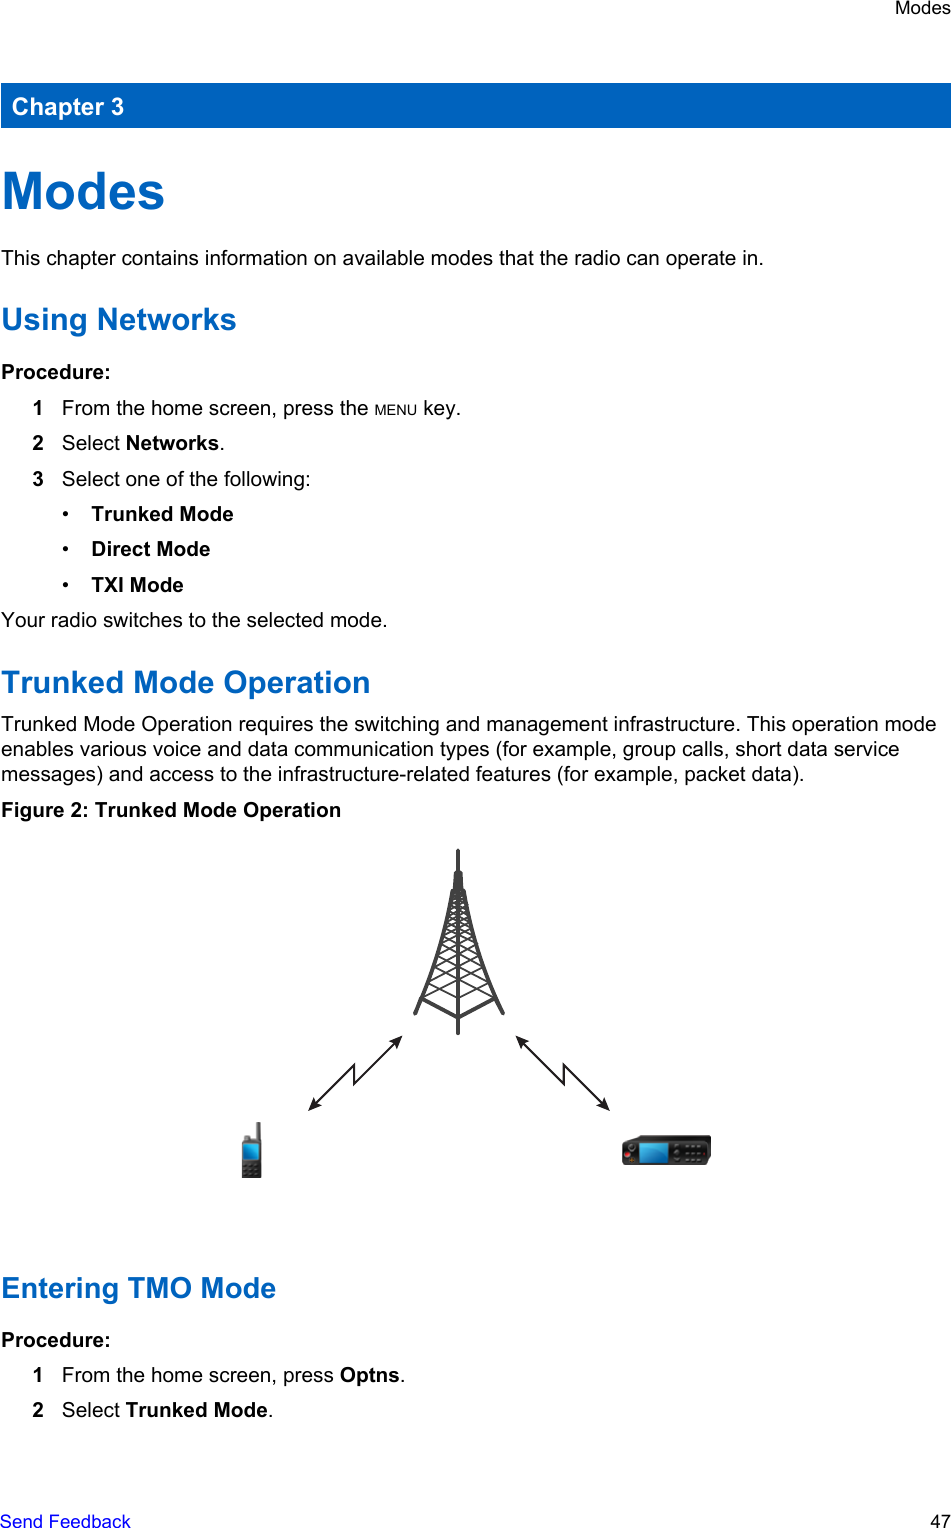
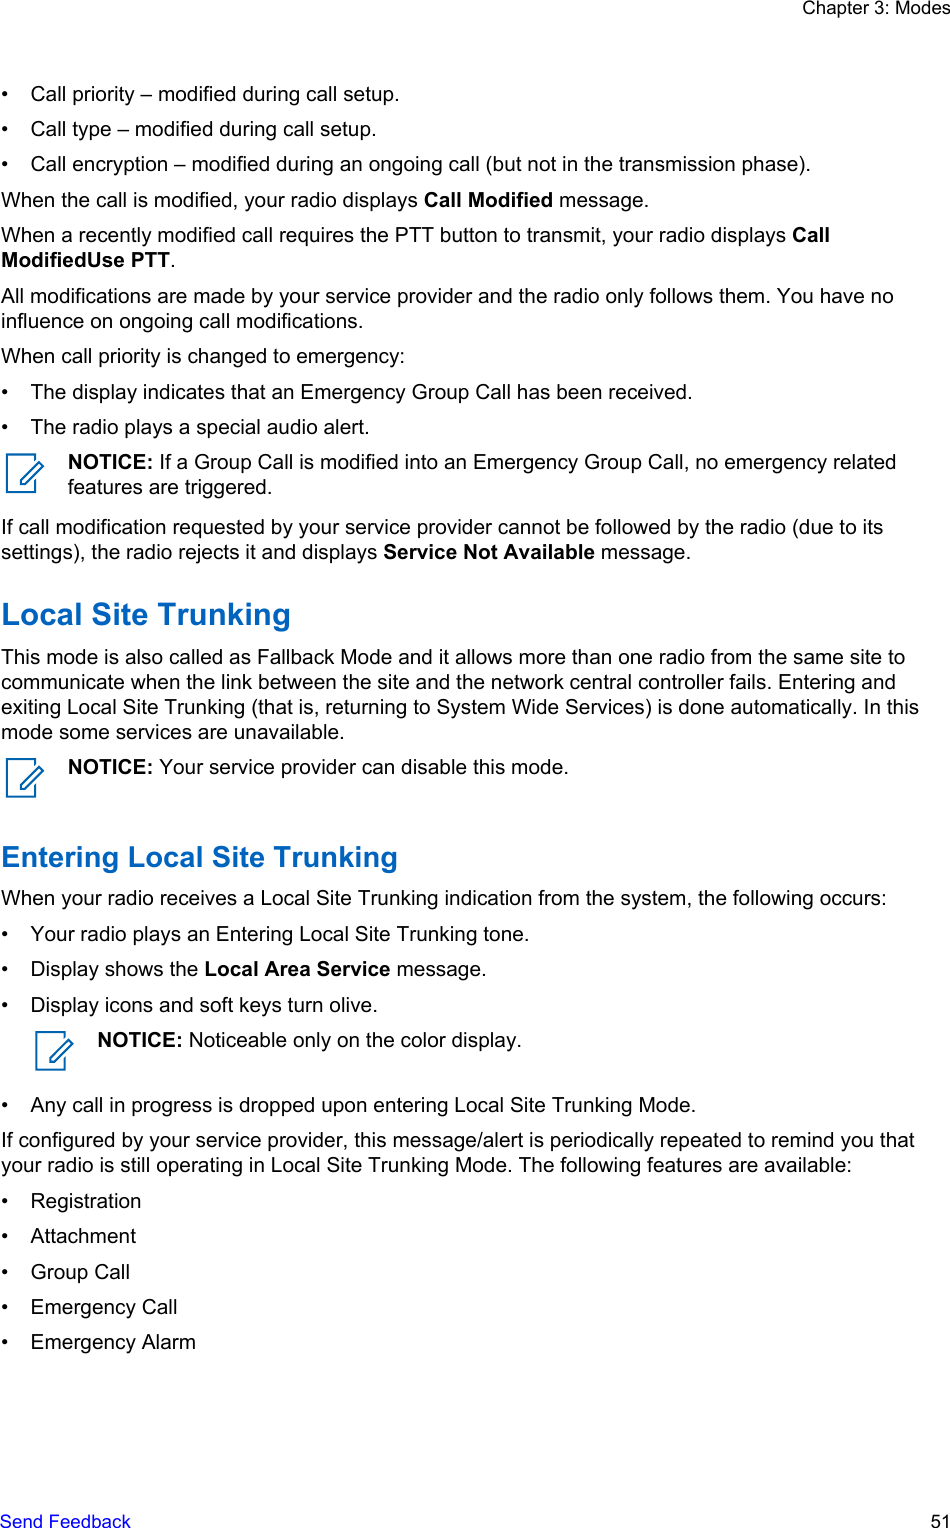
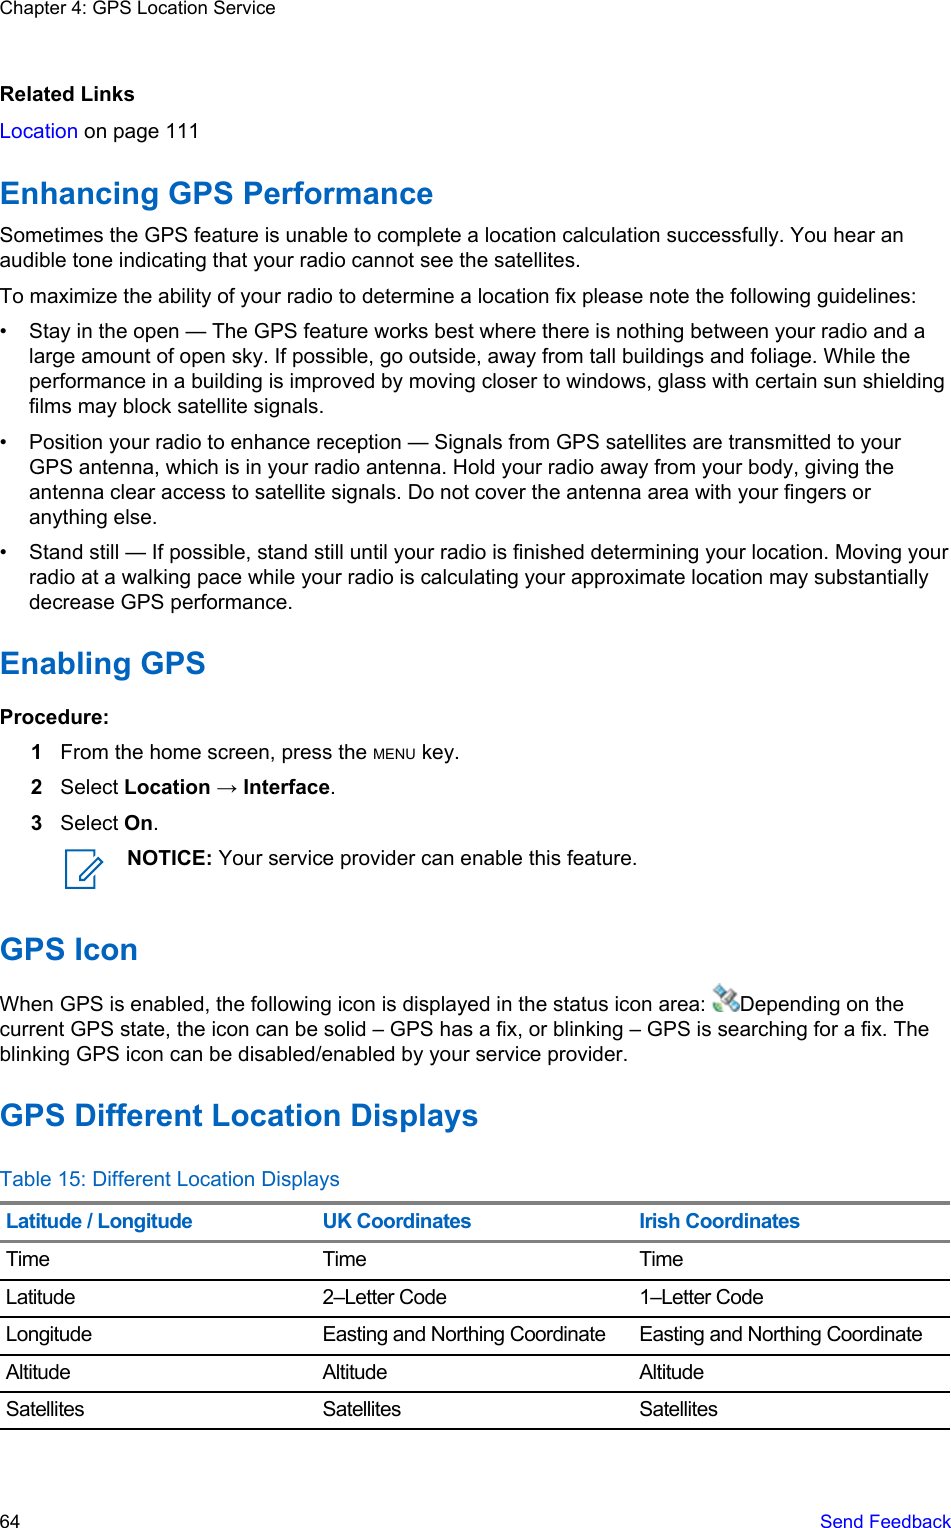
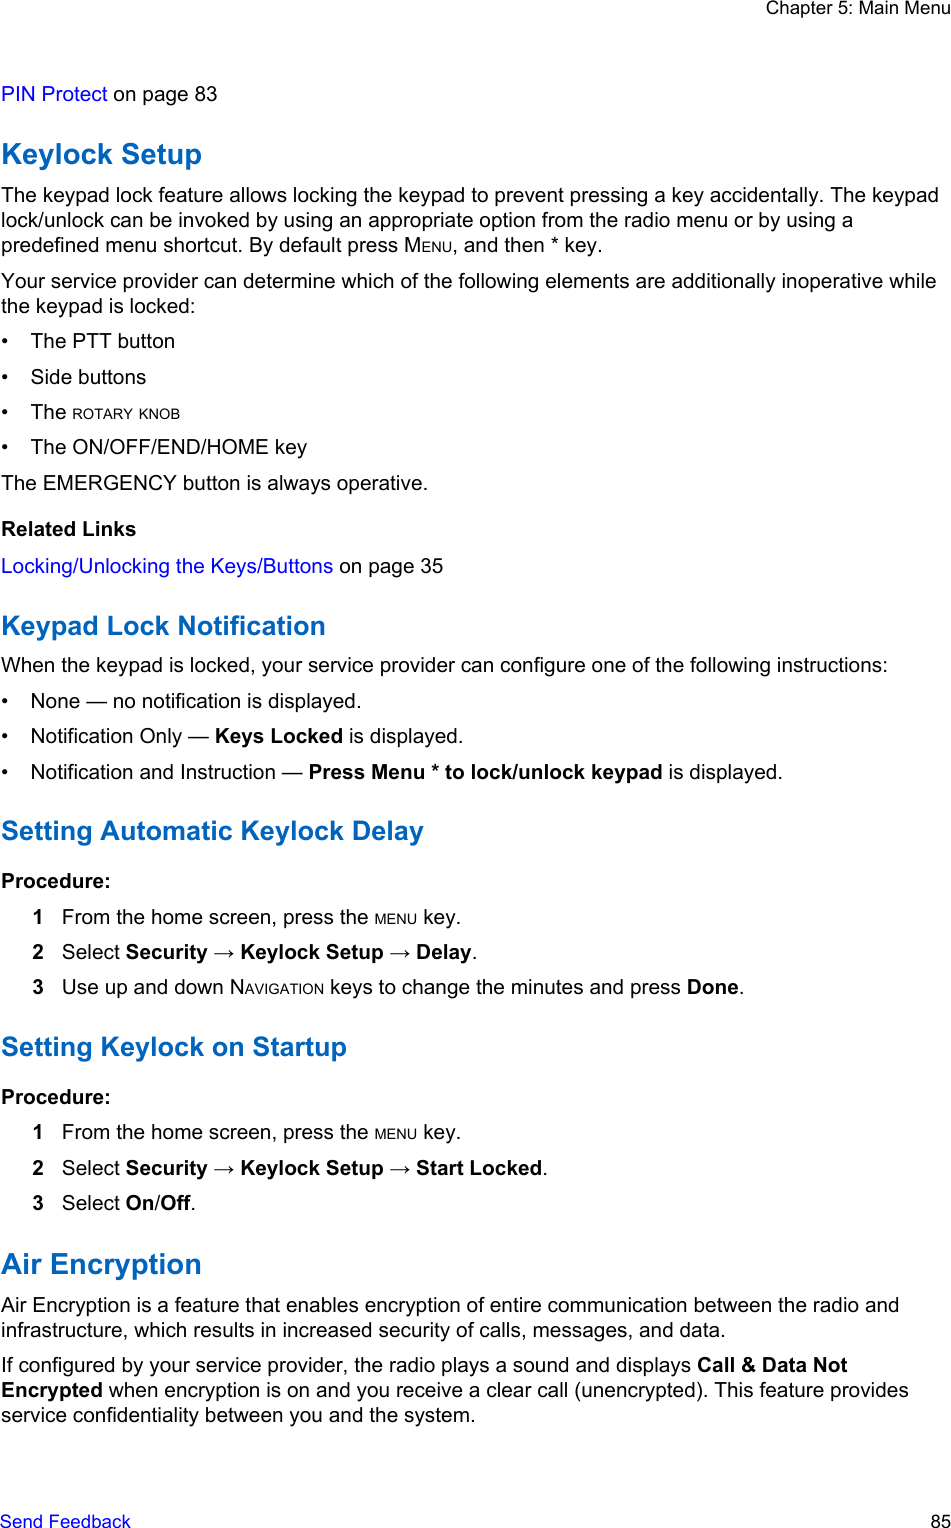
![•[Send] — for sending the image to the destination of your choice.•Reload — for reloading the image.•Details — for displaying the image details.•Show Image — for showing the image on its own page.Text Input PanePrerequisites: This pane is visible when the browser menu is opened and text entry field is active.When and where to use: To input the text for the URL.Procedure:1Select the URL.2Press abc.The text input pane opens up.3Select www.4Scroll the required extension (for example: .com).5Press .com. The screen displays the URL with the selected extension.Table 24: Browser Text Input IconsMode Soft Key ActionAlphabetic characters - lowercaseabc Enter text in lowercase.Alphabetic characters - uppercaseABC Enter text in uppercase.Numeric 123 Enter numbers and symbols.http mode www EnterCall-OutThis feature allows you to receive Call-Out alerts. On receiving the Call-Out messages, the radiointerrupts current services and attends to the Call-Out alert without any further delay. After call-out alerthas been cleared, the radio exits Call-Out mode and reverts to normal mode. During Call-Out modeyou are only able to receive Emergency Calls.NOTICE: To read an entire Call-Out message, scroll down the screen by pressing the downNAVIGATION key. The length of the message is indicated by the vertical red bar on the left of thescreen.Figure 5: Call-Out MessageChapter 6: Features128 Send Feedback](https://usermanual.wiki/Motorola-Solutions/89FT5868.Manual/User-Guide-2590389-Page-128.png)