Motorola Solutions 89FT7010 Handheld Terminal with GPRS, WLAN & Bluetooth User Manual X Pad owners
Motorola Solutions, Inc. Handheld Terminal with GPRS, WLAN & Bluetooth X Pad owners
UserManual.wiki
>
Motorola Solutions
>
89FT7010 User Manual
>
Users Manual
Contents
1.
Users Manual
2.
Users Manual Addendum
Users Manual
Navigation menu
Upload a User Manual
Namespaces
Wiki Guide
HTML
PDF
Info
Views
User Manual
Discussion / Help
Navigation
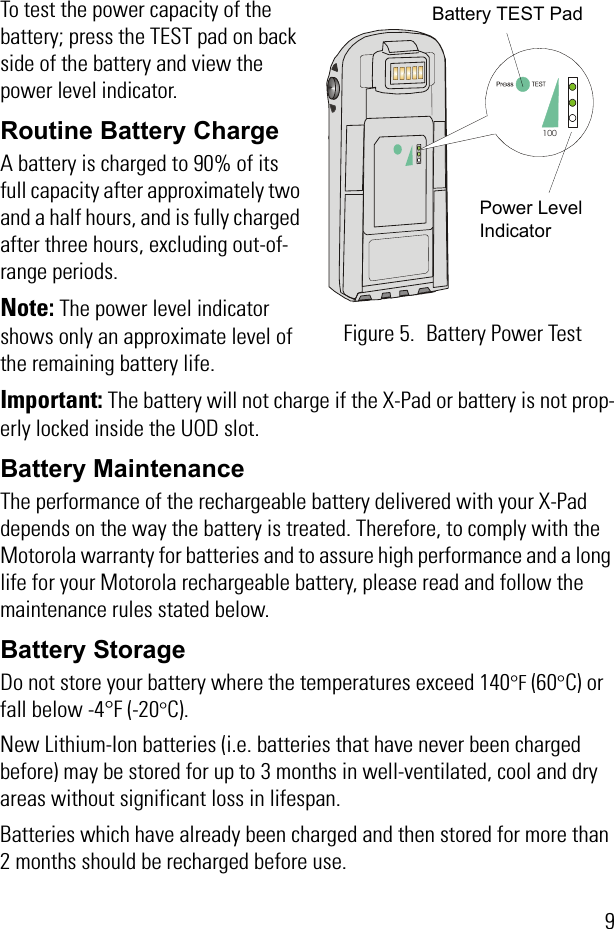
![8 First Time Battery ChargeThe first time battery charge ensures maximum start capacity for the bat-tery. Charge your new battery for at least 24 continuous hours before using it or until the LED indicator of the UOD shows green. Note: Out of box batteries are in sleep mode. Press the TEST pad, at the back side of the battery (see Figure 5) for at least two seconds before any attempt to charge or use. Pressing the TEST button awakes the battery gas-gauge.The UOD charges your battery effectively when it is at room temperature [approx. 68°F (20° C)]. Battery charging temperature range is 32°F to 95°F (0°C to 35°C).Table 1: Status of a UOD Slot LED During Battery ChargeSlot LED Status IndicationNo Light No device inserted.Blinking Amber Battery temperature out of tolerance and charging has been temporarily stopped.Solid Amber X-Pad Battery is being charged.Solid Green X-Pad Battery is at least 90% charged after 2.5 hours and fully charged after 3.Solid Red X-Pad Battery is not fully charged after 3 hours of charging, and is considered failed.](https://usermanual.wiki/Motorola-Solutions/89FT7010.Users-Manual/User-Guide-546862-Page-18.png)
![10Extending Battery LifeA battery is an expendable part and may need replacing during the life of the X-Pad. To ensure maximum service life of your X-Pad, always replace the battery with a genuine Motorola replacement.Your UOD will charge your battery effectively when it is at room tempera-ture [approx. 68°F (20° C)]. Battery charging temperature range is 32°F to 95°F (0°C to 35°C).](https://usermanual.wiki/Motorola-Solutions/89FT7010.Users-Manual/User-Guide-546862-Page-20.png)