Motorola Solutions 89FT7019 iDEN ic502 WITH CDMA 2000 User Manual Racer
Motorola Solutions, Inc. iDEN ic502 WITH CDMA 2000 Racer
UserManual.wiki
>
Motorola Solutions
>
89FT7019 User Manual
>
USERS MANUAL
Contents
1.
USERS MANUAL
2.
USERS MANUAL 1
3.
USERS MANUAL 2
4.
users manual
USERS MANUAL
Navigation menu
Upload a User Manual
Namespaces
Wiki Guide
HTML
PDF
Info
Views
User Manual
Discussion / Help
Navigation
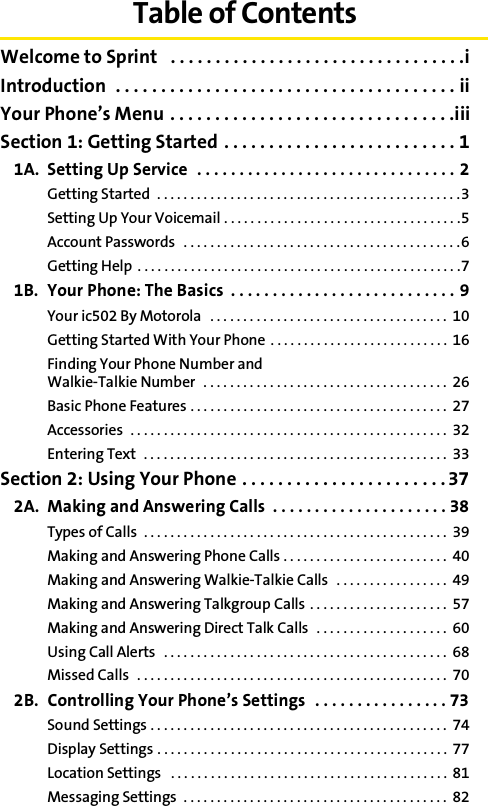
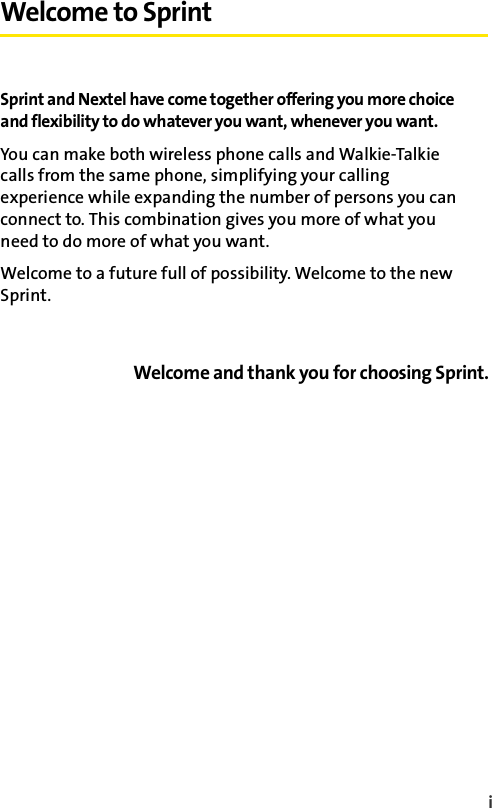
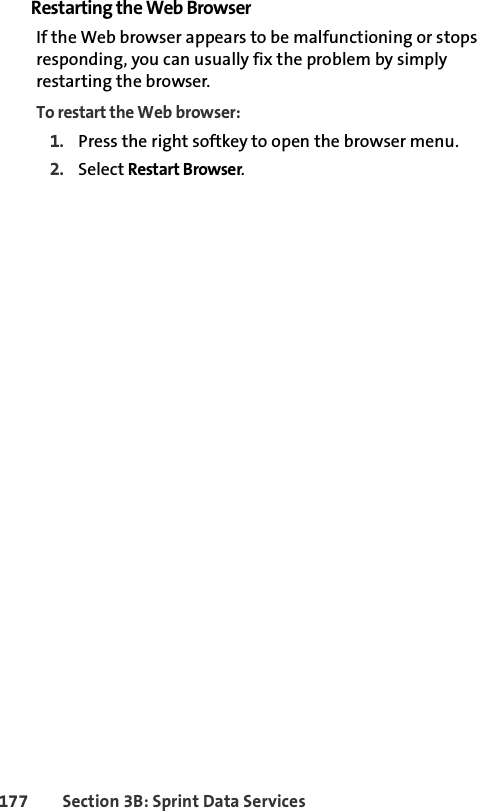
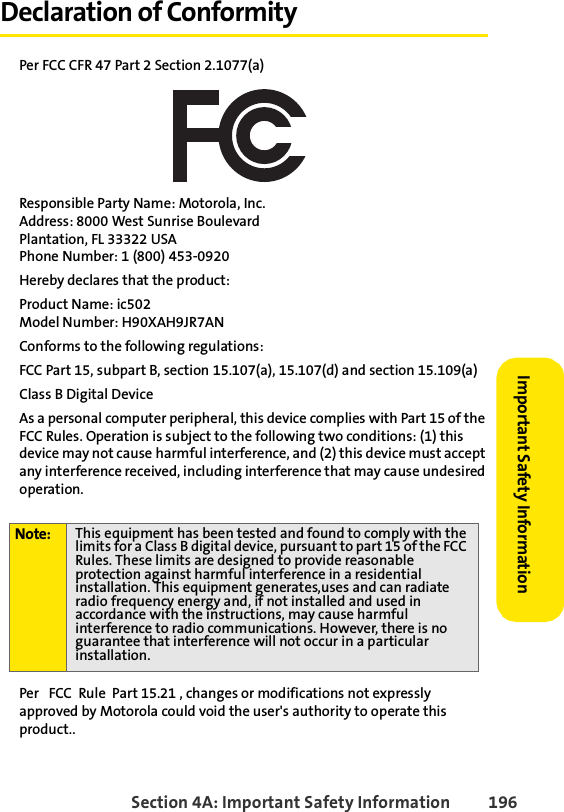
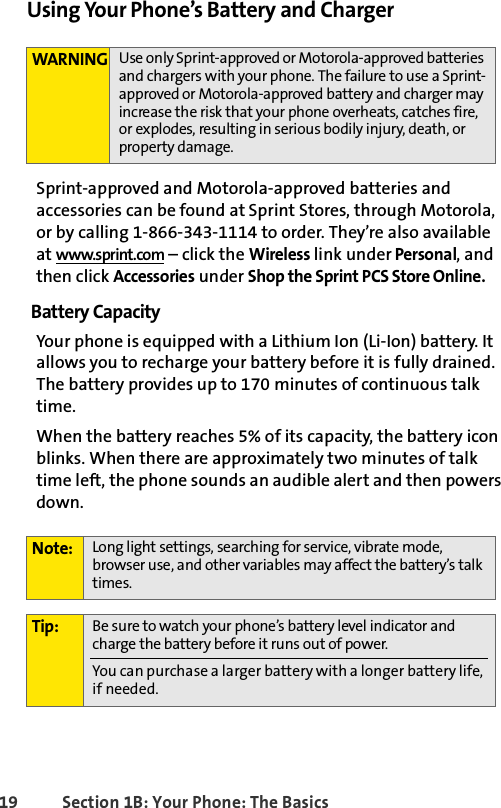
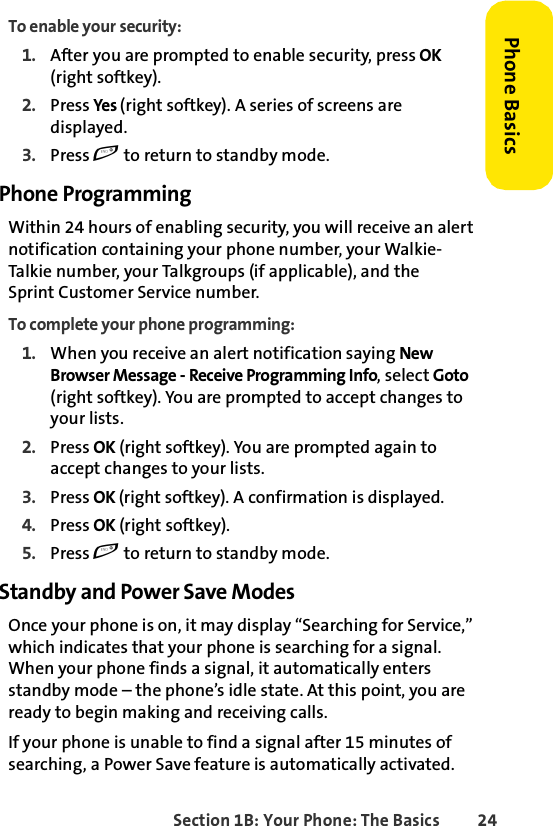
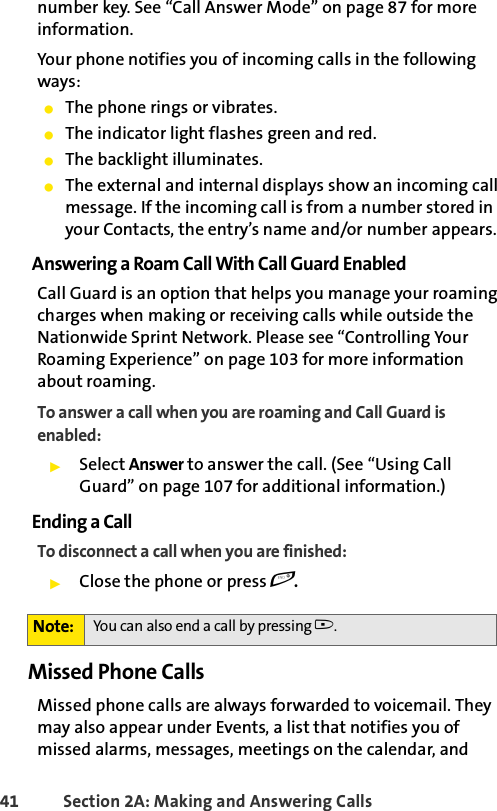
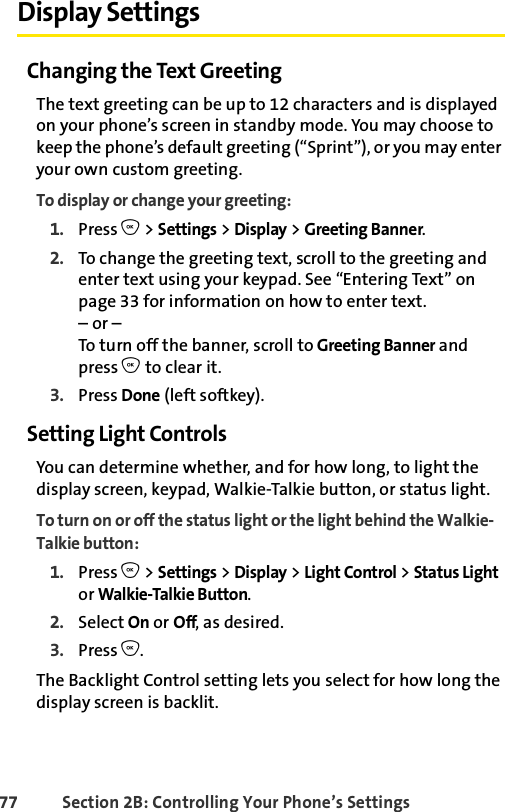
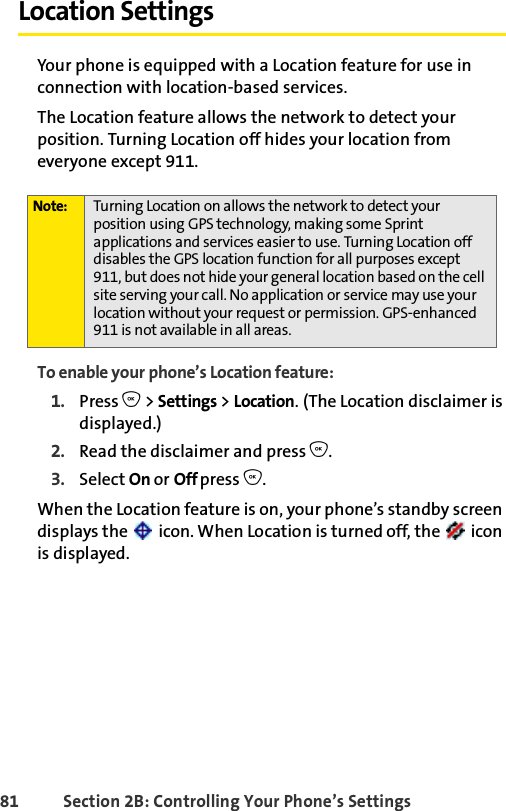
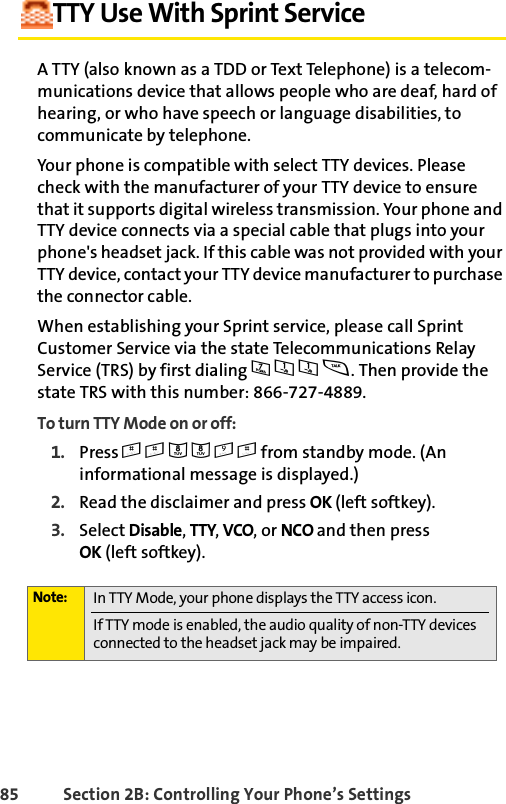
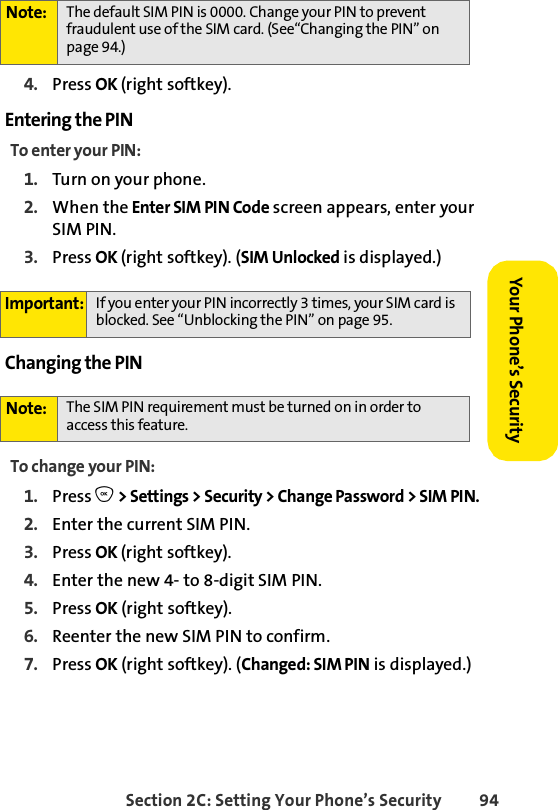
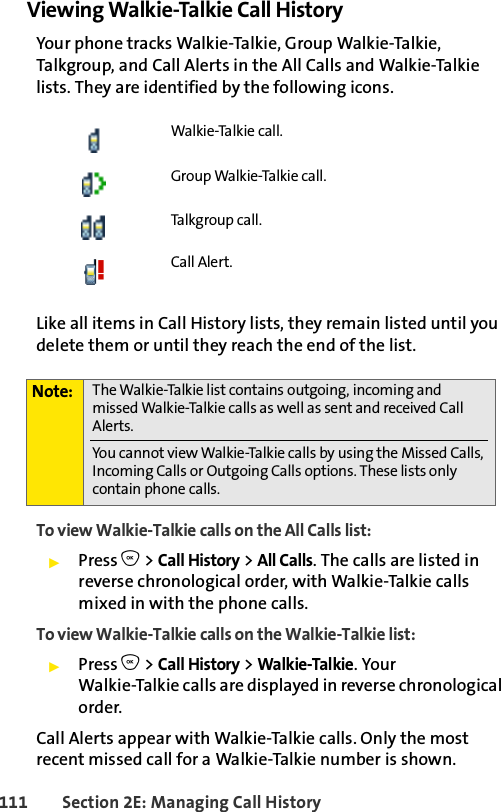
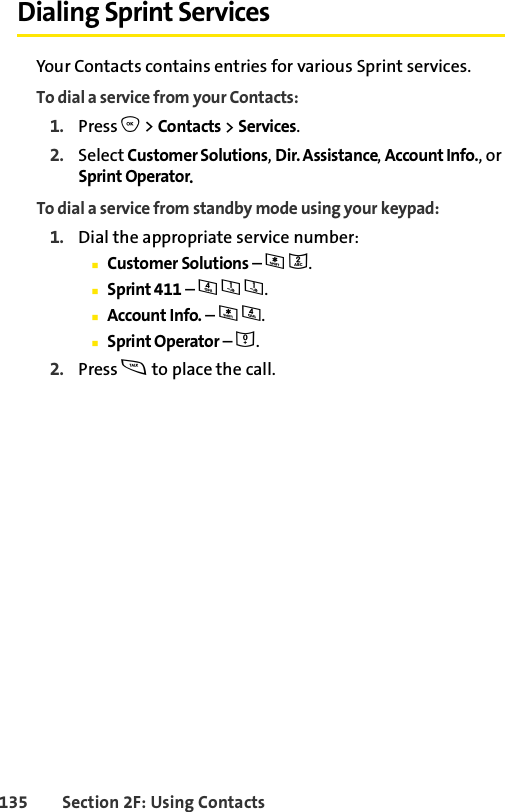
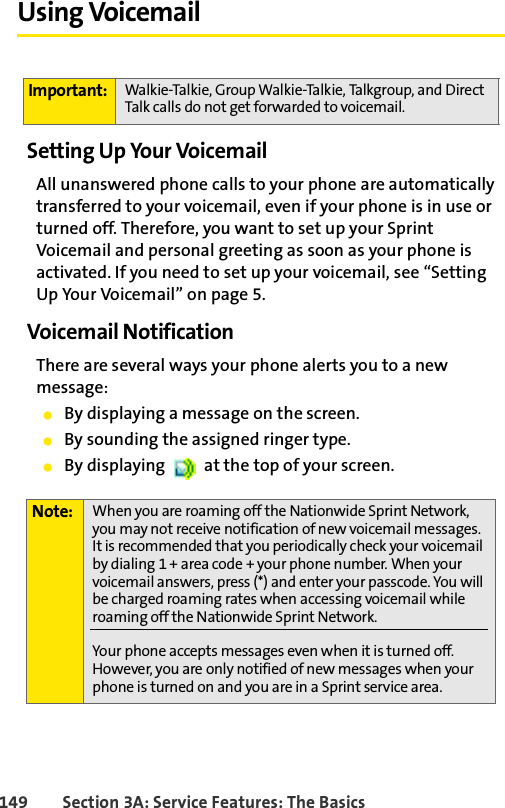
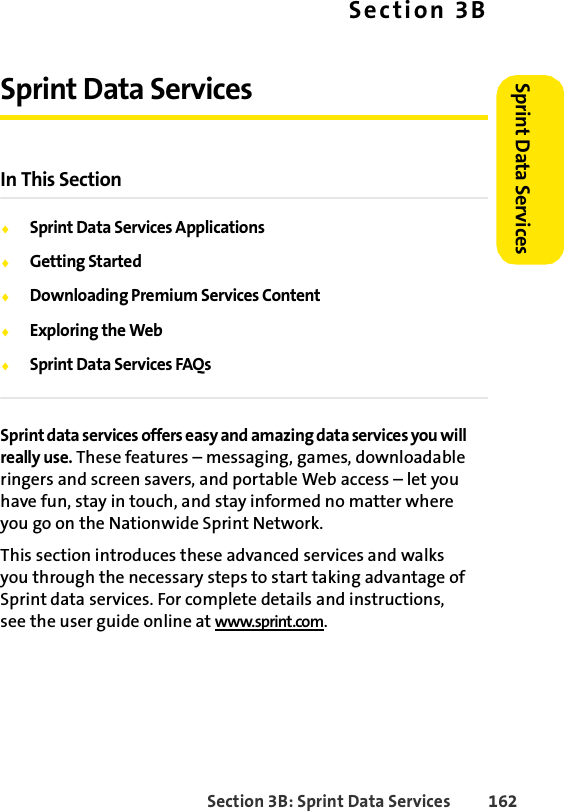
![vi 4: WALKIE-TALKIE1: One Touch WLK-TLK2: Talkgroup Silent3: Talkgroup Area5: ROAMING1: Set Mode2: Call Guard3: Data Roam Guard 6: LOCATION 7: SECURITY1: Lock Phone2: Change Lock Code3: SIM PIN (On / Off)4: Change SIM PIN5: Limit Use 1: Lock Contacts 2: Lock Vision3: Restrict Outgoing Calls 4: Restrict Incoming Calls5: Restrict Walkie-Talkie6: Erase Contacts7: Erase My Content8: Reset Phone 9: Special Numbers8: OTHERS1: Language 2: Answer Options1: Any Key 2: Auto 3: Open4: [Talk] Key 3: Speed Dial 4: Abbreviated Dial5: Auto Redial](https://usermanual.wiki/Motorola-Solutions/89FT7019.USERS-MANUAL/User-Guide-676181-Page-12.png)


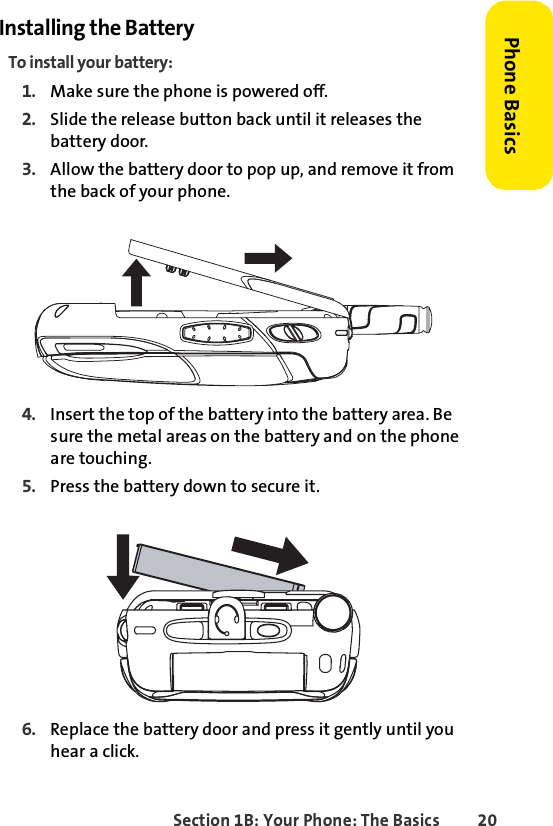

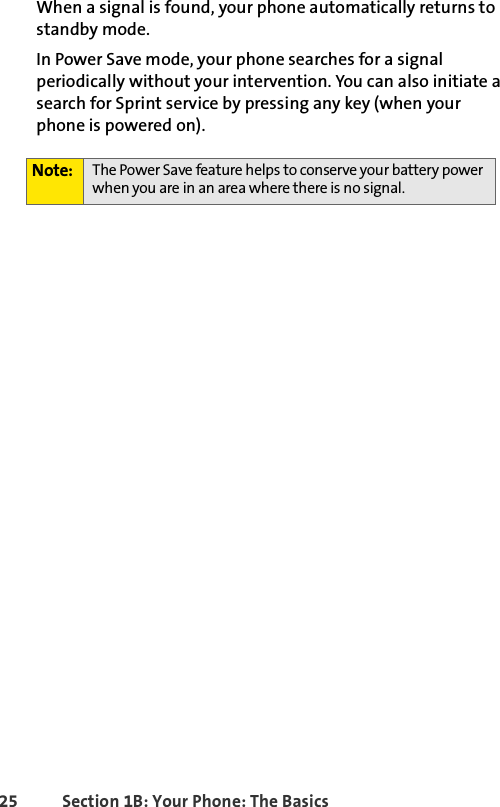
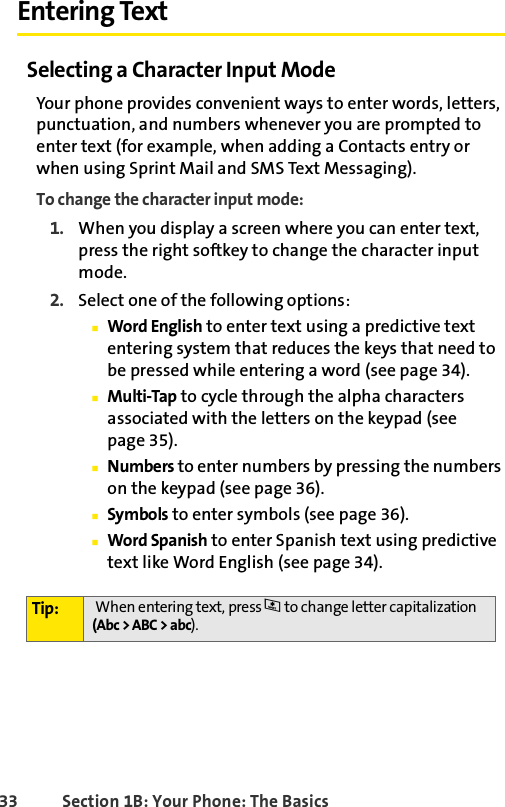
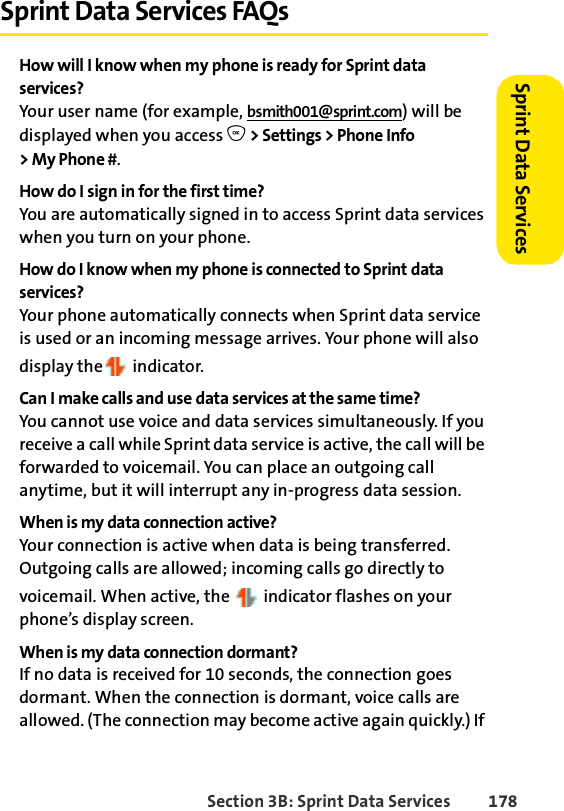
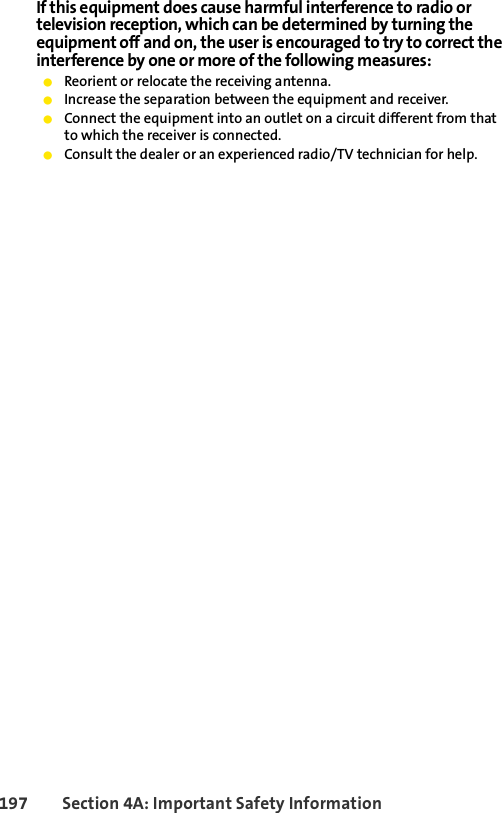
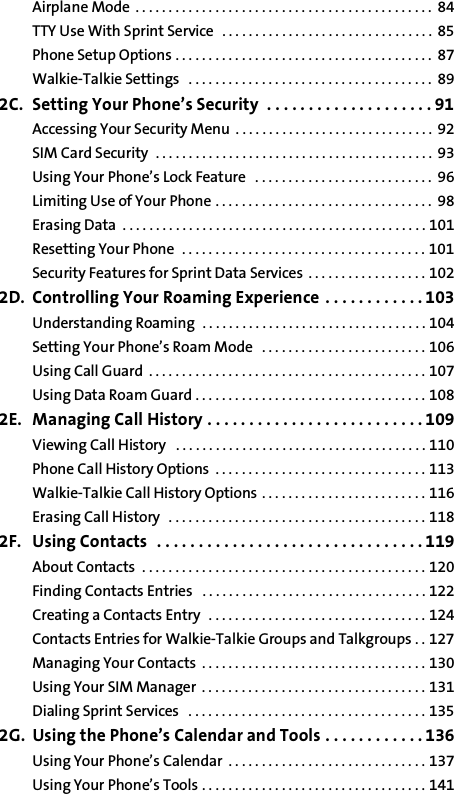
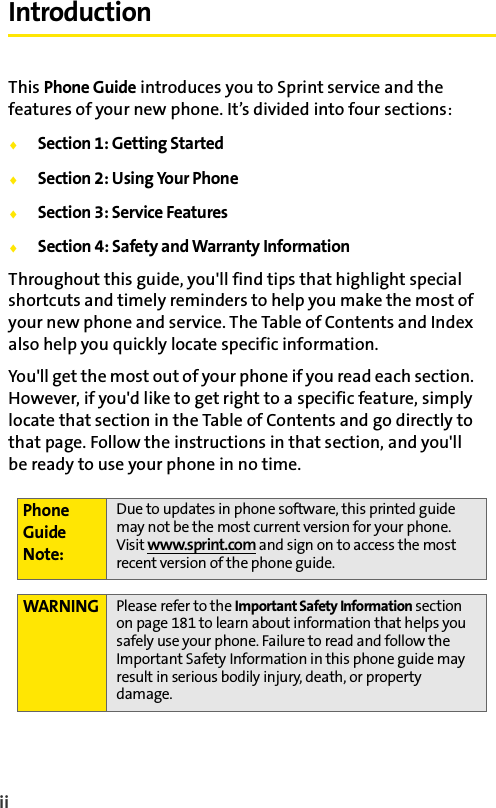
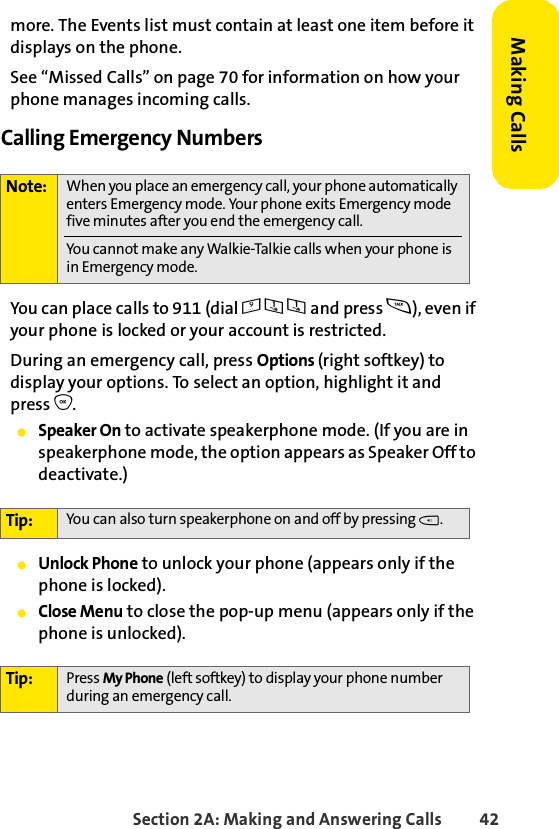
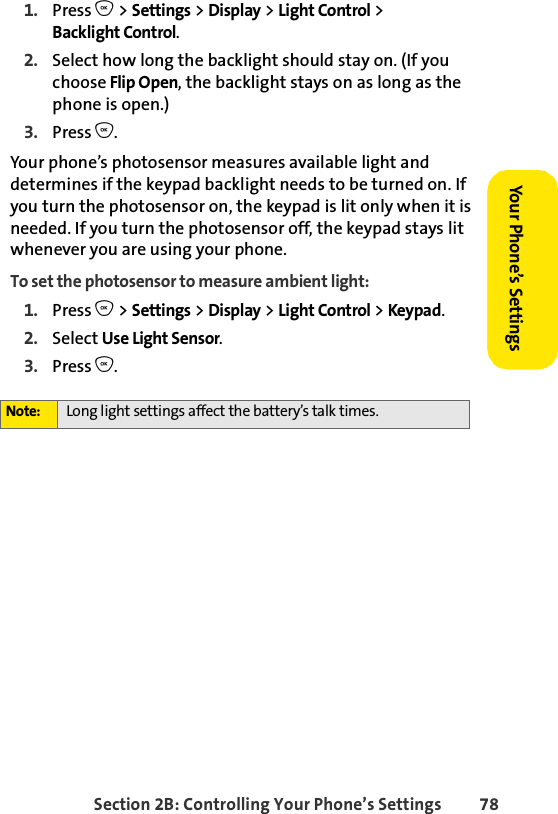
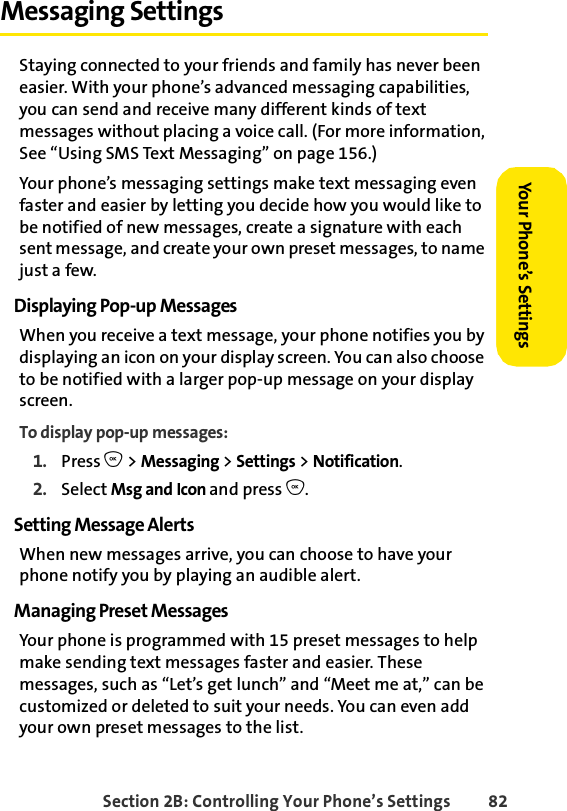
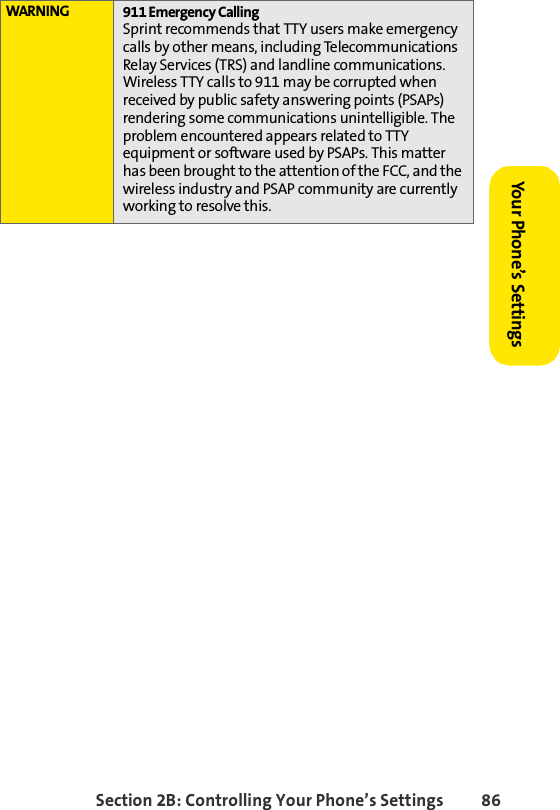
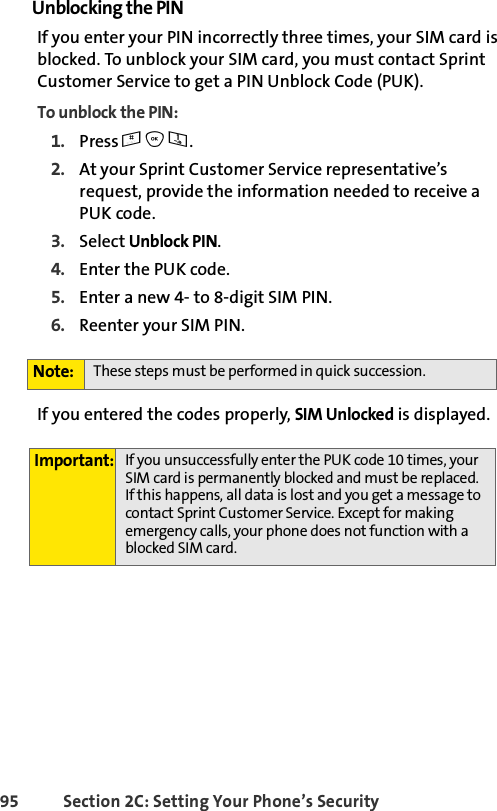
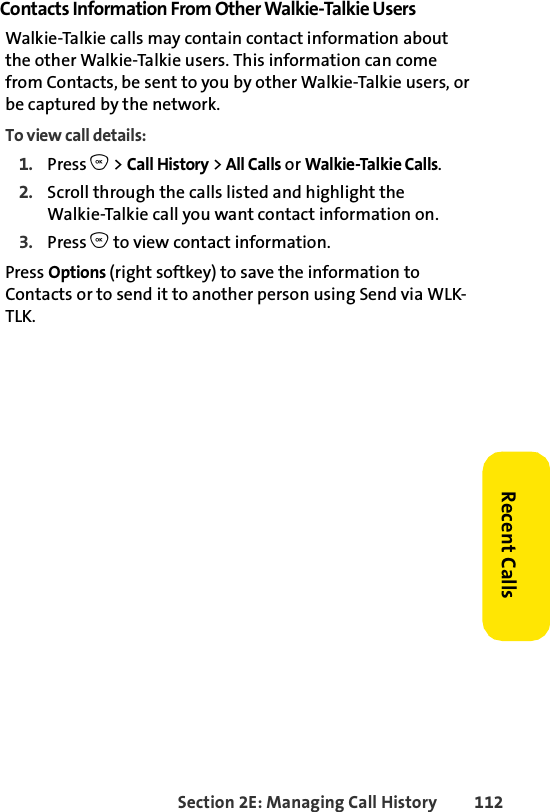
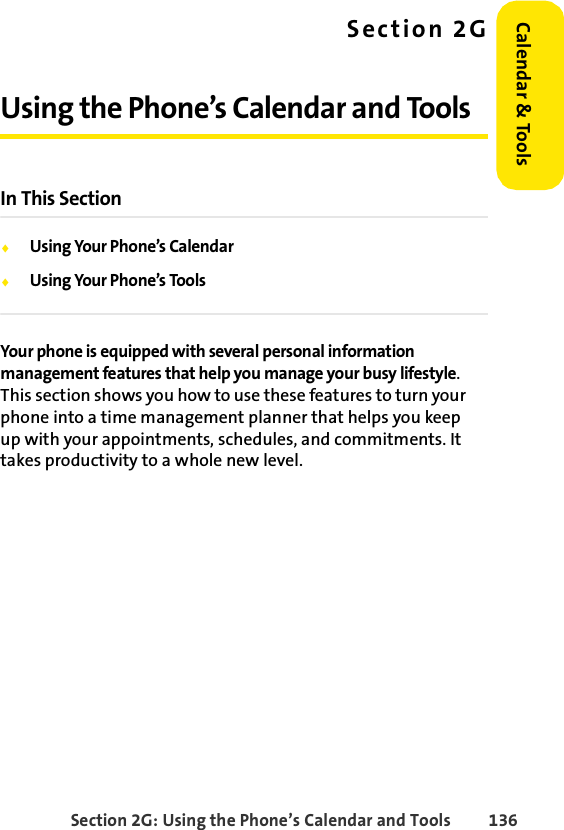
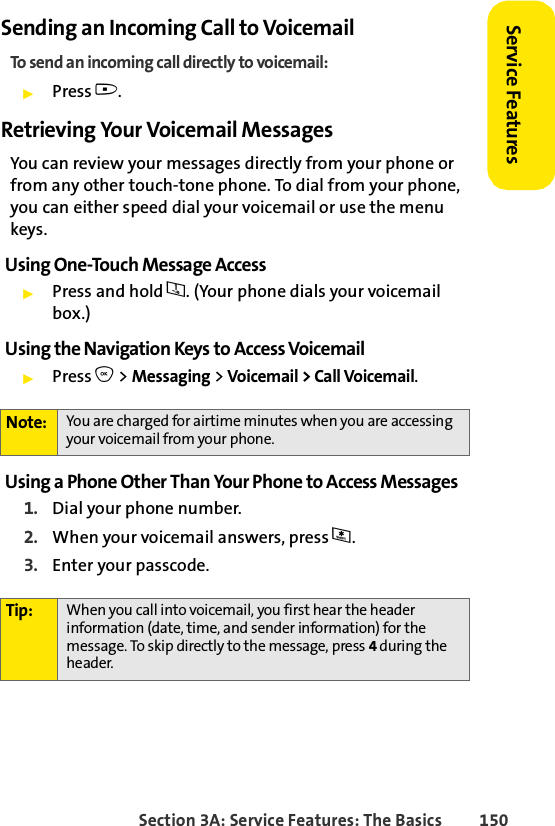
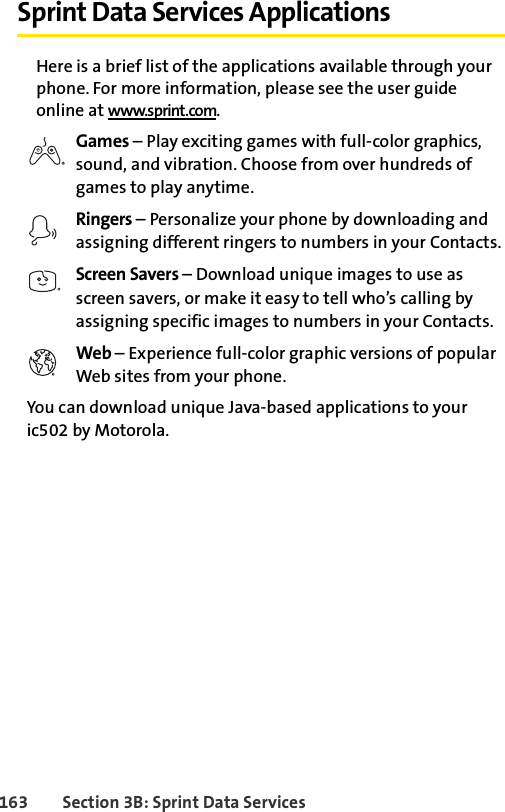
![Section 1B: Your Phone: The Basics 36Phone BasicsCharacters scroll in the following order: Entering Numbers, Symbols, and Preset MessagesTo enter numbers:ᮣSelect the Numbers mode and press the appropriate key. (See “Selecting a Character Input Mode” on page 33.)To enter symbols:ᮣSelect the Symbols mode. (See “Selecting a Character Input Mode” on page 33.) To enter a symbol, press the appropriate key indicated on the display screen.1. ? ! , @ ' - _ : ; ( ) & " 1 0 ^ ` % $ + * / \ | ~ [ ] = > < #2A B C 23D E F 34G H I 45J K L 56M N O 67P Q R S 78T U V 89W X Y Z 900 (no letters)#Space*Shift](https://usermanual.wiki/Motorola-Solutions/89FT7019.USERS-MANUAL/User-Guide-676181-Page-49.png)
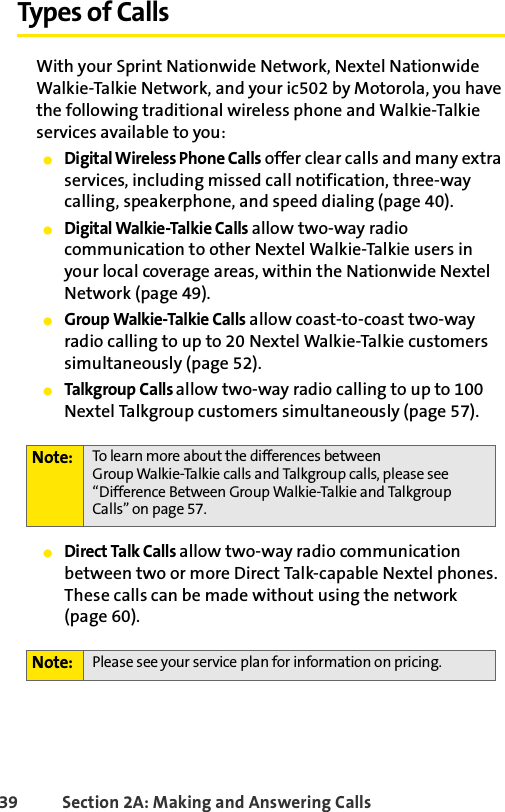
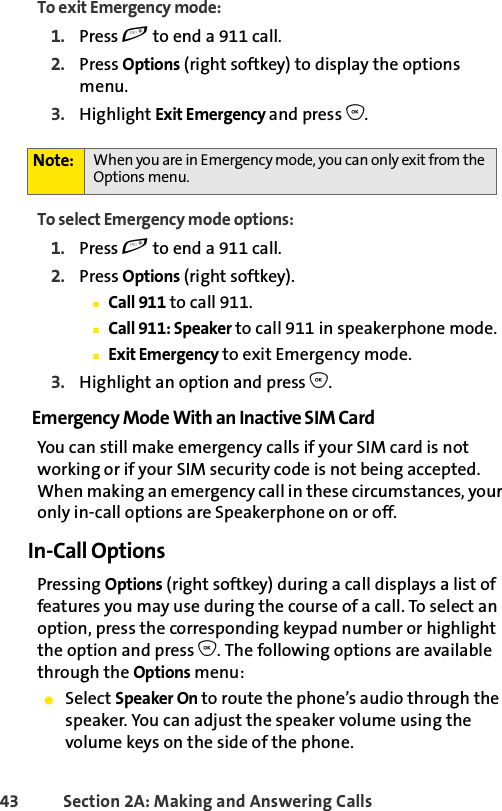


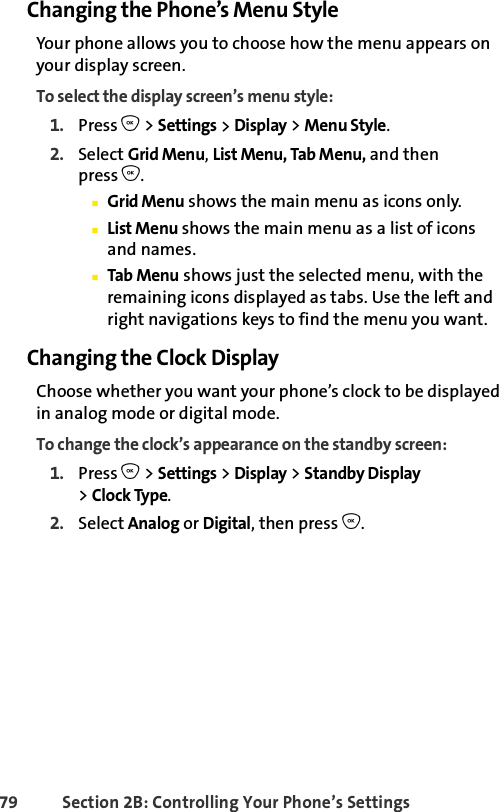
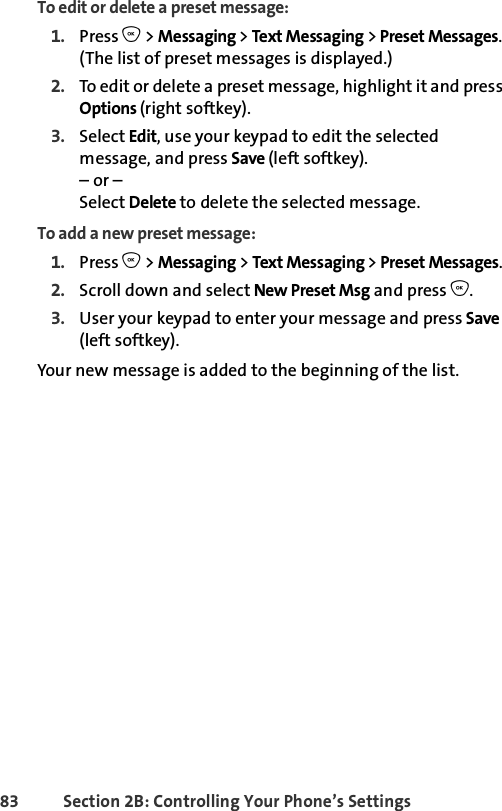
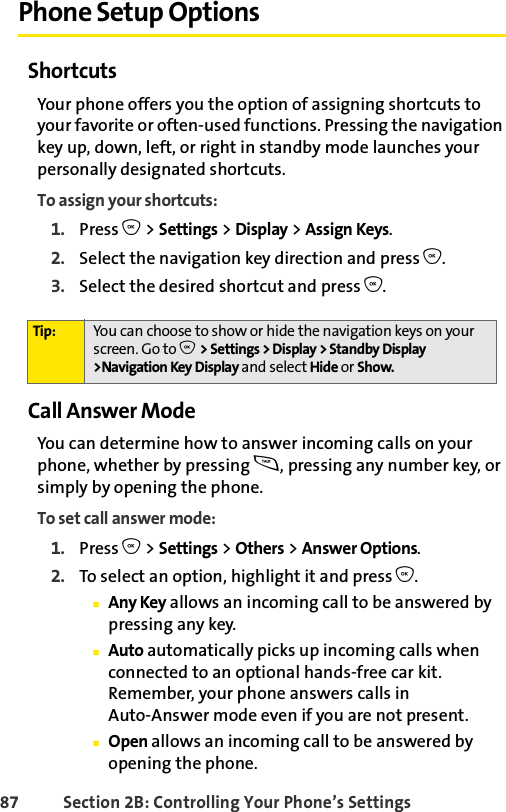
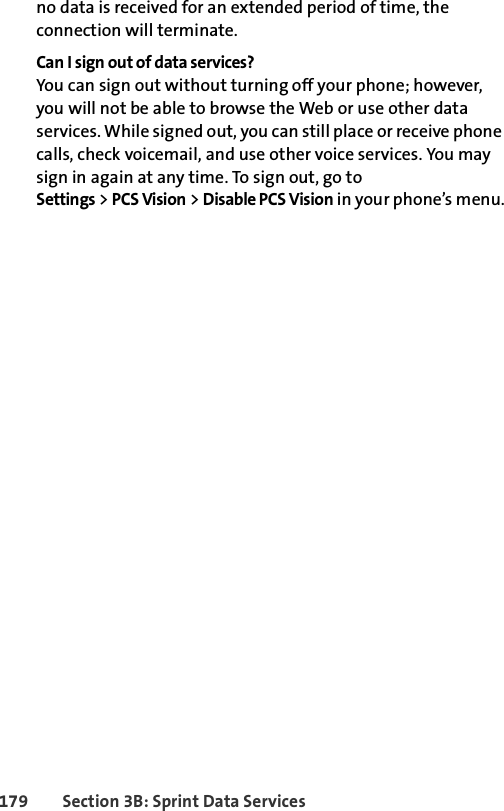
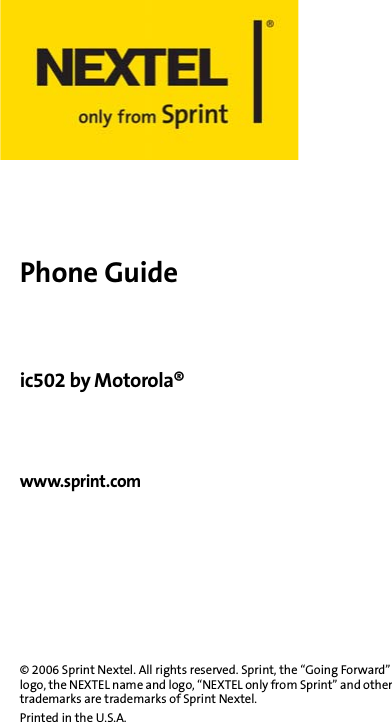
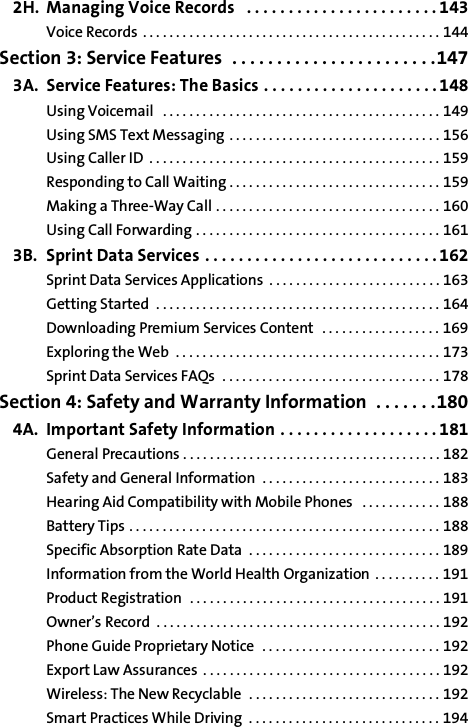
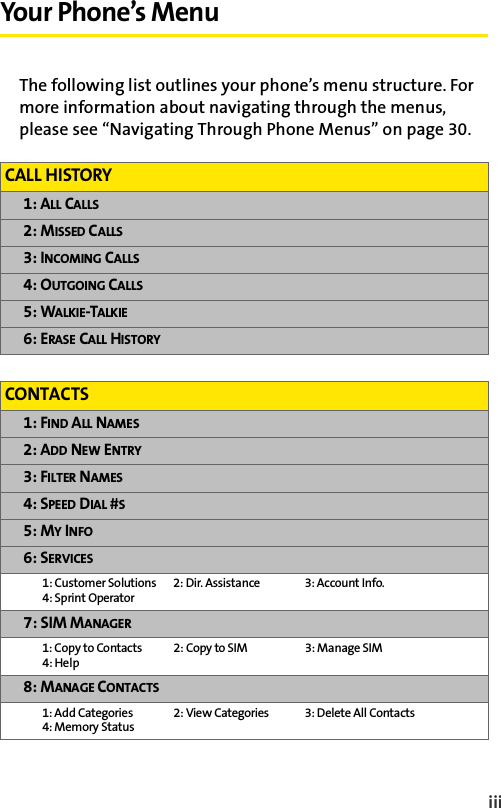
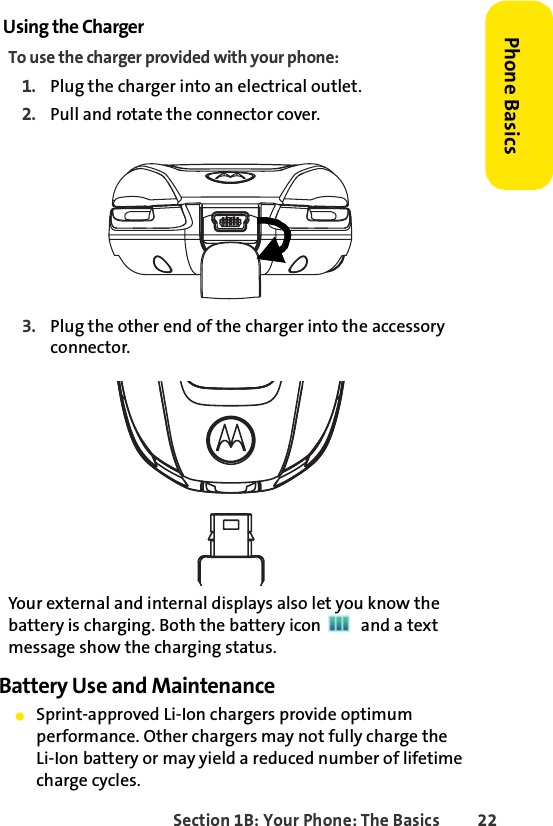
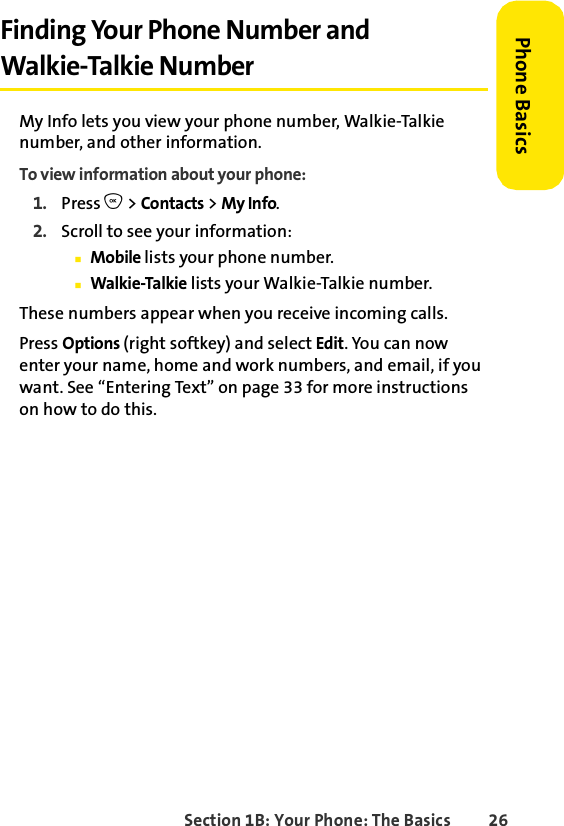
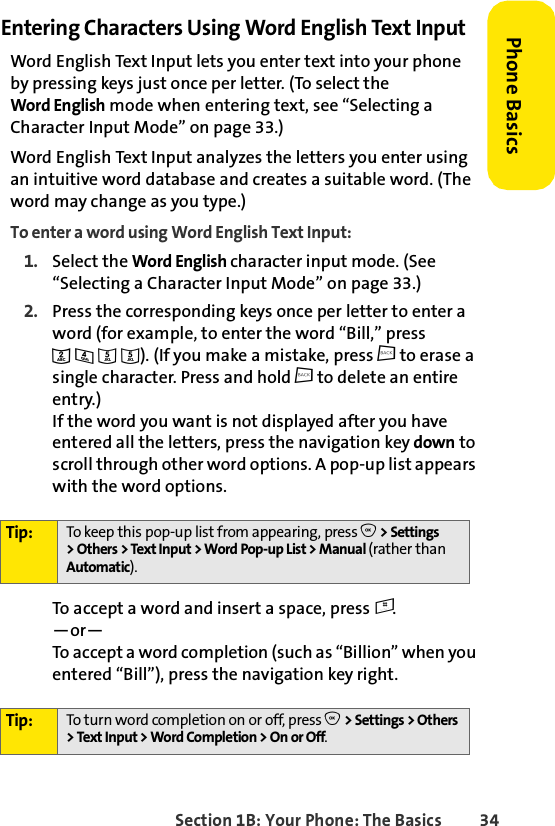
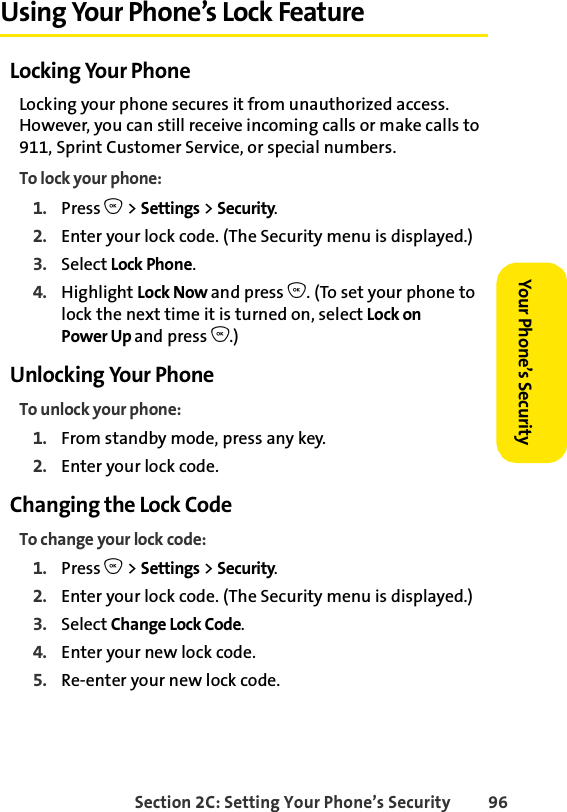
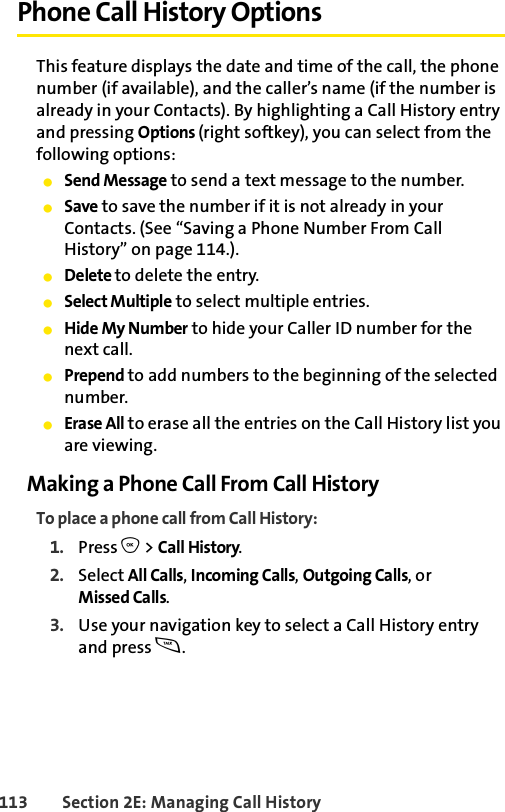
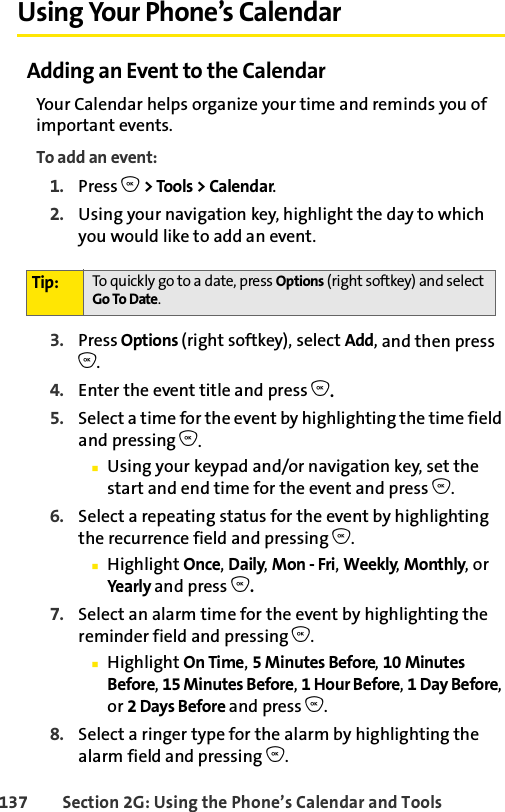
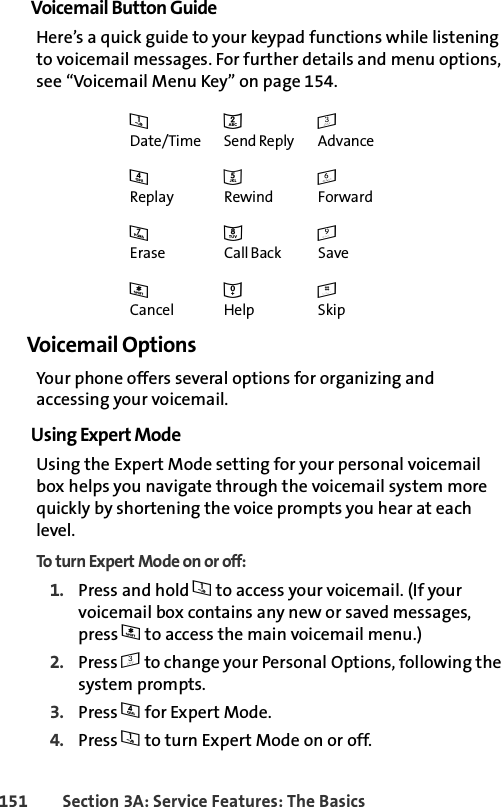
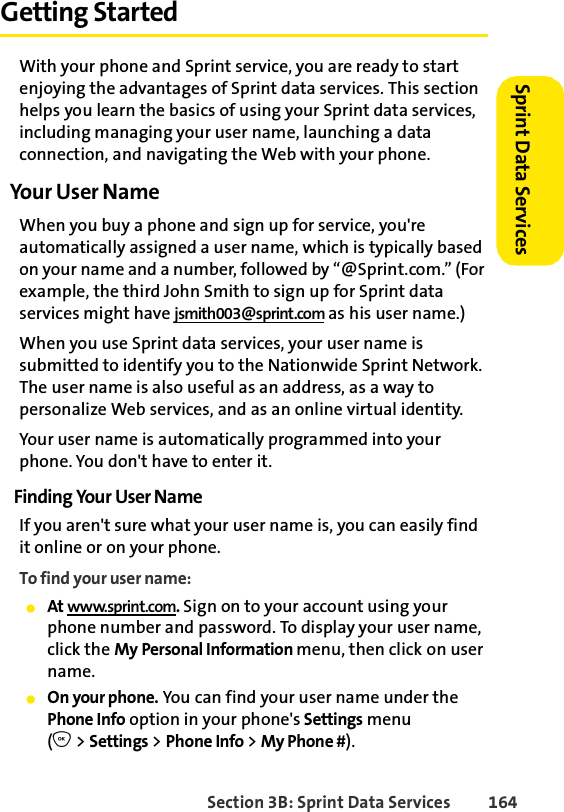
![Section 2B: Controlling Your Phone’s Settings 88Your Phone’s SettingsYour Phone’s SettingsⅢ[Talk] Key allows an incoming call to be answered only by pressing s.Calling OptionsYou can set up your phone to make dialing numbers even quicker and easier. To set special options to making dialing easier:1. Press O > Settings > Others. 2. Select the display option you want to change. (See below for a list of options.) 3. Follow the prompts to make your choice. 4. Press O to save your settings. Display LanguageYou can choose to display your phone’s menus in English or in Spanish.To assign a language for the phone’s display:1. Press O > Settings > Others > Language.2. Select English or Español and press O. Speed Dialing Allows you to dial entries using just one, two, or three key presses. Abbreviated Dialing Allows you to dial numbers sharing the same beginning digits by dialing only the last four. Enter the digits you want to prepend when using Abbreviated Dialing. Auto Redial Lets you redial the last number you dialed by pressing s.](https://usermanual.wiki/Motorola-Solutions/89FT7019.USERS-MANUAL/User-Guide-676181-Page-101.png)


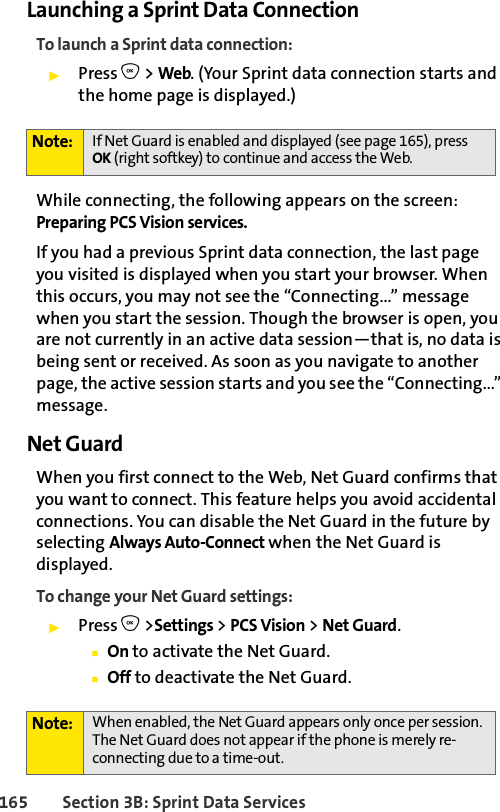
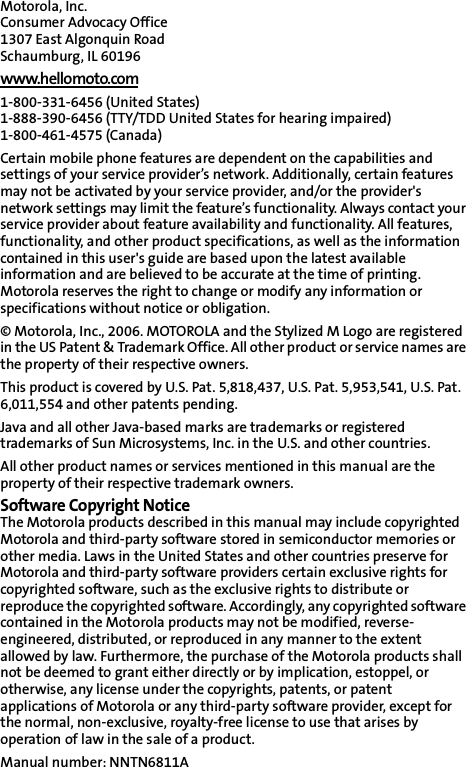
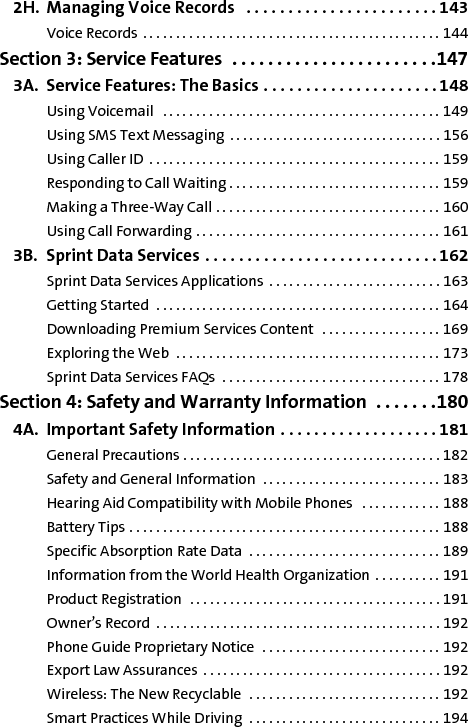
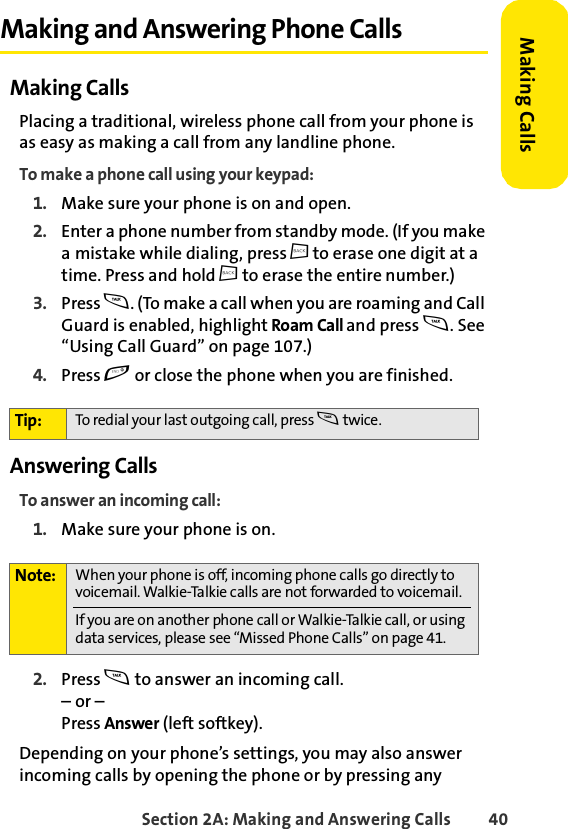
![167 Section 3B: Sprint Data ServicesTo use softkeys:ᮣPress the desired softkey button. (If an additional pop-up menu appears when you press the softkey button, select the menu items using your keypad [if they’re numbered] or by highlighting the option and pressing O.)ScrollingAs with other parts of your phone's menu, you'll have to scroll up and down to see everything on some Web sites.To scroll line by line through Web sites:ᮣPress the navigation key up and down.To scroll page by page through Web sites:ᮣPress the volume buttons on the side of the phone.SelectingOnce you've learned how to use softkeys and scroll, you can start navigating the Web.To select onscreen items:ᮣUse the navigation key to highlight the desired item, then press the desired softkey button (or press O).Links, which appear as underlined text, allow you to jump to Web pages, select special functions, or even place phone calls. Tip: Depending on which Web sites you visit, the labels on the softkeys may change to indicate their function.Tip: You’ll find that the left softkey is used primarily for selecting items. This softkey is often labeled “OK.”If the items on a page are numbered, you can use your keypad (number keys) to select an item.](https://usermanual.wiki/Motorola-Solutions/89FT7019.USERS-MANUAL/User-Guide-676181-Page-180.png)


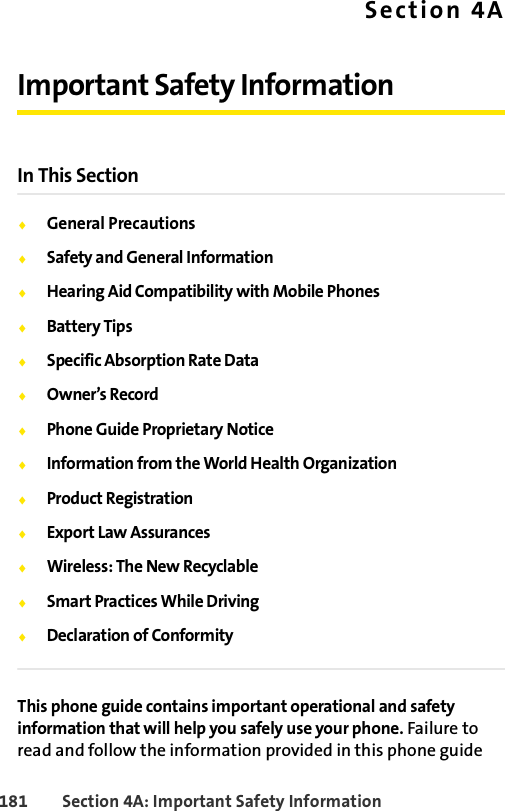
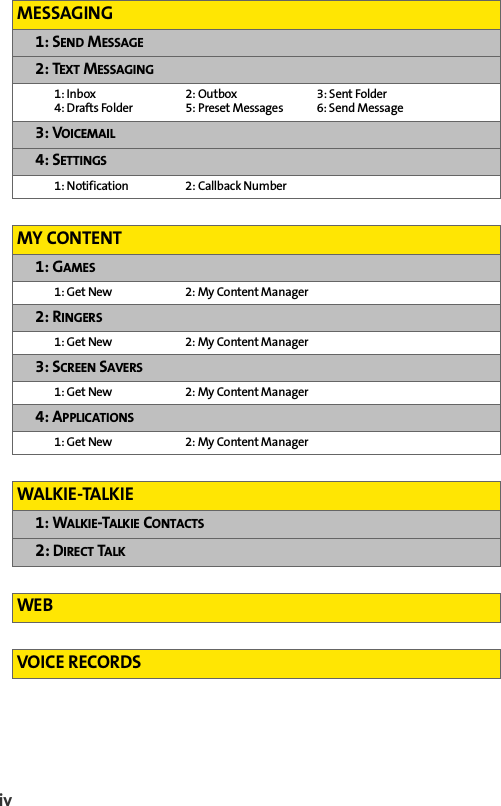
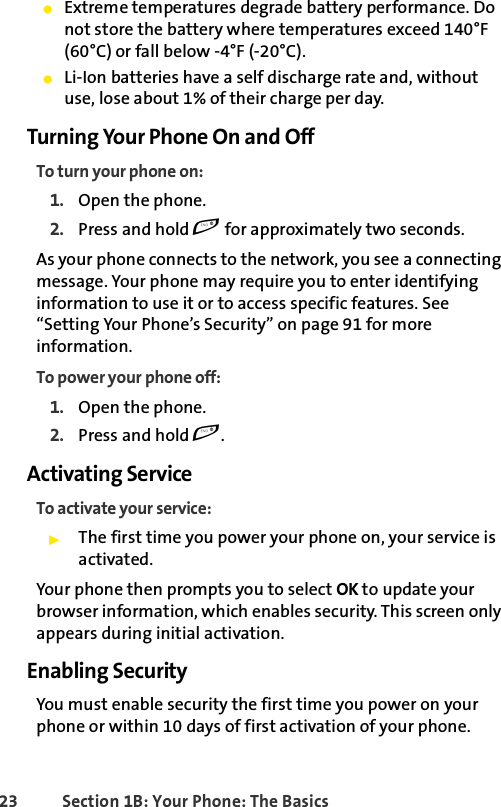
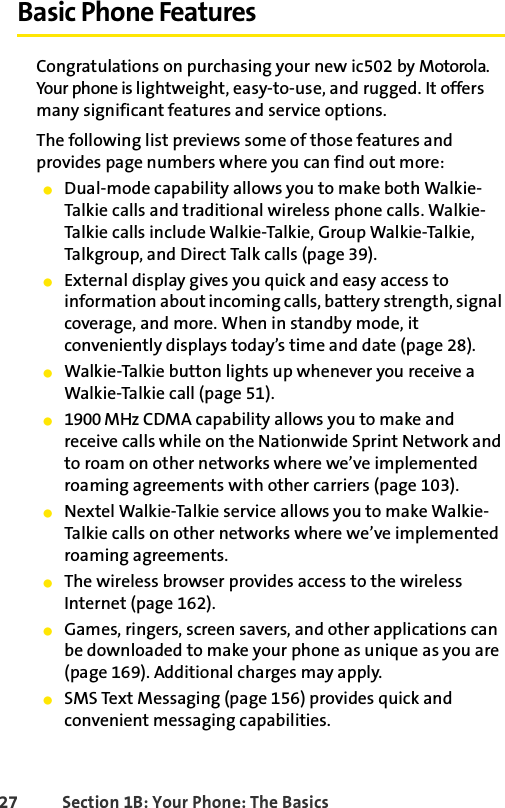
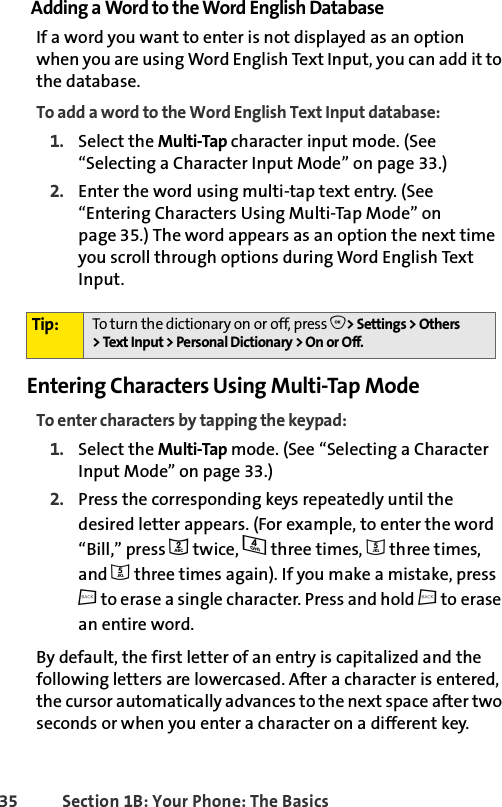
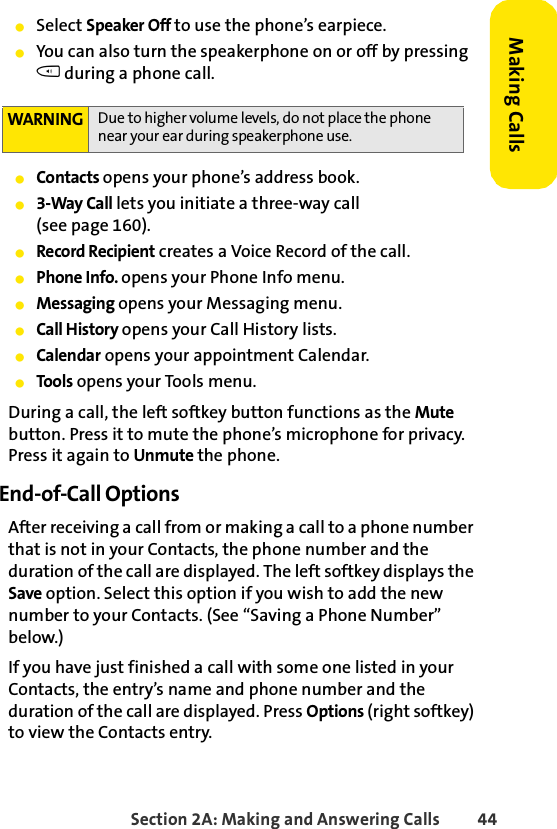
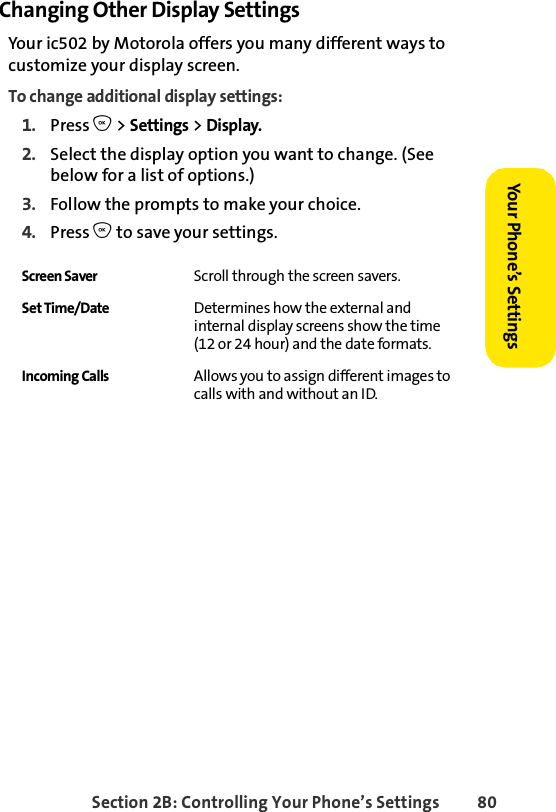
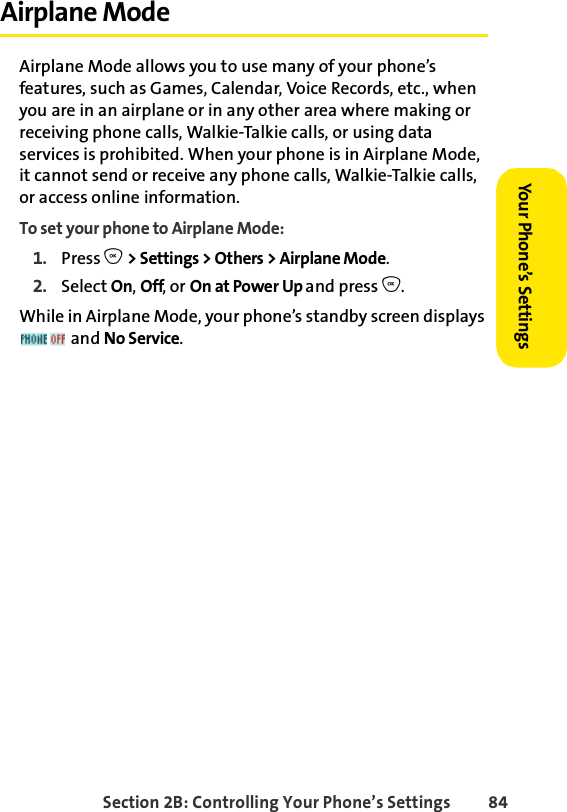
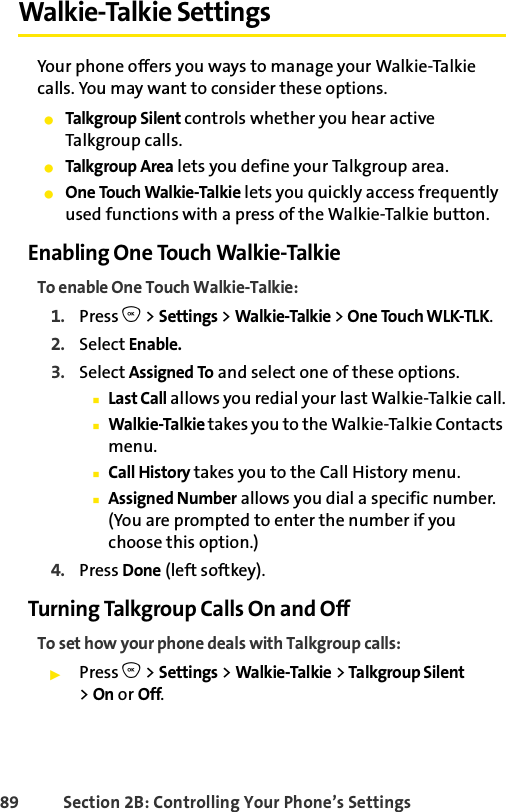
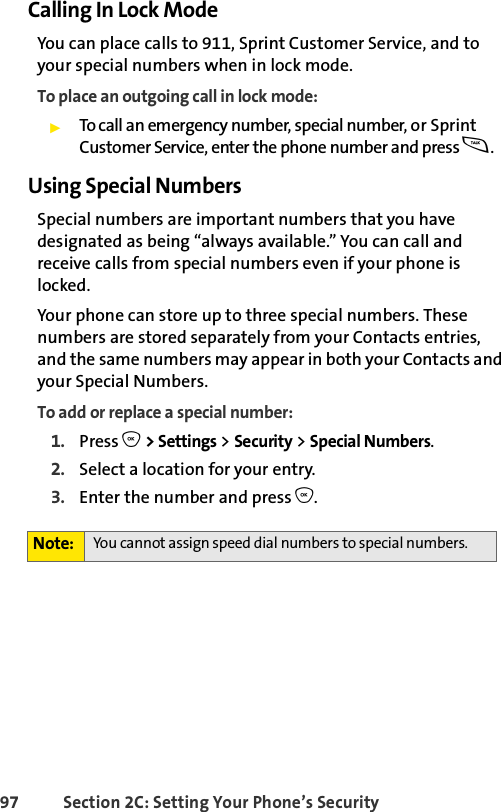
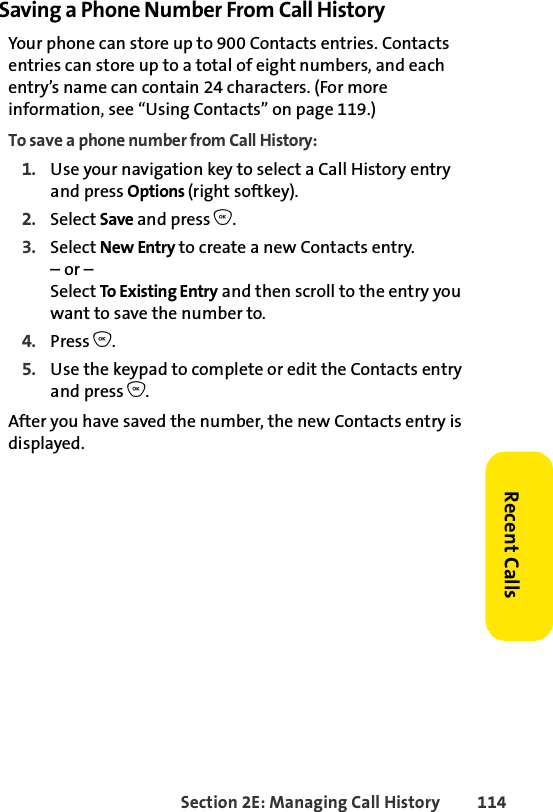
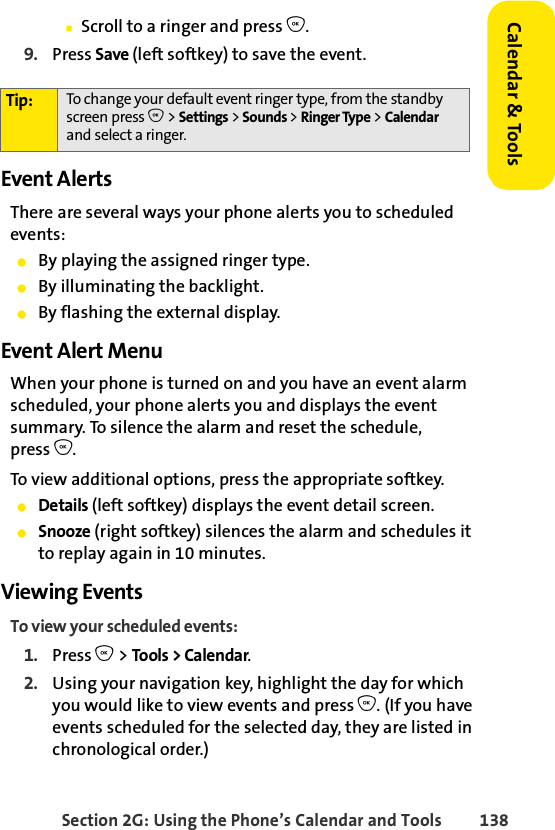
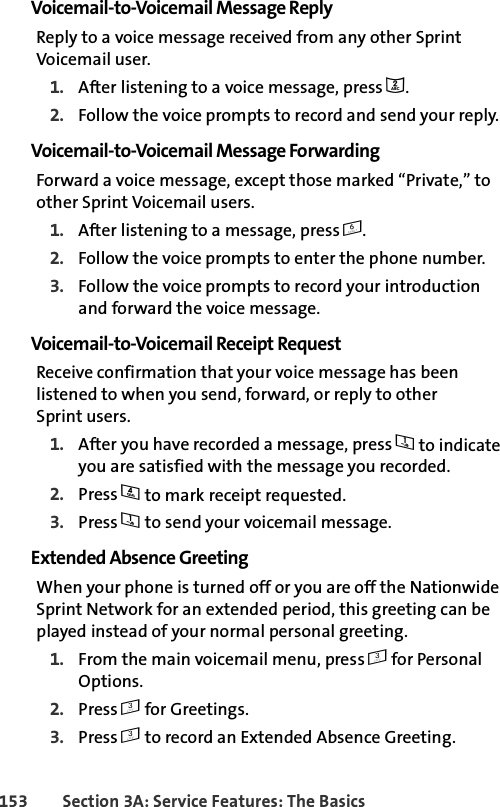
![Section 3B: Sprint Data Services 172Sprint Data Services To download purchased content from My Content Manager:1. From the My Content Manager display (see above), highlight the item you wish to download and press O. (The information page for the selected item is displayed.)2. Scroll to highlight Download and press O. (The item downloads automatically. When the New Download screen appears, the item has been successfully downloaded to your phone.)3. Select an option to continue:ⅢSelect Use/Run/View to assign the downloaded item (or to launch, in the case of a game or application). Your Sprint data session ends and you are redirected to the appropriate phone menu screen.ⅢSelect Set as to assign a ringer or screen saver to a phone function.ⅢSelect Settings to configure downloaded games or applications.ⅢSelect Shop to browse for other items to download.ⅢPress e to quit the browser and return to standby mode.For complete information and instructions on downloading Games, Ringers, Screen Savers, and Applications, see the user’s guide at www.sprint.com.Tip: You can also access My Content Manager through the phone’s main menu. Press O > My Content > [Games, Ringers, Screen Savers, or Applications] > My Content Manager. The browser starts and takes you to the corresponding content.](https://usermanual.wiki/Motorola-Solutions/89FT7019.USERS-MANUAL/User-Guide-676181-Page-185.png)