Motorola Solutions 89FT7096 2-Way Portable Radio with Bluetooth, Bluetooth LE and WiFi User Manual APX TWO WAY RADIOS
Motorola Solutions, Inc. 2-Way Portable Radio with Bluetooth, Bluetooth LE and WiFi APX TWO WAY RADIOS
Contents
- 1. Users Guide
- 2. RF Safety Manual
- 3. Manual
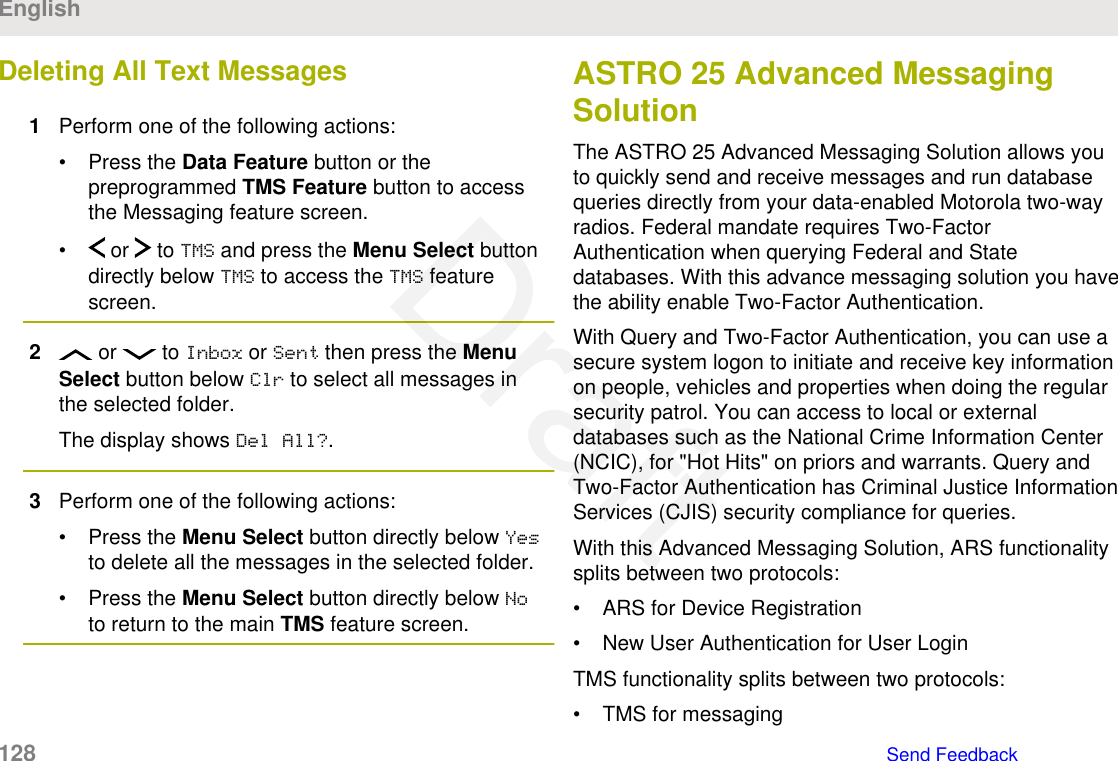
Users Guide
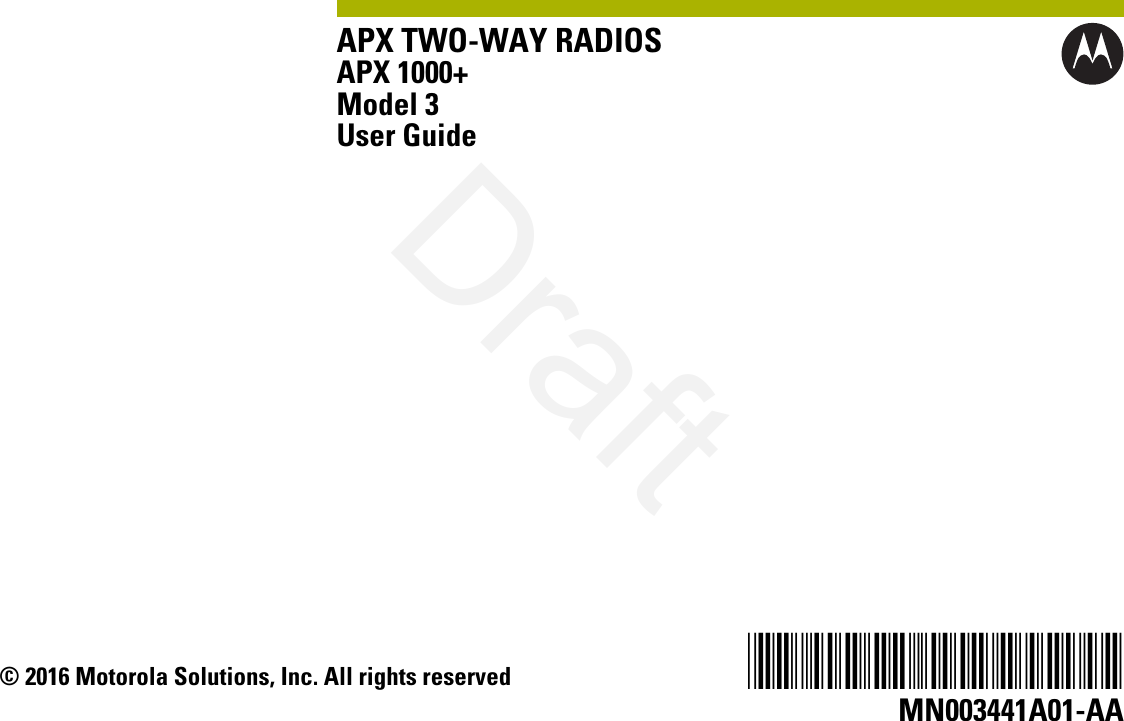


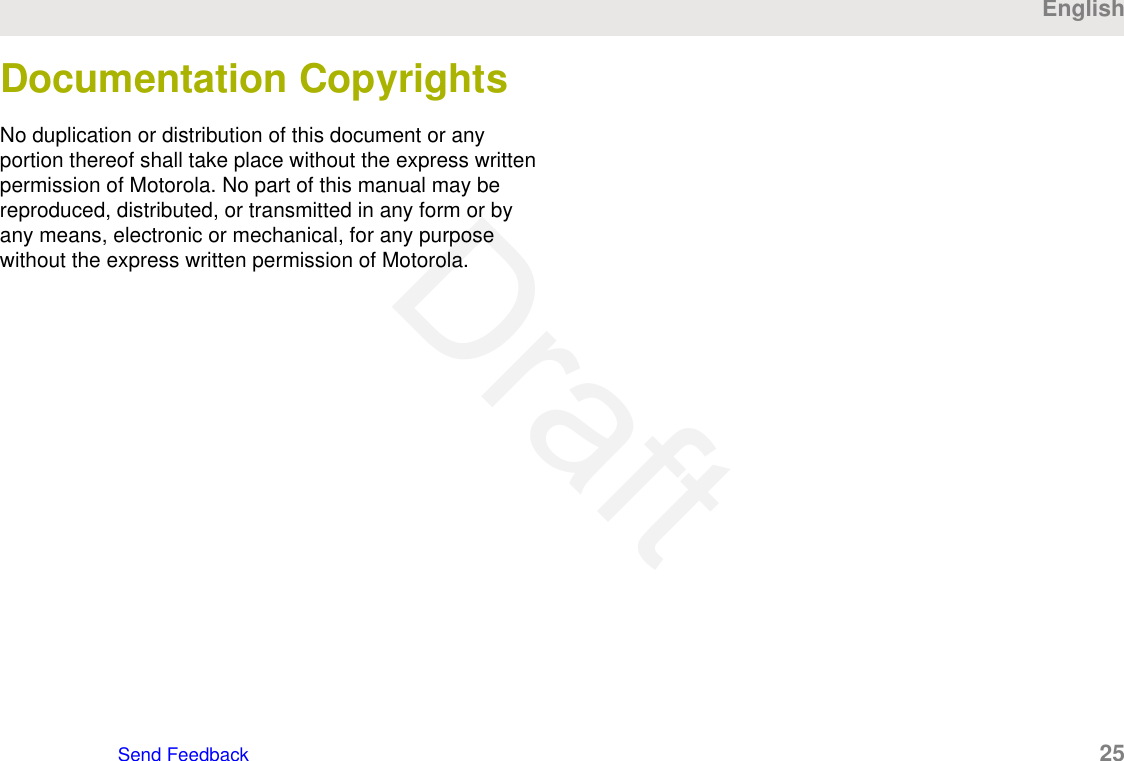


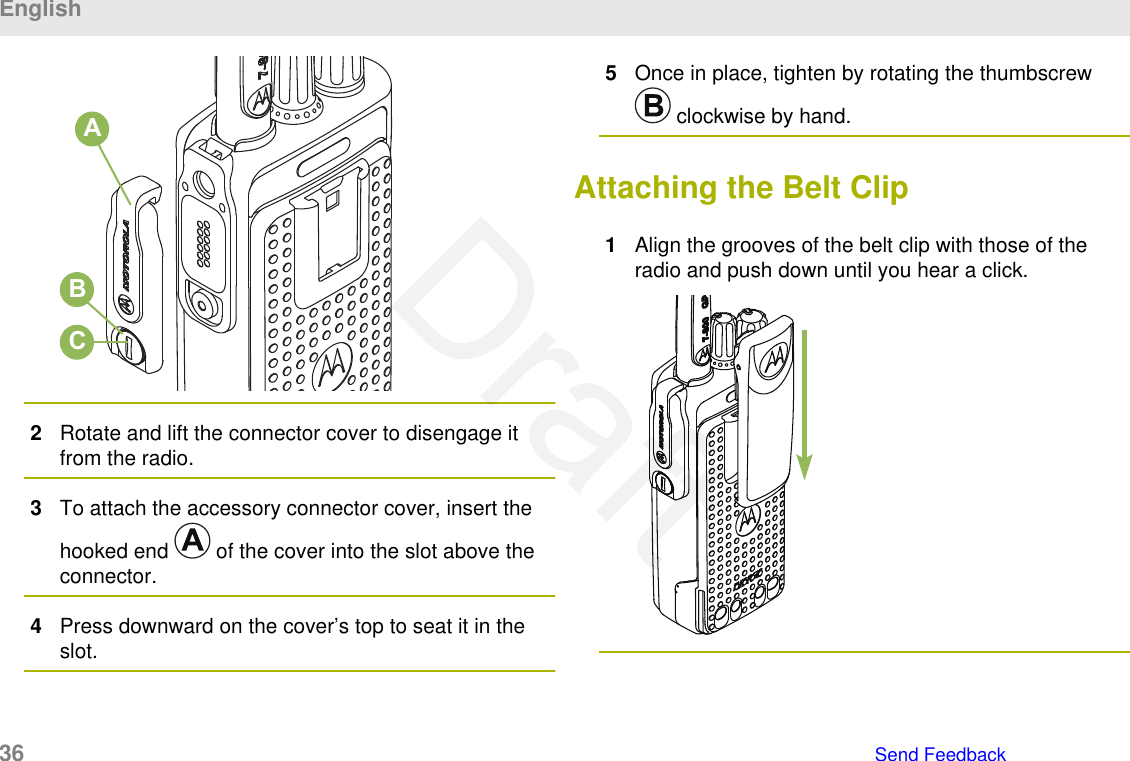


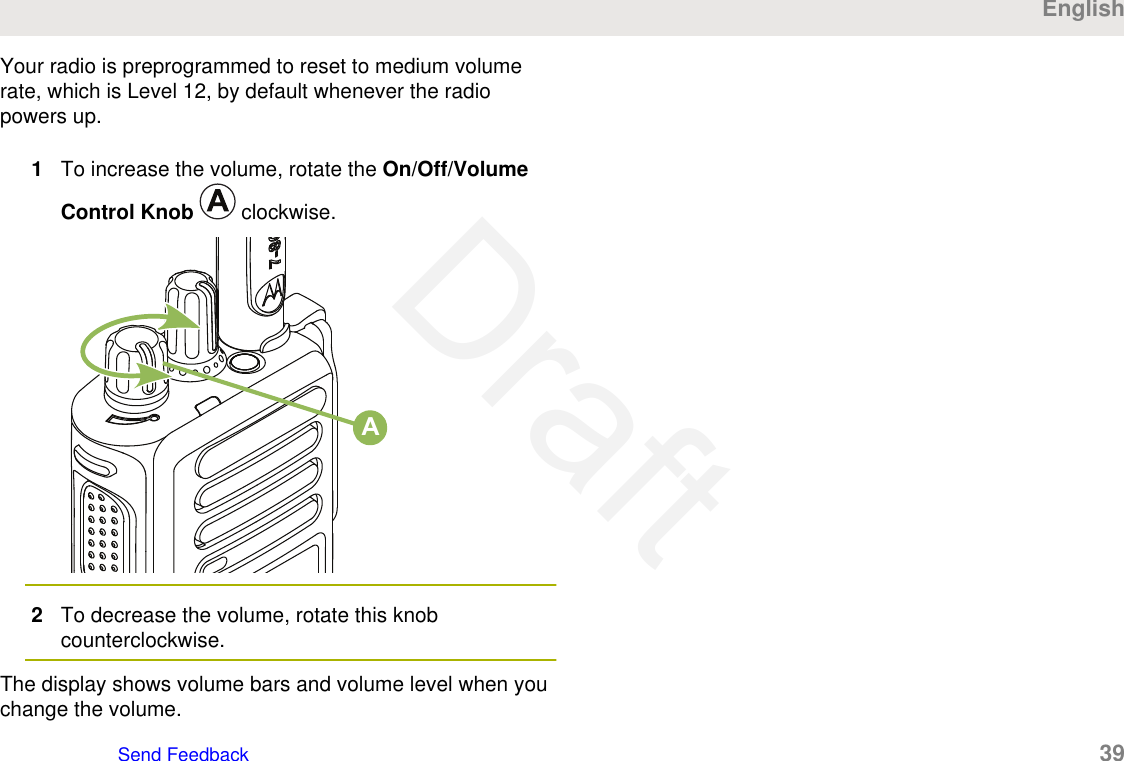

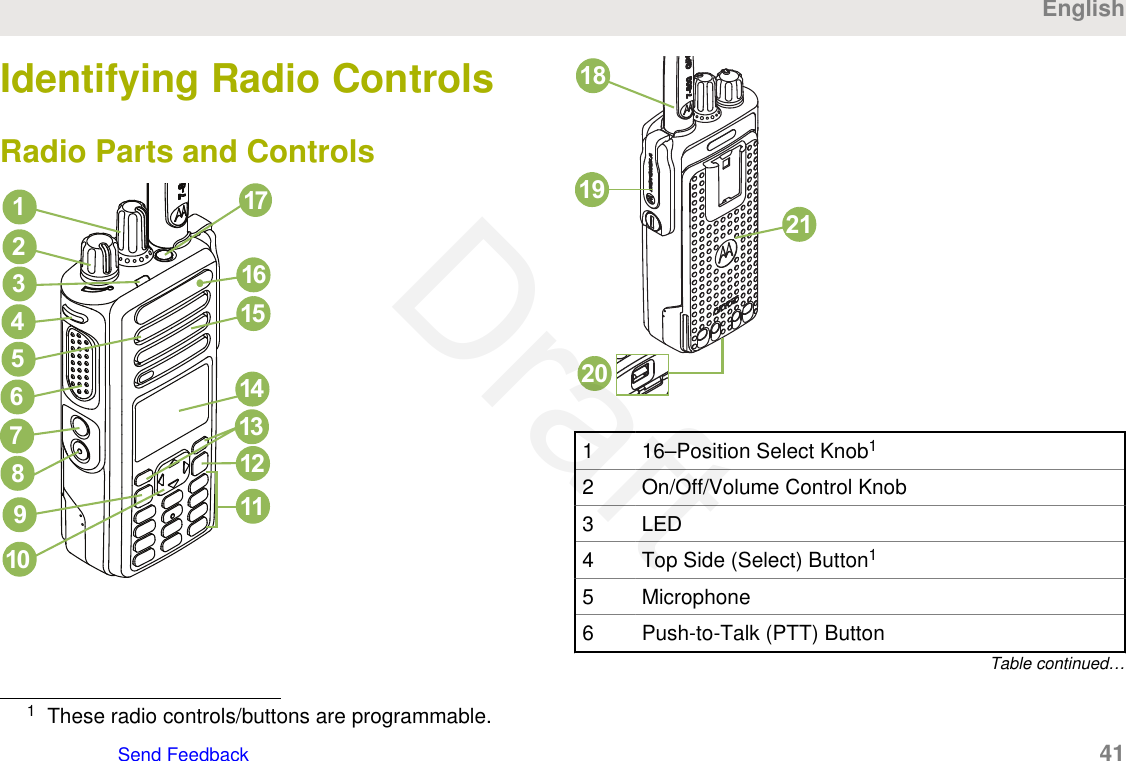
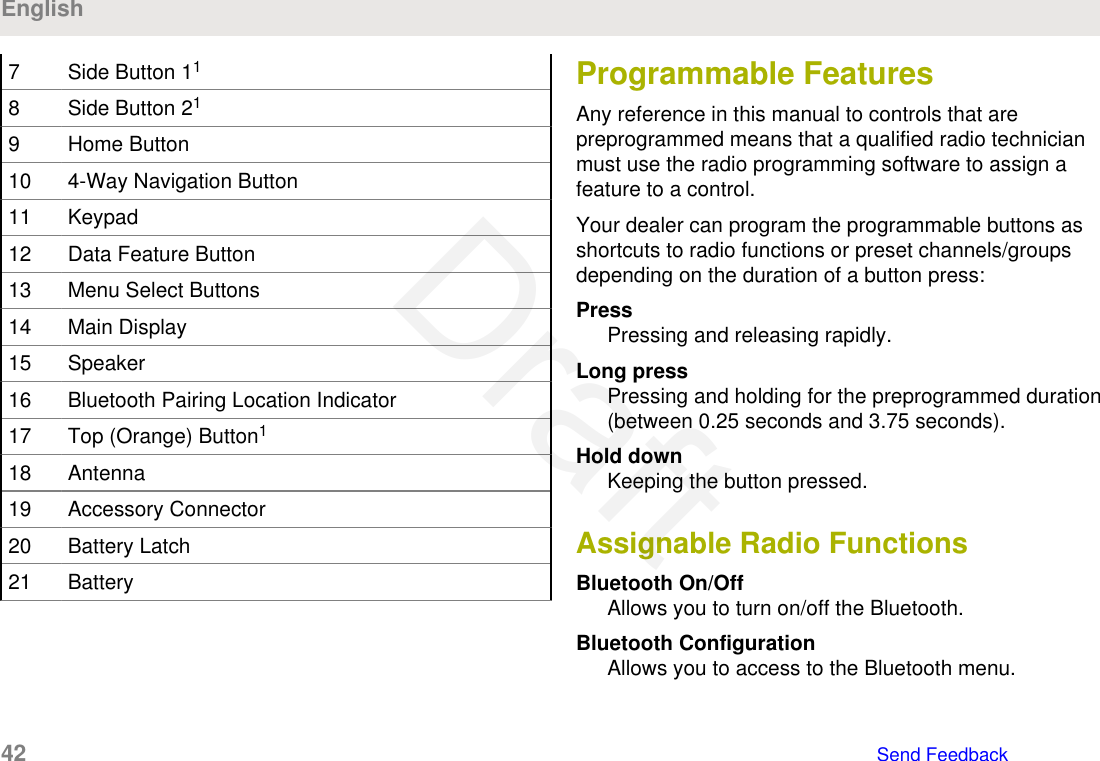


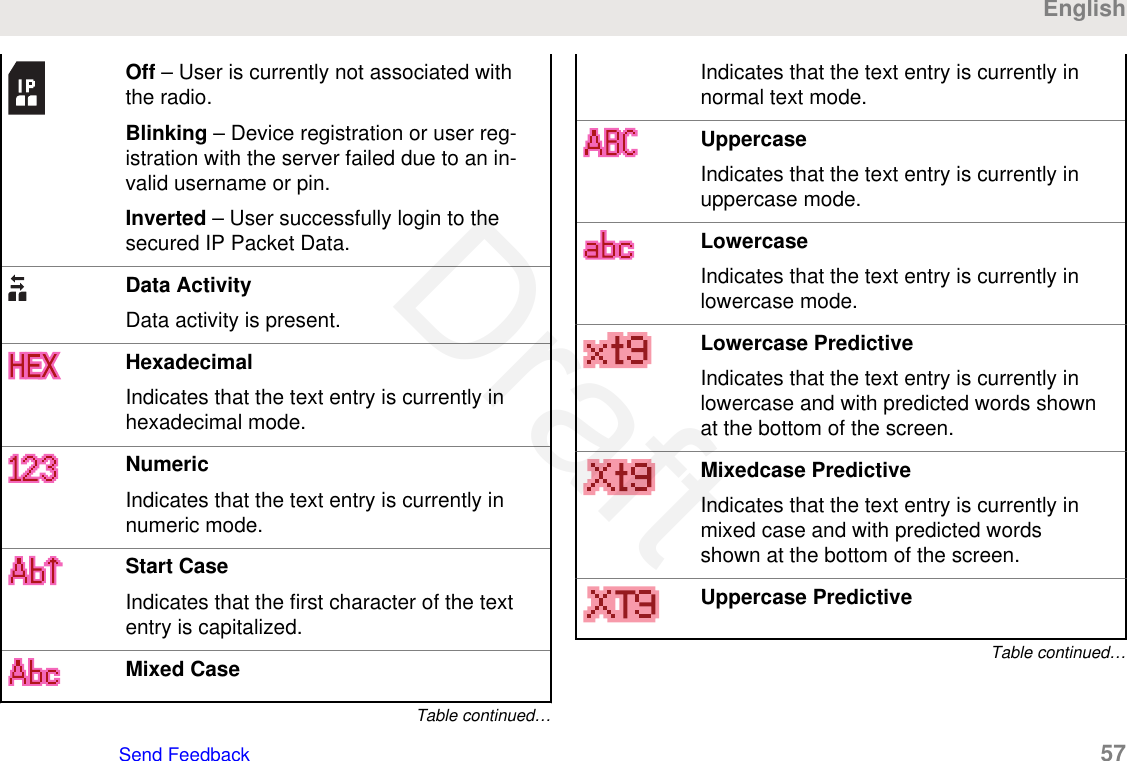


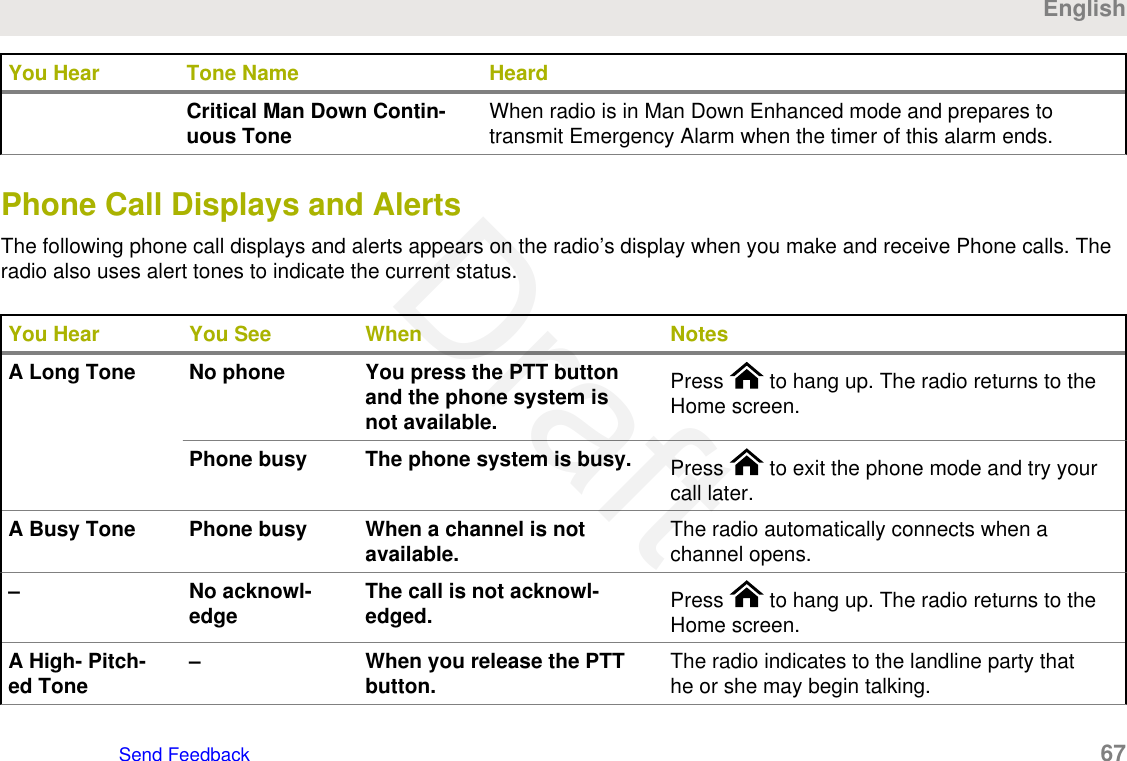
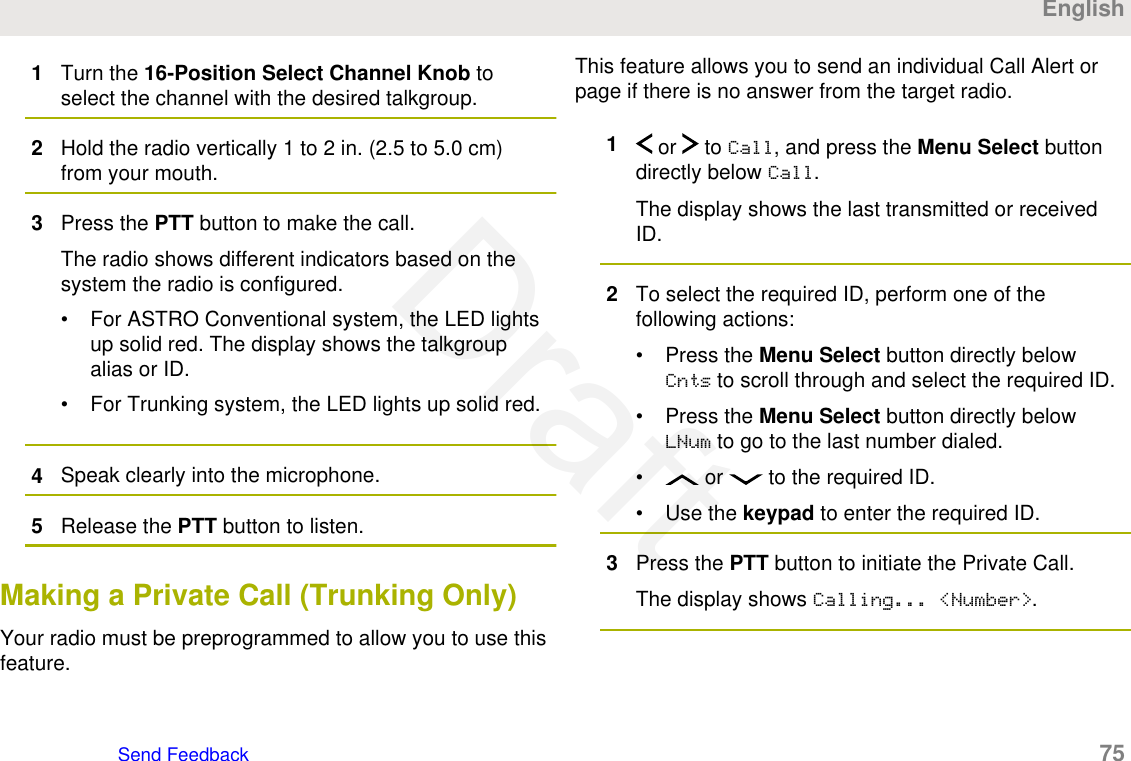
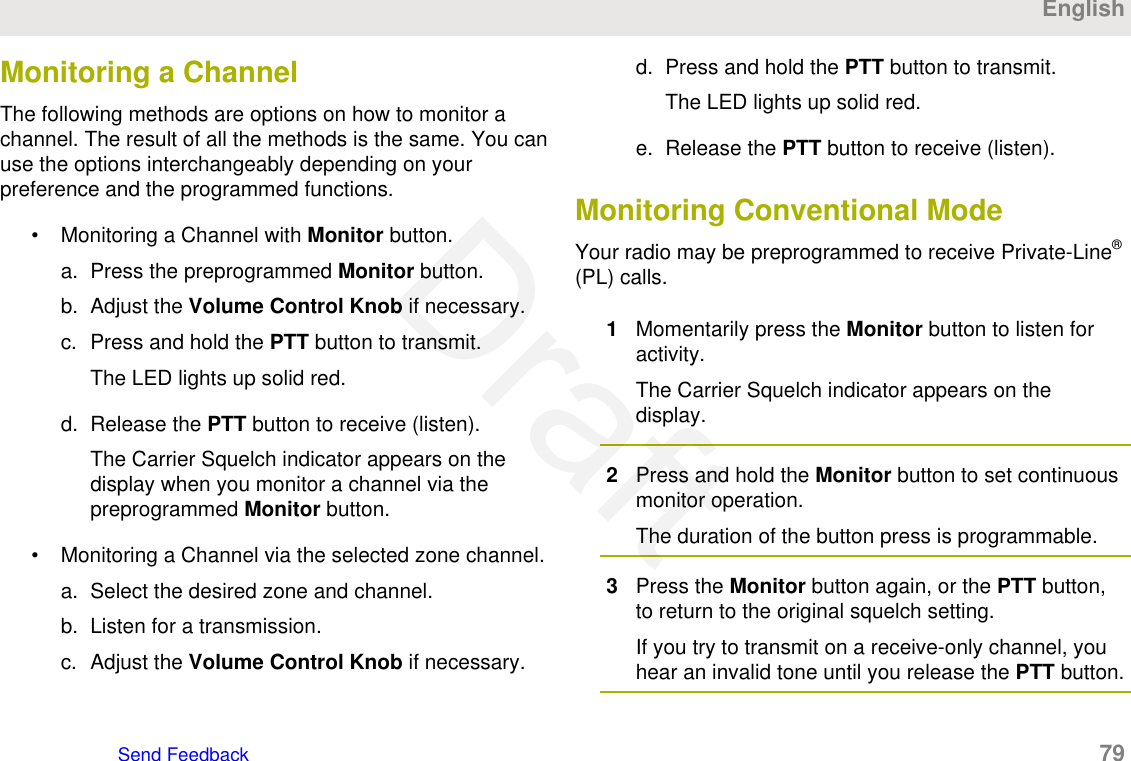

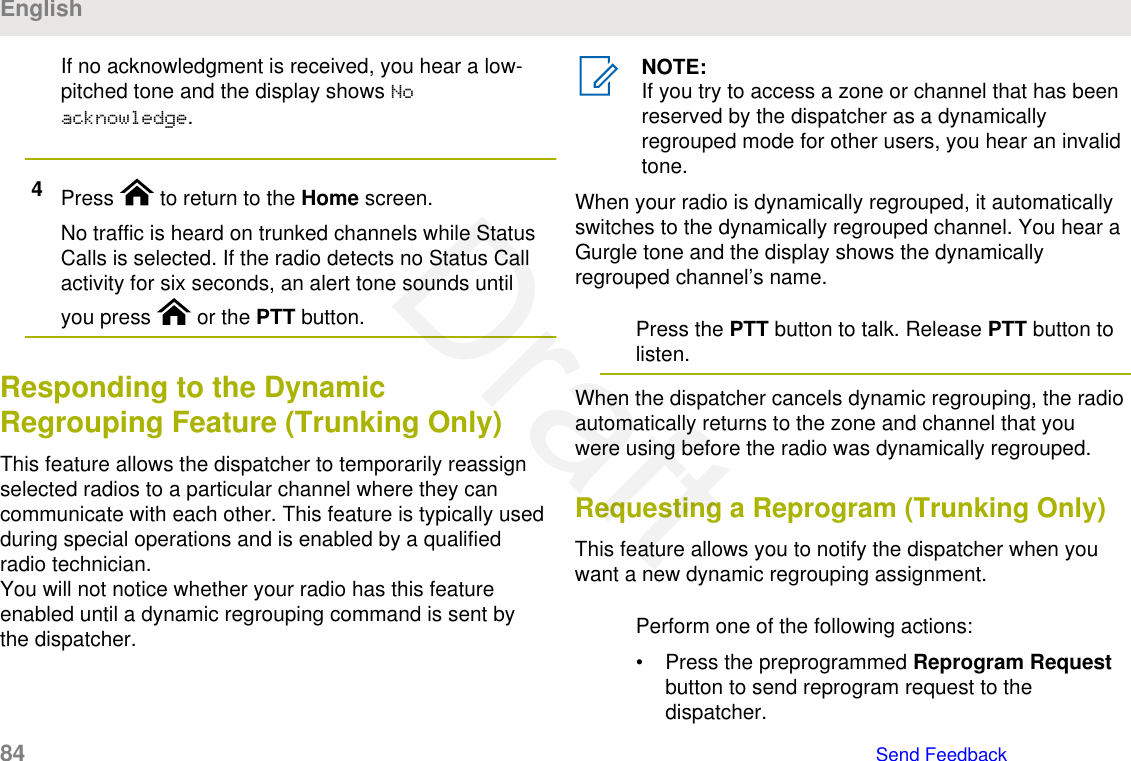
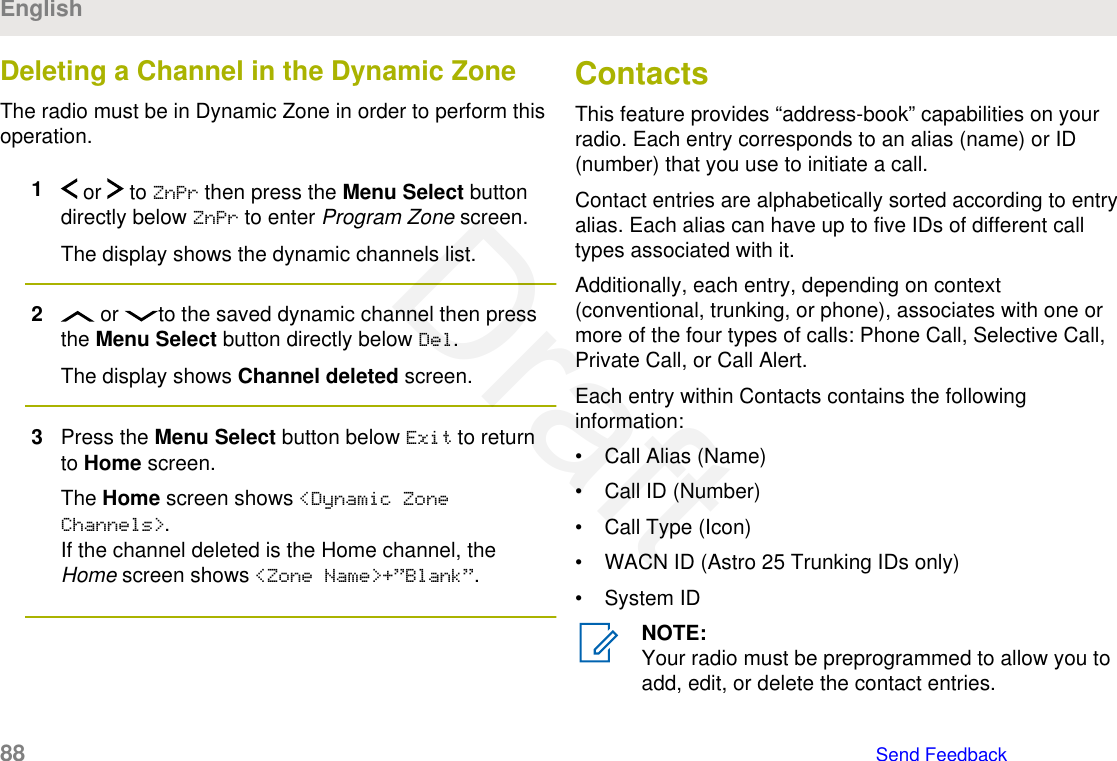
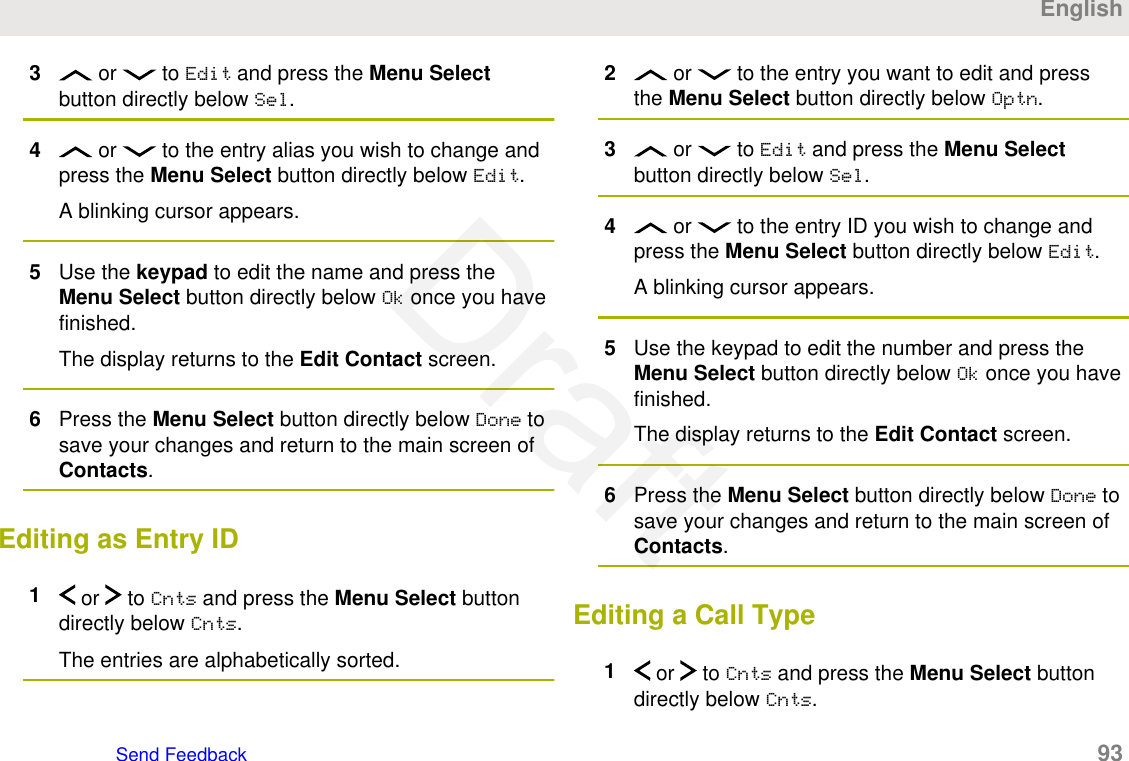
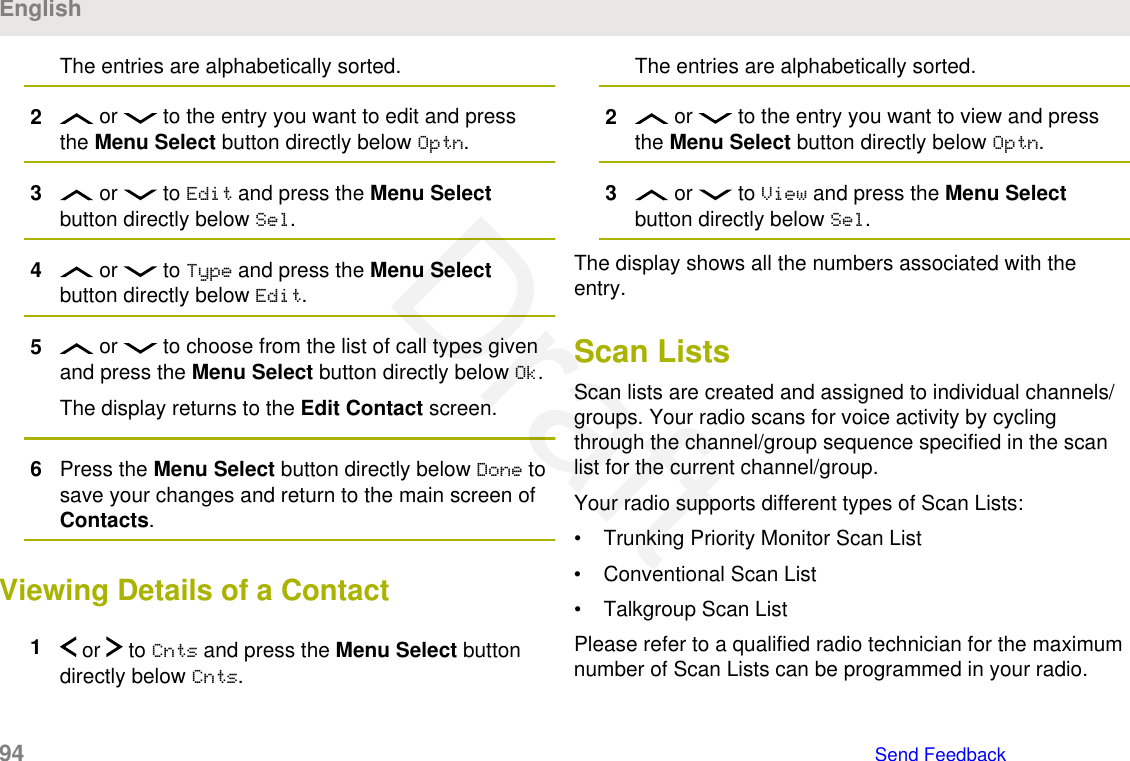
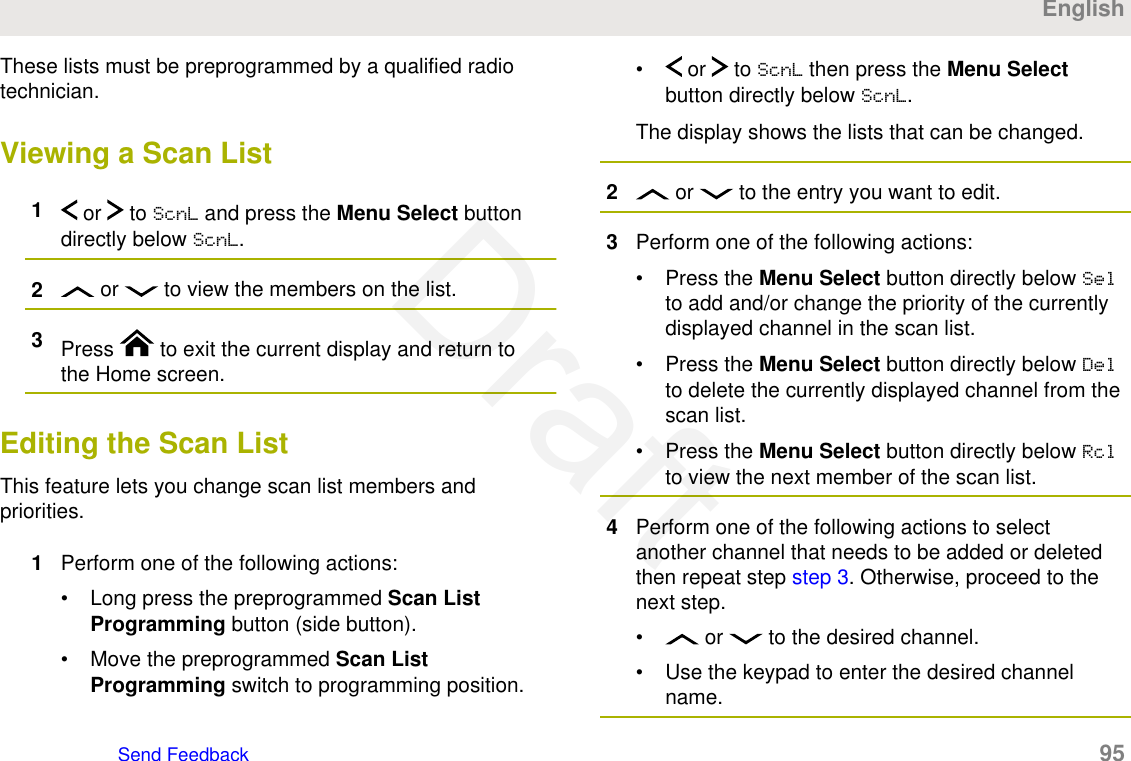
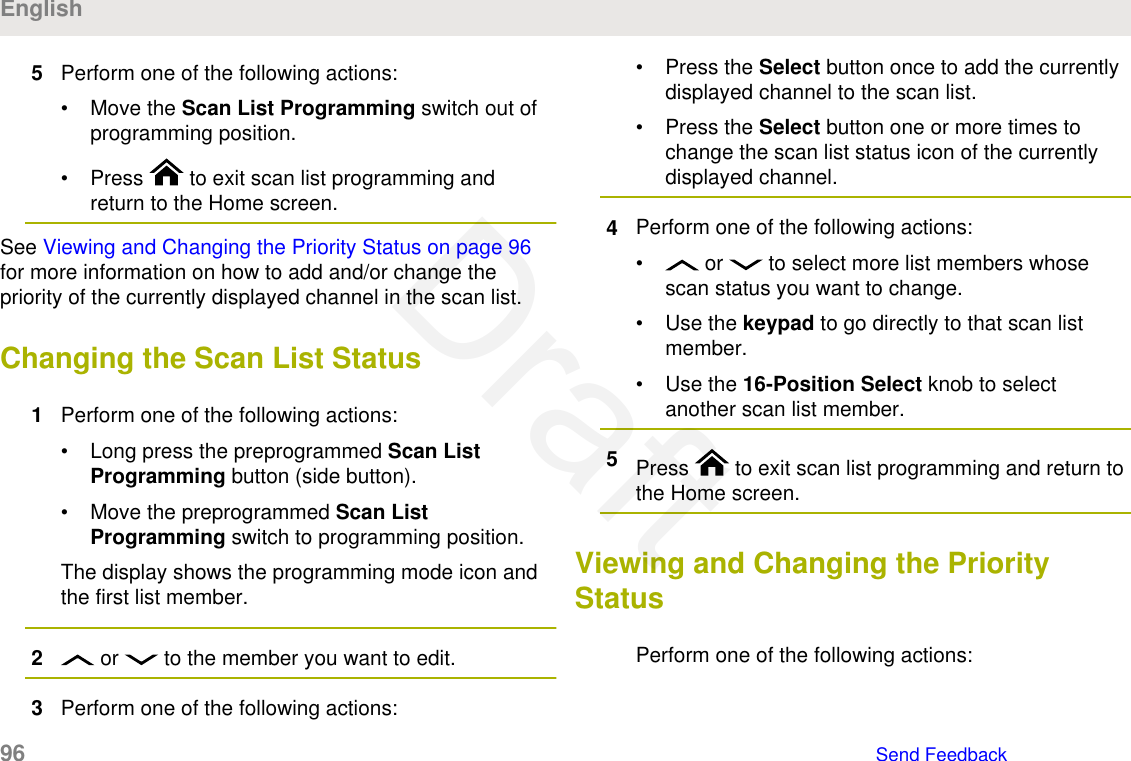
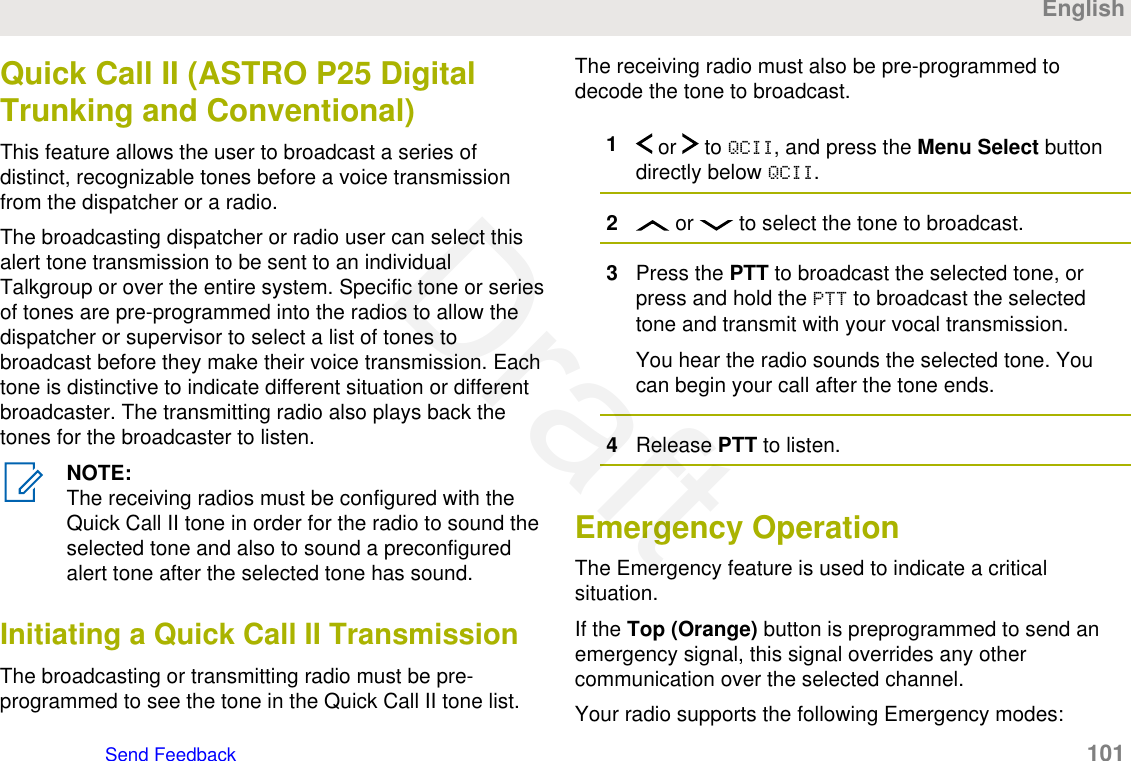
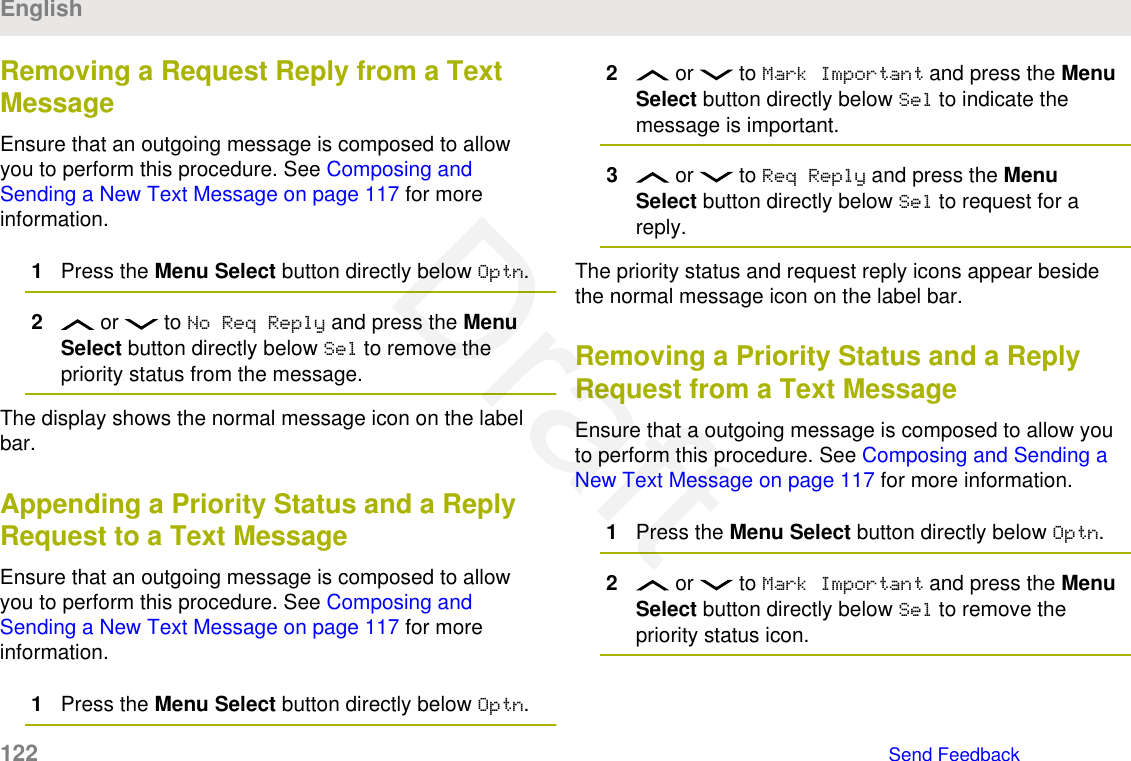
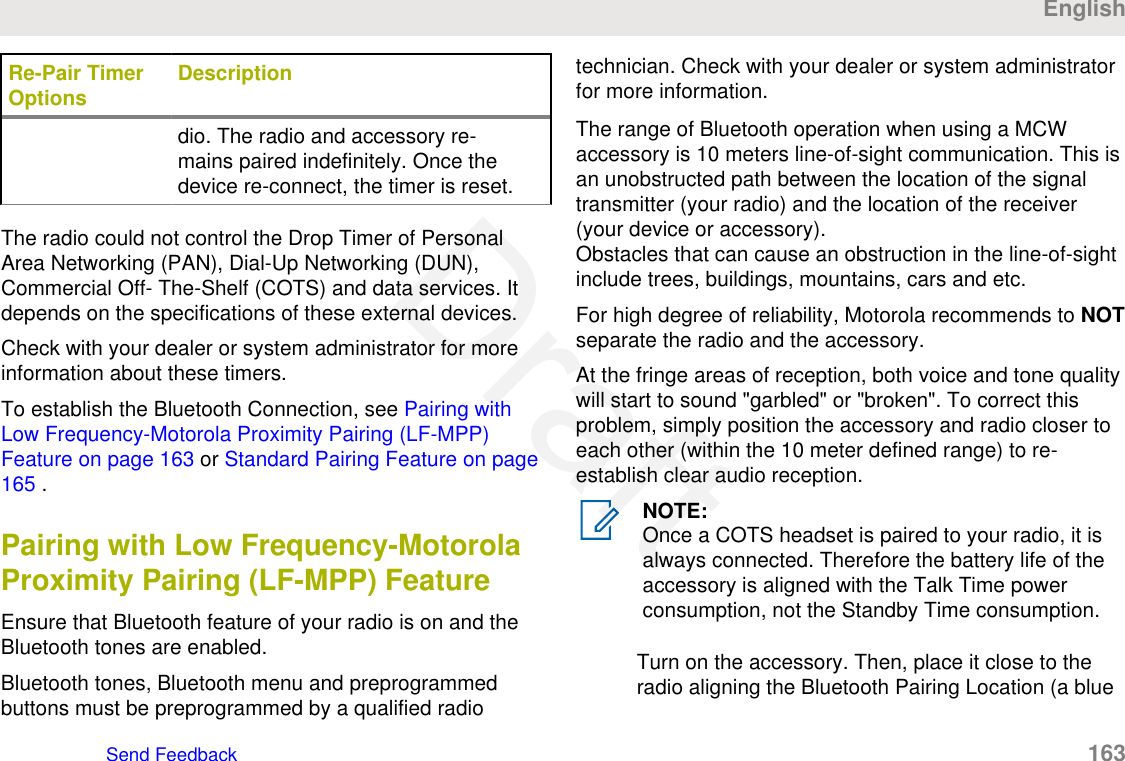
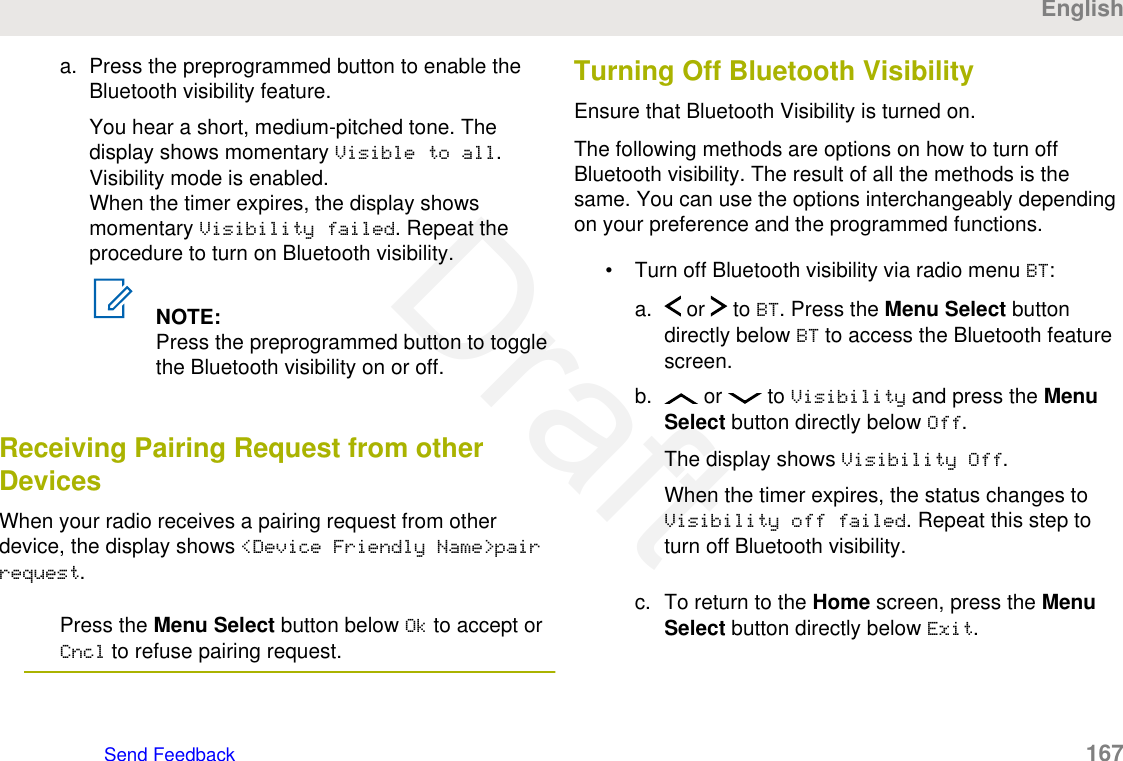
![Adding a New Contact Entry1 or to Cnts and press the Menu Select buttondirectly below Cnts.The entries are alphabetically sorted.2 or to [New Contact] and press the MenuSelect button directly below Sel.3 or to Name and press the Menu Selectbutton directly below Edit.The display shows Edit name and a blinking cursorappears.4Use the keypad to enter the name and press theMenu Select button directly below Ok once you haveentered the name.To cancel this operation, press the Menu Selectbutton directly below Cncl to return to the previousscreen.5 or to [Add Number] and press the MenuSelect button directly below Sel.6 or to Number 1 and press the Menu Selectbutton directly below Edit.The display shows Edit Number 1 and a blinkingcursor appears.7Use the keypad to enter the number and press theMenu Select button directly below Ok once you haveentered the number.To cancel this operation, press the Menu Selectbutton directly below Cncl to return to the previousscreen.8Perform one of the following actions per theinformation you need to add to current name:• or to Type 1 and press the Menu Selectbutton directly below Edit. or to the required mode and press theMenu Select button directly below Ok.• Repeat Steps step 6 through step 7 to enter oredit the exisitng system IDs.• Repeat Steps step 5 through step 7 to add a newnumber.English90 Send FeedbackDraft](https://usermanual.wiki/Motorola-Solutions/89FT7096.Users-Guide/User-Guide-3307316-Page-90.png)
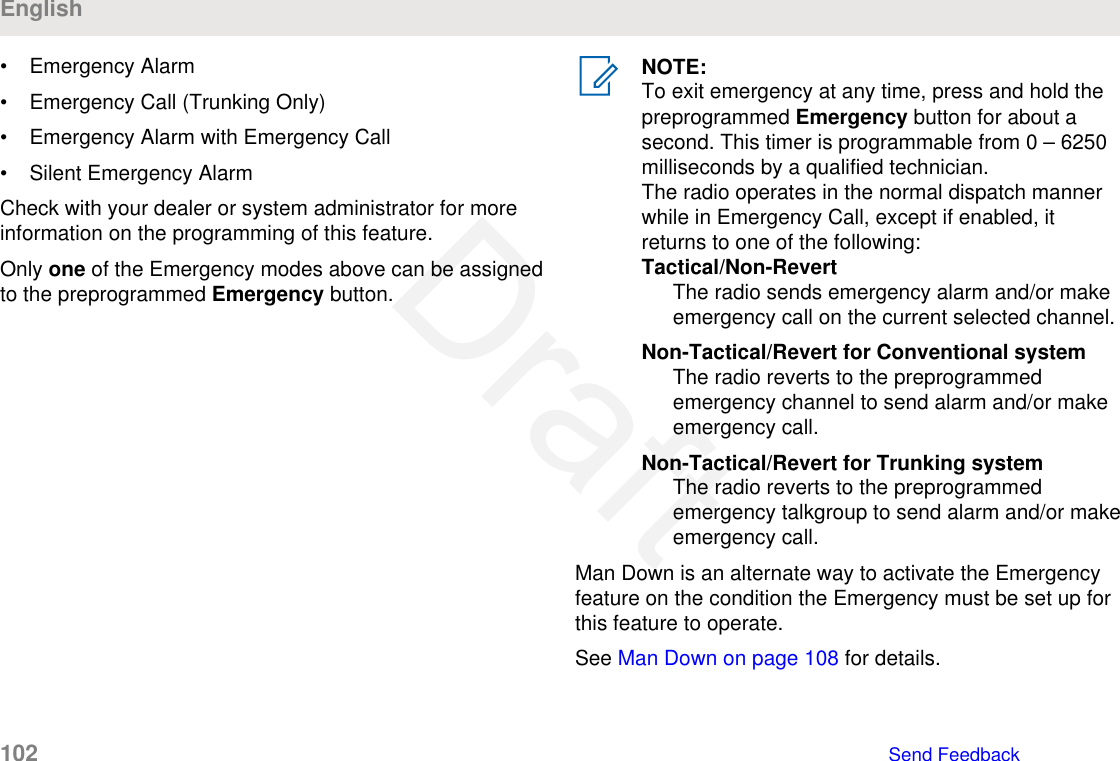


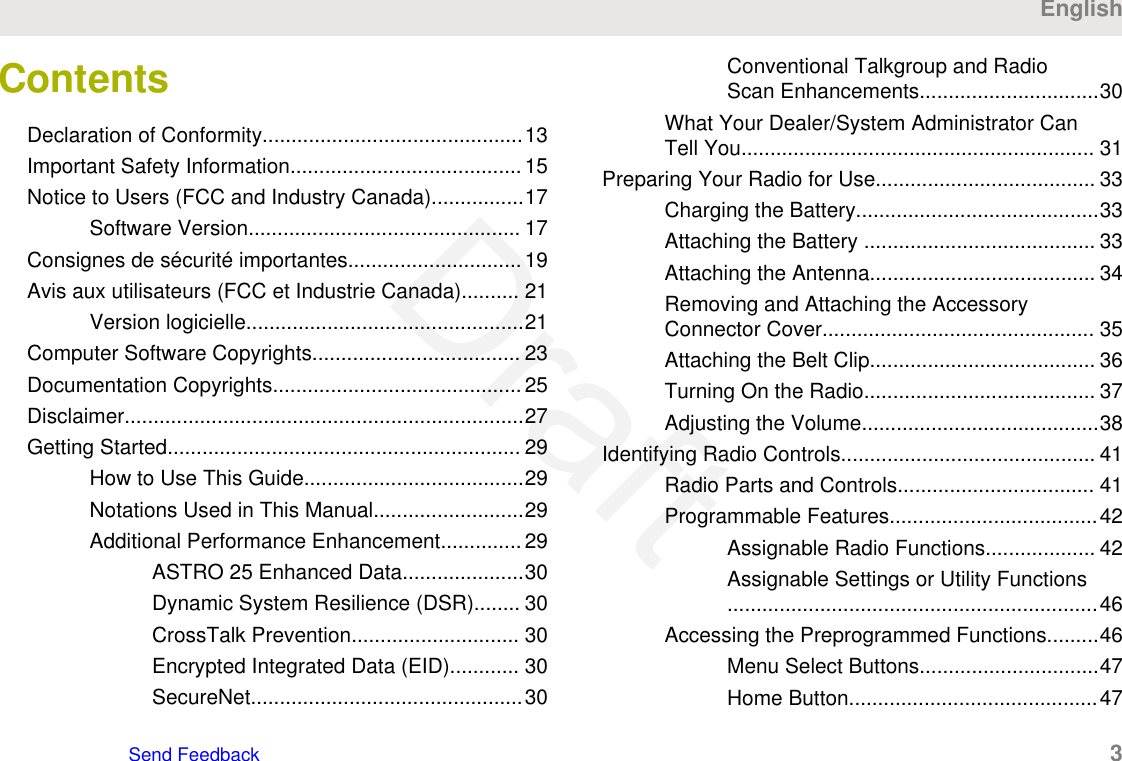
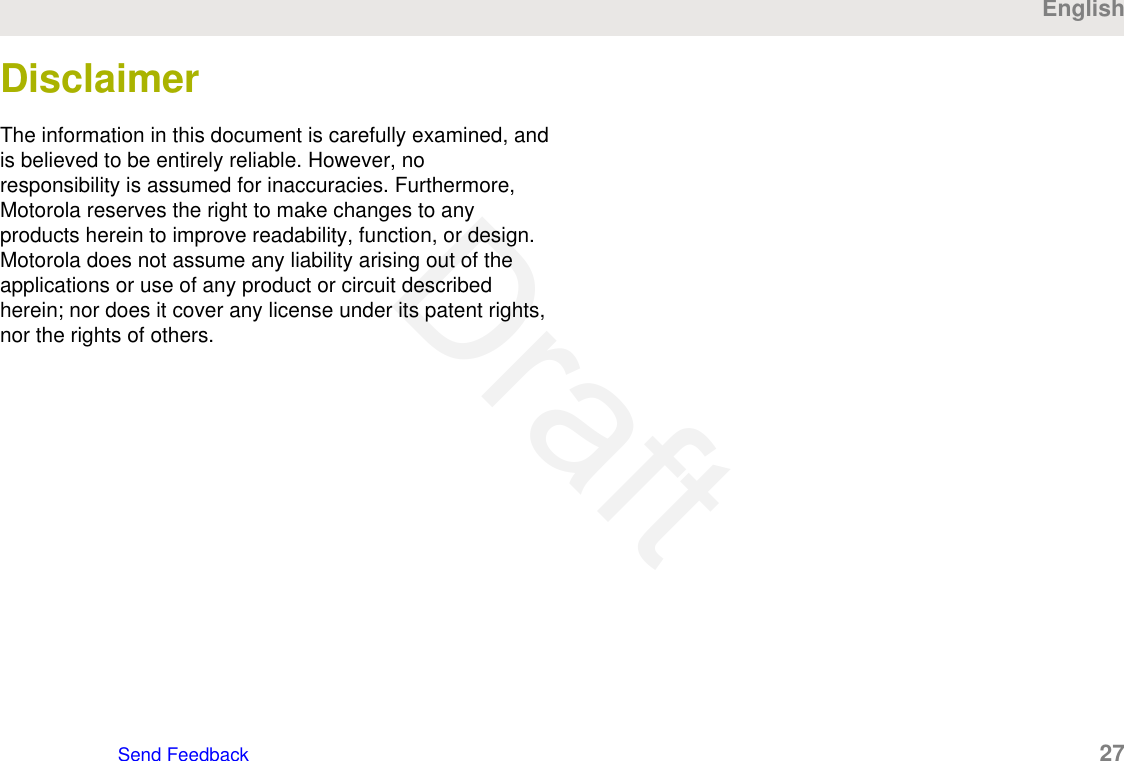
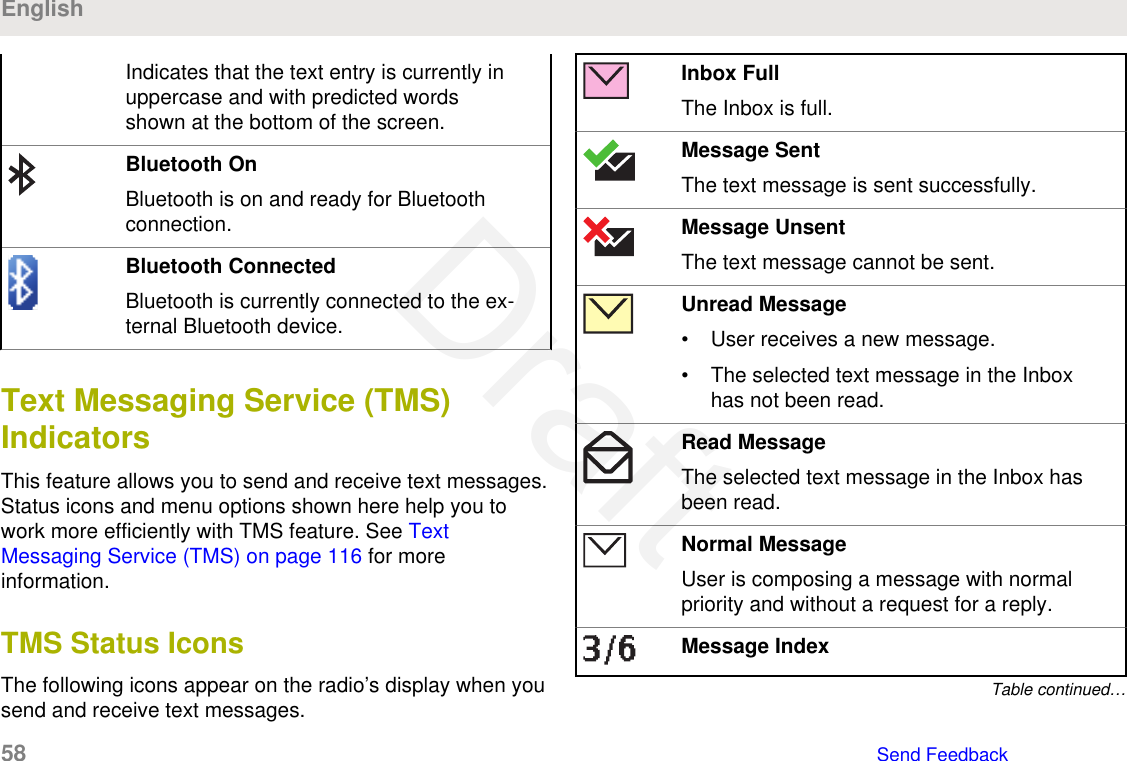
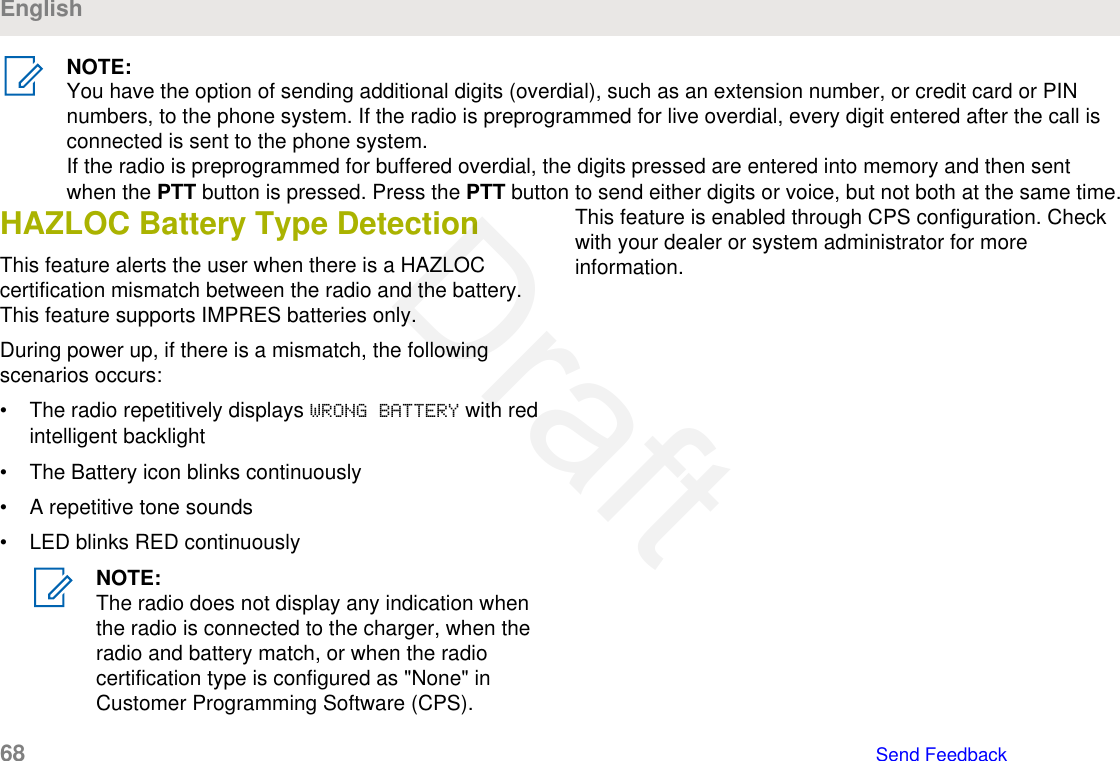
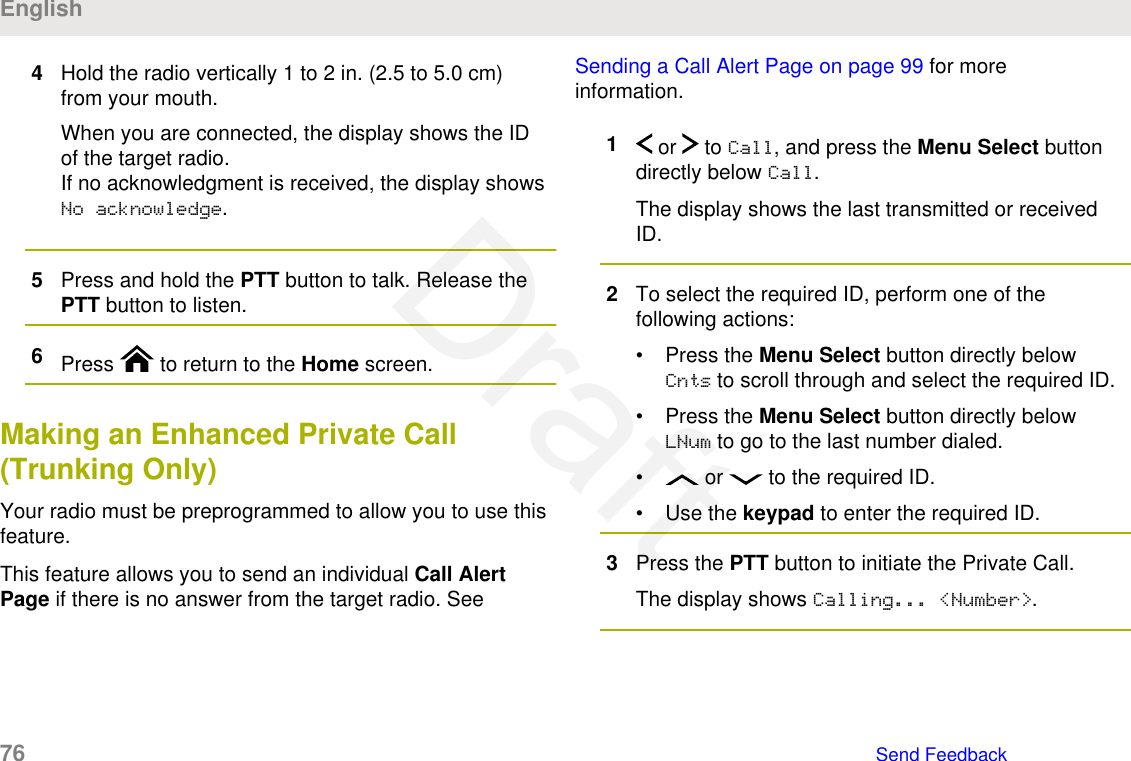
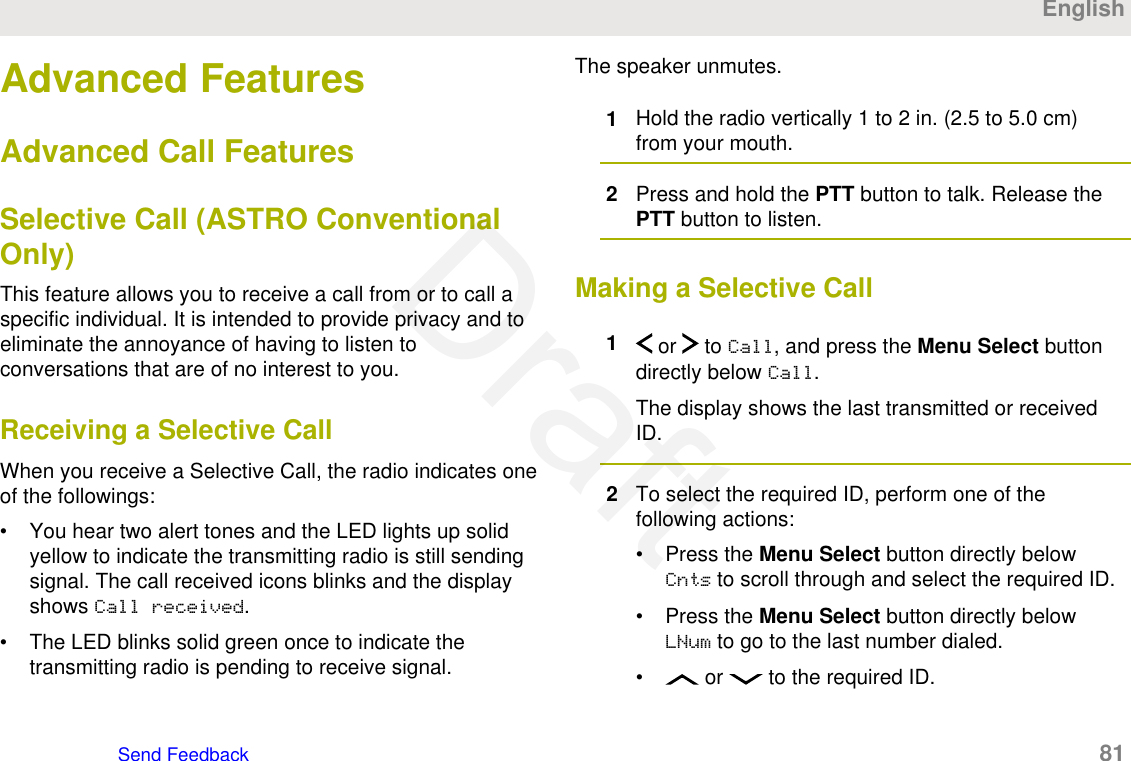
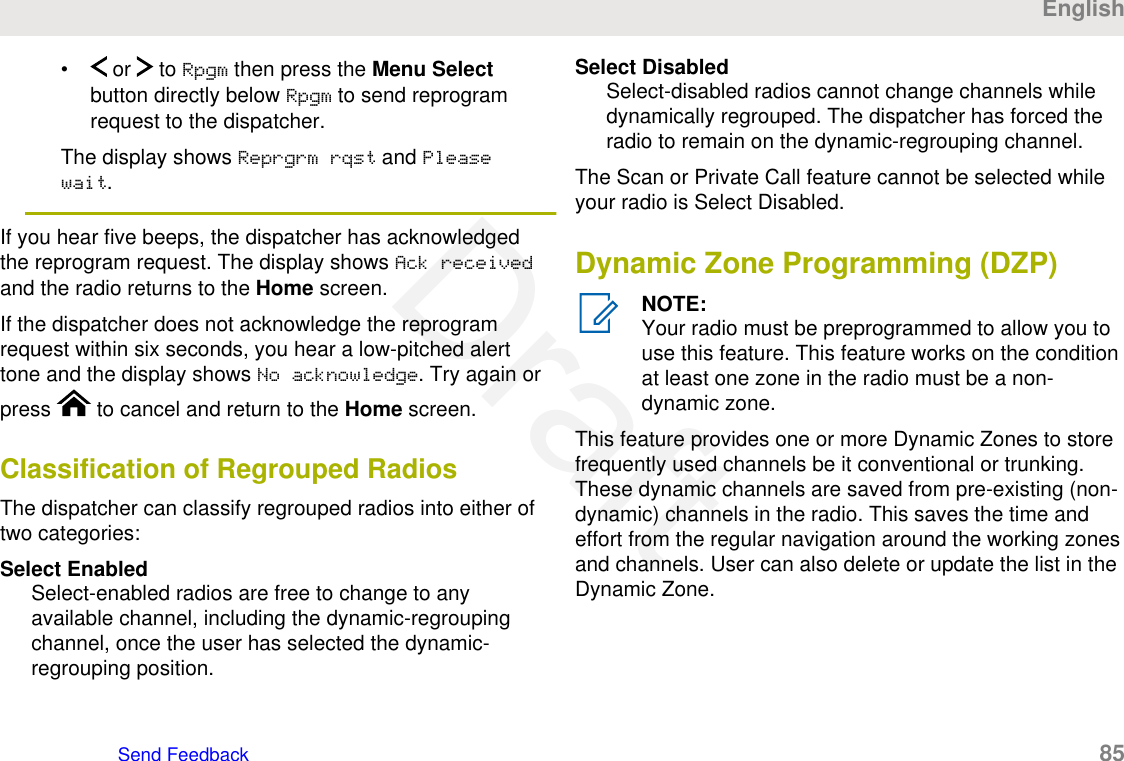
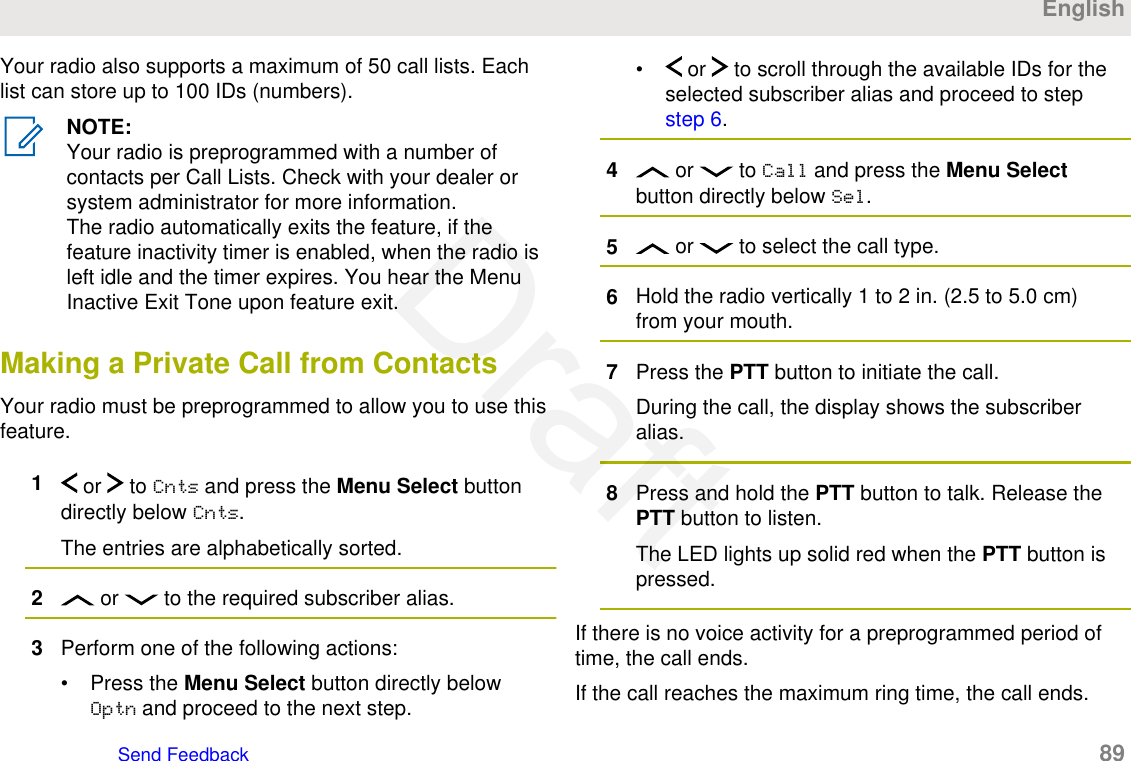
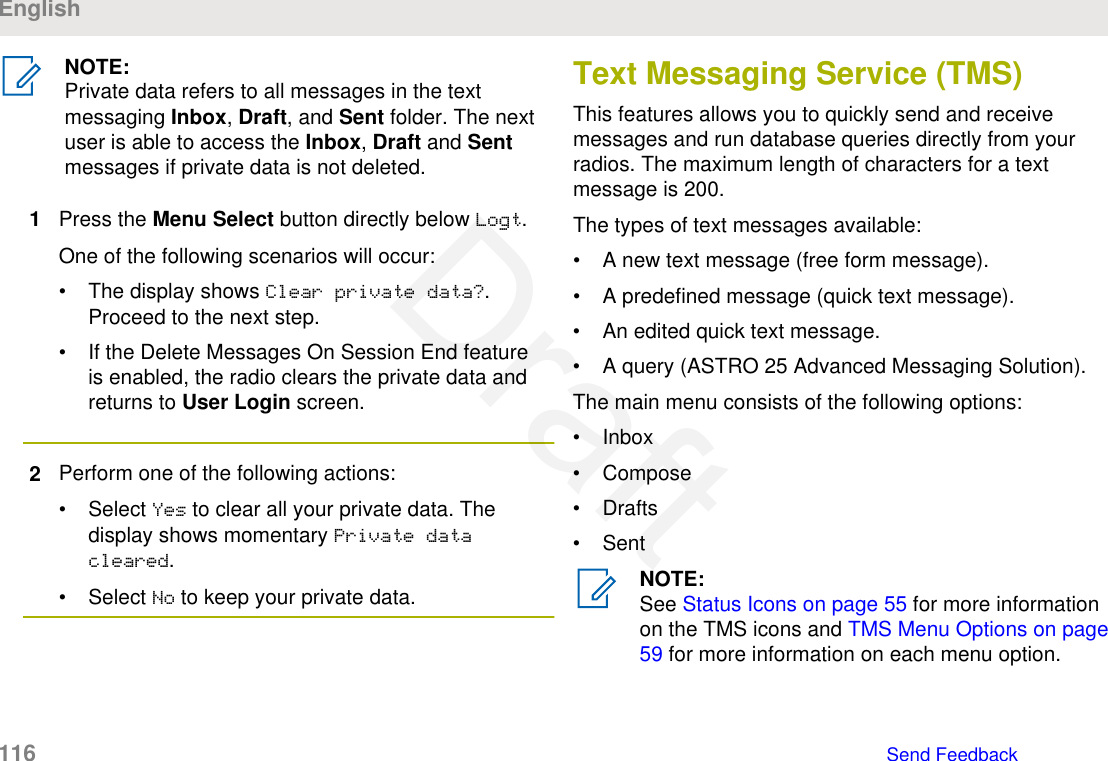
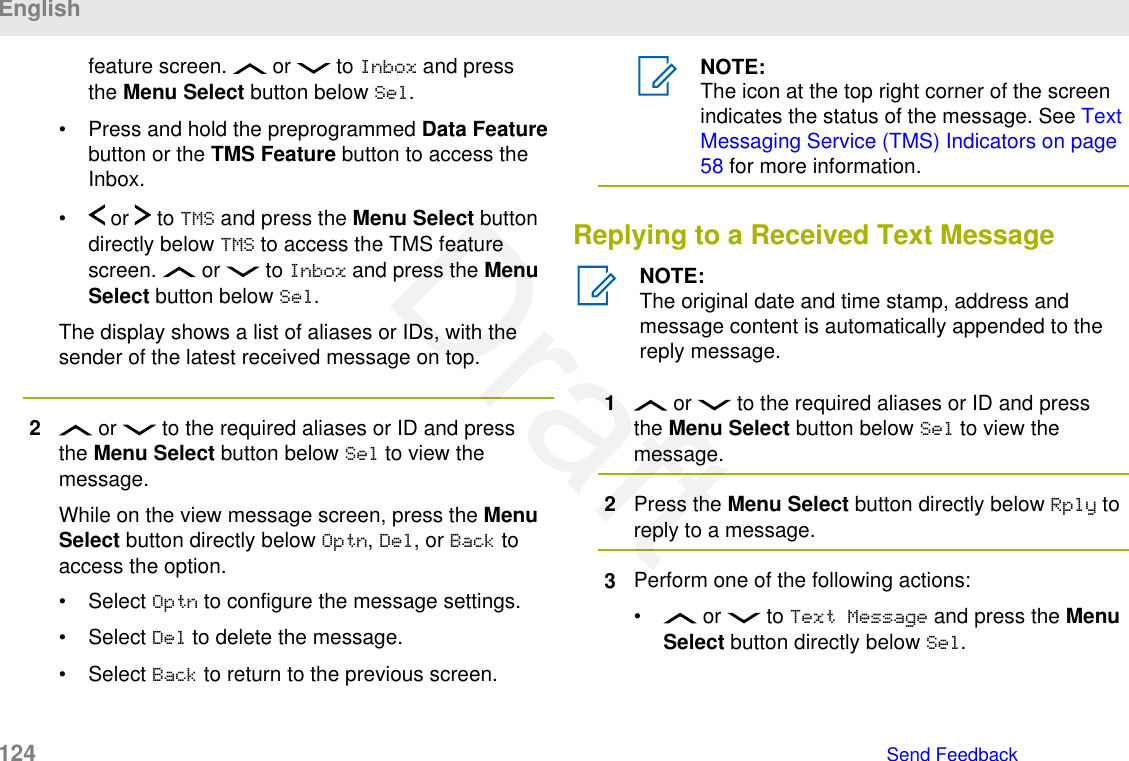
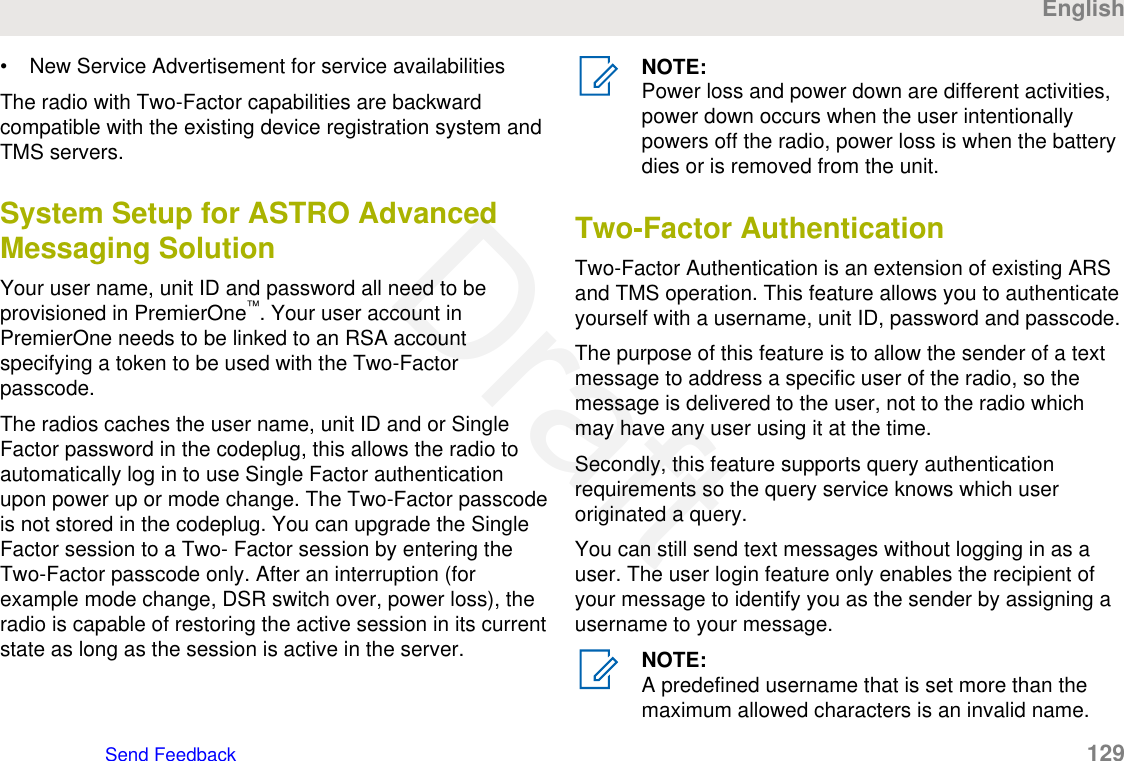
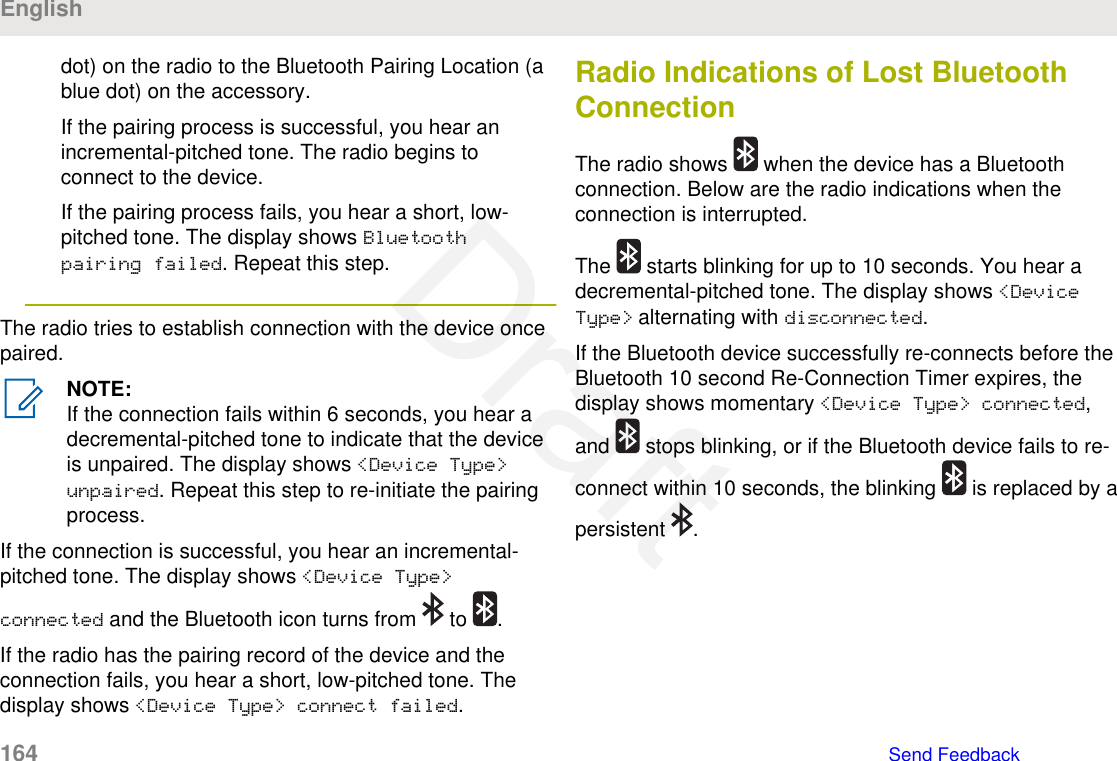
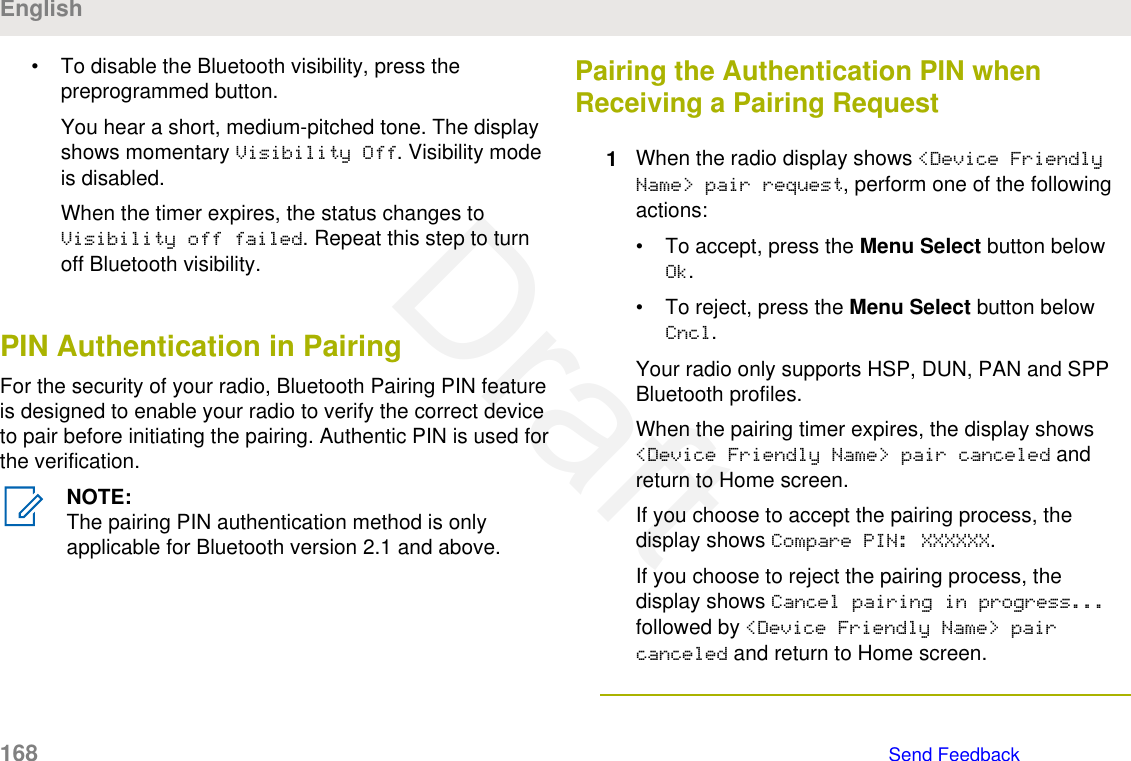
![c. or to the required channel or mode.One of the following scenarios occur:• In ARS Server Mode, the display shows thezone and ARS server channel.• In ARS Non-Server Mode, the display showsthe zone and ARS non-server channel.• If the channel or mode selected isunprogrammed, the display showsUnprogrammed. Repeat this step.d. Press Sel to confirm the displayed channel.User Login FeatureThis feature allows you as the user to be associated withthe radio. With this association, every data application(Example: Text Messaging Service) takes on a friendlyusername.You can still send text messages without logging in as auser. The user login feature only enables the recipient ofyour message to identify you as the sender by assigning ausername to your message.NOTE:A predefined username that is set more than themaximum allowed characters is an invalid name.Logging In as a User1Perform one of the following actions:• Press the preprogrammed User Login button.• or to User and press the Menu Selectbutton directly below User.The display shows the User Login screen.2Perform one of the following actions:• or to [ID Entry] and press the MenuSelect button directly below Edit to enter ID. Ablinking cursor appears on the screen. Use thekeypad to type or edit a user name. Press theMenu Select button directly below Ok to submit.• or to scroll through the list of predefineduser names. Press the Menu Select buttondirectly below Sel to select the predefined username.English114 Send FeedbackDraft](https://usermanual.wiki/Motorola-Solutions/89FT7096.Users-Guide/User-Guide-3307316-Page-114.png)
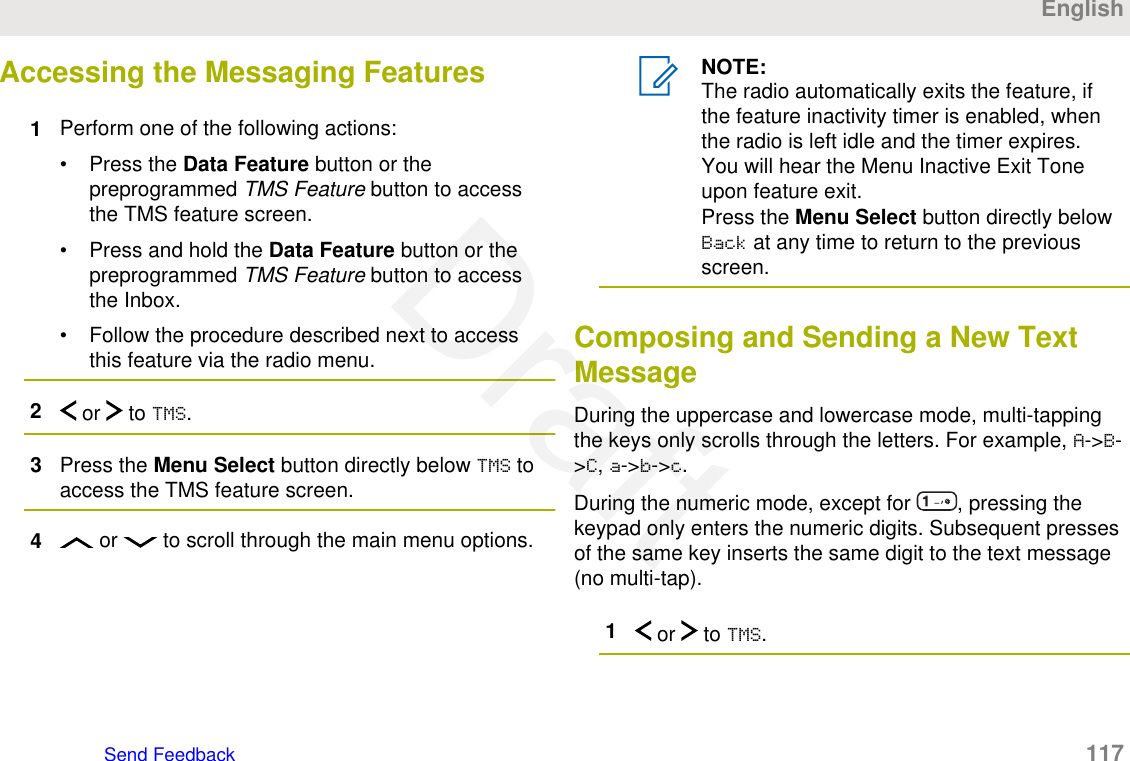
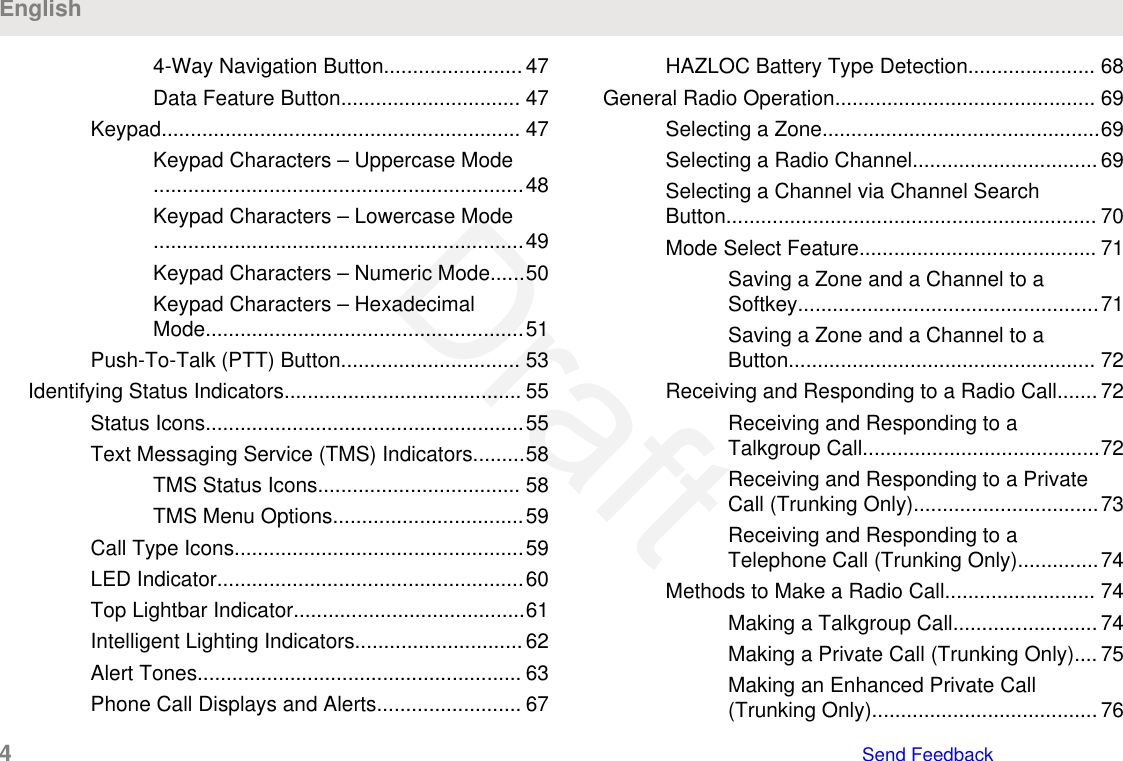
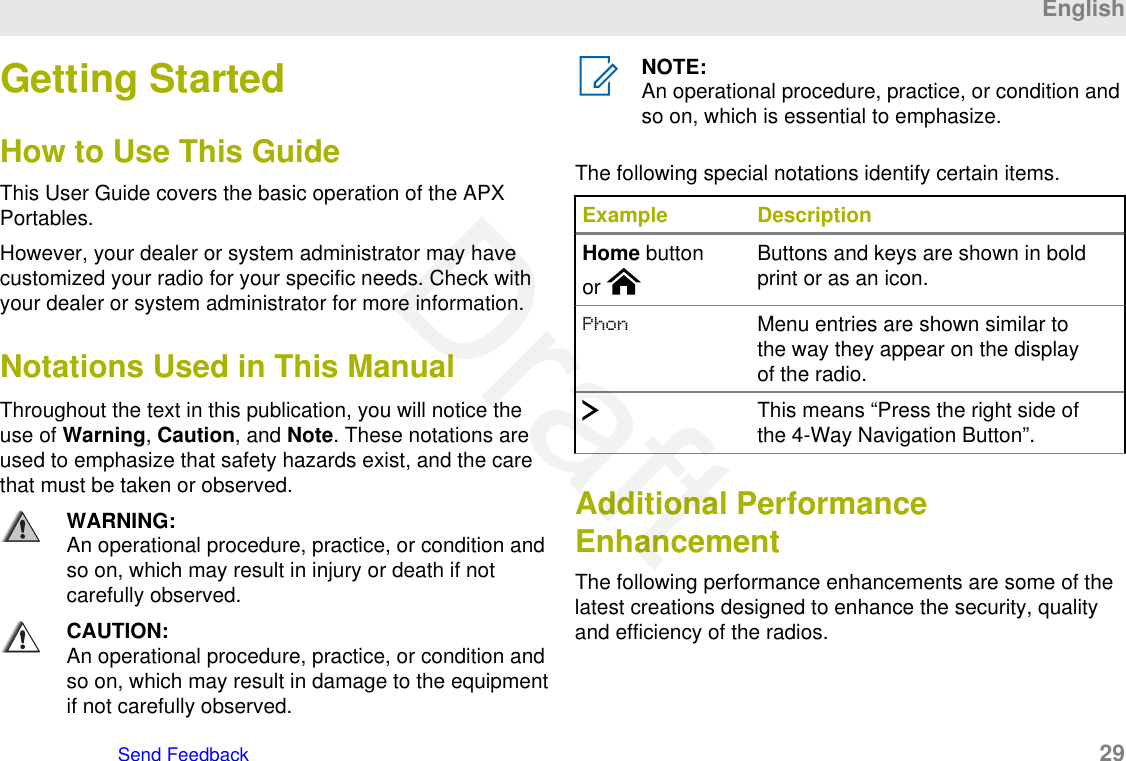
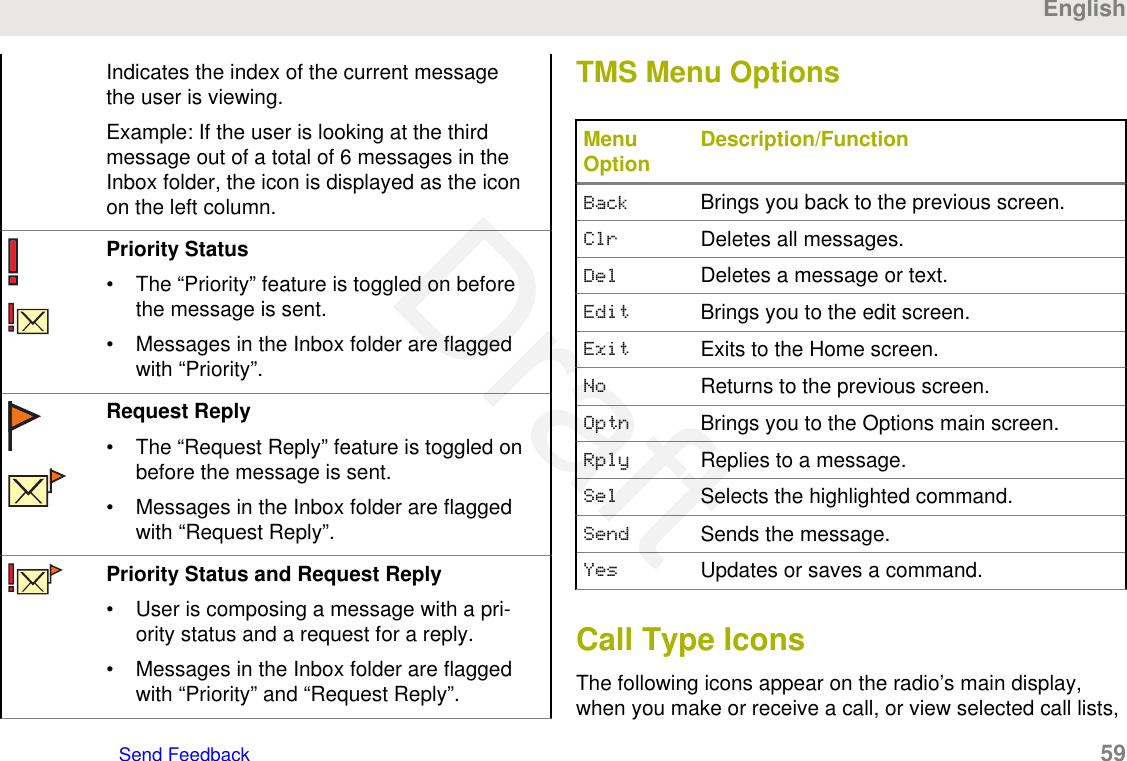
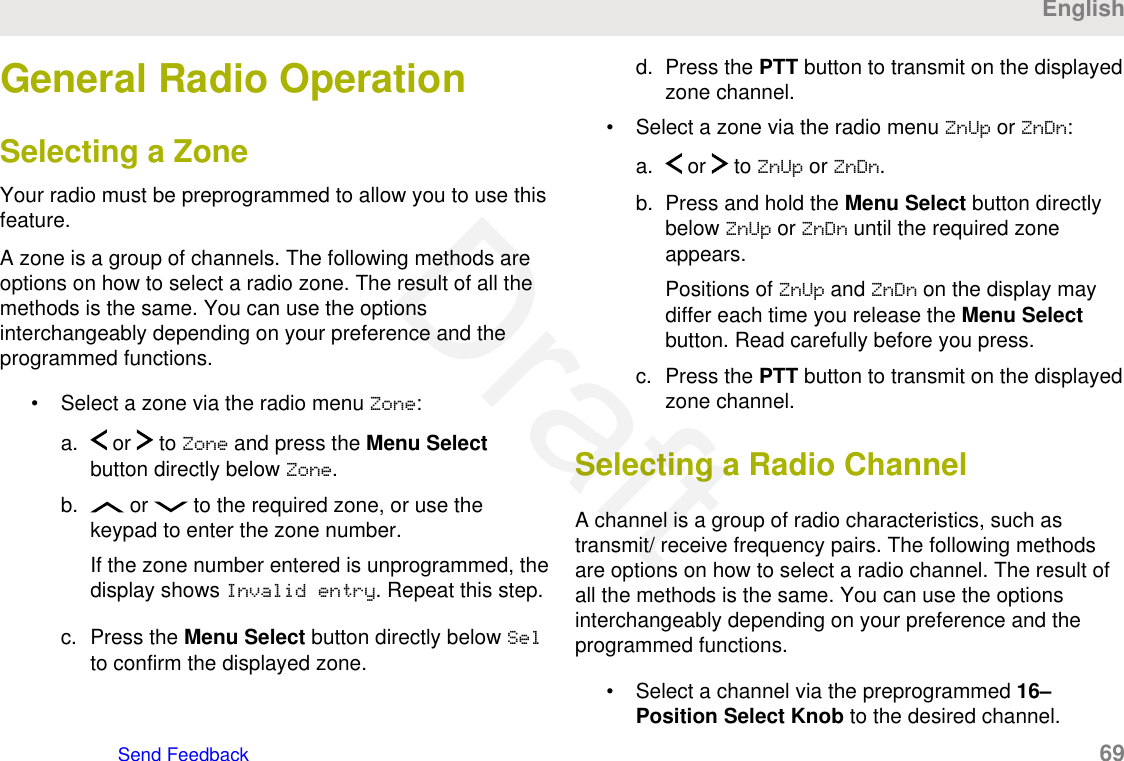
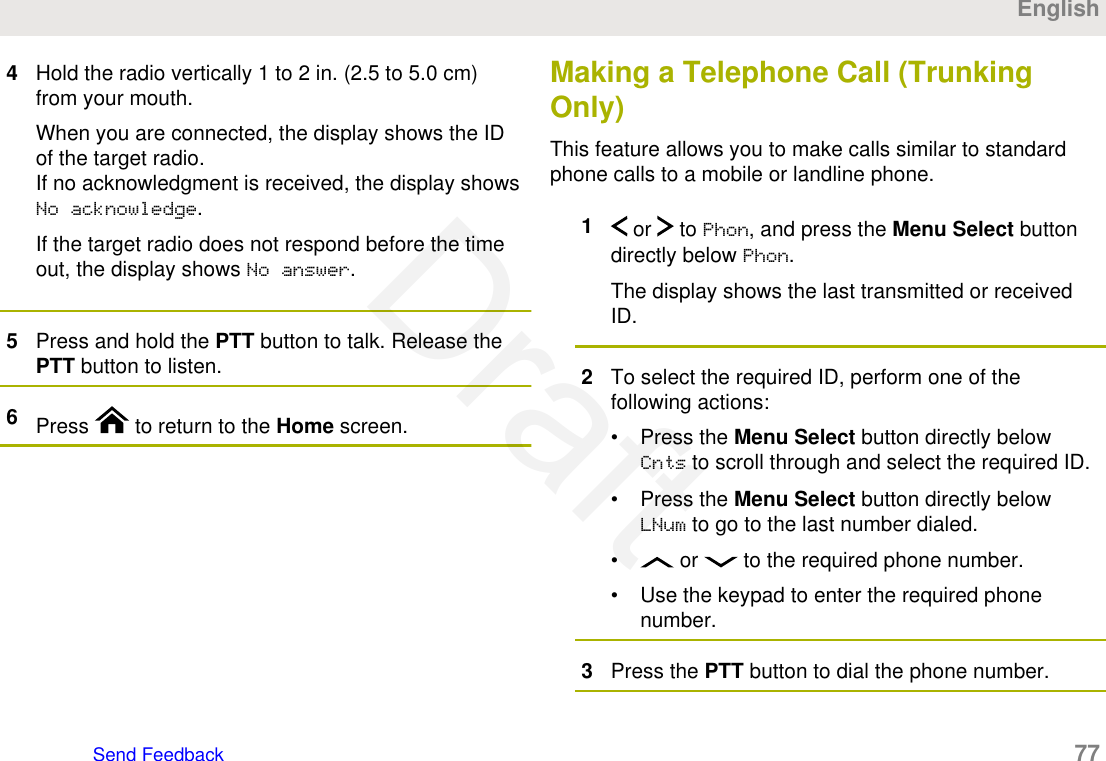
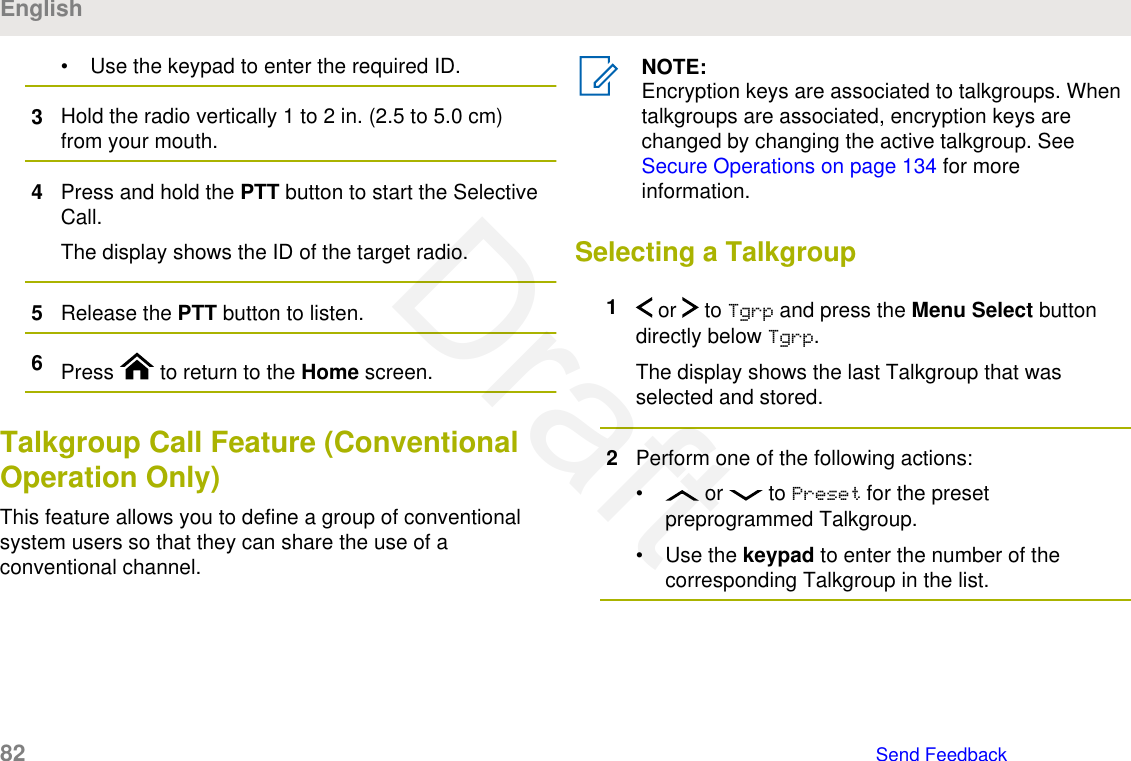
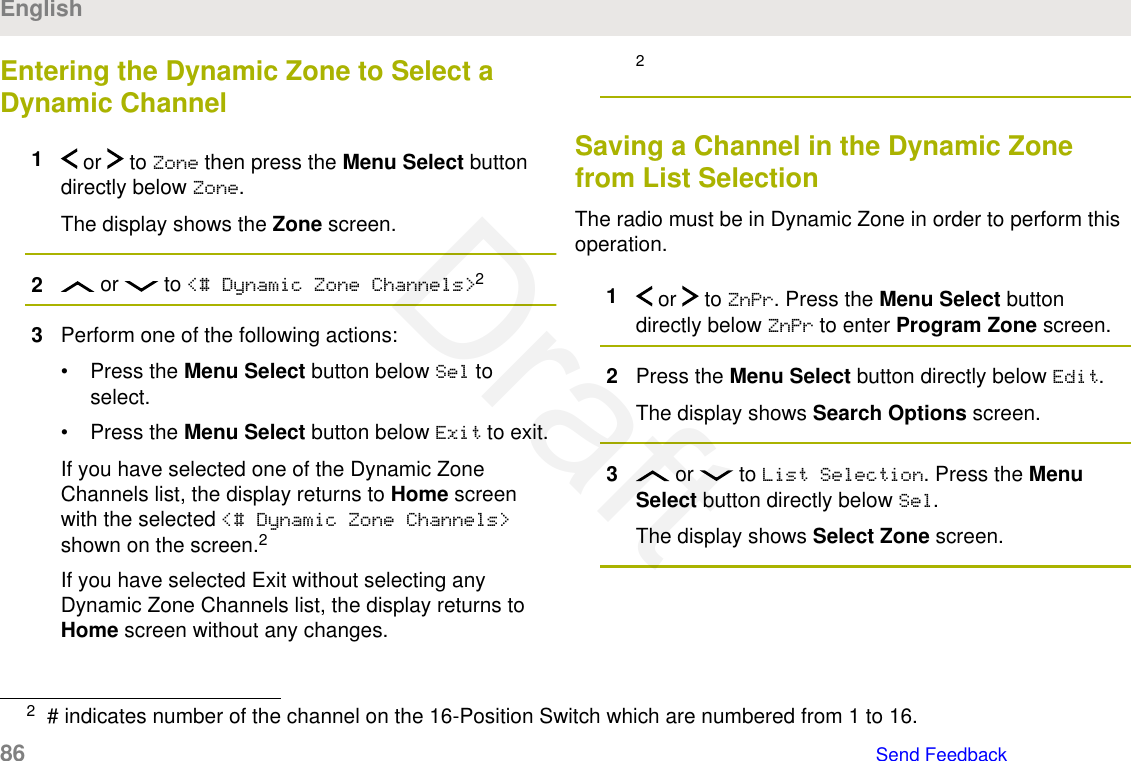
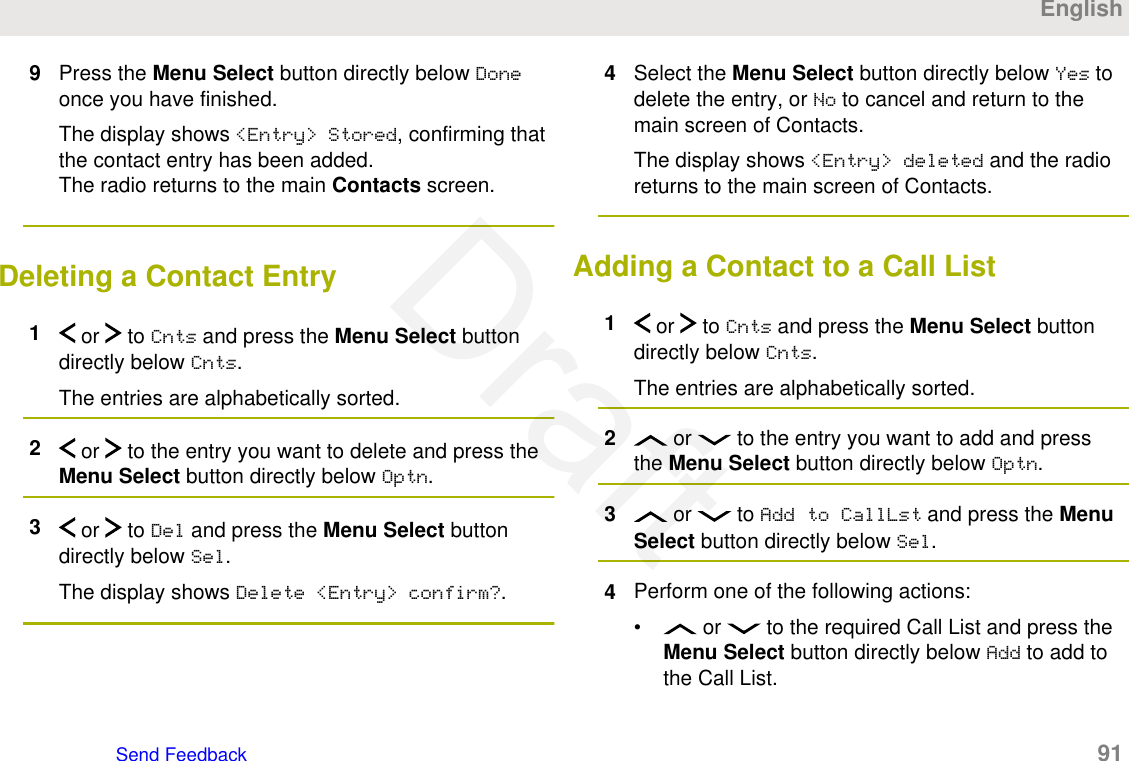
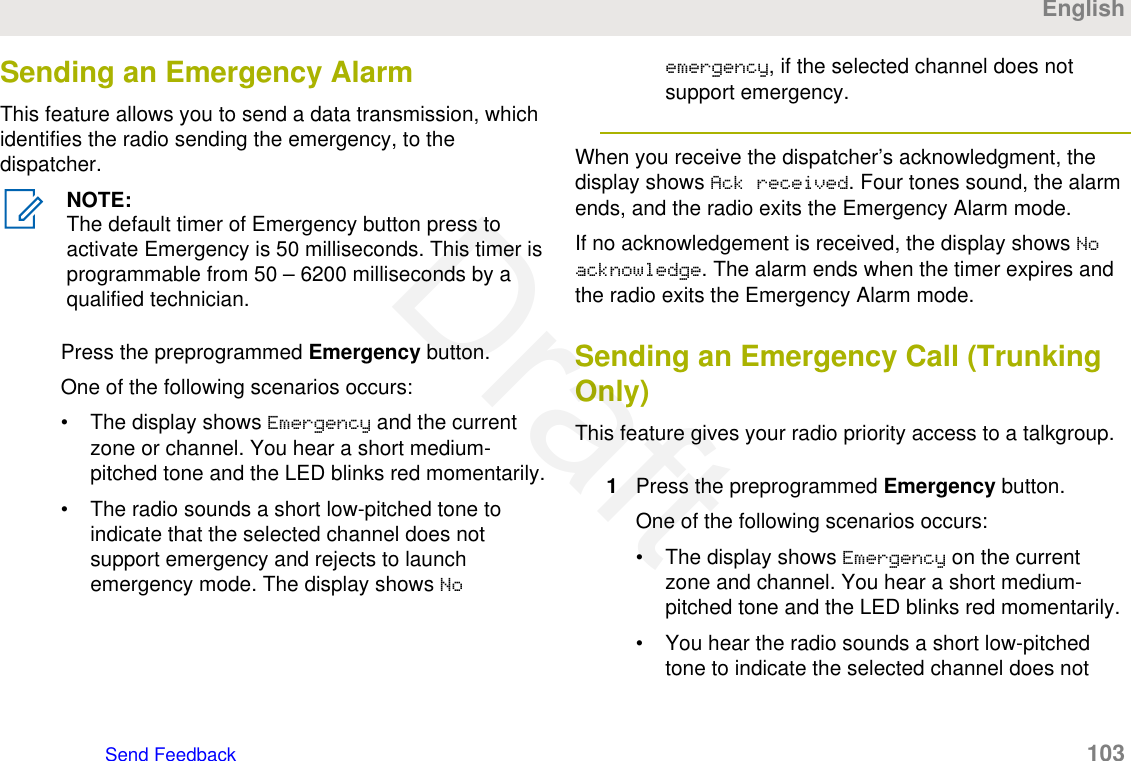
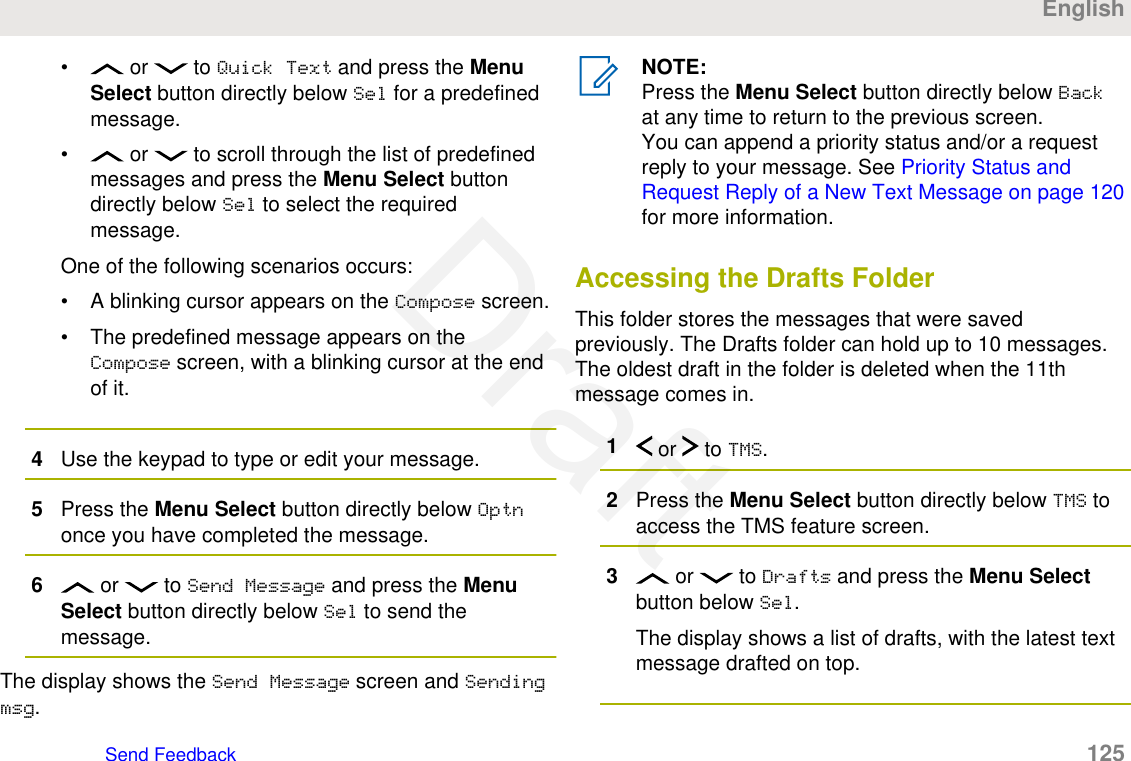
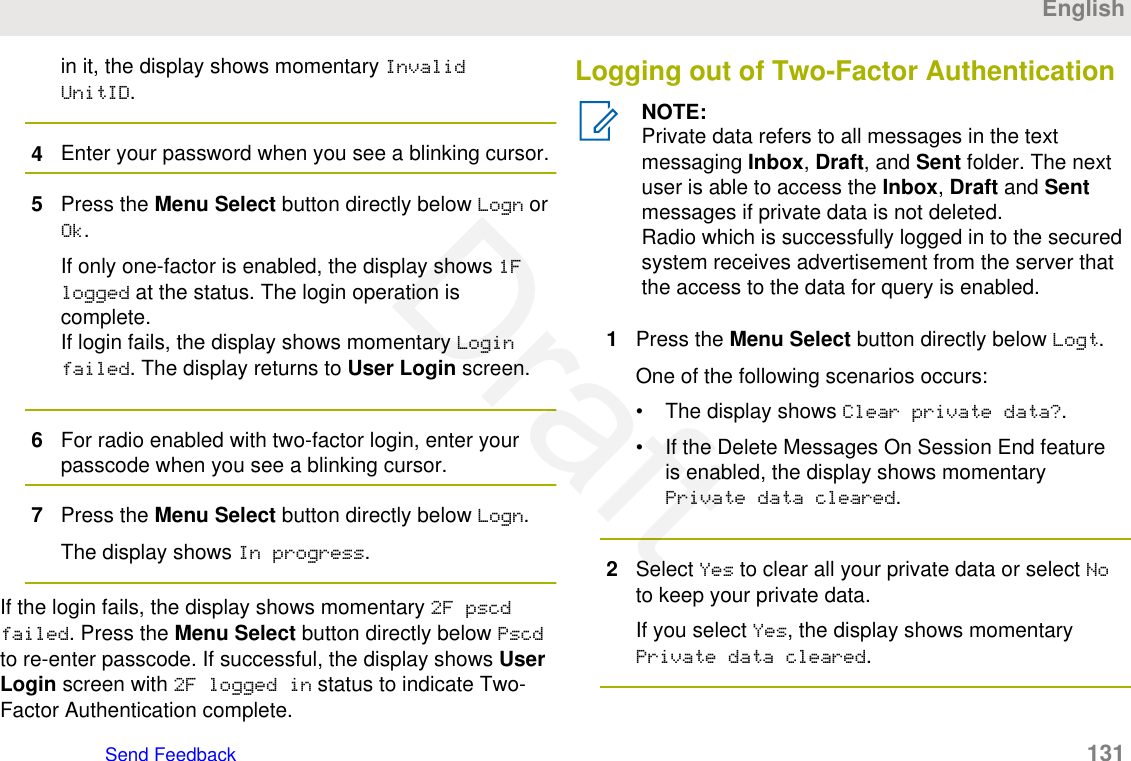
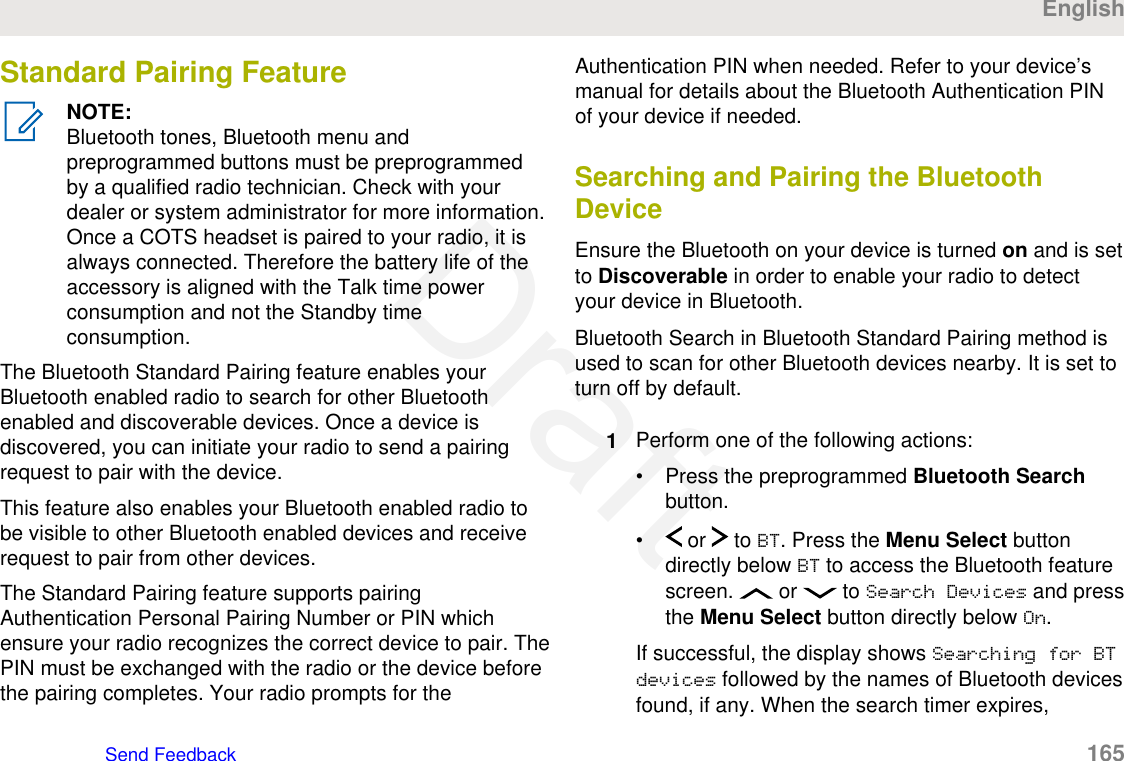
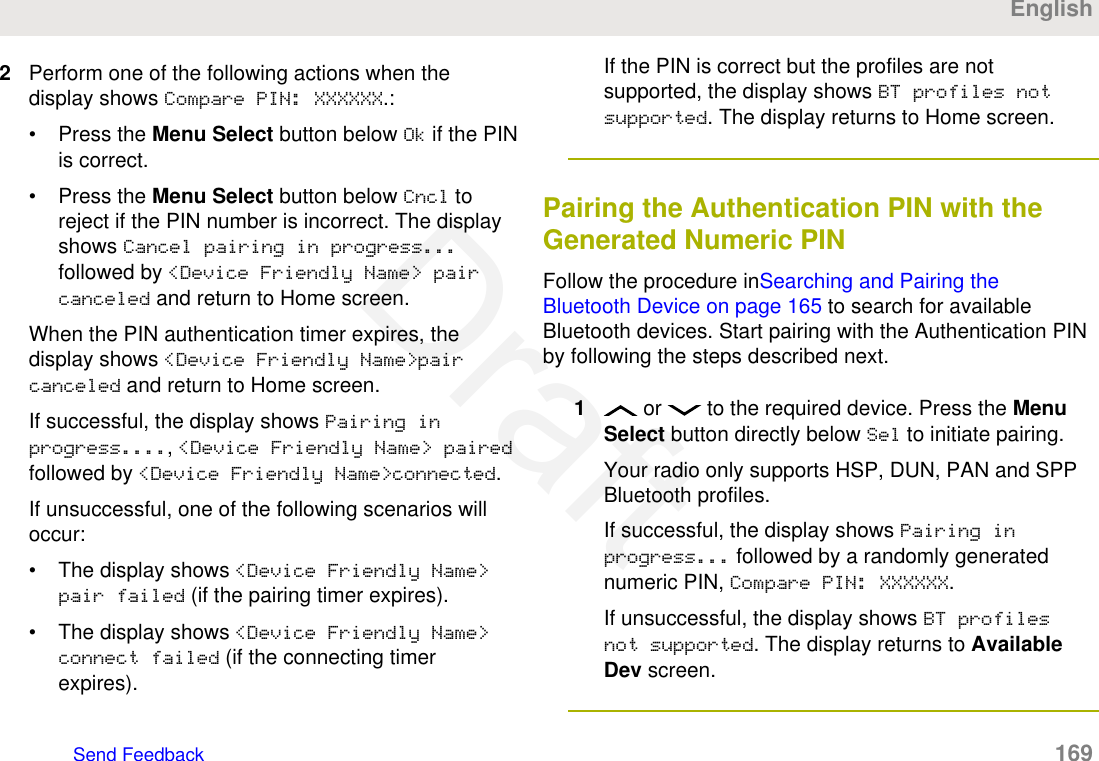
![2Press the Menu Select button directly below TMS toaccess the TMS feature screen.3Perform one of the following actions:• or to Compose and press the MenuSelect button directly below Sel.• Press the Menu Select button directly belowExit to return to the Home screen.4 or to Text Message and press the MenuSelect button directly below Sel to compose a newmessage.A blinking cursor appears on the Compose screen.5Use the keypad to type or edit your message.6Press the Menu Select button directly below Optnonce the message is composed.7 or to Send Message and press the MenuSelect button directly below Sel.8Perform one of the following actions:• or to scroll through the address list andselect the required address.• or to [Other Recpnt] and press theMenu Select button below Edit. When a blinkingcursor appears in the Enter Address screen,use the keypad to type the address entry.9Press the Menu Select button directly below Send orpress the PTT button to send the message.The display shows the Send Message screen andSending msg.If the message is sent, you hear a tone and thedisplay shows Msg sent.If the message is not sent, you hear a low tone, thedisplay shows Send failed and returns to the mainTMS screen.English118 Send FeedbackDraft](https://usermanual.wiki/Motorola-Solutions/89FT7096.Users-Guide/User-Guide-3307316-Page-118.png)
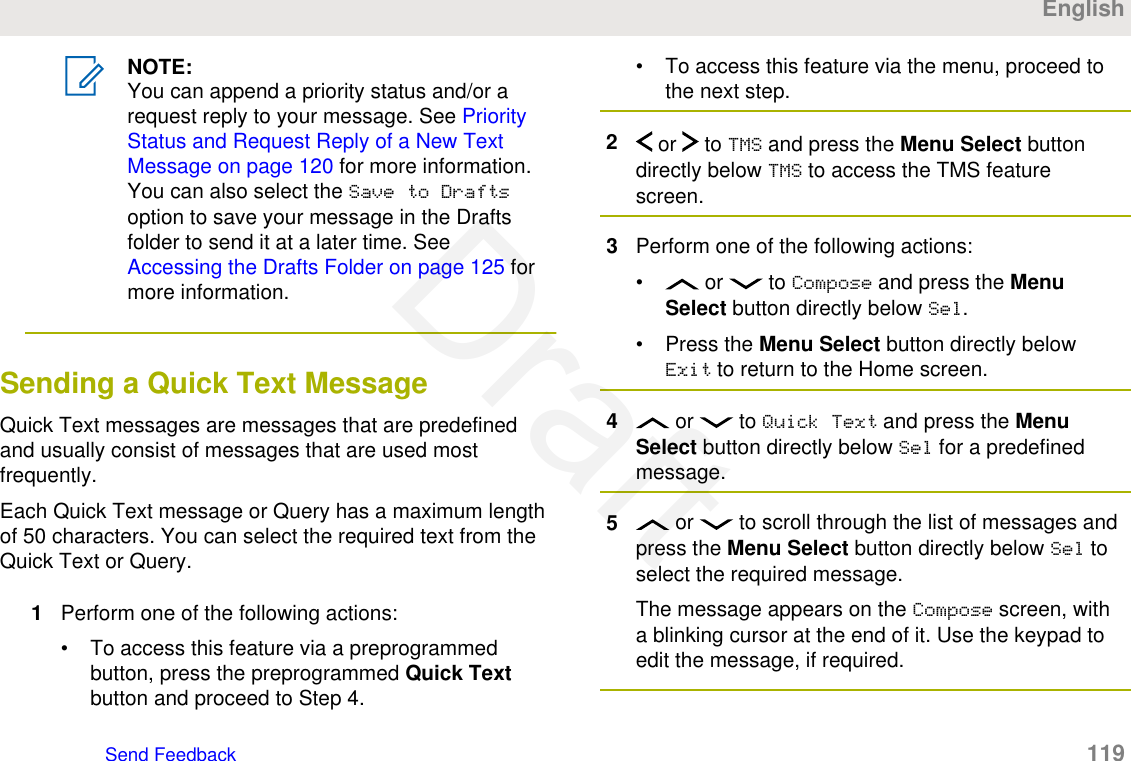
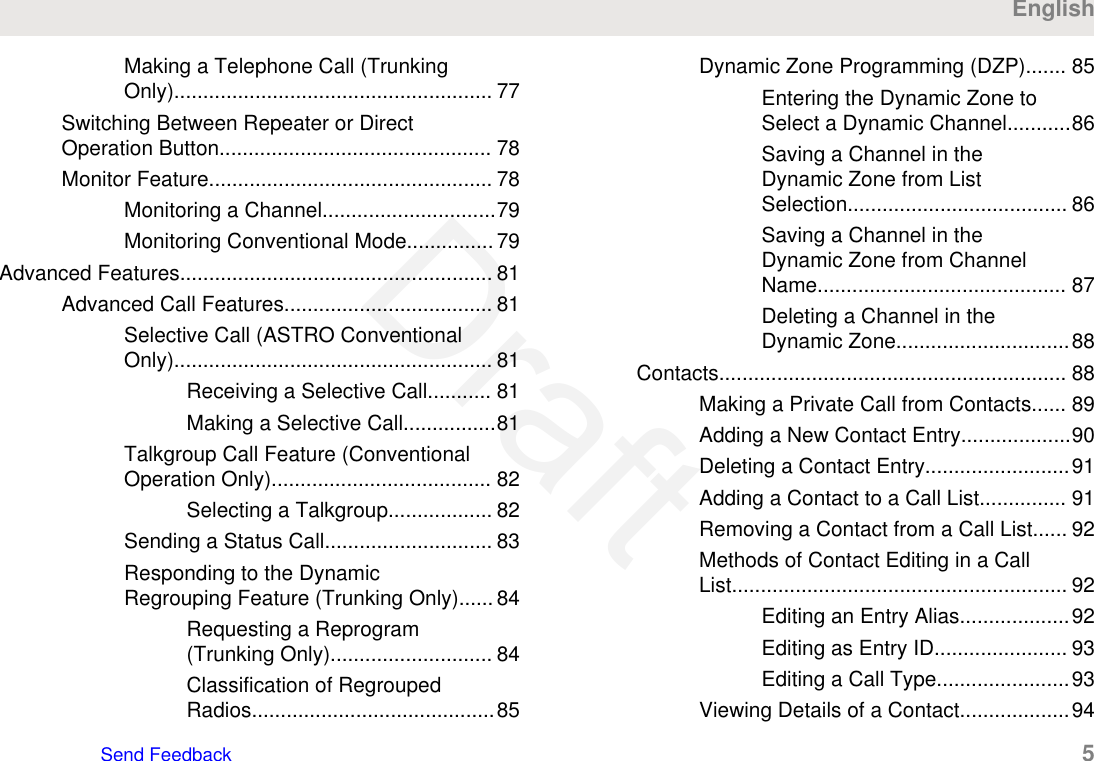
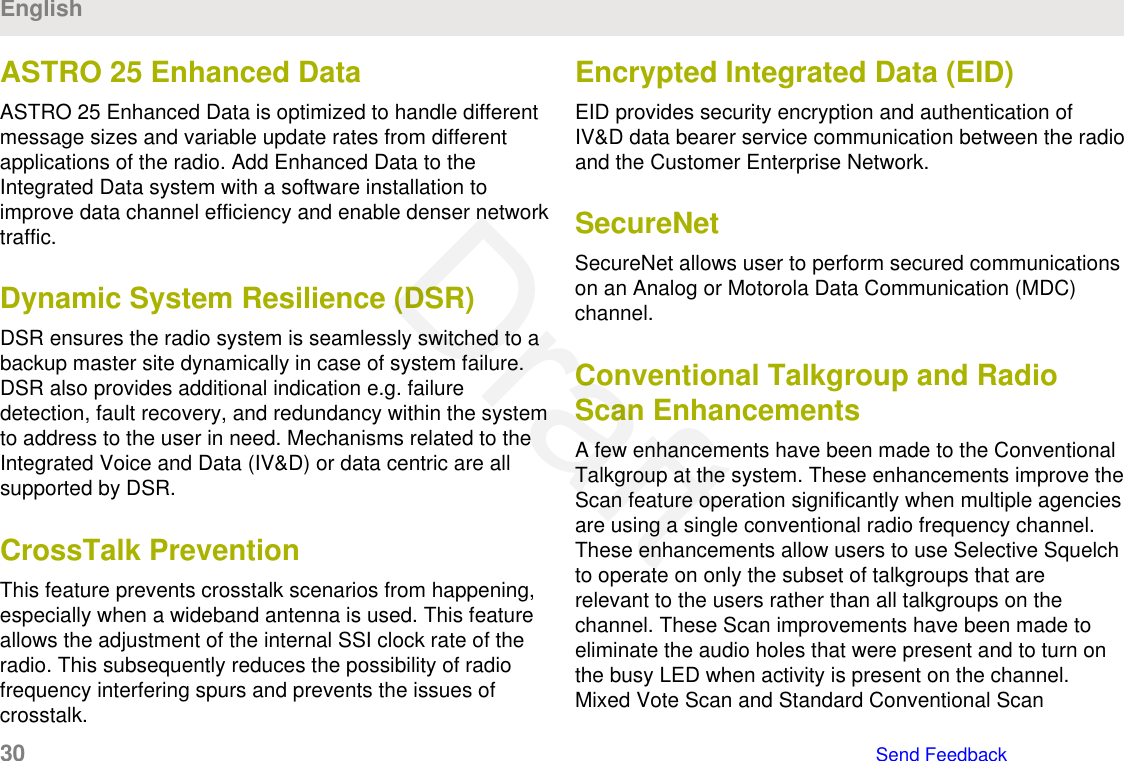
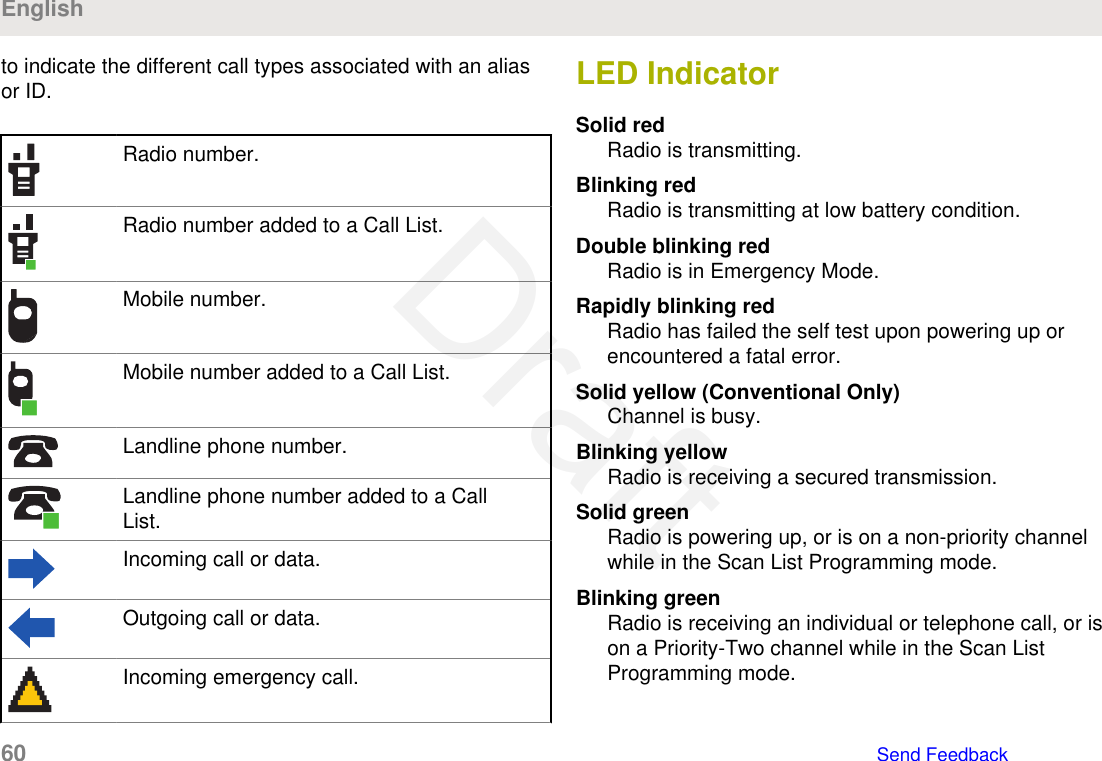
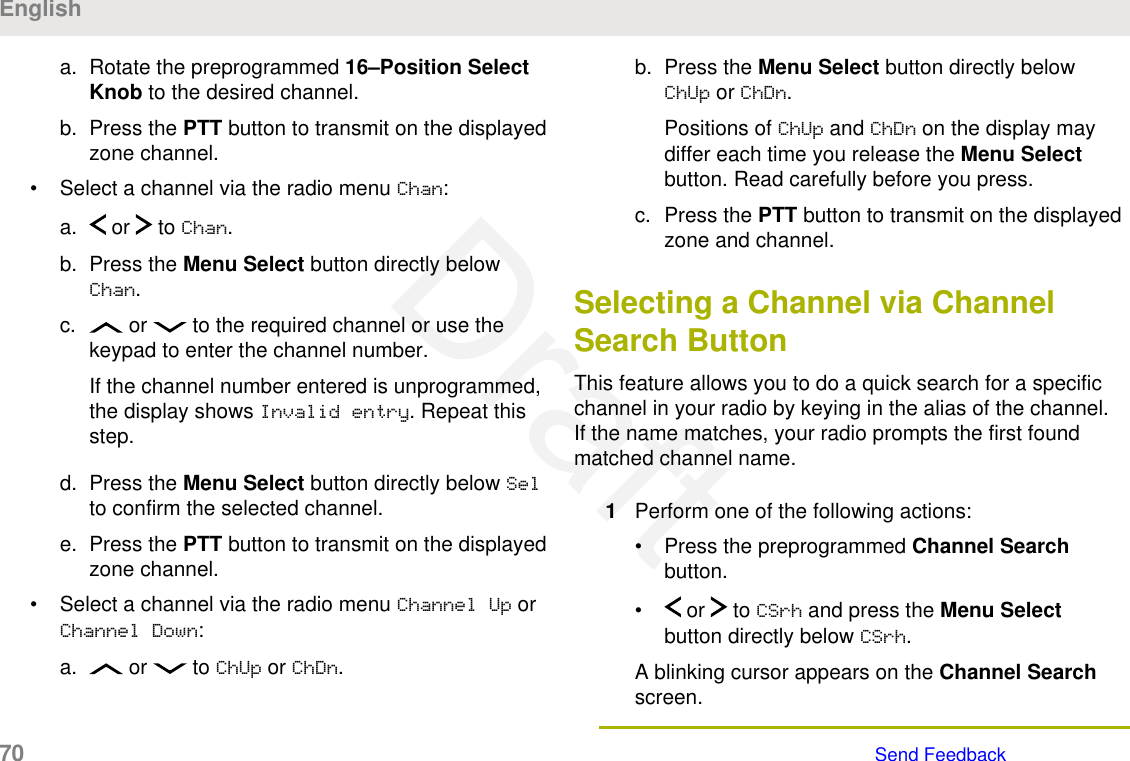
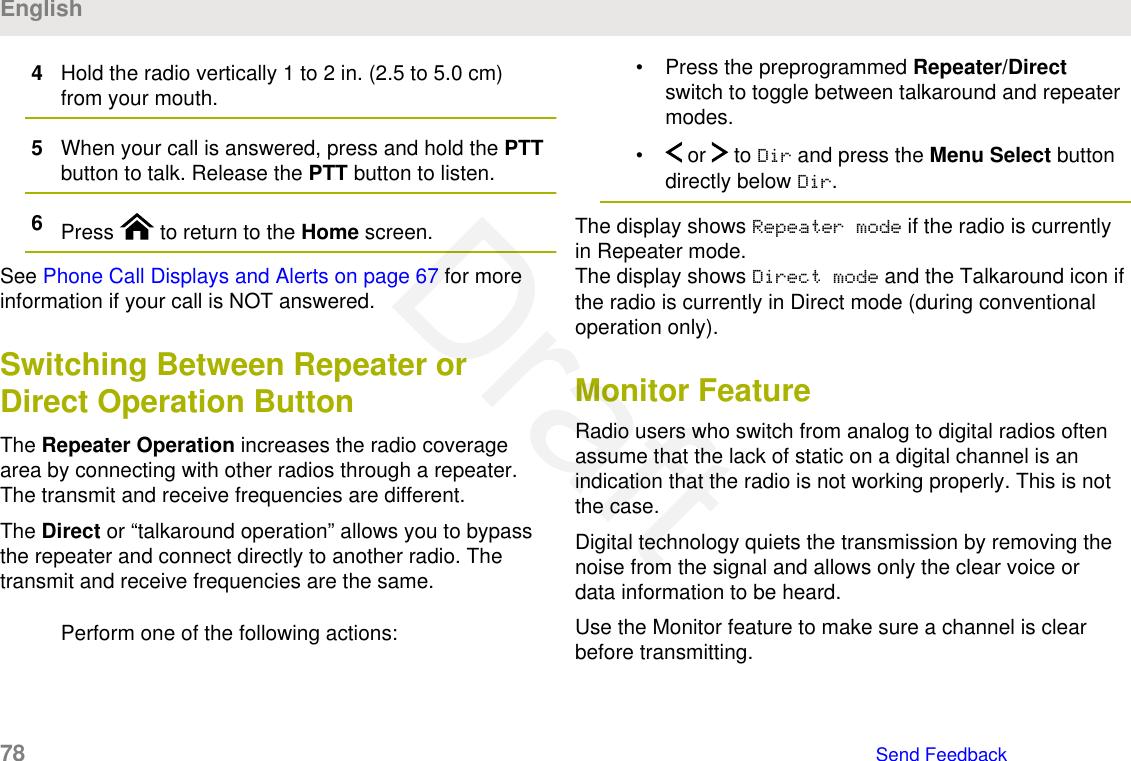
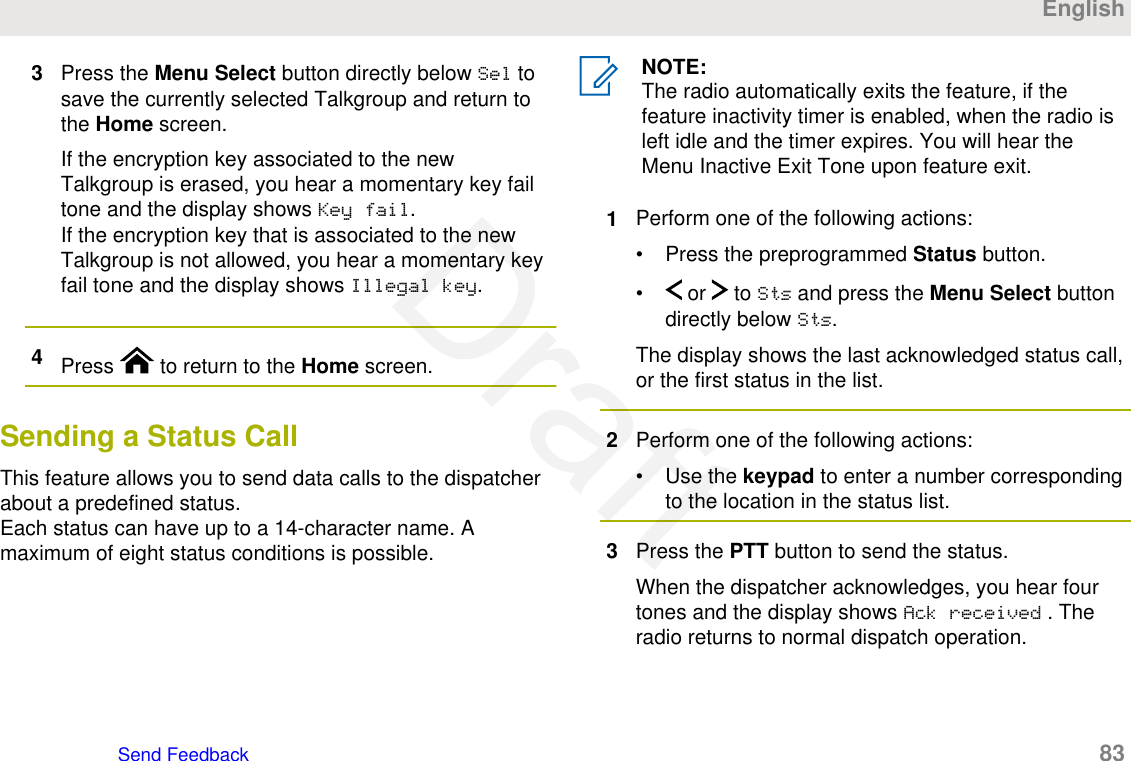
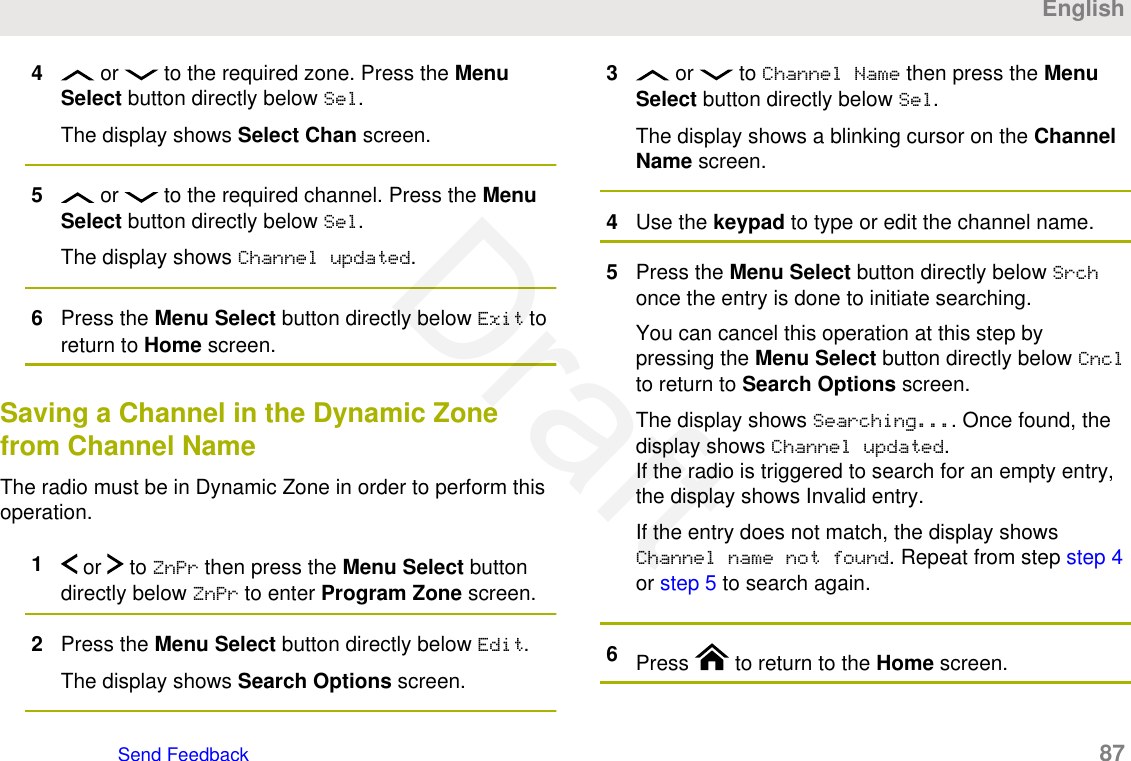
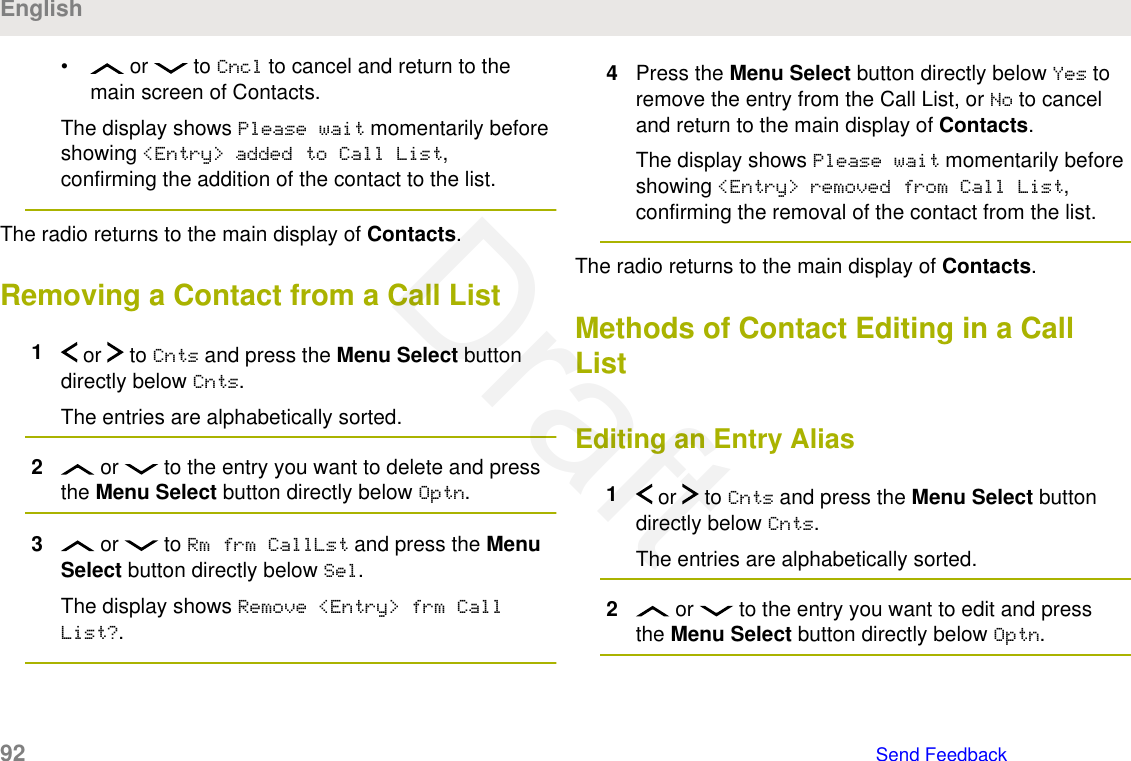
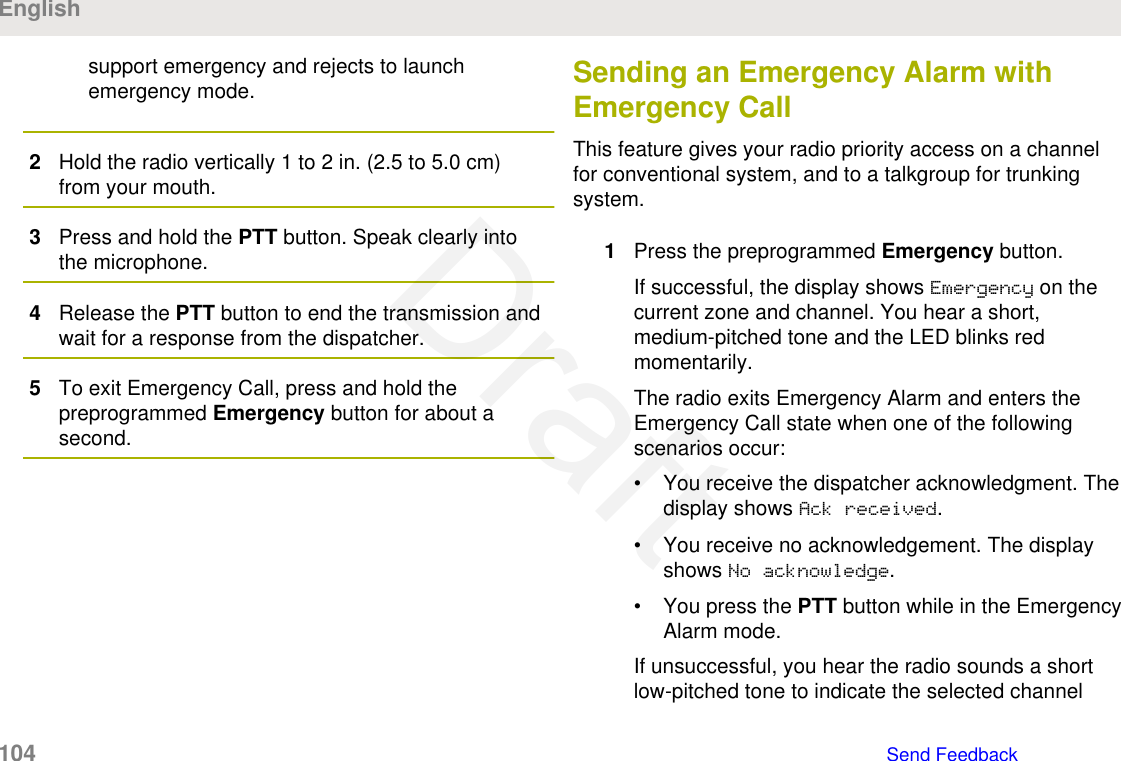
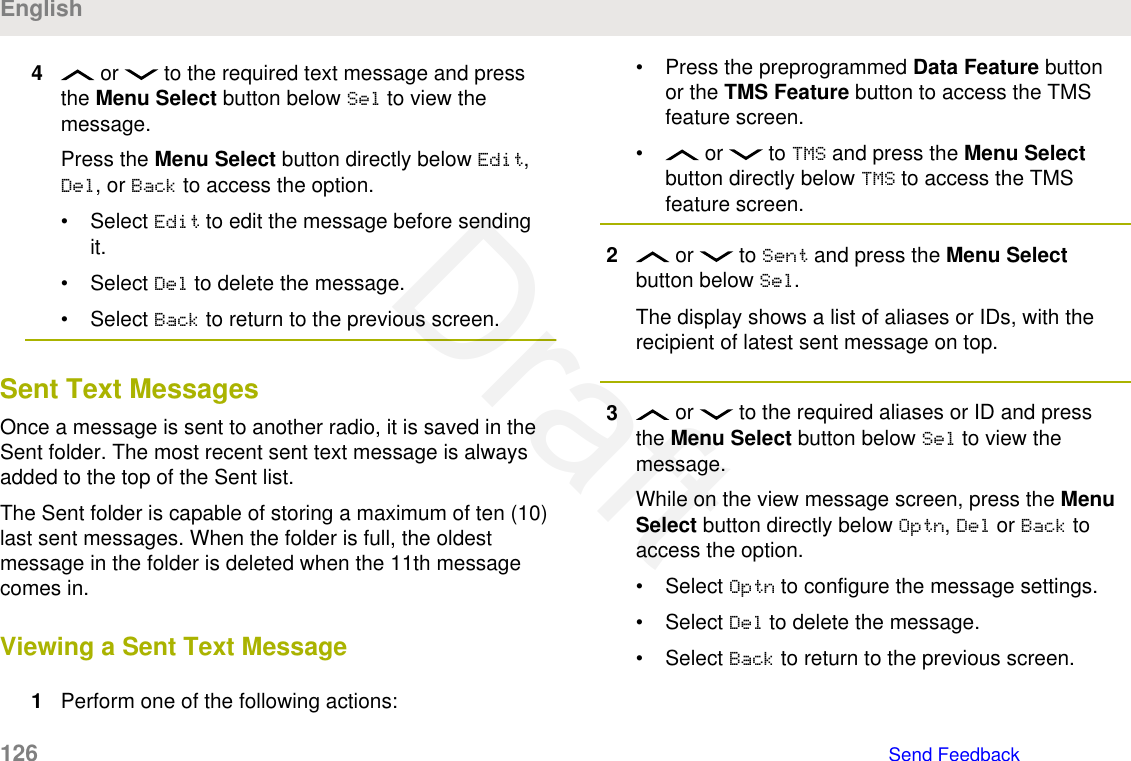
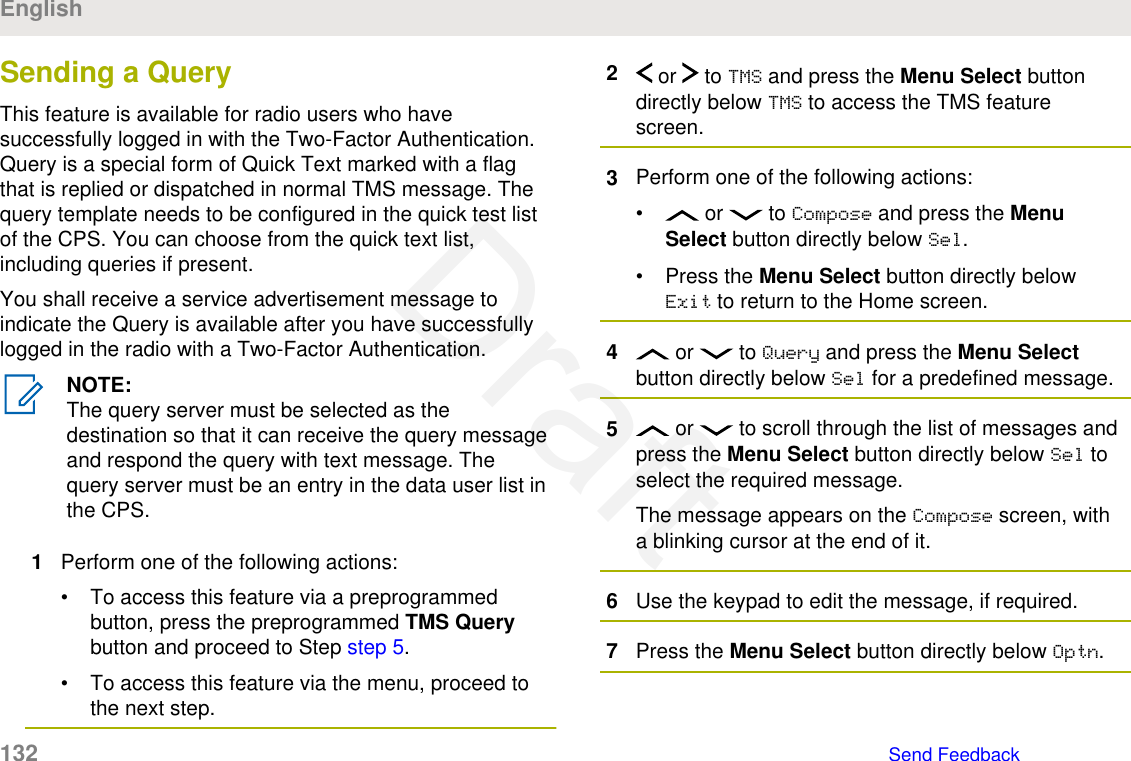
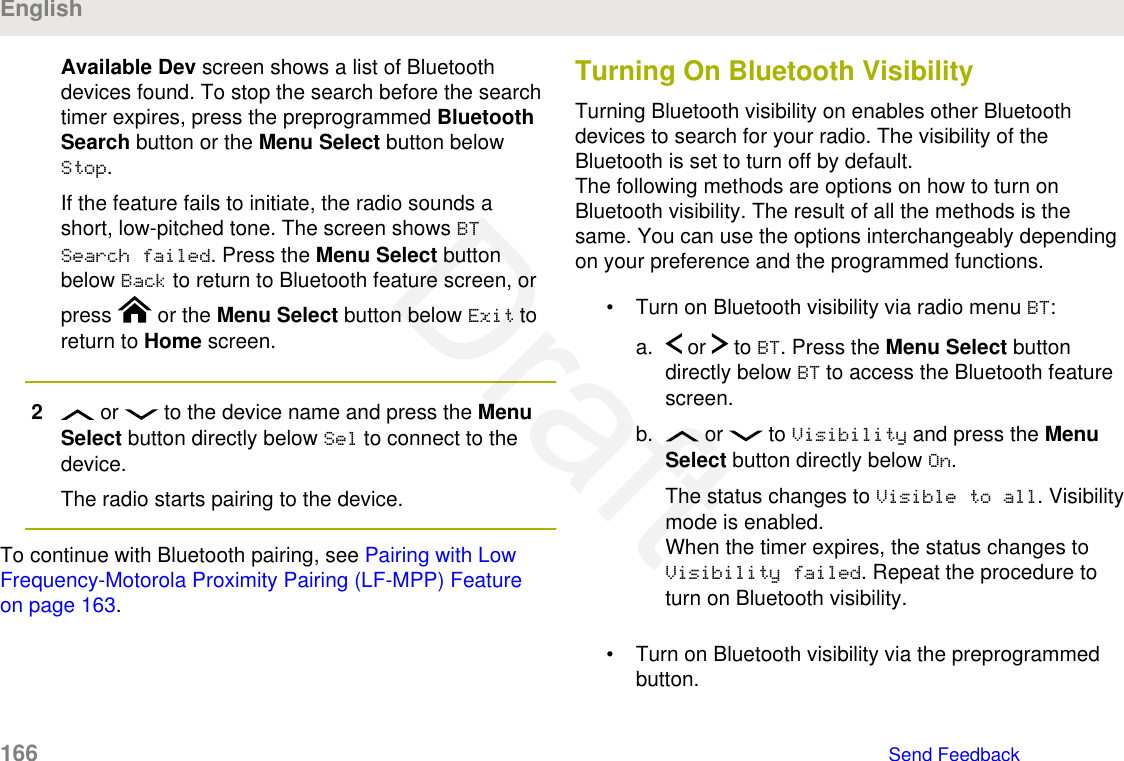
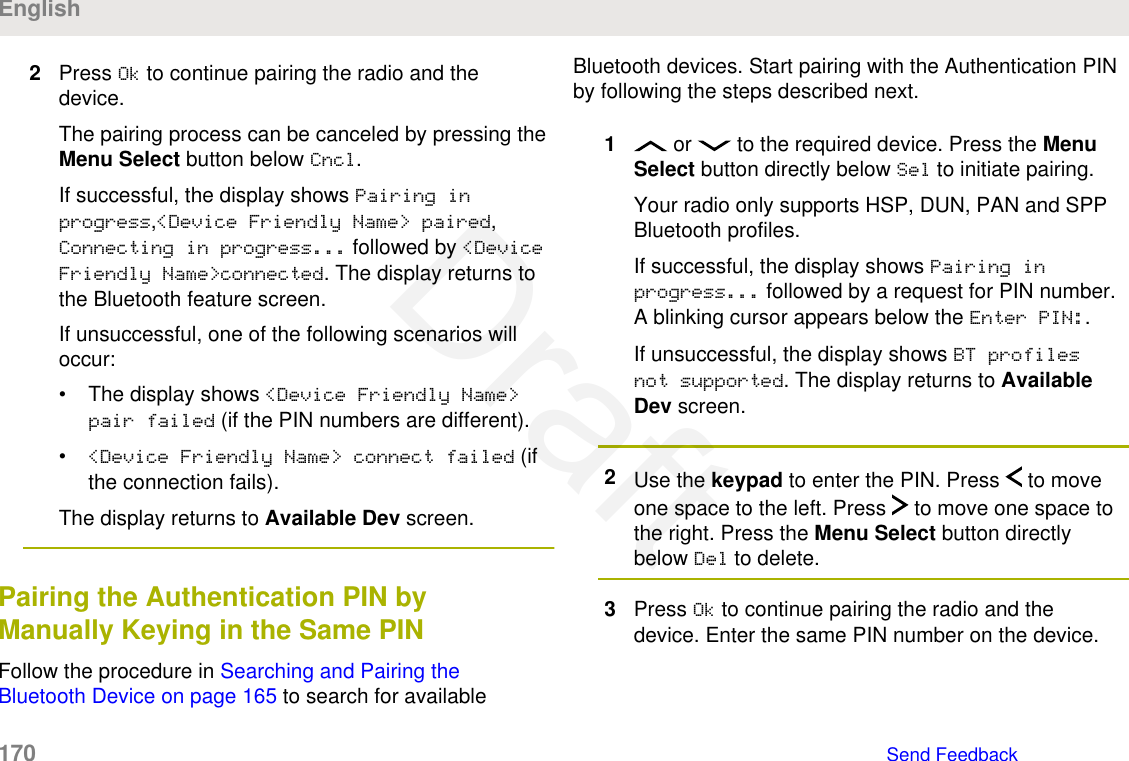
![6Press the Menu Select button directly below Optn.7 or to Send Message and press the MenuSelect button directly below Sel..8Perform one of the following actions:• or to scroll through the address list andselect the required address.• or to [Other Recpnt] and press theMenu Select button below Edit. When a blinkingcursor appears on the Enter Address screen.Use the keypad to type the address entry.9Press the Menu Select button directly below Send orpress the PTT button to send the message.The display shows the Send Message screen andSending msg.If the message is sent, you hear a tone and thedisplay shows Msg sent.If the message is not sent, you hear a low tone, thedisplay shows Send failed and returns to the mainTMS screen.NOTE:You can append a priority status and/or arequest reply to your message. See PriorityStatus and Request Reply of a New TextMessage on page 120 for more information.Priority Status and Request Reply of aNew Text MessageBefore sending your message, you can append a prioritystatus and/or a request reply to your message.Appending a Priority Status to a TextMessageEnsure that an outgoing message is composed to allowyou to perform this procedure. See Composing andSending a New Text Message on page 117 for moreinformation.English120 Send FeedbackDraft](https://usermanual.wiki/Motorola-Solutions/89FT7096.Users-Guide/User-Guide-3307316-Page-120.png)
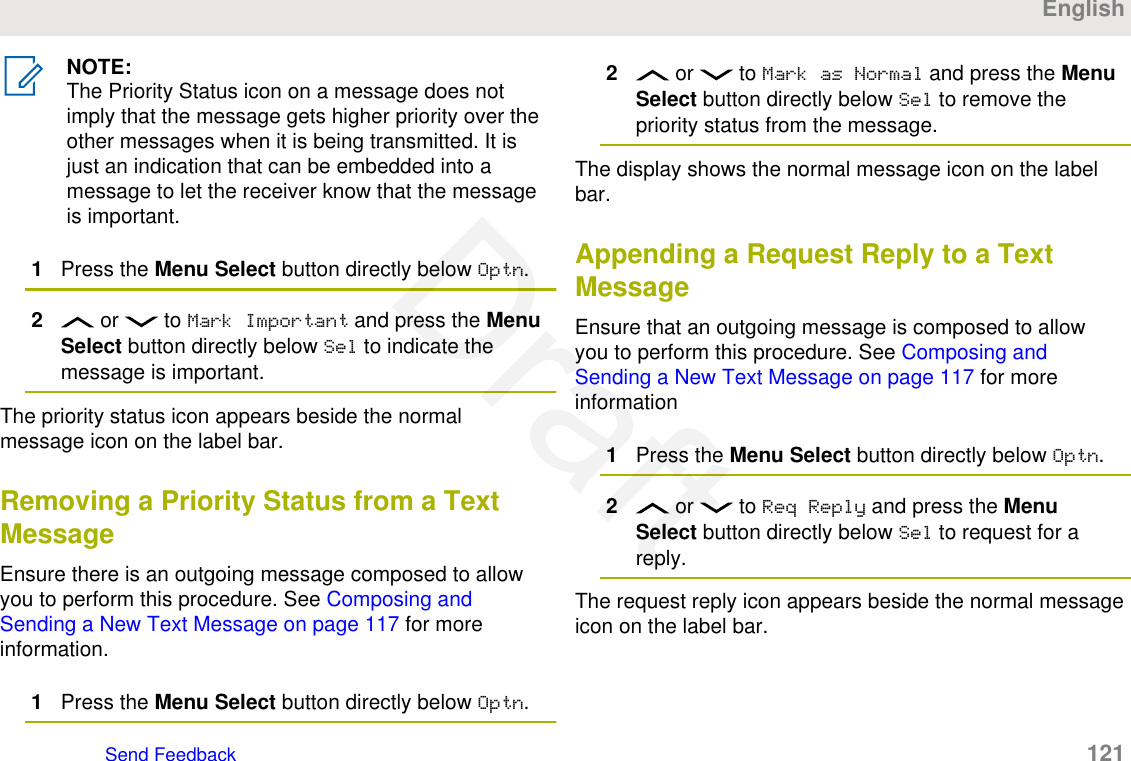

![NOTE:The icon at the top right corner of the screenindicates the status of the message. See TextMessaging Service (TMS) Indicators on page58 for more information.Sending a Sent Text Message1Press the Menu Select button directly below Optnwhile viewing the message.2 or to Send Message and press the MenuSelect button directly below Sel.3Perform one of the following actions:• or to scroll through the address list andselect the required address.• or to [Other Recpnt] and press theMenu Select button below Edit. When a blinkingcursor appears in the Enter Address screen,use the keypad to type the address entry.4Press the Menu Select button below Send or thePTT button to send the message.The display shows the Send Message screen andSending msg.NOTE:Press the Menu Select button directly belowBack at any time to return to the previousscreen.You can append a priority status and/or arequest reply to your message. See PriorityStatus and Request Reply of a New TextMessage on page 120 for more information.Deleting a Text Message1From the Inbox, Draft, or Sent screen, or toscroll through the messages.2Press the Menu Select button directly below Del todelete the current message.EnglishSend Feedback 127Draft](https://usermanual.wiki/Motorola-Solutions/89FT7096.Users-Guide/User-Guide-3307316-Page-127.png)
![Logging in via the Two-FactorAuthentication1Perform one of the following actions:• Press the preprogrammed User Login button.• or to User, and press the Menu Selectbutton directly below User.The display shows the User Login screen.2Perform one of the following actions:• or to [ID Entry] and press the MenuSelect button directly below Edit. A blinkingcursor appears. Use the keypad to type or edit ausername. Press the Menu Select button directlybelow Ok to submit.• or to scroll through the list of predefinedusernames. Press the Menu Select buttondirectly below Sel to select the predefinedusername.• Press and hold or to scroll through thelist of predefined usernames at a fast scroll rate.Press the Menu Select button directly below Selto select the predefined username.If the selected predefined username has more thanthe maximum allowed characters, or an invalidcharacter in it, the display shows momentaryInvalid ID.3For radio enabled with Unit ID, perform one of thefollowing actions:• or to [UnitID Entry] and press theMenu Select button directly below Edit. Ablinking cursor appears. Use the keypad to typeor edit a Unit ID. Press the Menu Select buttondirectly below Ok to submit.• or to scroll through the list of predefinedUnit IDs. Press the Menu Select button directlybelow Sel to select the predefined Unit ID.• Press and hold or to scroll through thelist of predefined Unit IDs at a fast scroll rate.Press the Menu Select button directly below Selto select the predefined Unit ID.If the selected predefined Unit ID has more than themaximum allowed characters, or an invalid characterEnglish130 Send FeedbackDraft](https://usermanual.wiki/Motorola-Solutions/89FT7096.Users-Guide/User-Guide-3307316-Page-130.png)
![8 or to Send Message and press the MenuSelect button directly below Sel.9Perform one of the following actions:• or to scroll through the address list andhighlight the required address.• or to [Other Recpnt] and press theMenu Select button below Edit. A blinkingcursor appears on the Enter Address screen.Use the keypad to type the address entry.10 Press the Menu Select button below Send or thePTT button to send the message.The display shows the Send Message screen andSending msg.If the message is sent, you hear a tone and thedisplay shows Msg sent.If the message is not sent, you hear a low tone, thedisplay shows Send failed and returns to the mainTMS screen.NOTE:The server responds to your query with therequired report in text messages.You can append a priority status and/or arequest reply to your message. See PriorityStatus and Request Reply of a New TextMessage on page 120 for more information.Receiving a QueryYou shall receive the information you have requested inTMS format.When you receive a query, you hear a unique, high-pitchedchirp and the display shows the message icon flagged with“Priority”. The display shows momentary New msg.To access the Inbox, press and hold the DataFeature button or the preprogrammed TMS Featurebutton or press the Menu Select button directlybelow TMS.The display shows a list of aliases or IDs, with the senderof the latest received message on top.EnglishSend Feedback 133Draft](https://usermanual.wiki/Motorola-Solutions/89FT7096.Users-Guide/User-Guide-3307316-Page-133.png)


![If the radio fails to get a location fix, the displayshows No service and returns to the previousdisplay.5To return to the Home screen, press , the PTTbutton, the preprogrammed GPS button or the MenuSelect button directly below Exit.Saving a WaypointEnsure that your radio shows the current location on thescreen.1Press the Menu Select button directly below Optn.2Perform one of the following actions:• or to Save as Waypt and press theMenu Select button directly below Sel.• or to Save as Home and press the MenuSelect button directly below Sel and proceed tostep step 5.• or to Save as Dest. and press theMenu Select button directly below Sel andproceed to step step 5.A blinking cursor appears in the screen.3Use the keypad to edit the auto-generated waypoint,if required, or press the Menu Select button directlybelow Cncl to return to the Location main screen.4Press the Menu Select button directly below Okonce you are done.One of the following scenarios occur:• The display shows Current loc saved as<Waypoint name>.• The display shows Current loc saved as[Home].• The display shows Current loc saved as[Destination].5To return to the Home screen, press , the PTTbutton, the preprogrammed GPS button or the MenuSelect button directly below Exit.EnglishSend Feedback 149Draft](https://usermanual.wiki/Motorola-Solutions/89FT7096.Users-Guide/User-Guide-3307316-Page-149.png)
![• Press the Menu Select button directly below Okonce you are done.• Press the Menu Select button directly belowCncl to return to the Waypoints main screen.7The display shows <Waypoint name> Updated andthe radio returns to the Waypoints main screen.8Perform one of the following actions:• Press the Menu Select button directly belowBack to return to the previous screen.• Press , the PTT button, or thepreprogrammed GPS button to return to theHome screen.Editing the Coordinates of a WaypointNOTE:Only the preprogrammed coordinates of Home andDestination can be edited by the user.Ensure your radio shows the current location on thescreen.1Press the Menu Select button directly below Optn.2 or to Waypoints and press the MenuSelect button directly below Sel.The display shows a list of waypoints.3Perform one of the following actions:• or to [Home] and press the Menu Selectbutton directly below Optn.• or to [Destination] and press theMenu Select button directly below Optn.4 or to Edit location and press the MenuSelect button directly below Sel.The first number blinks.5Utilize the following control buttons to select thenumber/coordinates if required, then press the MenuSelect button directly below Edit to change thenumber/coordinates.EnglishSend Feedback 151Draft](https://usermanual.wiki/Motorola-Solutions/89FT7096.Users-Guide/User-Guide-3307316-Page-151.png)
![• Press to move to the previous number/coordinates.• Press to move to the next number/coordinates.A blinking cursor appears in the Edit Locationscreen.6Utilize the following control buttons or menu tochange the number/coordinates if required thenpress the Menu Select button directly below Okonce.• Press to move one space to the left.• Press to move one space to the right.• Press the Menu Select button directly below Delto delete any unwanted characters.• Press the Menu Select button directly belowCncl to return to the previous screen7Press the Menu Select button directly below Okonce complete setting up the new Home orDestination.One of the following scenarios occurs:• The display shows [Home] Updated and theradio returns to the Waypoints main screen.• The display shows [Destination] Updated andthe radio returns to the Waypoints main screen.Deleting a Single Saved WaypointEnsure your radio shows the current location on thescreen.1Press the Menu Select button directly below Optn.2 or to Waypoints and press the MenuSelect button directly below Sel.The display shows a list of waypoints.3Perform one of the following actions:• or to the required saved waypoint, andpress the Menu Select button directly belowOptn. or to Edit name and press the MenuSelect button directly below Del.• Press the Menu Select button directly below Del.English152 Send FeedbackDraft](https://usermanual.wiki/Motorola-Solutions/89FT7096.Users-Guide/User-Guide-3307316-Page-152.png)
![6To return to the Home screen, press the MenuSelect button directly below Exit.If you are at the site designated to receive this alert, youcan hear an alert tone repeated periodically. The displayshows the <Alert Alias> with the intelligent lighting atHome screen.Sending SSA Notification to Single SiteVia Manual Entry1 or to SSA.2Press the Menu Select button directly below SSA.The display shows the Site Alert screen.3 or to Start Alert and press the MenuSelect button directly below Sel.The display shows the Select Site screen.4 or to [SiteID Entry] to send alert viamanual entry. Press the Menu Select button directlybelow Edit.The display shows the Enter SiteID screen.5Key in the desired Site ID and press the MenuSelect button directly below Ok.If a correct Site ID is entered, the display shows theSelect Alert screen.If a wrong Site ID is entered, the display showsInvalid ID and prompts to enter the Site ID again.6 or to select the desired Alert Alias and pressthe Menu Select button directly below Send.The display shows Sending req.If radio is out of range, roaming to a foreign systemor in a failsoft situation, the display shows Reqfailed.If the request is successful, the display shows Reqsuccessful.If the site is not available, the display shows <SiteID> not available.EnglishSend Feedback 179Draft](https://usermanual.wiki/Motorola-Solutions/89FT7096.Users-Guide/User-Guide-3307316-Page-179.png)
![If the site does not exist, the display shows <SiteID>does not exist.7To return to the Home screen, press the MenuSelect button directly below Exit.If you are at the site designated to receive this alert, youcan hear an alert tone repeated periodically. The displayshows the <Alert Alias> with the intelligent lighting atHome screen.Sending SSA Notification to All Sites1 or to SSA.2Press the Menu Select button directly below SSA.The display shows the Site Alert screen.3 or to Start Alert and press the MenuSelect button directly below Sel.The display shows the Select Site screen.4 or to [All Sites] and press the MenuSelect button directly below Sel.The display shows the Select Alert screen.5 or to select the desired <Alert Alias> andpress the Menu Select button directly below Send.The display shows Sending req.If radio is out of range, roaming to a foreign systemor in a failsoft situation, the display shows Reqfailed.If the request is successful, the display shows Reqsuccessful.If one or more sites are not available, the displayshows Not all sites available. Repeat step 3.6To return to the Home screen, press the MenuSelect button directly below Exit.If you are at the site designated to receive this alert, youcan hear an alert tone repeated periodically. The displayshows the <Alert Alias> with the intelligent lighting atHome screen.English180 Send FeedbackDraft](https://usermanual.wiki/Motorola-Solutions/89FT7096.Users-Guide/User-Guide-3307316-Page-180.png)
![Sending SSA Notification to AllAvailable Sites1 or to SSA.2Press the Menu Select button directly below SSA.The display shows the Site Alert screen.3 or to Start Alert and press the MenuSelect button directly below Sel.The display shows the Select Site screen.4 or to [All Avail] and press the MenuSelect button directly below Sel.The display shows the Select Alert screen.5 or to select the desired Alert Alias and pressthe Menu Select button directly below Send.The display shows Sending req.If radio is out of range, roaming to a foreign systemor in a failsoft situation, the display shows Reqfailed.If the request is successful, the display shows Reqsuccessful.6To return to the Home screen, press the MenuSelect button directly below Exit.If you are at the site designated to receive this alert, youcan hear an alert tone repeated periodically. The displayshows the <Alert Alias> with the intelligent lighting atHome screen.Stopping SSA Notification of a SingleSite1 or to SSA.2Press the Menu Select button directly below SSA.The display shows the Site Alert screen.3 or to Stop Alert and press the MenuSelect button directly below Sel.The display shows the Select Site screen.EnglishSend Feedback 181Draft](https://usermanual.wiki/Motorola-Solutions/89FT7096.Users-Guide/User-Guide-3307316-Page-181.png)
![4 or to select the desired Site Alias and pressthe Menu Select button directly below Send.The display shows Sending req.If radio is out of range, roaming to a foreign systemor in a failsoft situation, the display shows Reqfailed.If the request is successful, the display shows Reqsuccessful.If the site is not available, the display shows <SiteAlias> not available.If the site does not exist, the display shows <SiteAlias>does not exist.5To return to the Home screen, press the MenuSelect button directly below Exit.The SSA Alert for the designated site stops.Stopping SSA Notification of a SingleSite Via Manual Entry1 or to SSA.2Press the Menu Select button directly below SSA.The display shows the Site Alert screen.3 or to Stop Alert and press the MenuSelect button directly below Sel.The display shows the Select Site screen.4 or to [SiteID Entry] and press the MenuSelect button directly below Edit.The display shows the Enter SiteID screen.5Key in the required Site ID and press the MenuSelect button directly below Send.One of the following scenarios occur:• If a wrong Site ID is entered, the display showsInvalid ID and prompts to enter the Site IDagain.• If a correct Site ID is entered, the display showsSending req.• If the request is successful, the display showsReq successful.English182 Send FeedbackDraft](https://usermanual.wiki/Motorola-Solutions/89FT7096.Users-Guide/User-Guide-3307316-Page-182.png)
![• If the single site is not available, the displayshows <Site ID> not available.• If the single site does not exist, the display shows<Site ID> does not exist.6To return to the Home screen, press the MenuSelect button directly below Exit.The SSA Alert for the designated site stops.Stopping SSA Notification of All Sites1 or to SSA.2Press the Menu Select button directly below SSA.The display shows the Site Alert screen.3 or to Stop Alert and press the MenuSelect button directly below Sel.The display shows the Select Site screen.4 or to [All Sites] and press the MenuSelect button directly below Send.The display shows Sending req.If radio is out of range, roaming to a foreign systemor in a failsoft situation, the display shows Reqfailed.If the request is successful, the display shows Reqsuccessful.If one or more sites are not available, the displayshows Not all sites available. Repeat step step 3.5To return to the Home screen, press the MenuSelect button directly below Exit.The SSA Alert for all sites stop.Stopping SSA Notification of AllAvailable Sites1 or to SSA.EnglishSend Feedback 183Draft](https://usermanual.wiki/Motorola-Solutions/89FT7096.Users-Guide/User-Guide-3307316-Page-183.png)
![2Press the Menu Select button directly below SSA.The display shows the Site Alert screen.3 or to Stop Alert and press the MenuSelect button directly below Sel.The display shows the Select Site screen.4 or to [All Avail] and press the MenuSelect button directly below Send.The display shows Sending req.If radio is out of range, roaming to a foreign systemor in a failsoft situation, the display shows Reqfailed.If the request is successful, the display shows Reqsuccessful.5To return to the Home screen, press the MenuSelect button directly below Exit.The SSA Alert for all available sites stop.UtilitiesViewing Recent CallsThis feature allows you to view the recent incoming andoutgoing call information of the following call types:• Call Alert• Selective Call• Private Call• Phone Call (Outgoing Only)• Emergency Call (Incoming Only)NOTE:The radio can also be preprogrammed to log onlythe radio IDs associated with incoming DispatchCalls. Check with your dealer or systemadministrator for more information.The following methods are options on how to view recentcalls. The result of all the methods is the same. You canuse the options interchangeably depending on yourpreference and the programmed functions.• Viewing recent calls via the preprogrammed RecentCalls button:English184 Send FeedbackDraft](https://usermanual.wiki/Motorola-Solutions/89FT7096.Users-Guide/User-Guide-3307316-Page-184.png)