Motorola Solutions 92FT3802 VRS750--Vehicular Repeater System User Manual Service Manual
Motorola Solutions, Inc. VRS750--Vehicular Repeater System Service Manual
UserManual.wiki
>
Motorola Solutions
>
92FT3802 User Manual
>
Service Manual
Contents
1.
Preliminary Users Manual
2.
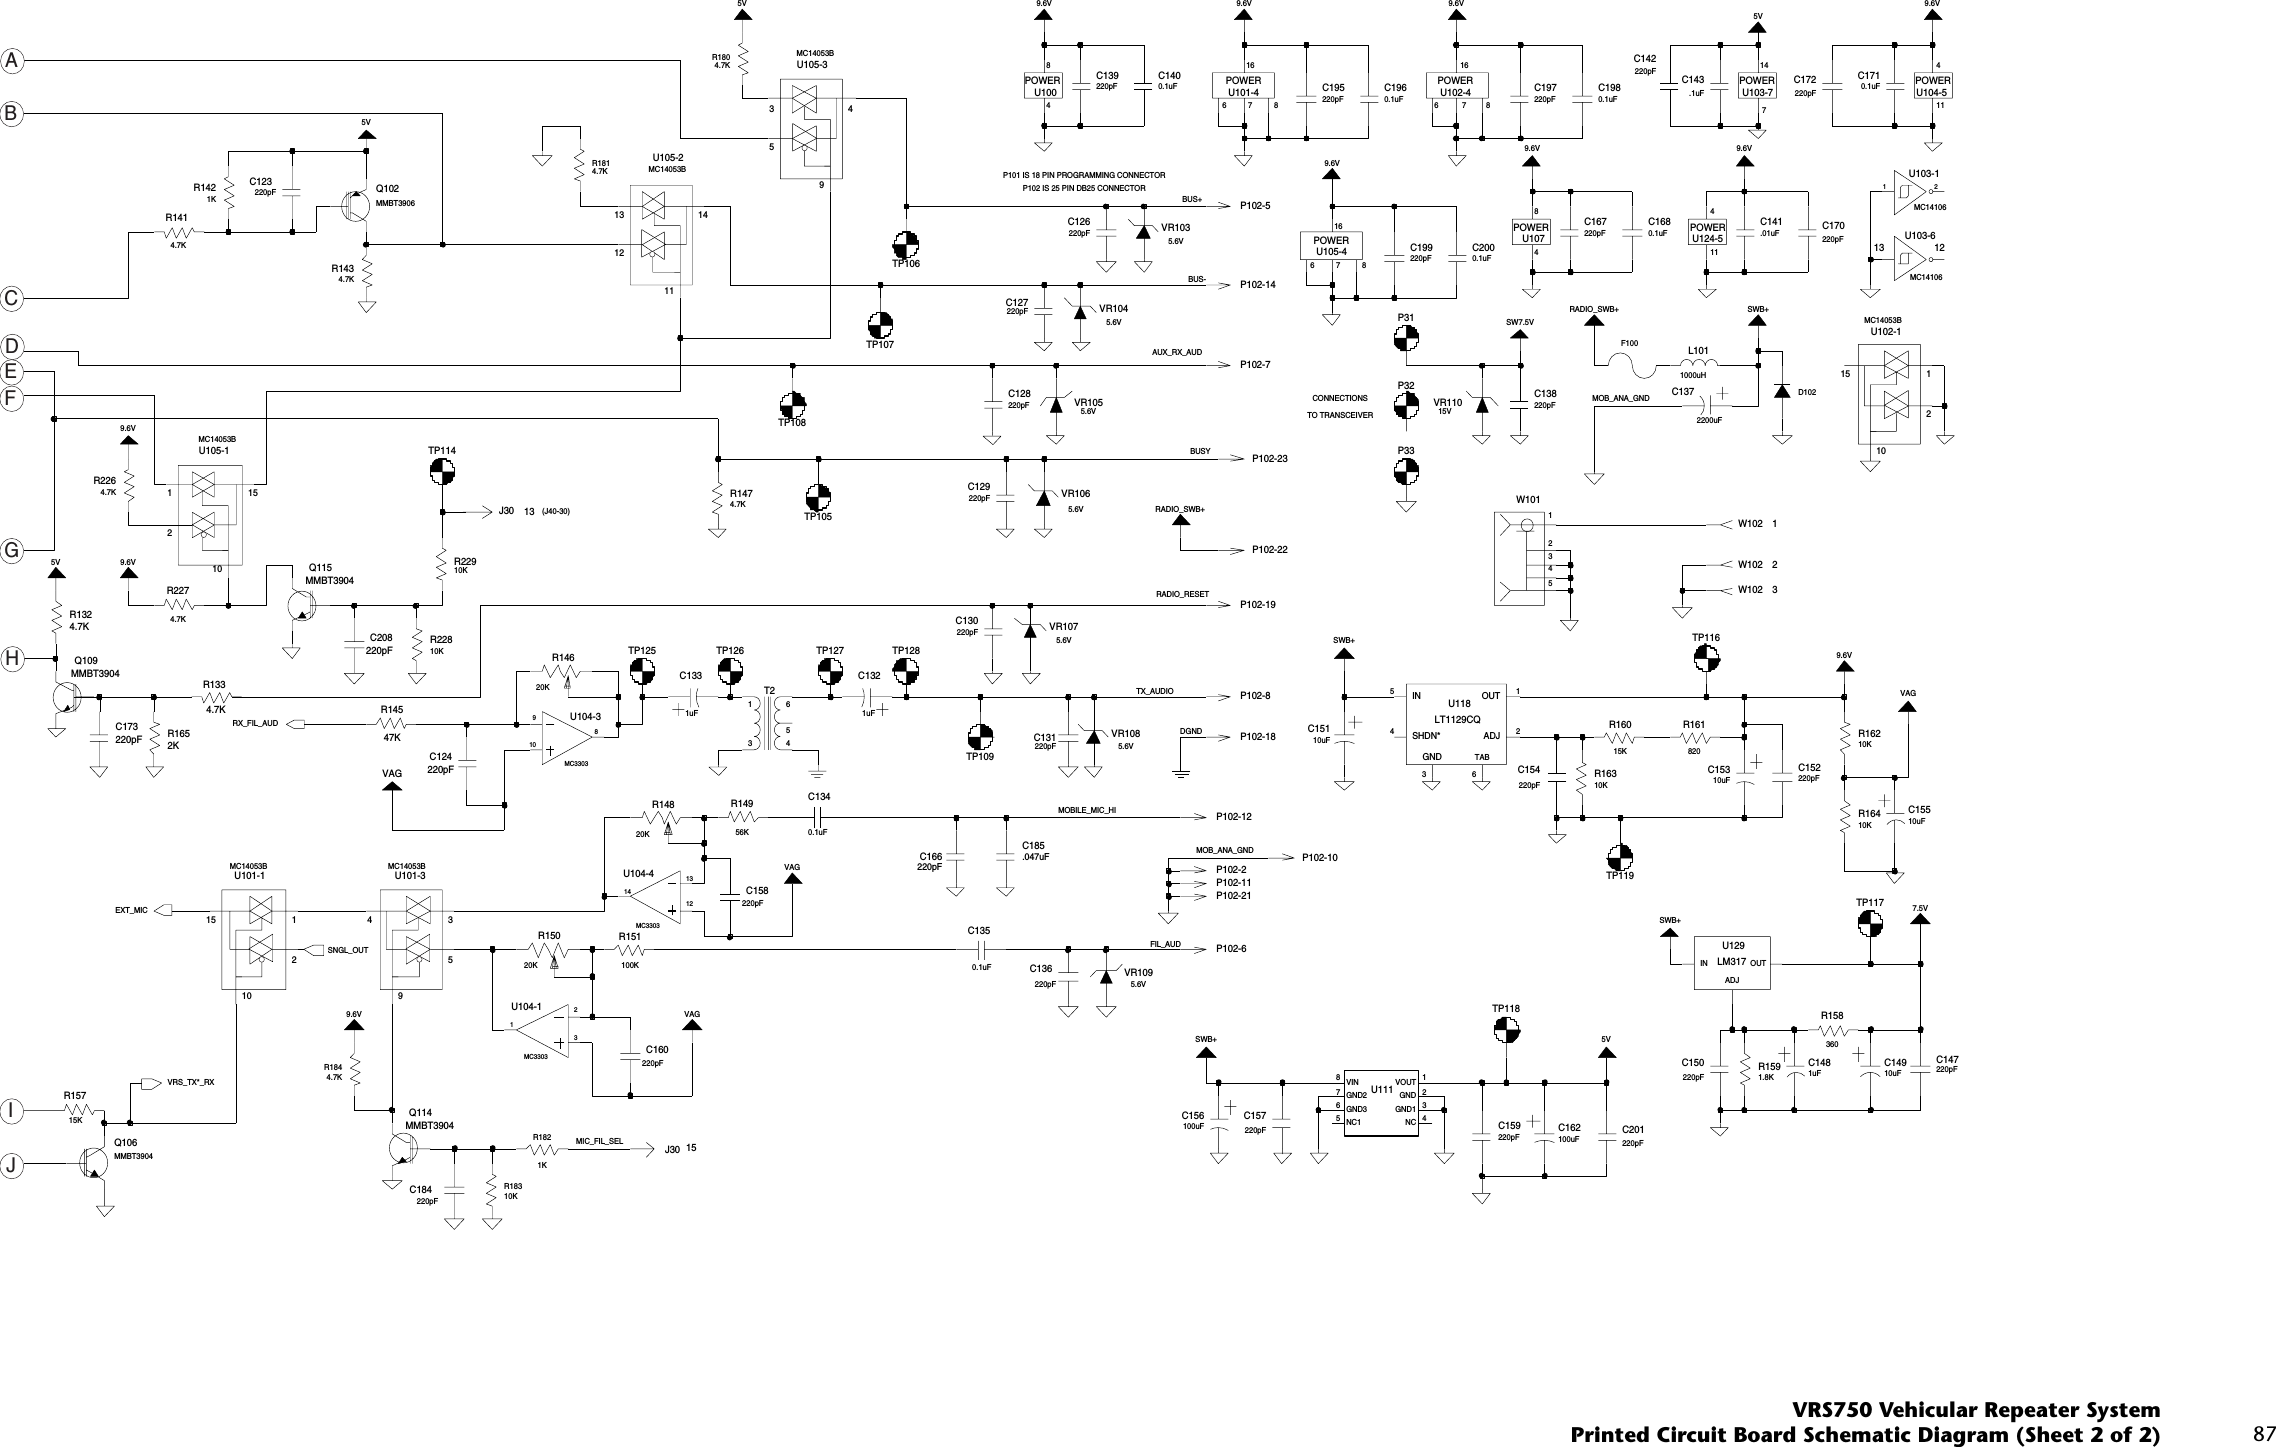
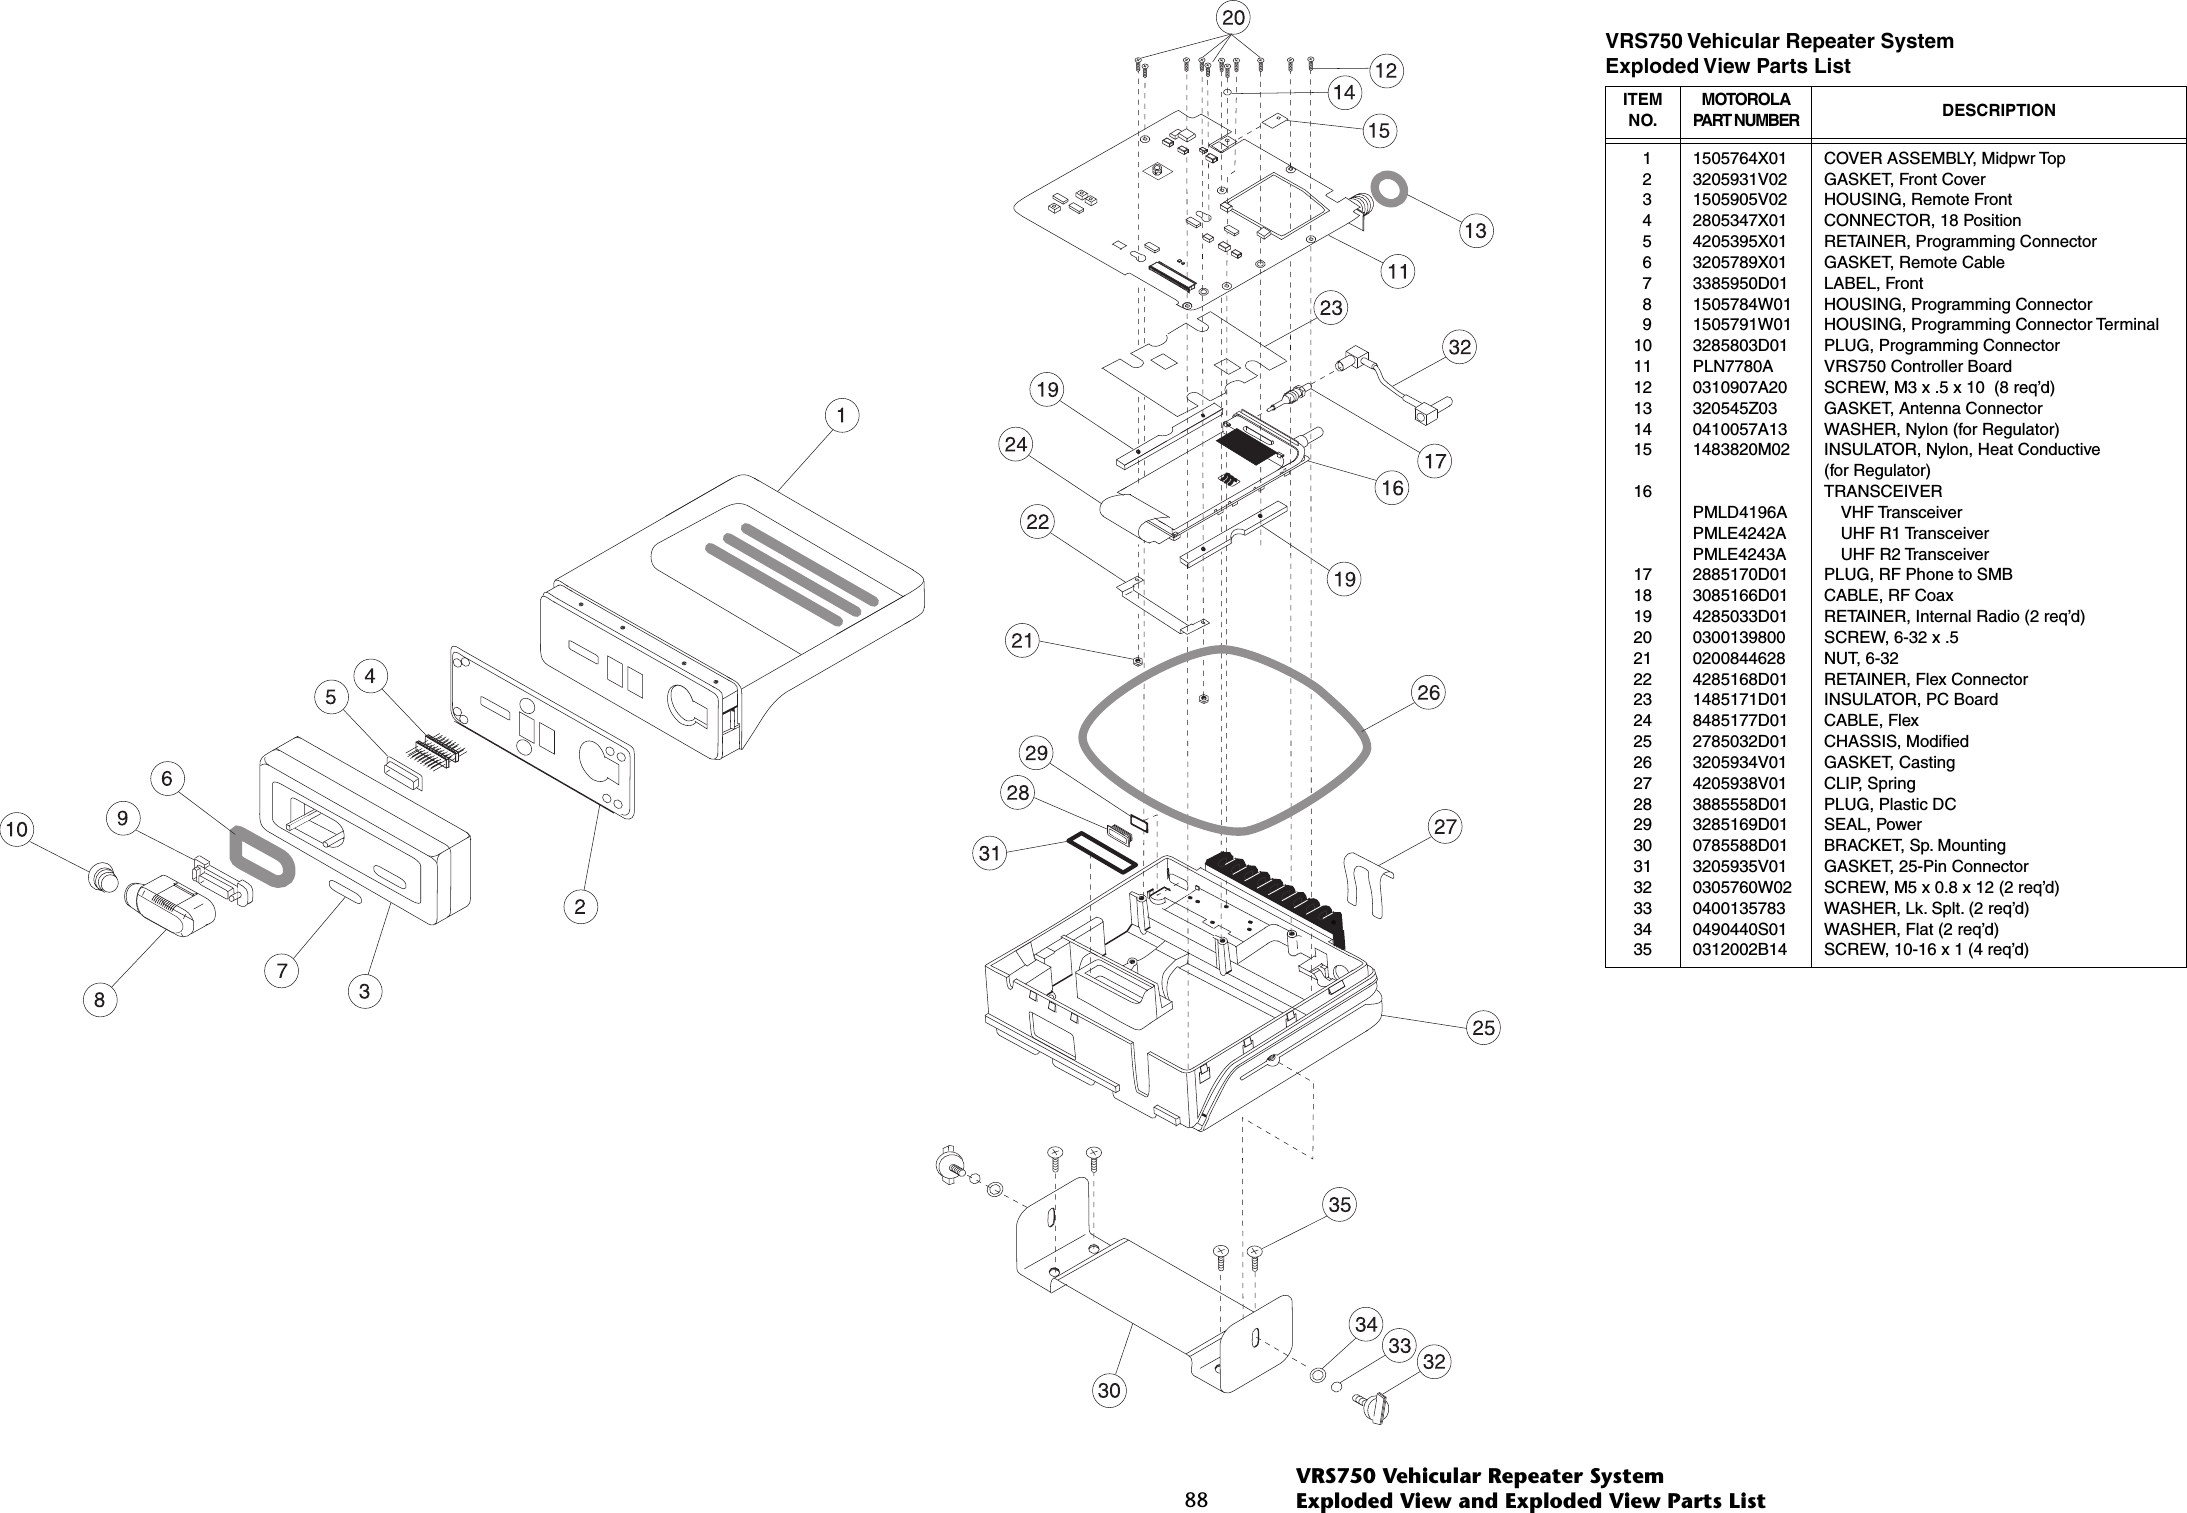
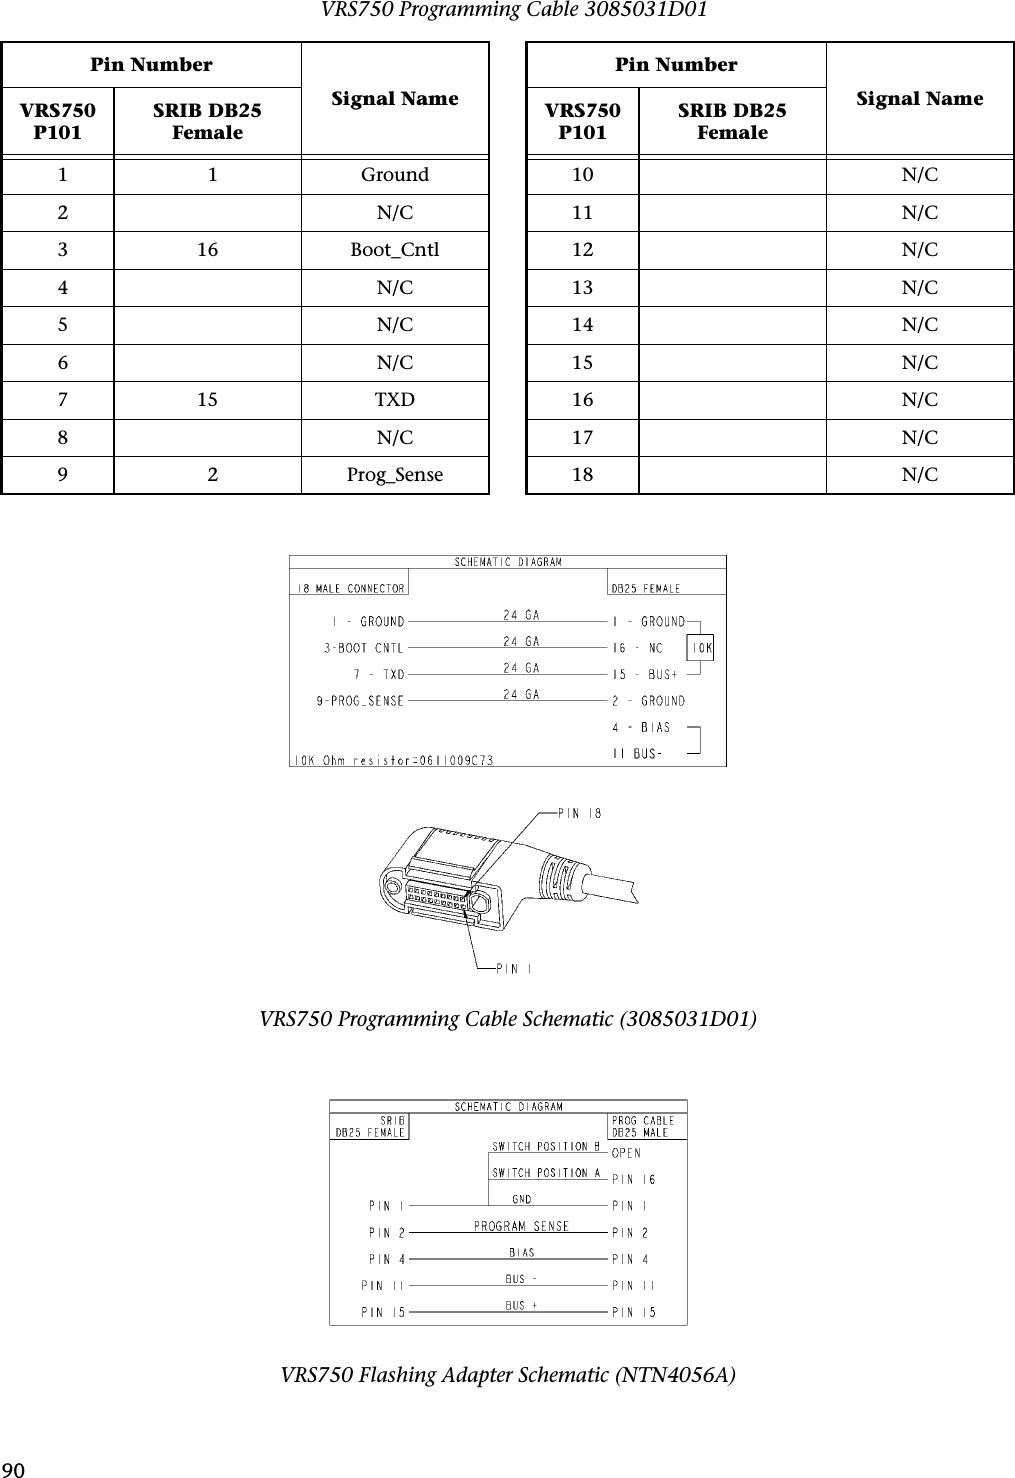
Service Manual
Service Manual
Navigation menu
Upload a User Manual
Namespaces
Wiki Guide
HTML
PDF
Info
Views
User Manual
Discussion / Help
Navigation


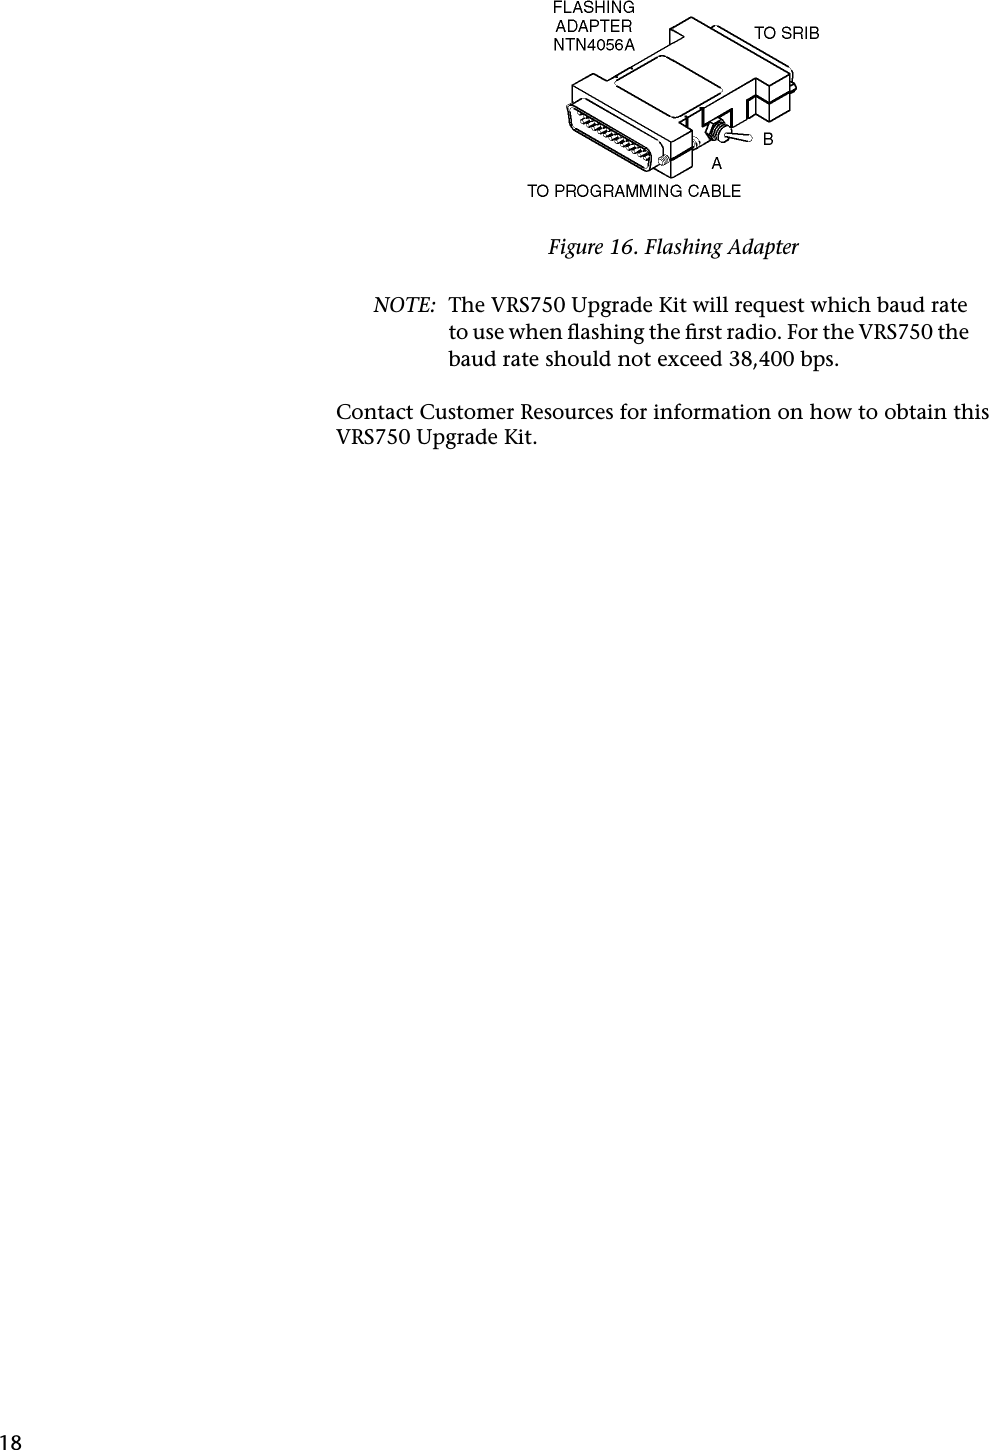
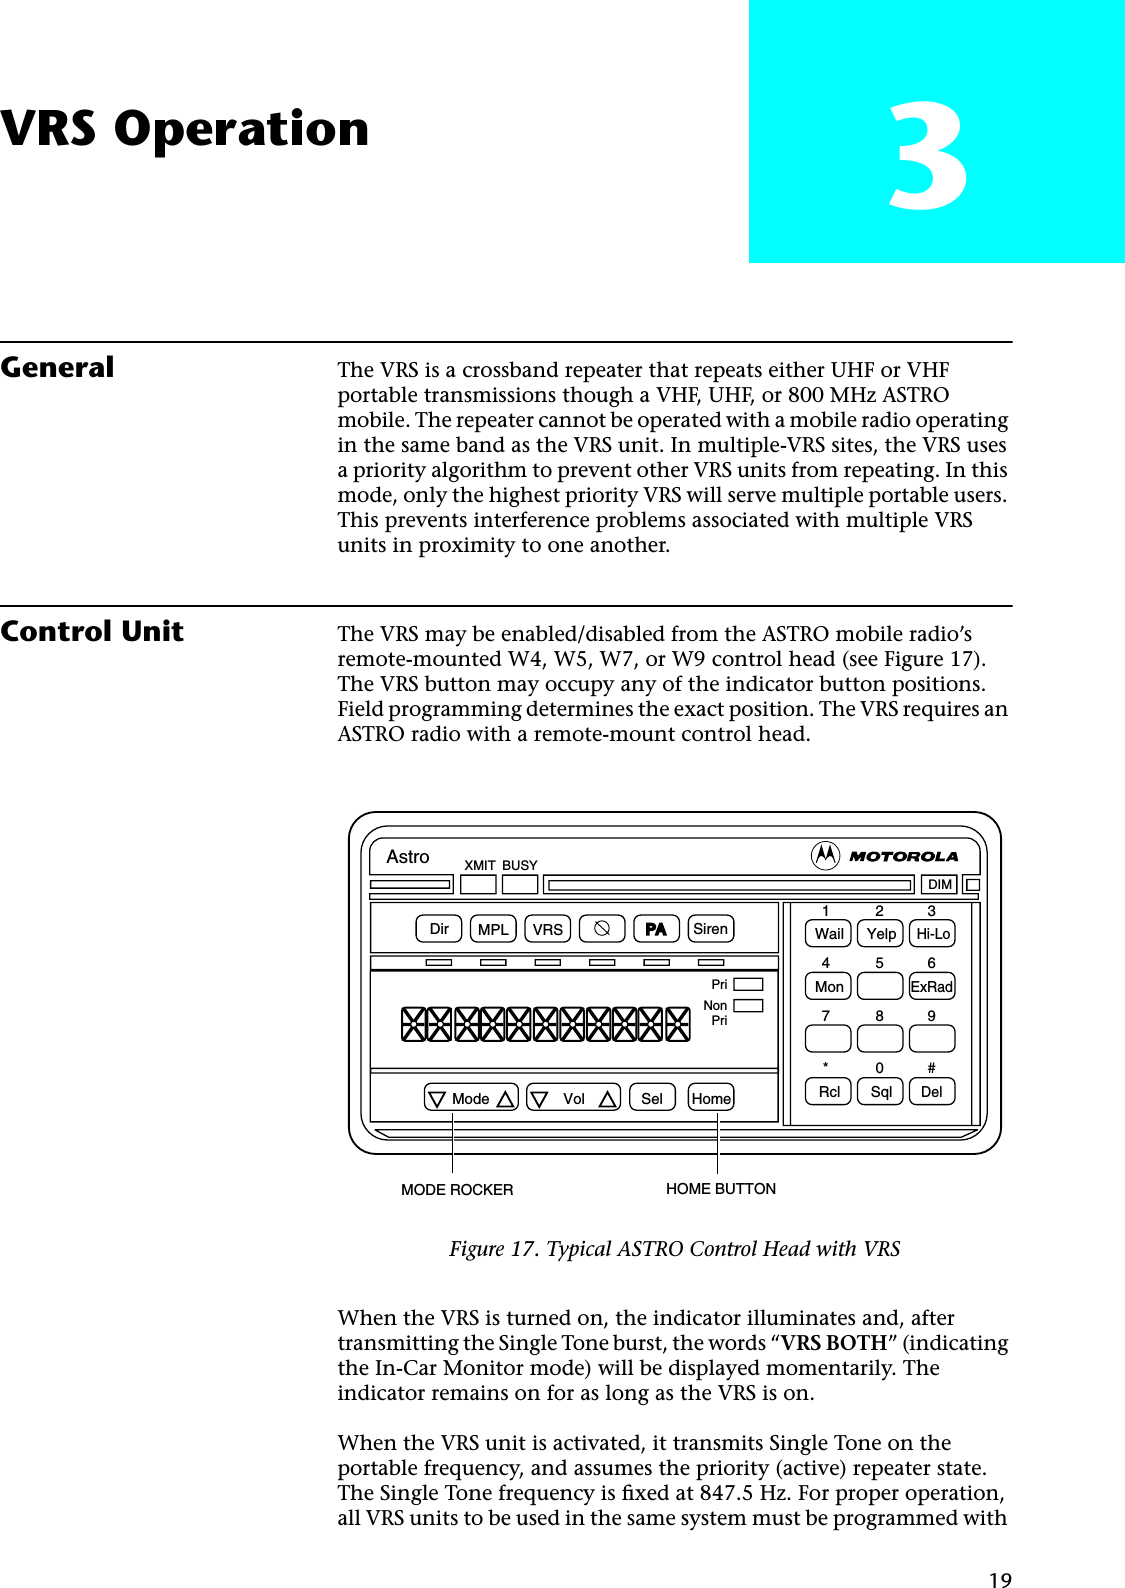
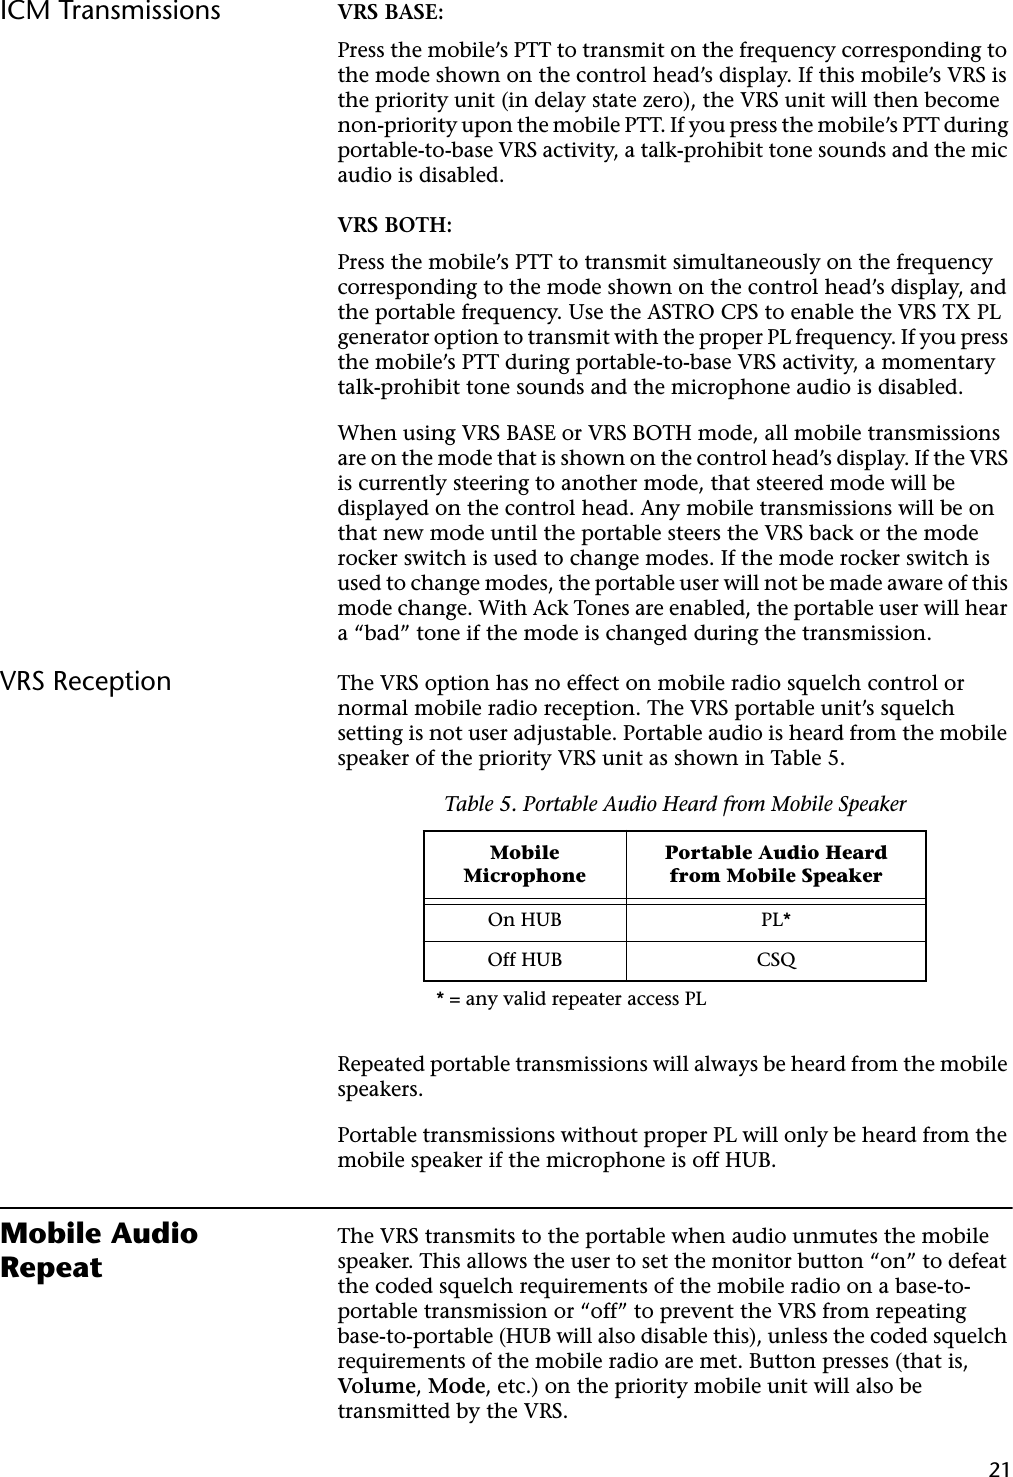

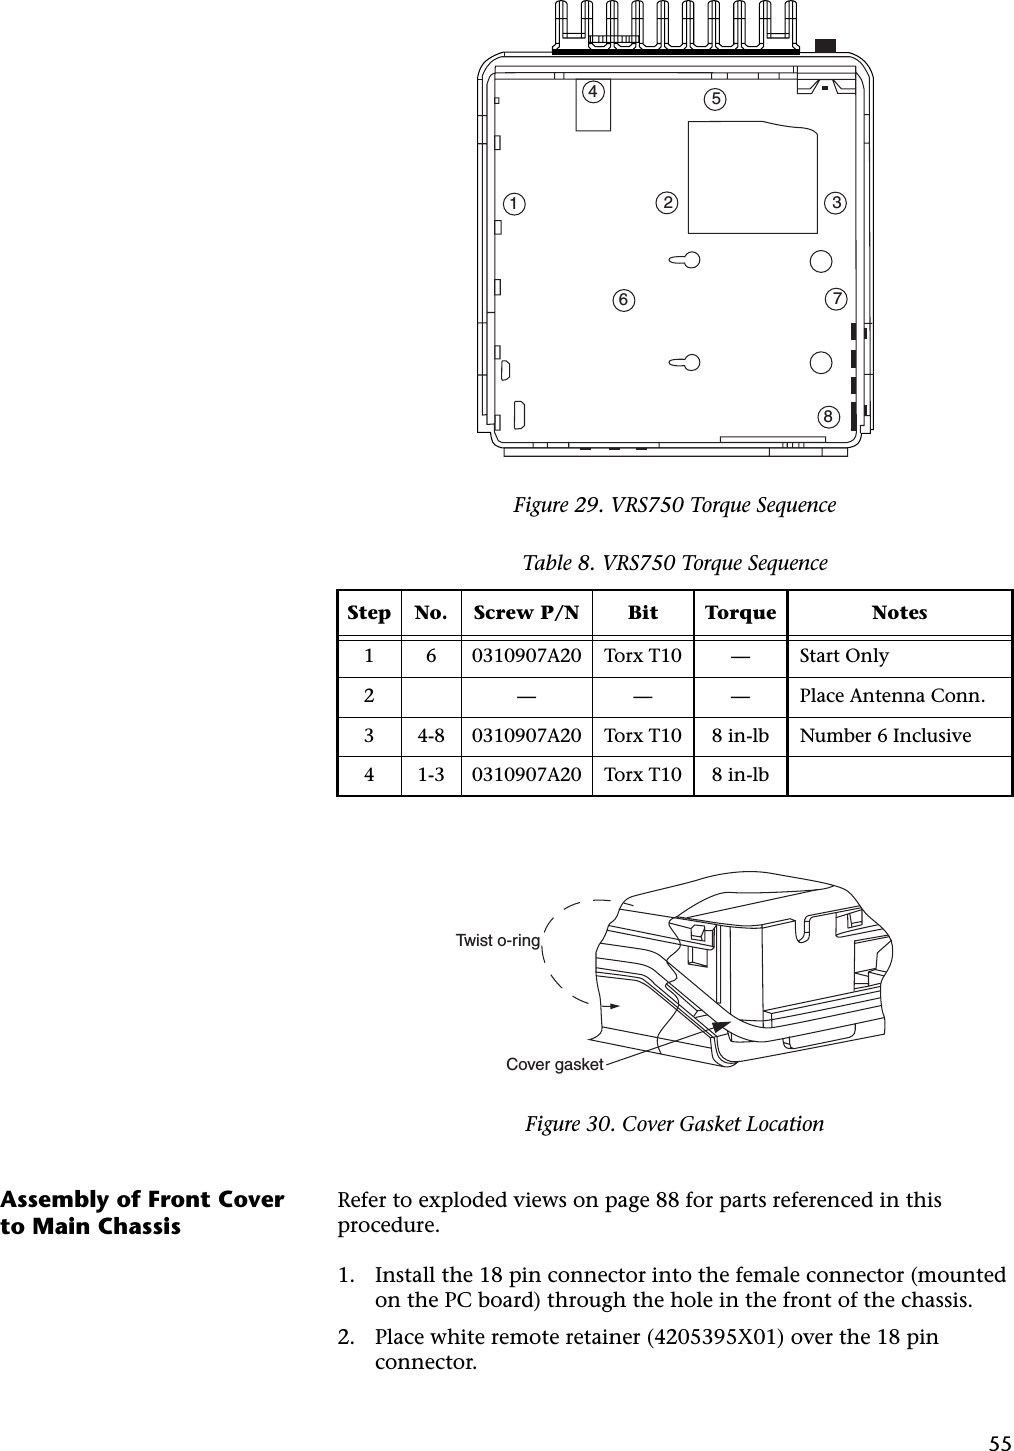
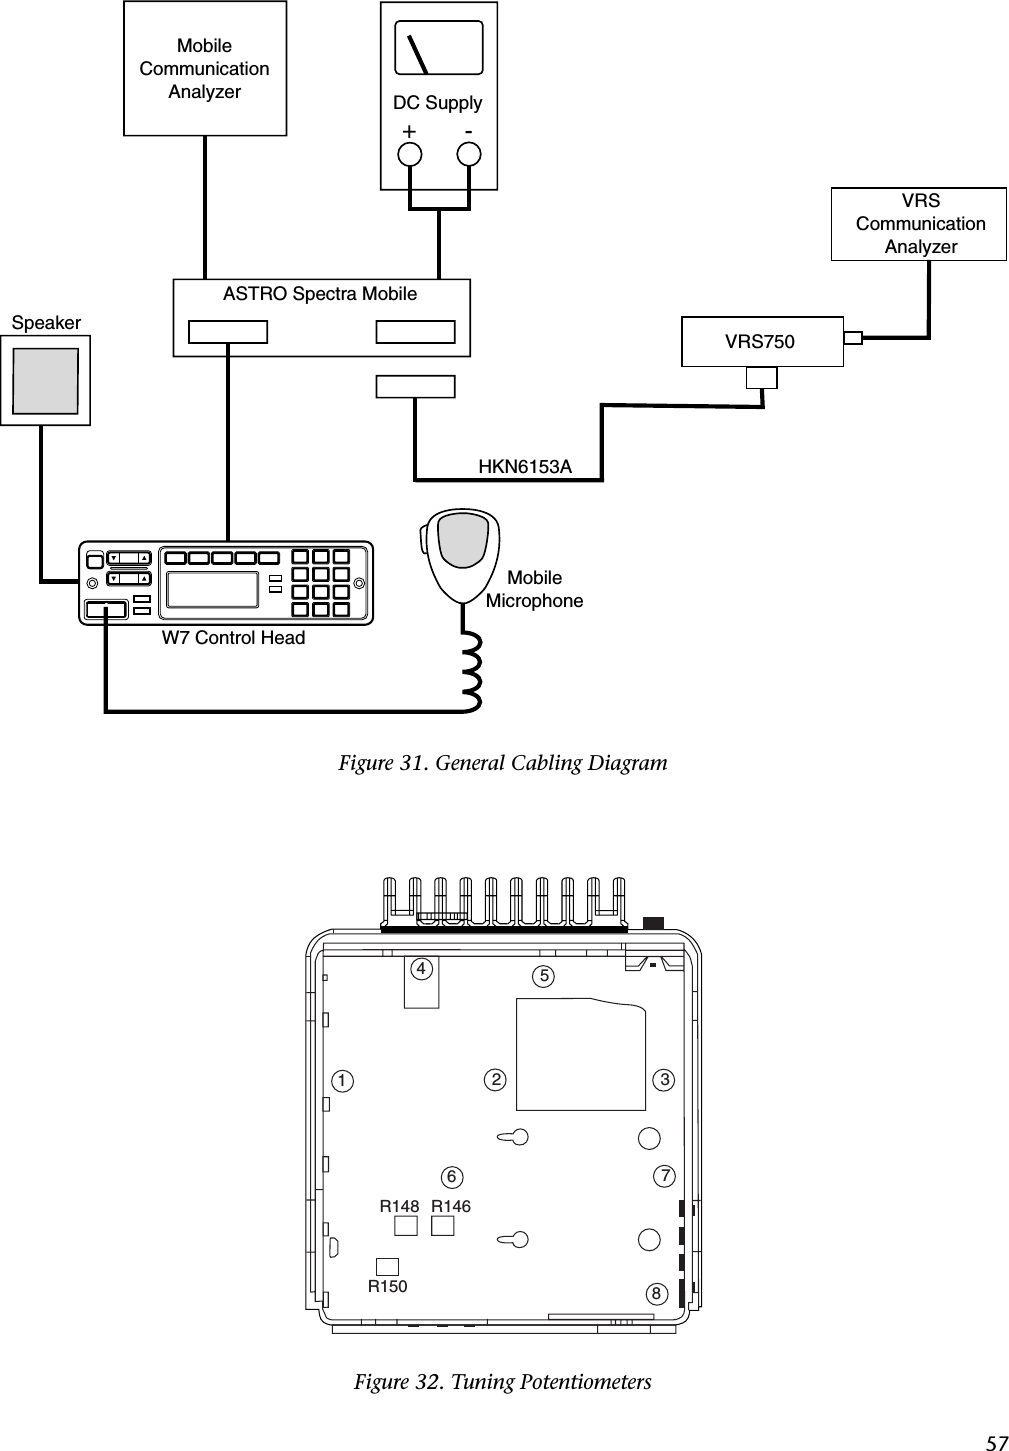
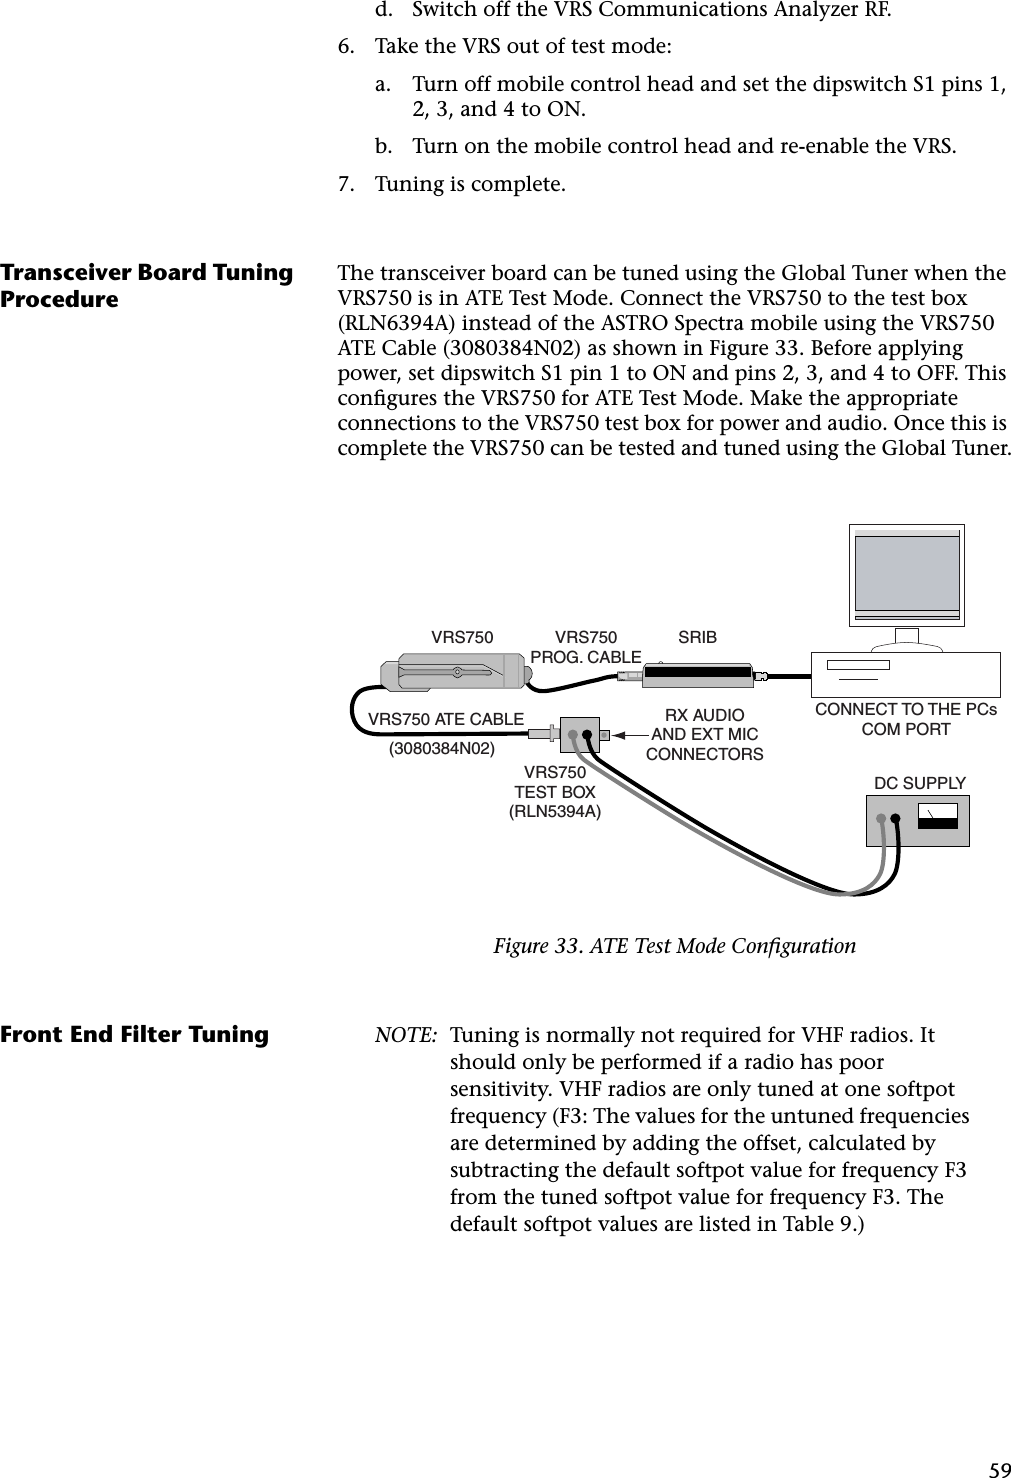
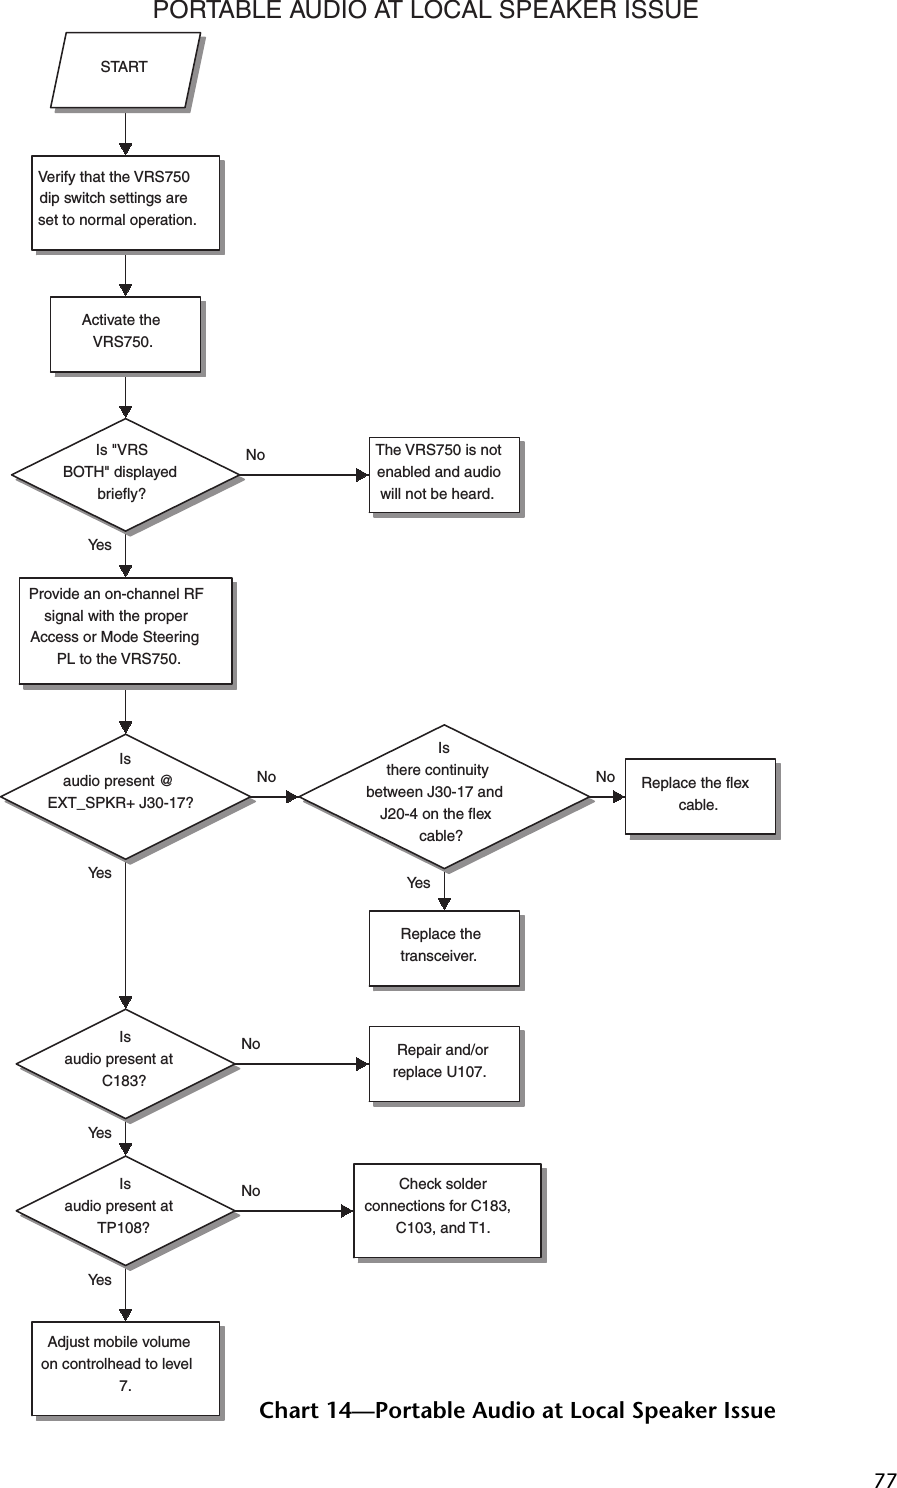
![27VRS Mobile-TX Acknowledgment Tones (Conventional Only)When this option is enabled, the VRS transmits a 750 Hz feedback tone after it has received a repeatable message on the portable frequency. This signals the portable operator that the transmission was received. If the repeated message was cut short due to the mobile TOT being exceeded or the mobile channel being changed during the repeat, a lower-pitched tone (304 Hz) sounds. If the portable user does not hear a tone after completing a transmission, the portable is either out of range of the repeater or there is no priority repeater in the area.See “VRS Mobile Trunking Tones (Trunking Only)” on page 38 for a description of trunking acknowledgment tones.Flashing Display The Flashing Display feature causes the display on the control head to alternate between the current mode and “VRS BOTH.” This feature is used primarily when the VRS enable/disable button does not have an indicator light or when VIP activation is used. This feature is normally disabled in CPS. The length of time “VRS BOTH” is displayed every 6 seconds is determined by the “temporary message display timer” value. This value (from 250 to 6250 ms [default = 1000 ms]) canbe programmed by the CPS. To configure, select Radio Configuration --> Display & Menu --> Advanced screen.Repeater PPI The Repeater Portable Priority Interrupt (PPI), when enabled, causes a base-to-portable transmission to be interrupted every 1 second in trunked mode or 2 seconds in conventional mode so that the repeater can search for a portable radio signal. (These times are programmable and may be changed to 500 ms for trunked or 500 ms for conventional modes). This interruption may be heard on the portable as a “clicking” noise, but PPI is necessary to give the portable user priority over base-to-portable transmissions, for the self-clearing function of the automatic priority resolution feature, and to allow portable users in trunked mode to break in during system hang time to prevent loss of voice channel. This feature may be disabled through CPS.Quick-Key This feature allows the portable user to determine the status of the mobile trunking system. The feature is initiated by a short press of the portable’s PTT that is long enough for the VRS to key the mobile and access the trunking system, for less than 1 second in duration.](https://usermanual.wiki/Motorola-Solutions/92FT3802.Service-Manual/User-Guide-188855-Page-39.png)