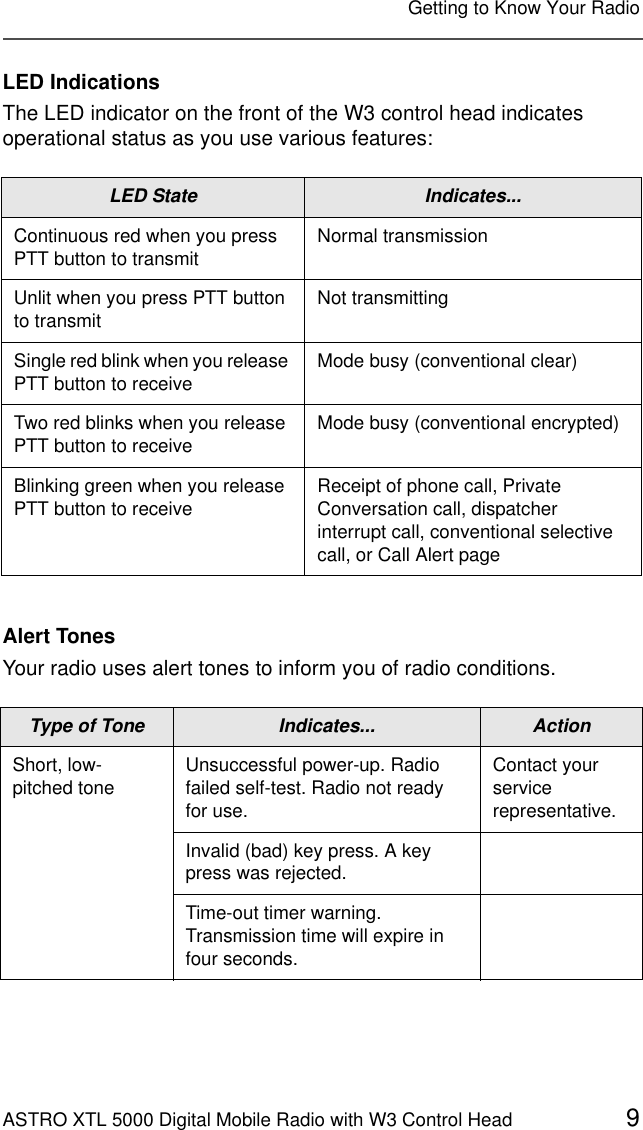
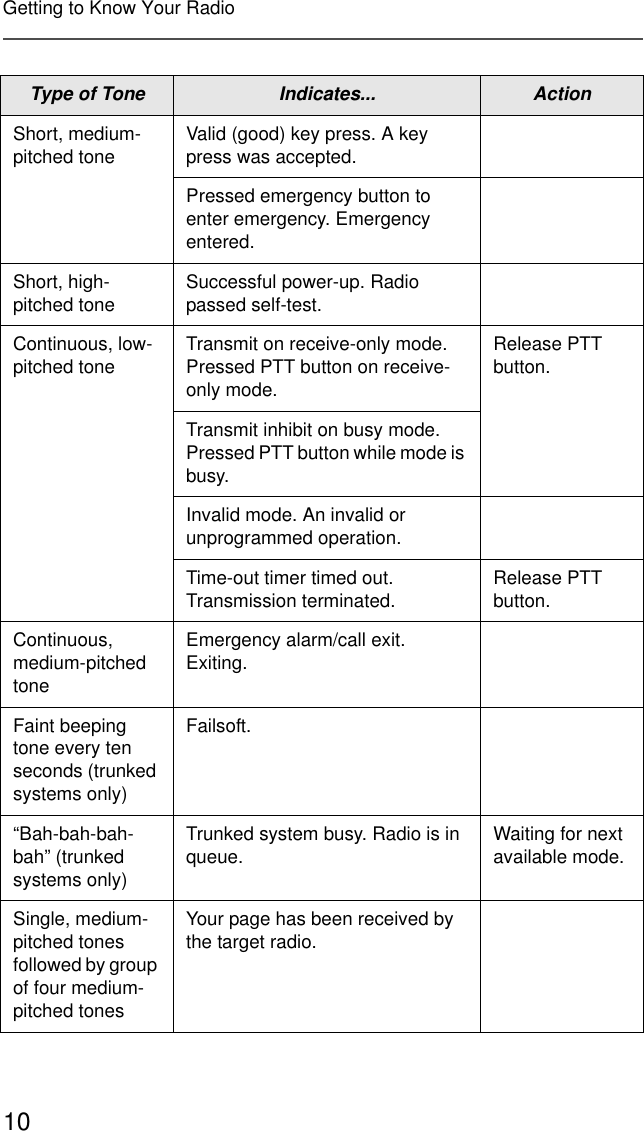
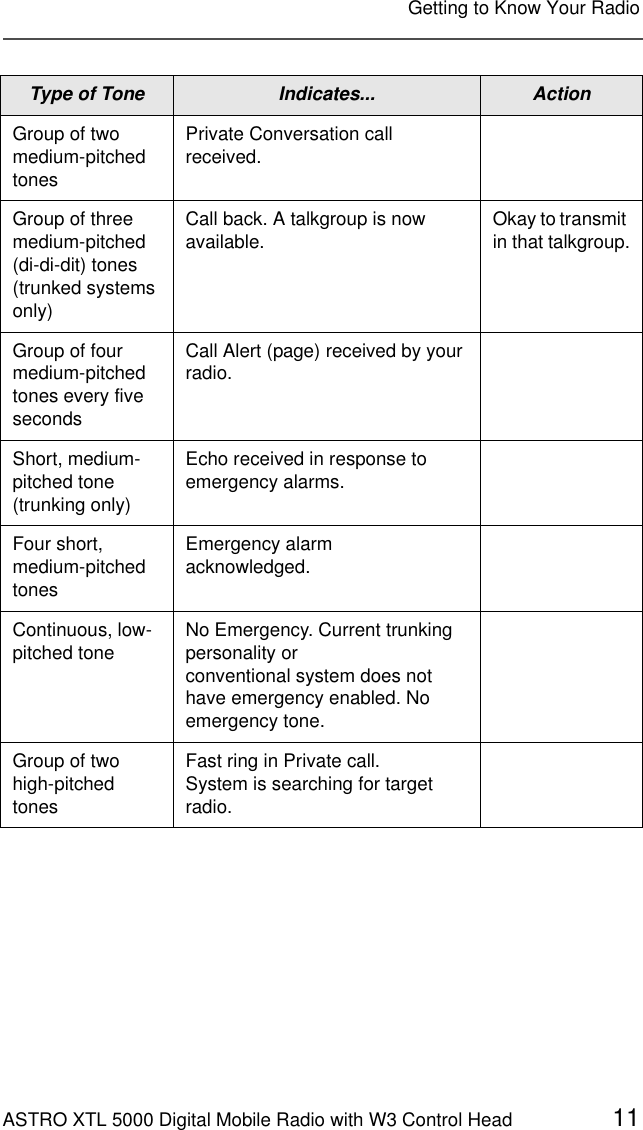
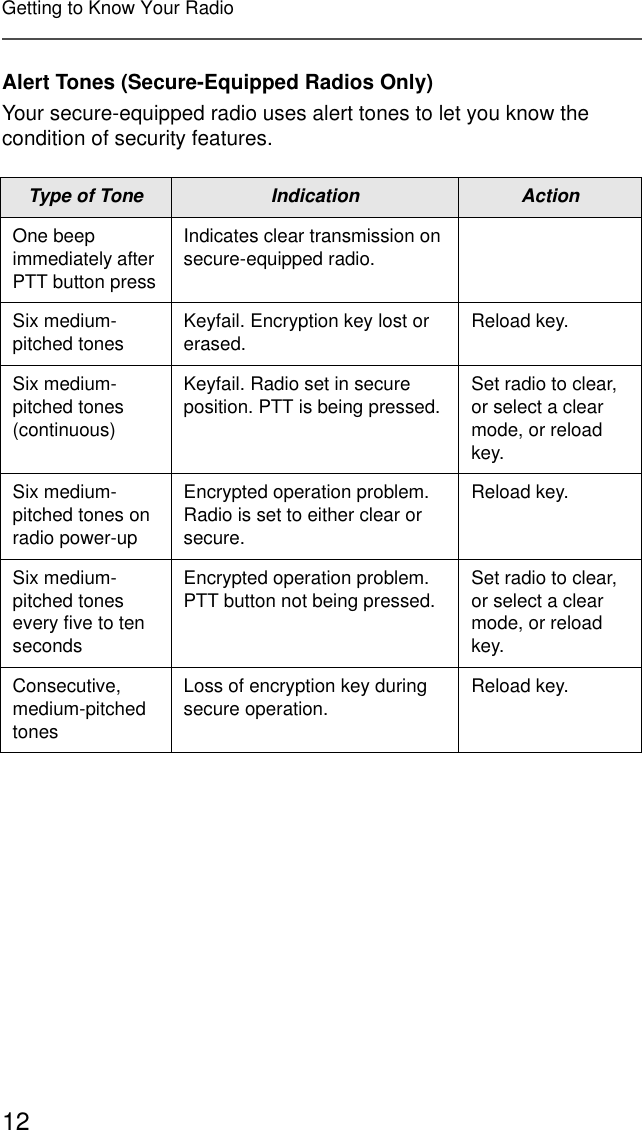
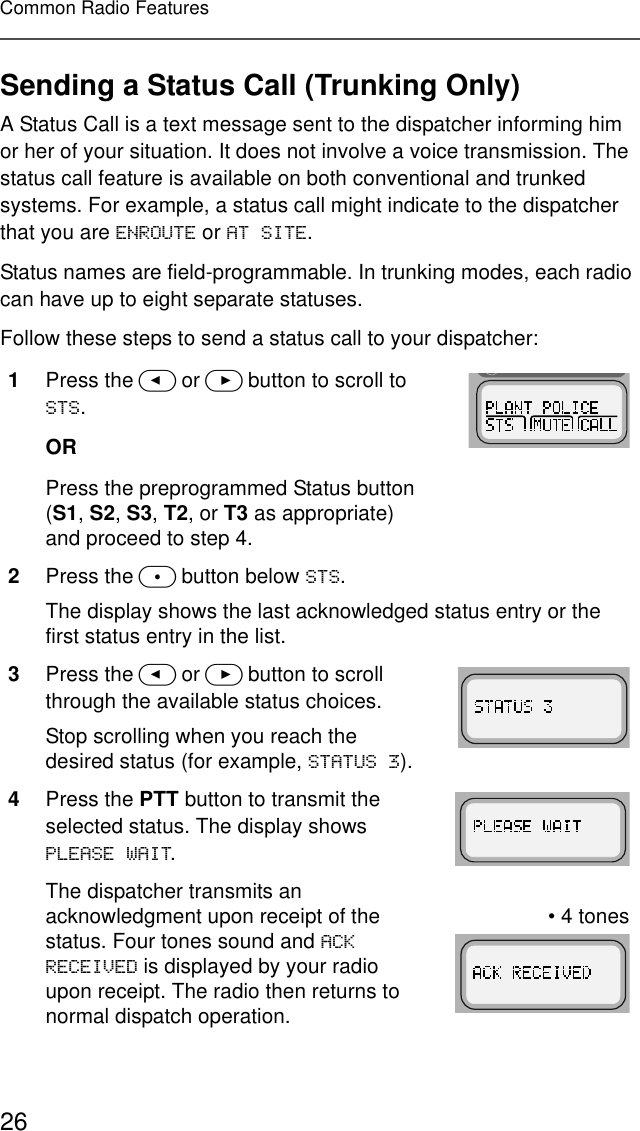
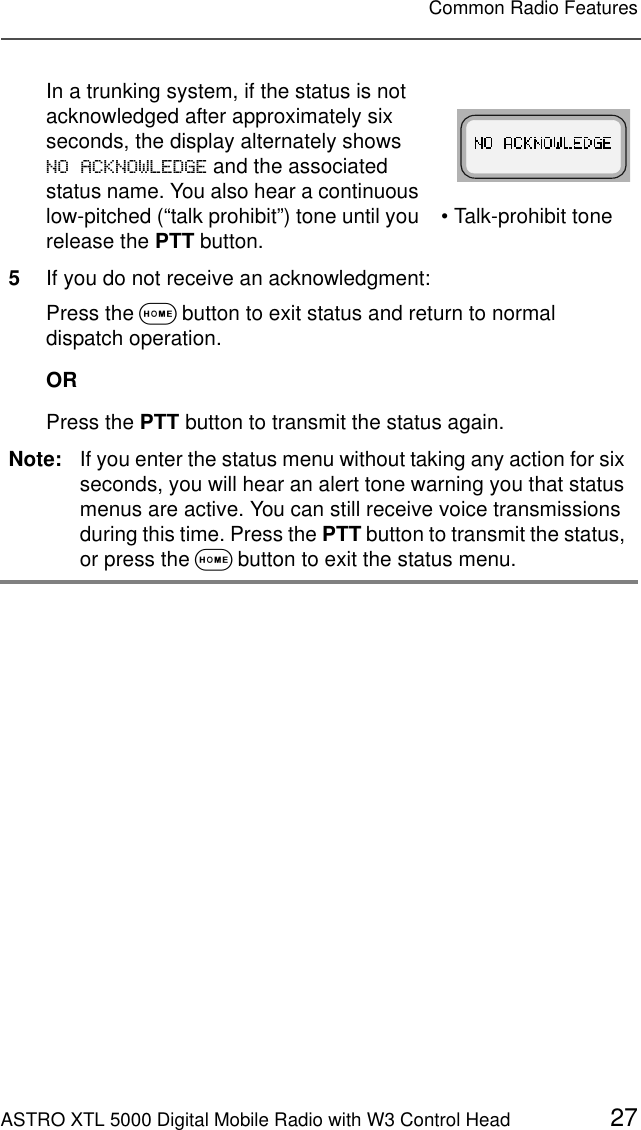
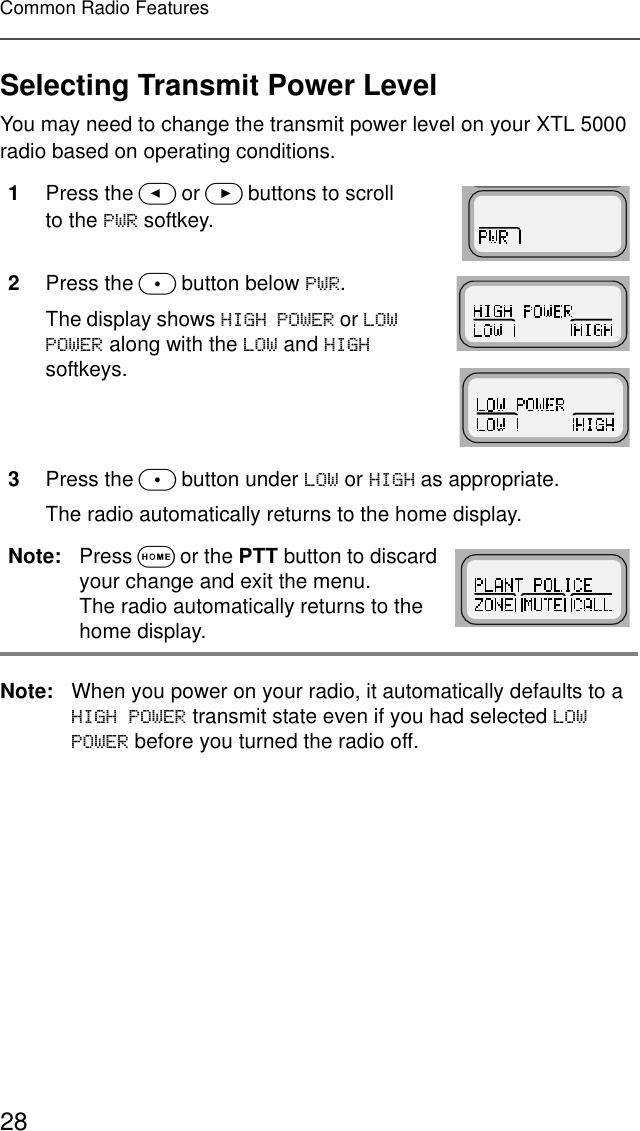
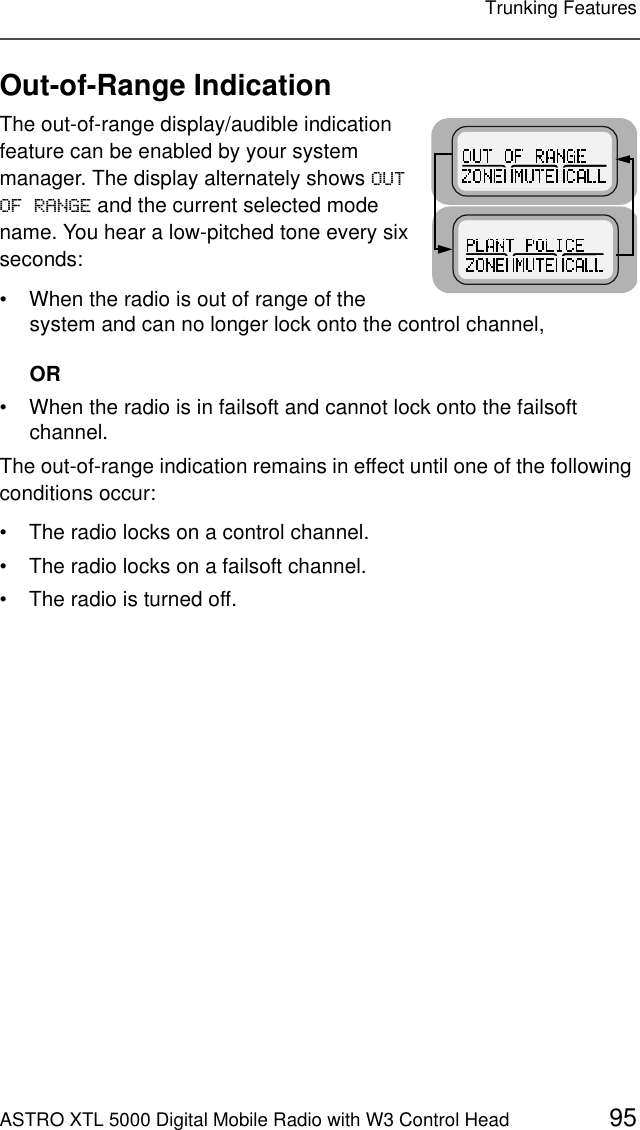
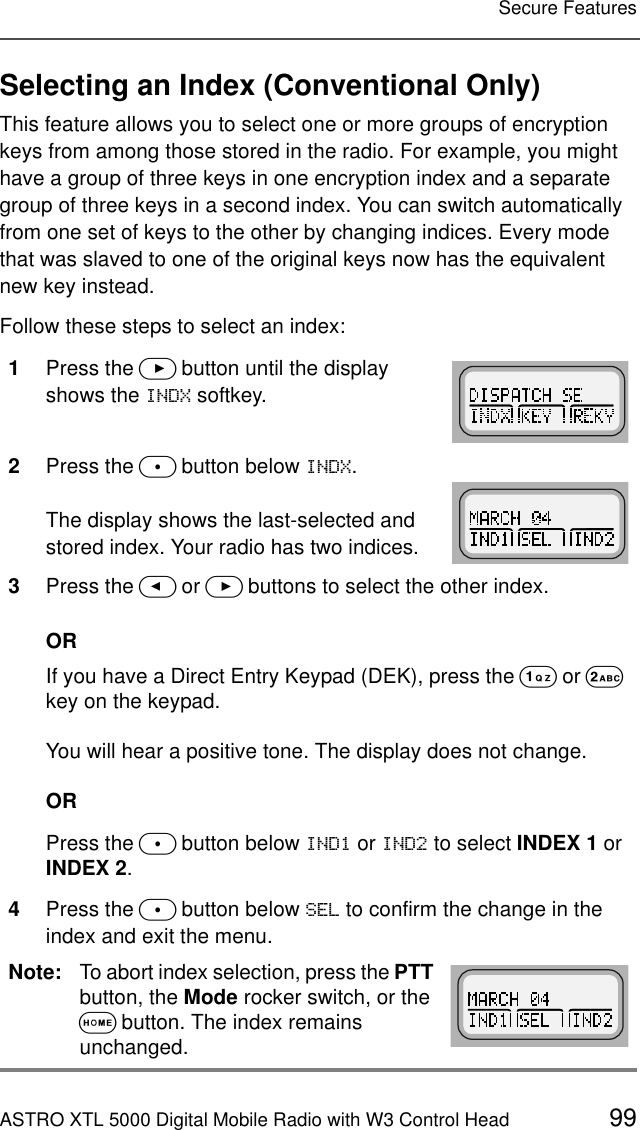
Motorola Solutions 92FT4862 Astro XTL5000 Digital Mobile Radio User Manual Exhibit D Users Manual per 2 1033 c3
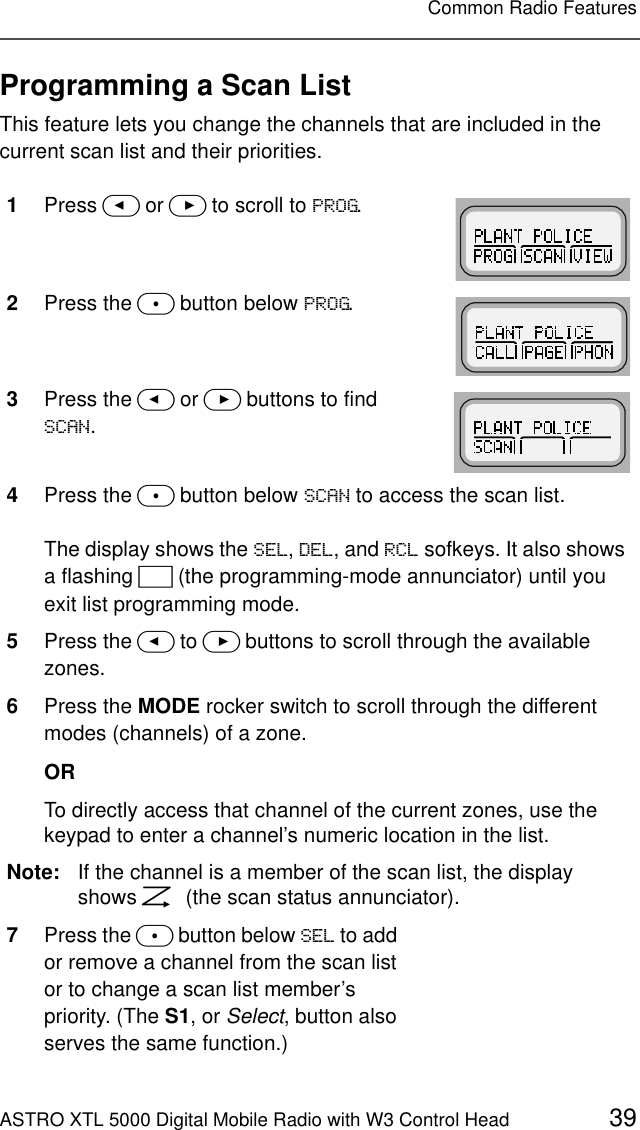
Motorola Solutions, Inc. Astro XTL5000 Digital Mobile Radio Exhibit D Users Manual per 2 1033 c3
UserManual.wiki
>
Motorola Solutions
>
92FT4862 User Manual
Exhibit D Users Manual per 2 1033 c3
Navigation menu
Upload a User Manual
Namespaces
Wiki Guide
HTML
PDF
Info
Views
User Manual
Discussion / Help
Navigation


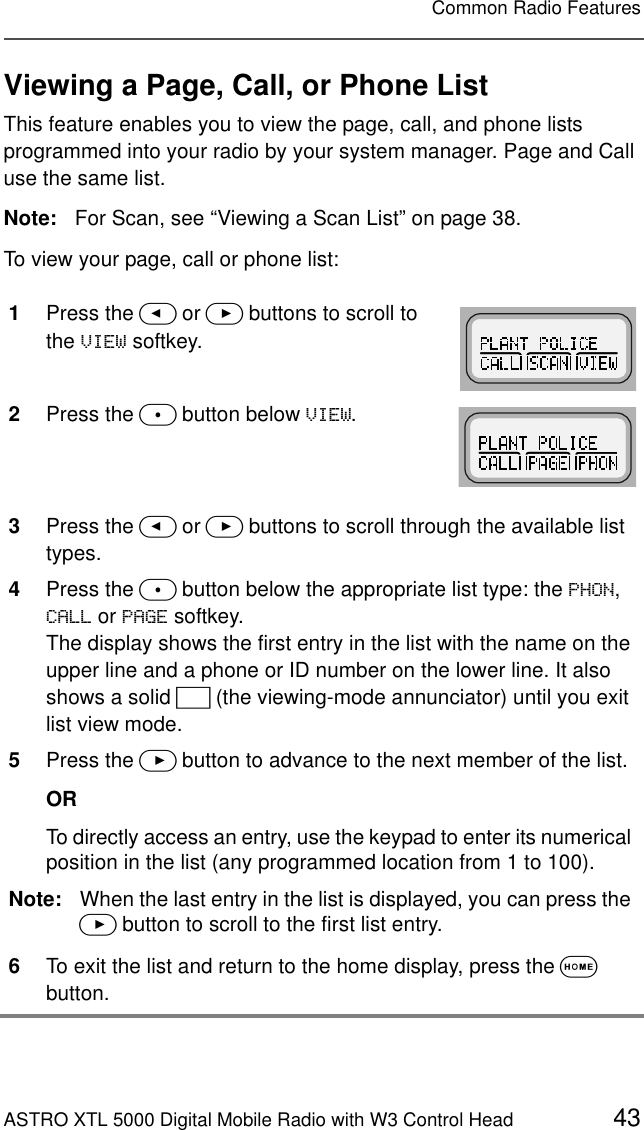
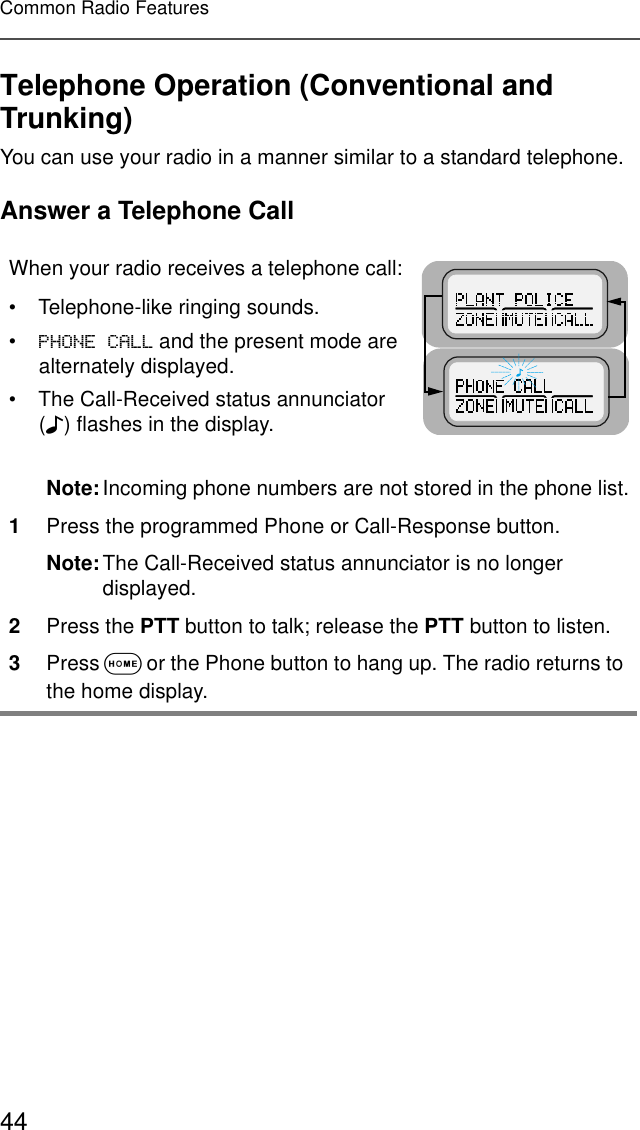
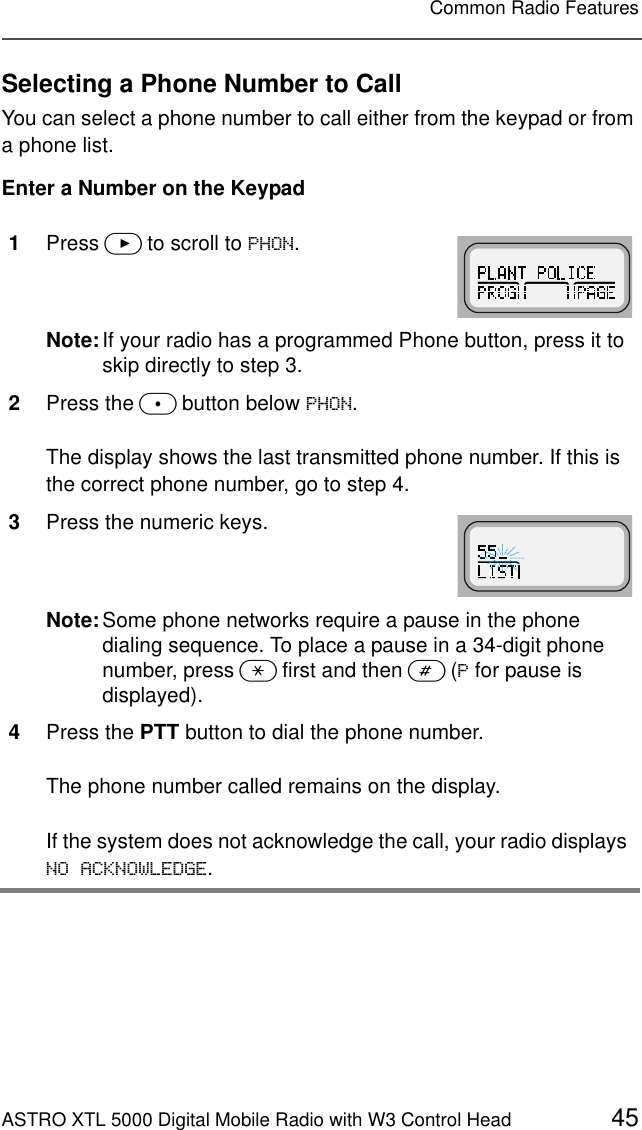
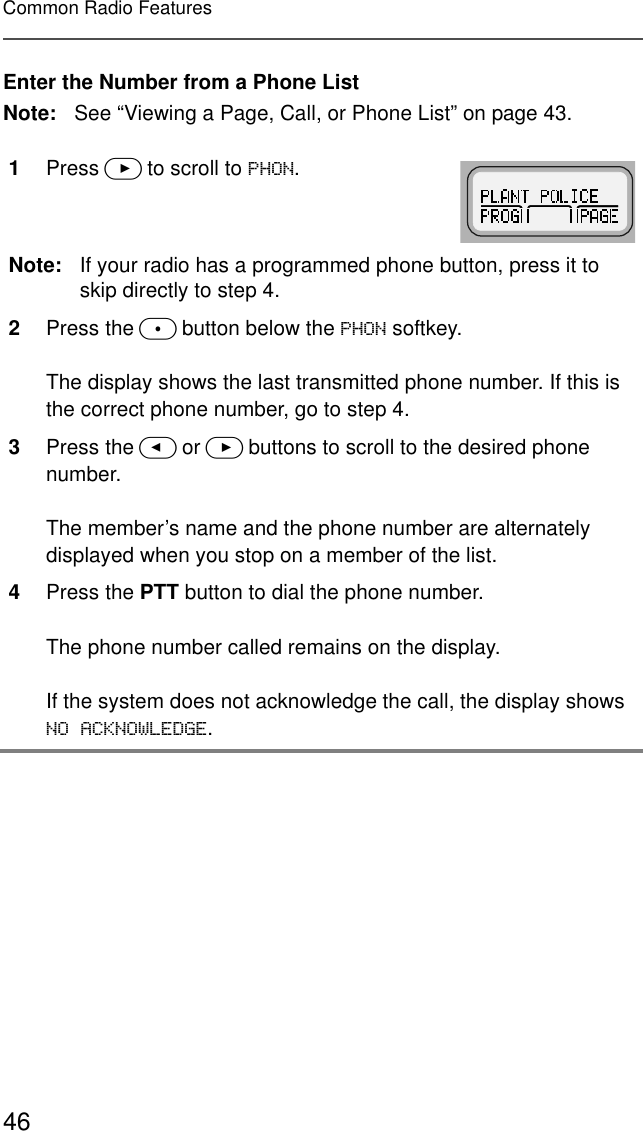


![ASTRO XTL 5000 Digital Mobile Radio with W3 Control Head 107Patent DisclosureThis product is covered by one or more of the following United States patents:4,512,035 4,551,856 4,653,117 4,816,774 4,829,594 4,837,853 4,864,2524,885,550 4,914,321 4,918,403 4,959,617 4,975,650 4,994,768 5,006,7305,021,754 5,079,526Commercial Warranty (Standard)Motorola radio communications products are warranted to be free from defects in material and workmanship for a period of ONE (1) YEAR, (except for crystals and channel elements which are warranted for a period of ten [10] years) from the date of shipment. Parts, including crystals and channel elements, will be replaced free of charge for the full warranty period, but the labor to replace defective parts will only be provided for one-hundred-twenty (120) days from the date of shipment. Thereafter, purchaser must pay for the labor involved in repairing the product or replacing the parts at the prevailing rates together with any transportation charges to or from the place where warranty service is provided. This express warranty is extended by Motorola Communications and Electronics, Inc., 1301 E. Algonquin Road, Schaumburg, Illinois 60196, to the original purchaser only, and only to those purchasing for purpose of leasing or solely for commercial, industrial, or governmental use.THIS WARRANTY IS GIVEN IN LIEU OF ALL OTHER WARRANTIES EXPRESS OR IMPLIED WHICH ARE SPECIFICALLY EXCLUDED, INCLUDING WARRANTIES OR MERCHANTABILITY OR FITNESS FOR A PARTICULAR PURPOSE. IN NO EVENT SHALL MOTOROLA BE LIABLE FOR INCIDENTAL OR CONSEQUENTIAL DAMAGES TO THE FULL EXTENT SUCH MAY BE DISCLAIMED BY LAW.In the event of a defect, malfunction, or failure to conform to specifications established by seller, or if appropriate, to specifications accepted by seller in writing, during the period shown, Motorola, at its option, will either repair or replace the product or refund the purchase price thereof, and such action on the part of Motorola shall be the full extent of Motorola’s liability hereunder.This warranty is void if:a. the product is used in other than its normal and customary manner;b. the product has been subject to misuse, accident, neglect, or damage;c. unauthorized alterations or repairs have been made, or unapproved parts used in the equipment.This warranty extends only to individual products, batteries are excluded, but carry their own separate limited warranty. Because each radio system is unique, Motorola disclaims liability for range, coverage, or operation of the system as a whole under this warranty except by a separate written agreement signed by an officer of Motorola.](https://usermanual.wiki/Motorola-Solutions/92FT4862/User-Guide-353811-Page-123.png)