Motorola Solutions 99FT4056 CP200 UHF Portable Radio User Manual 309N60 O cvr
Motorola Solutions, Inc. CP200 UHF Portable Radio 309N60 O cvr
UserManual.wiki
>
Motorola Solutions
>
99FT4056 User Manual
>
Ex 8a Users Manual
Contents
1.
Ex 8a Users Manual
2.
Ex 8b RF Safety Booklet
Ex 8a Users Manual
Navigation menu
Upload a User Manual
Namespaces
Wiki Guide
HTML
PDF
Info
Views
User Manual
Discussion / Help
Navigation


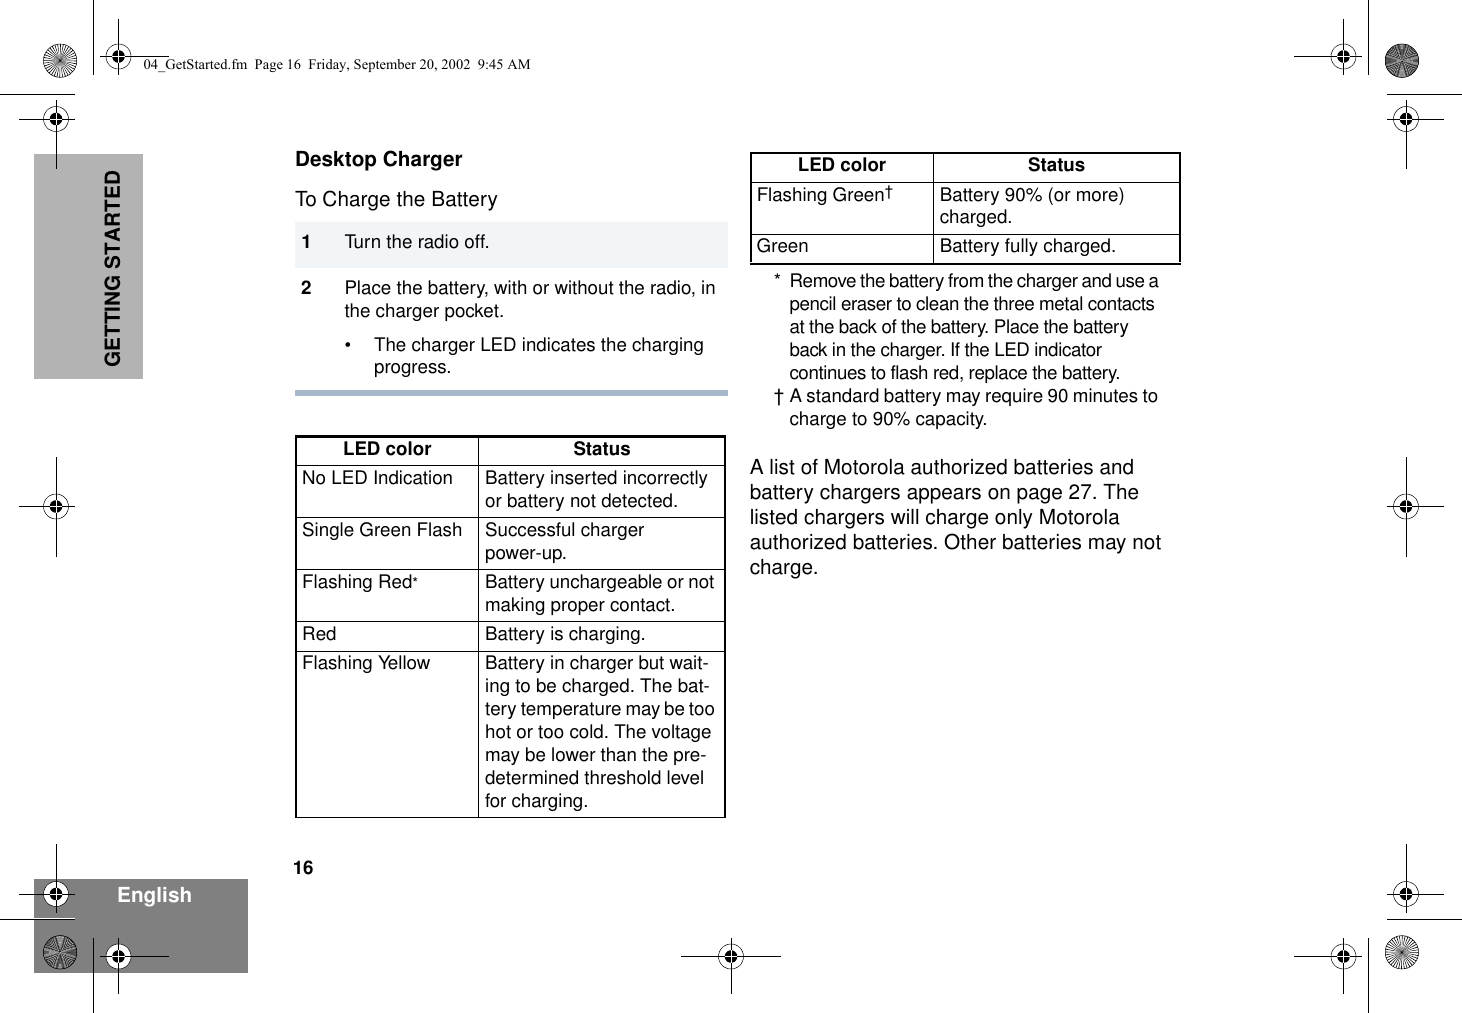
![3EnglishSAFETY AND WARRANTYSAFETY AND WARRANTYPRODUCT SAFETY AND RF EXPOSURE COMPLIANCEATTENTION! This radio is restricted to occupational use only to satisfy FCC RF energy exposure requirements. Before using this product, read the RF energy awareness information and operating instructions in the Product Safety and RF Exposure booklet enclosed with your radio (Motorola Publication part number 68P81095C98) to ensure compliance with RF energy exposure limits. For a list of Motorola-approved antennas, batteries, and other accessories, visit the following web site which lists approved accessories: http://www.motorola.com/cgiss/index.shtml.BATTERY INFORMATIONCharging BatteriesThis product is powered by a nickel-cadmium (NICd) or lithium-ion (Lilon) rechargeable battery. Charge the battery before use to ensure optimum capacity and performance. The battery was designed specifically to be used with a Motorola charger. Charging in non-Motorola equipment may lead to battery damage and void the battery warranty.Note: When charging a battery attached to a radio, turn the radio off to ensure a full charge.The battery should be at about 77°F (25°C) (room temperature), whenever possible. Charging a cold battery (below 50° F [10°C]) may result in leakage of electrolyte and ultimately in failure of the battery. Charging a hot battery (above 95°F [35°C]) results in reduced discharge capacity, affecting the performance of the radio. Motorola rapid-rate battery chargers contain a temperature-sensing circuit to ensure that batteries are charged within the temperature limits stated above.Before using this product, read the operating instructions for safe usage contained in the Product Safety and RF Exposure booklet enclosed with your radio.!C a u t i o n10_SafetyNA..fm Page 3 Thursday, September 19, 2002 4:59 PM](https://usermanual.wiki/Motorola-Solutions/99FT4056.Ex-8a-Users-Manual/User-Guide-276248-Page-4.png)