Muro MR200 MR-200 User Manual
Muro Co., Ltd. MR-200 Users Manual
UserManual.wiki
>
Muro
>
MR200 User Manual
Users Manual
Navigation menu
Upload a User Manual
Namespaces
Wiki Guide
HTML
PDF
Info
Views
User Manual
Discussion / Help
Navigation


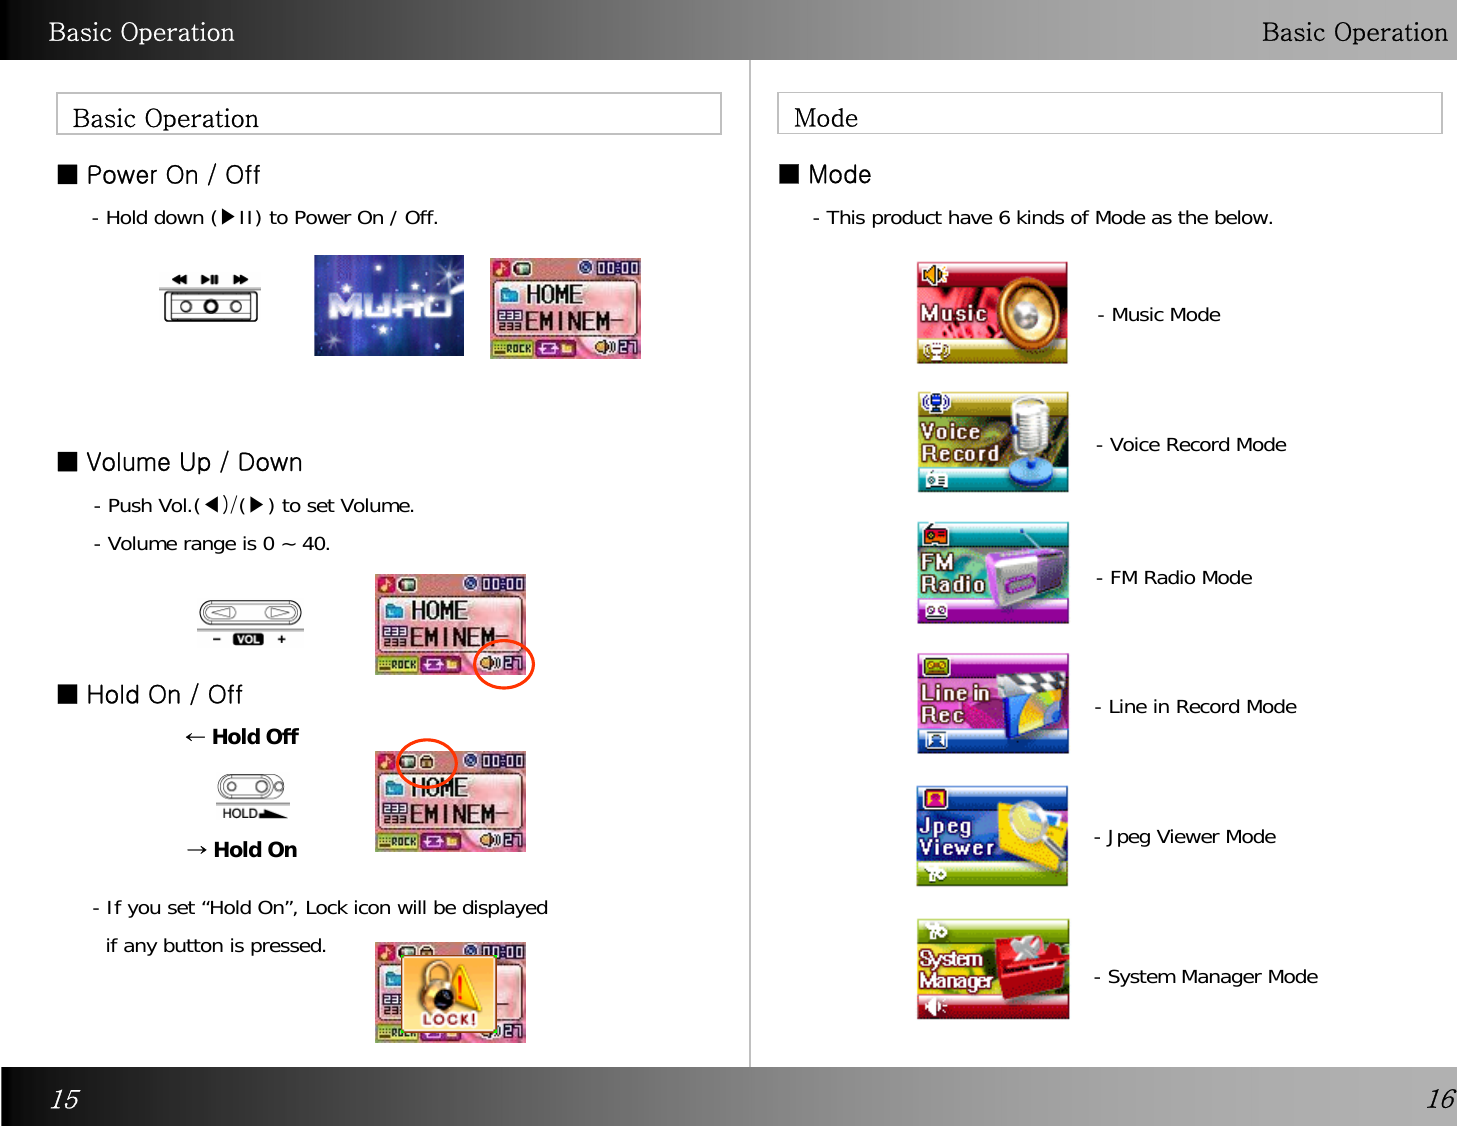
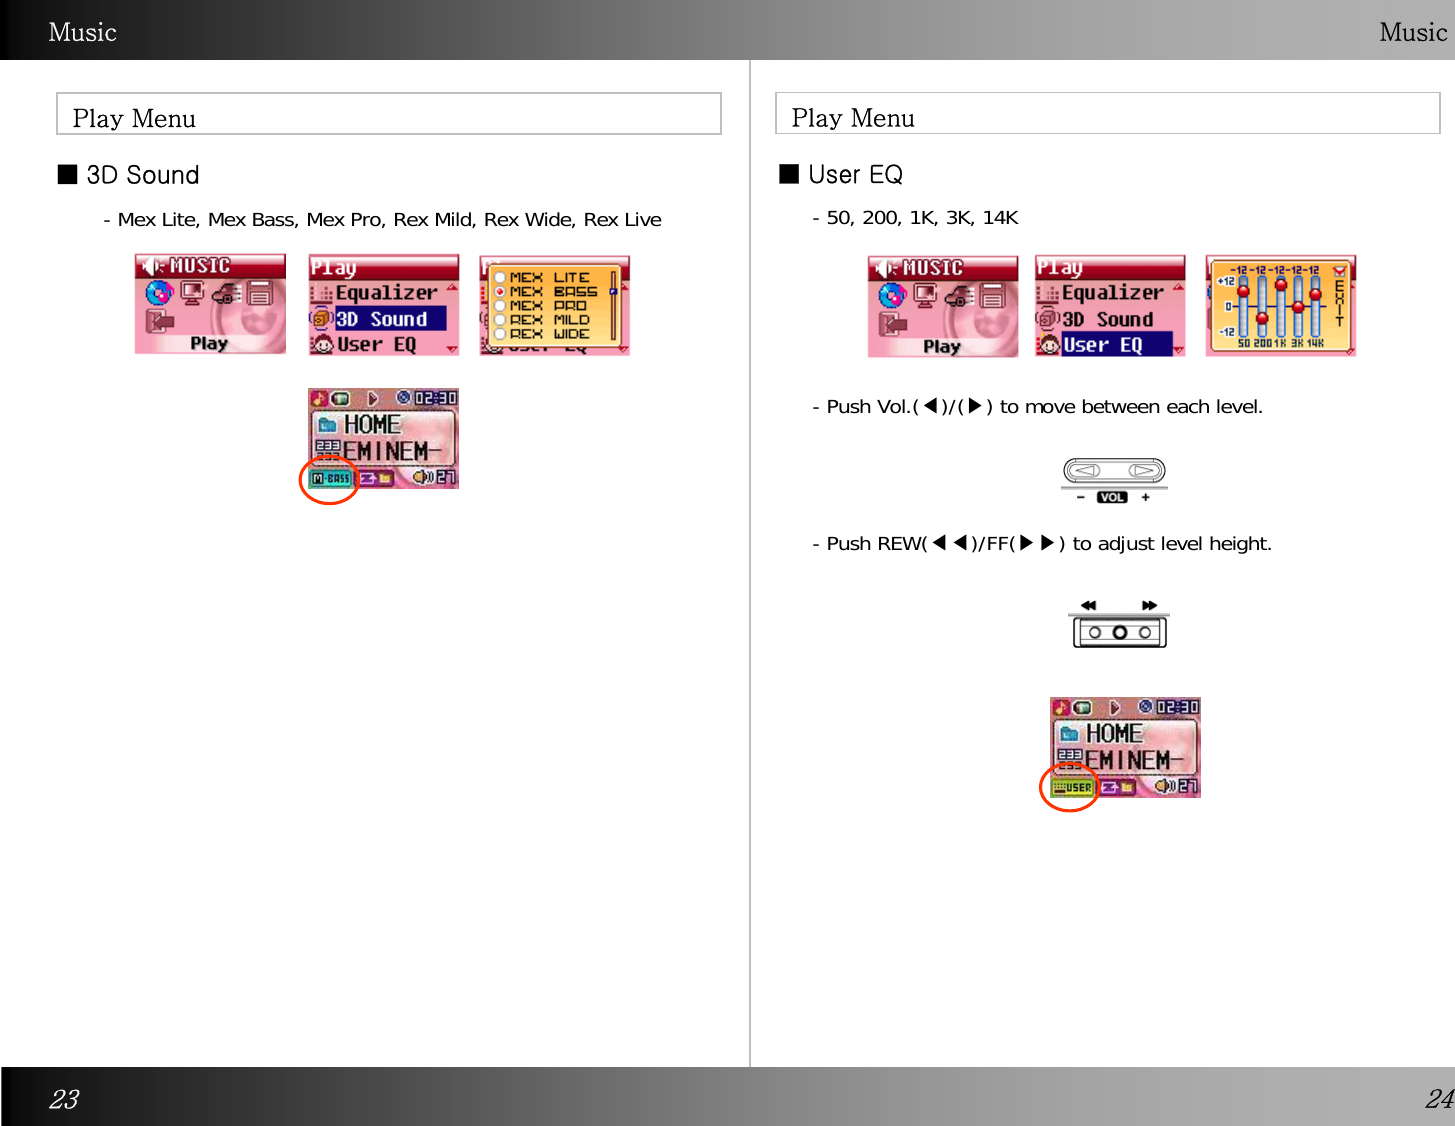
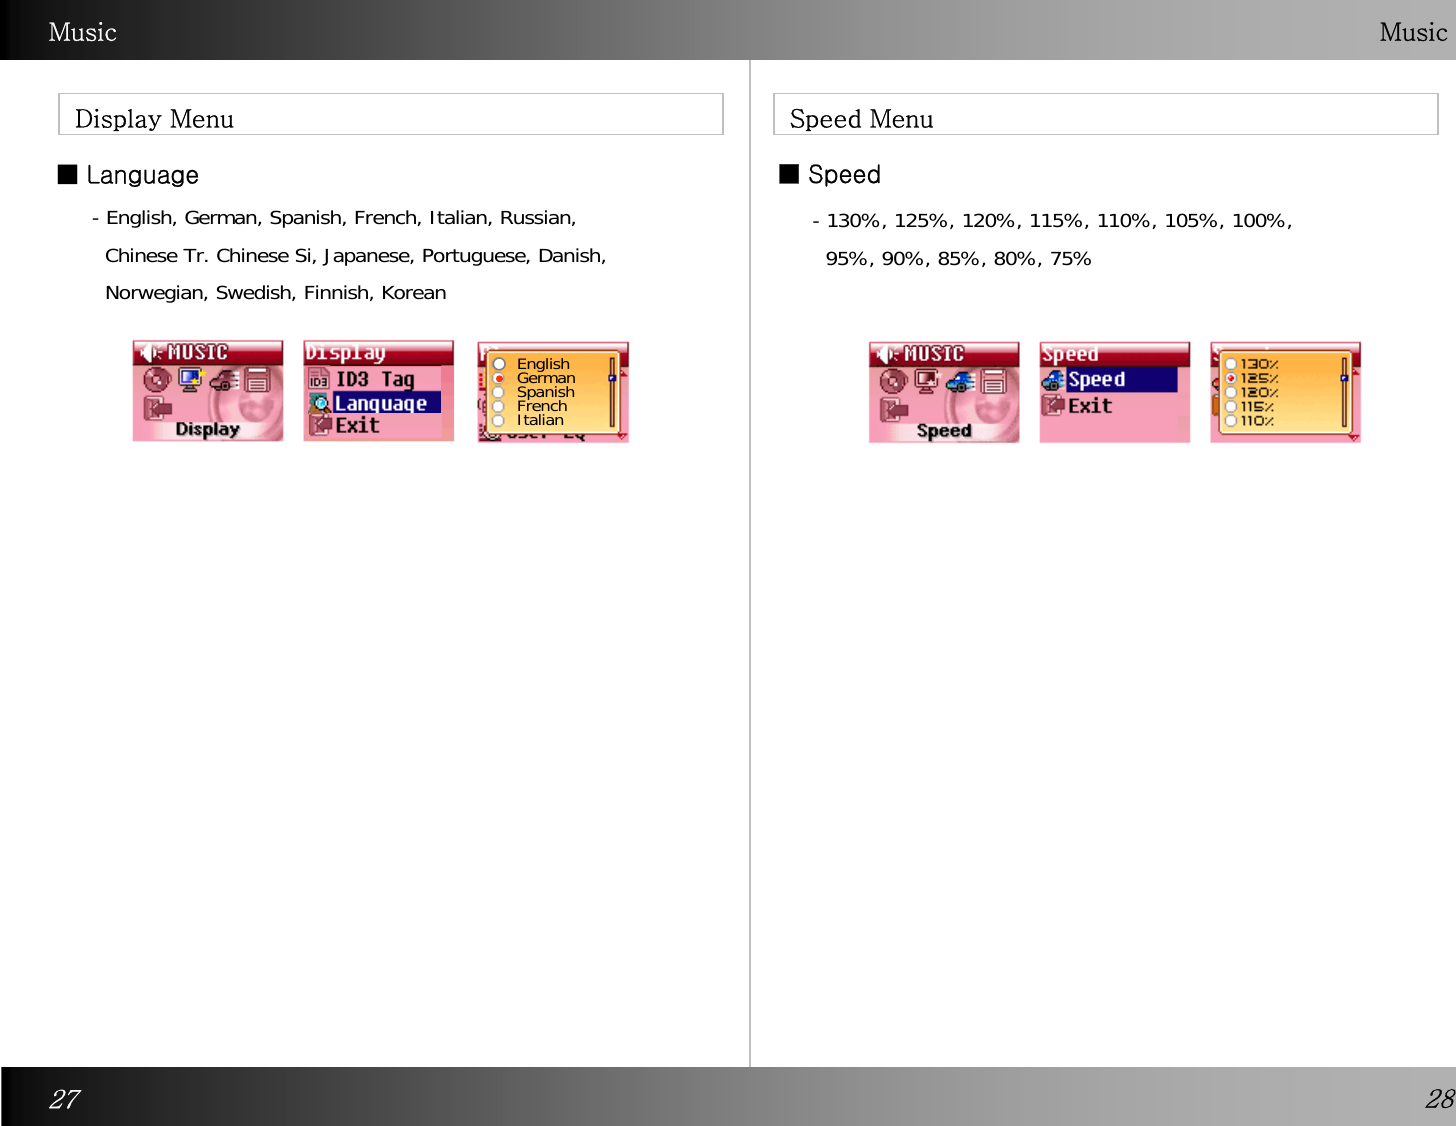
![Music Music■ Repeat Mode ■ID3 TagDisplay MenuPlay Menu- Normal, Track Once, Repeat Track, Repeat Folder, Repeat All, Shuffle Once, Shuffle Folder, Shuffle Repeat, Intro, B-Mark, B-Mark Repeat - You can turn ID3 Tag display on or off. - If you set ID3 Tag on, the name of Artist and Song display.25 26* ID3 Tag OFF* ID3 Tag ON : ID3 Information displays as the below type. File Name - [Artist Name] - [Song Name]](https://usermanual.wiki/Muro/MR200/User-Guide-560109-Page-15.png)