NEC of America KMP6J1CH Single-Band PCS GSM/ EDGE Phone with Bluetooth User Manual Manual
NEC Corporation of America Single-Band PCS GSM/ EDGE Phone with Bluetooth Manual
Contents
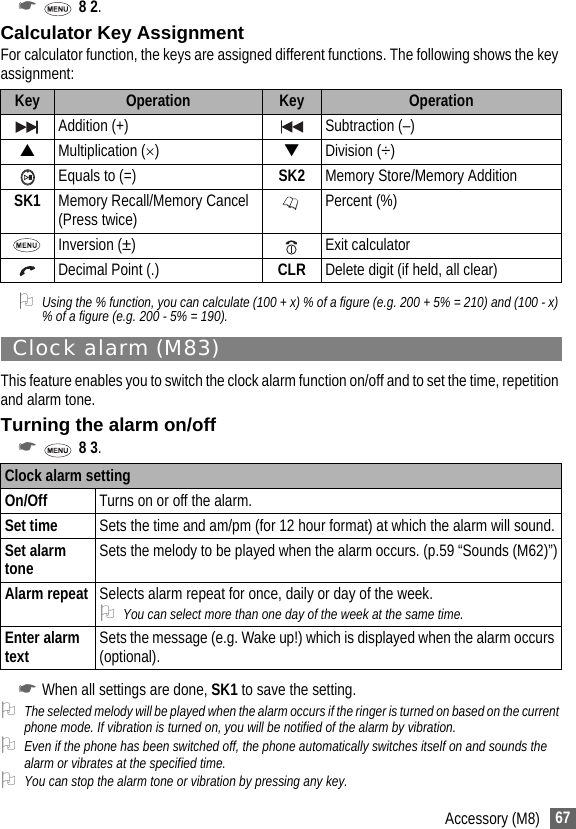
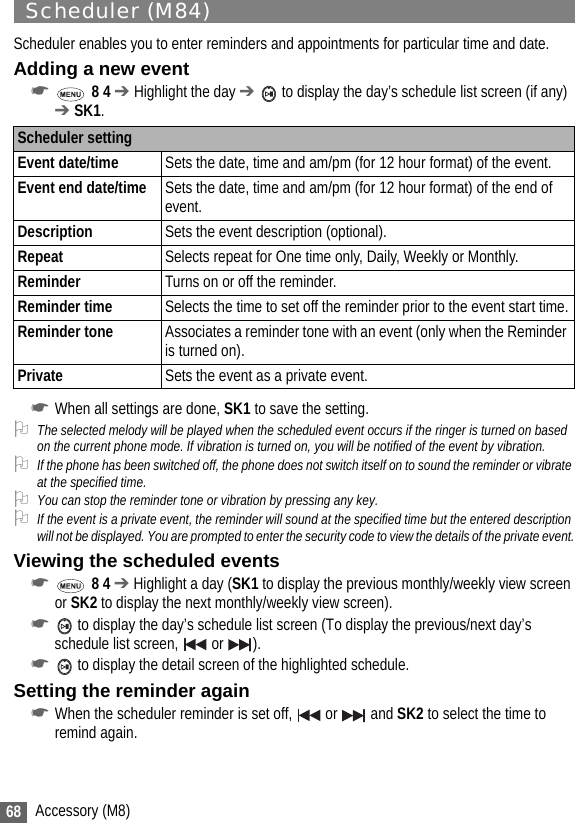
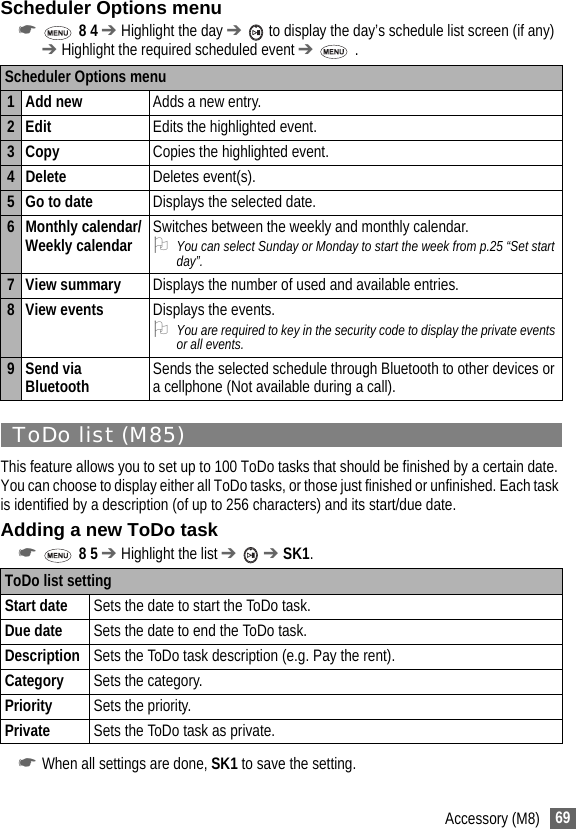
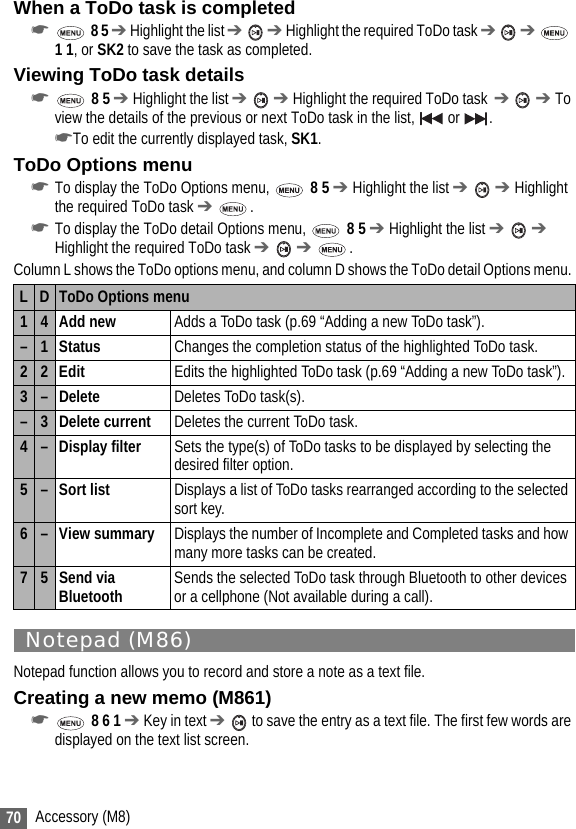
- 1. Users Manual
- 2. Supplemental Users Manual 1
- 3. Supplemental Users Manual 2
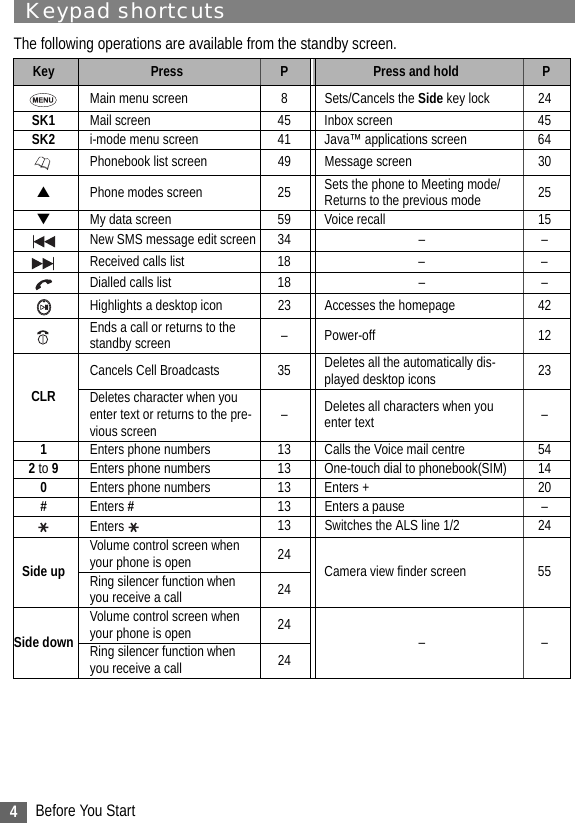
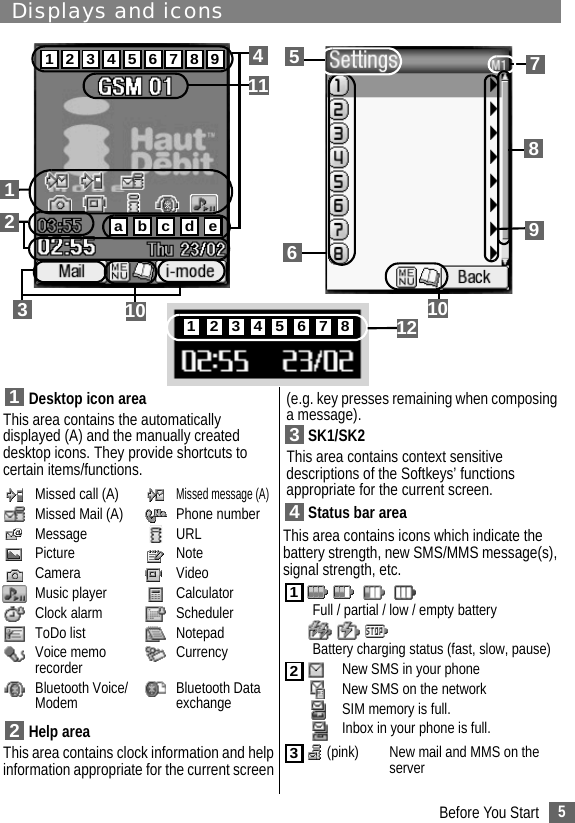
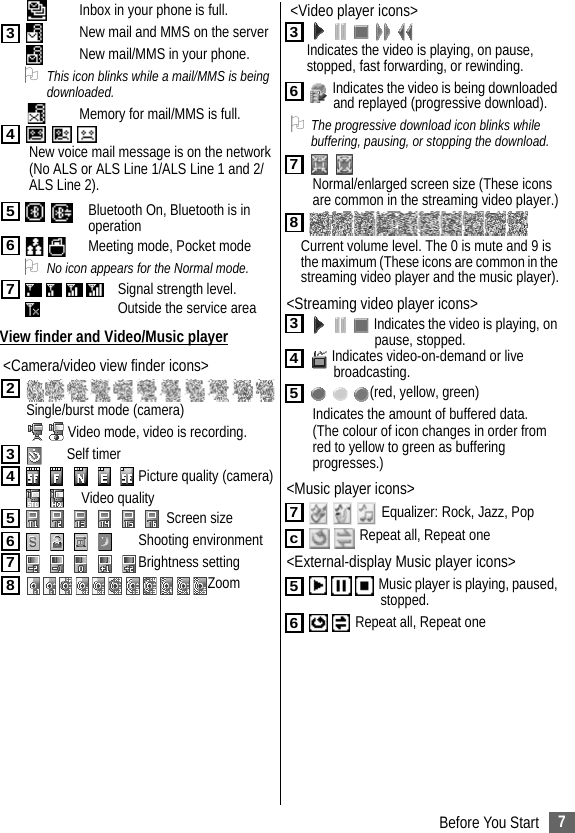
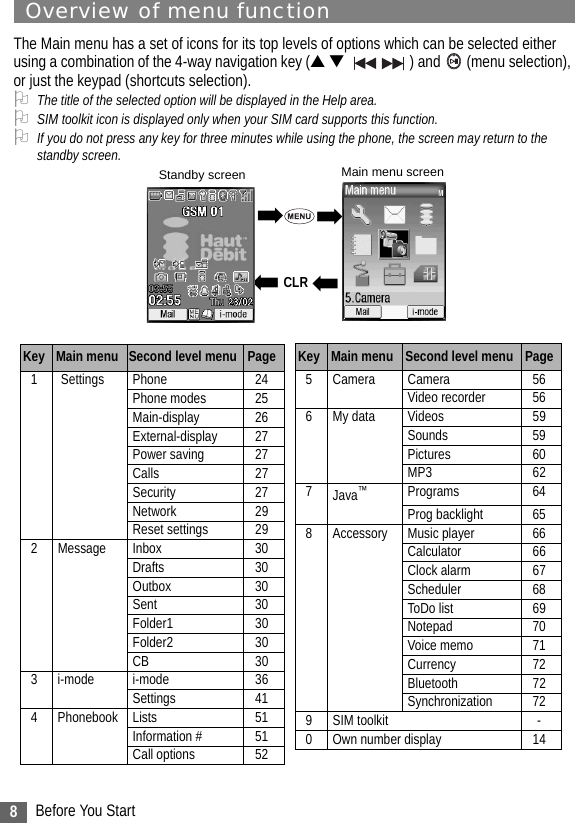
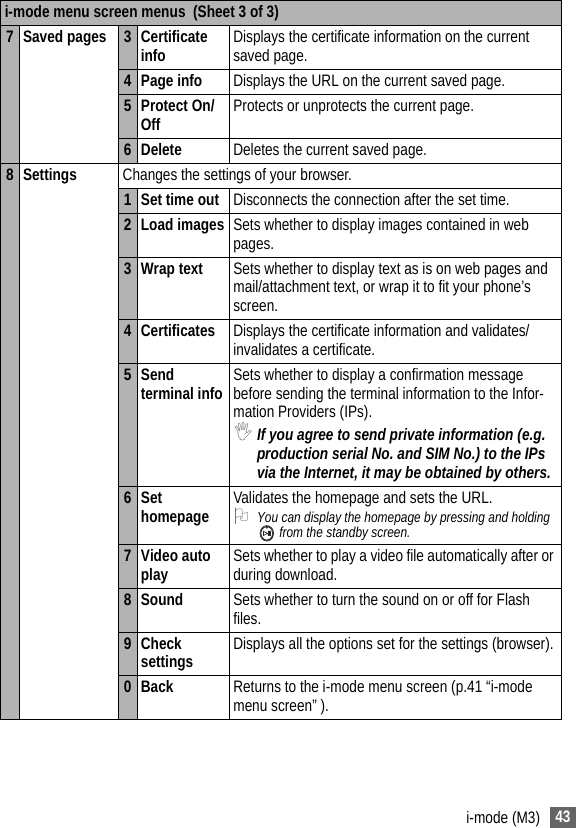
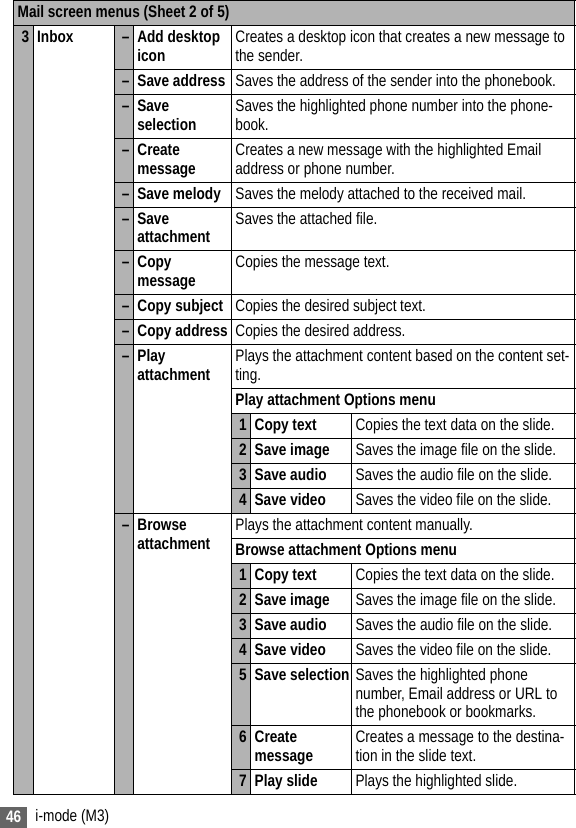
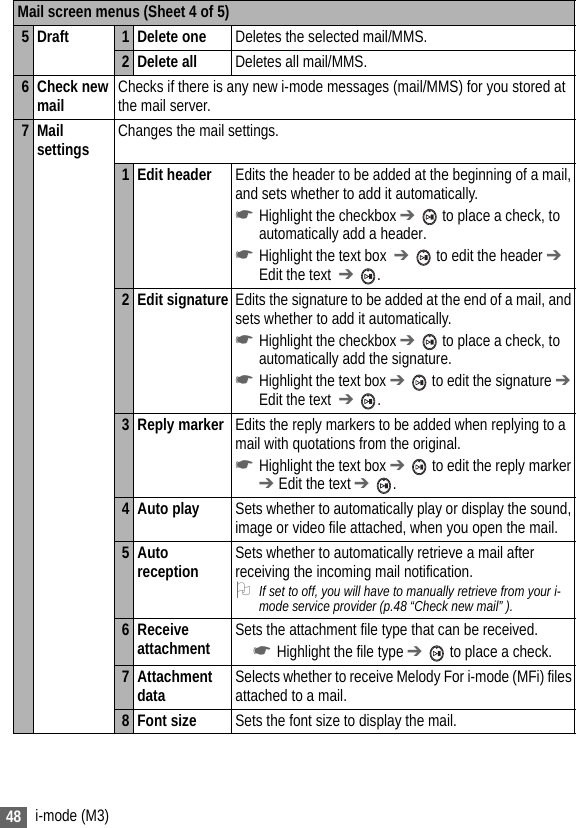
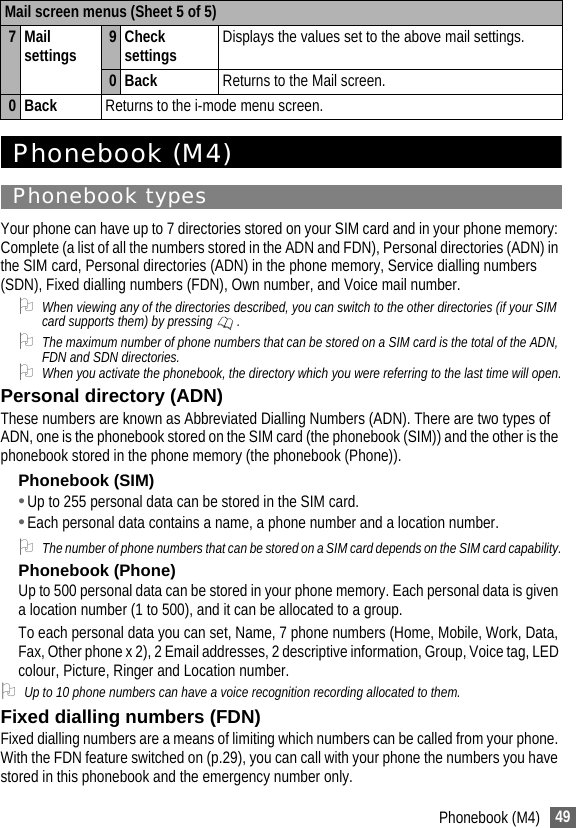
Users Manual