NEC of America LOBTC Bluetooth Cradle User Manual BT TEL E
NEC Corporation of America Bluetooth Cradle BT TEL E
UserManual.wiki
>
NEC of America
>
LOBTC User Manual
Users Guide
Navigation menu
Upload a User Manual
Namespaces
Wiki Guide
HTML
PDF
Info
Views
User Manual
Discussion / Help
Navigation

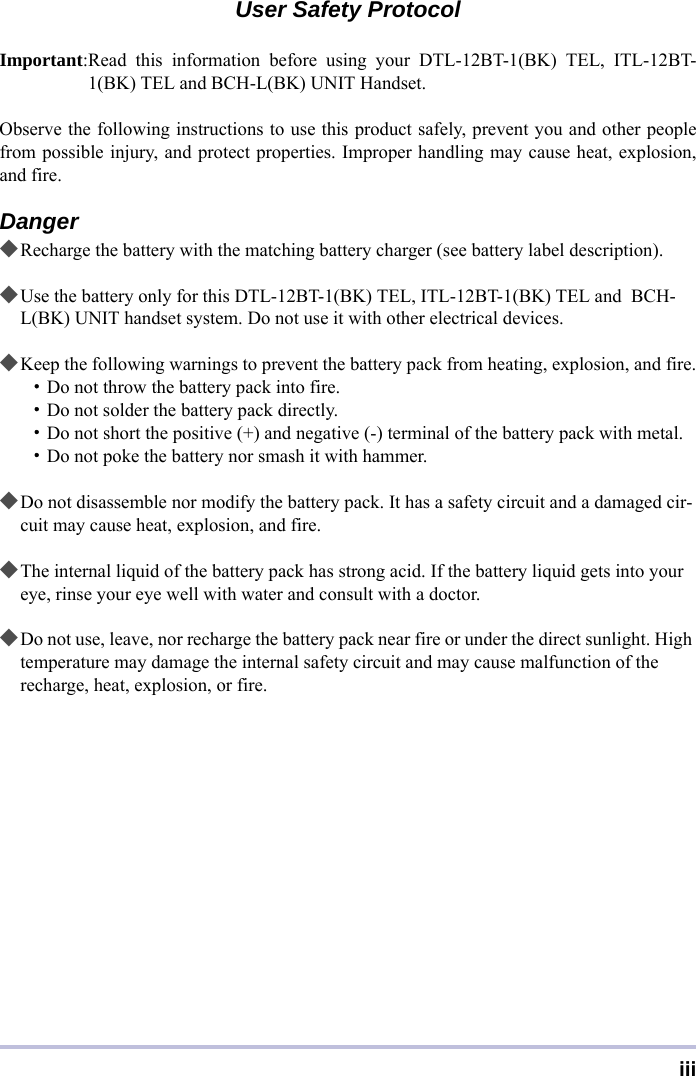


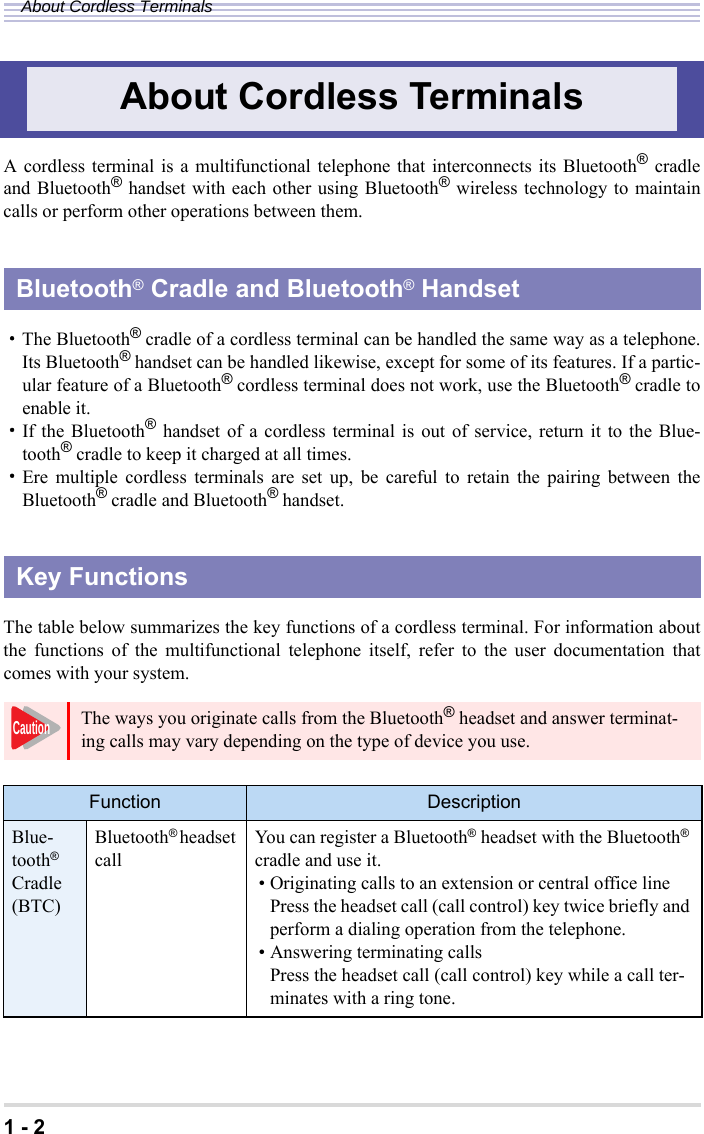
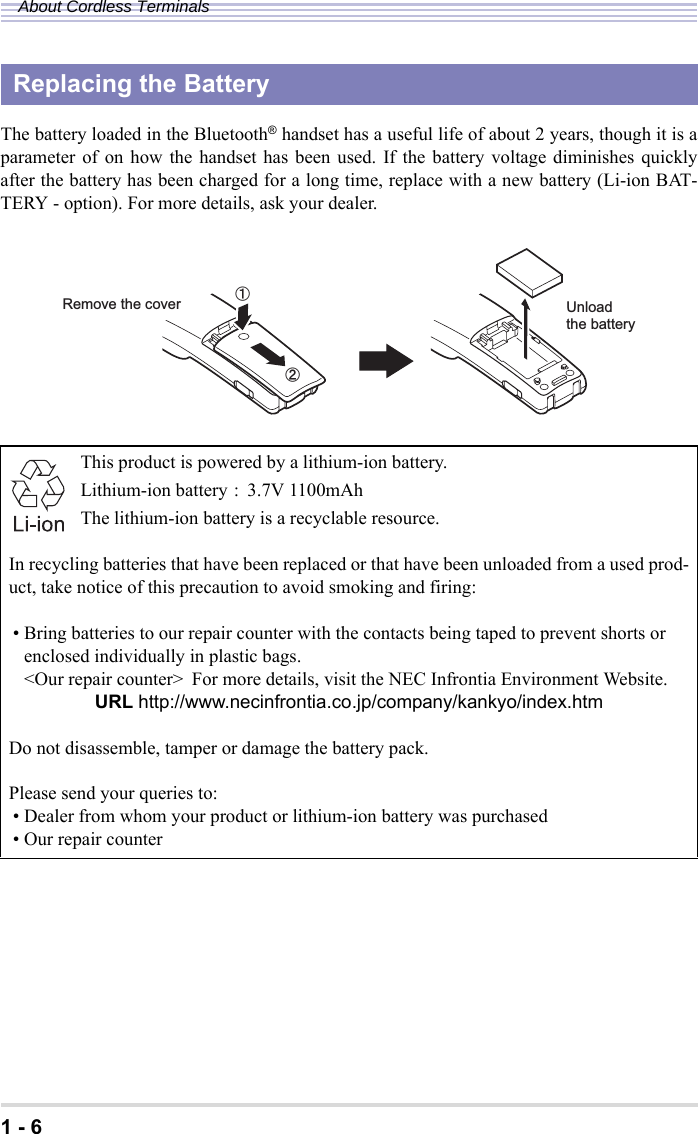


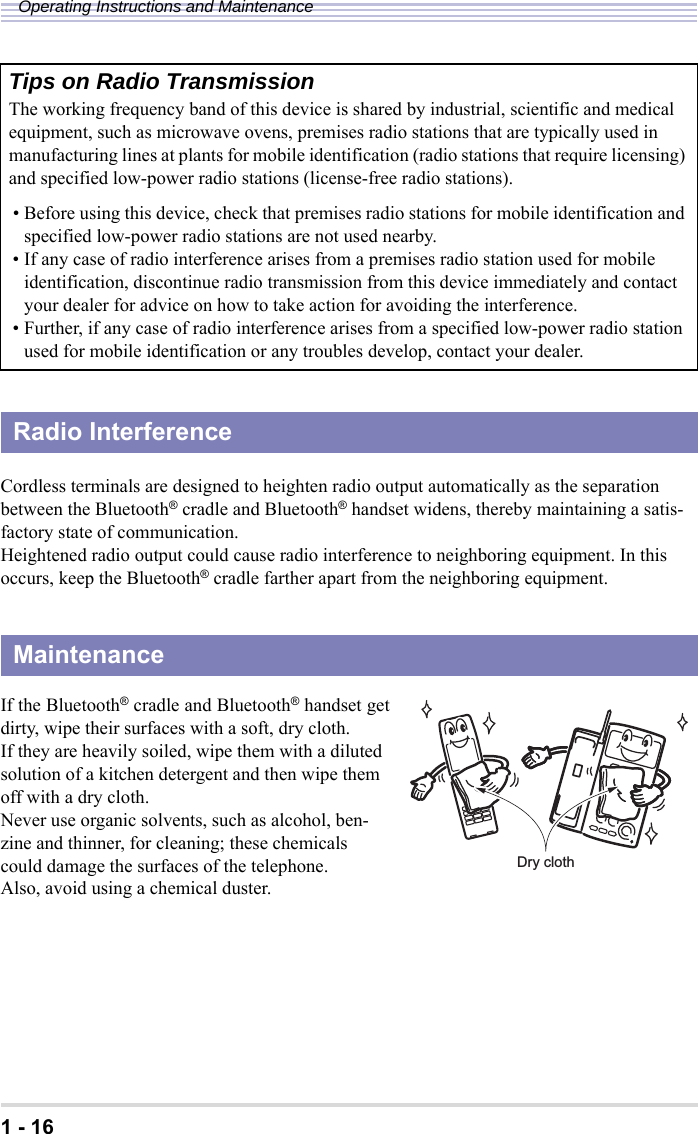
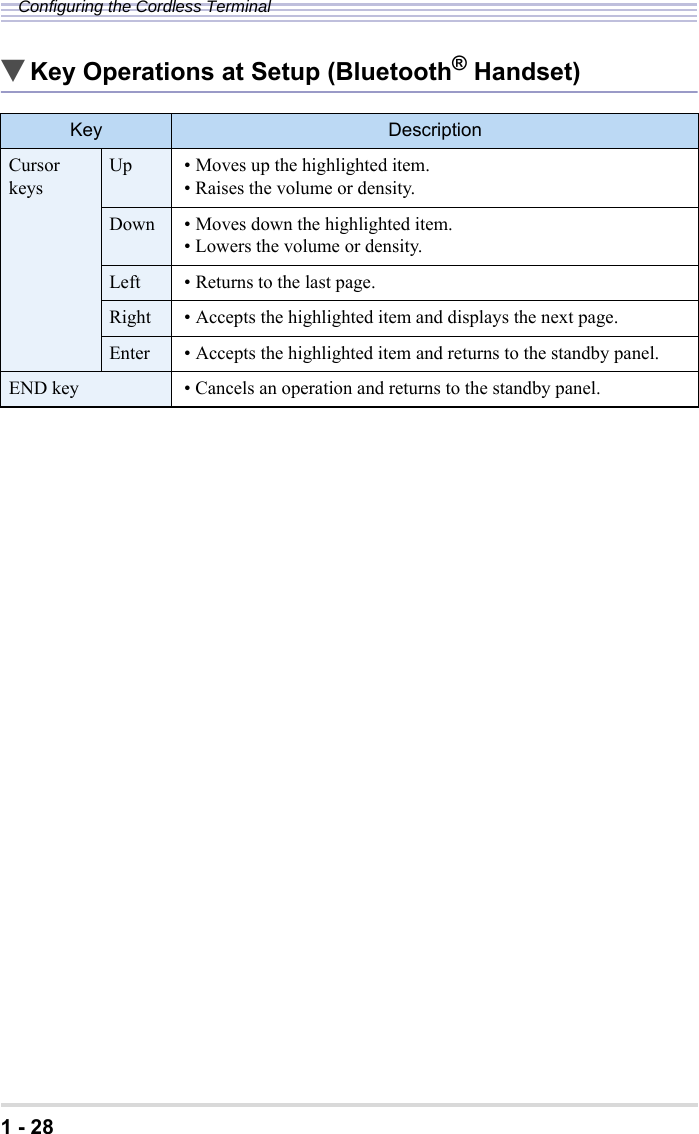
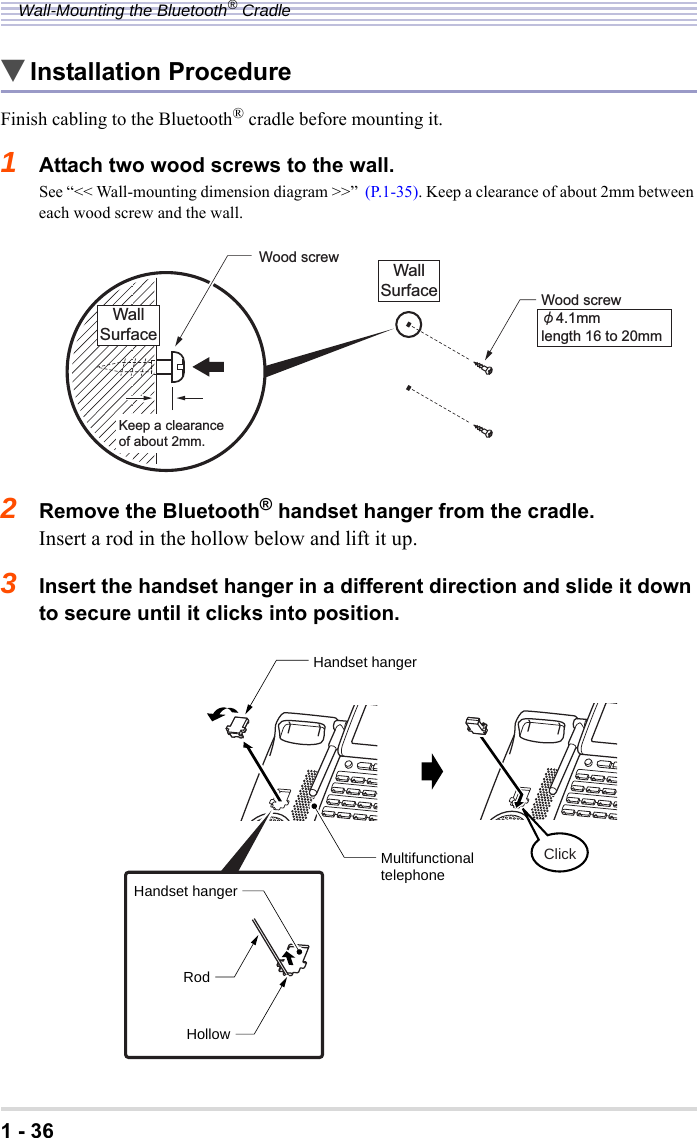
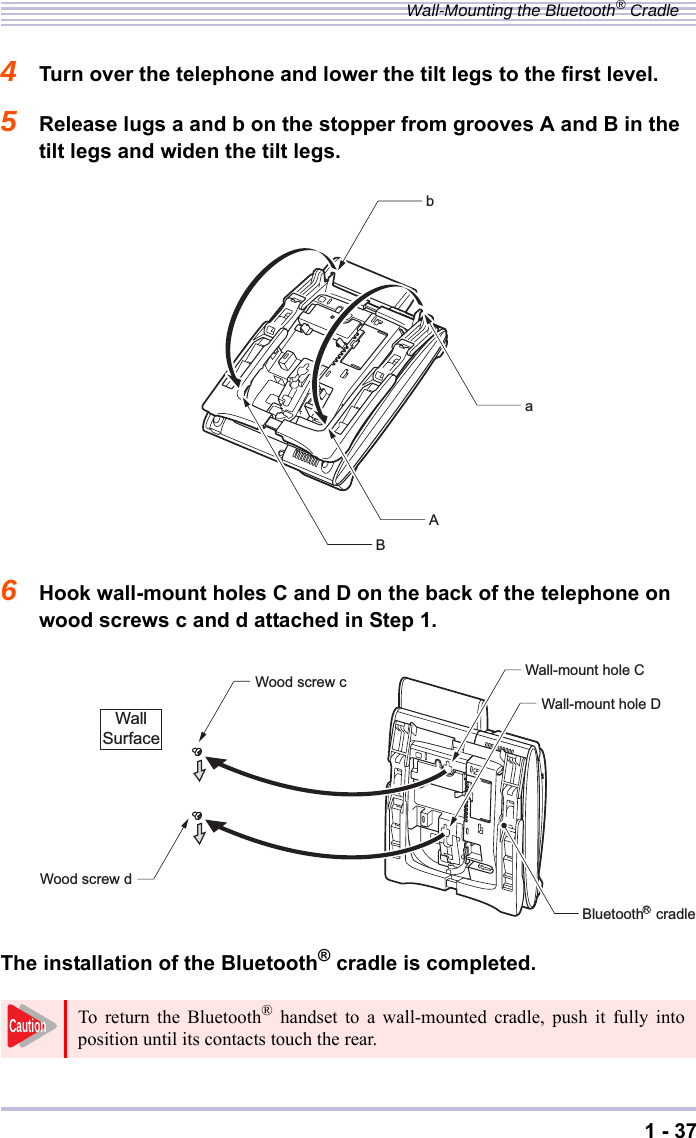
![1 - 19Component Names and FunctionsBluetooth® Handset (BTH)Back RightsideHOLDTRFCONF Recall@ ABC DEFGHI JKL MNOPQRS TUV WXYZHOLDRecallCONFFNCTRFFNC㨇 ޓޓ㨪ޓޓ 㨉㨇ޓޓ㨉㨇ޓޓ㨉㨇ޓ 㨉㨇ޓޓ 㨪ޓ ޓ㨉[ ޓ ] 㨪[ ޓ ] [ޓ ][ޓ ]㨇ޓޓ㨉㨇ޓޓ㨉 [ ޓ ]Incoming call/charging lampHeadset jackCorsur keyUse to accept the terminating or originating call history displayed in the LCD screen or and make a call.Use to adjust tone volumes ordisplay densities.Volume Up/Down key:Received History key:Use to view a history ofterminating calls.Enter key:Call History key:Use to view a history of originatingcalls.Transfer keyUse to forward a call to an extension or central office line.FNC/Conference key (with lamp)Use to call an extention or answer a call. This key can also be used to on the man unit as a FNC (functionkey) key. A setting on the man unit is required to use this key as a FNC key. For more details, refer to the user dcocumentation that comes with your system.TALK key(with lamp)Use to originate a call to an extension or central office line or answer a terminating call.Indicates the sutatus of a terminating call and in progress, and the status of charging.Accepts a wireheadset.㨇ޓޓ㨉 LCD screen (with backlight)Displays various information according to the status of the telephone, such as a clock, remote party information, originating and terminating call histories and menues.Line keys 1 to 8 (with lamp)Access the functions preporgrammed on function buttons 1 to 8 on the cradle. Also display the status of the functions preprogrammed on the buttons.HOLD keyUse to place extention or central office line calls on hold.Recall keyUse to forward calls on a private exchange (PBX) or receive the call waiting service feature.END key (Disconect)Use to clear a call.Dial keys 1 to # (with backlight)Charging terminals@](https://usermanual.wiki/NEC-of-America/LOBTC/User-Guide-894629-Page-29.png)
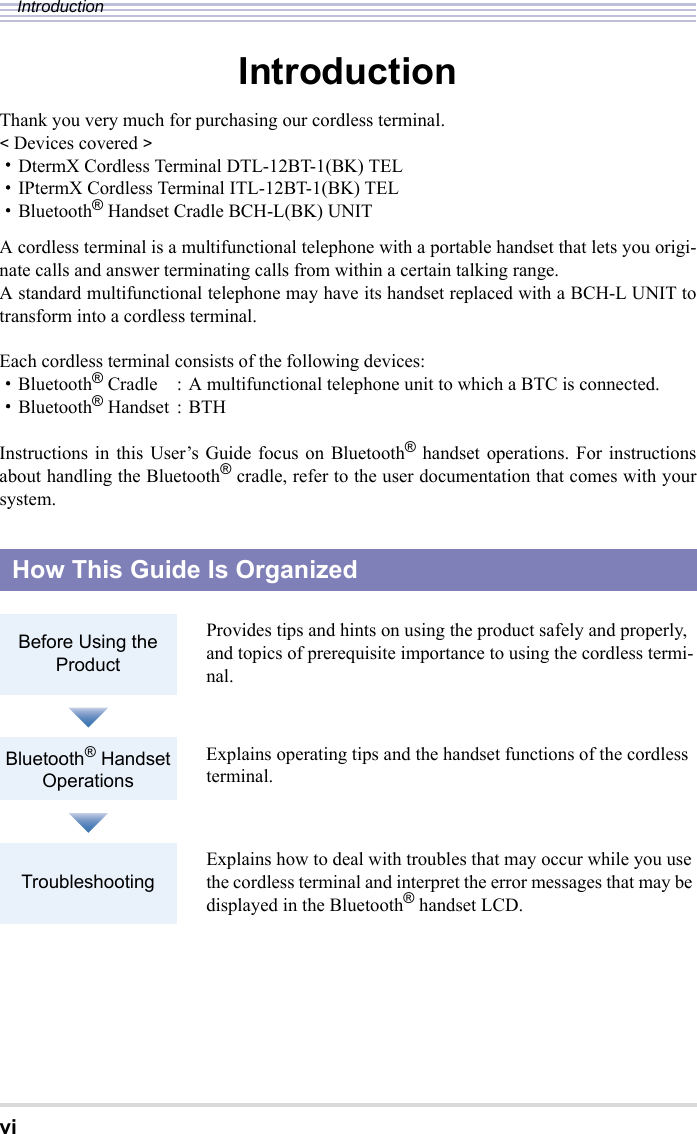
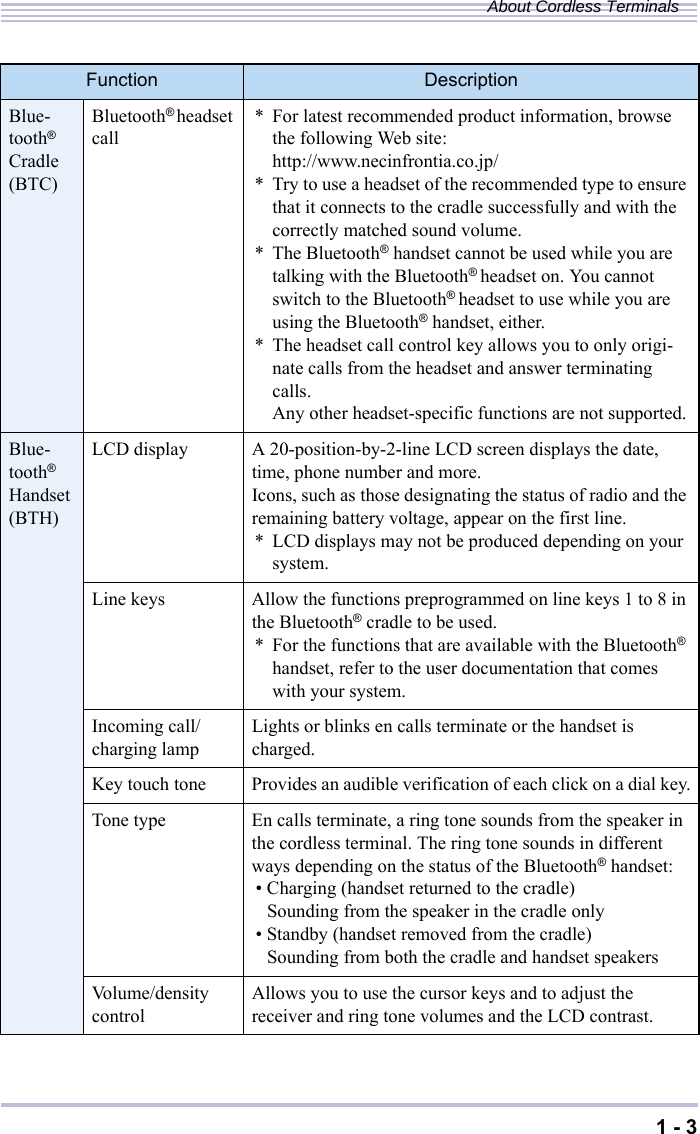
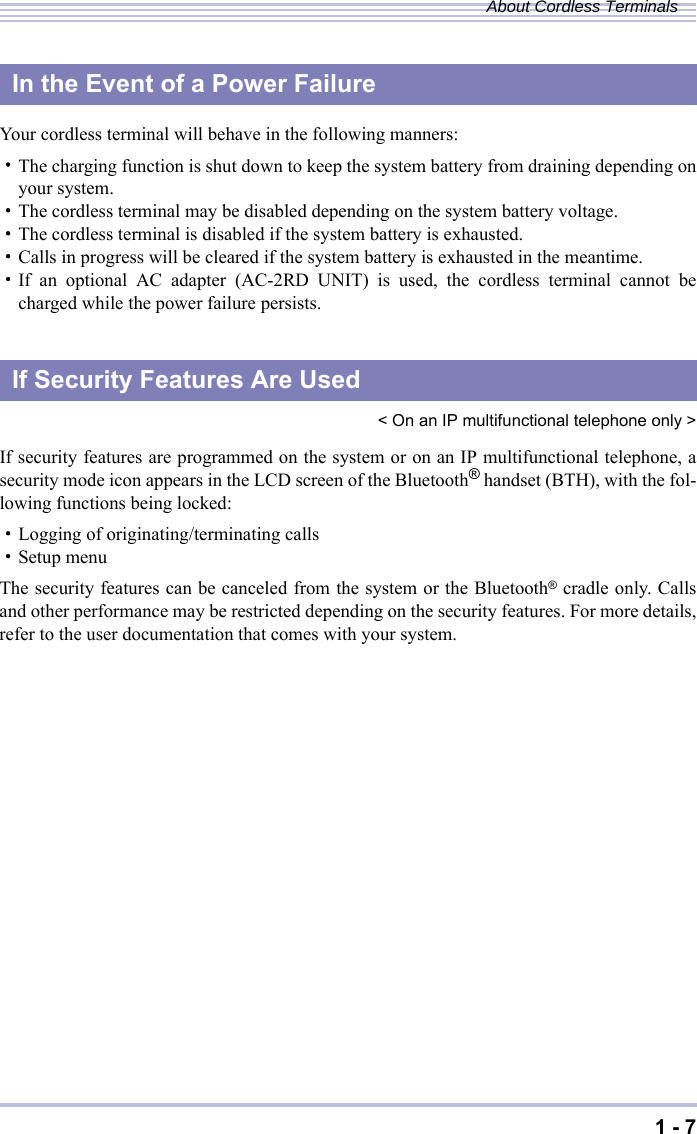
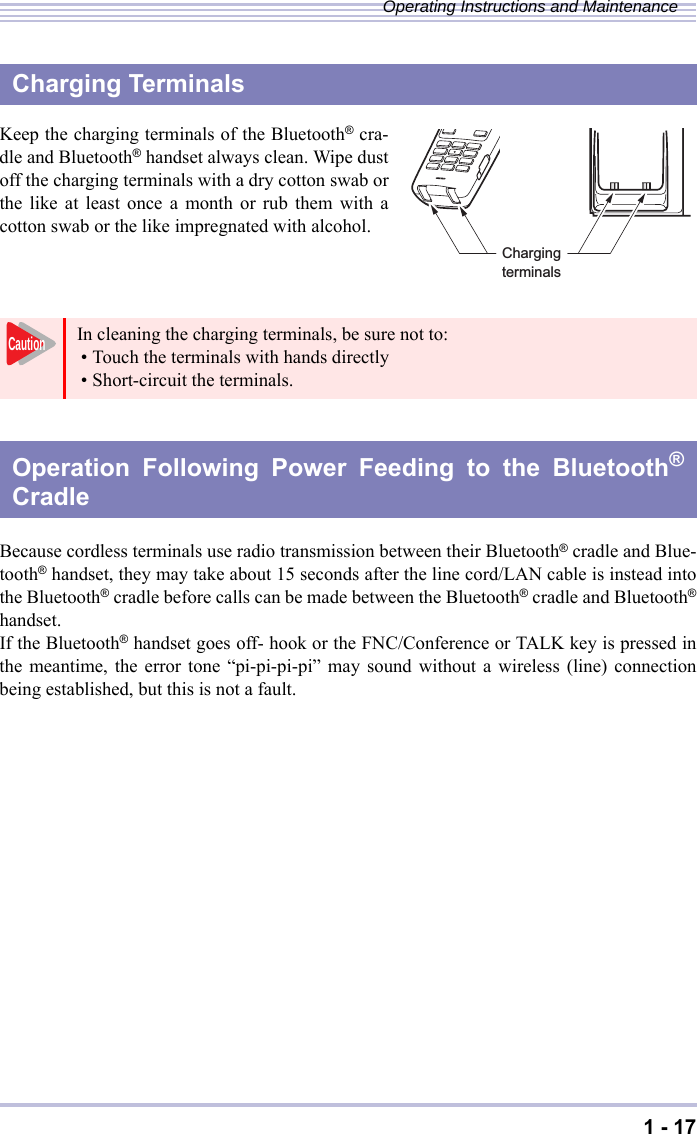
![1 - 25Configuring the Cordless TerminalStart configuring Bluetooth® from the cradle setup menu.The table below lists the setting of each setup item.Configuring the Cordless TerminalConfiguring the Bluetooth® Cradle (BTC)Menu display Setting ([ ] default) ExplanationPairing Mode Pairing - Up to 8 Bluetooth® devices located around the Bluetooth® cradle (BTC) are located, among which select a headset want to pair with the multi-functional telephone.For more details, see “Pairing with a Bluetooth® Headset” (P.1-38).PIN Code 4 to 16digits [0000]Before pairing, you need to adjust the PIN Code of the Bluetooth® cradle (BTC) and the Blue-tooth® headset.In pairing with a Bluetooth® headset having a PIN Code other than 0000, enter a string of 4 to 16 digits to suit that device.For more details, see “Pairing with a Bluetooth® Headset” (P.1-38).* The PIN Code is a password that is exchanged between Bluetooth® devices preparatory to launching a session of communication between them.Visibility 1. Disable [2. Enable] Set ether to make information about the Blue-tooth® cradle (BTC) visible to other Bluetooth® devices or not.• Disable : Invisible• Enable : Visible](https://usermanual.wiki/NEC-of-America/LOBTC/User-Guide-894629-Page-35.png)
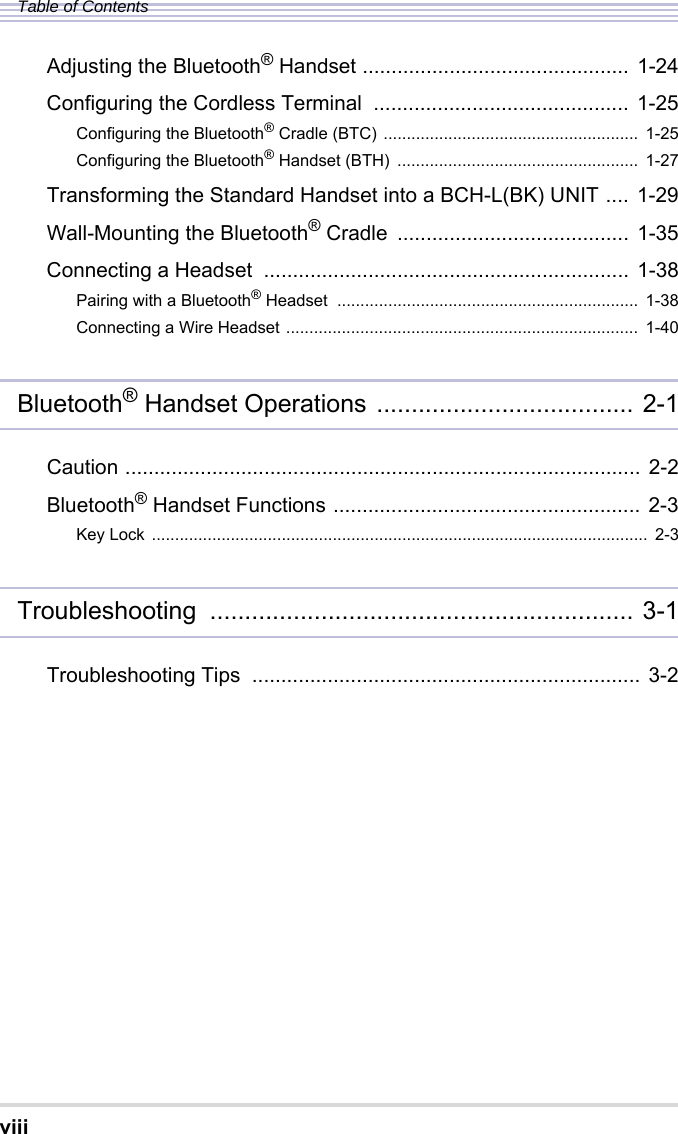
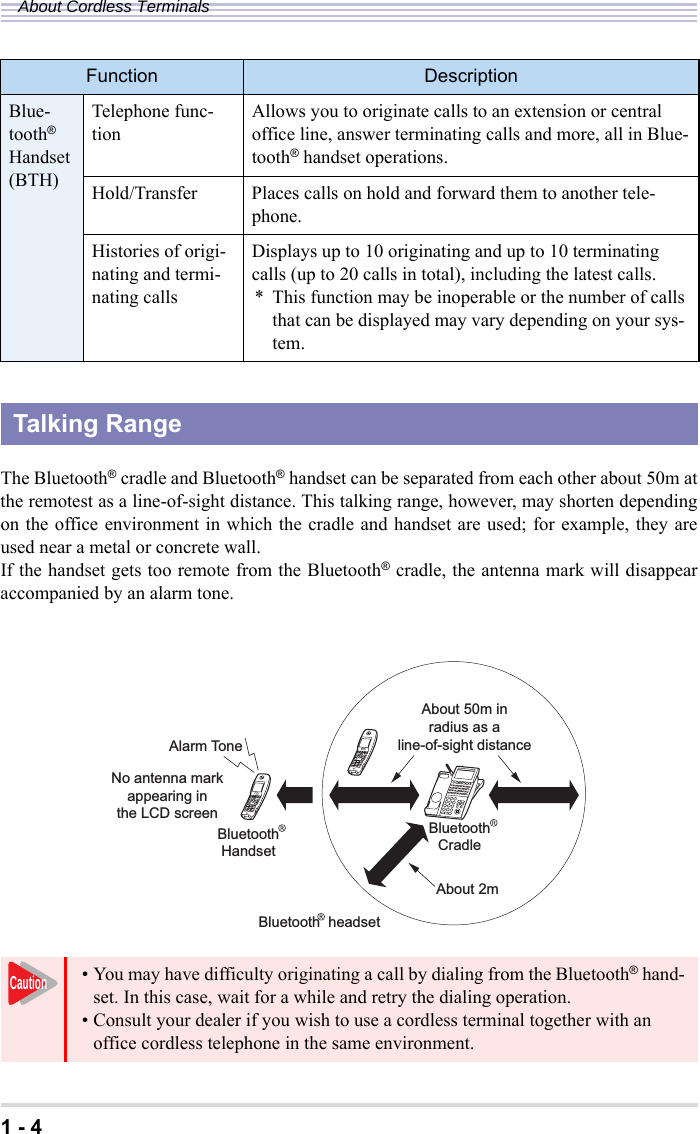
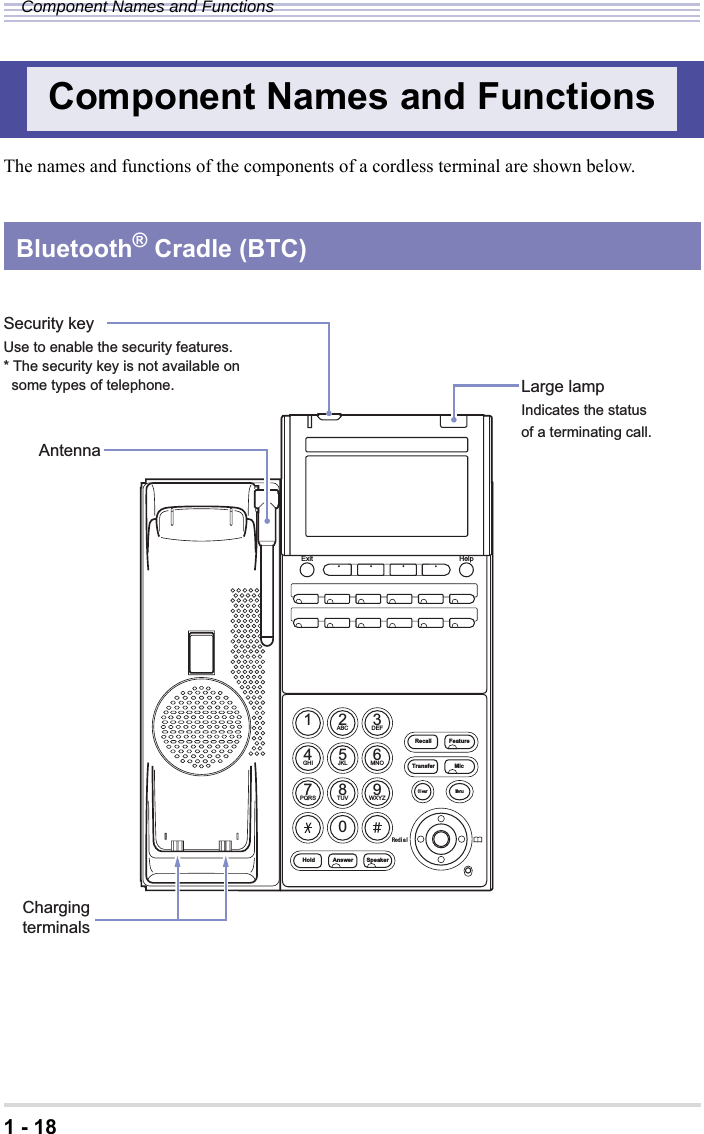
![1 - 26Configuring the Cordless Terminal▼Key Operations at Menu Setup (Bluetooth® Cradle)BT Information - You can view the following kinds of information about the Bluetooth® cradle (BTC):• Firmware version• Hardware version• BT module• BT profile (Bluetooth® standard)• SPP (SPP profile version)• HSP (HSP profile version)• HFP (HFP profile version)• Device address•Device nameKey DescriptionCursor keys Up • Moves up the highlighted item.• Raises the volume or density.Down • Moves down the highlighted item.• Lowers the volume or density.Left • Returns to the last page.Right • Accepts the highlighted item and displays the next page.Enter • Accepts the highlighted item and displays the next page.• Saves the change and returns to the last page.Dial keys • Accept the item of a number pressed and display the next page.• Save the change to a number pressed and return to the last page.• Enter numerals.Clear key • Returns to the last page.• Deletes one numeral.* The clear key is not available on some types of telephone.Exit key • Cancels an operation and returns to the standby panel.You cannot originate calls or answer terminating calls while the Bluetooth® menu setup is in progress. Exit the menu before originating calls or answering terminating calls.Menu display Setting ([ ] default) ExplanationCaution](https://usermanual.wiki/NEC-of-America/LOBTC/User-Guide-894629-Page-36.png)
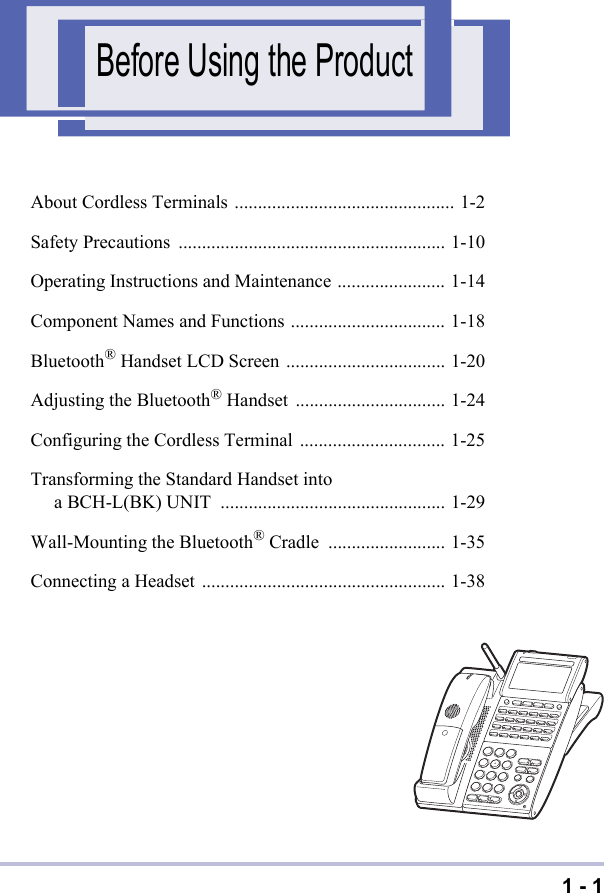
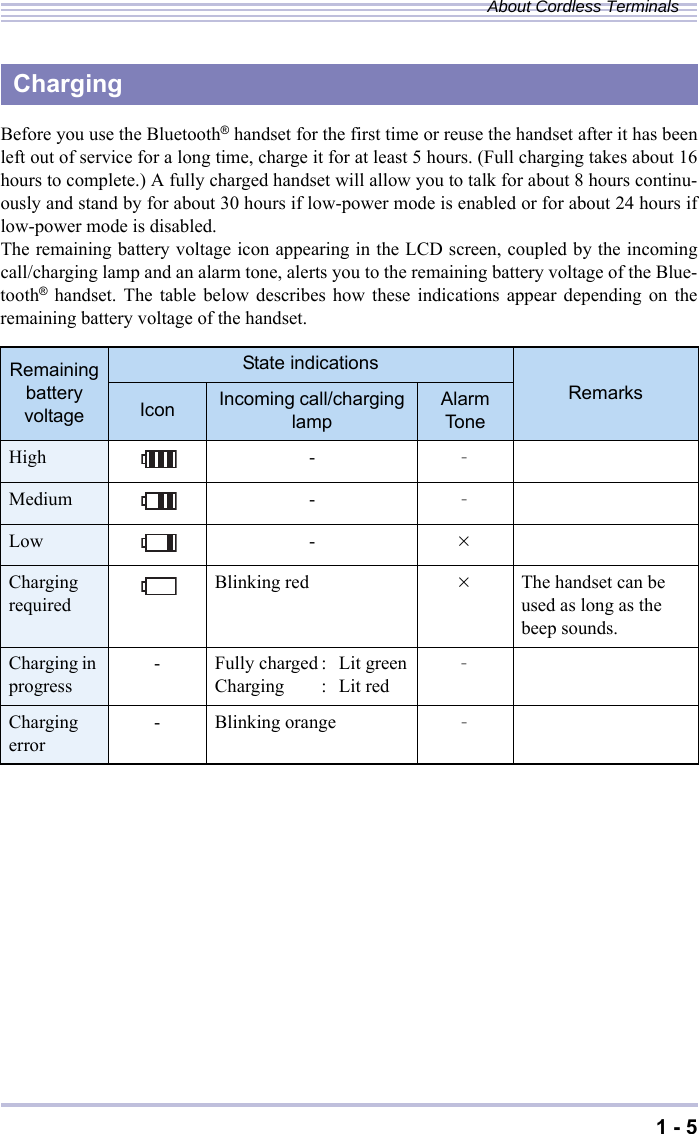
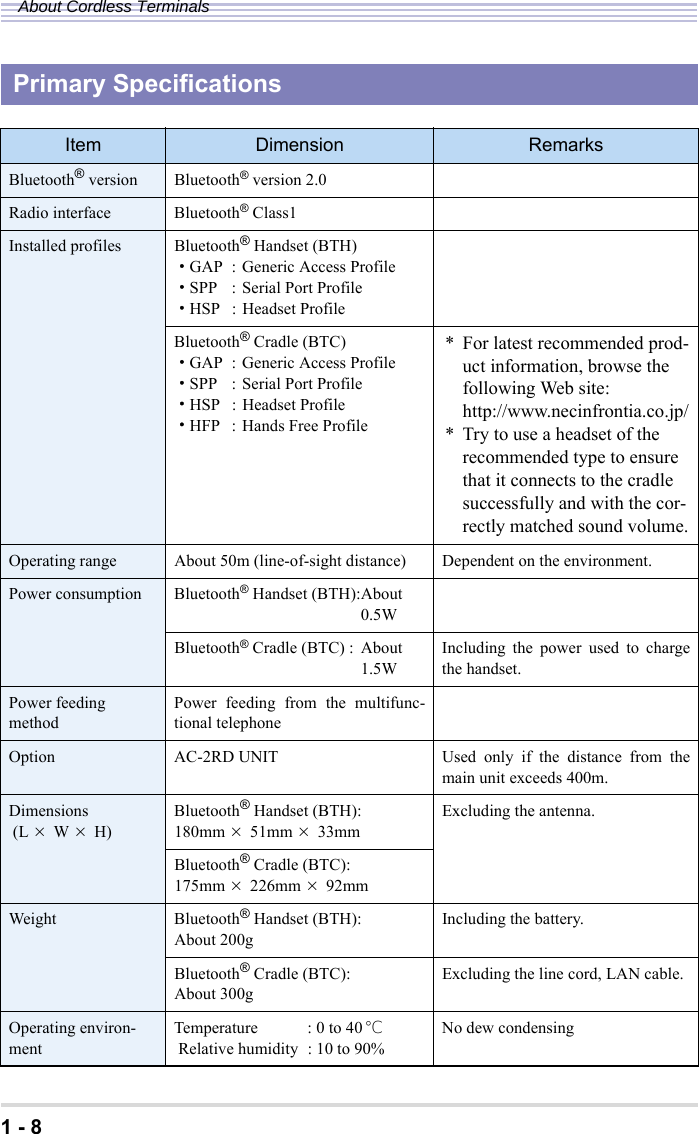
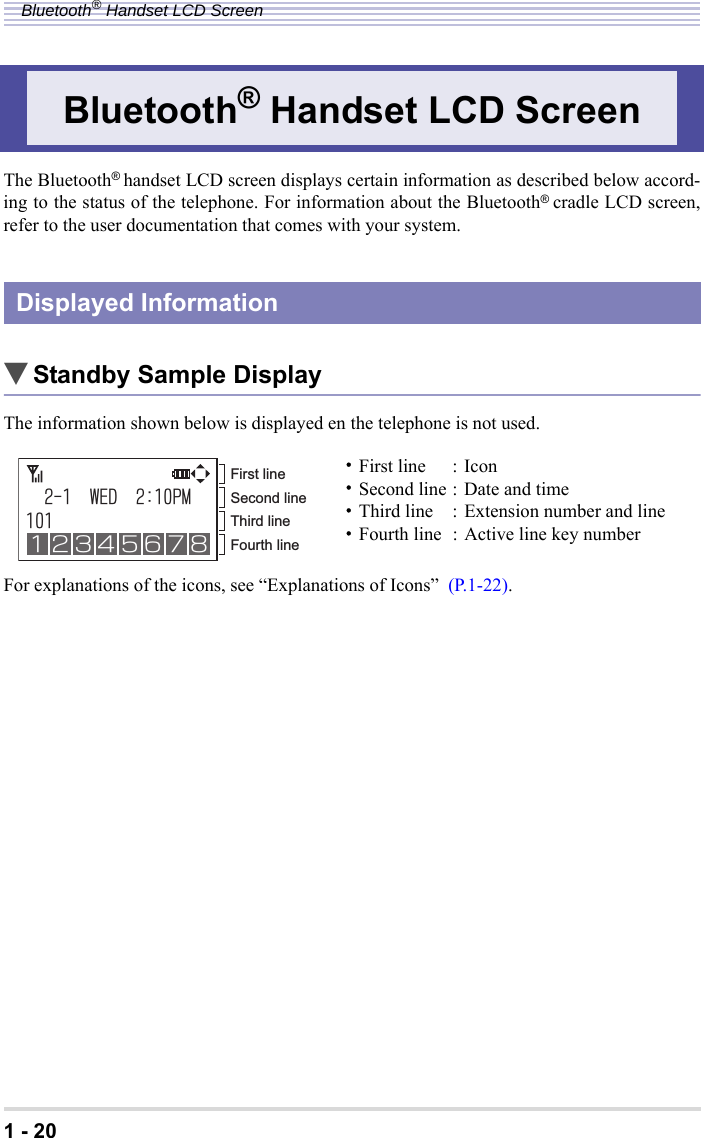
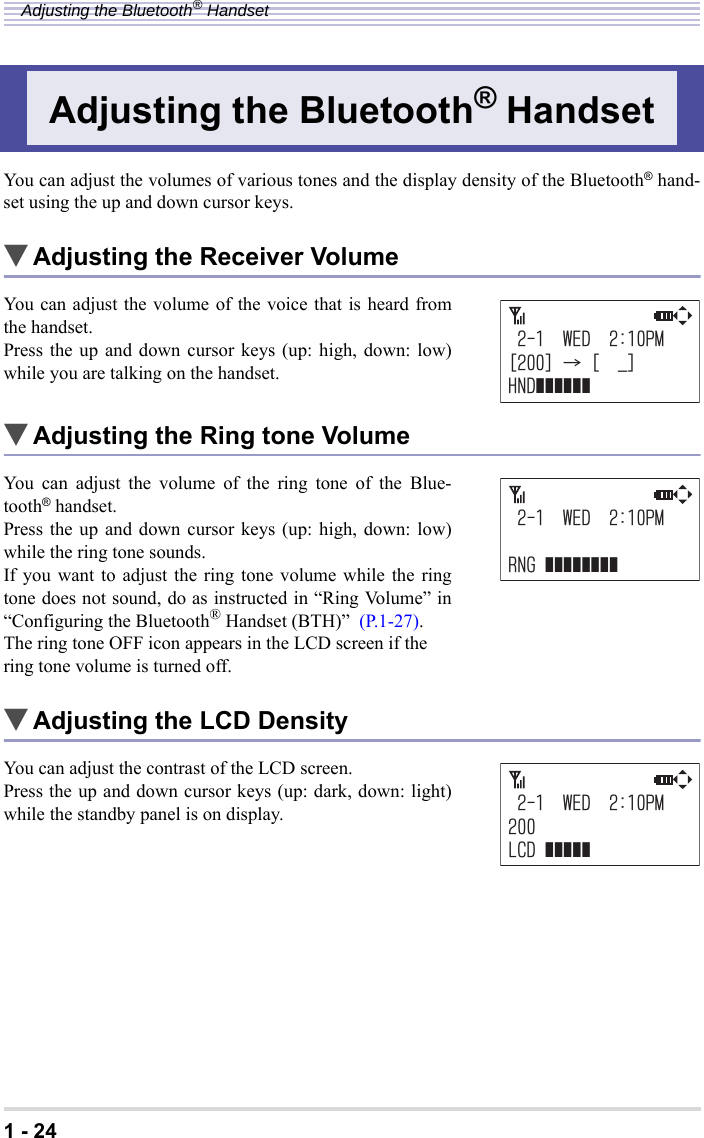
![1 - 27Configuring the Cordless TerminalOn the Bluetooth® handset in standby mode, press the [HOLD] > [Transfer] keys and thenpress dial keys (1) to (6) to see a Setup Screen associated with the dial key pressed. The table below lists the setting of each item.Configuring the Bluetooth® Handset (BTH)The handset will return to the standby panel automatically if 4 minutes pass with the no action being launched from the menu.Dial key Item Setting ([ ] default) Explanation(1) Base Call - Allows you to call up the paired Bluetooth® cradle and identify it en it is unknown.(2) Key Touch Tone •Disable•[Enable] Set ether to sound a confirmation tone each time a key is pressed or not.(3) Ring Volume Off (0),1 to [8] to 13 Adjusts the ring tone volume.The ring tone OFF icon appears in the LCD screen if the ring tone volume is turned off.(4) No Service Tone •Disable•[Enable] Set ether to sound a no service tone en no service occurs.(5) Low Power Mode •Disable•[Enable] Set ether to transition to low-power mode automatically en no call or key operation has been launched for a long time.(6) Font Size • Double Height•[Normal]Set ether to display the characters on the two lines in the middle in the LCD screen in double or normal height.* Characters display in normal height while a setup item is on display.You cannot originate calls or answer terminating calls while the Bluetooth® menu setup is in progress. Exit the menu before originating calls or answering terminating calls.CautionCaution](https://usermanual.wiki/NEC-of-America/LOBTC/User-Guide-894629-Page-37.png)
![1 - 38Connecting a HeadsetThe following kinds of headsets can be used with a cordless terminal:・Bluetooth® Cradle (BTC) side : Bluetooth® head set, wire head set・Bluetooth® Handset (BTH) side : Wire head setThe method of connecting each headset is as follows.A Bluetooth® headset can be connected to the Bluetooth® cradle (BTC) by pairing in a cradlemenu operation. To perform pairing, follow these steps:1Invoke the Bluetooth® device setup screen in the Bluetooth® cra-dle LCD screen.For instructions on how to invoke the setup screen, see “Configuring the Bluetooth® Cradle (BTC)” (P.1-25).If the Bluetooth® headset has a PIN code of ‘0000’, go to Step 3; else, go to Step 2.2In the Bluetooth® screen, select [1. Pairing Mode] > [2. PIN Code] in this order. Enter a PIN Code (4 to 16 digits) to suit the Bluetooth® device and press the OK key.Connecting a HeadsetPairing with a Bluetooth® Headset=$NWGVQQVJ?2CKTKPI/QFG8KUKDKNKV[ĉĊ$CEM1-Ĵĵ=2CKTKPI/QFG?2CKTKPI2+0%QFGĉĊ$CEM1-Ĵĵ=2+0%QFG?2+0%QFG!$-$CEM1-Ĵĵ](https://usermanual.wiki/NEC-of-America/LOBTC/User-Guide-894629-Page-48.png)
![1 - 39Connecting a Headset3In the Bluetooth® screen, select [1. Pairing Mode] > [1. Pairing] > [1. -- Bluetooth Headset --] in this order and select a headset to pair with from a list of Bluetooth® devices located.4Select [1. Paired Head Set] > [2. Connect] > [2. Enable] in the pair-ing screen in this order and press the OK key.Pairing between the Bluetooth® headset and the Bluetooth® cradle(BTC) is completed.After pairing, be sure to configure the cradle connection with the Bluetooth® headset in Step 4 to enable it. If connected setting is not done, the Bluetooth® headset that does the pairing cannot be used. To unpair a paired Bluetooth® headsetSelect [1. Delete] in the Bluetooth® Headset screen in Step 4 above to switch to a Deletescreen. Press the OK key to unpair the paired Bluetooth® headset.=2CKTKPI?$NWGVQQVJ*GCFUGVĉĊ$CEM1-Ĵ=2CKTKPI?ĉĊ$CEM1-ĴĴ=$NWGVQQVJ*GCFUGV?CCDDEEFFGGHHĉĊ$CEM1-ĴĵĴĴ Ĵ Ĵĵ=$NWGVQQVJ?2CKTKPI/QFG8KUKDKNKV[ĉĊ$CEM1-Ĵĵ=2CKTKPI/QFG?2CKTKPI2+0%QFGĉĊ$CEM1-ĴĵĴĵ=2CKTKPI?ĉĊ$CEM1-ĴĴĵ=$NWGVQQVJ*GCFUGV?&GNGVG%QPPGEVĉĊ$CEM1-Ĵĵ=%QPPGEV?&KUCDNG'PCDNGĉĊ$CEM1-Ĵĵ ĵCautionTips](https://usermanual.wiki/NEC-of-America/LOBTC/User-Guide-894629-Page-49.png)
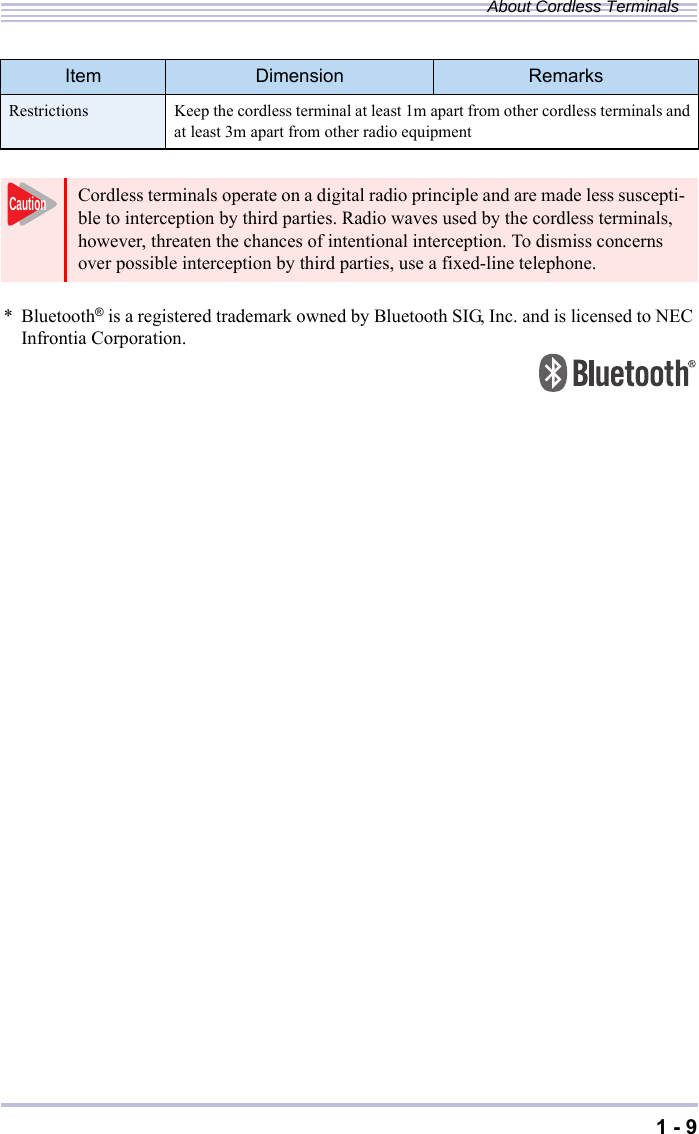
![1 - 40Connecting a Headset▼Visibility SettingSet whether to make information about the Bluetooth® cradle (BTC) visible to other Blue-tooth® devices. The example below assumes that the cradle information is not made visible.1Invoke the Bluetooth® device setup screen in the Bluetooth® cra-dle LCD screen.For instructions on how to invoke the setup screen, see “Configuring the Bluetooth® Cradle (BTC)” (P.1-25).2In the Bluetooth® screen, select [2. Visibility] > [1. Disable] and press the OK key.The visibility setting is completed.You can connect a headset to the Bluetooth® handset (BTH). For latest recommended product information, browse the following Web site:http://www.necinfrontia.co.jp/Insert the headset plug firmly into the headset jack (bearing the mark in the cover) on theright side of the Bluetooth® handset (BTH).Connecting a Wire Headset=$NWGVQQVJ?2CKTKPI/QFG8KUKDKNKV[ĉĊ$CEM1-Ĵĵ=8KUKDKNKV[?&KUCDNG'PCDNGĉĊ$CEM1-ĴĵĴĵBluetooth Handset (BTH)Headset jackBluetooth cradle 㧔BTC㧕RR](https://usermanual.wiki/NEC-of-America/LOBTC/User-Guide-894629-Page-50.png)