NEXTO DI ND2325 EXTERNAL STORAGE EQUIPMENT User Manual USERS MANUAL
NEXTO DI Inc. EXTERNAL STORAGE EQUIPMENT USERS MANUAL
UserManual.wiki
>
NEXTO DI
>
ND2325 User Manual
USERS MANUAL
Navigation menu
Upload a User Manual
Namespaces
Wiki Guide
HTML
PDF
Info
Views
User Manual
Discussion / Help
Navigation
![6. Data Backup The basic function of Nexto-M1 is to backup data from memory card to HDD. Executing the function is easy and is done through the single button. Nexto-M1 has built-in slot for CF, MD, SD, SDHC, MemoryStick and MMC card. Or you can use USB card readers to back up data from other kinds of memory cards. Refer to chapter 11 for more information on USB card reader connection. [Caution] For MS Duo, MS Duo MagicGate, MS Pro Duo, or MS Pro Duo MagicGate use the MemoryStick transform adapter. Do not insert these cards into Nexto-M1 directly. Also use SD card transform adapter for mini SD, TransFlash, MMC mobile or RSMMC. To backup data; Turn on Nexto-M1. (You can insert memory card before turn on Nexto-M1) If screen displays other messages than the screen shown here, refer to “Error Messages” at the end of this chapter. Insert memory card. For CF or Md use the slot at the top and for SD, SDHC, MemoryStick or MMC use the slot at the side. If you insert 2 cards at the same time, Nexto-M1 will only back up from the card inserted first. [Caution] If any device or cable is connected to USB connector at the bottom the backup process will not work properly so remove any device of cable from the USB connector before inserting the cards.](https://usermanual.wiki/NEXTO-DI/ND2325/User-Guide-798186-Page-7.png)

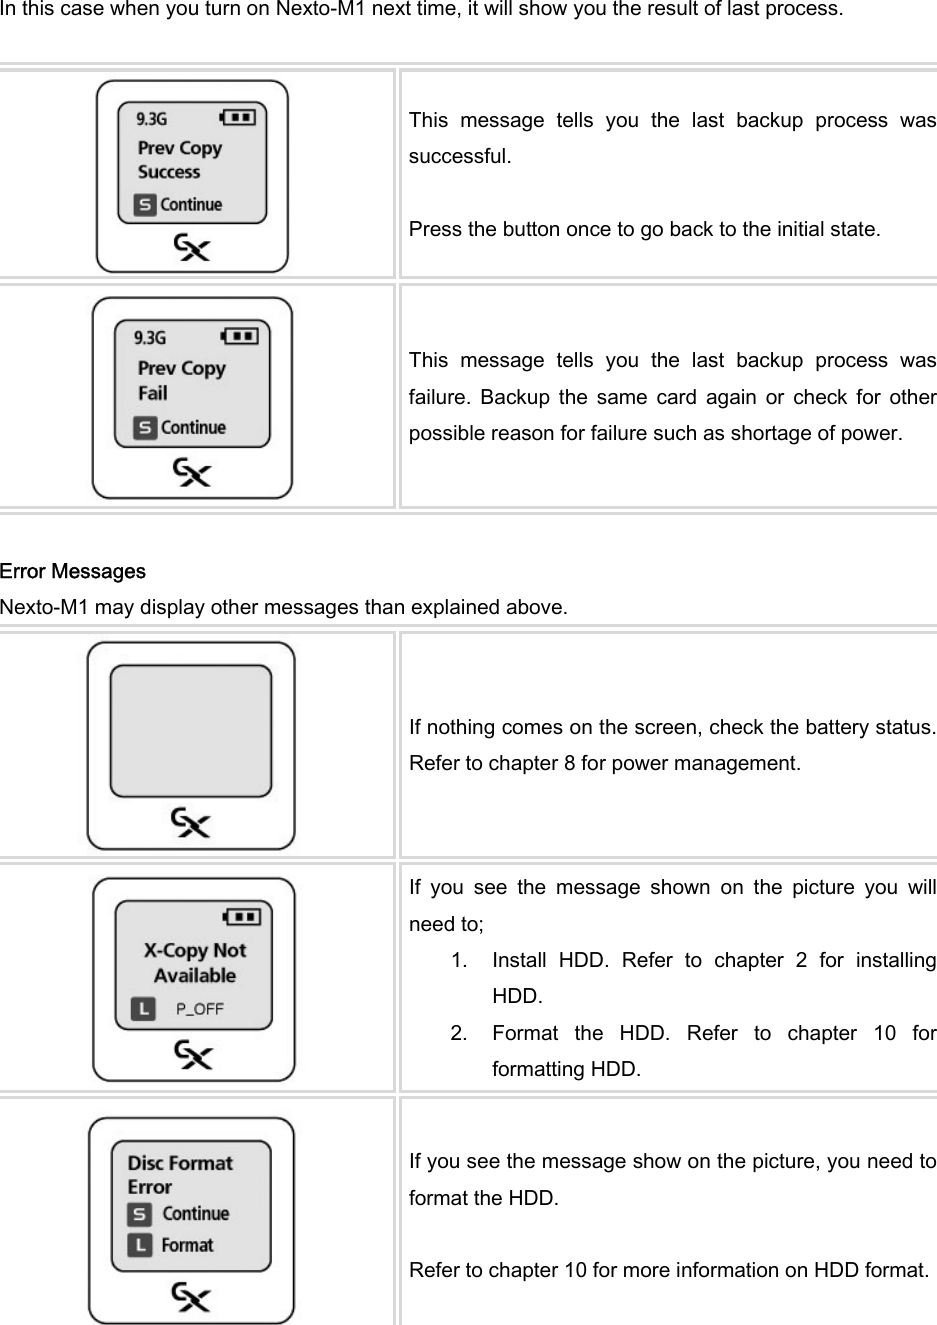
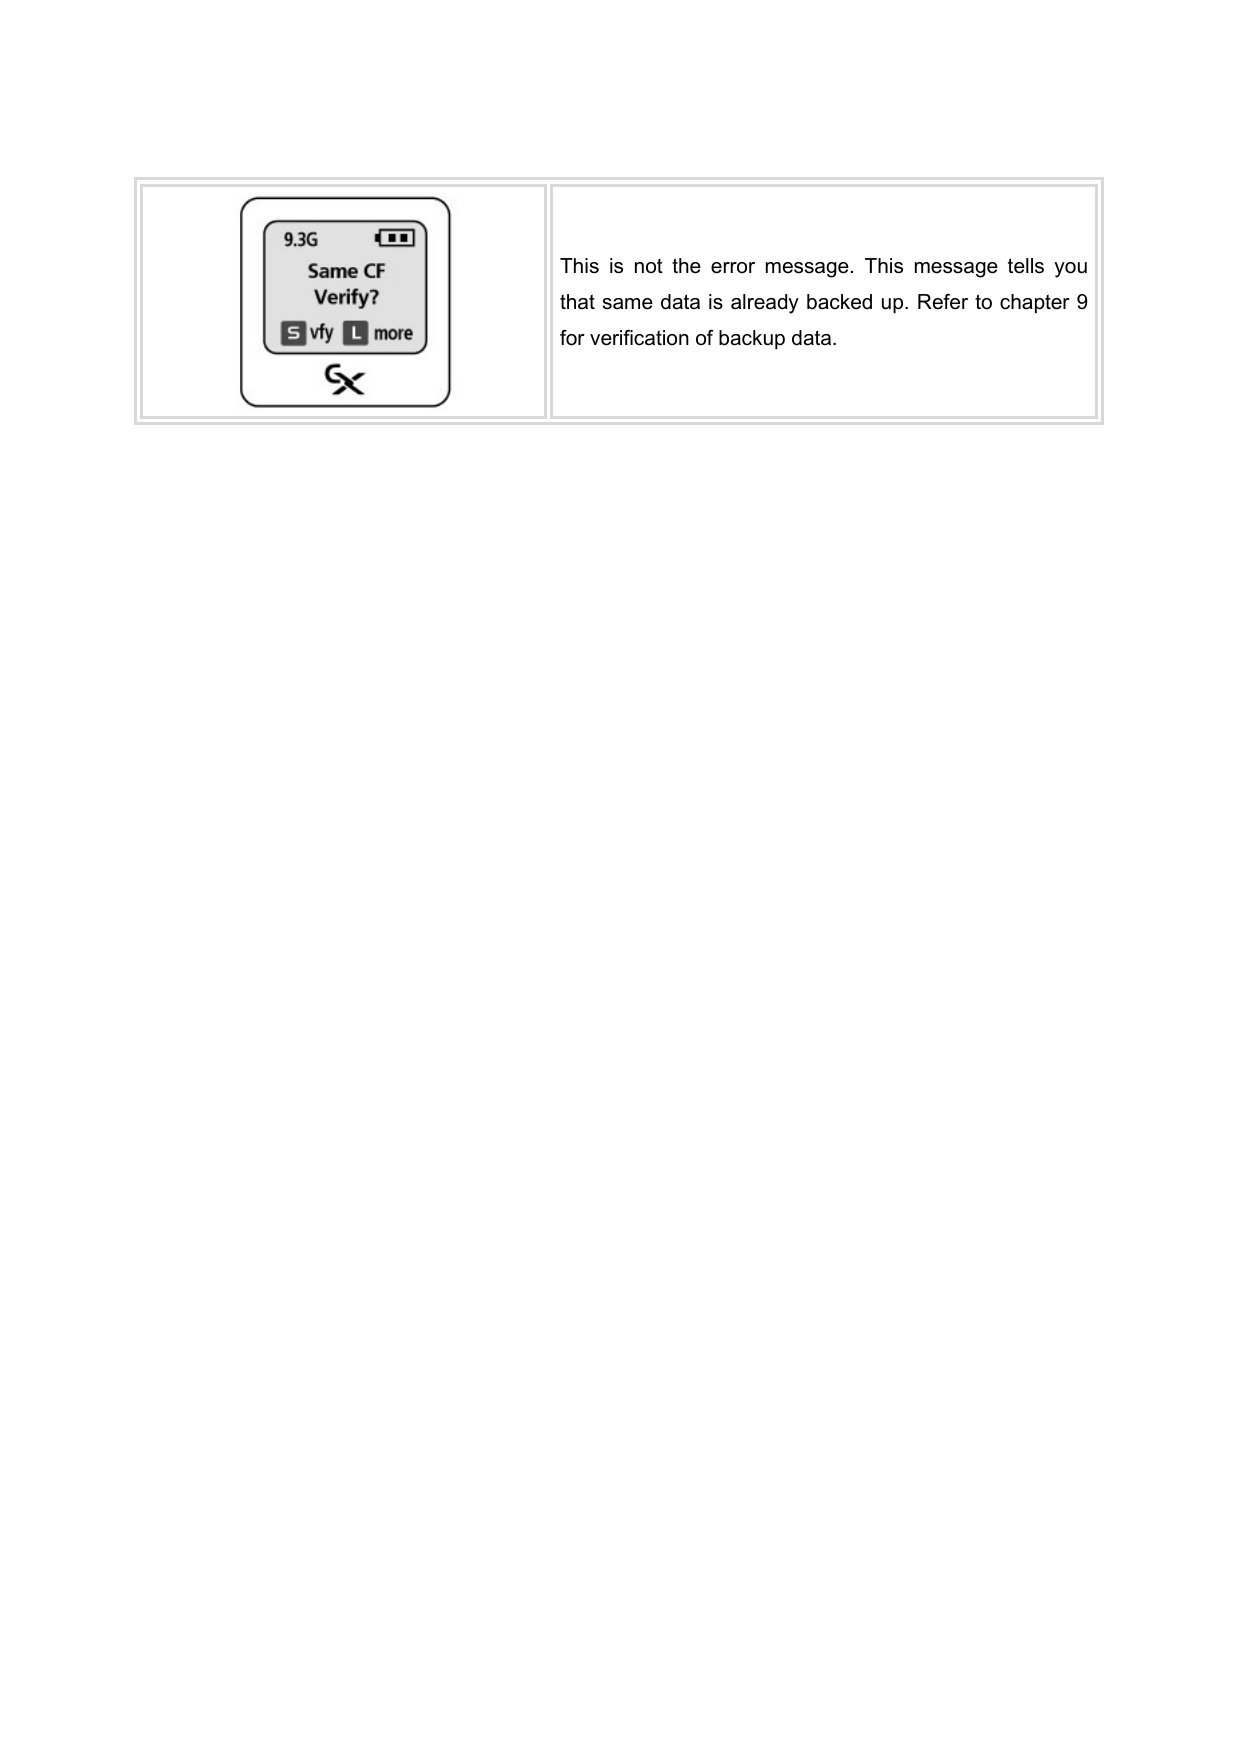
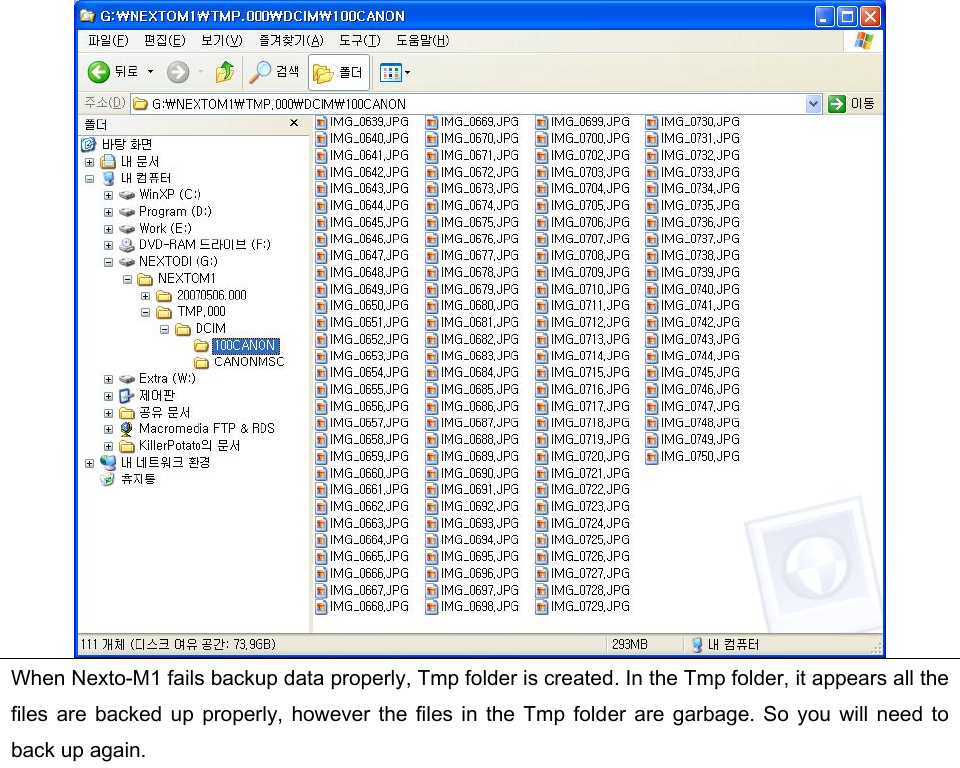
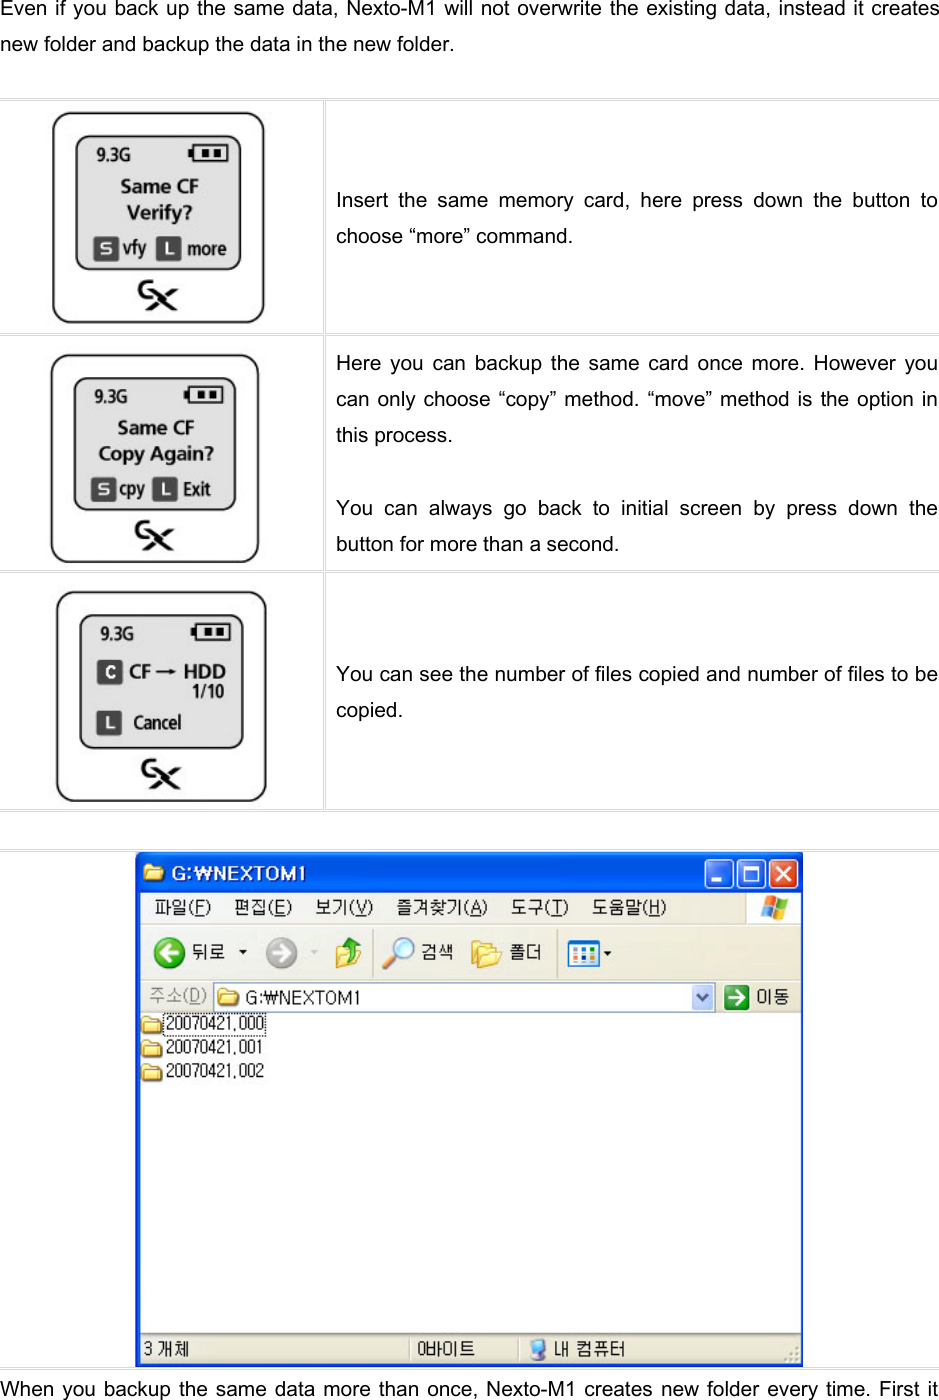
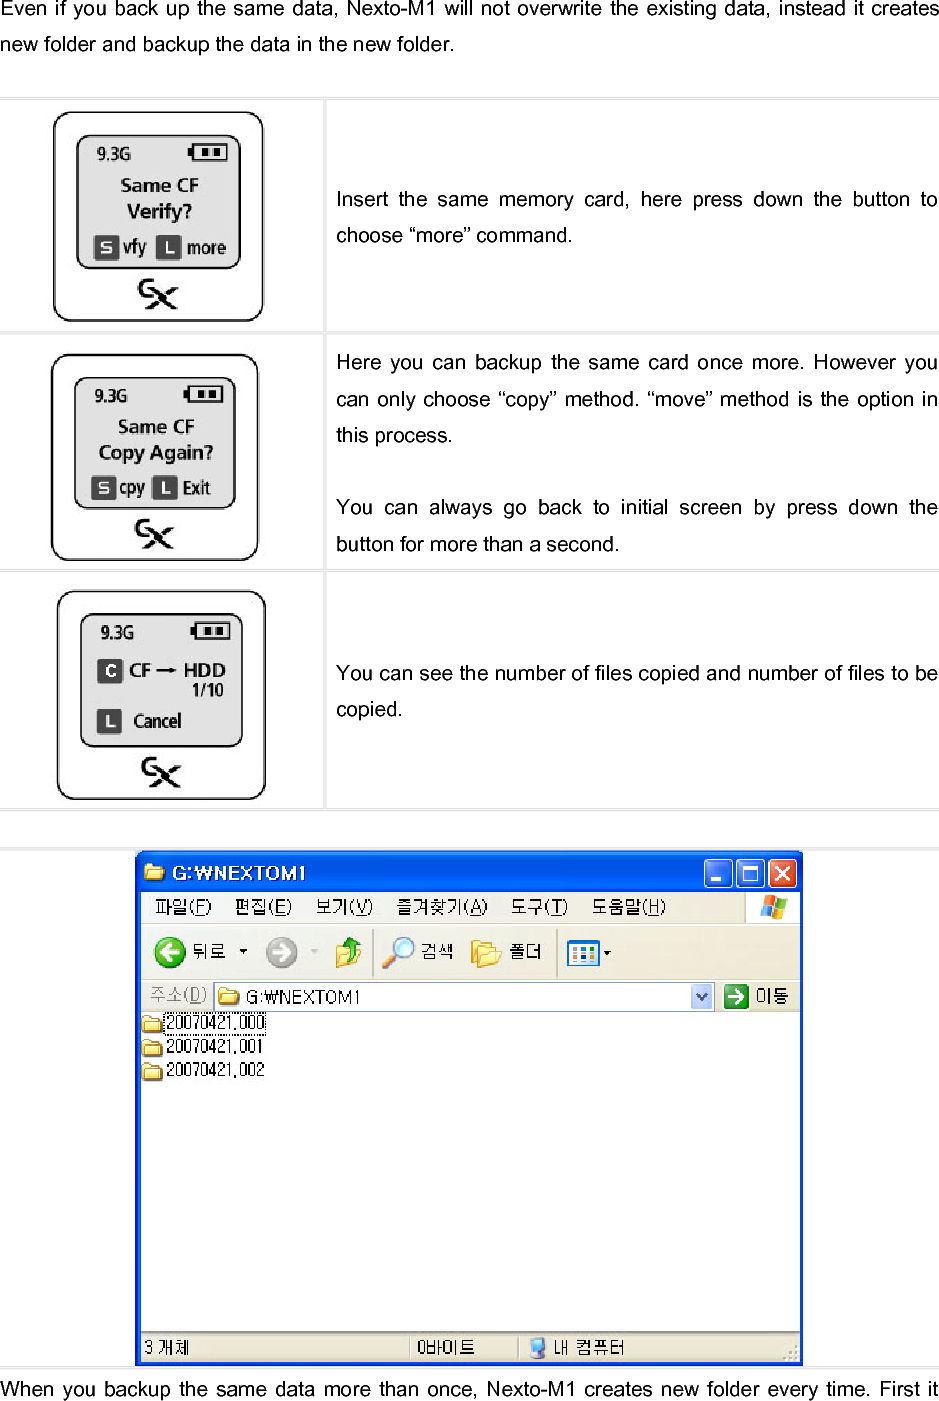
![Nexto-M1 will copy the exact structure and files from the memory card inserted. Every time you backup data, a new folder is created under NEXTOM1 folder. The new folder will have name like YYYYMMDD.XXX. Nexto-M1 checks the files and extracts the latest creation date among the files and use to name the folder. The 3 letters of suffix is version number of the folder in case same date comes up more than once among the backup files. For example, if the latest file creation date is 2007-10-25 then new folder 200071025.000 is created for backup. [Caution] Every time you backup, even for the very same data more than once, new folder is created and no data is over written. When backup fail.](https://usermanual.wiki/NEXTO-DI/ND2325/User-Guide-798186-Page-12.png)
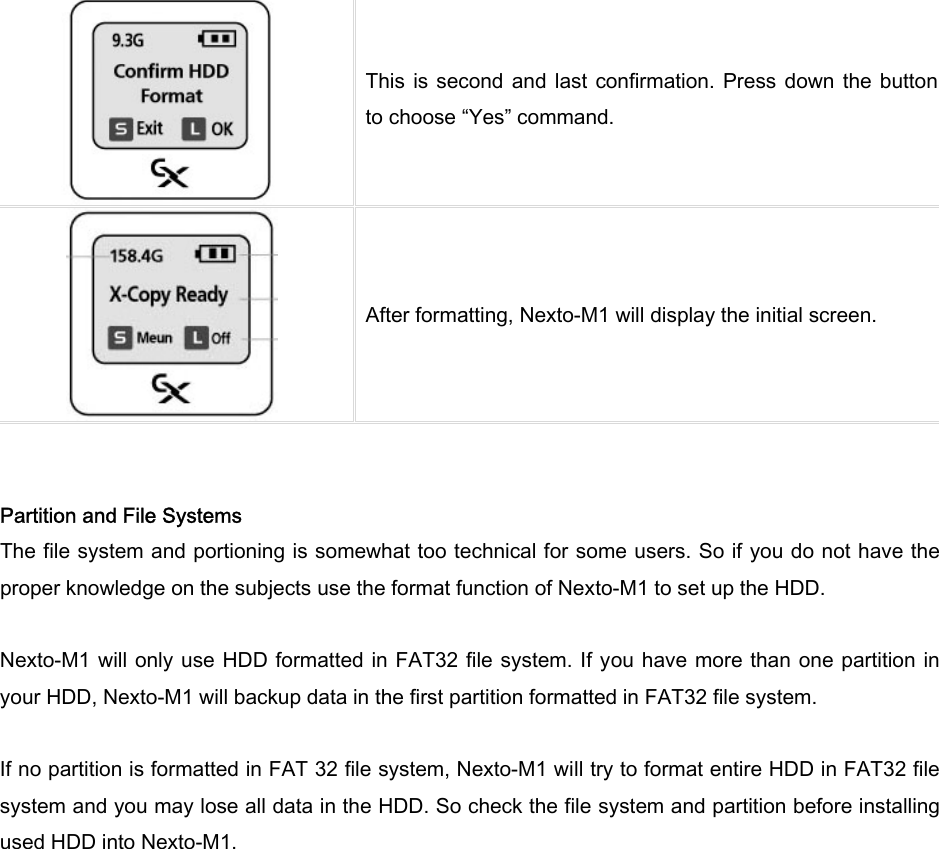
![10. HDD Format Nexto-M1 has format function so you do not need PC to format the HDD installed in Nexto-M1. [Caution] All the data in HDD will be erased after formatting the HDD. Remember to back up important data to some other media before formatting your HDD. Formatting New HDD When you install brand new HDD to Nexto-M1, you must first format the HDD. Nexto-M1 does not support partitioning of HDD, so if you need to create partitions connect Nexto-M1 to PC and do it in Windows environment. Nexto-M1 formats HDD in FAT32 file system. For more information on file systems please refer to OS guide books or web sites. Install HDD into Nexto-M1 (refer to chapter 2 for installing HDD) and turn on the power and you will see the message as shown in the picture. Press down the button to choose “Format” command. If you choose “Continue” menu, Nexo-M1 will display error message. Nexto-M1 will ask you twice for confirmation. Press down the button to choose “Yes” command. This will be the first confirmation. Press down the button for second and final confirmation to proceed formatting. Press down the button to choose “Yes” command and format will proceed.](https://usermanual.wiki/NEXTO-DI/ND2325/User-Guide-798186-Page-18.png)

![11. Connecting USB Devices Nexto-M1 has OTG feature that you can connect USB devices such as card reader, USB storage or digital camera directly to Nexto-M1. [Caution] Not all USB devices can be connected to Nexto-M1. Nexto-M1 may not support devices that consume more power than Nexto-M1 can supply. And Nexto-M1 does not support MP3 Player. Turn on Nexto-M1 and connect USB device to the USB port at the bottom of Nexto-M1 marked “OTG” using USB cable. Nexto-M1 automatically detects the USB device. You can copy data from/to USB devices or delete data in USB devices. Refer to chapter 12 for more information. If the USB device consumes more power than Nexto-M1 can supply or USB device that does not support common USB protocols Nexto-M1 will turn itself off. You can copy data from USB device the same way as you copy data from memory card.](https://usermanual.wiki/NEXTO-DI/ND2325/User-Guide-798186-Page-21.png)
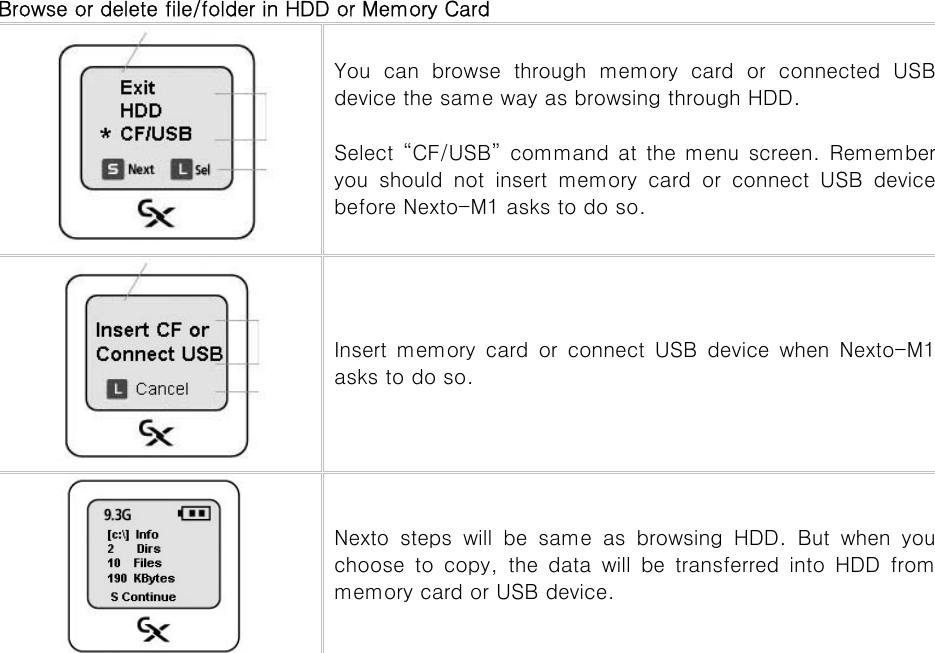
![12. Browsing HDD and Memory Cards You can check the store data in HDD of Nexto-M1 without connecting to PC. You can even browse through the data in connected memory card or storage of USB devices. You can also copy file or folder to/from HDD from/to memory card or USB devices and delete file or folder in HDD or memory card. Browse or delete file/folder in HDD or Memory Card At the initial screen press down the button to choose “Menu” command. At this time no memory card or USB device should be connected to Nexto-M1 Move the cursor (*) by pressing button next to “Browse” command and press down the button for more than 1 second. On next screen move the cursor next to HDD and press down the button to choose “HDD” command. Nexto-M1 shows you the summary information of root directory of HDD. As shown in the picture, the root directory has 10 files total size of 190Ksbytes and 2 folders. Press button once to continue. Next, you can see the actual structures of folders and files in root directory of HDD. To move the cursor; z [S]: Press the button once to move the cursor down. z [D]: Double click the button to move the cursor up. [L]: Press down the button for more than one second to select the file or folder. Move the cursor to NESXODI folder and select it by pressing down the button.](https://usermanual.wiki/NEXTO-DI/ND2325/User-Guide-798186-Page-22.png)
![When you select a folder, first you can see the summary information of the folder. When you select a file you will first see the summary of the file. At the top of the screen there are 3 menus you can choose from; “Exit”, “Copy” and “Del” z “Exit”: Go back to initial screen. z “Copy” Copy the file or entire folder, sub structure and files in the folders to memory card or connected USB device. z “Del”: Delete the selected file or folder and entire sub hierarchy folders and files [Caution] Be careful when you choose delete a folder. It deletes not only the selected folder but also all sub folders in the selected folder. You can browse through sub folder by moving the cursor to the folder you wish to browse and press down the button to select. Choose one of the menus to copy or delete the folder. You can also select a file to copy or delete. When you select delete menu, Nexto-M1 ask you twice for confirmation. Press down the button to select “Yes” command to delete the selected folder. If you choose to copy a folder or a file, Nexto-M1 will ask you to insert memory card of connect USB device. You can then browse through memory card of USB device in the same way as browsing HDD to choose the destination folder to copy the data from HDD. Press down the button to select “Yes” command to copy the file or folder.](https://usermanual.wiki/NEXTO-DI/ND2325/User-Guide-798186-Page-23.png)