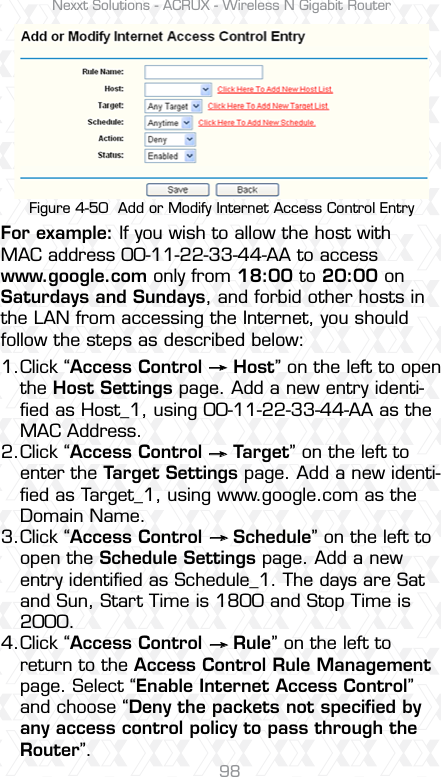
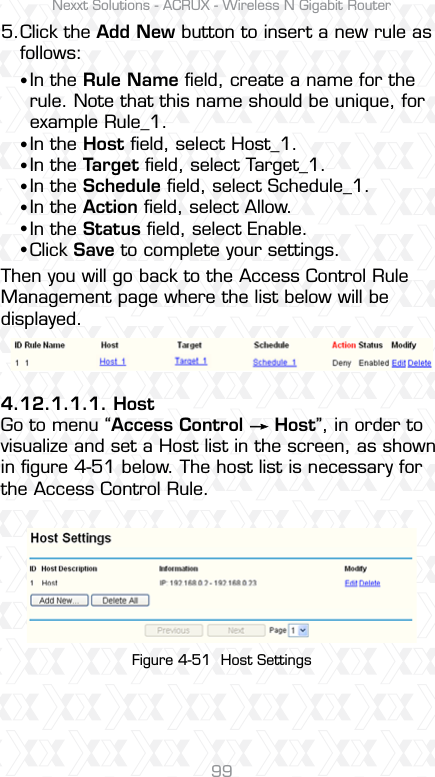
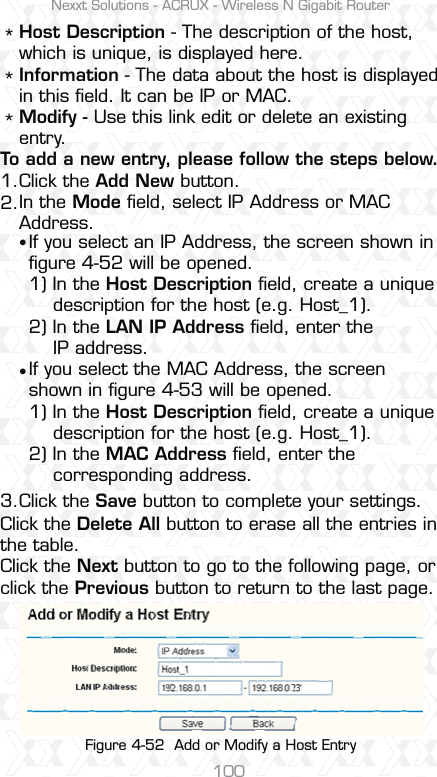
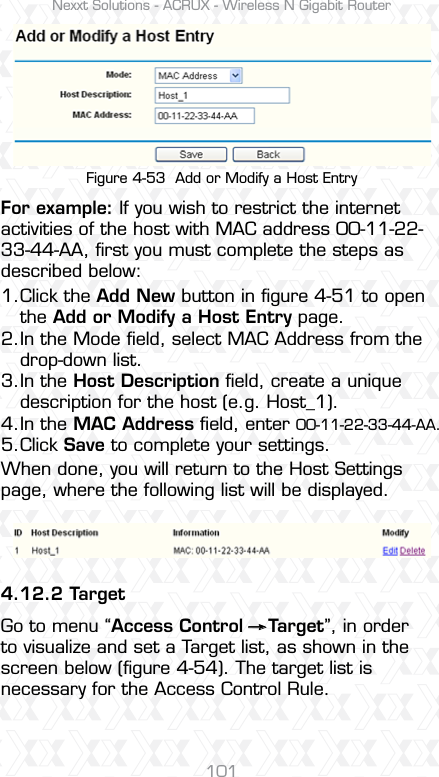
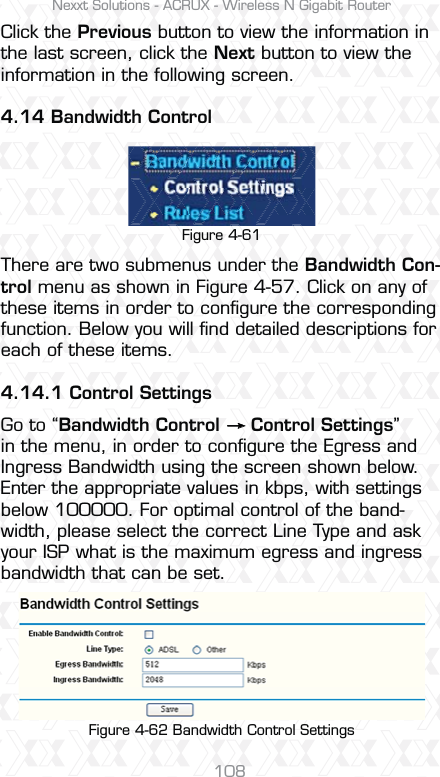
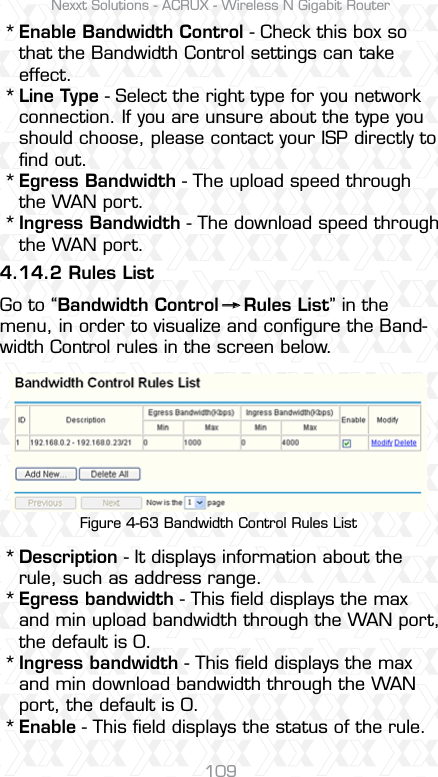
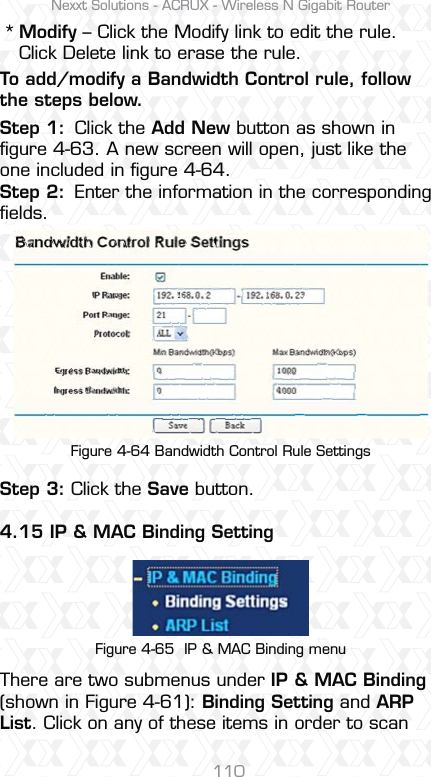
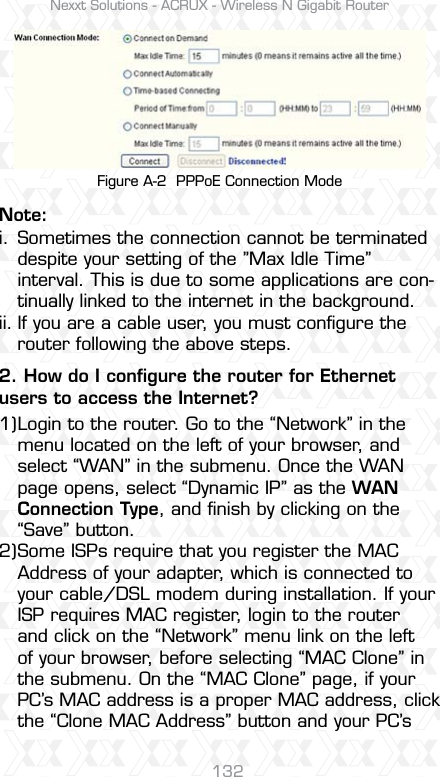
NEXXT SOLUTIONS ARN03304U1 300Mbps Wireless N Gigabit Router Model No.: ARN03304U1 User Manual Acrux Router Manual ENG
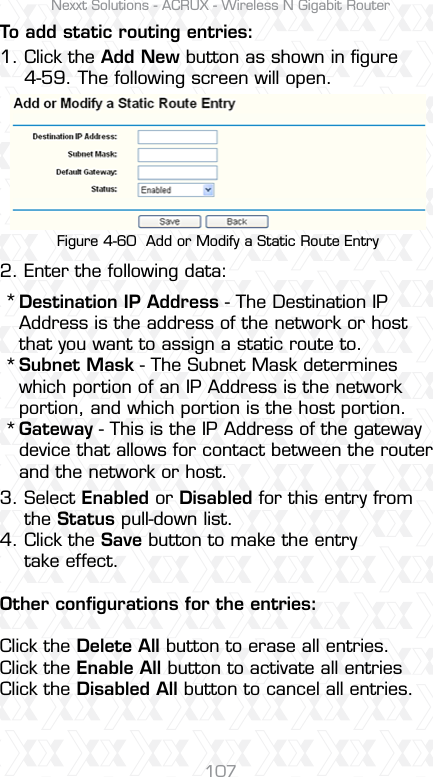
NEXXT SOLUTIONS 300Mbps Wireless N Gigabit Router Model No.: ARN03304U1 Acrux Router Manual ENG
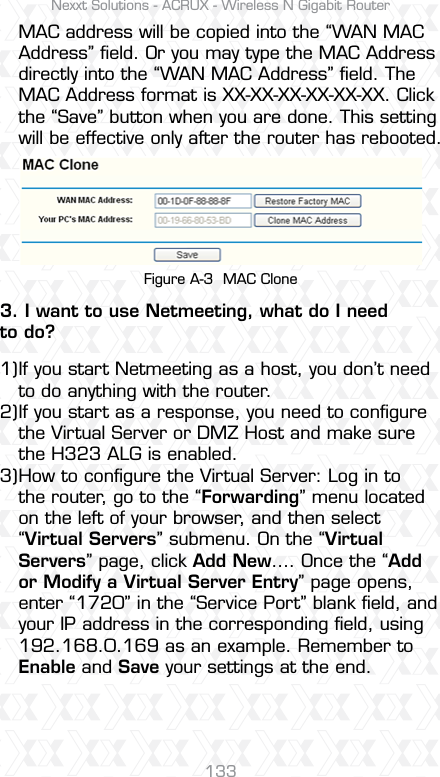
Contents
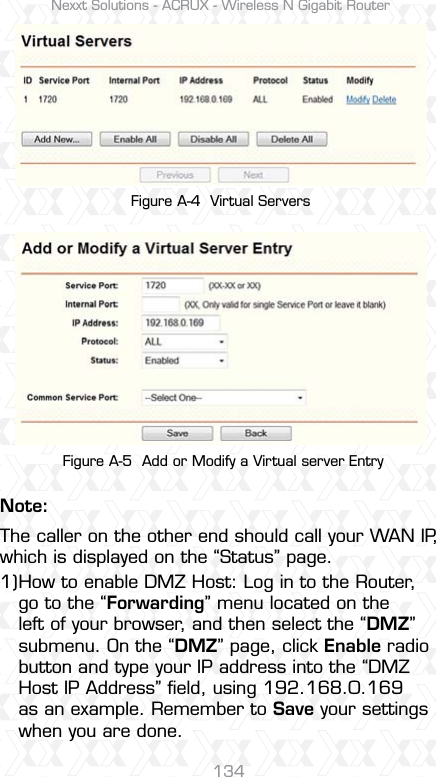
- 1. ARN03304U1_User Manual2
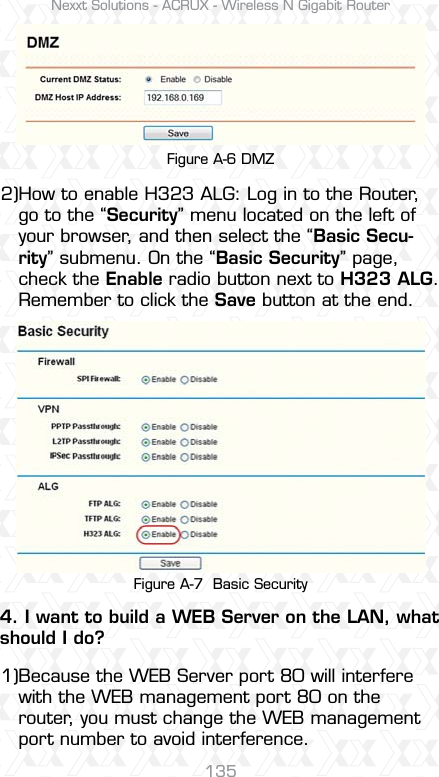
- 2. ARN03304U1_User Manual1_rev1
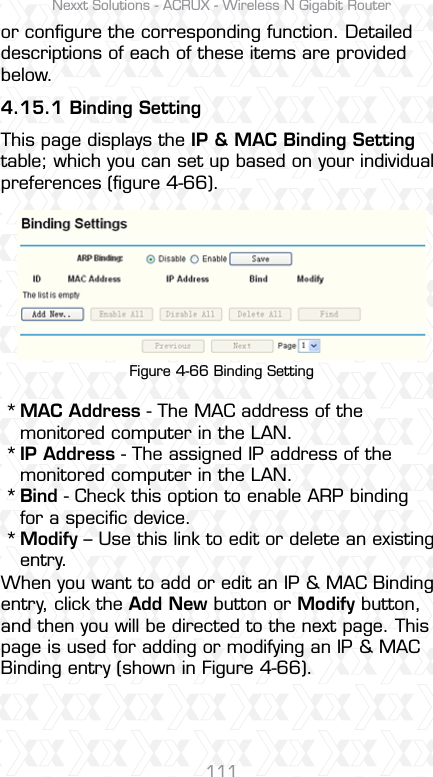
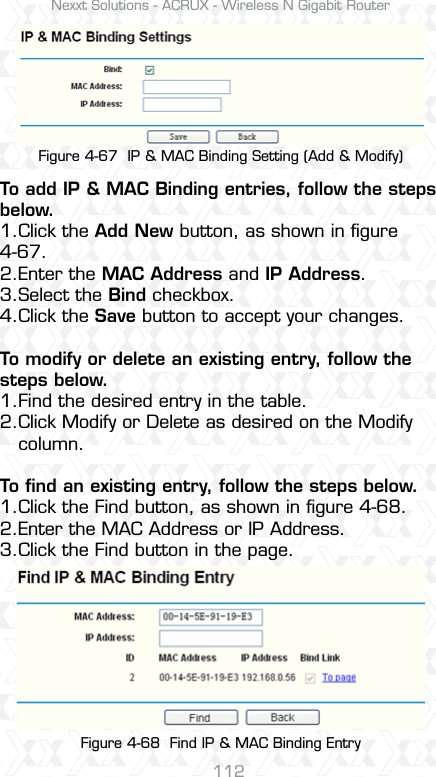
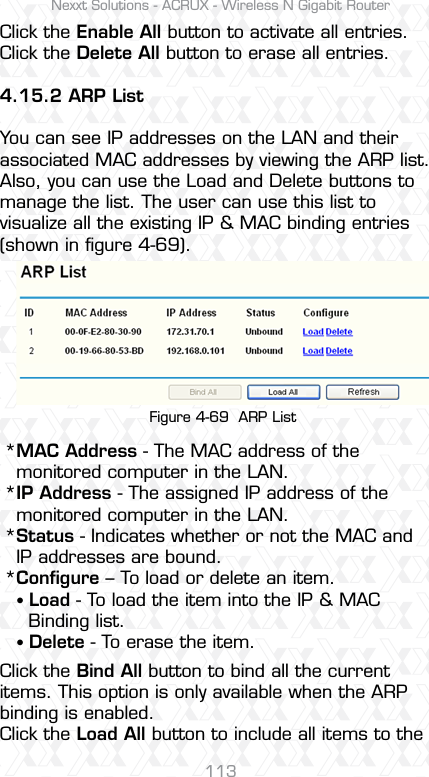
ARN03304U1_User Manual2
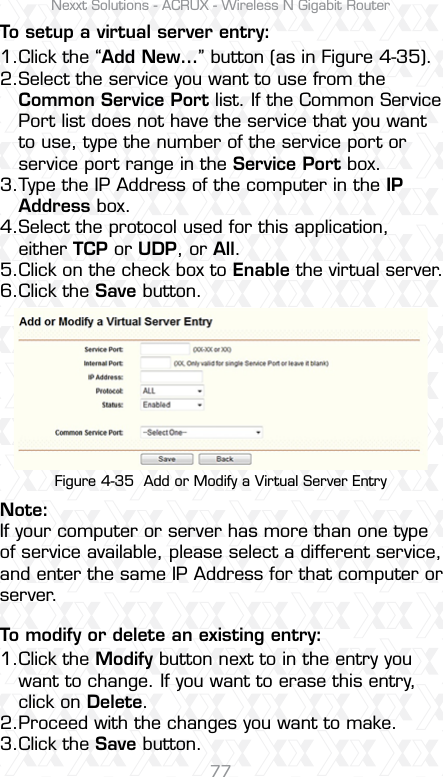


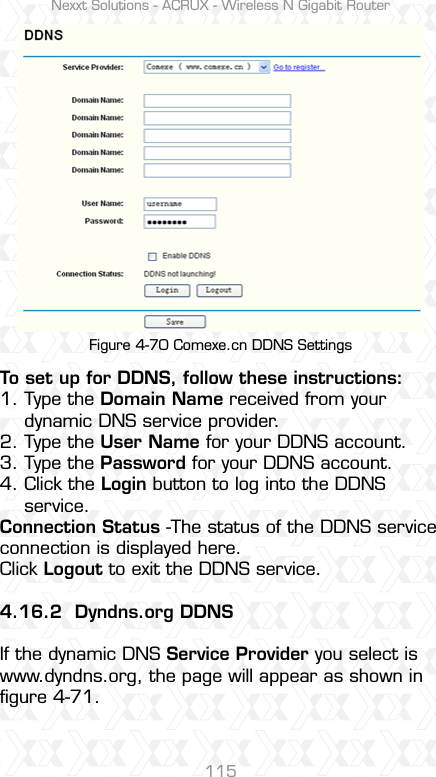

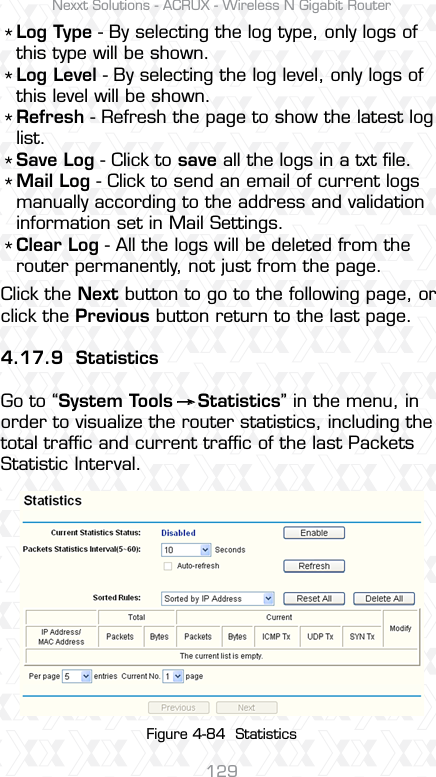

![Nexxt Solutions - ACRUX - Wireless N Gigabit Router143Appendix D: Glossary802.11n - 802.11n builds upon previous 802.11 standards by adding MIMO (multiple-input multiple-output). MIMO uses multiple transmitter and receiver antennas to allow for increased data throughput via spatial multiplexing and increased range by exploiting the spatial diversity, perhaps through coding schemes like Alamouti coding. The Enhanced Wireless Consortium (EWC) [3] was formed to help accelerate the IEEE 802.11n development process and promote a technology specification for interoperability of next-generation wireless local area networking (WLAN) products.802.11b - The 802.11b standard specifies a wireless networking at 11 Mbps using direct-sequence spread-spectrum (DSSS) technology and operating in the unlicensed radio spectrum at 2.4GHz, and WEP encryption for security. 802.11b networks are also referred to as Wi-Fi networks.802.11g - Specification for wireless networking at 54 Mbps using direct-sequence spread-spectrum (DSSS) technology, using OFDM modulation and operating in the unlicensed radio spectrum at 2.4GHz, and backward compatibility with IEEE 802.11b devices, and WEP encryption for security.DDNS (Dynamic Domain Name System) - The capability of assigning a fixed host and domain name to a dynamic Internet IP Address. DHCP (Dynamic Host Configuration Protocol) - A protocol that automatically configure the TCP/IP parameters for the all the PC(s) that are con-nected to a DHCP server.*****](https://usermanual.wiki/NEXXT-SOLUTIONS/ARN03304U1.ARN03304U1-User-Manual2/User-Guide-1731783-Page-73.png)