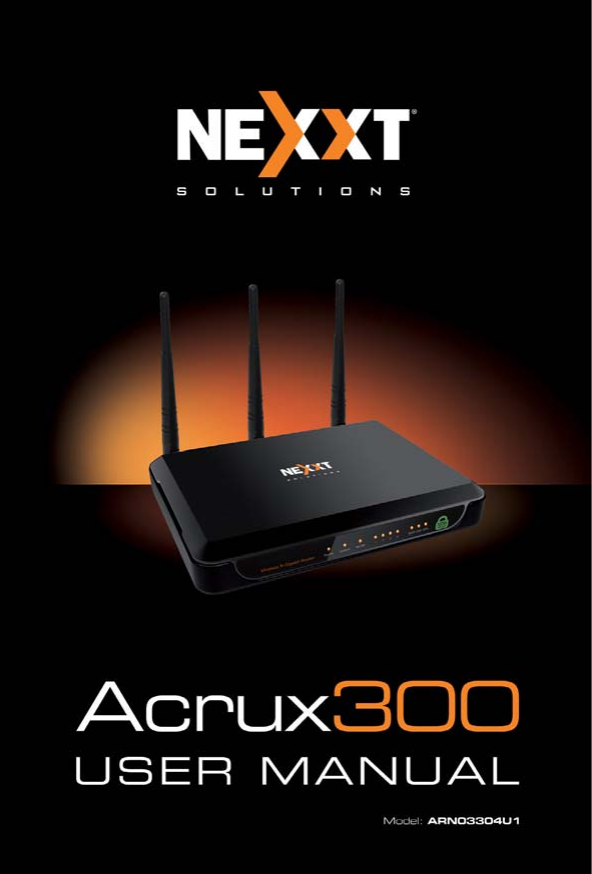
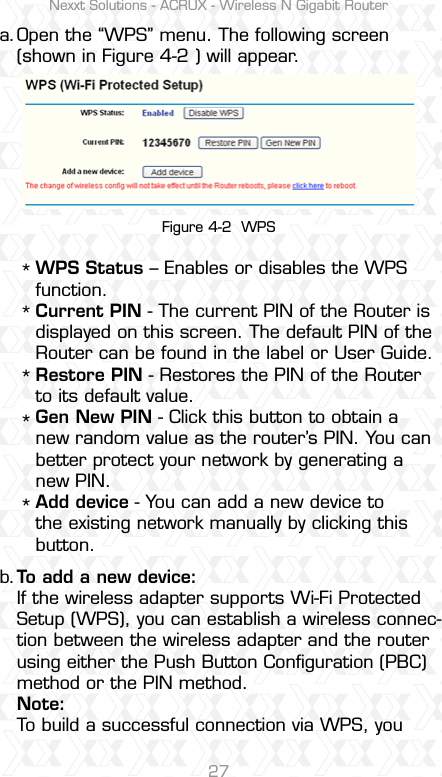
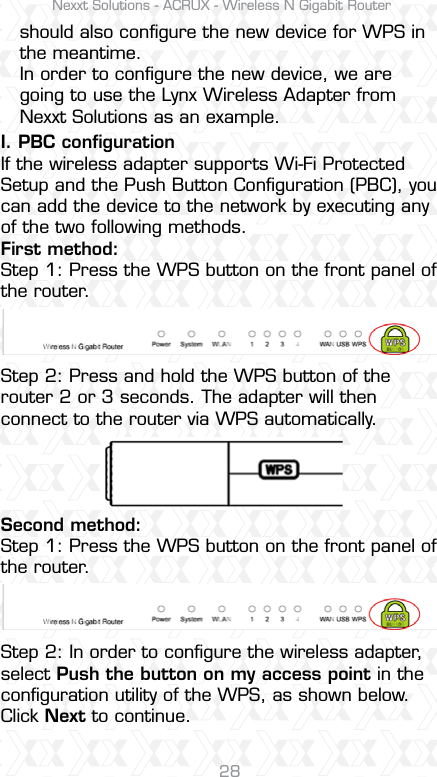
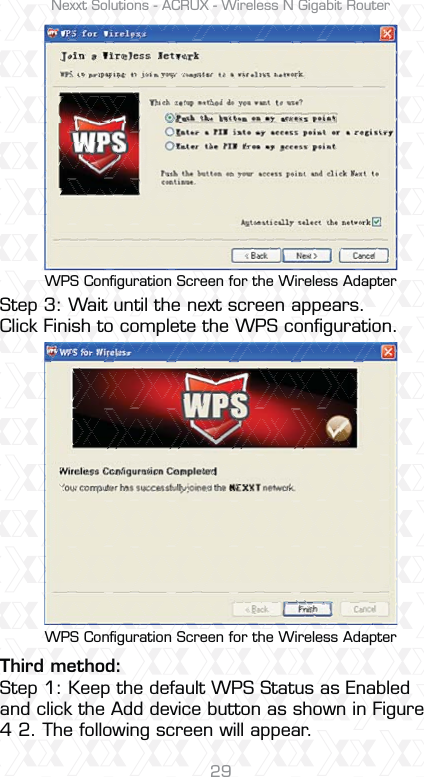
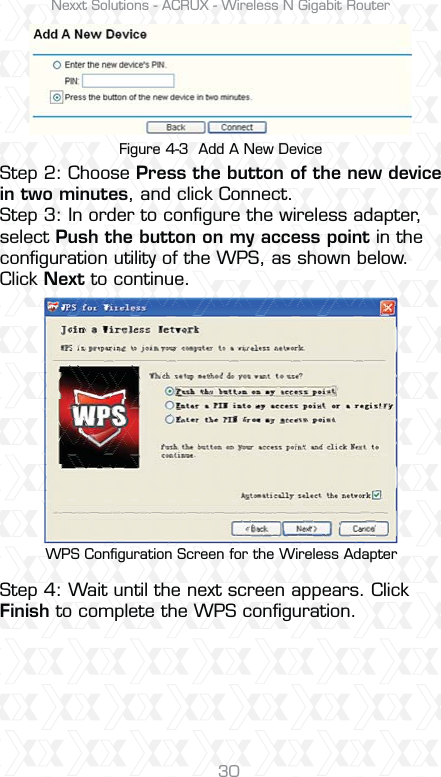
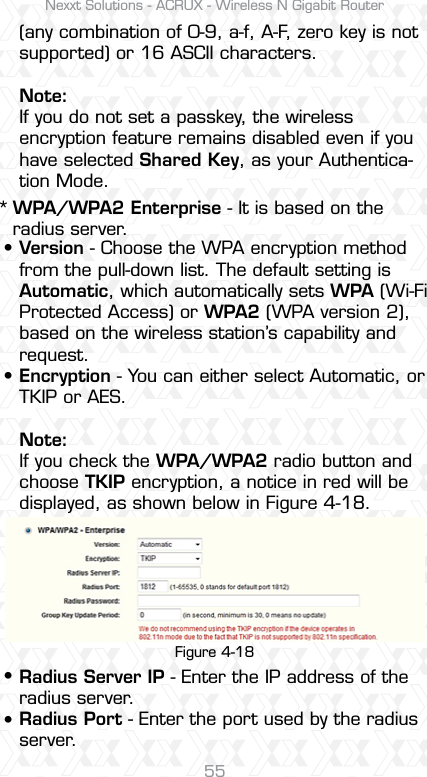
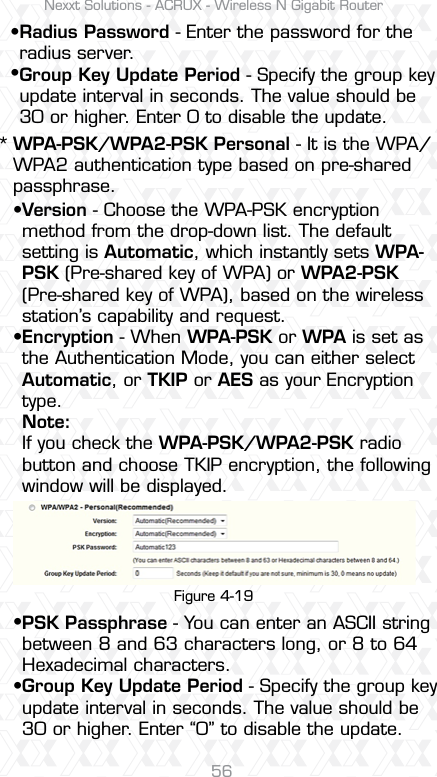
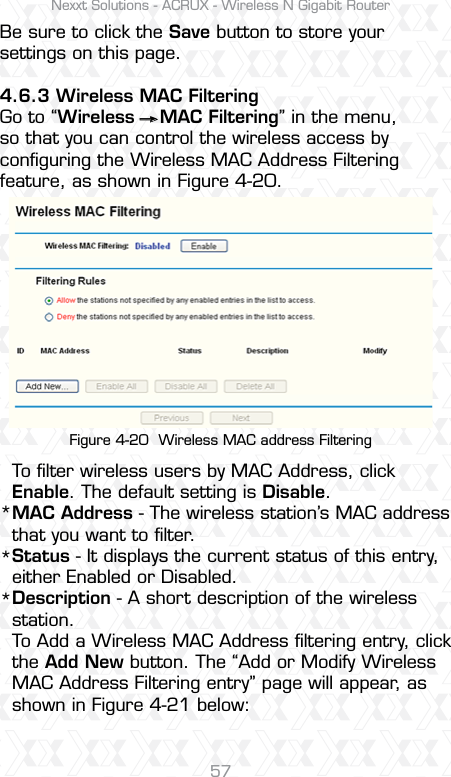
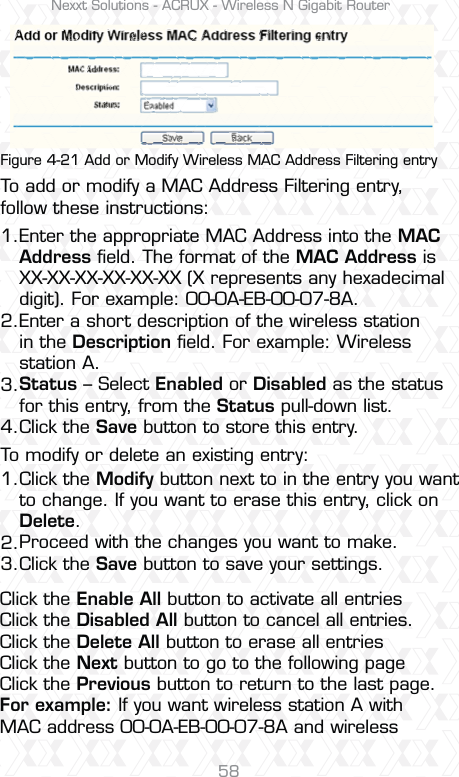
NEXXT SOLUTIONS ARN03304U1 300Mbps Wireless N Gigabit Router Model No.: ARN03304U1 User Manual Acrux Router Manual ENG
NEXXT SOLUTIONS 300Mbps Wireless N Gigabit Router Model No.: ARN03304U1 Acrux Router Manual ENG
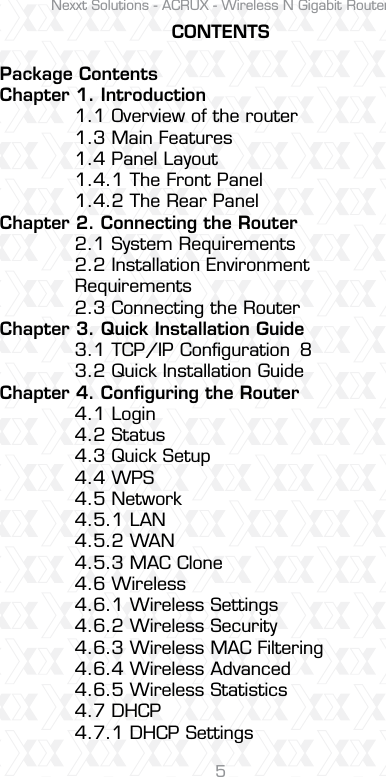
Contents
- 1. ARN03304U1_User Manual2
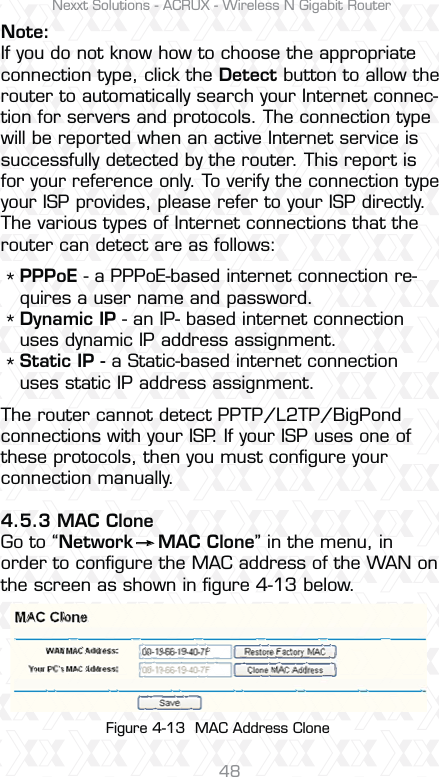
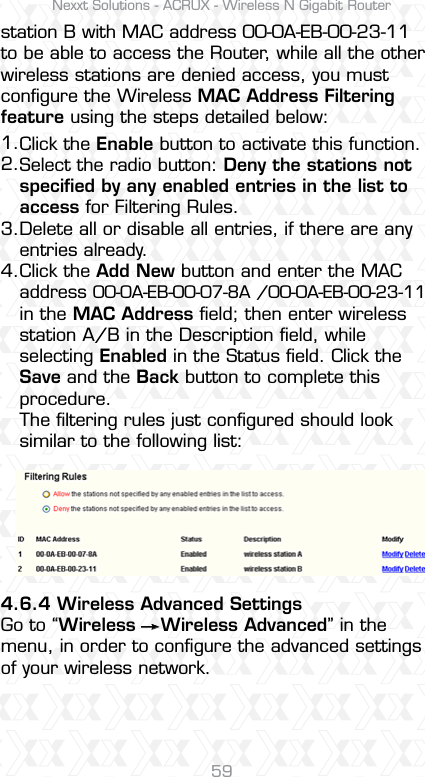
- 2. ARN03304U1_User Manual1_rev1
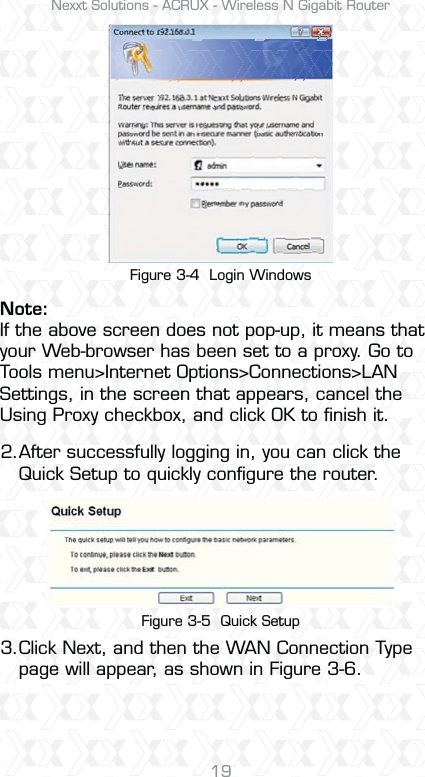
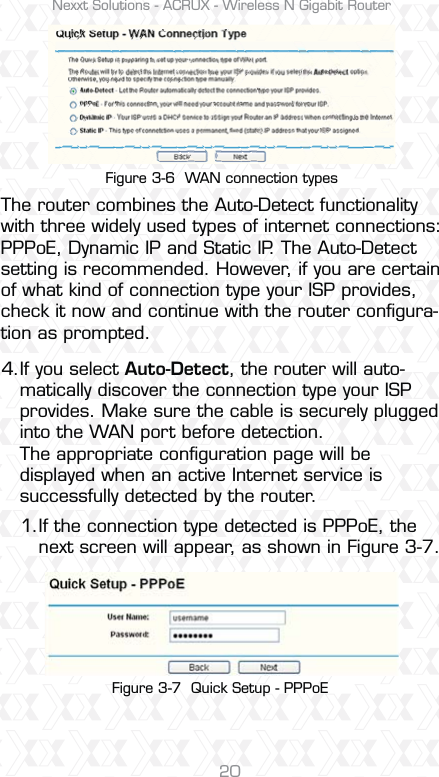
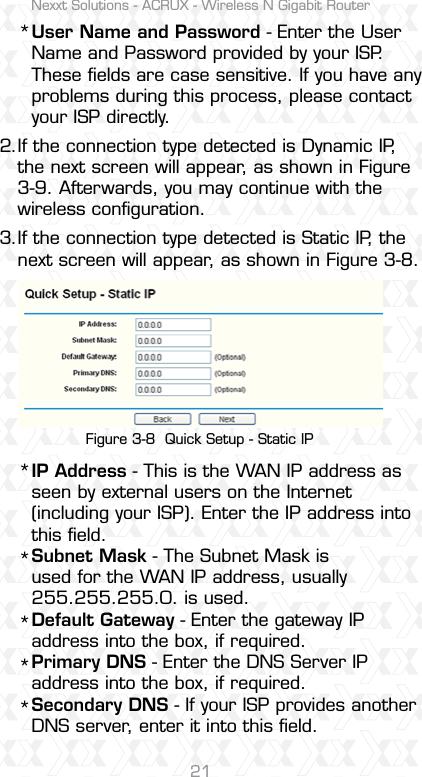
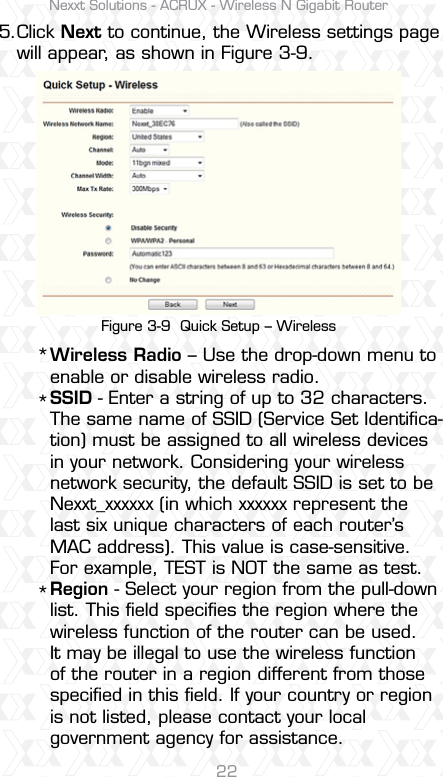
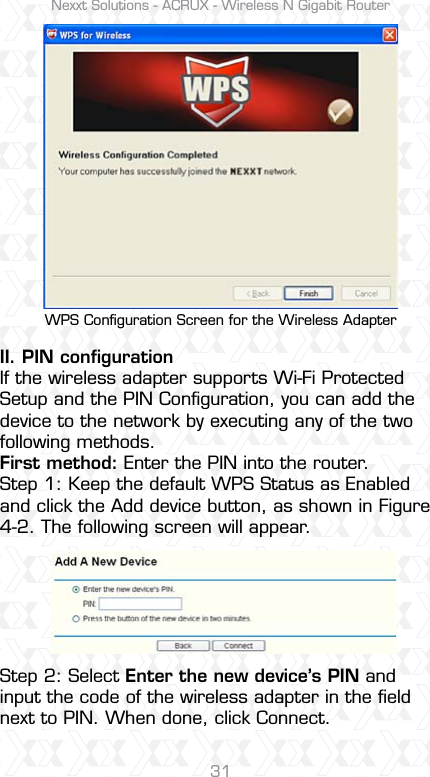
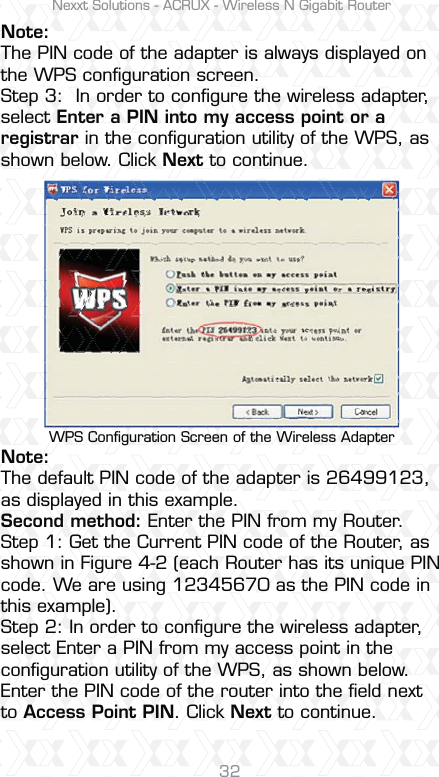
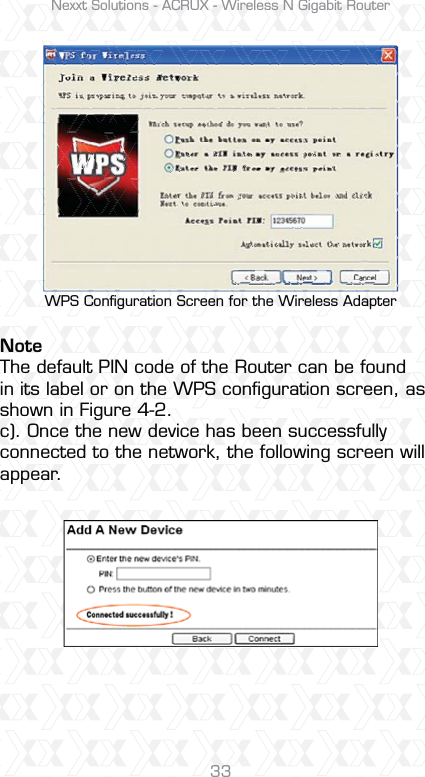
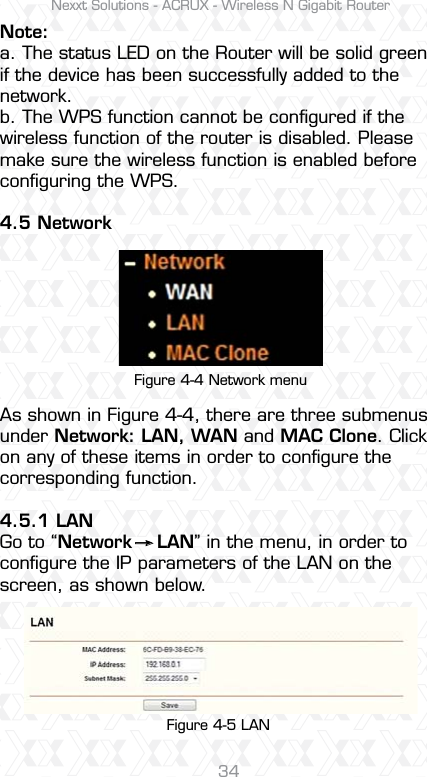
ARN03304U1_User Manual1_rev1