NINGBO DOOYA MECHANIC and ELECTRONIC TECHNOLOGY DV50112 DC Venetian Blinds Drive User Manual DM35 45 ECA Y
NINGBO DOOYA MECHANIC & ELECTRONIC TECHNOLOGY CO., LTD. DC Venetian Blinds Drive DM35 45 ECA Y
User manual
1. Optrating:
①The valid interval of the emitter button is 6s,the emitter will quit the set after 6s.
②The motor will run for hint,please do the next step after the hint.
2. Set limit position:
①Befor use,you have to set up/down limit position,and it is invalid when the up/down
limit and the third limit are at the same locateon.
②Atter limit setting,with power and memory function.
③It will exit limit setting when program there is no operation for 2 minutes.
④It will delete every memory and restore the factory settings.
3. If the emitter lost,please set up again with new emitter.
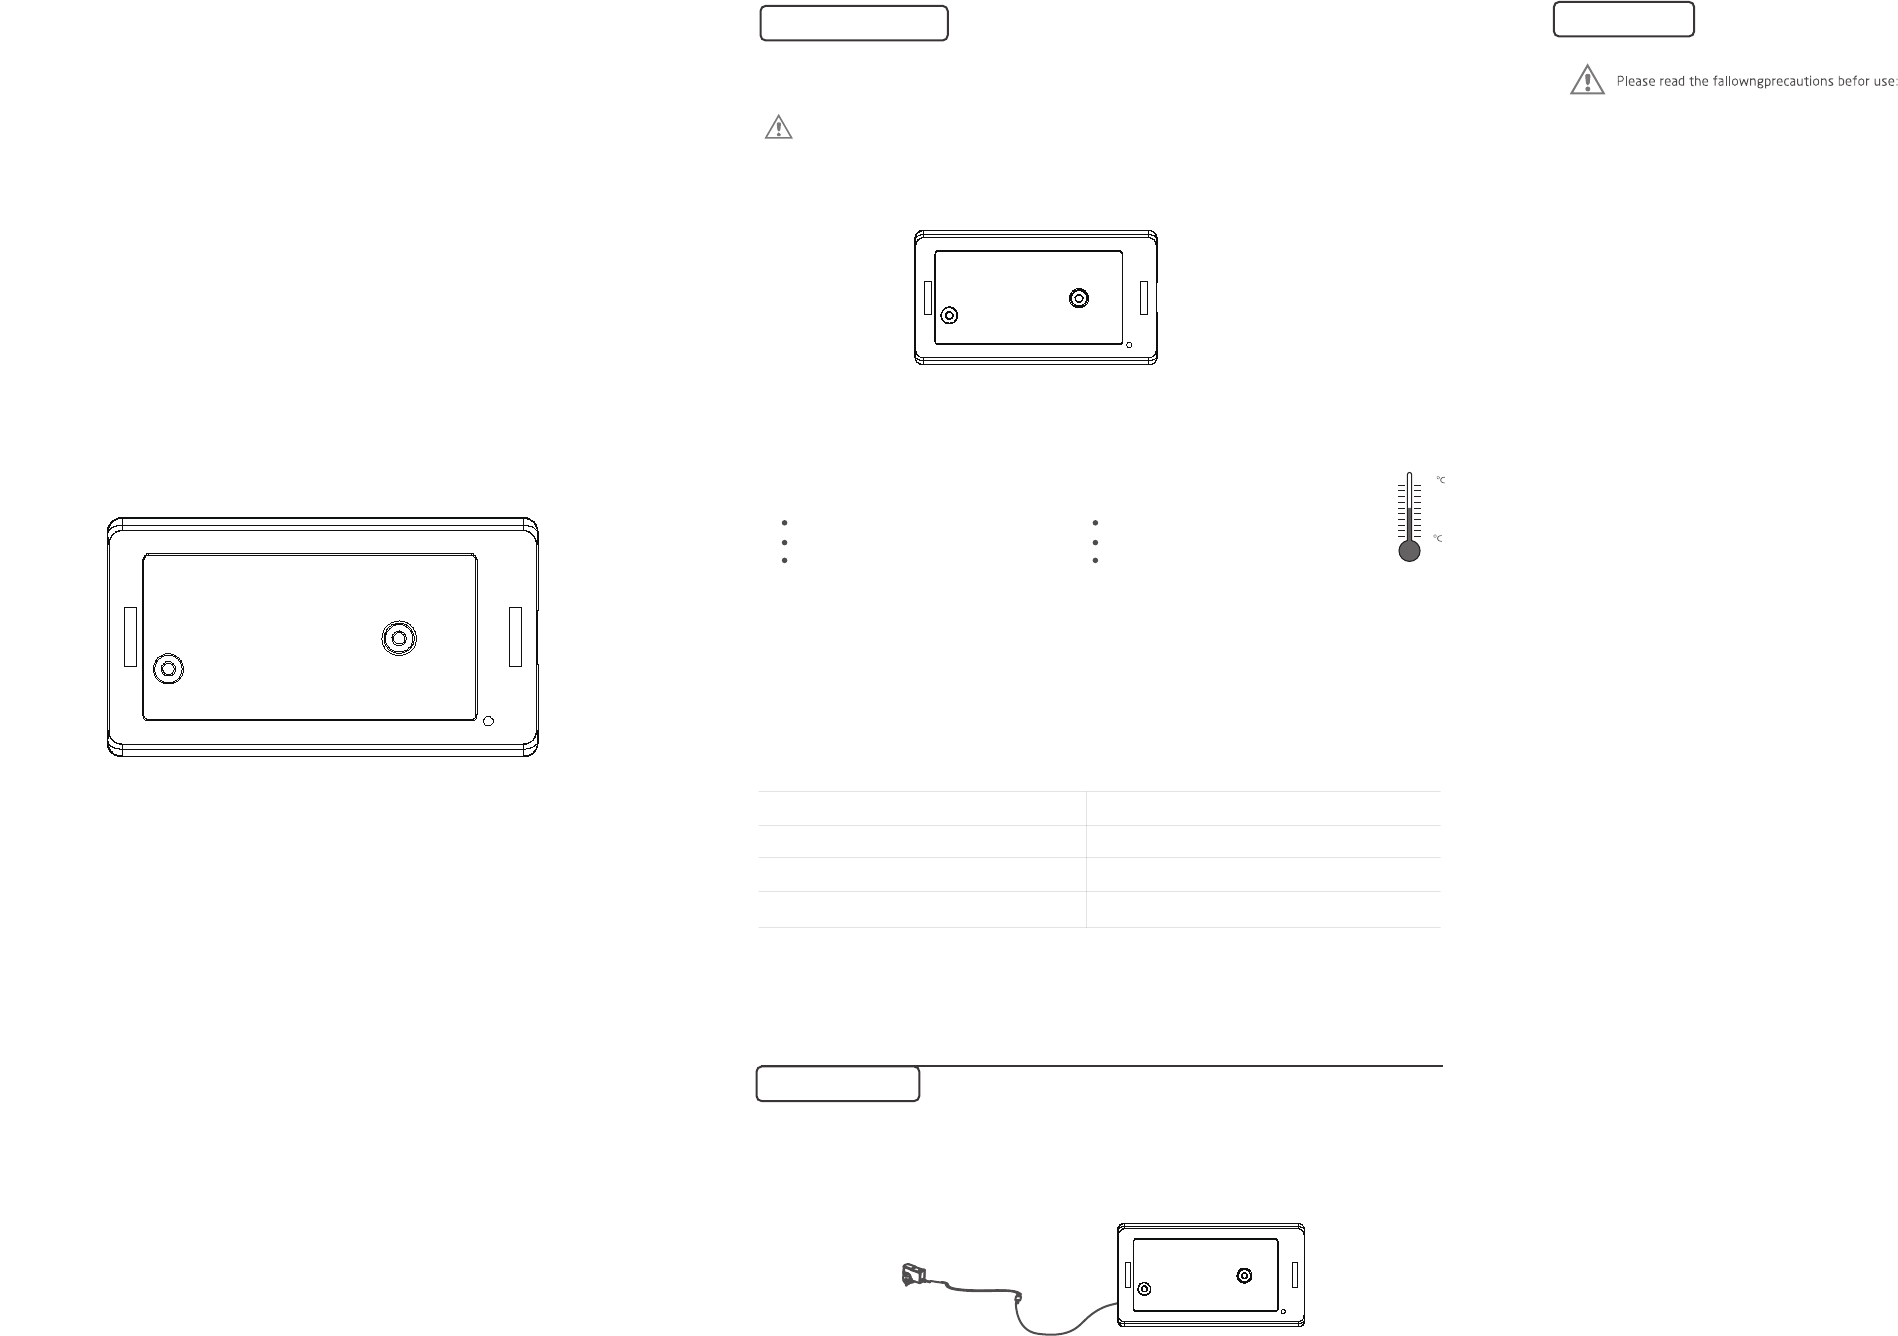
Note:The motor DV50CE can be charged by both the power adapter DC240(I/J/K) or the 12V supply electricity.
Product introduction
One Electronic motor maximum can store 20 channels,over 20 channels,if still need add
new channels,it will be repeating covered in turn from second channel.
Product features:
The reverse of direction setting
Can set and delete motor limit position
The third limit position setting
Can match code,add code and delete code
Limit position
Only Dot-move & light-adjust function
DV50CE-0.6N/10r
0.6N.m
12V
0.5A
Venetian Blinds Motor-
DV50CE
Specification
(A-03)
DC240(I/J/K)
-5
50
Operating
temperature
Parameters
Type
Rated Torque(N.m)
Rated Current(A)
Rated Voltage(V)
READING
Operation note
Motor Installation

Press 2S Loosen P1
Press 5S Loosen P1
Press 8S Loosen P1
Short press P1
Repeating up,stop down
Set up is ok
Successful change
the direction
Activate is ok
Every perssing
2, The reverse of direction setting
3, Restore factory settings
4, Short press function
P1 button setting
1 Setting up
P2
M
P2
Lithium Cell
3V
P2
Up
Stop
Down
Setting
button
OPERATION GUIDE
Button specification
setting
successful
P2
1, Go into limit-setting mode
P2
P2→Up→P2
Up→Stop→Stop
setting
successful
Down→Stop→Stop
ON
Run for
hint x1Run for
hint x1
Run for
hint x2
Run for
hint x3
Run for
hint x1
Press 3
Run for
hint x1
Press 3
P2 P2
P2 →P2 →P2
OFF
ON
T≥10S T<10s
Power on
P2→P2→Up/ P2→P2→Down
Set up
is ok
P2 P2
P2 →P2 →P2
Or
P2 P2P2
P2 →P2 →P2
ON
6 Delete limit
ON
P2 P2
The limit
is deleted
P2→Down→P2
Emitter adding
is ok
Press 2s
Loosen
Press 2s
Loosen
P2
5 Delete all emitter
P2 P2
P2→Stop→P2
Note:Can use DC1331.
+
Emitter adding
is ok
7 Dot-move setting
+
Go into
adjustment mode
Jog increasing the
distance a stall
+
Go into
adjustment mode
Jog distance the
decreases a stall
Press the button corresponding to the scene
Note:①This operation is void under sleeping status; ②Must be in active status, this operation is valid.
P2 P2
Set up
is ok
Or
Note: When the transmitter will not be prompted to rotate once, does not turn the transmitter when prompted. With special transmitter instructions
Run to a preset first scene
The first scene
Or
The first scene is
memorized position
Note:①After a short time you press a scene setting, motor running position automatically to the first scene, the
other profiles and so on;
②Motor at the corresponding point of the scene (the scene has been set for this point), press
the corresponding scene button, the motor rotates one time, this position is deleted scenes;
③Special remote control for theDC2150I,DC2150J,DC2152J,DC2152I.
Common troubleshooting
1
PHENOMENON REASON PROCESSING METHODNUMBER
The motor is
not running
a,Set up the match code
b,Contact the engineers for after-sales
a,The emitter is not matched.
b,If press P1 button for a long
time while with no reaction.may
be the power is short-ciralit or
the ciralit board or the motor is
broken.
Setting button(P1)
Run for
hint x1
Run for
hint x1
Run for
hint x1
Run for
hint x1
Run for
hint x1
Run for
hint x1
Run for
hint x1
Run for
hint x1
Run for
hint x1
Run for
hint x1
Run for
hint x1
Run for
hint x1
Press 1s Press 1s Press 1s
Power on
Power on
Press 1s Press 1s Press 1s
Press 1s
Press 1s
Press 1s Press 1s
Run for
hint x1
Run for
hint x1
Run for
hint x1
Press 1s Press 1s Press 1s
Run for
hint x1
Run for
hint x1
Run for
hint x1
Press 1s Press 1s Press 1s
Run for
hint x1
Run for
hint x1
Run for
hint x1
Press 1s
Run for
hint x1
Press 1s
Run for
hint x1
Press 1s
Run for
hint x1
Press 1s
Run for
hint x1
Press 1s
Press 1s Press 1s
2 Add Emitter
Note:Emitter is the one already matched code, while emitter has not.
3 Limit position
Power on
Run for
hint x1
Run for
hint x1
Run for
hint x1
Press 1s Press 1s Press 1s
Go into limit-setting
mode Follow step 2
2, Set up limit position
3, Set down limit position
Press 1s Press 1s
The blind
run up The blind
stop
Confirm the Blind
to stop in the up
limit position
The up
limit point
Press 1s Press 1s
The blind
run down
The blind
stop
Confirm the Blind
to stop in the down
limit position
The down
limit point
4 Delete one emitter
One emitter
is deleted
The emitters
all deleted
Note: with the same method,you only can delete the emitter not the emitter
1, Activate motor for the first time
Already set
up, down
limit position