NT ware Systemprogrammierung MICARDLM03 USB RF-Cardreader MiCard V3 User Manual MiCard V3 Installation Manual Full Install Guide
NT-ware Systemprogrammierung GmbH USB RF-Cardreader MiCard V3 MiCard V3 Installation Manual Full Install Guide
user manual
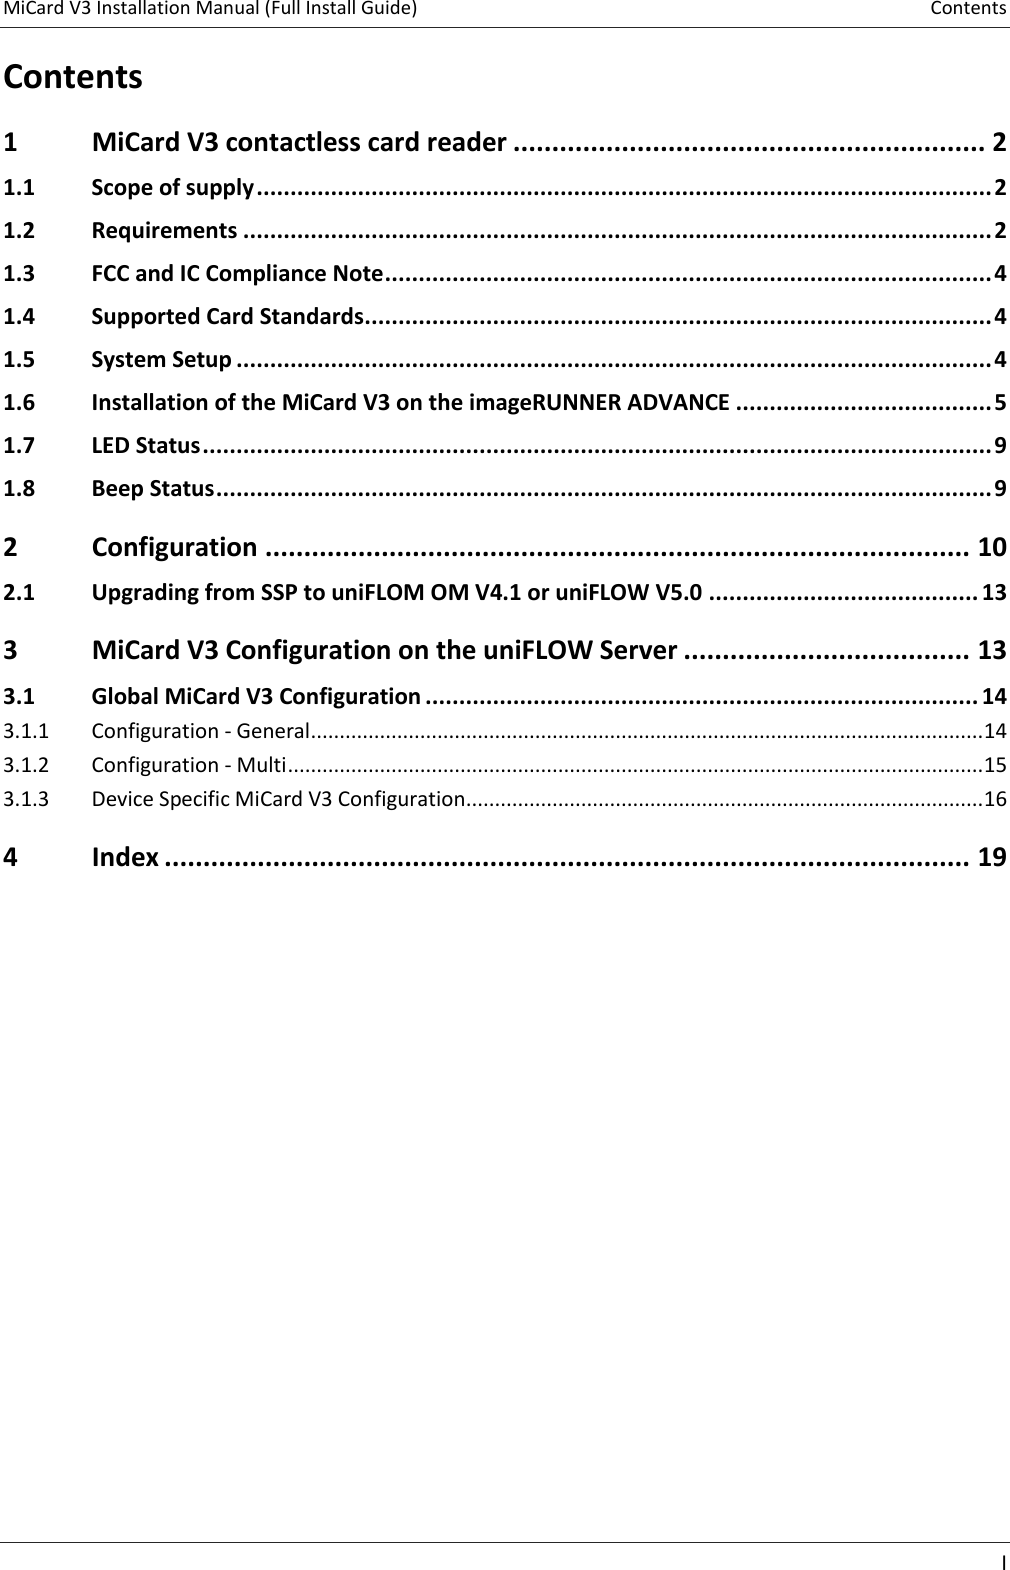
![MiCard V3 Installation Manual (Full Install Guide) 11 Click on the ID-Device column to open a configuration pop-up. This will look like the screenshot below: The terms used and the possible settings of the configuration window are as follows: Connected ID Module Shows the ID Module connected, e.g. MiCard / miniMIND. Last Read ID Shows the last ID read by a card swipe. Conversion Result Shows the result of the last read ID when the configured code conversions are applied. This is the ID sent to the server for authentication. Code Remove First Specifies the number of characters to be removed from the start of the ID read before the code conversion takes place. For instance a value of 3 applied to A881C045 will result in 1C045. Code Remove Last Specifies the number of characters to be removed at the end of the ID read before the code conversion takes place. For instance a value of 3 applied to A881C045 will result in A881C. Code Length Specifies the code length applied after the code conversion. For instance a value of 6 applied to A881C045 will result in A881C0, whereas a value of 10 applied to A881C045 will result in 00A881C045. Code Conversion No. [N] Specifies the code conversion that has to be applied to the ID read in a series of code conversions at step [N]. The results of the code conversions at step [N] are displayed](https://usermanual.wiki/NT-ware-Systemprogrammierung/MICARDLM03/User-Guide-1897061-Page-17.png)
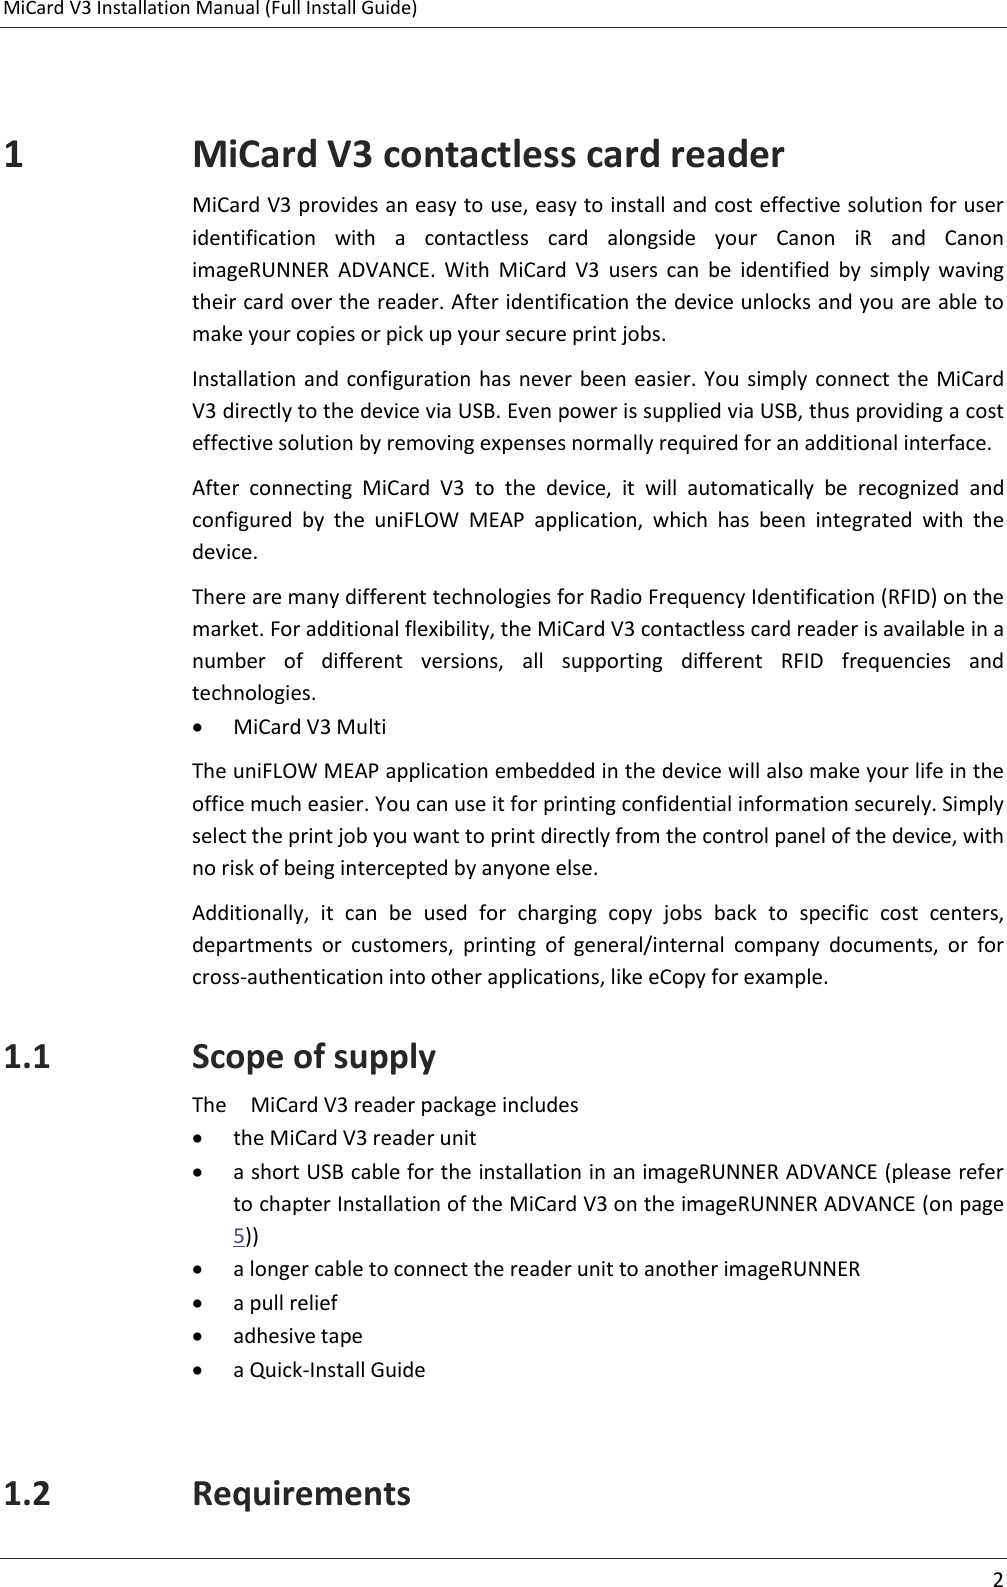
![MiCard V3 Installation Manual (Full Install Guide) 12 next to the name of the selected code conversion in the drop down list. If the result is empty "()", this code conversion can’t be applied in the actual step (cf. screenshot above). After a code conversion step [N] has been saved by clicking the Save button the configuration page will be allowed to specify code conversion step [N+1] as shown in the screenshot above. Next to the name of the Connected ID Module in the configuration page (MiCard) you can click on a link (config) which will bring up the page shown below. With uniFLOW Login Manager / MomClient (Secure/Public Printing Applet), from V2.1.2 onwards, updating the MiCard Firmware is possible via this configuration page. A Firmware Update File can be requested from our support department (Email: support@nt-ware.com) mailto:support@nt-ware.com). The Extended Card Format option is explained in detail in chapter Upgrading to uniFLOW OM V4.1 or uniFLOW V5.0 from SSP (see "Upgrading from SSP to uniFLOM OM V4.1 or uniFLOW V5.0" on page 13). To upload the new firmware browse for the file and click on Update. If the file is not a valid MiCard (V3) Firmware file, you will be presented with the following message: If a valid MiCard (V3) Firmware file is selected, the upload will start and you will see the upload progress via a progress bar.](https://usermanual.wiki/NT-ware-Systemprogrammierung/MICARDLM03/User-Guide-1897061-Page-18.png)