Nanjing Hanlong Technology UC92SERIAL IP PHONE User Manual A9R2214 tmp
Nanjing Hanlong Technology Co.,Ltd. IP PHONE A9R2214 tmp
UserManual.wiki
>
Nanjing Hanlong Technology
>
UC92SERIAL User Manual
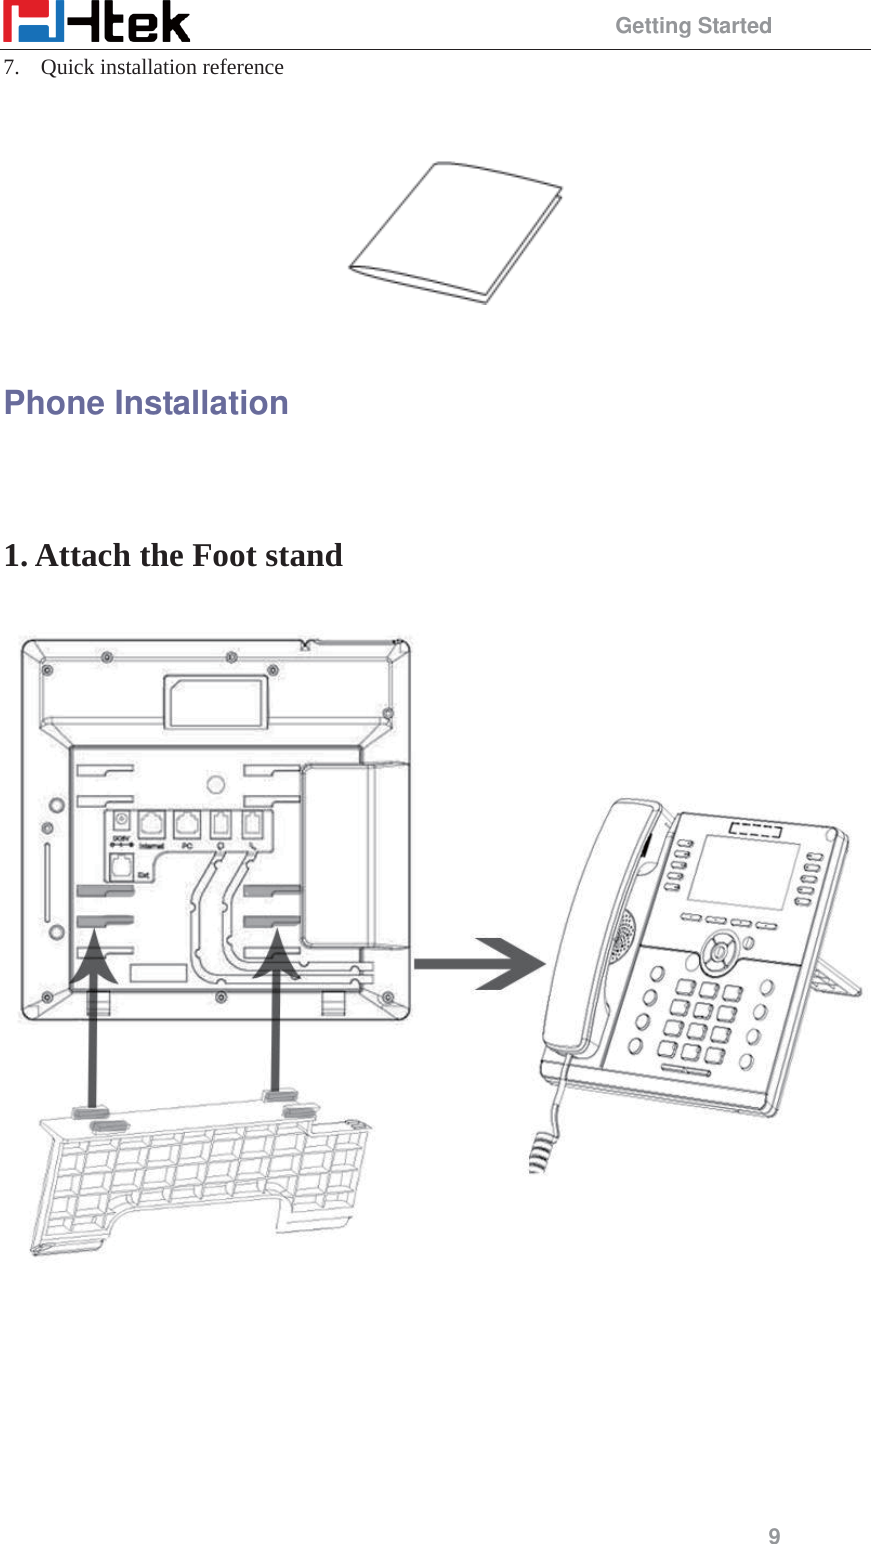
User manual
Navigation menu
Upload a User Manual
Namespaces
Wiki Guide
HTML
PDF
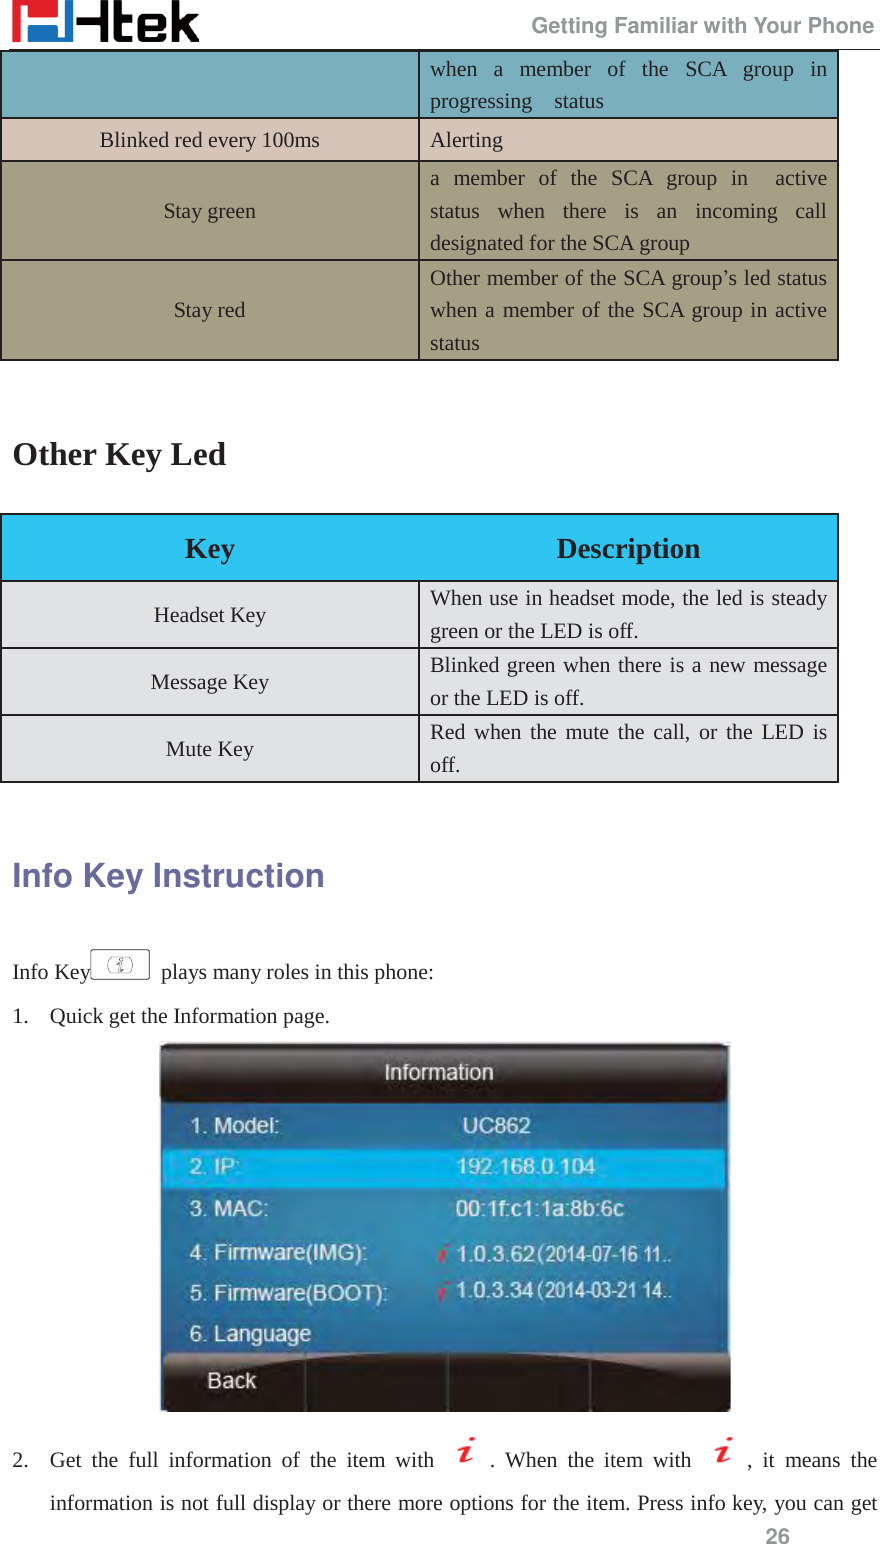
Info
Views
User Manual
Discussion / Help
Navigation


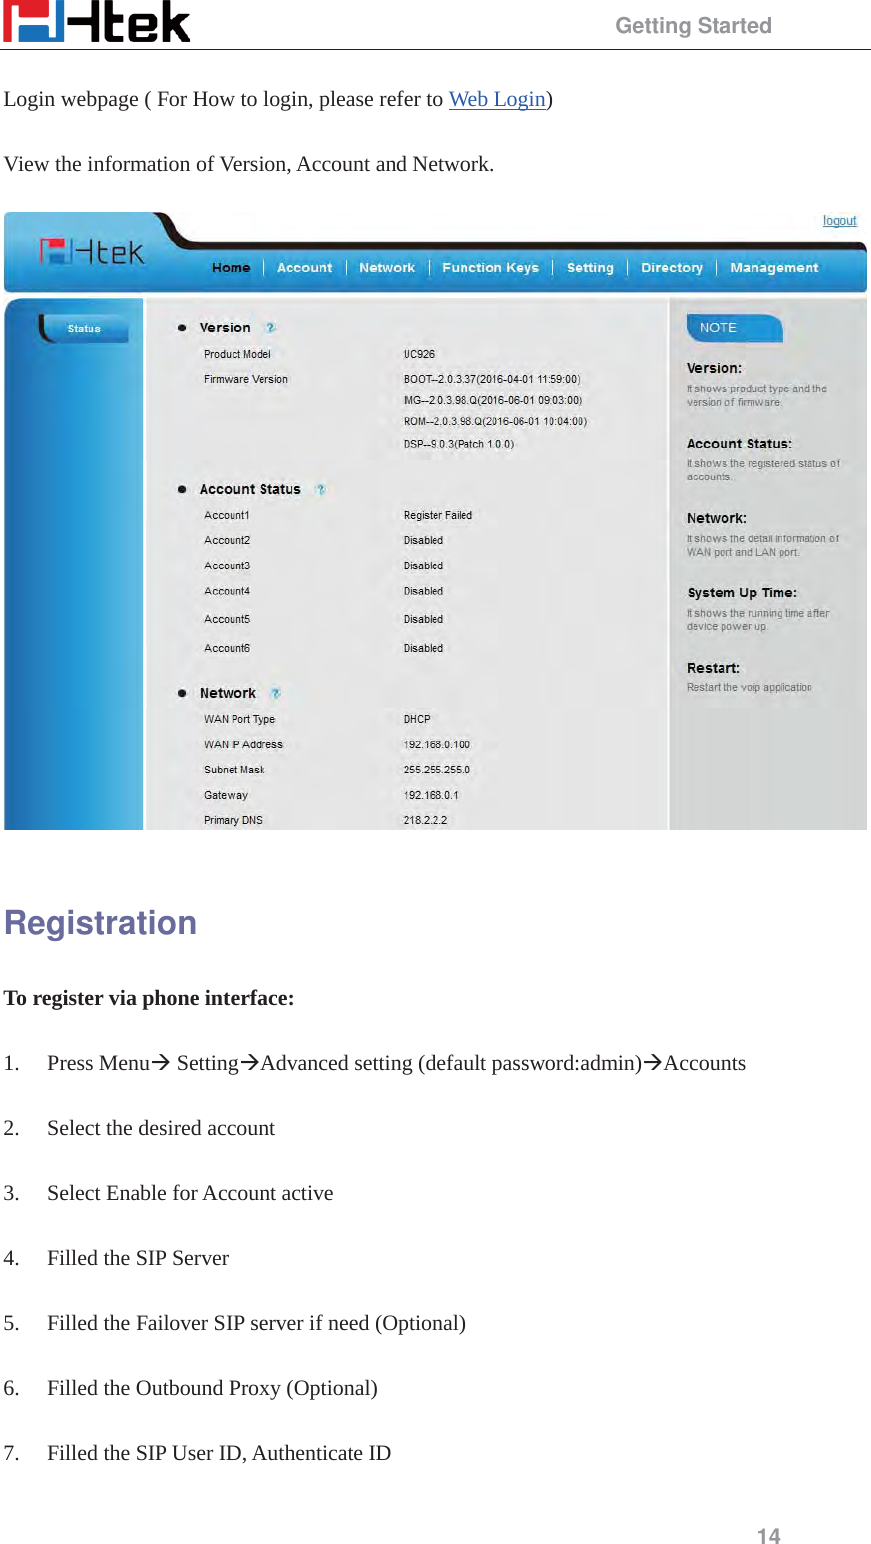
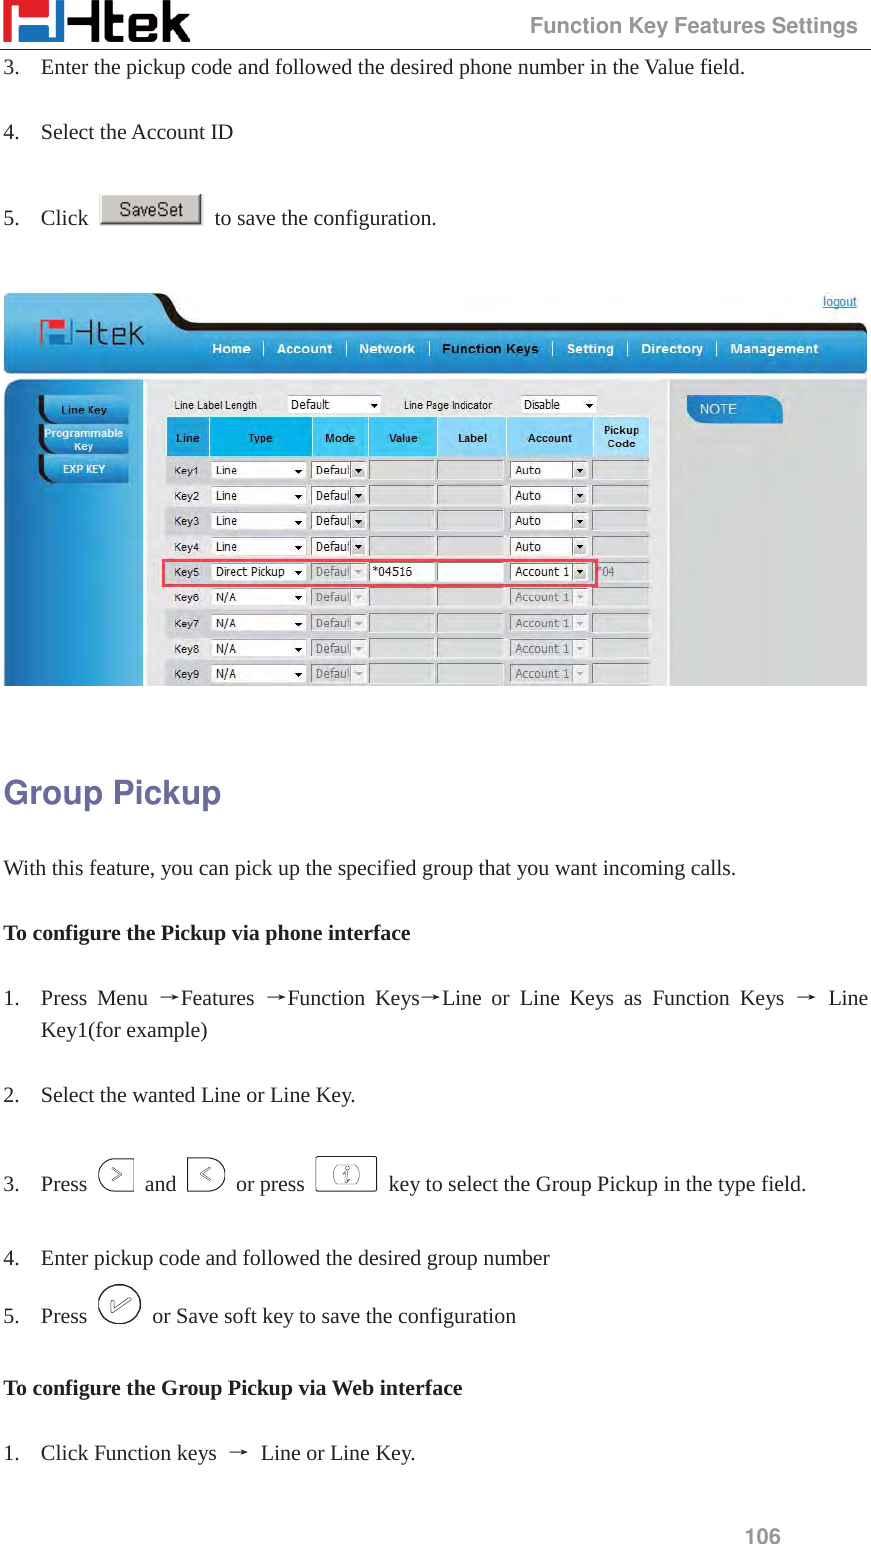
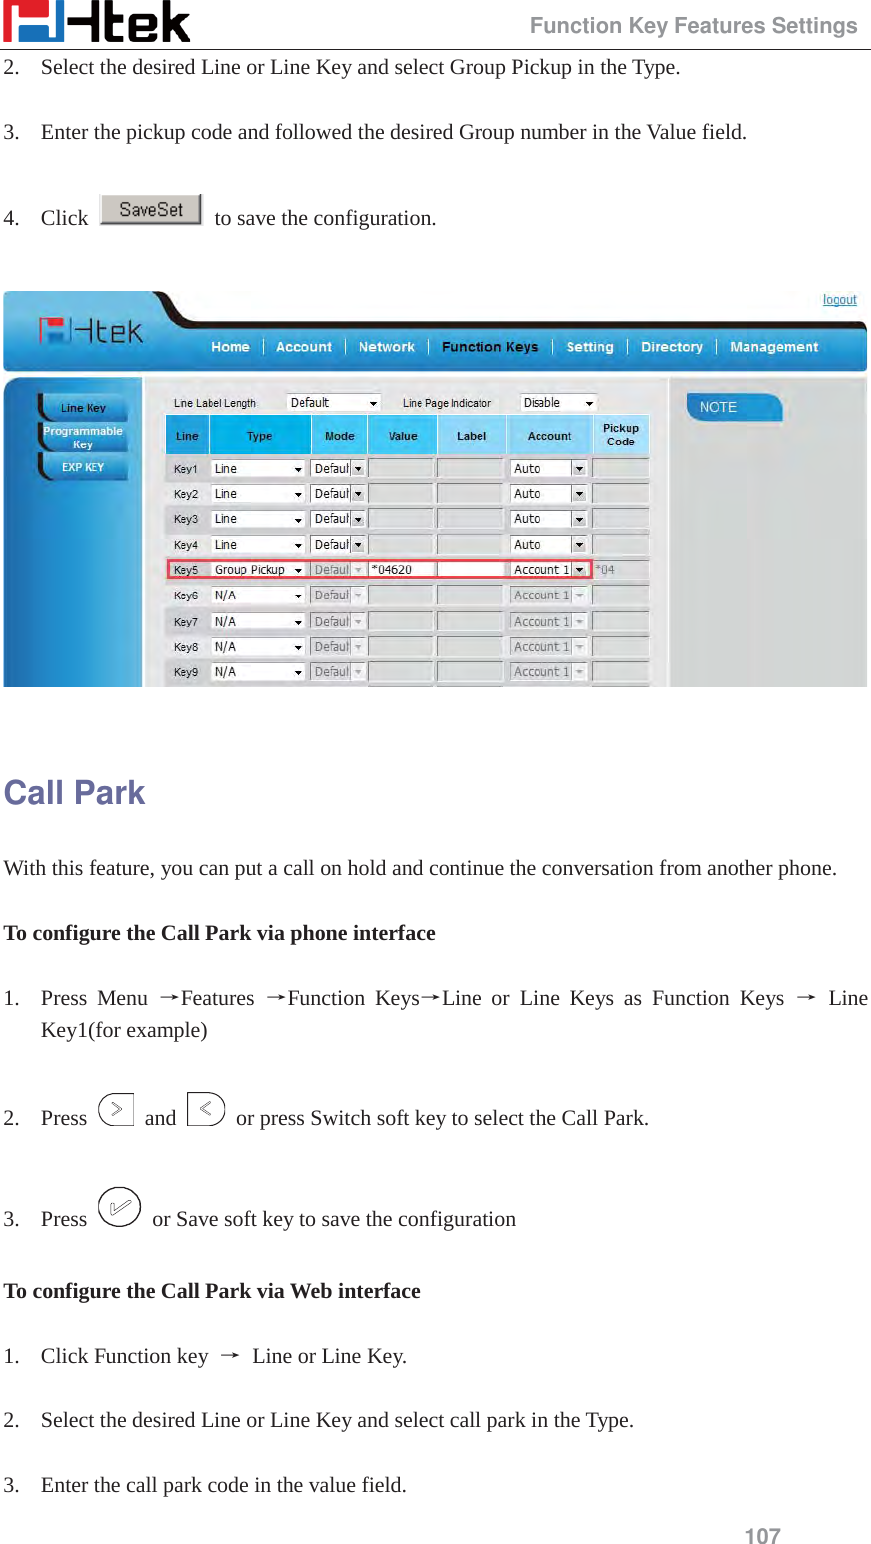
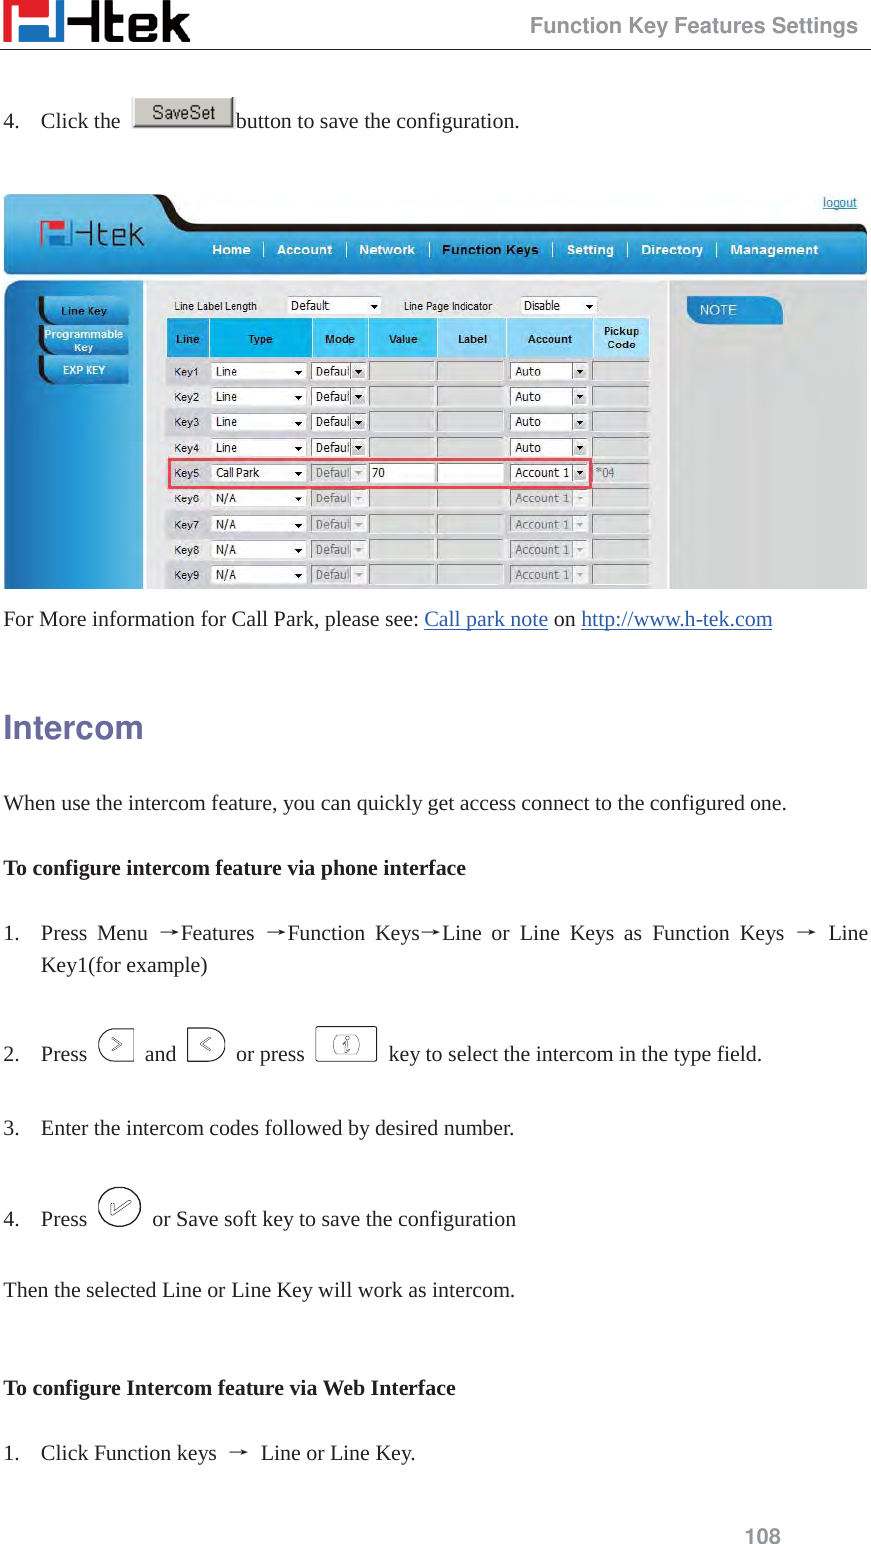
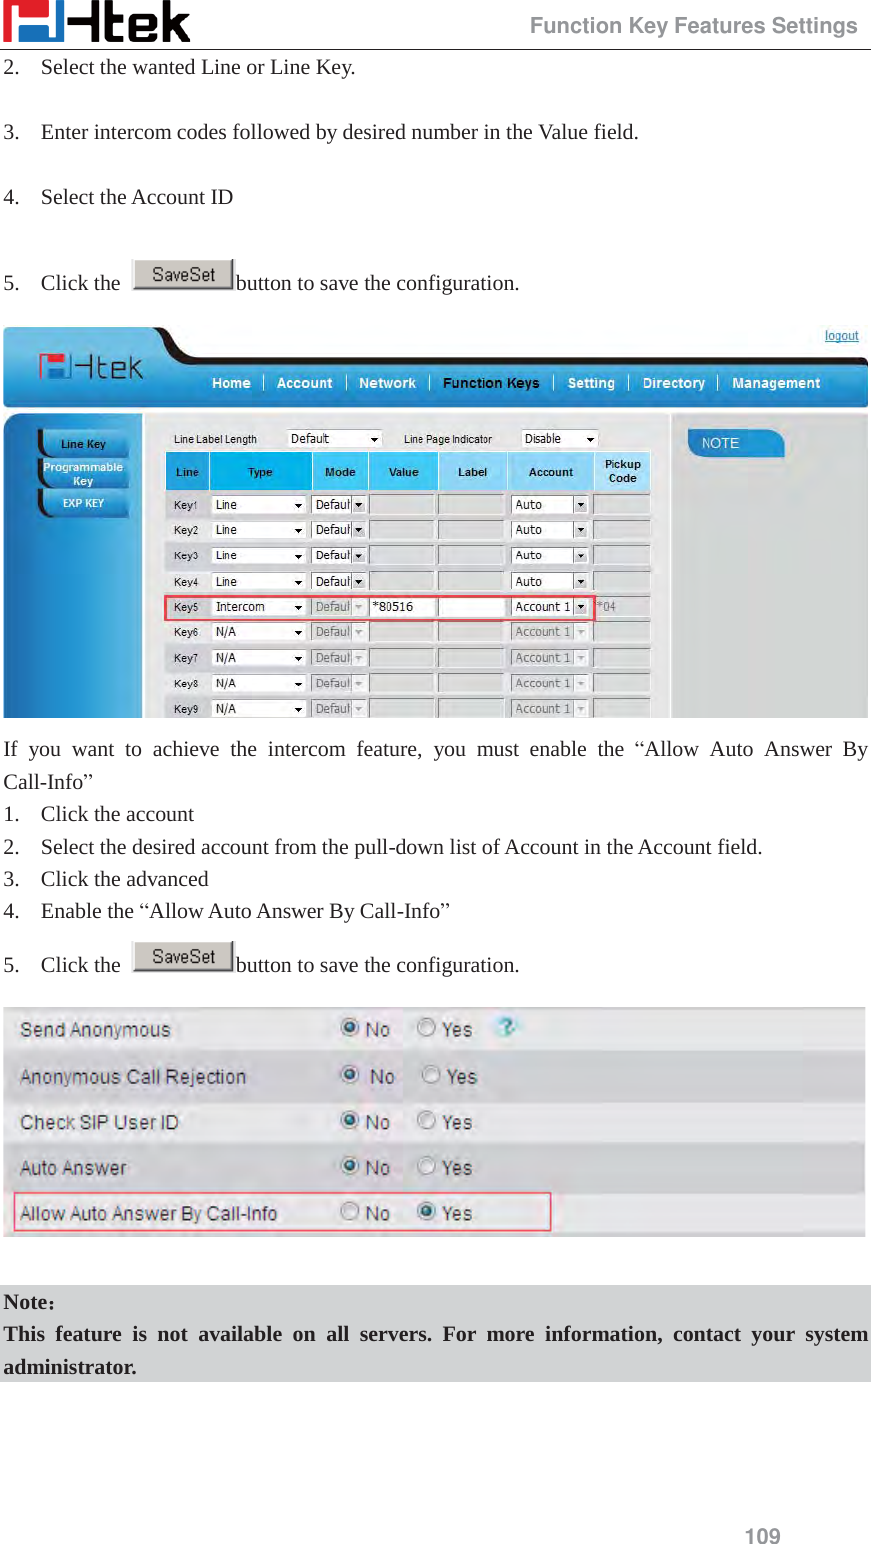
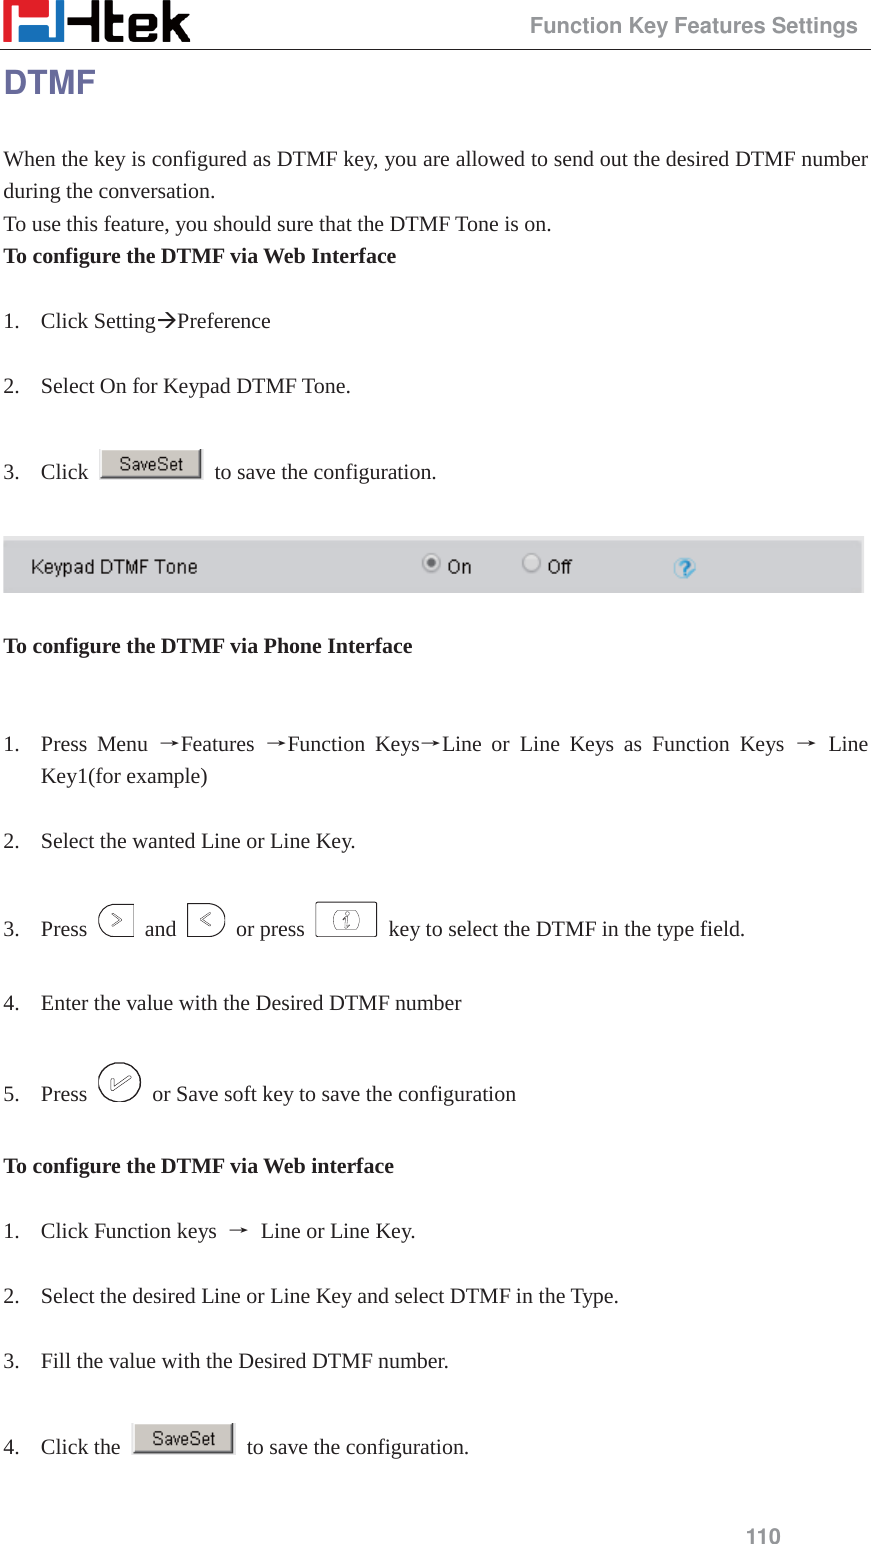
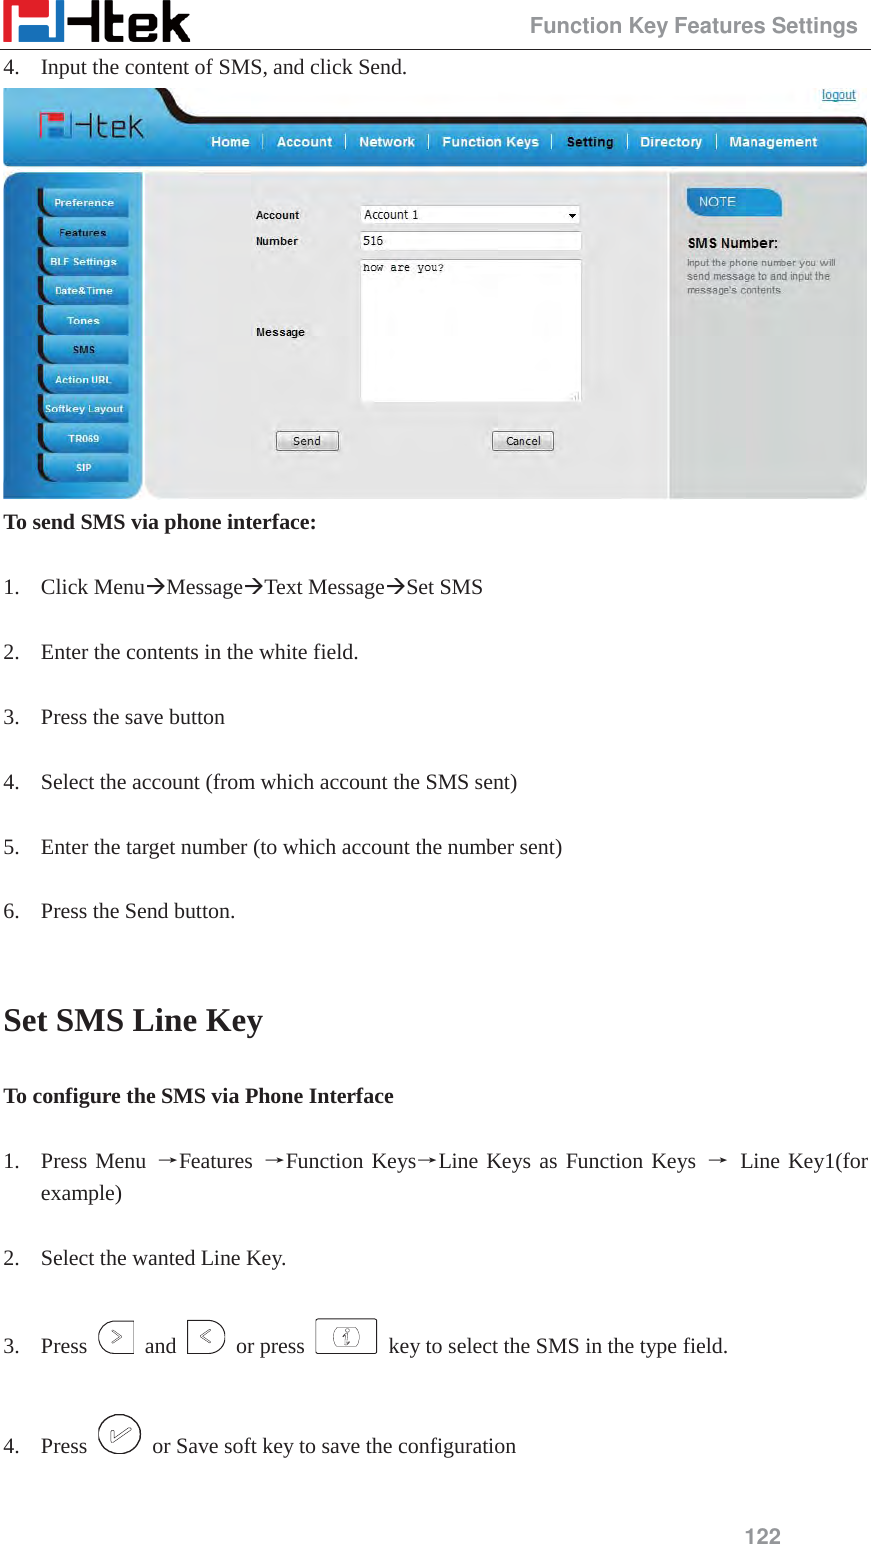
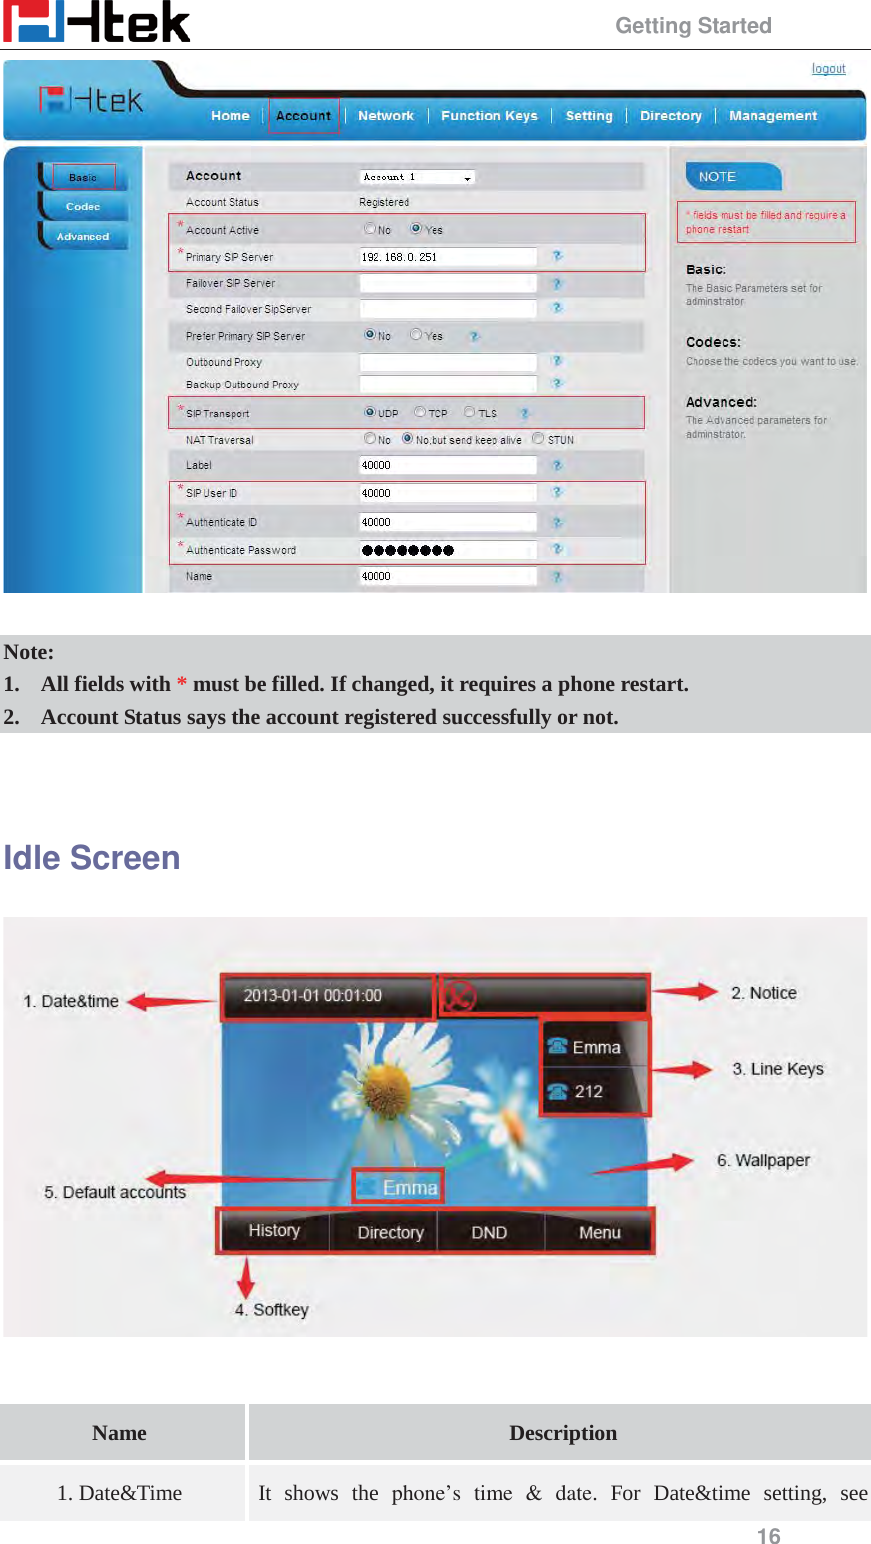
![Getting Started 15 8. Filled the password, Name (shown on LCD) and Ringtone. 9. Press Save to save the configuration. Note: If there is a port of sip server, you need to press “1” on the keypad, then you will find the “:”. Additional Information: When the current input method is ABC/abc/2ab, Pressing “1”, you will find “, . ?:;” Pressing “0”, you will find “ < >(){}[]” Pressing “*”, you will find “*/”!@$” Pressing “#”, you will find “#’%&*|” To register via web interface: 1. Login webpage and Click AccountÆBasic 2. Select the desired Account 3. Select Yes for Account Active 4. Filled the Primary SIP SERVER and other account information 5. Click to save the configuration.](https://usermanual.wiki/Nanjing-Hanlong-Technology/UC92SERIAL/User-Guide-3025942-Page-16.png)


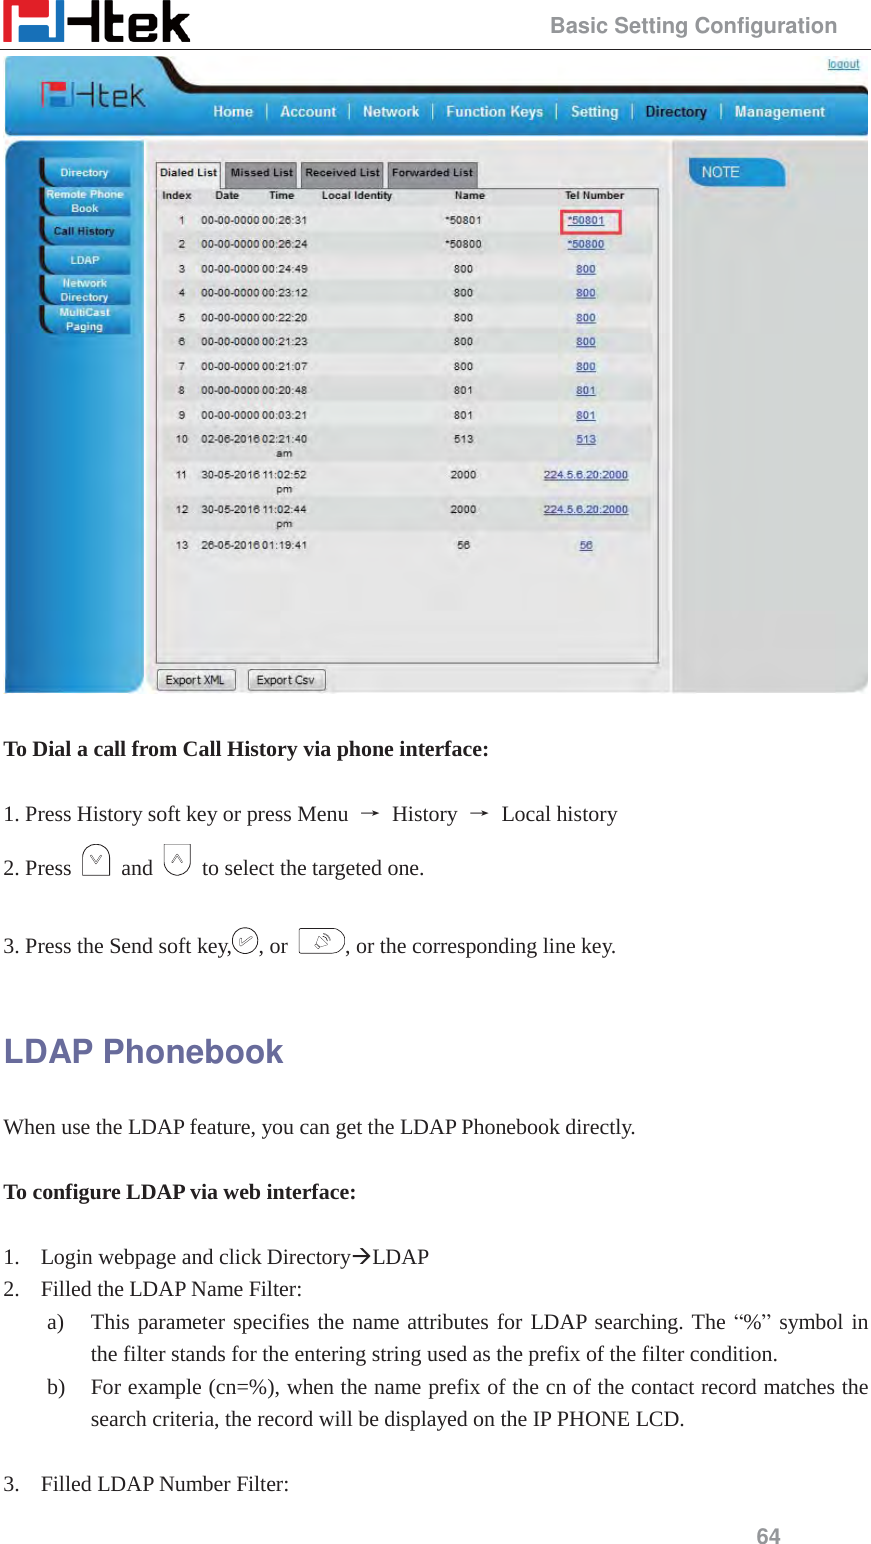
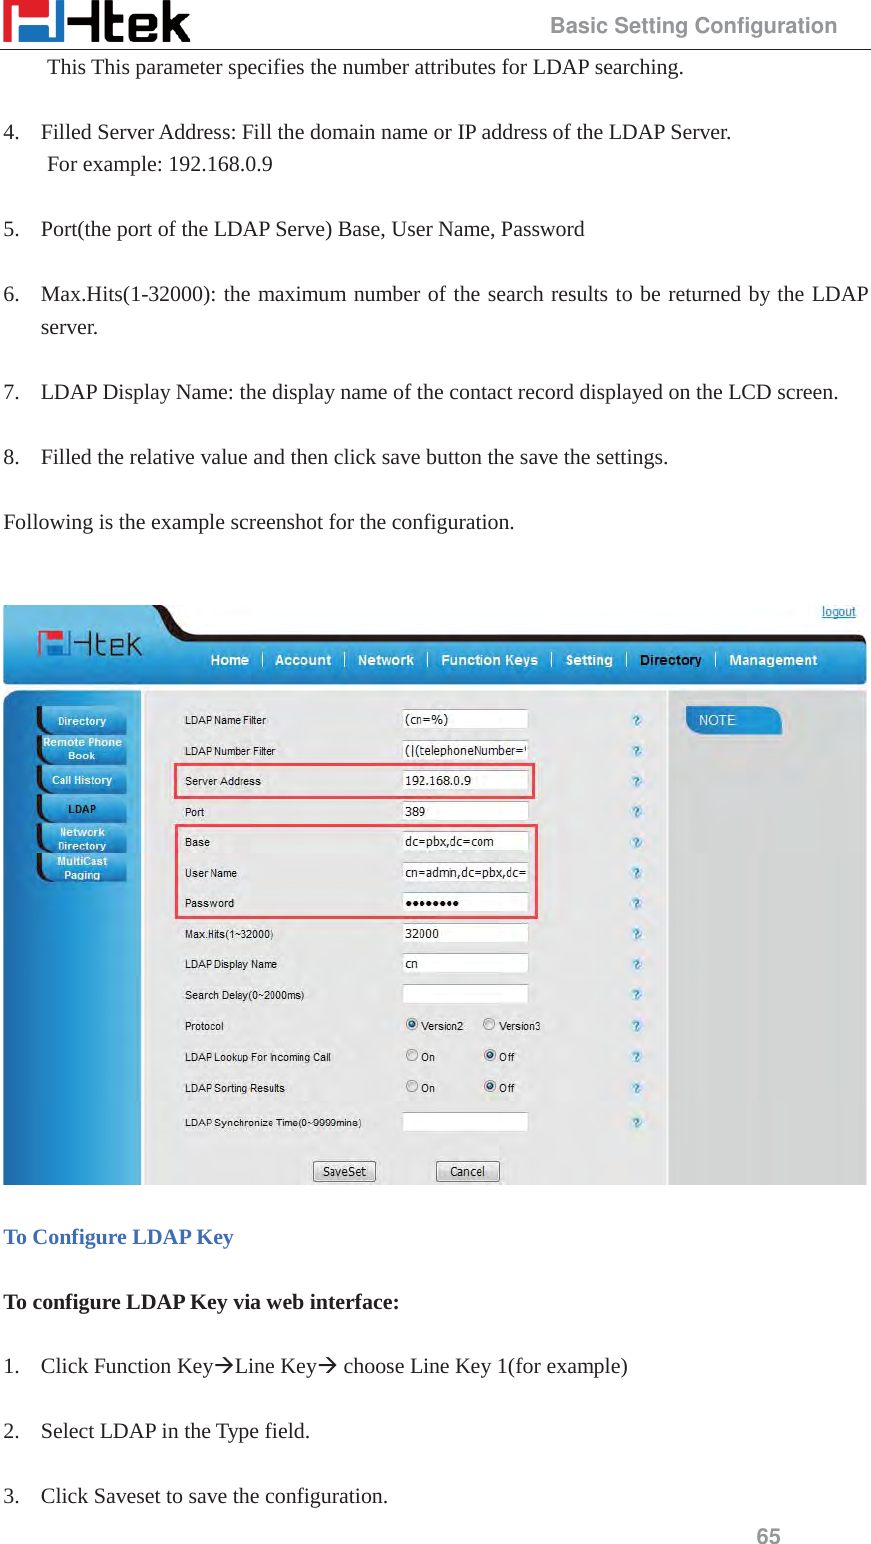
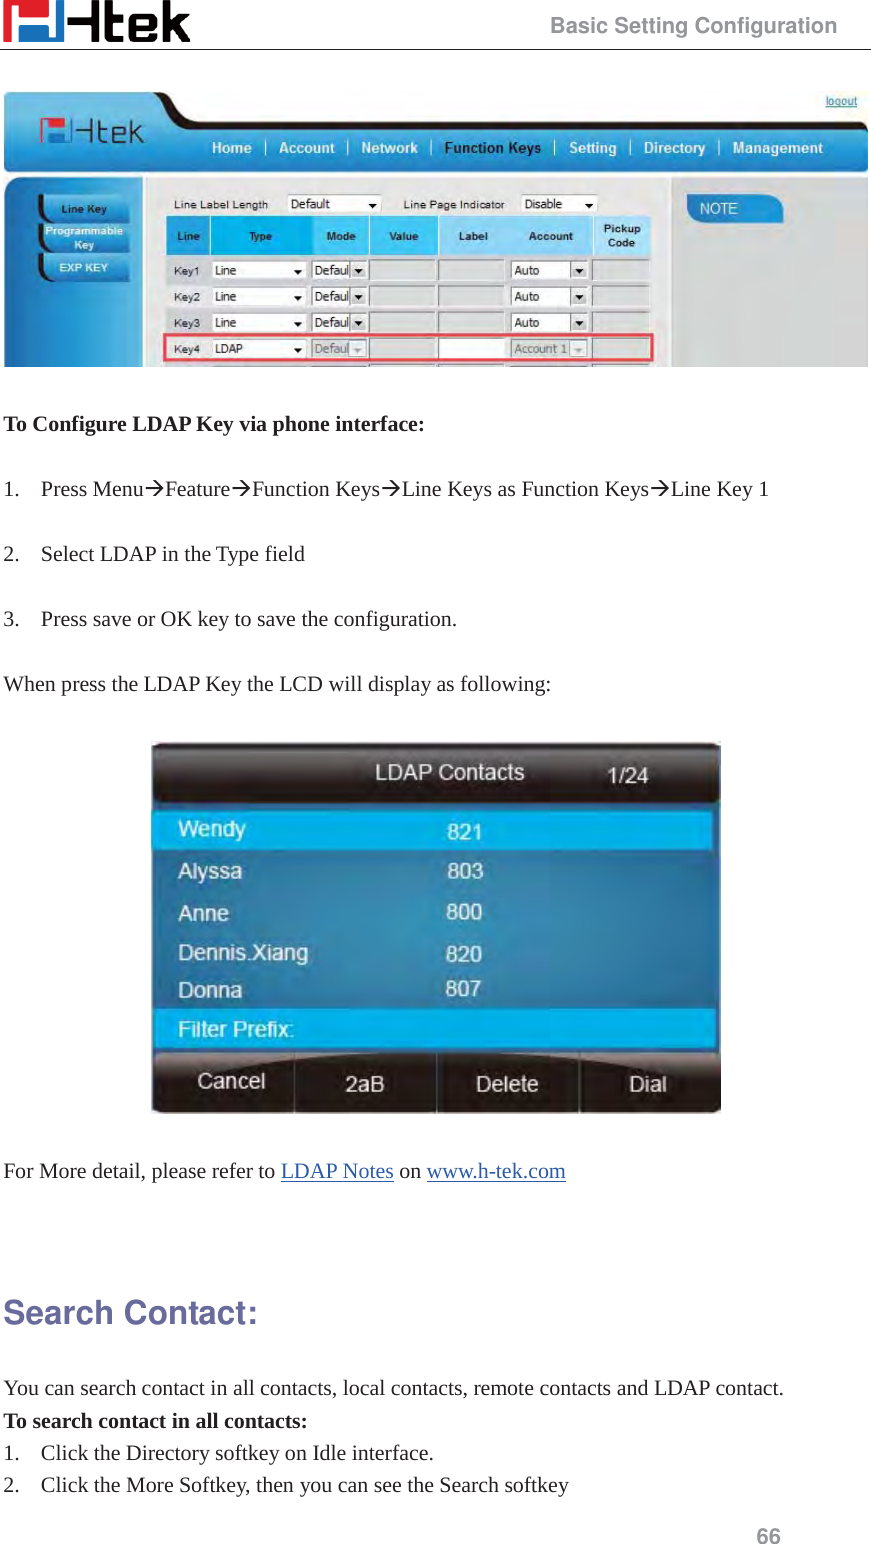
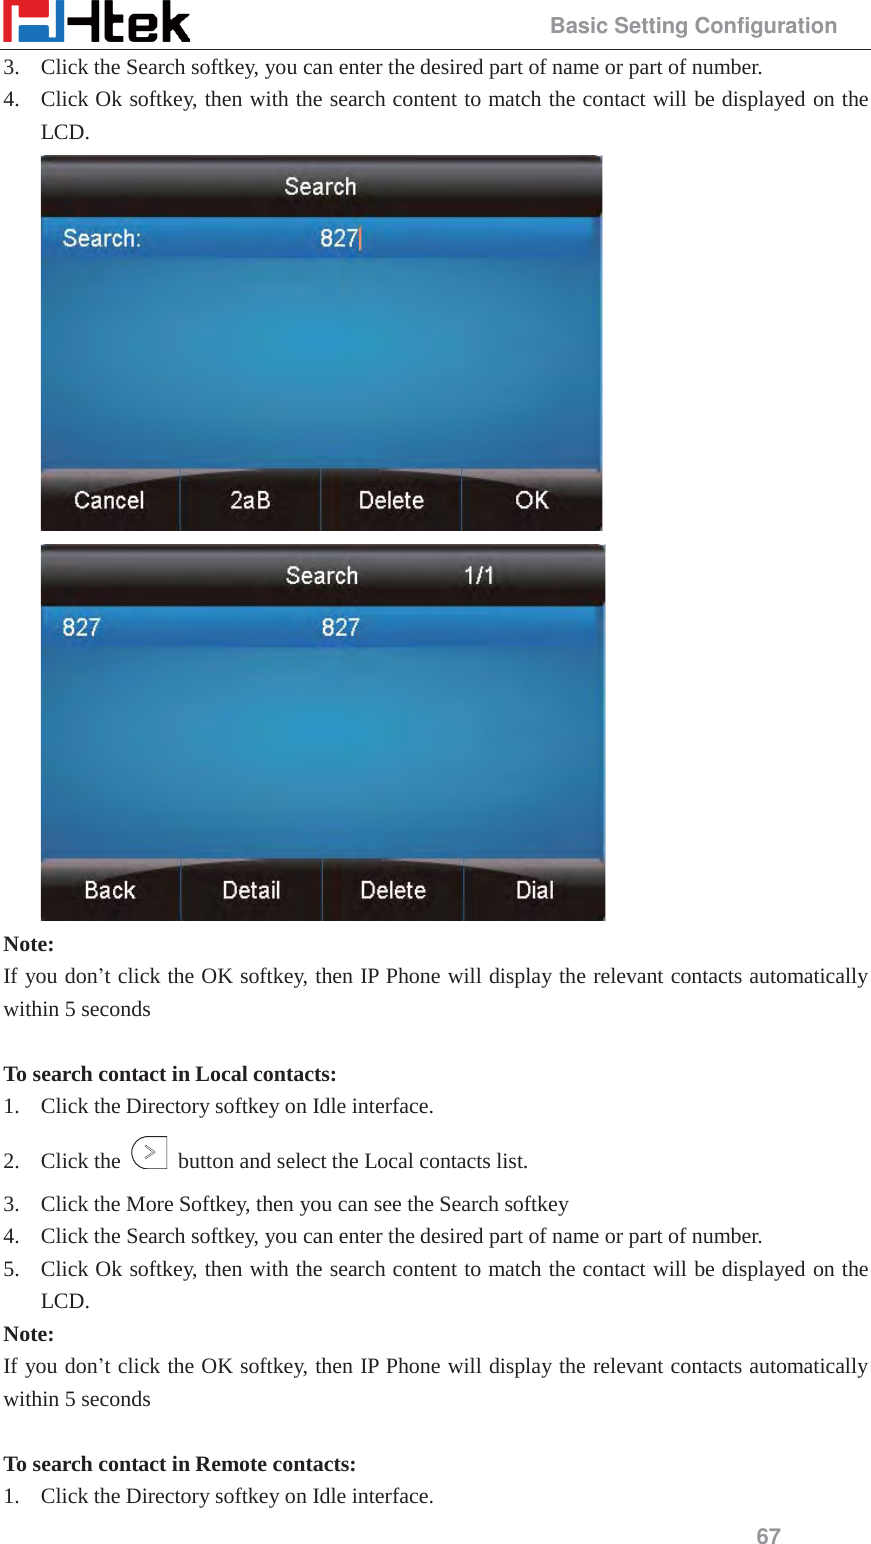
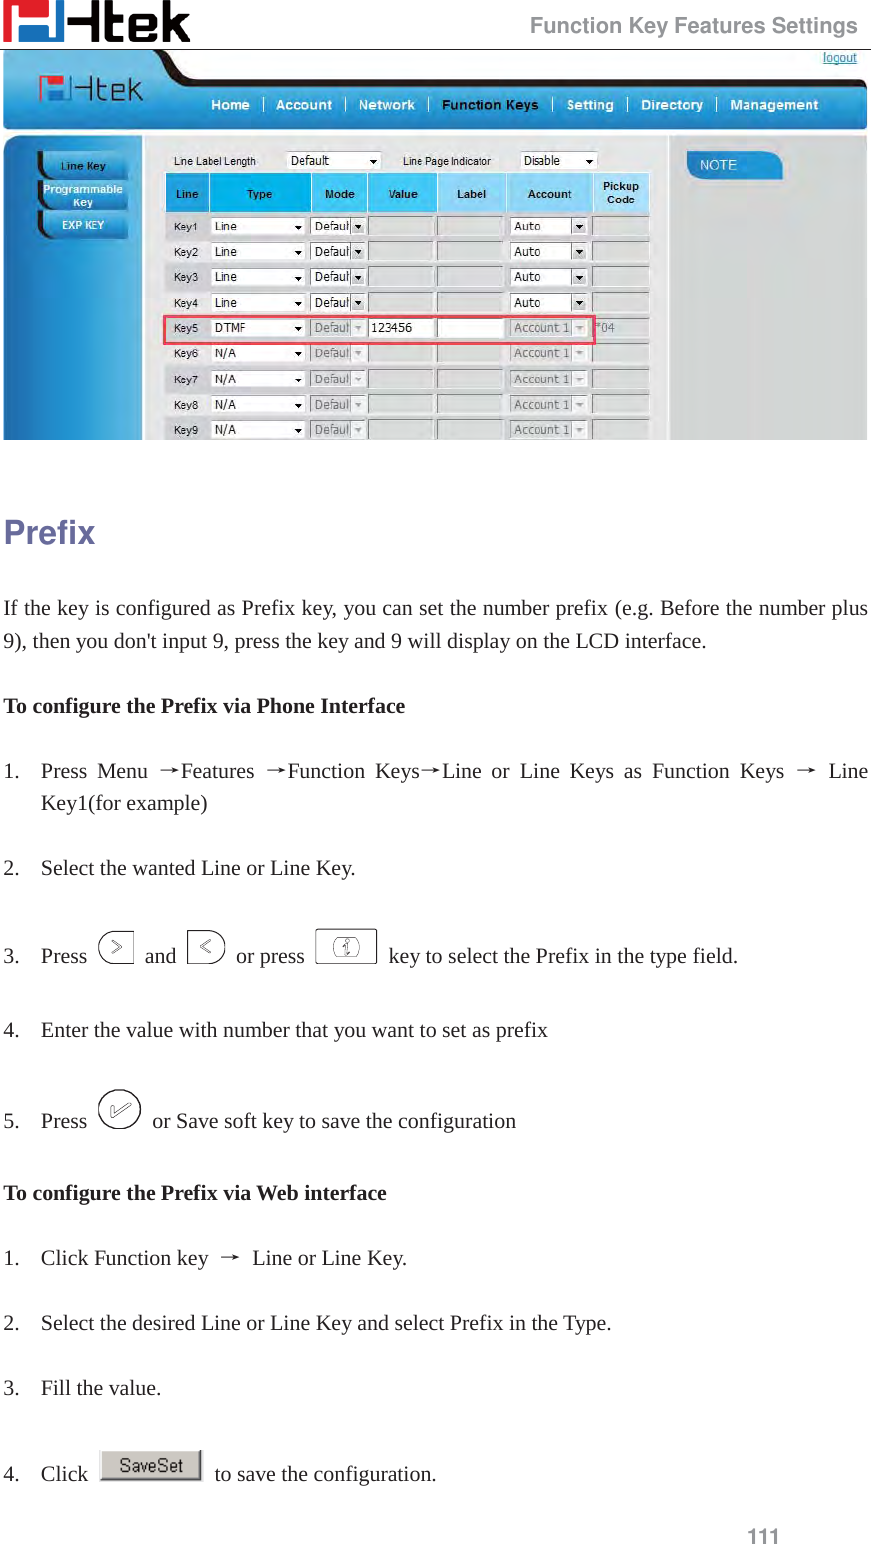
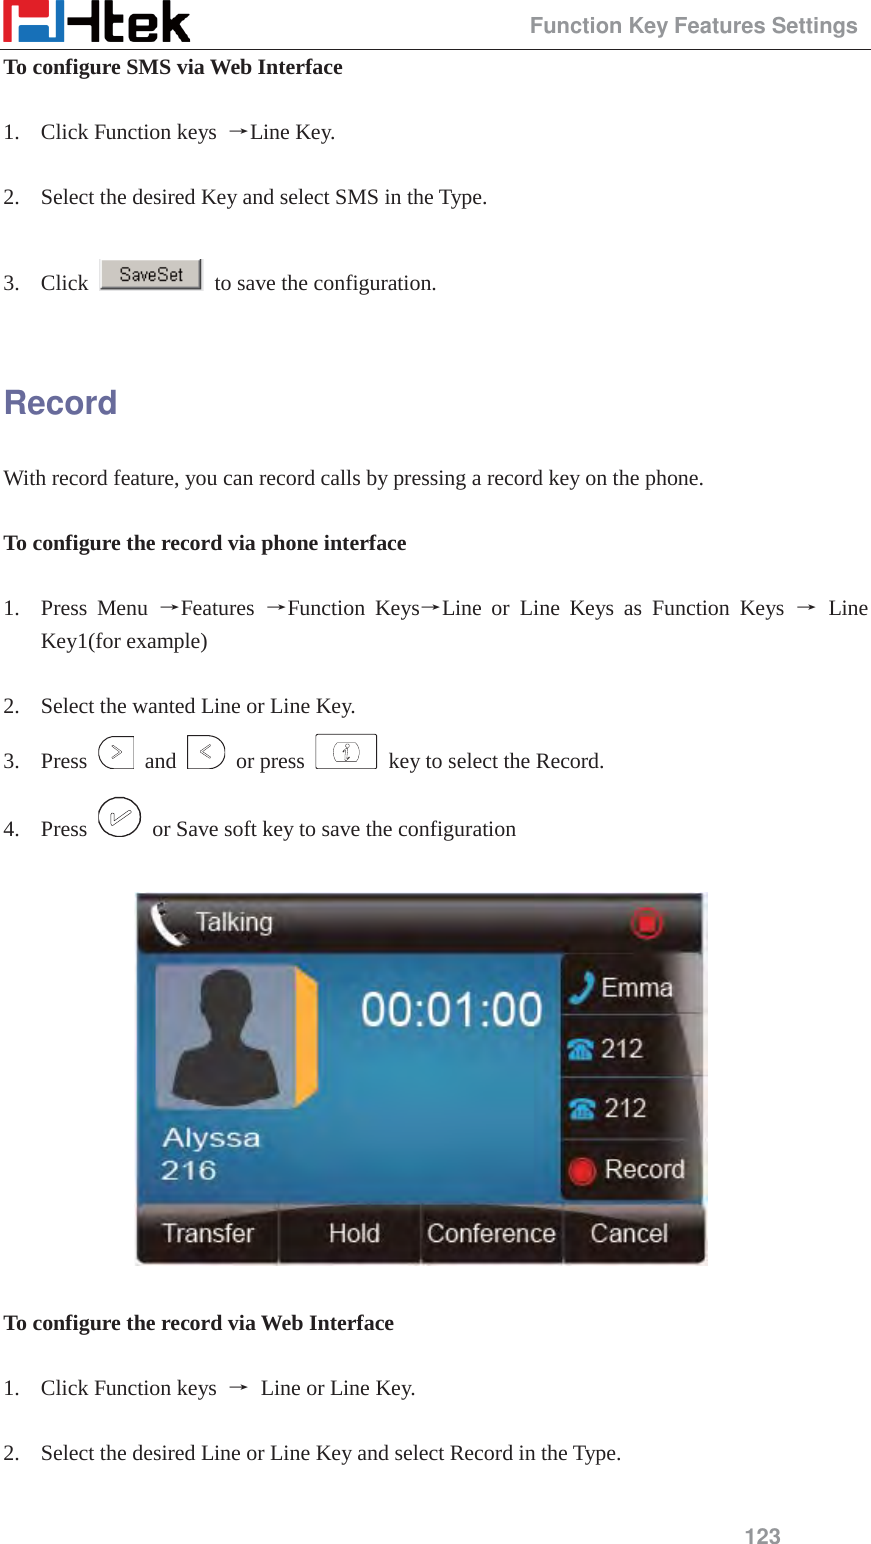
![Other features settings 68 2. Click the button and select the remote contacts list. 3. Select the desired the remote contact and click Enter softkey. 4. Click the Search softkey, you can enter the desired part of name or part of number. 5. Click Ok softkey, then with the search content to match the contact will be displayed on the LCD. Note: If you don’t click the OK softkey, then IP Phone will display the relevant contacts automatically within 5 seconds To search contact in LDAP contacts: 1. Click the LDAP function key. 2. Enter the first character or more of contact’s name. 3. Select the desired the remote contact and click Enter softkey. 4. Then IP Phone will display the relevant contacts automatically within Search Delay. Other features settings Dial Plan Dial plan is a string of characters that governs the way this phone processes the inputs received from your phone keypad. This phone supports dial plan with following accept digits: 1,2,3,4,5,6,7,8,9,0,*,# Grammer Description x any digit from 0-9; xx+ at least 2 digit number; ^ exclude; , hear dial tone; [3-5] any digit of 3, 4, or 5; [147] any digit 1, 4, or 7; <2=011> replace digit 2 with 011 when dialing. To configure dial plan via web interface:](https://usermanual.wiki/Nanjing-Hanlong-Technology/UC92SERIAL/User-Guide-3025942-Page-69.png)
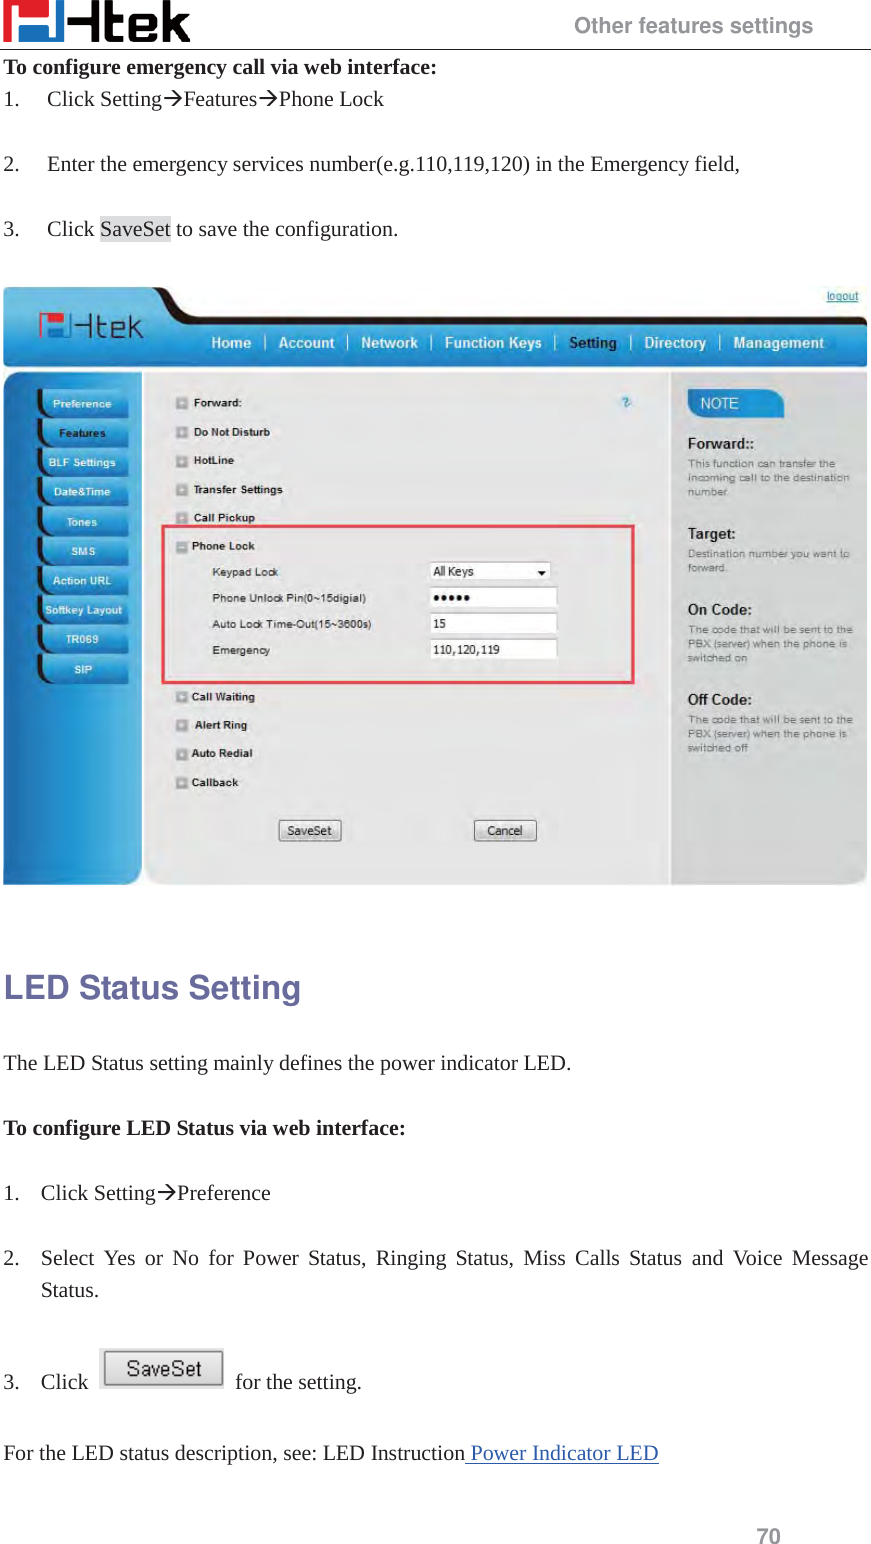
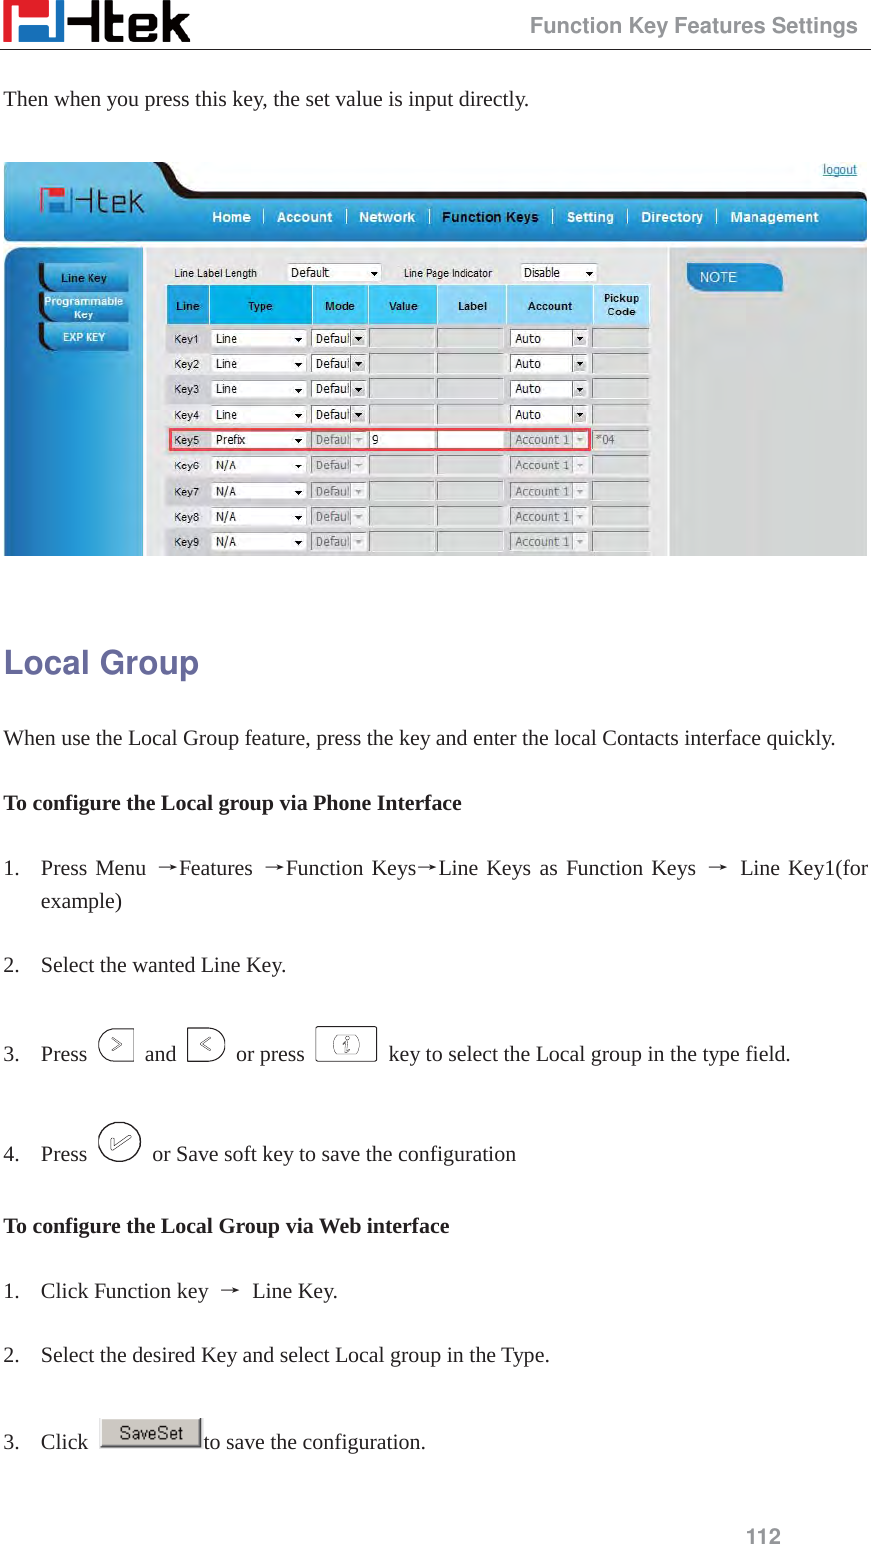
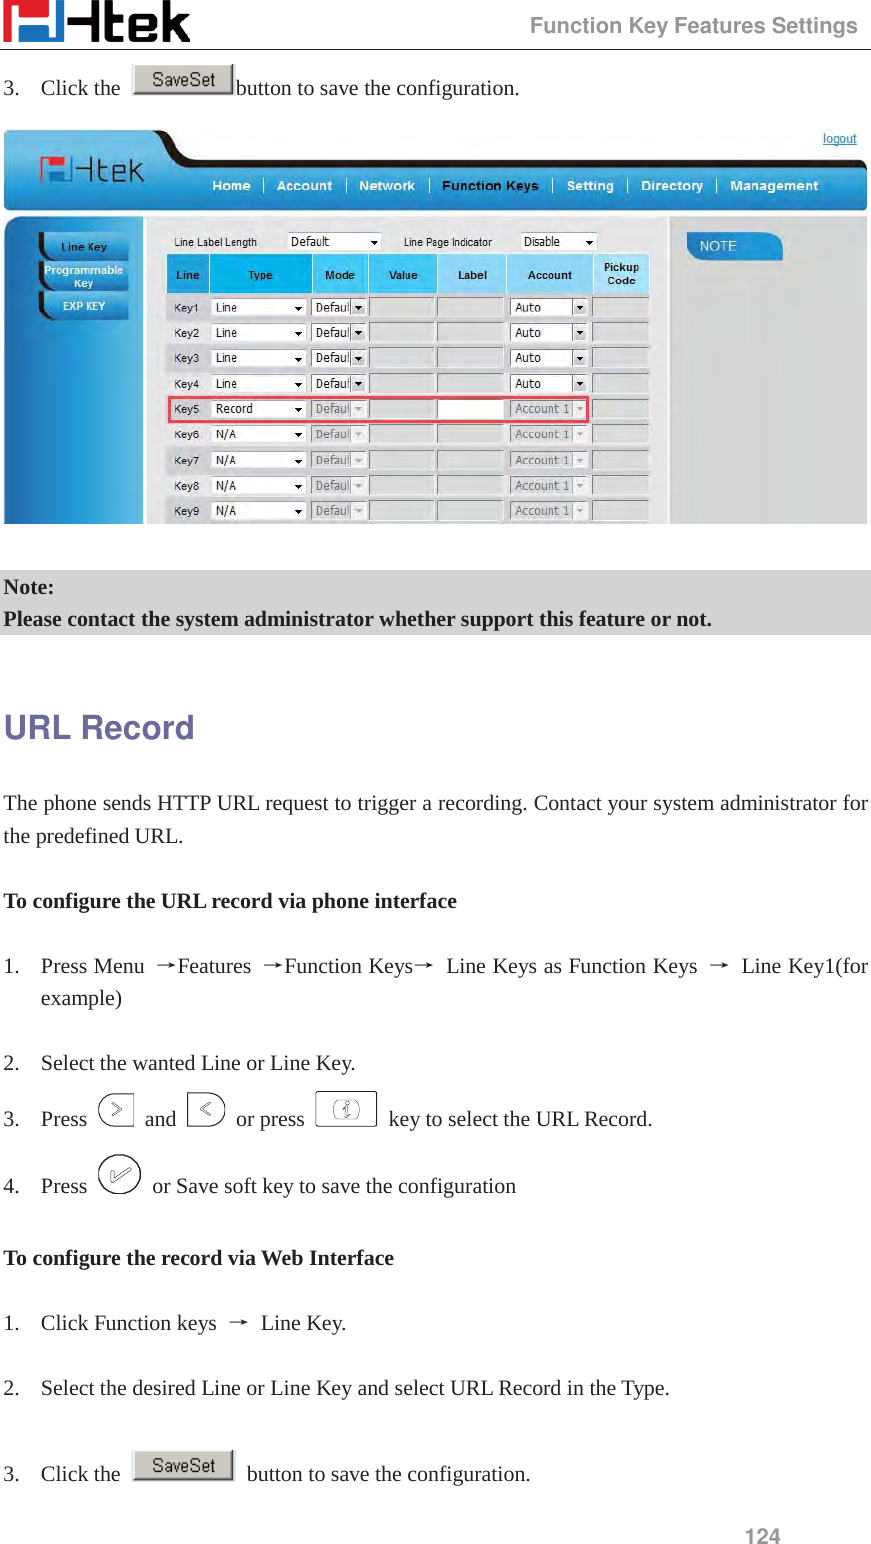
![Other features settings 69 1. Click Account—Advanced—Dial Plan. 2. Filled the value in dial plan field. 3. Click SaveSet to save the configuration. Note: Illegal input will fall back to default: {[x*]+}. For More, please refer to dial plan on www.h-tek.com Emergency Call Public telephone networks in countries around the world have a single emergency telephone number (emergency services number), that allows a caller to contact local emergency services for assistance when required. The emergency telephone number may differ from country to country. It is typically a three-digit number so that it can be easily remembered and dialed quickly. Some countries have a different emergency number for each of the different emergency services. You can specify the emergency telephone numbers on the IP phone for contacting the emergency services in an emergency situation.](https://usermanual.wiki/Nanjing-Hanlong-Technology/UC92SERIAL/User-Guide-3025942-Page-70.png)