National Datacomm 1021S01 WLAN PCMCIA Adapter User Manual
National Datacomm Corporation WLAN PCMCIA Adapter
UserManual.wiki
>
National Datacomm
>
1021S01 User Manual
user manual
Navigation menu
Upload a User Manual
Namespaces
Wiki Guide
HTML
PDF
Info
Views
User Manual
Discussion / Help
Navigation

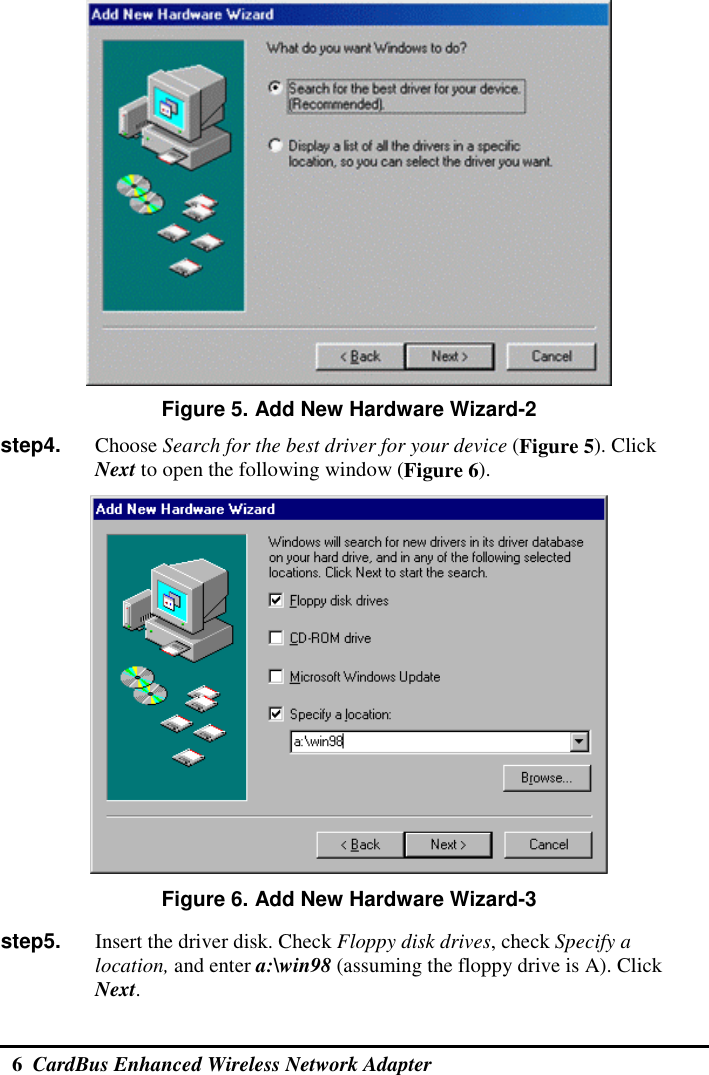
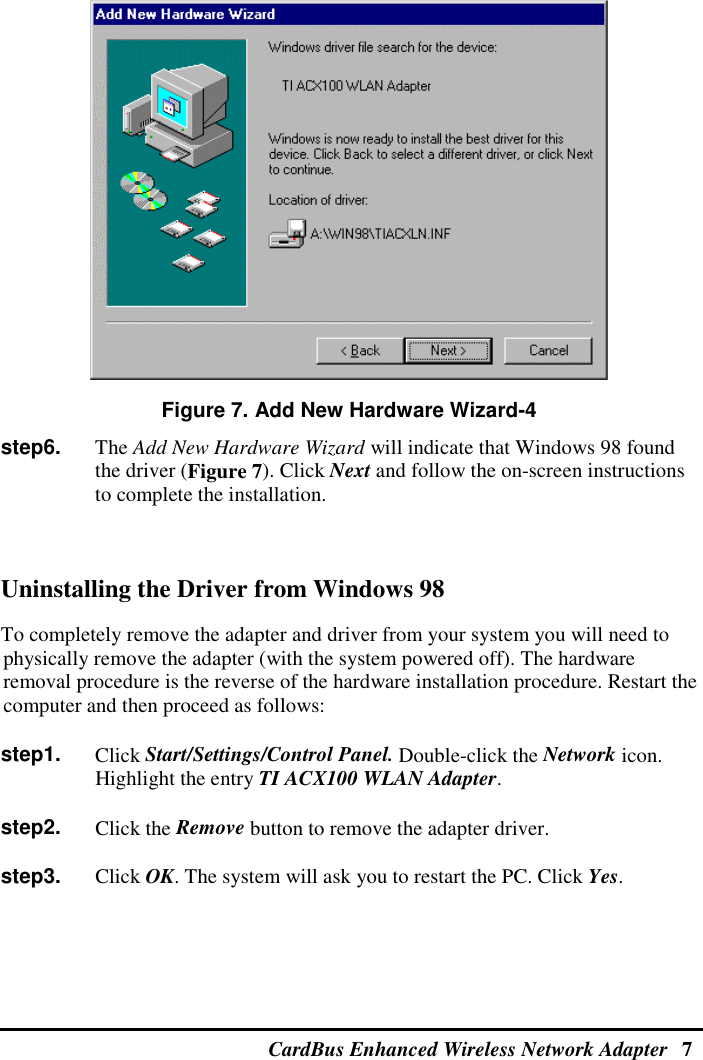
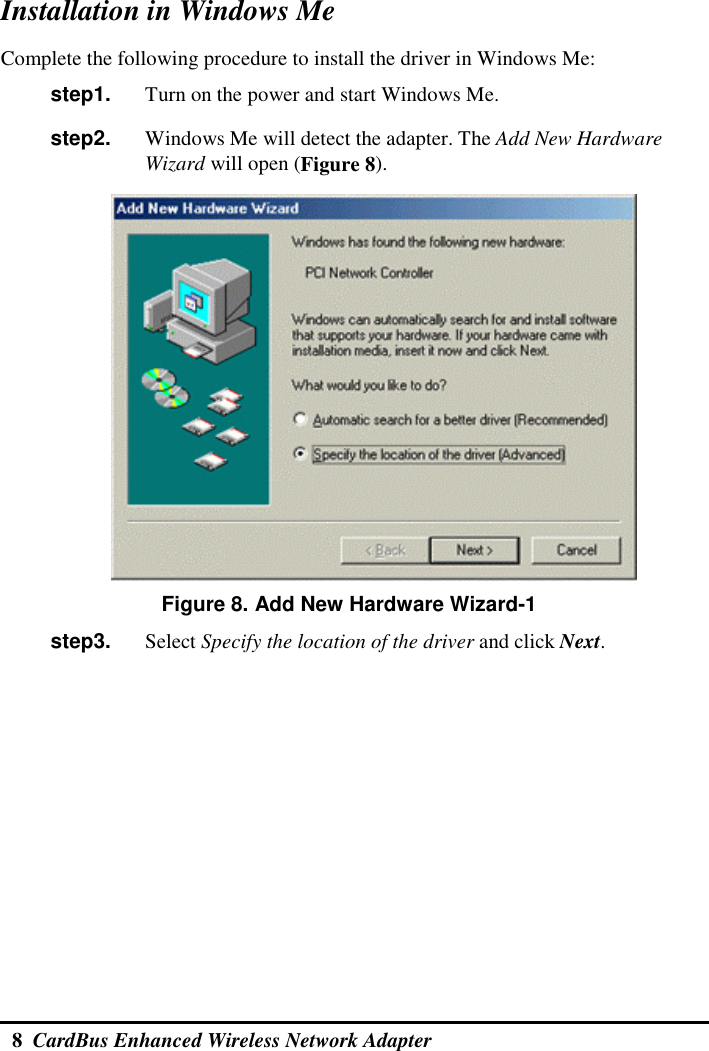


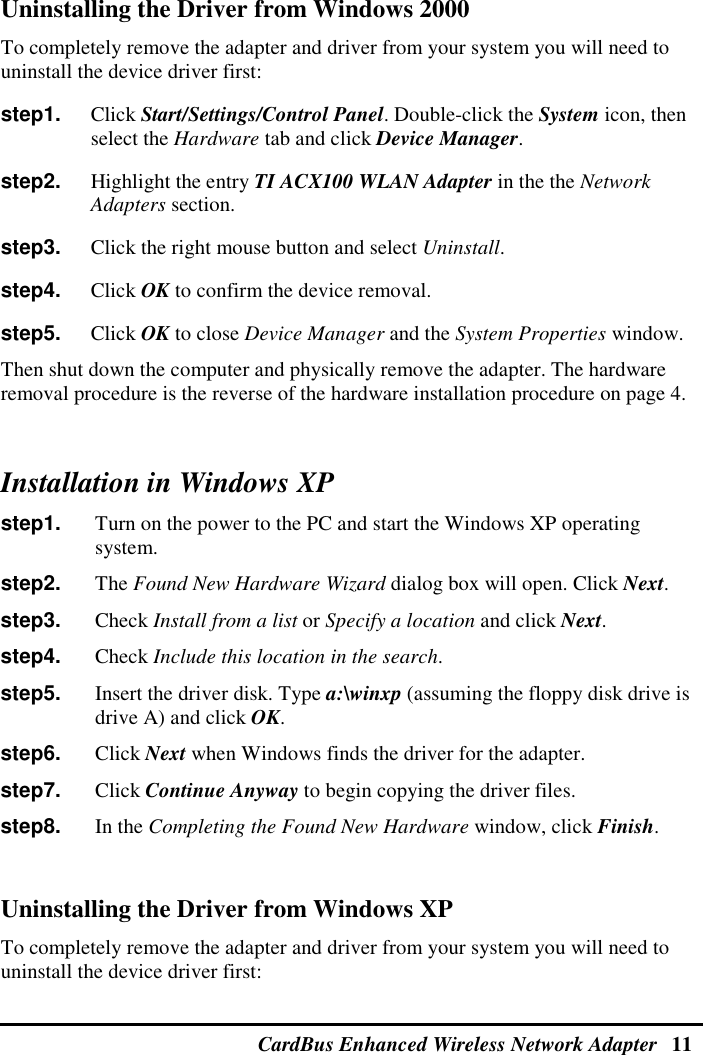

![28 CardBus Enhanced Wireless Network Adapter Troubleshooting This section provides you with some troubleshooting information should you encounter installation or operation problems with InstantWave products. If your problem still cannot be remedied after going through the Troubleshooting section, check the FAQs at http://www.ndc.com.tw/support/insfaq.htm If you still have a problem, call the reseller from whom you purchased the InstantWave product, or contact NDC technical support for assistance (see Technical Support, page 31). Symptom Suggested Solutions Could not complete the InstantWave adapter installation. 1. Make sure the adapter is fully home in the computer’s CardBus slot. 2. Uninstall and reinstall the adapter to see if the error persists. If it does, uninstall the adapter and reinstall it in another slot and, if possible, try the adapter in another PC to verify that the problem is in the adapter and not its PC environment. 3. You may have IRQ conflicts with another device: Go to Start/Control Panel/System/Device Manager and expand the Network Adapters entry. If you see an exclamation mark [!] displayed on the TI ACX100 WLAN Adapter icon, highlight the adapter entry and click Properties. On the Resources panel you will see a device conflict message displayed in the Conflicting device list. Uncheck Use automatic settings and click the Change Setting button. Select a new IRQ value. When the Conflicting device list confirms there is no conflict, click OK to close the windows. Restart the computer.](https://usermanual.wiki/National-Datacomm/1021S01/User-Guide-305834-Page-34.png)