Navico LHR80US HANDHELD MARINE TRANSCEIVER User Manual LHR 80 82 Owner s Manual
Navico Auckland Limited HANDHELD MARINE TRANSCEIVER LHR 80 82 Owner s Manual
UserManual.wiki
>
Navico
>
LHR80US User Manual
USERS MANUAL
Navigation menu
Upload a User Manual
Namespaces
Wiki Guide
HTML
PDF
Info
Views
User Manual
Discussion / Help
Navigation
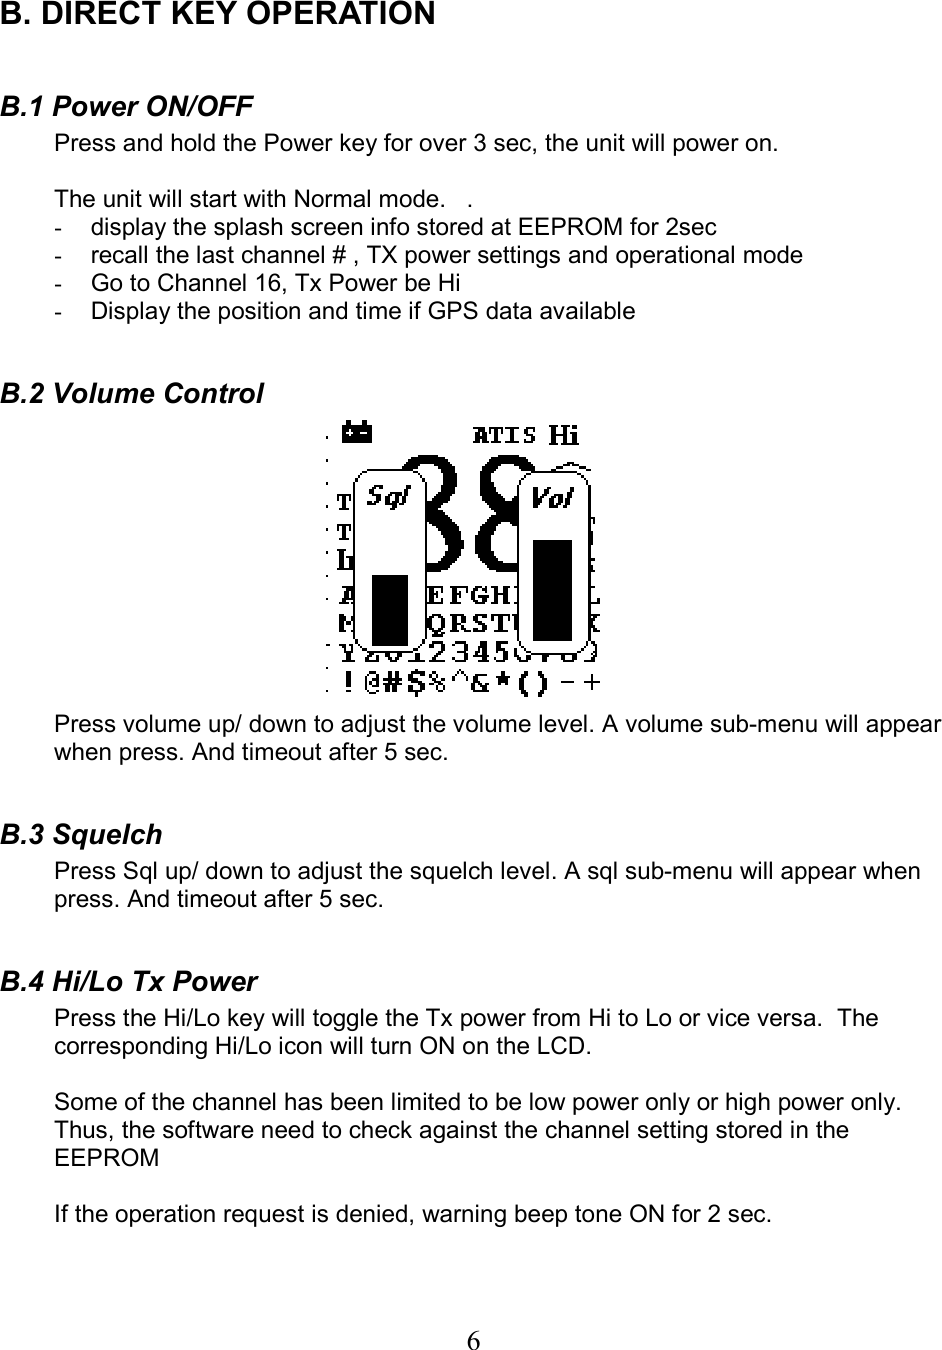
![7 For some channel is allowed to over-rule the restriction temporary such as CH 13 & 67. Press and hold the PTT key and the Hi/Lo key to switch the Tx power to Hi power temporarily until the either key is released. B.5 16 Channel Jump to either Channel 16 directly by pressing the 16 Key. Toggle between Channel 16 at High Power. Press 16 key again will go back to last channel. (channel before enter 16 mode ) 16 key also can use to cancel all mode and switch to CH 16 HI power mode independent the current Hi/Lo setting. It will quit the menu mode and jump to CH16 directly when pressed. B.6 BAND Switch the operational channel band [USA, International & Canada ] in the setup menu, see C3 for detail. Please refer to the EEPROM channel table for detail. The corresponding icon will turn on as indication. B.7 Scan In normal mode, long press the right soft key will act as Scan key function. This is the function to scan for broadcasting channel. When available channel detected, the receiver will stop at that channel and continue to search when that transmission ceased. There are 2 Scan mode available – ALL Scan; 3 CH Scan. During the SCAN modes : Press Up/Down key ( CH knob clockwise/anti-clockwise ) will change the scan direction. Press SCAN key again will terminate the scan operation and stop at the last used channel. Press EXIT key will also terminate the scan function and state at the last used channel WATCH or H/L key will be no function and sound an error beep if pressed.](https://usermanual.wiki/Navico/LHR80US/User-Guide-934323-Page-7.png)