Nedap N V UPRO1356 Inductive Proximity RFID Cardreader User Manual
N. V. Nederlandsche Apparatenfabriek NEDAP Inductive Proximity RFID Cardreader
UserManual.wiki
>
Nedap N V
>
UPRO1356 User Manual
>
User Manual
Contents
1.
Brochure
2.
User Manual
User Manual
Navigation menu
Upload a User Manual
Namespaces
Wiki Guide
HTML
PDF
Info
Views
User Manual
Discussion / Help
Navigation
![[Installation Guide] quick installation guide: unshielded proximity reader 13.56 mhz Quick Installation Guide Version 3.2 | 23rd February 2012](https://usermanual.wiki/Nedap-N-V/UPRO1356.User-Manual/User-Guide-1642767-Page-1.png)


![note The staff station can, in principle, replace barcode scanners. The unit enables the staff to identify all articles with an RFID-label. The standard staff station consists of an RFID reader positioned on the counter/desk (tabletop model). The reader is connected to the existing hardware (PC) and/or library automation system. The BiblioCheck 4 Lite software is designed for the simple use of the reader in combination with your current database management system. Included: 1x [A-1] Proximity Reader with [A-2] preinstalled antenna 1x [B] Power cable 1x [C] USB-cable 1x [D] Nedap installation CD 4x [E] Screw for mounting the proximity reader Not Included: 1x Cross point-screwdriver 1x Computer with CD/DVD-drive 1x Item containing an RFID-Label safety instructions & precautions The following safety instructions and precautions should be observed during normal use, service and repair. • Do not change anything regarding the proximity reader or the installation procedure. • Always switch off the power (by disconnecting the power plug) before you remove the cover. • Do not mount the proximity under a table with an metal frame or under metal tables. • Do not remove ferrite cores. Required for EMC suppression.](https://usermanual.wiki/Nedap-N-V/UPRO1356.User-Manual/User-Guide-1642767-Page-6.png)
![chapter 1: hardware instructions Installation scheme: 1.1 steps Step 1: Remove the cover of the proximity reader [A-1]. Step 2: Connect the USB-cable [C] to the proximity reader [A-1]. Step 3: Connect the USB-cable [C] to the USB-port of the computer. The USB-port is most likely located on the back of the computer. Step 4: Connect the power cable [B] to the proximity reader [A-1]. The side with the screws needs to be up. This way, you will insert the plug the correct way. DO NOT ACTIVATE THE POWER BEFORE YOU HAVE COMPLETED STEP 5! USB-cable [C]](https://usermanual.wiki/Nedap-N-V/UPRO1356.User-Manual/User-Guide-1642767-Page-7.png)
![8 OPTIONAL Mount the proximity reader [A-1] by putting the screws [E] in the premade holes. ATTENTION! Mount the electronics [A-1] at least 15 cm’s (6 inches) away from the antenna[A-2] to make it work properly! Do not mount the electronics under the antenna! Step 5: Replace the proximity reader’s cover. Step 6: Activate the power by putting the plug of the power cable [B] in an electric point. Step 7: Proceed to the SOFTWARE INSTRUCTIONS.](https://usermanual.wiki/Nedap-N-V/UPRO1356.User-Manual/User-Guide-1642767-Page-8.png)
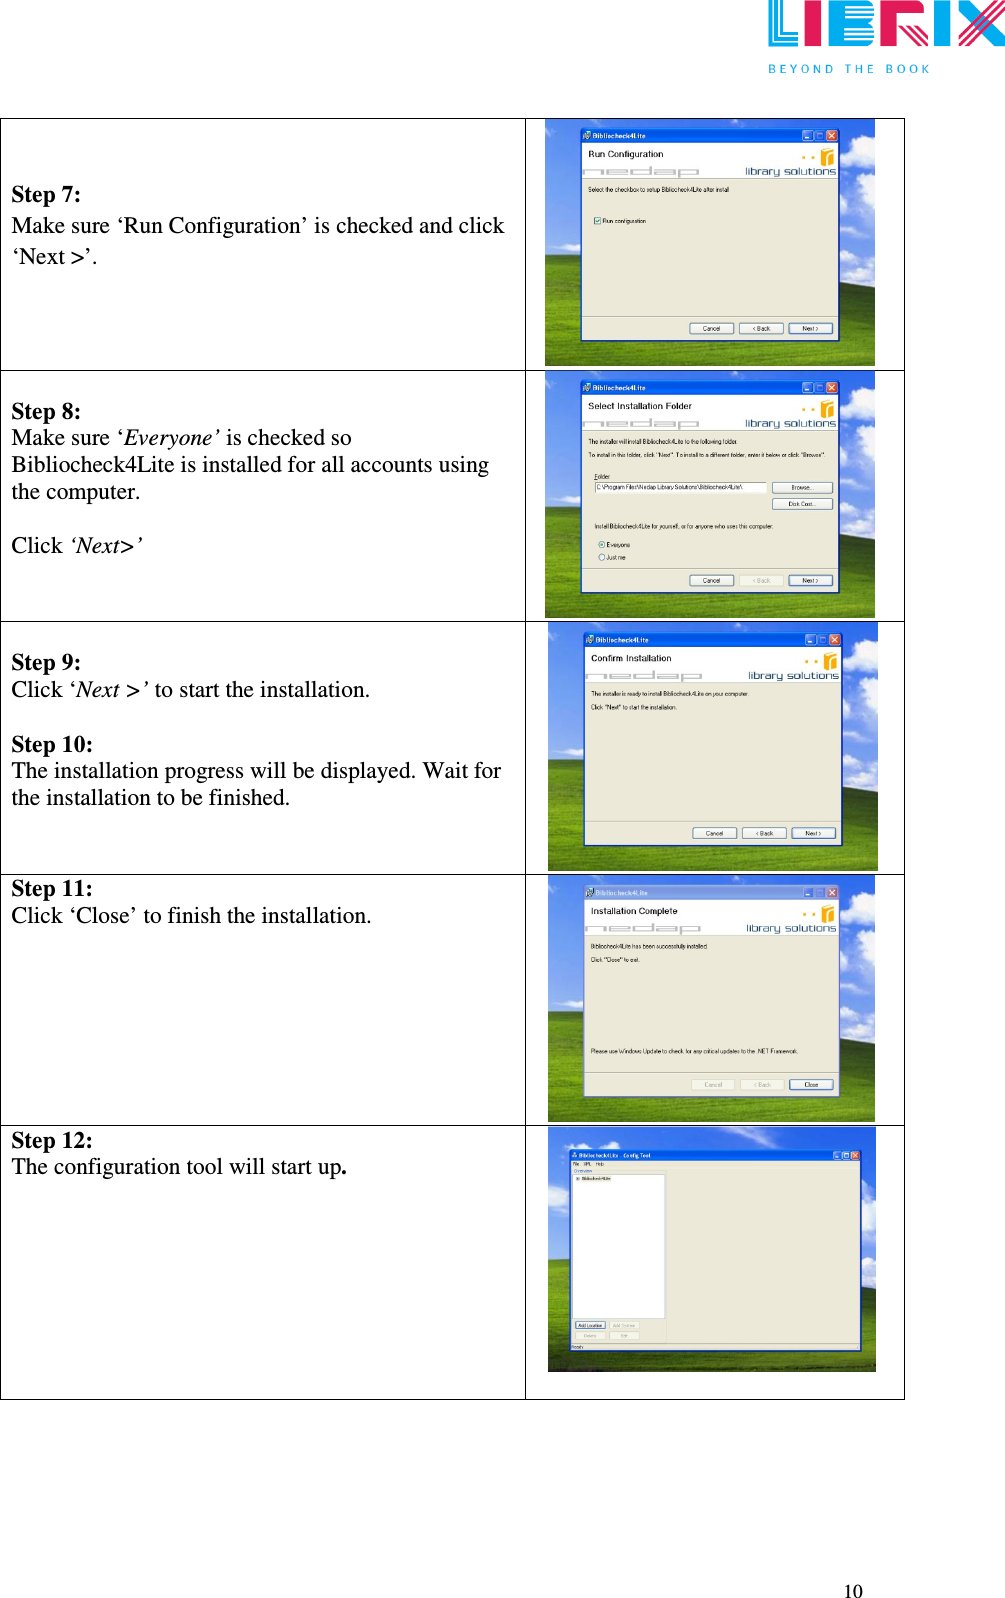
![9 chapter 2: software instructions Notice: The screenshots in this guide may differ from what the computer is displaying. However, the procedure remains the same. Minimal system requirements: - Operating system: o Windows 2000, XP Professional SP3, Vista Business and 7 Business o Windows Installer 3.1 o Microsoft .NET framework 2.0 sp2 - CD/DVD-drive 2.1 steps Step 1: Start up the computer. Log in with ‘administrator rights’. Step 2: Insert the installation-CD [D]. Step 3: Normally, the CD will run automatically. When this does not occur: Go to: Start > My Computer > CD/DVD-drive (Now called: Nedap Librix). Step 4: Enter the folder ‘BiblioCheck4Lite’. Step 5: Run ‘BiblioCheck4LiteSetup.msi’. Step 6: Read the instructions and click on ‘Next >’.](https://usermanual.wiki/Nedap-N-V/UPRO1356.User-Manual/User-Guide-1642767-Page-9.png)
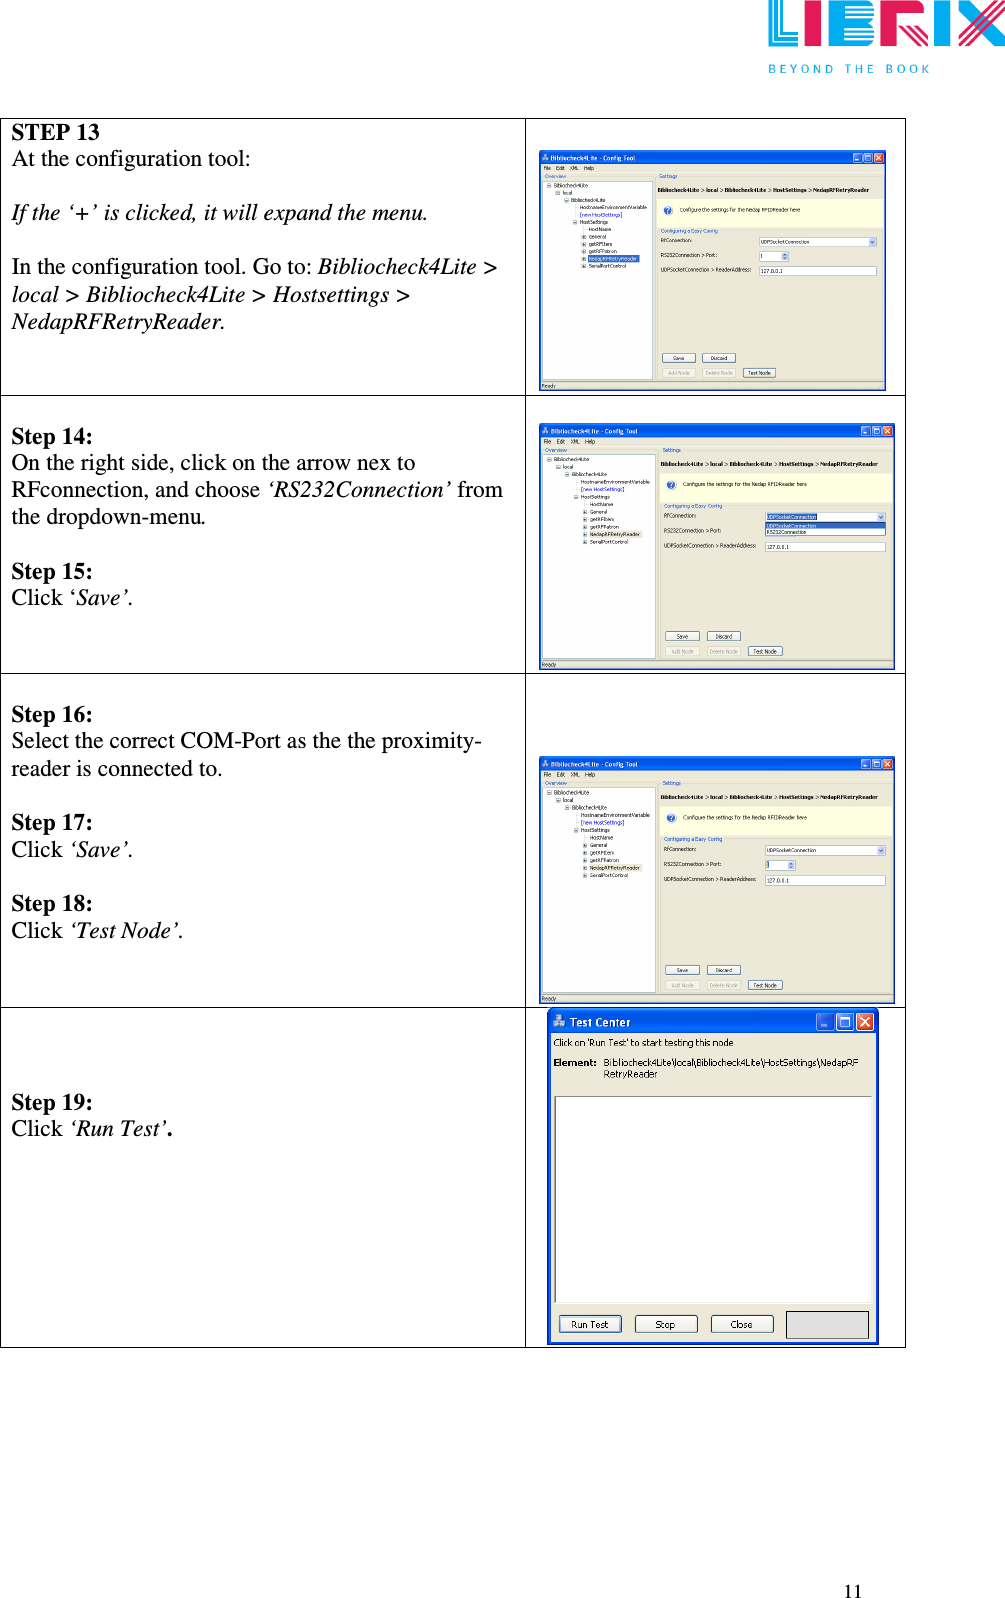
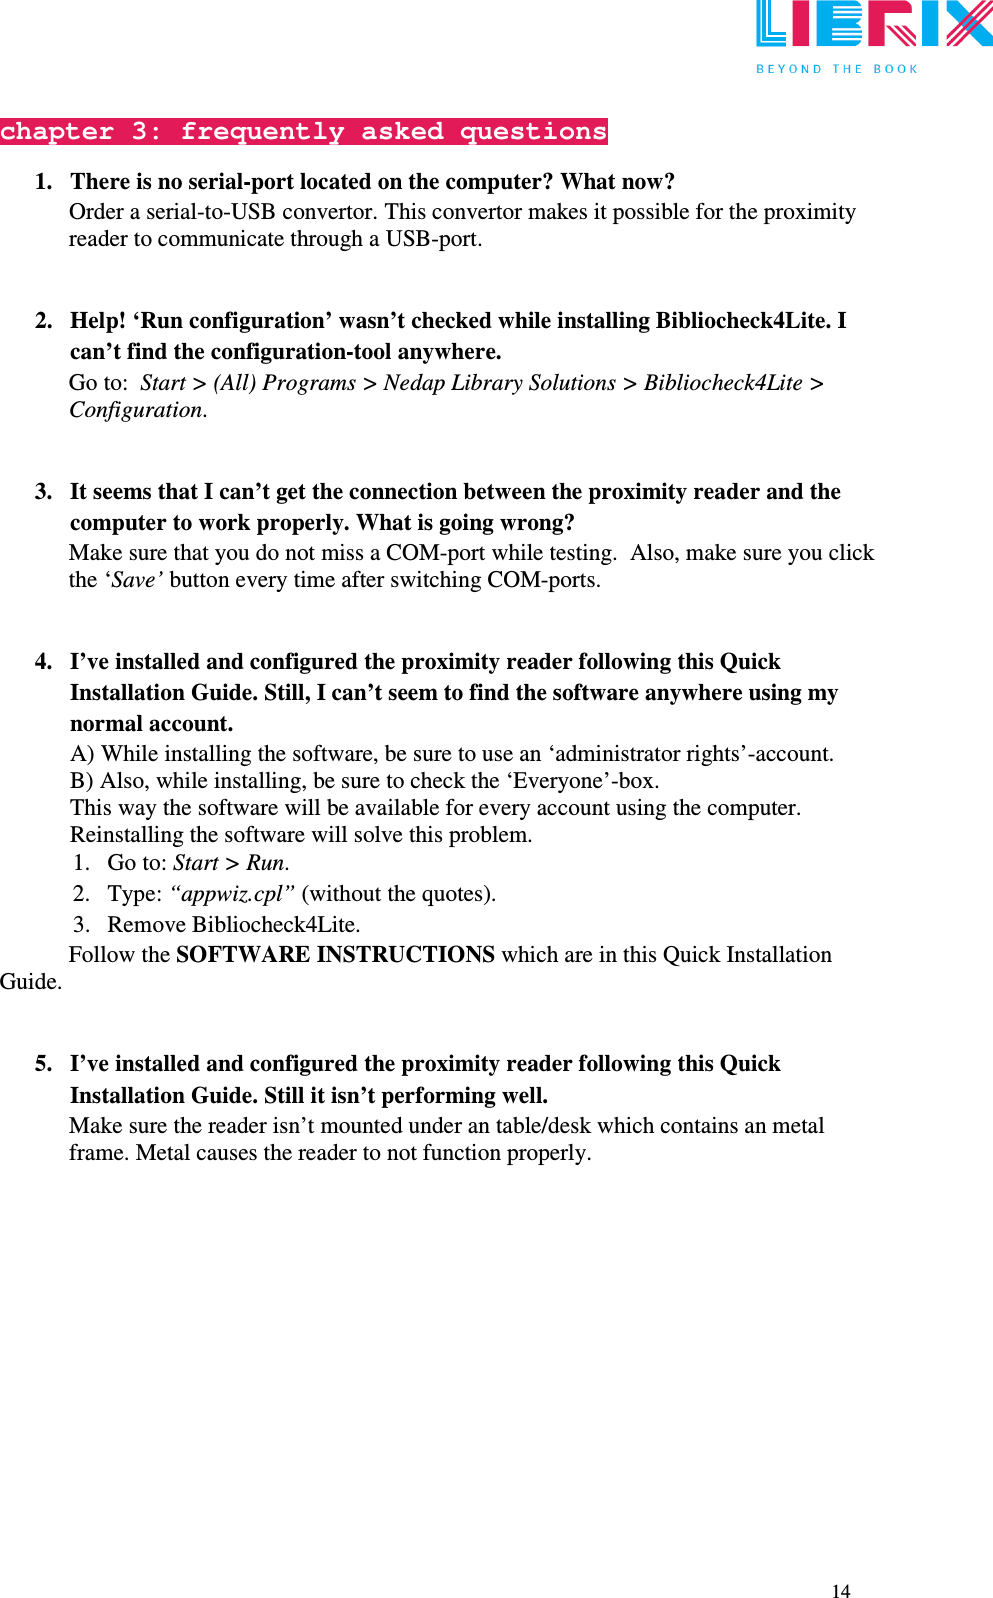
![12 Step 20: If the right COM-Port is selected it will display the message: ‘OK’. [1] If the wrong COM-Port is selected it will display the message ‘ERROR’. [2] If an ‘ERROR’-message occurs; repeat STEP 16 to 21 until the right COM-Port is selected. Example: Switch from COM-Port 1 to COM-Port 2 (or COM-Port 2 to 3, etc) and test the connection again. Repeat this procedure until you get the green ‘OK’ as result. Then, proceed to STEP 21. Step 21: Click ‘Close’. Step 22: Quit the configuration tool by pressing the ‘X’ in the upper-right corner. Step 23: Go to: Start > (All) Programs > Nedap Librix > Bibliocheck4Lite and run ‘Bibliocheck4Lite’.](https://usermanual.wiki/Nedap-N-V/UPRO1356.User-Manual/User-Guide-1642767-Page-12.png)
![13 Step 24: Click ‘Start’ so the reader starts the data-reading process. If activated, the Bibliocheck4Lite icon in the right-hand corner of the taskbar will turn yellow. Step 25: Click ‘Manual’. This way it will be selected as the screenshot (blue and selected) displays. Step 26: Scan a RFID-tag by placing it on the proximity-reader’s antenna [A]. Step 27: If the reader scans the RFiD-tag successfully, a chain of numbers will be displayed. (the numbers will be shown where ‘Manual’ was selected during the previous step). Step 28: Click ‘Exit’. The proximity reader is now installed, configured and ready for use. 2.2 contact & support Want to know more about the solutions Nedap Librix has to offer? Visit: www.nedaplibrix.com In case of problems during the installation or use of the product; contact your local supplier.](https://usermanual.wiki/Nedap-N-V/UPRO1356.User-Manual/User-Guide-1642767-Page-13.png)