Neon Gate NI-1201 PC Interface Card User Manual Manual
Neon Gate Inc. PC Interface Card Manual
Manual
Product Manual (NI-1201)

This equipment has been tested and found to comply with the limits for a Class B
digital device, pursuant to part 15 of the FCC Rules. These limits are designed to
provide reasonable protection against harmful interference in a residential
installation.
This equipment generates, uses and can radiate radio frequency energy and, if not
installed and used in accordance with the instructions, may cause harmful
interference to radio communications. However, there is no guarantee that
interference will not occur in a particular installation.
If this equipment does cause harmful interference to radio or television reception,
which can be determined by turning the equipment off and on, the user is
encouraged to try to correct the interference by one or more of the following
measures:
-Reorient or relocate the receiving antenna.
-Increase the separation between the equipment and receiver.
-Connect the equipment into an outlet on a circuit different from that to which the
receiver is connected.
-Consult the dealer or an experienced radio/TV technician for help.
CAUTION: Changes or modifications not expressly approved by the manufacturer
responsible for compliance could void the user's authority to operate the
equipment
FCC Information

NI1201
This is a PC internal type interface card that enables users to
enjoy internet service at the speed of 1.2Mbps within the
distance of 1Km by connecting with central unit(NH-1216, NH-
12104) over existing telephone lines.
<How to install NI-1201>
1. Check your package to make sure that it includes the
following items.
a. NI-1201(Internal type interface card)
b. Telephone connection cord (RJ-11 to RJ-11)
c. 4-pin connection cord
d. Product manual e. Install CD
2. Product specifications
ACT LED
(Light when communication
with central unit is made)
LINK LED
(Lights when central unit is
connected)
Connection cord
for 4-pin consent
(RJ-11)
adcbe
Telephone connection
cord(RJ-11 to RJ-11)

3. Product Specification
Interface
PCIBus
width*length*height26*120*20mmDimensions
Windows95,98,2000,
NT
OS
66gWeight
1for telephone line connection
1for telephone set connection
RJ-11*2
RemarkSpecifications Item
4. How to install
1. Correctly insert the NI-1201 into the PCI slot of the PC.
2. Connect the 4-Pin consent cord provided along with NI-1201
to the 4-Pin wall outlet and then insert RJ-11 into the LINE
terminal of NI-1201
3. To use telephone, office line should be used for installation
and in this case connect the telephone connection cord(RJ-11 to
RJ-11) to the Phone jack of the NI-1201.
4. Setup the NI-1201 driver in PC by using the installation CD
after confirming the light on LINK LED of NI-1201 is on.

NI1201 Driver Setup
1. Insert the card(NI-1201) into PCI slot and turn on the PC.
Then, search new hardware. At the following screen,
please click ‘Next’to move to next setup.
Window 98 Version

2. Please select ‘Search for the best driver for your device
(recommended)’and then click ‘Next’.
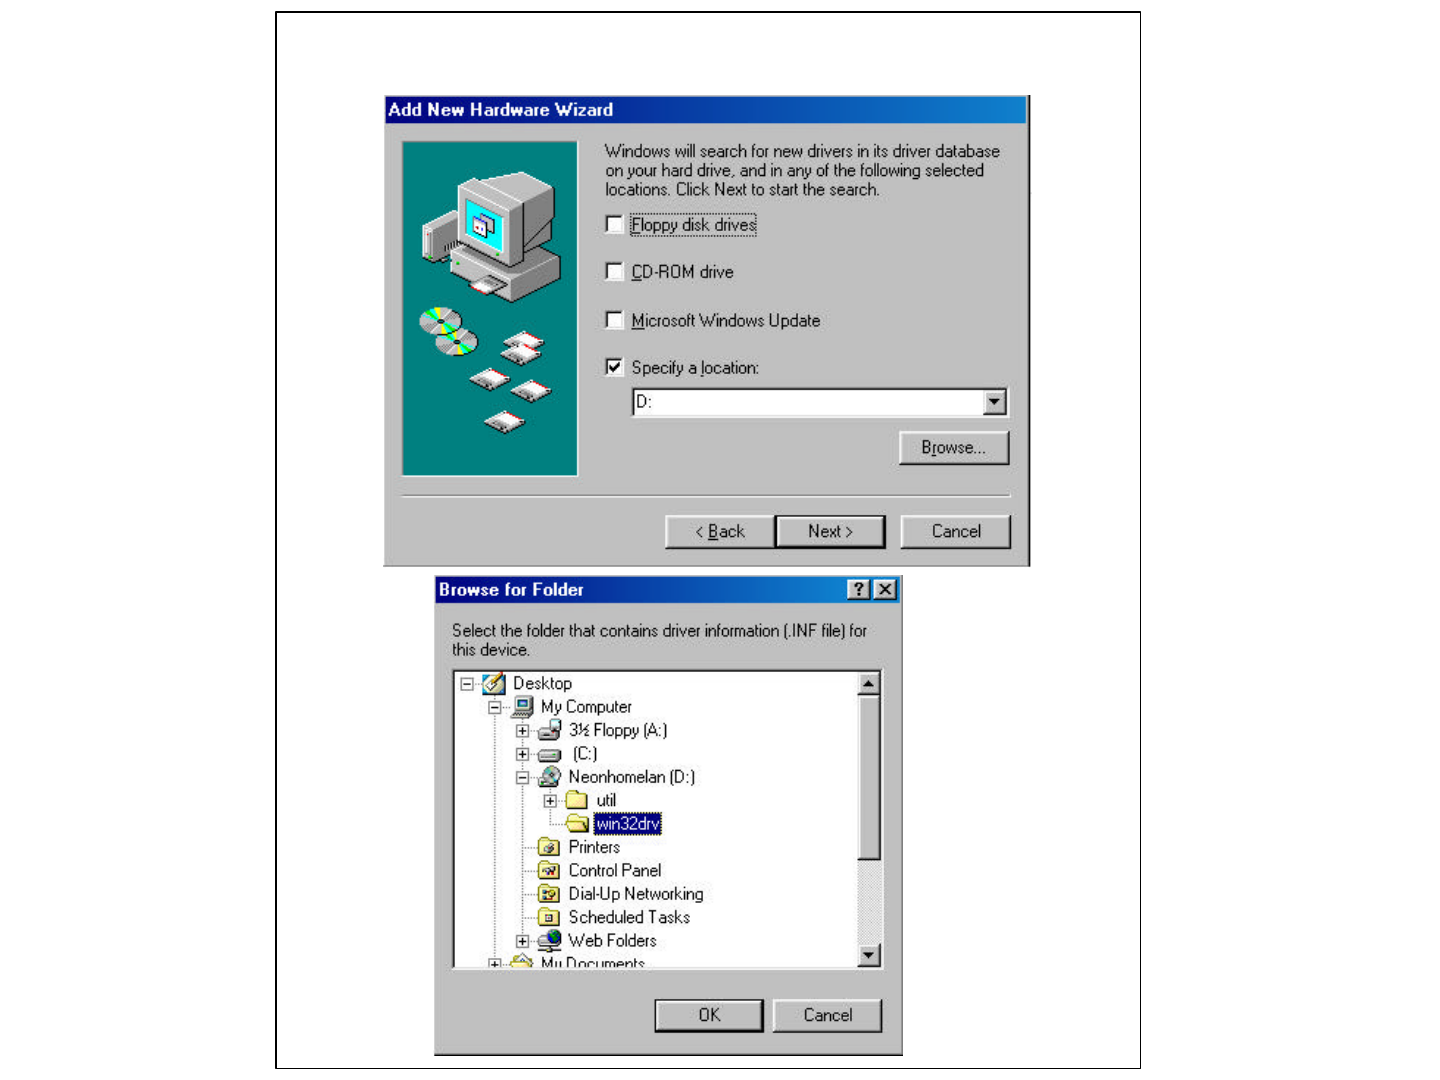
3. Please insert install CD into CD-ROM driver, and click ‘Browse’.
Then, select ‘win32drv’in D driver and click ‘OK’.

4. You will see the screen as below and click ‘Next’for the search.
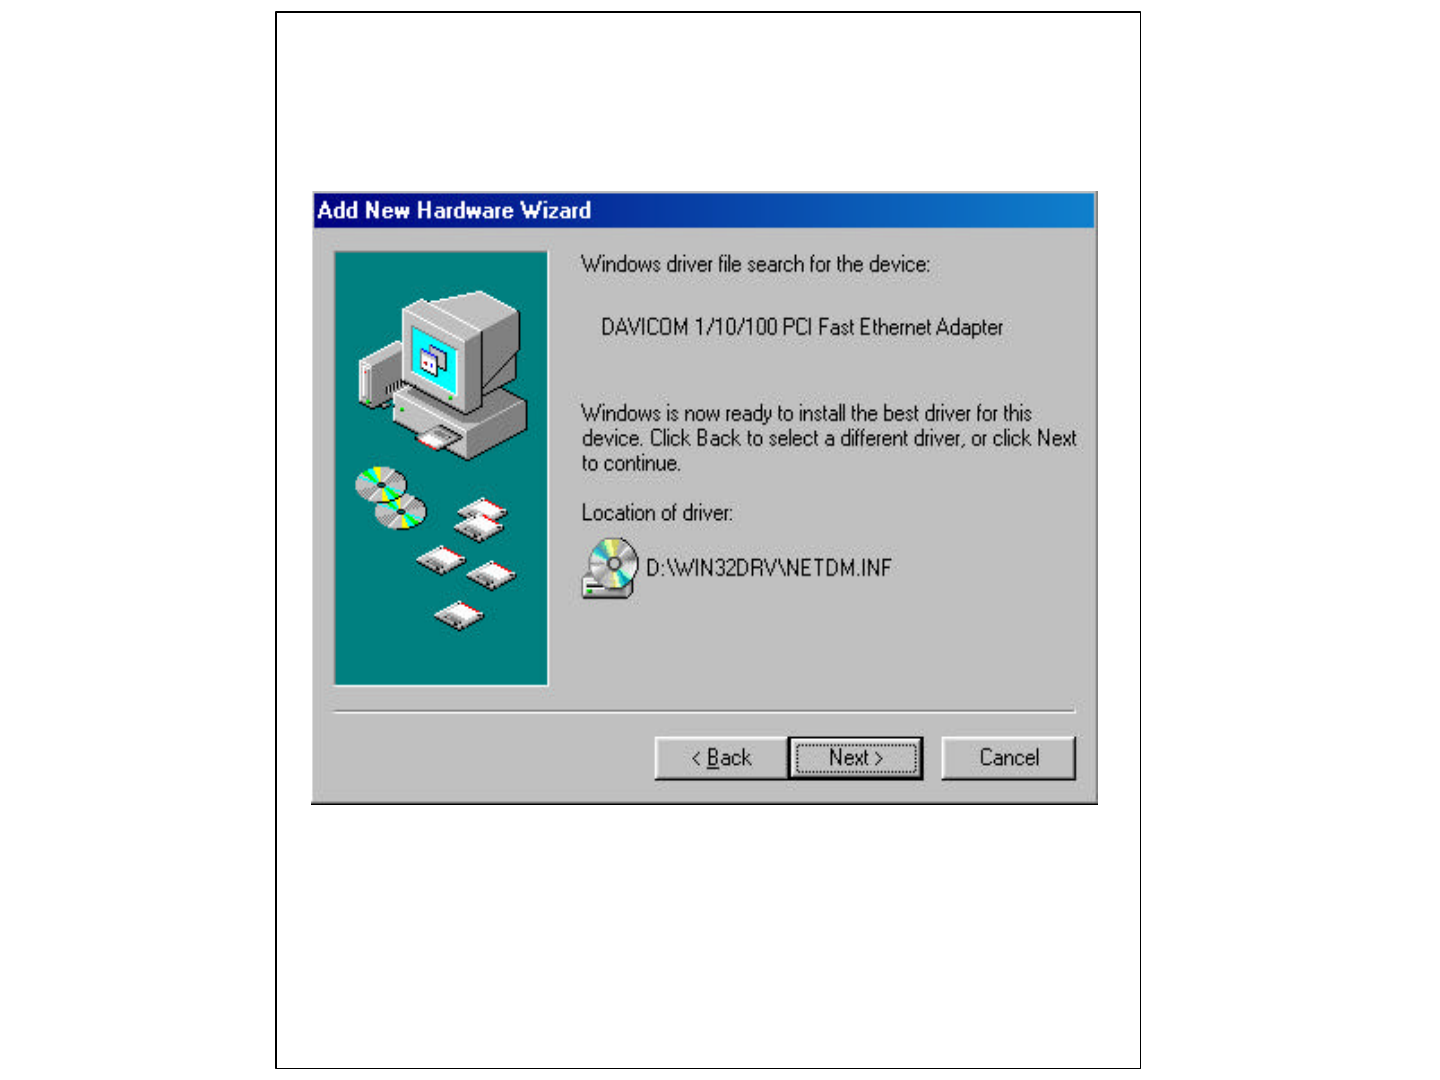
5. Please click ‘Next’to continue the installation.
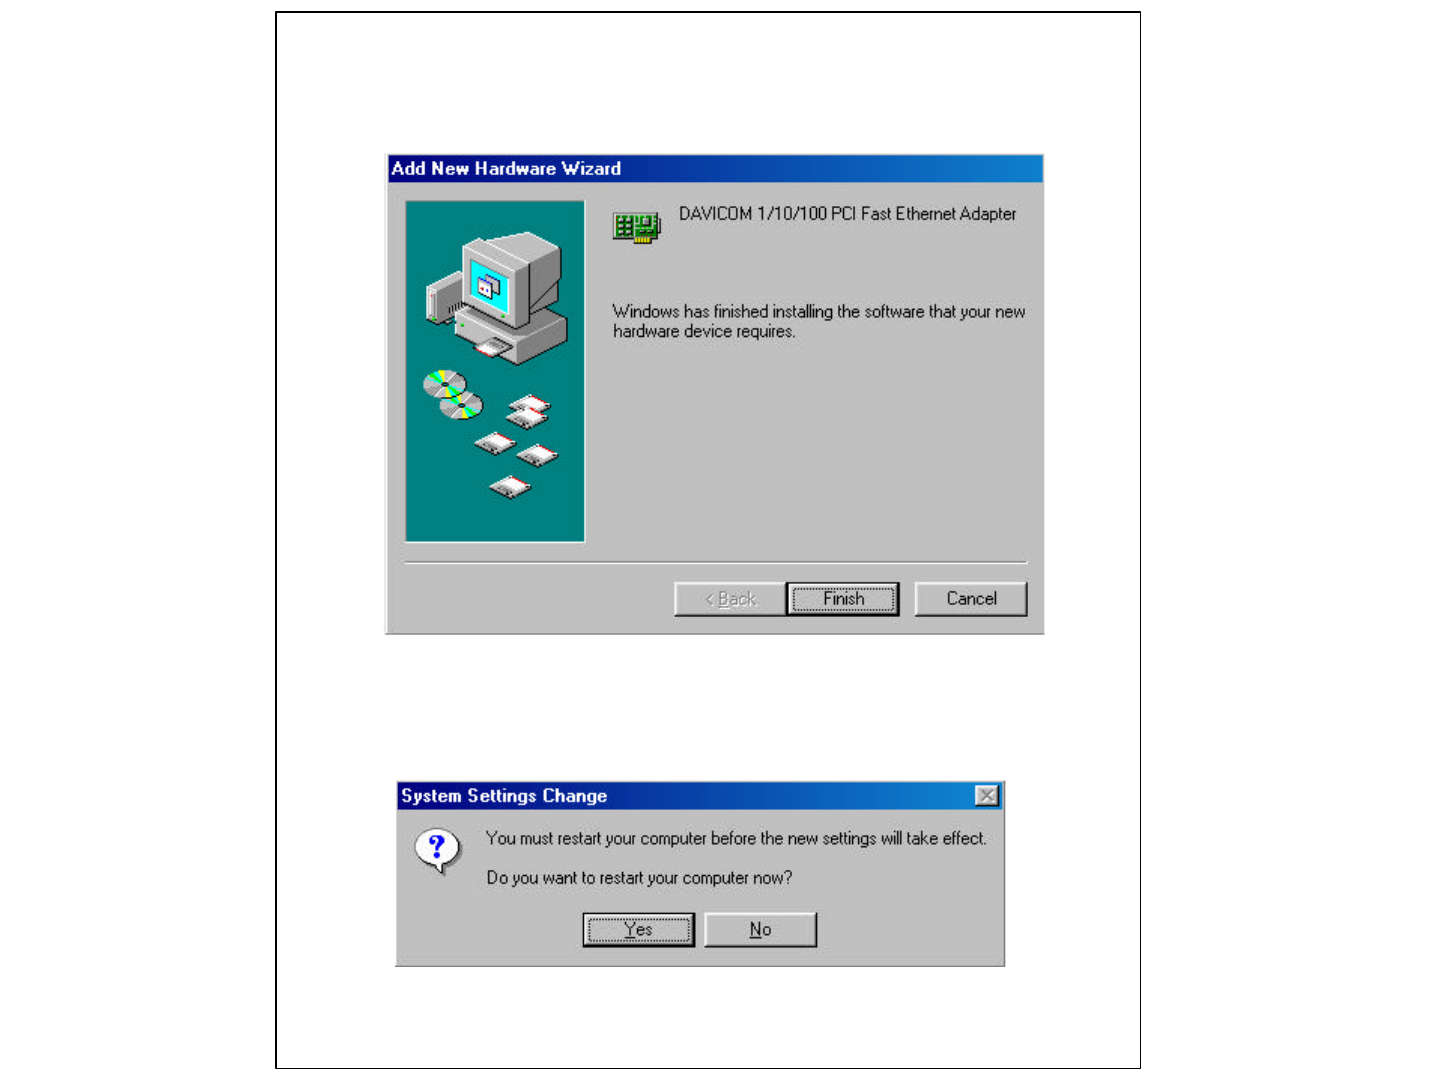
6. Please click ‘Finish’to complete the installation process.
7. Restart the system by clicking ‘Yes’.

NI1201 Driver Setup
1. Insert the card(NI-1201) into PCI slot and turn on the
PC. Then you can see the message for hardware
installation.
Window 2000 Version
2. In the following screen, please click ‘Next’to move to
next setup.
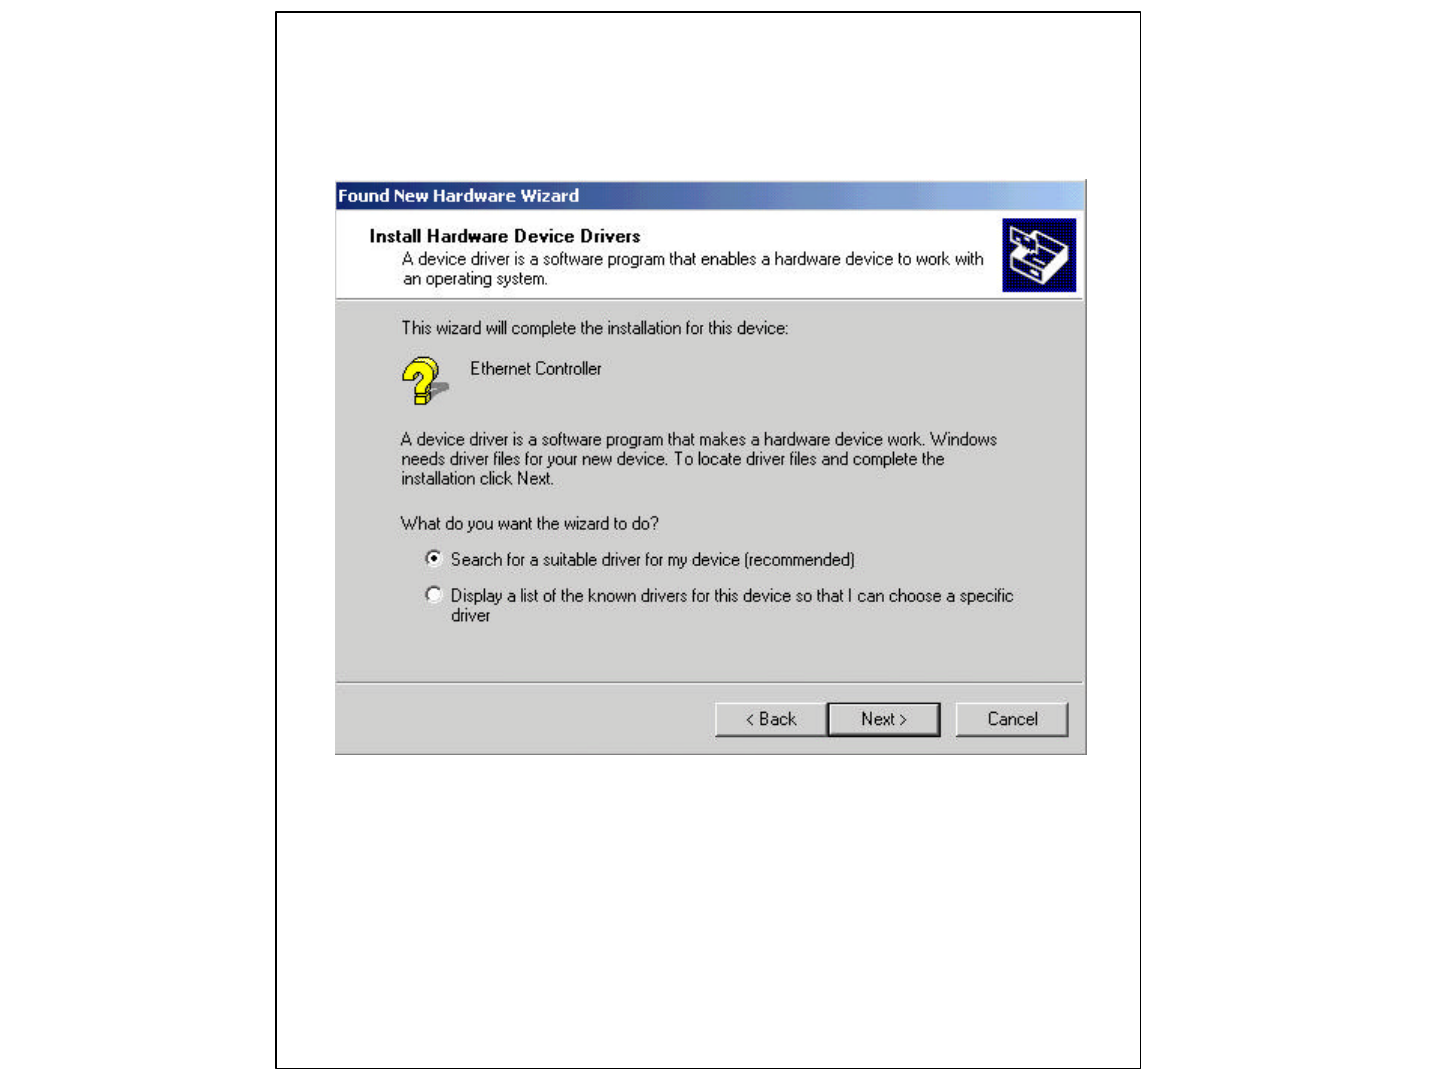
3. Please select ‘Search for a suitable driver for my device
(recommended)’and click ‘Next’

4. Please insert install CD into CD-rom driver and click ‘Next’

5. Please click ‘Yes’to continue the installation.
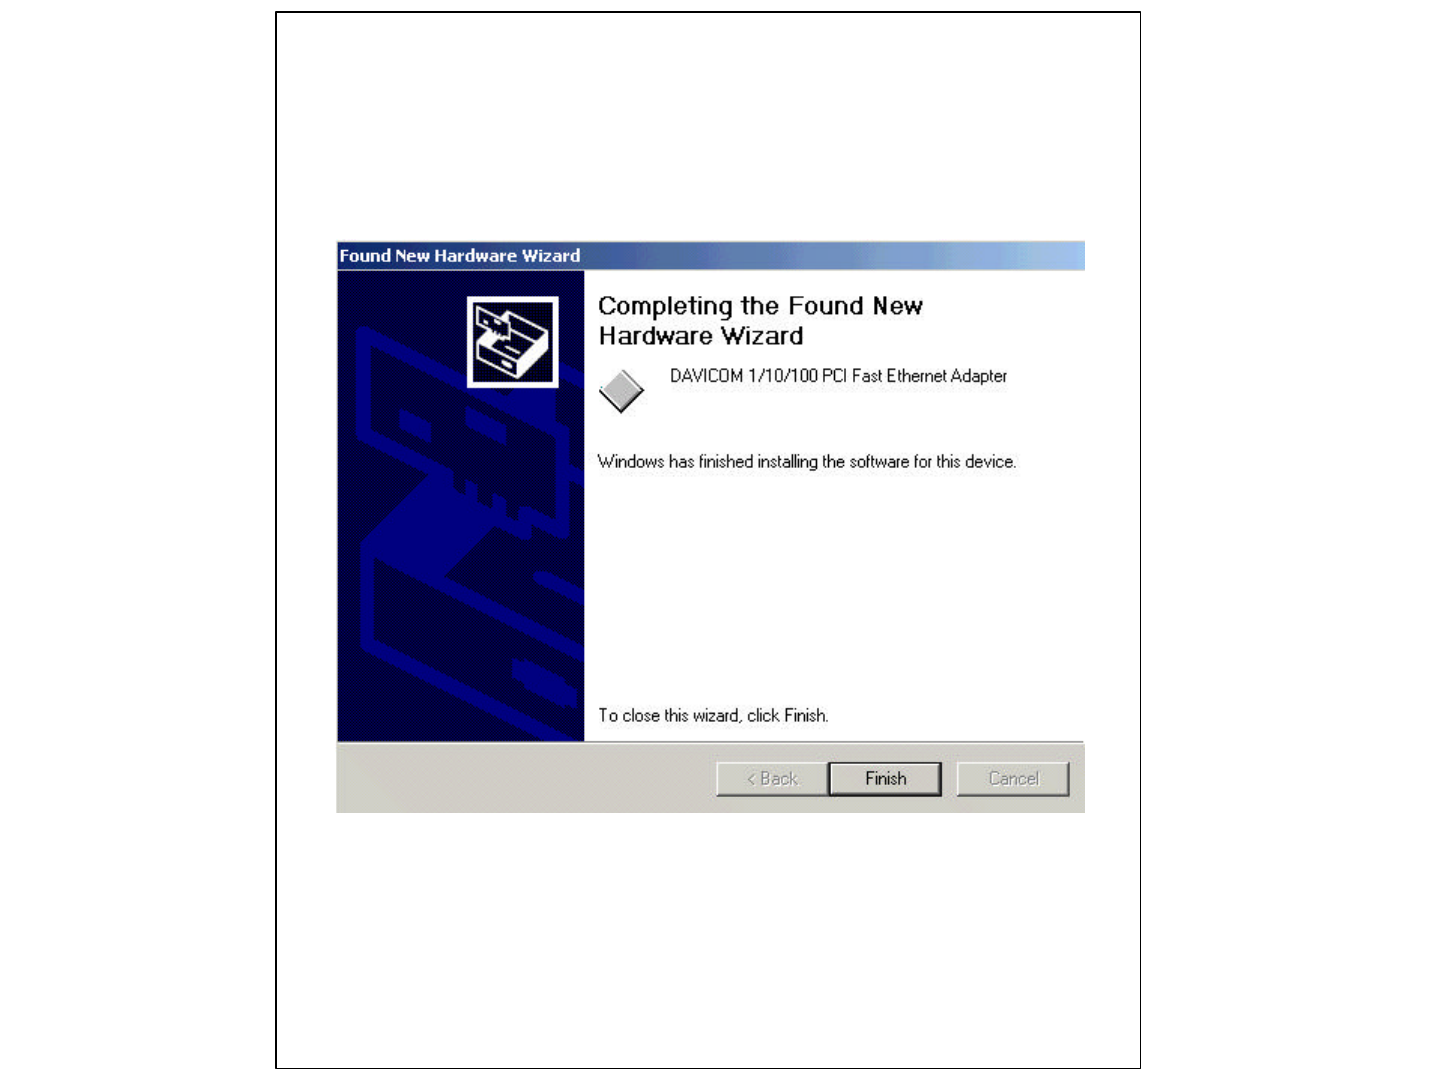
6. Please click ‘Finish’to complete the installation process.
•For more information, refer to the Installation Manual
and use the system with the default values.

Quality Warrant
Name
Customer Address
Name
Seller Address
1 yearWarrant Period
(date)Manufactured on
NeonHome-LAN(NI-1201)Model Name
Warranty Period
1. The product is warranted for one year from the date when the equipment is
purchased.
2. Free-charging repair service will be provided within the period of warranty when
the product is out of order in normal operation and use.
3. In the following cases, the customer will be charged when receiving repair services
based on the ‘Regulations for the Warrant’.
A. Malfunction caused not by the product itself but other external reasons.
B. Malfunction caused by disassembly conducted by the customer on its own
decision.
C. Malfunction caused by natural disaster (fire, flood, lightning, etc )
D. Malfunction or damage caused by failure of customer during transportation.
4. For the case above No.3 actual cost shall be charged for repair services.
¡ØFree repair service will be provided by regulations for the warrant only when the
product is out of order in normal operation and use.
Repair Application Form
(In detail)
Configuration
Address :Address :
Contact :
Person in charge :
Purchased at :
Details of defect
Symptom
Contact :
Model Name
Manufacturing number
Person in charge :
Sales shop :
Date :
(Remark)
¡ØFill out and submit this form when the malfunction is found during the period of product
warranty.
NEON GATE INC.
Address : Yu-il B/D 4F, #411-14 Dogok-dong, Gangnam-gu,
Seoul, Korea (zip : 135-270)
Homepage : http://www.neongate.com
Customer conseling / Product sales
Tel : 82-2-576-9730 (Ext. 230,241,243)
Fax : 82-2-576-6418,9
e-mail : sales@neongate.com
Technical Support
Tel : 82-2-576-6418 (Ext. 221,204)
Fax : 82-2-576-6418,9
e-mail : network@neongate.com