Netgear orporated 11200167 N300 WIRELESS ADSL2+ MODEM ROUTER User Manual N300 Wireless ADSL2 Modem Router DGN2200
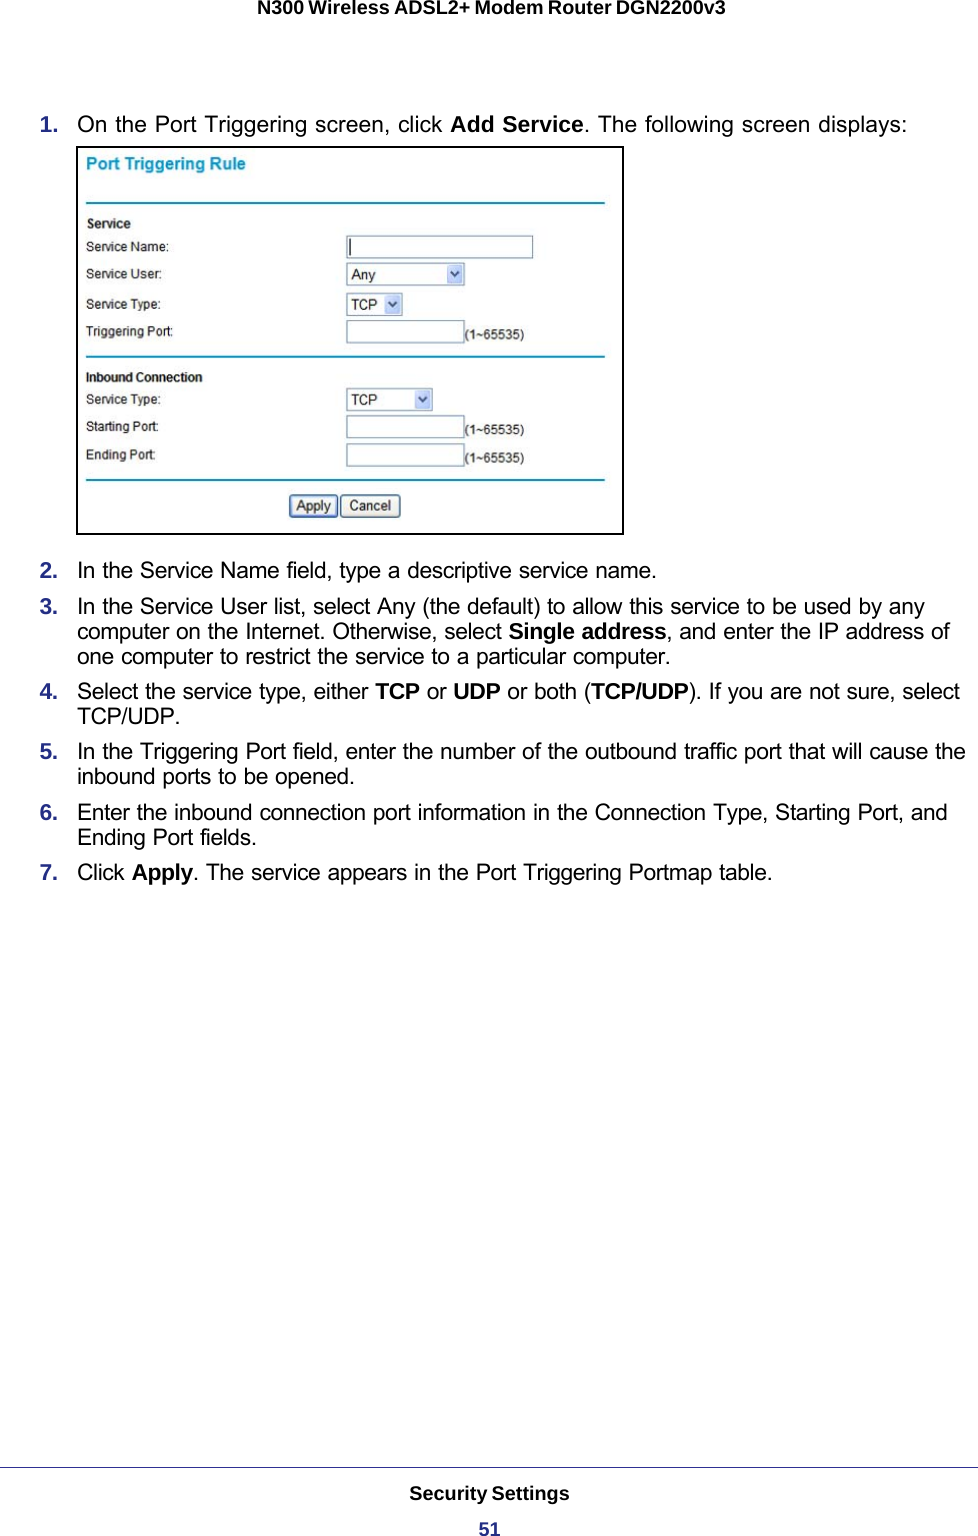
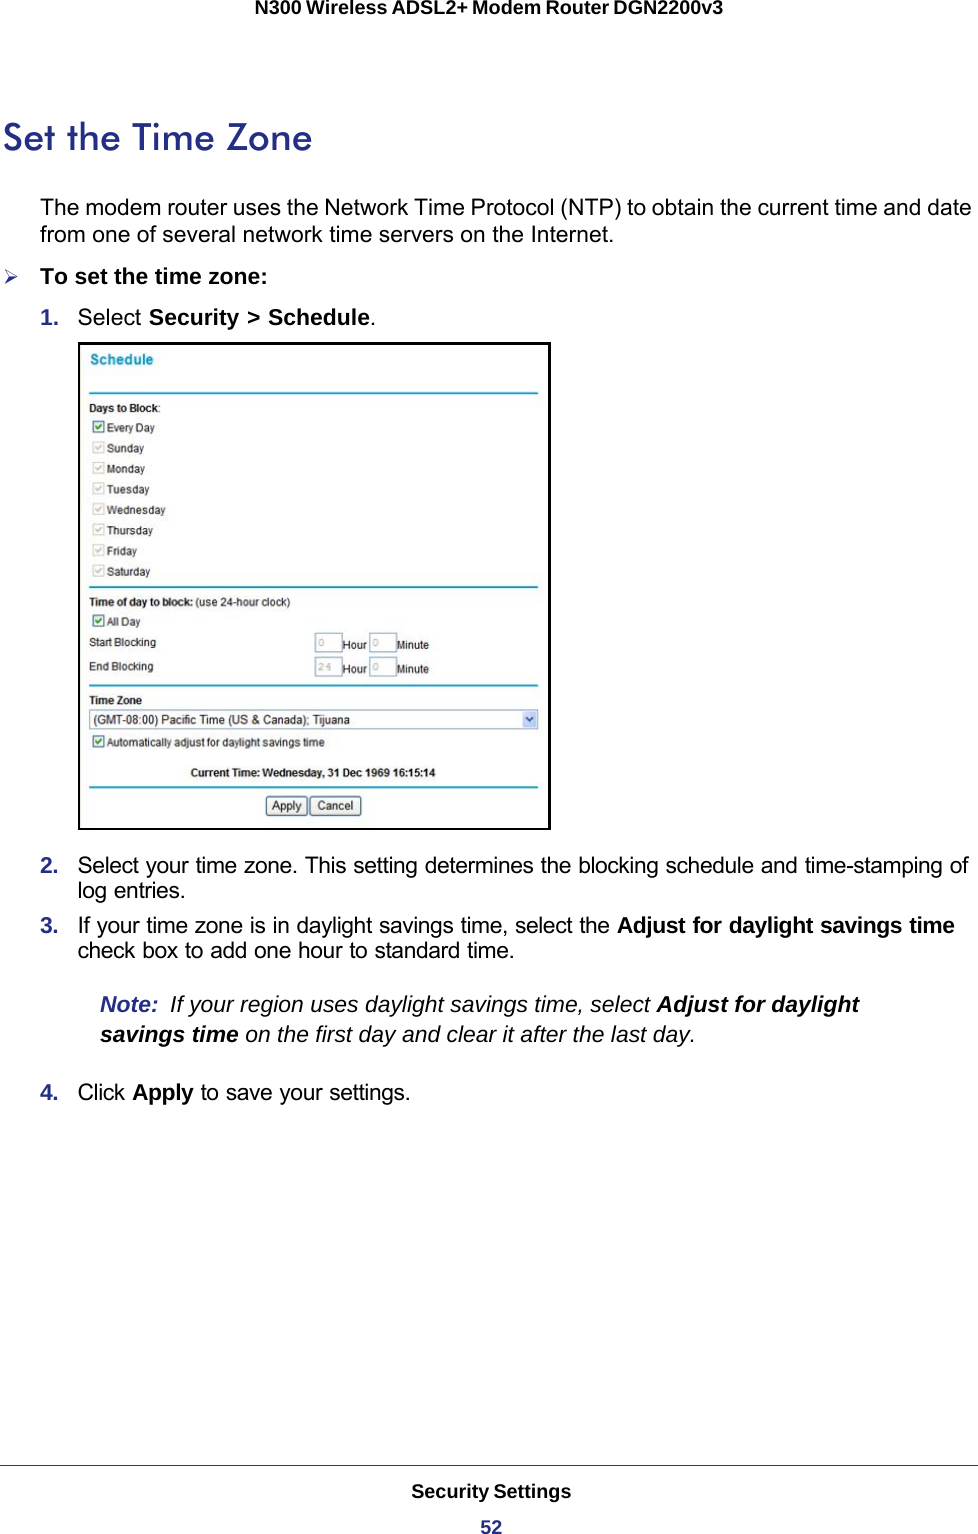
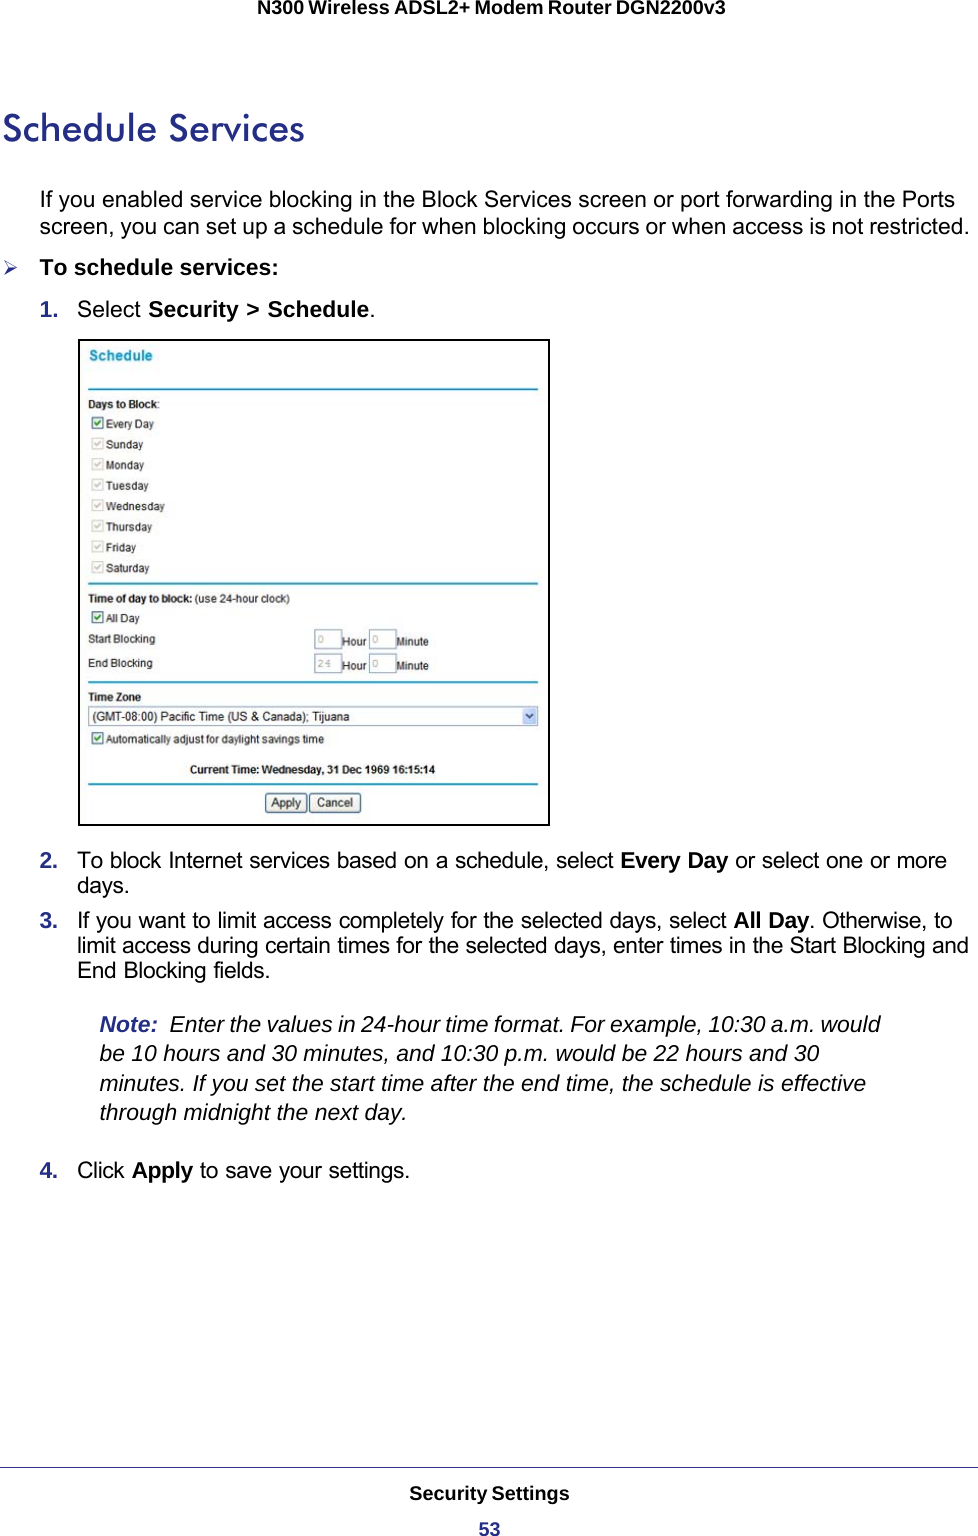
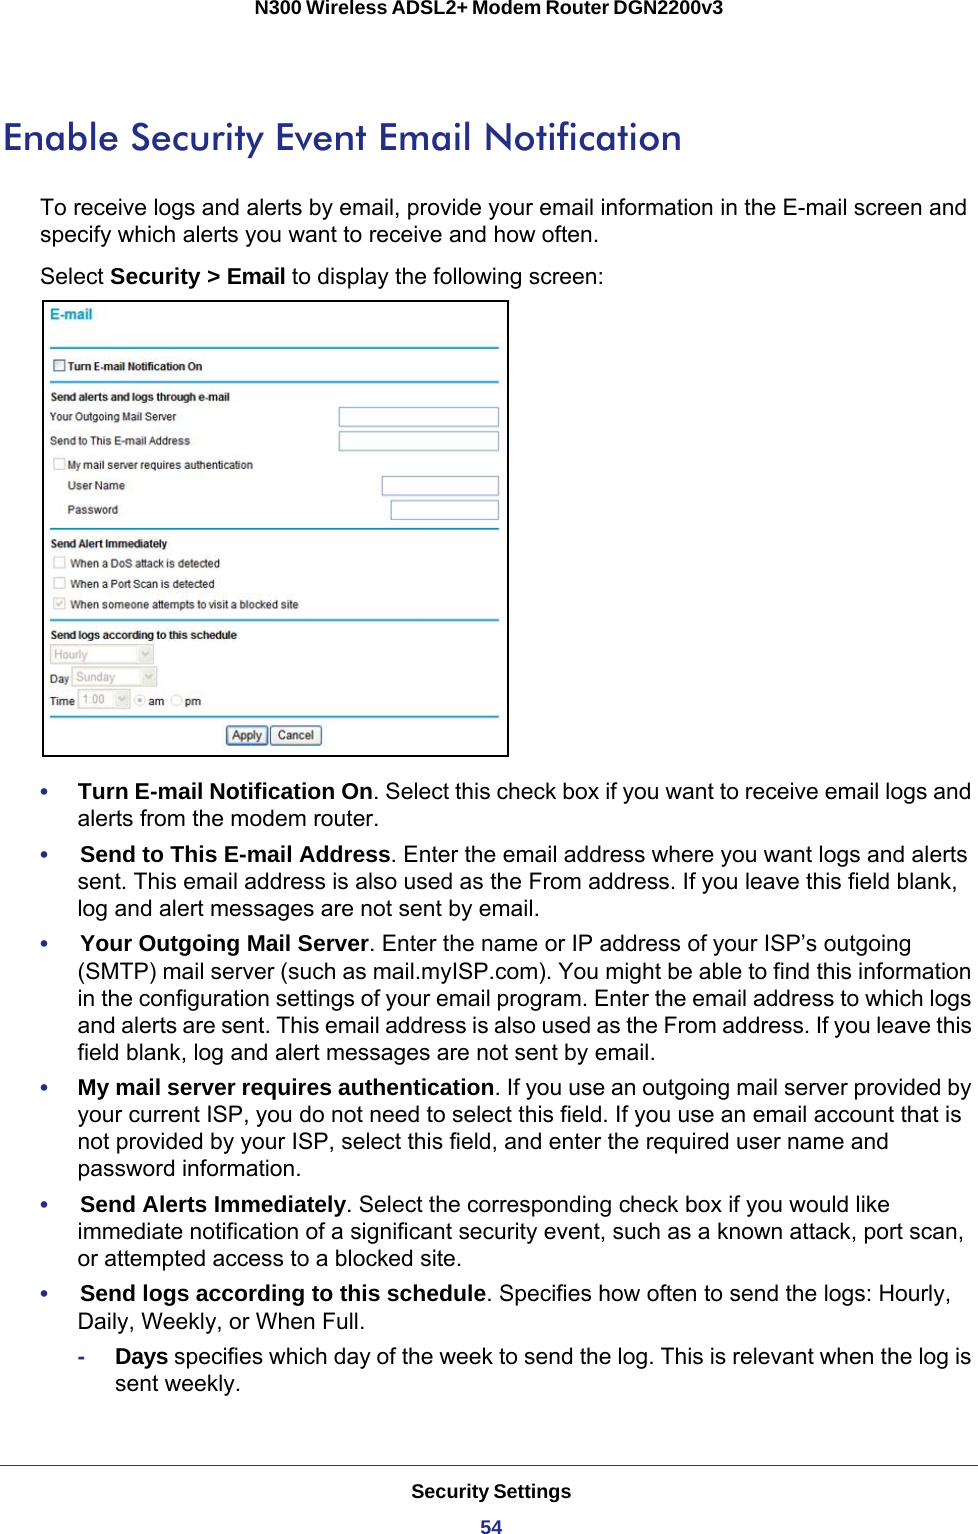
Netgear Incorporated N300 WIRELESS ADSL2+ MODEM ROUTER N300 Wireless ADSL2 Modem Router DGN2200
Contents
- 1. USERS MANUAL 1
- 2. USERS MANUAL 2
USERS MANUAL 1

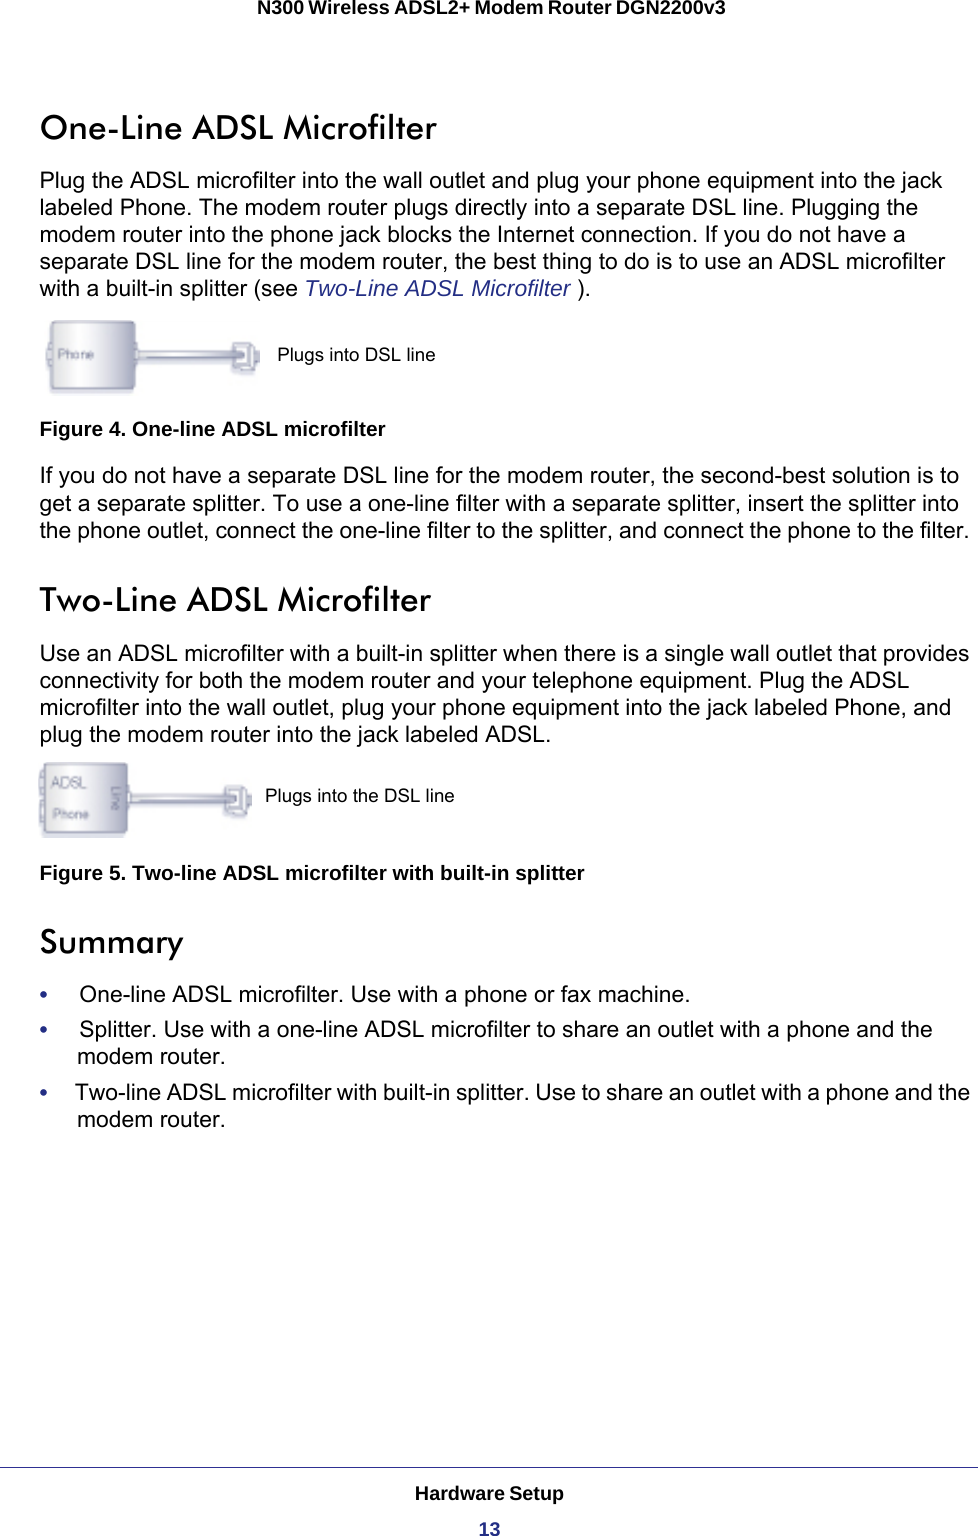
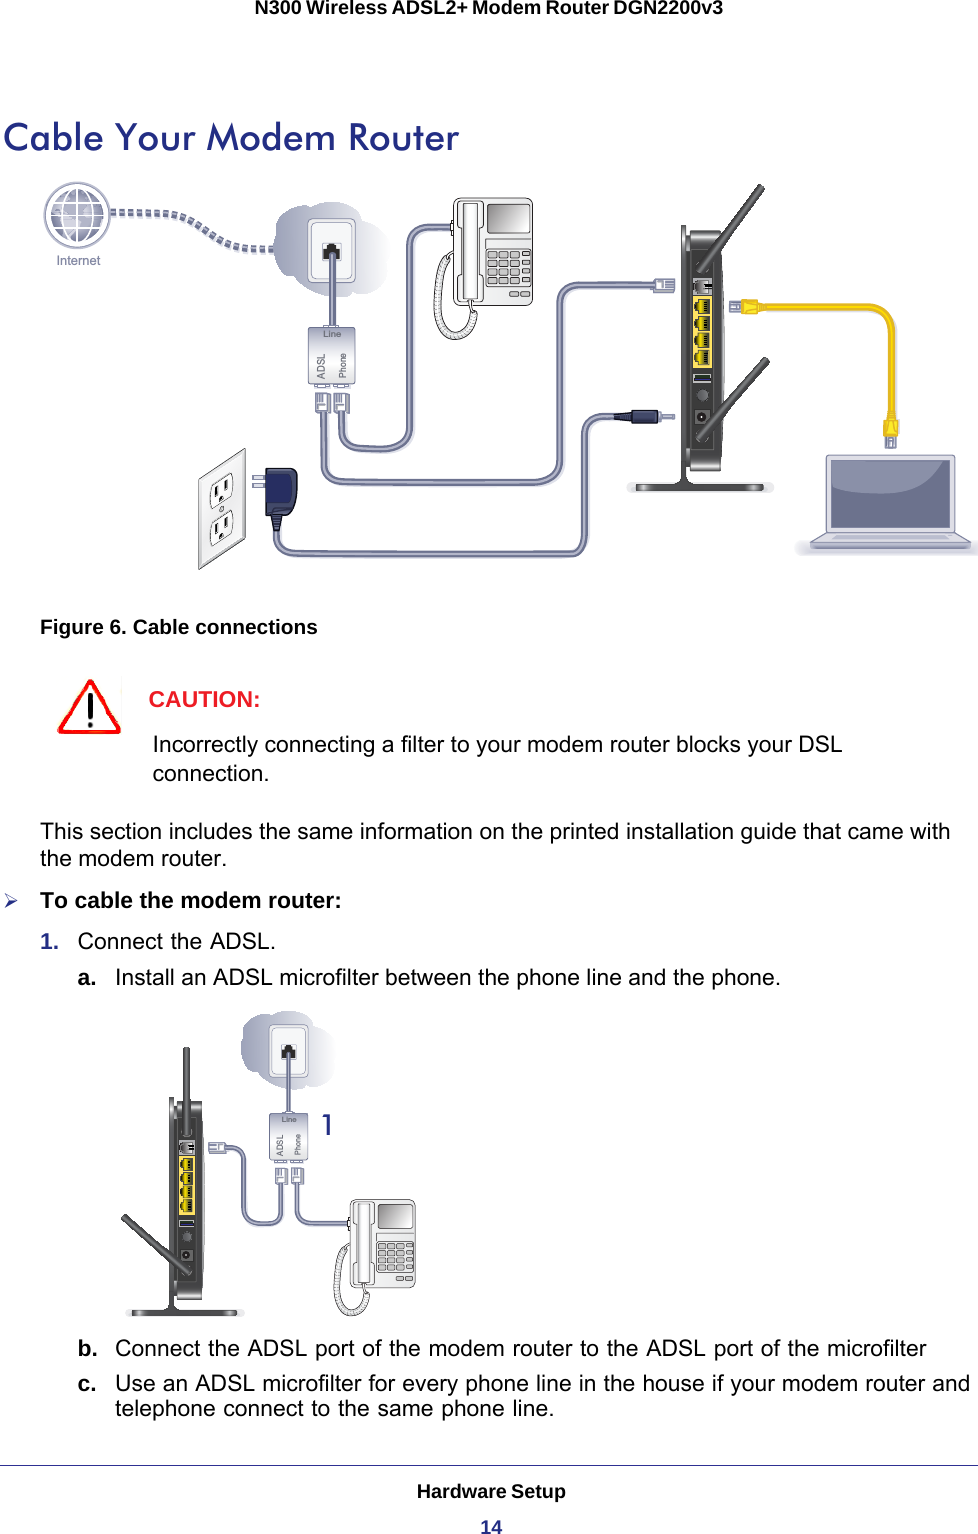
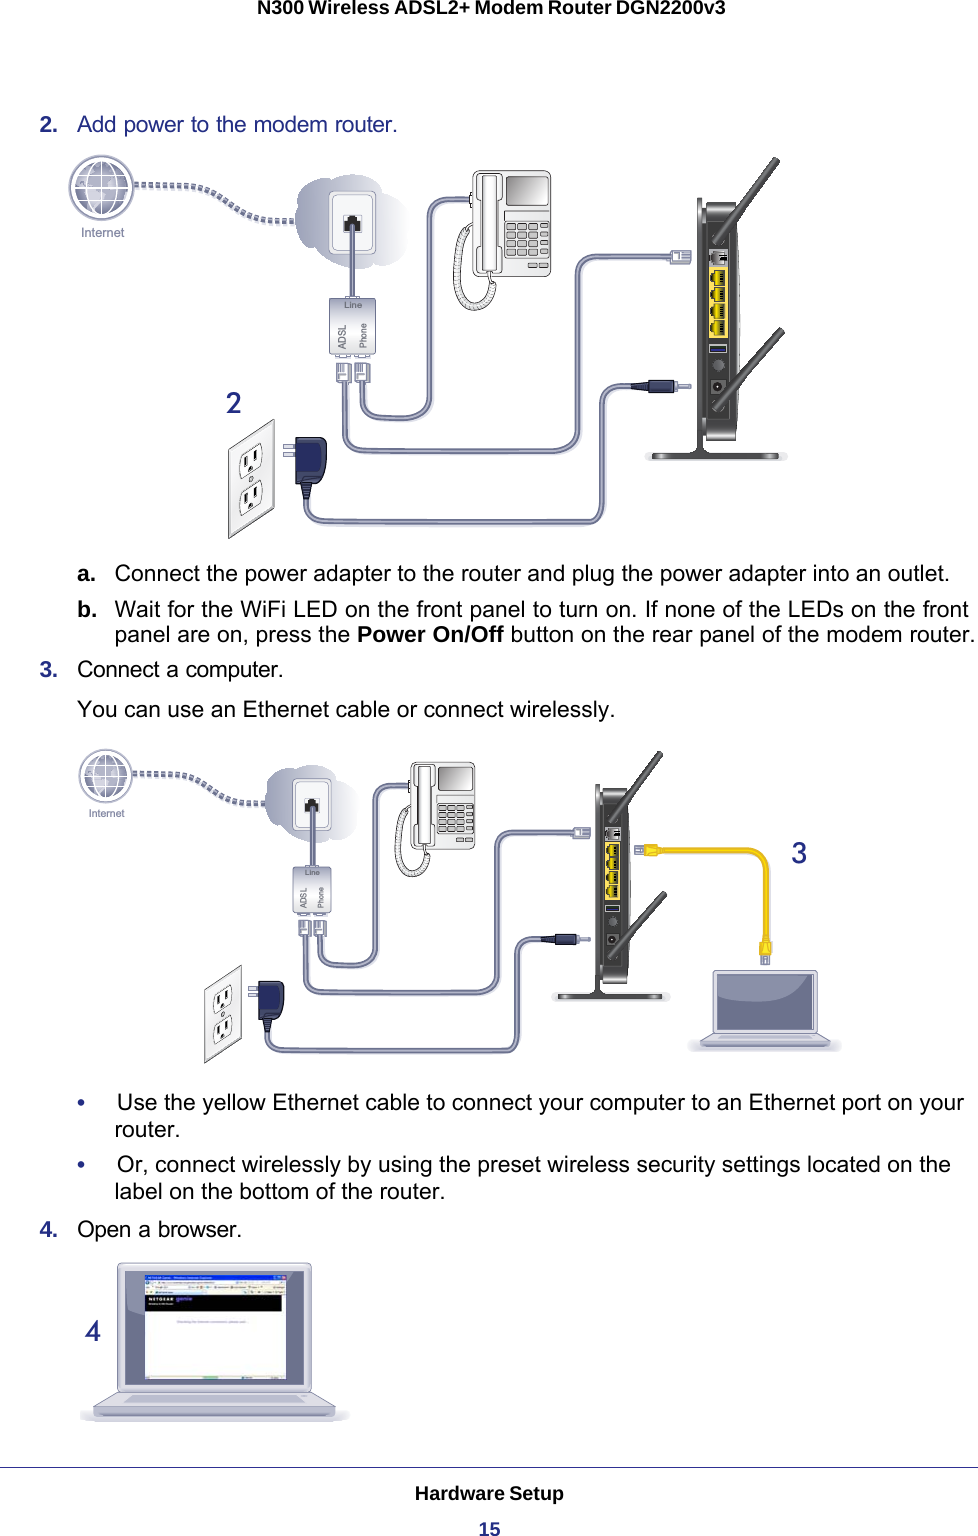

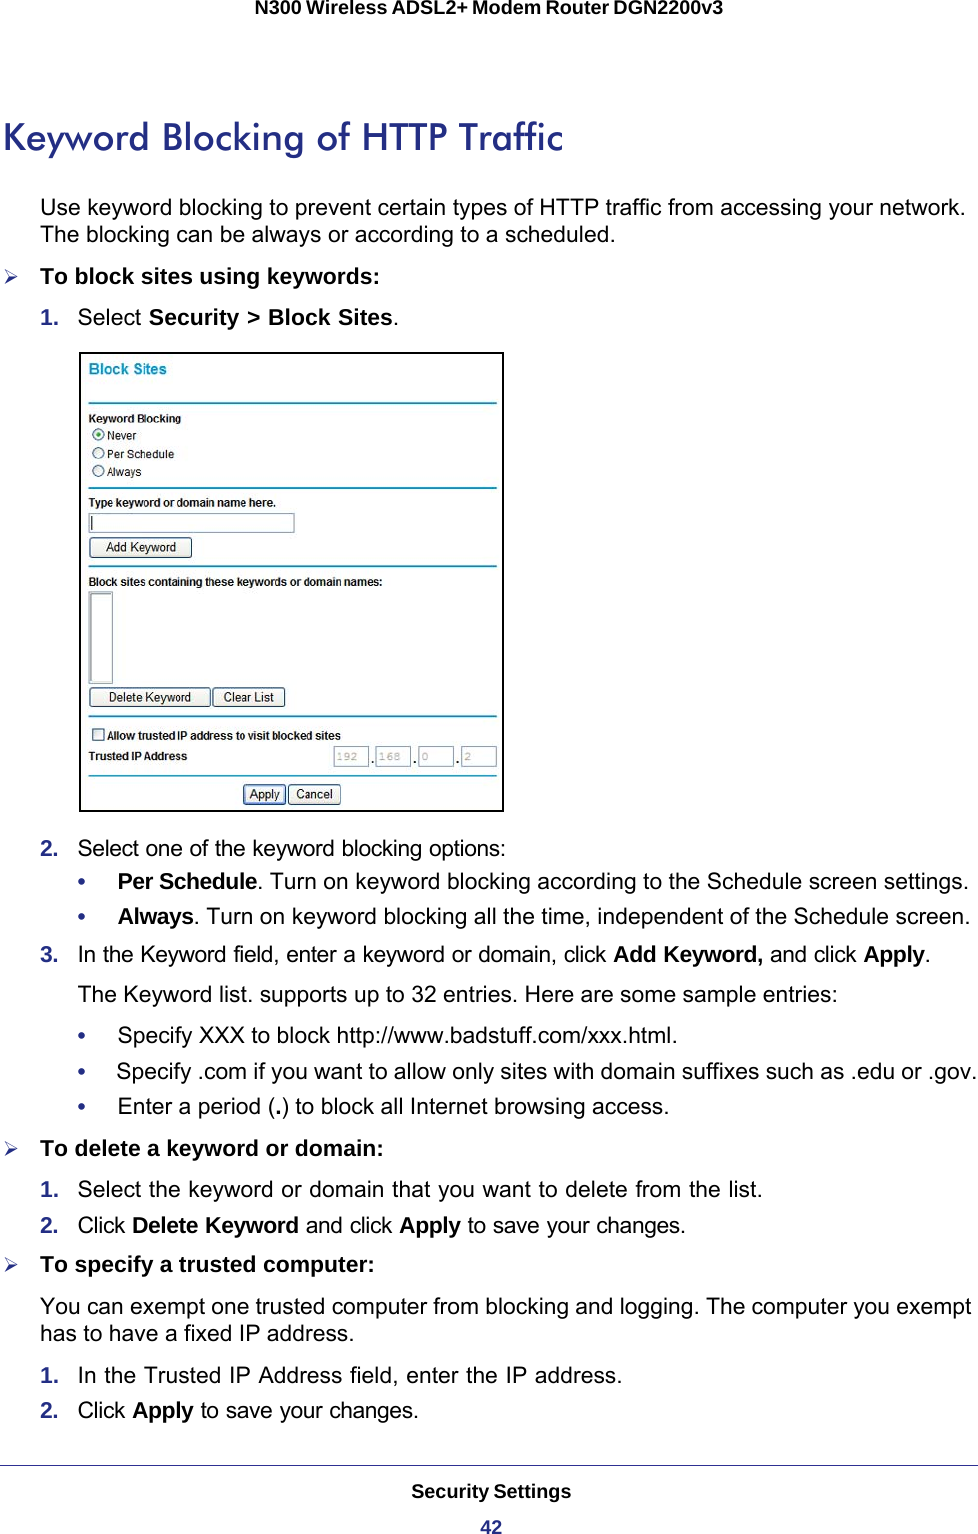
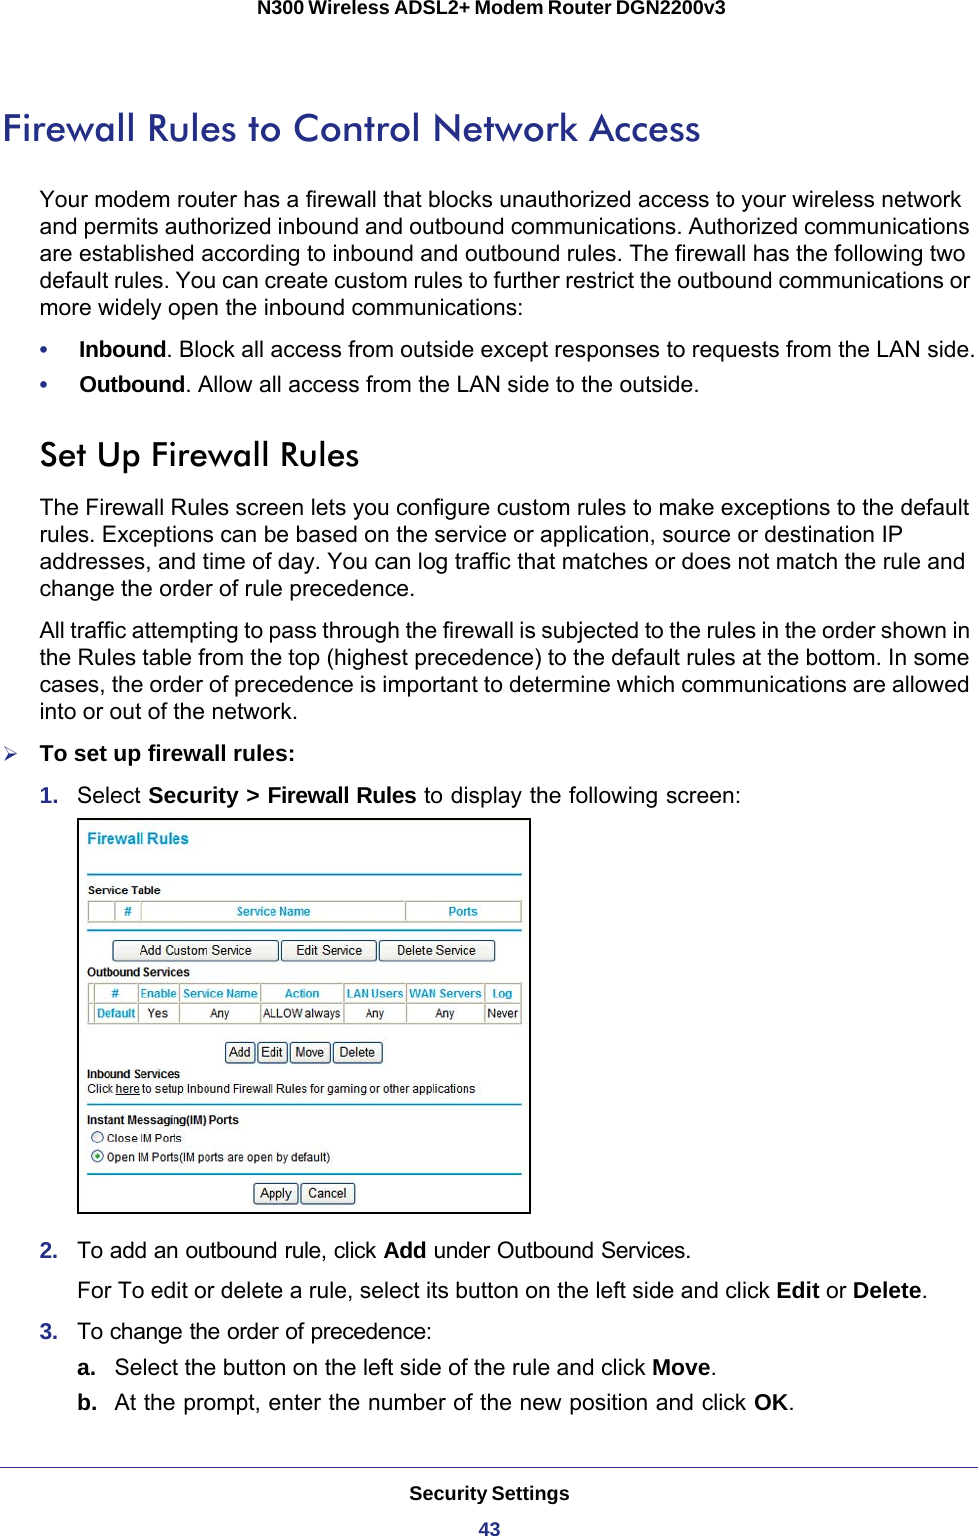
![Security Settings41 N300 Wireless ADSL2+ Modem Router DGN2200v3Examples of Log MessagesFollowing are examples of log messages. In all cases, the log entry shows the time stamp as day, year-month-date hour:minute:second.Activation and AdministrationTue, 2006-05-21 18:48:39 - NETGEAR activated [This entry indicates a power-up or reboot with initial time entry.]Tue, 2006-05-21 18:55:00 - Administrator login successful-IP:192.168.0.2 Thu, 2006-05-21 18:56:58 - Administrator logout - IP:192.168.0.2 [This entry shows an administrator logging in and out from IP address 192.168.0.2.]Tue, 2006-05-21 19:00:06 - Login screen timed out - IP:192.168.0.2[This entry shows a time-out of the administrator login.]Wed, 2006-05-22 22:00:19 - Log emailed[This entry shows when the log was emailed.]Dropped Packets Wed, 2006-05-22 07:15:15 - TCP packet dropped - Source:64.12.47.28,4787,WAN - Destination:134.177.0.11,21,LAN - [Inbound Default rule match]Sun, 2006-05-22 12:50:33 - UDP packet dropped - Source:64.12.47.28,10714,WAN - Destination:134.177.0.11,6970,LAN - [Inbound Default rule match]Sun, 2006-05-22 21:02:53 - ICMP packet dropped - Source:64.12.47.28,0,WAN - Destination:134.177.0.11,0,LAN - [Inbound Default rule match][These entries show an inbound FTP (port 21) packet, a User Datagram Protocol (UDP) packet (port 6970), and an Internet Control Message Protocol (ICMP) packet (port 0) being dropped as a result of the default inbound rule, which states that all inbound packets are denied.]](https://usermanual.wiki/Netgear-orporated/11200167.USERS-MANUAL-1/User-Guide-1583065-Page-41.png)