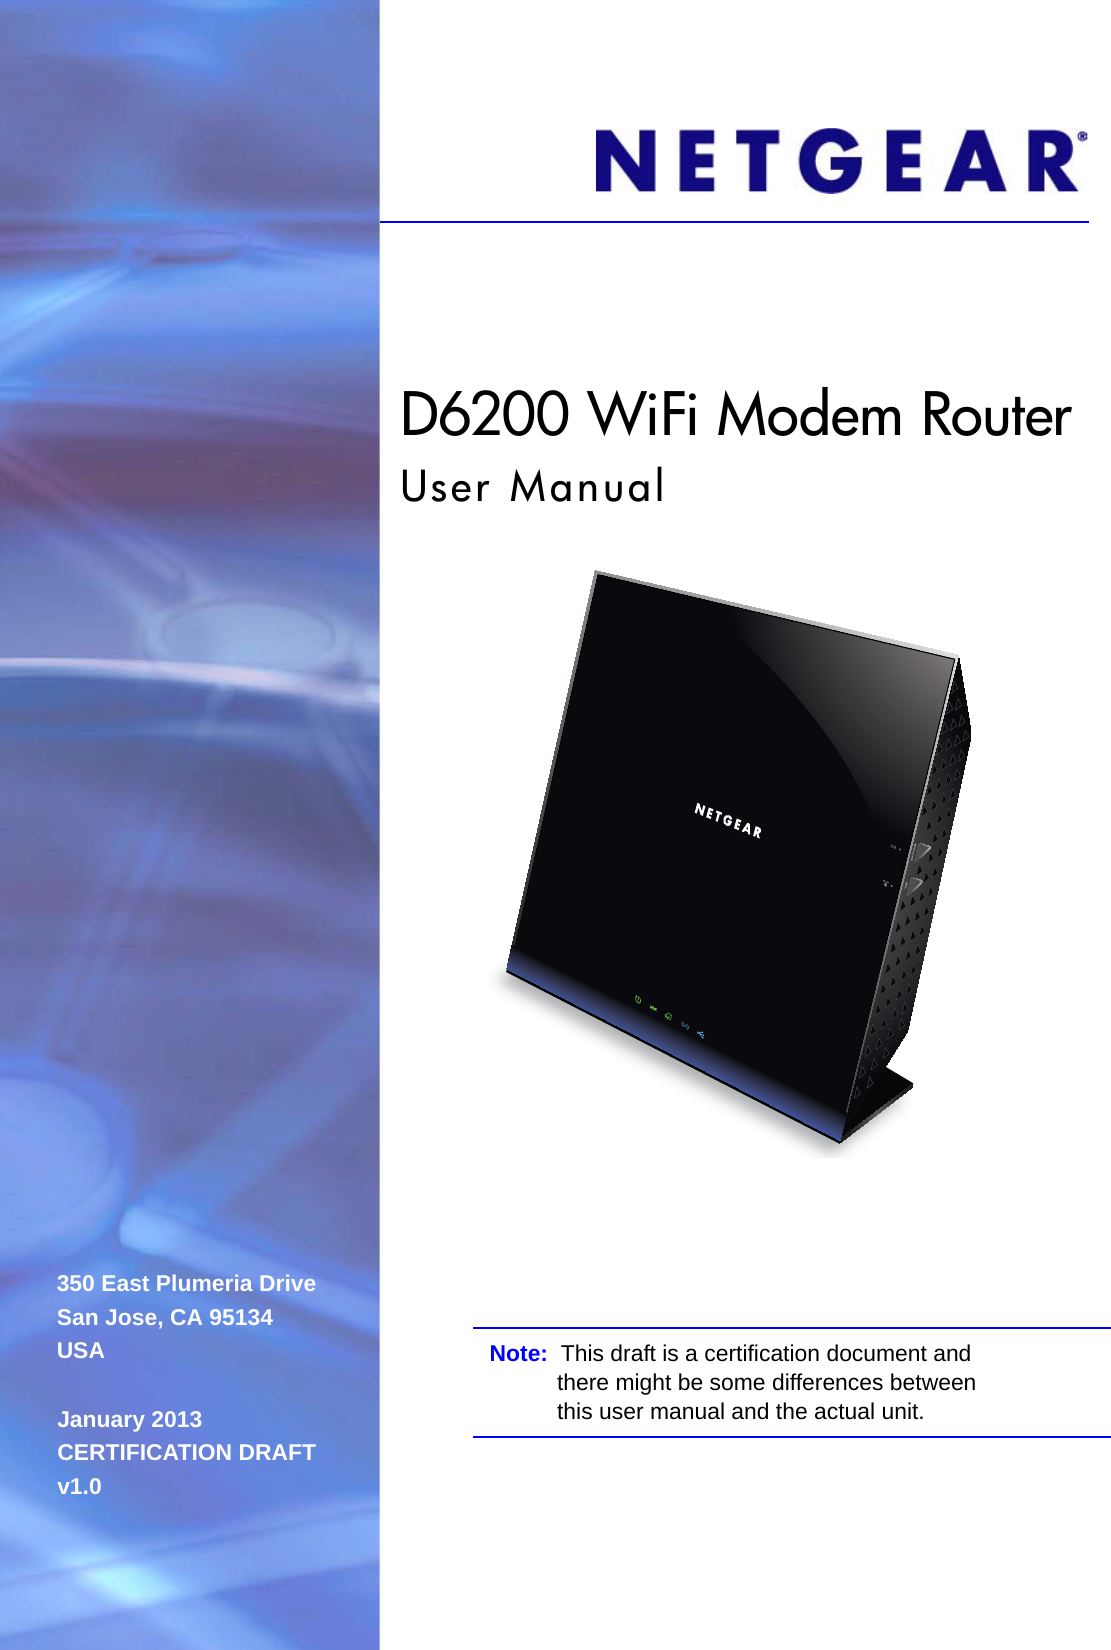
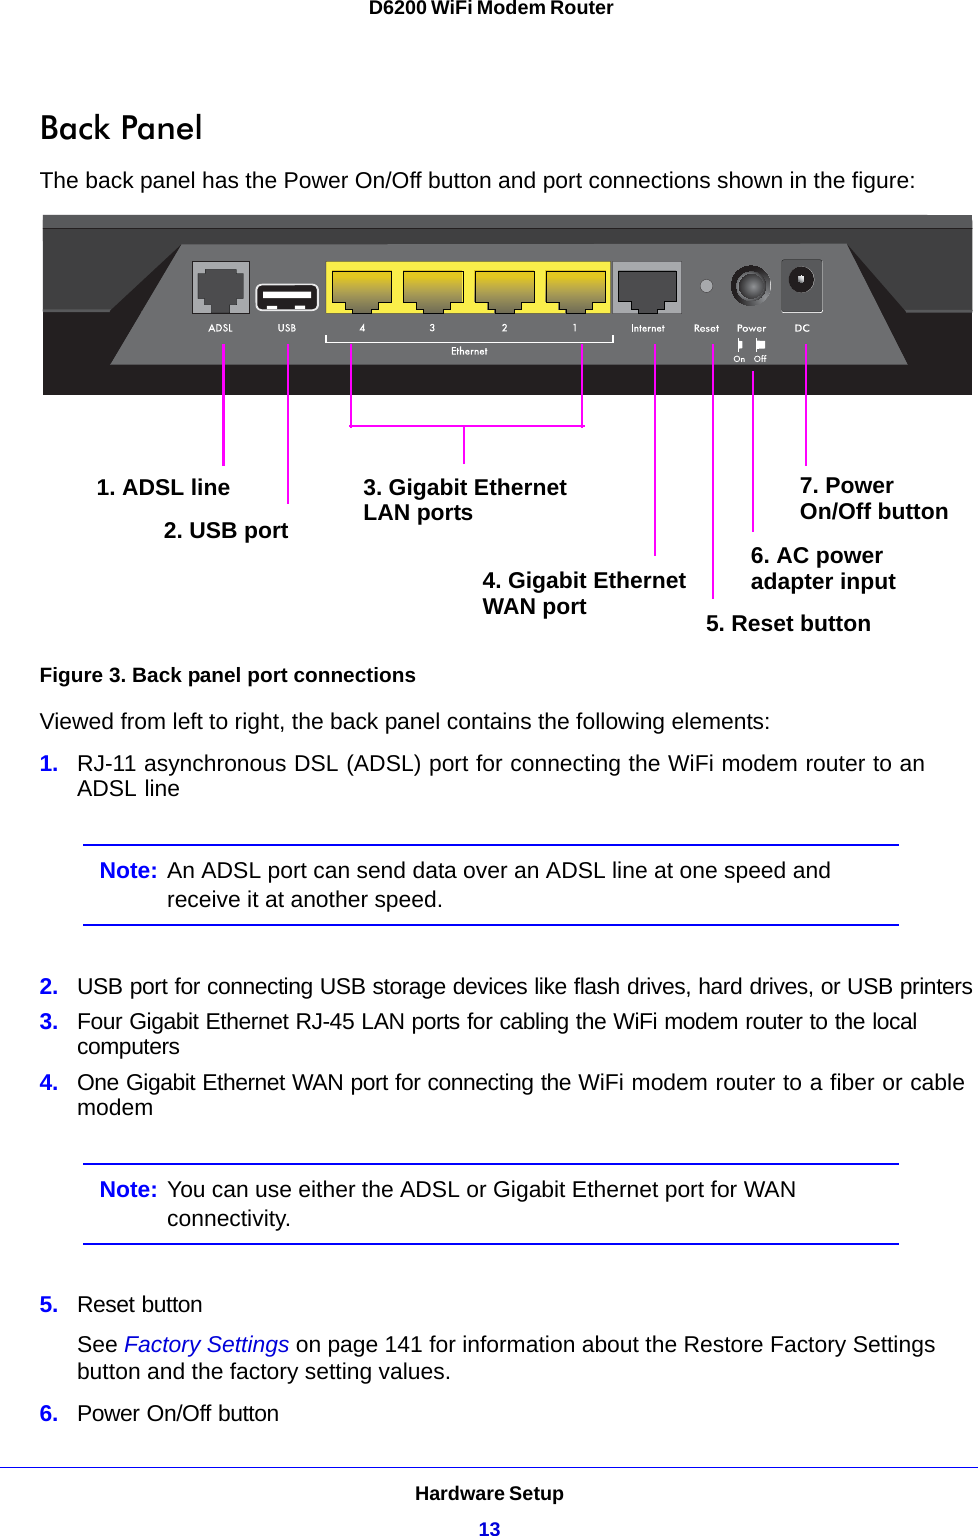
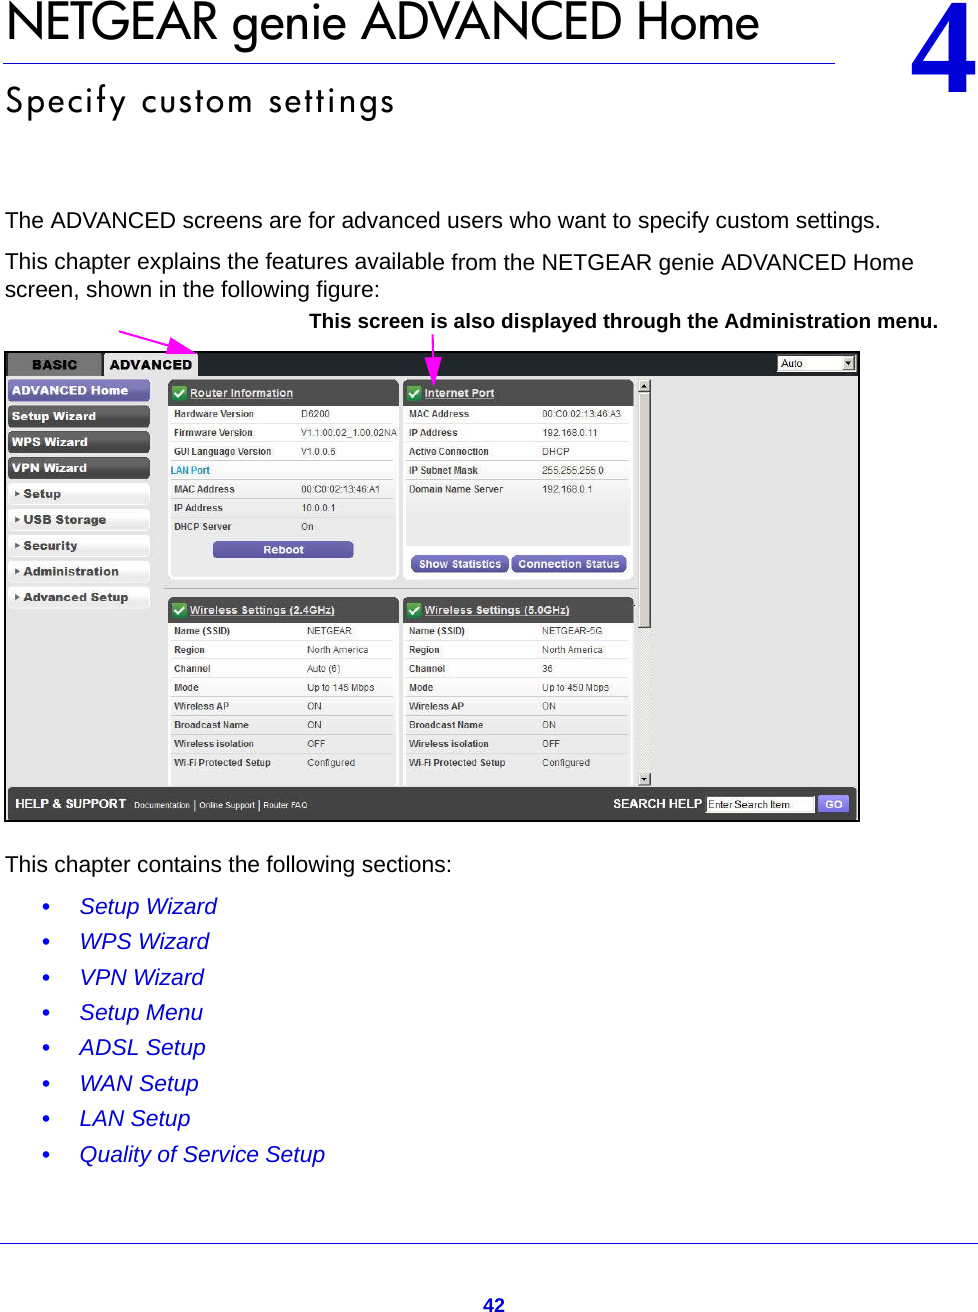
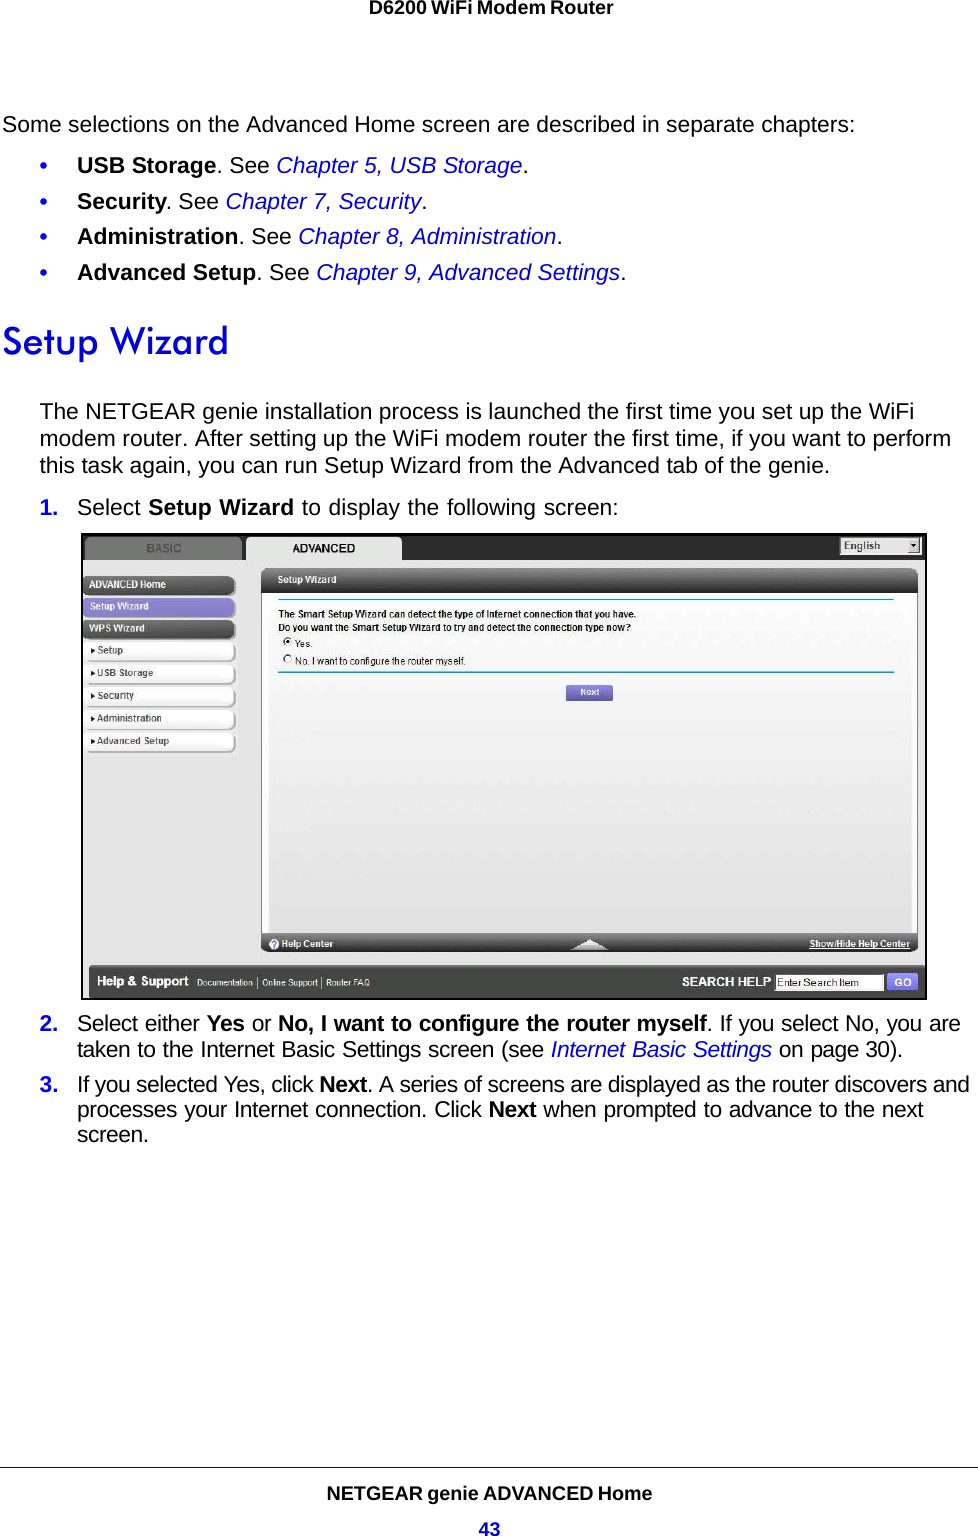
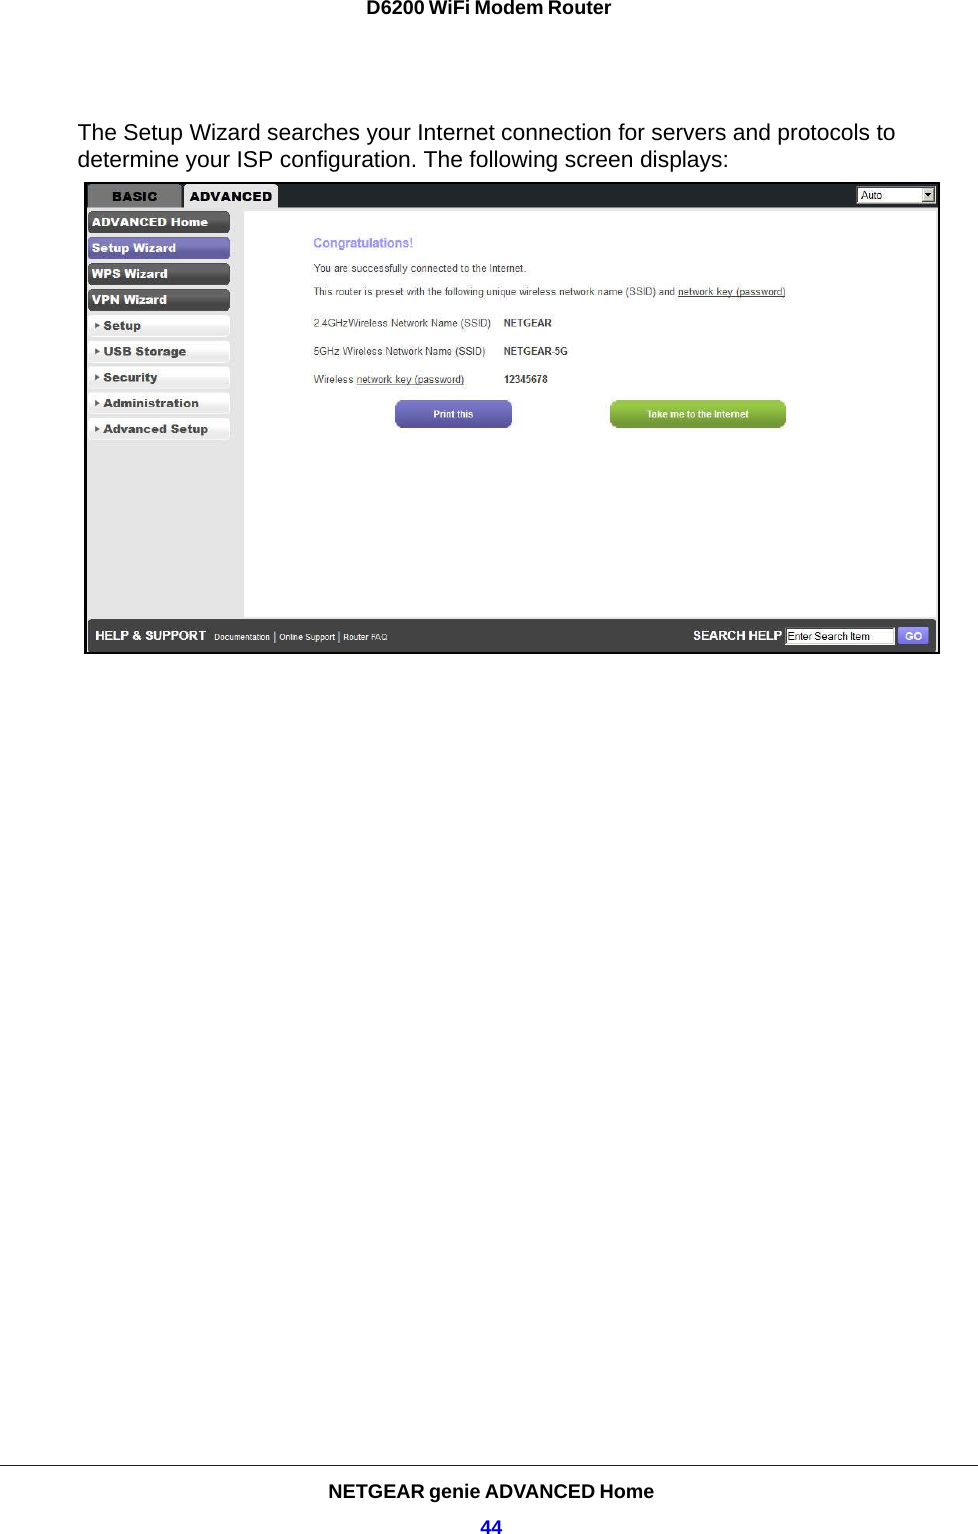
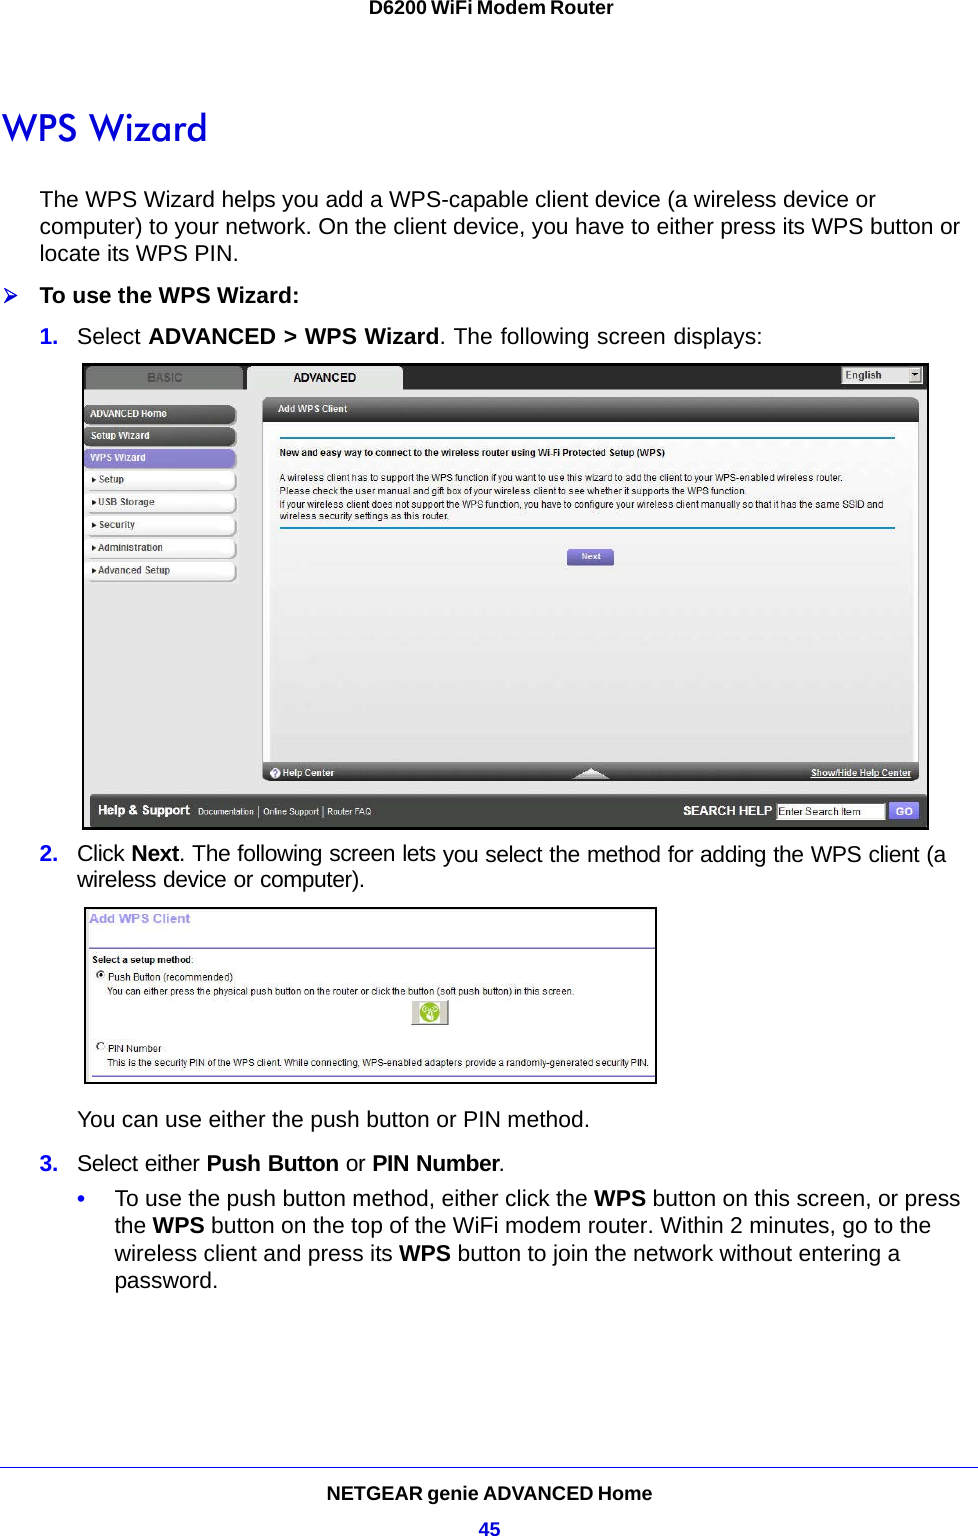
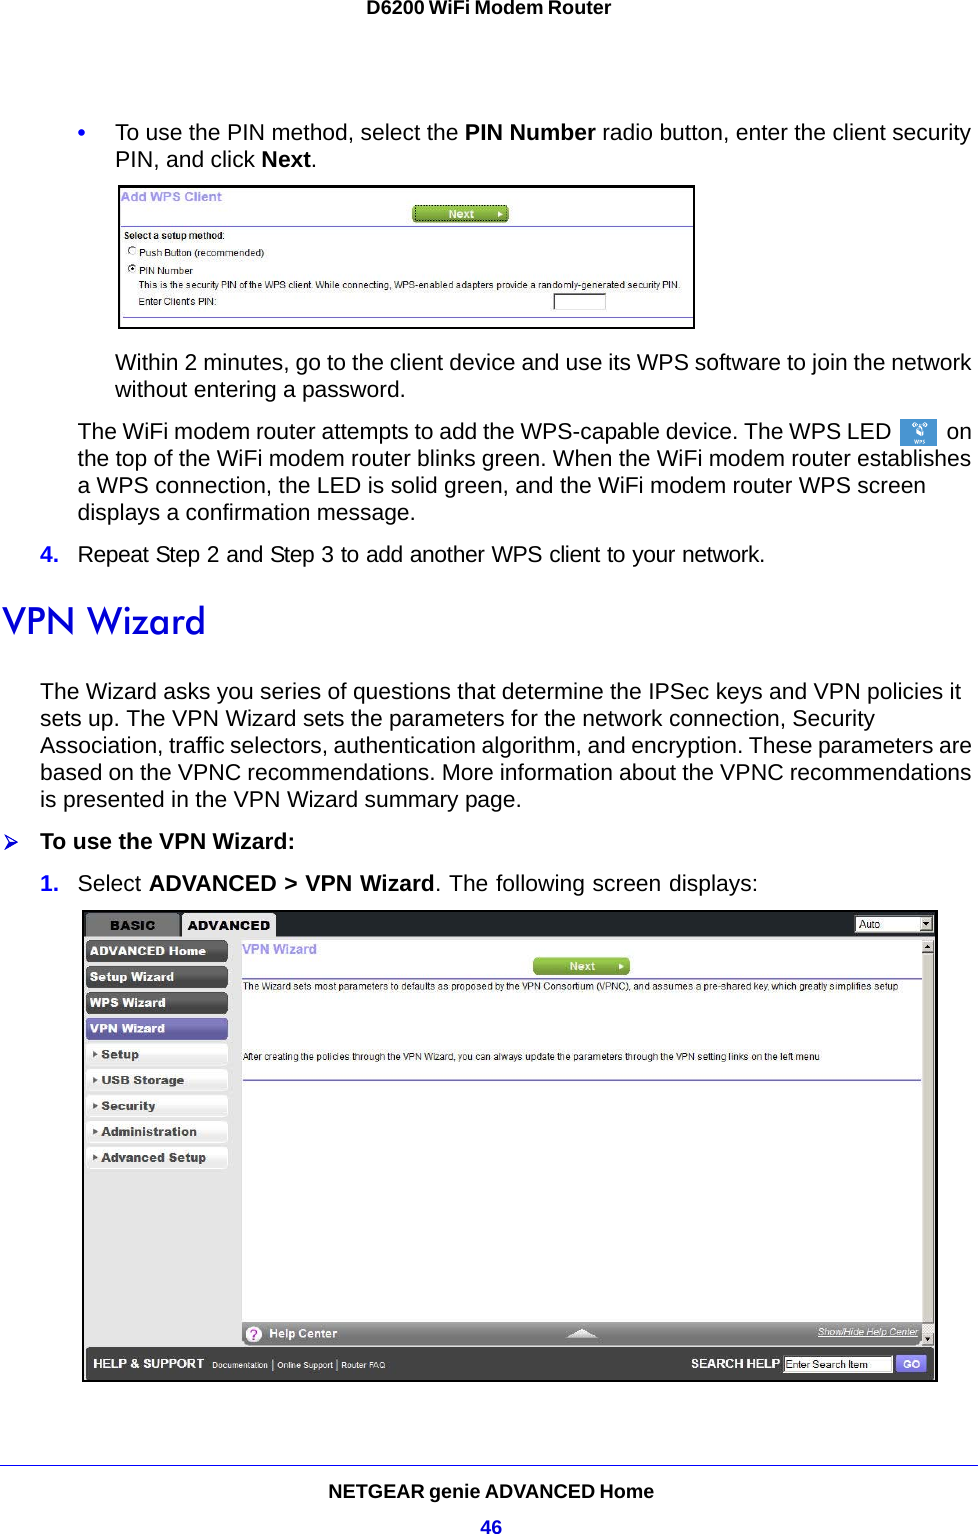
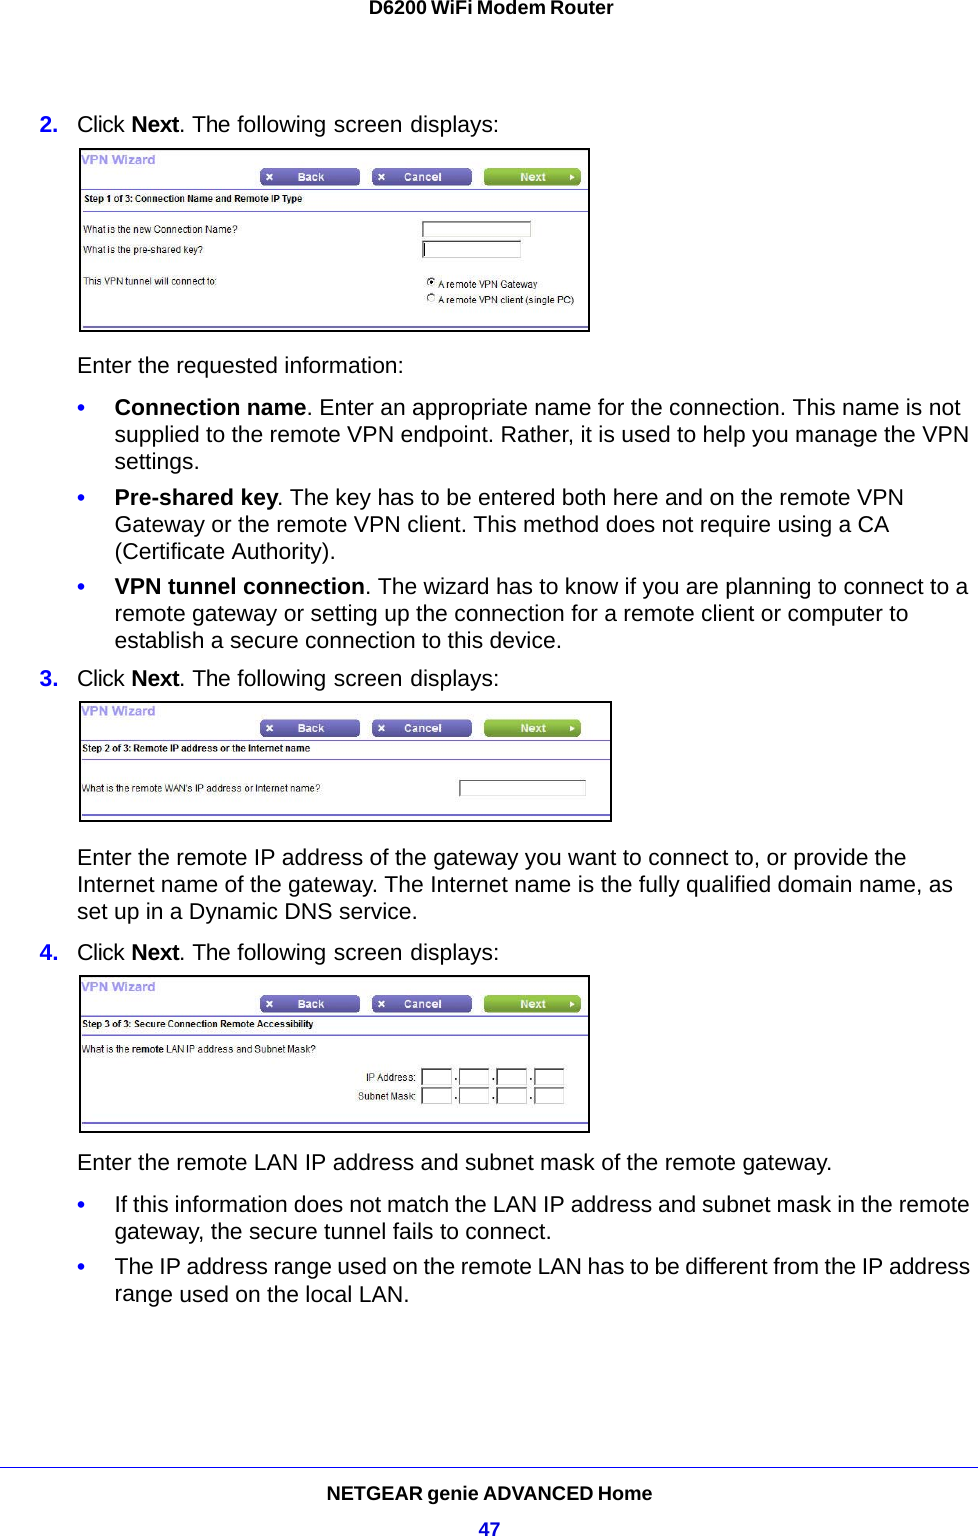
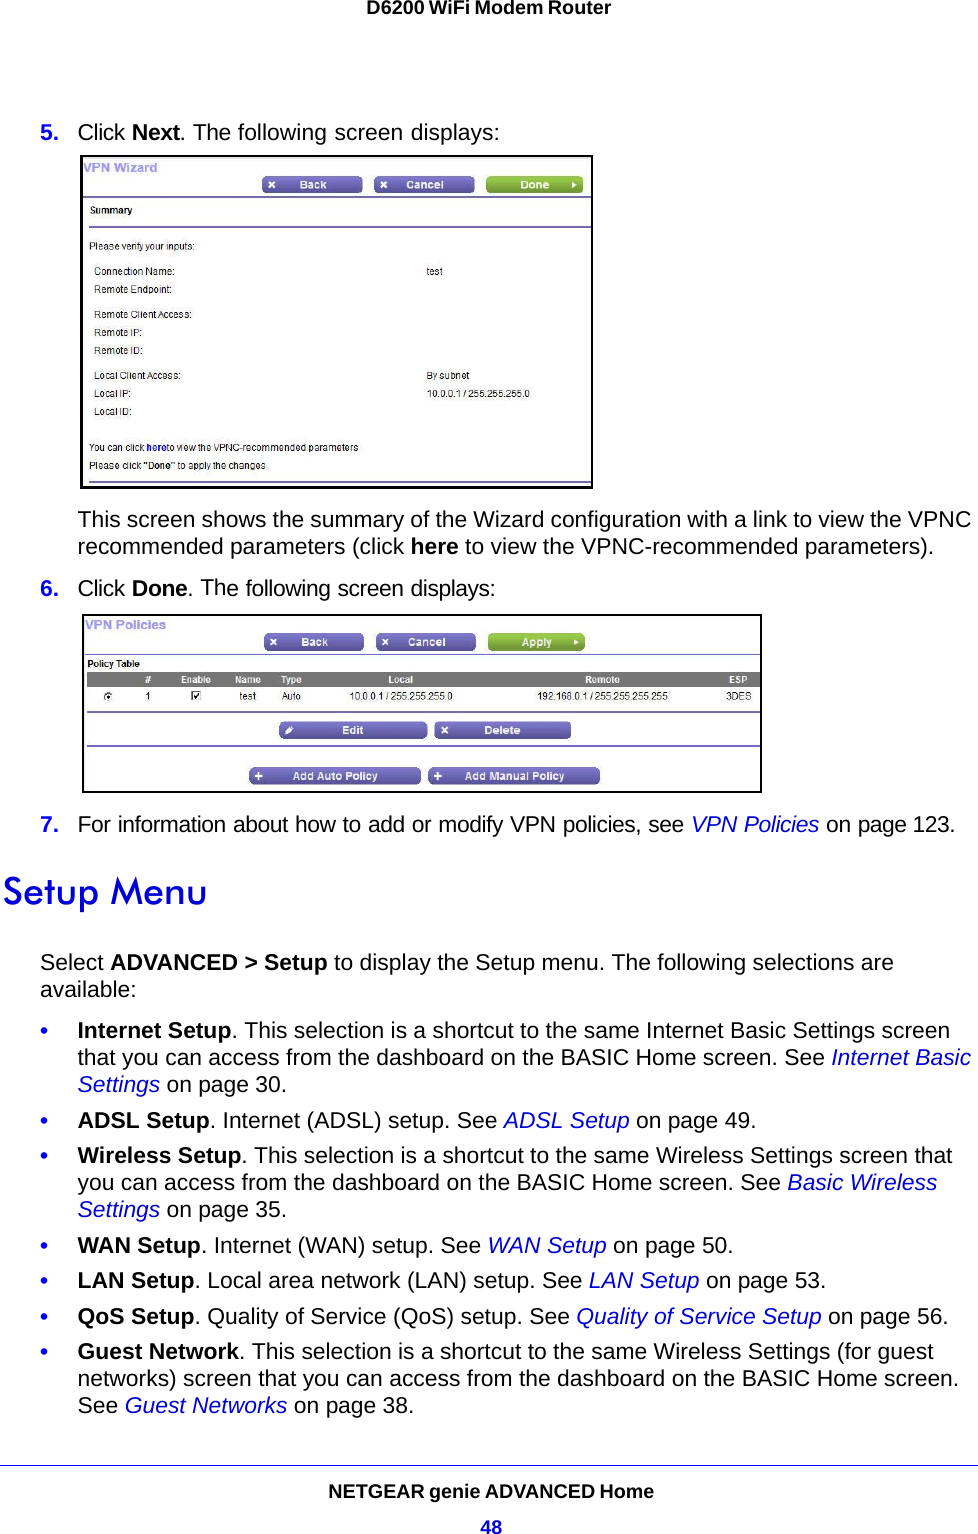
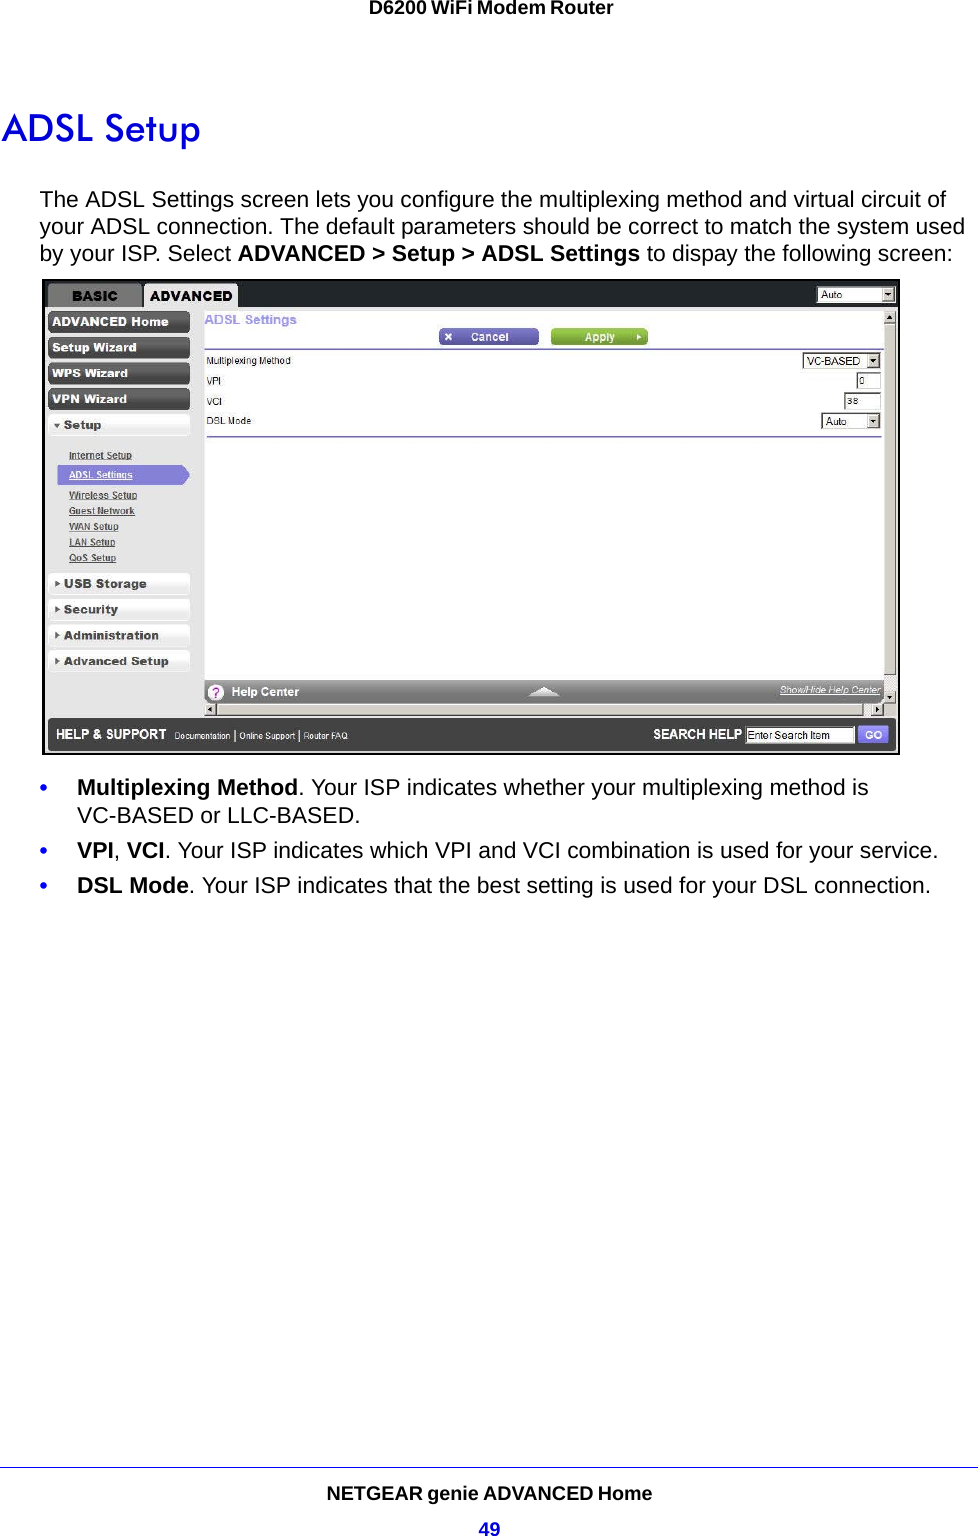
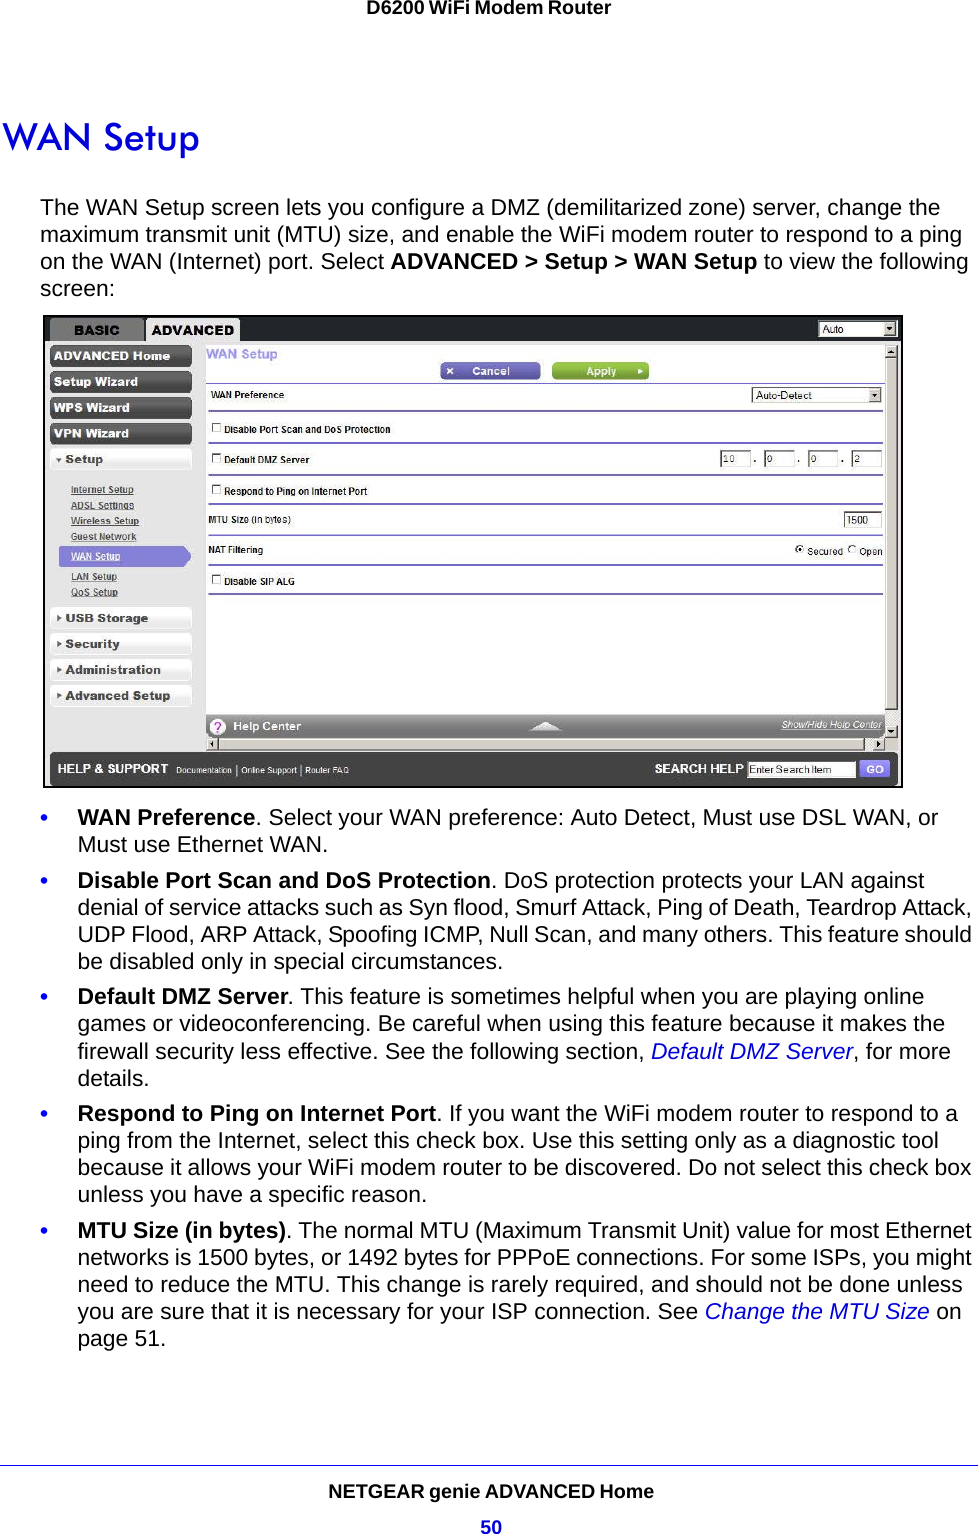
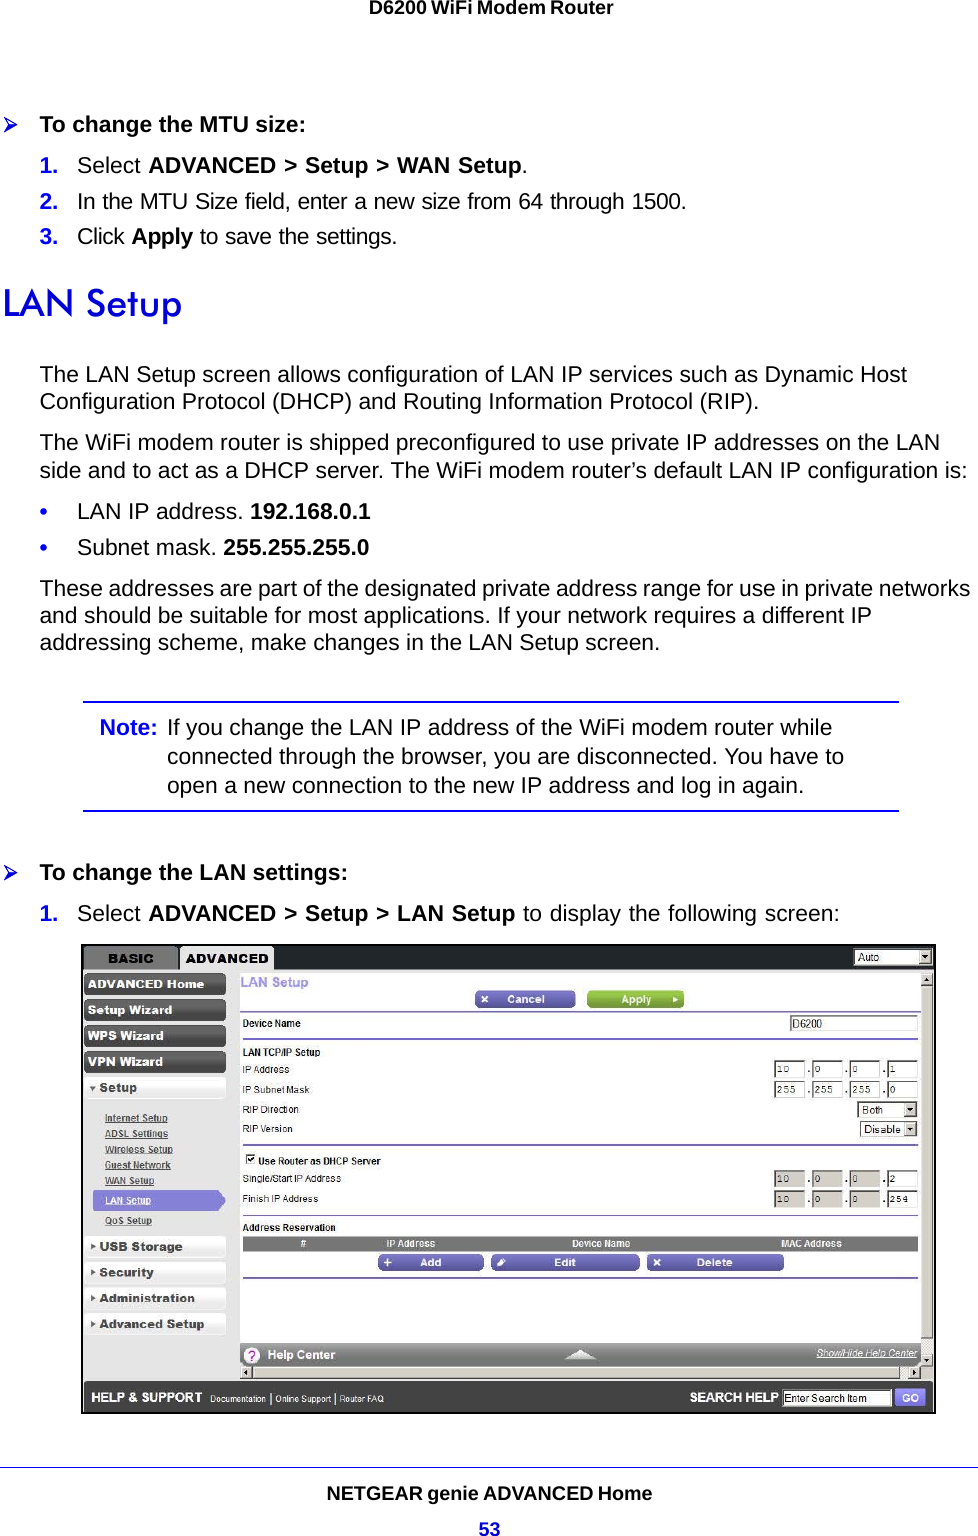
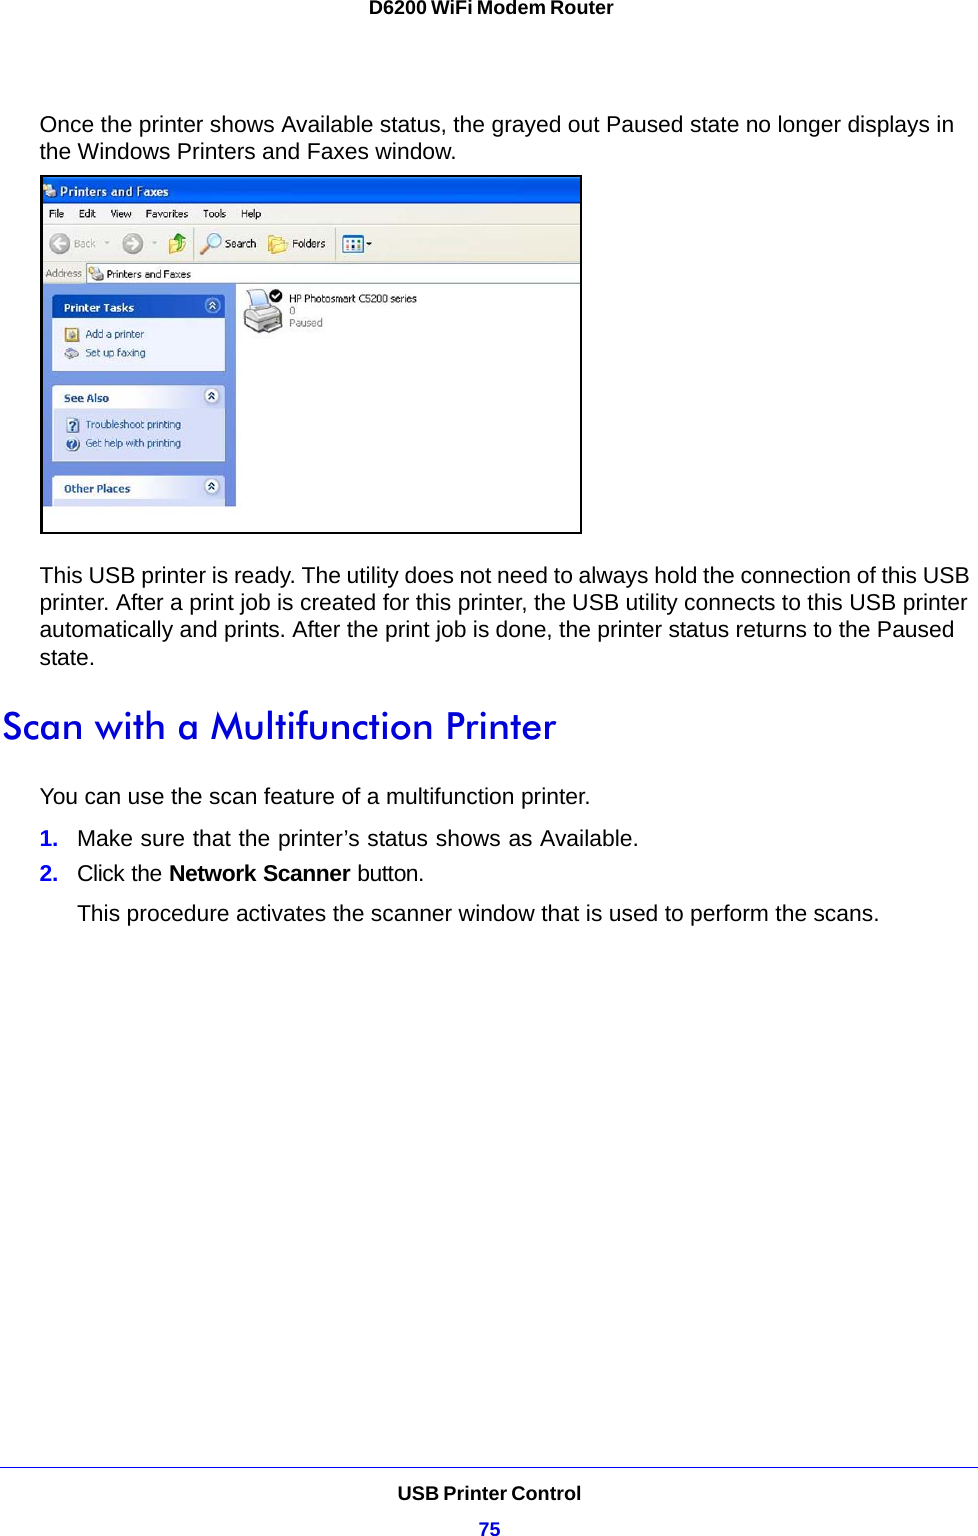
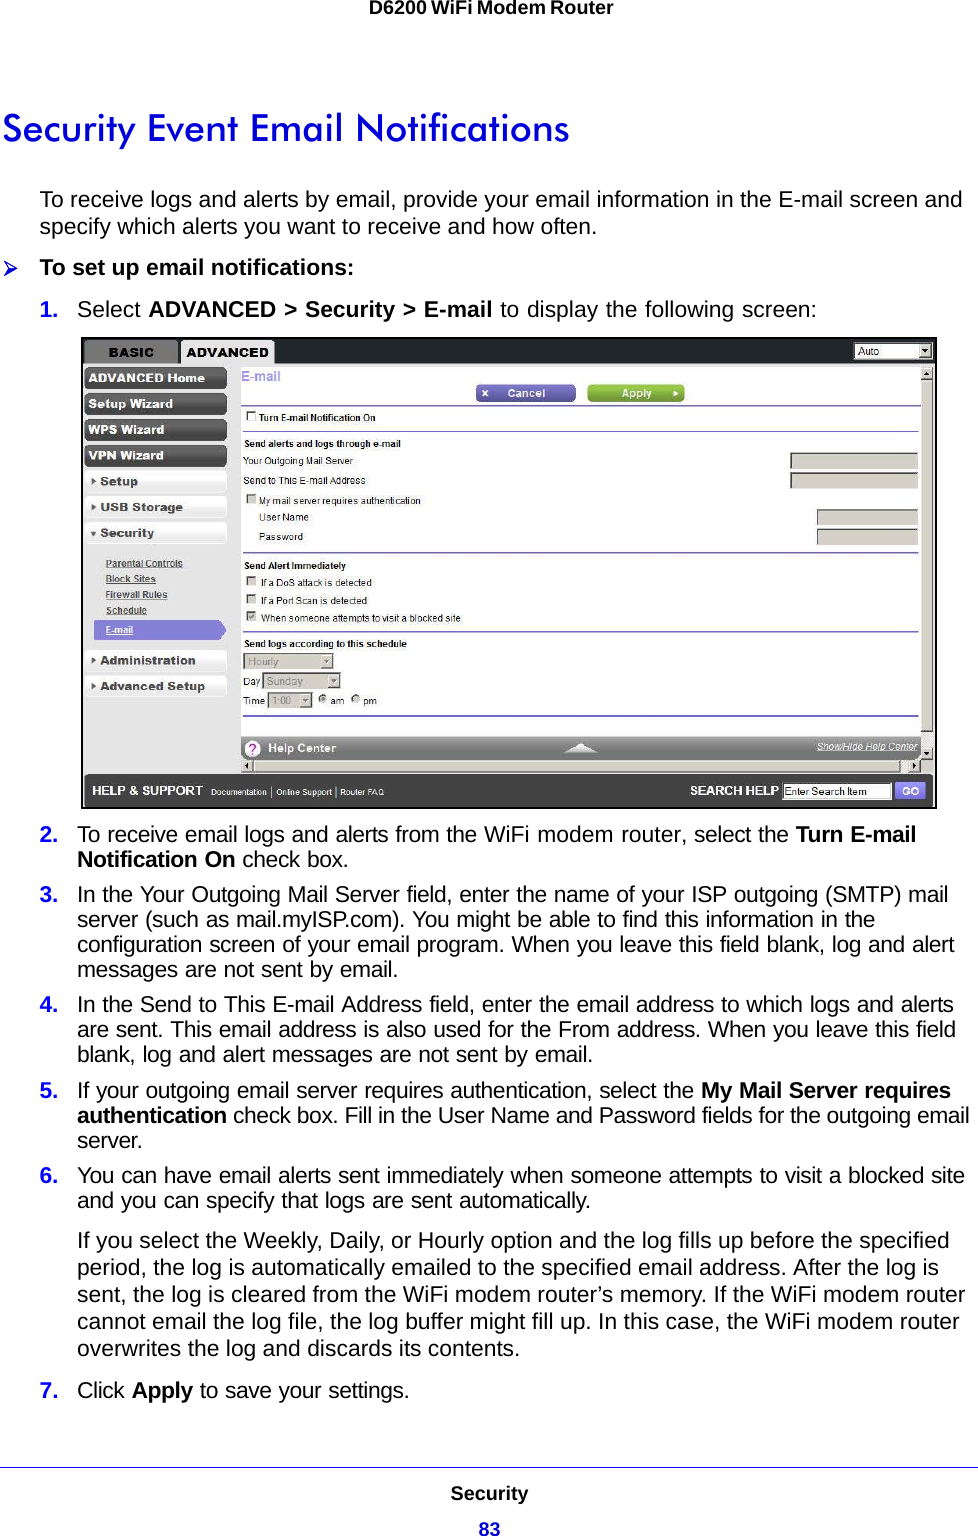
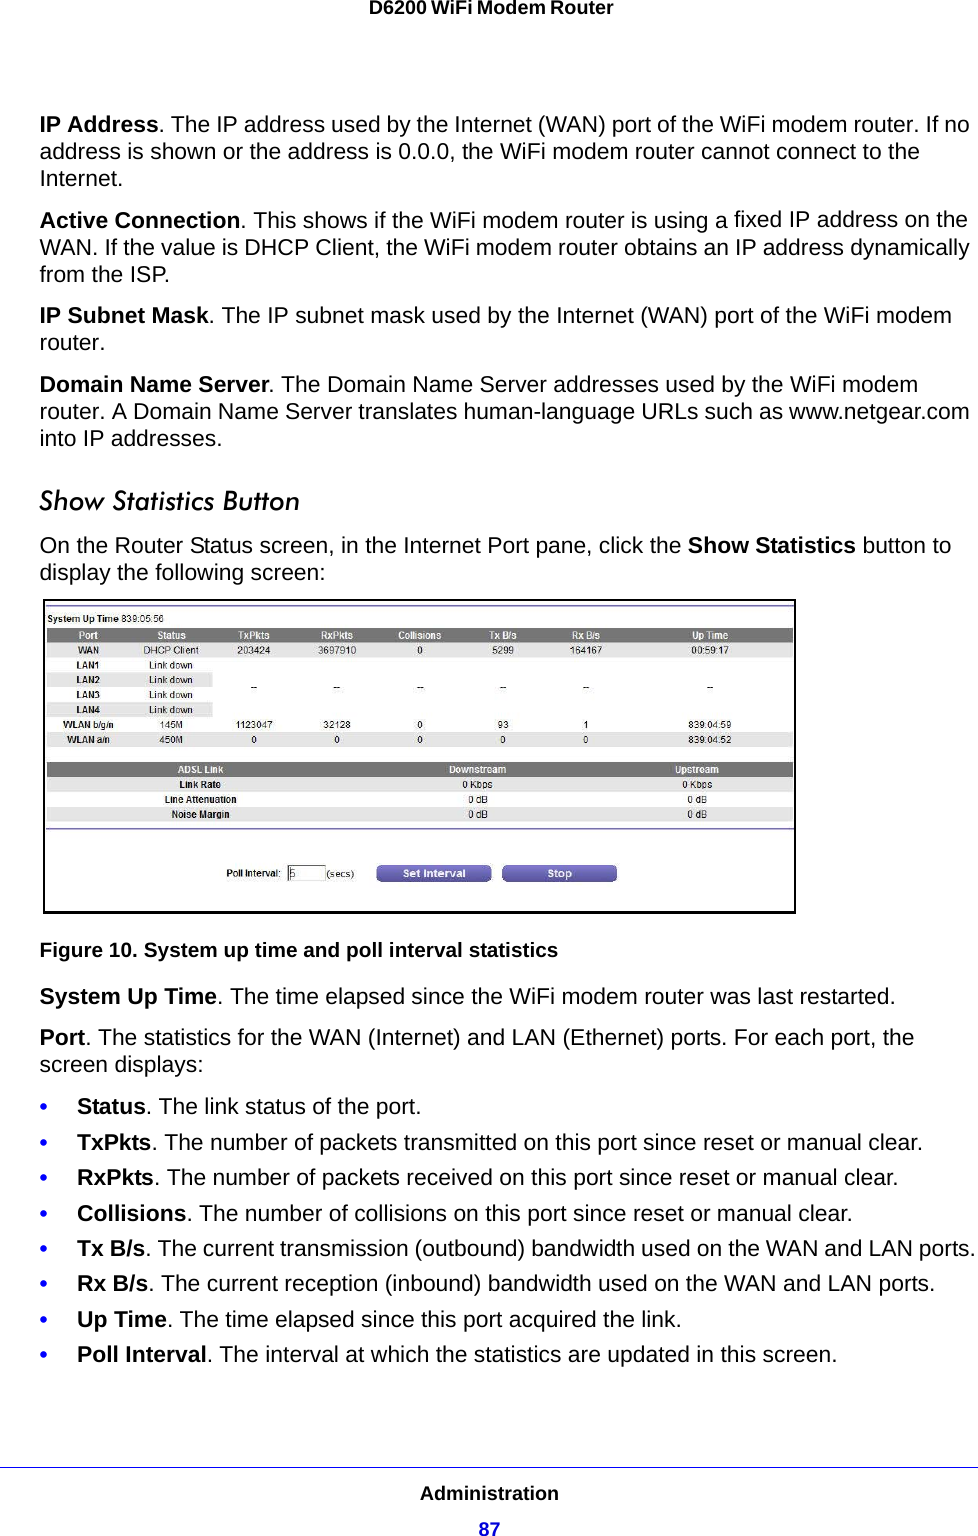
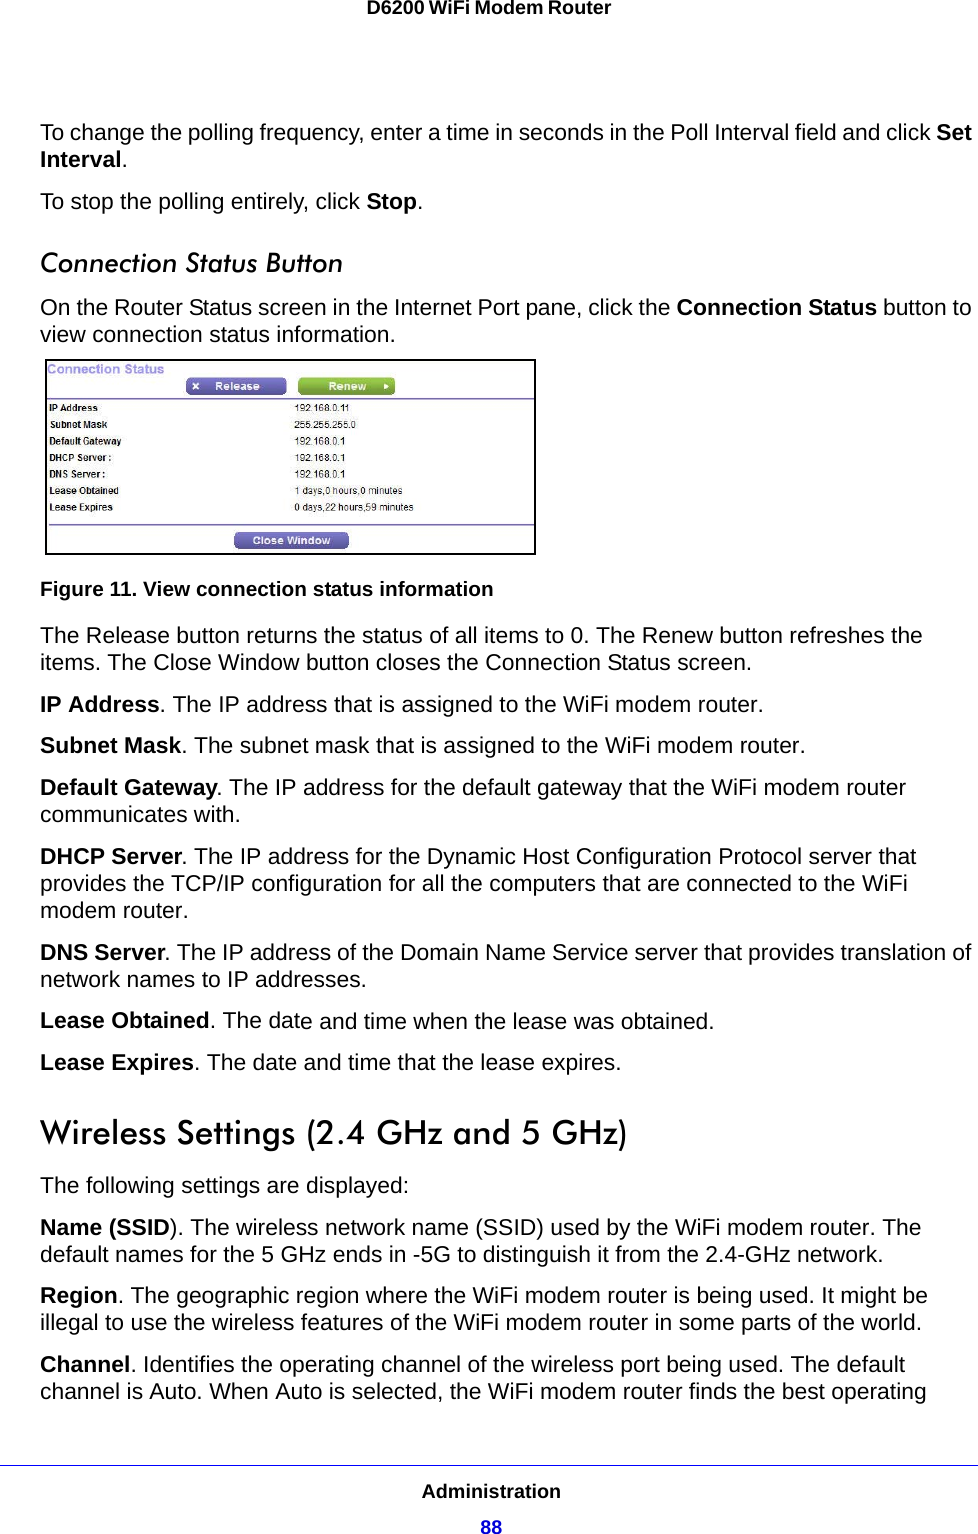
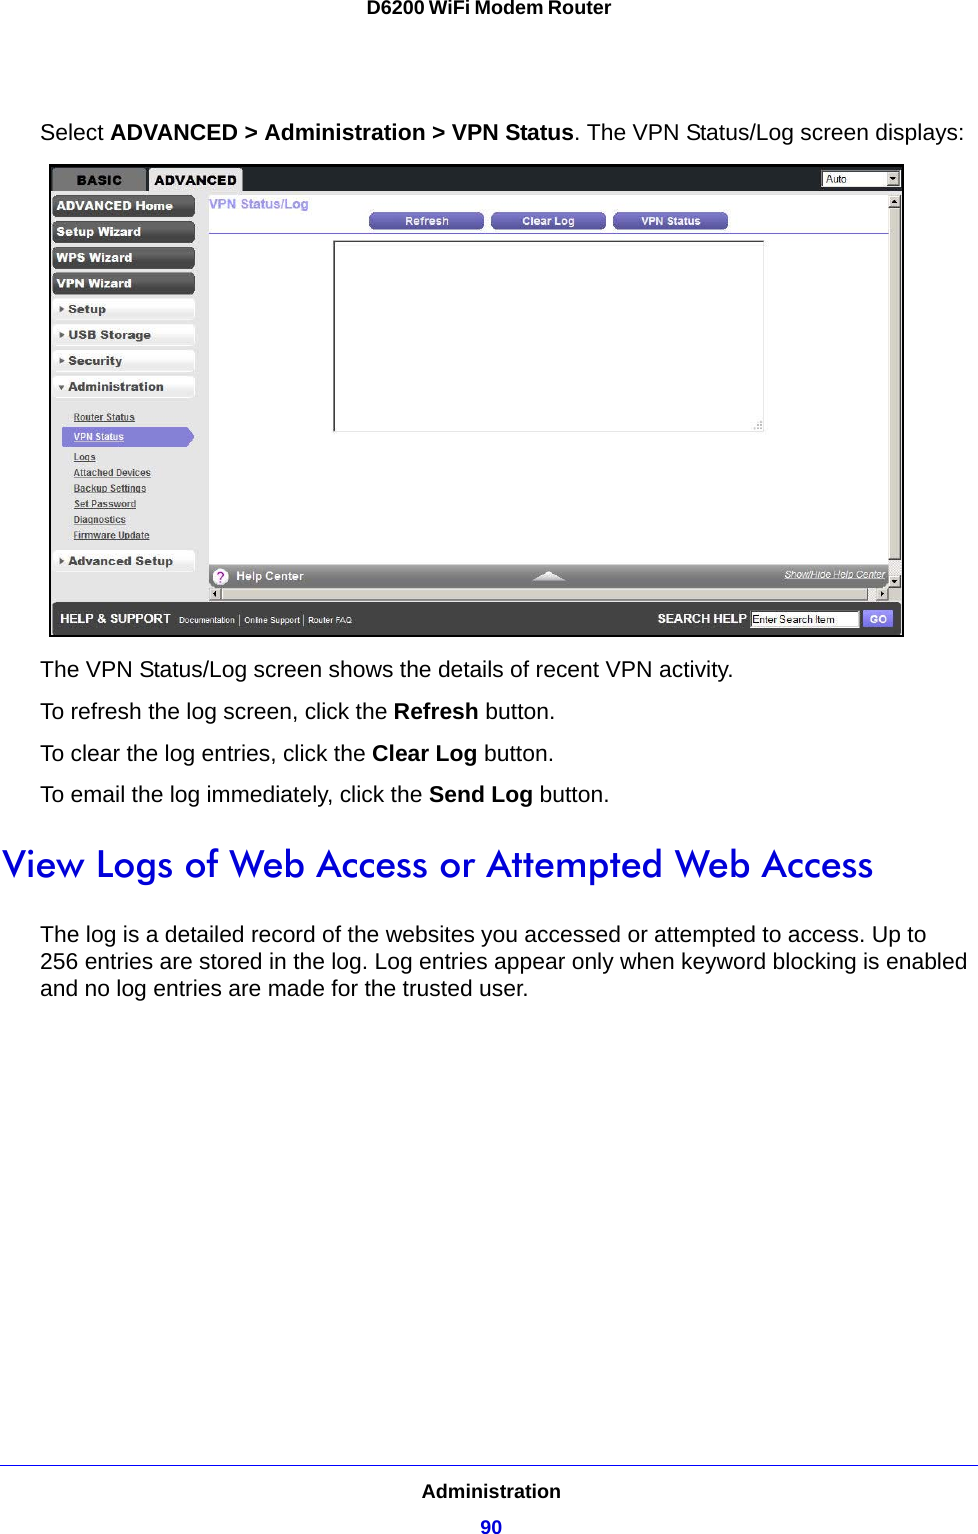
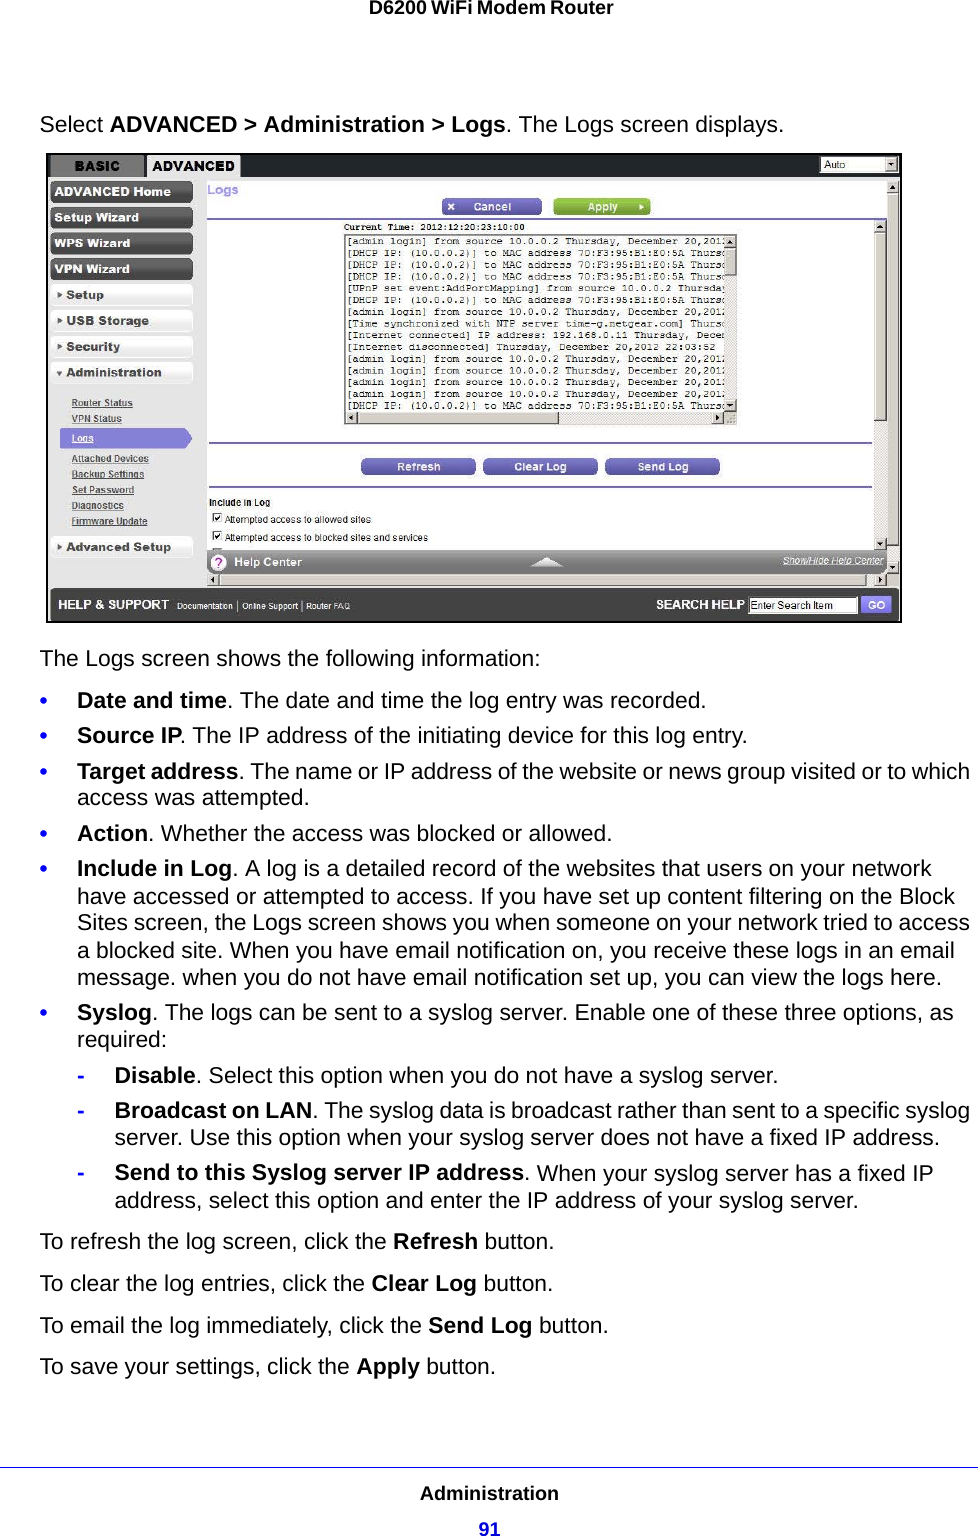
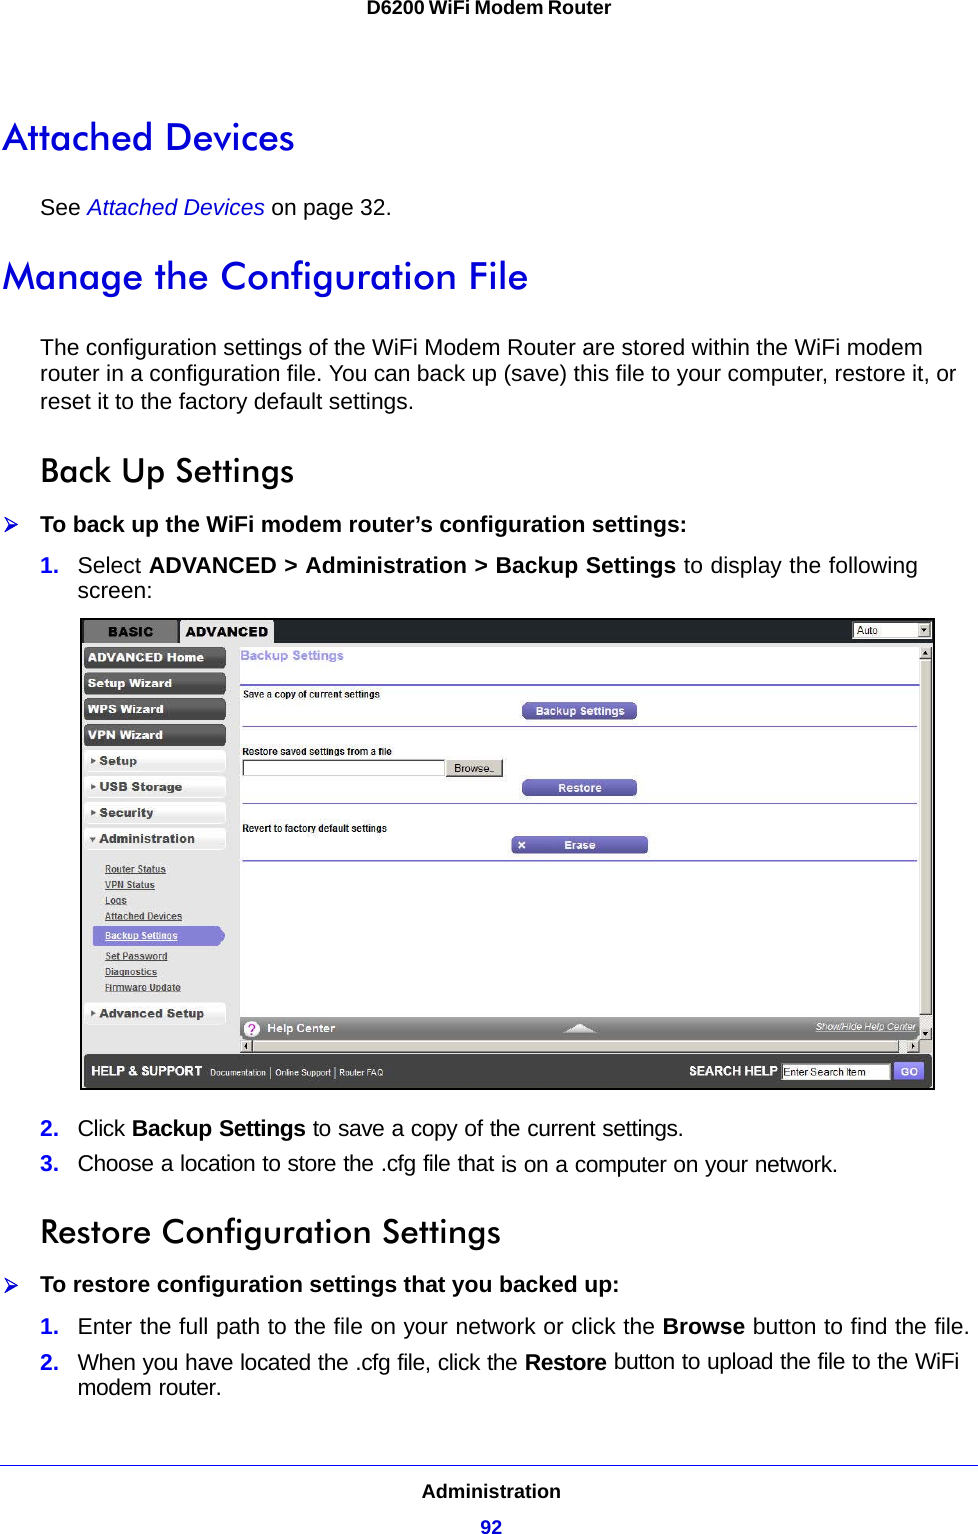
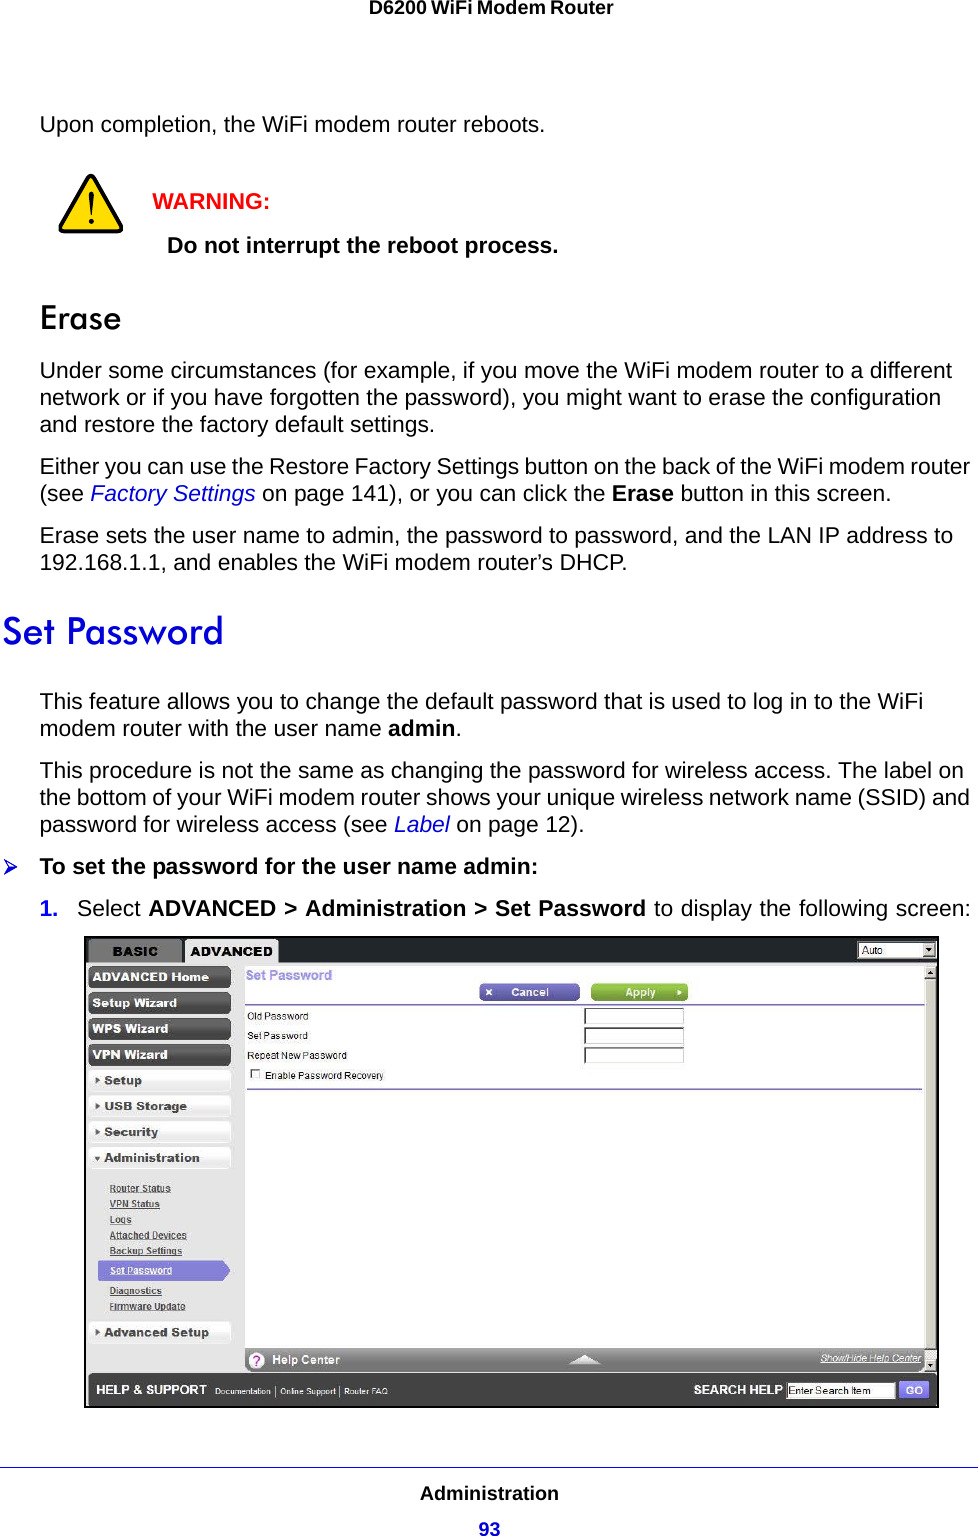
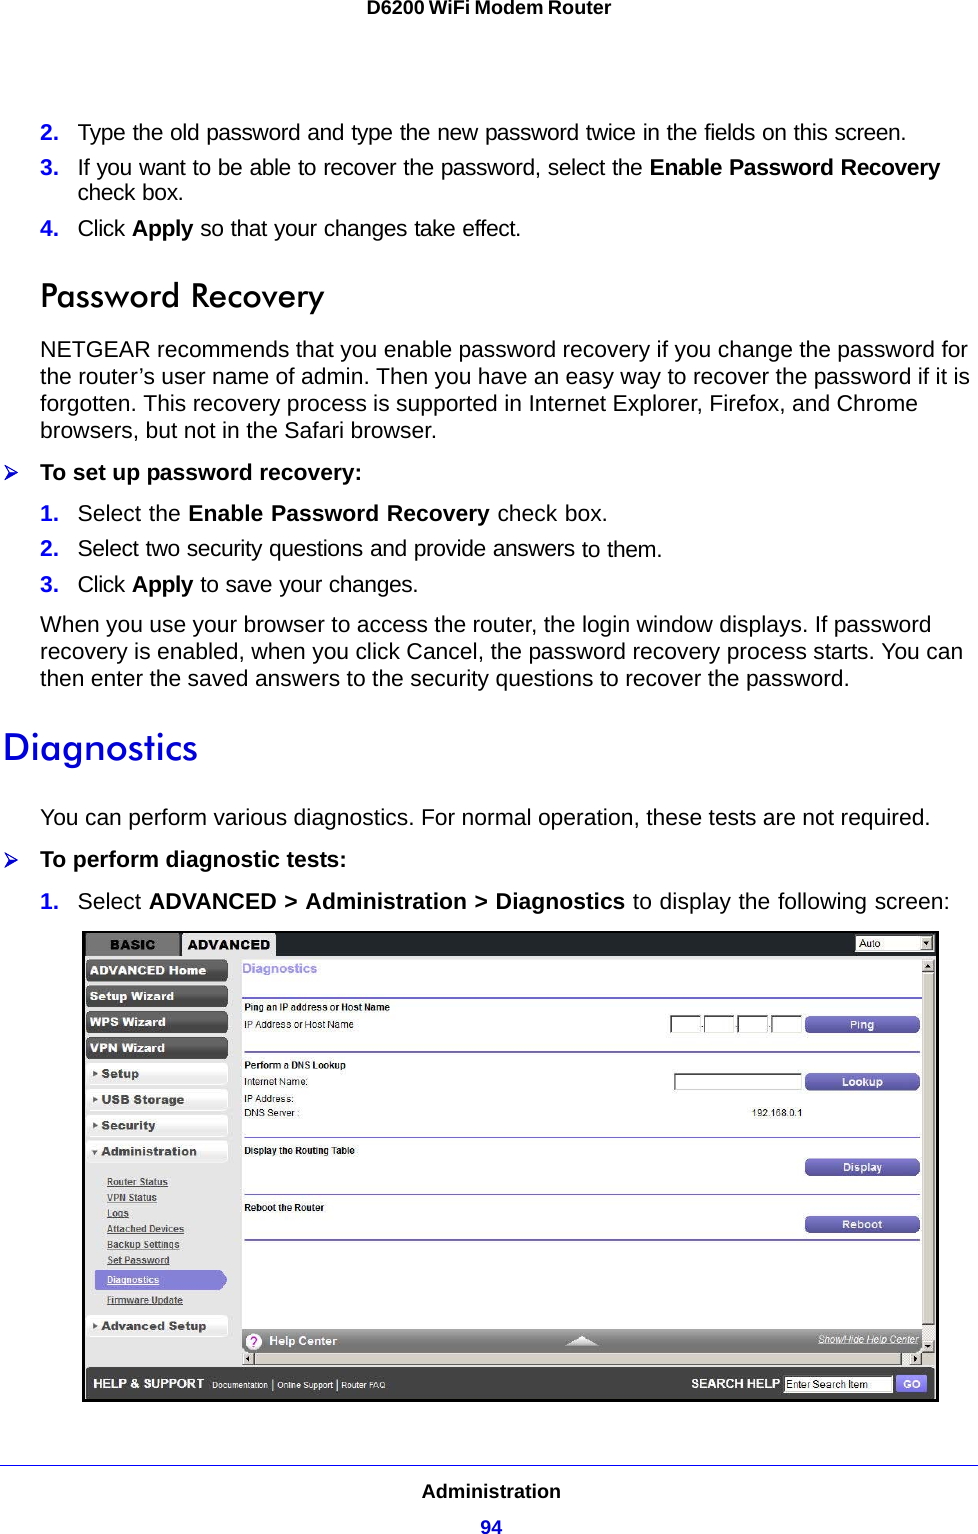
Netgear orporated 12400216 D6200 WiFi Modem Router User Manual D6200 WiFi Modem Router
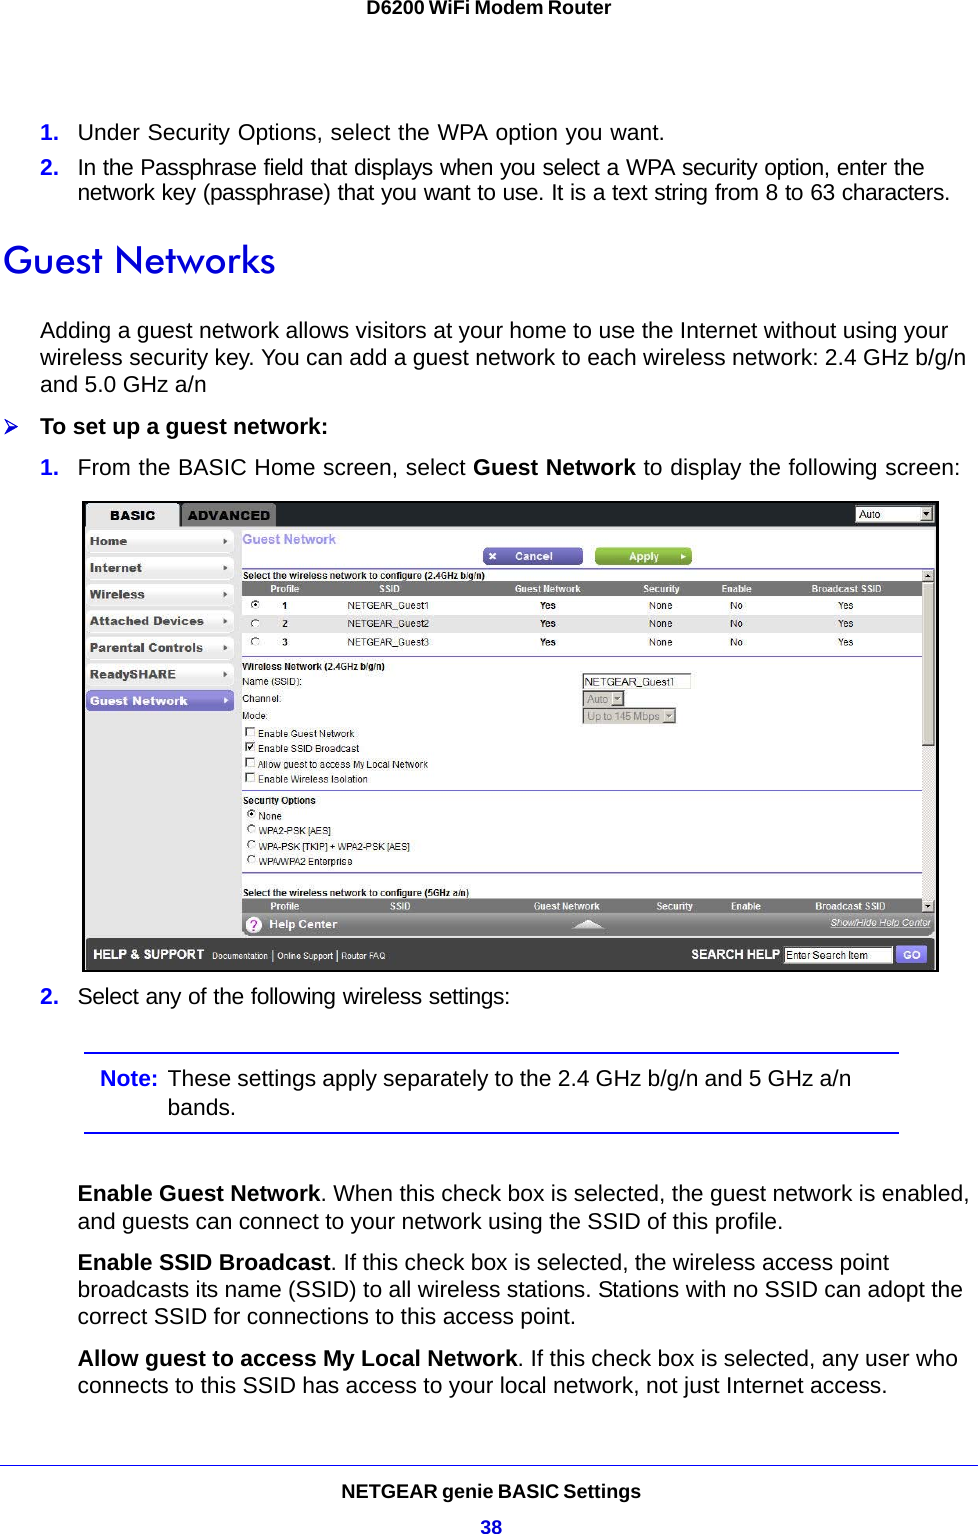
Netgear Incorporated D6200 WiFi Modem Router D6200 WiFi Modem Router
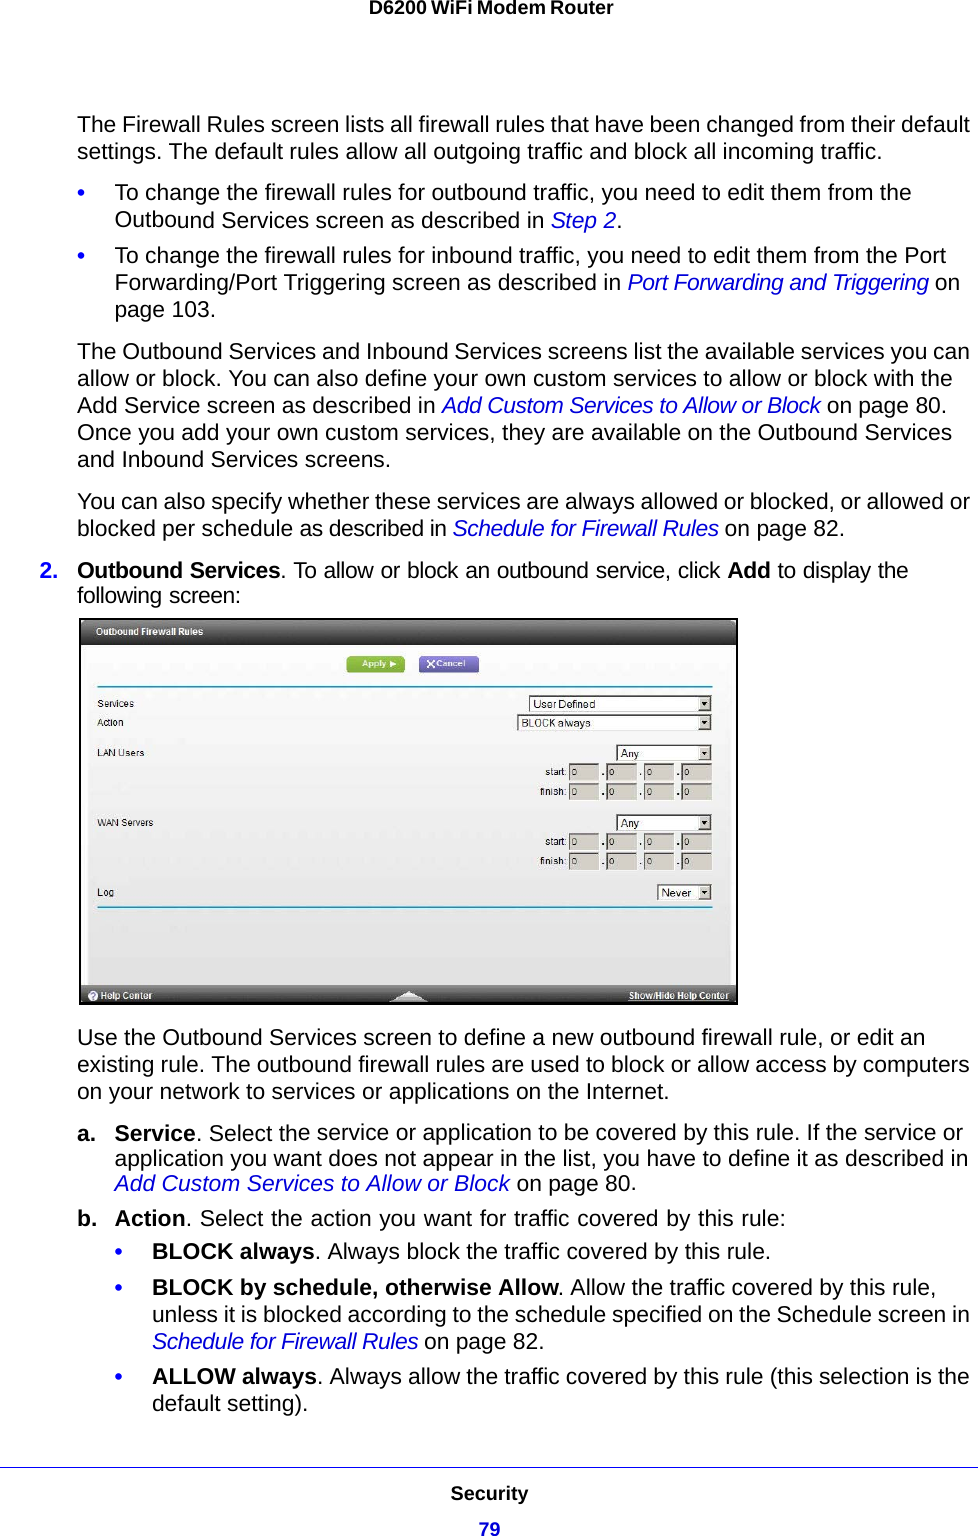
Contents
- 1. Users manual I
- 2. Users manual II
- 3. User manual I
- 4. User manual II
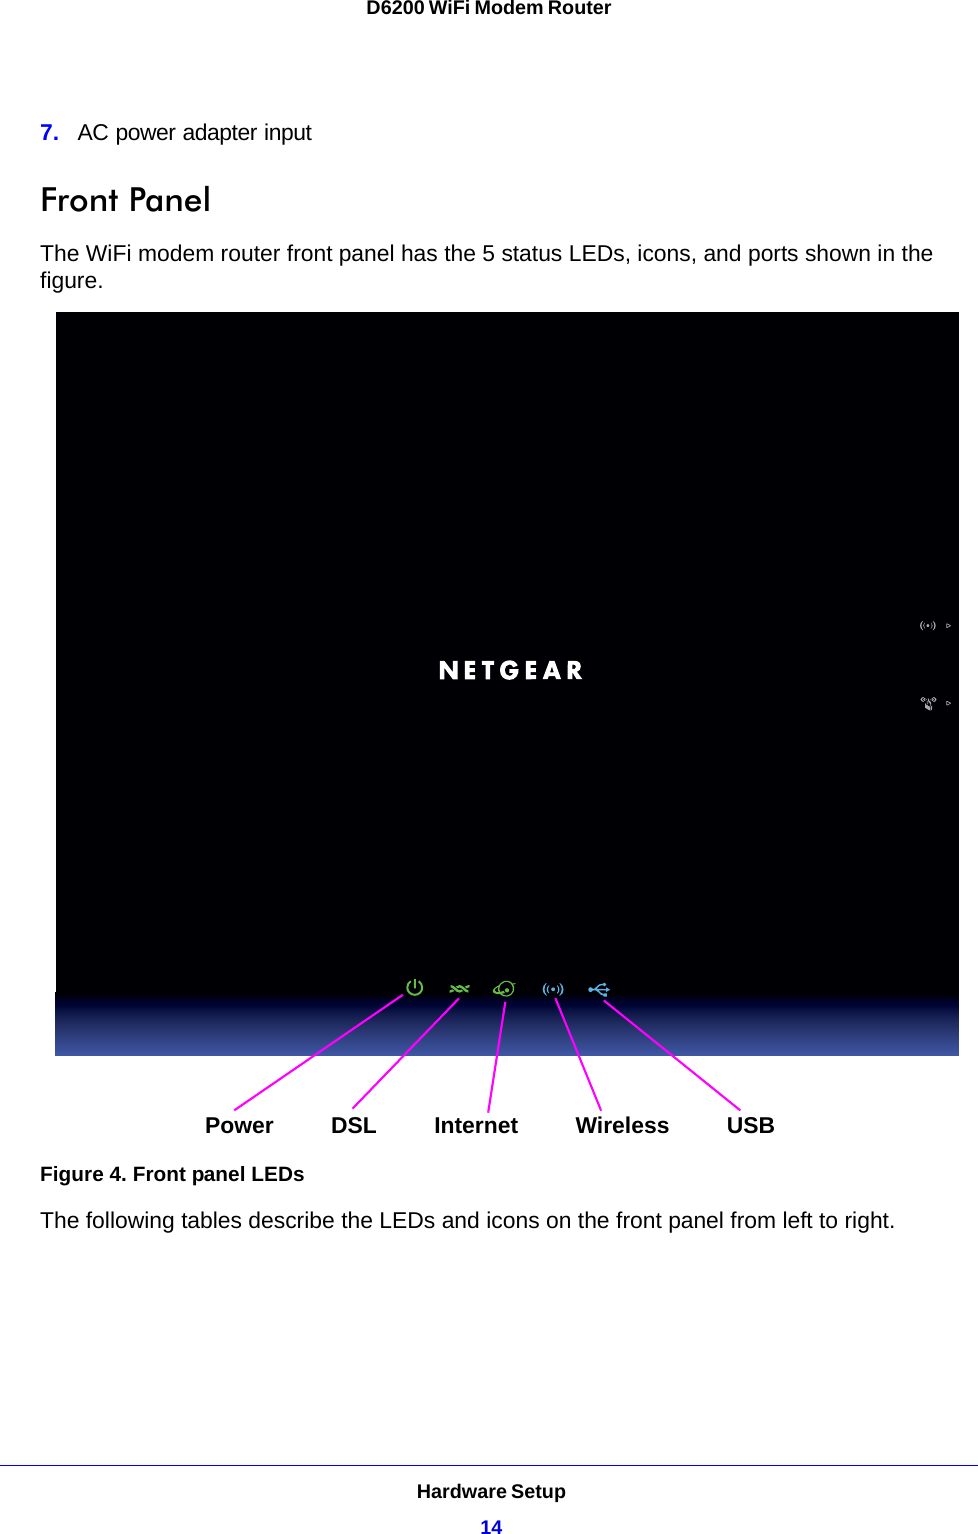
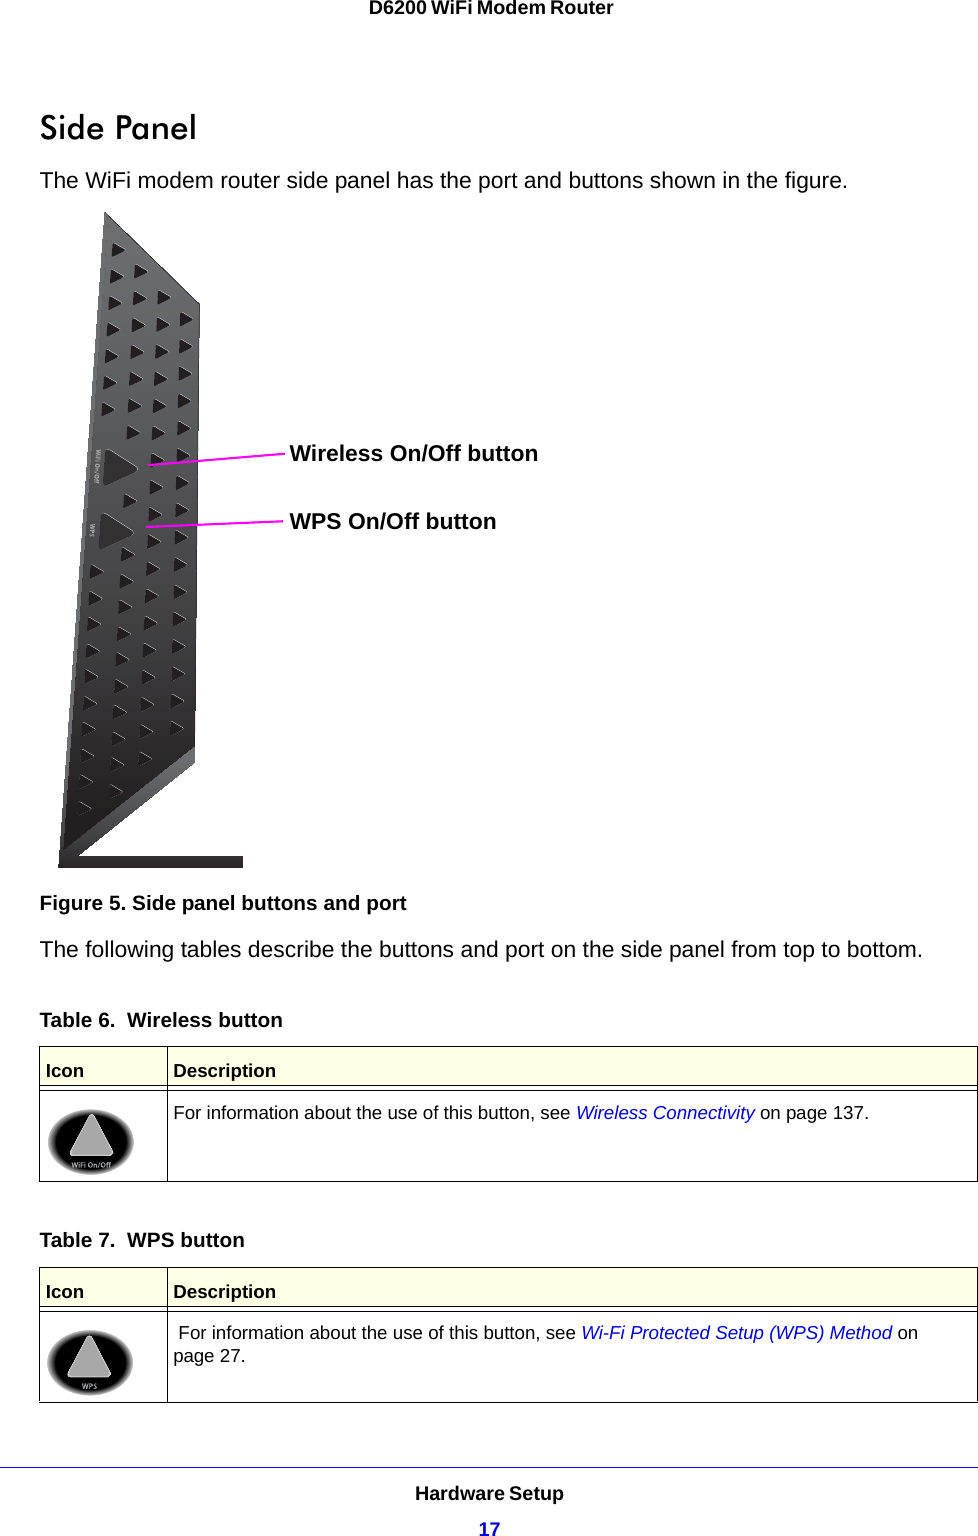
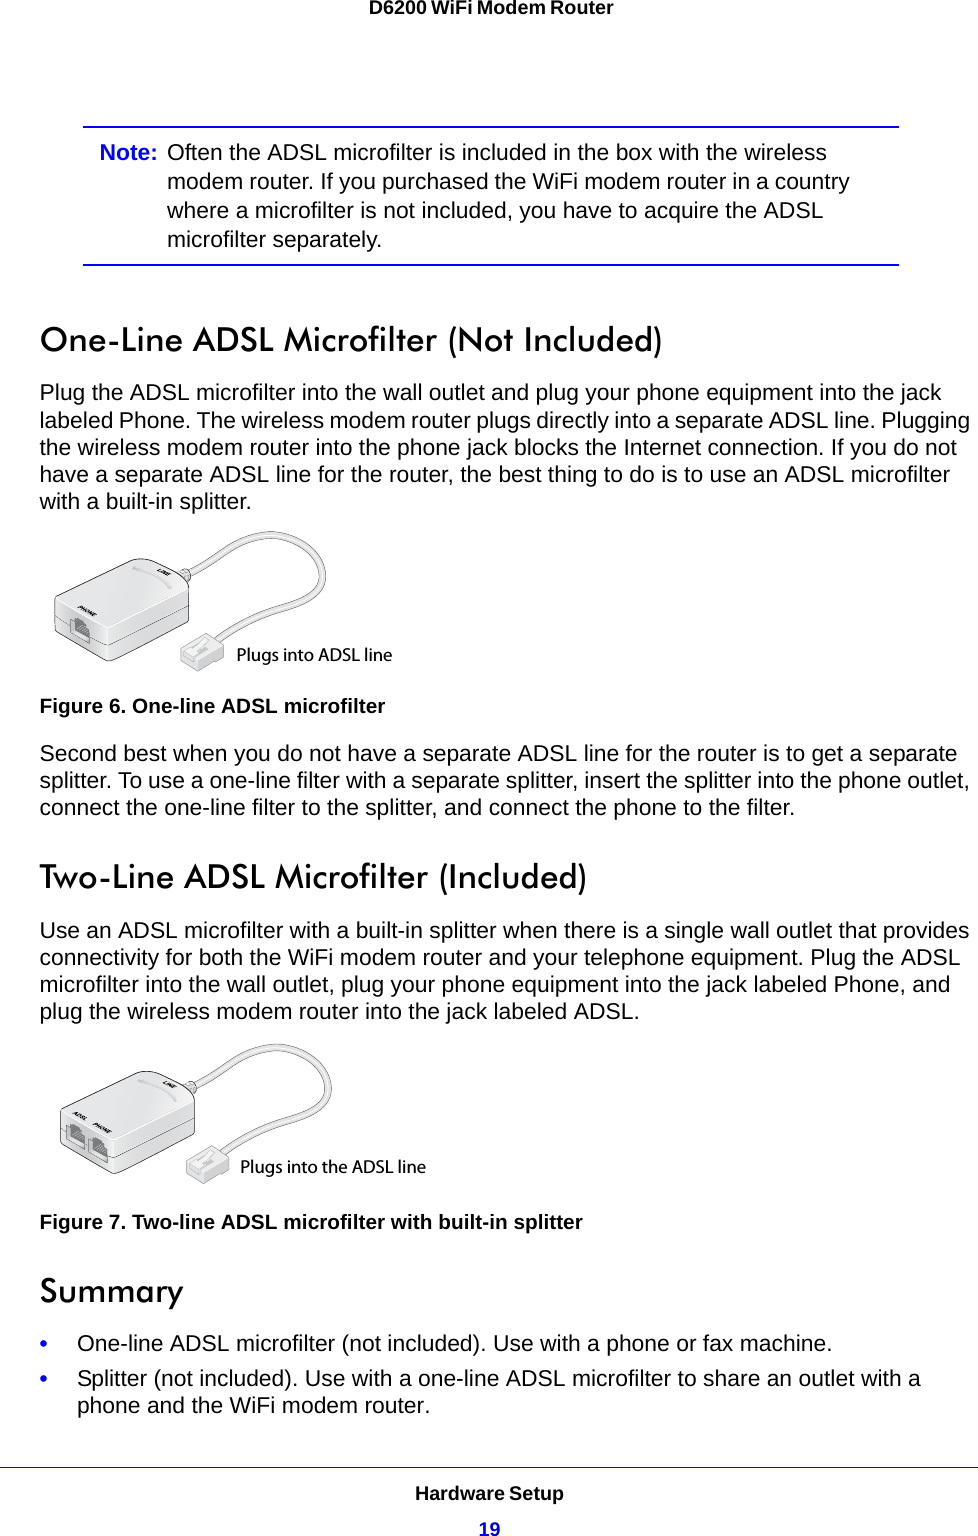
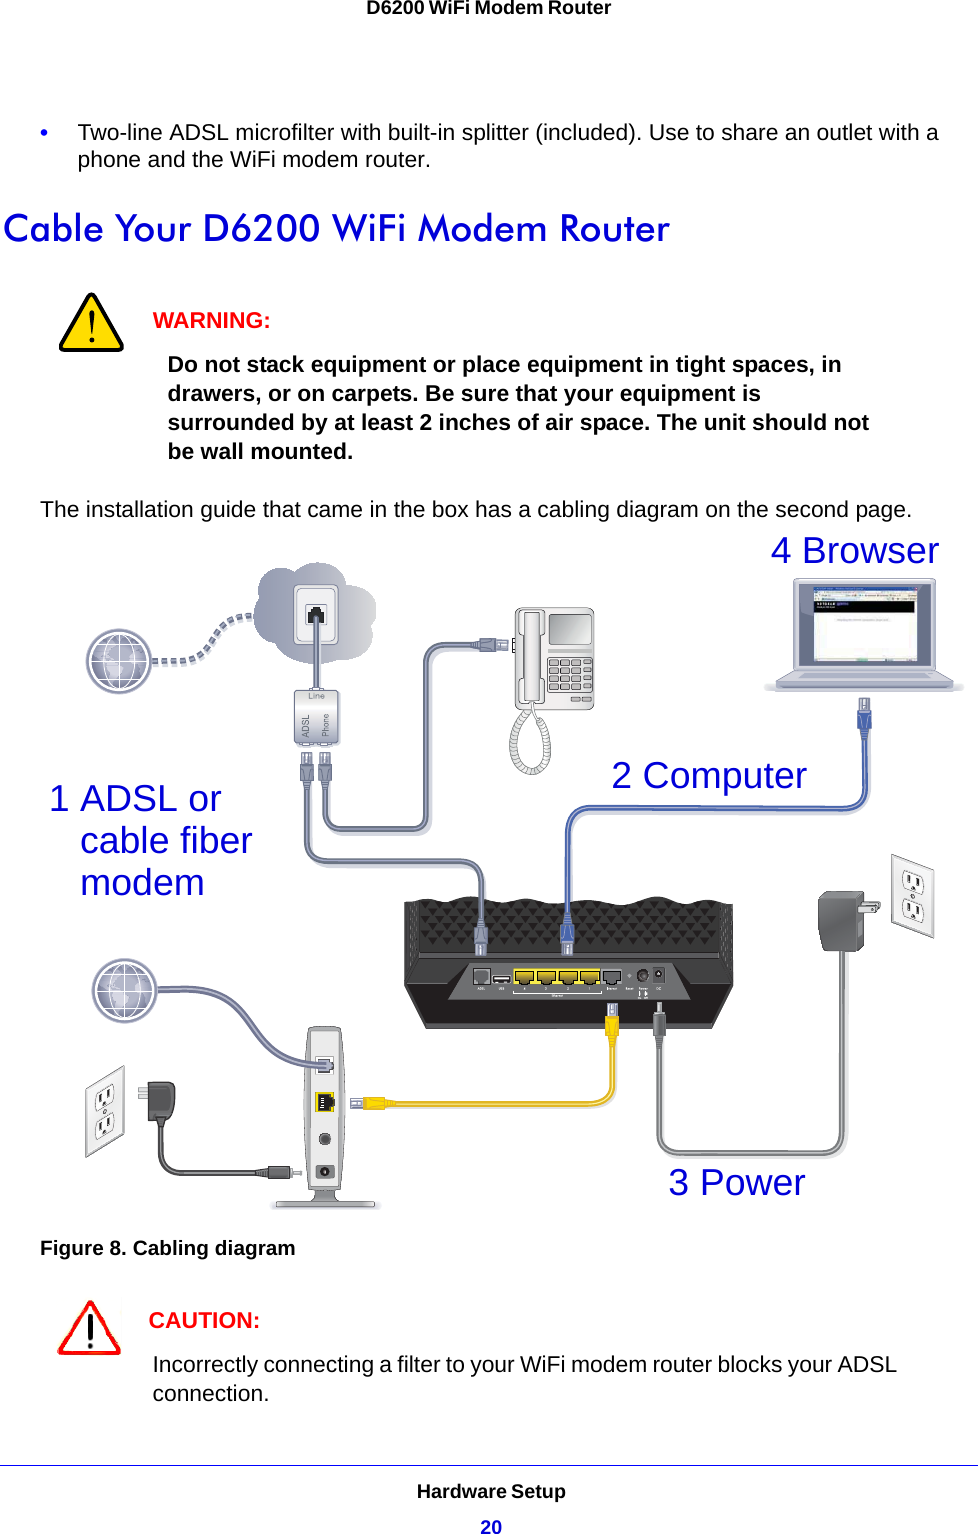
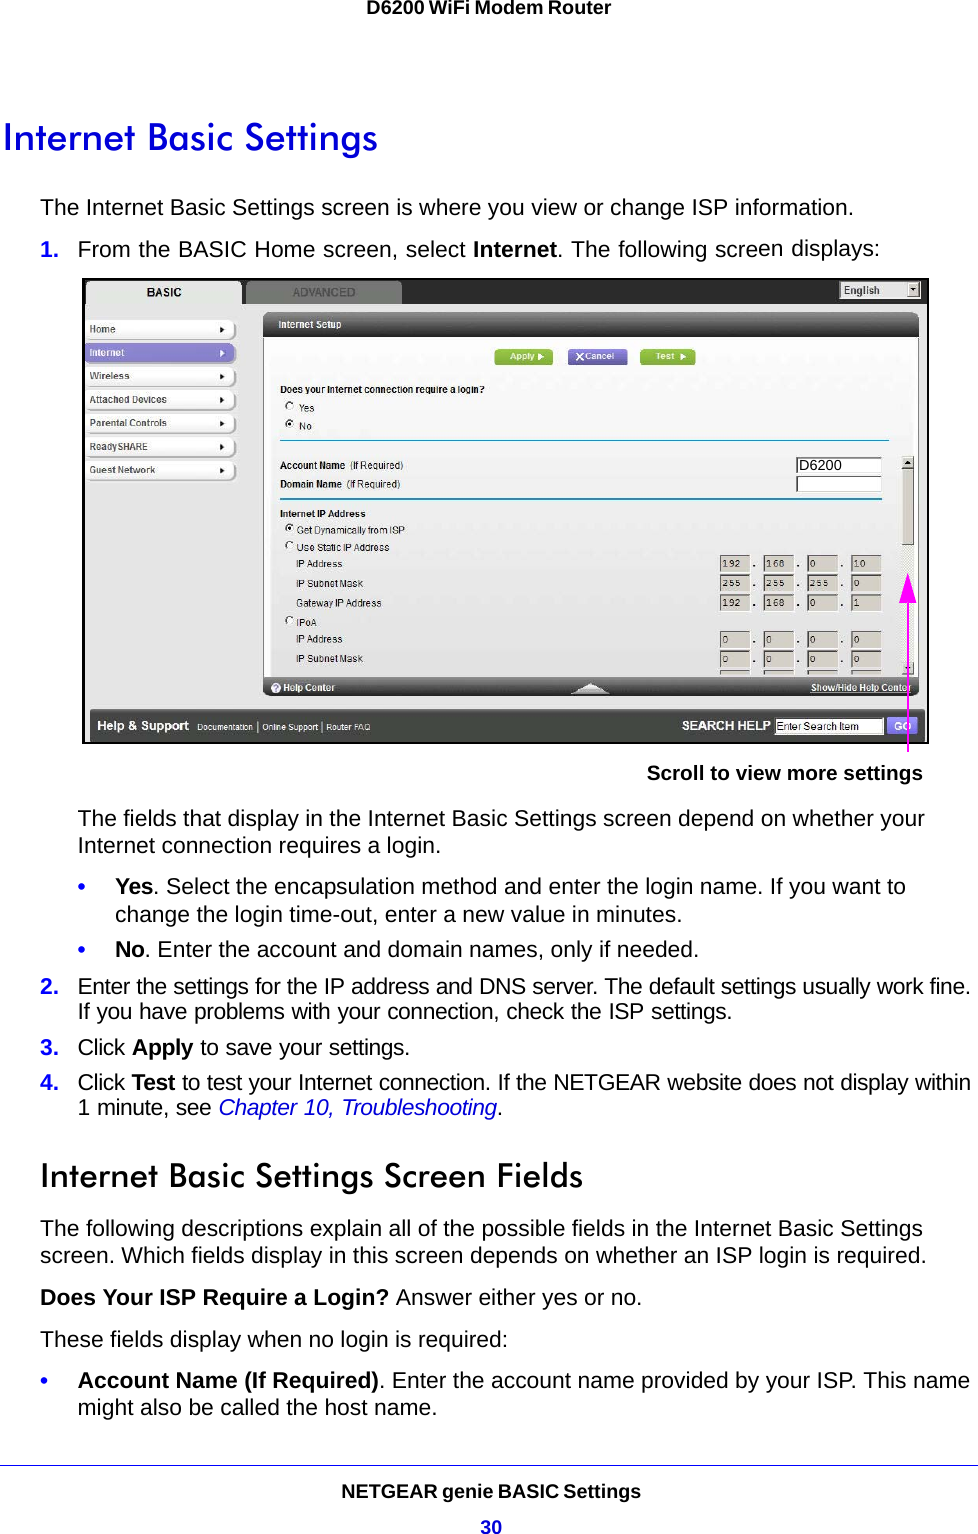
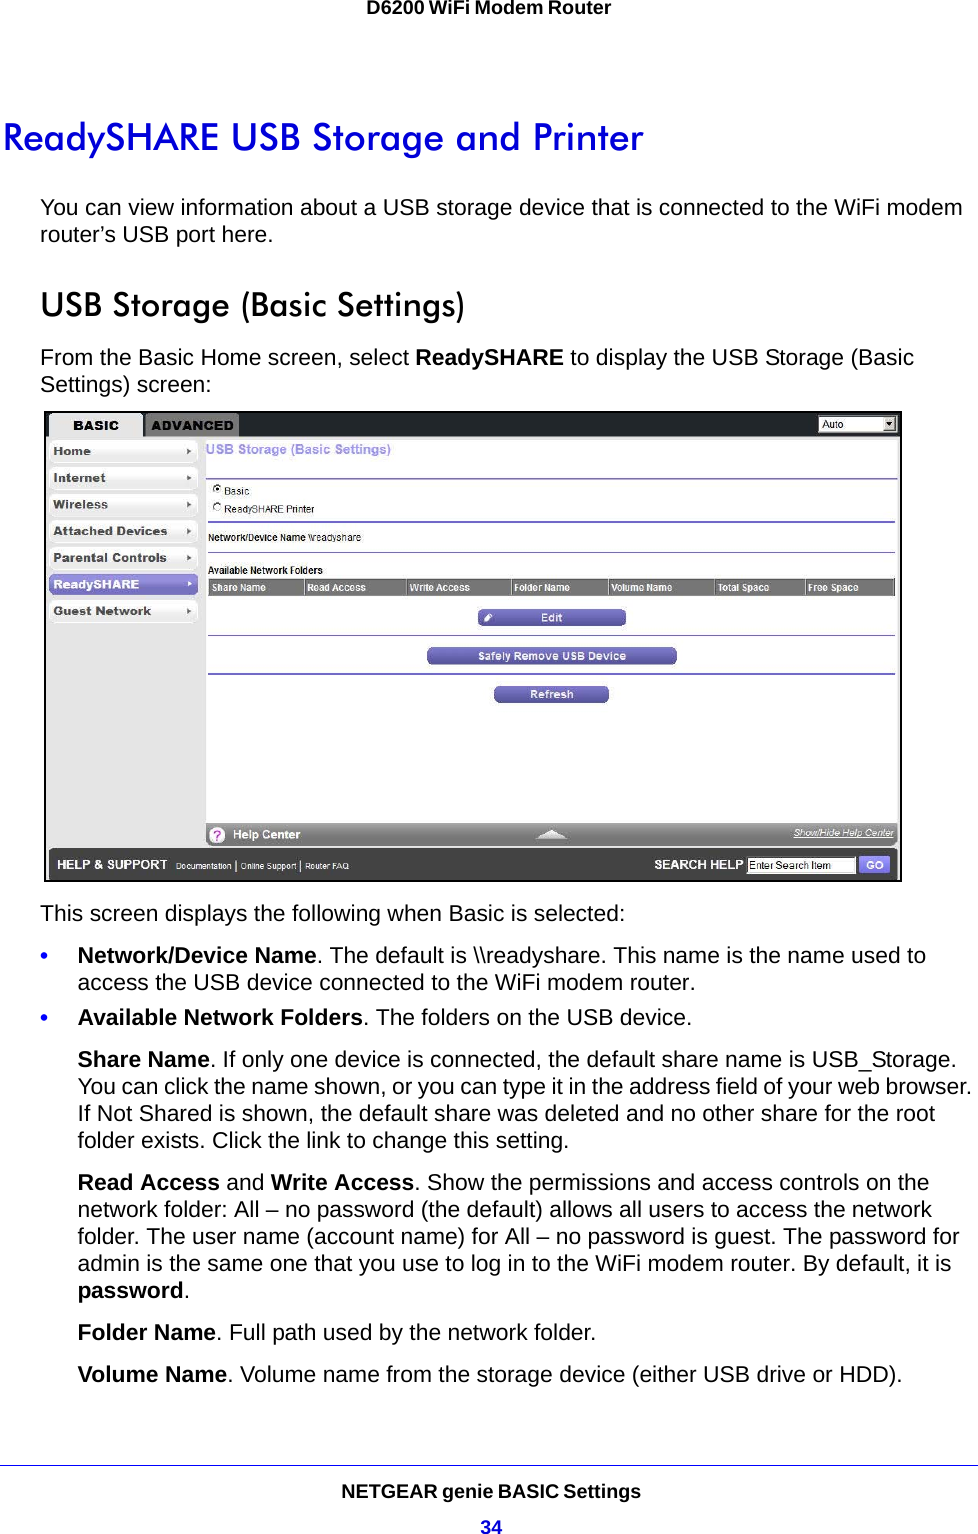
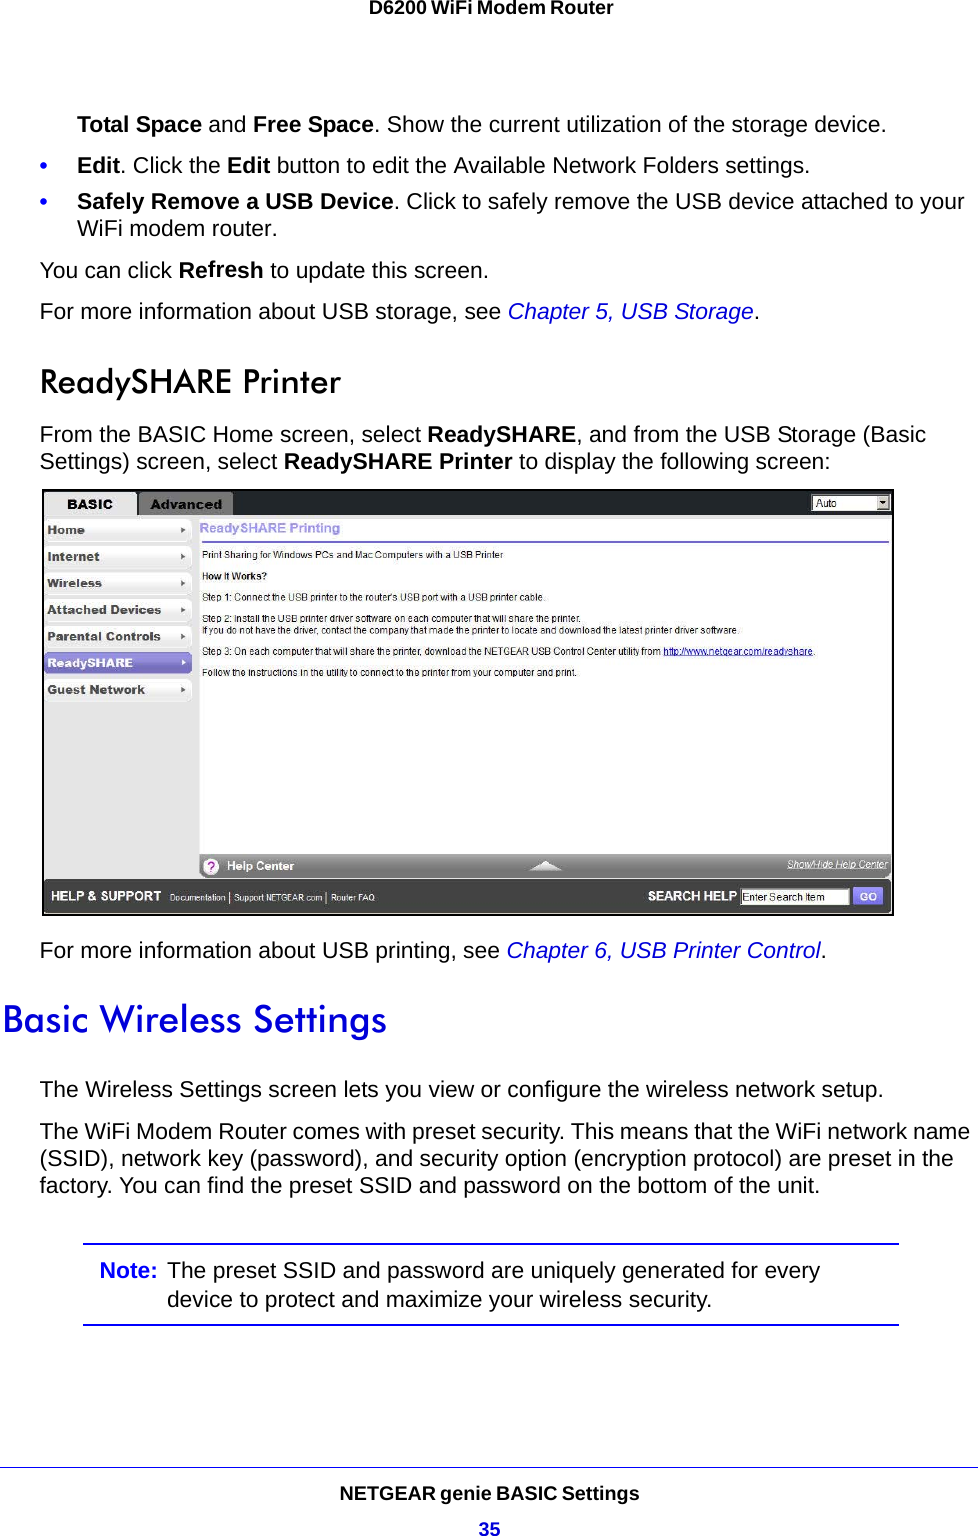
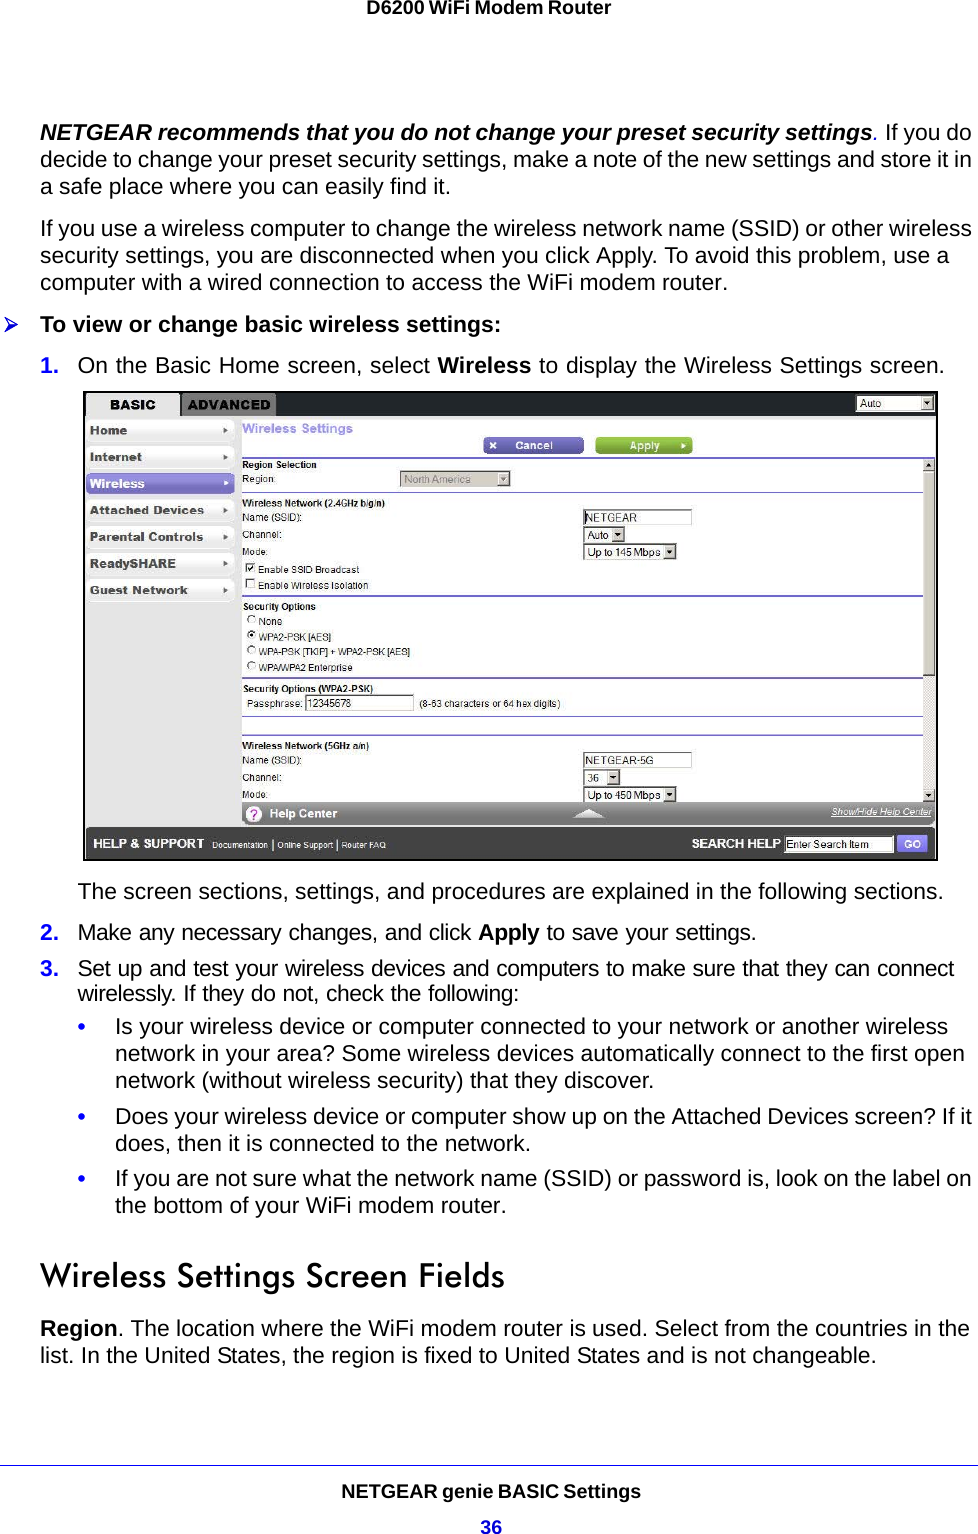
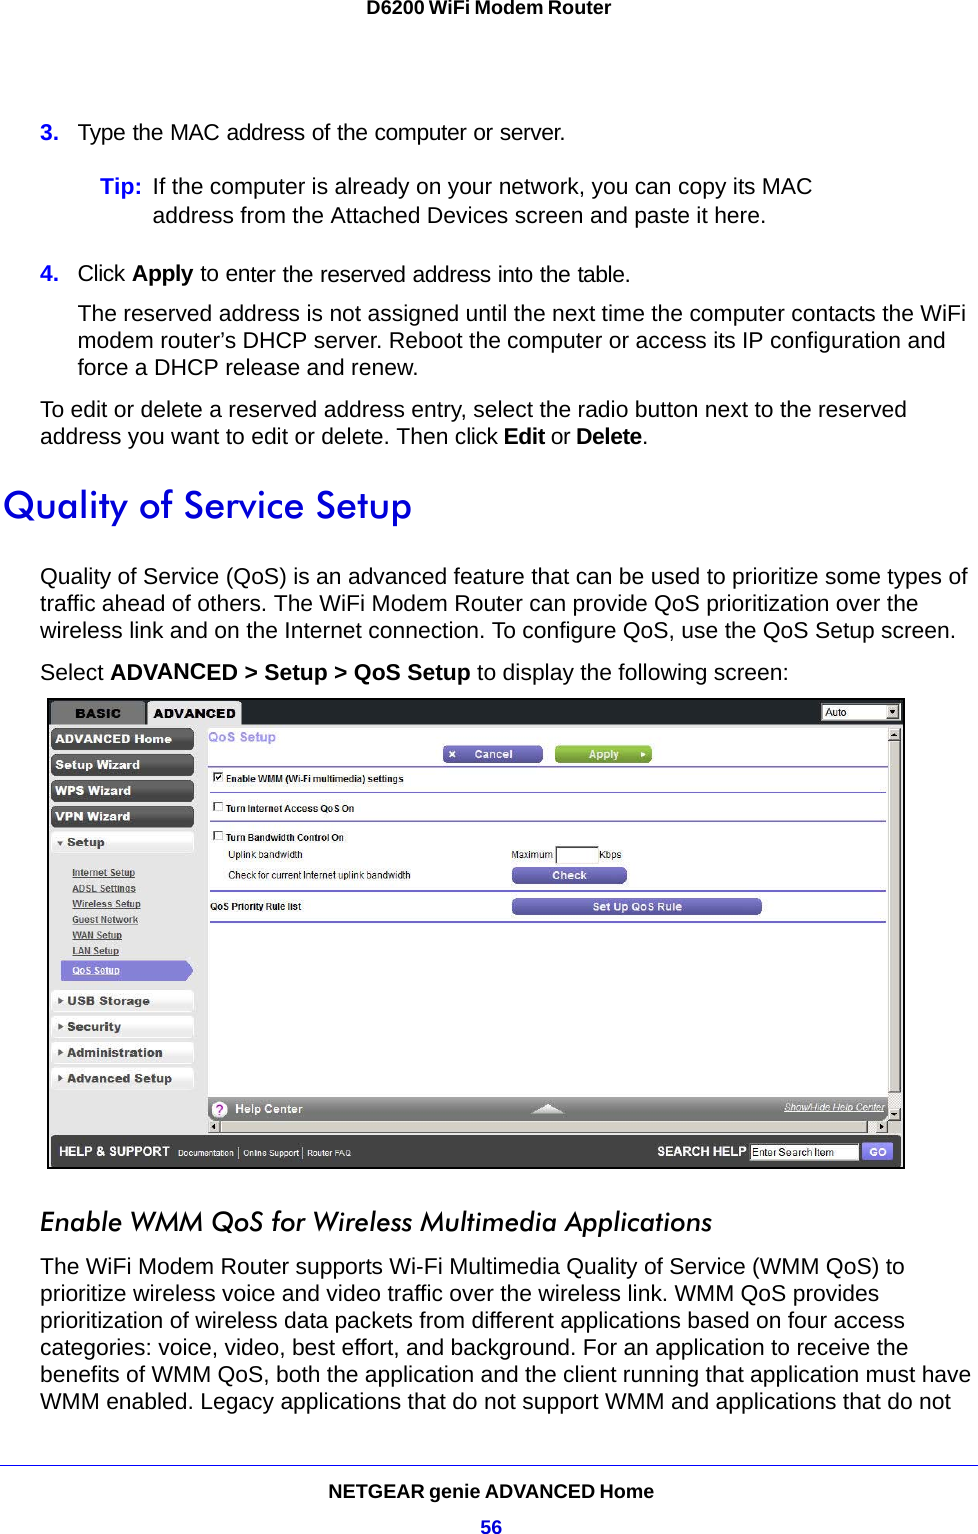
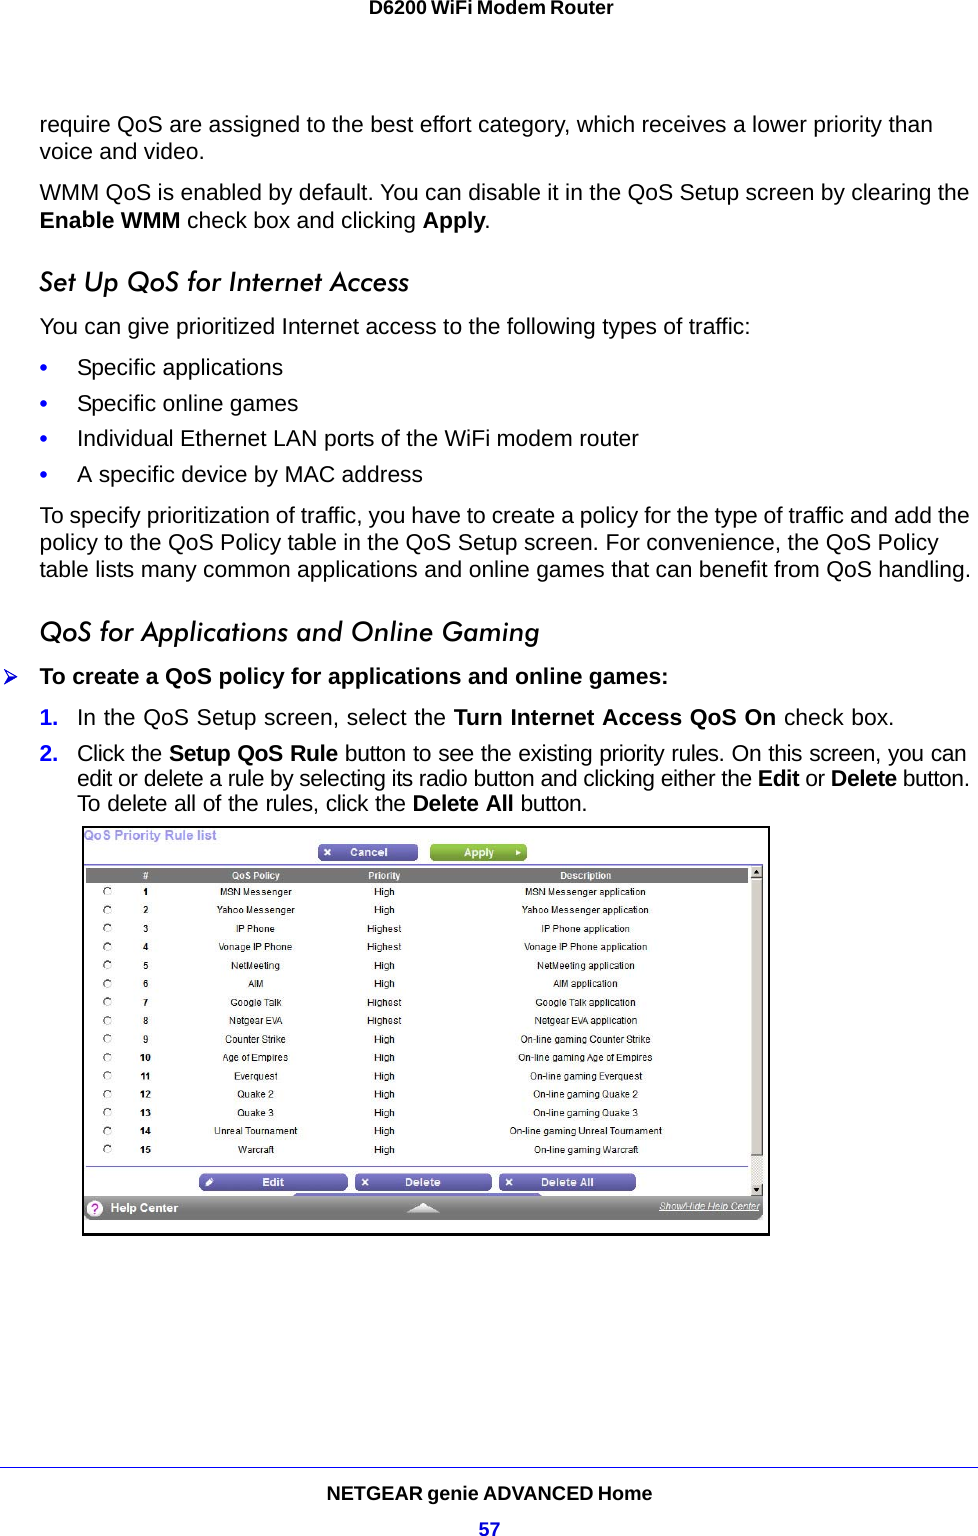
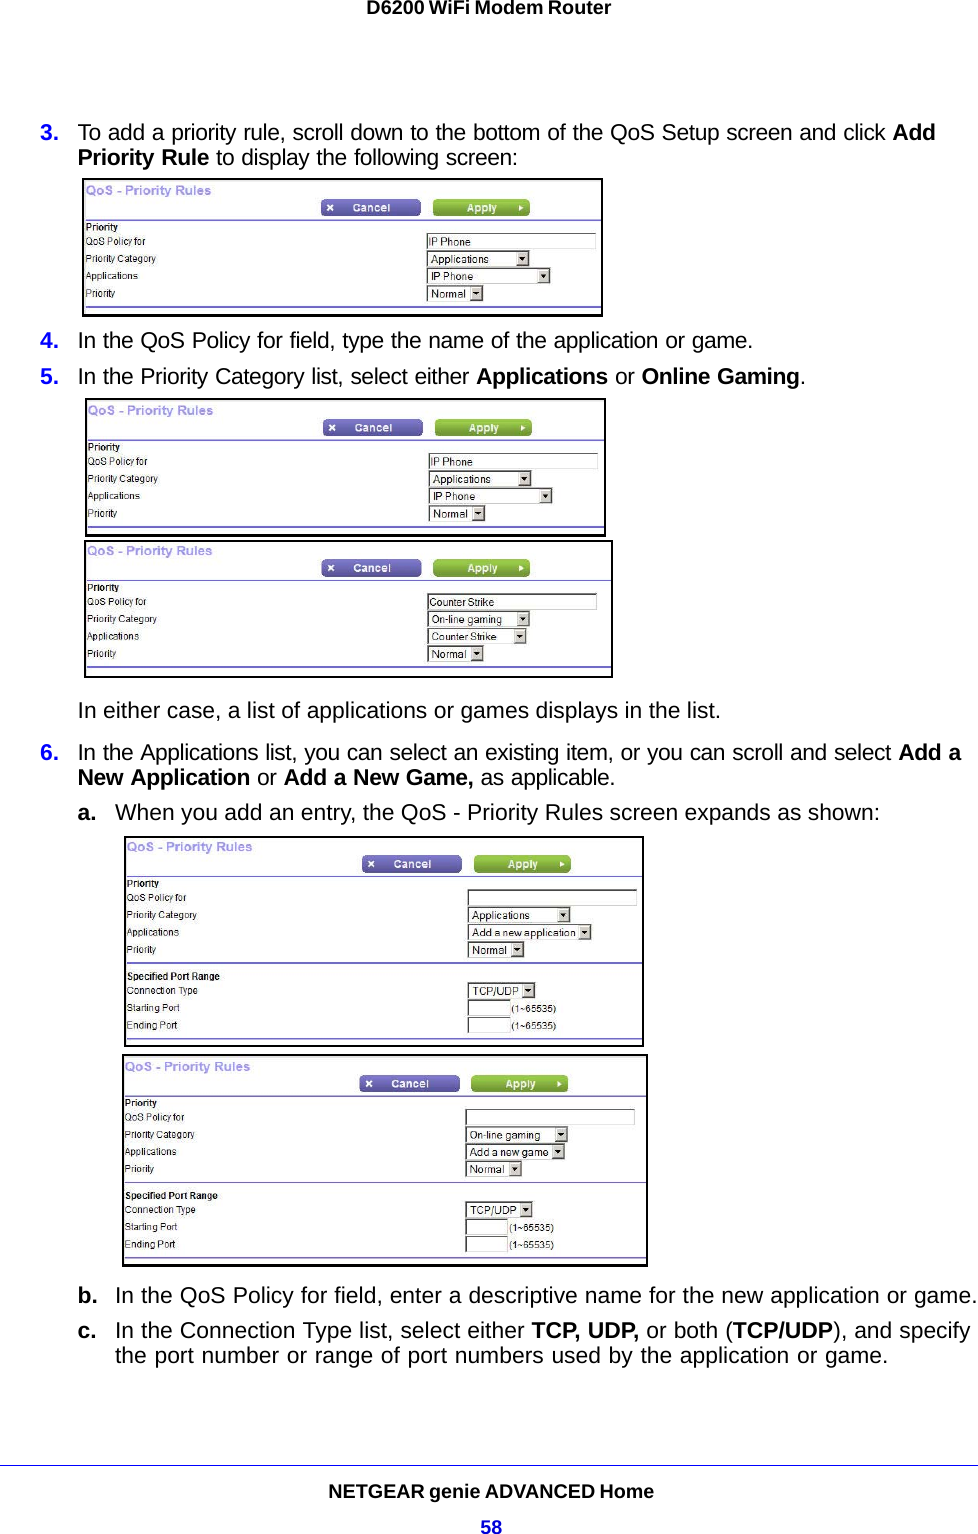
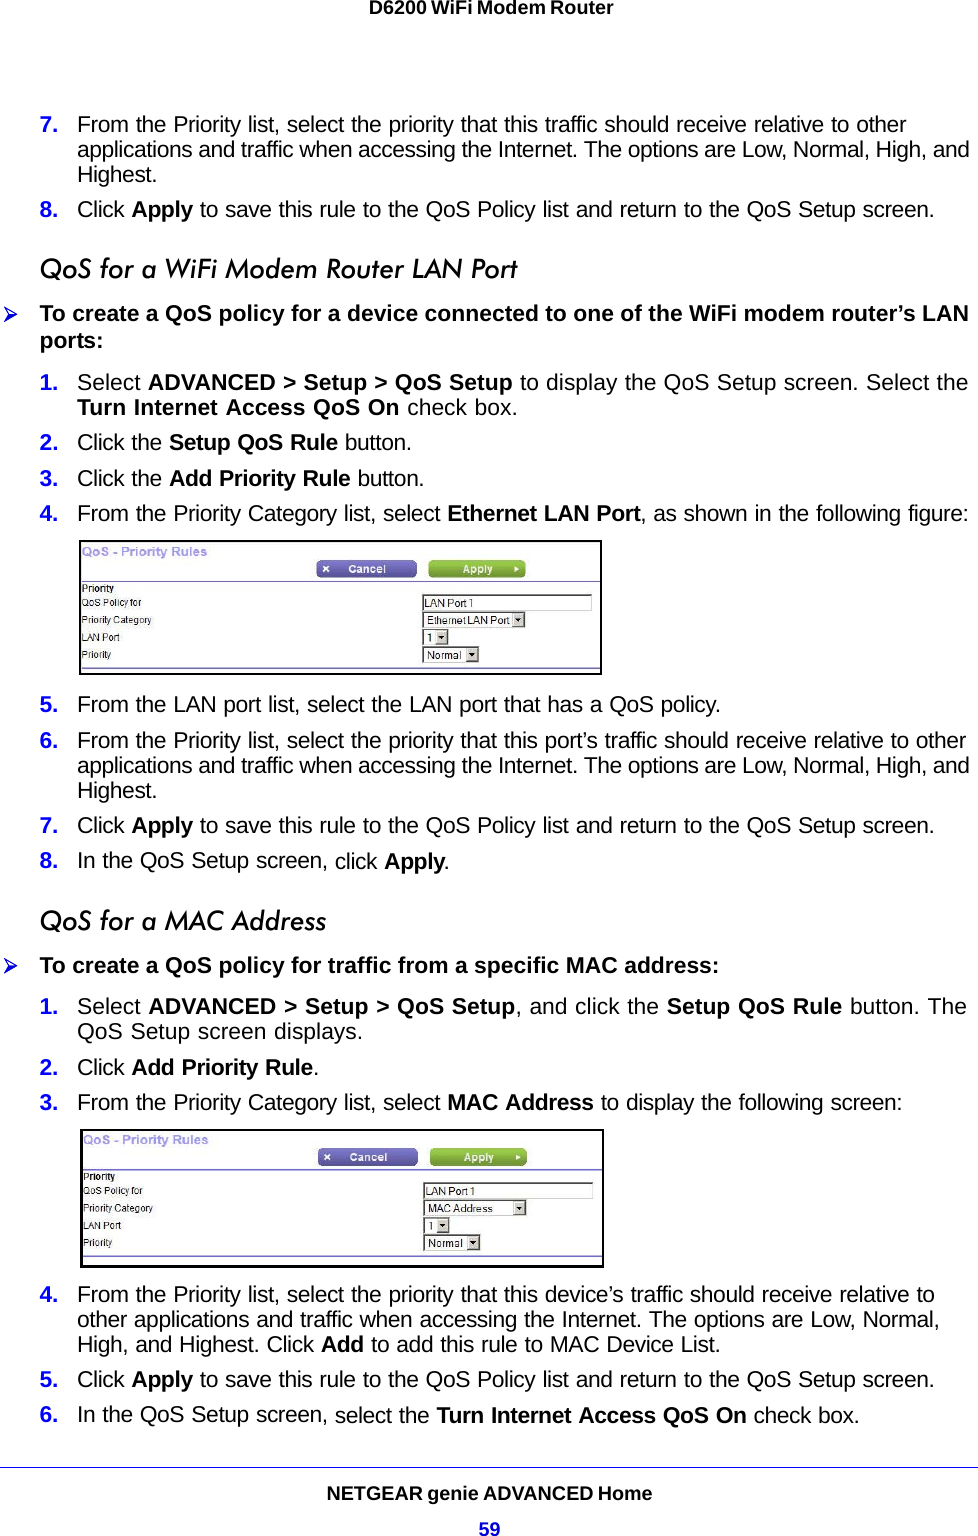
Users manual I