Netgear orporated 13200230 WiFi Range Extender User Manual High Power WiFi Extender EX6200 User Manual
Netgear Incorporated WiFi Range Extender High Power WiFi Extender EX6200 User Manual
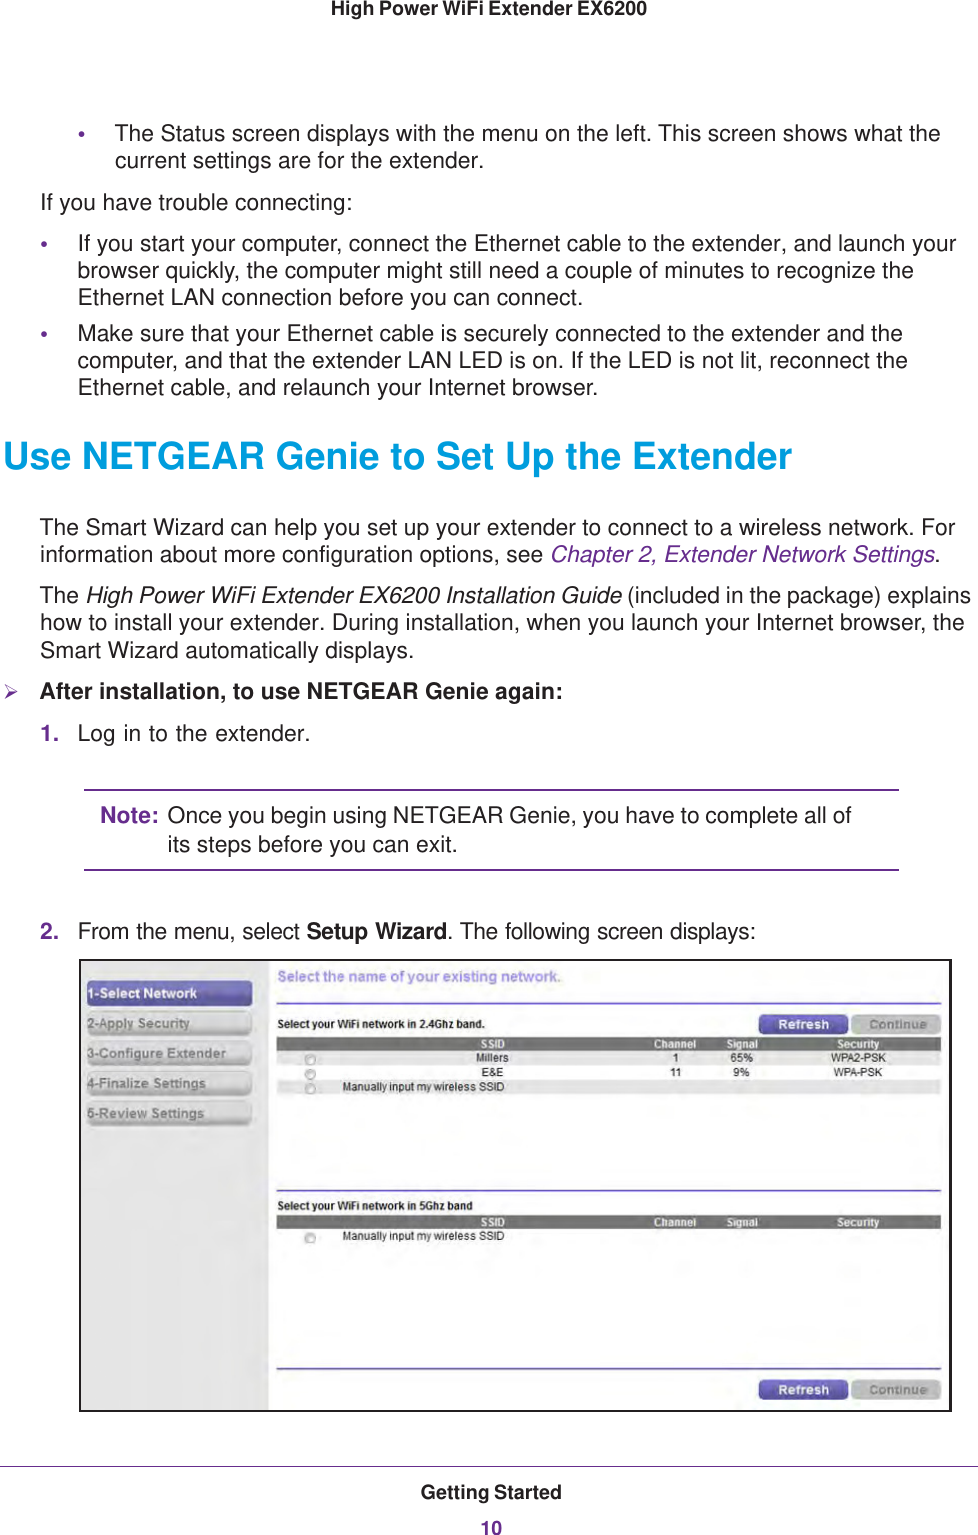
UserManual.wiki
>
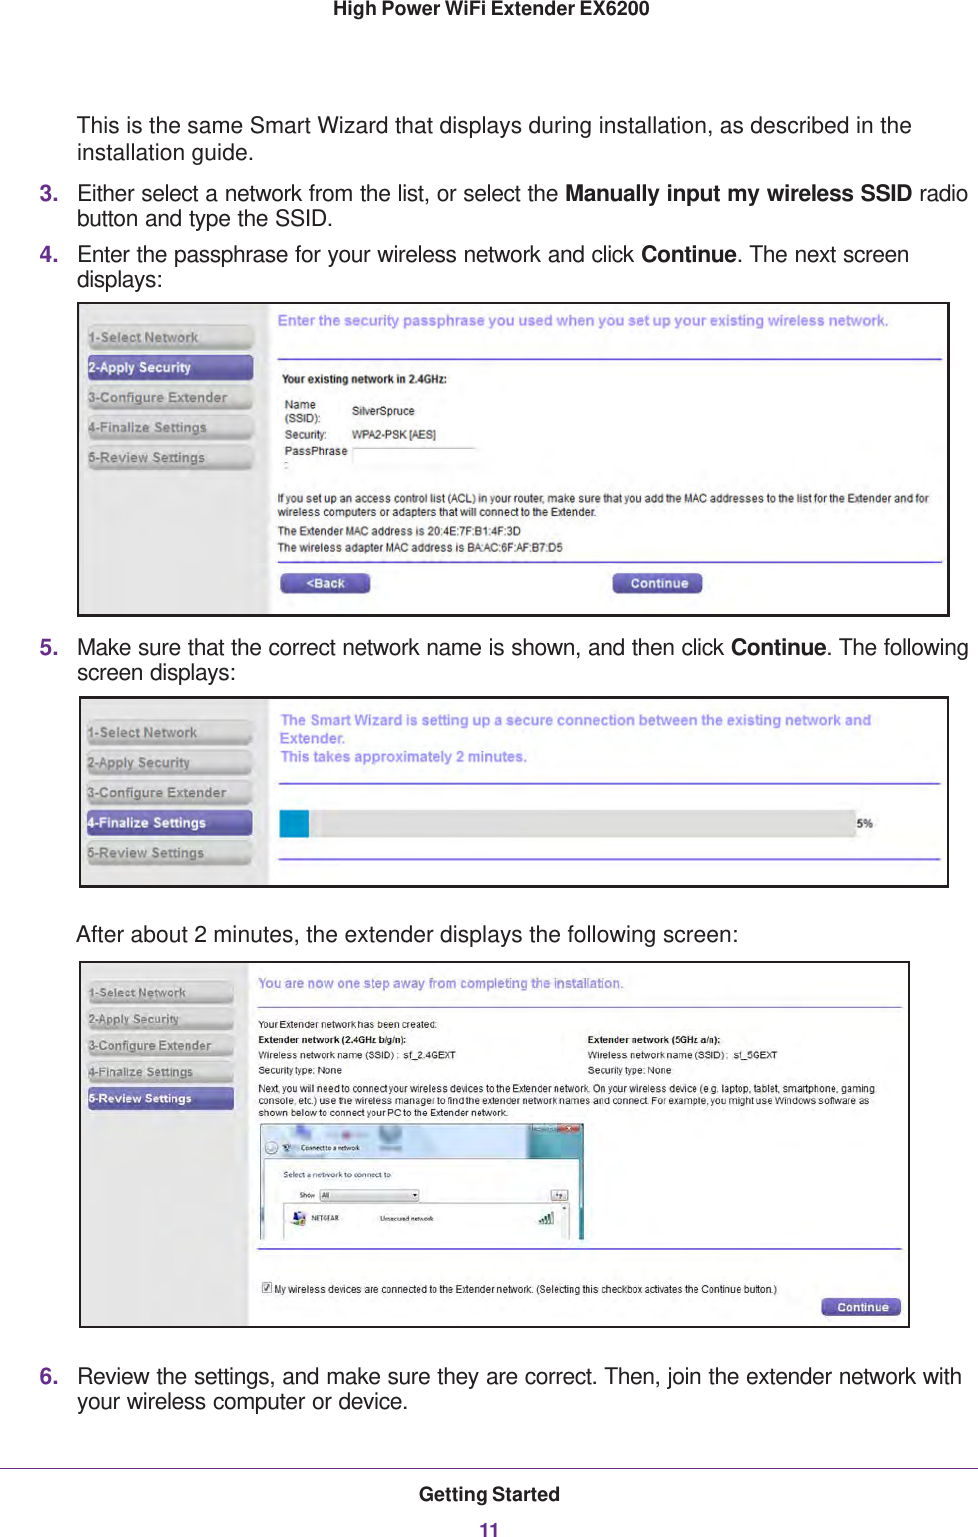
Netgear orporated
>
13200230 User Manual
User Manual
Navigation menu
Upload a User Manual
Namespaces
Wiki Guide
HTML
PDF
Info
Views
User Manual
Discussion / Help
Navigation

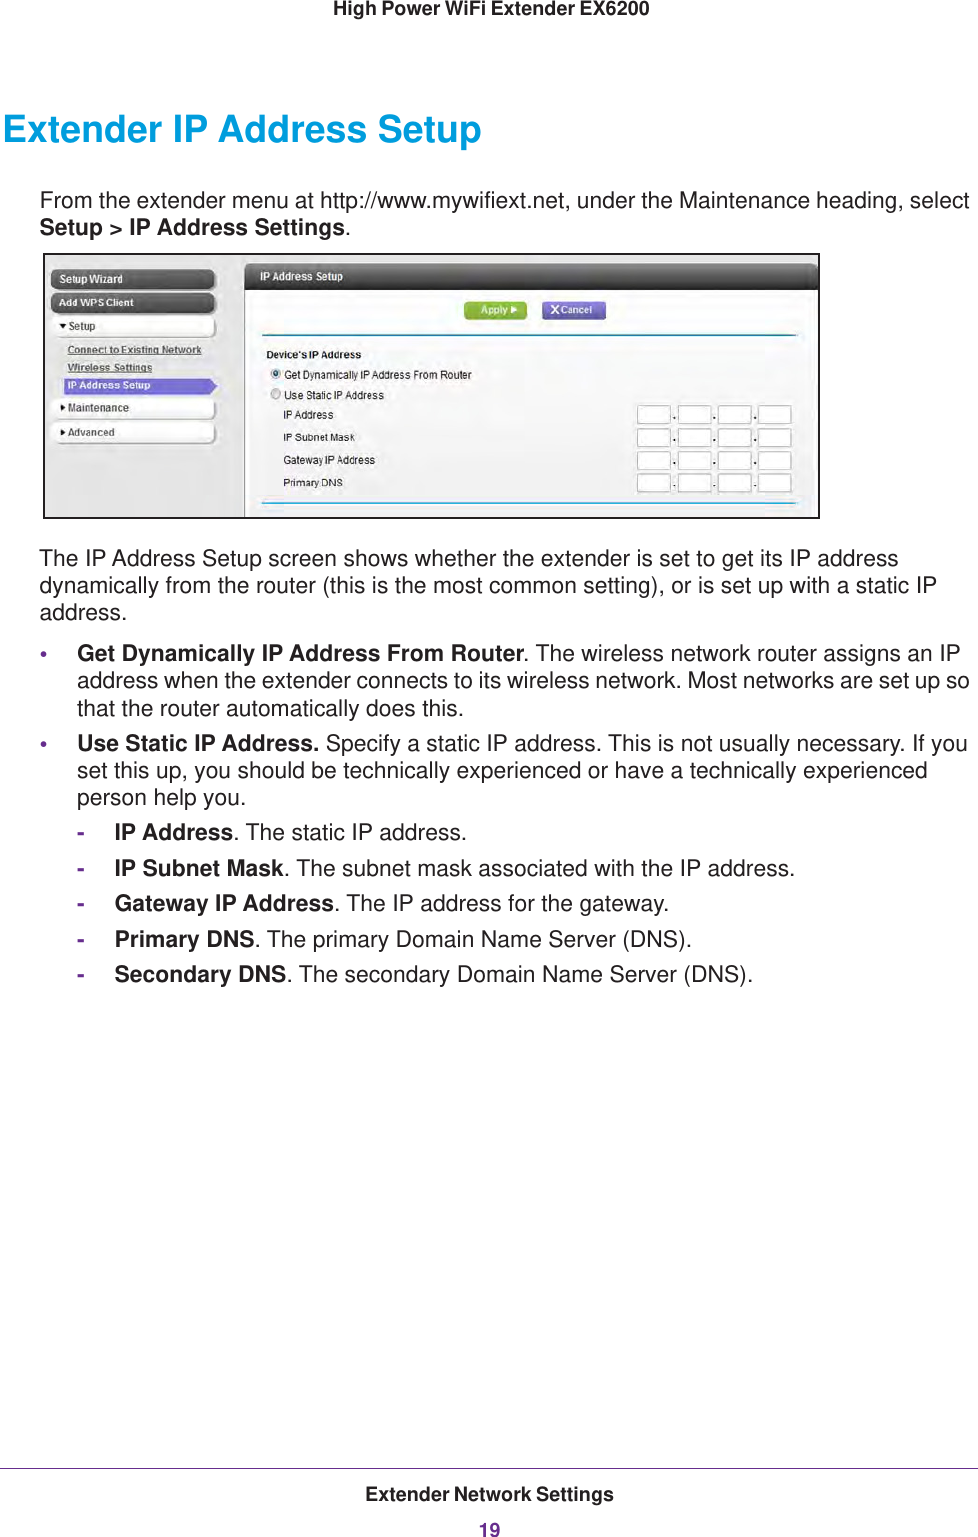
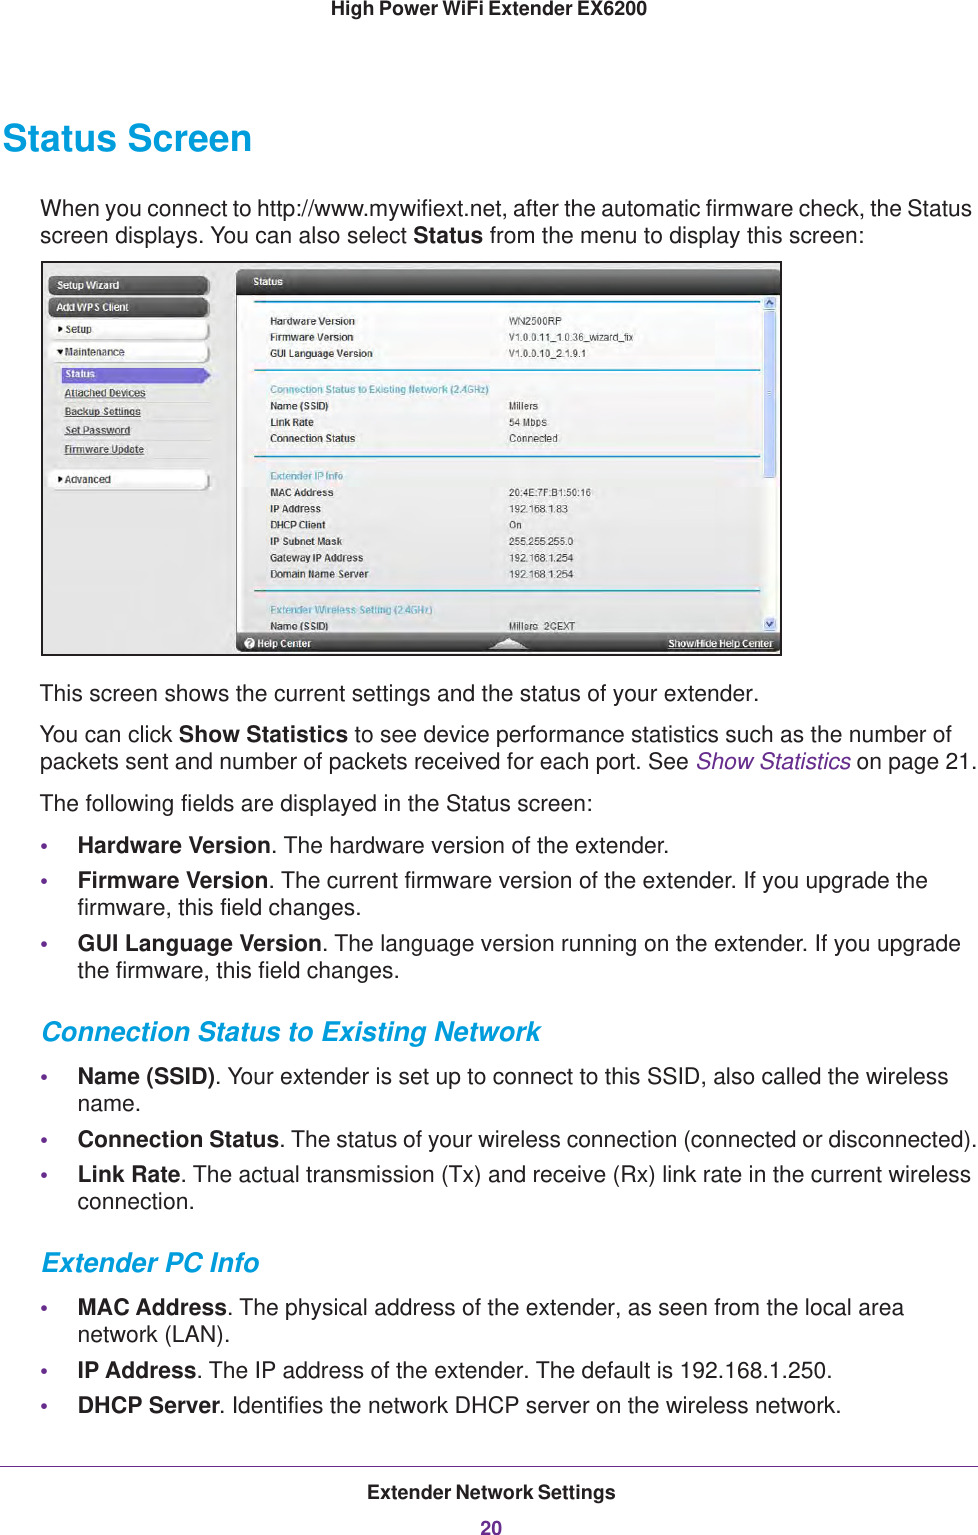
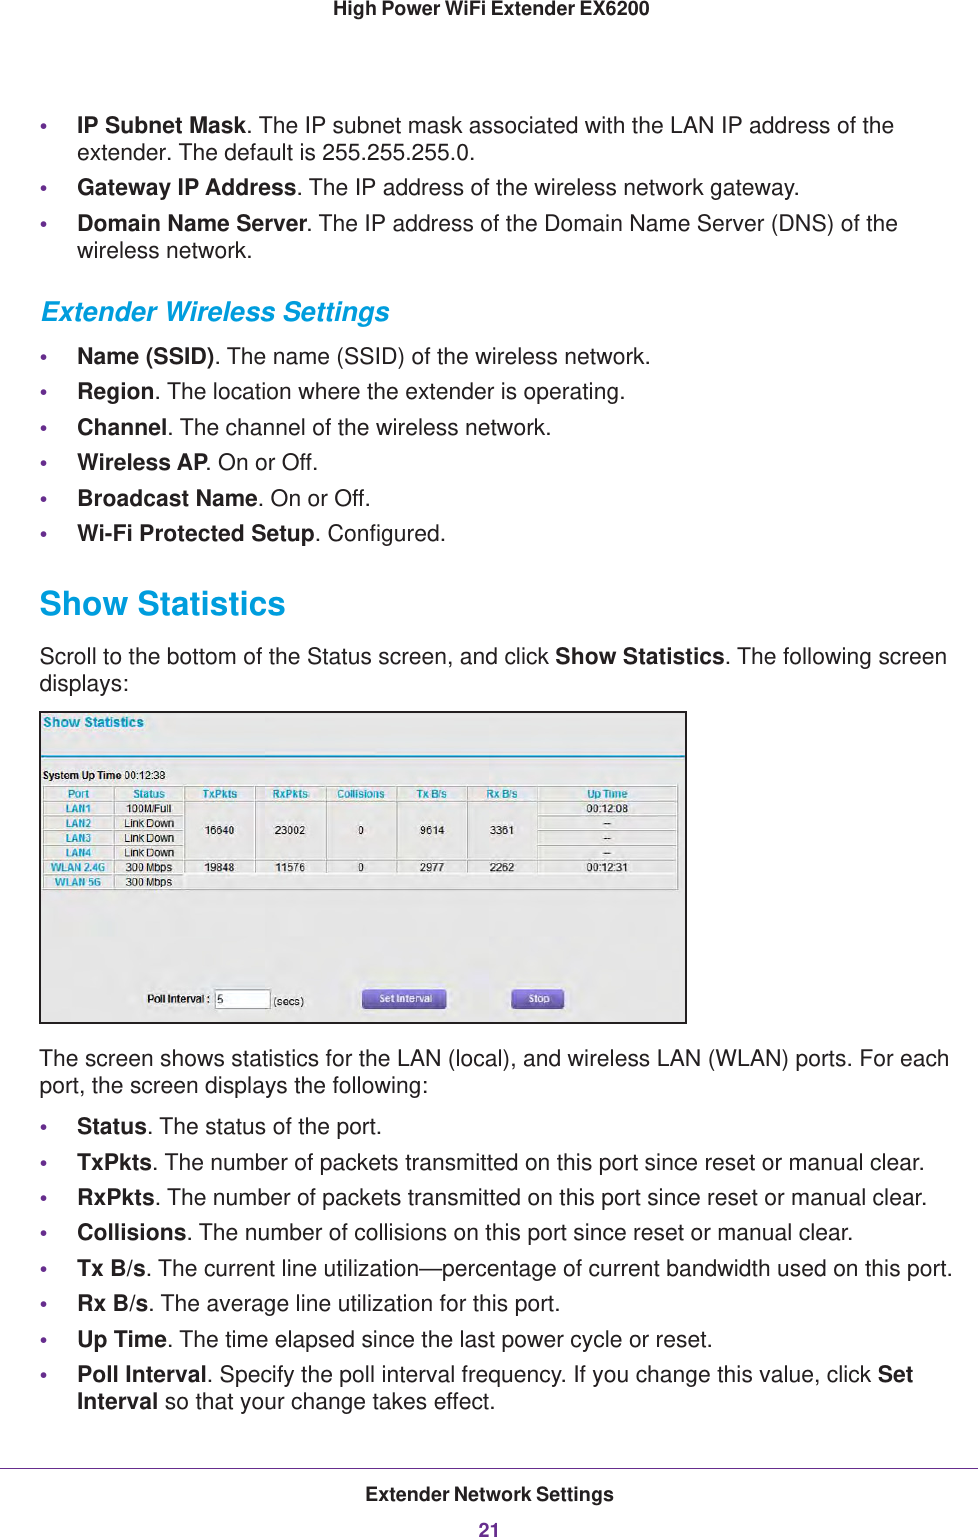
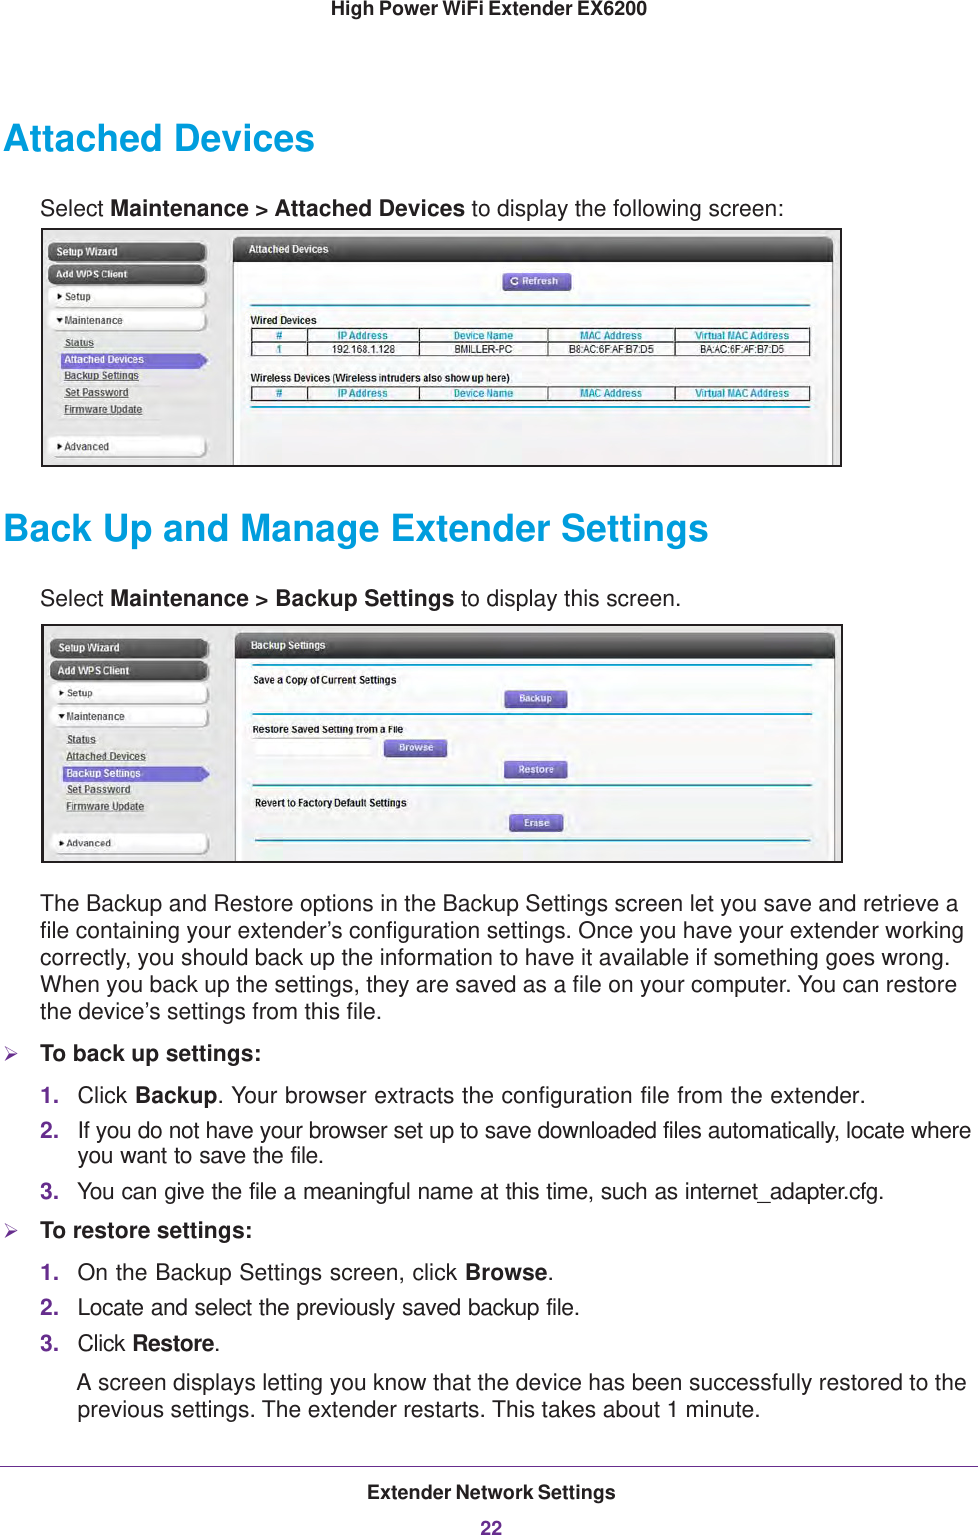
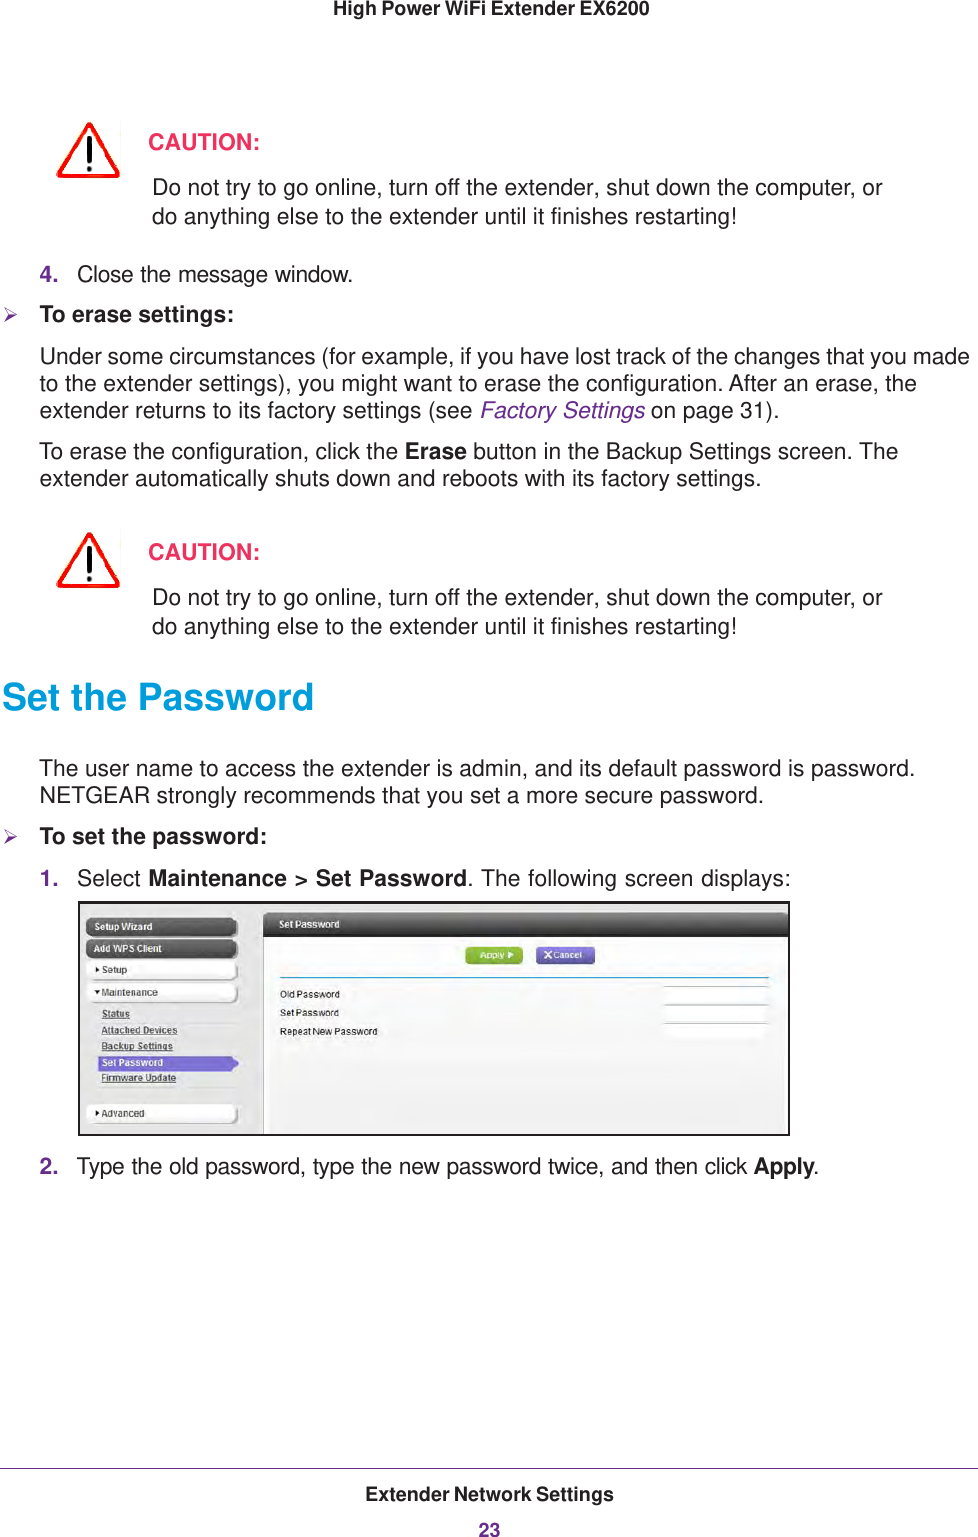
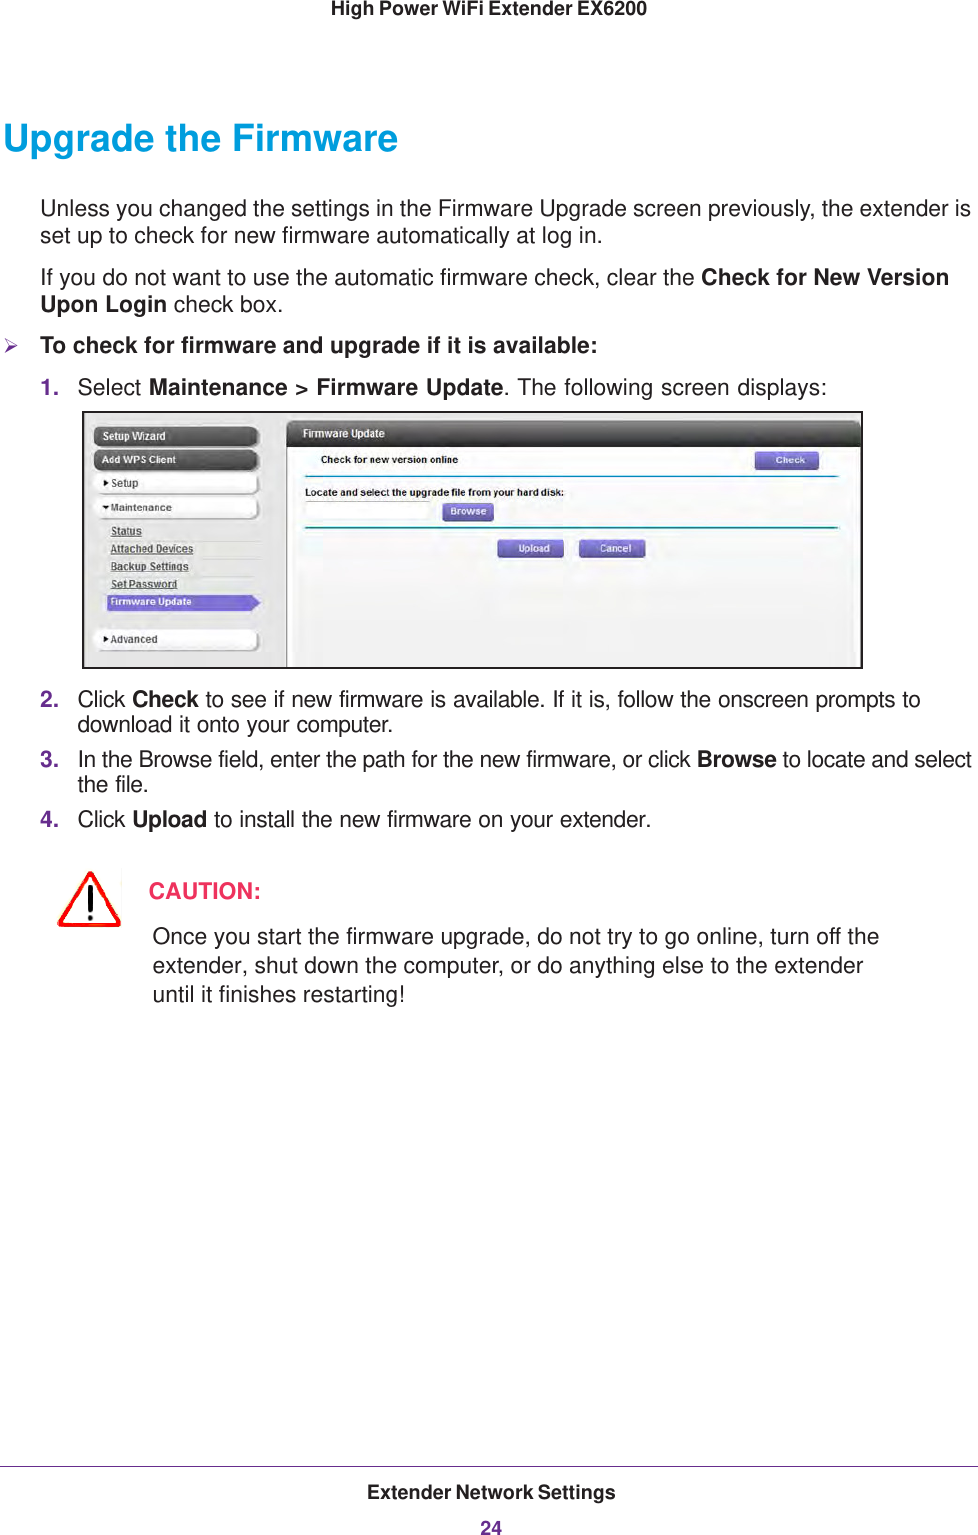
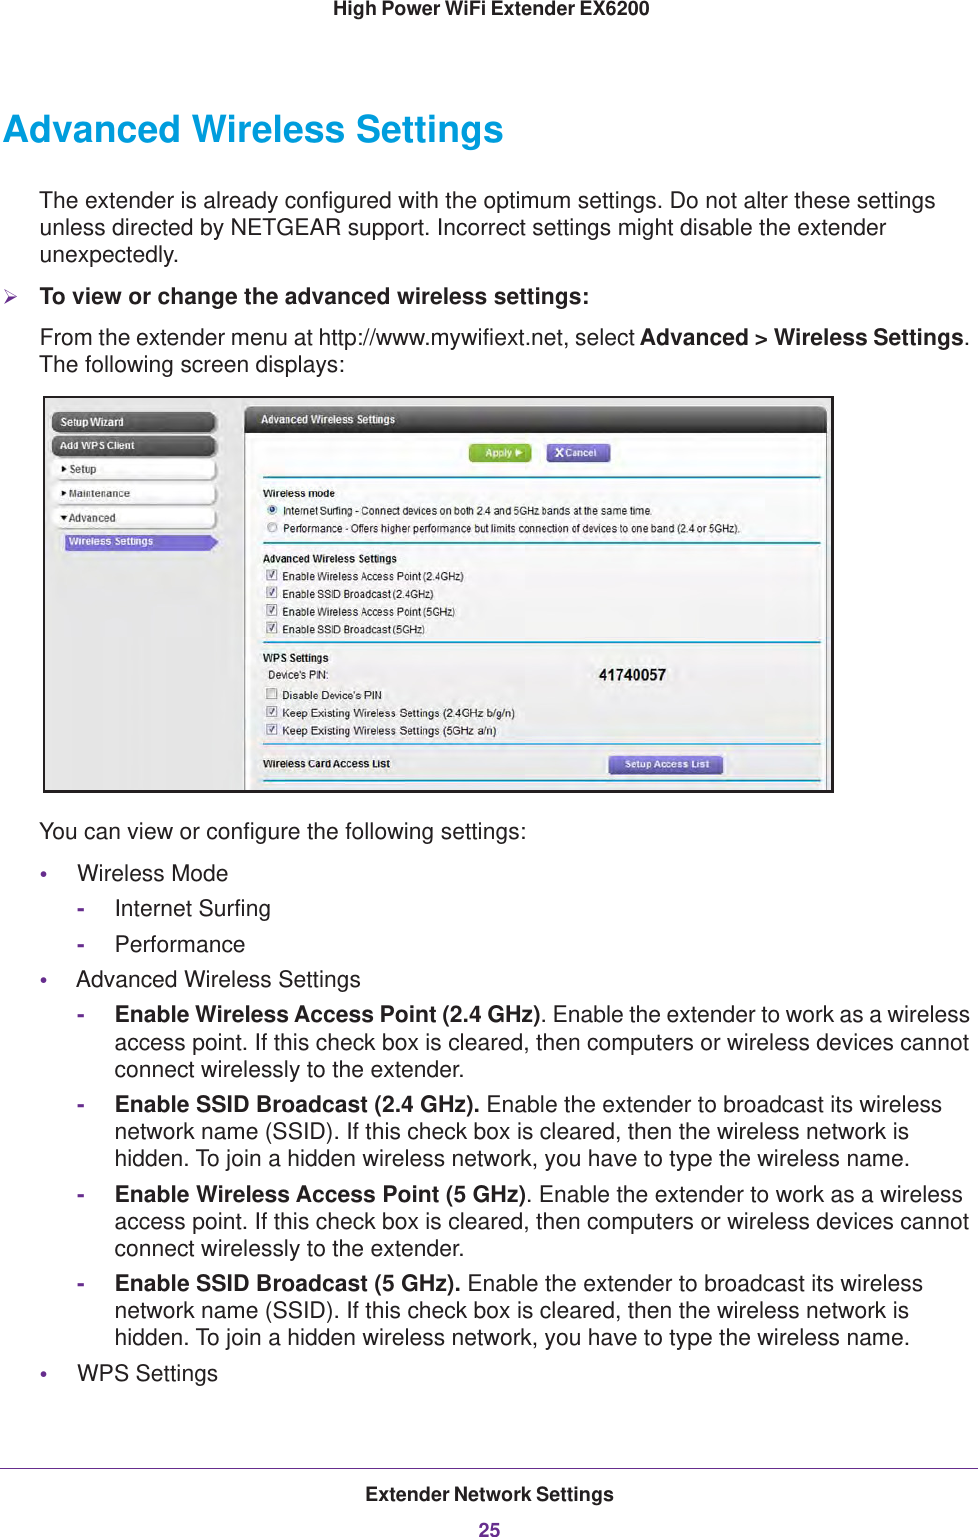
![Extender Network Settings17 High Power WiFi Extender EX6200•WPA-PSK [TKIP]. WPA is more secure than WEP. When using wireless computers or devices that support WPA, you can enter a passphrase to join the extender’s wireless network.•WPA2-PSK [AES]. WPA2 is even more secure, but some older computers do not support this standard. When using wireless computers or devices that support WPA2, you can enter the passphrase to join the extender’s wireless network.•WPA-PSK [TKIP] + WPA2-PASK [AES]. When using wireless computers or devices that support either WPA or WPA2, you can enter the passphrase to join the extender’s wireless network.4. Click Apply to save your settings.5. Use your wireless computer to connect to the extender’s network with its new settings. The Smart Wizard can guide you through this process. Set Up WPA, WPA2, or WPA + WPA2Both WPA and WPA2 provide strong data security. WPA with TKIP can be used on Windows systems with Service Pack 2 or later. WPA2 with AES is a hardware implementation; see your device documentation before implementing it. To configure WPA or WPA2 in the extender:1. On the Wireless Setting screen, select the radio button for the WPA or WPA2 option of your choice.2. The settings displayed on the screen depend on which security option you select.3. For WPA-PSK or WPA2-PSK, enter the passphrase. 4. Click Apply to save your settings.Set Up WEPWEP is a legacy wireless security setting. NETGEAR recommends that you use a newer standard such as WPA2 or WPA unless you have older wireless equipment that supports only WEP.To set up WEP:1. In the Wireless Settings screen, in the Security Options section, select the WEP radio button.2. Select the authentication type: Automatic, Open System, or Shared Key. The default is Open System.Note: The authentication is separate from the data encryption. You can select authentication that requires a shared key, but still leaves data transmissions unencrypted. Security is stronger if you use both the Shared Key and WEP encryption settings.](https://usermanual.wiki/Netgear-orporated/13200230/User-Guide-2135145-Page-17.png)