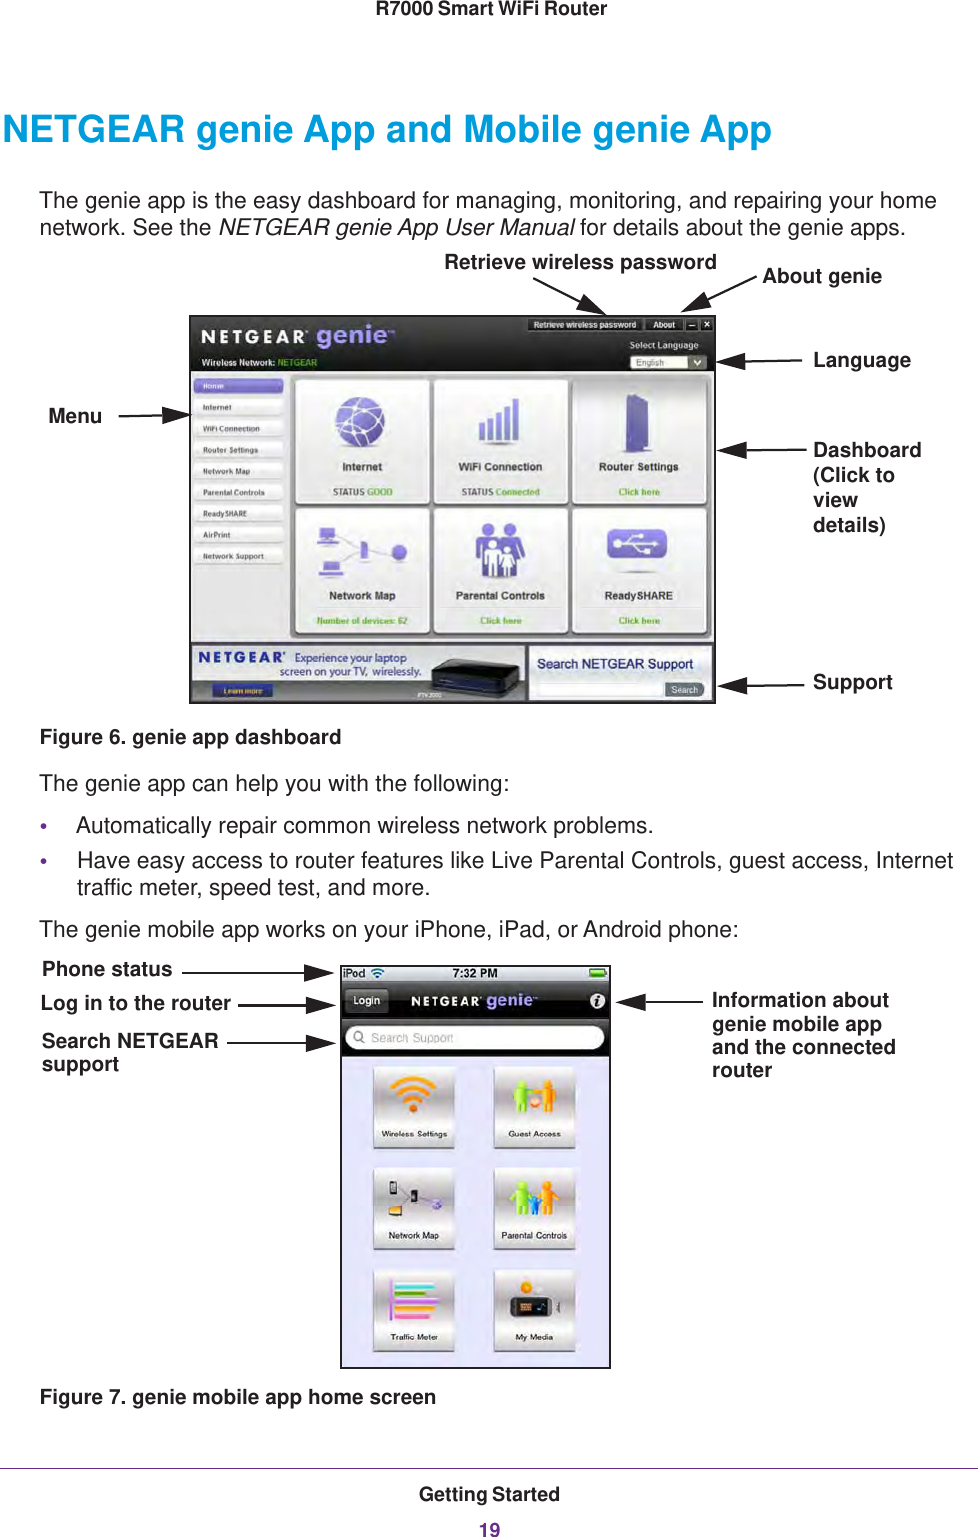
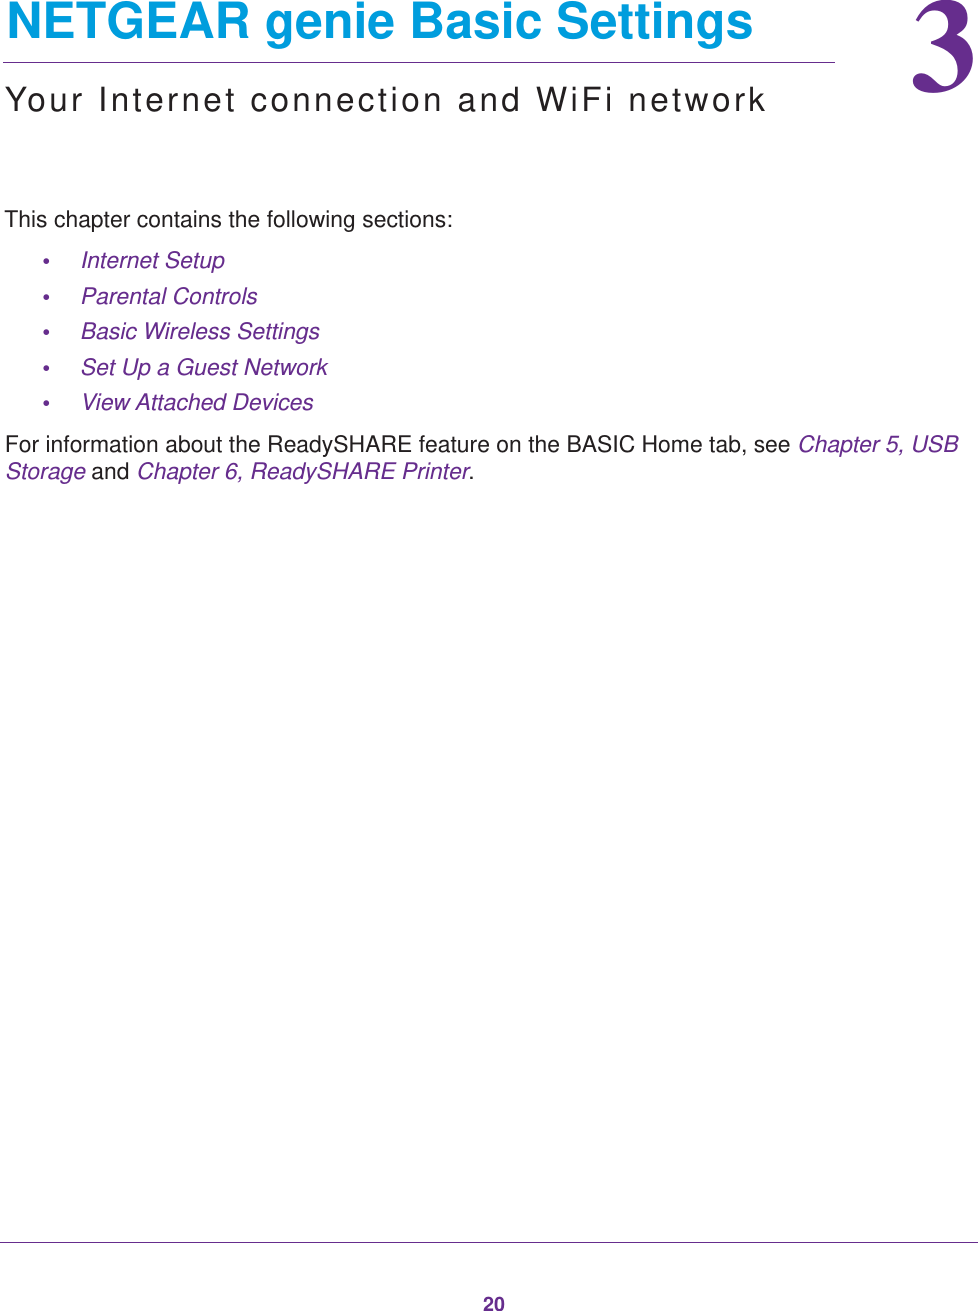
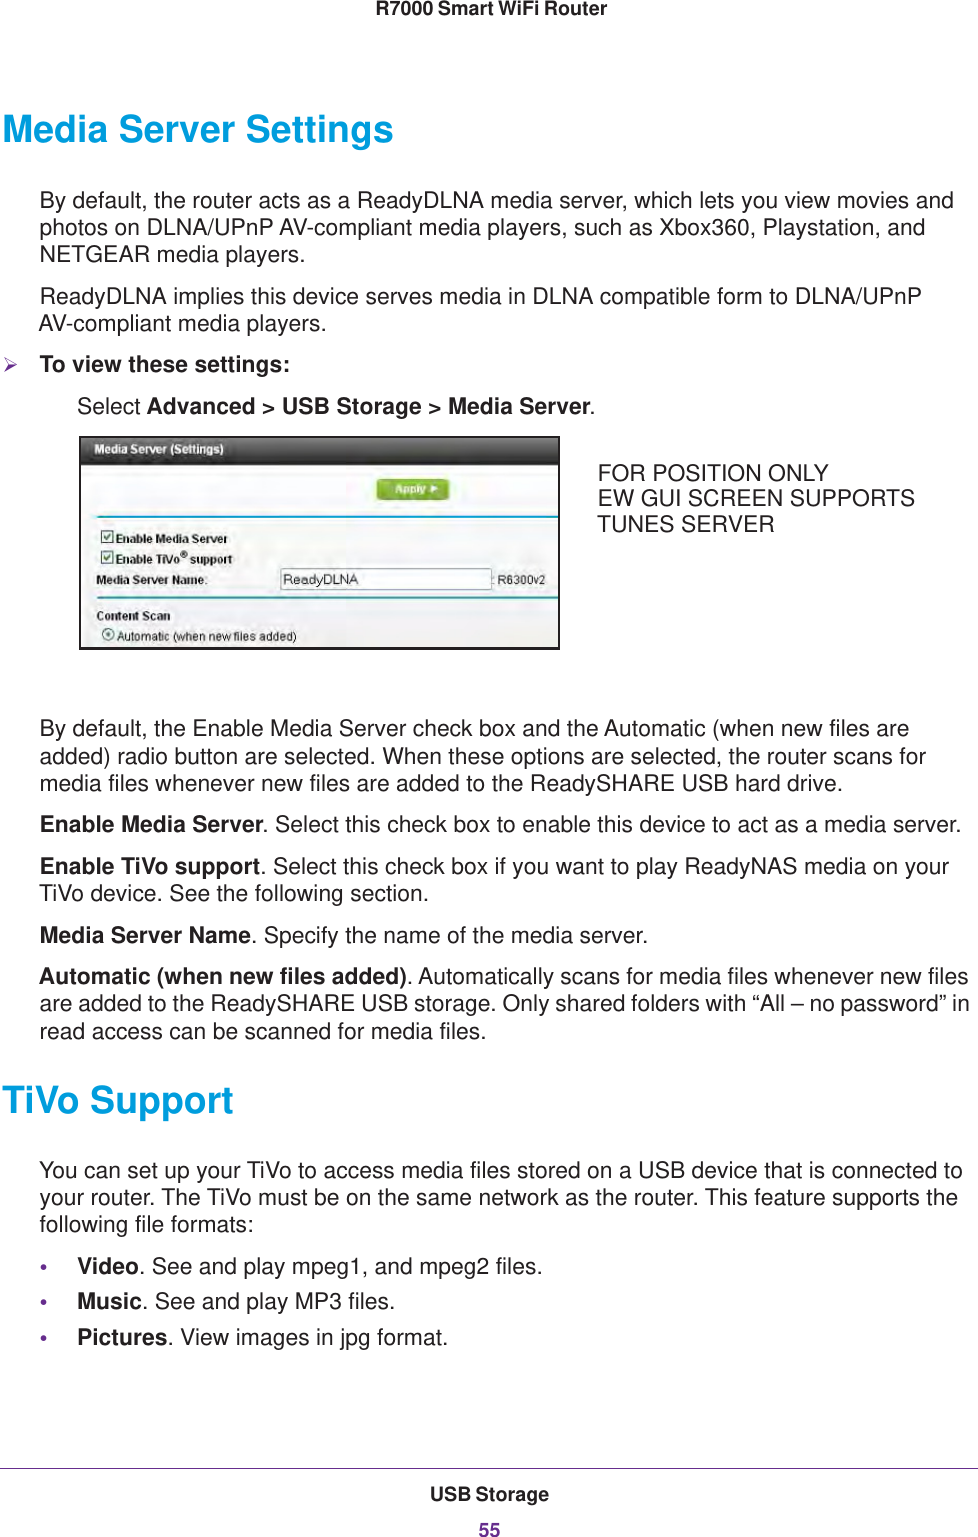
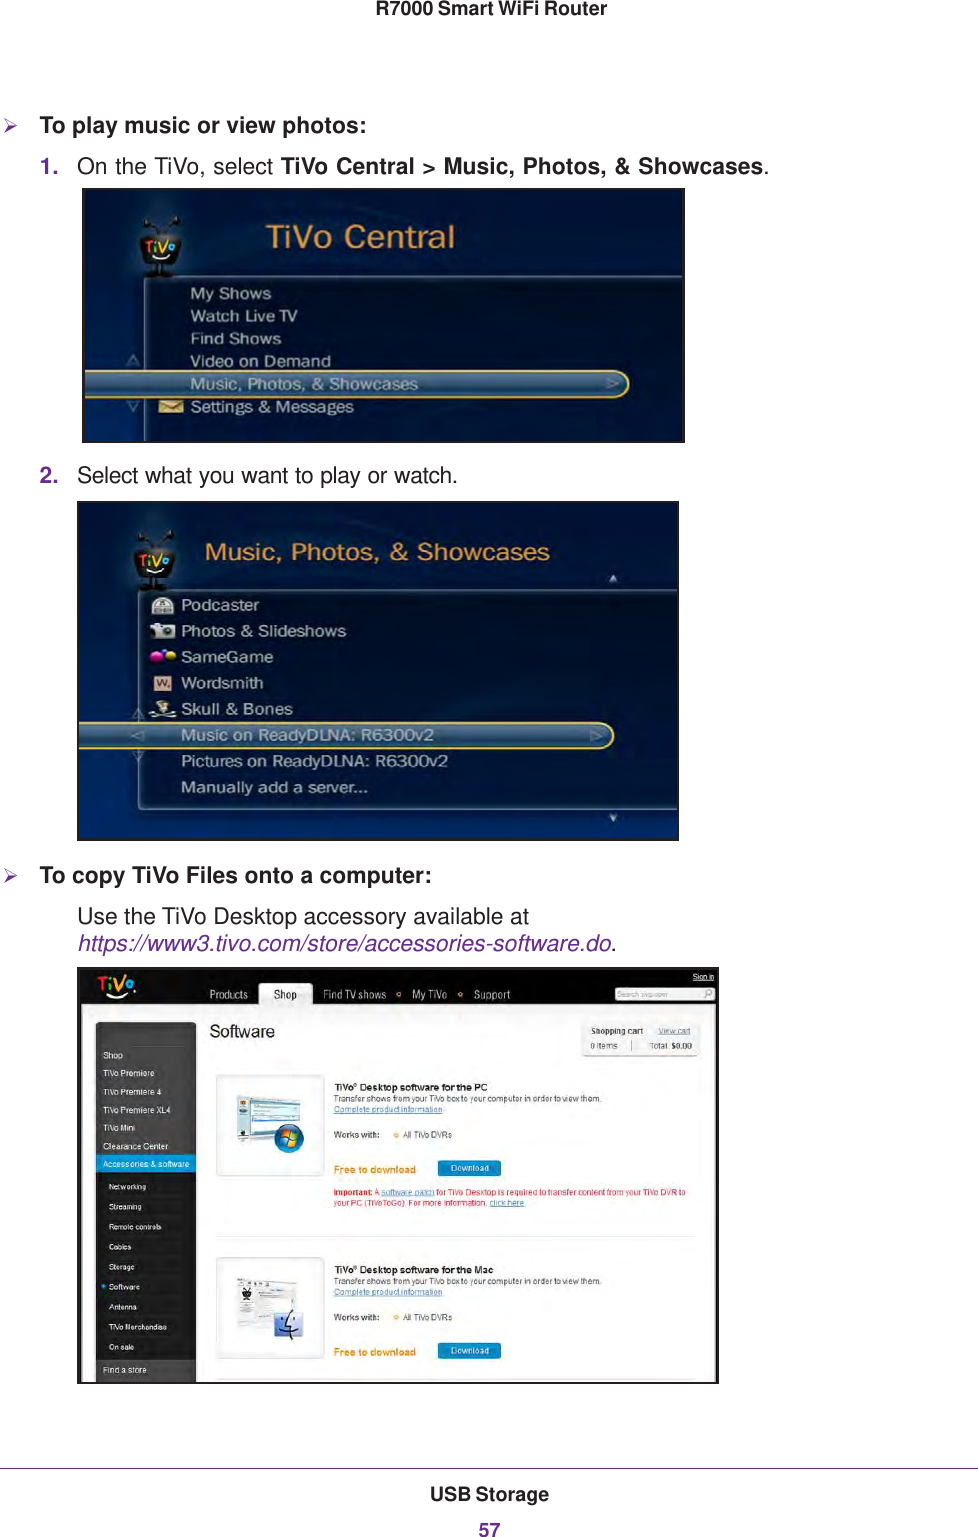
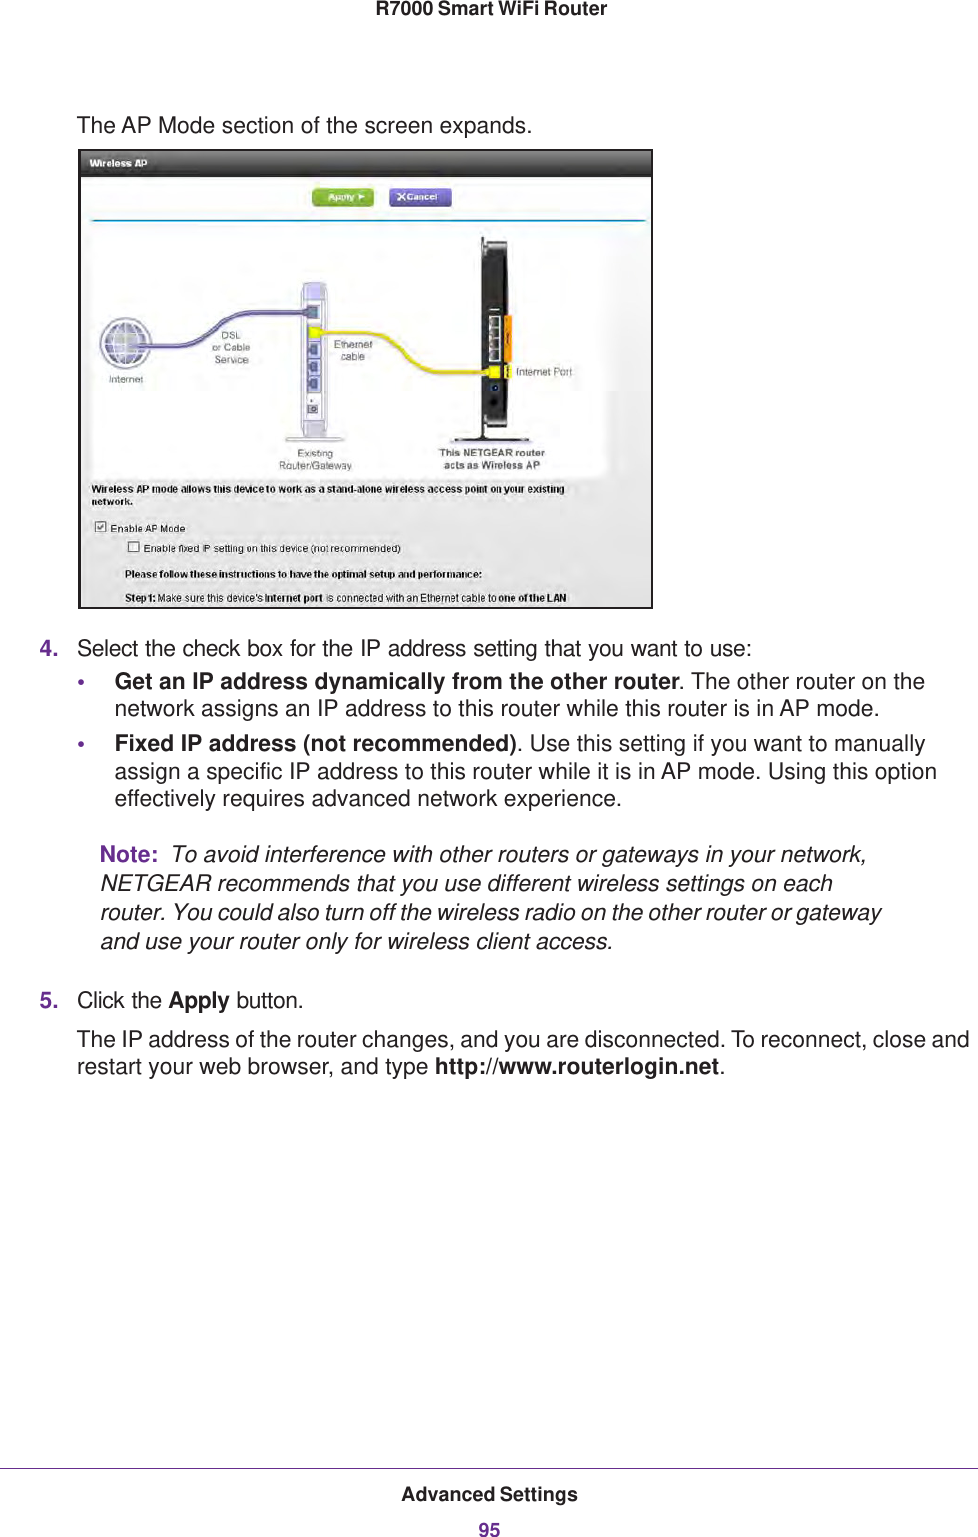
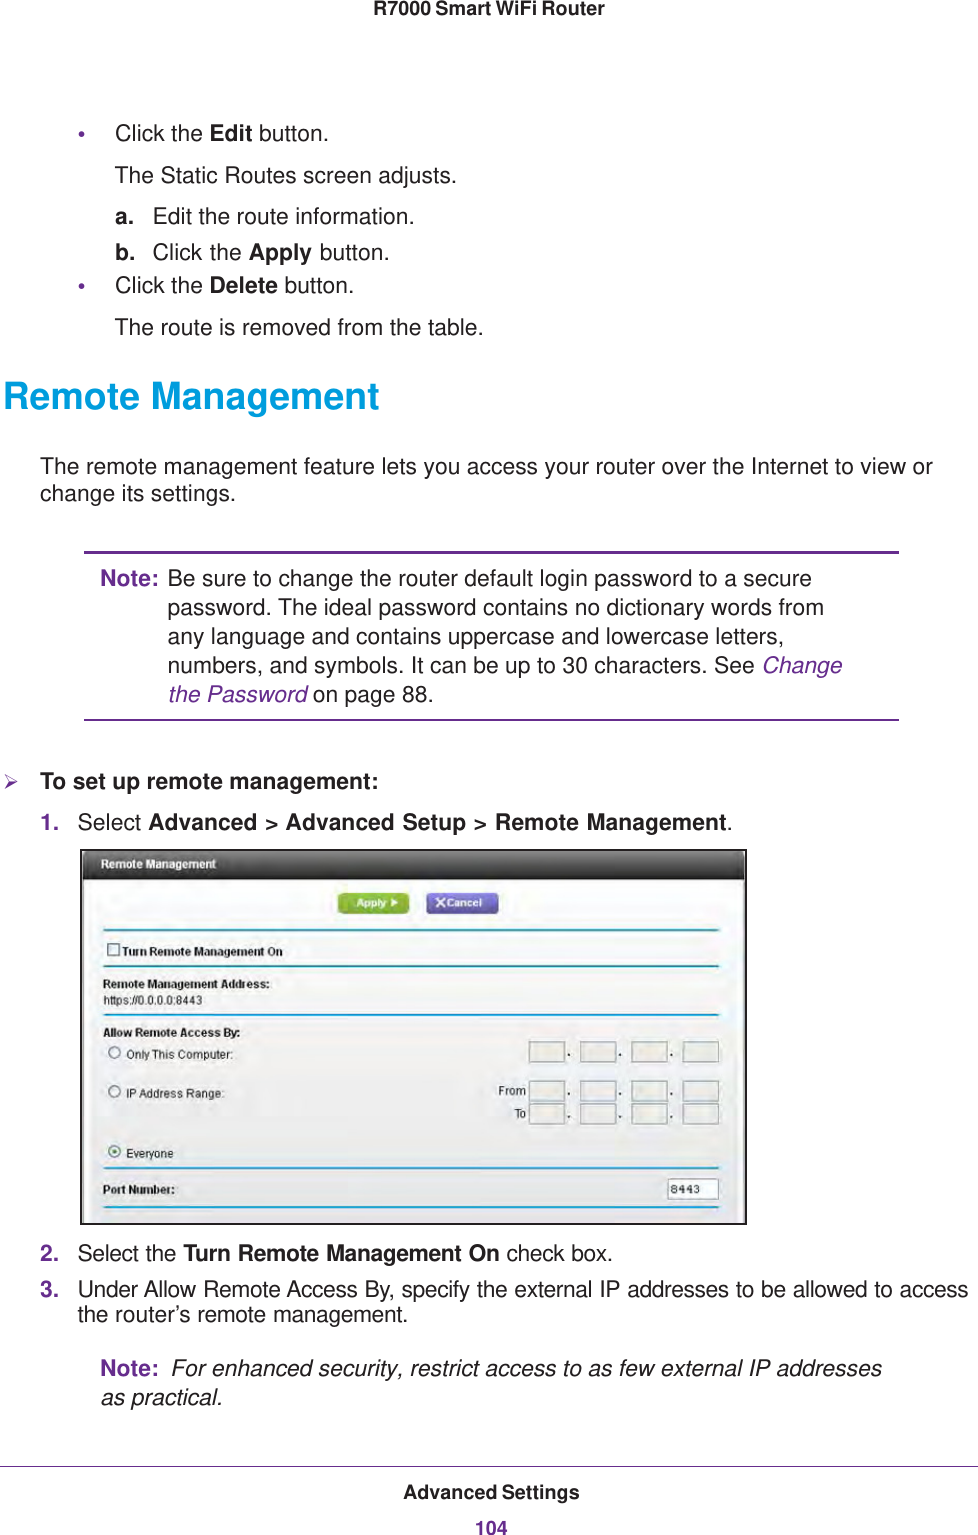
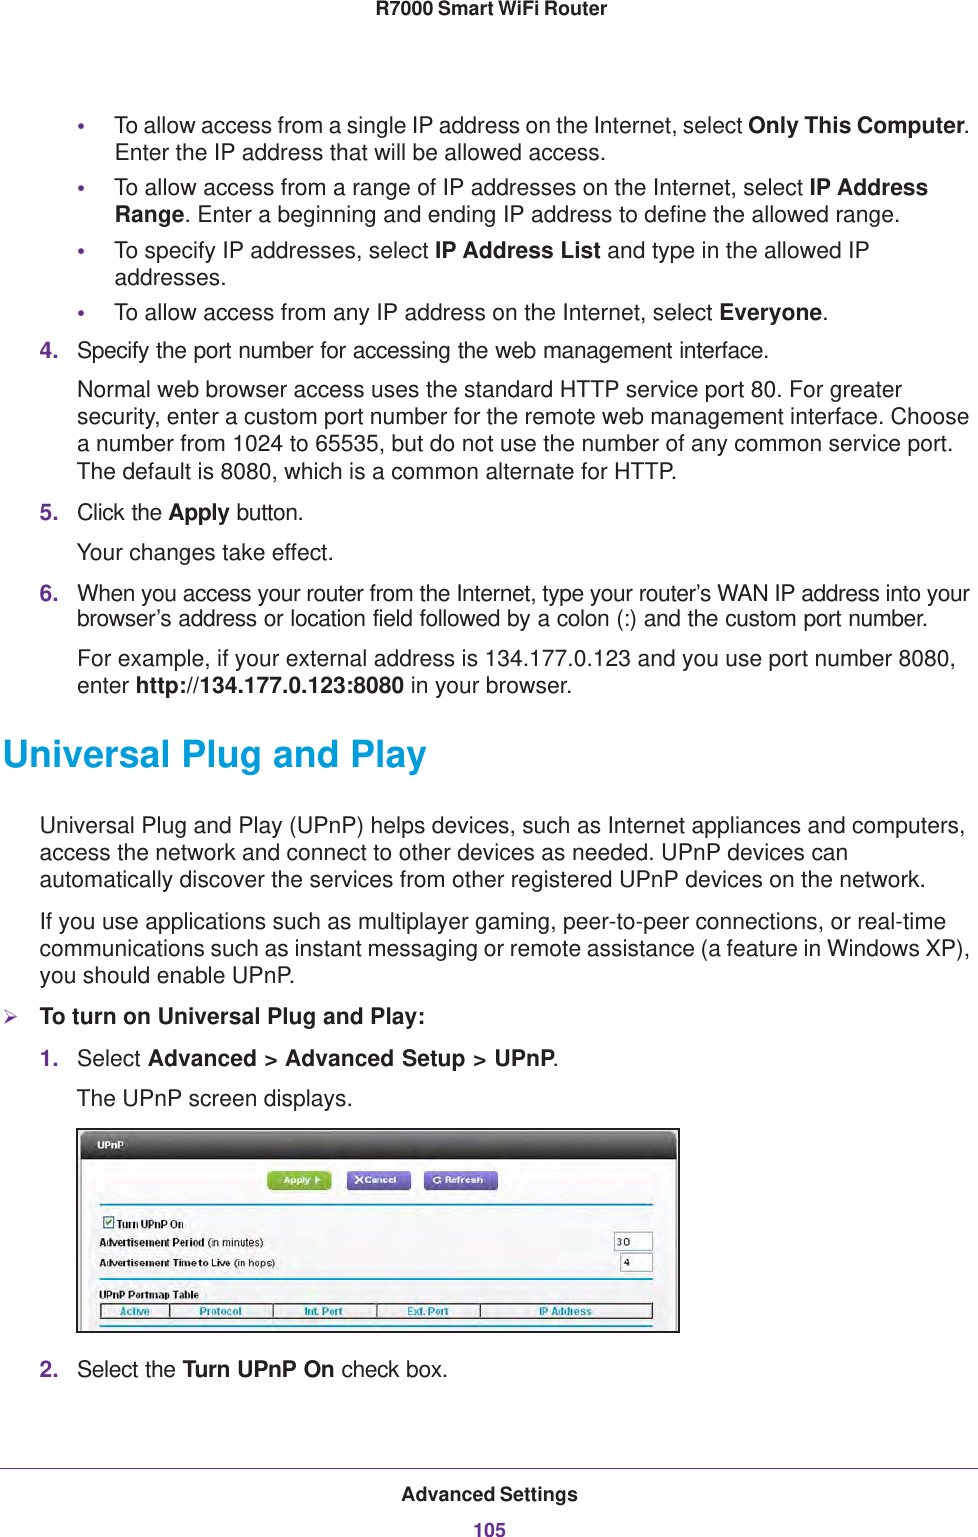
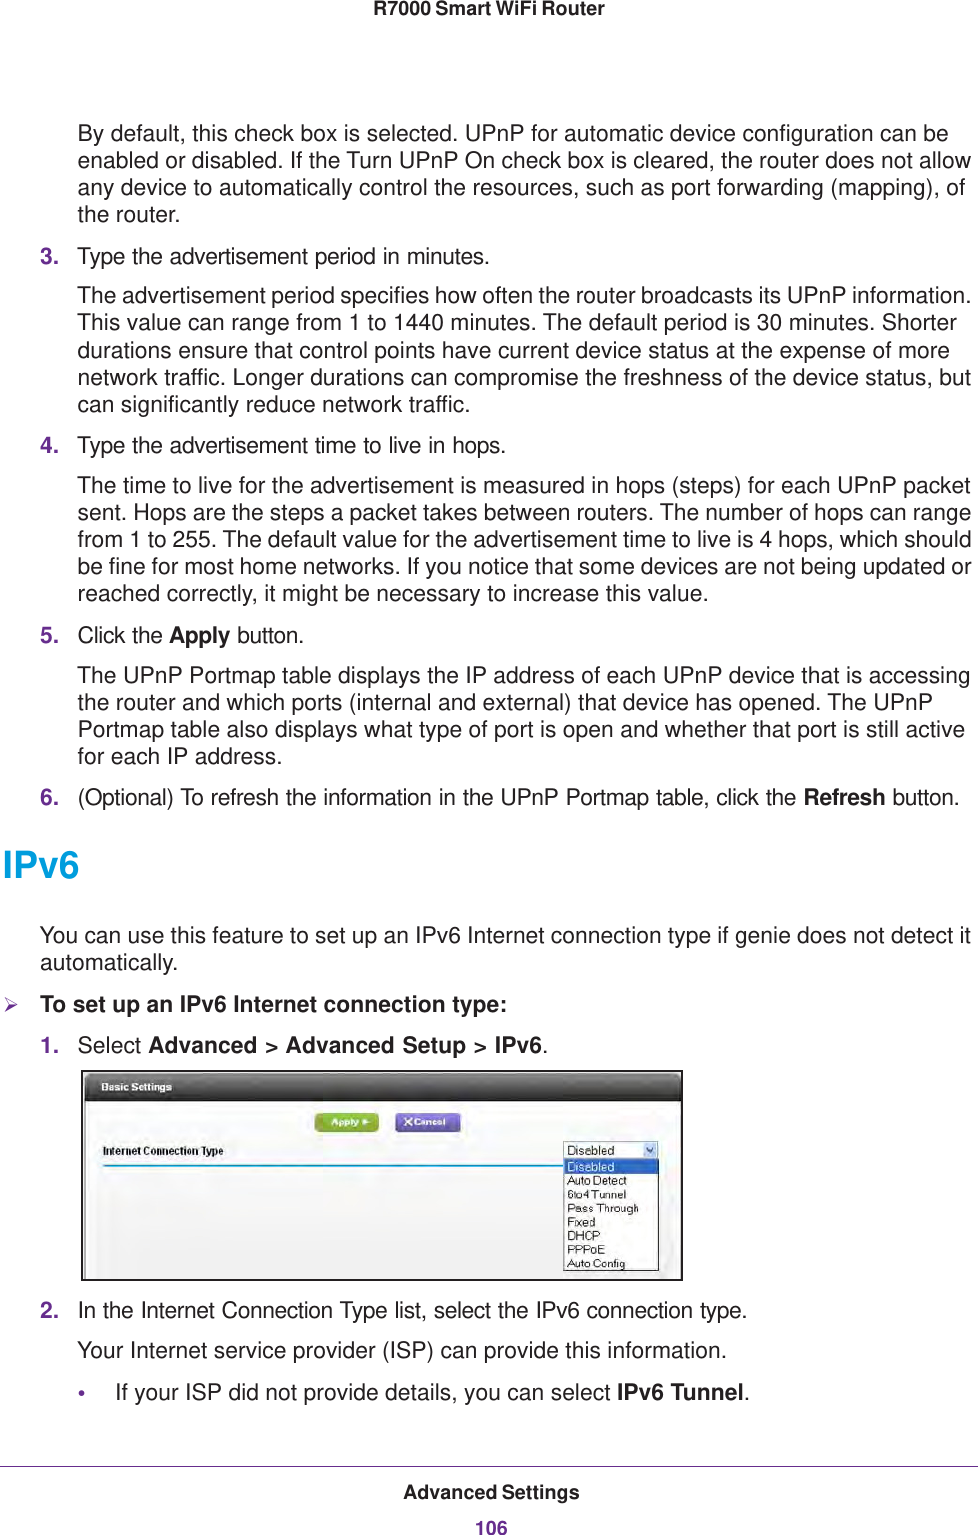
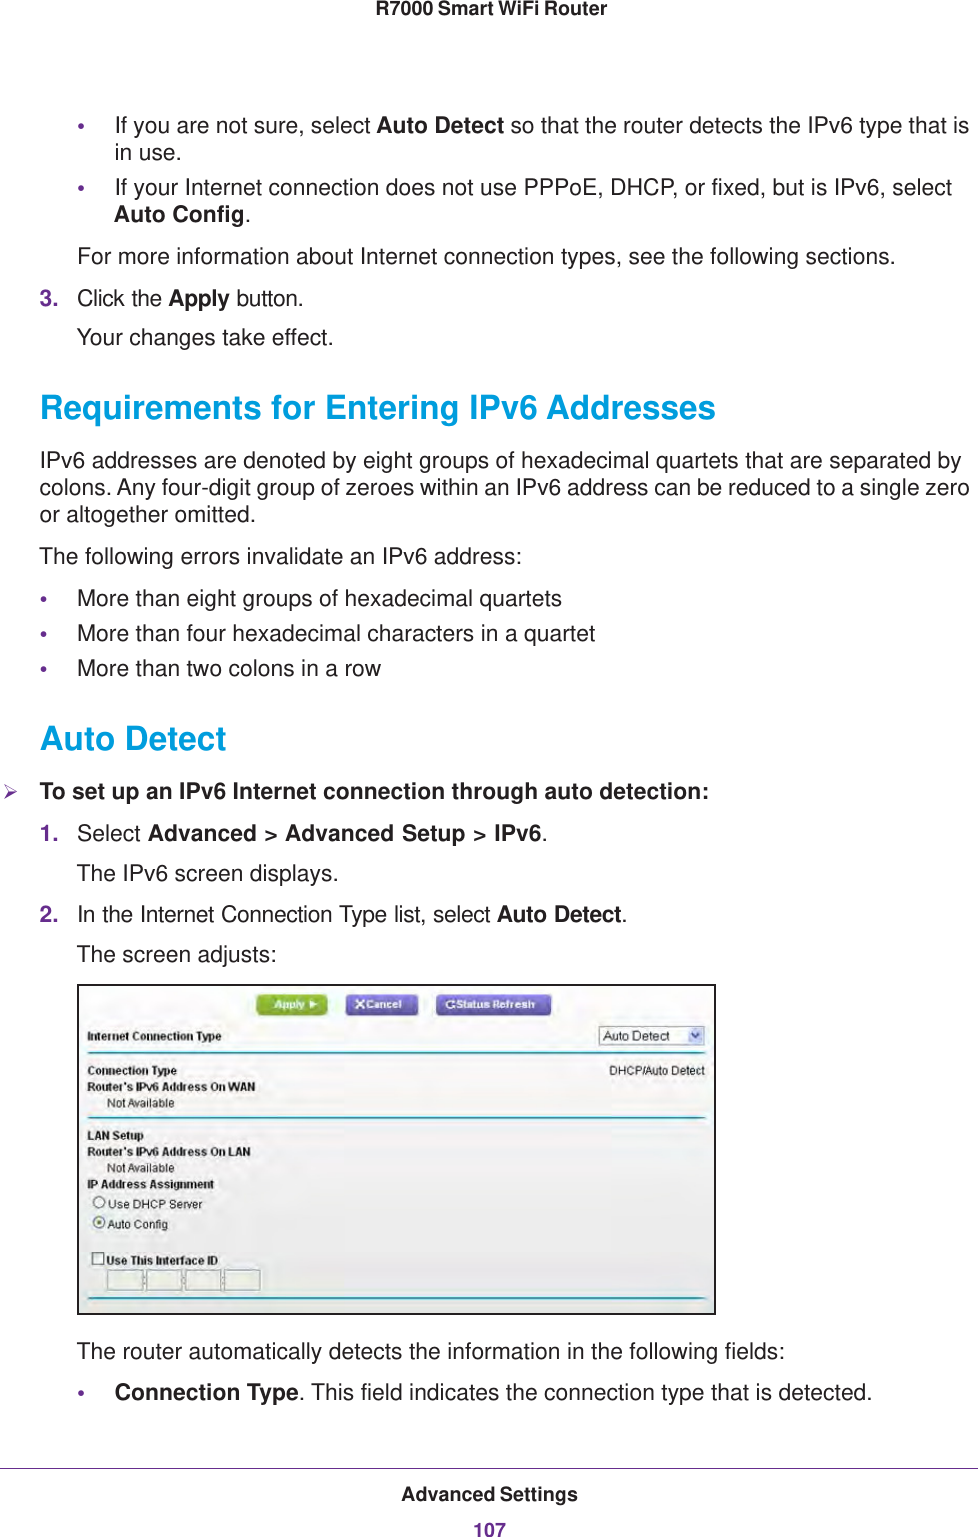
Netgear orporated 13200233 R7000 Smart WiFi Router User Manual R6300v2 Smart WiFi Router
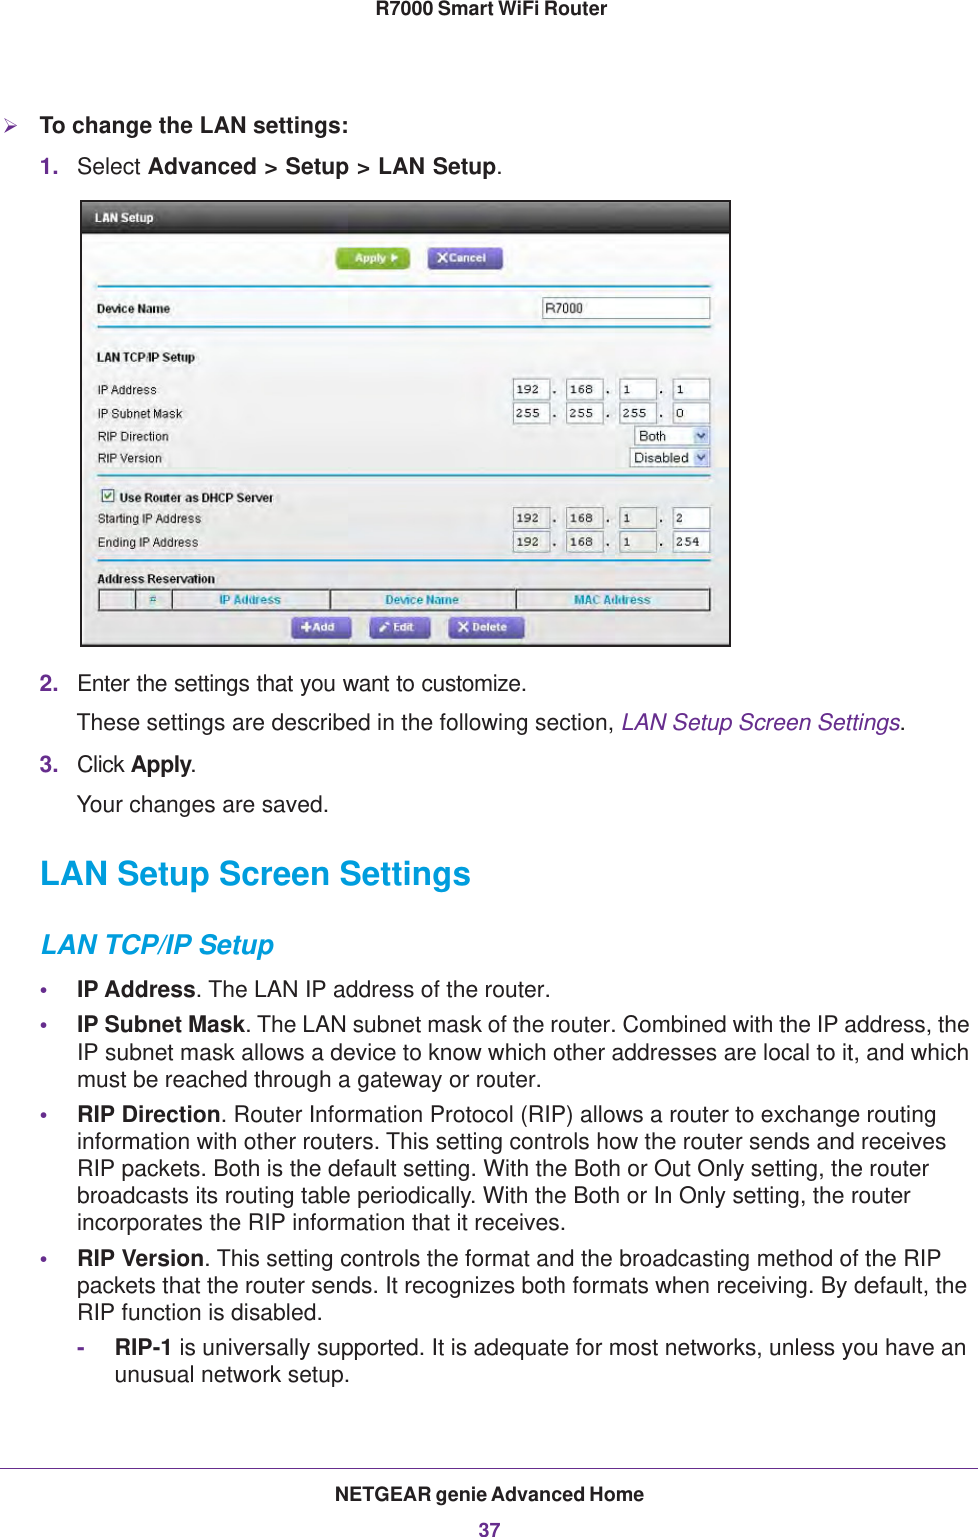
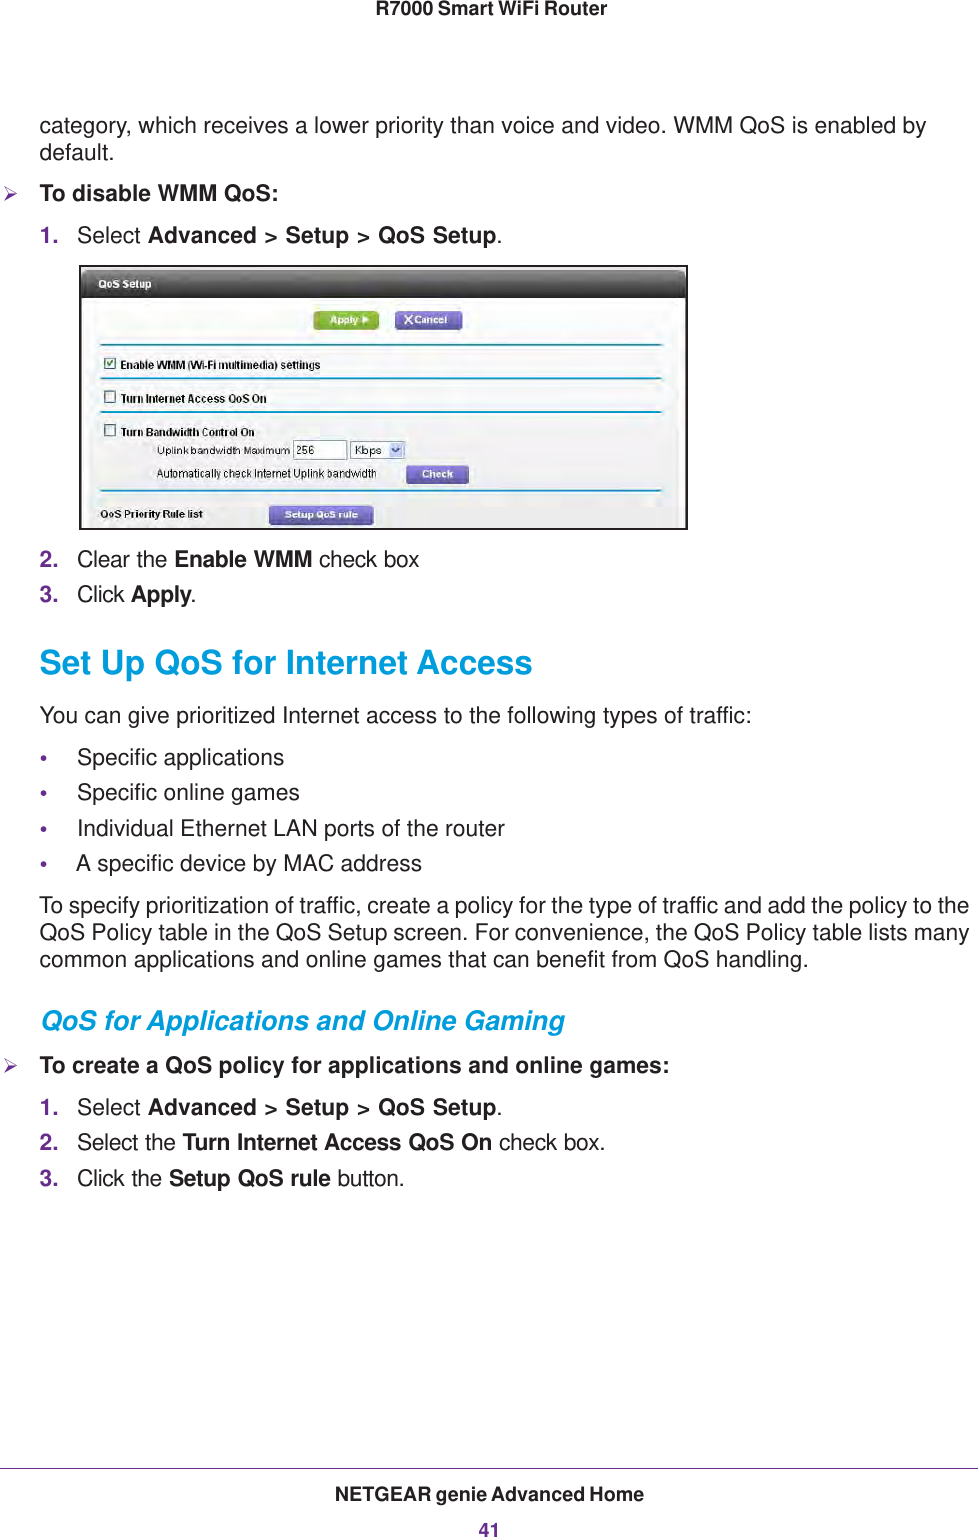
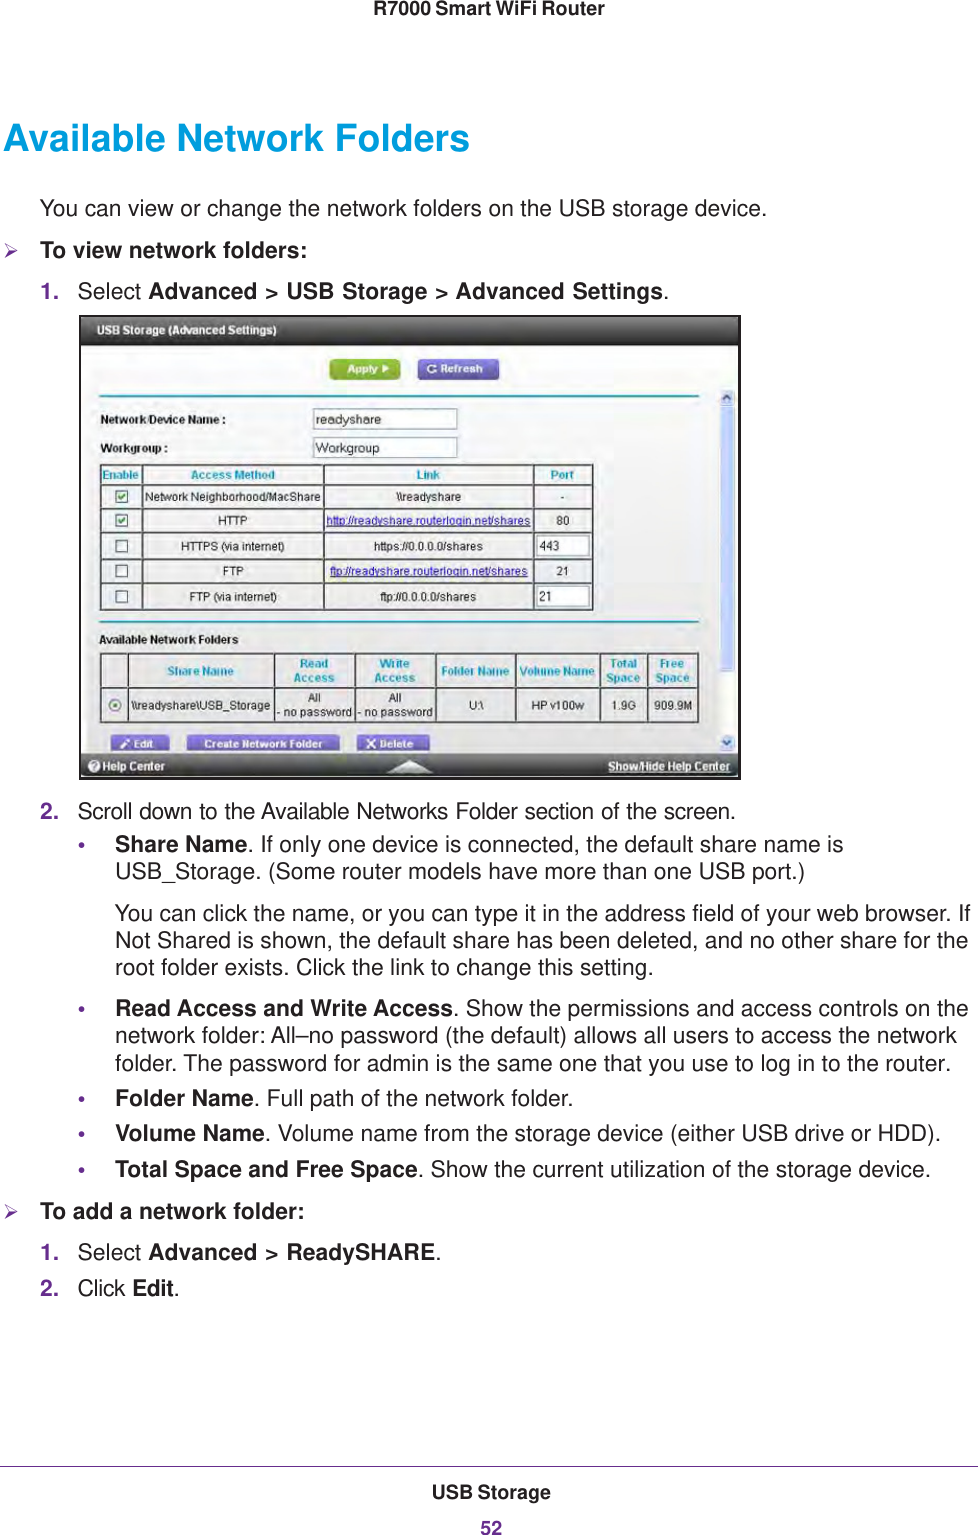
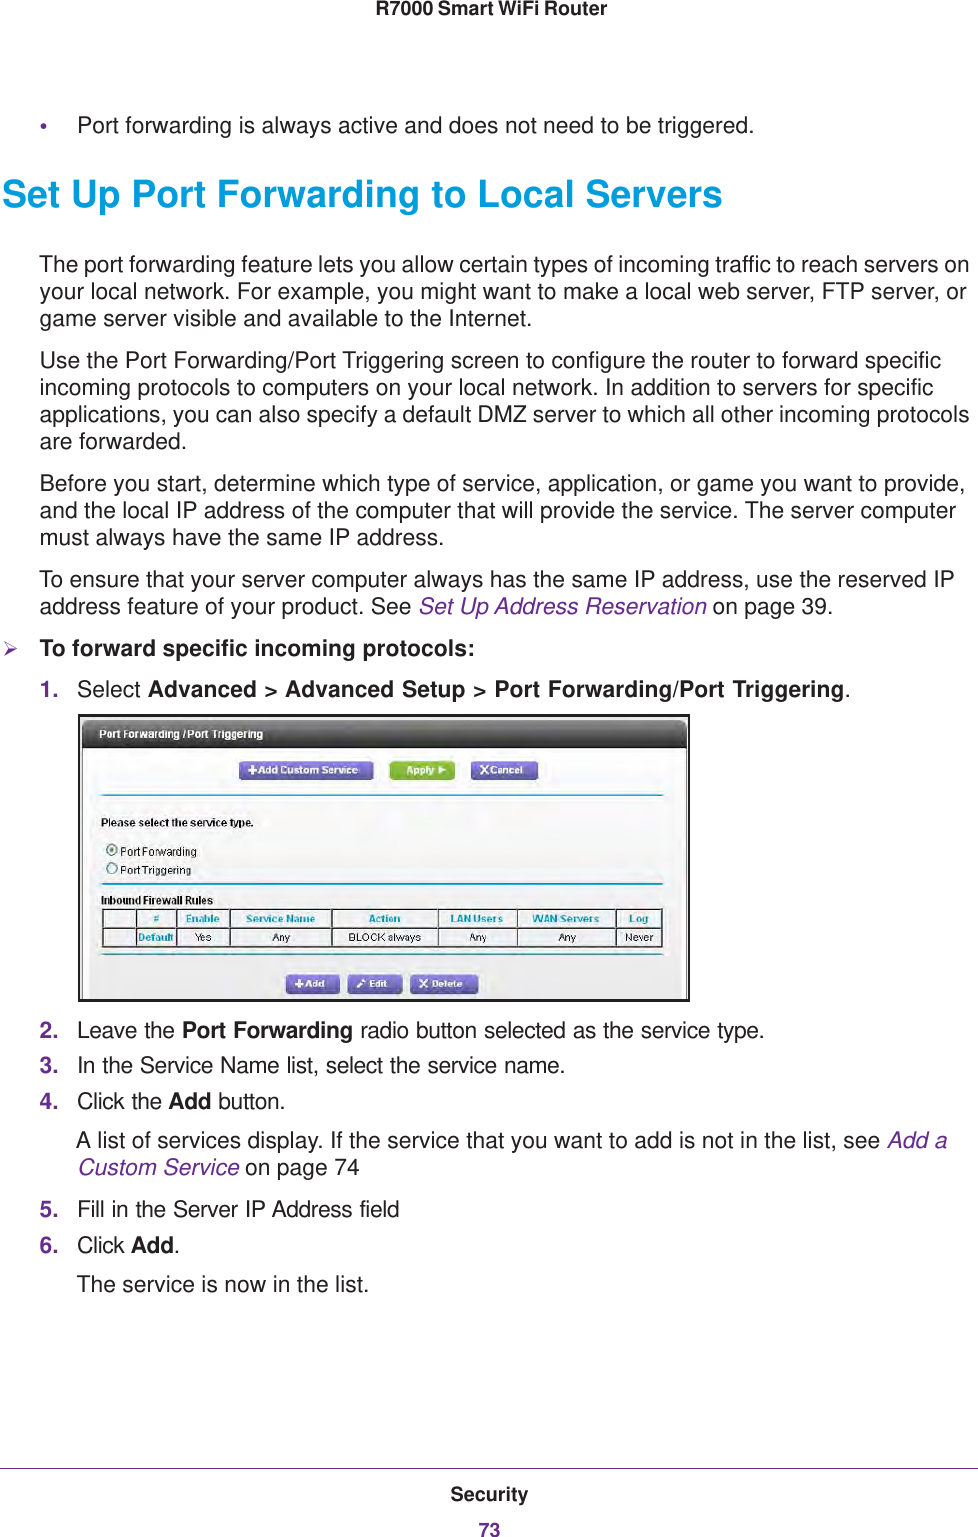
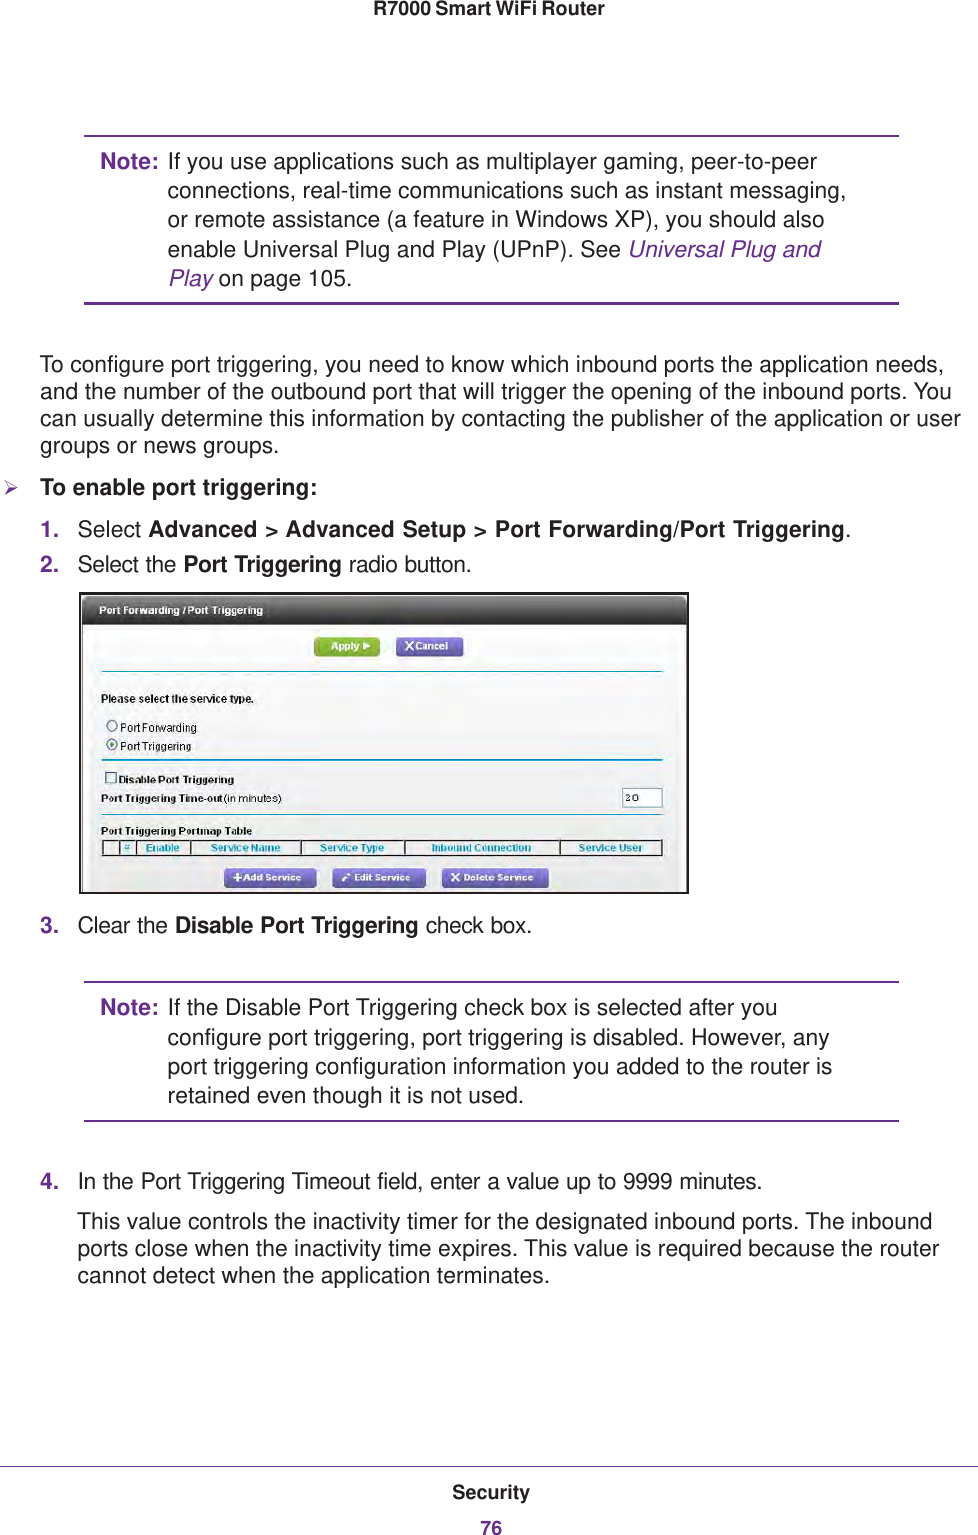
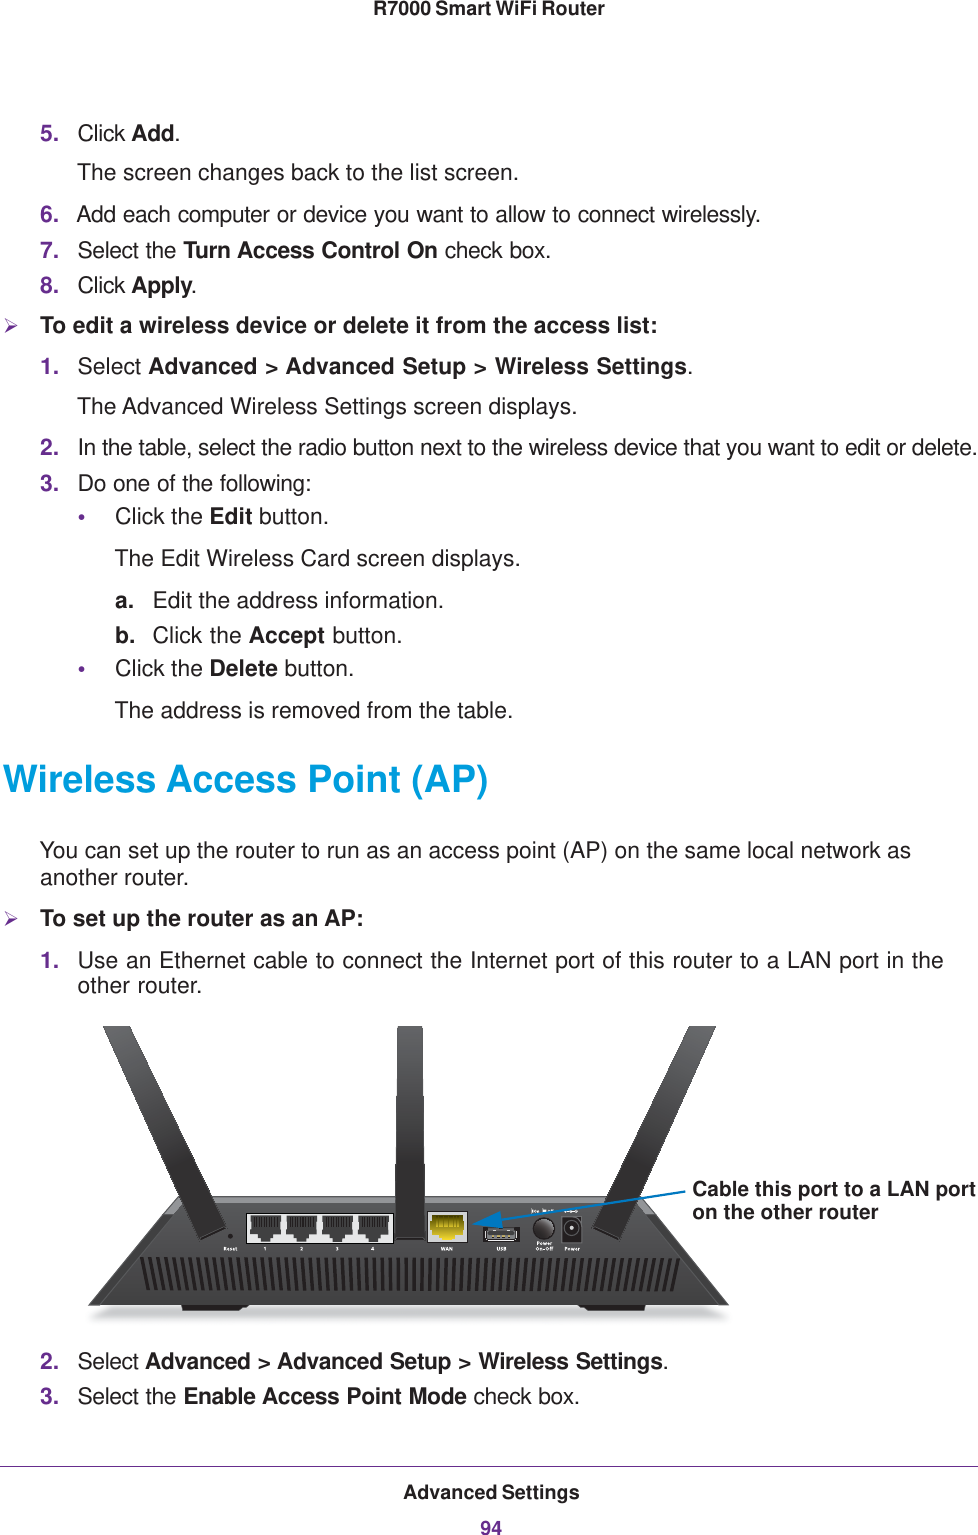
Netgear Incorporated R7000 Smart WiFi Router R6300v2 Smart WiFi Router
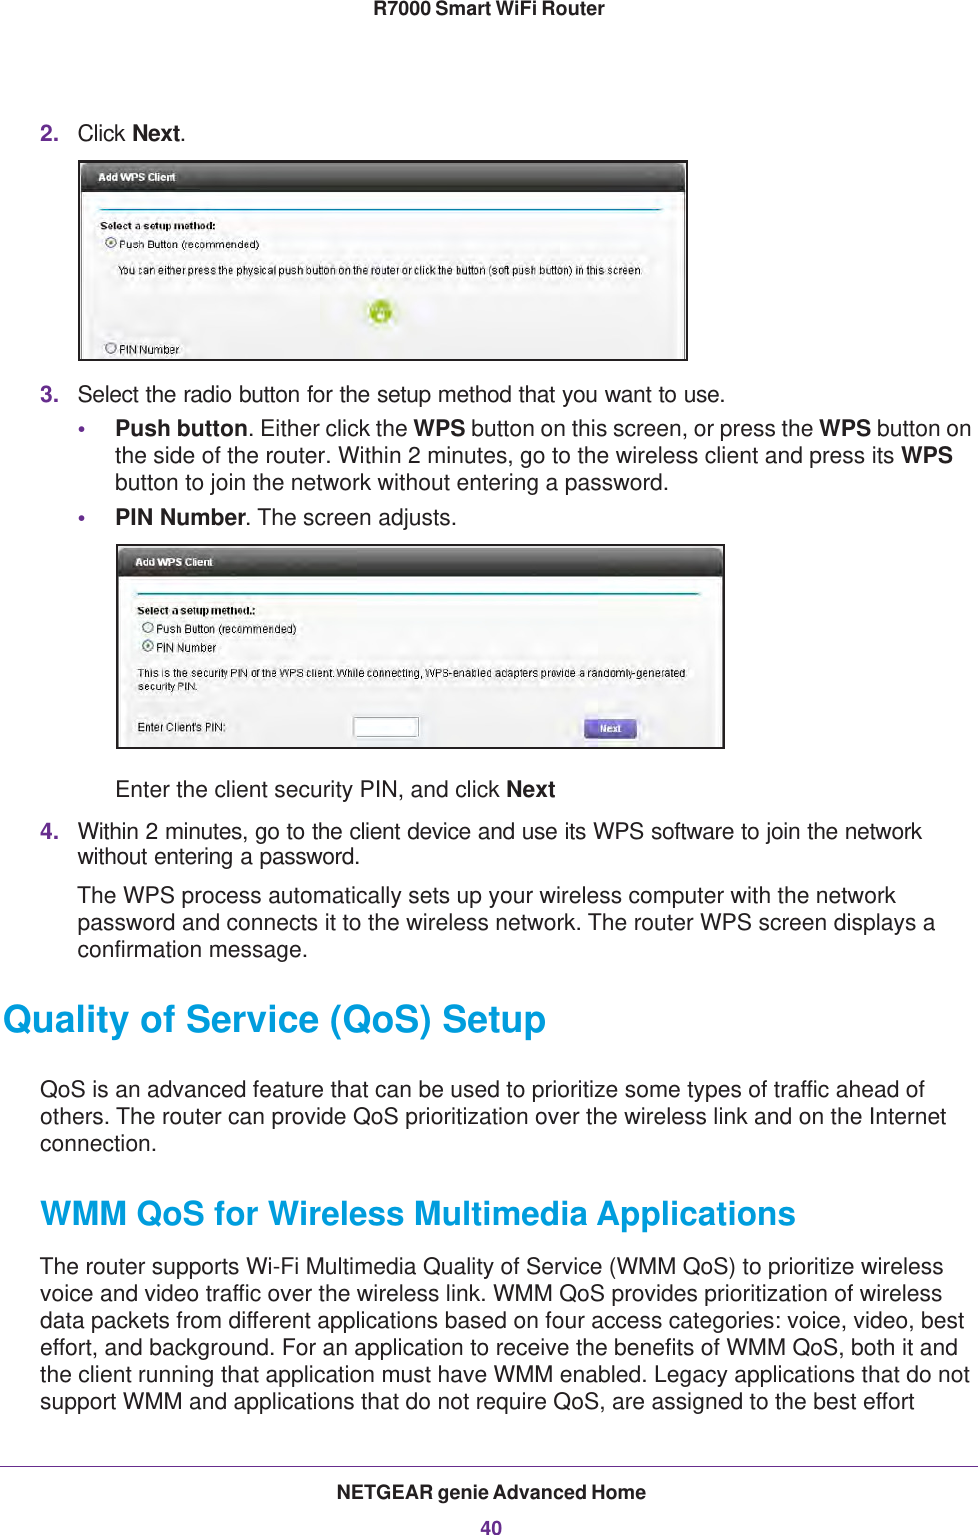
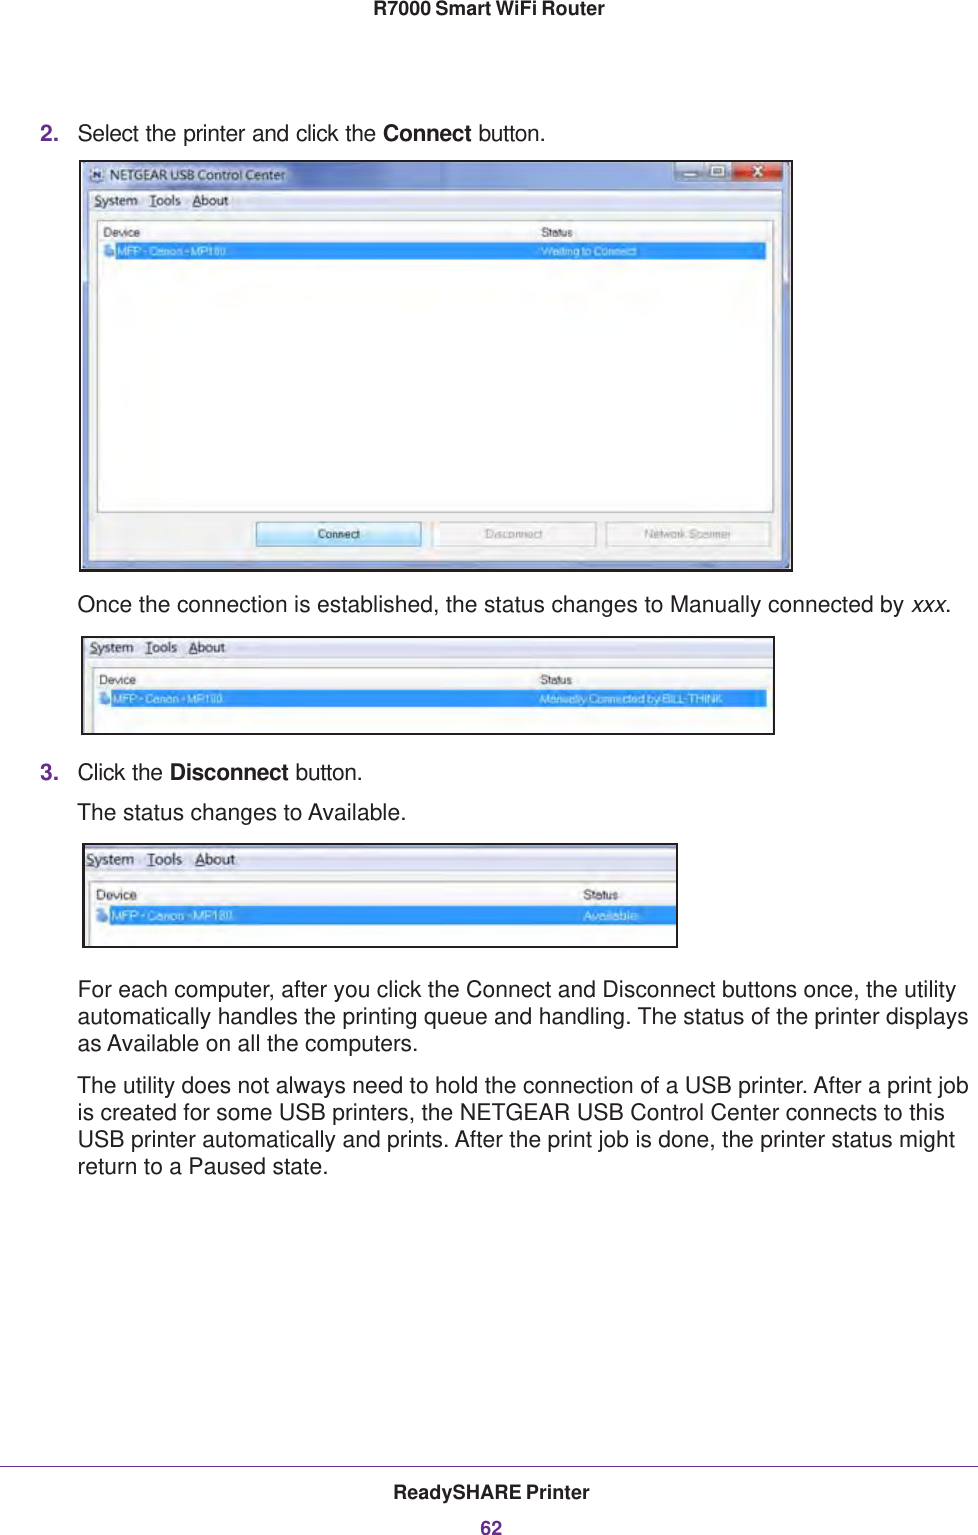
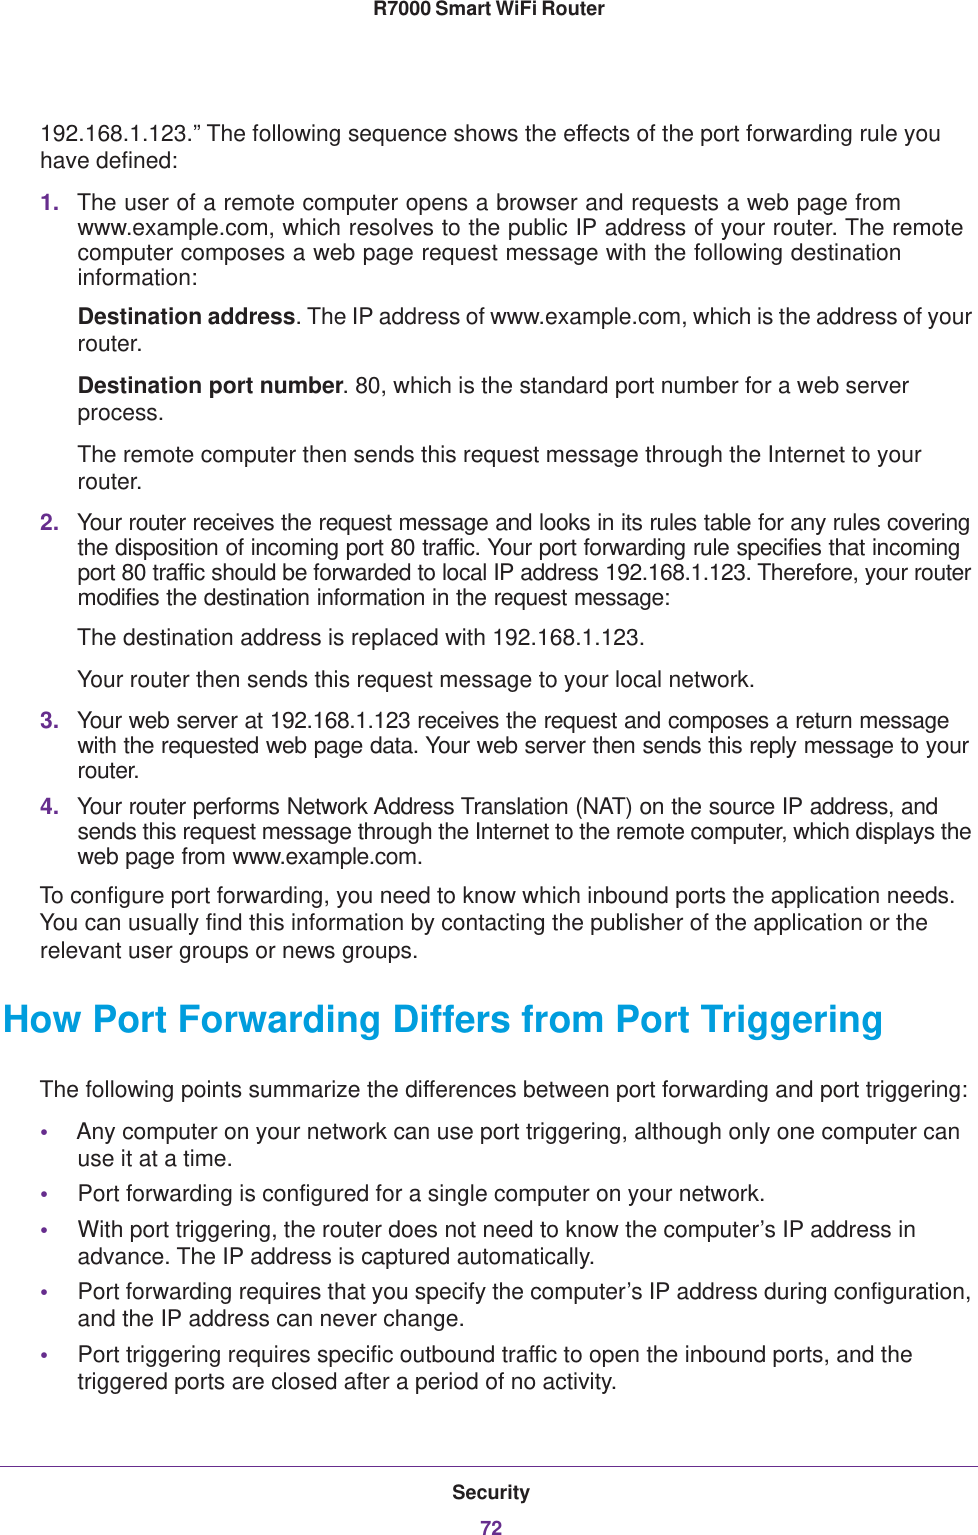
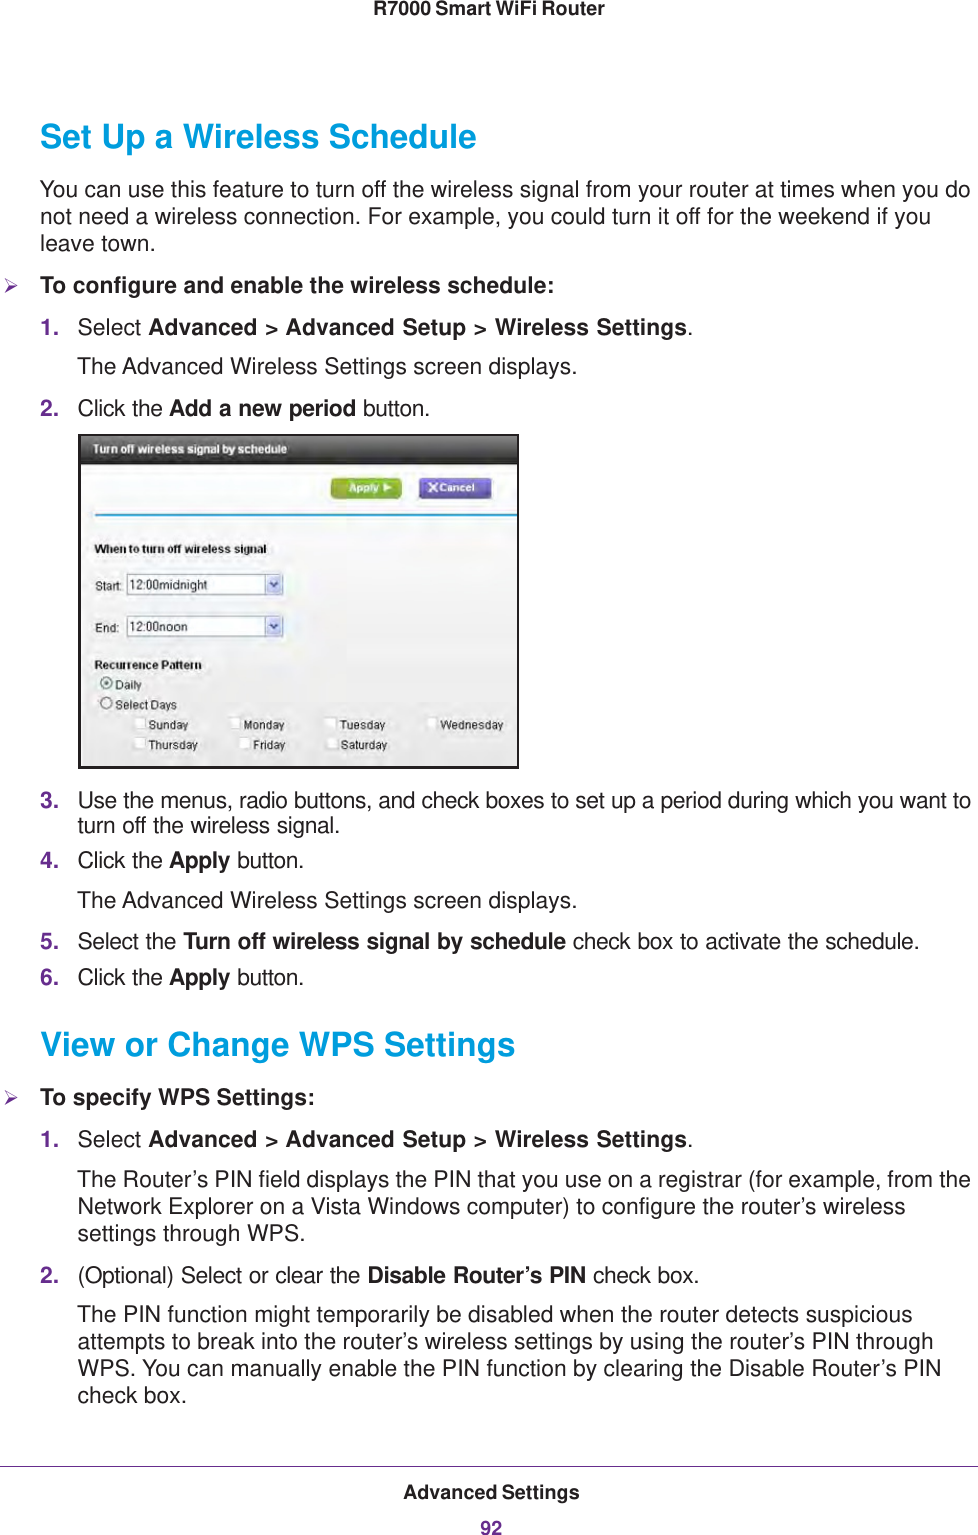
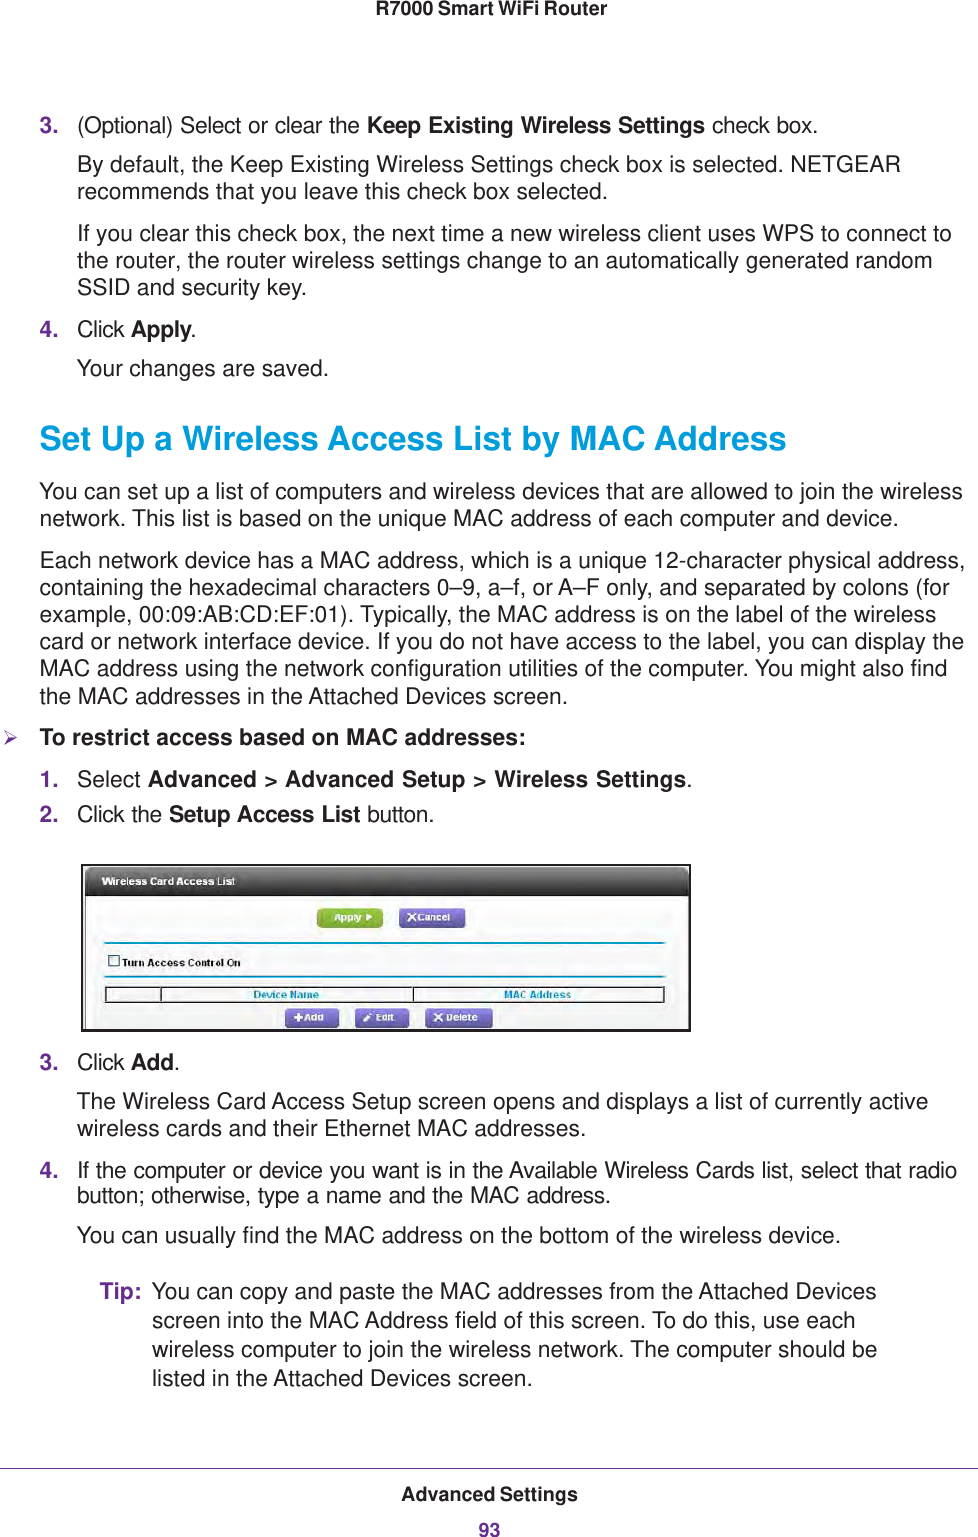
UserManual.wiki
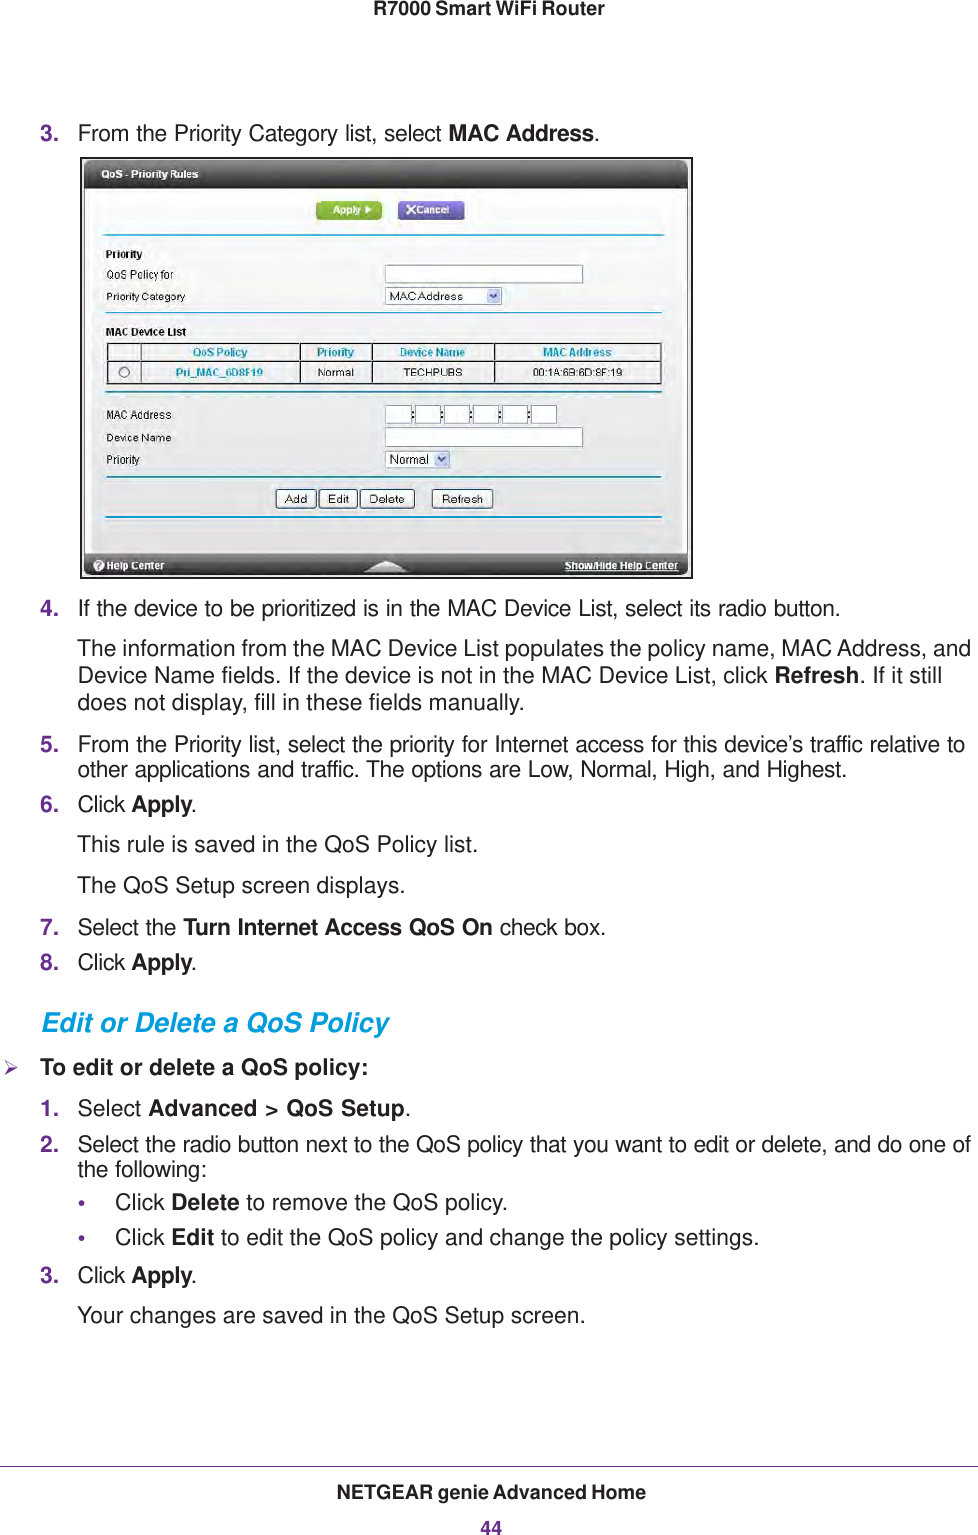
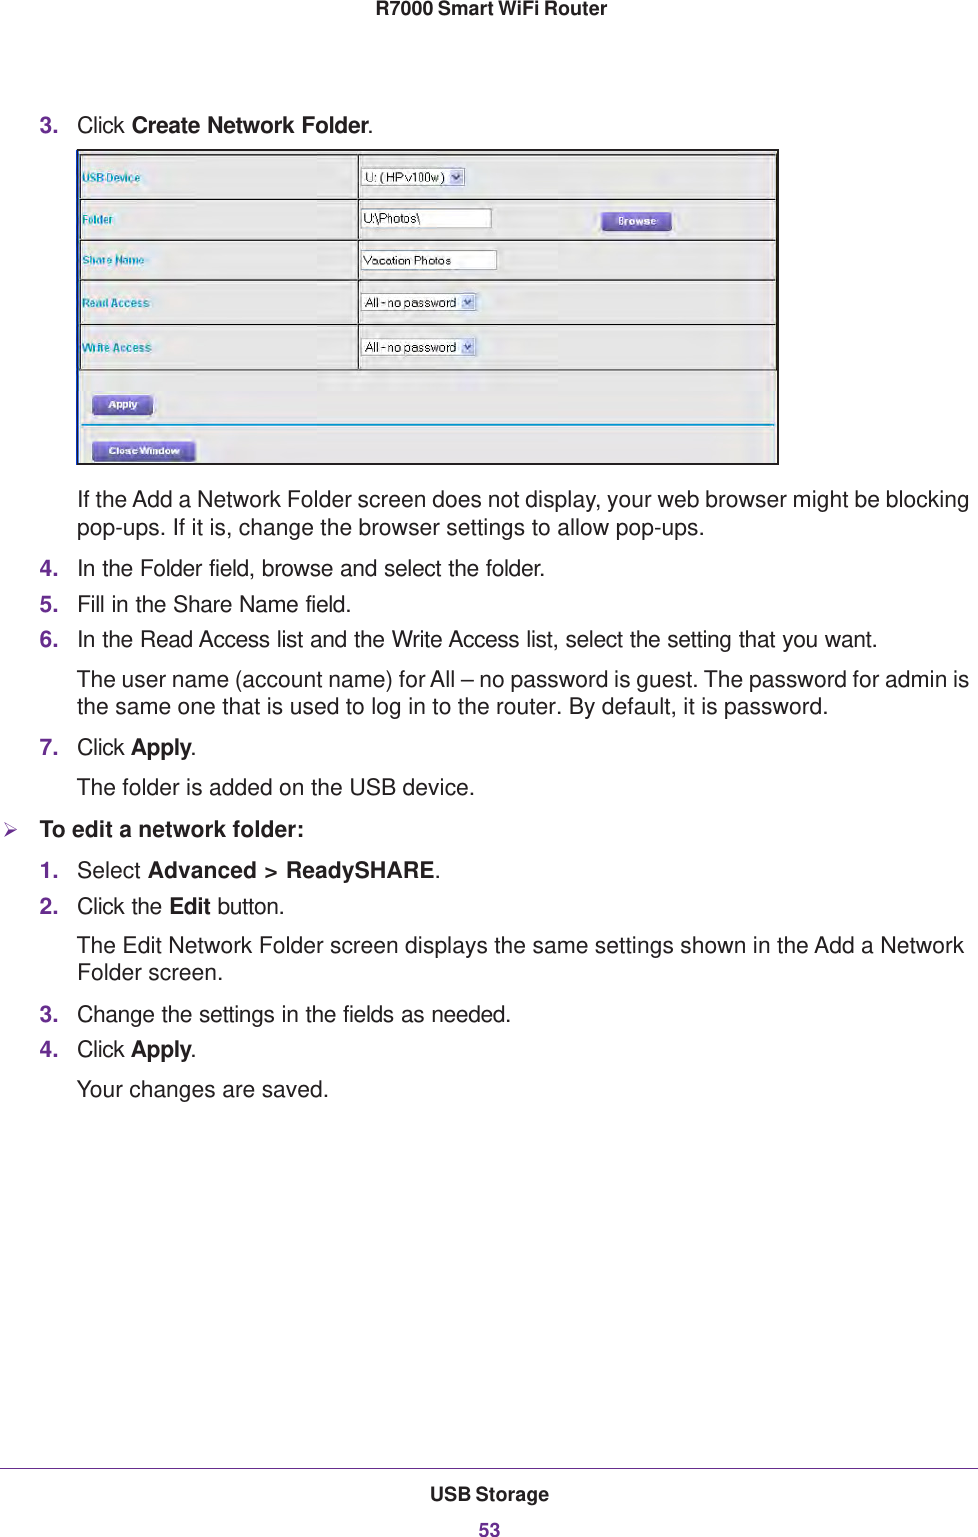
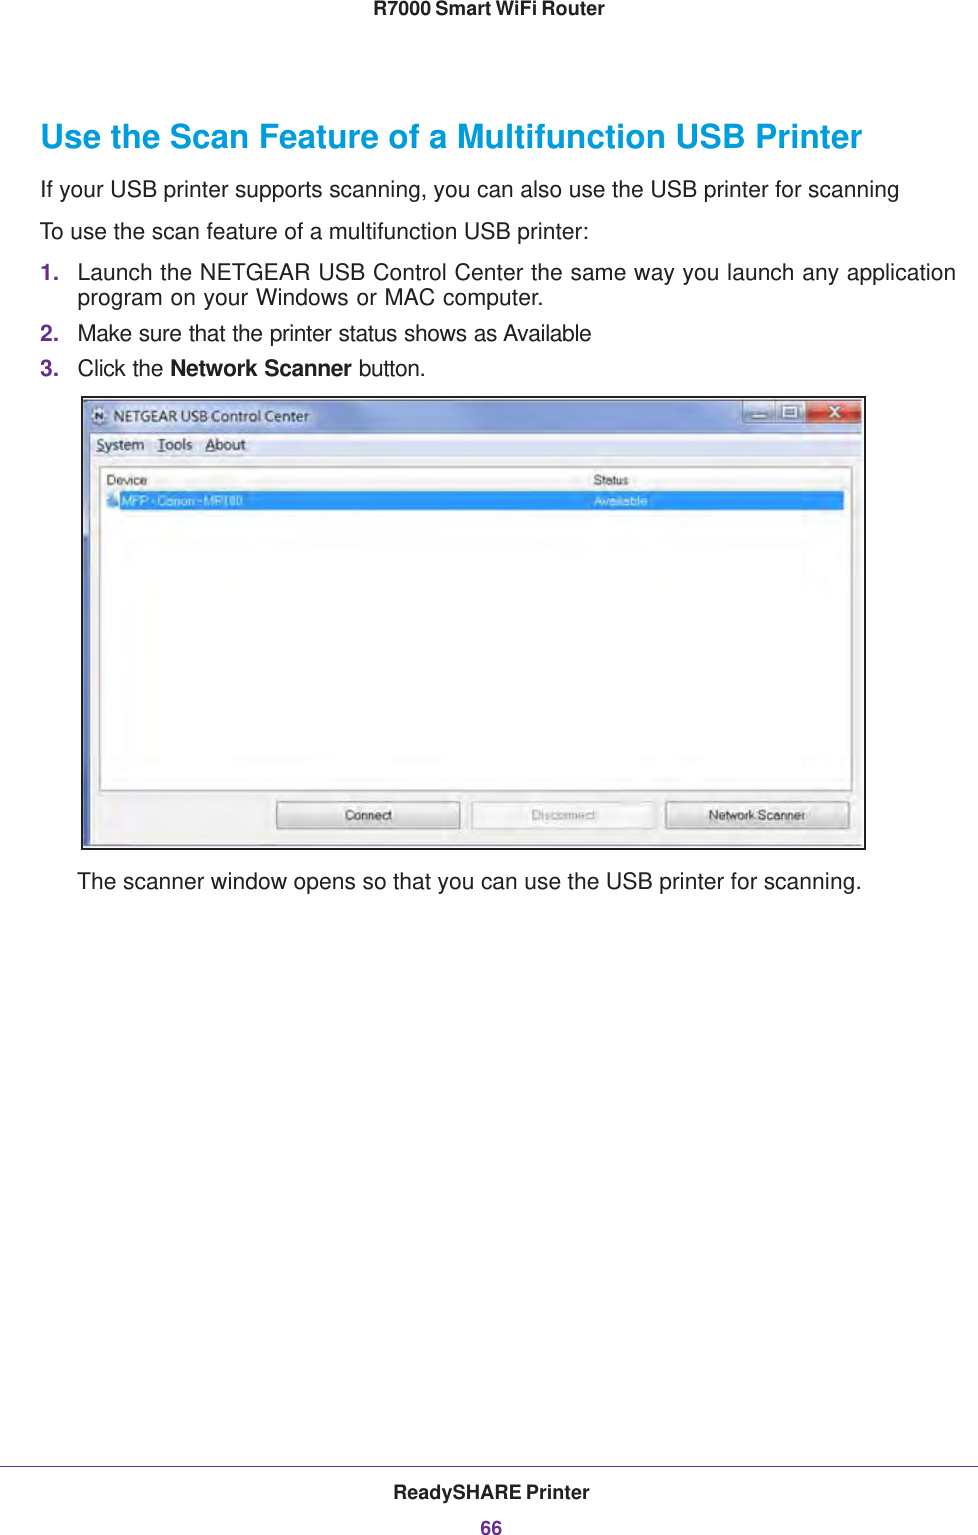
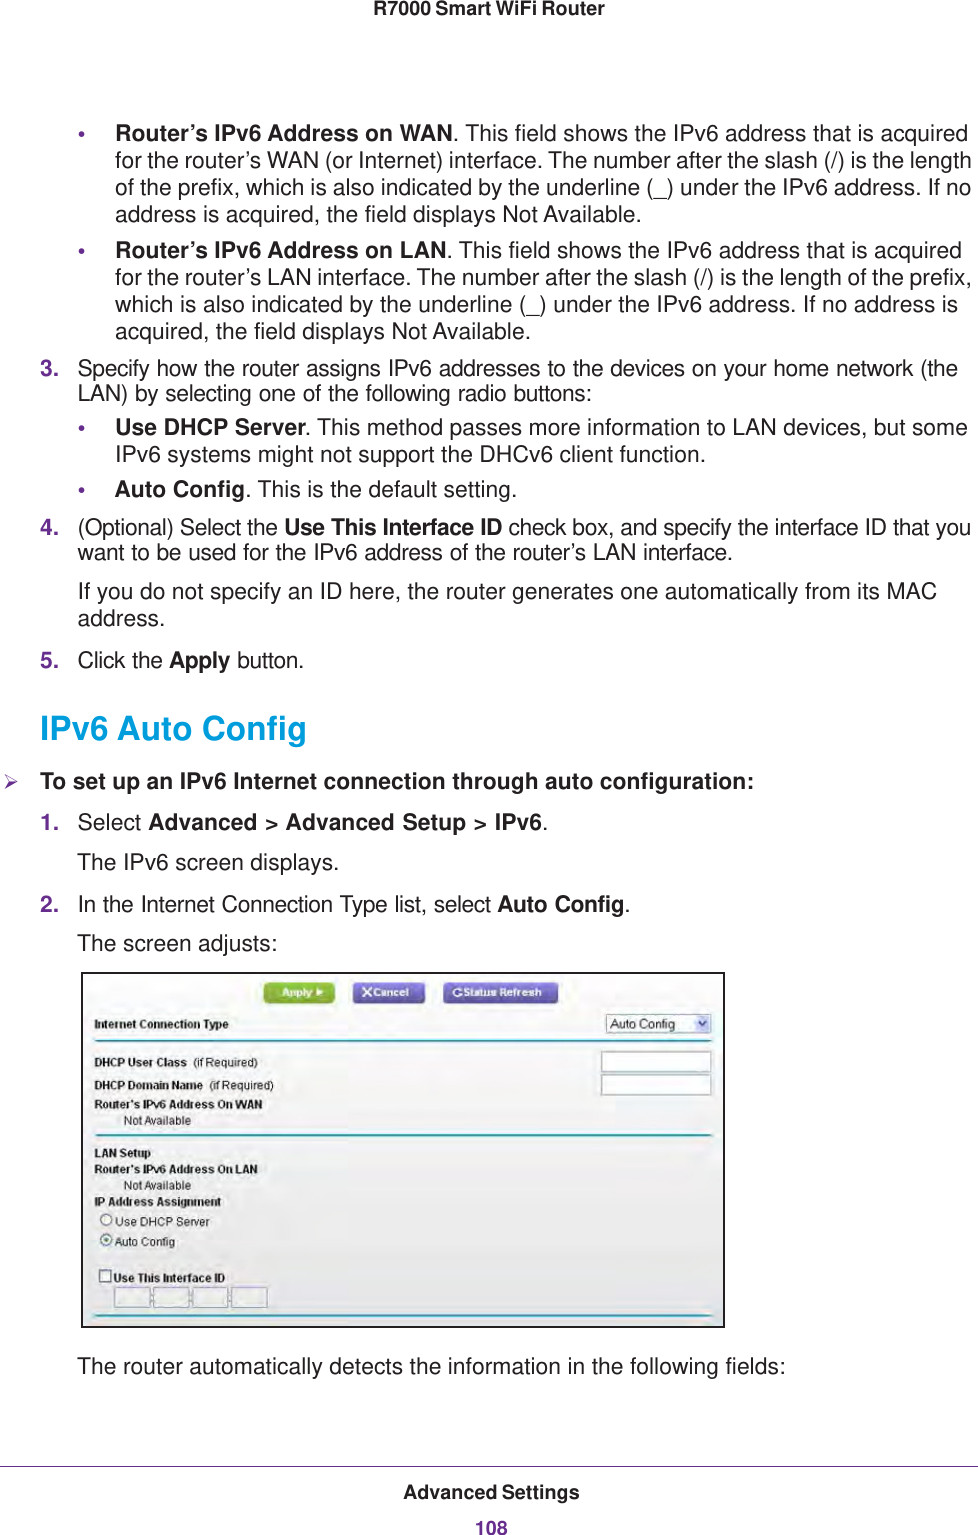
>
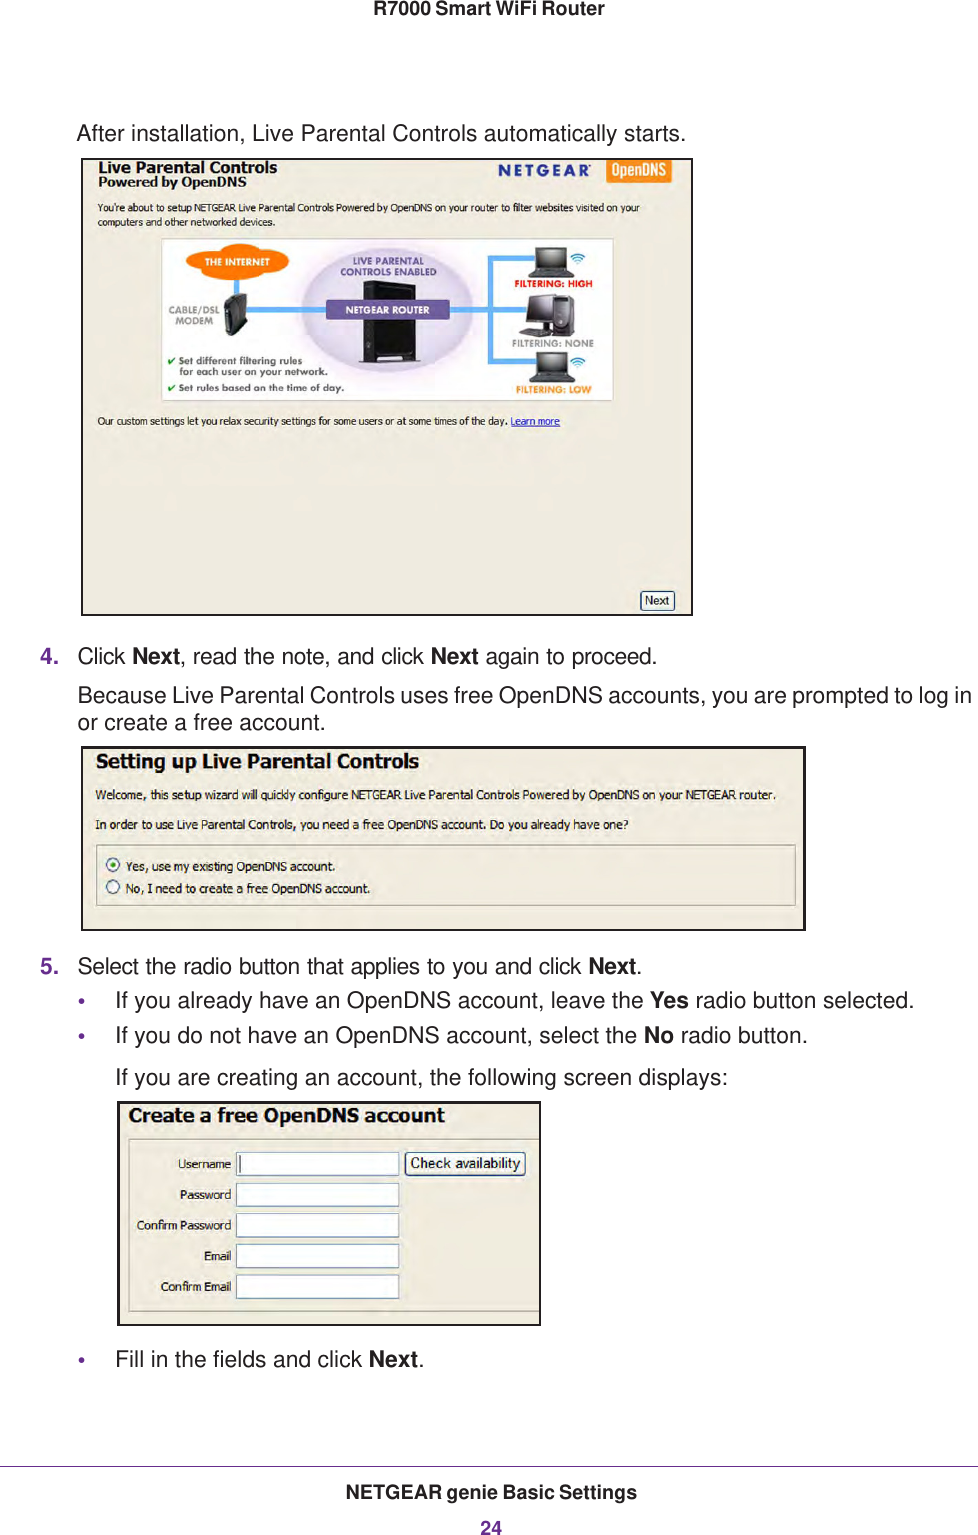
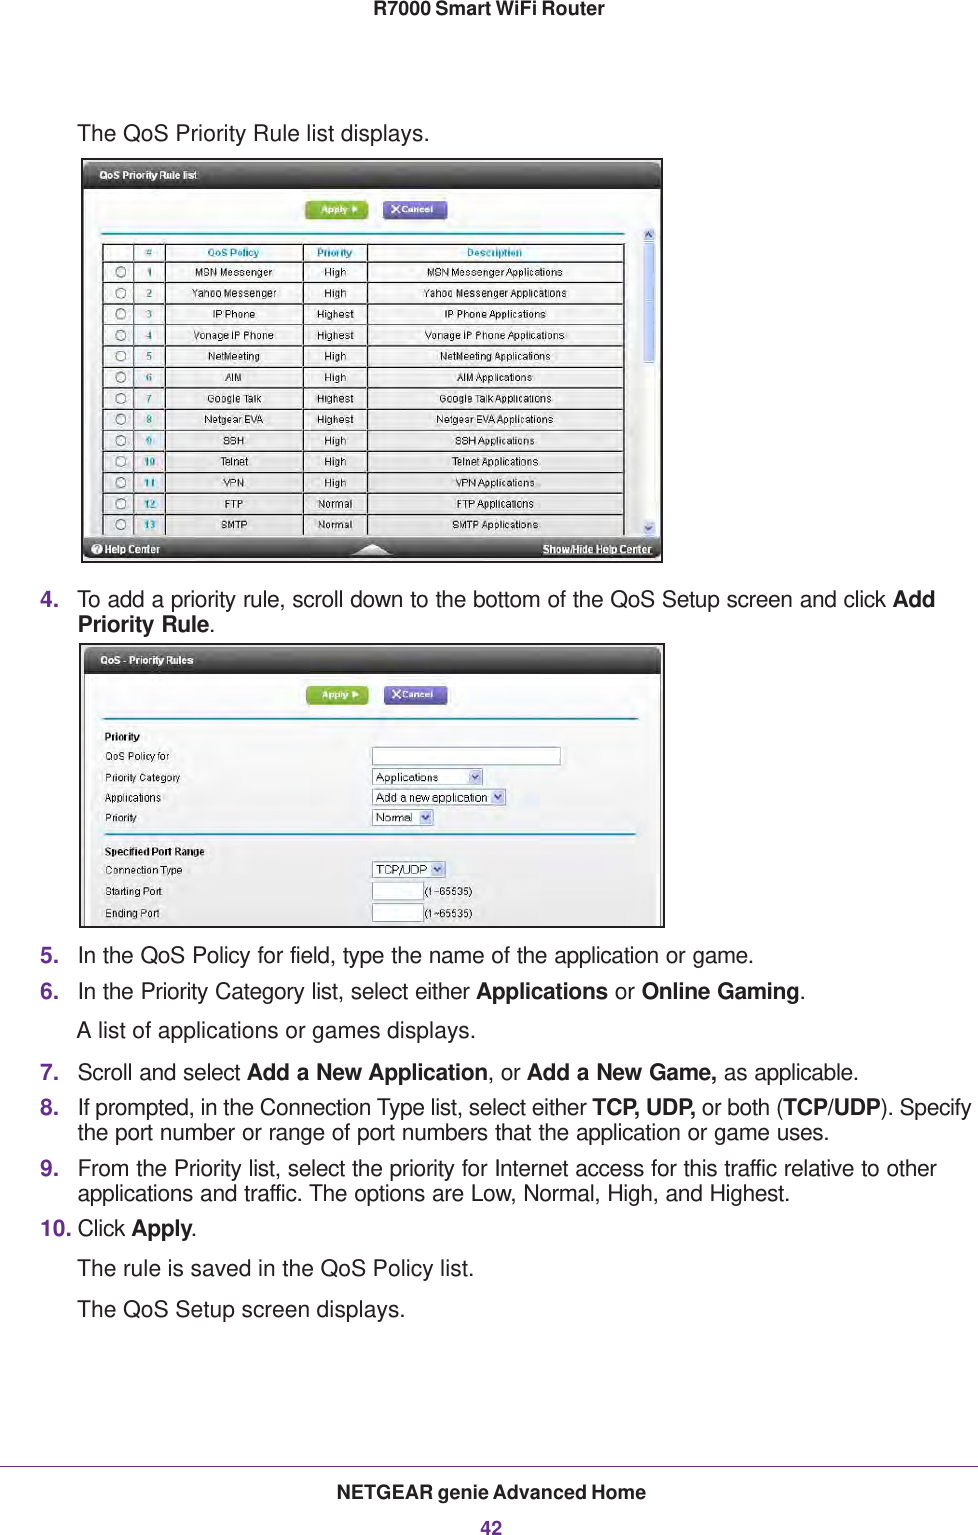
Netgear orporated
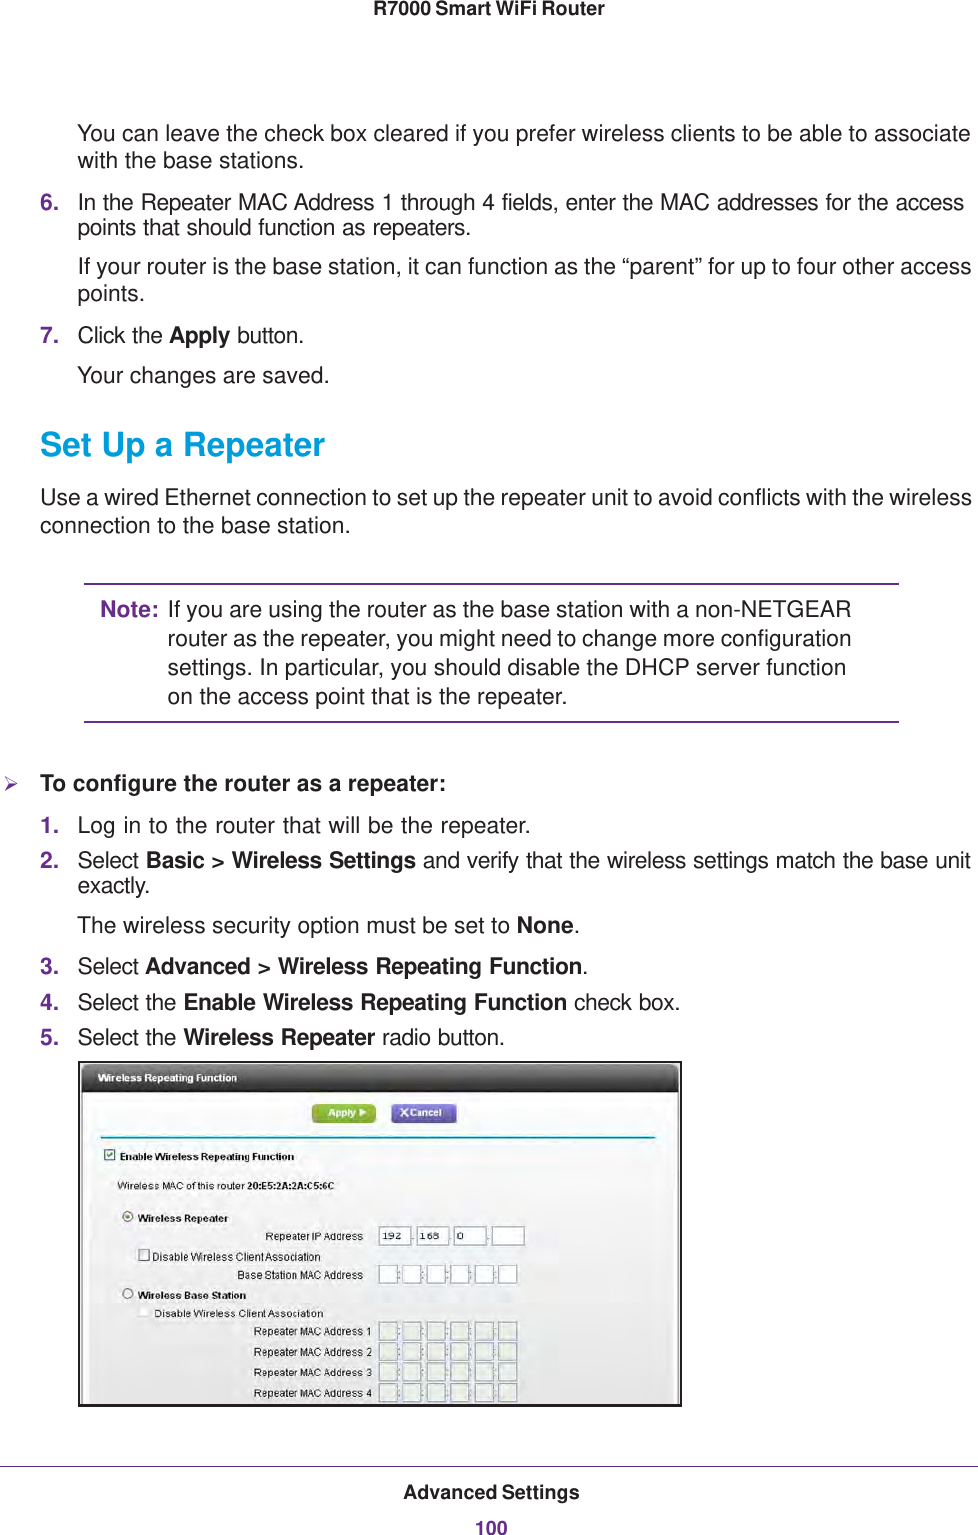
>
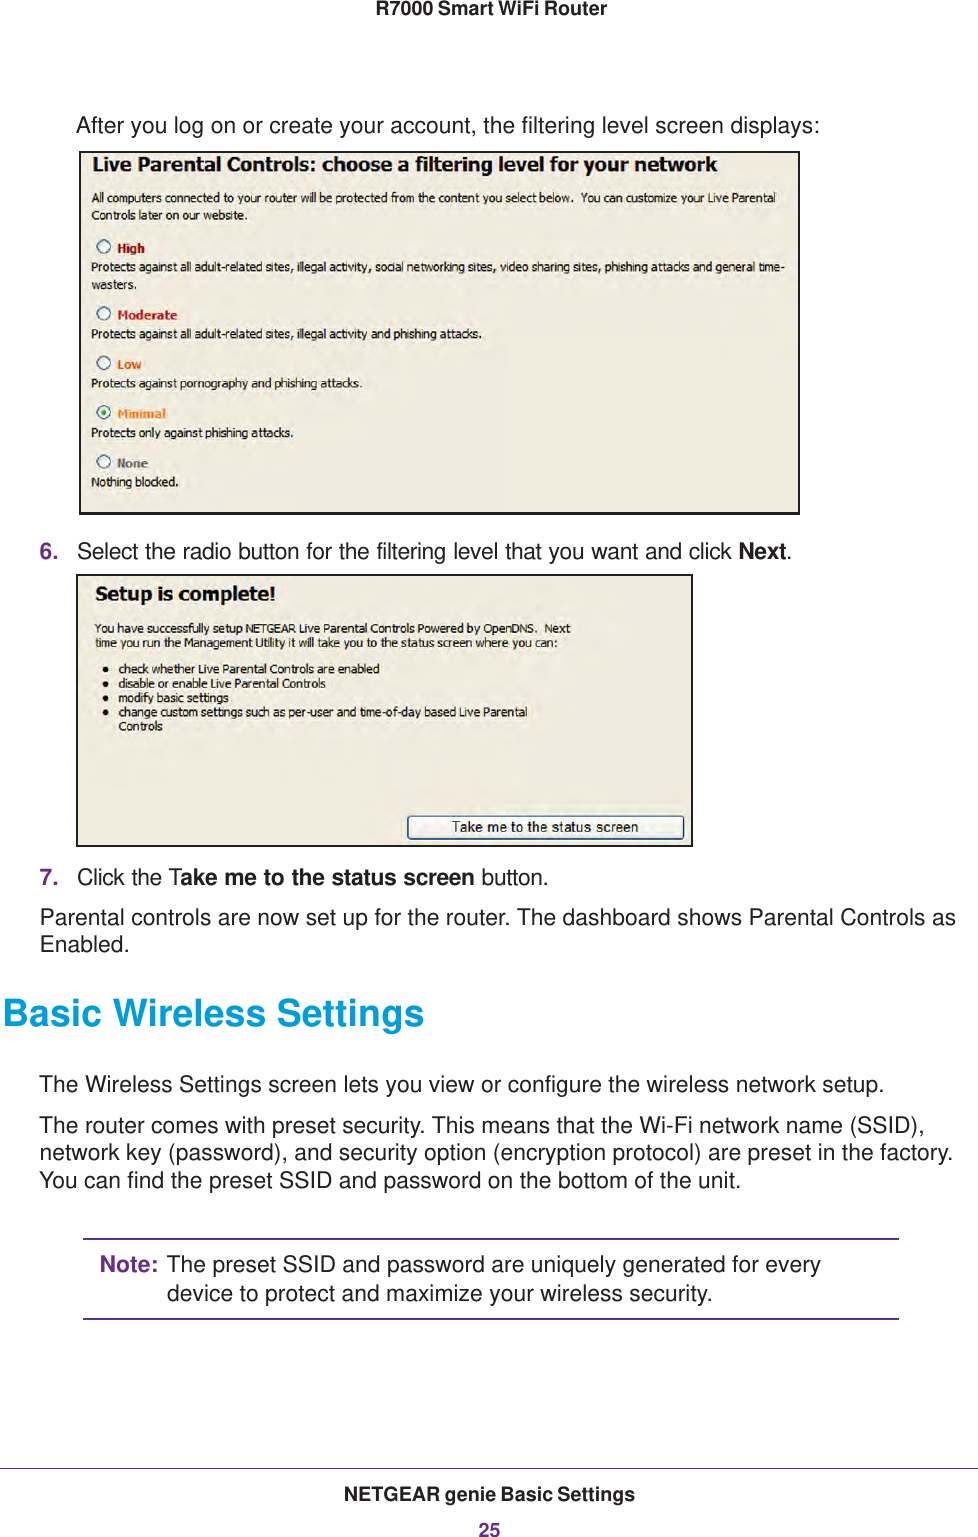
13200233 User Manual
>
User Manual
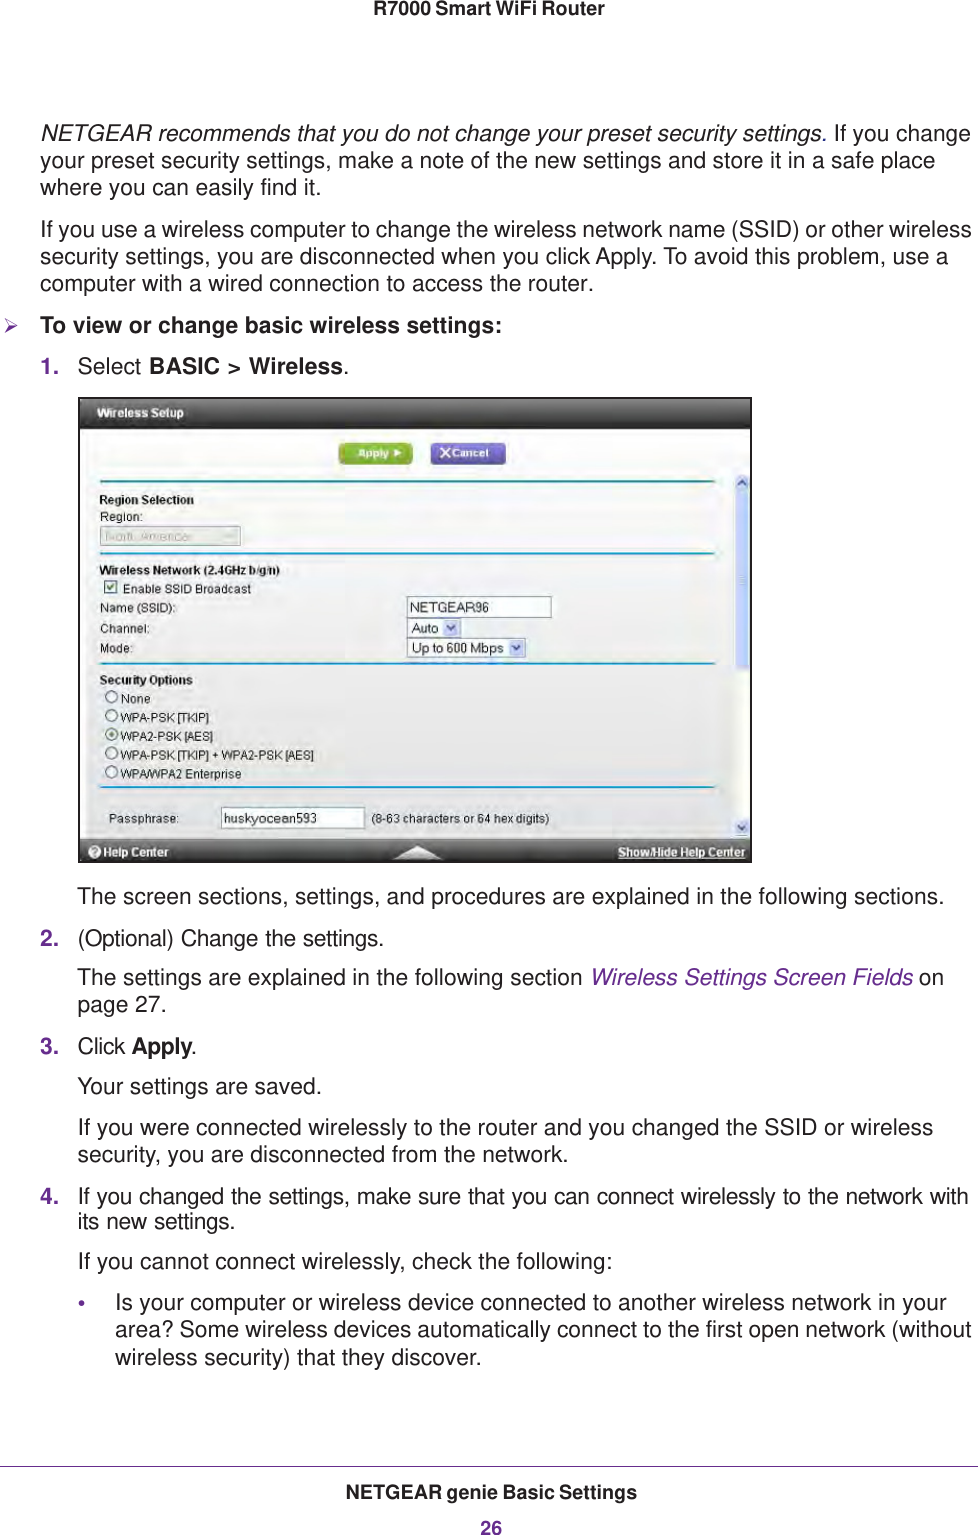
Contents
1.
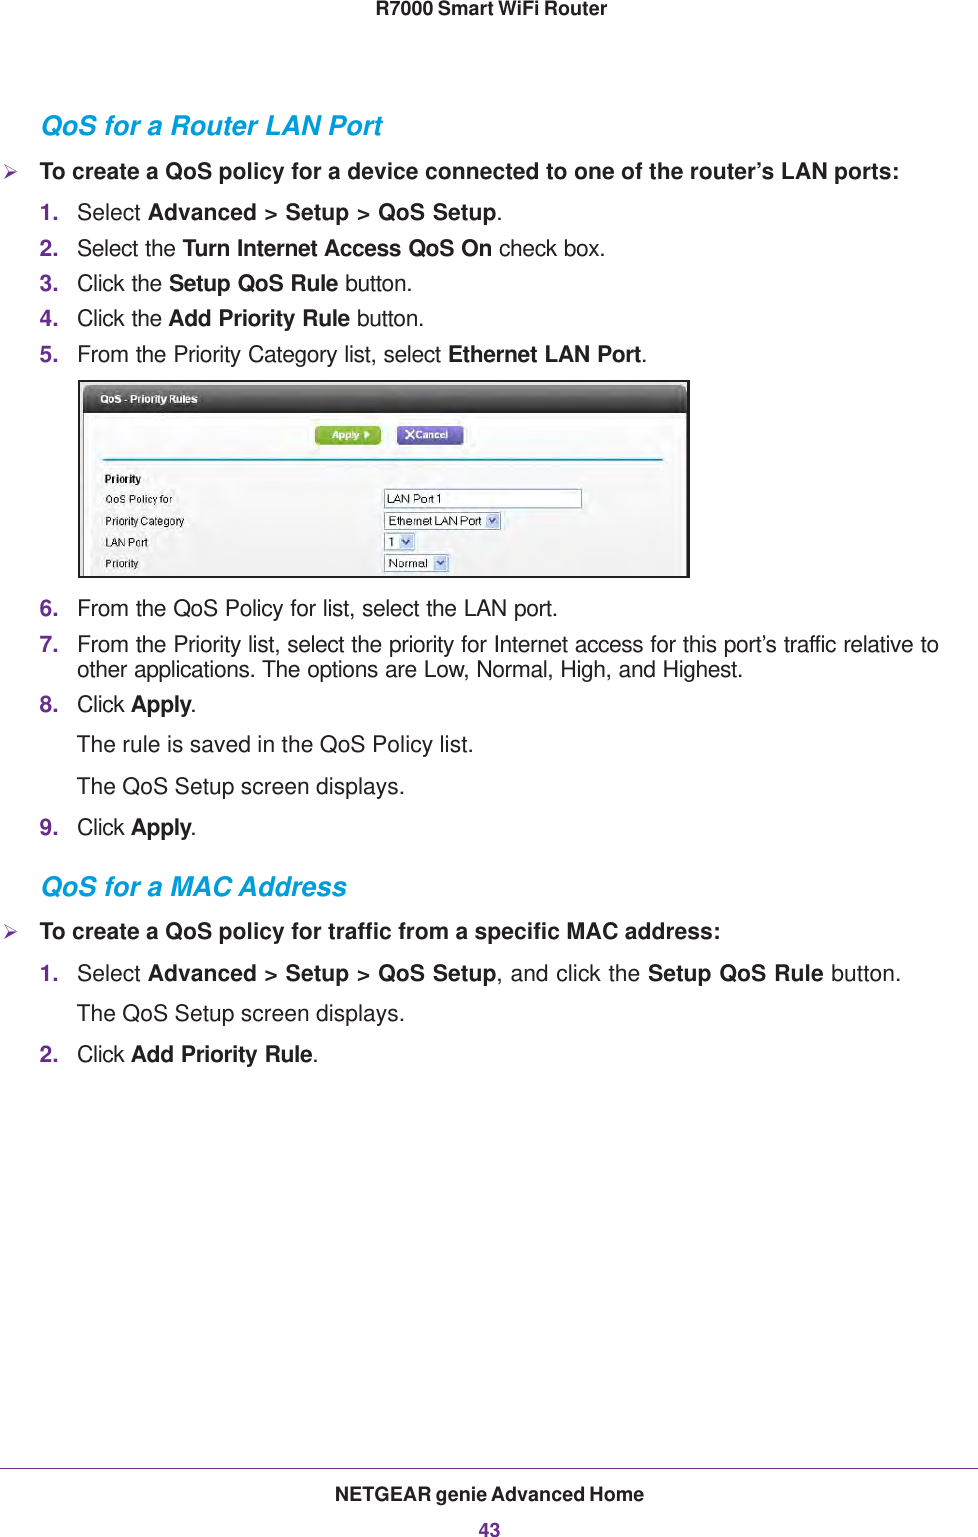
User Manual
2.
User Manual Part 2
3.
User Manual Part 1
User Manual
Navigation menu
Upload a User Manual
Namespaces
Wiki Guide
HTML
PDF
Info
Views
User Manual
Discussion / Help
Navigation