Neurio Technology ULC N1LD Communications Module User Manual Installation Guide
Energy Aware Technology Inc Communications Module Installation Guide
UserManual.wiki
>
Neurio Technology ULC
>
N1LD User Manual
>
Installation Guide
Contents
1.
User Manual
2.
Installation Guide
3.
Installation Guide - User Manual
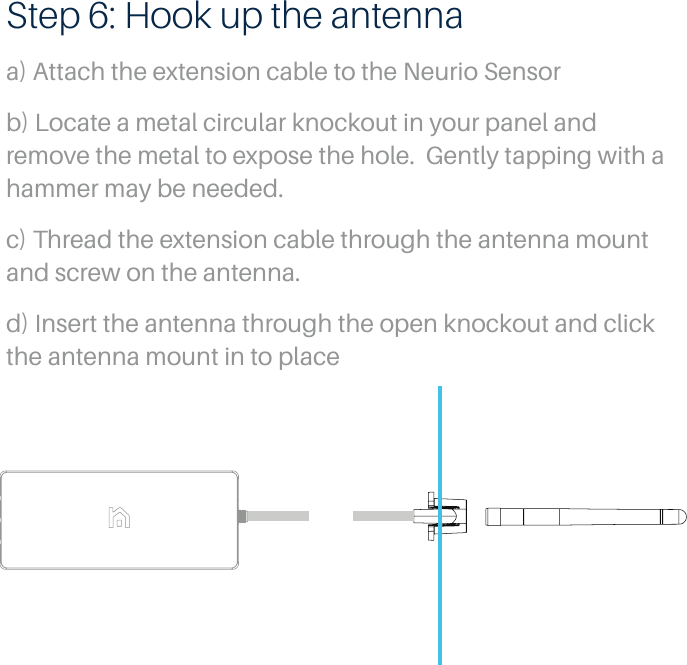
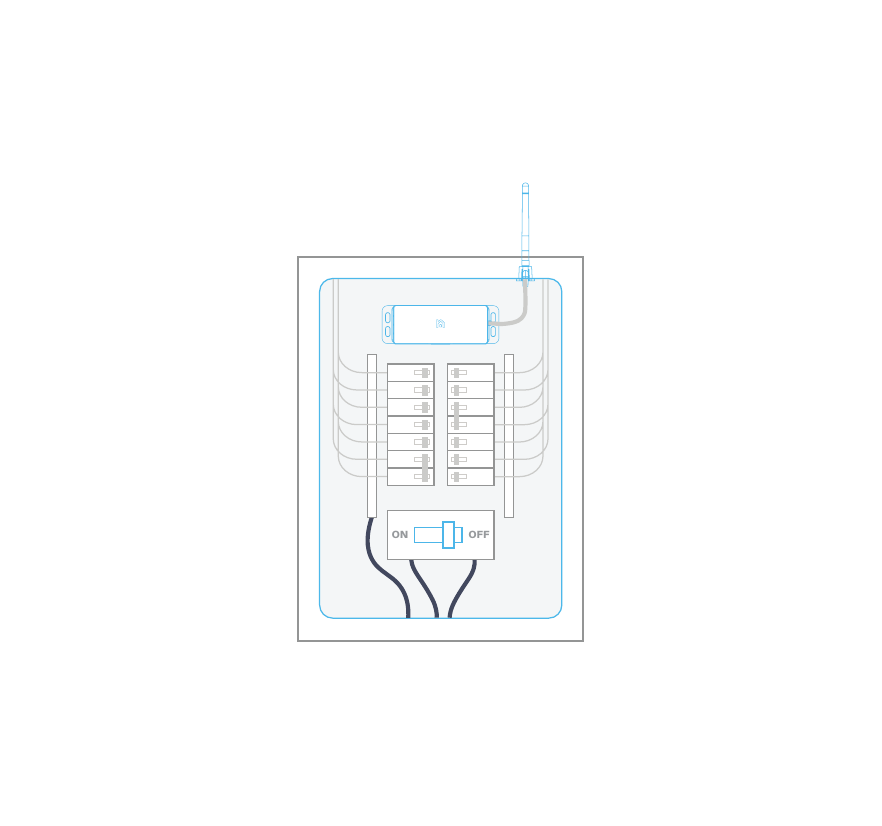
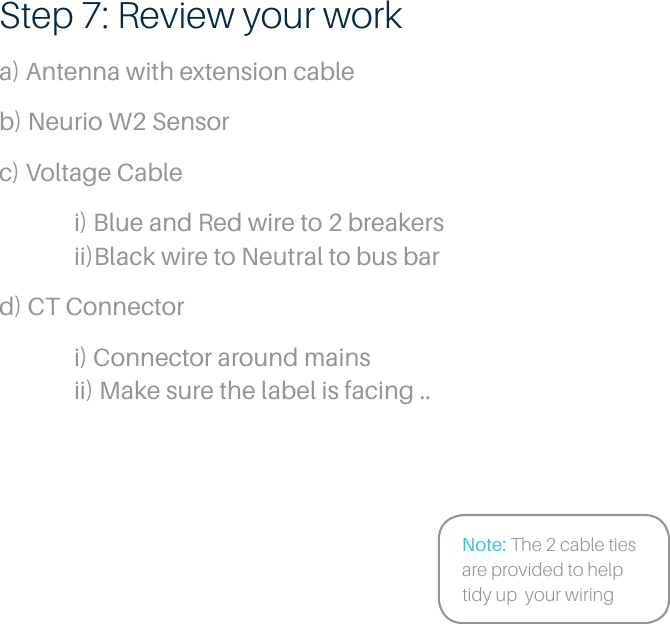
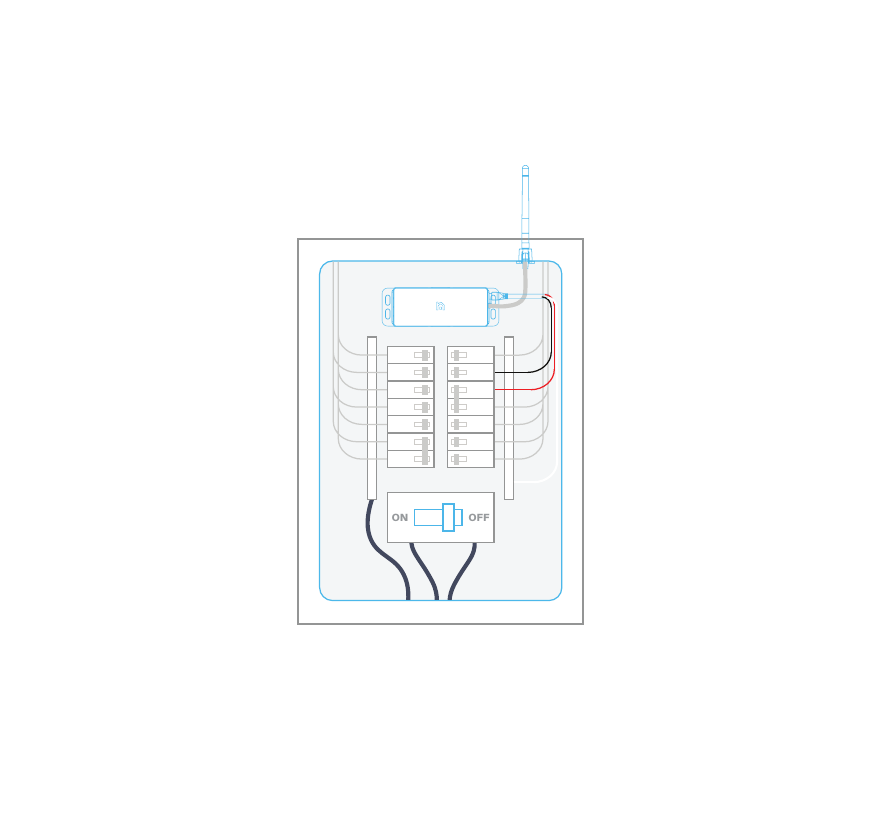
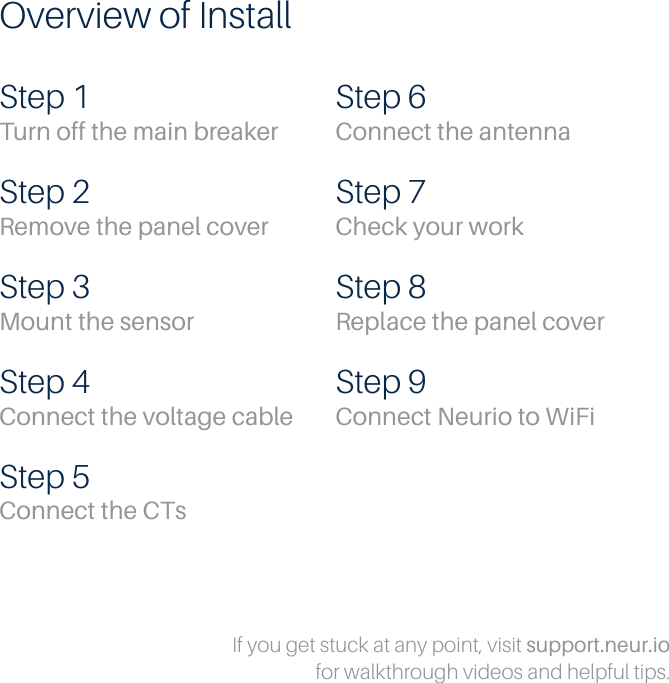
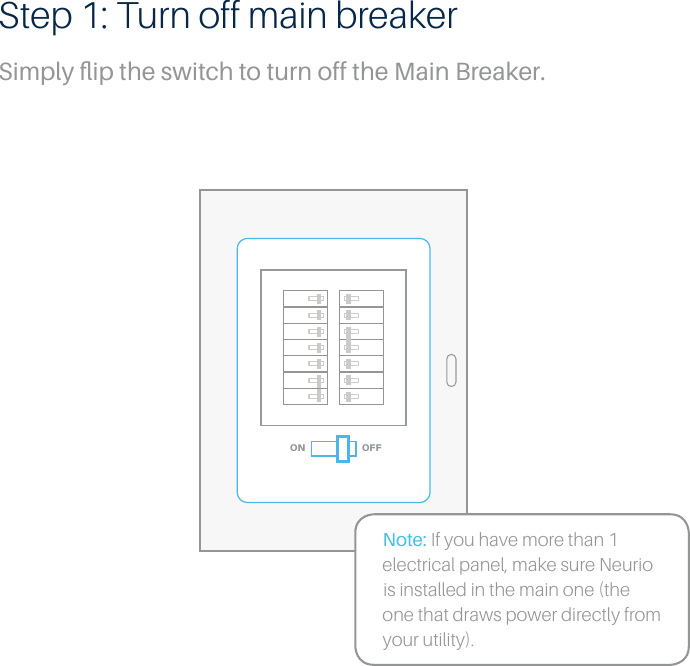
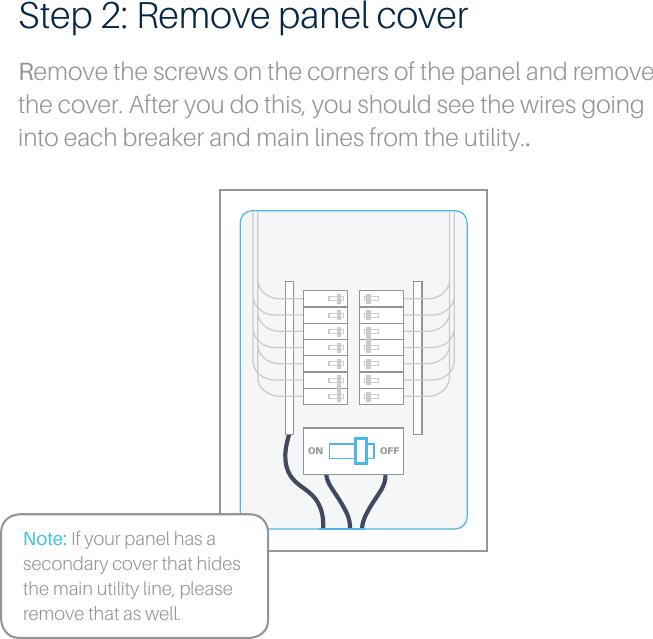
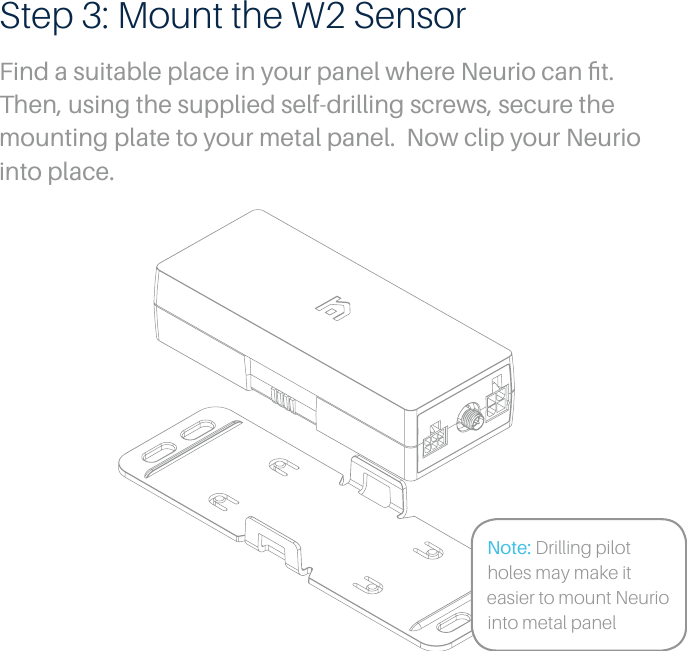
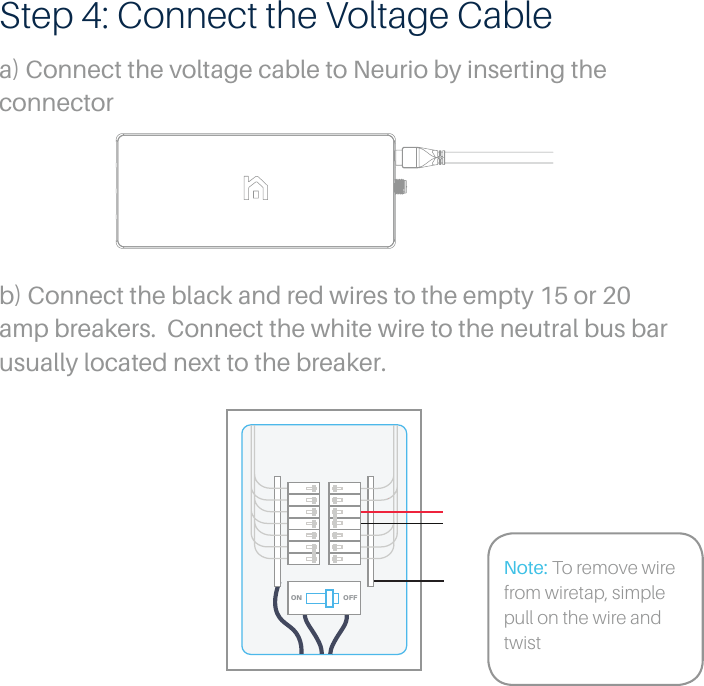
Installation Guide
Navigation menu
Upload a User Manual
Namespaces
Wiki Guide
HTML
PDF
Info
Views
User Manual
Discussion / Help
Navigation

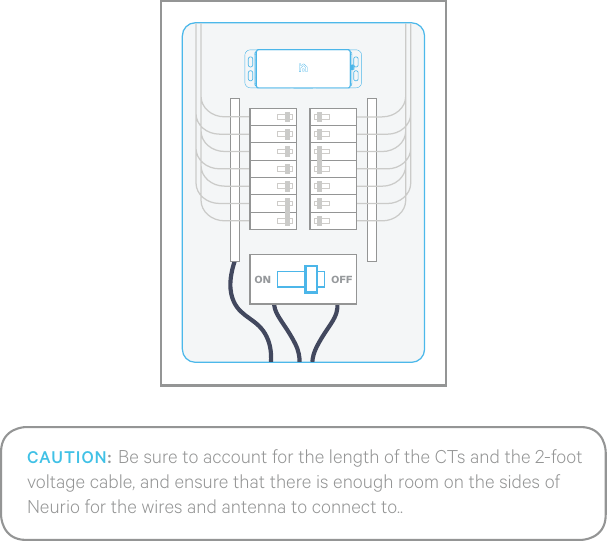

![c) Insert the CT connectors to the ports labeled [1] and [2].OFFONb) Loop the CT around each of the main power lines. Pay close attention to the label. The direction it faces is very important.](https://usermanual.wiki/Neurio-Technology-ULC/N1LD.Installation-Guide/User-Guide-4177101-Page-13.png)