Nikko Co RP7200H Radio Controlled Toy (Receiver) User Manual 060009 Hummer Hip Hop ST39710 eng
Nikko Co Ltd Radio Controlled Toy (Receiver) 060009 Hummer Hip Hop ST39710 eng
Nikko Co >
Users Manual
KMNA-060009
NM0-010605
Do not charge Battery Pack immediately after use. Wait until it has cooled before charging.
Avoid short circuits. Short circuits will cause overheating, burning of the cords and other damages to the
battery Pack and Charger.
The Ni-Cd Battery Charger should be used for charging one Battery Pack. Do not use the Charger for
charging other type of batteries and battery packs
Do not use the Charger as a direct current outlet for other electrical appliances or machines.
Make sure that the Battery Pack and Charger are kept out of the hands of infants and small children while
charging.
Do not charge near fires, where the temperature is extremely high, or where it is wet or damp.
The charger will become slightly heated while charging. Allow sufficient free space around the Charger.
If the power of the battery pack is weak in spite of proper charging, the batteries may be worn out from
repeated use. Replace it with a new Ni-Cd battery pack.
Dispose of use Ni-Cd battery packs correctly.
Disconnect the supply before making or breaking connections to the battery.
Only use batteries or accumulators of the recommended type or a similar type.
WARNING AGAINST RECHARGING NON-RECHARGEABLE BATTERIES.
Please use this battery charger only for the charge of the rechargeable battery pack.
The Ni-Cd battery pack should be charged under the supervision of an adult.
CAUTION
Charger
Household
outlet
Ni-Cd battery pack
Press
Charger’s
connector
Battery’s
Connector
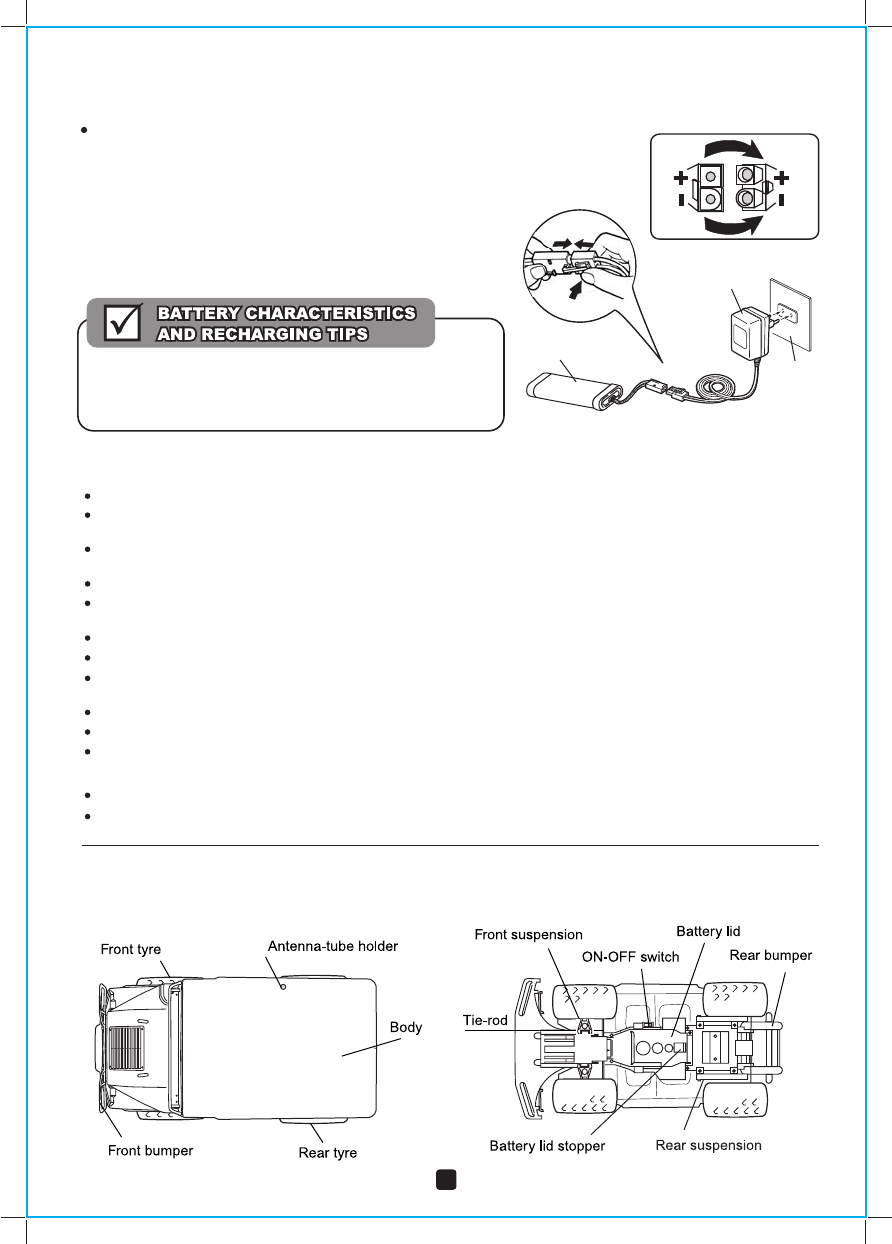
RECHARGING
"WARNING! USE UNDER THE DIRECT SUPERVISION OF AN ADULT."
The newly purchased Ni-Cd pack is not charged.
Charge before operating.
1. Join the connector of the charger to the connector of
the Ni-Cd battery pack.
2. Plug the charger into an electrical outlet.
3. Recharge for about 4-5 hours.
4. When the recharging is over, plug out the charger
from the electrical outlet and detach the connectors.
When playing for the first time after purchase, or after a long
interval, the battery power may be weak. Even after recharging,
the playing time can be relatively short. The battery will gradually
regain power after 2 or 3 repetitions of usage and recharging.
BOTTOM VIEW
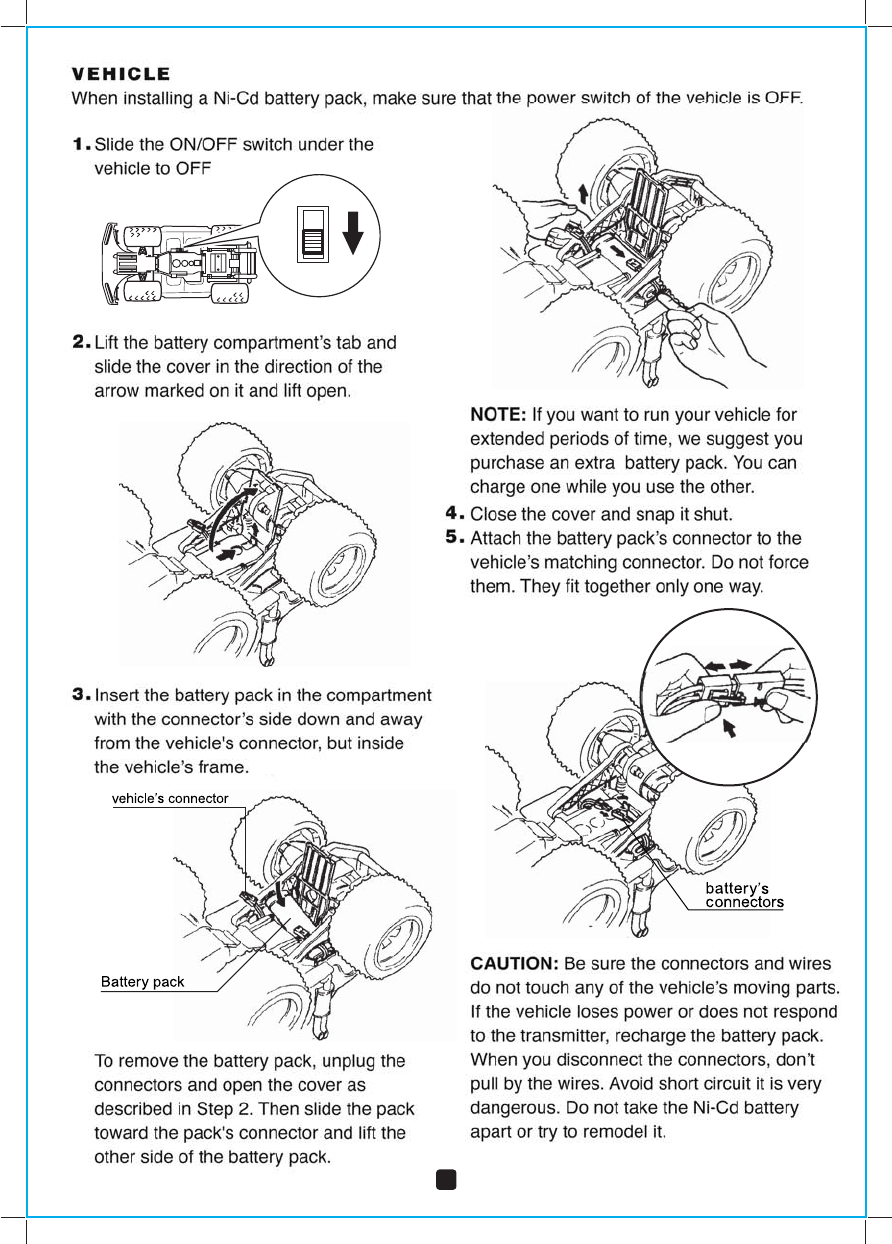
VEHICLE
TOP VIEW
2
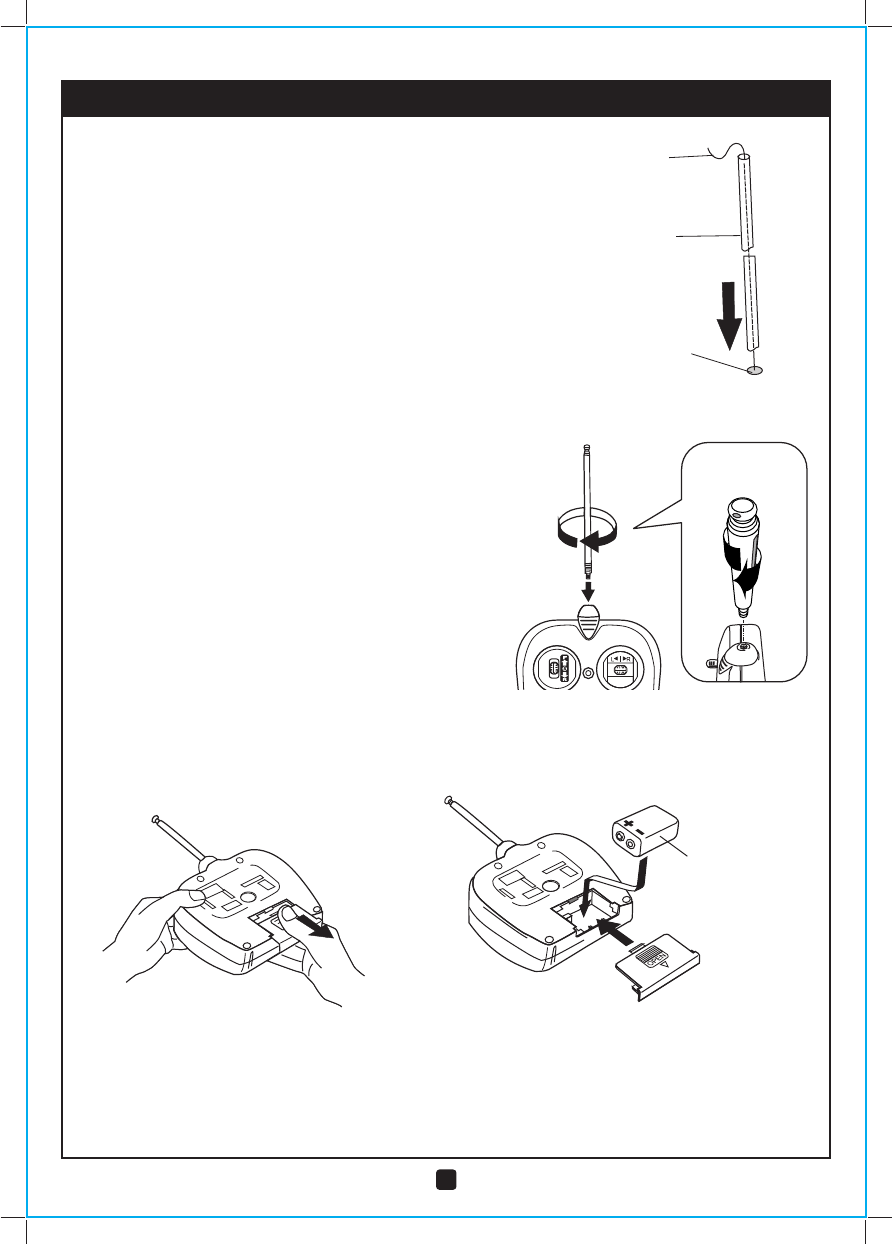
Pass the antenna wire through the antenna tube,
then insert the tube into the antenna tube holder.
If the antenna tube cannot be successfully inserted
into the antenna tube holder, try holding the root of
the antenna wire with fingers of one hand and
extending the wire with fingers of the other hand.
1. ATTACHING ANTENNA TUBE
* Note: Be careful not to pull antenna wire too strong.
PREPARATION FOR STARTING OPERATION
2. INSTALLING TRANSMITTER ANTENNA
Place the transmitter antenna into the antenna
holder to screw it in clock-wise.
Do not extend the antenna when installing. It’s
dangerous.
If the antenna is not screwed in securely, the
vehicle may move erratically. Screw the antenna
securely.
Transmitter
antenna
3. INSTALLING THE BATTERIES
TRANSMITTER
To remove the battery lid, press the
point marked “OPEN” and pull the lid
downward.
Install battery make sure that (+) and (-) poles
are positioned properly.
* Dispose the used batteries separately from
other trash.
One 9 volt
(006P) battery
Antenna wire
Antenna tube
Antenna tube holder
3
4
ON
OFF
(1)
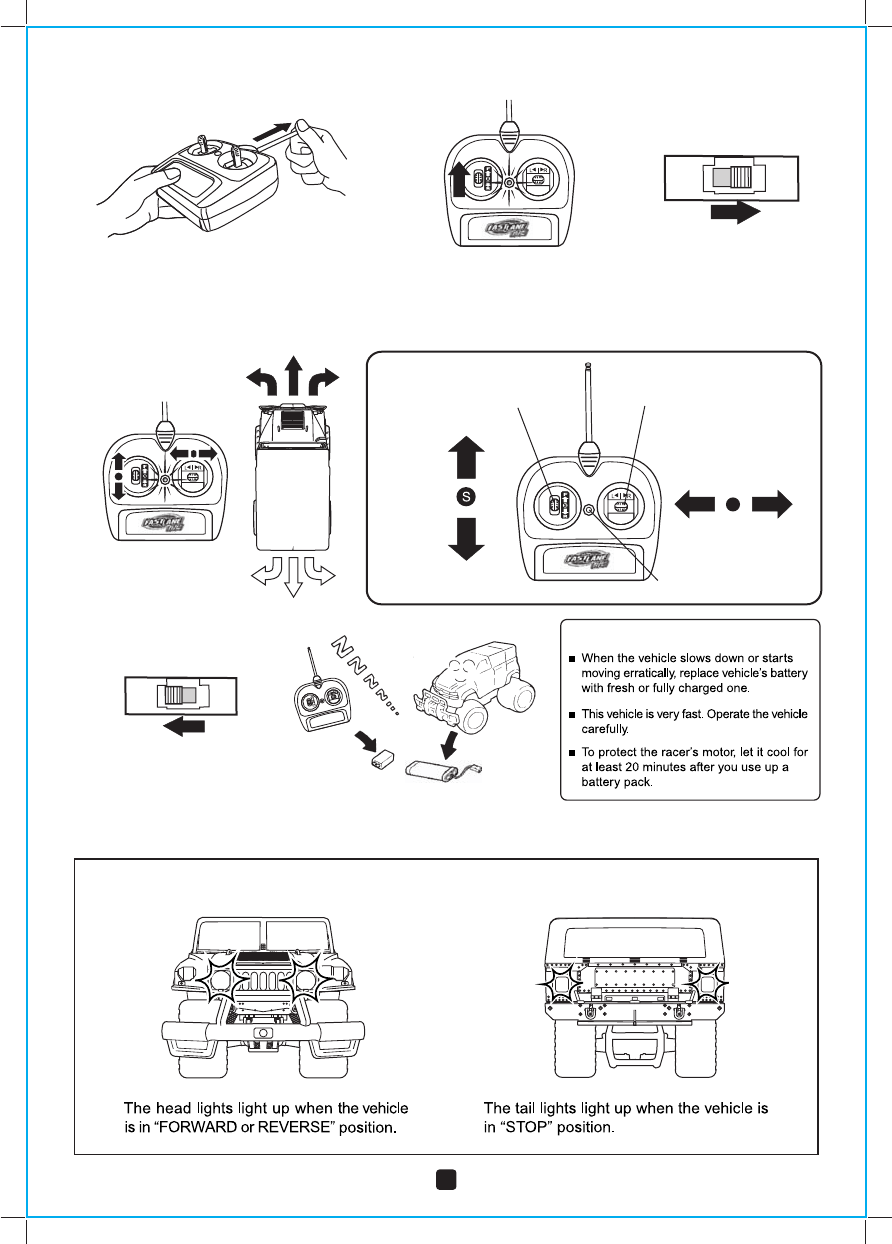
USING THE CONTROLLER
(5) Turn “OFF” the vehicle.
Steering
control stick
Forward / Reverse
control stick
Red LED
power indicator
LEFT / STRAIGHT / RIGHT
FORWARD
STOP
(NEUTRAL)
REVERSE
OFF ON
(4) Start operating the vehicle.
OFF ON
5
ADJUSTING WORKING LIGHT FUNCTION
CAUTION:
Extend transmitter antenna to its
full length. The vehicle can be
controlled from a long distance
by holding the transmitter higher
with the antenna straight up.
(2) (3) Turn “ON” the vehicle.
(6) Remove all the batteries from the vehicle and the transmitter.
Turn on the transmitter
by operating the control
stick. (The power indicator
will light up.)
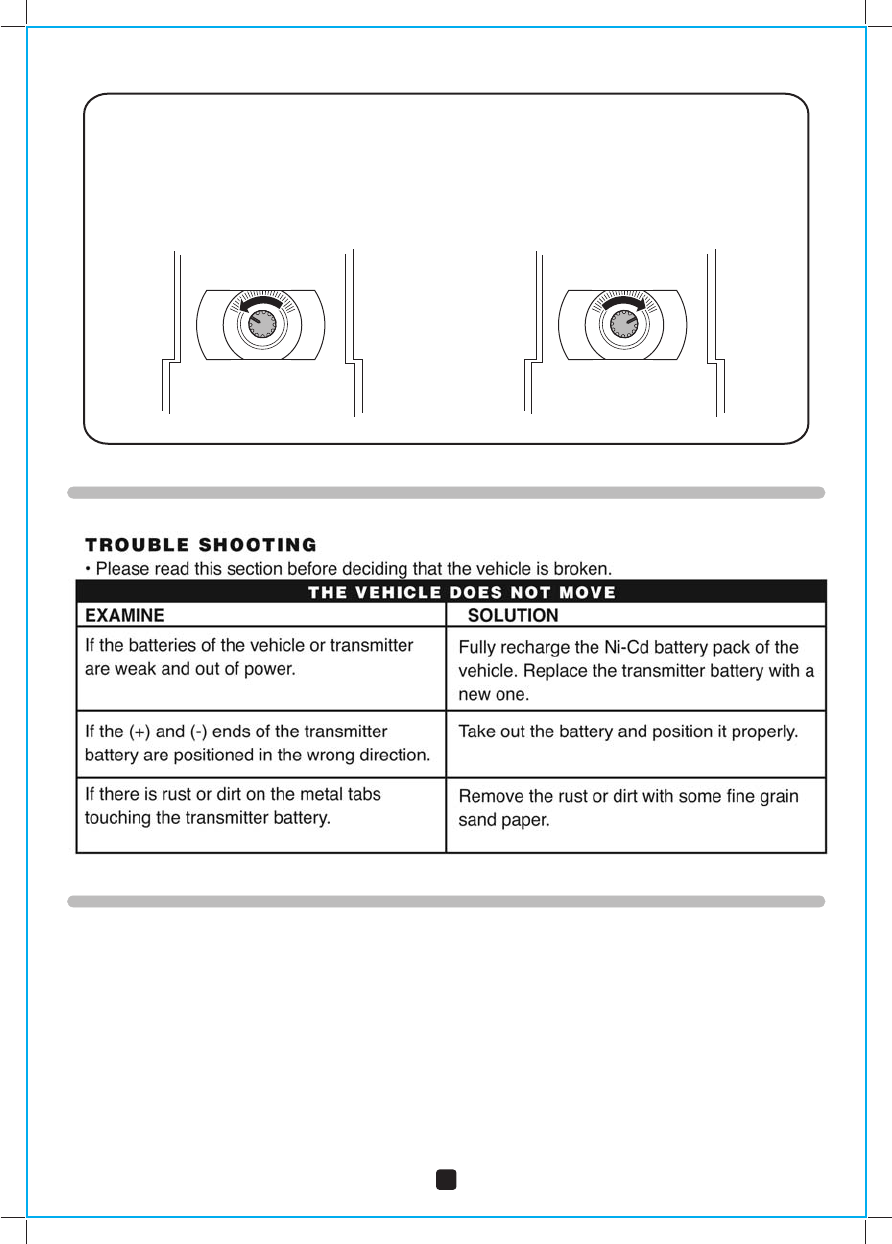
Adjust the steering alignment when the vehicle does not run straight forward.
TO ADJUST STEERING ALIGNMENT
Turn the steering alignment lever towards
“L” if the vehicle runs towards right. Turn the steering alignment lever towards
“R” if the vehicle runs towards left.
L RL R
6
7
8