Nikon 1150EB Digital Camera User Manual TempConfidential COOLPIX S6600 UserMan part2
Nikon Corporation Digital Camera TempConfidential COOLPIX S6600 UserMan part2
Nikon >
Contents
- 1. TempConfidential_(COOLPIX S6600) UserMan_part1
- 2. TempConfidential_(COOLPIX S6600) UserMan_part2
- 3. TempConfidential_(COOLPIX S6600) UserMan_part3
TempConfidential_(COOLPIX S6600) UserMan_part2
69
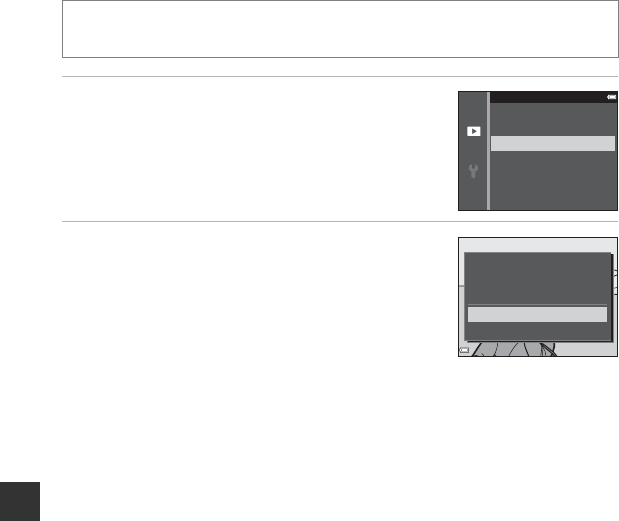
Playback Features
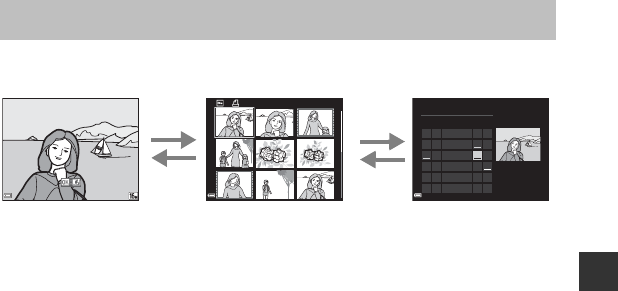
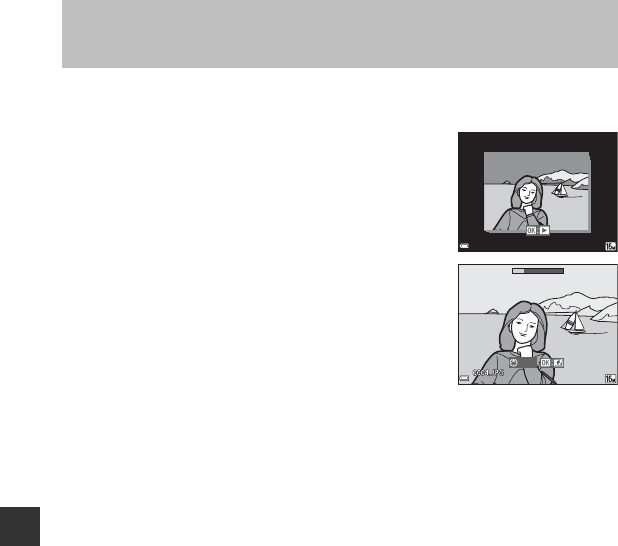
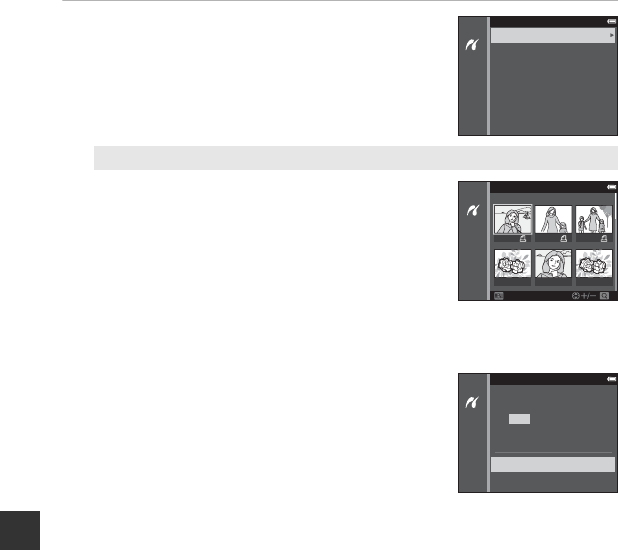
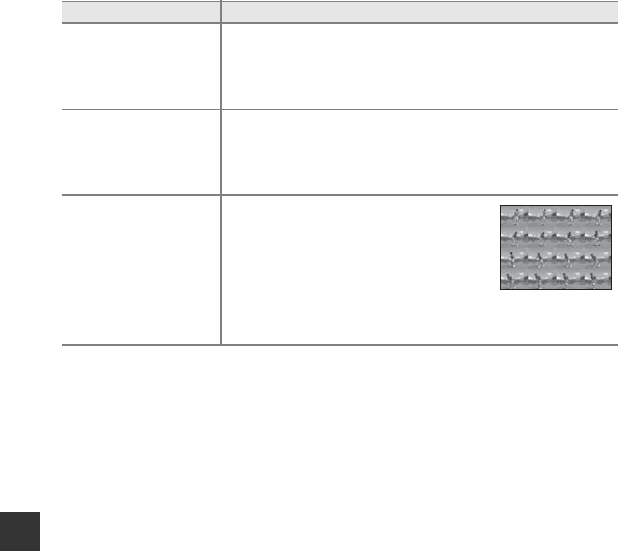
Moving the zoom control toward f (h) in full-frame playback mode (A28) displays
images as thumbnails.
•You can change the number of thumbnails displayed by moving the zoom control toward
f(h) or g(i).
•While using thumbnail playback mode, press the multi selector HIJK to select an
image and then press the k button to display that image in full-frame playback mode.
•While using calendar display mode, press HIJK to select a date and then press the k
button to display the images captured on that day.
BCalendar Display
Images captured when the camera’s date is not set are treated as images captured on January 1,
2013.
Thumbnail Playback, Calendar Display
1
/
20
1
/
20
15
/
11
/
2013 15:30
15
/
11
/
2013 15:30
0004.
JPG
0004.
JPG
1
/
20
1
/
20
4
/
4
4
/
4
24
Su M Tu W Th F Sa
2013 11
13 14 15 1610 11 12
20 21 22 2317 18 19
27
28 29 3025 26
6789345
12
Thumbnail PlaybackFull-frame Playback Calendar Display
g
(i)
f
(h)
g
(i)
f
(h)

70
Playback Features
When viewing images in full-frame playback mode or thumbnail playback mode, you can
configure the menu operations listed below by pressing the d button (A4).
Functions That Can Be Set with the d Button
(Playback Menu)
Option Description A
Quick retouch* Allows you to create retouched copies in which contrast and
saturation have been enhanced. E16
D-Lighting* Allows you to create copies with enhanced brightness and
contrast, brightening dark portions of an image. E16
Red-eye correction* Corrects “red-eye” that may occur in images when shooting
with a flash. E17
Glamour retouch* Detects faces in images and retouches the detected faces
glamorously. E18
Print order Allows you to select which images are printed, and how many
copies of each image are printed, prior to printing. E52
Slide show Allows you to view images in an automatic slide show. E56
Protect Protects selected images from accidental deletion. E57
Rotate image Allows you to rotate the displayed image to portrait or
landscape orientation. E59
Small picture* Creates a small copy of images. E20
Voice memo Allows you to use the camera’s microphone to record voice
memos and attach them to images. E60

71
Playback Features
* Edited images are saved as separate files. Some images may not be edited.
Copy Allows you to copy images between the internal memory and a
memory card. E61
Sequence display
options
Allows you to select whether to display only the key picture for a
sequence of images captured continuously or to display the
sequence as individual images.
•When only the key picture is displayed for a sequence, press
the k button to display each image in the sequence. Press
the multi selector H to return to the key picture display.
E63
Choose key picture Allows you to change the key picture for images captured in
sequence. E63
Favorite pictures Allows you to add images to an album.
This option is not displayed in favorite pictures mode. E6
Remove from
favorites
Allows you to remove images from an album.
This option is displayed only in favorite pictures mode. E8
Option Description A
72
Recording and Playing Back Movies
Recording and Playing Back Movies
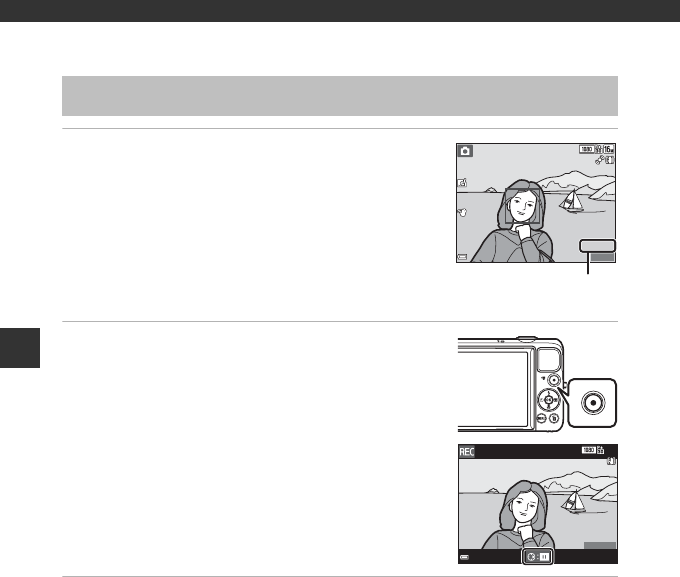
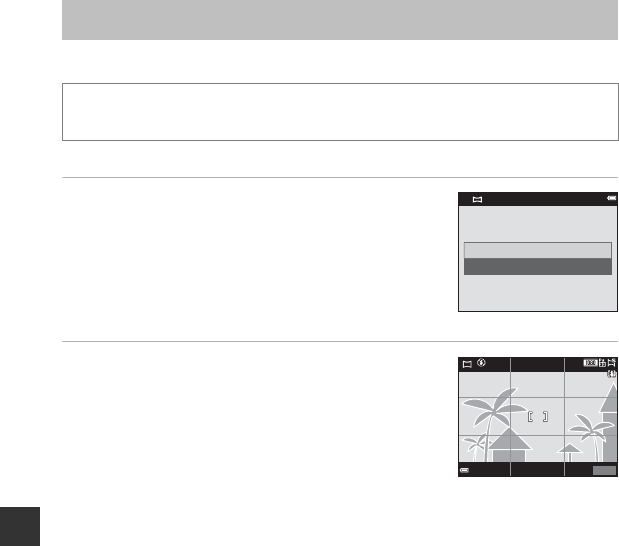
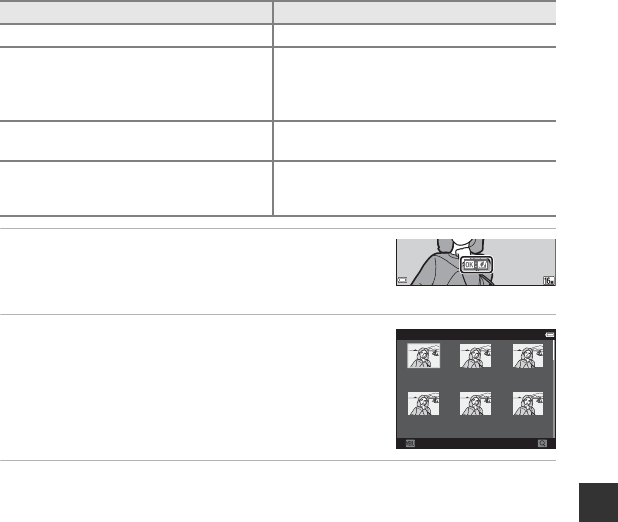
1Display the shooting screen.
•Check the remaining amount of movie recording time.
•If Photo info in the Monitor settings (A78) in the setup
menu is set to Movie frame+auto info, the area that will
be visible in the movie can be confirmed before movie
recording starts.
2Press the b (e movie-record) button to start
movie recording.
•The camera focuses on the subject in the center of the
frame.
•Press the multi selector K to pause recording, and press K
again to resume recording (except when p iFrame 720/
30p (p iFrame 720/25p) or an HS movie option is
selected in Movie options). Recording automatically ends if
it remains paused for about five minutes.
3Press the b (e movie-record) button again to end recording.
Recording Movies
25
m
0s
25
m
0s
880
880
Movie recording time
remaining
14
m
3
0s
14
m
3
0s

73
Recording and Playing Back Movies
BMaximum Movie Length
Individual movie files cannot exceed 4 GB in size or 29 minutes in length, even when there is
sufficient free space on the memory card for longer recording.
•The maximum movie length for a single movie is displayed on the shooting screen.
•Recording may end before either limit is reached if camera temperature becomes elevated.
•The actual movie length may vary depending on the movie content, subject movement, or type of
memory card.
BNotes About Saving Images and Recording Movies
The indicator showing the number of exposures remaining or the indicator showing the maximum
movie length flashes while images are being saved or while a movie is being recorded. Do not open
the battery-chamber/memory card slot cover or remove the battery or memory card while an
indicator is flashing. Doing this could result in loss of data, or in damage to the camera or the
memory card.
BNotes About Movie Recording
•Memory cards with an SD Speed Class rating of 6 or faster are recommended when recording
movies (F22). Movie recording may stop unexpectedly when memory cards with a lower Speed
Class rating are used.
•There may be some degradation in image quality when digital zoom is used.
•The sounds of zoom control operation, zoom, autofocus lens drive movement, vibration
reduction, and aperture operation when brightness changes may be recorded.
•The following phenomena may be seen in the monitor while recording movies. These
phenomena are saved in the recorded movies.
- Banding may occur in images under fluorescent, mercury-vapor, or sodium-vapor lighting.
- Subjects that move quickly from one side of the frame to the other, such as a moving train or car,
may appear skewed.
- The entire movie image may be skewed when the camera is panned.
- Lighting or other bright areas may leave residual images when the camera is moved.
•Depending on the distance to the subject or the amount of zoom applied, subjects with repeating
patterns (fabrics, lattice windows, etc.) may have colored stripes (interference patterns, moire, etc.)
in them during movie recording and playback. This occurs when the pattern in the subject and the
layout of the image sensor interfere with each other; it is not a malfunction.

74
Recording and Playing Back Movies
BCamera Temperature
•The camera may become warm when shooting movies for an extended period of time or when
the camera is used in a hot area.
•If the inside of the camera becomes extremely hot when recording movies, the camera will
automatically stop recording.
The amount of time remaining until the camera stops recording (B10s) is displayed.
After the camera stops recording, it turns itself off.
Leave the camera off until the inside of the camera has cooled.
BNotes About Autofocus
Autofocus may not perform as expected (A66). Should this occur, try the following:
1. Set Autofocus mode in the movie menu to Single AF (default setting) before starting movie
recording.
2. Frame another subject—positioned at the same distance from the camera as the intended
subject—in the center of the frame, press the b (e movie-record) button to start recording, and
then modify the composition.
75
Recording and Playing Back Movies
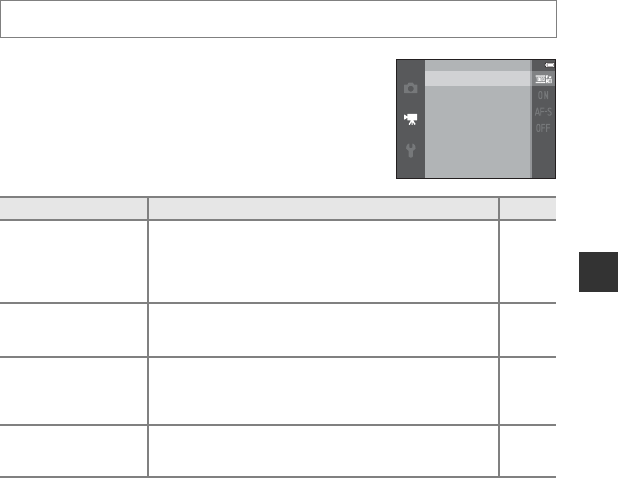
Functions That Can Be Set with the d Button (Movie
Menu)
The settings of the menu options listed below can be
configured.
Enter shooting mode M d button M D menu icon M k button
Option Description A
Movie options
Select the movie type.
Select normal speed to record movies at normal speed, or HS
(high speed) to record movies that play in slow or fast
motion.
•Default setting: d 1080P/30p (R 1080P/25p)
E64
Open with HS footage
Set whether to start recording at high speed or normal speed
when recording HS movies.
•Default setting: On
E68
Autofocus mode
Select either Single AF, which locks focus when movie
recording begins, or Full-time AF, which continues focusing
during movie recording.
•Default setting: Single AF
E68
Wind noise reduction
Set whether or not to reduce wind noise during movie
recording.
•Default setting: Off
E69
Movie options
Open with HS footage
Autofocus mode
Wind noise reduction

76
Recording and Playing Back Movies
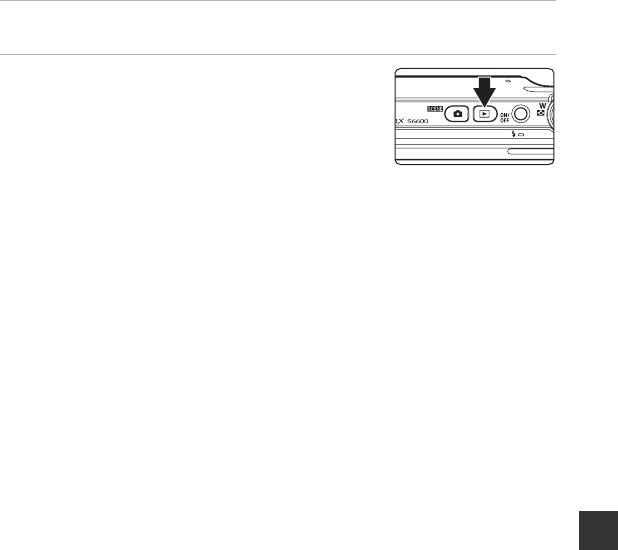
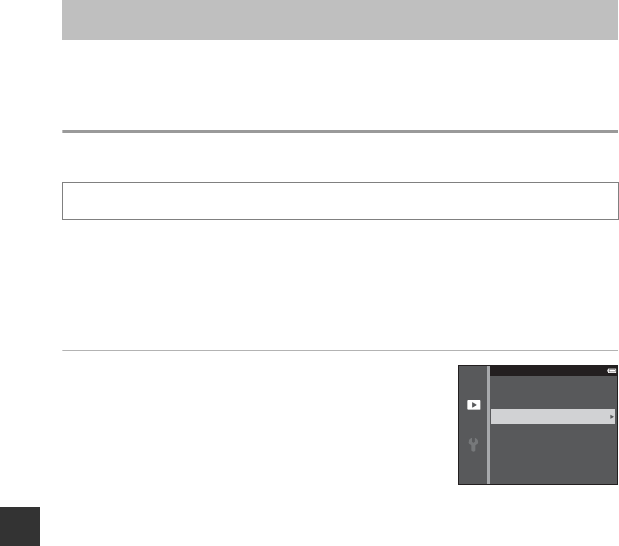
Press the c button to enter playback mode.
Movies are indicated by the movie options icon (A75).
Press the k button to play back movies.
•To adjust the volume, move the zoom control (A1).
Playing Back Movies
15
/
11
/
2013 15:30
15
/
11
/
2013 15:30
0010.
MOV
0010.
MOV
10s
10s
Movie options
4s
Volume indicator

77
Recording and Playing Back Movies
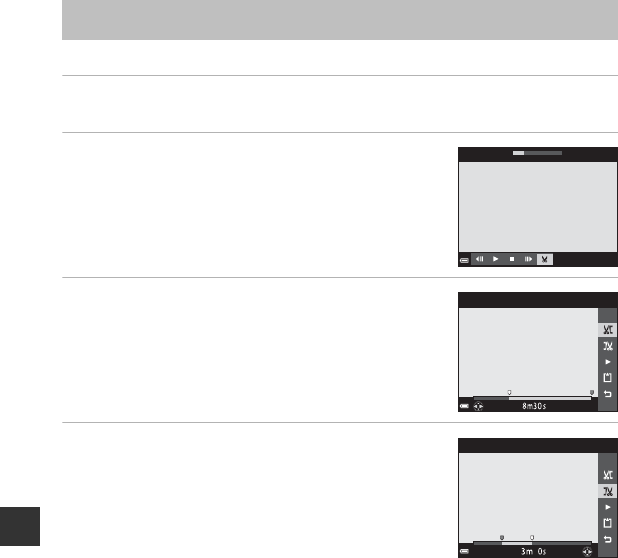
Functions Available During Playback
Playback controls are displayed at the bottom of the monitor.
The operations listed below can be performed by using the
multi selector JK to select a control and then pressing the k
button.
CCutting Unwanted Scenes from Recorded Movies
If a movie recorded using the gesture control function contains an unwanted scene of you stopping
the recording (A47), pause the movie during playback and follow the steps below to edit it.
1. Select I in the playback controls, and then press the k button.
2. Select M (choose end point) in the editing controls.
3. Select m (save) and press the k button.
Deleting movies
To delete a movie, select the desired movie in full-frame playback mode (A28) or thumbnail
playback mode (A69) and press the l button (A30).
Function Icon Description
Rewind AHold down the k button to rewind the movie.
Advance BHold down the k button to advance the movie.
Pause E
Pause playback. The operations listed below can be performed while paused.
CRewind the movie one frame. Hold down the k button for
continuous rewinding.
DAdvance the movie one frame. Hold down the k button for
continuous advancing.
FResume playback.
IExtract the desired portion of a movie and save it as a separate file.
End GReturn to full-frame playback mode.
4s
Paused
78
General Camera Setup
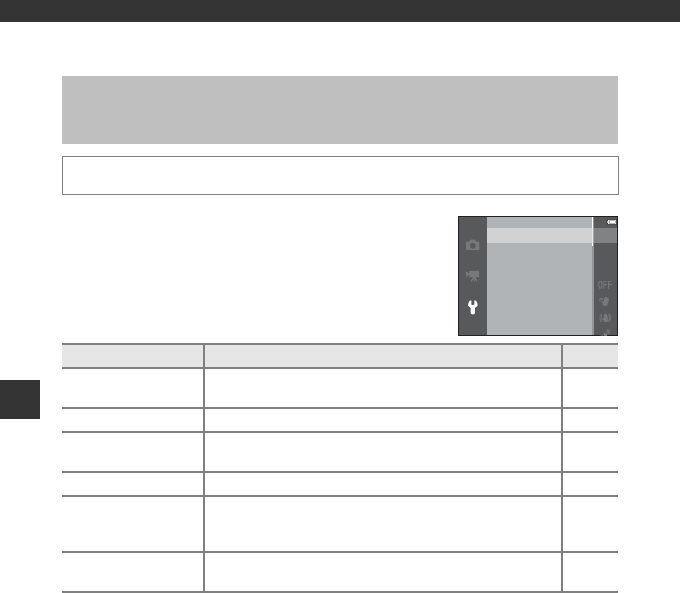
General Camera Setup
The settings of the menu options listed below can be
configured.
Functions That Can Be Set with the d Button
(Setup Menu)
Press the d button M z (setup) menu icon M k button
Option Description A
Welcome screen Allows you to select whether or not the welcome screen is
displayed when the camera is turned on. E70
Time zone and date Allows you to set the camera clock. E71
Monitor settings Allows you to adjust photo information display, post-shooting
image review, and monitor brightness settings. E73
Print date Allows you to imprint the shooting date and time on images. E75
Gesture control
Allows you to set whether or not the gesture control function
(A46) is enabled when you position the monitor facing
forward in the same direction as the camera lens.
E76
Vibration reduction Allows you to select the vibration reduction setting used
when shooting. E77
Welcome screen
Time zone and date
Monitor settings
Print date
Gesture control
Vibration reduction
Motion detection

79
General Camera Setup
Motion detection
Allows you to set whether or not the camera automatically
increases the shutter speed to reduce blurring caused by
camera shake if motion is detected when shooting still
images.
E78
AF assist Allows you to enable or disable the AF-assist illuminator. E79
Digital zoom Allows you to enable and disable digital zoom. E79
Sound settings Allows you to adjust sound settings. E80
Auto off Allows you to set the amount of time that passes before the
monitor turns off to save power. E80
Format memory/
Format card
Allows you to format the internal memory or the memory
card. E81
Language Allows you to change the camera’s display language. E82
TV settings Allows you to adjust TV-connection settings. E82
Charge by computer Allows you to set whether or not the battery in the camera is
charged when the camera is connected to a computer. E83
Blink warning Allows you to set whether or not closed eyes are detected
when taking images of people using face detection. E84
Wi-Fi options
Allows you to configure the Wi-Fi (wireless LAN) settings to
connect the camera and a smart device.
See “Using the Wi-Fi (Wireless LAN) Function” (A80) for more
information.
E85
Eye-Fi upload
Allows you to set whether or not to enable the function for
sending images to a computer using a commercially available
Eye-Fi card.
E87
Reset all Allows you to reset the camera’s settings to their default
values. E88
Firmware version View the current camera firmware version. E88
Option Description A

80
Using the Wi-Fi (Wireless LAN) Function
Using the Wi-Fi (Wireless LAN) Function
You can perform the following functions if you install the dedicated software “Wireless Mobile
Utility” on your smart device that runs on Android OS or iOS, and connect it to the camera.
Take Photos
You can take still images using the two methods described below.
•Release the shutter on the camera and save the captured images to a smart device.
•Use a smart device to remotely* release the camera shutter and save images to the smart
device.
* Operations cannot be performed on the camera during remote control operation.
View Photos
You can copy the pictures saved in the camera’s memory card to your smart device.
1Use your smart device to connect to Google Play Store, App Store or
other online apps marketplace and search for “Wireless Mobile Utility.”
•Check the user’s manual provided with your smart device for further details.
2Check the description and other information and install the software.
•For more information about how to operate the software, download the user’s manual from
the website below.
- Android OS: http://nikonimglib.com/ManDL/WMAU/
- iOS: http://nikonimglib.com/ManDL/WMAU-ios/
Functions That Can Be Performed Using Wi-Fi
Installing the Software on the Smart Device
81
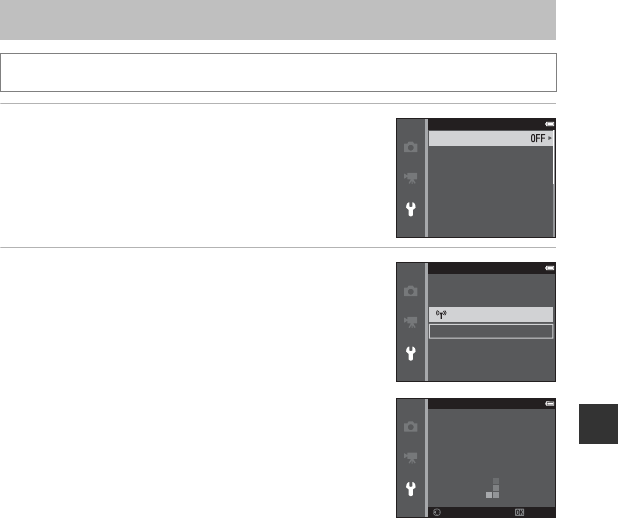
Using the Wi-Fi (Wireless LAN) Function
1Use the multi selector HI to select the Wi-Fi
network and press the k button.
2Select On and press the k button.
•SSID and the password are displayed.
•If no connection confirmation is received from the smart
device within 3 minutes, the setting returns to Off.
Connecting the Smart Device to the Camera
Press the d button M z menu icon M Wi-Fi options M k button
Wi-Fi network
SSID
Auth./encryp.
Password
Channel
Current settings
Restore factory defaults
Wi-Fi options
Wi-Fi network
On
O
Wi-Fi network
BackBack
XXXXXXXXXXXXXXXXXX
XXXXXXXXXXXXXXXXXX
XXXXXXXXXXXXXXXXXX
CancelCancel
Password:
SSID:

82
Using the Wi-Fi (Wireless LAN) Function
3Set the Wi-Fi setting on the smart device to On.
•Check the user’s manual provided with your smart device for further details.
•After the network name (SSID) that can be used for the smart device is displayed, select the
SSID displayed on the camera.
•When the message for entering a password is displayed, enter the password that is
displayed on the camera.
•When the camera is successfully connected to a Wi-Fi network, the shooting screen is
displayed with the Wi-Fi icon (A7).
4Start the dedicated software installed on the smart device.
•The screen for selecting “Take photos” or “View photos” is displayed.
•When the message “Cannot connect to camera.” is displayed, retry the Wi-Fi network
setting.
To Terminate the Wi-Fi Connection
•Turn off the camera.
•Set the Wi-Fi setting on the smart device to Off.
BNotes About Wi-Fi Connection
•Set the Wi-Fi network to Off in a place where the use of radio waves is prohibited.
•When a memory card is not inserted in the camera, the Wi-Fi function cannot be used. When
Eye-Fi card (E87) is inserted in the camera, the Wi-Fi function cannot be used.
•When Wi-Fi is connected, Auto off is disabled.
•When the Wi-Fi network is set to On, the battery drains faster than normal.
•The Wi-Fi network cannot be selected when the battery level indicator in the monitor indicates
B. In addition, if the battery level indicator indicates B while a Wi-Fi connection is established,
the connection is terminated.
CNotes About Security Settings
If the camera is installed with the Wi-Fi function without proper security settings (encryption and
password), unauthorized third parties may access the network and cause harm. We strongly
recommend performing the required security settings before using the Wi-Fi function.
Use Wi-Fi options of the setup menu (A79) to perform the security settings.
83
Connecting the Camera to a TV, Computer, or Printer
Connecting the Camera to a TV,
Computer, or Printer
You can enhance your enjoyment of images and movies by connecting the camera to a TV,
computer, or printer.
•Before connecting the camera to an external device, make sure the remaining battery level
is sufficient and turn the camera off. Before disconnecting, make sure to turn the camera
off.
•If the AC Adapter EH-62G (available separately) is used, this camera can be powered from
an electrical outlet. Do not use any other make or model of AC adapter as it may cause the
camera to heat up or malfunction.
•For information about the connection methods and subsequent operations, refer to the
documentation included with the device in addition to this document.
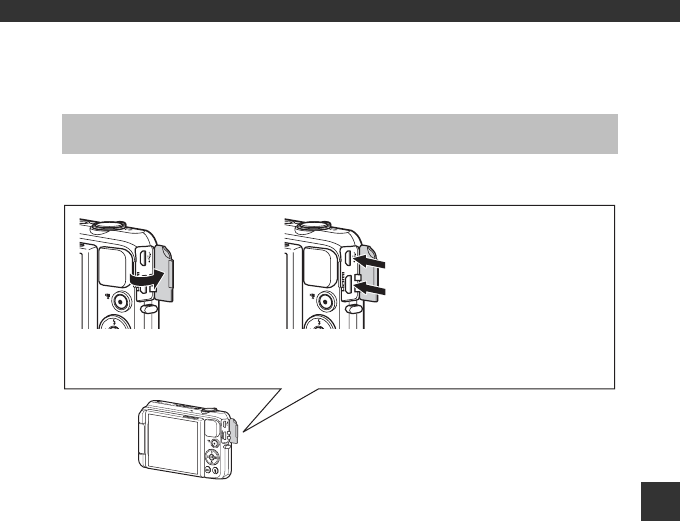
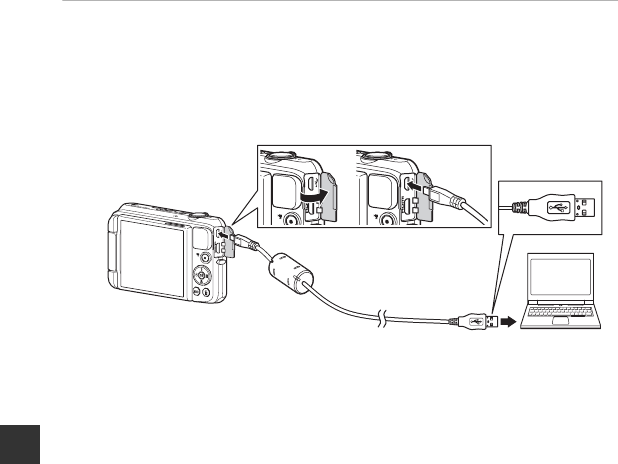
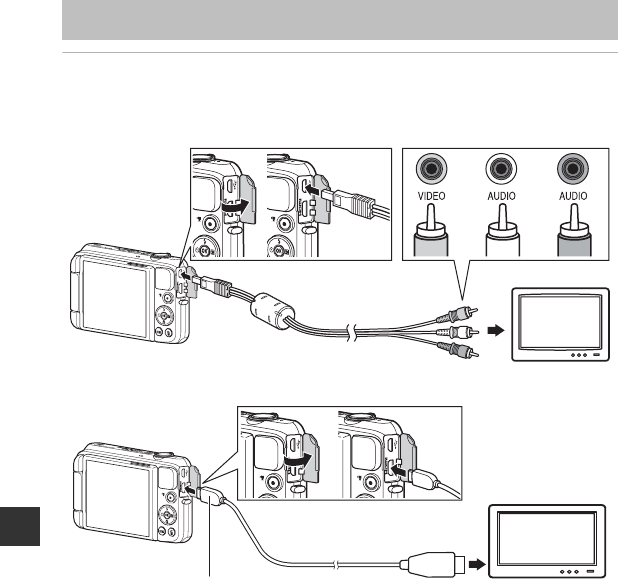
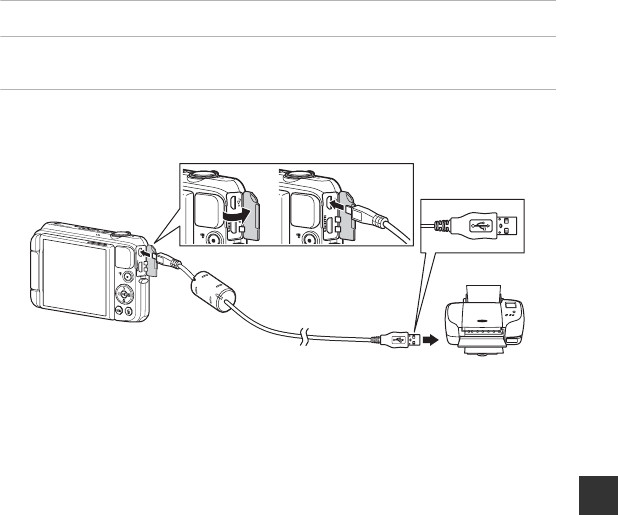
Connection Methods
Insert the plug straight.
USB/audio/video output connector
HDMI micro connector (Type D)
Open the connector
cover.
84
Connecting the Camera to a TV, Computer, or Printer
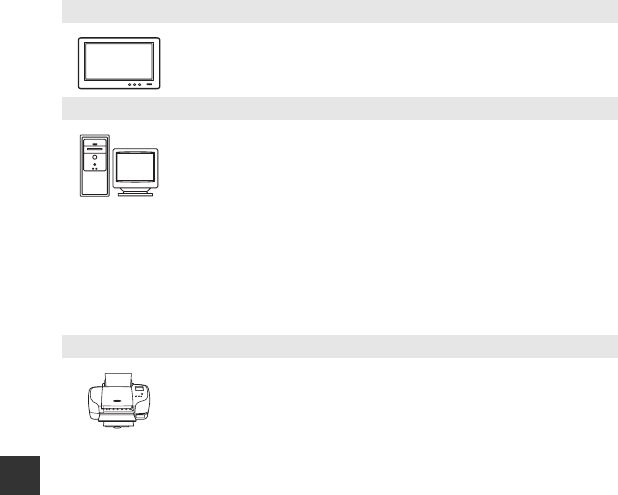
Viewing images on a TV E22
Images and movies captured with the camera can be viewed on a TV.
Connection method: Connect the video and audio plugs of an optional audio
video cable to the TV’s input jacks. Alternatively, connect a commercially
available HDMI cable to the TV’s HDMI input jack.
Viewing and organizing images on a computer A85
You can transfer images to a computer to perform simple retouching and
manage image data.
Connection method: Connect the camera to the computer’s USB port with
the USB cable.
•Before connecting to a computer, install ViewNX 2 on the computer
(A85). For information about using the ViewNX 2 CD-ROM and
transferring images to a computer, see page A85.
•If any USB devices that draw the power from the computer are connected,
disconnect them from the computer before you connect the camera to it.
Connecting the camera and other USB-powered devices to the same
computer simultaneously may cause a camera malfunction or excessive
power supply from the computer, which could damage the camera or
memory card.
Printing images without using a computer E25
If you connect the camera to a PictBridge-compatible printer, you can print
images without using a computer.
Connection method: Connect the camera directly to the printer’s USB port
with the USB cable.

85
Connecting the Camera to a TV, Computer, or Printer
ViewNX 2 is an all-in-one software package which enables you to transfer, view, edit and share
images. Install ViewNX 2 using the included ViewNX 2 CD-ROM.
Installing ViewNX 2
•An Internet connection is required.
Compatible Operating Systems
Windows
Windows 8, Windows 7, Windows Vista, Windows XP
Macintosh
Mac OS X10.6, 10.7, 10.8
Refer to the Nikon website for details on system requirements, including the latest
information on operating system compatibility.
Using ViewNX 2
Your Imaging Toolbox ViewNX 2™
86
Connecting the Camera to a TV, Computer, or Printer
1Start the computer and insert the ViewNX 2 CD-ROM into the CD-ROM
drive.
•Windows: If instructions for operating the CD-ROM are displayed in the window, follow the
instructions to proceed to the installation window.
•Mac OS: When the ViewNX 2 window is displayed, double-click the Welcome icon.
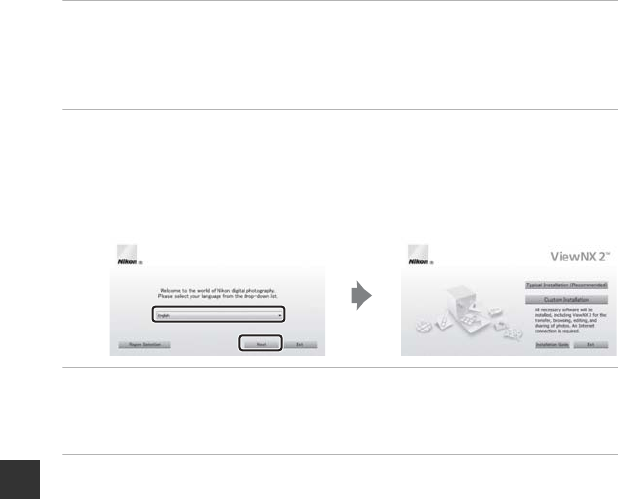
2Select a language in the language selection dialog to open the
installation window.
•If the desired language is not available, click Region Selection to choose a different region
and then choose the desired language (the Region Selection button is not available in the
European release).
•Click Next to display the installation window.
3Start the installer.
•We recommend clicking Installation Guide in the installation window to check the
installation help information and system requirements before installing ViewNX 2.
•Click Typical Installation (Recommended) in the installation window.
4Download the software.
•When the Software Download screen is displayed, click I agree - Begin download.
•Follow the on-screen instructions to install the software.

87
Connecting the Camera to a TV, Computer, or Printer
5Exit the installer when the installation completion screen is displayed.
•Windows: Click Yes.
•Mac OS: Click OK.
The following software is installed:
•ViewNX 2 (consisting of the three modules below)
- Nikon Transfer 2: For transferring images to the computer
- ViewNX 2: For viewing, editing, and printing transferred images
- Nikon Movie Editor: For basic editing of transferred movies
•Panorama Maker (for creating a single panorama image of a landscape, etc. from a series of
images that each capture a separate portion of the subject)
6Remove the ViewNX 2 CD-ROM from the CD-ROM drive.
88
Connecting the Camera to a TV, Computer, or Printer
Transferring Images to the Computer
1Choose how images will be copied to the computer.
Choose one of the following methods:
•Direct USB connection: Turn the camera off and ensure that the memory card is inserted
in the camera. Connect the camera to the computer using the USB cable. The camera
automatically turns on.
To transfer images that are saved in the camera’s internal memory, remove the memory card
from the camera before connecting it to the computer.
•SD card slot: If your computer is equipped with an SD card slot, the card can be inserted
directly in the slot.
•SD card reader: Connect a card reader (available separately from third-party suppliers) to
the computer and insert the memory card.
89
Connecting the Camera to a TV, Computer, or Printer
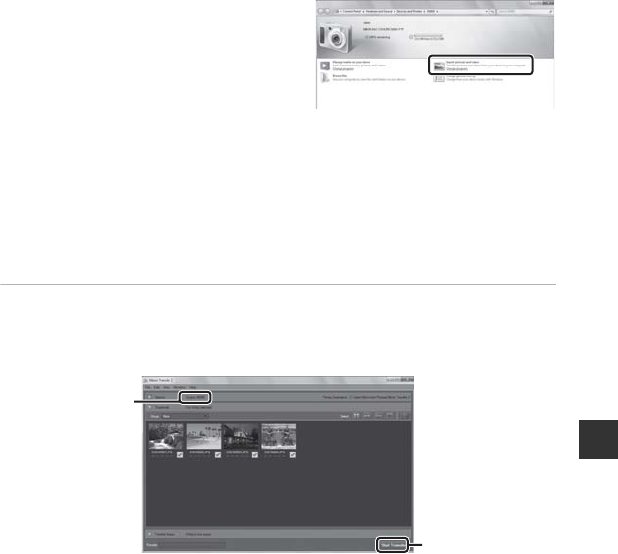
If a message is displayed prompting you to choose a program, select Nikon Transfer 2.
•When using Windows 7
If the dialog shown at right is displayed,
follow the steps below to select
Nikon Transfer 2.
1Under Import pictures and videos, click
Change program. A program selection
dialog will be displayed; select Import
File using Nikon Transfer 2 and click
OK.
2Double-click Import File.
If the memory card contains a large number of images, it may take a while for Nikon Transfer 2
to start. Wait until Nikon Transfer 2 starts.
BConnecting the USB Cable
The connection may not be recognized if the camera is connected to the computer via a USB hub.
2Transfer images to the computer.
•Confirm that the name of the connected camera or removable disk is displayed as the
“Source” on the “Options” title bar of Nikon Transfer 2 (1).
•Click Start Transfer (2).
•At default settings, all the images on the memory card will be copied to the computer.
1
2
90
Connecting the Camera to a TV, Computer, or Printer
3Terminate the connection.
•If the camera is connected to the computer, turn the camera off and disconnect the USB
cable. If you are using a card reader or card slot, choose the appropriate option in the
computer operating system to eject the removable disk corresponding to the memory card
and then remove the card from the card reader or card slot.
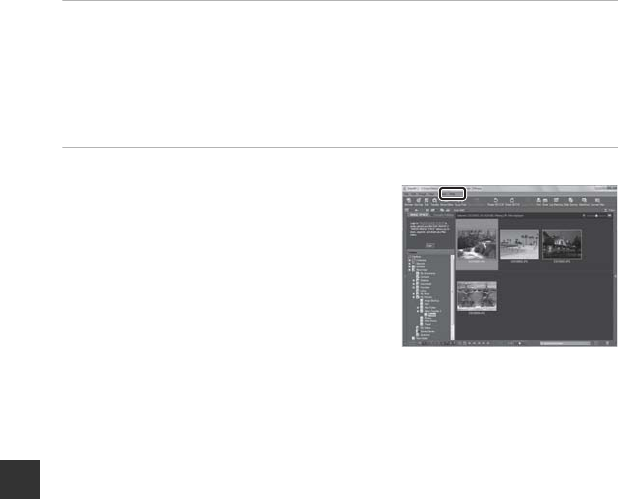
Viewing Images
Start ViewNX 2.
•Images are displayed in ViewNX 2 when transfer
is complete.
•Consult online help for more information on
using ViewNX 2.
CStarting ViewNX 2 Manually
•Windows: Double-click the ViewNX 2 shortcut on the desktop.
•Mac OS: Click the ViewNX 2 icon in the Dock.

E1
The Reference Section provides detailed information and hints about using the camera.
Shooting
Using Easy Panorama (Shooting and Playback).............................................. E2
Playback
Favorite Pictures Mode............................................................................................. E6
Auto Sort Mode.........................................................................................................E10
List by Date Mode ....................................................................................................E11
Viewing and Deleting Images Captured Continuously (Sequence) ......E12
Editing Still Images ..................................................................................................E14
Connecting the Camera to a TV (Viewing Images on a TV).......................E22
Connecting the Camera to a Printer (Direct Print) .......................................E24
Editing Movies...........................................................................................................E32
Menu
The Shooting Menu (for A (Auto) Mode)......................................................E34
The Smart Portrait Menu........................................................................................E49
The Playback Menu..................................................................................................E52
The Movie Menu .......................................................................................................E64
The Setup Menu........................................................................................................E70
Additional Information
Error Messages ..........................................................................................................E89
File Names...................................................................................................................E94
Optional Accessories...............................................................................................E95
Reference Section
E2
Reference Section
Shooting with Easy Panorama
* The icon of the last scene selected is displayed.
1Select Normal (180°) or Wide (360°) as the
shooting range and press the k button.
•When the camera is readied in the horizontal position, the
image size (width × height) is as follows.
-Normal (180°): 4800 × 920 when moved horizontally,
1536 × 4800 when moved vertically
-Wide (360°): 9600 × 920 when moved horizontally, 1536 ×
9600 when moved vertically
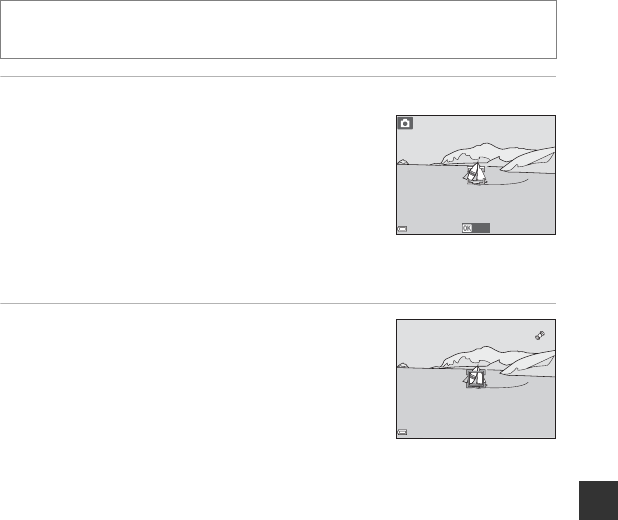
2Frame the first edge of the panorama scene,
and then press the shutter-release button
halfway to focus.
•The zoom position is fixed at wide-angle position.
•The camera focuses on the area in the center of the frame.
Using Easy Panorama (Shooting and Playback)
Enter shooting mode M A (shooting mode) button M b (second icon from the top*)
M K M HIJK M p (easy panorama) M k button
Normal (18 0°)
Wide (360°)
Easy panorama
25
m
0s
25
m
0s
880
880
E3
Reference Section
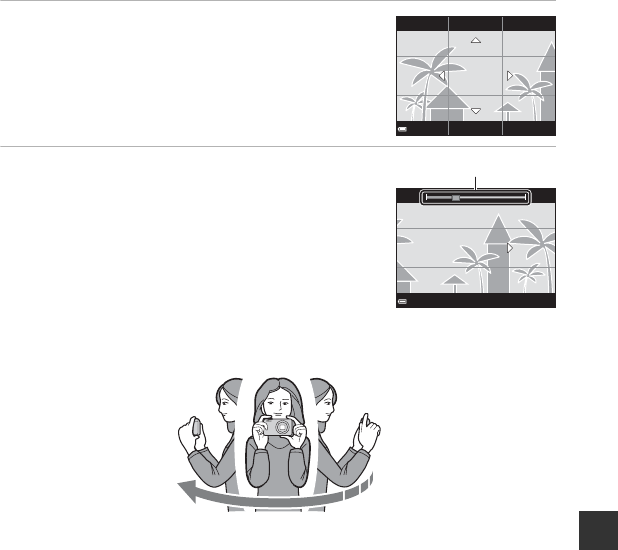
3Press the shutter-release button all the way,
and then remove your finger from the
shutter-release button.
•KLJI are displayed to indicate the direction of camera
movement.
4Move the camera in one of the four directions
until the guide indicator reaches the end.
•When the camera detects which direction it is moving in,
shooting begins.
Example of camera movement
•Using your body as the axis of rotation, move the camera slowly in an arc, in the direction
of the marking (KLJI).
•Shooting stops if the guide does not reach the edge within about 15 seconds (when
Normal (180°) is selected) or within about 30 seconds (when Wide (360°) is selected)
after shooting starts.
Guide

E4
Reference Section
BNotes About Easy Panorama Shooting
•The range of the image seen in the saved image is narrower than that seen in the monitor at the
time of shooting.
•If the camera is moved too quickly or shaken too much, or if the subject is too uniform (e.g. walls or
darkness), an error may occur.
•If shooting is stopped before the camera reaches the half-way point in the panorama range, a
panorama image is not saved.
•If more than half of the panorama range is captured but shooting ends before reaching the edge
of the range, the range not captured is recorded and displayed in gray.
E5
Reference Section
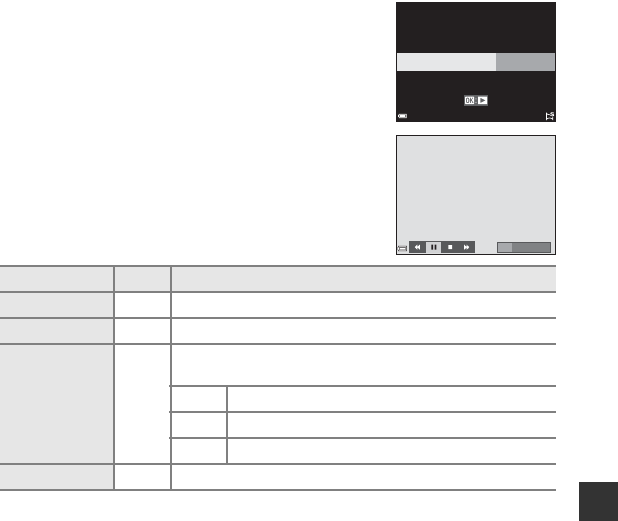
Viewing Images Captured with Easy Panorama
Switch to playback mode (A28), display an image captured
using easy panorama in full-frame playback mode, and then
press the k button to scroll the image in the direction that
was used when shooting.
Playback controls are displayed at the bottom of the monitor
during playback. Use the multi selector JK to select a control,
and then press the k button to perform the following
operations.
BNotes About Scroll Playback
This camera may not be able to scroll the playback of, or zoom in on, easy panorama images
captured with another make or model of digital camera.
Function Icon Description
Rewind AHold down the k button to scroll backward quickly.
Advance BHold down the k button to scroll forward quickly.
Pause E
Pause playback. The operations listed below can be performed
while paused.
CHold down the k button to rewind.
DHold down the k button to scroll.
FResume automatic scrolling.
End GSwitch to full-frame playback mode.
0004.
JPG
0004.
JPG
4
/
4
4
/
4
15
/
11
/
2013 15:30
15
/
11
/
2013 15:30
E6
Reference Section
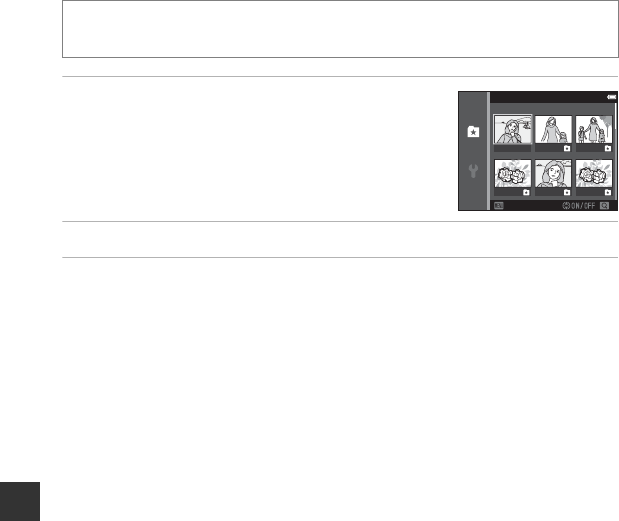
By adding images (except movies) to albums as favorite pictures, you can play back only the
added images.
•Images can be sorted into nine albums. Up to 200 images can be added to each album.
•The original images are not copied or moved.
•The same image can be added to multiple albums.
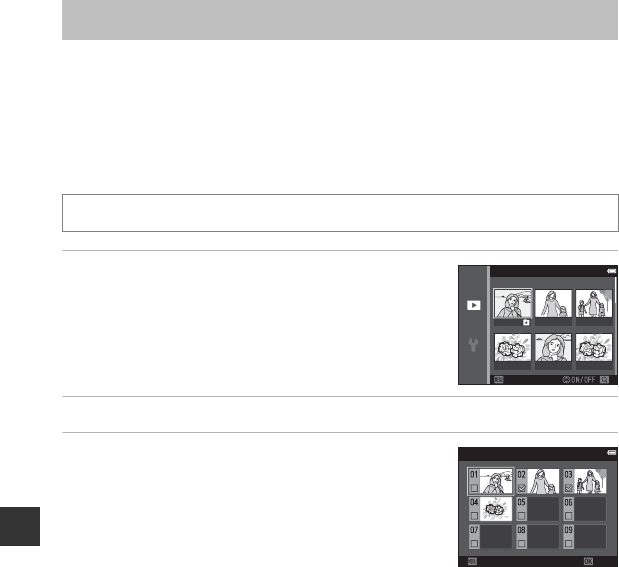
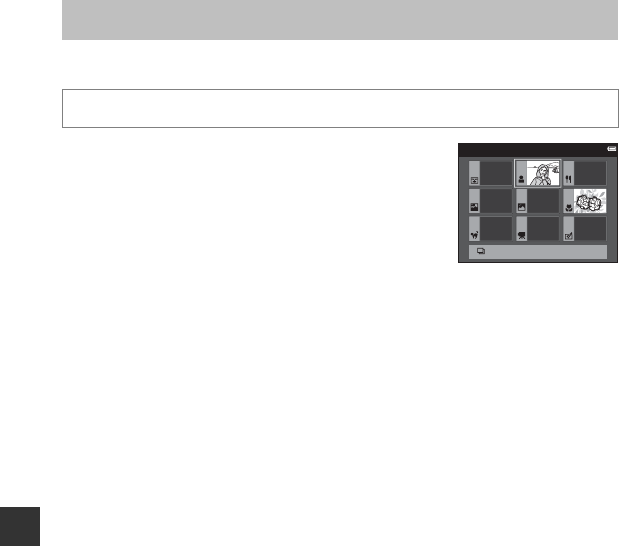
Adding Images to Albums
1Use the multi selector JK to select an image
and use H to display L.
•You can add L to multiple images. To remove L, press
I.
•Move the zoom control (A1) toward g (i) to switch to
full-frame playback or f (h) to switch to thumbnail
playback.
2Press the k button after configuring the settings.
3Select the desired album and press the k
button.
•The selected images are added.
Favorite Pictures Mode
Press the c button (playback mode) M d button M Favorite pictures M k button
Favorite pictures
BackBack
Favorite pictures
AddBackBack
E7
Reference Section
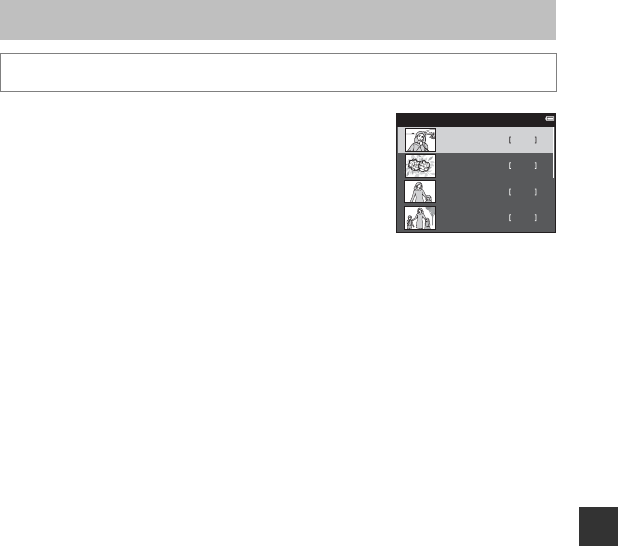
Playing Back Images in Albums
Use the multi selector to select an album and then press the
k button to play back the images in the selected album.
•Functions in the playback menu (A70) can be used for the
images in the selected album (except Copy and Favorite
pictures).
•The following operations are available from the album
selection screen.
-d button: Changes the album icon (E9).
-l button: Deletes all original images added to the
selected album.
BNotes About Deletion
If an image is deleted while using favorite pictures mode, the original image is deleted. When
removing images from albums, see “Removing Images from Albums” (E8).
Press the c button (playback mode) M c button M h Favorite pictures M k button
Favorite pictures
Choose iconChoose icon
E8
Reference Section
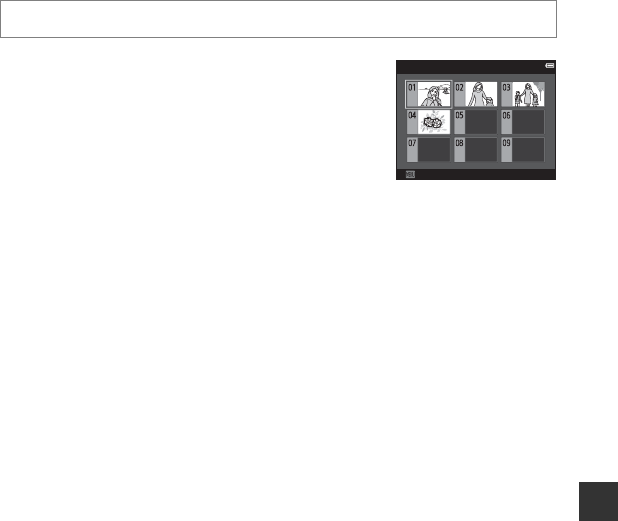
Removing Images from Albums
1Use the multi selector JK to select an image
and use H to hide L.
•To display the icons again, press I.
•Move the zoom control (A1) toward g (i) to switch to
full-frame playback or f (h) to switch to thumbnail
playback.
2Press the k button after configuring the settings.
3Select Yes and press the k button.
•To cancel removal, select No.
Enter h Favorite pictures mode M select the album containing the image you want to
remove M k button M d button M Remove from favorites M k button
Remove from favorites
BackBack
E9
Reference Section
Changing the Favorites Album Icon
1Use the multi selector to select an album and
press the d button.
2Use JK to select an icon color and press the
k button.
3Select an icon and press the k button.
•The icon changes.
Press the c button (playback mode) M c button M h Favorite pictures M k button
Favorite pictures
Choose iconChoose icon
Choose icon
BackBack
Choose icon
BackBack
E10
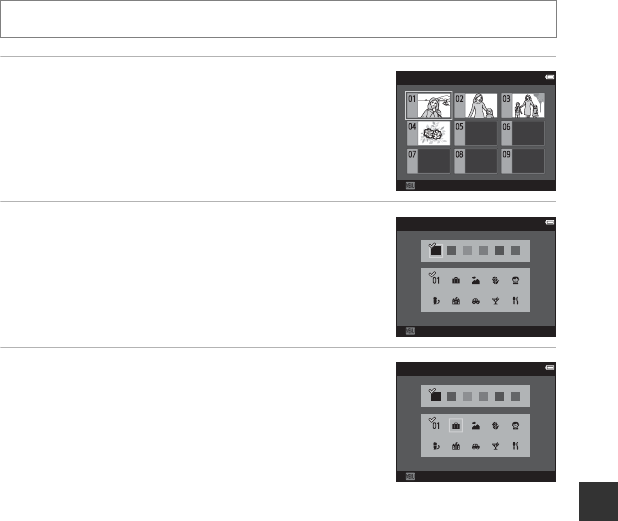
Reference Section
Images are automatically sorted into categories, such as portraits, landscapes, and movies,
based on the camera settings at the time of shooting.
Use the multi selector to select a category and then press the
k button to play back the images in the selected category.
•Functions in the playback menu (A70) can be used for the
images in the selected category (except Copy and
Remove from favorites).
•While the category selection screen is displayed, press the
l button to delete all original images in the selected
category.
BNotes About Auto Sort Mode
•Up to 999 images and movie files can be sorted into each category in auto sort mode.
•Images or movies saved by cameras other than this camera cannot be played back in auto sort
mode.
Auto Sort Mode
Press the c button (playback mode) M c button M F Auto sort M k button
Portraits
Other scenes
E11
Reference Section
Use the multi selector to select a date and then press the k
button to play back the images captured on the selected date.
•Functions in the playback menu (A70) can be used for the
images in the selected shooting date (except Copy and
Remove from favorites).
•The following operations are available while the shooting
date selection screen is displayed.
-d button: The functions listed below are available.
•Print order*
•Slide show
•Protect*
* The same settings can be applied to all images captured on the selected date.
-l button: Deletes all images captured on the selected date.
BNotes About List by Date Mode
•Up to the most recent 29 dates can be selected. If images exist for more than 29 dates, all images
saved earlier than the most recent 29 dates will be combined under Others.
•The 9,000 most recent images can be displayed.
•Images captured when the camera’s date is not set are treated as images captured on January 1,
2013.
List by Date Mode
Press the c button (playback mode) M c button M C List by date M k button
List by date
3
20/11/2013
2
15/11/2013
1
10/11/2013
05/11/201310
E12
Reference Section
Viewing Images in a Sequence
Images captured continuously are saved as a sequence.
The first image of a sequence is used as the key picture to
represent the sequence when displayed in full-frame playback
mode or thumbnail playback mode (default setting).
To display each image in the sequence individually, press the
k button.
After pressing the k button, the operations listed below are
available.
•To display the previous or next image, press the multi
selector JK.
•To display images that are not included in the sequence,
press H to return to the key picture display.
•To display images in a sequence as thumbnails, or to play
them back in a slide show, set Sequence display options
to Individual pictures in the playback menu (E63).
BSequence Display Options
Images captured continuously with cameras other than this camera cannot be displayed as a
sequence.
Viewing and Deleting Images Captured
Continuously (Sequence)
15
/
11
/
2013 15:30
15
/
11
/
2013 15:30
0004.
JPG
0004.
JPG
1
/
5
1
/
5
BackBack
1
/
5
1
/
5
15
/
11
/
2013
15
:
30
15
/
11
/
2013
15
:
30

E13
Reference Section
CPlayback Menu Options Available When Using Sequence
•When images in a sequence are displayed in full-frame playback mode, press the d button to
select functions in playback menu (A70).
•If you press the d button when a key picture is displayed, the following settings can be applied
to all images in the sequence:
- Favorite pictures, Print order, Protect, Copy
Deleting Images in a Sequence
When the l button is pressed for images in a sequence, the images that are deleted vary
depending on how the sequences are displayed.
•When the key picture is displayed:
•When images in a sequence are displayed in full-frame playback mode:
-Current image: All images in the displayed sequence are deleted.
-Erase selected images: When a key picture is selected on the erase selected
images screen (A31), all images in that sequence are
deleted.
-All images: All images in the internal memory or on the memory card
are deleted.
-Current image: The image currently displayed is deleted.
-Erase selected images: Images that are selected in the sequence are deleted.
-Entire sequence: All images in the displayed sequence are deleted.

E14
Reference Section
Before Editing Images
You can easily edit images on this camera. Edited copies are saved as separate files.
Edited copies are saved with the same shooting date and time as the original.
CRestrictions on Image Editing
When an edited copy is further modified with another editing function, check the following
restrictions.
•Copies created with editing functions cannot be further edited with the same function used to
create them.
Editing Still Images
Editing function used Editing functions to use
Quick effects
Quick retouch
D-Lighting
The glamour retouch, small picture, or crop function can be used.
Red-eye correction Editing functions cannot be used.
Glamour retouch The quick effects, quick retouch, D-Lighting, small picture, or crop
function can be used.
Small picture
Crop
Editing functions cannot be used. When using in combination with
other editing functions, use the small picture or crop function after
the other editing functions have been applied.
E15
Reference Section
Quick Effects: Changing Hue or Mood
1Display the image to which you want to apply
an effect in full-frame playback mode and
press the k button.
2Use the multi selector HIJK to select the
desired effect and press the k button.
•Move the zoom control (A1) toward g (i) to switch to
full-frame playback or f (h) to switch to thumbnail
playback.
•To exit without saving the edited image, press the d
button.
3Select Yes and press the k button.
•An edited copy is created.
Quick Effects Option Description
Pop and Super vivid Mainly enhances the color saturation.
Painting, High key, Toy camera effect 1, Toy
camera effect 2, Low key, Cross process (red),
Cross process (yellow), Cross process (green),
and Cross process (blue)
Mainly adjusts hue and creates a different look
for the image.
Soft portrait, Fisheye, Cross screen, and
Miniature effect Processes images with a variety of effects.
High-contrast monochrome, Sepia,
Cyanotype, and Selective color
Turns multicolor images into single color images.
Selective color transforms all colors, except a
specified color, to black and white.
15
/
11
/
2013 15:30
15
/
11
/
2013 15:30
0004.
JPG
0004.
JPG
4
/
4
Quick eects
CancelCancel
PopPop Super vividSuper vivid PaintingPainting
High keyHigh key Toy camera
eect 1
Toy camera
eect 1
Toy camera
eect 2
Toy camera
eect 2
E16
Reference Section
Quick Retouch: Enhancing Contrast and Saturation
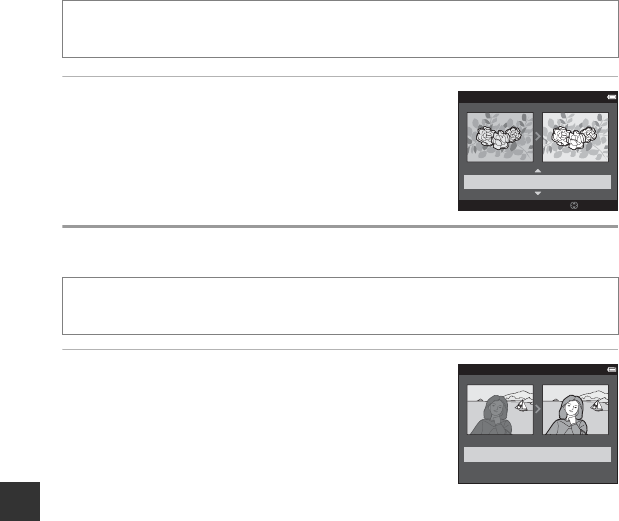
Use the multi selector HI to select the amount
of effect applied and press the k button.
•The edited version is displayed on the right.
•To exit without saving the copy, press J.
D-Lighting: Enhancing Brightness and Contrast
Use the multi selector HI to select OK and press
the k button.
•The edited version is displayed on the right.
•To exit without saving the copy, select Cancel and press the k
button.
Press the c button (playback mode) M select an image M d button M
Quick retouch M k button
Press the c button (playback mode) M select an image M d button M
D-Lighting M k button
Quick retouch
AmountAmount
Normal
D-Lighting
OK
Cancel

E17
Reference Section
Red-eye Correction: Correcting Red-eye When Shooting
with the Flash
Preview the result and press the k button.
•To exit without saving the copy, press the multi selector J.
BNotes About Red-eye Correction
•Red-eye correction can only be applied to images when red-eye is detected.
•Red-eye correction can be applied to pets (dogs or cats) even if their eyes are not red.
•Red-eye correction may not produce the desired results in some images.
•In some rare cases, red-eye correction may be applied unnecessarily to other areas of the image.
Press the c button (playback mode) M select an image M d button M
Red-eye correction M k button
SaveBack
Red-eye correction
E18
Reference Section
Glamour Retouch: Enhancing Human Faces
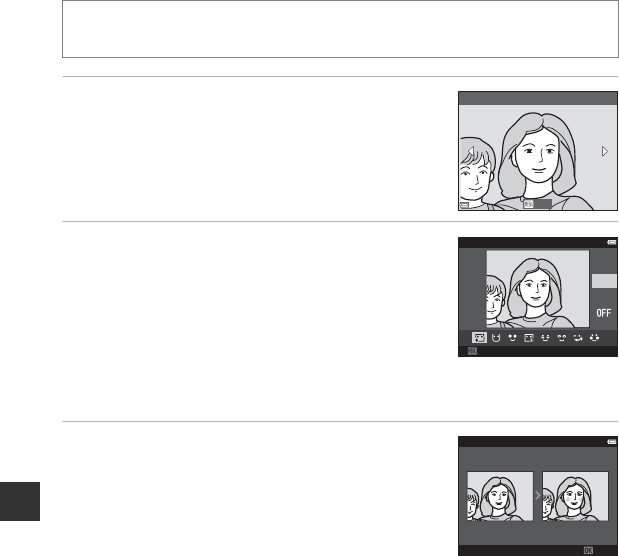
1Use the multi selector HIJK to select the
face that you want to retouch and press the
k button.
•When only one face is detected, proceed to step 2.
2Use JK to select the effect, use HI to
select the effect level, and press the k
button.
•You can simultaneously apply multiple effects.
Adjust or check the settings for all effects before pressing
the k button.
B (skin softening), F (small face), A (big eyes),
C(brighten faces), E (hide eye bags), G (whiten eyes),
H (whiten teeth), D (redden cheeks)
•Press the d button to return to the screen for selecting a face.
3Preview the result and press the k button.
•To change the settings, press J to return to step 2.
•To exit without saving the edited image, press the d
button.
Press the c button (playback mode) M select an image M d button M
Glamour retouch M k button
Subject selection
BackBack
Skin softening
3
2
1
BackBack
Preview
Save

E19
Reference Section
4Select Yes and press the k button.
•An edited copy is created.
BNotes About Glamour Retouch
•Only one face per image can be edited using the glamour retouch function.
•Depending upon the direction in which faces are looking, or the brightness of faces, the camera
may be unable to accurately detect faces, or the glamour retouch function may not perform as
expected.
•If no faces are detected, a warning is displayed and the screen returns to the playback menu.
•The glamour retouch function is available only for images captured when the ISO sensitivity is
1600 or lower.
Yes
No
Save OK?
E20
Reference Section
Small Picture: Reducing the Size of an Image
1Use the multi selector HI to select the
desired copy size and press the k button.
•Images taken at an image mode setting of l 4608×2592
are saved at 640 × 360 pixels. Proceed to step 2.
2Select Yes and press the k button.
•An edited copy is created (compression ratio of
approximately 1:16).
Press the c button (playback mode) M select an image M d button M
Small picture M k button
640
×
480
320
×
240
160
×
120
Small picture
Yes
No
Create small picture file?

E21
Reference Section
Crop: Creating a Cropped Copy
1Move the zoom control to enlarge the image (A68).
2Refine copy composition and press the d
button.
•Move the zoom control toward g(i) or f(h) to adjust
the zoom ratio. Set a zoom ratio at which u is
displayed.
•Use the multi selector HIJK to scroll the image so that
only the portion to be copied is visible in the monitor.
3Select Yes and press the k button.
•An edited copy is created.
CImage Size
When the image size of the cropped copy is 320 × 240 or smaller, the image is displayed at a smaller
size during playback.
CCropping the Image in Its Current “Tall” Orientation
Use the Rotate image option (E59) to rotate the image so that it is displayed in landscape
orientation. After cropping the image, rotate the cropped image back to “tall” orientation.
3.0
3.0
Yes
No
Save this image as
displayed?
E22
Reference Section
1Turn off the camera and connect it to the TV.
•Make sure that the plugs are properly oriented. Do not insert or remove the plugs at an
angle when connecting or disconnecting them.
When using an audio video cable
When using an HDMI cable
Connecting the Camera to a TV (Viewing Images on a TV)
WhiteYellow Red
HDMI micro connector (Type D) to HDMI jack
E23
Reference Section
2Set the TV’s input to external video input.
•See the documentation provided with your TV for details.
3Hold down the c button to turn on the
camera.
•Images are displayed on the TV.
•The camera monitor does not turn on.
BIf Images Are Not Displayed on the TV
Make sure that TV settings (E82) in the setup menu conforms to the standard used by your TV.
CUsing a TV Remote Control (HDMI Device Control)
The remote control of an HDMI-CEC-compatible TV can be used to select images, start and pause
movie playback, switch between full-screen playback mode and four-image thumbnail display, etc.
•Set the HDMI device control setting (E82) of TV settings to On (default setting) and then
connect the camera and TV using an HDMI cable.
•Aim the remote control at the TV when operating it.
E24
Reference Section
Users of PictBridge-compatible printers can connect the camera directly to the printer and
print images without using a computer.
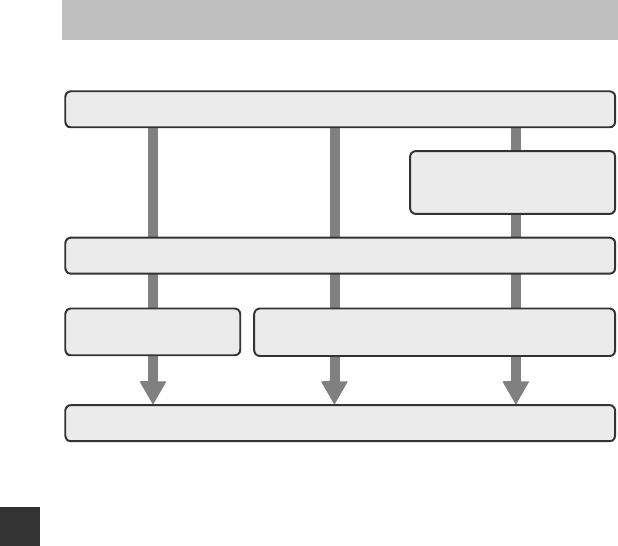
Connecting the Camera to a Printer (Direct Print)
Take images
Select images for printing and
number of copies using
Print order option (E52)
Connect to the printer (E25)
Print images one at a time
(E27) Print multiple images (E29)
When printing is complete, turn the camera off and disconnect the USB cable
E25
Reference Section
Connecting the Camera to a Printer
1Turn off the camera.
2Turn on the printer.
•Check printer settings.
3Connect the camera to the printer using the USB cable.
•Make sure that the plugs are properly oriented. Do not insert or remove the plugs at an
angle when connecting or disconnecting them.
E26
Reference Section
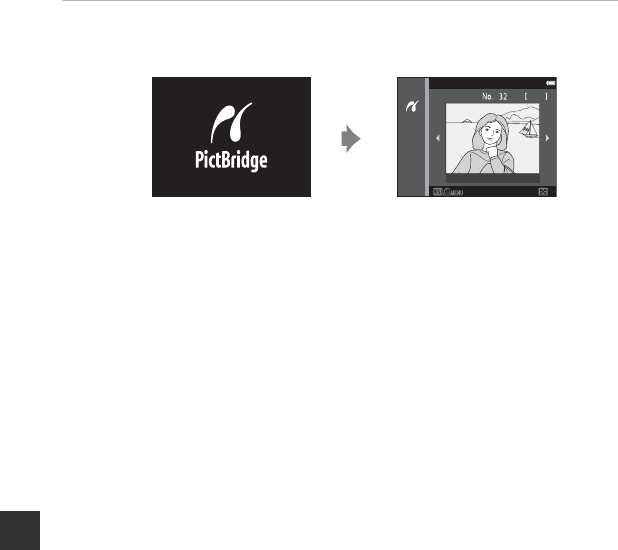
4The camera is automatically turned on.
•The PictBridge startup screen (1) is displayed in the camera monitor, followed by the
Print selection screen (2).
BIf the PictBridge Startup Screen Is not Displayed
When Auto is selected for Charge by computer (E83), it may be impossible to print images with
direct connection of the camera to some printers. If the PictBridge startup screen is not displayed
after the camera is turned on, turn the camera off and disconnect the USB cable. Set Charge by
computer to Off and reconnect the camera to the printer.
Print selection
32
15
/
11
/
2013
12
E27
Reference Section
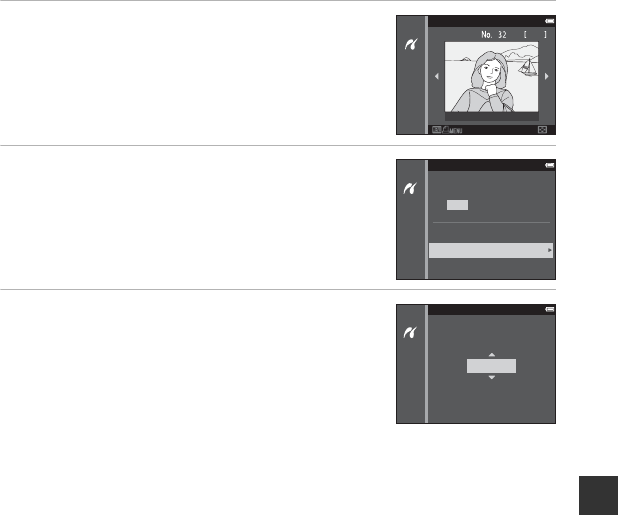
Printing Individual Images
1Use the multi selector to select the desired
image and press the k button.
•Move the zoom control toward f (h) to switch to
thumbnail playback or g (i) to switch to full-frame
playback.
2Use HI to select Copies and press the k
button.
3Select the desired number of copies (up to
nine) and press the k button.
Print selection
32
15
/
11
/
2013
PictBridge
1
Copies
Paper size
Start print
prints
Copies
4

E28
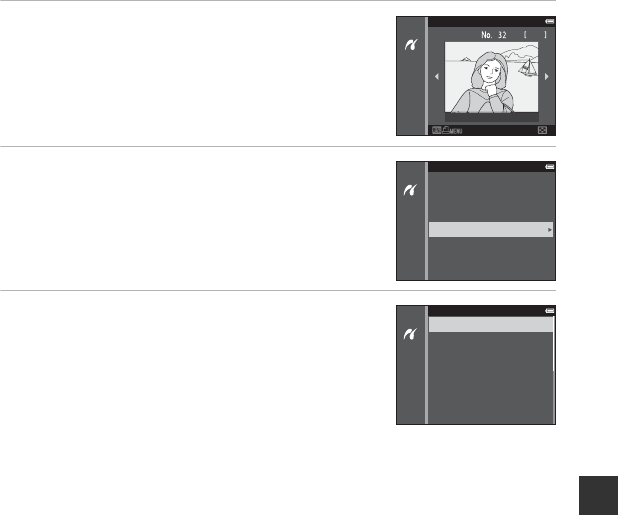
Reference Section
4Select Paper size and press the k button.
5Select the desired paper size and press the k
button.
•To apply the paper size setting configured on the printer,
select Default as the paper size option.
•The paper size options available on the camera vary
depending on the printer that you use.
6Select Start print and press the k button.
•Printing starts.
•To cancel printing, press the k button.
PictBridge
4
Copies
Paper size
Start print
prints
Paper size
Default
3.5×5 in.
5×7 in.
100×150 mm
4×6 in.
8×10 in.
Letter
PictBridge
4
Copies
Paper size
Start print
prints
E29
Reference Section
Printing Multiple Images
1When the Print selection screen is displayed,
press the d button.
2Use the multi selector HI to select Paper
size and press the k button.
•To exit the print menu, press the d button.
3Select the desired paper size and press the k
button.
•To apply the paper size setting configured on the printer,
select Default in the paper size option.
•The paper size options available on the camera vary
depending on the printer that you use.
Print selection
32
15
/
11
/
2013
Print menu
Print selection
Print all images
DPOF printing
Paper size
Paper size
Default
3.5×5 in.
5×7 in.
100×150 mm
4×6 in.
8×10 in.
Letter
E30
Reference Section
4Select Print selection, Print all images, or
DPOF printing and press the k button.
Print selection
Select images (up to 99) and the number of copies
(up to nine) of each.
•Use the multi selector JK to select images, and
use HI to specify the number of copies to be
printed.
•Images selected for printing are indicated by M
and the numeral indicating the number of copies
to be printed. If no copies have been specified for
images, the selection is canceled.
•Move the zoom control toward g(i) to switch to full-frame playback or f(h) to
switch to thumbnail playback.
•Press the k button when setting is complete.
•When the screen shown on the right is displayed,
select Start print and press the k button to start
printing.
Print menu
Print selection
Print all images
DPOF printing
Paper size
Print selection
BackBack
311
10
Print selection
10
Start print
Cancel
prints

E31
Reference Section
Print all images
One copy each of all images saved in the internal
memory, or on the memory card, is printed.
•When the screen shown on the right is displayed,
select Start print and press the k button to start
printing.
DPOF printing
Print images for which a print order was created
using the Print order option (E52).
•When the screen shown on the right is displayed,
select Start print and press the k button to start
printing.
To view the current print order, select View
images and press the k button. To print images,
press the k button again.
Print all images
18
Start print
Cancel
prints
DPOF printing
10
View images
Cancel
Start print
prints
E32
Reference Section
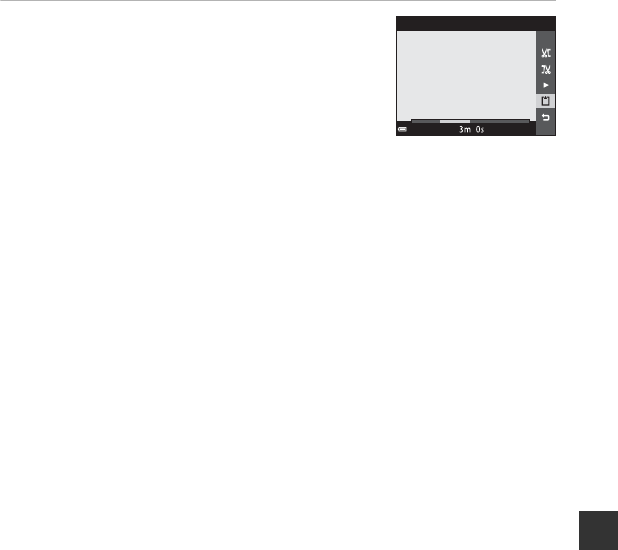
The desired portions of a recorded movie can be saved as a separate file.
1Play back the desired movie and pause at the start point of the portion
that is to be extracted (A76).
2Use the multi selector JK to select I in the
playback controls, and then press the k
button.
3Use HI to select M (choose start point) in
the editing controls.
•Use JK to move the start point.
•To cancel editing, select O (return), and press the k
button.
4Use HI to select N (choose end point).
•Use JK to move the end point.
•To preview the specified portion, select G and then press
the k button. Press the k button again to stop
previewing.
Editing Movies
1
m
30
s
1
m
30
s
Choose start point
Choose end point
E33
Reference Section
5Use HI to select m (save) and press the k
button.
•Follow the instructions on the screen to save the movie.
BNotes About Movie Editing
•Movies recorded using p iFrame 720/30p (p iFrame 720/25p) (E64) cannot be edited.
•Use a sufficiently charged battery to prevent the camera from turning off during editing. When the
battery level indicator is B, movie editing is not possible.
•A movie that was created by editing cannot be trimmed again.
•The actual trimmed portion of a movie may differ slightly from the portion selected using the start
and end points.
•Movies cannot be trimmed so that they are less than two seconds long.
Save

E34
Reference Section
Image Mode Settings (Image Size and Quality)
Select the combination of image size and compression ratio that is used when saving images.
The higher the image mode setting, the larger the size at which it can be printed, and the
lower the compression ratio, the higher the quality of the images, but the number of images
that can be saved is reduced.
* The total number of pixels captured, and the number of pixels captured horizontally and
vertically.
Example: P 4608×3456 = approx. 16 megapixels, 4608 × 3456 pixels
The Shooting Menu (for A (Auto) Mode)
Enter shooting mode M d button M Image mode M k button
Option* Compression ratio Aspect ratio
(horizontal to vertical)
Q 4608×3456PApprox. 1/4 4:3
P 4608×3456 (default setting) Approx. 1/8 4:3
R 3264×2448 Approx. 1/8 4:3
r 2272×1704 Approx. 1/8 4:3
q 1600×1200 Approx. 1/8 4:3
O 640×480 Approx. 1/8 4:3
l 4608×2592 Approx. 1/8 16:9
s 3456×3456 Approx. 1/8 1:1

E35
Reference Section
CNotes About Image Mode
•The image mode setting can also be changed in shooting modes other than auto. The changed
setting is also applied to other shooting modes.
•The setting may not be changed when using certain settings of other functions.
CNumber of Images That Can Be Saved
•The approximate number of images that can be saved can be checked in the monitor when
shooting (A20).
•Note that due to JPEG compression, the number of images that can be saved may vary greatly
depending on the image content, even when using memory cards with the same capacity and
the same image mode setting. In addition, the number of images that can be saved may vary
depending on the make of the memory card.
•If the number of exposures remaining is 10,000 or more, the number of exposures remaining
display shows “9999”.
CPrinting Images at 1:1 Aspect Ratio
Change the printer setting to “Border” when printing images at a 1:1 aspect ratio. Some printers may
not be able to print images at a 1:1 aspect ratio.

E36
Reference Section
White Balance (Adjusting Hue)
Adjust white balance to suit the light source or weather conditions in order to make the
colors in images match what you see with your eyes.
•Use Auto under most conditions. Change the setting when you want to adjust the hue of
the image you are taking.
BNotes About White Balance
•Set the flash to W (off) when white balance is set to any setting other than Auto and Flash
(A49).
•The setting may not be changed when using certain settings of other functions.
Select A (auto) mode M d button M White balance M k button
Option Description
aAuto
(default setting) White balance is automatically adjusted to suit lighting conditions.
bPreset manual Use when the desired result is not achieved with Auto,
Incandescent, etc. (E37).
cDaylight White balance adjusted for direct sunlight.
dIncandescent Use under incandescent lighting.
eFluorescent Use under fluorescent lighting.
fCloudy Use when taking images under overcast skies.
gFlash Use with the flash.
E37
Reference Section
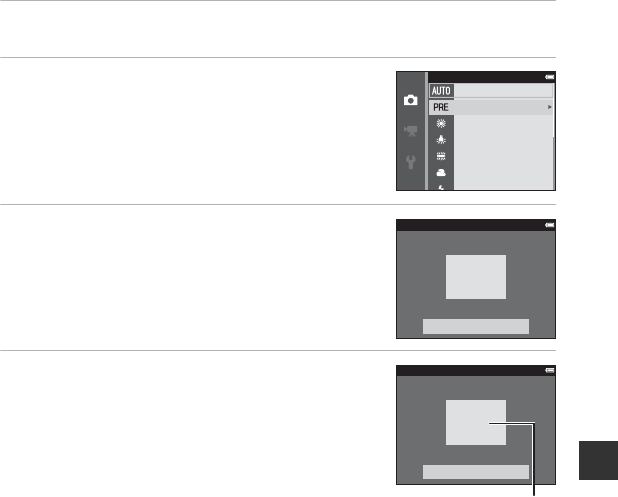
Using Preset Manual
Use the procedure below to measure the white balance value under the lighting used during
shooting.
1Place a white or gray reference object under the lighting that will be
used during shooting.
2Use the multi selector HI to select Preset
manual in the White balance menu, and
press the k button.
•The camera zooms in to the position for measuring white
balance.
3Select Measure.
•To apply the last measured value, select Cancel and press
the k button.
4Frame the reference object in the measuring
window.
Auto
Auto
Auto
Preset manual
Daylight
Daylight
Daylight
Incandescent
Incandescent
Incandescent
Fluorescent
Fluorescent
Fluorescent
Cloudy
Cloudy
Cloudy
FlashFlash
White balance
Preset manual
Cancel
Measure
Preset manual
Cancel
Measure
Measuring window


E39
Reference Section
Continuous Shooting
Select A (auto) mode M d button M Continuous M k button
Option Description
USingle
(default setting) One image is taken each time the shutter-release button is pressed.
k Continuous H
While the shutter-release button is held all the way down, images are
captured continuously.
•The frame rate for continuous shooting is about 10 fps and the
maximum number of continuous shots is about 7 (when image
mode is set to P 4608×3456).
m Continuous L
While the shutter-release button is held all the way down, images are
captured continuously.
•The frame rate for continuous shooting is about 2 fps and the
maximum number of continuous shots is about 6 (when image
mode is set to P 4608×3456).
q Pre-shooting cache
When the shutter-release button is pressed halfway, pre-shooting
cache shooting begins. When the shutter-release button is pressed
the rest of the way down, the camera saves the current image as well
as the images captured immediately before the button is pressed
(E41). This function helps you to avoid missing the shot.
•The frame rate for continuous shooting is about 10 fps and the
maximum number of continuous shots is 5, including a maximum
of two frames captured in the pre-shooting cache (when image
mode is set to P 4608×3456).
n Continuous H:
120 fps
Each time the shutter-release button is pressed all the way, images
are captured at a high speed rate.
•The frame rate for continuous shooting is about 120 fps and the
maximum number of continuous shots is 50.
•Image mode is fixed at O (image size: 640 × 480 pixels).
E40
Reference Section
BNotes About Continuous Shooting
•When a setting other than Single is selected, the flash cannot be used. Focus, exposure, and white
balance are fixed at the values determined with the first image in each series.
•It may take some time to save the images after shooting.
•When ISO sensitivity increases, noise may appear in captured images.
•The frame rate for continuous shooting may vary depending upon the current image mode
setting, the memory card used, or shooting condition.
•When using Pre-shooting cache, Continuous H: 120 fps, Continuous H: 60 fps, or Multi-
shot 16, banding or variance in brightness or hue may occur in images that were captured under
lighting that flickers at high speeds, such as fluorescent, mercury-vapor, or sodium-vapor lighting.
•The setting may not be changed when using certain settings of other functions.
j Continuous H:
60 fps
Each time the shutter-release button is pressed all the way, images
are captured at a high speed rate.
•The frame rate for continuous shooting is about 60 fps and the
maximum number of continuous shots is 25.
•Image mode is fixed at M (image size: 1280 × 960 pixels).
DBSS
(Best Shot Selector)
While the shutter-release button is held all the way down, the camera
captures a series of up to ten images and automatically saves the
sharpest image.
Use when shooting a stationary subject in a place where flash
photography is prohibited and camera shake is likely to occur.
WMulti-shot 16
Each time the shutter-release button is
pressed all the way down, the camera
captures a series of 16 images and saves it as
a single image.
•The frame rate for continuous shooting is
about 30 fps.
•Image mode is fixed at L (image size:
2560 × 1920 pixels).
•Digital zoom cannot be used.
Option Description

E41
Reference Section
CPre-shooting Cache
When the shutter-release button is pressed halfway or all the way down, images are saved in the
manner described below.
•The pre-shooting cache icon (Q) in the monitor glows green while the shutter-release button is
pressed halfway.
Images saved before pressing all the way Images saved by pressing all
the way
Press down halfway Press down all the way

E42
Reference Section
ISO Sensitivity
Higher ISO sensitivity allows darker subjects to be captured. Additionally, even with subjects
of similar brightness, images can be taken at faster shutter speeds, and blurring caused by
camera shake and subject movement can be reduced.
•When higher ISO sensitivity is set, images may contain noise.
BNotes About ISO Sensitivity
The setting may not be changed when using certain settings of other functions.
CISO Sensitivity Display on the Shooting Screen
•When Auto is selected, E is displayed if the ISO sensitivity automatically increases.
•When Fixed range auto is selected, the maximum value for ISO sensitivity is displayed.
Select A (auto) mode M d button M ISO sensitivity M k button
Option Description
a Auto
(default setting)
Sensitivity is automatically selected from the range of ISO 125 to
1600.
I Fixed range auto Select the range in which the camera automatically adjusts ISO
sensitivity, from ISO 125-400 or ISO 125-800.
125, 200, 400, 800, 1600,
3200, Hi 1
Sensitivity is locked at the specified value.
•Hi 1 is equivalent to ISO 6400.

E43
Reference Section
Color Options
Make colors more vivid or save images in monochrome.
BNotes About Color Options
The setting may not be changed when using certain settings of other functions.
Select A (auto) mode M d button M Color options M k button
Option Description
nStandard color
(default setting) Use for images exhibiting natural color.
oVivid color Use to achieve a vivid, “photoprint” effect.
pBlack-and-white Save images in black-and-white.
qSepia Save images in sepia tones.
rCyanotype Save images in cyan-blue monochrome.
E44
Reference Section
AF Area Mode
Use this option to determine how the camera selects the focus area for autofocus.
Select A (auto) mode M d button M AF area mode M k button
Option Description
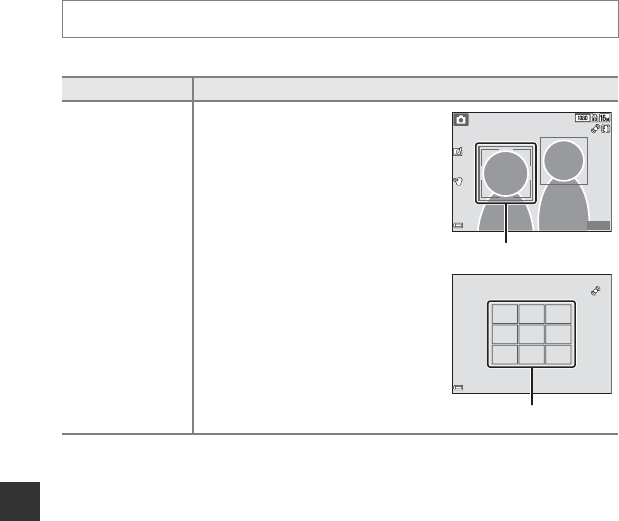
aFace priority
When the camera detects a human face,
it focuses on that face. See “Using Face
Detection” (A64) for more information.
When framing a composition with no
human subjects or detected faces, the
camera automatically selects one or more
of the nine focus areas containing the
subject closest to the camera when the
shutter-release button is pressed halfway.
880
880
25
m
0s
25
m
0s
Focus area
F3.3
F3.3
1/250
1/250
Focus areas
E45
Reference Section
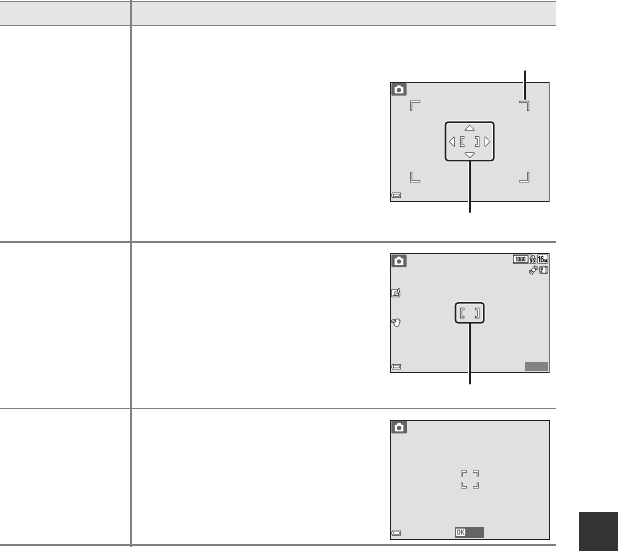
xManual
Use the multi selector HIJK to move
the focus area to where you want to
focus.
•To use the multi selector to configure
the flash mode or other settings, press
the k button. To return to moving the
focus area, press the k button again.
yCenter
The camera focuses on the subject in the
center of the frame.
s Subject
tracking
Use this function to take images of
moving subjects. Register the subject on
which the camera focuses. The focus area
automatically moves to track the subject.
See “Using Subject Tracking” (E47) for
more information.
Option Description
Scope of movable
focus area
Focus area
25
m
0s
25
m
0s
880
880
Focus area
Start
E46
Reference Section
BNotes About AF Area Mode
•When digital zoom is in effect, the camera focuses on the area in the center of the frame
regardless of the AF area mode setting.
•The setting may not be changed when using certain settings of other functions.
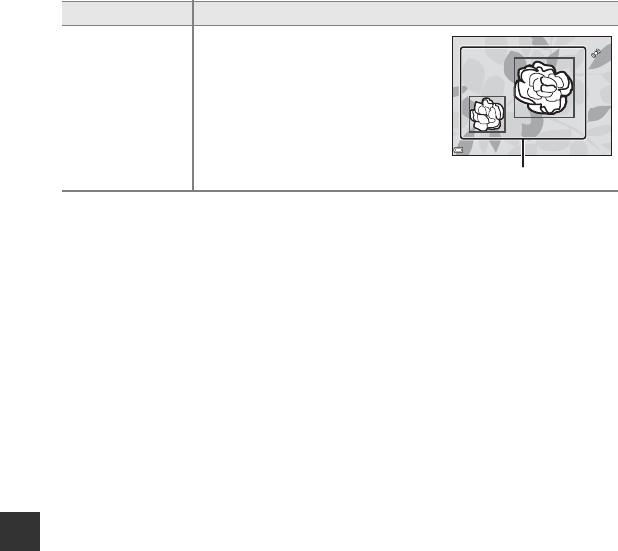
M Target finding
AF (default setting)
When the camera detects the main
subject, it focuses on that subject.
See “Using Target Finding AF” (A63) for
more information.
Option Description
F3.3
F3.3
1/250
1/250
Focus areas
E47
Reference Section
Using Subject Tracking
1Register a subject.
•Align the subject that you want to track with the border in
the center of the monitor and press the k button.
•When the subject is registered, a yellow border (focus area)
is displayed around that subject and the camera begins
tracking that subject.
•If the subject cannot be registered, the border glows red.
Change the composition and try registering the subject
again.
•To cancel subject registration, press the k button.
•If the camera can no longer track the registered subject, the focus area disappears. Register
the subject again.
2Press the shutter-release button fully to take
the picture.
•If the shutter-release button is pressed while the focus area
is not displayed, the camera focuses on the area in the
center of the frame.
BNotes About Subject Tracking
•If you perform operations such as zooming while the camera is tracking the subject, the
registration is canceled.
•Subject tracking may not be possible in certain shooting conditions.
Select A (auto) mode M d button M AF area mode M k button M
s Subject tracking M k button M d button
Start
F3.3
F3.3
1/250
1/250

E48
Reference Section
Autofocus Mode
Select how the camera focuses when shooting still images.
CAutofocus Mode for Movie Recording
Autofocus mode for movie recording can be set with Autofocus mode (E68) in the movie menu.
Quick Effects
BNotes About Quick Effects
The setting may not be changed when using certain settings of other functions.
Select A (auto) mode M d button M Autofocus mode M k button
Option Description
ASingle AF
(default setting)
The camera focuses only when the shutter-release button is pressed
halfway.
BFull-time AF
The camera continues focusing even when the shutter-release
button is not pressed halfway. The sound of lens drive movement is
heard while the camera focuses.
Select A (auto) mode M d button M Quick effects M k button
Option Description
p On (default setting)
In A (auto) mode, press the k button immediately after releasing
the shutter to display the effect selection screen and use the quick
effects function (A45).
Off Disables the quick effects function (during shooting).

E49
Reference Section
•See “Image Mode Settings (Image Size and Quality)” (E34) for information about Image
mode.
Skin Softening
The effects of skin softening are not visible when framing images for shooting. Check the
results in playback mode, after taking images.
The Smart Portrait Menu
Enter shooting mode M A (shooting mode) M F Smart portrait M k button M
d button M Skin softening M k button
Option Description
S High When the shutter is released, the camera detects one or more
human faces (up to three), and processes the image to soften
facial skin tones before saving the image. You can select the
amount of effect that is applied.
R Normal (default setting)
Q Low
Off Turns skin softening off.

E50
Reference Section
Smile Timer
The camera detects human faces and then automatically releases the shutter whenever a
smile is detected.
BNotes About Smile Timer
The setting may not be changed when using certain settings of other functions.
Enter shooting mode M A (shooting mode) M F Smart portrait M k button M
d button M Smile timer M k button
Option Description
a On (single) Whenever a smile is detected, the camera captures one image.
aC On (continuous)
Whenever a smile is detected, the camera captures up to 5
images continuously and saves them all. The flash cannot be
used.
aD On (BSS)
(default setting)
Whenever a smile is detected, the camera captures up to 5
images continuously and saves the one that best captured the
smile. The flash cannot be used.
Off Turns the smile timer off.
E51
Reference Section
Blink Proof
BNotes About Blink Proof
The setting may not be changed when using certain settings of other functions.
Enter shooting mode M A (shooting mode) M F Smart portrait M k button M
d button M Blink proof M k button
Option Description
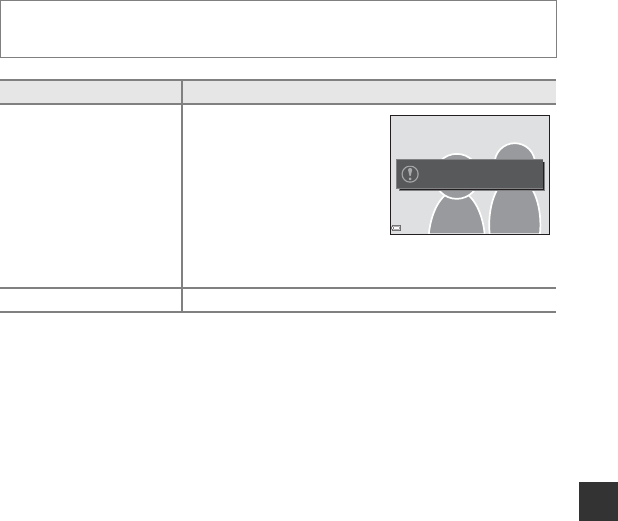
y On
The camera automatically
releases the shutter twice with
every shot and saves one image
in which the subject's eyes are
open.
•If the camera saved an image
in which the subject’s eyes
may have been closed, the
dialog shown on the right is
displayed for a few seconds.
•The flash cannot be used.
Off (default setting) Turns the blink proof off.
A blink was detected in the
picture just taken.
E52
Reference Section
•See “Editing Still Images” (E14) for information about image editing functions.
•See “Favorite Pictures Mode” (E6) for information about Favorite pictures and
Remove from favorites.
Print Order (Creating a DPOF Print Order)
If you configure print order settings in advance, you can use them with the printing methods
listed below.
•Taking the memory card to a digital photo lab that supports DPOF (Digital Print Order
Format) printing.
•Inserting the memory card into a DPOF-compatible printer’s card slot.
•Connecting the camera to a PictBridge-compatible printer (E24).
1Use the multi selector HI to select Select
images and press the k button.
•In favorite pictures, auto sort, or list by date mode, the
screen shown on the right is not displayed. Proceed to the
step 2.
The Playback Menu
Press the c button (playback mode) M d button M Print order M k button
Select images
Print order
Delete print order

E53
Reference Section
2Select images (up to 99) and the number of
copies (up to nine) of each.
•Use the multi selector JK to select images, and use HI
to specify the number of copies to be printed.
•Images selected for printing are indicated by M and the
numeral indicating the number of copies to be printed. If no
copies have been specified for images, the selection is
canceled.
•Move the zoom control toward g(i) to switch to full-frame playback or f(h) to switch
to thumbnail playback.
•Press the k button when setting is complete.
3Select whether or not to print shooting date
and shooting information.
•Select Date and press the k button to print the shooting
date on all images.
•Select Info and press the k button to print the shutter
speed and aperture value on all images.
•Lastly, select Done and press the k button to complete
the print order.
Print selection
BackBack
311
Print order
Date
Done
Info

E54
Reference Section
BNotes About Print Order
When a print order is created in favorite pictures mode, auto sort mode, or list by date mode, the
screen shown below is displayed if images other than those in the selected album, category, or
shooting date have been marked for printing.
•Yes: Does not remove print markings from other images, and adds the current print order settings.
•No: Removes print markings from all other images, and uses only the current print order settings.
If the total number of the images in the print order exceeds 99 when the new settings are applied,
the screen shown below is displayed.
•Yes: Removes print markings from all other images, and uses only the current print order settings.
•Cancel: Does not remove print markings from other images, and cancels the current print order
settings.
List by date modeFavorite pictures mode or
auto sort mode
Print order
Date
Done
Info
Yes
No
Save print marking for other
images?
Print order
Date
Done
Info
Yes
No
Save print marking for other
dates?
List by date modeFavorite pictures mode or
auto sort mode
Print order
Date
Done
Info
Yes
Cancel
Too many images selected.
Remove print marking from
other images?
Print order
Date
Done
Info
Yes
Cancel
Too many images selected.
Remove print marking for
other dates?

E55
Reference Section
BNotes About Printing Shooting Date and Shooting Information
•Some printers may not be able to print the shooting date and shooting information.
•Shooting information is not printed when the camera is connected to a printer.
•The Date and Info settings are reset each time the Print order option is displayed.
•The date printed is that saved when the image was captured.
•For images taken with the Print date (E75) option enabled,
only the date and time imprinted at the time of shooting are
printed, even if the Print order date option is enabled for the
images.
CCanceling Existing Print Order
Select Delete print order in step 1 of “Print Order (Creating a DPOF Print Order)” (E52).
CMore Information
See “Printing Images at 1:1 Aspect Ratio” (E35) for more information.
15.11.2013
15.11.2013
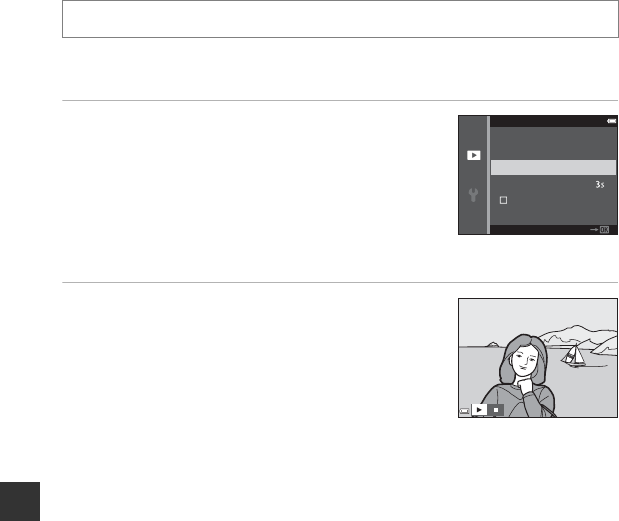
E56
Reference Section
Slide Show
Play back images one by one in an automated “slide show.” When movie files are played back
in the slide show, only the first frame of each movie is displayed.
1Use the multi selector HI to select Start
and press the k button.
•The slide show begins.
•To change the interval between images, select Frame
intvl, press the k button, and specify the desired interval
time before selecting Start.
•To repeat the slide show automatically, select Loop and
press the k button before selecting Start.
•The maximum playback time is up to about 30 minutes even if Loop is enabled.
2Select End or Restart.
•The screen shown on the right is displayed after the slide
show ends or is paused. To exit the show, select G and
then press the k button. To resume the slide show, select
F and then press the k button.
Operations During Playback
•Use JK to display the previous/next image. Press and hold to rewind/fast forward.
•Press the k button to pause or end the slide show.
Press the c button (playback mode) M d button M Slide show M k button
Slide show
Frame intvl
Start
Loop
PausePause

E57
Reference Section
Protect
The camera protects selected images from accidental deletion.
Select images to protect or cancel protection for previously protected images from the image
selection screen (E58).
Note that formatting the camera’s internal memory or the memory card permanently deletes
protected files (E81).
Press the c button (playback mode) M d button M Protect M k button
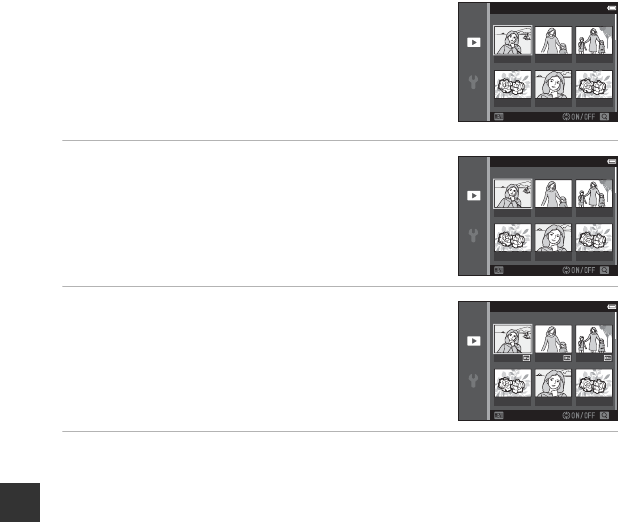
E58
Reference Section
The Image Selection Screen
When an image selection screen such as the one shown on
the right is displayed while operating the camera, follow the
procedures described below to select the images.
1Use the multi selector JK to select an image.
•Move the zoom control (A1) toward g(i) to switch to
full-frame playback or f(h) to switch to thumbnail
playback.
•Only one image can be selected for Rotate image,
Choose key picture, and Welcome screen. Proceed to
step 3.
2Use HI to select or deselect (or to specify
the number of copies).
•When an image is selected, an icon is displayed below the
image. Repeat steps 1 and 2 to select additional images.
3Press the k button to apply image selection.
•When Selected images is selected, a confirmation dialog is displayed. Follow the
instructions displayed in the monitor.
Protect
BackBack
Protect
BackBack
Protect
BackBack
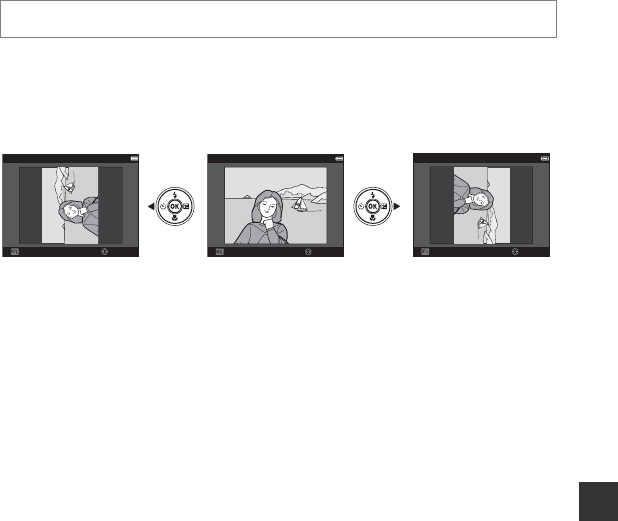
E59
Reference Section
Rotate Image
Specify the orientation in which saved images are displayed during playback. Still images can
be rotated 90 degrees clockwise or 90 degrees counterclockwise.
Select an image from the image selection screen (E58). When the Rotate image screen is
displayed, press the multi selector JK to rotate the image 90 degrees.
Press the k button to finalize display orientation, and save orientation information with the
image.
Press the c button (playback mode) M d button M Rotate image M k button
Rotate image
BackBack RotateRotate
Rotate image
BackBack RotateRotate
Rotate image
BackBack RotateRotate
Rotate 90 degrees
counterclockwise
Rotate 90 degrees
clockwise
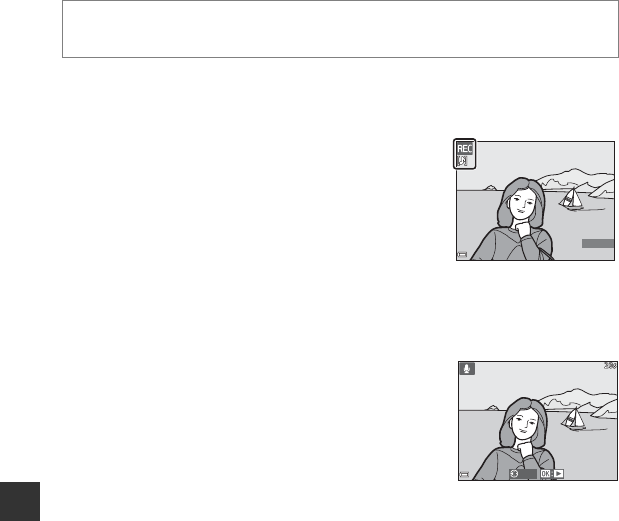
E60
Reference Section
Voice Memo
Voice memos can be recorded and attached to images.
Recording Voice Memos
•Press and hold the k button to record (up to about 20
seconds).
•Do not touch the microphone.
•During recording, o and p flash in the monitor.
•The voice memo playback screen is displayed after
recording ends. Press the k button to play back the voice
memo.
•Delete the current voice memo before recording a new
voice memo (E61).
•p is displayed for images with a voice memo when in full-frame playback mode.
Playing Voice Memos
Select an image with p displayed before pressing the d
button.
•Press the k button to play the voice memo. Press the
button again to stop playback.
•Move the zoom control during playback to adjust playback
volume.
Press the c button (playback mode) M select an image M d button M
Voice memo M k button
17s
17s
Back
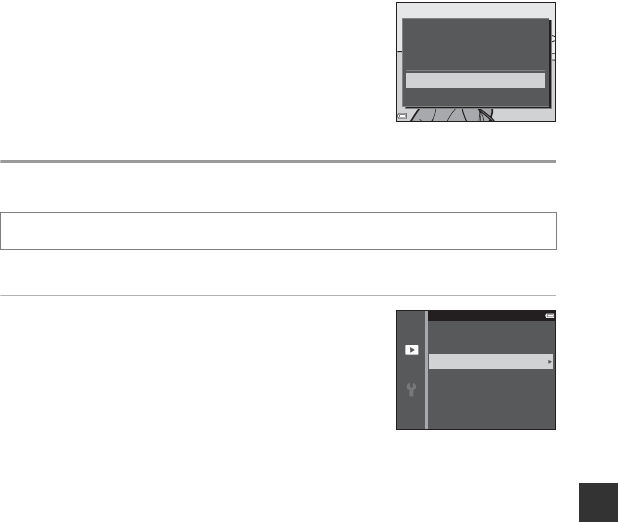
E61
Reference Section
Deleting Voice Memos
Press the l button while the screen described in “Playing
Voice Memos” (E60) is displayed.
When the confirmation dialog is displayed, use the multi
selector HI to select Yes and press the k button.
•To delete a voice memo for a protected image, the Protect
setting must first be disabled.
Copy (Copy Between Internal Memory and Memory Card)
Copy images between the internal memory and a memory card.
1Use the multi selector HI to select a
destination option to which images are
copied and press the k button.
Press the c button (playback mode) M d button M Copy M k button
Yes
No
File will be deleted. OK?
Camera to card
Card to camera
Copy

E62
Reference Section
2Select a copy option and press the k button.
•If you choose the Selected images option, use the image
selection screen to specify images (E58).
BNotes About Copying Images
•Only files in formats that this camera can record can be copied.
•Operation is not guaranteed with images captured with another make of camera or that have
been modified on a computer.
•The Print order (E52) settings configured for images are not copied.
•Copied images or movies cannot be displayed in auto sort mode (E10).
•If an image added to an album (E6) is copied, the copied image is not added to the album.
CNotes About Copying Images in a Sequence
•If you select a key picture of a sequence in Selected images, all images in the sequence are
copied.
•If you press the d button while images in a sequence are displayed, only the Card to camera
copy option is available. All images in the sequence are copied if you select Current sequence.
CCopying to a Memory Card That Contains No Images
When the camera is switched to playback mode, Memory contains no images. is displayed. Press
the d button to select Copy.
Selected images
All images
Camera to card

E63
Reference Section
Sequence Display Options
Select the method used to display images in the sequence (E12).
Settings are applied to all sequences, and the setting is saved in the camera’s memory even if
the camera is turned off.
Choose Key Picture
Specify a different image in the sequence as the key picture.
•When the key picture selection screen is displayed, select an image (E58).
Press the c button (playback mode) M d button M Sequence display options M
kbutton
Option Description
Q Individual pictures Displays each image in a sequence individually. Fis displayed on
the playback screen.
C Key picture only
(default setting) Displays only the key picture for images in a sequence.
Press the c button (playback mode) M display a sequence for which you want to
change the key picture M d button M Choose key picture M k button

E64
Reference Section
Movie Options
Select the desired movie option to record.
Select normal speed movie options to record at normal speed, or HS movie options (E65)
to record in slow or fast motion.
•Memory cards (Class 6 or higher) are recommended for recording movies (F22).
Normal Speed Movie Options
The Movie Menu
Enter shooting mode M d button M D menu icon M Movie options M k button
Option
(Image size/Frame
rate1, File format)
Image size Aspect ratio (horizontal to
vertical)
d 1080P/30p
R 1080P/25p
(default setting)
1920×1080 (High) 16:9
e 1080/30p
S 1080/25p 1920×1080 16:9
Z 1080/60i
U 1080/50i 1920×1080 16:9
f 720/30p
V 720/25p 1280×720 16:9
p iFrame 720/30p2
p iFrame 720/25p21280×720 16:9
g 480/30p
W 480/25p 640×480 4:3

E65
Reference Section
1The items and frame rate that can be set vary depending on the Video mode setting in TV
settings in the setup menu (E82).
2iFrame is a format supported by Apple Inc. iFrame files cannot be edited on this camera. When
recording movies to the internal memory, recording may stop before the maximum movie length
is reached.
HS Movie Options
Recorded movies are played back in fast or slow motion.
See “Recording Movies in Slow Motion and Fast Motion (HS Movie)” (E66).
* While recording movies, the camera can be switched between normal speed movie recording
and slow motion or fast motion movie recording.
The maximum recording time shown here refers only to the portion of the movie that is recorded
in slow motion or fast motion.
BNotes About HS Movie
•Sound is not recorded.
•Zoom position, focus, exposure, and white balance are locked when movie recording starts.
•Some Movie options settings are not available when using certain special effects.
Option
Image size
Aspect ratio
(horizontal to vertical)
Description
h
aHS 480/4× 640×480
4:3
1/4-speed slow motion movies
•Max. recording time*: 10 seconds
(playback time: 40 seconds)
i
XHS 720/2× 1280×720
16:9
1/2-speed slow motion movies
•Max. recording time*: 30 seconds
(playback time: 1 minute)
j
YHS 1080/0.5× 1920×1080
16:9
2× speed fast motion movies
•Max. recording time*: 2 minutes
(playback time: 1 minute)
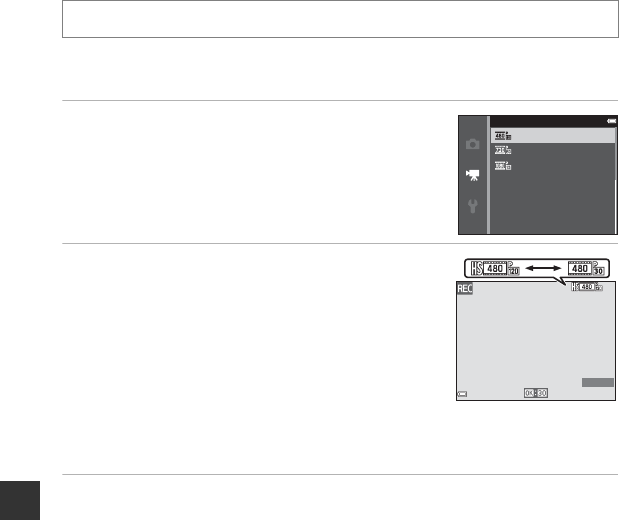
E66
Reference Section
Recording Movies in Slow Motion and Fast Motion (HS Movie)
Movies recorded using HS movie can be played back in slow motion at 1/4 or 1/2 of the
normal playback speed, or in fast motion at twice the normal playback speed.
1Use the multi selector HI to select an HS
movie option (E65) and press the k
button.
•After applying the option, press the d button to return
to the shooting screen.
2Press the b(emovie-record) button to start
recording.
•Movie recording starts at high speed when the Open with
HS footage option in the movie menu is set to On, or at
normal speed when it is set to Off.
•The camera switches between normal speed movie
recording and HS movie recording each time the k
button is pressed.
•The movie options icon changes when switching between
HS movie recording and normal speed movie recording.
•When the maximum recording time for HS movies (E65) is reached, the camera
automatically switches to normal speed movie recording.
3Press the b(emovie-record) button to end recording.
Enter shooting mode M d button M D menu icon M Movie options M k button
HS 720/2×
HS 1080/0.5×
HS 480/4×
Movie options
5s
5s
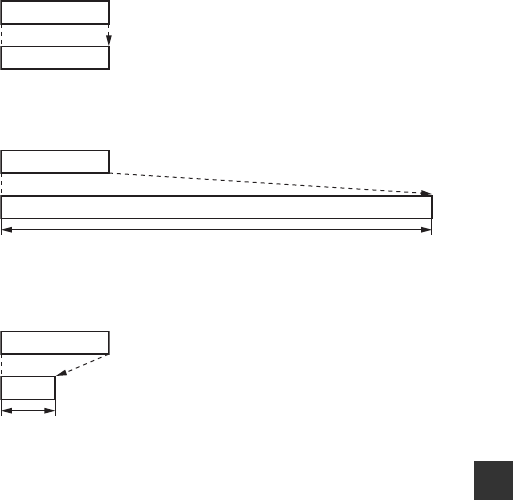
E67
Reference Section
CPlaying Back in Slow Motion and Fast Motion
When recording at normal speed:
When recording at h HS 480/4× (a HS 480/4×):
Movies are recorded at 4× normal speed.
They are played back in slow motion at 4× slower speed.
When recording at j HS 1080/0.5× (Y HS 1080/0.5×):
Movies are recorded at 1/2 normal speed.
They are played back in fast motion at 2× faster speed.
Recording time 10 s
Playback time 10 s
Recording time 10 s
Slow motion playback
Playback time 40 s
Recording time 10 s
Fast motion playback
Playback time 5 s

E68
Reference Section
Open with HS Footage
Set whether to start recording at high speed or normal speed when recording HS movies.
Autofocus Mode
Set how the camera focuses in movie mode.
•When an HS movie option is selected in Movie options, the setting is fixed at Single AF.
Enter shooting mode M d button M D menu icon M Open with HS footage M
kbutton
Option Description
On (default setting) Record HS movies when movie recording begins.
Off Record normal speed movies when movie recording begins.
Enter shooting mode M d button M D menu icon M Autofocus mode M k button
Option Description
A Single AF
(default setting)
Focus is locked when the b (e movie-record) button is pressed to
start recording.
Select this option when the distance between the camera and the
subject will remain fairly consistent.
B Full-time AF
Camera focuses continuously.
Select this option when the distance between the camera and
subject will change significantly during recording. The sound of the
camera focusing may be heard in the recorded movie. Use of Single
AF is recommended to prevent the sound of the camera focusing
from interfering with recording.

E69
Reference Section
Wind Noise Reduction
Set whether or not to reduce wind noise during movie recording.
•When an HS movie option is selected in Movie options, the setting is fixed at Off.
Enter shooting mode M d button M D menu icon M Wind noise reduction M
kbutton
Option Description
Y On
Reduces the sound produced when wind passes over the
microphone. Other sounds may become difficult to hear during
playback.
Off (default setting) Wind noise reduction is not enabled.

E70
Reference Section
Welcome Screen
Configure the welcome screen that is displayed when you turn on the camera.
The Setup Menu
Press the d button M z menu icon M Welcome screen M k button
Option Description
None (default setting) Does not display the welcome screen.
COOLPIX Displays a welcome screen with the COOLPIX logo.
Select an image
Displays an image selected for the welcome screen.
•The image selection screen is displayed. Select an image (E58)
and press the k button.
•Because a copy of the selected image is saved in the camera, it will
be displayed when the camera is turned on, even if the original
image is deleted.
•An image cannot be selected if its aspect ratio is different from that
of the screen, or if the image size is extremely small after the small
picture or crop function is applied.
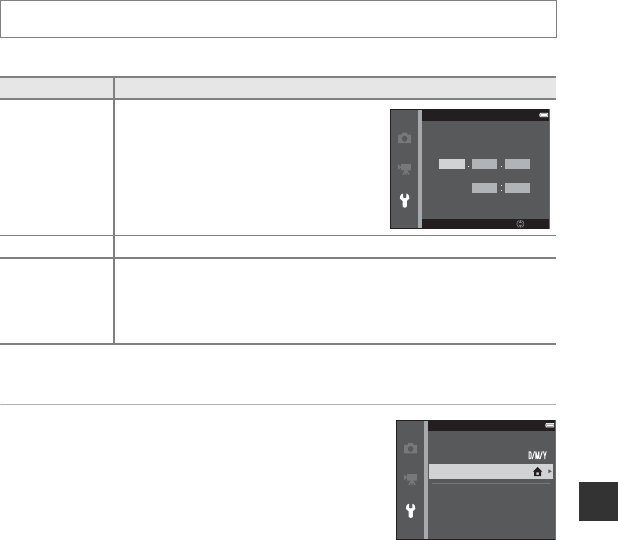
E71
Reference Section
Time Zone and Date
Set the camera clock.
Setting the Time Zone
1Use the multi selector HI to select Time
zone and press the k button.
Press the d button M z menu icon M Time zone and date M k button
Option Description
Date and time
•Select an item: Press the multi selector
JK (changes between D, M, Y, hour, and
minute).
•Edit the date and time: Press HI.
•Apply the setting: Select the minute
setting and press the k button.
Date format Select Year/Month/Day, Month/Day/Year, or Day/Month/Year.
Time zone
Set time zone and daylight saving time.
•When Travel destination (x) is set after having set the home time zone
(w), the time difference between the travel destination and the home time
zone is automatically calculated, and the date and time are saved for the
selected region.
Date and time
EditEdit
DMY
01 01 2013
00 00
Time zone and date
Date and time
Date format
Time zone
London, Casablanca
15/11/2013
15
:
30
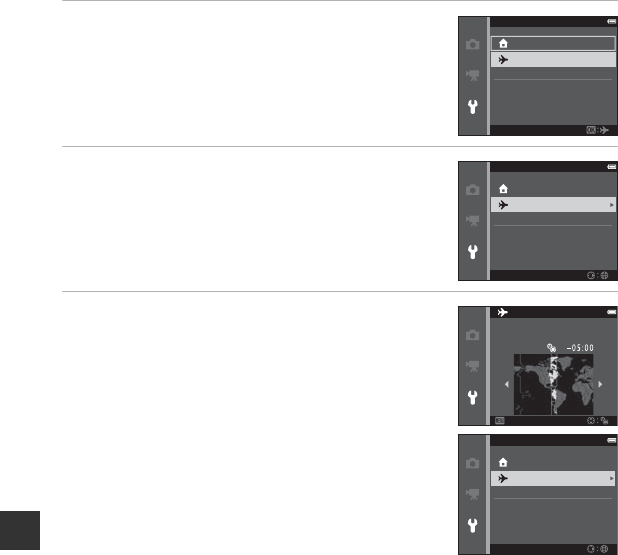
E72
Reference Section
2Select w Home time zone or x Travel
destination and press the k button.
•The date and time displayed in the monitor changes
depending on whether the home time zone or travel
destination is selected.
3Press K.
4Use JK to select the time zone.
•Press H to enable daylight saving time function, and W is
displayed. Press I to disable the daylight saving time
function.
•Press the k button to apply the time zone.
•If the correct time is not displayed for the home or travel
destination time zone setting, set the appropriate time in
Date and time.
Time zone
Home time zone
Travel destination
London, Casablanca
15/11/2013
15
:
30
Time zone
Home time zone
Travel destination
London, Casablanca
15/11/2013
15
:
30
BackBack
New York, Toronto, Lima
10
:
30
Time zone
Home time zone
Travel destination
New York, Toronto, Lima
15/11/2013
10
:
30
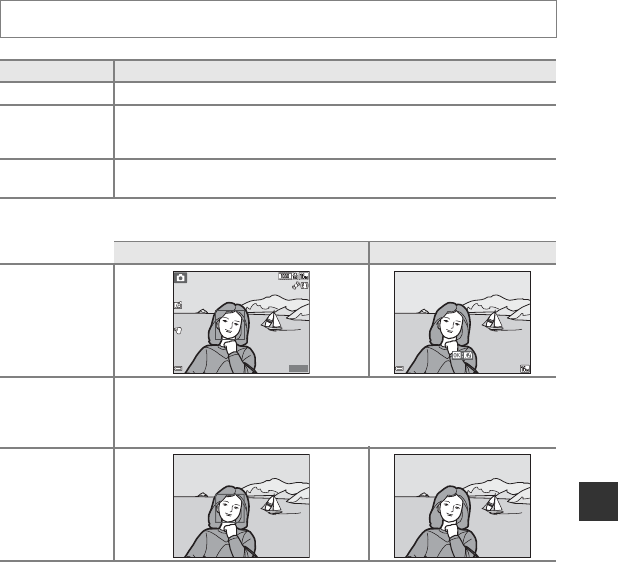
E73
Reference Section
Monitor Settings
Photo Info
Press the d button M z menu icon M Monitor settings M k button
Option Description
Photo info Set whether or not to display information in the monitor.
Image review
This setting determines whether or not the captured image is displayed
immediately after shooting.
•Default setting: On
Brightness Select from five settings.
•Default setting: 3
Shooting mode Playback mode
Show info
Auto info
(default setting)
Current settings and operation guide are displayed as in Show info.
If no operations are performed for a few seconds, the information is hidden as
in Hide info. Information is displayed again when the next operation is
performed.
Hide info
25
m
0s
25
m
0s
880
880
4
/
4
4
/
4
15
/
11
/
2013 15:30
15
/
11
/
2013 15:30
0004.
JPG
0004.
JPG
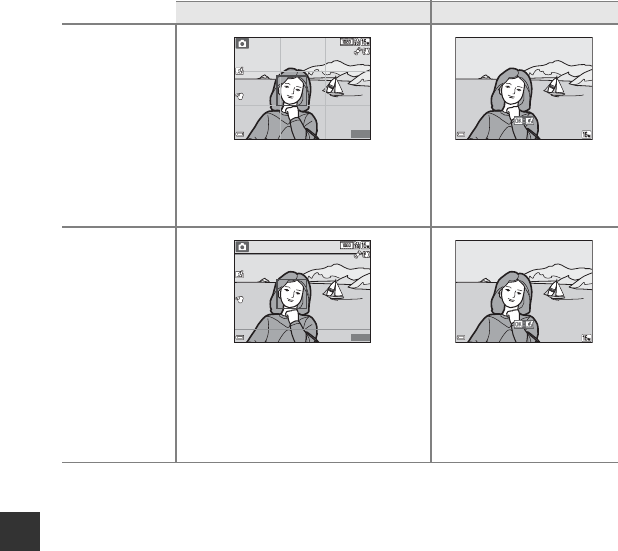
E74
Reference Section
BNotes About Monitor Settings
When Quick effects (E48) is set to On, Image review is fixed at On.
Framing
grid+auto info
In addition to information shown with
Auto info, a framing grid is displayed to
help frame images.
The framing grid is not displayed when
recording movies.
The current settings or
operation guide is displayed as
in Auto info.
Movie
frame+auto info In addition to information shown with
Auto info, a frame is displayed before
recording begins that represents the area
that will be captured when recording
movies.
The movie frame is not displayed when
recording movies.
The current settings or
operation guide is displayed as
in Auto info.
Shooting mode Playback mode
25
m
0s
25
m
0s
880
880
4
/
4
4
/
4
15
/
11
/
2013 15:30
15
/
11
/
2013 15:30
0004.
JPG
0004.
JPG
25
m
0s
25
m
0s
880
880
4
/
4
4
/
4
15
/
11
/
2013 15:30
15
/
11
/
2013 15:30
0004.
JPG
0004.
JPG
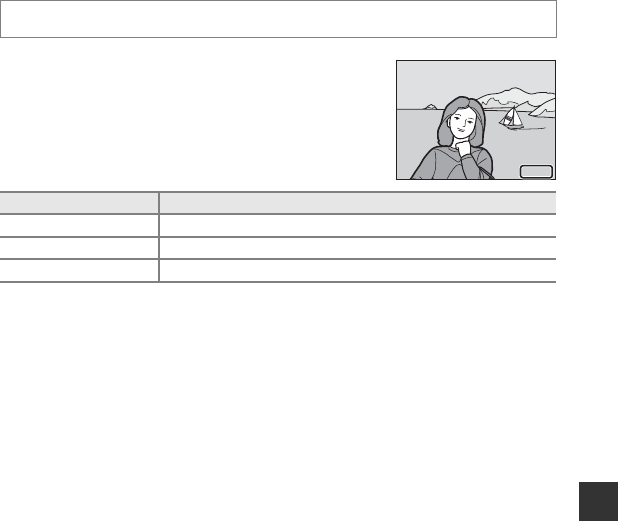
E75
Reference Section
Print Date (Imprinting Date and Time)
The shooting date and time can be imprinted on the images
when shooting, allowing the information to be printed even
from printers that do not support date printing (E55).
BNotes About Print Date
•Imprinted dates form a permanent part of image data and cannot be deleted. The date and time
cannot be imprinted on images after they have been captured.
•The date and time cannot be imprinted in the following situations:
-When using Night portrait (when Hand-held is selected), Night landscape (when Hand-
held is selected), or Easy panorama scene mode
- When the continuous shooting setting (E39) is set to Pre-shooting cache, Continuous H:
120 fps, or Continuous H: 60 fps
- When shooting movies
•The imprinted date and time may be difficult to read when using a small image size.
Press the d button M z menu icon M Print date M k button
Option Description
fDate Date is imprinted on images.
SDate and time Date and time are imprinted on images.
Off (default setting) Date and time are not imprinted on images.
15.11.2013
15.11.2013

E76
Reference Section
Gesture Control
Set whether or not to enable the gesture control function when you position the monitor
facing forward in the same direction as the camera lens.
This function is available in Portrait and Night portrait scene modes, smart portrait mode,
and A (auto) mode.
BNotes About Gesture Control
•The camera may not detect your palm or hand movement in some shooting conditions.
•When moving your hand, hold up your palm vertically facing the camera, and maintain the same
hand shape as you move it.
•The functions listed below cannot be used when the gesture control function is in use.
•When the monitor is returned to the open rearward-facing position against the back of the
camera, the restricted functions are reset to their original settings (if you did not change the
settings while using the gesture control function).
Press the d button M z menu icon M Gesture control M k button
Option Description
c On (default setting) Gesture control is enabled.
Off Gesture control is disabled.
Restricted function Description
Self-timer (A51), Quick effects
(E48), Smile timer (E50), AF
assist (E79), Digital zoom (E79)
This function cannot be used.
Continuous (E39)
The setting is fixed at Single if Continuous H,
Continuous L, Pre-shooting cache, or BSS is set before
you start using the gesture control function.
AF area mode (E44) The setting is fixed at Target finding AF.
Monitor settings (E73) Photo info is fixed at Show info.
Auto off (E80) The setting is fixed at 5 min if 30 s or 1 min is set before
you start using the gesture control function.

E77
Reference Section
Vibration Reduction
Set to reduce the effects of camera shake while shooting.
Set Vibration reduction to Off when using a tripod to stabilize the camera during shooting.
BNotes About Vibration Reduction
•After turning on the camera or after switching from playback mode to shooting mode, wait for the
shooting mode screen to be displayed completely before taking images.
•Images displayed in the camera monitor immediately after shooting may be displayed blurry.
•Vibration reduction may be unable to completely eliminate the effects of camera shake in some
situations.
Press the d button M z menu icon M Vibration reduction M k button
Option Description
gOn (default setting) Vibration reduction is enabled.
Off Vibration reduction is disabled.

E78
Reference Section
Motion Detection
Enable motion detection to reduce the effects of subject movement and camera shake when
shooting still images.
BNotes About Motion Detection
•Motion detection may be unable to eliminate the effects of subject movement and camera shake
in some situations.
•Motion detection may be disabled if the subject exhibits significant movement or is too dark.
•The images captured using motion detection may be somewhat “grainy” in appearance.
Press the d button M z menu icon M Motion detection M k button
Option Description
UAuto
(default setting)
Motion detection is enabled with some shooting modes or settings,
when r is displayed on the shooting screen.
When the camera detects subject movement or camera shake, r
turns green, and the ISO sensitivity and shutter speed are
automatically increased to reduce blurring.
•Set ISO sensitivity (E42) to Auto in A (auto) mode.
Off Motion detection is disabled.

E79
Reference Section
AF Assist
Enable or disable the AF-assist illuminator which assists autofocus operation.
Digital Zoom
BNotes About Digital Zoom
Digital zoom cannot be used in the following situations.
•When Portrait, Night portrait, Night landscape, Backlighting (when HDR is set to On), Easy
panorama, or Pet portrait is selected in scene mode
•When smart portrait mode is selected
•When Continuous (E39) is set to Multi-shot 16 in A (auto) mode
•When AF area mode (E44) is set to Subject tracking in A (auto) mode
Press the d button M z menu icon M AF assist M k button
Option Description
a Auto
(default setting)
The AF-assist illuminator automatically lights up when the subject is
dimly lit. The illuminator has a range of about 2.0 m (6 ft 6 in.) at the
maximum wide-angle position and about 1.1 m (3 ft 7 in.) at the
maximum telephoto position.
•Note that for some scene modes or focus areas, the AF-assist
illuminator may not light.
Off The AF-assist illuminator does not light.
Press the d button M z menu icon M Digital zoom M k button
Option Description
On (default setting) Digital zoom is enabled.
Off Digital zoom is disabled.

E80
Reference Section
Sound Settings
Auto Off
Set the amount of time that elapses before the camera enters standby mode (A21).
You can select 30 s, 1 min (default setting), 5 min, or 30 min.
CNotes About Auto Off
The time that passes before the camera enters standby mode is fixed in the following situations:
•When a menu is displayed: 3 minutes (5 or 30 minutes if 5 min or 30 min is selected)
•When the AC adapter EH-62G is connected: 30 minutes
•When an audio video cable or HDMI cable is connected: 30 minutes
Press the d button M z menu icon M Sound settings M k button
Option Description
Button sound
When On (default setting) is selected, the camera produces one beep
when operations are performed, two beeps when focus is acquired
on the subject, and three beeps when an error occurs. The start-up
sound is also produced.
•Sounds are disabled when using Pet portrait scene mode.
Shutter sound
When On (default setting) is selected, the shutter sound is produced
when the shutter is released.
•The shutter sound is not produced when using continuous
shooting mode, when recording movies, or when using Pet
portrait scene mode.
Press the d button M z menu icon M Auto off M k button