Contents
- 1. Users Manual-1
- 2. Users Manual-2
- 3. Users Manual-3
Users Manual-2
53
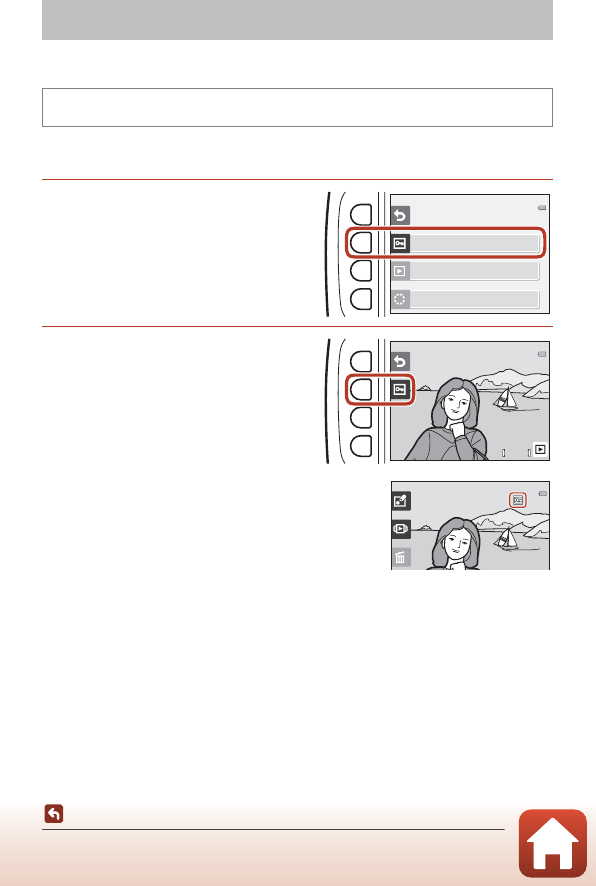
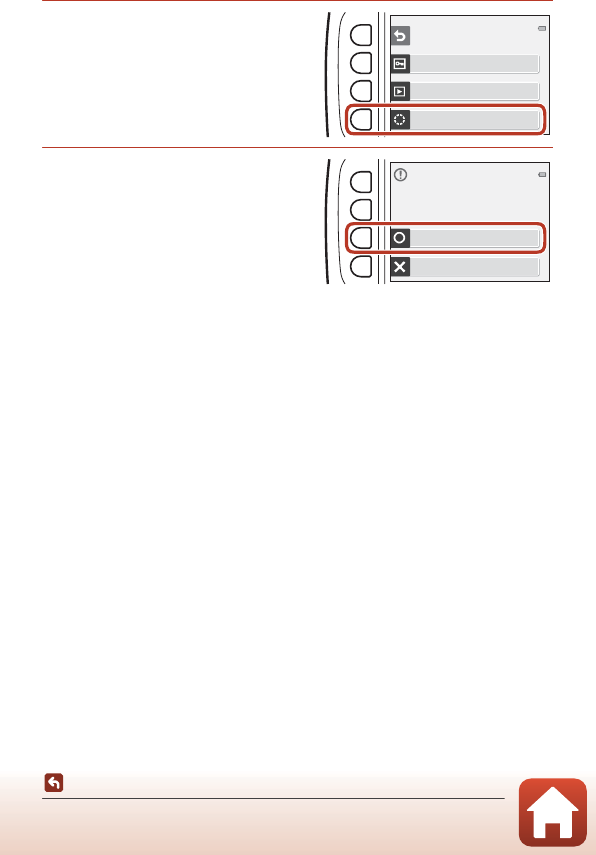
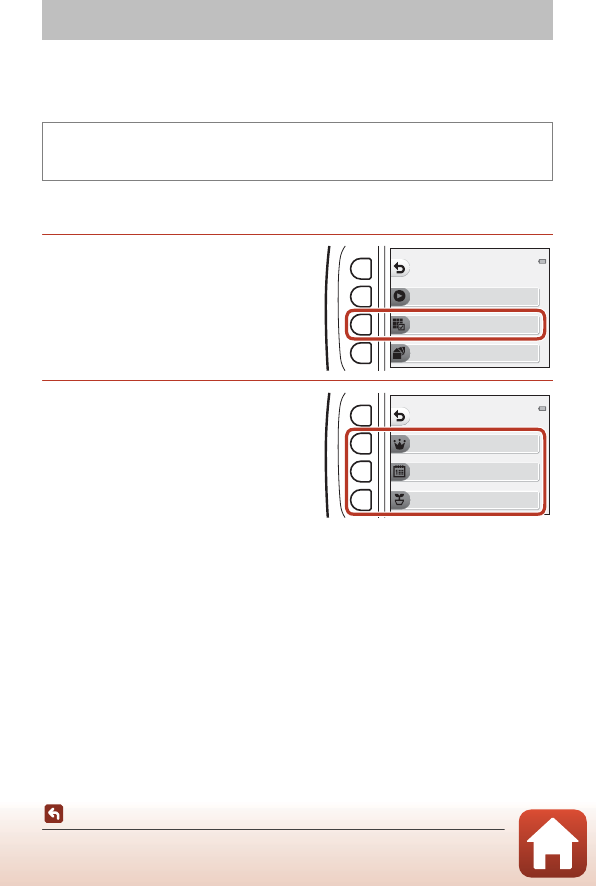
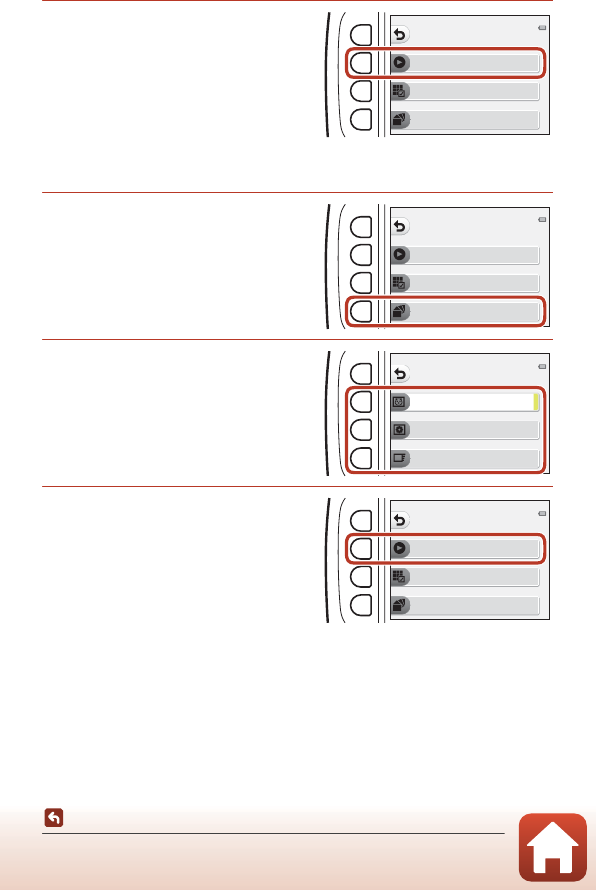
Playback Features
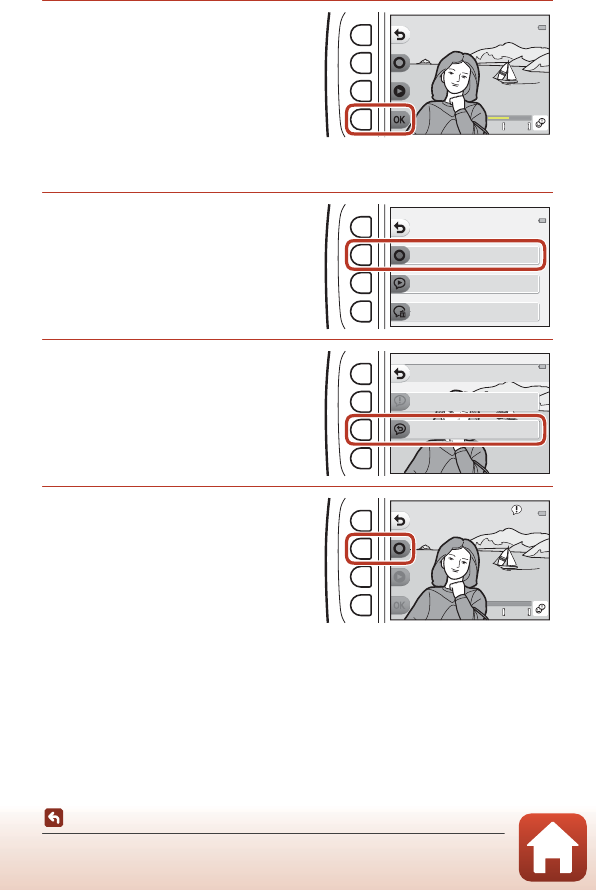
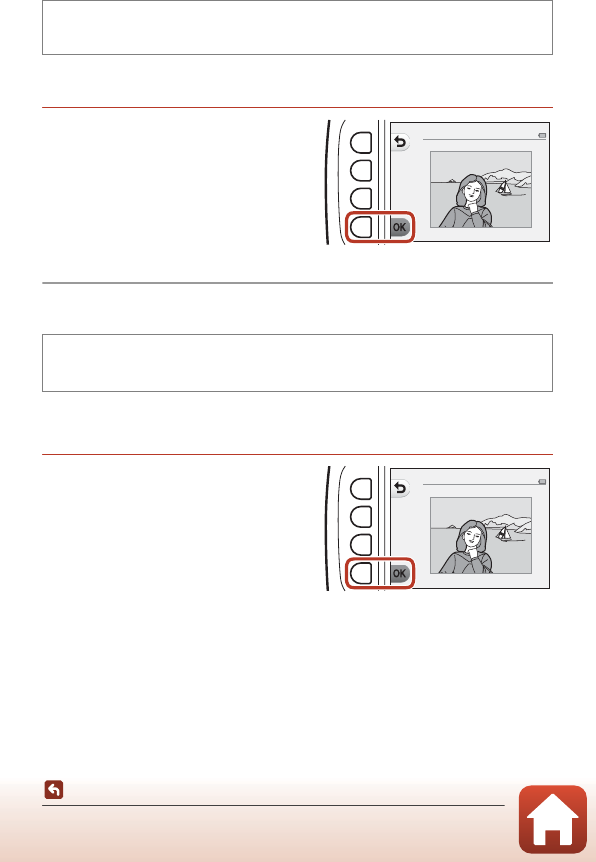
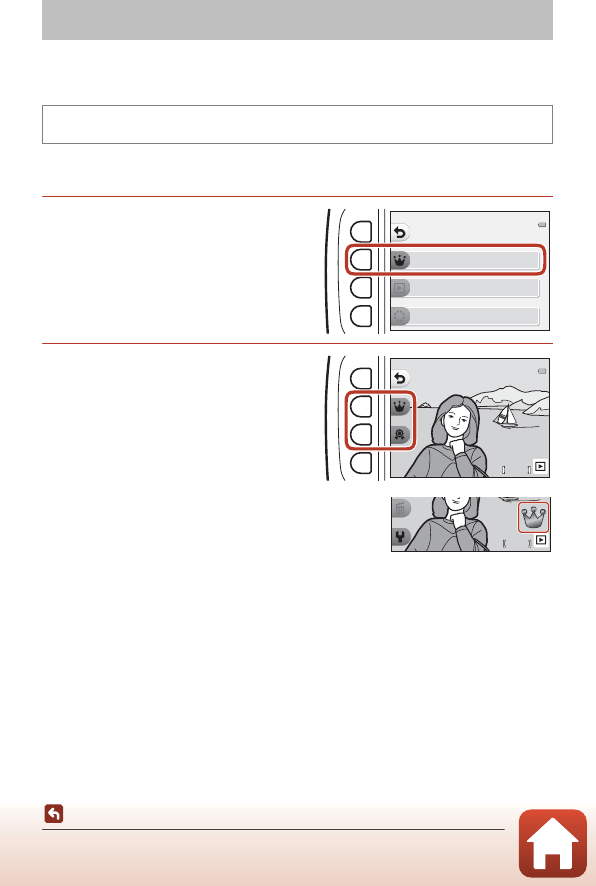
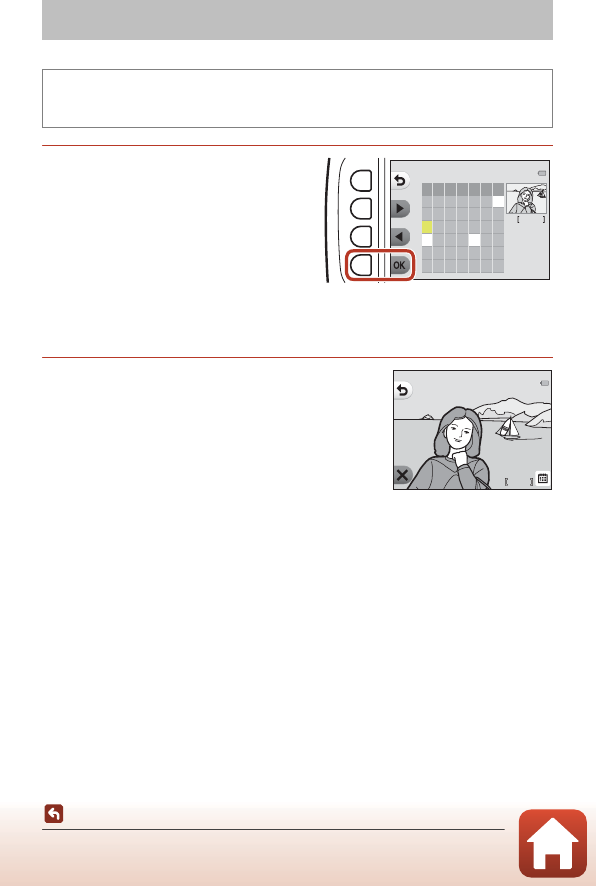
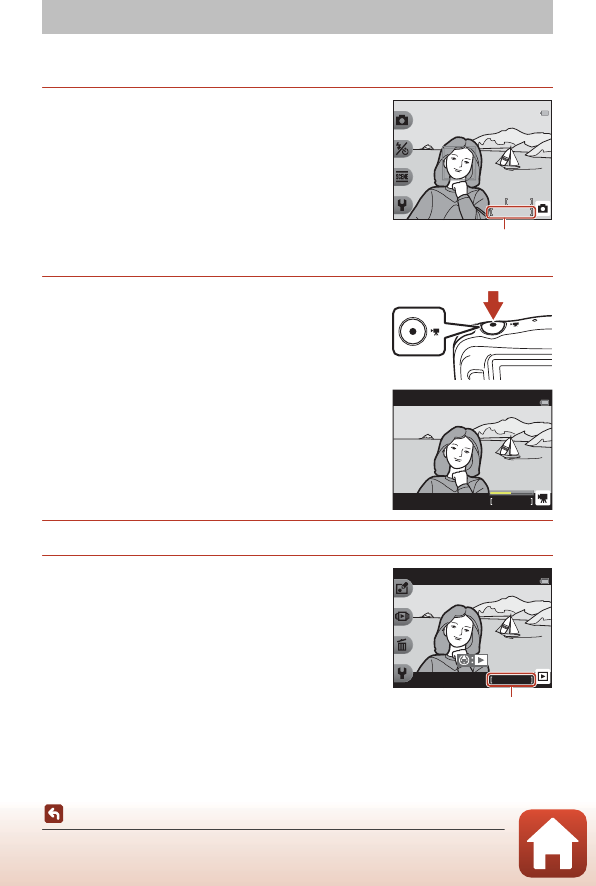
E Exchange Messages
4Press flexible button 4 (O).
•Message recorded. is displayed and
the message is attached to the image.
•Delete the current message before
recording a new message (A54).
Leave a Reply
1Press flexible button 2 (q
Record).
2Press flexible button 3 (J
Leave a reply).
•You cannot select this option if the
image does not have a message
attached to it. ➝ “Leave a Message”
(A52)
3Press flexible button 2 (q).
•Once recording starts, the operations
are the same as explained in “Leave a
Message” (A52).
10s10s
Record
Exchange messages
Play recordings
Erase recordings
Leave a message
Record
Leave a reply
20s
20s
54
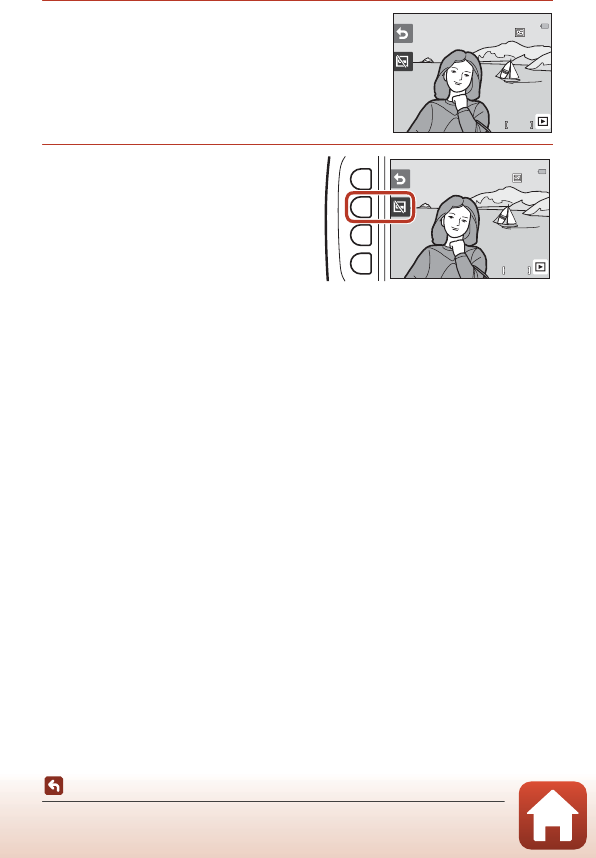
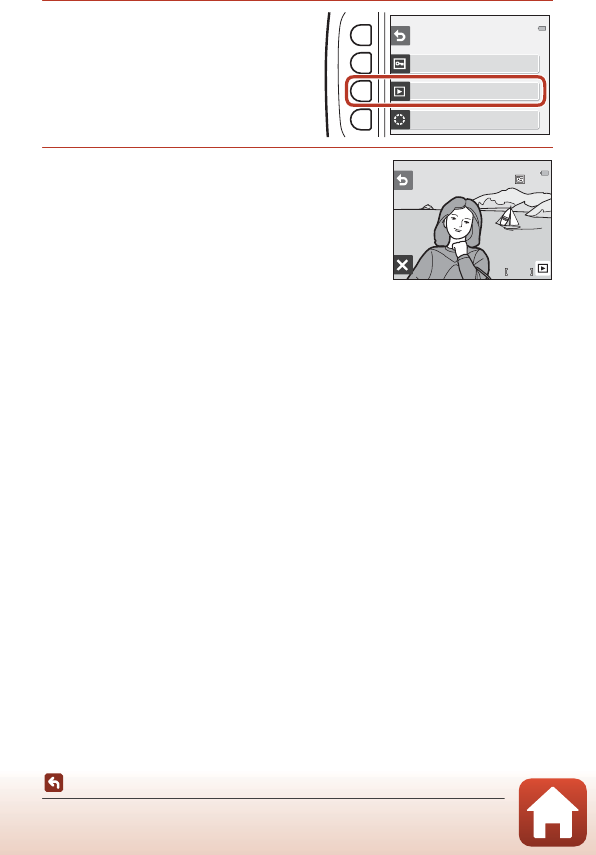
Playback Features
E Exchange Messages
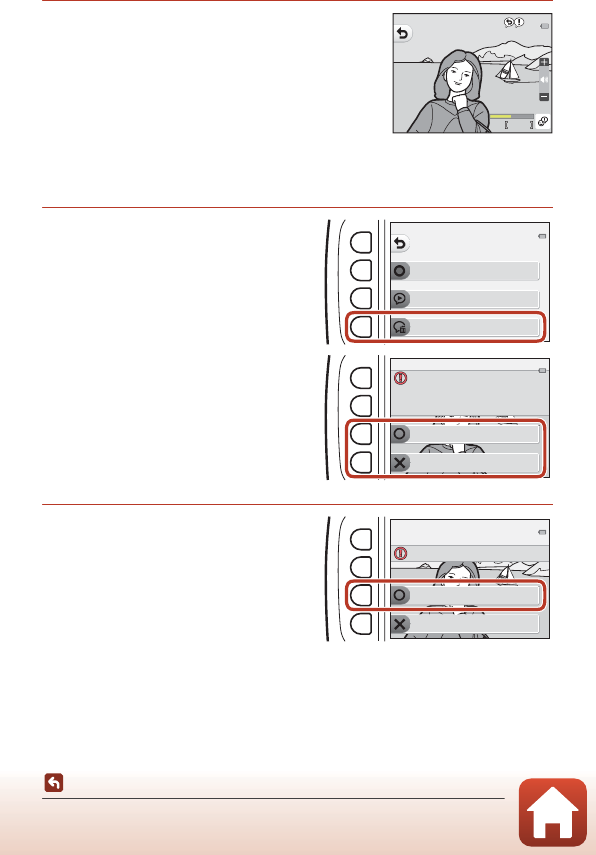
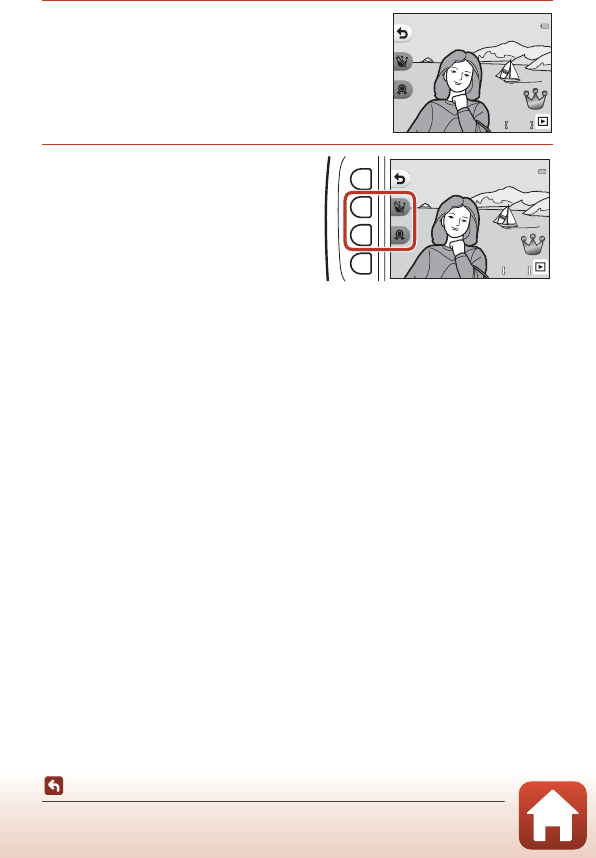
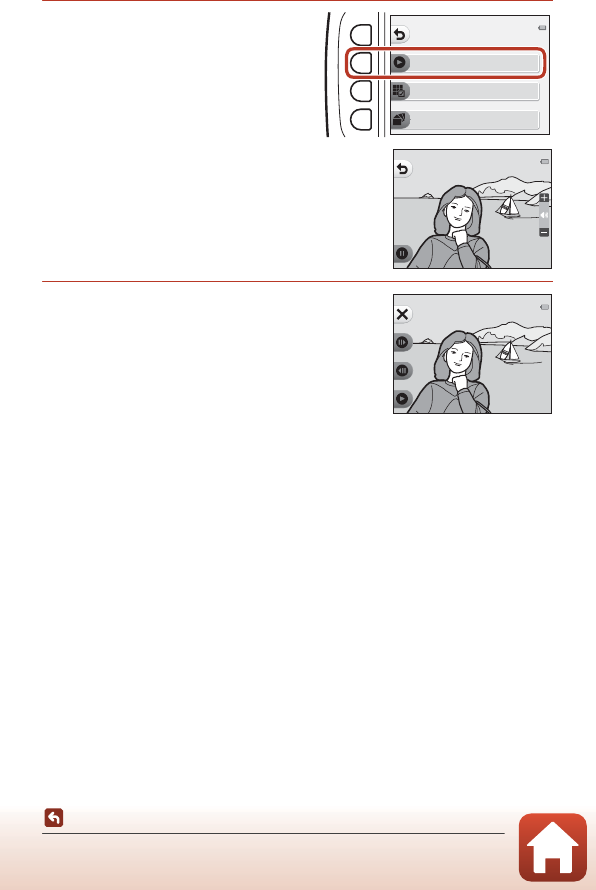
Play Recordings
Press flexible button 3 (K Play recordings).
•The camera plays the message. If two messages
have been recorded, they are played back to back.
•Press flexible button 1 (Q) to stop playback.
•Use the multi selector HI during playback to
adjust playback volume.
•If battery power runs out, playback stops
automatically.
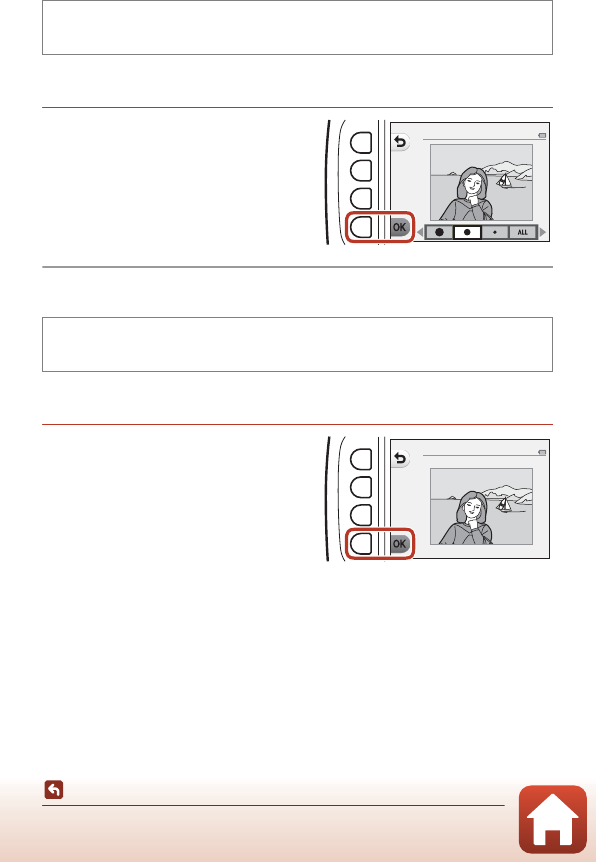
Erase Recordings
1Press flexible button 4 (L
Erase recordings).
•If you select an image that has a grade
mark (A64) or an image that is added
to favorites (A68), a confirmation
message is displayed.
-R Yes: Removes the grade or
removes the image from favorites
and displays the screen displayed in
step 2.
-S No: Returns to step 1.
2When the confirmation
message is displayed, press
flexible button 3 (R Yes).
•Only the recording is deleted. If both a
message and a reply have been
recorded, they are both deleted.
10s10s
Record
Exchange messages
Play recordings
Erase recordings
Yes
No
You'll need to remove the
grade from this picture.
Remove?
Yes
No
Erase voice recordings?

55
Playback Features
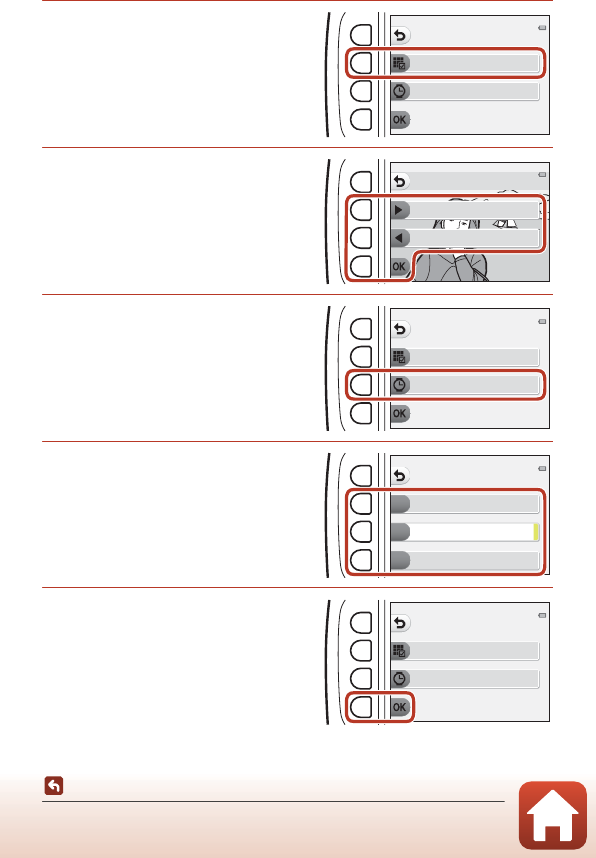
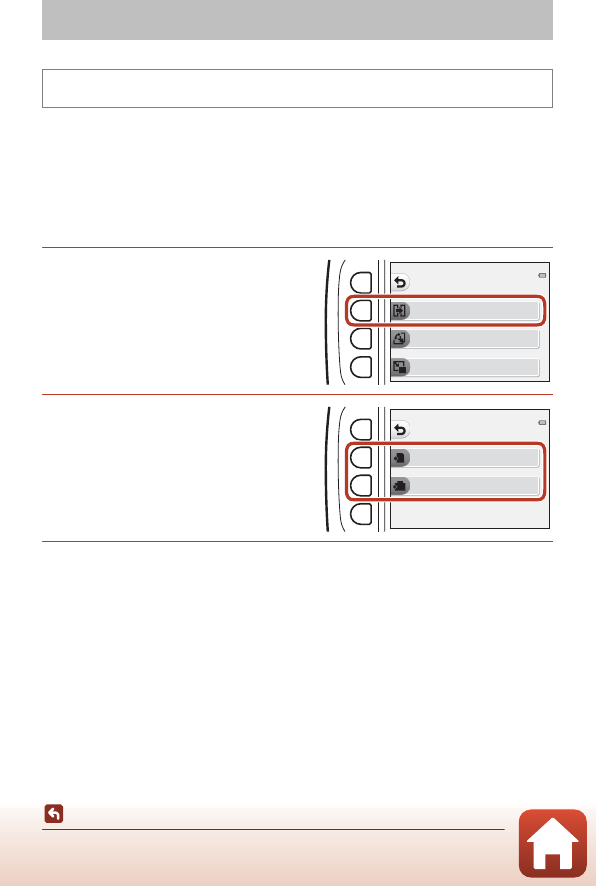
V Picture Play
Before Editing Images
You can easily edit images on this camera. Edited copies are saved as separate files
(except for Rotate pictures).
Edited copies are saved with the same shooting date and time as the original.
CRestrictions on Image Editing
•An image can be edited up to 10 times (there is no restriction on the number of times
Rotate pictures can be applied).
•You may not be able to edit images of a certain size or with certain editing functions.
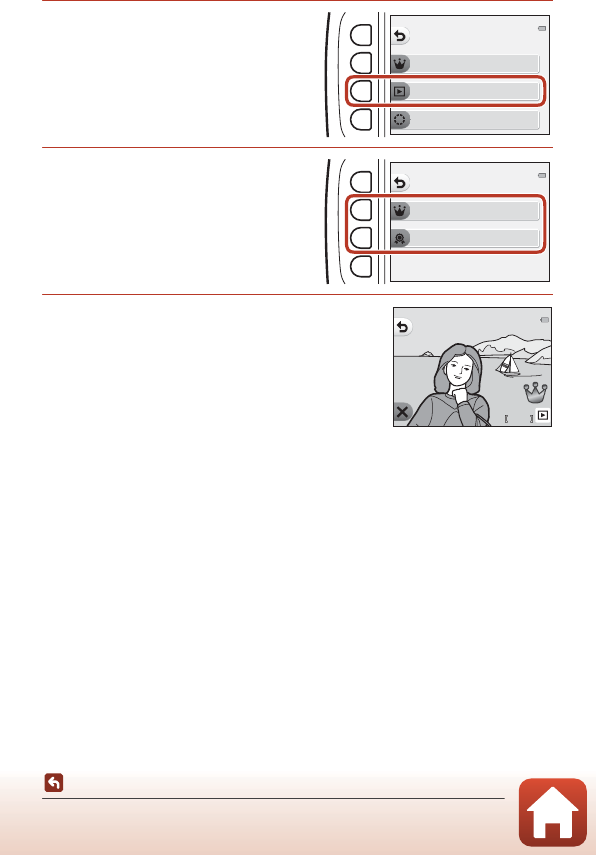
V Picture Play
56
Playback Features
V Picture Play
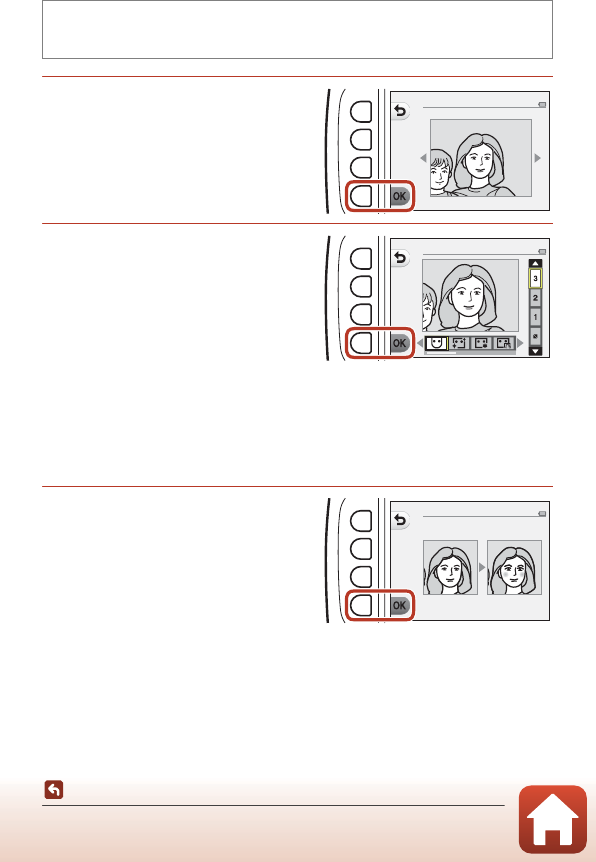
K Add Makeup
1Use the multi selector HIJK
to select the face that you want
to retouch and press flexible
button 4 (O).
•When only one face is detected,
proceed to step 2.
2Use JK to select the effect,
use HI to select the effect
level, and press flexible button
4 (O).
•You can simultaneously apply multiple
effects.
Adjust or check the settings for all
effects before pressing flexible button 4
(O).
F Make faces smaller, B Make skin prettier, l Color faces, m Make skin
less shiny, E Hide eye bags, AMake eyes bigger, G Whiten eyes, nAdd
eye shadow, o Add mascara, H Whiten teeth, pColor lips, D Redden
cheeks
•Press flexible button 1 (Q) to return to the screen for selecting a person.
3Preview the result and press
flexible button 4 (O).
•To change the settings, press flexible
button 1 (Q) to return to step 2.
Enter playback mode M select an image M flexible button 1 (V) M flexible
button 3 (VPicture play) M use JK to select K M flexible button 4 (O)
Subject selection
Make faces smaller
Preview

57
Playback Features
V Picture Play
BNotes About Add Makeup
•One face can be edited at a time. To add makeup to another face, edit the edited image
again.
•Depending on the direction in which faces are looking, or the brightness of faces, the
camera may be unable to accurately detect faces, or the function may not perform as
expected.
•If no faces are detected, a warning is displayed and the screen returns to the playback
menu.
•Only images captured at an image size of 640 × 480 or larger can be edited.
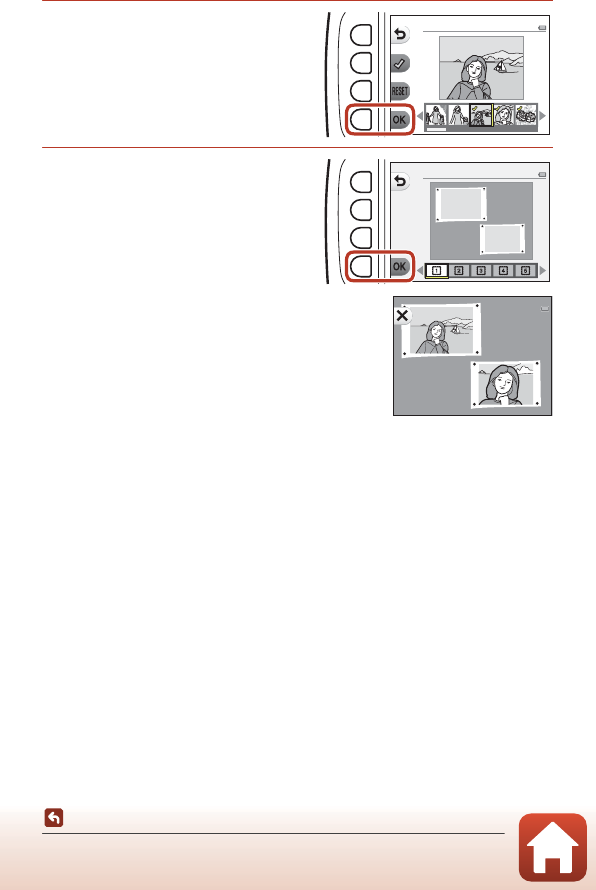
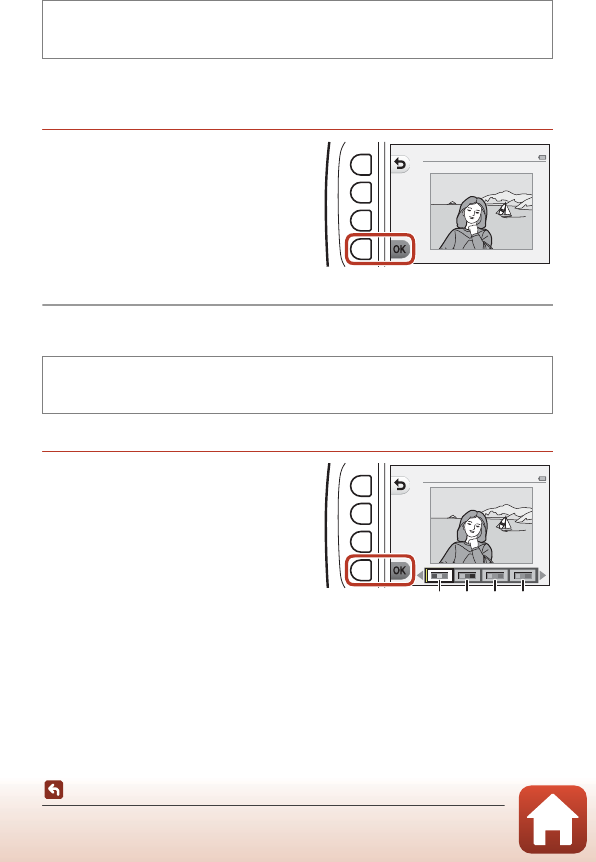
D Make Photo Albums
Display images similarly to a photo album. Five different photo album designs are
available. The created album is saved as a separate image of 2 megapixels (1600 ×
1200) in size.
1Use the multi selector JK to select an
image.
2Press flexible button 2 (S).
•A check mark is displayed.
•A check mark is displayed or removed
every time you press flexible button 2
(S).
•Press flexible button 3 (P) to
remove all check marks.
•Images are arranged in an album in the
order the check marks were added.
•Up to 20 images can be selected.
Enter playback mode M flexible button 1 (V) M flexible button 3 (VPicture
play) M use JK to select D M flexible button 4 (O)
Make photo albums
Make photo albums
58
Playback Features
V Picture Play
3Press flexible button 4 (O).
4Use JK to select the desired
photo album design and press
flexible button 4 (O).
•Photo albums are displayed one page
at a time. After all pages have been displayed, the
camera returns to Have fun with pictures menu.
•To cancel before the photo album has been
created, press flexible button 1 (S).
BNotes About Make Photo Albums
•Movies cannot be selected.
•This camera is unable to select images captured with other cameras.
Make photo albums
Choose an album design
59
Playback Features
V Picture Play
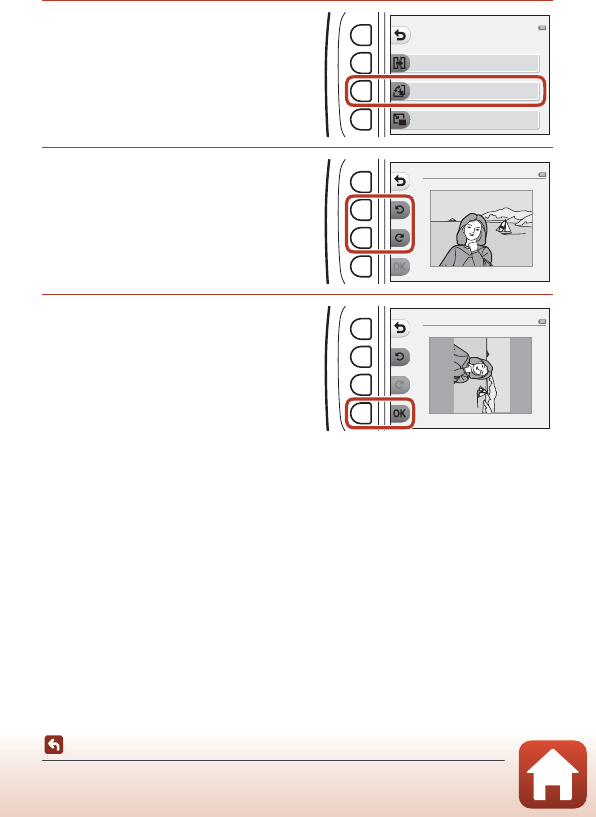
W Add a Fisheye Effect
Make an image look as if it were captured with a fisheye lens. This effect is well-suited
for images captured using Shoot close-ups in the shooting menu.
Confirm the effect and press
flexible button 4 (O).
•To cancel, press flexible button 1 (Q).
Z Toy Camera
Make an image look as if it were shot with a toy camera. This effect is well-suited for
landscapes.
Confirm the effect and press
flexible button 4 (O).
•To cancel, press flexible button 1 (Q).
Enter playback mode M select an image M flexible button 1 (V) M flexible
button 3 (VPicture play) M use JK to select W M flexible button 4 (O)
Enter playback mode M select an image M flexible button 1 (V) M flexible
button 3 (VPicture play) M use JK to select Z M flexible button 4 (O)
Add a fisheye effect
Toy camera
60
Playback Features
V Picture Play
Q Soften Pictures
Soften the image by adding a slight blur around the center of the image. Four blur
regions are available.
Use the multi selector JK to select
the area to be blurred and press
flexible button 4 (O).
•To add a slight blur to the entire image,
press k.
•To cancel, press flexible button 1 (Q).
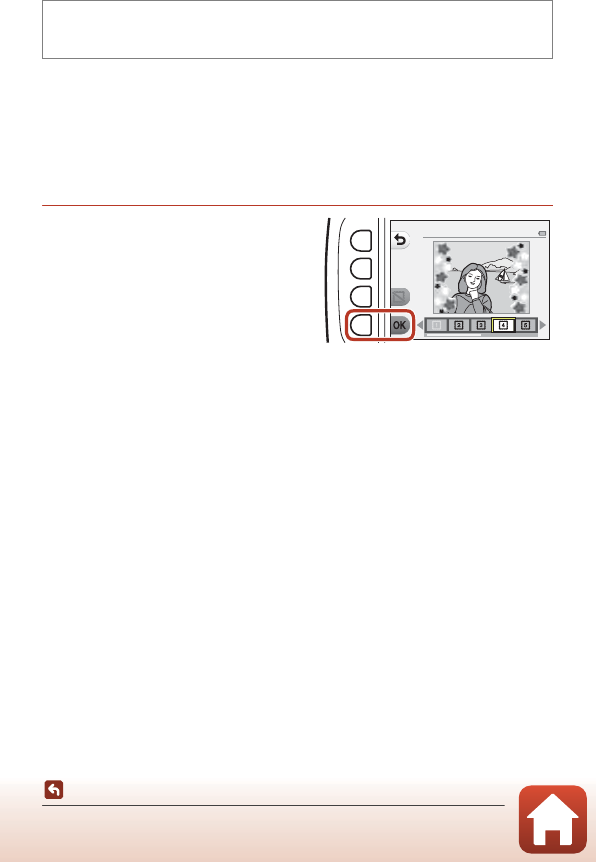
f Add Starbursts
Produce star-like rays of light that radiate outward from bright objects such as
sunlight reflections or street lights. This effect is suitable for night scenes.
Confirm the effect and press
flexible button 4 (O).
•To cancel, press flexible button 1 (Q).
Enter playback mode M select an image M flexible button 1 (V) M flexible
button 3 (VPicture play) M use JK to select Q M flexible button 4 (O)
Enter playback mode M select an image M flexible button 1 (V) M flexible
button 3 (VPicture play) M use JK to select f M flexible button 4 (O)
Soften pictures
Add starbursts
61
Playback Features
V Picture Play
M Add a Diorama Effect
Make an image look like a miniature scene captured in macro mode. This effect is
well-suited for images captured from a high vantage point with the main subject at
the center of the image.
Confirm the effect and press
flexible button 4 (O).
•To cancel, press flexible button 1 (Q).
d Change Colors
Adjust image colors.
Use the multi selector JK to select
the desired setting and press
flexible button 4 (O).
•The following image color settings are
available.
1Vivid color (default setting): Use to
achieve a vivid, photoprint effect.
2Black-and-white: Save images in
black-and-white.
3Sepia: Save images in sepia tones.
4Cyanotype: Save images in cyan-blue monochrome.
•To cancel, press flexible button 1 (Q).
Enter playback mode M select an image M flexible button 1 (V) M flexible
button 3 (VPicture play) M use JK to select M M flexible button 4 (O)
Enter playback mode M select an image M flexible button 1 (V) M flexible
button 3 (VPicture play) M use JK to select d M flexible button 4 (O)
Add a diorama effect
Change colors
1342

62
Playback Features
V Picture Play
P Highlight Colors
Creates a black and white image in which only the specified color remains.
Use the multi selector JK to select
a color and press flexible button 4
(O).
•To cancel, press flexible button 1 (Q).
Enter playback mode M select an image M flexible button 1 (V) M flexible
button 3 (VPicture play) M use JK to select P M flexible button 4 (O)
Highlight colors
63
Playback Features
V Picture Play
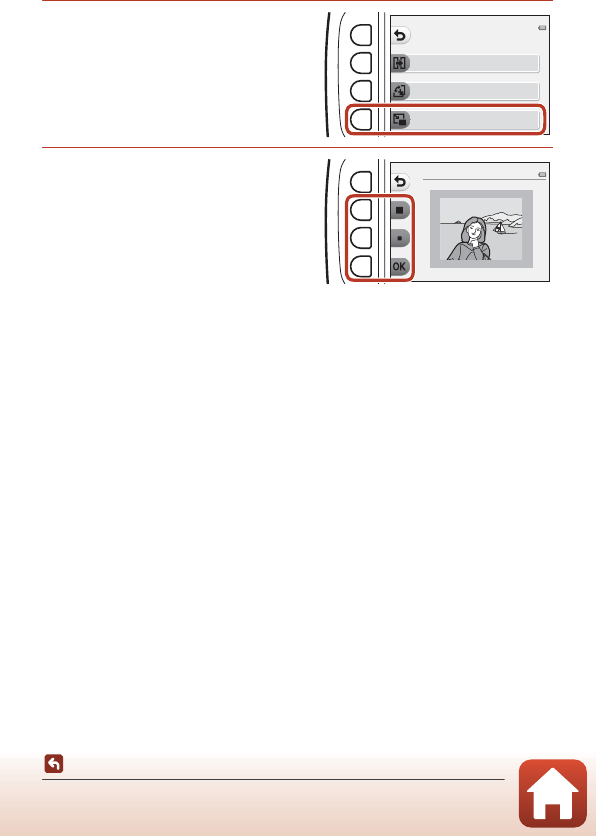
A Decorate
Add a frame around your images. Nine different frames are available. The image size of
the edited copy varies depending on the size of the original image, as described
below.
•When the original image is 2 megapixels (1600 × 1200) or larger, the copy is saved
at 2 megapixels (1600 × 1200).
•When the original image is smaller than 2 megapixels (1600 × 1200), the copy is
saved at the same size as the original.
Use the multi selector JK to select
the desired frame and press flexible
button 4 (O).
•The frame is added to the image and
saved as a new copy.
•To cancel, press flexible button 1 (Q).
•Press flexible button 3 (c) to remove the
frame.
BNotes About Decorate
•The frame is placed on top of the image and therefore replaces the area of the image
underneath it. Thicker frames cover up a larger area of the image.
•When using borderless printing to print images that you have added frames to, the frames
may not be printed.
Enter playback mode M select an image M flexible button 1 (V) M flexible
button 3 (VPicture play) M use JK to select A M flexible button 4 (O)
Decorate
64
Playback Features
A Grading
This function is displayed when Variety menu (A100) is set to On.
Grade images by using A Excellent or B Good. You can use View graded
pictures to play back only the images that have grade marks.
Grade Pictures
1Press flexible button 2 (A
Grade pictures).
2Use the multi selector JK to
select an image and press
flexible button 2 (A) or flexible
button 3 (B).
•Graded images are indicated with grade marks (A
or B) on the playback screen, and are protected.
•You cannot add two grade marks to a single
image.
BNotes About Graded Images
Formatting the memory card or the camera's internal memory (A104) permanently
deletes all data, including graded images.
CGrading
•Graded images are also added to Favorites (A68). Removing the grade also removes
the image from favorites.
•Grade mark A can be added to up to a total of 200 images that includes the images added
to favorites. Grade mark B can be added to up to a total of 200 images.
A Grading
Enter playback mode M flexible button 1 (V) M flexible button 4 (AGrading)
Grade pictures
Grading
View graded pictures
Remove all grades
1 5
15
15/11/2015
15/11/2015
15:30
15:30
4
4
65
Playback Features
A Grading
Changing or Removing Grades from Individual Images
1In step 2 (A64) of “Grade Pictures”,
select the image with the grade you
want to change or remove.
2Change or remove the grade.
•Press flexible button 2 (A) or flexible
button 3 (B) to change the current
grade to the selected grade.
•Press flexible button 2 (a) or flexible
button 3 (b) to remove the grade of
the selected image.
1 515
15/11/201515/11/2015 15:3015:30
1 5
15
15/11/2015
15/11/2015
15:30
15:30
66
Playback Features
A Grading
View Graded Pictures
1Press flexible button 3 (B
View graded pictures).
2Press flexible button 2 (A
Excellent) or flexible button 3
(B Good).
•Only images with the grade mark you
selected are displayed.
3Use the multi selector JK to view
images.
•Press H to magnify the image.
•Press I to switch to thumbnail playback mode.
•Press flexible button 1 (Q) to return to the screen
displayed in step 2.
•Press flexible button 4 (S) to return to full-frame
playback mode (A20).
BNotes About View Graded Pictures
Images cannot be edited, including changing or removing grades, when they are played
back using View graded pictures.
Grade pictures
Grading
View graded pictures
Remove all grades
Excellent
View graded pictures
Good
4
4
15/11/2015
15/11/2015
15:30
15:30
67
Playback Features
A Grading
Remove All Grades
1Press flexible button 4 (S
Remove all grades).
2Press flexible button 2 (a
Excellent) or flexible button 3
(b Good).
3Press flexible button 3 (R Yes).
•The selected grade mark is removed
from all images.
Grade pictures
Grading
View graded pictures
Remove all grades
Excellent
Remove all grades
Good
Yes
No
Remove all grades?
68
Playback Features
I Favorites
This function is displayed when Variety menu (A100) is set to Off.
You can use View favorites to play back only the images added to favorites.
Add to Favorites
1Press flexible button 2 (IAdd
to favorites).
2Use the multi selector JK to
select a favorite image and
press flexible button 2 (I).
•Images added to favorites are displayed with s on
the playback screen, and are protected.
BNotes About Images Added to Favorites
Formatting the memory card or the camera's internal memory (A104) permanently
deletes all data, including graded images.
CFavorites
•Grade mark A (A64) is added to images that are added to favorites. Removing the
image from favorites also removes the grade.
•Up to a total of 200 images can be added to favorites, which includes graded images.
I Favorites
Enter playback mode M flexible button 1 (V) M flexible button 4 (IFavorites)
Add to favorites
Favorites
View favorites
Remove from favorites
1 5
15
15/11/2015
15/11/2015
15:30
15:30
15/11/2015
15/11/2015
15:30
15:30
69
Playback Features
I Favorites
Removing Favorites from Individual Images
1In step 2 (A68) of “Add to Favorites”,
select the image that you want to
remove from favorites.
2Press flexible button 2 (i).
•The selected image is removed from
favorites.
1 515
15/11/201515/11/2015 15:3015:30
1 5
15
15/11/2015
15/11/2015
15:30
15:30
70
Playback Features
I Favorites
View Favorites
1Press flexible button 3 (B
View favorites).
2Use the multi selector JK to view
images.
•Press H to magnify the image.
•Press I to switch to thumbnail playback mode.
•Press flexible button 1 (Q) to return to the screen
displayed in step 1.
•Press flexible button 4 (S) to return to full-frame
playback mode (A20).
BNotes About View Favorites
Images cannot be edited, including removing from favorites, when they are played back
using View favorites.
Add to favorites
Favorites
View favorites
Remove from favorites
1 5
15
15/11/2015
15/11/2015
15:30
15:30
71
Playback Features
I Favorites
Remove From Favorites
1Press flexible button 4
(SRemove from favorites).
2Press flexible button 3 (RYes).
•All images added to favorites are
removed.
Add to favorites
Favorites
View favorites
Remove from favorites
Yes
No
Remove all pictures from
favorites?
72
Playback Features
G View by Date
Play back images by selecting the shooting date from the calendar.
1Use the multi selector HIJK
to select the desired date and
press flexible button 4 (O).
•Images are selected based on the
selected date. The first image captured
on that date is displayed.
•A white background of a date indicates
that images were recorded on that
date.
•Press flexible button 2 (K) to display the next month. Press flexible button 3 (J) to
display the previous month.
2Use JK to view images.
•Press H to magnify the image.
•Press I to switch to thumbnail playback mode.
•Press flexible button 1 (Q) to return to the screen
displayed in step 1.
•Press flexible button 4 (S) to return to full-frame
playback mode (A20).
BNotes About View by Date
•The 9000 most recent images can be displayed.
•Images captured when the camera’s date is not set are treated as images captured on
January 1, 2015.
•When movie files are played back, only the first frame of each movie is displayed.
•Images cannot be edited when they are played back using View by date.
G View by Date
Enter playback mode M flexible button 2 (Z) M flexible button 2 (GView by
date)
4
2015
Su
11
MTuWTh F
18 19 20 211516 17
25 26 27 2822 23 24
29 30
Sa
4567123
1112 13 148910
4
4
15/11/2015
15/11/2015
15:30
15:30
73
Playback Features
m Slide Show
Play back images one by one in an automated “slide show.” When movie files are
played back in the slide show, only the first frame of each movie is displayed.
Background music is played during playback. Background music varies depending on
the theme selected under nChoose a theme (A76).
Choose Pictures
1Press flexible button 3 (o
Choose pictures).
•To play back all images ➝ step 3.
2Use flexible button 2, 3, or 4 to
select the images you want to
play back.
•A View graded pictures/ View
favorites: Only graded images or
images added to favorites are played
back. Proceed to step 3.
•G Choose by date: Only images
captured on the same day are played back. Select a date from the calendar, press
flexible button 4 (O), and continue from step 3.
•O Pick a series: Images captured using Shoot at intervals (A32) are played
back consecutively. This option can be selected only when images have been
captured using Shoot at intervals (A75).
m Slide Show
Enter playback mode M flexible button 2 (Z) M flexible button 3 (mSlide
show)
Start
Slide show
Choose pictures
Choose a theme
View graded pictures
Choose pictures
Choose by date
Pick a series
74
Playback Features
m Slide Show
3Press flexible button 2 (A
Start).
•The slide show begins.
•To pause playback, press flexible
button 4 (D). To exit, press flexible button 1 (Q).
•While the slide show is in progress, press the multi
selector K to display the next image or J to
display the previous image. Press and hold K or J
to fast forward or rewind.
•Press HI during playback to adjust the volume
of the background music.
4End or restart the slide show.
•The screen shown on the right is displayed when
the slide show is paused.
S: Returns to the screen displayed in step 1.
E: Displays the next image.
F: Displays the previous image.
A: Resumes playback.
Start
Slide show
Choose pictures
Choose a theme
75
Playback Features
m Slide Show
Pick a Series
1Press flexible button 2 (o
Choose pictures).
•The first image in the folder where
images captured using Shoot at
intervals are saved is displayed.
2Use flexible button 2 (K Next
series) or flexible button 3 (J
Previous series) to select the
folder and press flexible button
4 (O).
3Press flexible button 3 (n Pick
a speed).
4Use flexible button 2, 3, or 4 to
select a desired speed.
•Select Fast, Normal (default setting),
or Slow.
5Press flexible button 4 (O).
Choose pictures
Pick a series
Pick a speed
Next series
Choose pictures
Previous series
Choose pictures
Pick a series
Pick a speed
Fast
Pick a speed
Normal
Slow
Choose pictures
Pick a series
Pick a speed
76
Playback Features
m Slide Show
6Press flexible button 2 (A
Start).
•The slide show begins.
Choose a Theme
1Press flexible button 4 (n
Choose a theme).
2Use flexible button 2, 3, or 4 to
select a playback theme.
•You can select o Animated (default
setting), o Pop art, or p Classic.
3Press flexible button 2 (A
Start).
•The slide show begins.
BNotes About Slide Show
The maximum playback time is up to about 30 minutes.
Start
Slide show
Choose pictures
Choose a theme
Start
Slide show
Choose pictures
Choose a theme
Animated
Choose a theme
Pop art
Classic
Start
Slide show
Choose pictures
Choose a theme
77
Playback Features
y Retouch
Copy or rotate images or create a small copy of the current image.
h Copy
Images can be copied between a memory card and the internal memory.
•When a memory card that contains no images is inserted and the camera is
switched to playback mode, Memory contains no images. is displayed. In that
case, press a flexible button and select flexible button 2 (y Retouch) to select
Copy.
1Press flexible button 2 (h
Copy).
2Use flexible button 2 (k
Camera to card) or flexible
button 3 (l Card to camera)
to select the copy source and
destination.
3Use flexible button 2 (j Selected images) or flexible button 3
(i All images) to select the copy method.
•When i All images is selected, proceed to step 6.
y Retouch
Enter playback mode M flexible button 4 (l) M flexible button 2 (yRetouch)
Copy
Retouch
Rotate pictures
Small picture
Camera to card
Copy
Card to camera

78
Playback Features
y Retouch
4Use the multi selector JK to
select an image and press
flexible button 2 (S).
•The selected image is indicated by a
check mark.
•A check mark is displayed or removed
each time you press flexible button 2
(S).
•Press flexible button 3 (P) to remove all check marks.
•Repeat step 4 to select additional images.
5Press flexible button 4 (O) to apply image selection.
•A confirmation dialog is displayed.
6Press flexible button 3 (R Yes).
•Images are copied.
BNotes About Copy
•Only files in formats that this camera can record can be copied.
•Operation is not guaranteed with images captured with another make of camera or that
have been modified on a computer.
•The Grade pictures (A64) and Add to favorites (A68) settings configured for
images are not copied.
Selected images
79
Playback Features
y Retouch
d Rotate Pictures
Specify the orientation in which saved images are displayed during playback.
Still images can be rotated 90 degrees clockwise or 90 degrees counterclockwise.
1Press flexible button 3 (d
Rotate pictures).
2Press flexible button 2 (e) or
flexible button 3 (f).
•The image is rotated 90 degrees.
3Press flexible button 4 (O).
•The displayed orientation is applied,
and the orientation information is
saved with the image.
Copy
Retouch
Rotate pictures
Small picture
Rotate pictures
Rotate pictures
80
Playback Features
y Retouch
s Small Picture
Create a small copy of images.
1Press flexible button 4 (s
Small picture).
2Use flexible button 2 (D) or
flexible button 3 (E) to select
the desired copy size and press
flexible button 4 (O).
•A new, edited copy is saved as a
separate image with a compression
ratio of about 1:16.
•To cancel, press flexible button 1 (Q).
BNotes About Small Picture
Images with an image size of 640 × 480 or smaller cannot be edited using Small picture.
Copy
Retouch
Rotate pictures
Small picture
Small picture
1024×768
1024×768

82
Movies
Recording and Playing Back Movies
•When using the camera’s internal memory, the movie frame size (A41) can be set
to H Small (640) or C Small (old-fashioned).
1Display the shooting screen.
•Check the remaining amount of movie recording
time.
2Press the b (e movie-record) button
to start movie recording.
•The camera focuses in the center of the frame.
3Press the b (e) button again to end recording.
4Select a movie in full-frame playback
mode and press the multi selector H.
•An image with a playback time displayed is a
movie.
Recording and Playing Back Movies
1100
1100
25m 0s
25m 0s
Remaining movie
recording time
12m30s
12m30s
15/11/2015
15/11/2015
15:30
15:30
10s
10s
Playback time

83
Movies
Recording and Playing Back Movies
Area Captured in Movies
•The area that is captured in a movie varies depending on Movie frame size
(A41).
•When recording movies while Electronic VR (A102) in the camera settings is set
to Auto, the angle of view (i.e., the area visible in the frame) is narrow compared to
that of still images.
Maximum Movie Recording Time
Individual movie files cannot exceed 4 GB in size or 29 minutes in length, even when
there is sufficient free space on the memory card for longer recording.
•The remaining recording time for a single movie is displayed on the shooting
screen.
•The actual remaining recording time may vary depending on the movie content,
subject movement, or type of memory card.
•Memory cards with an SD Speed Class rating of 6 or faster are recommended when
recording movies (A134). Movie recording may stop unexpectedly when
memory cards with a lower Speed Class rating are used.
BNotes About Camera Temperature
•The camera may become hot when shooting movies for an extended period of time or
when the camera is used in a hot area.
•If the inside of the camera becomes extremely hot when recording movies, the camera
will automatically stop recording.
The amount of time remaining until the camera stops recording (u10s) is displayed.
After the camera stops recording, it turns itself off.
Leave the camera off until the inside of the camera has cooled.

84
Movies
Recording and Playing Back Movies
Notes About Movie Recording
BNotes About Saving Images or Movies
The indicator showing the number of exposures remaining or the indicator showing the
remaining recording time flashes while images or movies are being saved. Do not open
the battery-chamber/memory card slot cover or remove the battery or memory
card while an indicator is flashing. Doing this could result in loss of data, or in damage to the
camera or the memory card.
BNotes About Recorded Movies
•The optical zoom ratio cannot be changed once recording starts.
•There may be some degradation in image quality when digital zoom is used.
•The sounds of multi selector operation, autofocus lens drive movement, and aperture
operation when brightness changes may be recorded.
•The following phenomena may be seen on the screen while recording movies. These
phenomena are saved in the recorded movies.
- Banding may occur in images under fluorescent, mercury-vapor, or sodium-vapor
lighting.
- Subjects that move quickly from one side of the frame to the other, such as a moving
train or car, may appear skewed.
- The entire movie image may be skewed when the camera is panned.
- Lighting or other bright areas may leave residual images when the camera is moved.
•Depending on the distance to the subject or the amount of zoom applied, colored stripes
may appear on subjects with repeating patterns (fabrics, lattice windows, etc.) during
movie recording and playback. This occurs when the pattern in the subject and the layout
of the image sensor interfere with each other; it is not a malfunction.
BNotes About Autofocus for Movie Recording
Autofocus may not perform as expected (A44). Should this occur, try the following:
Frame another subject (positioned at the same distance from the camera as the intended
subject) in the center of the frame, press the b (e movie-record) button to start recording,
and then modify the composition.
85
Movies
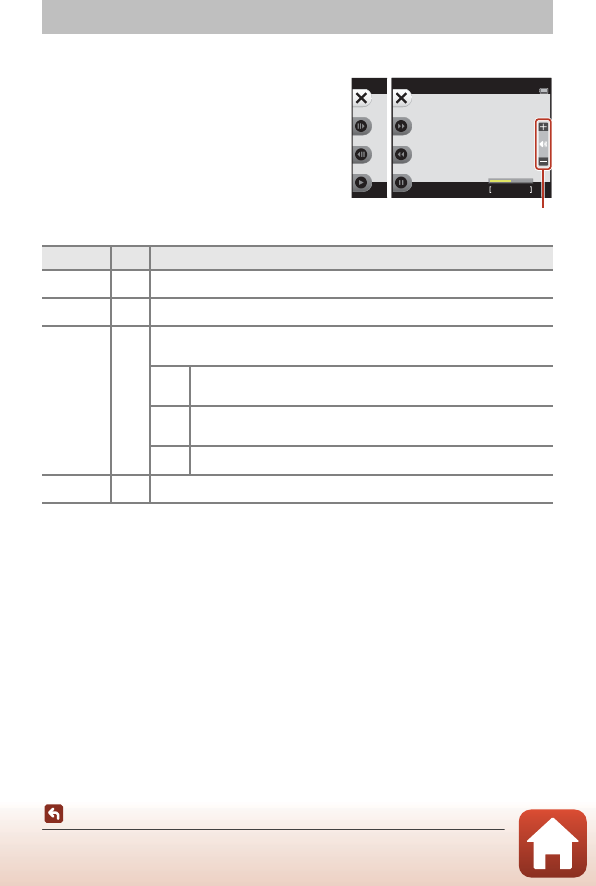
Operations During Movie Playback
To adjust the volume, press the multi selector
HI while a movie is playing.
You can use the flexible buttons to perform
the following operations.
Operations During Movie Playback
Function Icon Description
Advance BHold down the button to advance the movie.
Rewind CHold down the button to rewind the movie.
Pause D
Pause playback. The operations listed below can be performed while
paused.
EAdvance the movie one frame. Hold down the button for
continuous advancing.
FRewind the movie one frame. Hold down the button for
continuous rewinding.
AResume playback.
End SReturn to full-frame playback mode.
5 s
5s
When
paused
During playback
Volume indicator

86
Connecting the Camera to a TV, Printer, or Computer
Connecting the Camera to a TV,
Printer, or Computer
Utilizing Images ....................................................................................................................87
Viewing Images on a TV.....................................................................................................89
Printing Images Without a Computer...........................................................................90
Transferring Images to a Computer (ViewNX-i) ........................................................94
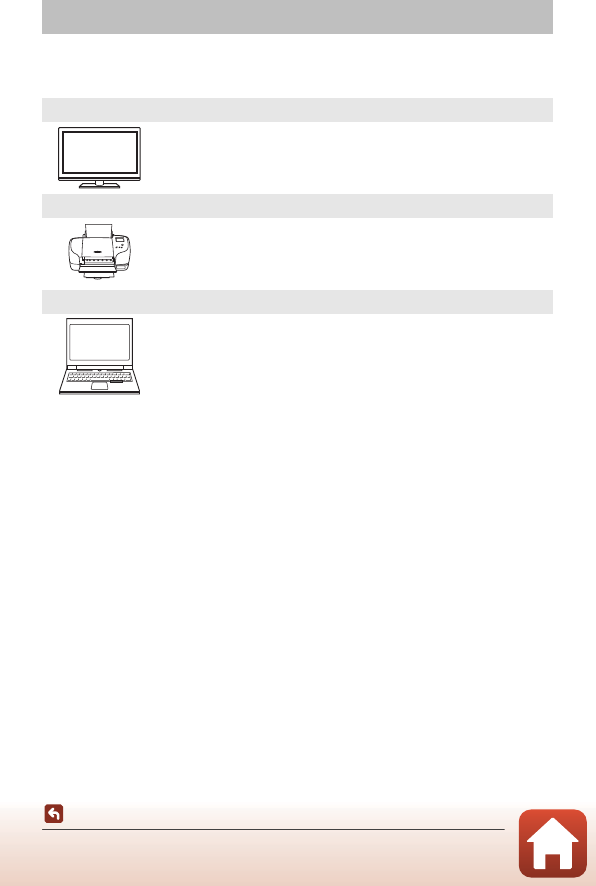
87
Connecting the Camera to a TV, Printer, or Computer
Utilizing Images
In addition to using the SnapBridge app (Aiii) to enjoy the captured images, you can
also utilize the images in various ways by connecting the camera to the devices
described below.
Utilizing Images
Viewing Images on a TV
Images and movies captured with the camera can be viewed on a TV.
Connection method: Connect a commercially available HDMI cable
to the TV’s HDMI input jack.
Printing Images Without a Computer
If you connect the camera to a PictBridge-compatible printer, you can
print images without using a computer.
Connection method: Connect the camera directly to the printer’s USB
port with the USB cable.
Transferring Images to a Computer (ViewNX-i)
You can transfer images and movies to a computer for viewing and
editing.
Connection method: Connect the camera to the computer’s USB port
with the USB cable.
•Before connecting to a computer, install ViewNX-i on the
computer.
88
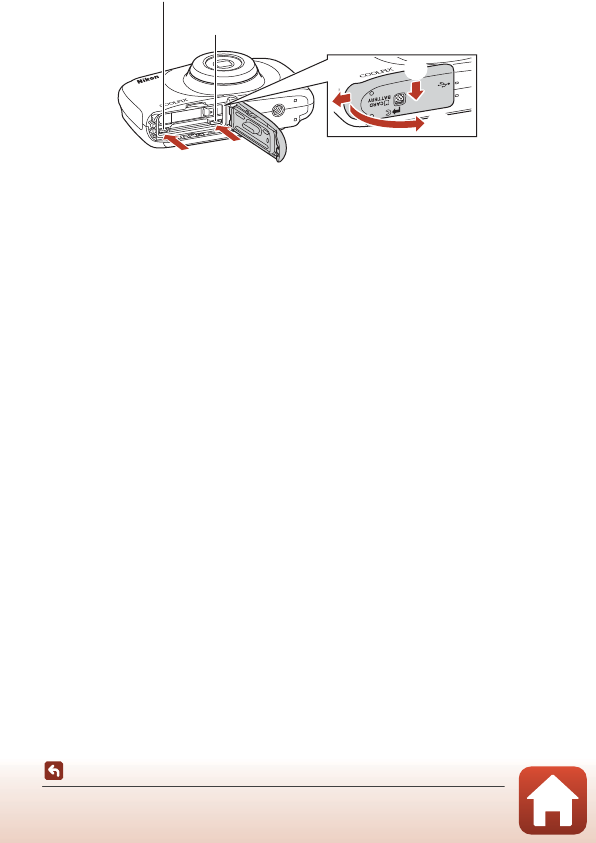
Connecting the Camera to a TV, Printer, or Computer
Utilizing Images
BNotes About Connecting Cables to the Camera
•Make sure to turn the camera off before openning the cover. Check there are no water
droplets. If there are water droplets, wipe the camera with a soft dry cloth.
•Make sure to turn the camera off before connecting or disconnecting cables. Check the
shape and direction of the plugs and do not insert or remove the plugs at an angle.
•Make sure that the camera battery is sufficiently charged. If the EH-62G AC Adapter
(available separately) is used, this camera can be powered from an electrical outlet. Do not
use any other make or model of AC adapter as it may cause the camera to heat up or
malfunction.
•For information about the connection methods and subsequent operations, refer to the
documentation included with the device in addition to this document.
3
1
2
Insert the plug straight.
HDMI micro connector (Type D)
Open the cover.
Micro-USB connector
89
Connecting the Camera to a TV, Printer, or Computer
Viewing Images on a TV
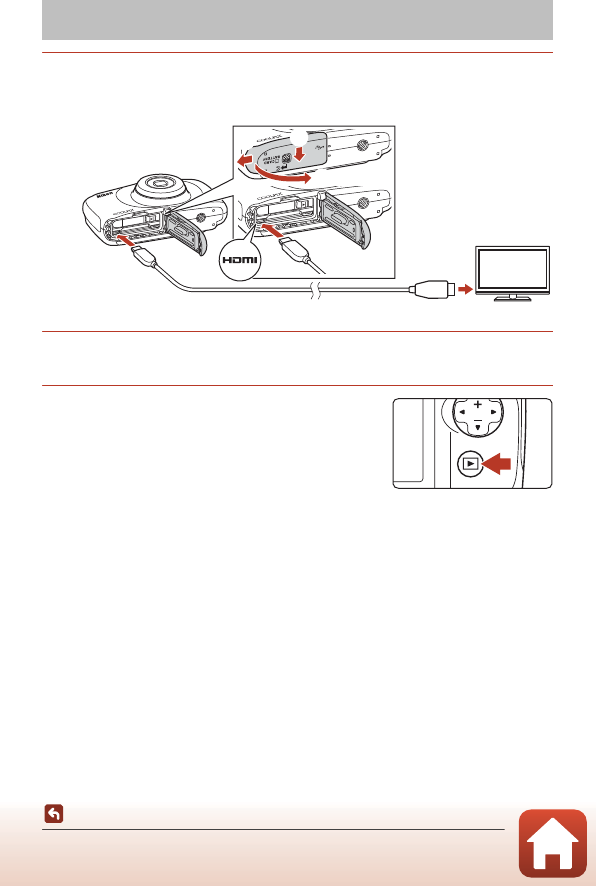
1Turn off the camera and connect it to the TV.
•Check the shape and direction of the plugs and do not insert or remove the plugs at
an angle.
2Set the TV’s input to external input.
•See the documentation provided with your TV for details.
3Press and hold down the c (shooting/
playback mode) button to turn on the
camera.
•Images are displayed on the TV.
•The camera screen does not turn on.
Viewing Images on a TV
3
1
2
HDMI micro connector (Type D) to HDMI jack
90
Connecting the Camera to a TV, Printer, or Computer
Printing Images Without a Computer
Users of PictBridge-compatible printers can connect the camera directly to the printer
and print images without using a computer.
Connecting the Camera to a Printer
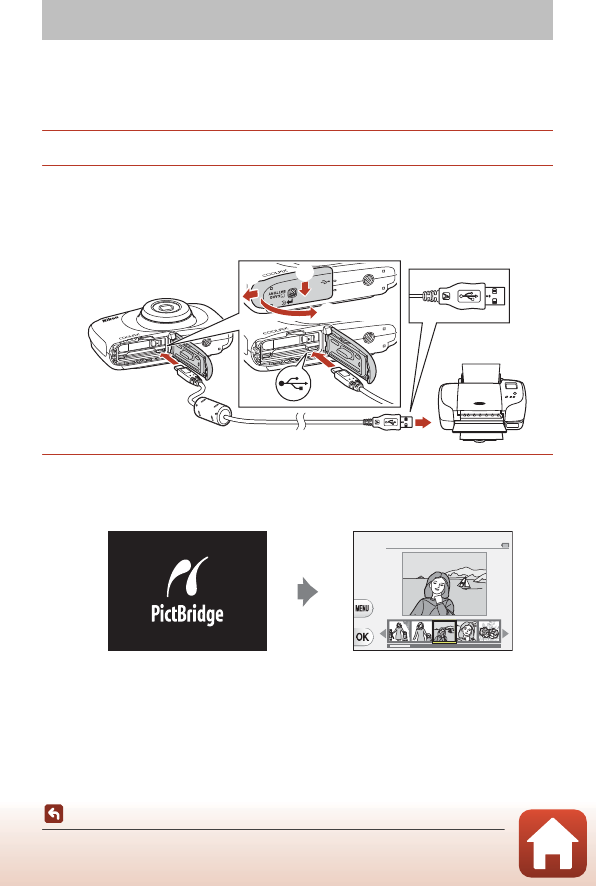
1Turn on the printer.
2Turn off the camera and connect it to the printer using the USB
cable.
•Check the shape and direction of the plugs and do not insert or remove the plugs at
an angle.
3The camera is automatically turned on.
•The PictBridge startup screen (1) is displayed in the camera screen, followed by
the Print selection screen (2).
Printing Images Without a Computer
3
1
2
Print selection
12
91
Connecting the Camera to a TV, Printer, or Computer
Printing Images Without a Computer
BIf the PictBridge Startup Screen Is Not Displayed
When Auto is selected for Charge by computer (A106), it may be impossible to print
images with direct connection of the camera to some printers. If the PictBridge startup
screen is not displayed after the camera is turned on, turn the camera off and disconnect the
USB cable. Set Charge by computer to Off and reconnect the camera to the printer.
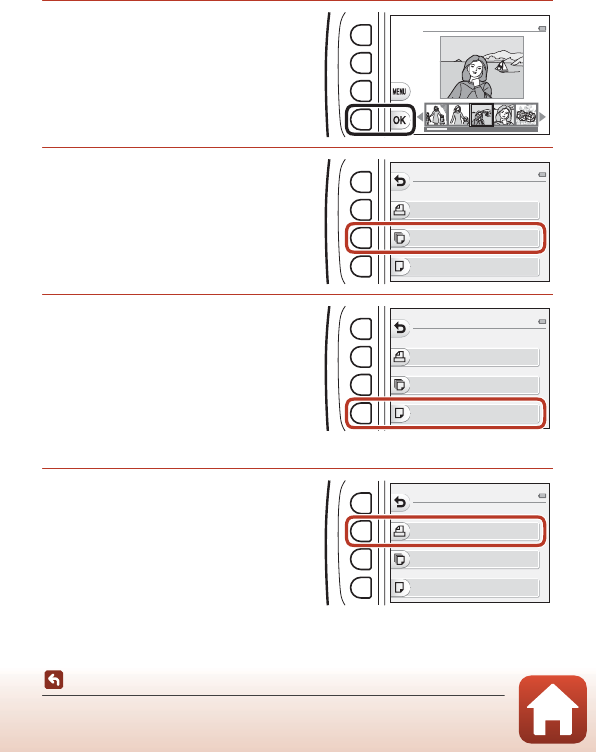
Printing Images One at a Time
1Use the multi selector JK to
select the desired image and
press flexible button 4 (O).
2Press flexible button 3 (b
Copies).
•Use HI to set the desired number of
copies (up to 9) and press flexible
button 4 (O).
3Press flexible button 4 (c
Paper size).
•Use HI to select the paper size and
press flexible button 4 (O).
•To print with the paper size setting
configured on the printer, select
Default.
•The paper size options available on the
camera vary depending on the printer that you use.
4Press flexible button 2 (a
Start print).
•Printing starts.
Print selection
Start print
Copies
Paper size
PictBridge
1 prints
Start print
Copies
Paper size
PictBridge
4 prints
Start print
Copies
Paper size
PictBridge
4 prints