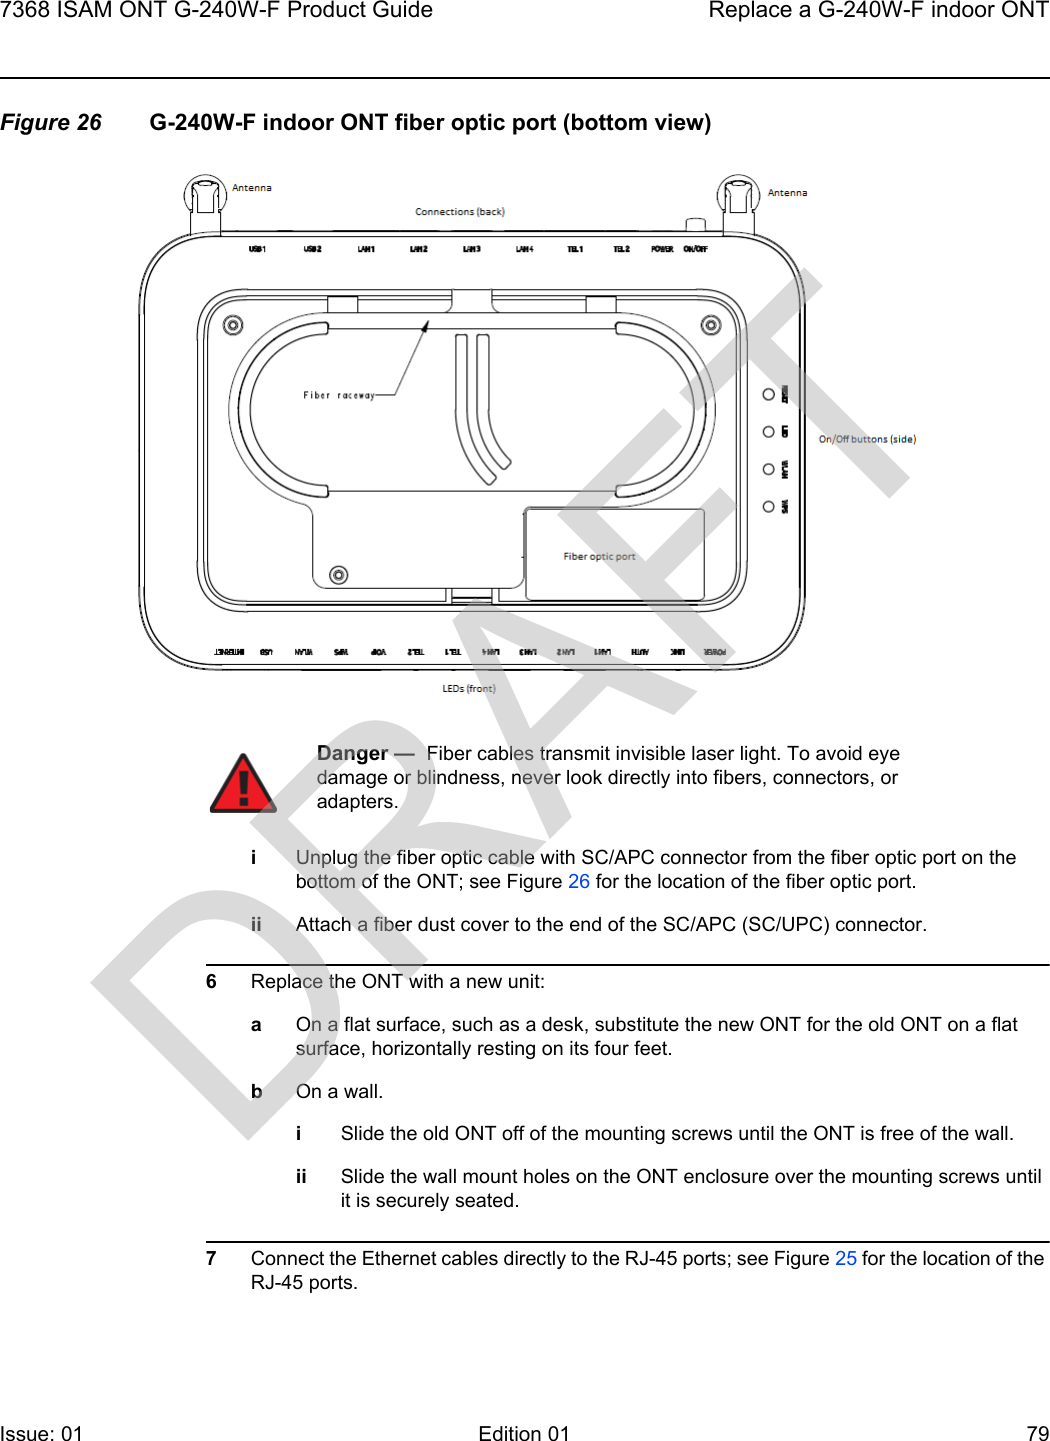
Nokia Bell G240WF G-240W-F User Manual 7368 ISAM ONT G 240W F Product Guide
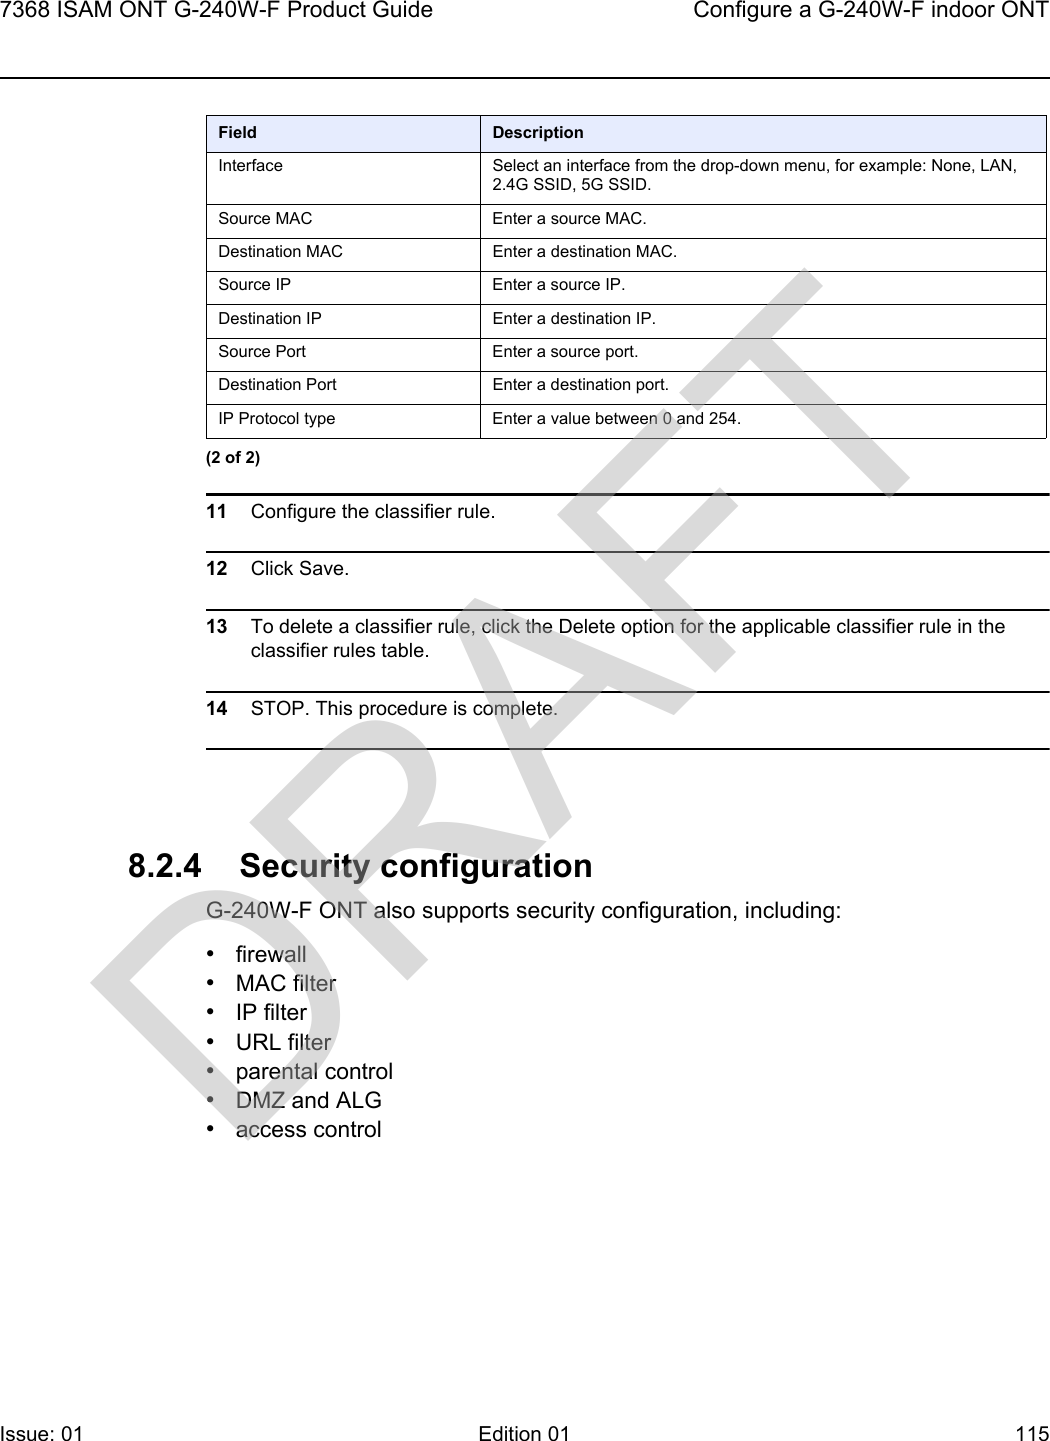
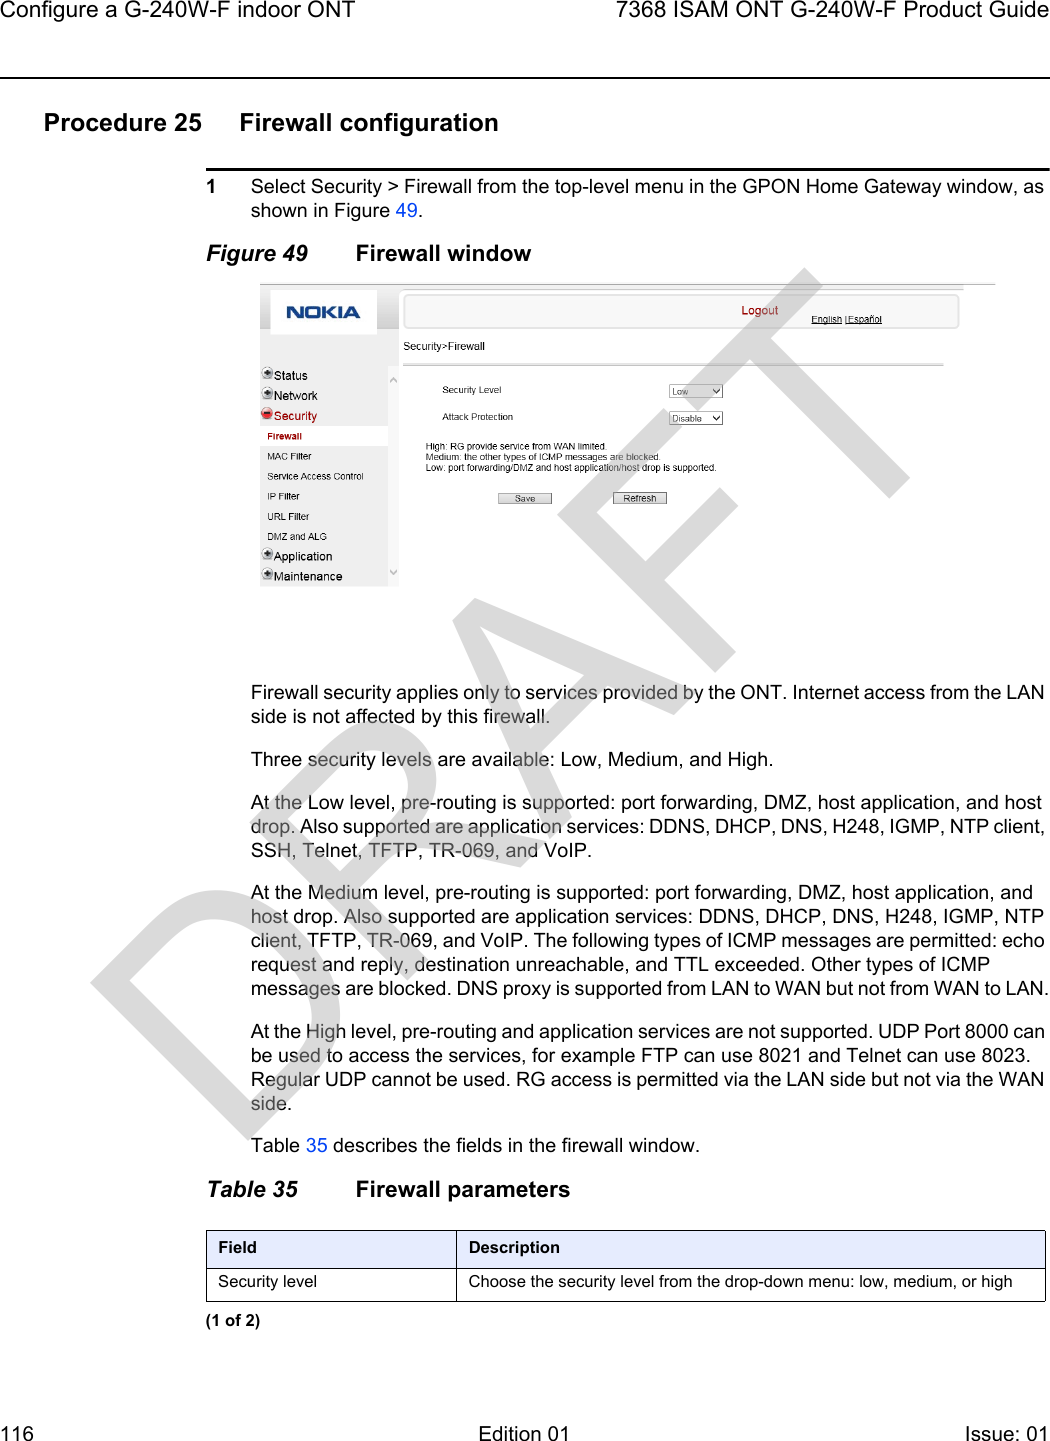
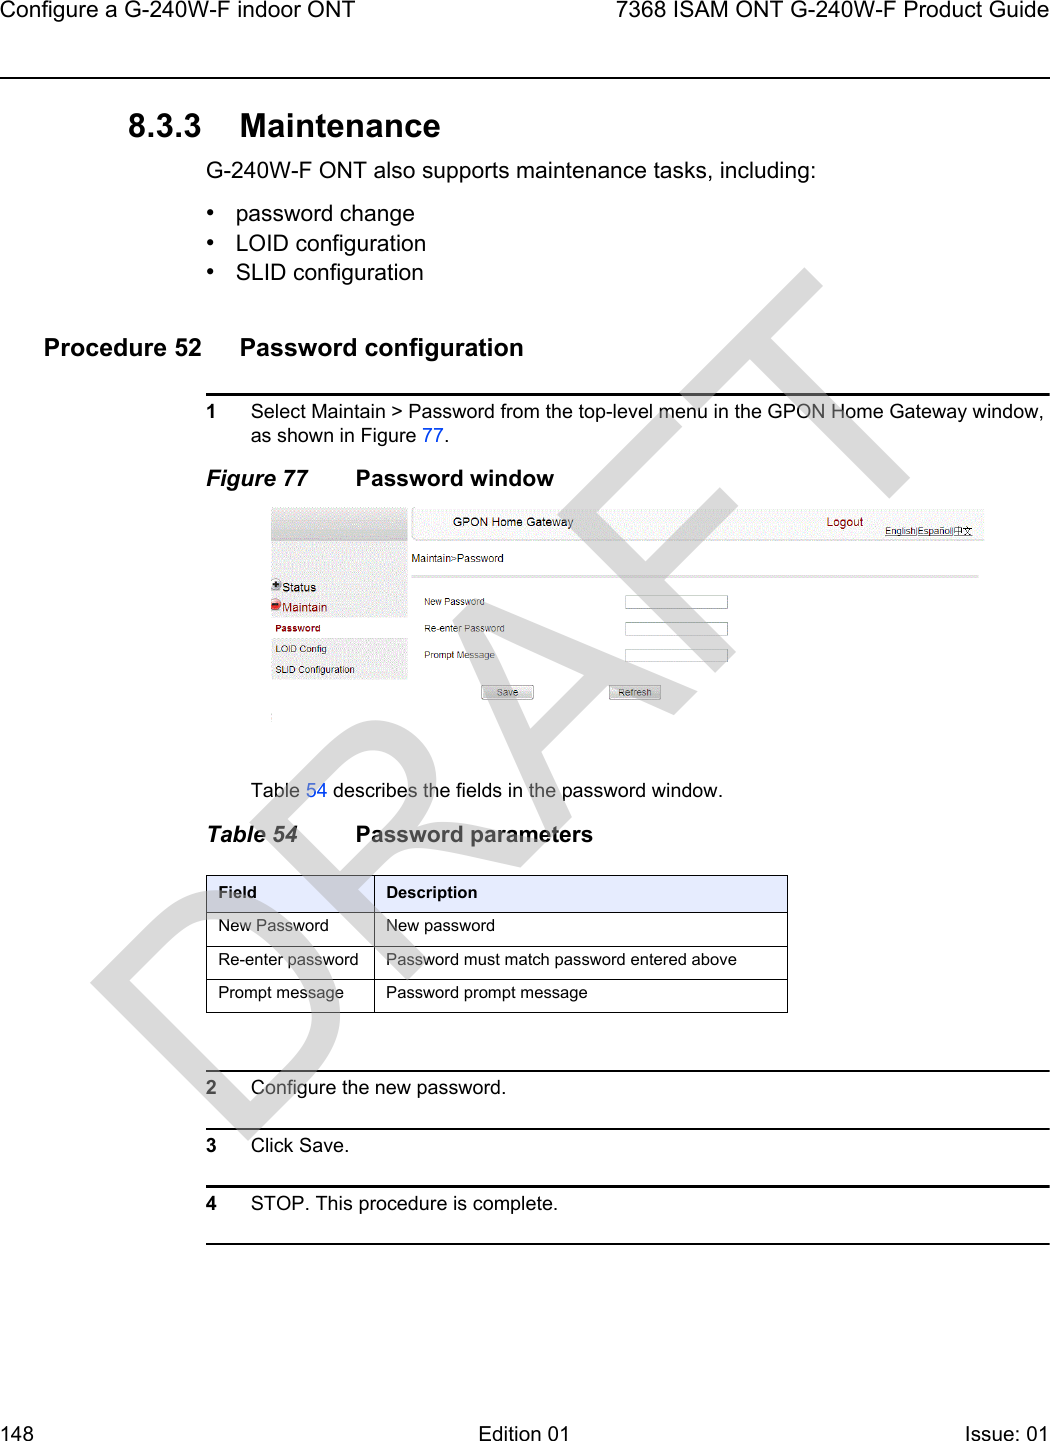
Alcatel-Lucent Shanghai Bell Co. Ltd. G-240W-F 7368 ISAM ONT G 240W F Product Guide
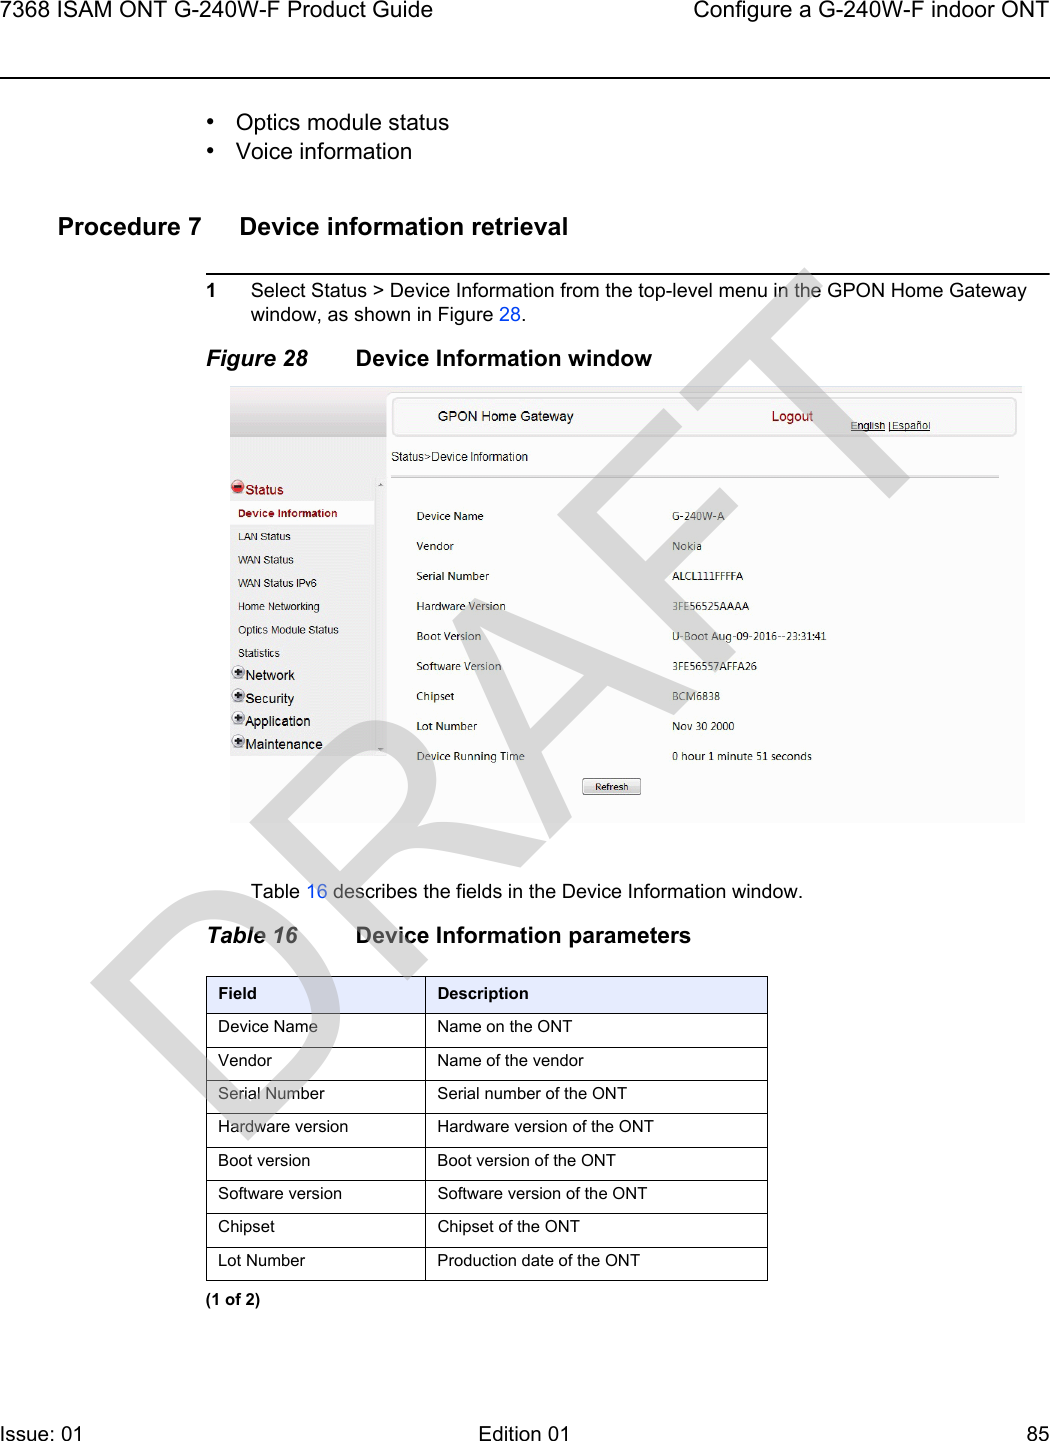
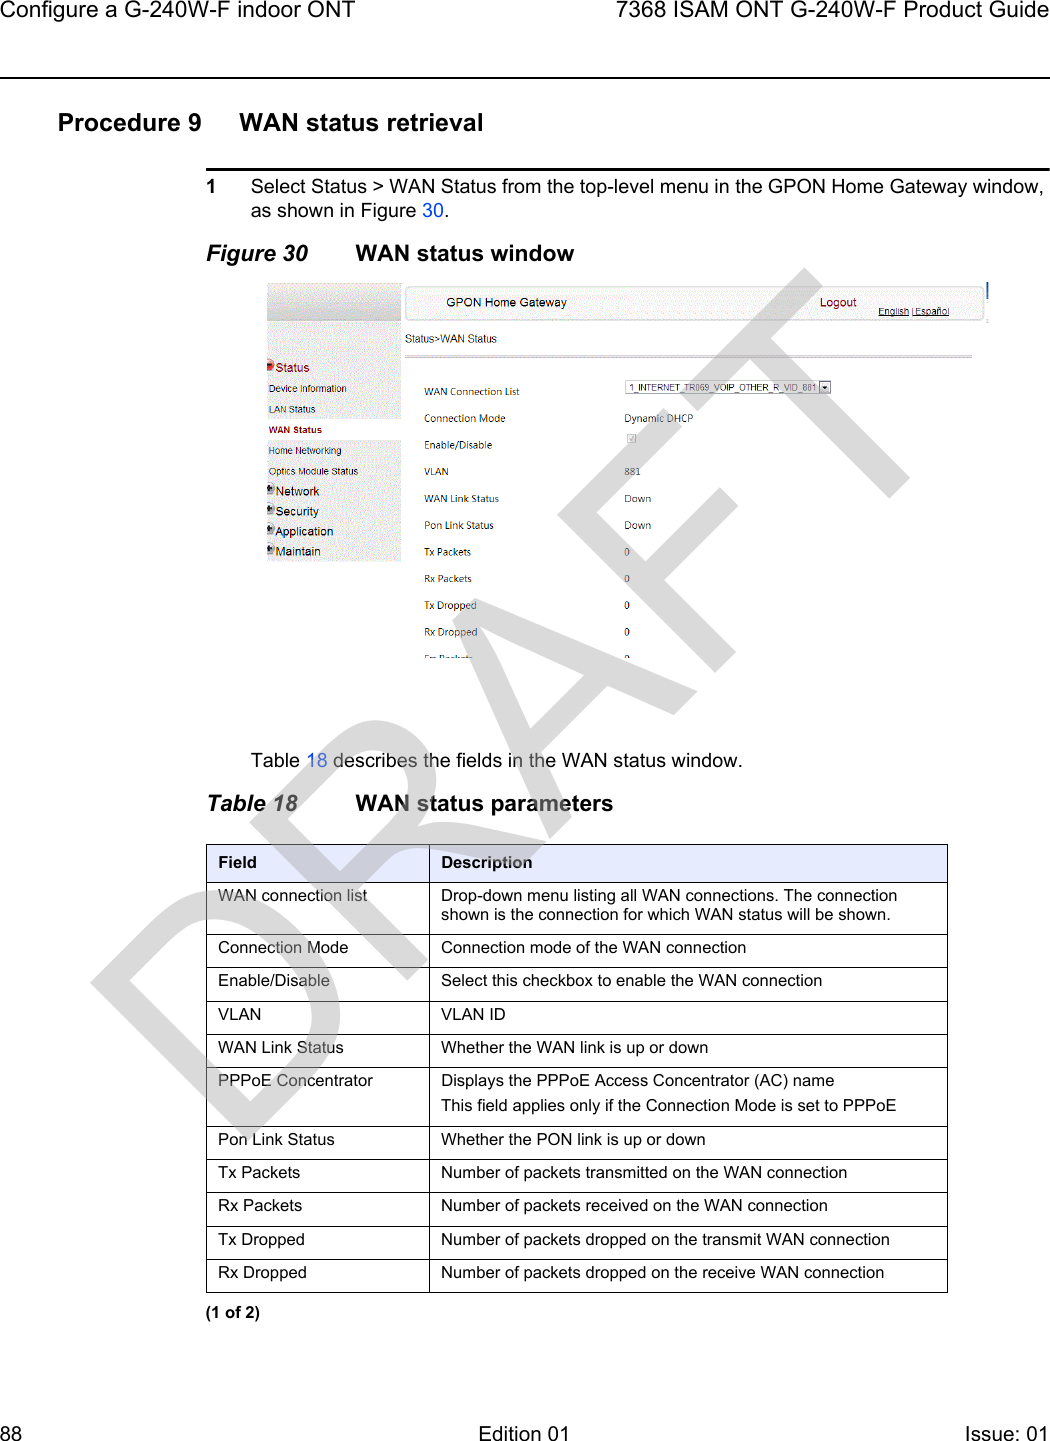
UserManual.wiki
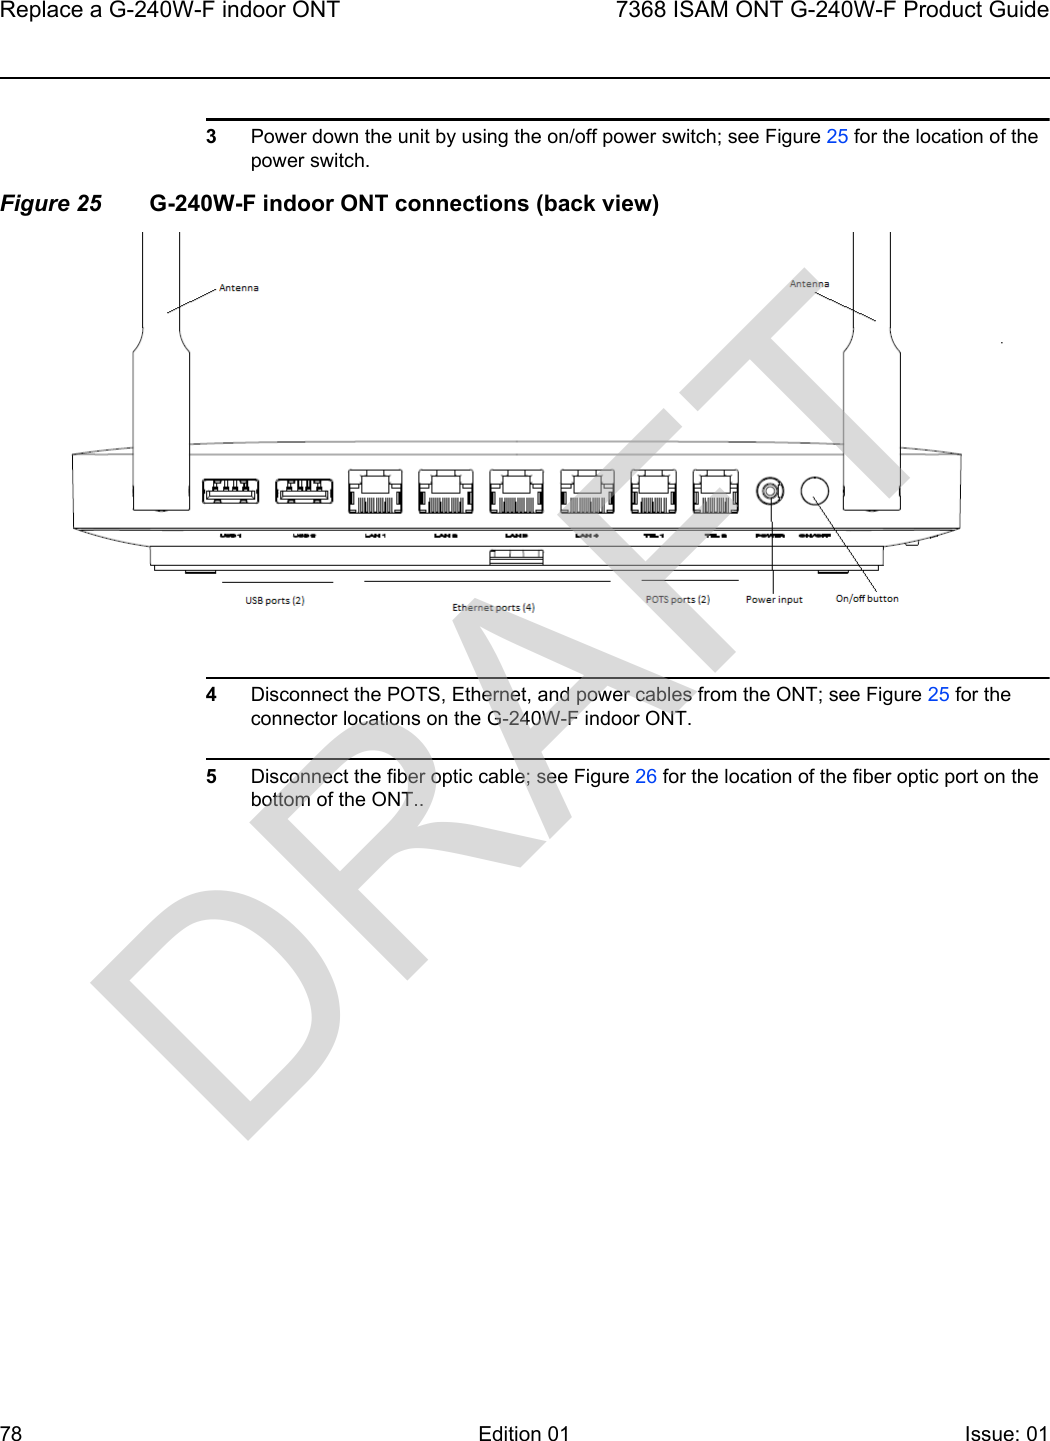
>
Nokia Bell
>
G240WF User Manual
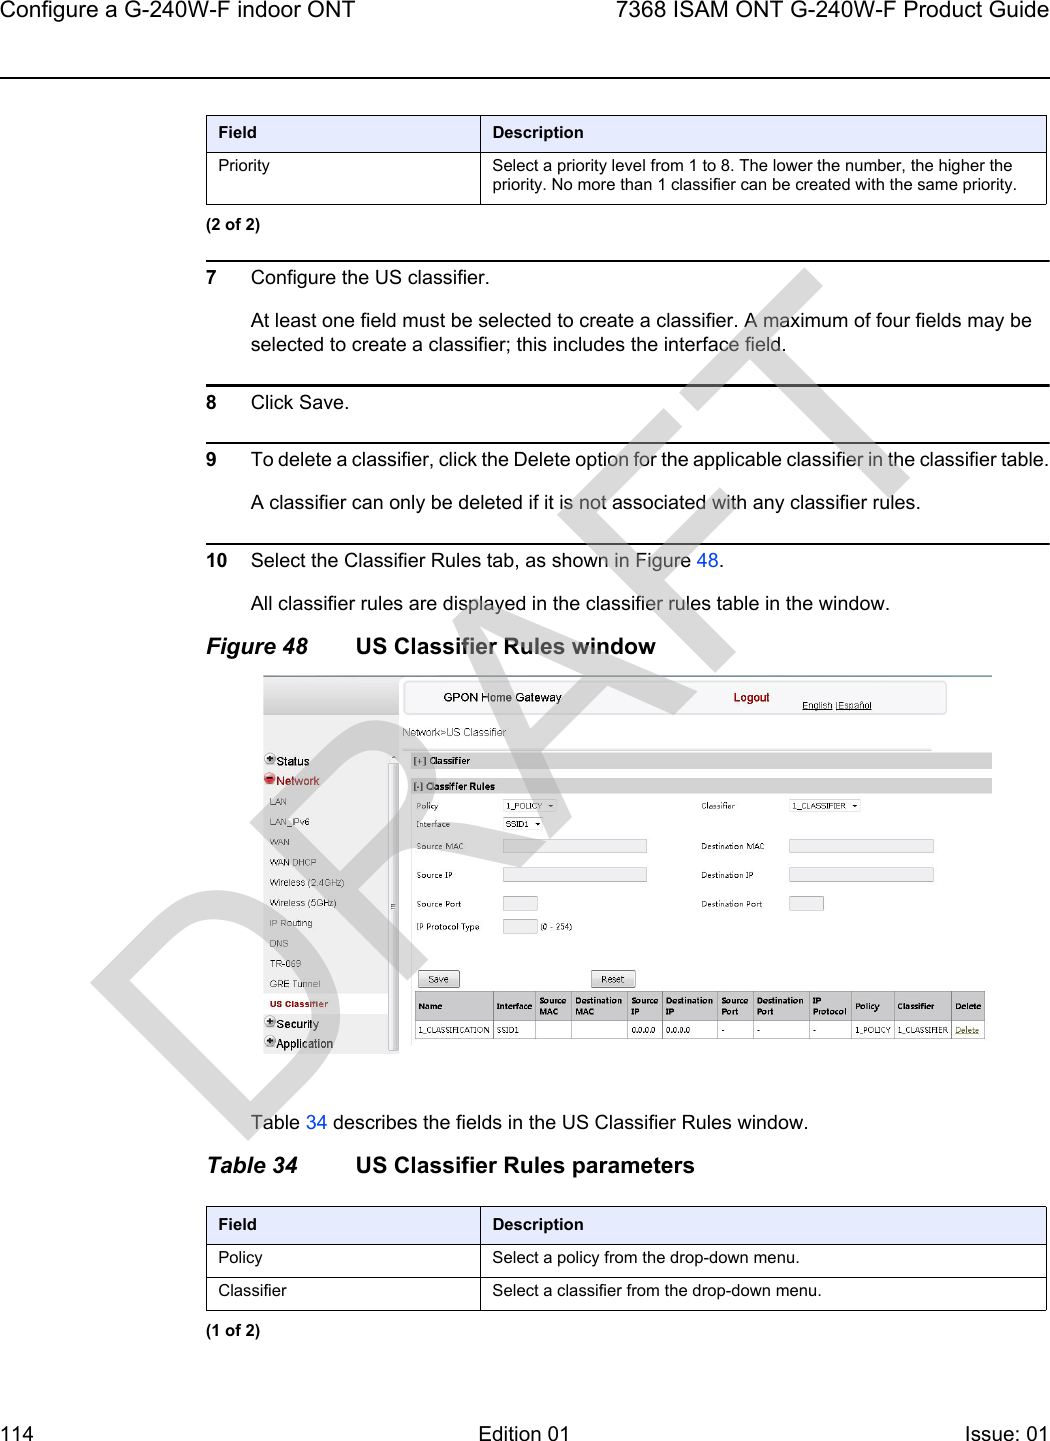
User Guide
Navigation menu
Upload a User Manual
Namespaces
Wiki Guide
HTML
PDF
Info
Views
User Manual
Discussion / Help
Navigation


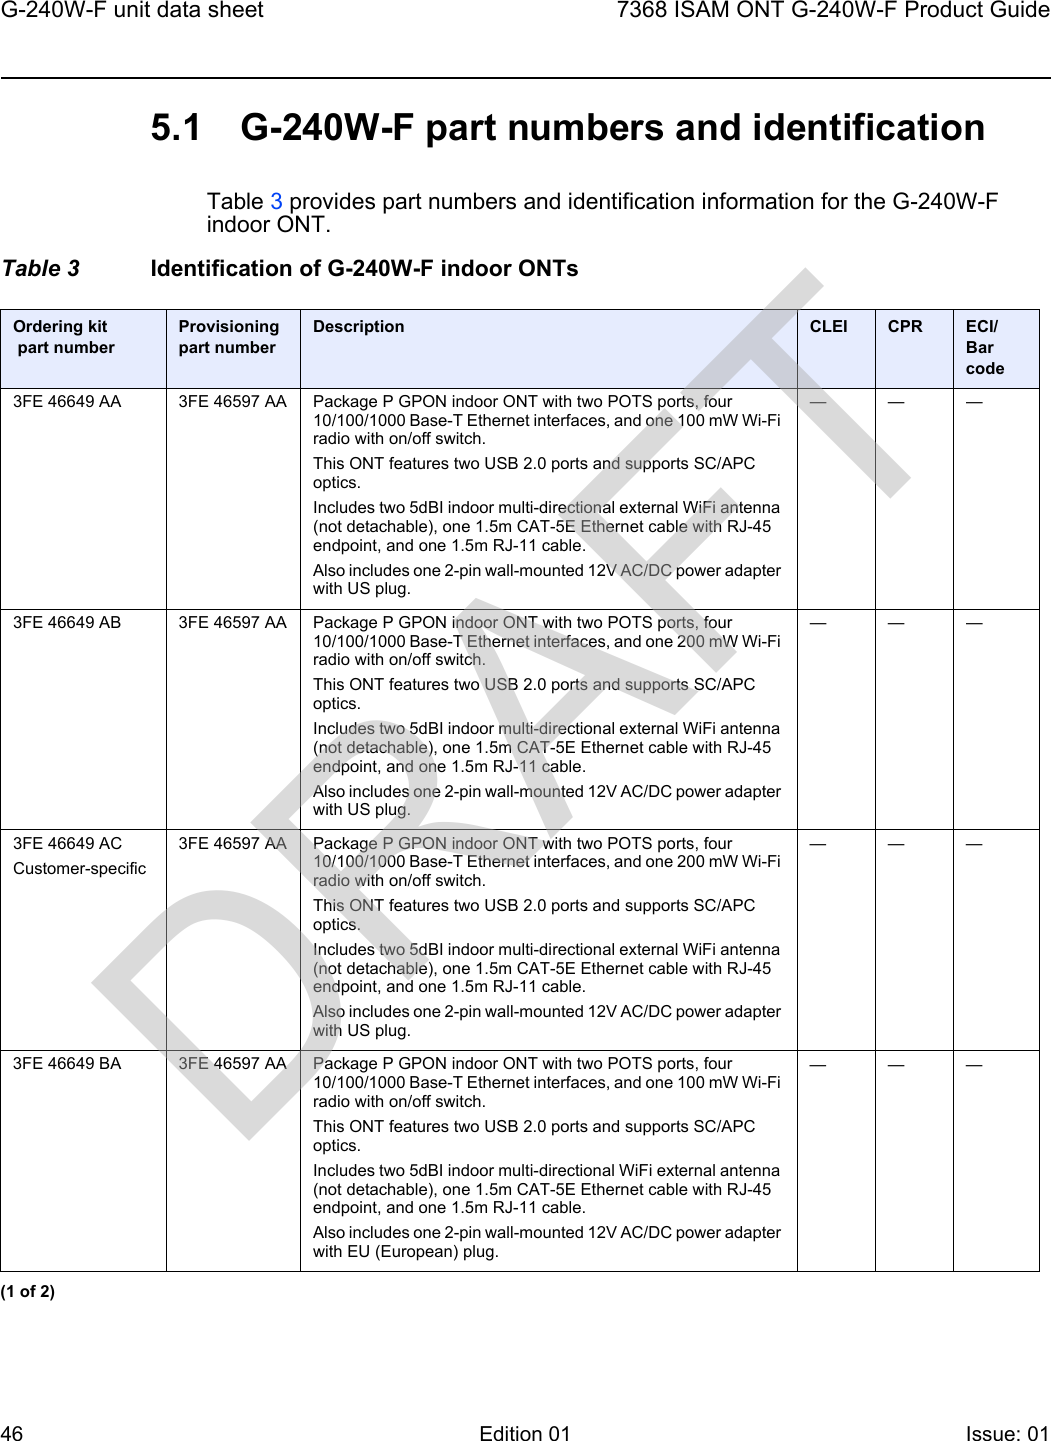
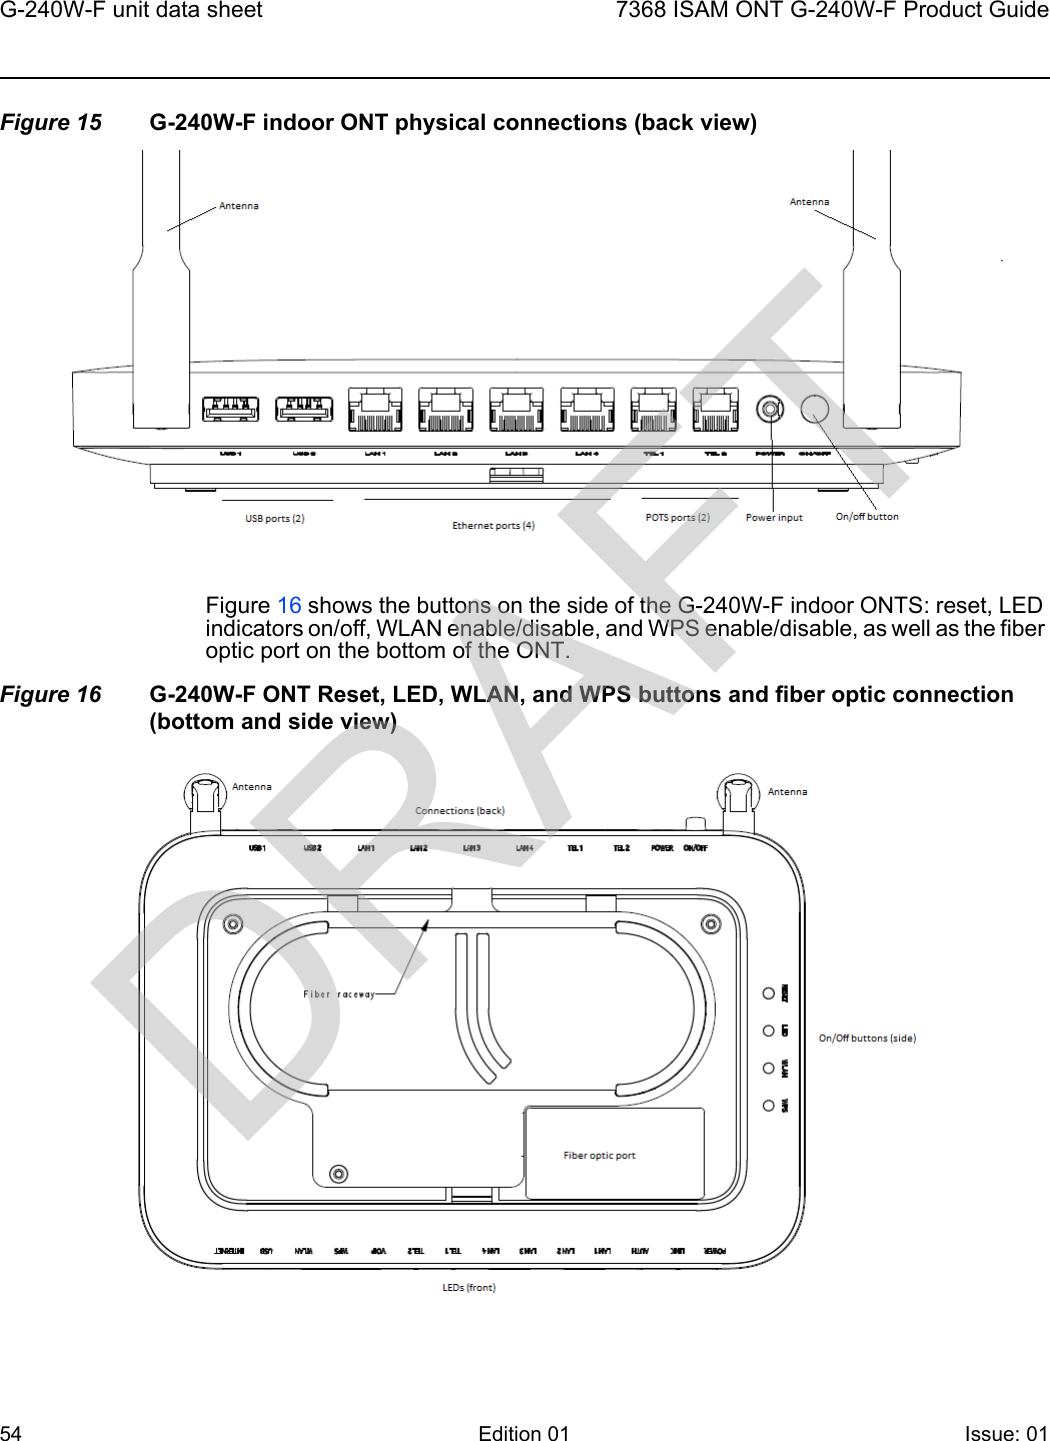
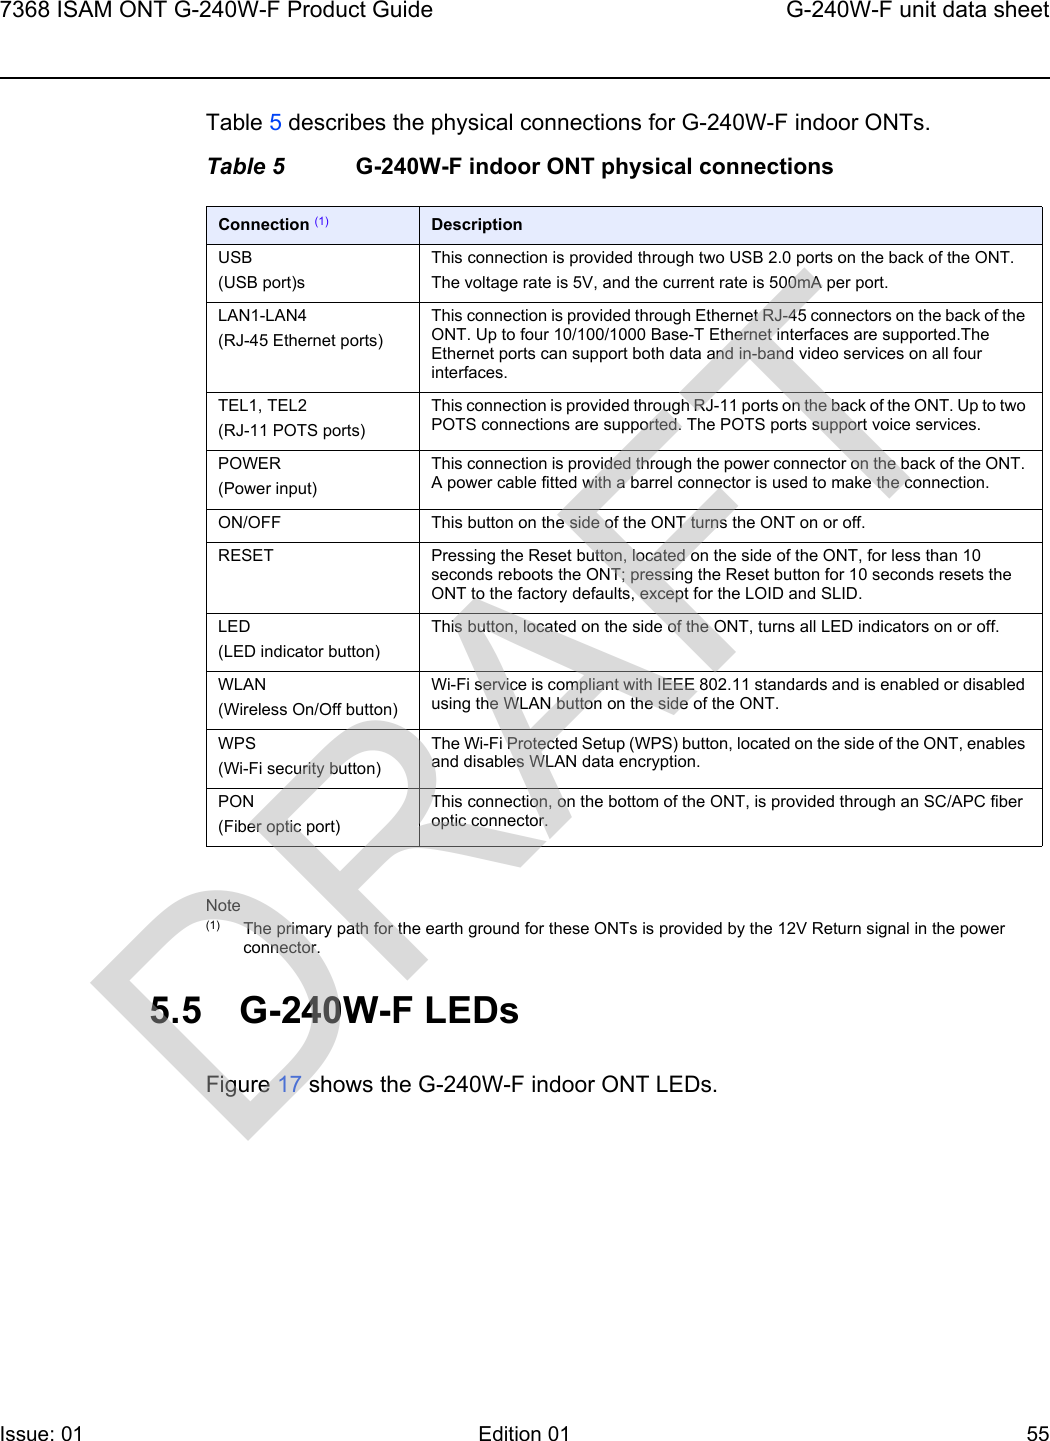
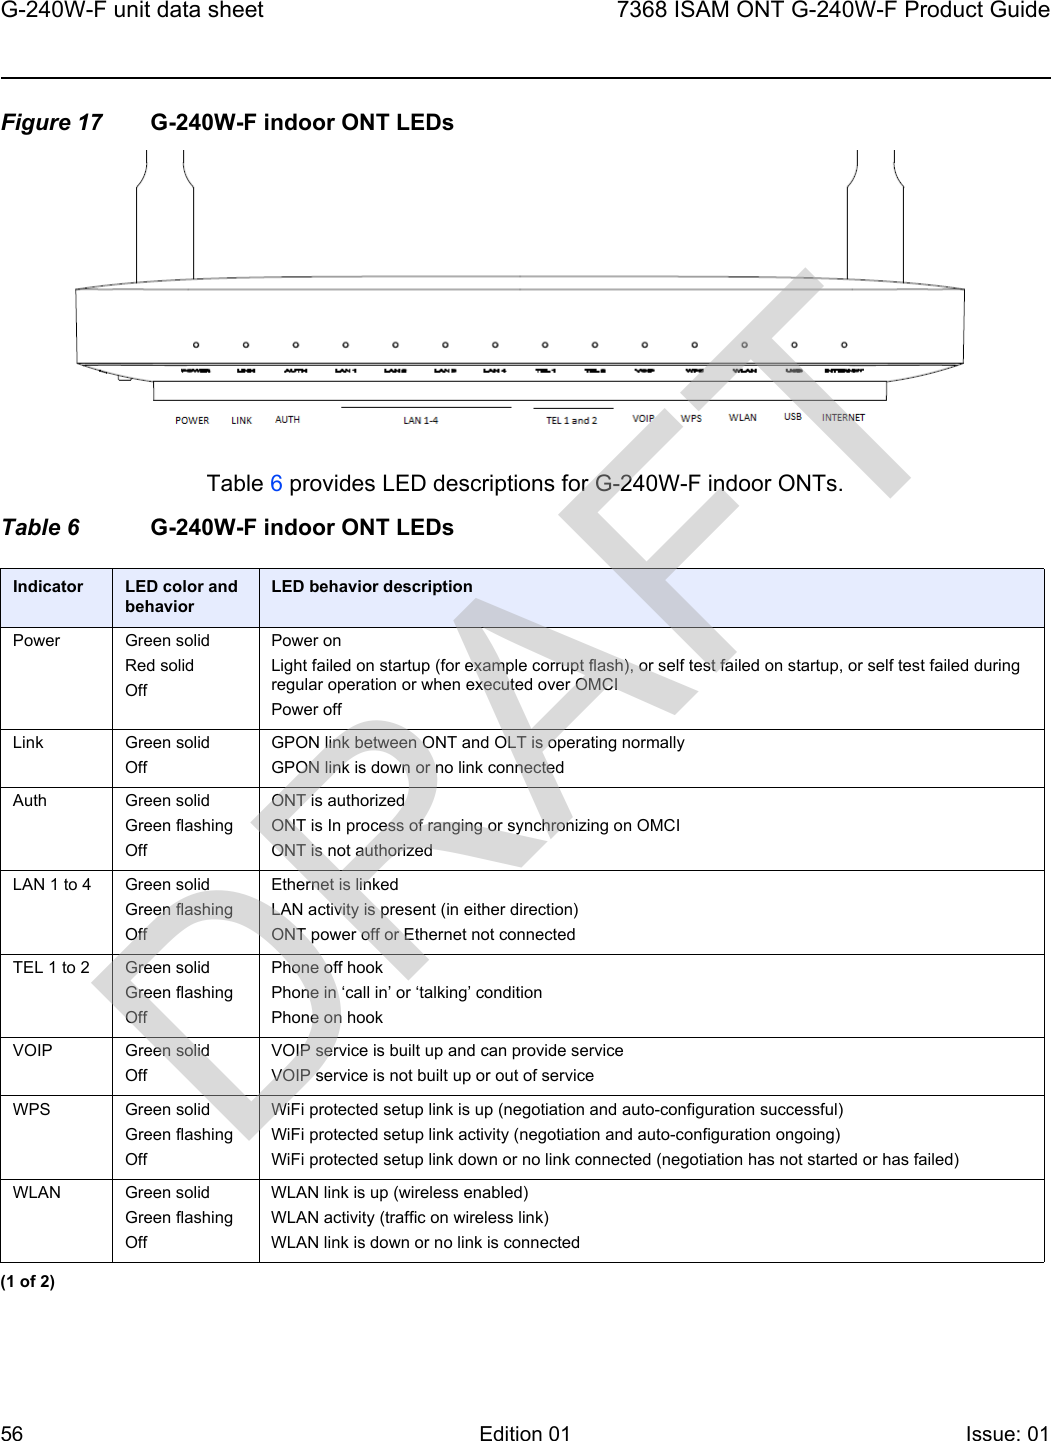
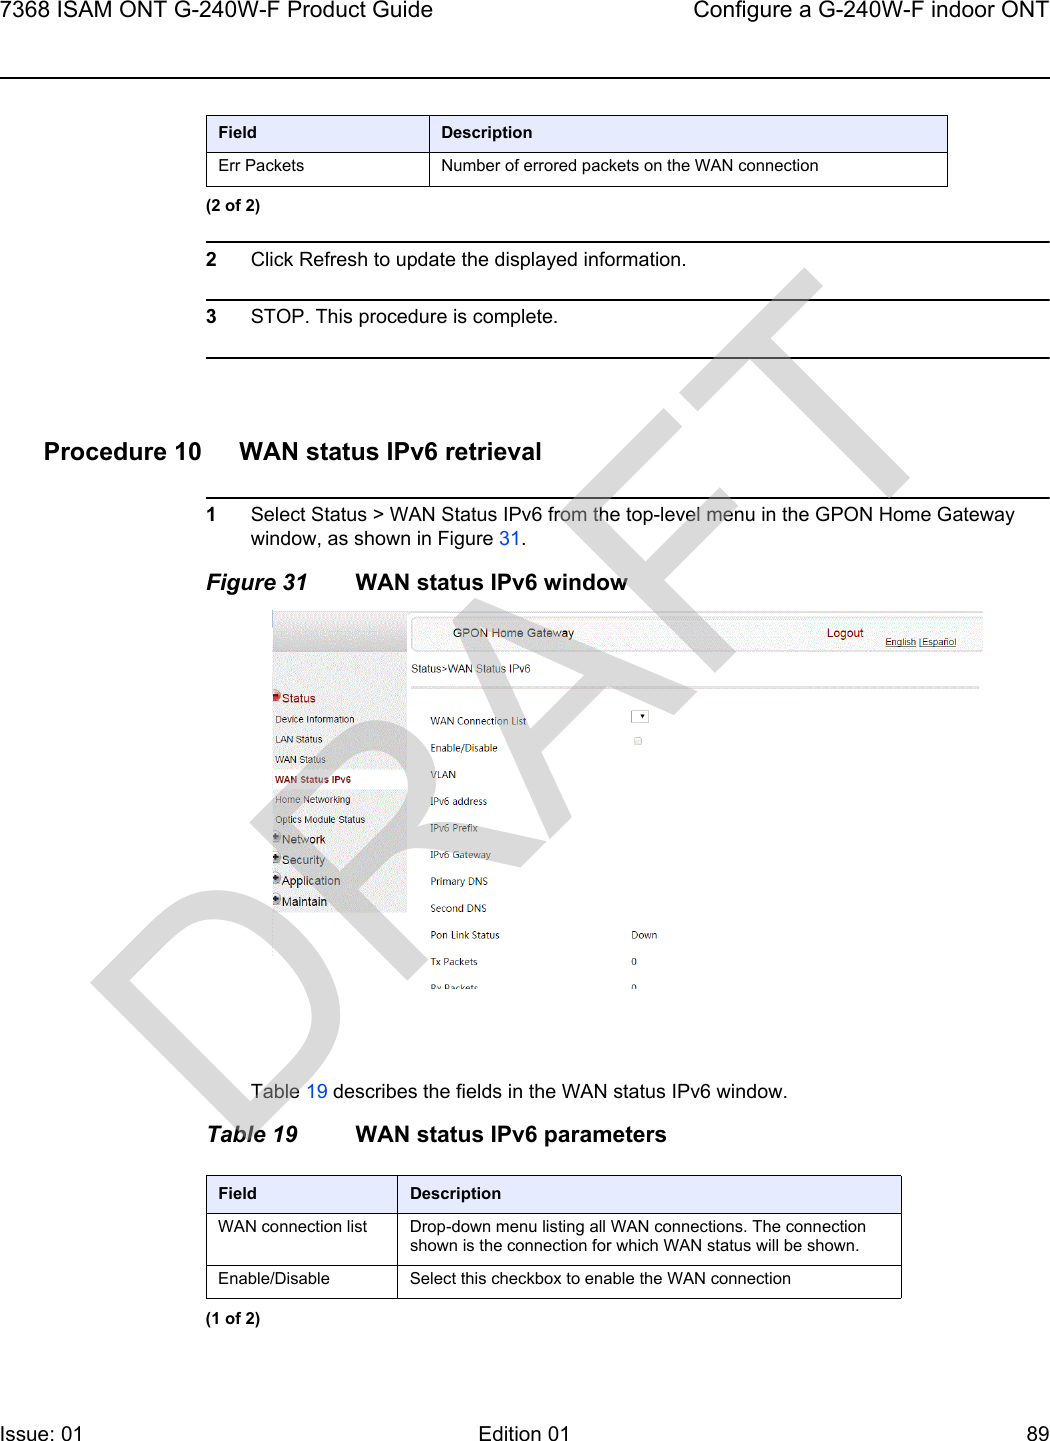
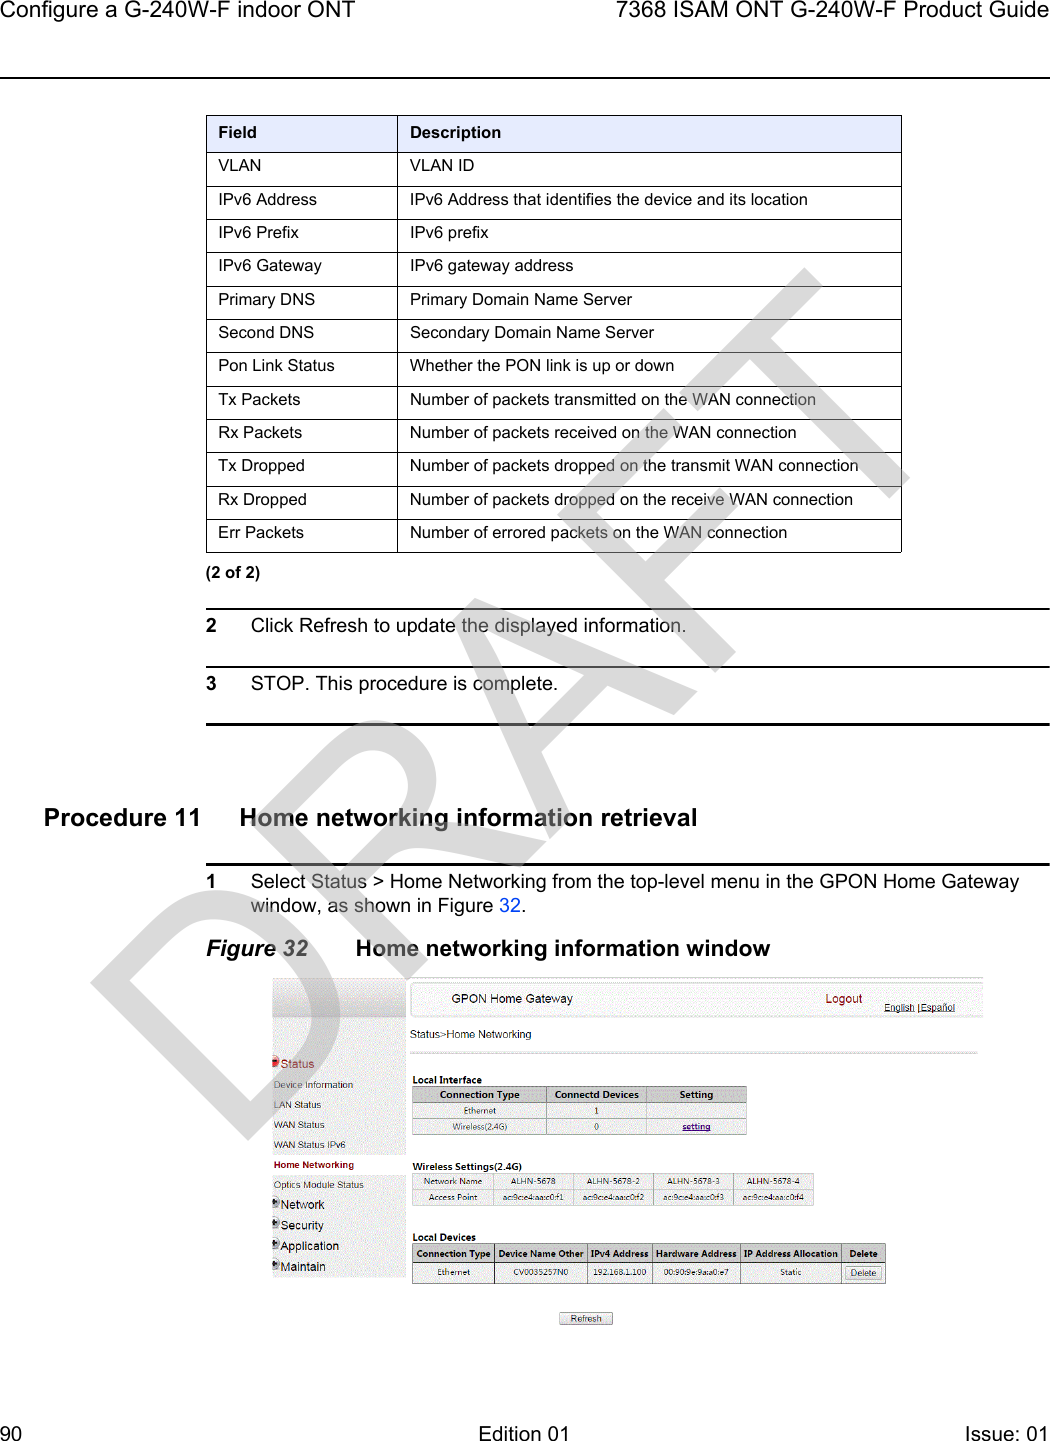
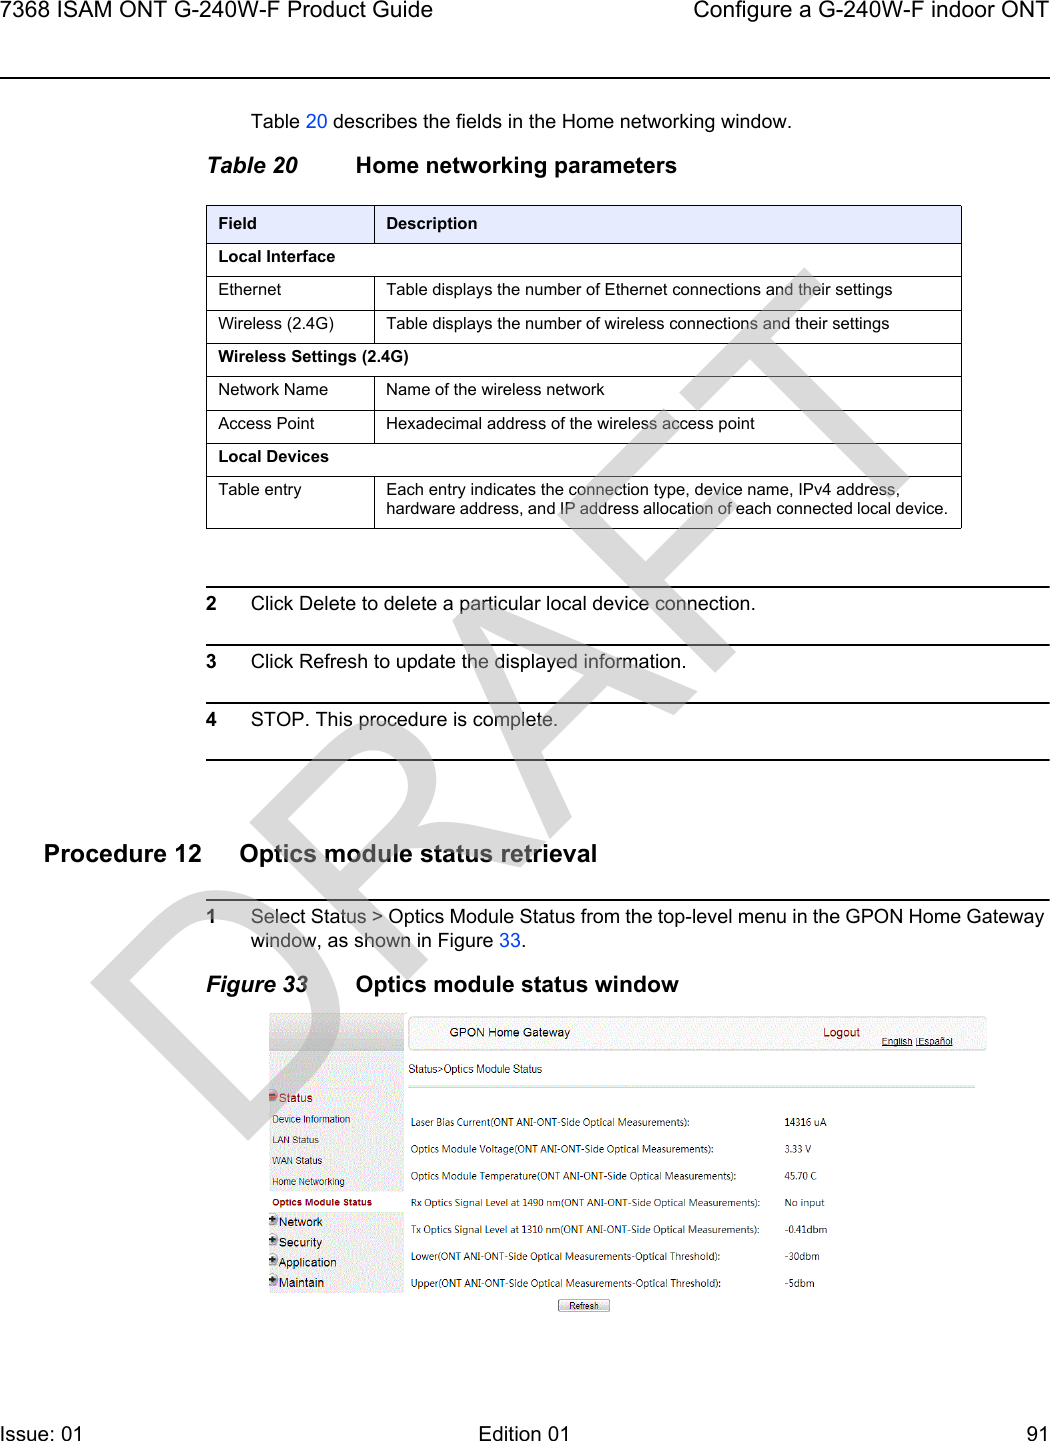
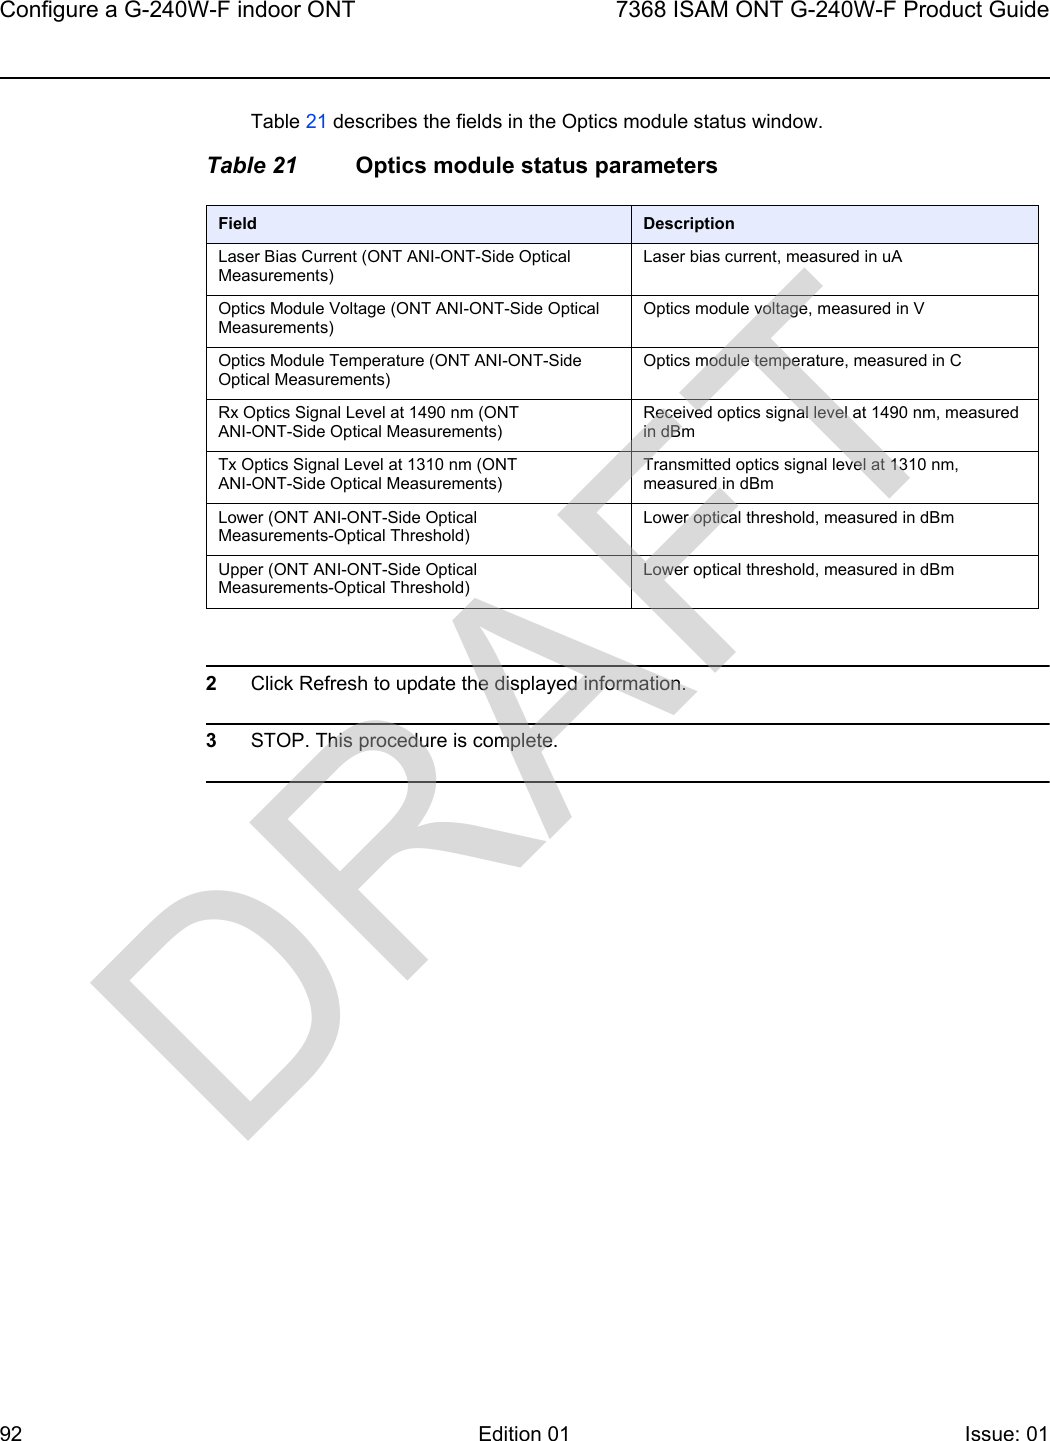
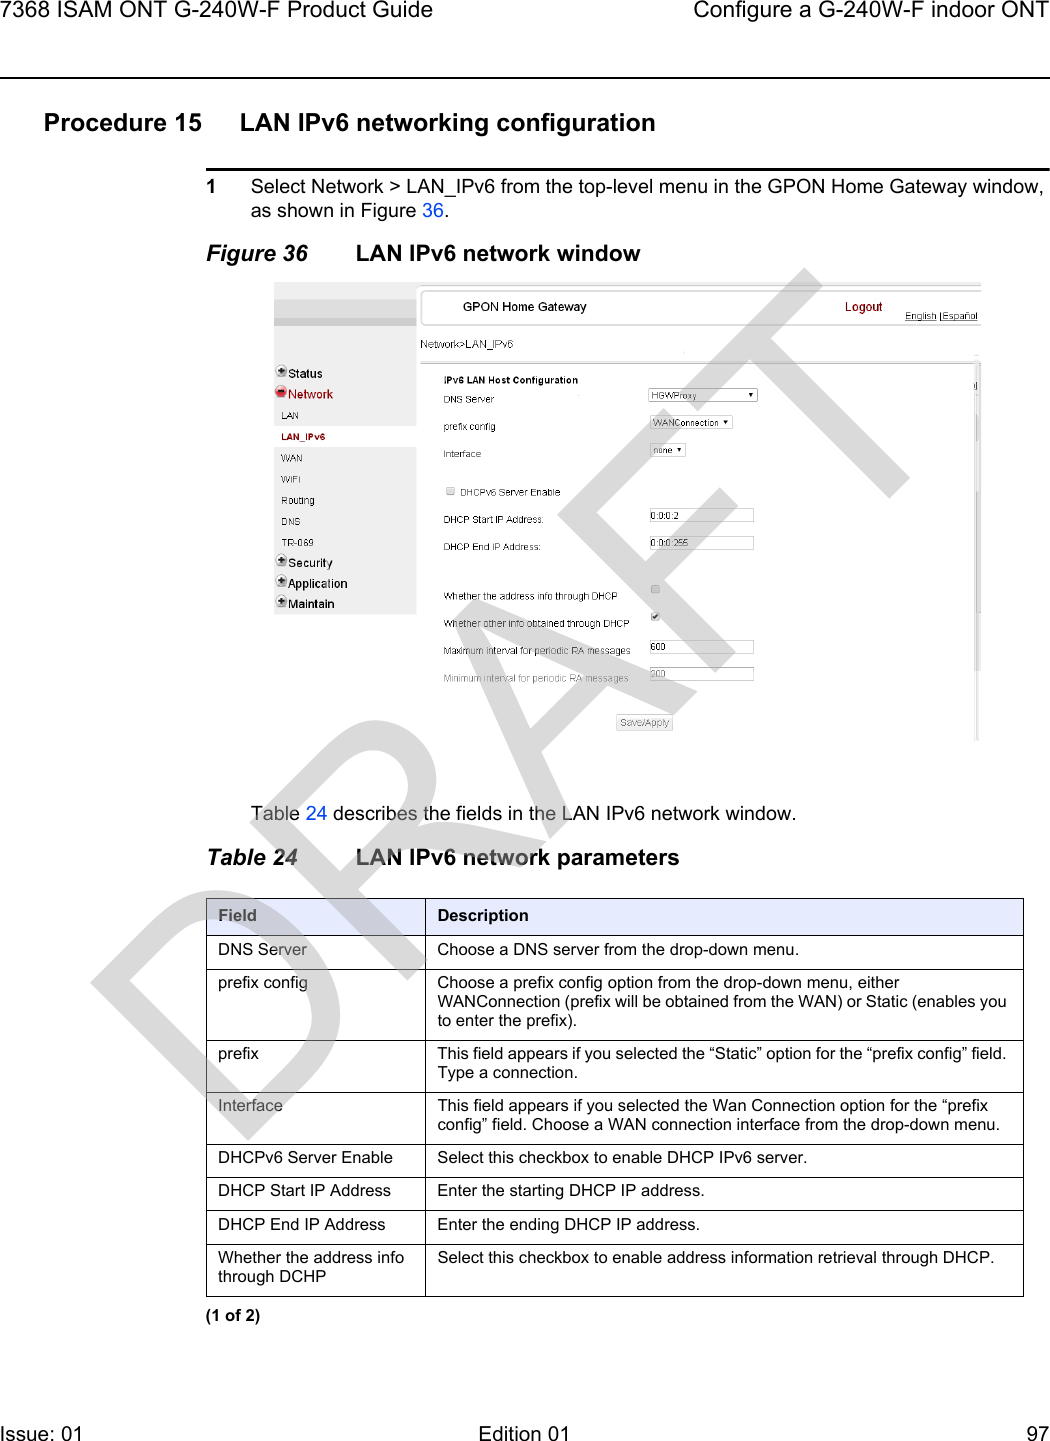
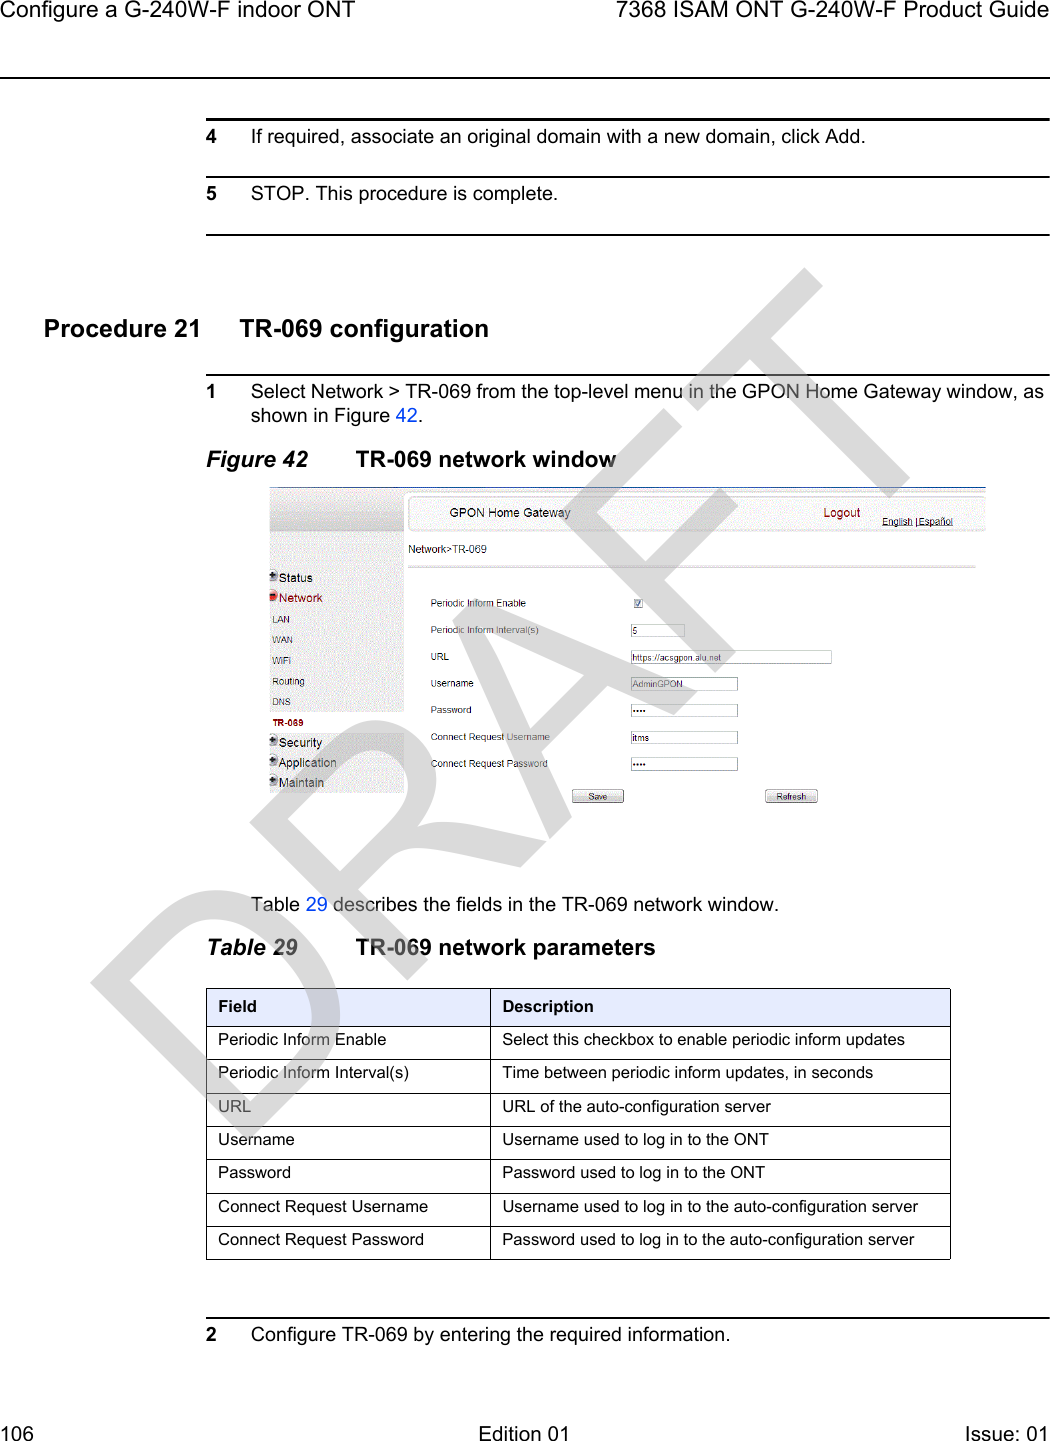
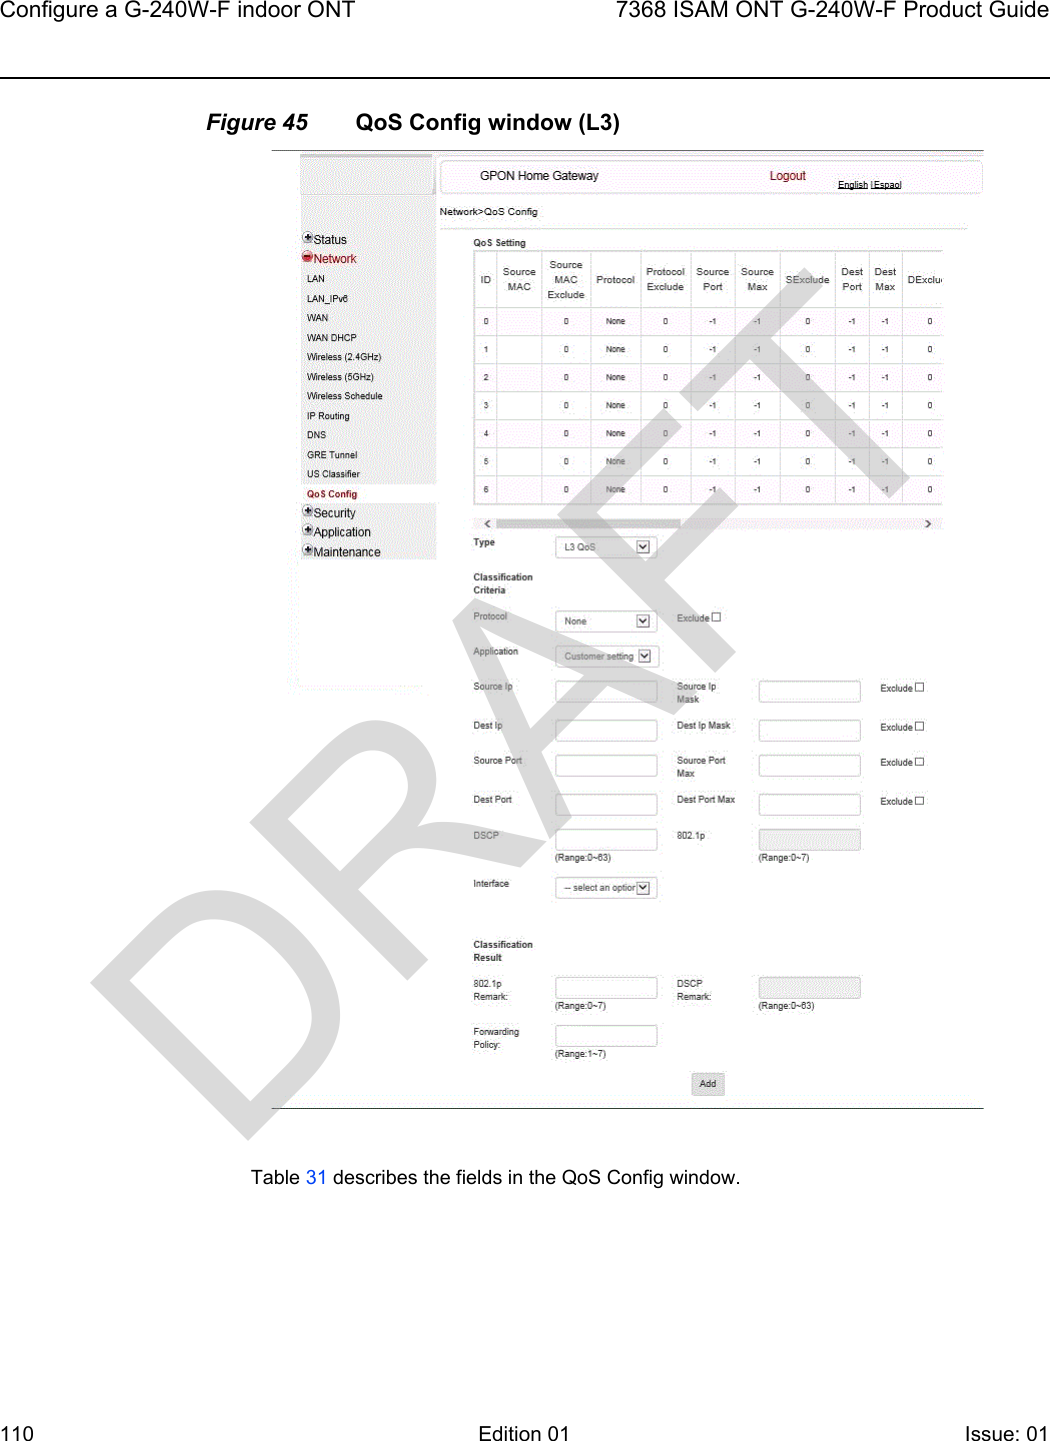
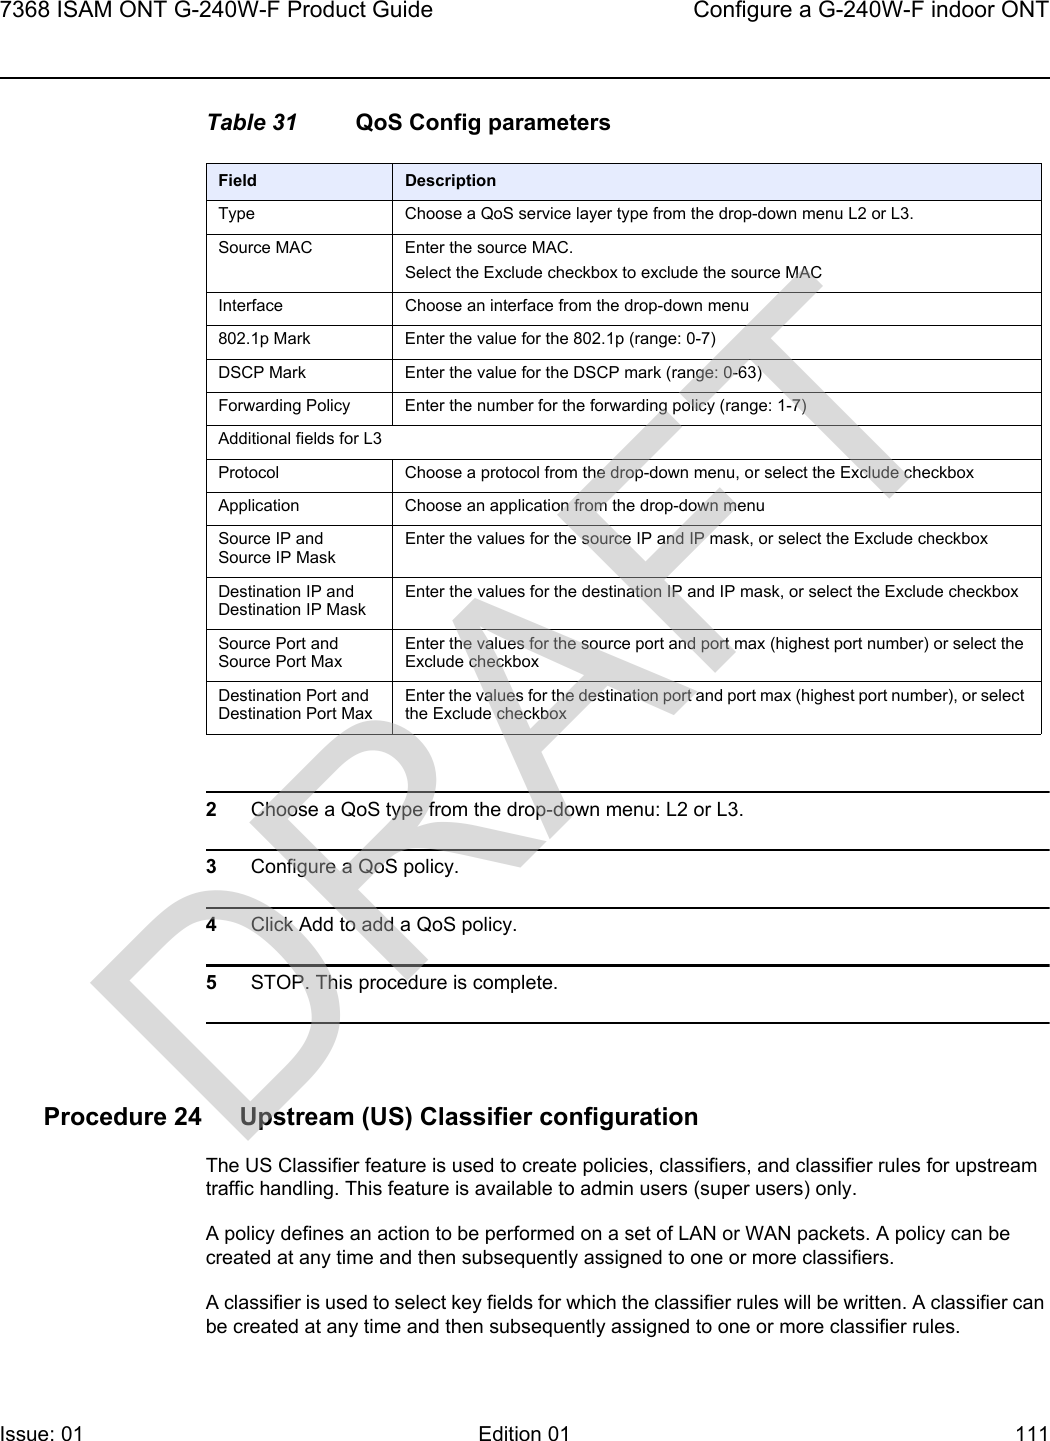
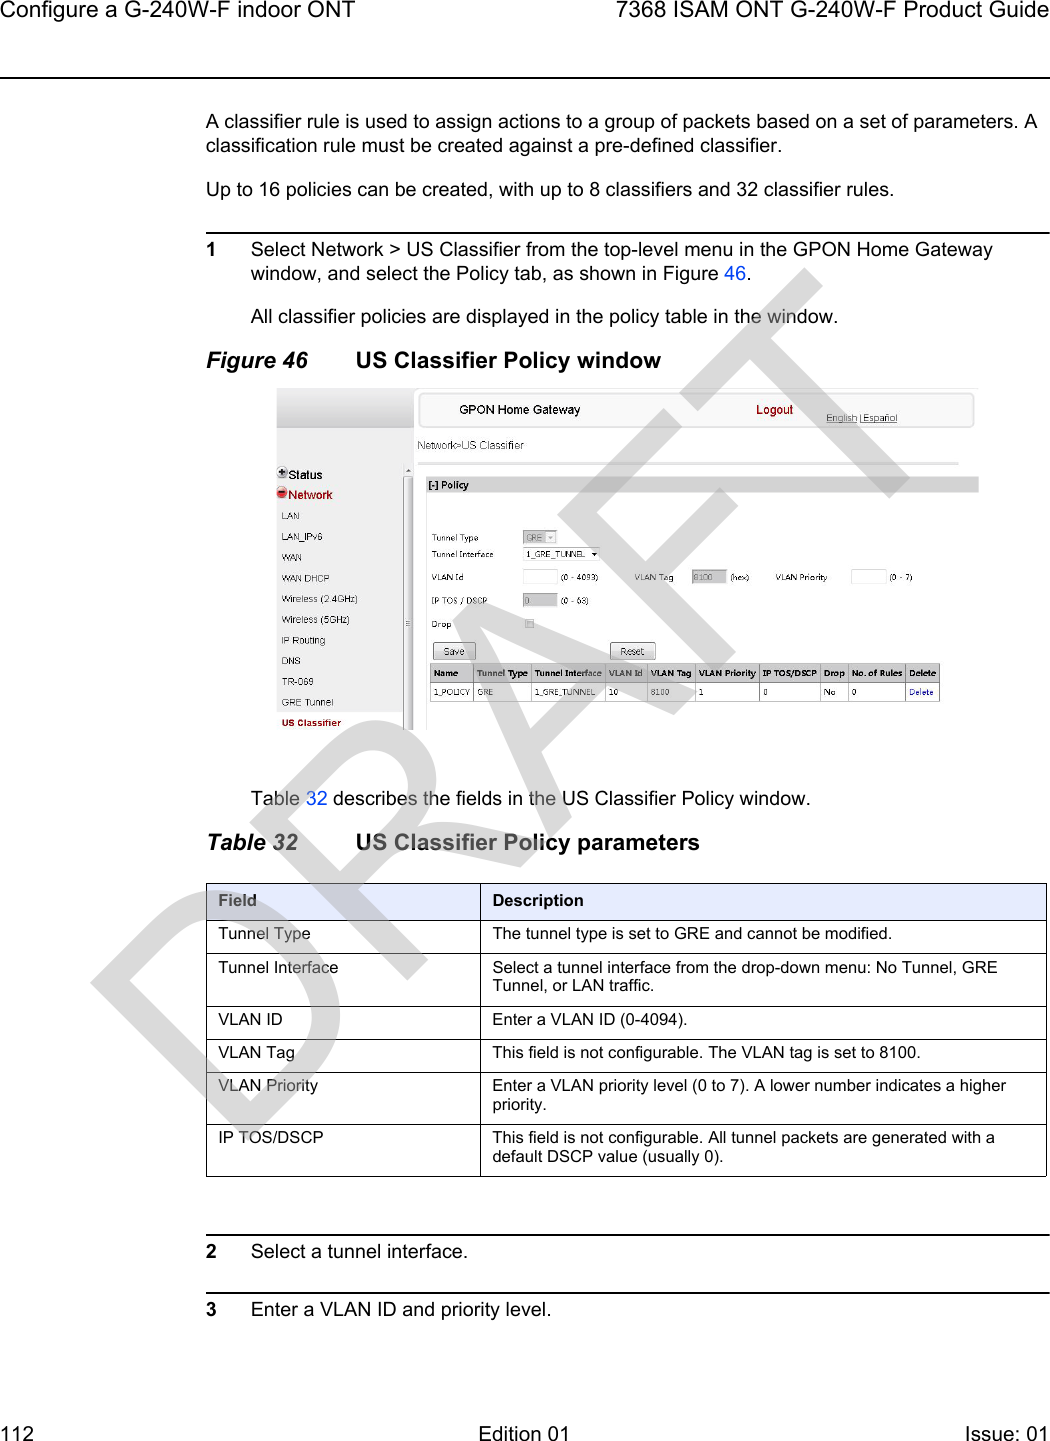
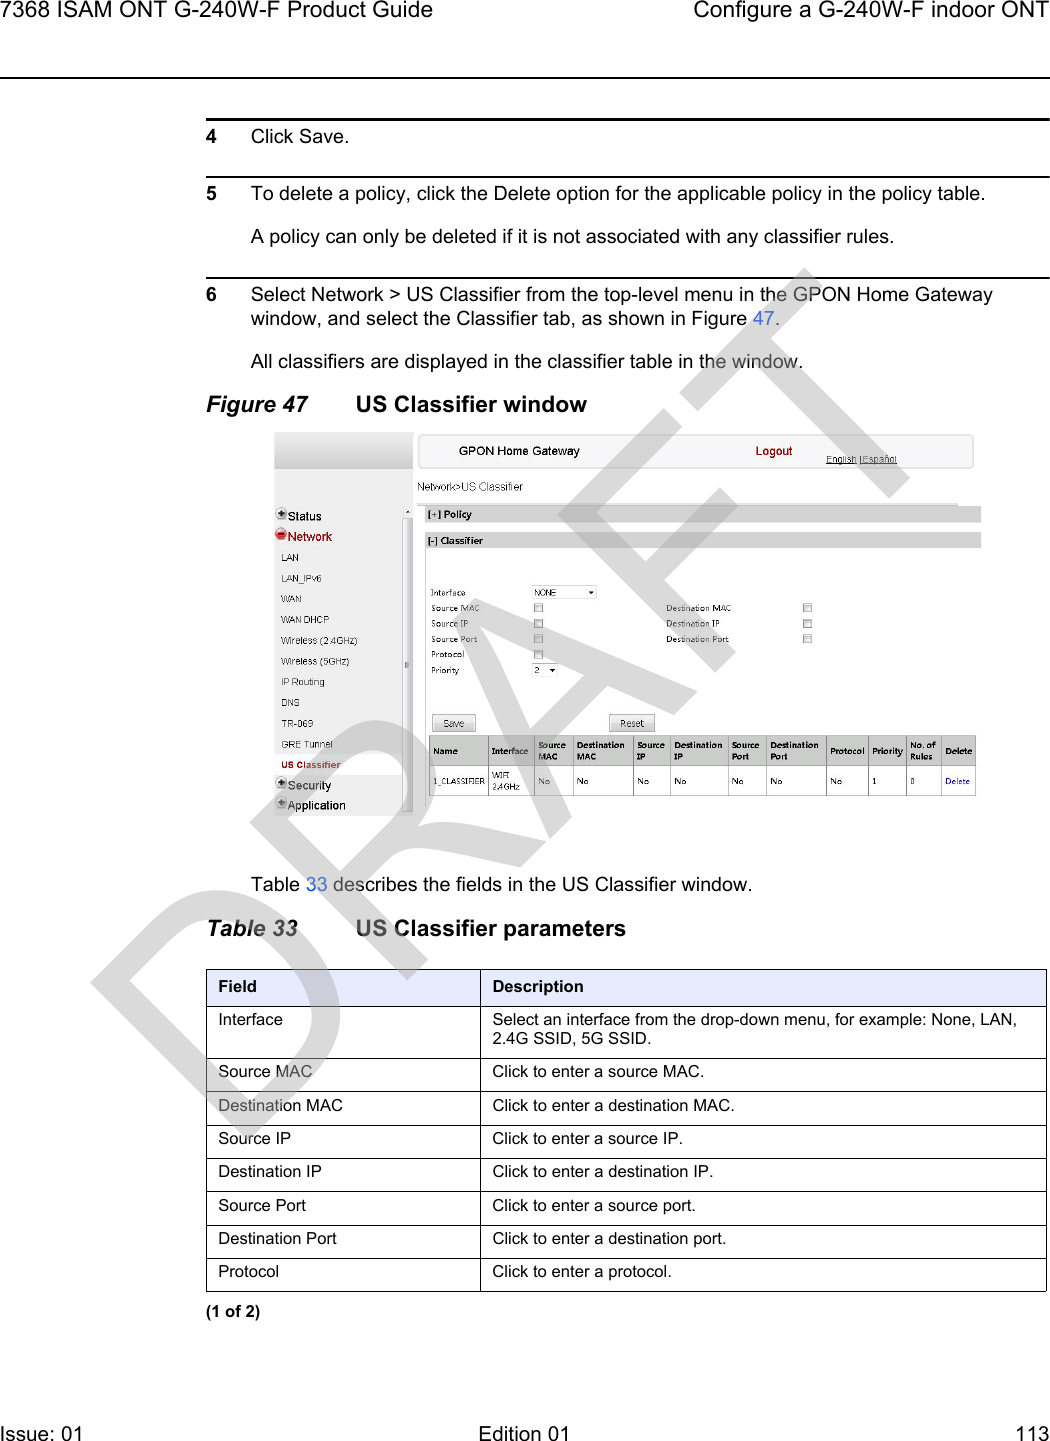
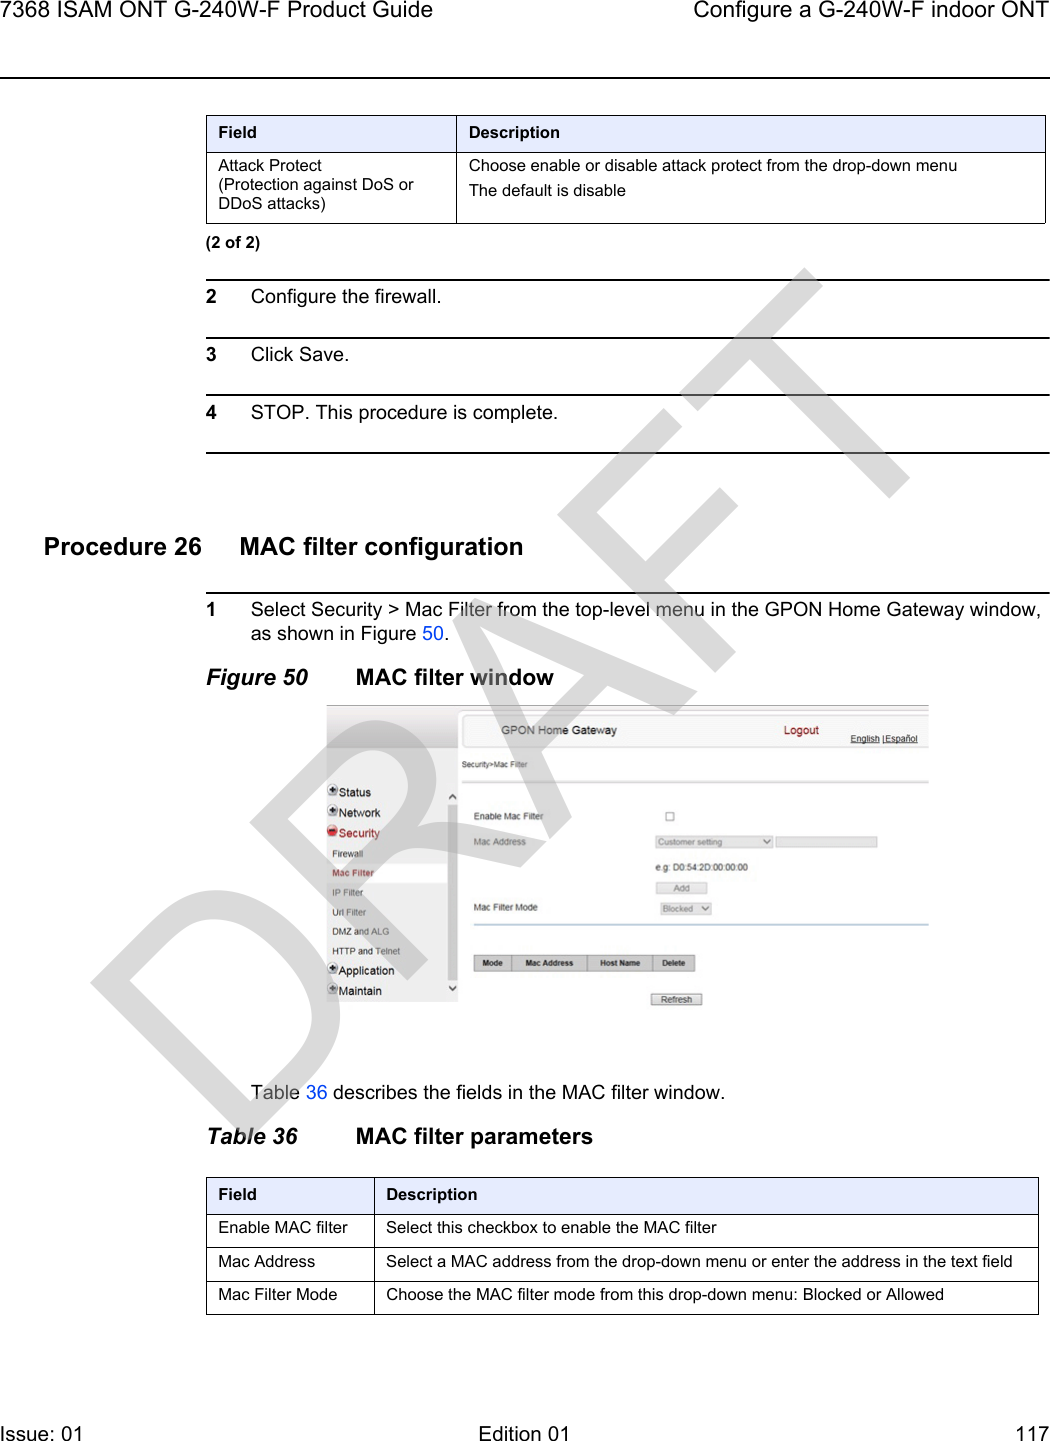
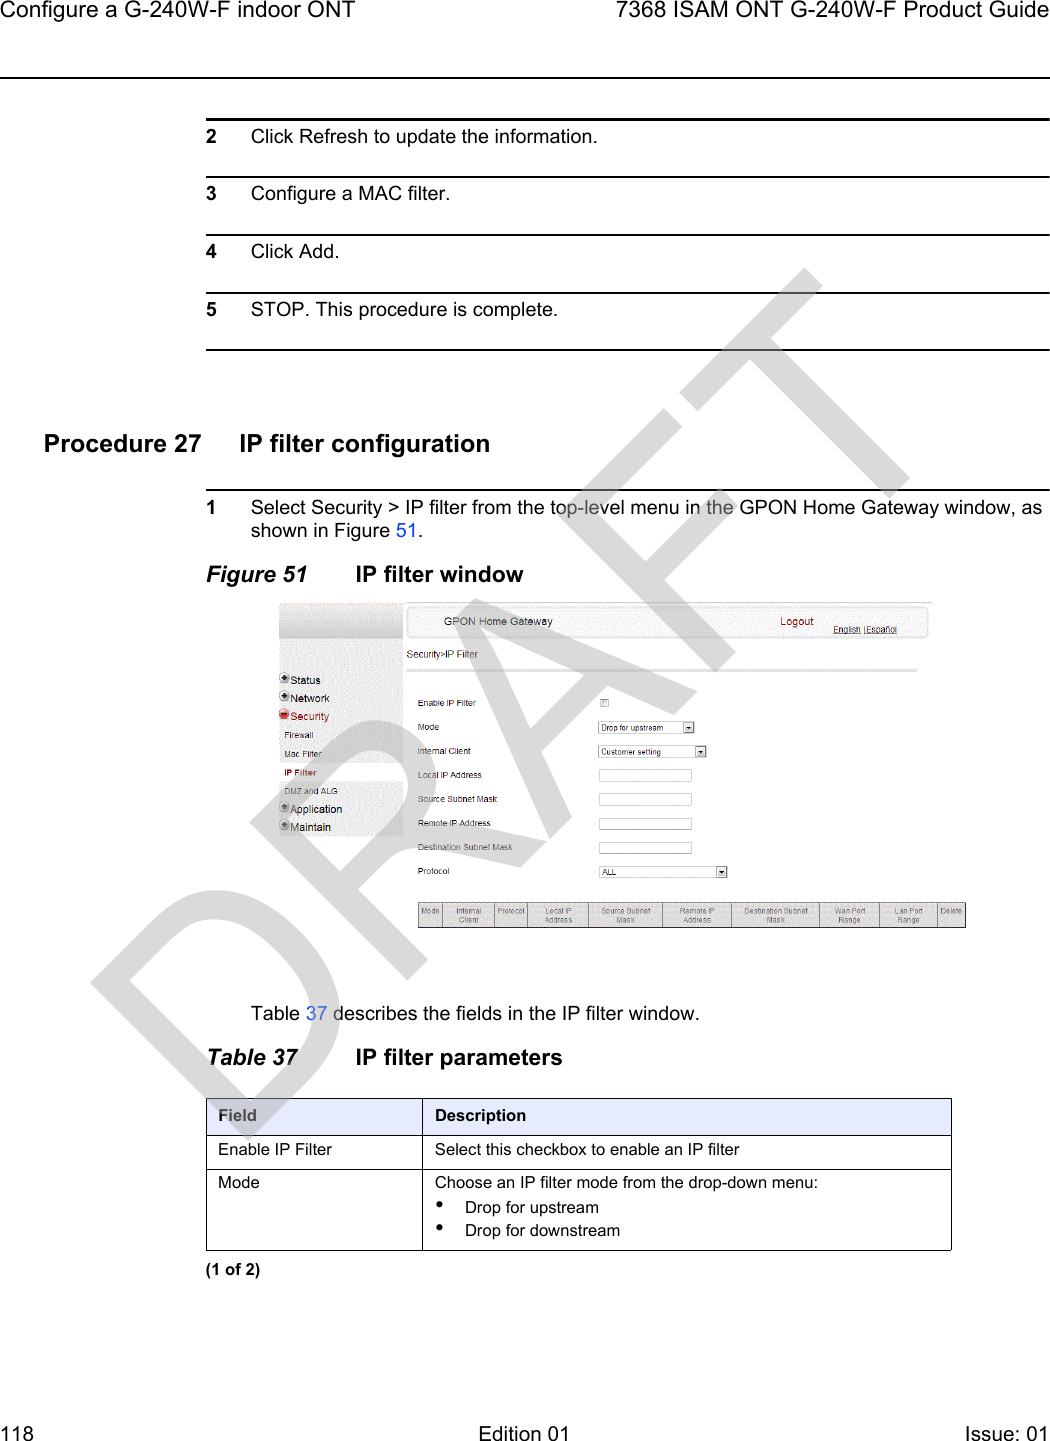
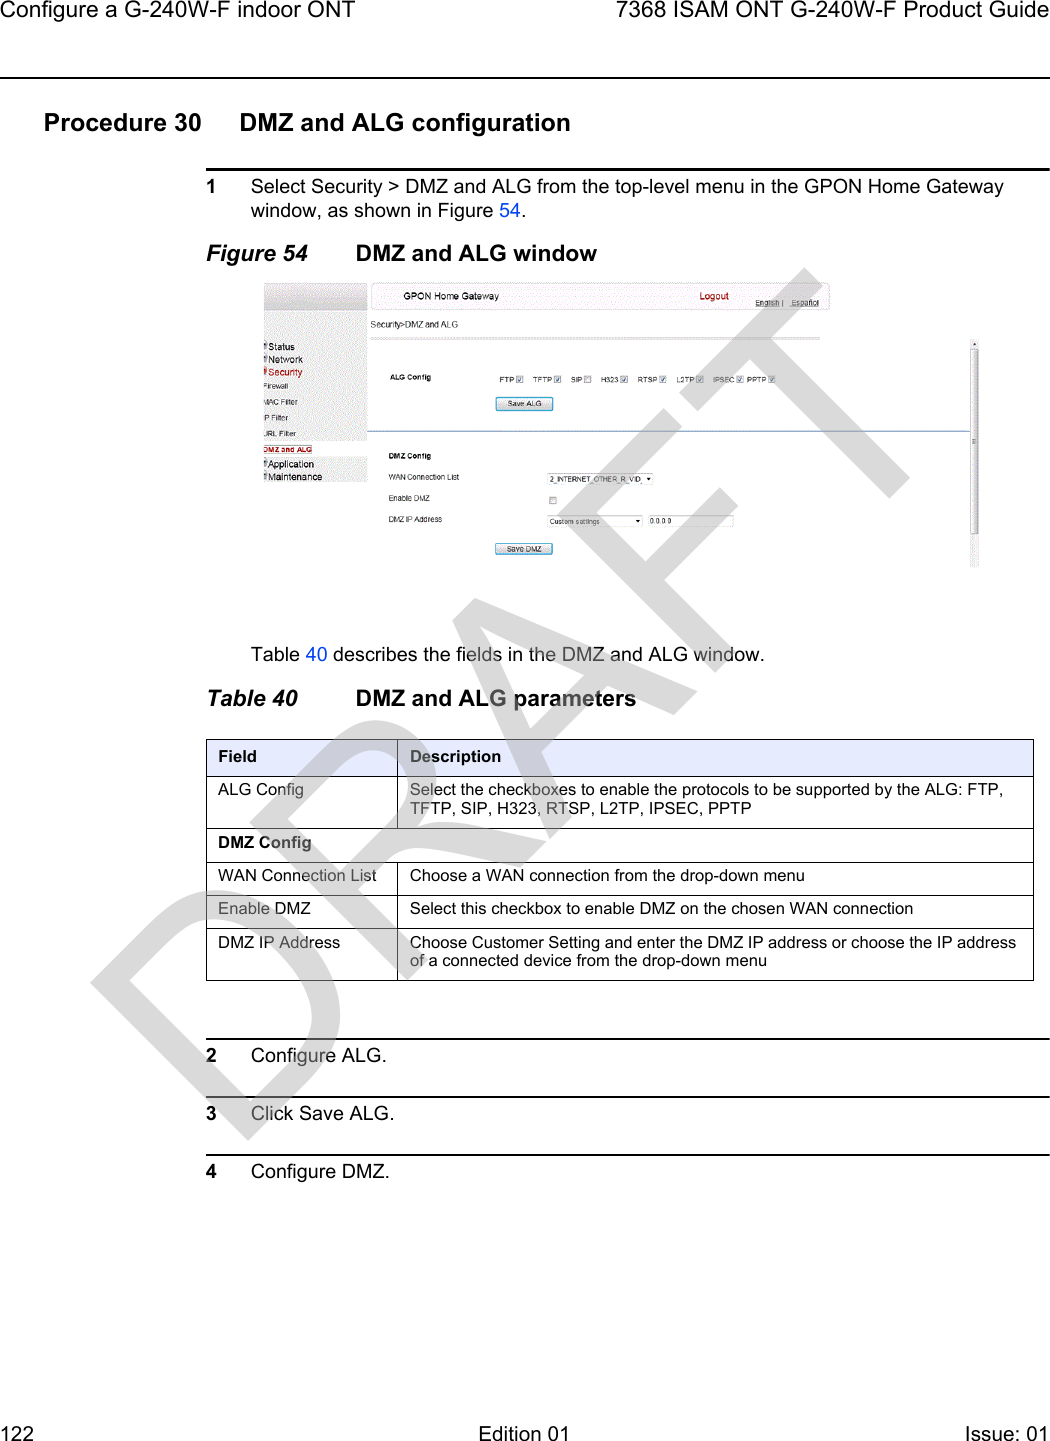
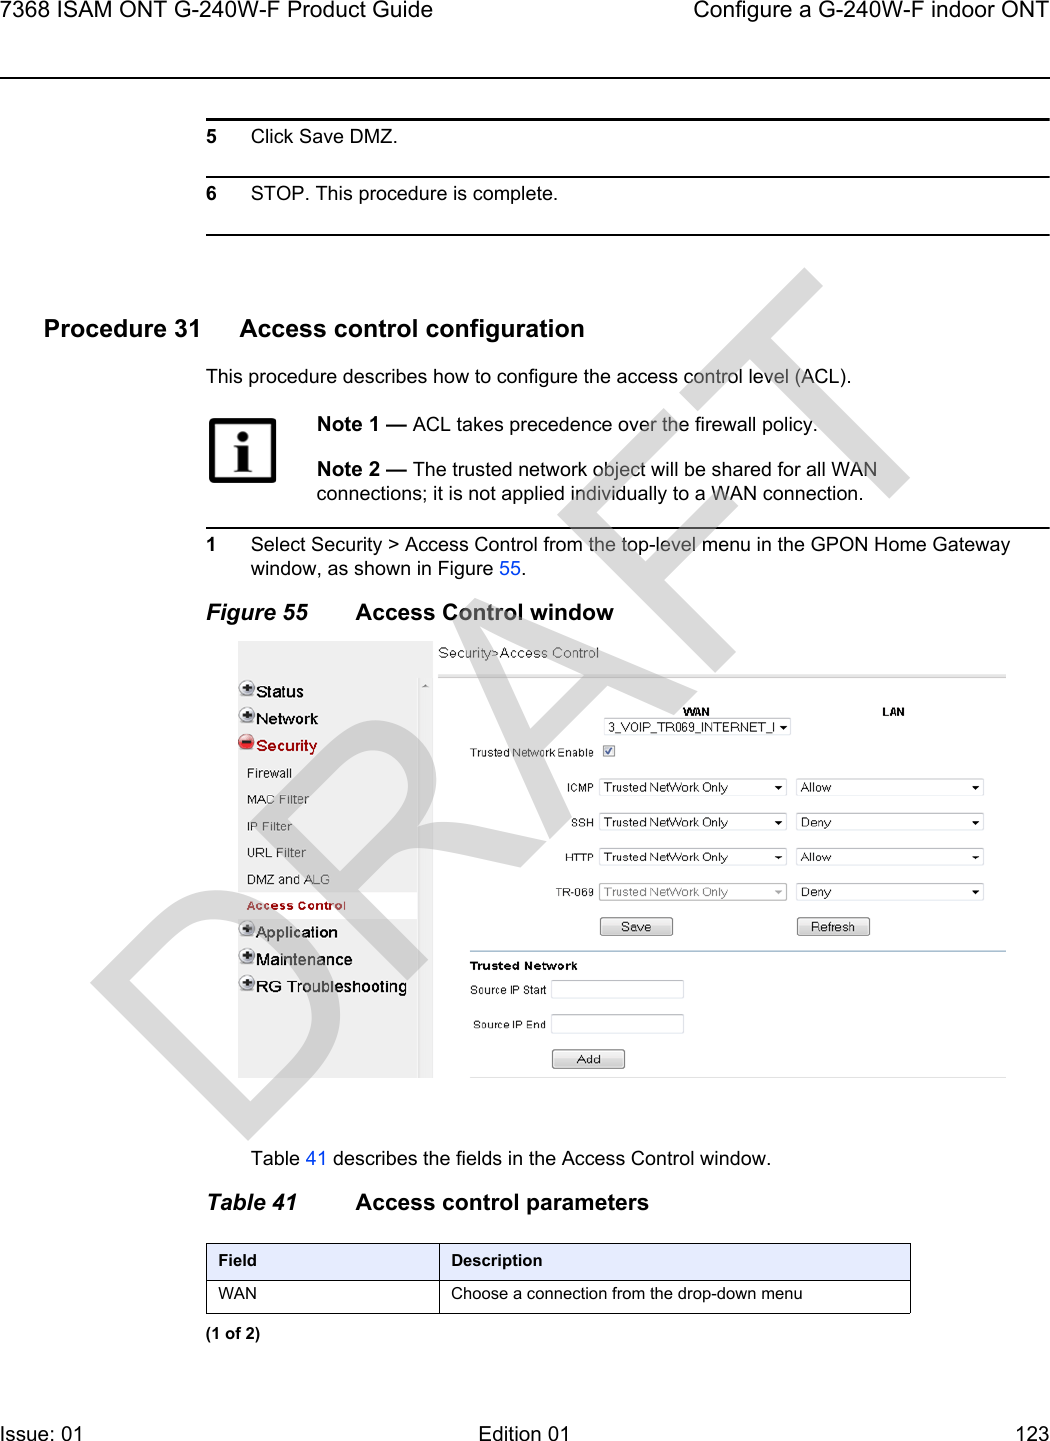
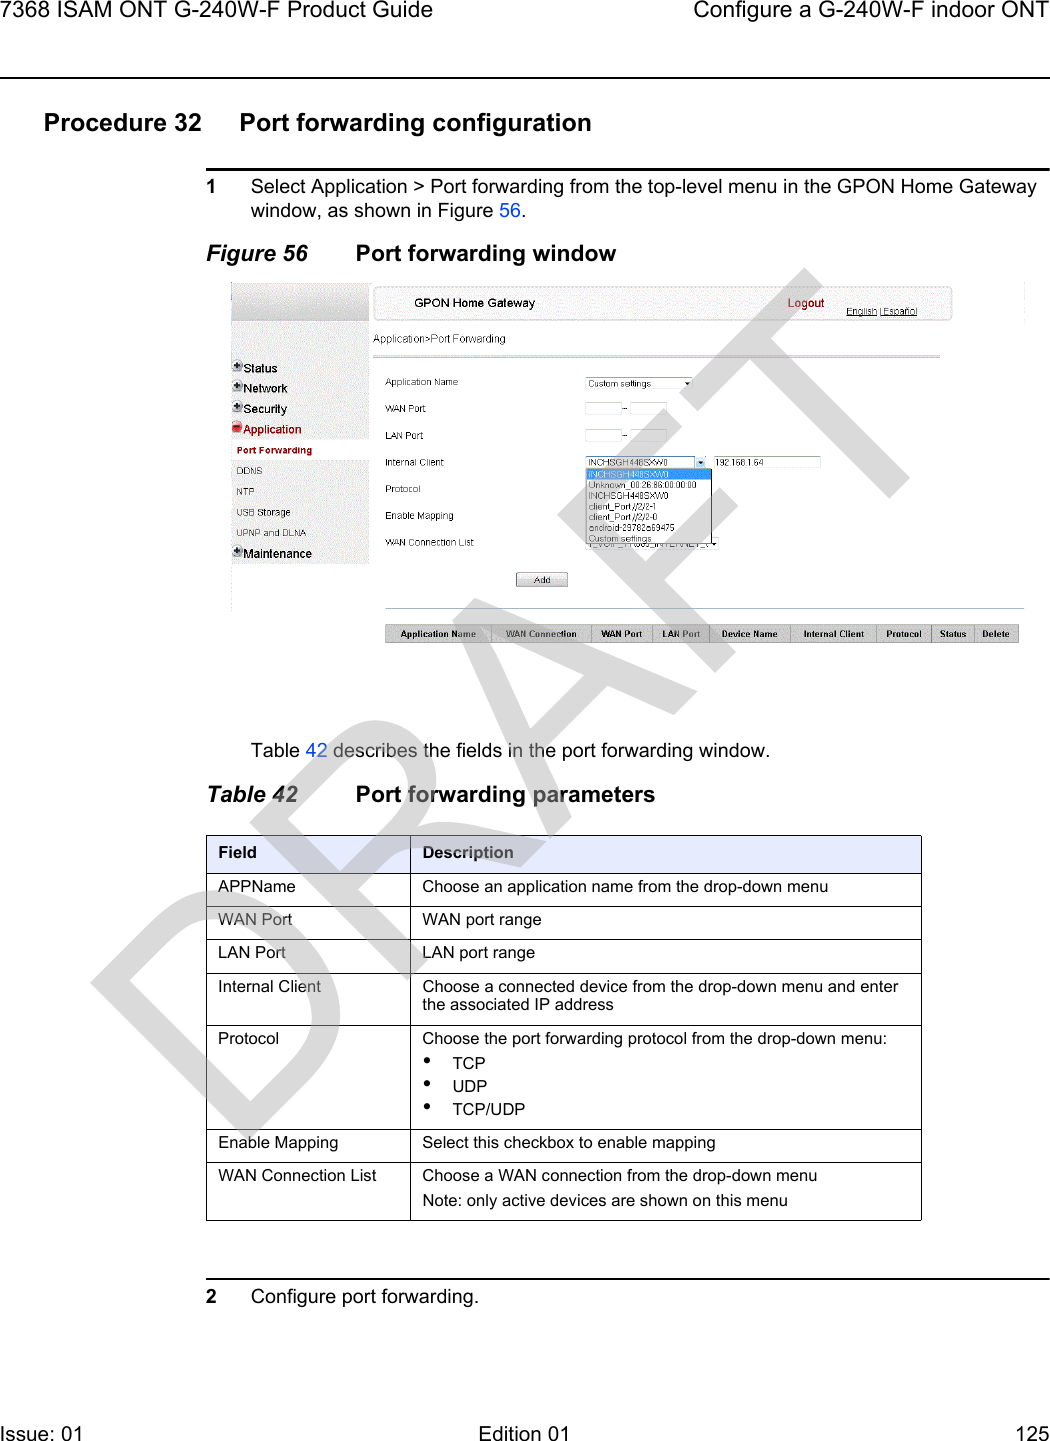
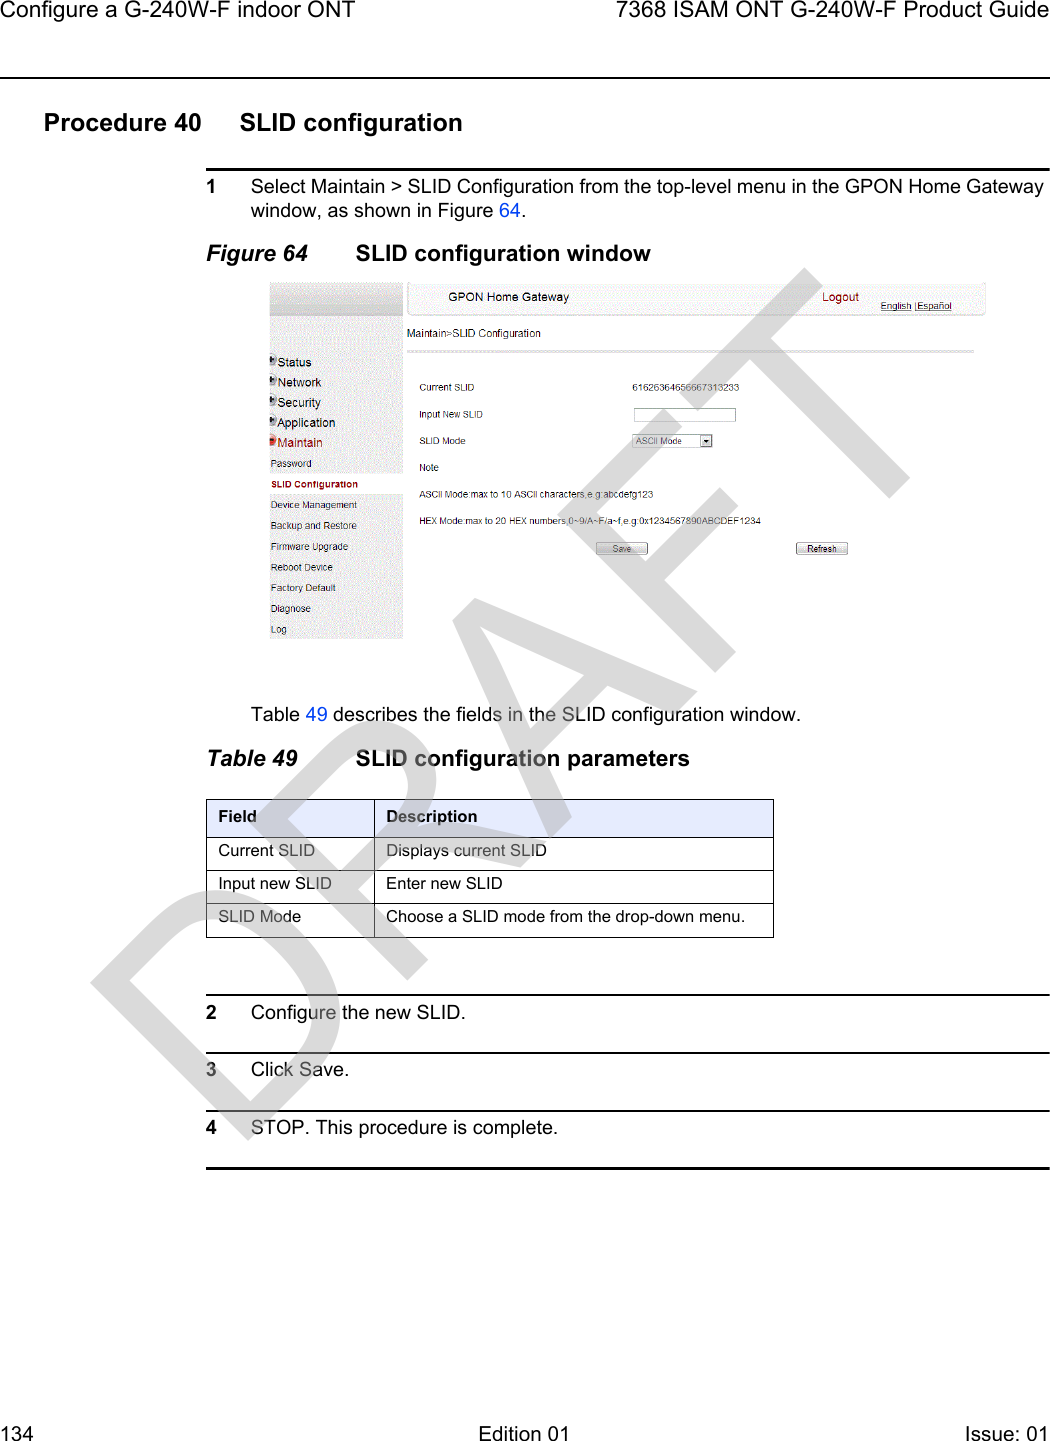
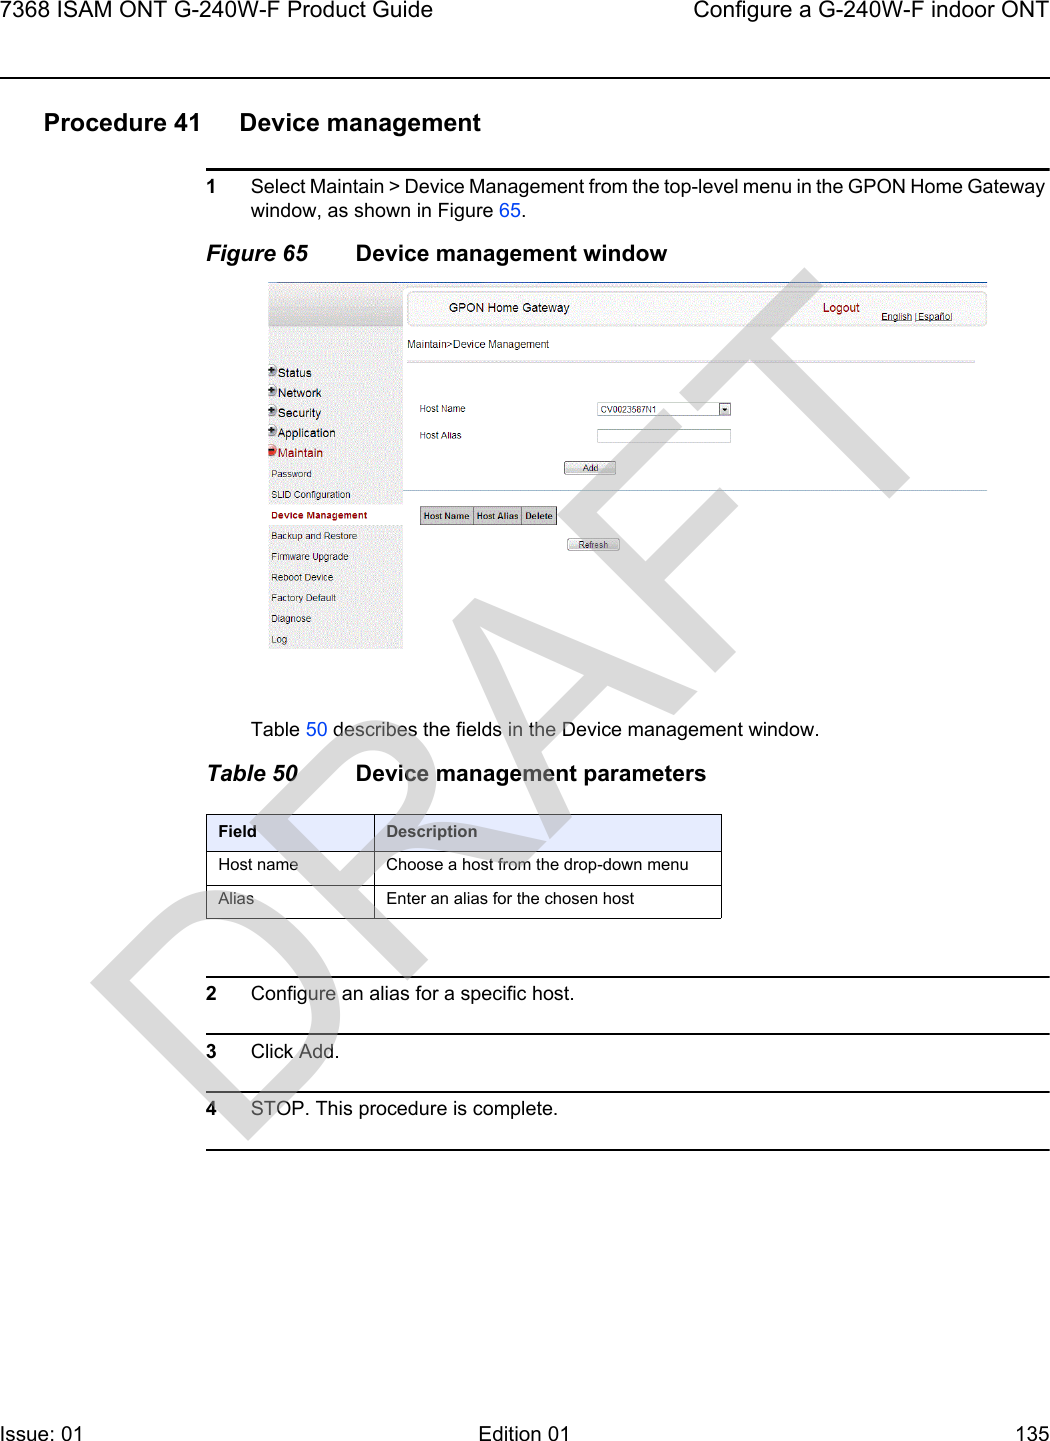
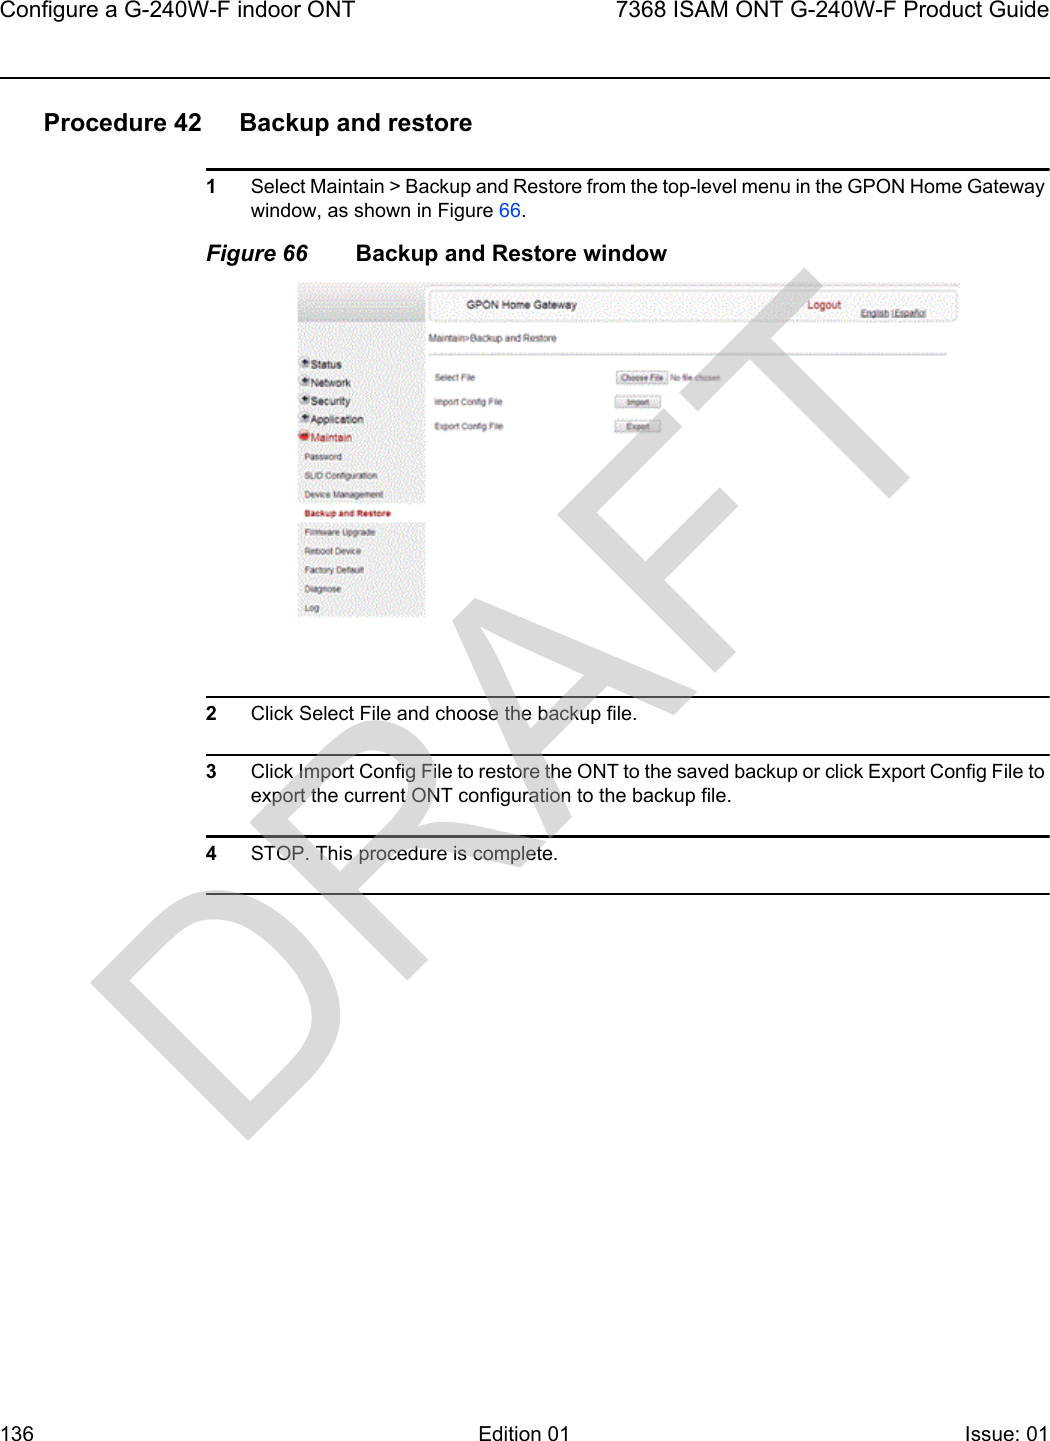
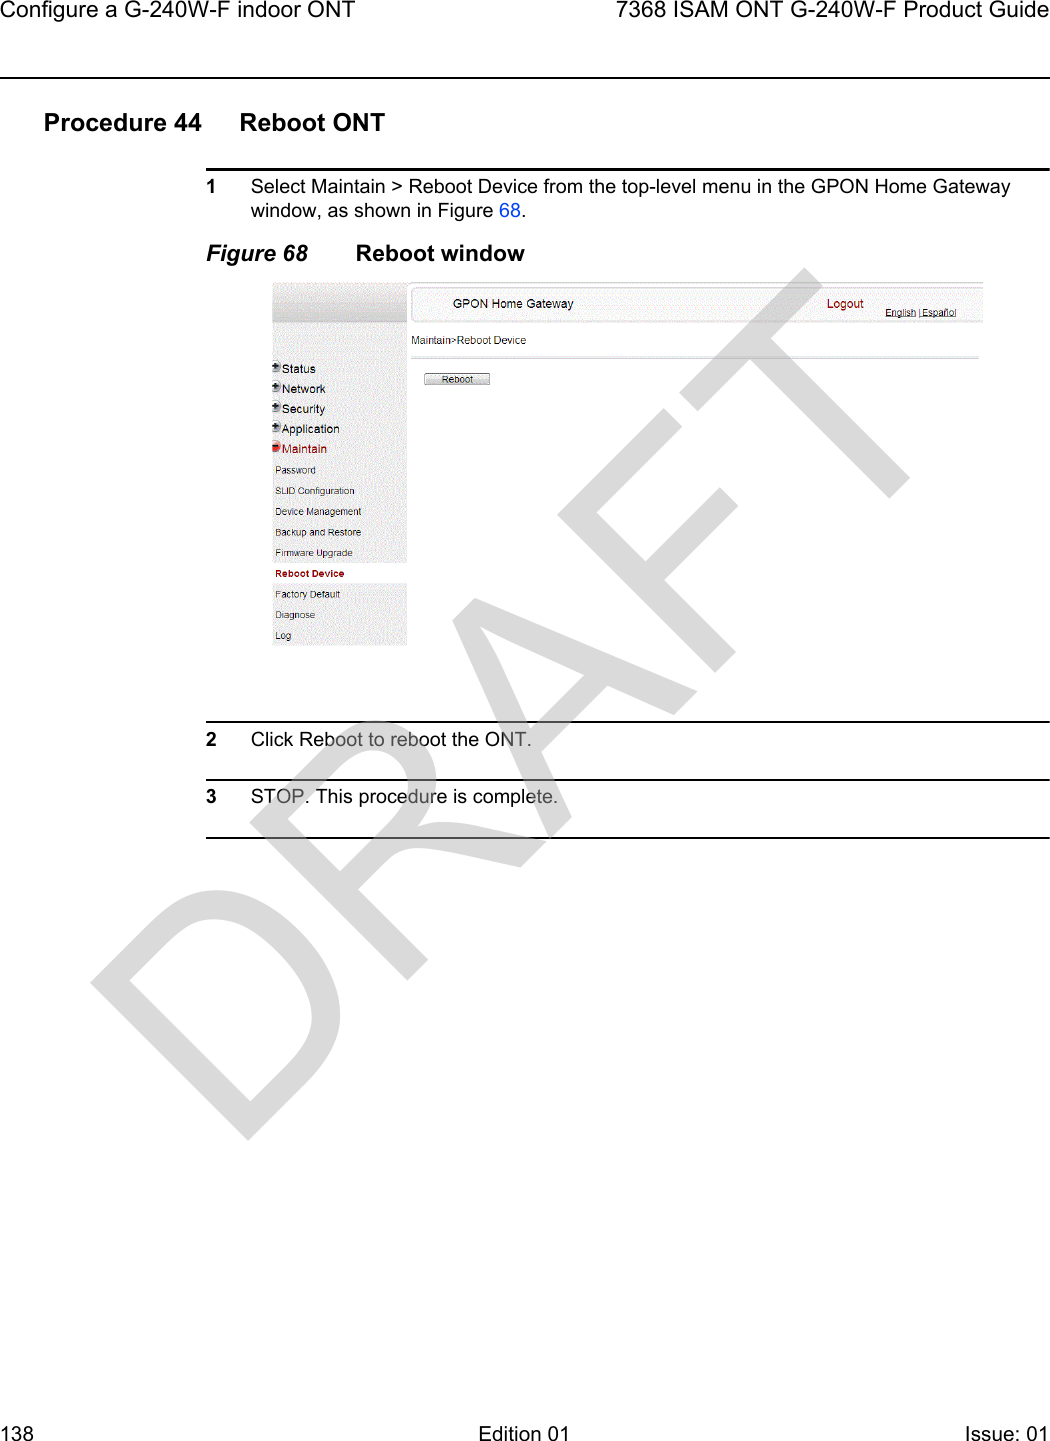
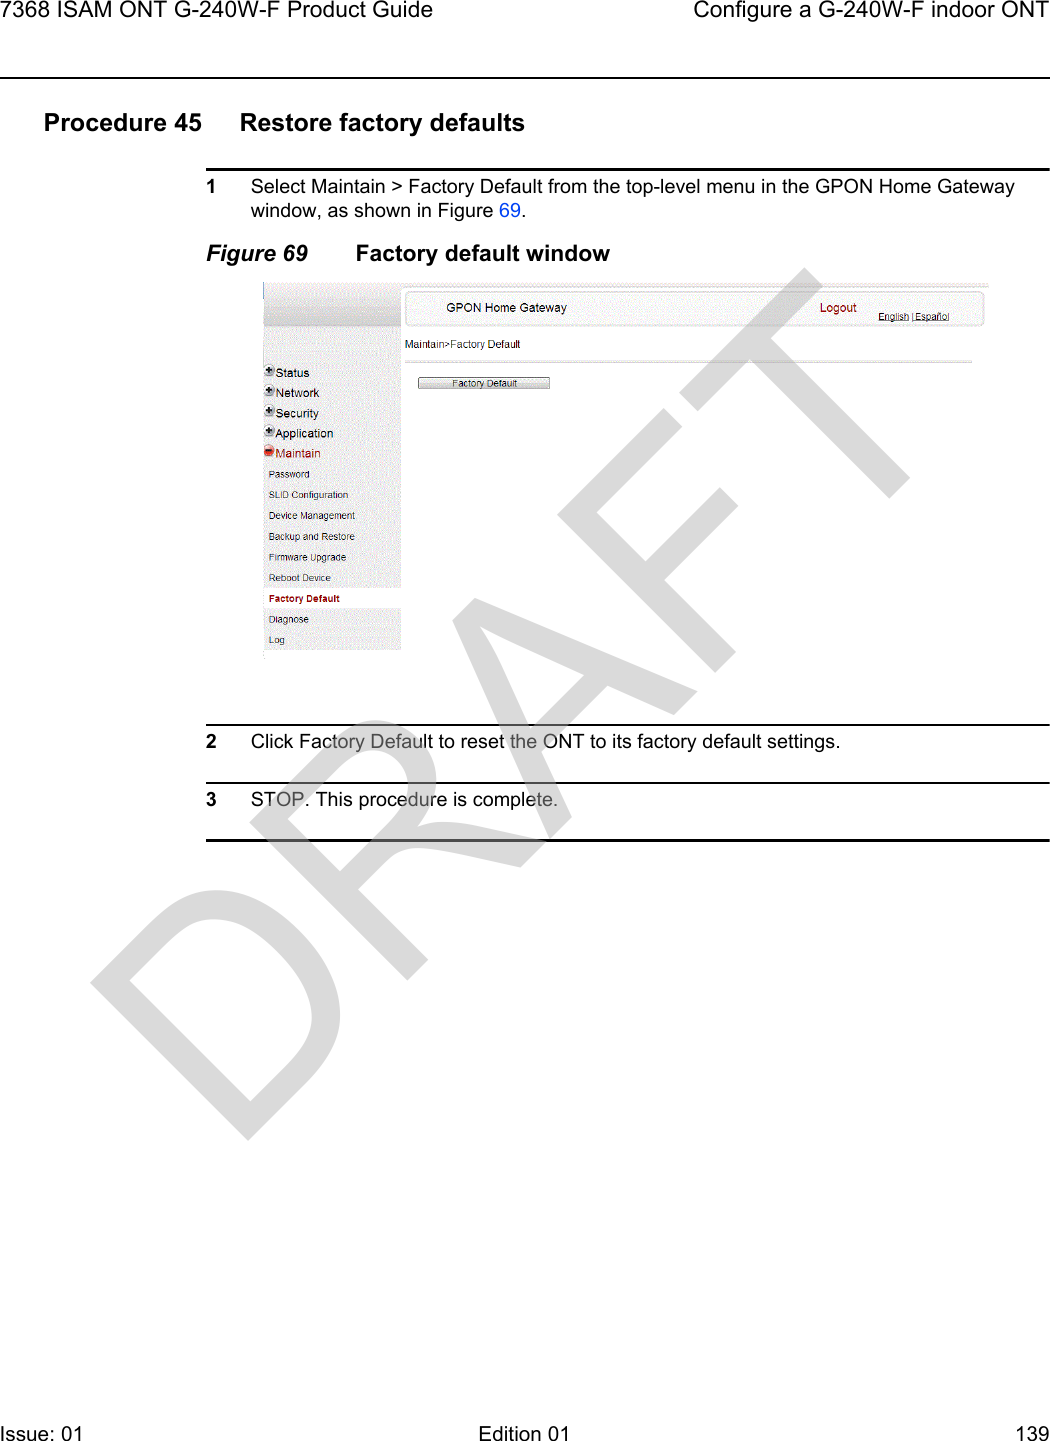
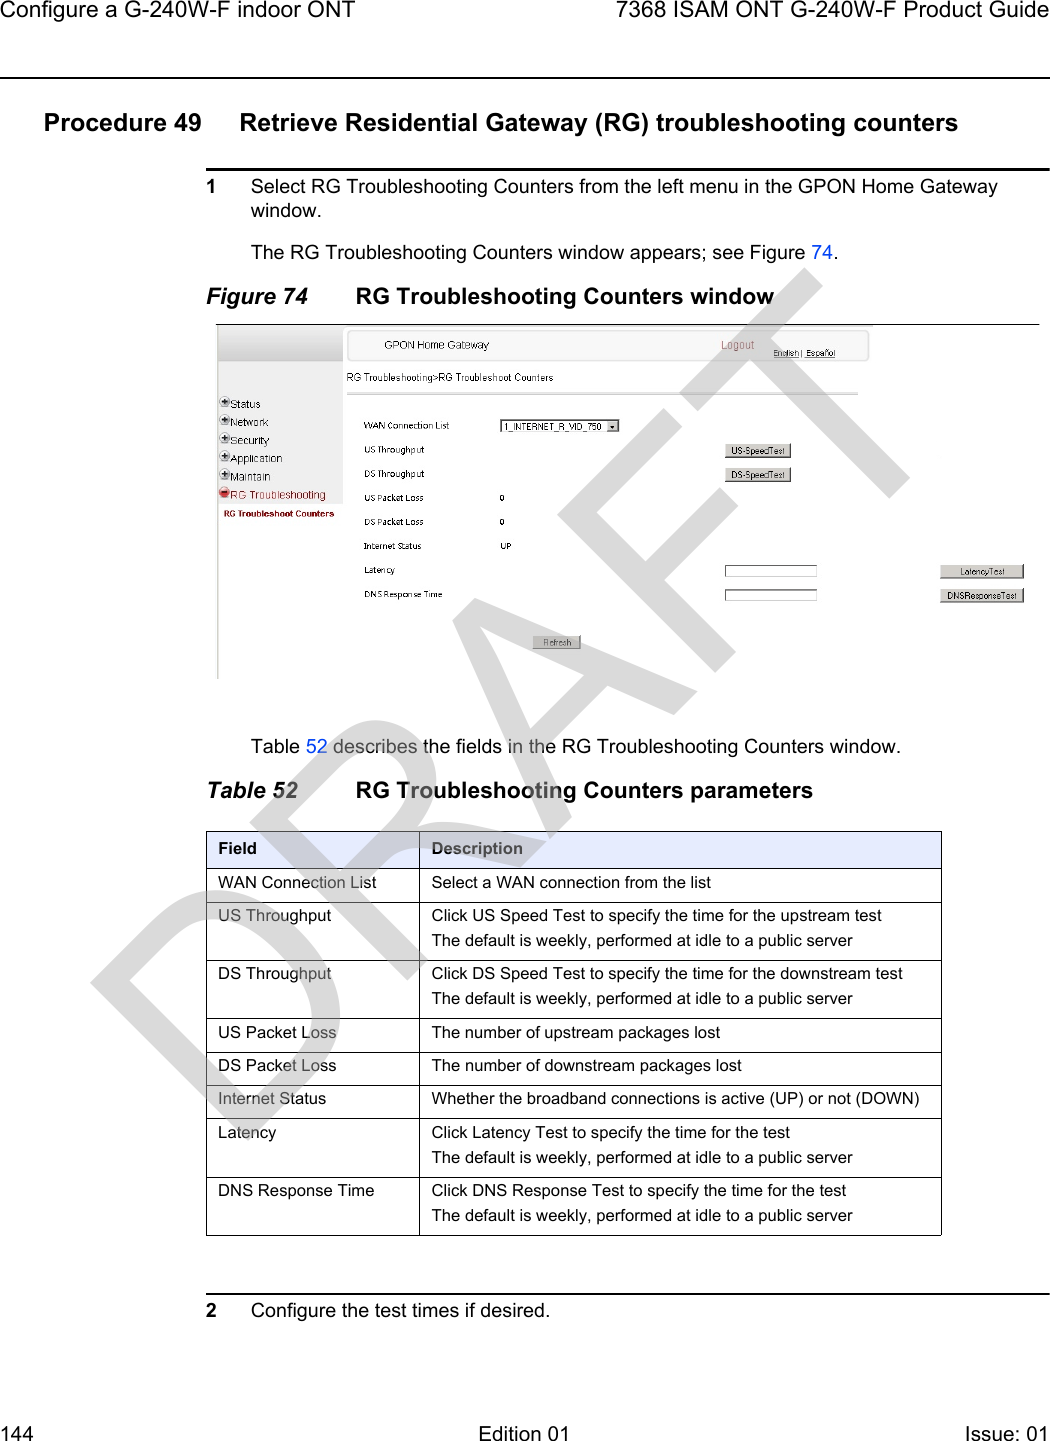
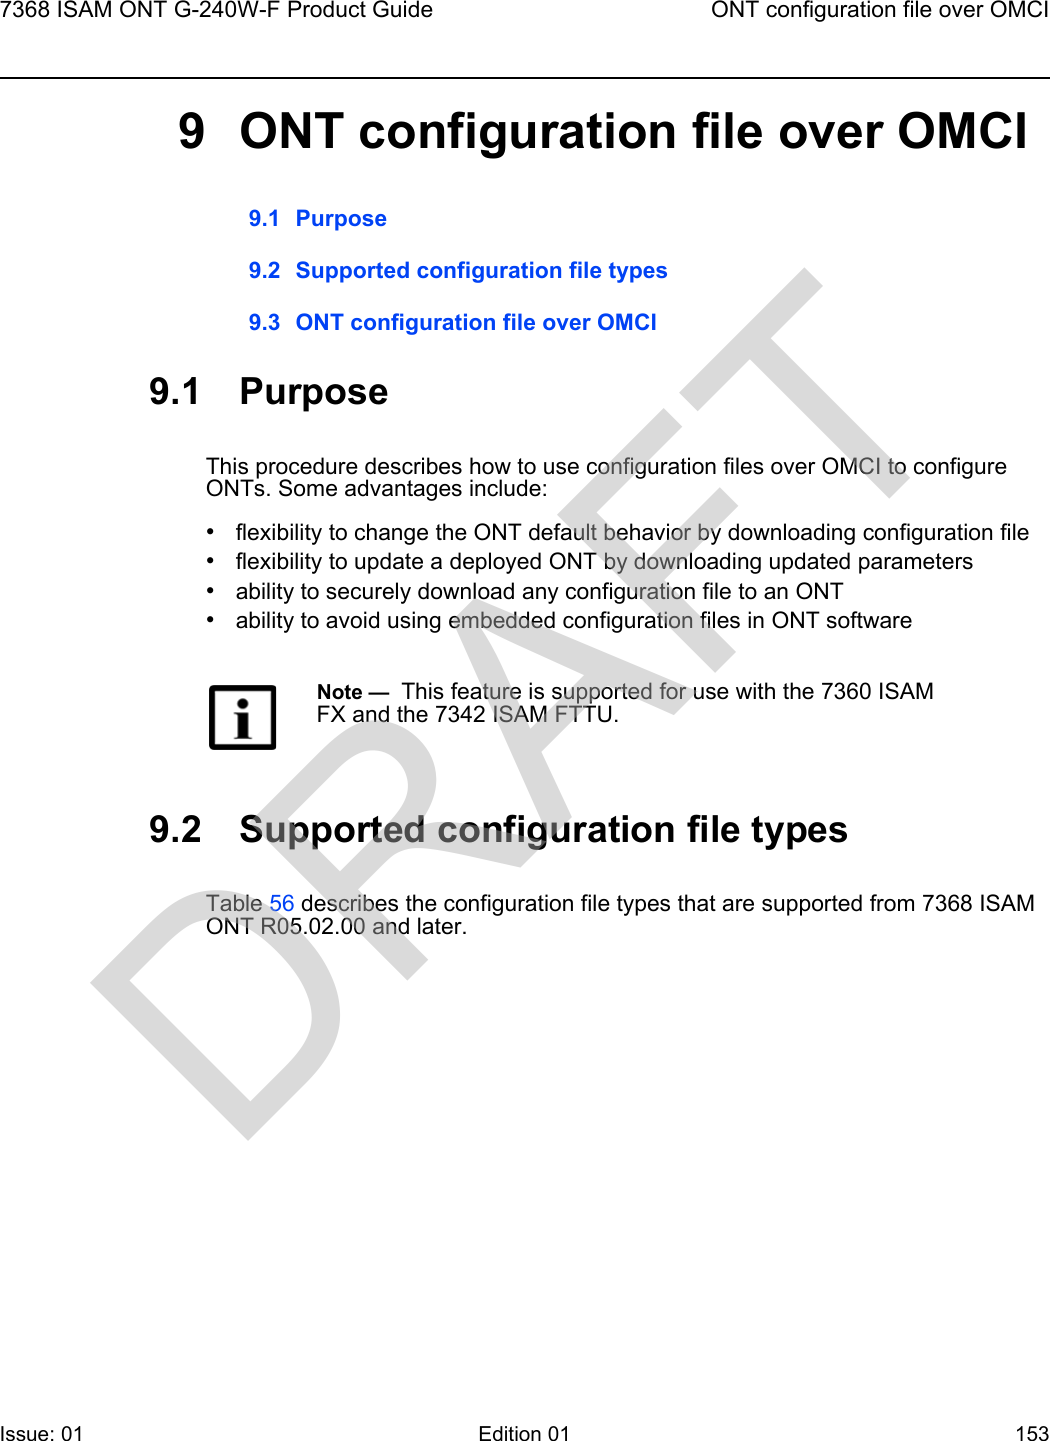
![7368 ISAM ONT G-240W-F Product Guide G-240W-F unit data sheetIssue: 01 Edition 01 57 5.6 G-240W-F detailed specificationsTable 7 lists the physical specifications for G-240W-F indoor ONTs.Table 7 G-240W-F indoor ONT physical specificationsTable 8 lists the power consumption specifications for G-240W-F indoor ONT.Table 8 G-240W-F indoor ONT power consumption specificationsTable 9 lists the environmental specifications for G-240W-F indoor ONT.USB Green solidGreen flashingOffAt least one USB device is connectedTraffic activity on at least on USB deviceNo USB device connectedINTERNET Green solid Green flashingOffHSI WAN is connected: a) the device has an IP address assigned from IPCP, DHCP, or static, and no traffic has been detected; b) the session is dropped due to idle timeout but the PON link is still present.PPPoE or DHCP connection in progressHSI WAN is not connected: a) there is no physical interface connection; b) the device is in bridged mode without an assigned IP address; c) the session has been dropped for reasons other than idle timeout.Indicator LED color and behaviorLED behavior description(2 of 2)Description SpecificationWidth 8.1 in. (205 mm)Length 6 in. (152 mm)7 in. (176 mm with antennaHeight 1.3 in. (33 mm)Weight [within ± 0.5 lb (0.23 kg)] 0.88 lb (0.4 kg)Maximum power (Not to exceed)Condition Minimum powerCondition13.6 W 2 POTS off-hook, 4 10/100/1000 Base-T Ethernet, Wi-Fi operational3.06 W 2 POTS on-hook, other interfaces/services not provisionedDRAFT](https://usermanual.wiki/Nokia-Bell/G240WF/User-Guide-3412105-Page-57.png)